


P55P55
V3.0
Congratulations on your purchase of the GIGABYTE Notebook.
1
3
2
This manual will help you to get started with setting up your notebook. The final product
conguration depends on the model at the point of your purchase. GIGABYTE reser ves the
right to amend without prior notice. For more detailed information, please visit our website at
www.gigabyte.com
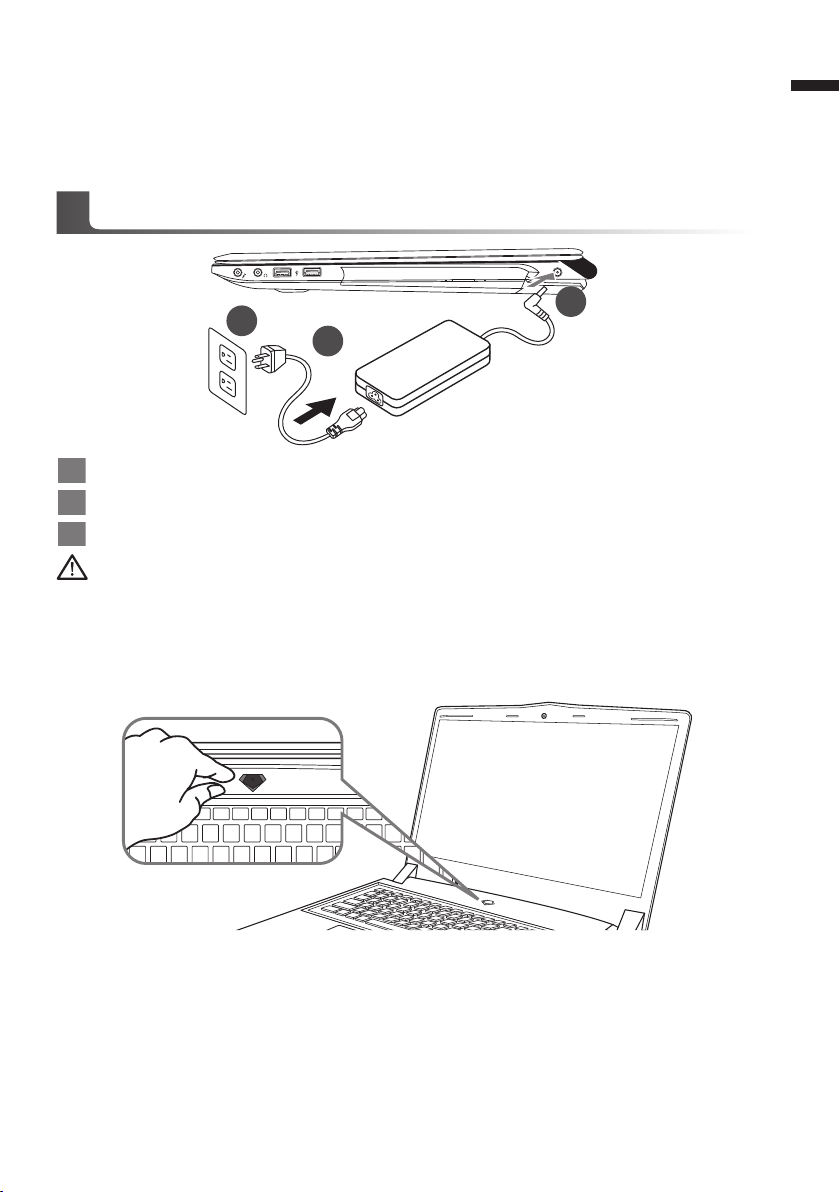
Using GIGABYTE Notebook for the First Time
1 Connect the power cord to the AC adapter.
2 Connect the AC adapter to the DC-in jack on the right side of the notebook.
3 Connect the power cord to the power outlet.
IMPORTANT
•
Ensure that you r Noteboo k PC is connec ted to a grounded power adapter bef ore turning it on for the rst tim e.
•
When usin g your Notebo ok PC on power adapte r mode, the socket outlet must be nea r to the unit and easily ac cessi ble.
•
Locate the input /outpu t rating label on your Noteb ook PC a nd ensure that it matche s th e inp ut/ou tput ratin g inf ormat ion on yo ur
power adapt er. Some Notebo ok PC models may have mul tiple rat ing output current s based on the availa ble SKU.
•
Power adapte r information: Inpu t voltage: 100 -240Vac ,- Input frequen cy: 50-60 Hz ,- Rating out put voltage: 19.5V
1
English
Switching on the Power
After you turn on the Notebook for the very rst time, do not turn it off until the operating system
has been congured. Please note that the volume for the audio will not function until Windows®
Setup has completed.
Booting Up the Notebook for the First Time
Depending on your conguration, the Microsoft® Windows® Boot Screen will be the rst screen that
you will see as the notebook starts up. Follow the on-screen prompts and instructions and enter
your personal information to complete the setup of the Windows® Operating System.
2
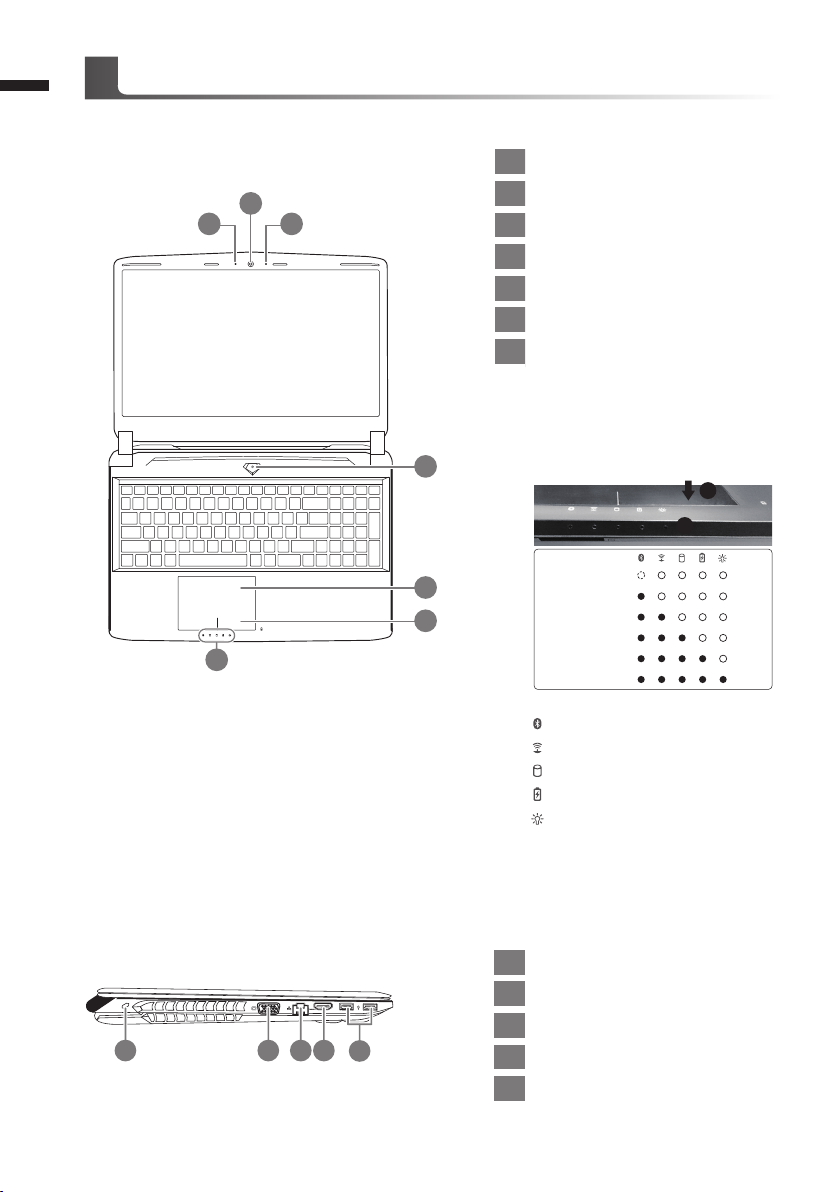
Top View
English
Your GIGABYTE Notebook Tour
1 Webcam Status LED Indicator
2
1 3
4
2 Webcam
3 Microphone
4 Power Button
5 TouchPad
6 Battery Indicator Button
LED Indicators
7
Right-click to show the remaining power
percentage.
As shown below, the battery life indicator is available when the laptop is shut
down, in stand-by or hibernation. (Bat-
tery mode)
1
2
7
Left View
1 2 3 4
5
6
1 Kensington Lock Slot
2 D-sub (VGA) Port
3 Ethernet Port
5
4 HDMI Port
5 USB Port
<10%
11-30%
31-50%
51-70%
71-90%
>90%
Bluetooth Status LED
Wireless Lan Status LED
HDD Status LED
Battery Status LED
Power Status LED
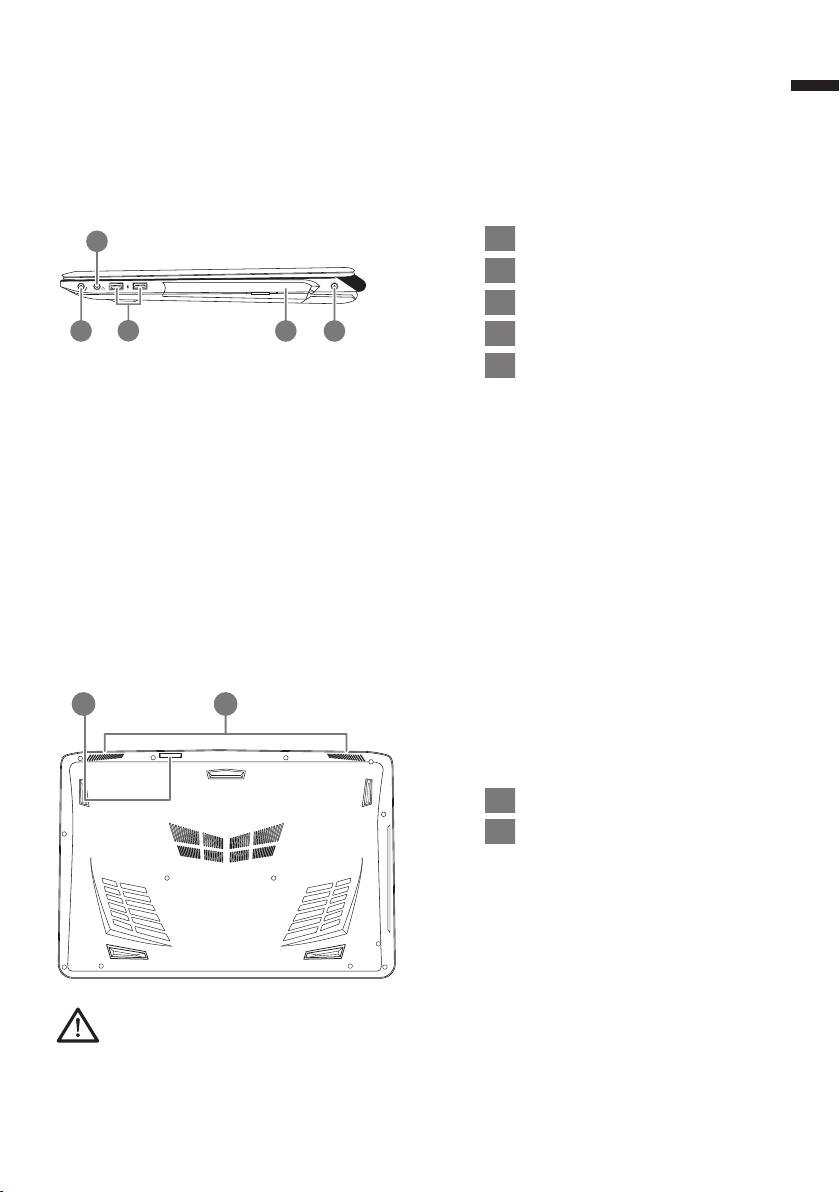
Right View
3
English
2
3
1 4 5
Base View
21
1 Microphone Jack
2 Headphone Jack
3 USB Port
4 Optical Disc Drive
5 DC-in Jack
1 SD Card Reader
2 Speakers
Warning:
DO NOT remove the built-in lithium battery. For any service needs, please contact your local GIGABYTE
Authorized Service Center.
 Loading...