

Gigabyte GV-N84S-512l User Manual
GIGABYTE
Щ nViDIA
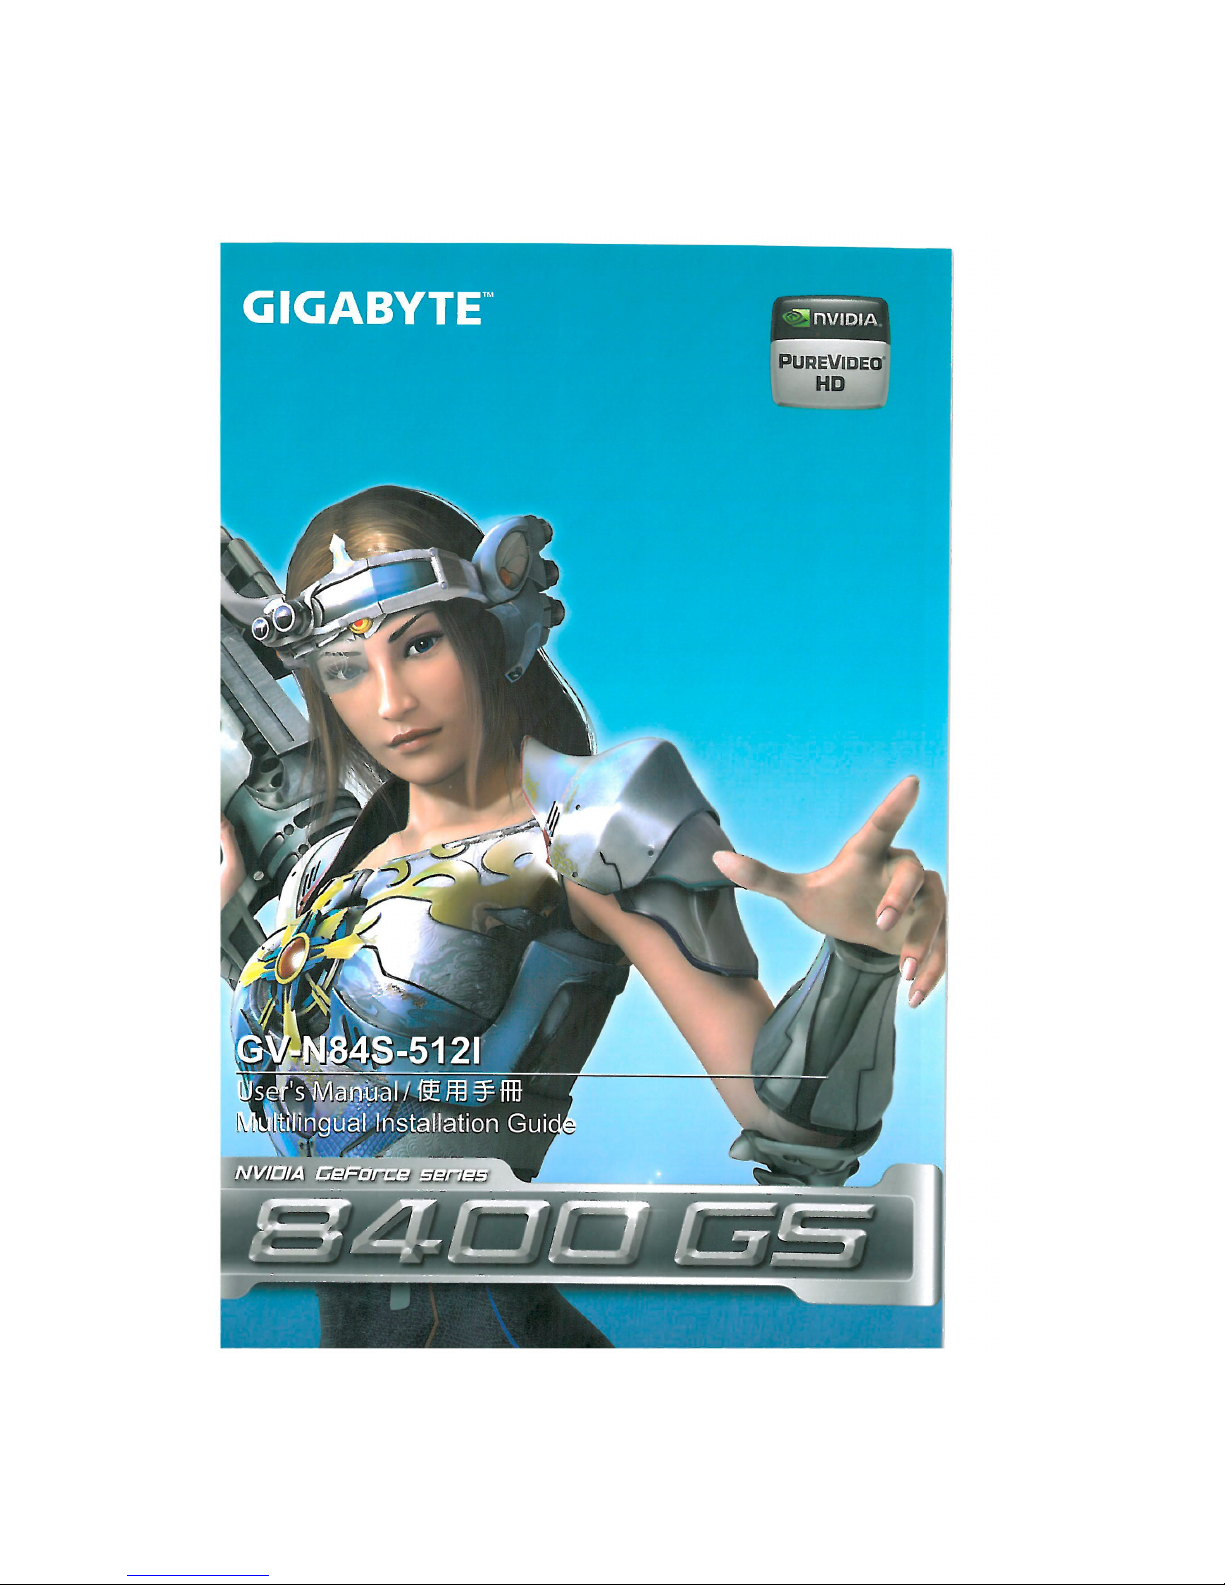
GV-N84S-51Ш
NVIDIA® GeForce™ 8400 GS Graphics Accelerator
User's Manual
Rev. 102
12MM-N84S5I-102R
Copyright
© 2009 GIGABYTE TECHNOLOGY CO., LTD
Copyright by GIGA-BYTE TECHNOLOGY CO., LTD. ("GBT"). No part of this manual may be reproduced or transmitted
in any form without the expressed, written permission of GBT.
Trademarks
Third-party brands and names are the properties of their respective owners.
Notice
Please do not remove any labels on this graphics card. Doing so may void the warranty of this card.
Due to rapid change in technology, some of the specifications might be out of date before publication of this this manual.
The author assumes no responsibility for any errors or omissions that may appear in this document nor does the author
make a commitment to update the information contained herein.
Macrovision corporation product notice:
This product incorporates copyright protection technology that is protected by U.S. patents and other intellectual property
rights. Use of this copyright protection technology must be authorized by Macrovision, and is intended for home and other
limited viewing uses only unless otherwise authorized by Macrovision. Reverse engineering or disassembly is prohibited.

Declaration of Conformity
We, Manufacturer/Importer
(tut *.<мпив)
G.B.T. Technology Trading GMbH
Bultenkoppe) 18,22047 Hamburg, Germany
declare thai the product
(description of the apparatus, sy "em, Installation to which it refers)
VGA Card
GV-N84S-512I
is in conformity with
(reference to the specification under which conformity is declared)
in accordance with 2004,'ЮШЕС EMC Dire-.4ve
Limits and methods of m
of radio disturbance characteristics of
industrial, scientific and medical (ISM)
high frequency equipment
• EN 55013 Limits and methods of m.
of radio disturbance characteristics of
broadcast receivers and associated
equipment
• EN 55014-1 Limits and methods of measurement
of radio disturbance characteristics of
household electrical appliances,
portable tools and similar electrical
apparatus
0 EN 61000-3-2 Disturbances in supply syster e caused
В EN 61000-3-3 Disturbances in eupply systems caused
by household appliances and similar
electrical equipment "Voltage fluctuations"
В EN 55024 information Technology
equipment-Immunity
characteristics-Limits and methods of
O EN 50082-2
Limits and methods of measurement
of radio disturbance characteristics of
fluorescent lamps and luminaries
Immunity from radio interference of
broadcast rece..'ers and assoi died
equipment
D EN 55014-2
EMC requirements for uninterruptible
power systems (UPS)
• DIN VDE 0855 Cabled distribution svstems; Equipment
C€
(EC conformity marking)
Safety requirements for mains operated
electronic and related apparatus for
household and similar general use
Manufarturer'lrnpprter
Signature:
(Stamp)
Date; June. 15,2009
Timmy Huang

DECLARATION OF CONFORMITY
Per FCC Part 2 Section 2.1077(a)
Responsible Party Name: G.B.T. INC. (U.S.A.)
Address: 17358 Railroad Street
City of Industry, CA 91748
Phone/Fax No: (8X8) 854-9338/ (818) 854-9339
hereby declares that the product
Product Name: VGA Card
Model Number: GV-N84S-5121
Conforms to the following specifications:
FCC Part 15, Subpart B, Section 15.107(a) and Section 15.109
(a),Class В Digital Device
Supplementary Information:
This device complies with part 15 of the FCC Rules. Operation is
subject to the following two conditions: (1) This device may not
cause harmful and (2) this device must accept any inference received,
including that may cause undesired operation.
Representative Person's Name: ERIC LU
Signature: Eri<• Lv.
Date: June. 15.2009
Table of Contents
1. Introduction 4
1.1. Features 4
1.2. Minimum System Requirements 4
2. Hardware Installation 5
2.1. Board Layout 5
2.2. Hardware Installation 7
3. Software Installation 9
3.1. Driver and Utility Installation 9
3.1.1. Driver Installation 9
3.1.2. GIGABYTE Gamer HUD Lite on Driver Disk 11
3.2. Display Properties Pages 13
3.3. Accessing NVIDIA Control Panel 14
4. Troubleshooting Tips 22
5. Appendix 23
5.1. How to Reflash the BIOS in MS-DOS Mode 23
5.2. Resolutions and Color Depth Tables 24
5.3. Regulatory Statements 26
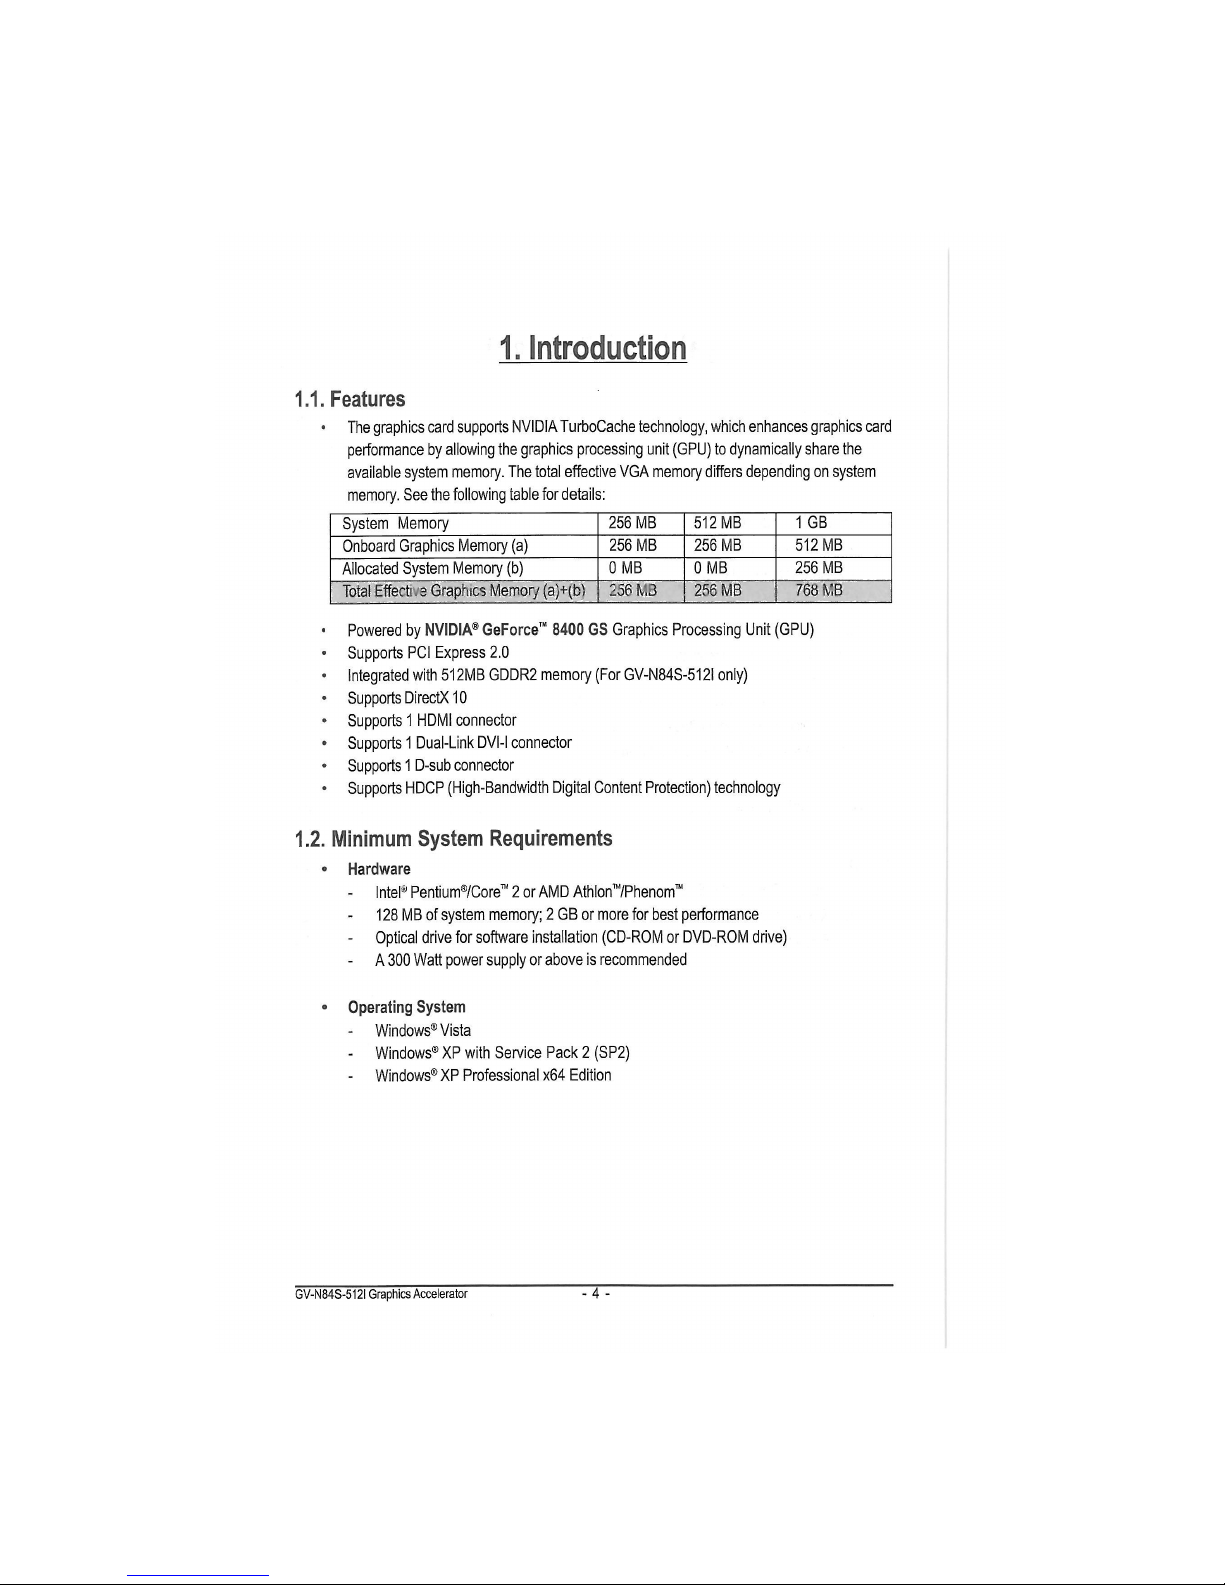
1. introduction
1.1. Features
• The graphics card supports NVIDIA TurboCache technology, which enhances graphics card
performance by allowing the graphics processing unit (GPU) to dynamically share the
available system memory. The total effective VGA memory differs depending on system
memory. See the following table for details:
System Memory
256MB 512MB 1 GB
Onboard Graphics Memory (a)
256 MB 256 MB
512MB
Allocated System Memory (b)
0 MB 0 MB 256 MB
Total Effective Graphics Memory (a)+(b)
256 MB 256 MB 76» MB
• Powered by NVIDIA® GeForce™ 8400 GS Graphics Processing Unit (GPU)
• Supports PCI Express 2.0
• Integrated with 512MB GDDR2 memory (For GV-N84S-512I only)
• Supports DirectX 10
• Supports 1 HDMI connector
• Supports 1 Dual-Link DVI-I connector
• Supports 1 D-sub connector
• Supports HDCP (High-Bandwidth Digital Content Protection) technology
1.2. Minimum System Requirements
• Hardware
- Intel" Pentium®/Core™ 2 or AMD AthlonM/Phenom™
128 M В of system memory; 2 GB or more for best performance
- Optical drive for software installation (CD-ROM or DVD-ROM drive)
- A 300 Watt power supply or above is recommended
• Operating System
- Windows® Vista
- Windows® XP with Service Pack 2 (SP2)
- Windows® XP Professional x64 Edition
GV-N84S-512I Graphics Accelerator — - 7 -
2. Hardware Installation
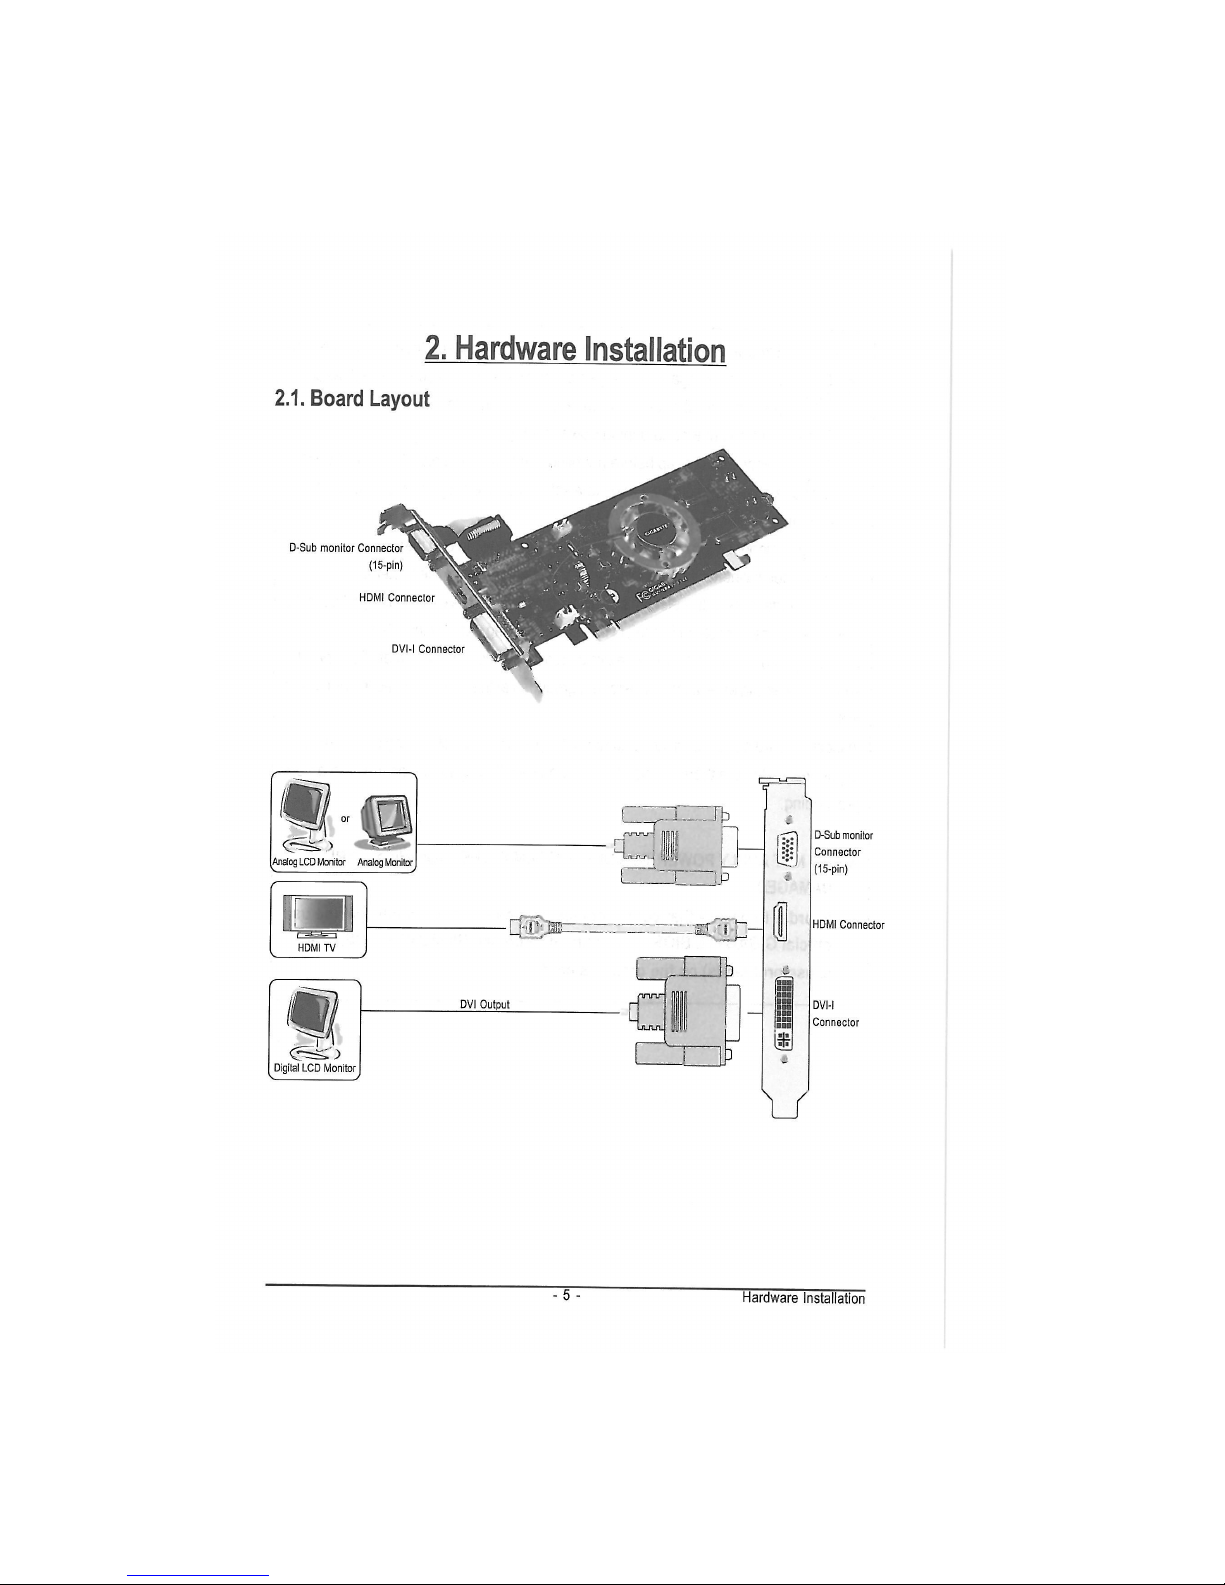
2.1. Board Layout
HDMI Connector
DVI-I Connector
D-Sub monitor Connector
(15-pin)
("TT-u-ij—j ""fl
ГГЬ
n,
*T"
as ч —
pnnr
HJUUL
I
m
D-Sub monitor
Connector
(15-pin)
HDMI Connector
DVI-I
Connector
-cFr
DVI Output
Hardware Installation
/\ Expansion cards contain very delicate Integrated Circuit (1С) chips. To
/ 1 \ protect them against damage from static electricity, you should follow some
CAUTION p
recautjons
whenever
you
work on your computer.
1. Turn off your computer and unplug power supply.
2. Use a grounded wrist strap before handling computer components. If
you
do not
have one, touch both of your hands to a safely grounded object or to a metal object,
such as the power supply case.
3. Place components on a grounded antistatic pad or
on
the bag that came with the
components whenever the components are separated from the system.
The card contains sensitive electric components, which can be easily damaged by static
electricity, so the card should be left
in
its original packing until it is installed.
Unpacking and installation should be done on a grounded anti-static mat. The operator
should be wearing an anti-static wristband, grounded at the same point as the anti-static
mat
Inspect the card carton for obvious damage. Shipping and handling may cause damage
to your card. Be sure there are no shipping and handling damages on the card before
proceeding.
DO NOT APPLY POWER TO YOUR SYSTEM IF THE GRAPHICS CARD IS
DAMAGED.
§r In order to ensure that your graphics card can work correctly, please use
official GIGABYTE BIOS only. Using non-official GIGABYTE BIOS might
cause problem(s) on the graphics card.
GV-N84S-512I Graphics Accelerator — - 9 -
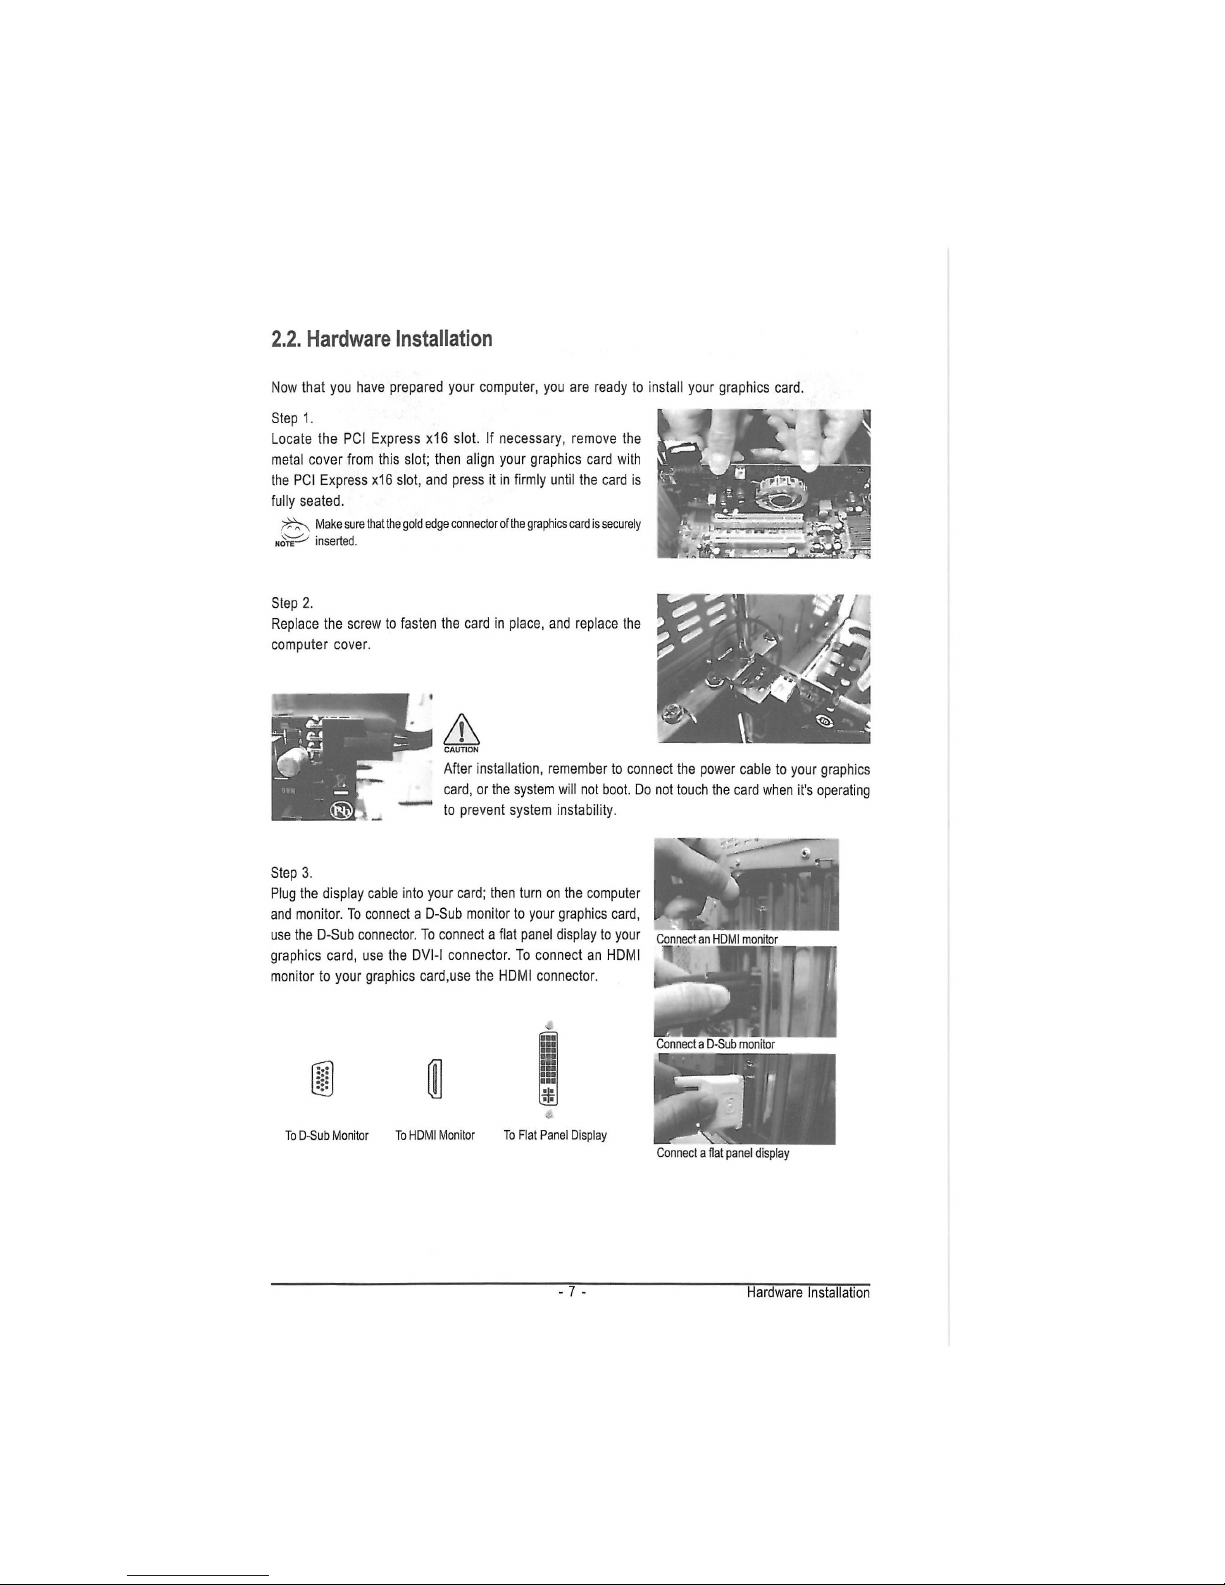
2.2. Hardware Installation
Now that you have prepared your computer, you are ready to install your graphics card.
Step 1.
Locate the PCI Express x16 slot. If necessary, remove the
metal cover from this slot; then align your graphics card with
the PCI Express x16 slot, and press it in firmly until the card is
fully seated.
Make sure that the gold edge connector of the graphics card is securely
noiir-' inserted.
Step 2.
Replace the screw to fasten the card in place, and replace the
computer cover.
A
CAUTION
After installation, remember to connect the power cable to your graphics
card, or the system will not boot. Do not touch the card when it's operating
to prevent system instability.
Step 3.
Plug the display cable into your card; then turn on the computer
and monitor. To connect a D-Sub monitor to your graphics card,
use the D-Sub connector. To connect a flat panel display to your
graphics card, use the DVI-I connector. To connect an HDMI
monitor to your graphics card,use the HDMI connector.
S3
JL
ПОП
t
To D-Sub Monitor To HDMI Monitor To Flat Panel Display
Connect a flat panel display
- 7 -
Hardware Installation
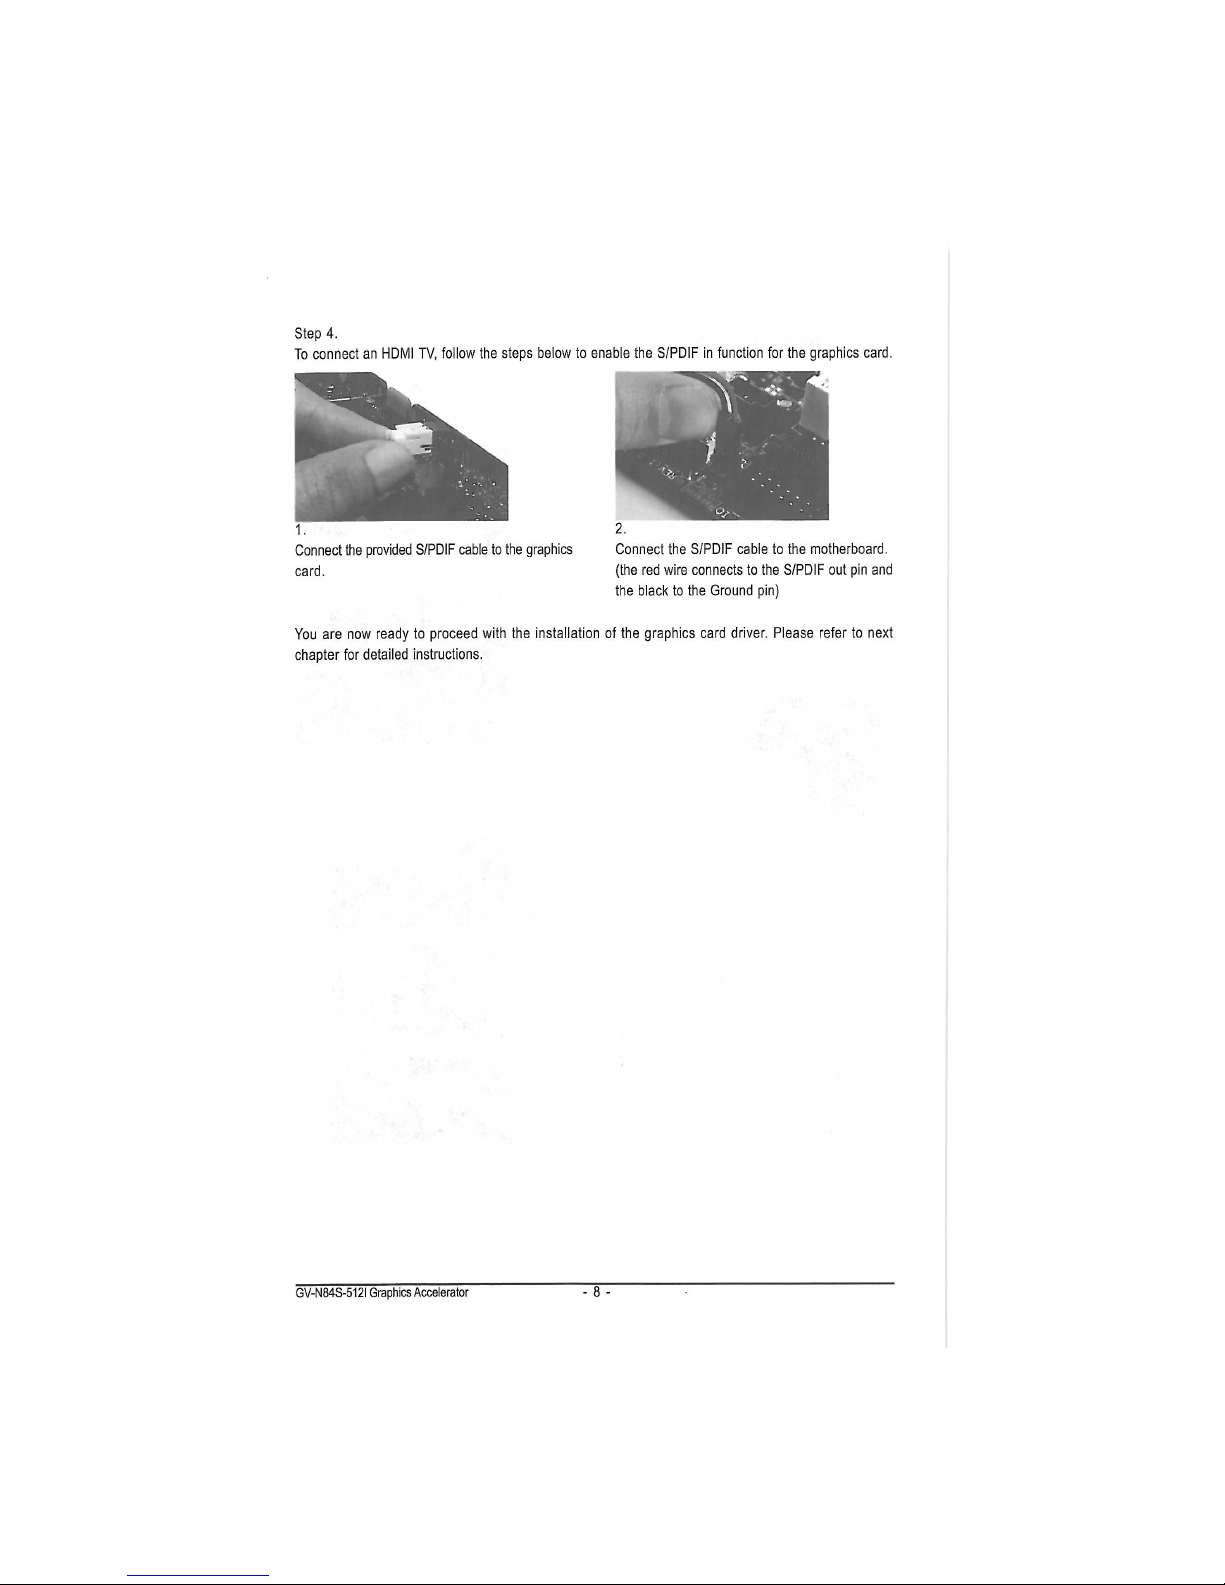
Step 4.
To connect an HDMI TV, follow the steps below to enable the S/PDIF in function for the graphics card.
1. 2.
Connect the provided S/PDIF cable to the graphics Connect the S/PDIF cable to the motherboard,
card. (the red wire connects to the S/PDIF out pin and
the black to the Ground pin)
You are now ready to proceed with the installation of the graphics card driver. Please refer to next
chapter for detailed instructions.
GV-N84S-512I Graphics Accelerator — - 11 -
 Loading...