

Page 1
GN-A 16B
Wir eless Access Point
User Gu ide
Re v.1.0 First Edi tion
Page 2

GN-A16B Wireless Access Point User Guide
Federal Co mmunication Commission Interference Statement
Thi s equipment has been tested and found to comply with the limits for a Class B digi tal
device, pursuant to Part 15 of the F CC Rules. These limits are designed to provide
reasonable protection against harmful inte rference i n a residential i nstalla tion. Thi s
equipment generates, uses and can radi ate rad io frequency energy and, i f not installed
and used in accordance with the instructions, may cause harmful interfere nce to radio
communi cations. However, the re i s no guarantee that interference will not occur in a
particular installation. I f this equipment does cause harmful interference to radio or television
recepti on, which can b e determi ned by turning the equipment off and on, the user i s
encoura ged to try to correct the interference by one of the following measures:
- Reorient or relocate the recei ving antenna.
- Increase the separation between the equipment and receiver.
- Connect the equipment into an outlet on a circuit different from that to which the
receiver is connected.
- Consult the dealer or an experienced radio/TV techni cian for help.
FCC Caution: To assure continued compliance, any changes or modifications not expressly
approved by the party responsible for compliance could void the user’s authority to operate
thi s equipment.
This device complies with Part 15 of the FCC Rules. Operation is subject to the follo wing
two conditi ons: (1) This device may not cause harmful i nterference, and (2) thi s device
must accept any i nterference received, including interference that may ca use undesired
operation.
IMPORTANT NOTE:
FCC Radiation Exposure Statement:
Thi s equipment complies with FCC radiation exposure limits set forth for an uncontrolled
envi ronment. This equipment should be installed and op erated with minimum distance
20cm between the radiator & your body.
This transmitter must not be co-located or operating in conjunction with any other antenna
or transmitter.
2
Page 3

GN-A16B Wireless Access Point User Guide
Contents
Chapter1 Introduction..................................................................4
Overview...........................................................................................................................4
Features............................................................................................................................4
Package Contents ............................................................................................................5
The Rear Panel.................................................................................................................5
The Front Panel LEDs.....................................................................................................6
Chapter 2 Installation...................................................................7
Hareware Requirements ..................................................................................................7
System Requirements .....................................................................................................7
Internet Configuration Requirements.............................................................................7
Hareware Installation.......................................................................................................8
Connect to Access Point .................................................................................................8
Illustration.........................................................................................................................9
Chapter3. Access Point Manager..............................................11
Installing the Access Point Manager.............................................................................11
Using the Access Point Manager...................................................................................15
Upgrade Firmware............................................................................................................30
Uninstall AP Utility.........................................................................................................31
Chapter4 Web-Based Configuration Utility..............................33
Chapter5 Troubleshooting.........................................................43
Appendix A: Glossary...................................................................45
Appendix B: Specification...........................................................48
Physical Interface..........................................................................................................48
802.11b System Specification.........................................................................................48
Appendix C: Configuration of the PCs......................................49
The Setting under Windows 2000...................................................................................49
The Settings under Windows 95/98/Me.........................................................................52
The Settings under Windows XP ....................................................................................55
3
Page 4

GN-A16B Wireless Access Point User Guide
Chapter1 Introduction
Overview
GN-A 16B access point are composed of the Realtek 802.11b and 10/100 Ethernet. This
product ado pts the direct sequence spread spectrum (DSSS) technology and the DBPSK,
DQPS K, and CCK modulation mode to provide a very stable wireless communication
quali ty and an excellent signal receiver capability. This product features the compact size,
lo w powe r consumption, and powe r mana gement functions, and provides a high-speed
wire less data communication.
The Gigabyte Wi reless system can co nnect PC s throughout your premises without the
headache of running cable. It is a effective way to tie together laptop PCs, mobile workers,
floa ting workers, tempo rary workers and offices. It is the ideal way to provide Internet and
Ethernet connecti vity to lecture halls, ware houses, retai l sales floors, gymnasiums and
factories, including large spaces where radio transmission echo has previously been a
problem.
Fe atures
n Confo rms to IEEE 802.11b specification.
n Transmits data rate up to the maximum speed of 11Mbps.
n Dynamically scales the data rate to 11 , 5.5, 2, and 1Mb ps.
n Supp orts 64-bit /128-bi t WEP encryption.
4
Page 5
GN-A16B Wireless Access Point User Guide
Package Contents
Before the installation procedures, please ensure the components are not damaged during the shipp ing. The shipment of the GN-A16B includes:
- One GN-A16B Wireless Access Point
- One AC Power Adapter
- One Installation CD with the AP Manag er and User Guide Soft C opy
- One User Guide
Please contact your local di stributor or authorized reseller immediately for any missing or
damaged components. If you require returning the damaged product, you must pack it in
the original packing material or the warranty will b e voided.
The Re ar Panel
The Access P oint’s ports are located on the Access Point’s rear panel.
n Power
The power port is where you connect the power adapter.
n One Ethernet W AN Port
RJ-45, Auto-sensing for 10/100M Ethernet WAN connection
n Init B ottom
I nitial reset (Init to factory default) and Hardware reset.
n Wireless antenna
One 2.4 GHz antenna
5
Page 6
GN-A16B Wireless Access Point User Guide
The Front Pa nel LEDs
The Access Point’s LEDs display information about the Access Point’s status.
n Power
Flicker The system is booti ng.
On The system is ready.
Note: When you are applying the changes to save the configuration, the Power LED
n WLAN
On The Wi reless function is acting.
Flicker Data i s being transmitted/received.
n LAN/100
On The connection speed is operating at 100 Mbps.
Flicker Data is being transmitted/received.
n LAN/10
(Green Light)
will be off for a while.
(Green Light)
(Green Light)
(Green Light)
On The connection speed is operating a t 10 Mbps.
Flicker Data is being transmitted/received.
6
Page 7

GN-A16B Wireless Access Point User Guide
Chapter 2 Installation
Hareware Requirements
To use the Wireless Access Point on your network, each computer may need the
following requirements:
n An installed 802.11b wireless adapter.
n An Ethernet LAN swi tch or hub.
n a wired RJ-45 Ethernet cable
System Requirements
n A C omputer with Windows, Macintosh, or Linux-based operating system.
n A Javascript-enabled web browser program whi ch supports HTTP upIoads such as
Microsoft I nternet Explorer or Netscape Navigator version 4.0 or above.
Internet Configuration Require ments
In order to connect your Access Point to the AP Manager, you will need the following
configuration parameters to configure the TCP/IP setting of your computer:
v Static IP Address: 192.168.1. x (e.g, 2 ~ 253)
v Subnet mask: 255.255.255.0
v Default Gateway: 192.168.1.254
7
Page 8

GN-A16B Wireless Access Point User Guide
Hareware Installation
Follow these ste ps to install the Wirele ss Access Point.
1. Choose a proper place for Access Point. In general, the best location is at the center
of your wi reless coverage area, within line of sight to all wireless devices. Keeping
cle ar of metal obstructions and away from direct sunlight.
2. Place the Access Point in the desired location. Normally, the higher you place the
antenna, the b etter the performance wi ll be. The antenna’s position enhances the
receiving sensitivi ty.
3. Attach one end of an RJ-45 E thernet cable to the Access Point and attach the other
end to a ne twork hub, switch, route r, or pa tch panel (possi bly on a wall).
4. Attach one end of the AC power adapter to the Access Point and the other end to a
powe r outlet. (Note: Only use the power adapter supplied by Gigabyte in the product
package. Using a different adapter may result in product damage.)
For the average home, si gnal range should not be an issue. I f you experience low or no
si gnal strength in areas of your home tha t you wish to access, consider posi tioning the
Access Point in a locati on directly between the computers with wireless adap ters. Additi onal Access Points can be conne cted to provide better coverage in rooms where the
signal does not appear as strong as desired.
Connect to Acce ss Point
Wired Ethernet Cable
You can connect a LAN cable from your computer’s Network card to the Access Point
without usi ng a Network switch or hub.
Wireless Connect ion
I f you are using the wireless connection, you can connect to the Access Poi nt using the
Gigabyte Access Point Manager without a wired Ethernet cable.
8
Page 9
GN-A16B Wireless Access Point User Guide
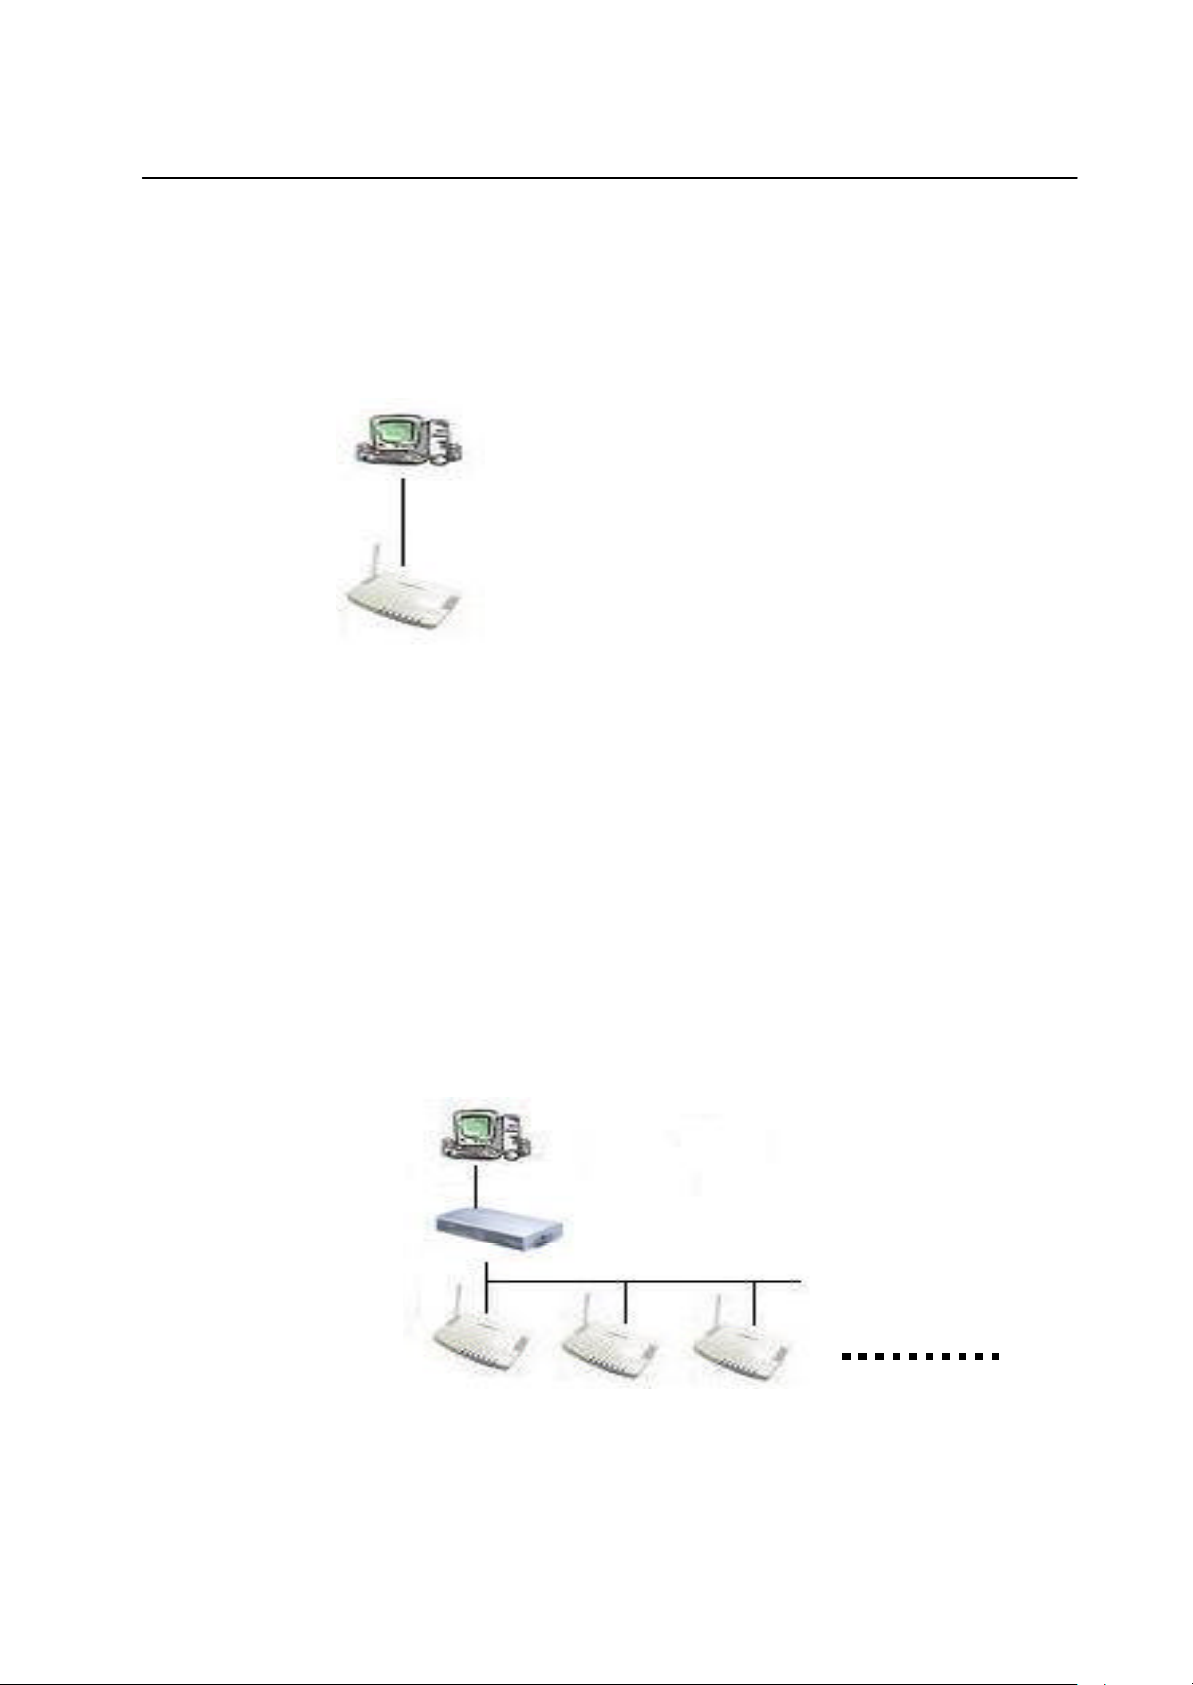
Illustration
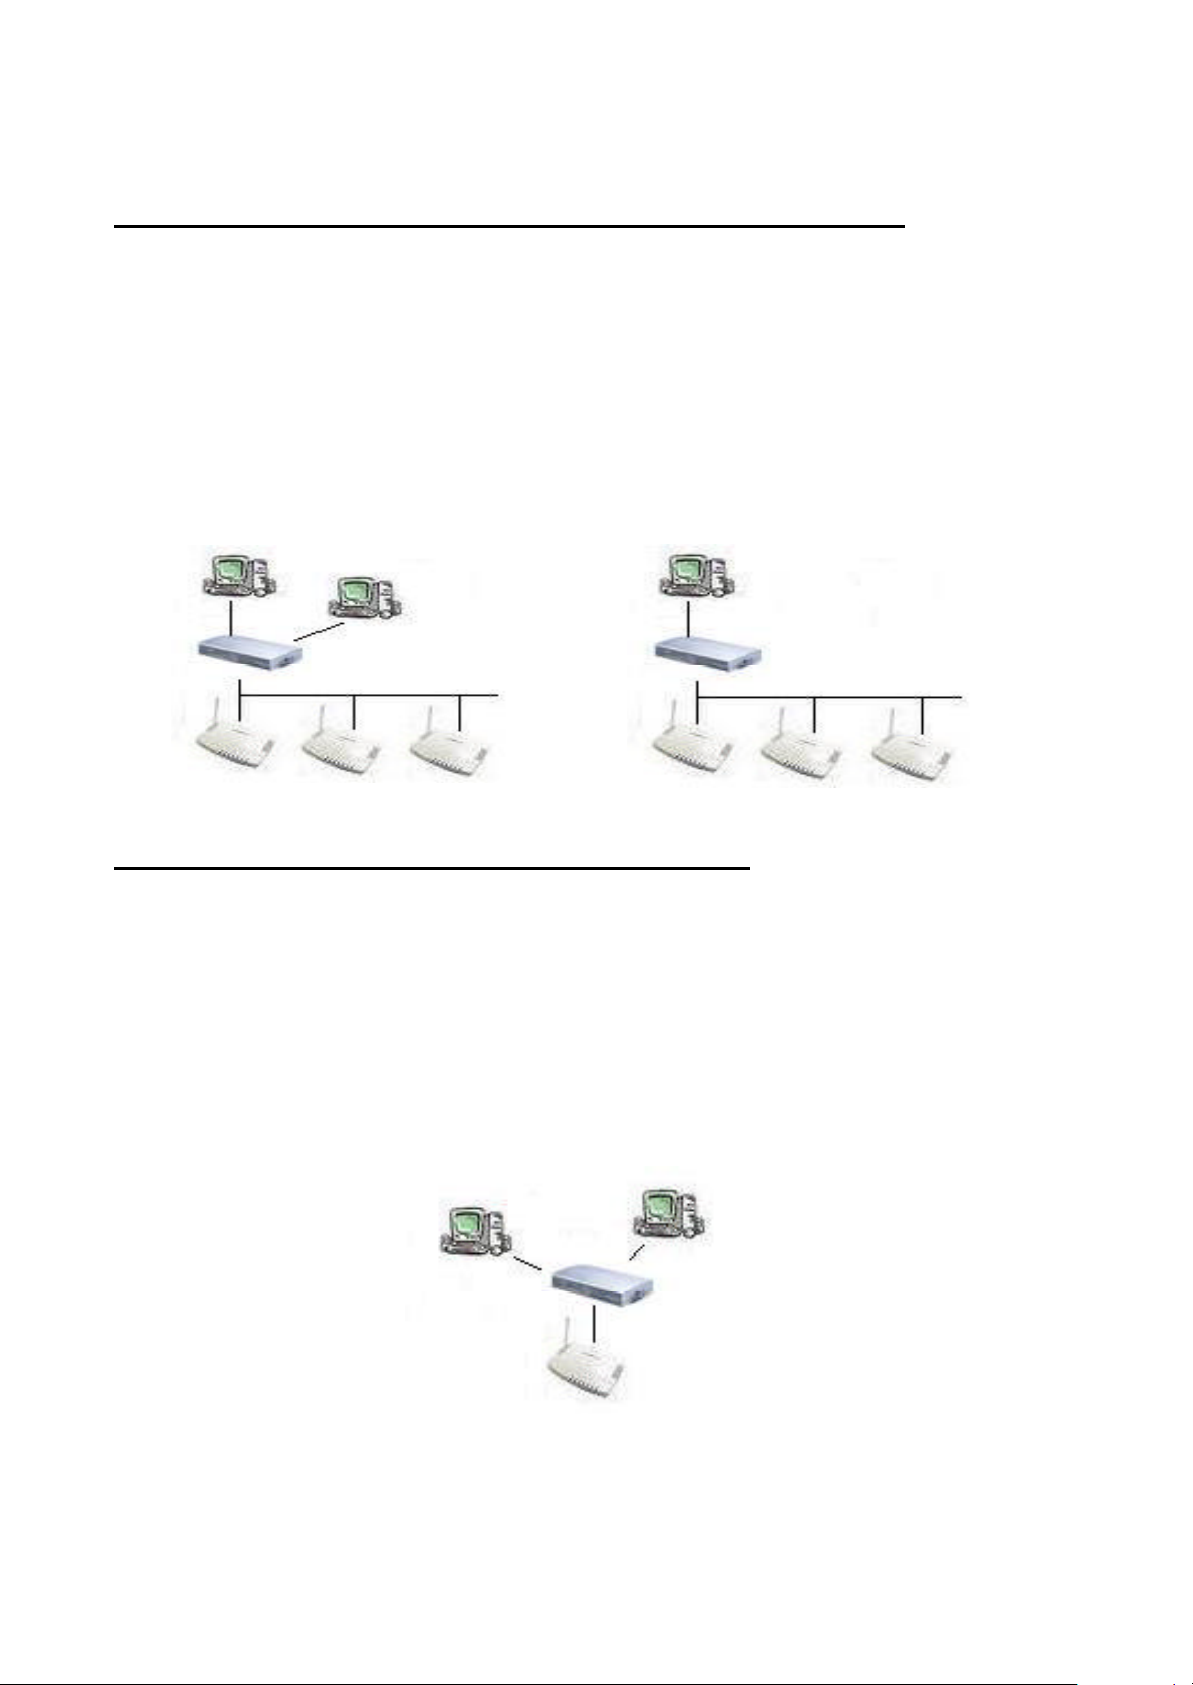
The re are two installation mode for your reference as follow:
M ethod 1: Static IP address
I f you are Not using a DHCP server in your network, you can configure the AP by connecting to the computer directly.
PC(AP Manager) 192.168.1.x
DHCP (Disable)
AP
192.168. 1.1(default)
1. You will need to assign a Stati c IP Address to the computer that you are using to
configure the Access Point on the same subnet.
For instance, the default IP address of the Access Point is 192.168.1.1 and the subnet
mask 2 55.255.255.0. You can enter I P address 192.168.1.20 (assuming that it is not
already assigned to another network device ), subnet mask 255.255.255.0 to your
computer.
Note: If you need the instructions on how to do this, please refer to Appendix C,
“Configuration of the PCs”
2. Connect to the Access Point one by one and assign a static IP to each Access Point.
For example, 192.168.1.2 or 192.168.1.y, etc. (If the IP address of your network is
10.1.5.x then your Access Point can be assigned to 10.1.5.y.)
PC(AP Manager) 192.168.1.x
DHCP (Disable)
192.168. 1.1 192.168.1.2
192.168.1.y
3. Make sure that every Access Poi nt has a unique IP.
4. After all A ccess Points have been configured successfully, then you can use AP
Manager to control/monitor all Access Points network.
9
Page 10
GN-A16B Wireless Access Point User Guide
M ethod 2: Numerous Access Points setting
Using DHCP server to setup the IP Address then remove DHCP server
I f require to setup as many Access Points at the same time. You can setup a DHCP Server
and let it assign IP to all the Access Points so it has its own unique IP address. After the
setup is finished, and then remove o r disabled DHCP Server a t last. Now, you can use the
AP Manager to find all Access Points in your network, and then setup the N-Access Points
as static IP address one by one. Notice: After assign static IP address to eve ry Access
Points, be sure to set the PC (AP Manager) to the same subn et.
PC(AP M anager)
PC(AP M anager)
DHCP Server
Switch / Hub
Switch / Hub
e
Obtain IP Address Automatically - DHCP Server Enabled
I f you are using a DHCP server in your network, you can connect a DHCP server with the
Access Poi nt and an AP Manager thro ugh a switch/hub . The IP address of the Access
Point should be configured to “Obtain an I P address automatically” (which is default setting).
The DHCP server will assign the IP address to the Access Point. The PC (AP Manager)
should use the I P on the same subnet as the Access Point. Or, you can configure the PC
(AP Manager) to “Obtain an I P address automatically” and assign IP by the same DHCP
server.
PC(AP M anager)
DHCP Server
AP
Switch / Hub
10
Page 11
GN-A16B Wireless Access Point User Guide
Chapter3. Access Point Manager
The Wireless Access P oint can be configured one of two ways, through the AP Manager
Utility or the Web-based configuration Utility.The Gigabyte Access Point Manager is used
to configure Gigabyte Access Points.
Note: The perf ormance of wire line link is better than wire less link between the AP
Manager and each Access Point. To use the wire line link to manage the
Access Point is recommended.
Installing the Acce ss Point Manager
Ple ase follow these steps to install the Gig abyte AP Manager in the Windows.
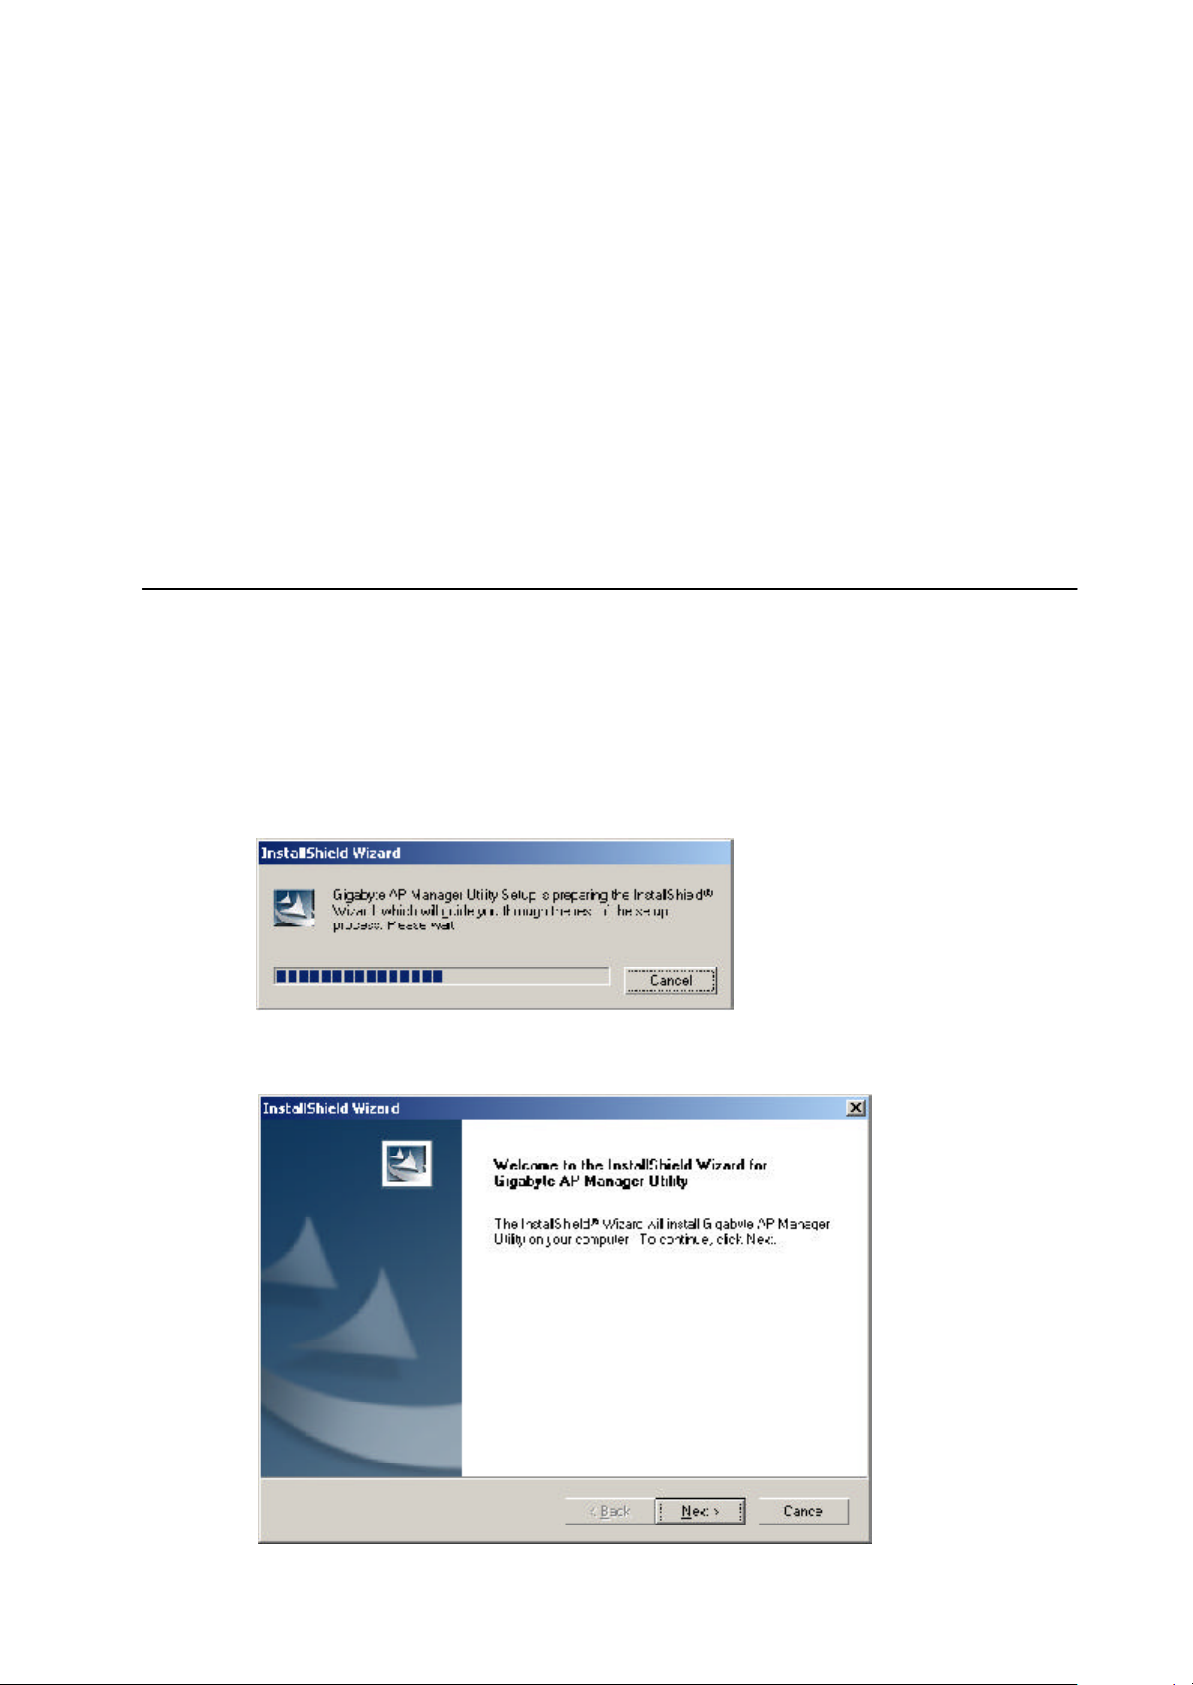
Step1. I nsert the installation CD and click Install Gigabyte AP Manager on the CD
autorun screen.
Step2. Please wait a while!
Step3. Click “Next”.
11
Page 12
GN-A16B Wireless Access Point User Guide
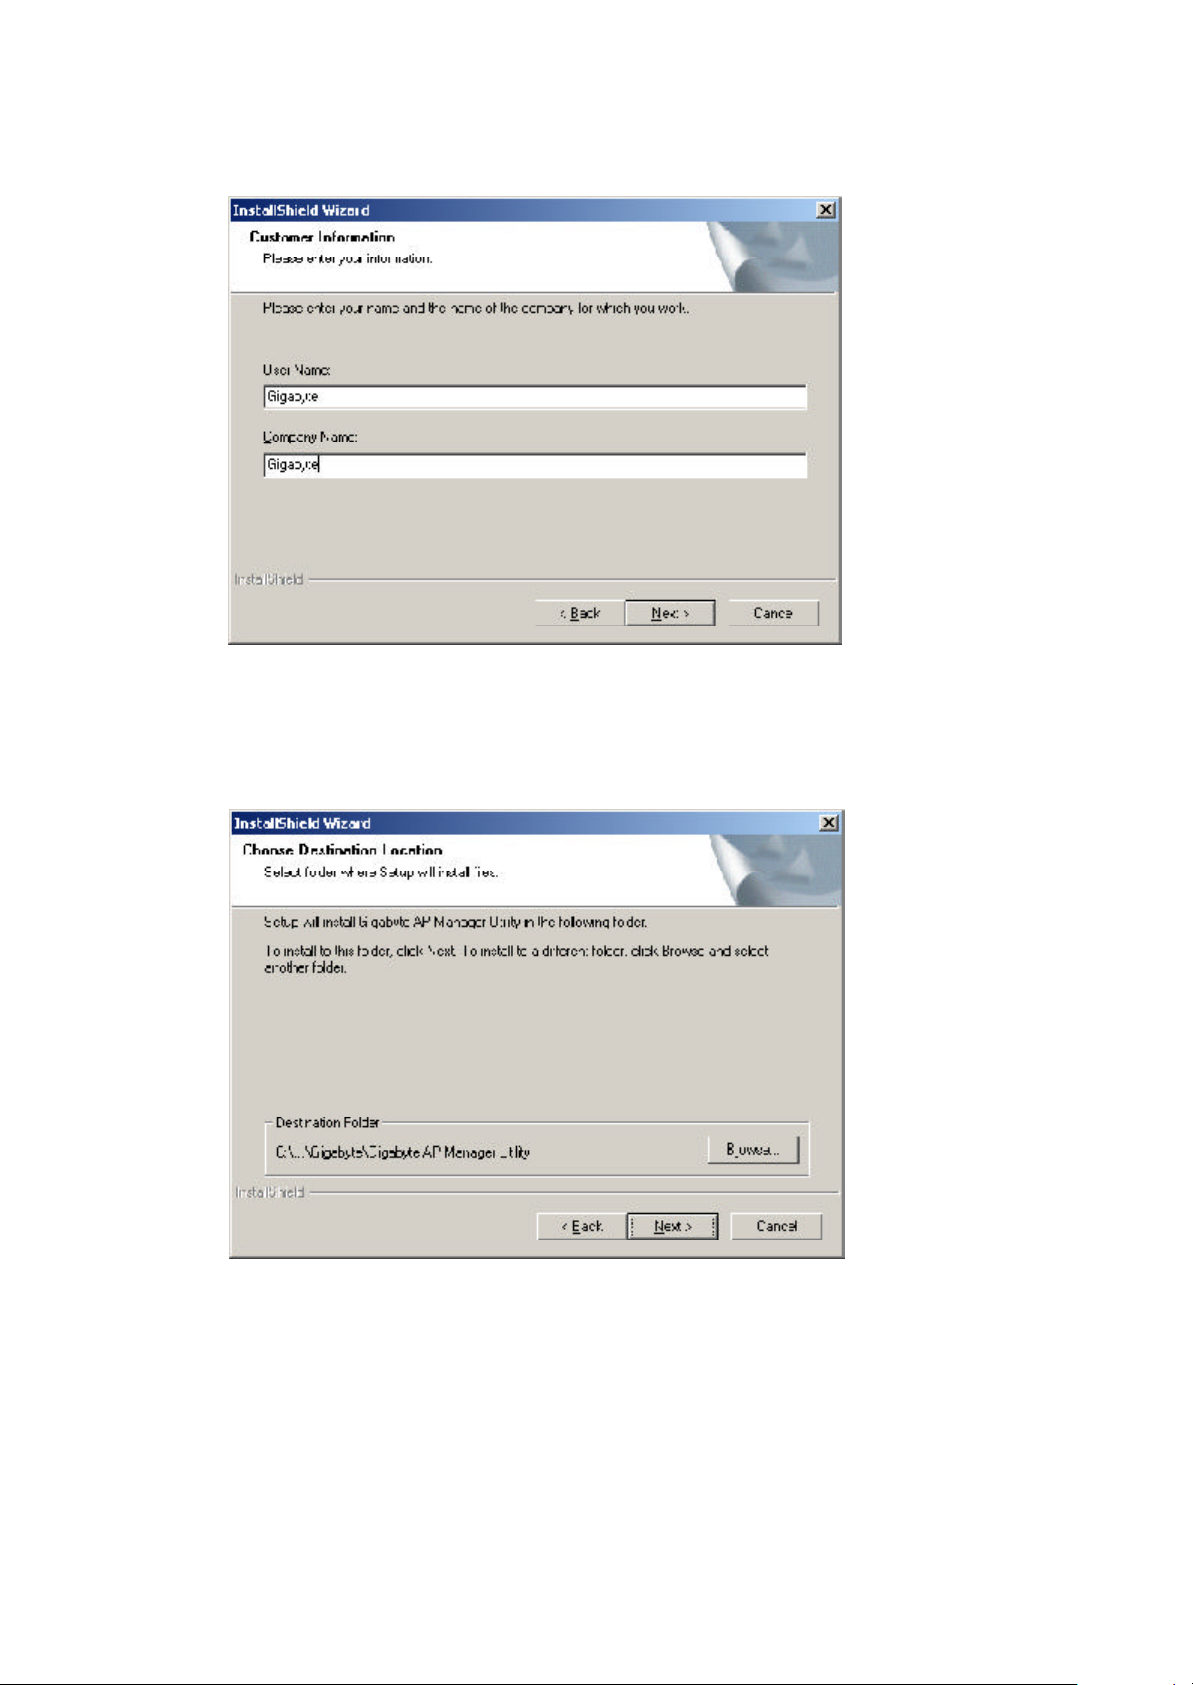
Step4. Typ e the User Information then click “Next”.
Step5. Click “Next” to accept the default directory or “Browse” to another location.
12
Page 13
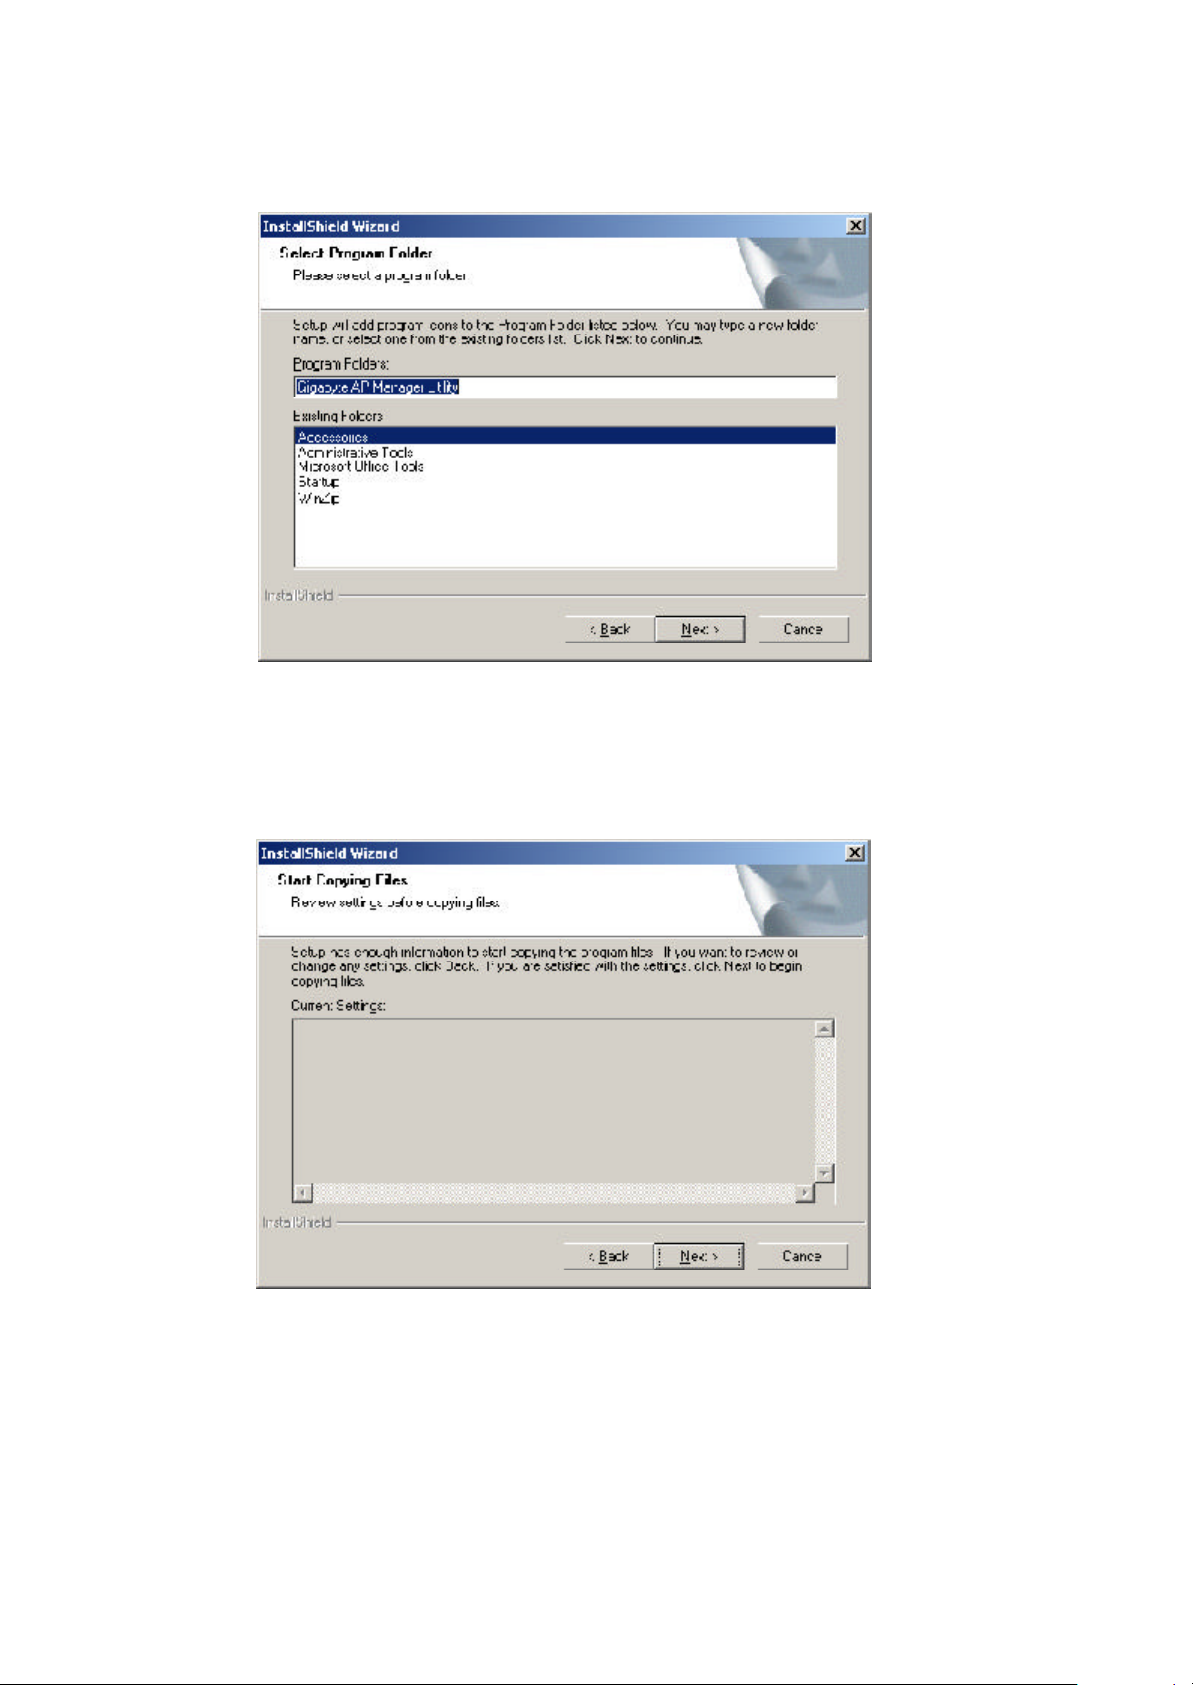
Step6. Click “Next”.
GN-A16B Wireless Access Point User Guide
Step7. Click “Next”.
13
Page 14
GN-A16B Wireless Access Point User Guide
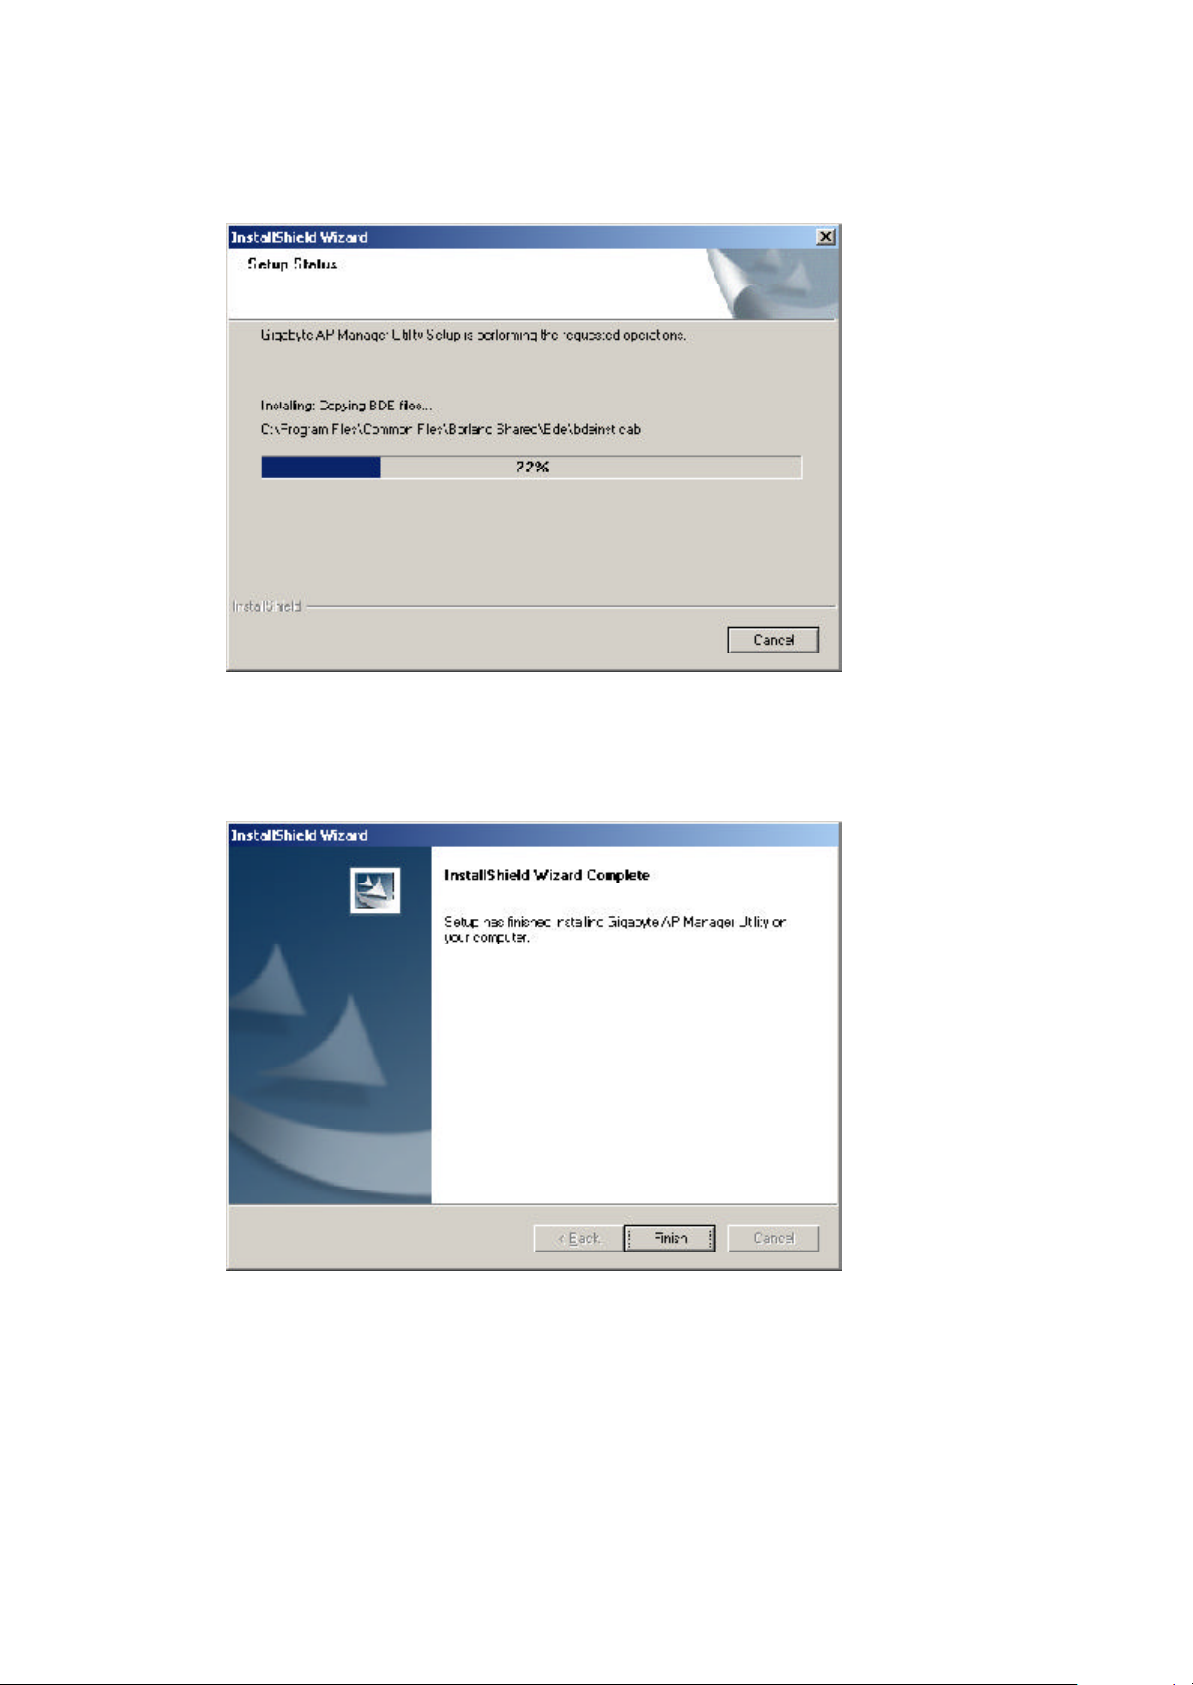
Step8. Please wait a while.
Step9. Click “Finish” to complete setup.
14
Page 15
GN-A16B Wireless Access Point User Guide
Using the Acce ss Point Manager
You can launch Gigabyte AP Manager through Start \ Programs \ Gigabyte AP Manager
Utility \ Gigabyte AP Manager.
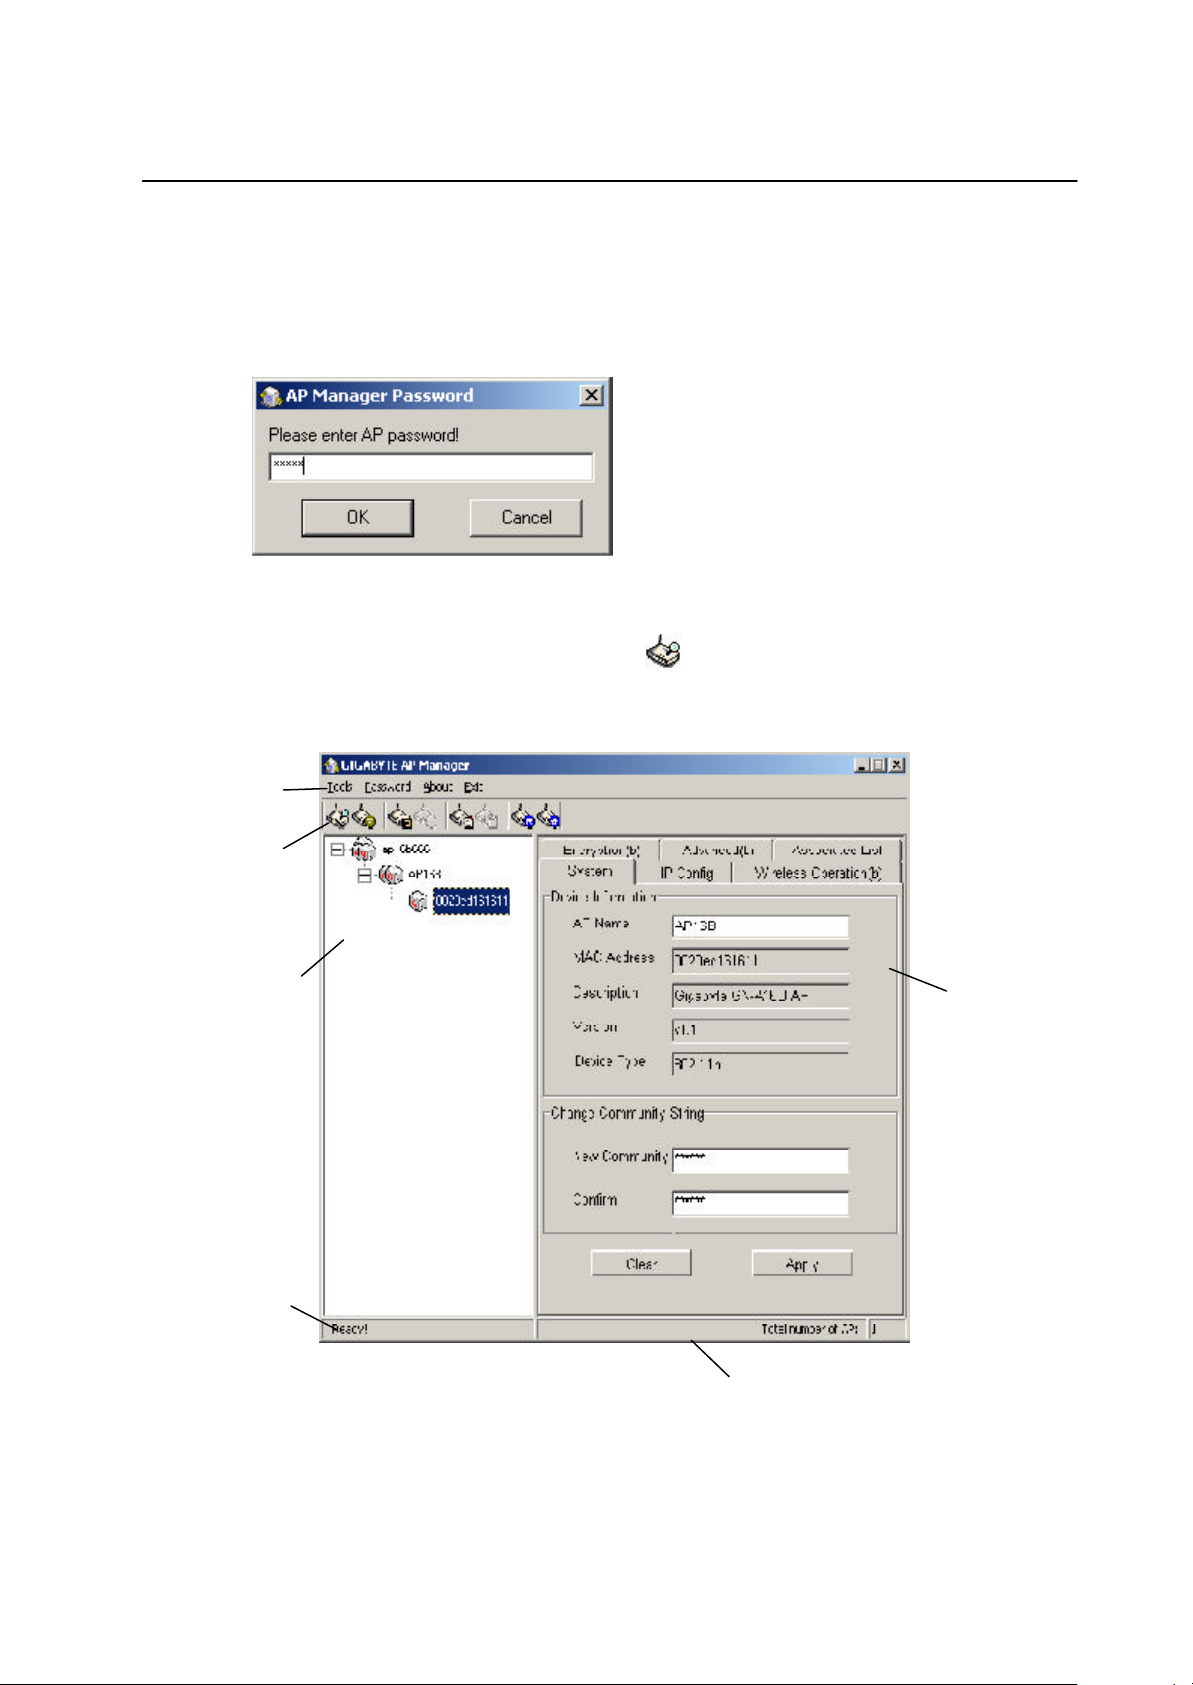
Enter the default password “admin” and click “OK” button.
I t will automatically search for Access Poi nts on the same subnet when you open the
Gigabyte AP Manager. You may click the icon to searching for A ccess P oints
manually.
Menu bar
Tool bar
Tre e vi ew
Page C ontrol
Status bar
Progress bar
15
Page 16
GN-A16B Wireless Access Point User Guide
n Tree structure
ESSI D (ap16b)
AP Name (AP16B)
MAC Address (0020ED001700)
n Menu bar
Tools Allow you to “Search” for AP by ESSID , AP Name, MAC Address,
and I P Address and “Connect to AP by IP”. And allow you to “Save”,
“Load” the AP configuration and “Copy”, “Paste” the configuration
at the current page . Besides, it includes both “System Reboot” and
“Load Default”.
Password Allow you to change the AP Manager password and set the SNMP
community string.
About An onli ne help and the AP Manager version.
Exit Exi t the AP Manager.
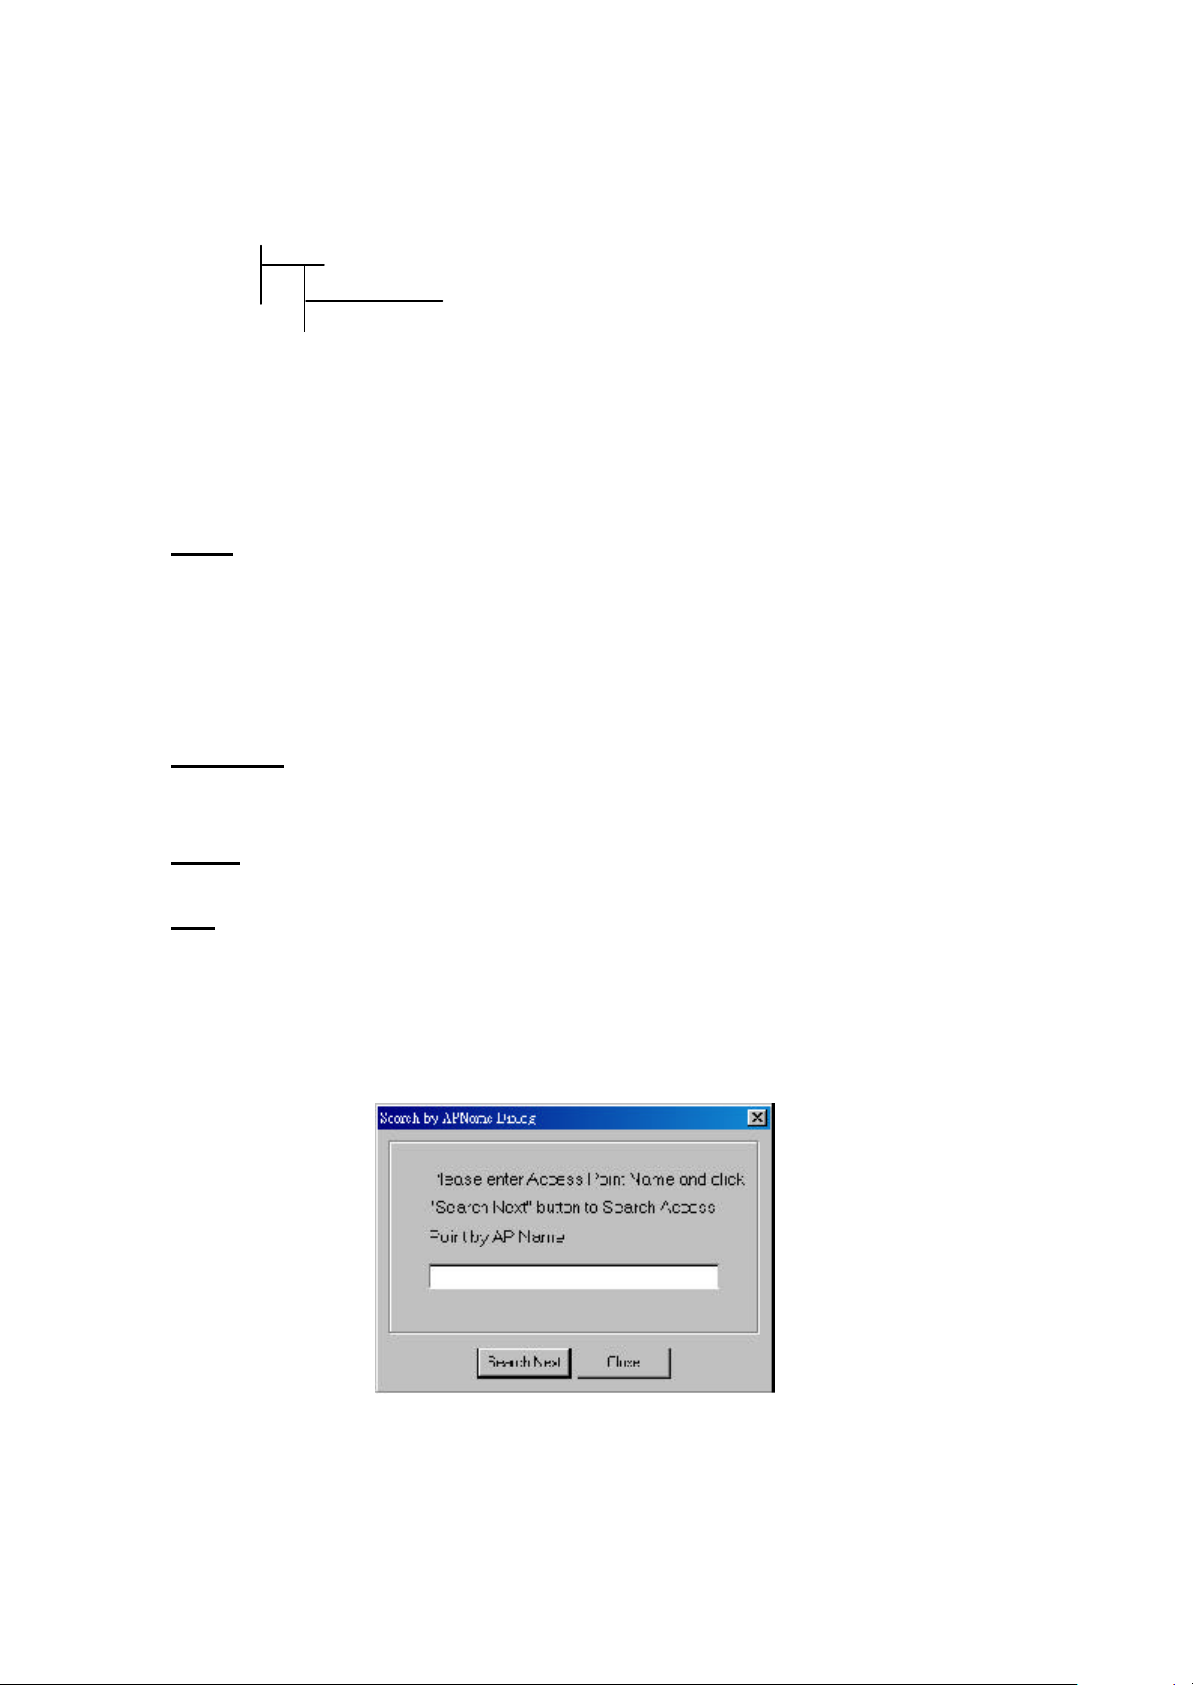
Note: When you search for AP by AP Name (Tools->Search->By AP Name). You can
press the “search next” to continue to search the same name of AP.
16
Page 17
n Toor bar
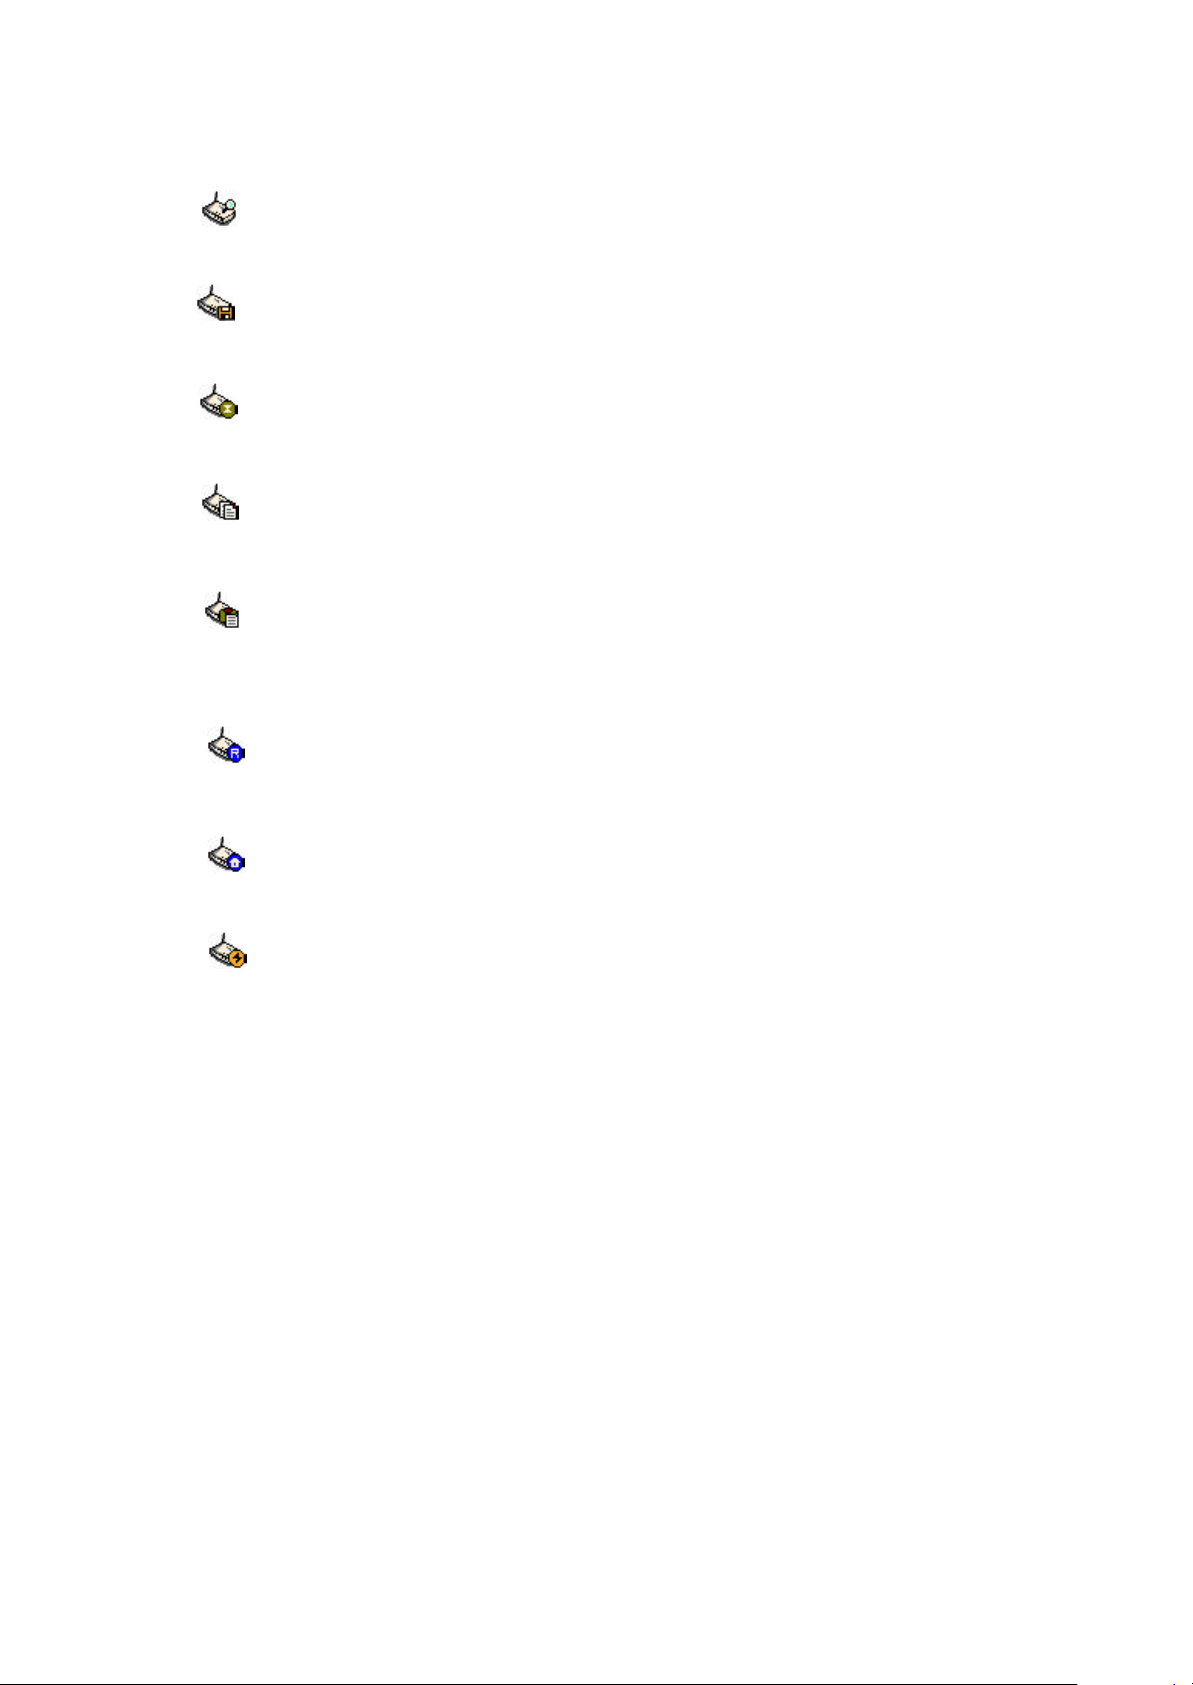
Find Access Point
Find all AP i n the same subnet.
Save AP Configuration
Save all setting of the AP to a temp fi le.
Load AP Configuration
Load the setting of the temp file that you saved before to the current AP.
Page Copy
Copy the setting of the current page.
Page Paste
Paste the se tting you has copied to the current pag e.(You can paste the setting
GN-A16B Wireless Access Point User Guide
of AP1 to AP2 at the same tab page.)
System Reboot
Rebo ot the Access Point.
Load Default
Set the Access Poi nt to the manufacture default.
Connect to AP by IP
I f you want to manage the AP in the different subnet, use this function and key
in the IP.
17
Page 18
GN-A16B Wireless Access Point User Guide
System Page
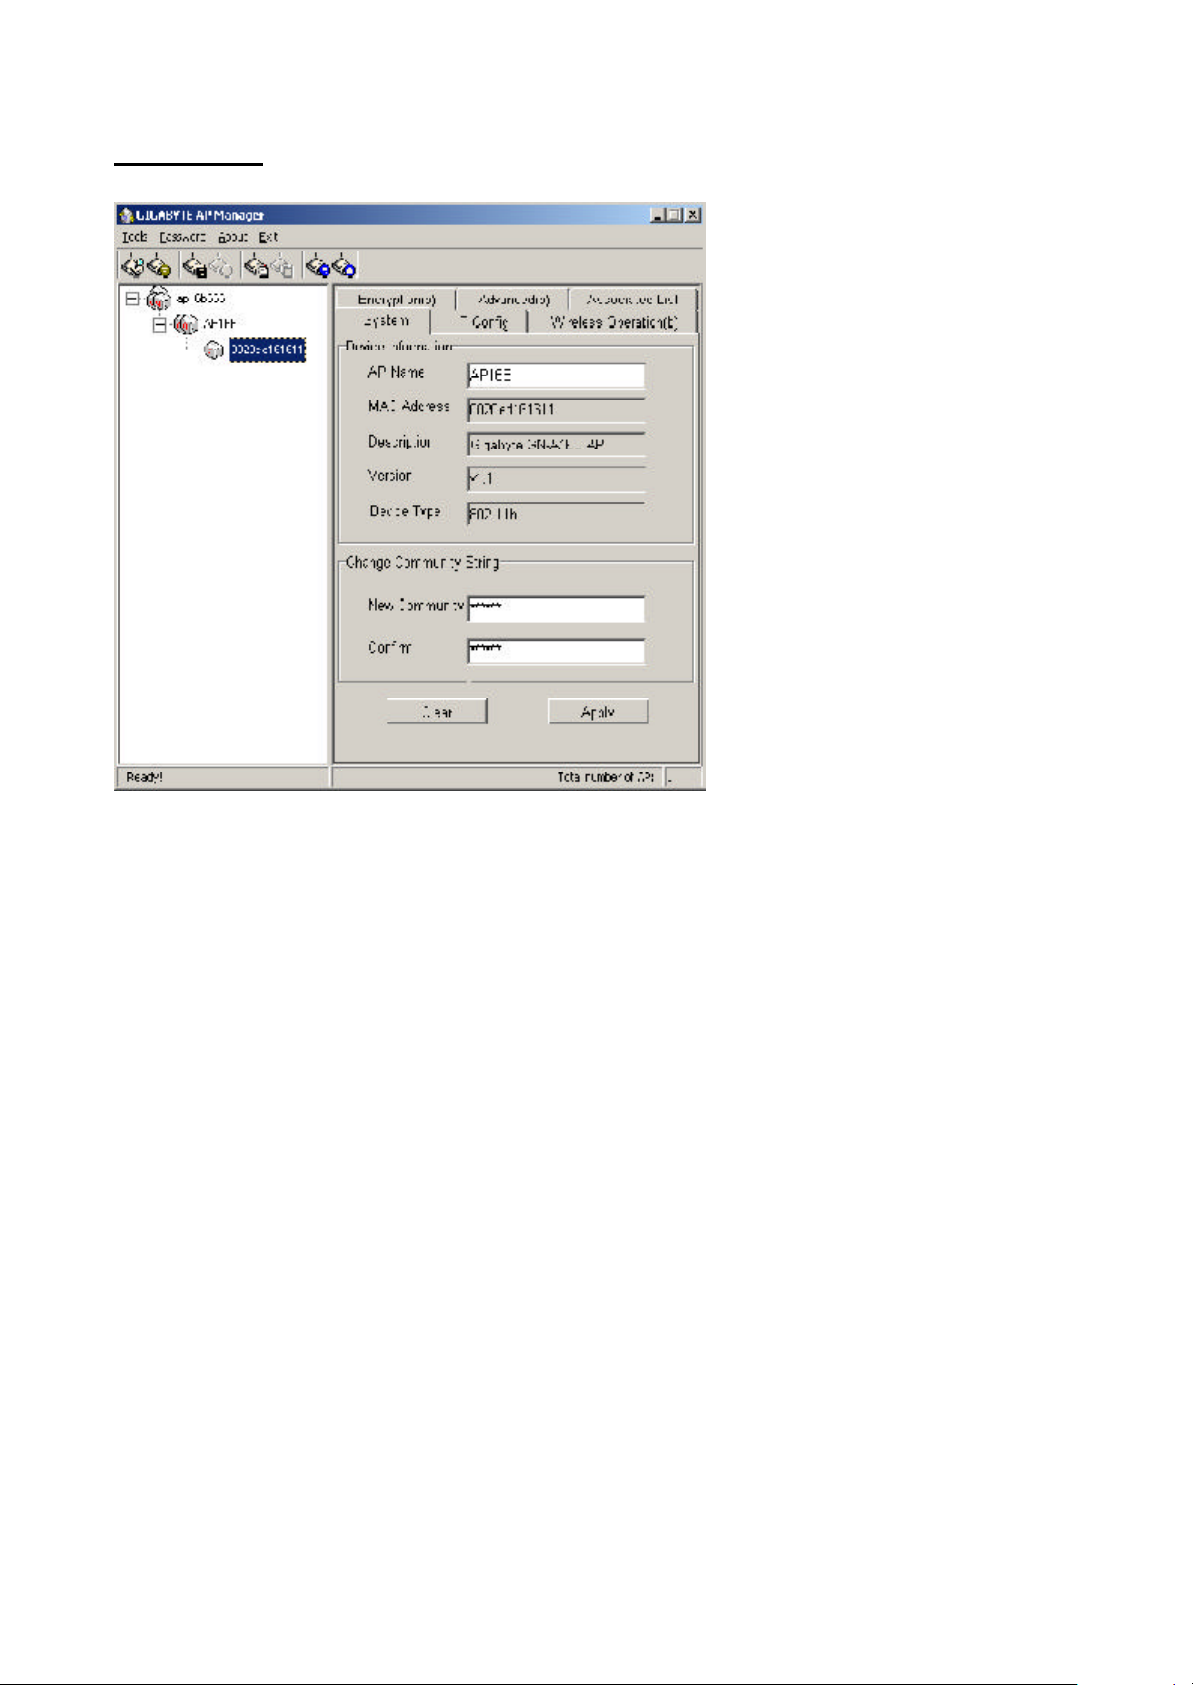
The System Page di spla ys the Device Informati on and the Change C ommunity String
functi on.
1 Device In formation
The Device I nformation include the AP name, MAC address, device description, the
version information and the device type. You can change the AP Name to whatever
unique name, which can represent this A P.
1 Change Commu nity String
This function can let you change the community string to the AP. You can change a
new community string on purpose to prohibit othe r AP Manager access and manage
your AP. After you change the community string to AP, you need to do two following
acti ons.
1. Use Password->Set Community String on the Menu Bar to set the community
string to the AP manager. The AP Manager and the AP should have the same
community string. Otherwise the AP Manager will not be able to find the AP with
di fferent community string
18
Page 19

GN-A16B Wireless Access Point User Guide
2. Please memori ze the community string or write it down at somewhere.
I nit bottom
I n case you forget the community string, you have to press the AP init button and
the n the AP setting (include community string) will be restore to default value.
Note: The SNMP community string defines the relationship between an SNMP manager
system (AP Manager) and the agent systems (all APs). This string acts like a pass
word to control the AP Manager to access the AP. The default value of the
community string is “public”. You can change the community string of AP Manager
by using Password->Set Community String on the Menu Bar.
19
Page 20

GN-A16B Wireless Access Point User Guide
IP Config Page
The IP Configure tab allows you to co nfigure the I P parameters of the access point.
1 IP Address
Use this option to assign an IP address to the access point. The default IP address
is 192.168.1.1. Please make sure the assi gned IP address is unique on your
ne twork.
1 Subnet Mask
Specify the subnet mask of the access point. The default subnet mask is
255.255.255.0.
1 Gateway
Enter the IP address of the default route. The default gateway is 192.168.1.254.
After you change the I P address of the AP, please also change the PC’s (AP Manager)
I P address to the same subnet. And then click the “Find Access Point” icon; AP
manager will sea rch the AP on the network.
20
Page 21

GN-A16B Wireless Access Point User Guide
1 DHCP Mode
The re are four settings unde r this option yo u can choose: “Disabled”, “Cli ent
Ena bled”, “Server Enabled” and “Auto”. Disab led is the default setting.
I f you want to get IP address from the DHCP server automatically on yo ur network,
you will select “Client Enabled”. Or you want to use the A ccess Point as a DHCP
server to automatically assign dynamic I P address on the network, you will select
“Server Enabled”
1 DHCP Client Range & DNS
I f you select the “Server Enabled” setting, please input the IP address range and the
DNS for your network. The DNS information provied by your ISP company.
1 802.1d Spanning Tree
Ena bled or Disabled the 8 02.1d Spanning Tree function. The default setting is
Disabled.
Ve rify the desi red setting and then click the “Ap ply” button to set the value into access
poi nt.
21
Page 22

GN-A16B Wireless Access Point User Guide
Wireless Operatio n Page
No rmally, yo u can have the wireless works smoothly even you didn’t change any item in
this page.
1 Region
Because of the differe nt region has a different open channel regulation, please check
whether the default region value is your local area. I f it did not appear properly region
ple ase contact your local distributor or authori zed reseller immediately.
1 Channel ID
Please choose the channel, which you can get best performance. Normally, it doesn’t
nee d to change.
1 Preamble Type
The preamble field shall be pro vided so that the receiver can perform the necessary
operations for synchro nization. Under this option two setting are possible: “Long” or
“Sho rt”. The default value is “Long”.
1 Transmit Rate
You can select one of the rates among 1M, 2M, 5.5M and 11M based on your need.
The default value is “11M”. If the “Auto Rate” option is enable, it will not be able to
perform the “Transmit Rate” funtion.
22
Page 23

GN-A16B Wireless Access Point User Guide
1 Auto Rate
I n this item you can select either “enable” or “disable”. The default value is “enable”.
Enable I f the selection is “enable”, the transfer rate will automatically change to
the optimum rate allowe d. The range of auto-change will base on the
setting of “Transmit Rate”.
Transmi t Rate setting:
11M : range is among 1M, 2M, 5,5M and 11M
5.5M: range is among 1M, 2M and 5,5M
2M : range i s between 1M and 2M
1M : no auto-change. The transmit rate is fixed at 1M.
Disable There is no transfer rate auto-change. The transfer rate wi ll be defined by
the “Transmit Rate” column.
1 Hidden ESSID
This setti ng allows you to hide the ESSID in wireless transmission. Those who don’t
kno w the ESSI D will not be able connect to the AP. The default value is “disable”.
1 RTS Threshold
Thi s value should remain at its default setting of 2347 . Should you encounter
inconsistent data flow, only minor modifications are recommended. The setting range
is 0 ~ 2347.
1 ESSID
The ESSI D or SSID is the name represent the AP in the wireless network. The ESSI D
of all A P in your network should set to identical for the mobile client can roam
between access p oints. This ESSI D string is case sensitive of up to 32 ASCII
cha racters.
1 Fragment Threshold
Thi s value indicates how much of the Access Point’s resources are devoted to
recovering packet errors. The value should remain at i ts default setting of 2346. I f
you have decreased thi s value and experience high packet error rates, you can
increase it ag ain, but it will likely decrease overall network performance. Only mi nor
modifications of this value are recommended. The setting rangeis 256 ~ 2346.
23
Page 24

GN-A16B Wireless Access Point User Guide
1 Beacon Interval
The beacon interval is the amount of time between access point beacon transmissions.
The default value for thi s interval is generally 100ms, that is 100 beacons sent every
second.You can increase the beacon interval and have lower overhead on the network,
but the n roaming will likely suffer. I t's best to leave this setting alone.
Ve rify the desi red setting and then click the “Ap ply” button to set the value into access
poi nt.
24
Page 25

Encryption Page
GN-A16B Wireless Access Point User Guide
Thi s page is the security configuration of the wireless connection. WEP (Wired Equi valent Privacy) is a d ata privacy mechanism based on a 64/128-bit shared key a lgorithm, as
described in the IE EE 802.1x standard. When the “D isable” is selected there is no WEP
encryptio n. When either “64bits” or “128bits” selected there is encryp ted date transfer to
prevent unauthorized user to access the wireless network.
1 Authentication Type
You may choose between “Open System”, “S hared Key”, and “Auto”. The
Authenticati on Type default is set to “Auto”.
Open System in which the sender and the recipient d o NOT share a secret key.
Each party genera tes its own key-pai r and asks the receiver to ac
cept the randomly gene rated key. Once accepted, thi s key is used
for a short time only. Then a new key is generated and agreed upon.
Shared Key is both the sender and the recipient share a secret key.
I f the “Shared Key” option is selected, it will not be able to perform the op tion
“disable” of the WEP Type.
25
Page 26

GN-A16B Wireless Access Point User Guide
1 64 (40) Bits or 128 (104) bits
The re are two levels of encryp tion 64 bits and 128 bits. The 64 bits encryption is
referenced as a lower level encrypti on. The 128 bits encryption is referenced as a
hi gher level encryption.
The 64 bits WEP encryp tion use 4 0 bits as a secret key, which can controlled by
use r, and 24 bits as the initialize vector, whi ch user can not control. These two
portions plus together is 64 bi ts encryption. Some other vendor’s product might
refer as 40 bits encryption. It is the same thing.
The 128 bits WEP encrypti on use 104 bits as a secret key, which can controlled by
use r, and 24 bits as the initialize vector, whi ch user can not control. These two
portions plus together is 128 bi ts encryption. Some other vendor’s product might
refer as 104 bits encryption. It is the same thing.
1 WEP Key Mode
Automatic Generation Check this selection can allow user to generate the WEP
key base d on the string use r key in. This file d can key in
up to 10 character .
Hex & ASCII The WEP key is generated from ASCII or Hexadecimal
entries that are either 64 or 128 i n length. Please select
the Key mode and then input the approp riate digits or
letters. You can create up to 4 keys. Please select one of
the key you want to use.
Ve rify the desi red setting and then click the “Ap ply” button to set the value into access
poi nt.
26
Page 27
Advanced Page
GN-A16B Wireless Access Point User Guide
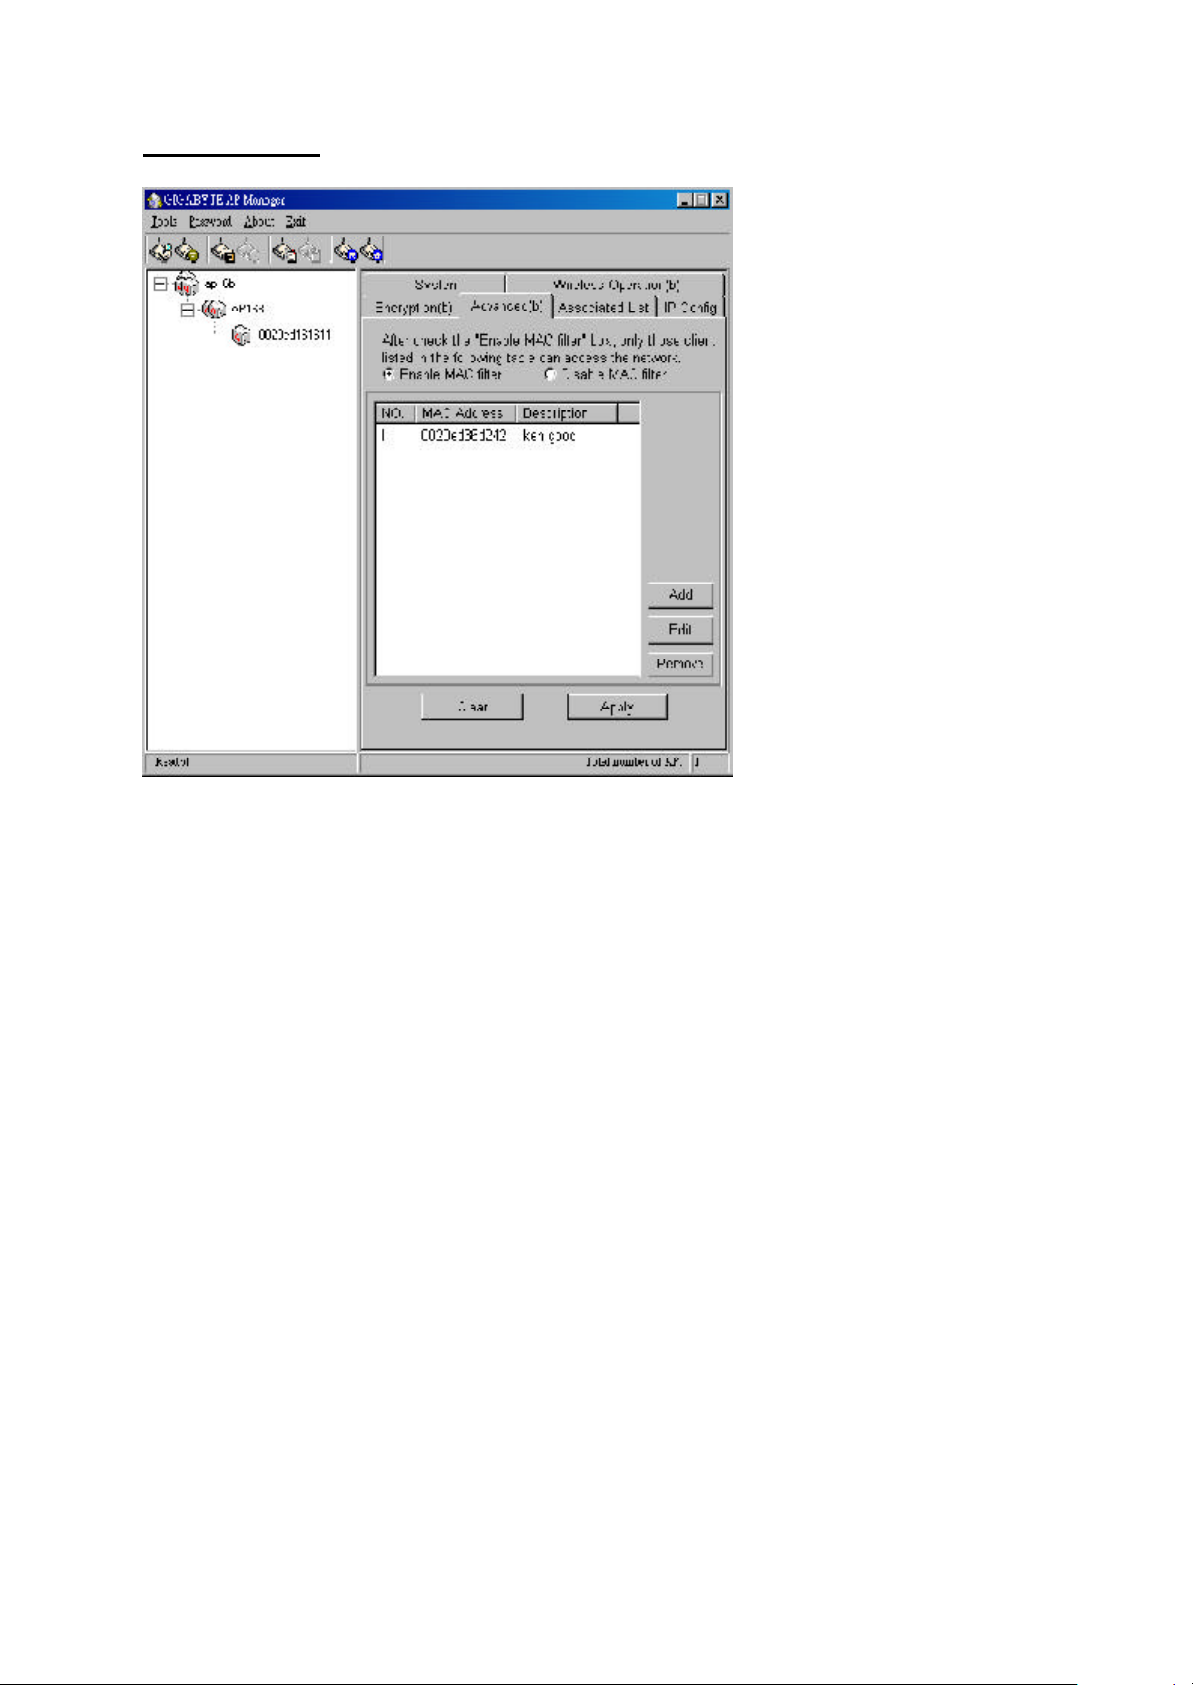
For enhance the security of the wireless network, this AP provide the MAC address filtering mechanism to p revent the unauthorized user access. Check “Enable MAC filter” and
key in MA C address table, then only those MAC address in the table are allowe d to conne ct to thi s AP.
1 Enable MAC Filter
Choose the “Enable MAC Filter” and click the “Add” b utton to add more MAC
addresses or cli ck “Remove” button to delete the MAC addresses from the
Authori zed MAC Address table. Besides, you can click “Edit” button to edit the MAC
address.
1 Disable MAC Filter
The default is “Disable MAC filter”.
Ve rify the desi red setting and then click the “Ap ply” button to set the value into access
poi nt.
27
Page 28

GN-A16B Wireless Access Point User Guide
Associated List Page
From this page, you wi ll get the informati on of the workstation which can connect to the
AP. The form list includes the MAC Address, Signal level and description of the workstation.
28
Page 29

GN-A16B Wireless Access Point User Guide
Change AP Manager Password
User can change the administration password of the AP manger to prevent other user
access to the A P Mana ger. On the Menu Bar (Password->AP Manager Password) can
invo ke the password change di alog. Please enter a new admin password and confirm
admin password then press “OK” button. You have to enter this new password to log in
when you want to use the AP Manager next time.
Set Commun ity String
The community string defines the relationship between AP manag er and the AP. This
string acts like a password to control the AP Manager t o access the AP. For detail description,
please re fer to “System Page” section.
29
Page 30

GN-A16B Wireless Access Point User Guide
Upgra de Firmware
You can download the upgraded firmware version from Gigabyte website.
1 Run TFTP Program
Step1. You can find the “Upgrade Tool” through Start \ Programs \ Gigabyte AP
Manager Utility \ Gigabyte AP Upgrade.
Step2. The Gigabyte Firmware Upgrade Tool screen will appear. Please enter the “AP
IP add ress” which you want to upgrade the firmware. You can press “Ping”
button to verify whether the AP is online.
Step3. Press “Open” button to choose the firmware then press “Upgrade” button to
start the firmware upgrade process.
Note: During the firmware upgrade, please DO NOT turn off the PC or AP and
DO NOT unplug the Ethernet cable.
30
Page 31

GN-A16B Wireless Access Point User Guide
Step4. After the AP device rebooting successful, the AP firmware upgrade is
completed.
Note: Right-Click on the screen, the content menu will be displayed. You can
find the online help and the version inf ormation of the firmware upgrade
utility.
Uninstall AP Utility
You can find the Uninstall program through Start \ Programs \ Gigabyte AP Man ager
Utility \ Uninstall.
Step1. The InstallShield Wizard will appear then please wait.
Step2. Click “Yes”.
Step3. Cli ck “OK” and then the Gigabyte AP Manager Utility has been uninstalled
successfully.
31
Page 32

GN-A16B Wireless Access Point User Guide
I f you just want to modify some program components or reinstall all program components,
you can run the i nstallation program directly. And then the InstallShield Wizard will appear.
Please choose one of the options what you want then click “Next” conti nues to modify,
repair or remove the Gigabyte AP Manager Utili ty.
32
Page 33

GN-A16B Wireless Access Point User Guide
Chapter4 Web-Based Configuration Utility
The Wireless Access Po int can be configured o ne of two ways, through the AP Manager
Utility or the Web-based co nfiguration Utility. If you choose to use the Web-based configuration utility, please configure the Access P oint from a computer with an ethernet connection to the Access Poi nt.
Ple ase input the IP address of the Access Poi nt 192.168.1.1 into the address column in
the web browser.
Status
You can use this status screen to view the Access Point’s system information, current
connection status.and configuration.
33
Page 34

GN-A16B Wireless Access Point User Guide
Wireless Bas ic settings
The Access Point automatically detects the settings to your wirele ss network. Changi ng
the se values wi ll alter your current wireless network configuration.
1 Alias Name
You may rename your Access Point, especially i f you have more than one Access
Point on your network.
1 SSID
The ESSI D or SSID is the name represent the AP in the wireless network. The ESSI D
of all A P in your network should set to identical for the mobile client can roam
between access p oints. This ESSI D string is case sensitive of up to 32 ASCII
cha racters.
1 Channel Number
Please choose the channel, which you can get best performance. Normally, it doesn’t
nee d to change.
1 Associated Clients
You can click “Show Active Clients” button to get the information of the current
active clients.
Verify the desi red setting and then click the “Apply Changes” button to set the value into
acce ss point.
34
Page 35

GN-A16B Wireless Access Point User Guide
Wireles s Advanced Settings
No rmally, yo u can have the wireless works smoothly even you didn’t change any item in
this page.
1 Authentication Type
You may choose between “Open System”, “S hared Key”, and “Auto”. The
Authenticati on Type default is set to “Auto”.
Open System in which the sender and the recipient d o NOT share a secret key.
Each party genera tes its own key-pai r and asks the receiver to ac
cept the randomly gene rated key. Once accepted, thi s key is used
for a short time only. Then a new key is generated and agreed upon.
Shared Key is both the sender and the recipient share a secret key.
1 Fragment Threshold
Thi s value indicates how much of the Access Point’s resources are devoted to
recovering packet errors. The value should remain at i ts default setting of 2346. I f
you have decreased thi s value and experience high packet error rates, you can
increase it ag ain, but it will likely decrease overall network performance. Only mi nor
modifications of this value are recommended. The setting rangeis 256 ~ 2346.
1 RTS Threshold
Thi s value should remain at its default setting of 2347 . Should you encounter
inconsistent data flow, only minor modifications are recommended. The setting range
is 0 ~ 2347.
35
Page 36

GN-A16B Wireless Access Point User Guide
1 Beacon Interval
The beacon interval is the amount of time between access point beacon transmissions.
The default value for thi s interval is generally 100ms, that is 100 beacons sent every
second.You can increase the beacon interval and have lower overhead on the network,
but the n roaming will likely suffer. I t's best to leave this setting alone.
1 Data Rate
You can select one of the rates among 1M, 2M, 5.5M and 11M based on your need.
The default value is “Auto”.
1 Preamble Type
The preamble field shall be pro vided so that the receiver can perform the necessary
operations for synchro nization. Under this option two setting are possible: “Long” or
“Sho rt”. The default value is “Long”.
1 Broadcast SSID
Enab led or Disabled the broad cast of the SSID name across the network.
Verify the desi red setting and then click the “Apply Changes” button to set the value into
acce ss point.
36
Page 37
GN-A16B Wireless Access Point User Guide
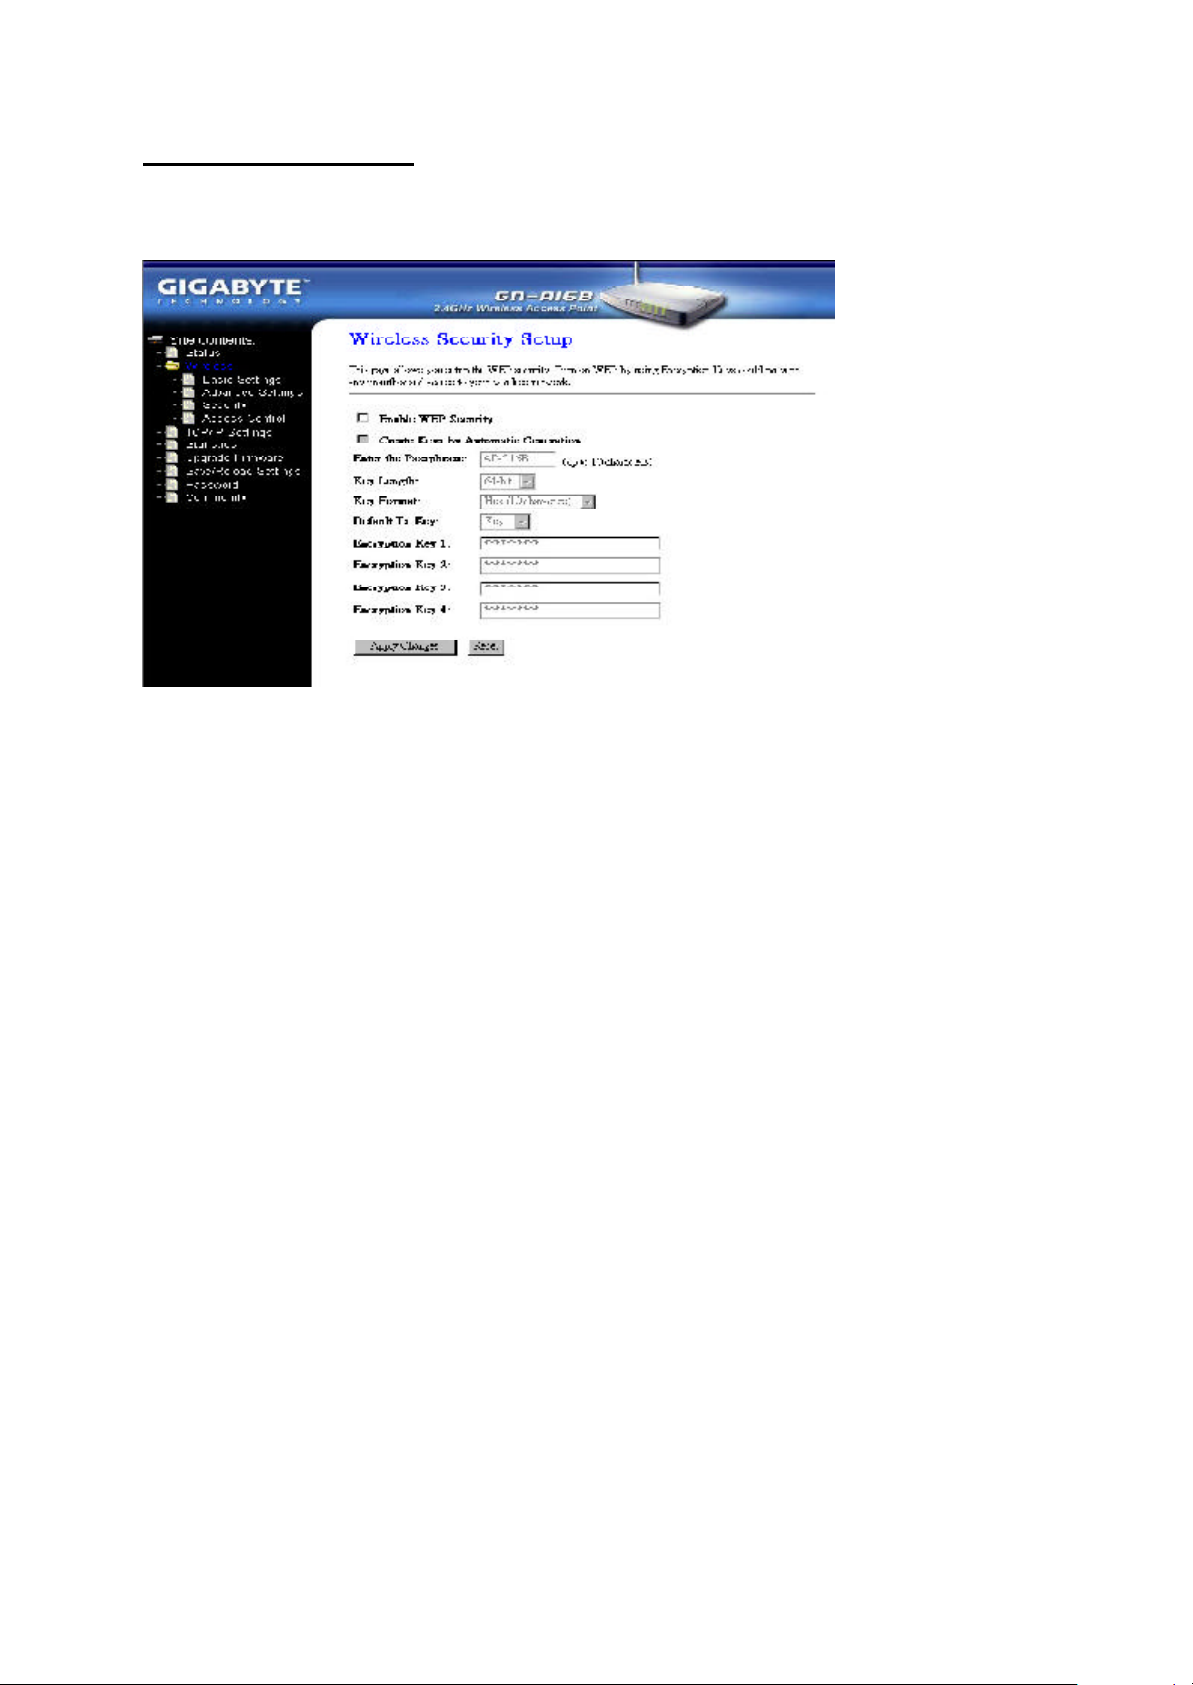
Wireless Sec urity Setup
Thi s page is the security configuration of the wireless connection.
WEP (Wired Equivalent Privacy) is a data privacy mechanism based on a 64/128-bit shared
key algorithm, as described in the I EEE 802.1x standard. When the “Enabled WEP secu-
rity ” is not selected there is no WEP encryption.
1 Automatic Generation
Che ck this selectio n can allow user to genera te the WEP key based on the string
use r key in. This Passphrase filed can key i n up to 10 character.
1 64 (40) Bits or 128 (104) bits
The re are two levels of encryp tion 64 bits and 128 bits. The 64 bits encryption is
referenced as a lower level encrypti on. The 128 bits encryption is referenced as a
hi gher level encryption.
The 64 bits WEP encryp tion use 4 0 bits as a secret key, which can controlled by
use r, and 24 bits as the initialize vector, whi ch user can not control. These two
portions plus together is 64 bi ts encryption. Some other vendor’s product might
refer as 40 bits encryption. It is the same thing.
The 128 bits WEP encrypti on use 104 bits as a secret key, which can controlled by
use r, and 24 bits as the initialize vector, whi ch user can not control. These two
portions plus together is 128 bi ts encryption. Some other vendor’s product might
refer as 104 bits encryption. It is the same thing.
37
Page 38

GN-A16B Wireless Access Point User Guide
1 Key Format
The WEP key is generated from AS CII or Hexadecimal entries that are either 64 or
128 in length. Please select the Key format and then input the appropriate digits or
letters. You can create up to 4 keys. Please select one of the key you want to use.
Verify the desi red setting and then click the “Apply Changes” button to set the value into
acce ss point.
Wireless Access Control
For enhance the security of the wireless network, this AP provide the Wireless address
control mechani sm to prevent the unauthorized user access. Check “Enable Wireless
Access C ontrol” and edit the Access Control list, then only those MAC address in the list
are allowed to connect to this AP.
1 Add a MAC Address
I nput a MAC address and the description of the client. Verify the desired setting and
the n click the “Apply Changes” button to set the value into Access Control list.
1 Delete the MAC Address
You can select which MA C address you wish to delete then click “Delete selected”
button. Or , you can click “Delete All” button to delete all the MAC address in the list.
38
Page 39

GN-A16B Wireless Access Point User Guide
TCP/IP Settings - LAN Interface Setup
Each se tup item of the local area network is the default settings, and is not necessary to
make change to it for no mal operation.
1 IP Address & Subnet Mask
The values are the Access Point’s IP Address and Subnet Mask. The default values
are 192.168.1.1 for the IP Address and 255.255.255.0 for the Subnet Mask. You
may need to assign a di fferent Static IP address to each Access Point. But all
devices on the network must have the same subnet mask to communi cate on the
ne twork.
1 Gateway
Enter the IP address of the default route. The default gateway is 192.168.1.254
1 DHCP Mode
The re are four settings unde r this option yo u can choose: “Disabled”, “Cli ent
Ena bled”, “Server Enabled” and “Auto”. Disab led is the default setting.
I f you want to get IP address from the DHCP server automatically on yo ur network,
you will select “Client Enabled”. Or you want to use the A ccess Point as a DHCP
server to automatically assign dynamic I P address on the network, you will select
“Server Enabled”
39
Page 40

GN-A16B Wireless Access Point User Guide
1 DHCP Client Range & DNS
I f you select the “Server Enabled” setting, please input the IP address range and the
DNS for your network. The DNS information provied by your ISP company.
1 802.1d Spanning Tree
Ena bled or Disabled the 8 02.1d Spanning Tree function. The default setting is
Disabled.
Verify the desi red setting and then click the “Apply Changes” button to set the value into
acce ss point.
Statistics
From this page, you can veiew the packet count for the transmi ssion of the Network.
40
Page 41

GN-A16B Wireless Access Point User Guide
Upgrade firmware
This tool allows you to upgrade the latest firmware of the GN-A16B using a file provided by
Gigabyte. You can download the upgraded firmware version from Gigabyte website. Please
click “Browse” and select your desired upgrade file (firmware version), and then click
“Upgrade”.
Save/ Reload Settings
This page allows you to save the current system settings as a file onto your computer. The
saved file or any other saved setting fi le can be reload ed back on the Access Poi nt. You
may also reset the A ccess Point back to the factory settings.
41
Page 42

GN-A16B Wireless Access Point User Guide
Password
User can choose to set the administration password of the AP manger to prevent other
user access to the AP Manager. Please enter a new user name, admin password and
confirm admin password then press “App ly Changes” b utton. You have to enter this new
password to log in when you want to configure the Access Point by Web-Based configurati on utility next time.
Note: If you don’t want use the protection function, please keep the empty user name and
password.
Community
I n order to prohibit other AP Manager access and manage your Access Point, you can
change the community stri ng of your Access Point from this page.
42
Page 43

GN-A16B Wireless Access Point User Guide
Chapter5 Troubleshooting
This chap ter gives information about troubleshooting your wireless Access Point. Read
the descriptions belo w to help you diagnose and solve the problem.
Q: What to do if you forget your password or forget the IP address of the Access
Point?
A: Please press the “init” bottom on the Access Point about 5 sec. The Access Point will
be restart and the system setting will restore to the default value.
Q: Unable to connect to the Internet?
A: 1. Please confi rm whether or not the power cord is connected properly, and the
powe r indicating light of the Access Point is normal.
2. Please confirm whether or not all of the setti ngs described in this manual are
set.
3. Please confirm if ADSL or Cable Modem operates properly, and if the ISP
network service expi res.
4. Please confirm if your network cable is connected properly, and the LED status
is normal.
Q: Unable to access the Access Point’s Web Configuration Interface?
A: 1. Please check the Ethernet connection between the PC and the Access Point is
correctness.
2. Make sure your computer’s IP address is on the same subnet as the Access
Poi nt.
3. Make sure you are using the correct login informati on.
Q: What is the IEEE802.11b standard?
A: I t also referred to as 802.11 High Rate or Wi-Fi. It is an extension to 802.11 that
appli es to wireless LANS and provides 11 Mbps transmission (with a fallback to 5.5,
2 and 1 Mbps) in the 2.4 GHz band. 802.11b uses only DSSS. 802.11b was a 1999
ratification to the original 802.11 standard, allowing wireless functionality
comparable to Ethernet.
Q: Can the router ac t as DHCP server?
A: Yes. The router has the DHC P server function built-in.
43
Page 44

GN-A16B Wireless Access Point User Guide
Q: What is WEP?
A: Wired E quivalent Privacy. Security mechanism defi ned within the 802.11 standard
designed to make the link integrity of the wireless medium equal to wired cable. Data
privacy mechanism based on a 40 bits (128 bi t optional ) shared key algorithm, as
described in the I EEE 802.11 standard.
44
Page 45

GN-A16B Wireless Access Point User Guide
Appendix A: Glossary
Access Point
An access po int is a wired controller that sends d ata to the wire less NICs installed in your
ne twork computers, and received data back from them. An AP is often connected to the
Ne twork comp uter that has I nternet access, or is directly connected to a A DSL or cable
modem.
ADSL
Asymmetri c digital subscriber line (ADSL) is a new modem technology that converts existing twisted-p air tele phone lines into access paths for high-speed communications of various sorts.
Auto-MD I/MDIX
On a network hub or switch, an auto-MDI/MDI X port automatically senses if it needs to act
as a MD I or MDIX port. The auto-MDI/MDIX capability eliminates the need for crosso ver
cables.
Auto-negotiate
To automatically determine the correct settings. The term is often used with communications and networki ng.
DHCP
The Dynamic Host Configuration Protocol (DHCP) is an Internet protocol for automating
the configuration of computers that use TCP/IP. DHCP can be used to automatically assi gn IP addresses, to deliver TCP/IP stack config uration parameters such as the subnet
mask and default router, and to provide other configuration information such as the addresses for printer, time and news servers.
DSSS
Also known as “Dire ct Sequence Spread Spectrum,” this is a variety of radio transmission
methods tha t continuously change frequencies or signal patterns. Direct Sequence Spread
Spectrum (DSSS), which is used i n CDMA, multiplies the data bits by a very fast, pseudorandom b it p attern (PN sequence) tha t “spreads” the data into a large coded stream that
takes the full bandwid th of the channel.
45
Page 46

GN-A16B Wireless Access Point User Guide
DNS
The Domain Name System (DNS) is a distributed I nternet directory service. DNS is used
mostly to translate betwe en domain names and IP addresses, and to control I nternet email
deli very. Most Internet services rely on DNS to work, and if DNS fails, web sites cannot be
located and email deli very stalls.
Dynamic IP Address
An I P address that is automatically assigned to a client station in a TCP/IP network,
typ ically by a DHCP server.
Firewall
A system desig ned to prevent unauthorized access to or from a private network. Firewalls
can be imp lemented in both ha rdware and software , or a combi nation of both. Firewalls
are frequently used to prevent unauthorized Internet users from accessing private
networks conne cted to the I nternet, especially intranets. All messages entering or leaving
the i ntranet pass through the firewall, which examines each message and blocks those
that do not meet the specified security criteria.
Gateway
A d evice, usually a router , that connects hosts on a local network to other networks.
IP Address
Every machi ne on the Internet has a unique identifying number, called an IP Address. A
typical I P address looks like this: 216.27.61.137
MAC Address
On a local area network (LAN) or other network, the MAC (Media Access Control) address
is your computer's unique hardware number. Usually written in the form 01:23:45:67:89:
ab
Ping (Packet In ternet Groper)
A utility to determine whether a specific IP address is accessible. It works by sending a
packet to the specified address and waiting for a reply. PING is used primarily to troubleshoot I nternet connections.
Router
A d evice that forward s data packets alo ng networks. A router is connected to at least two
ne tworks, commonly two LANs or WANs or a LAN and its I SP’s network. Routers are
located at gateways, the places where two or more networks connect.
46
Page 47

GN-A16B Wireless Access Point User Guide
SSID
The SSID is the name repre sent the route r in the wireless network.
Subnet Mask
A mask used to determi ne what subnet an IP address belongs to. An IP address has two
components, the network address and the host address. Subnetting enables the network
administrator to further divide the host part of the address into two or more subnets.
TCP/IP
TC P/IP (Transmission Control Protocol/Internet Protocol), the suite of communications
protocols used to connect hosts on the Internet.
WAN
Wi de Area Network, a communication network that covers a relatively large geographic
area, consisting of two or more LANs. Broadband communication over the WAN is often
throug h public ne tworks such as the ADSL or Cable systems, or through leased lines or
satellites. In its most basi c definition, the I nternet could be considered a WAN.
WEP
WEP (Wired Equivalent Privacy) is a data privacy mechanism based on a 64/128-bit shared
key algori thm, as described in the IEEE 802.11 standard.
47
Page 48

GN-A16B Wireless Access Point User Guide
Appendix B: Specification
Physical Interface
The Wireless Access P oint includes 1 RJ-45 E thernet LAN ports, one init hole and one
antenna .
Item Feature Description
1. LAN Port x 1 RJ-45, Auto-sensing for 10/100M Ethernet LAN connection.
2. Init Bottom Initial reset
3. Wireless 1 ext ernal antenna and 1 internal antenna support diversity.
IEEE802.1 1b
Realtek
802.1 1b System Specification
System
Standards IEEE802.1 1b compliant; Wi-Fi compatible
Modul ation 1Mbps: DBPSK ; 2Mbps: DQPSK; 5.5 and 11 Mbps: CCK
Dat a Rate 1, 2, 5.5, 11 Mbps
Secu rity 64/128 bit WEP
Operating Range Open space: 100-300m; Indoor: 30-100m
RF
Frequency Band 2.400 ~ 2.4835 GHz (subject to local regulation)
Radi o Technology DSSS (Direct Sequence Spread Spectrum)
Number of Channel
Pea k Output power 19 dBm @ Nominal Temp Range
Recei ve Sensitivity Typical - 81 dBm @ 1 1 Mbps dat e rate at nominal temperature
Antenna 1 ext ernal antenna and 1 internal antenna support diversity
1 1 Channels (US, Canada) 4 Cha nnels (Fra nce)
13 Cha nnels (Most Europea n countries, ETS)
Regulatory and Environmental Compliance
EMC certi fication
Temperature Range Operati ng: 0 ~ 40 degree C, Storage: -20 ~ 65 degree C
Humidity 10% ~ 85% Non-condensing
FCC part 15 (USA) DGT (Taiwan)
CE (Europe)
Software
Driver LINUX
Roa ming Yes
Ma nagement Utility WEB Configuration for Network link
Mechanical
Pa ckaging Generic, Gigabyte, private labeling optional
LED indicator Power/Status LED, Wireless, LAN/100, LAN/100 x 1
Gross Weight 215 + 5g
Dimension 1 10mm x 160mm x 25mm
48
Page 49

GN-A16B Wireless Access Point User Guide
Appendix C: Configurati on of the P Cs
To connect to the Access Point, you may need to configure your computer on the same
subne t as Access Point. Please follow the instructure to perform the setup under the TCP/
I P network environment. By default Windows 98, Me, 2000 and XP has TCP/IP installed.
I f you have not installed the TCP/IP communication P rotocol, please insta ll it now, and
the n select your ope rating system for the setup.
The Setting under Windows 2000
Step1. Click “Start” in the desktop of the Windows to select “Settings”, and then
select “Control Panel”.
49
Page 50

GN-A16B Wireless Access Point User Guide
Step2. Double-click the “Network and Dial-up Connections” icon.
Step3. Double-click the “LAN CONNECT ION” and click the “Properties” butto n.
50
Page 51

GN-A16B Wireless Access Point User Guide
Step4. The “Local Area Connection Properties” dialog box will appear. Verfiy that
the Internet Pro tocol (TCP/IP) ite m is checked. And then double-click the
“Internet Protocol (TCP/IP)” item.
Step5. Please assi gn a static IP address and the same subnet as Access Point to the
computer (e.g, I P address is 192.168.1.2 and Subnet Mask is 255.255.255.0),
and then click the “OK” b utton to return to Local Area Connection Properties.
Cli ck the “OK” button again to complete the PC config uration.
51
Page 52

GN-A16B Wireless Access Point User Guide
The Settings unde r Windows 95/98/Me
Step1. Click “Start” at the desktop of the Windows and select “Settings”, and then
select the “Control Panel”.
Step2. Double-click the “Network” icon.
52
Page 53

GN-A16B Wireless Access Point User Guide
Step3. On the Confi guration tab, please choose your appropriate setting “TCP/IP->
your n etwork LAN card” and click “Properties” button.
Step4. Select the “IP Address” tab. Please assign a static IP address and the same
subnet as Access Point to the computer (e.g, IP address i s 192.168.1.2 and
Subne t Mask is 255.255.255.0),and then cli ck the “OK” button.
53
Page 54

GN-A16B Wireless Access Point User Guide
Step5. Click the “OK ” button again. Windows will ask you to restart your P C. Please
cli ck the “Yes” button. If Windows does not ask you to restart , please restart
yo ur co mpute r anyway.
Note: The Windows may ask you f or the original Windows installation disk or additional
files. Pl ease insert your Windows CD-ROM into your CD-ROM drive and check
the correct locati on, e.g., D:\win98, D:\win9x, etc. (If “D” is your CD-ROM dri ve).
54
Page 55

GN-A16B Wireless Access Point User Guide
The Settings under Windows XP
Step1. Click “Start” in the desktop of the Windows to select “Settings”, and then
select “Control Panel”.
Step2. Double-click the “Network and Dial-up Connections” icon.
55
Page 56

GN-A16B Wireless Access Point User Guide
Step3. Double-click the “LAN CONNECT ION” and click the “Properties” butto n.
Step4. The “Local Area Connection Properties” dialog box will appear. Verfiy that
the Internet Pro tocol (TCP/IP) ite m is checked. And then double-click the
“Internet Protocol (TCP/IP)” item.
56
Page 57

GN-A16B Wireless Access Point User Guide
Step5. Please assi gn a static IP address and the same subnet as Access Point to the
computer (e.g, I P address is 192.168.1.2 and Subnet Mask is 255.255.255.0),
and then click the “OK” b utton to return to Local Area Connection Properties.
Cli ck the “OK” button again to complete the PC config uration.
57
Page 58

GN-A16B Wireless Access Point User Guide
Limited Warranty
1-Year Warranty
Gigabyte warrants to the original consumer/purchaser that the product free from defects in
materi al and workmanship for no limited time from the original manufactory shipment date.
This warranty does not cove r the product if it is damaged in the process of bei ng installed
or i mproperly used.
Gi gabyte may replace or repair the product with either new or reconditi oned parts. Repai red or replaced products will be returned to you at the same revision level as received
or hi gher at Gigabyte’s option. Gigabyte reverses the right to replace discounted products
with an equivalent gene ration product.
KEEP THIS STUB FOR YOUR PURCHASING RECORD
Customer:
Phone No:
Address:
Email:
Model:
Serial:
Date of Purchase:
Place of Purchase:
From Whom:
Distributor:
GI GA-BYTE T ECHNOLOGY CO., LTD.
Custom er Satisfaction
No.6, Bau Chi ang Road, Hsin-Tien, Taipei Hsien, Taiwan, R.O.C.
Tel: 886-2-89124888
Fax:886-2 -89124007
http://www.gi gabyte.com.tw
Techni cal Support
E-mail: networksupport@gi gabyte.com.tw
58
Page 59

GN-A16B Wireless Access Point User Guide
59
Page 60

GN-A16B Wireless Access Point User Guide
60
Page 61

GN-A16B Wireless Access Point User Guide
61
Page 62

GN-A16B Wireless Access Point User Guide
62
Page 63

GN-A16B Wireless Access Point User Guide
63
Page 64

ww.gi gabyte.com .tw
25A08-0A16B-F00
 Loading...