

Gigabyte 6BXDU User Manual

R-12-01-081015
6BXDU
USER'S MANUAL
1. System power on by PS/2 Mouse: First, enable this function
in CMOS Setup, then you can power on the system by double
clicking the right or left button of your PS/2 Mouse.
2. System power on by Keyboard: If your ATX power supply
supports larger than 100~300 mA 5V Stand-By current
(dependent on specification of keyboard), you can power on
your system by entering password from the Keyboard after
setting the “Keyboard power on” jumper (JP1) and password
in CMOS Setup.
3. Modem Ring-On on COM A , COM B.
4. Wake-up on LAN supports(on JP8): Your ATX power supply
must support larger than 720 mA 5V Stand-By current.
5. Support LDCM
6. Support 3 steps ACPI LED
Pentium II Processor MAINBOARD
REV. 1.2 First Edition


6BXDU
1
The author assumes no responsibility for any errors or omissions that may
appear in this document nor does it make a commitment to update the
information contained herein.
Third-party brands and names are the property of their respective owners.
Sound Blaster is a registered trademark of Creative Technology Ltd in the
United States and certain other countries. Sound Blaster-LINK and SB-LINK
are trademarks of Creative Technology Ltd.
Oct 15, 1998 Taipei, Taiwan

Quick Installation Guide
2
I. Quick Installation Guide :
CPU SPEED SETUP
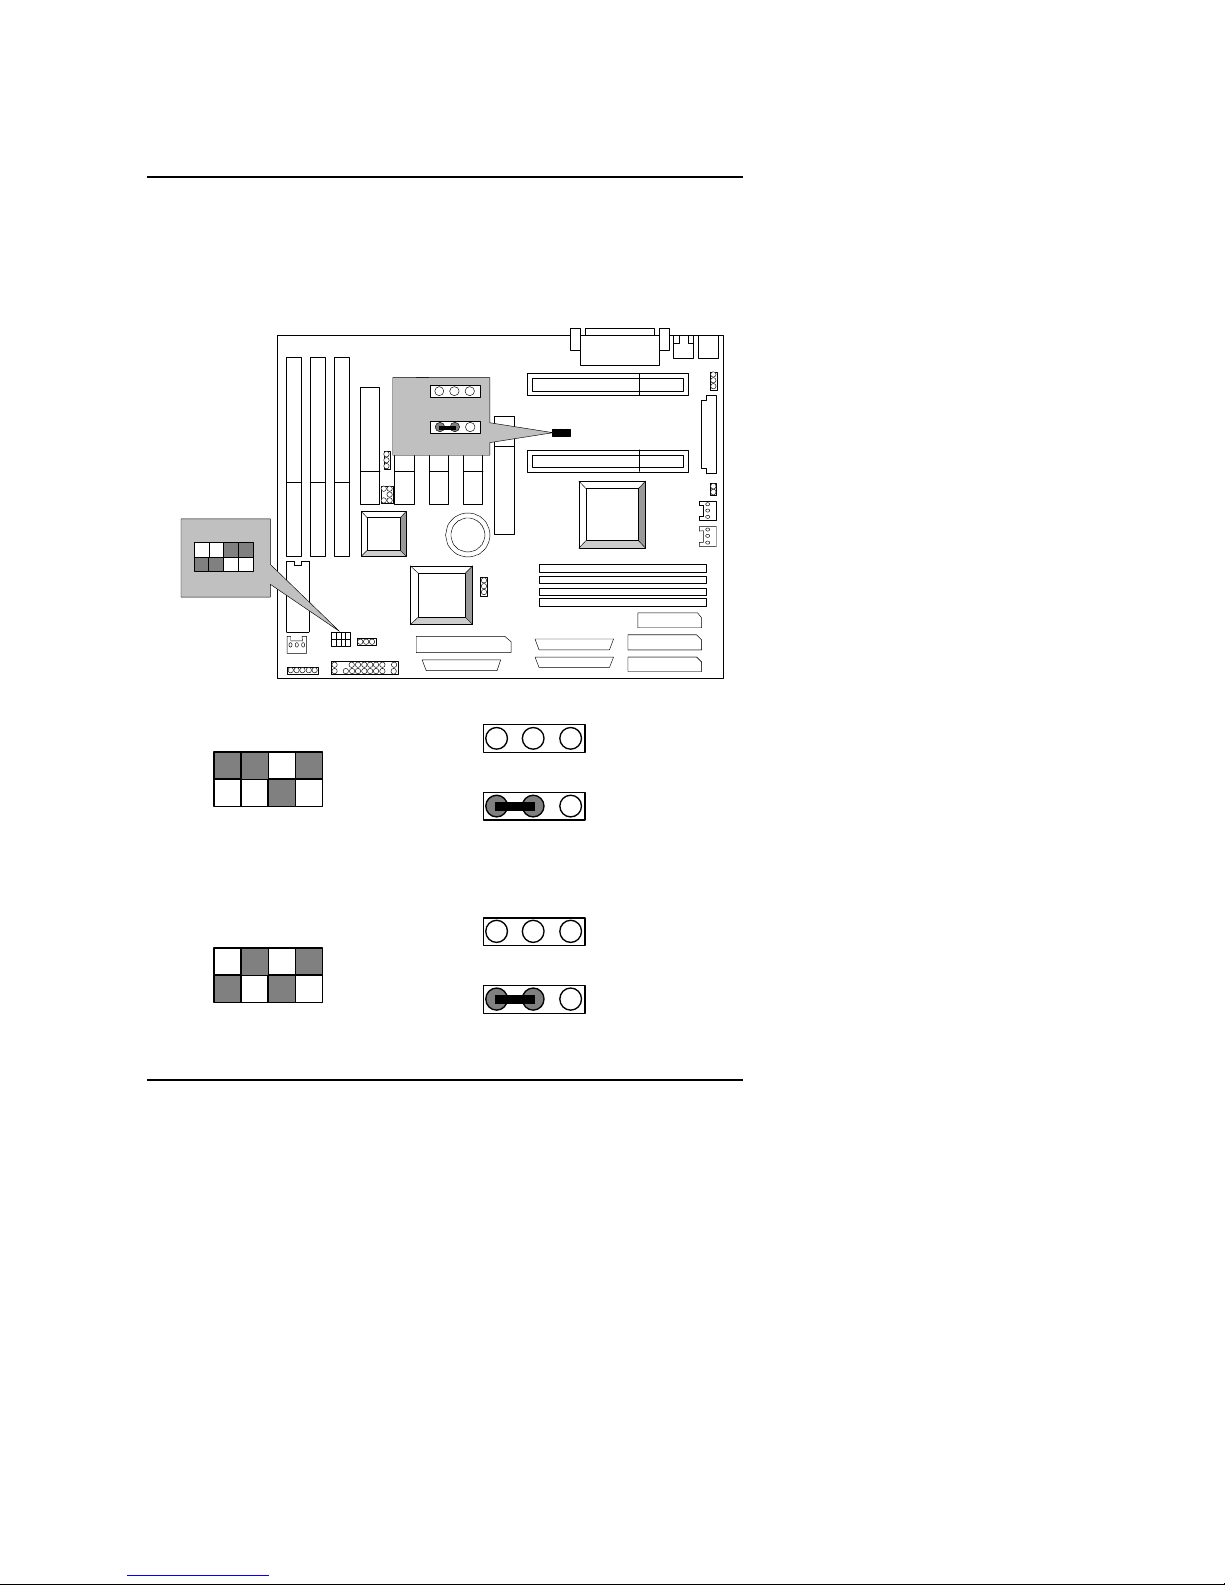
The system bus speed can be selectable between 66MHz and 100MHz. The
user can select the system bus speed (JP6) and change the DIP SWITCH (SW)
selection to set up the CPU speed for 200 - 633MHz processor.
M
The CPU speed must match with the frequency RATIO. It will cause
system hanging up if the frequency RATIO is higher than CPU's.
DIP SWITCH (SW)
FREQ. RATIO
1 2 3 4
X 3
ON OFF ON ON
X 3.5
OFF OFF ON ON
X 4
ON ON OFF ON
X 4.5
OFF ON OFF ON
X 5
ON OFF OFF ON
X 5.5
OFF OFF OFF ON
MJP6 (Select the system speed between 66MHz and 100MHz)
1-2 Close
Set system speed to 66MHz
−
system always
run at 66MHz FSB (Front Side Bus).
2-3 Close
Set system speed to Auto
−
system speed detect
automatically (66 /100MHz FSB).
1-2-3 Open
Set system speed to 100MHz
−
system always
run at 100MHz FSB (Front Side Bus).
M
If you use single CPU, please install to CPU2 slot.
1 2 3
1 2 3
6BXDU
3
MThere are two ways to set system speed
A. 66MHz forced (JP6 1-2 short) or Auto detect (2-3 short)
B. 100MHz forced (JP6 1-2-3 open) or Auto detect (2-3 short)
1. Pentium II 350 / 100MHz FSB
6BXDU
PIIX4
INTEL
443BX
adaptec
AIC-7896
BIOS
CPU 1
CPU 2
JP6
3 2 1
3 2 1
JP6
ON
1 2 3 4
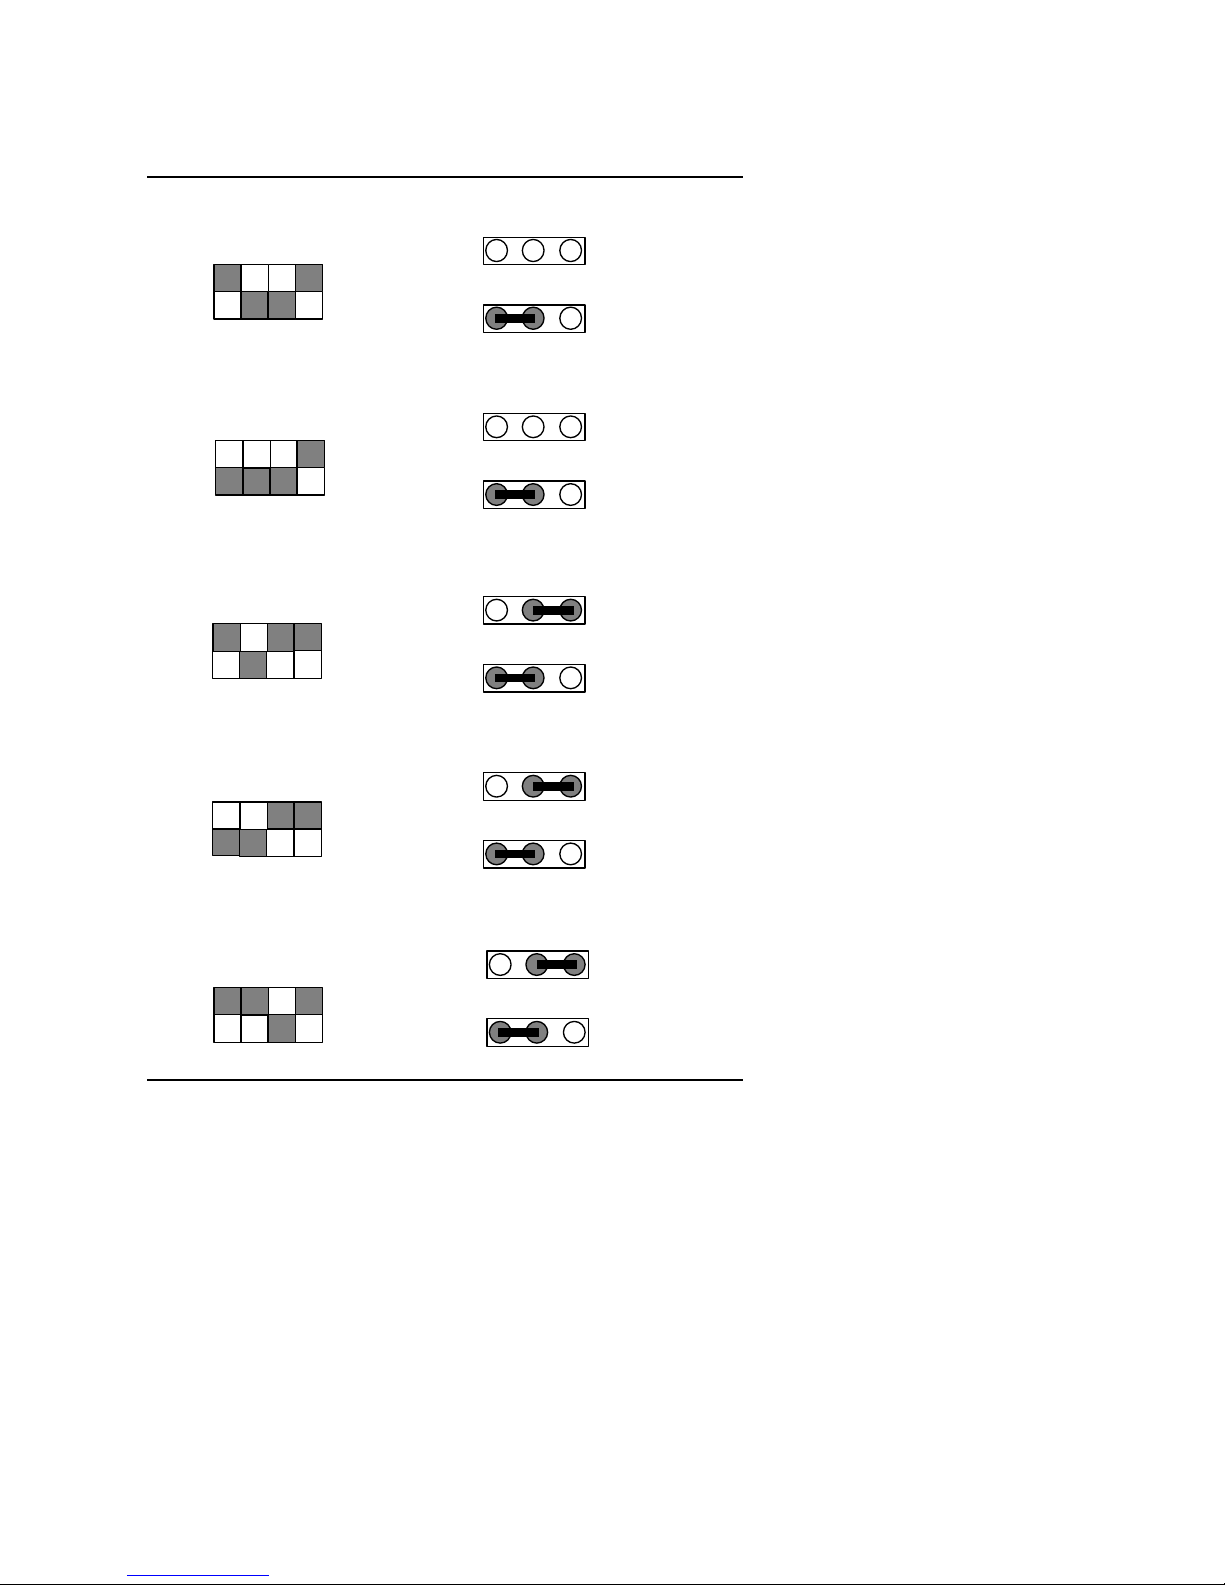
2. Pentium II 400 / 100 MHz FSB
3. Pentium II 450 / 100 MHz FSB
SW
ON
1 2 3 4
SW
ON
1 2 3 4
JP6
3 2 1
JP6
3 2 1
JP6
3 2 1
JP6
3 2 1
Quick Installation Guide
4
4. Pentium II 500 / 100 MHz FSB
5. Pentium II 550 / 100 MHz FSB
6. Pentium II 200 / 66 MHz FSB
7. Pentium II 233 / 66 MHz FSB
8. Pentium II 266 / 66 MHz FSB
SW
ON
1 2 3 4
SW
ON
1 2 3 4
JP6
3 2 1
JP6
3 2 1
JP6
3 2 1
JP6
3 2 1
JP6
3 2 1
JP6
3 2 1
SW
ON
1 2 3 4
JP6
3 2 1
JP6
3 2 1
ON
1 2 3 4
SW
JP6
3 2 1
JP6
3 2 1
ON
1 2 3 4
SW

6BXDU
5
9. Pentium II 300 / 66 MHz FSB
10. Pentium II 333 / 66 MHz FSB
11.Pentium II 366 / 66 MHz FSB
SW
ON
1 2 3 4
JP6
3 2 1
JP6
3 2 1
SW
ON
1 2 3 4
JP6
3 2 1
JP6
3 2 1
SW
ON
1 2 3 4
JP6
3 2 1
JP6
3 2 1
 Loading...