

Page 1
Gibson Robot
Gibson Robot
Interface Pack (RIP)
Interface Pack (RIP)
Owner’s Manual Version 1.0
Page 2

Important Safety Instructions
We value you as a customer—and want our products to give you an inspiring, and
gratifying, experience. So, to insure your safety and protect your investment in the
Gibson RIP, please read and follow all safety warnings and operating instructions before
using this product, and keep all documentation for future reference.
Environmental Factors
Heat and moisture can harm your Gibson RIP. Please do not install or operate this
product near sources of moisture, such as sinks, damp basements, leaky roofs, etc. and
never store it near heat sources, such as heaters or radiators. Both you and your RIP
will be much happier if you store and operate this product under safe conditions.
Power Sources
Use only the power sources recommended in this manual. Make sure any power supply
cords are not located where they are likely to be safety hazards, such as on the floor
where people might walk, or in locations where they may receive pressure from items
placed upon or against them. Also, be very careful with any power source connections,
such as where the AC adapter connects to the wall outlet and where it plugs into RIP. If
these are jostled loose, RIP may experience extreme power differentials, which can
potentially harm you and the product.
Service
Please do not attempt to service RIP yourself. Opening the case may expose you to
high voltages (besides, there are no user-serviceable parts), so let our expert
technicians handle any repairs for you.
Speaking of experts, always send the RIP to an authorized service technician if any of
the following occurs (contact numbers for service centers are at the end of this section):
● Any foreign object (especially liquid) has gotten into the case
● RIP has been exposed to water, dropped, or otherwise damaged
● A marked changed in RIP’s performance
● You hear anything rattling around inside if you shake the RIP gently
Page 3

Warranty Protection
It is very important to us that you are satisfied with your Gibson product. Register it and
activate your warranty protection by mailing the warranty card included with Dark Fire to
Gibson USA, Department W, P.O. Box 100087, Nashville, TN 37210-0087. If you
encounter any kind of problem, contact us as soon as possible so we can make things
right.
Once you your warranty protection is active, RIP’s electronic components are warranted
to be free from defects in materials and workmanship for a period of one (1) year from
the date of original purchase. Your warranty covers the cost of both labor and materials
on any repair deemed necessary by our Customer Service Representative for the
warranty period, subject to the limitations below. Please note that our warranty belongs
to the original retail purchaser only, and may not be transferred or assigned to
subsequent owners.
If RIP malfunctions as a result of faulty materials or workmanship, Gibson will determine
whether repair or replacement is more appropriate. In case the original materials are no
longer available for repair, Gibson reserves the right to use materials regularly utilized at
the time of repair.
If we determine that replacing RIP best serves your interests, or in the unlikely event
that it is destroyed, lost, or damaged beyond repair while in our possession for repairs,
we will replace the product. If it is no longer available, it will be replaced with the most
similar product whose value does not exceed your original product’s purchase price.
Remember—as a necessary condition to the warranty coverage described in this
section, you must activate your warranty by mailing the warranty card included
with Dark Fire to Gibson USA, Department W, P.O. Box 100087, Nashville, TN
37210-0087.
Warranty Limitations
Unfortunately, it is not possible for your product warranty to cover any of the following:
Any product that has been altered or modified in any way, or upon which any
serial or registration number has been tampered with or altered in any way.
Any product whose warranty card has been altered or contains false information.
Any product that has been damaged due to misuse, negligence, accident or
improper operation or storage.
Any product damaged during shipment. Inspect the package immediately upon
receipt, and notify the carrier immediately if there is damage.
Any product damaged as a result of extreme temperature, humidity, or the use of
an improper power source.
Page 4

Any product not purchased through an authorized dealer, or any product that has
had repairs, modifications or alterations made by an unauthorized service
technician.
Wear and tear based on normal usage.
Factory installed electronics after more than one year following the original date
of purchase.
Gibson makes no other express warranty of any kind. All implied warranties,
including warranties of merchantability and fitness for a particular purpose that
exceed the specific provisions of the warranty, are expressly and specifically
disclaimed and excluded from the warranty. Note, however, that some states and/or
countries do not allow the exclusion or limitation of implied warranties, so this paragraph
may not apply to you. In particular, if you purchased your product outside of the United
States, contact your local distributor for the handling and resolution of all warranty
issues, as the warranty described here is not always applicable.
And of course, Gibson shall not be liable for any special, indirect, consequential,
incidental or other similar damages to you or to any third party, including, without
limitation, damages for loss of profits or business, or damages resulting from use or
performance of the product, whether in contract or tort, even if Gibson or its authorized
representative has been advised of the possibility of such damages, and Gibson shall
not be liable for any expenses, claims or suits arising from or relating to any of the
foregoing.
To obtain warranty service, contact the service center nearest you:
US (Toll Free) 1-800-4GIBSON
US (Local) 1-615-871-4500
Email - service@gibson.com
Europe 00800-4GIBSON1
Email - service.europe@gibson.com
Japan 03-3434-5670
Email - service.japan@gibson.com
China 800-820-8841 (in China only)
Email - service.china@gibson.com
Please do not send a unit in for repair before contacting your customer service
center. They will advise you of the proper procedure for a quick and efficient repair, as
well as provide information on where and how to send the product.
Gibson® is a trademarkof t .he Gibson Guitar Corp
FireWire® , .is a trademarkof Apple Computer Inc
Windows® and WindowsXP® , .are registeredtrademarksof Microsoft Inc
Page 5

Chapter 1: Introduction
We know you don’t like to read manuals—you just want to play! And we certainly
understand. So, you have two options.
If you’re familiar with computers and driver installation: The printed Quick Start
guide is probably all you need. But after you’re up and running, return to this manual
and read about the Console application and the various tips and tricks.
If you’re new to computer-based music: Please read this manual in its entirety so you
can get the most out of Dark Fire and RIP.
Overview: What Is RIP?
The Robot Interface Pack (RIP) can send all available Dark Fire signals (magnetic
pickups, piezo pickup, and hex pickup) into a computer for recording or live use. RIP is
compatible with virtually all current Mac and Windows computers, as well as many older
models.
Setting up RIP involves three main steps:
Installing RIP’s software on your computer. On Windows, this includes drivers
—small programs that let RIP communicate with the computer. Mac OS X
already includes suitable drivers. For both computers, a virtual mixing Console
program—very much like a hardware digital mixer—lets you adjust the RIP’s
levels and routing within the computer.
Hooking Up RIP. RIP transfers audio to the computer via an industry-standard
FireWire (also called IEEE1394) cable. This physically connects RIP’s FireWire
port to a similar port on your computer. Most computers include a FireWire port,
but you can add FireWire ports to desktop and laptop computers via accessory
cards. See Appendix B for information on doing this, as well as other helpful
FireWire tips. RIP also needs power from the included AC adapter.
Customizing RIP for your particular computer or application. This involves
making adjustments to the virtual mixing Console.
Although RIP is designed and optimized for music programs, it can also provide
traditional “sound card” capabilities for Windows computers (see Appendix E).
Page 6

RIP Package Contents
The RIP package includes:
Gibson RIP interface box
FireWire cable
6-pin to 4-pin FireWire adapter
DVD-ROM containing:
A ReadMe file with important instructions
Windows and Mac RIP software
This PDF Owner’s Manual
Ableton Live Lite 7 Gibson Studio Edition
Native Instruments Guitar Rig 3
Note: The RIP’s AC adapter is included with the Dark Fire guitar. RIP will not operate
without this AC adapter.
Minimum System Requirements
Using RIP requires a desktop or laptop computer with:
Unused FireWire 400 port (four-pin or six-pin—described later)
At least 256MB RAM (512MB or more highly recommended)
A fast, high-capacity IDE, SCSI, SATA or FireWire hard disk drive for recording
audio
DVD-ROM drive for program installation
Mac: Mac OS X 10.3.9 or later. (Gibson does not officially support operation
under Boot Camp, although most users report that it works well.)
Windows: Either XP Home, XP Professional, XP Professional x64 Edition, Vista
32-bit, Vista 64-bit, Server 2003, or Server 2003 x64 Edition. XP must have at
least Service Pack 2 installed and Vista, Service Pack 1. Newer versions of these
operating systems are also supported.
Page 7

Chapter 2: Important General Installation
Instructions (Mac and Windows)
Check the Gibson Website for Updates
Gibson is committed to enhancing RIP’s performance. For the latest updates, go to
www.gibson.com/darkfire/downloads/software. This is where you’ll also find updated
documentation on exciting new features that Gibson will be adding. Please download
the latest version of this manual to make sure you’re taking advantage of everything RIP
has to offer.
Installing from a Downloaded File Instead of the DVD-ROM
When downloading new software, the downloaded file will create an icon where you
saved the software (e.g., the computer’s Desktop or Finder). Treat this icon as you
would the icon on the installation DVD-ROM (referred to in subsequent chapters).
FireWire 400 Port Types
There are two main types of FireWire 400 ports: 4-pin (usually found in laptops), and 6pin (found in desktops). RIP uses a 6-pin port, and the included cable connects RIP to
6-pin FireWire ports. If your computer has a 4-pin port, patch the enclosed 4-pin to 6adapter between your computer’s 4-pin port and the included 6-pin cable connector. If
you prefer not to use an adapter, cables are available at consumer electronics stores
with a 4-pin connector on one end and a 6-pin connector on the other.
RIP is also compatible with 9-pin FireWire 800 ports. However, you will need an
appropriate physical adapter.
Page 8
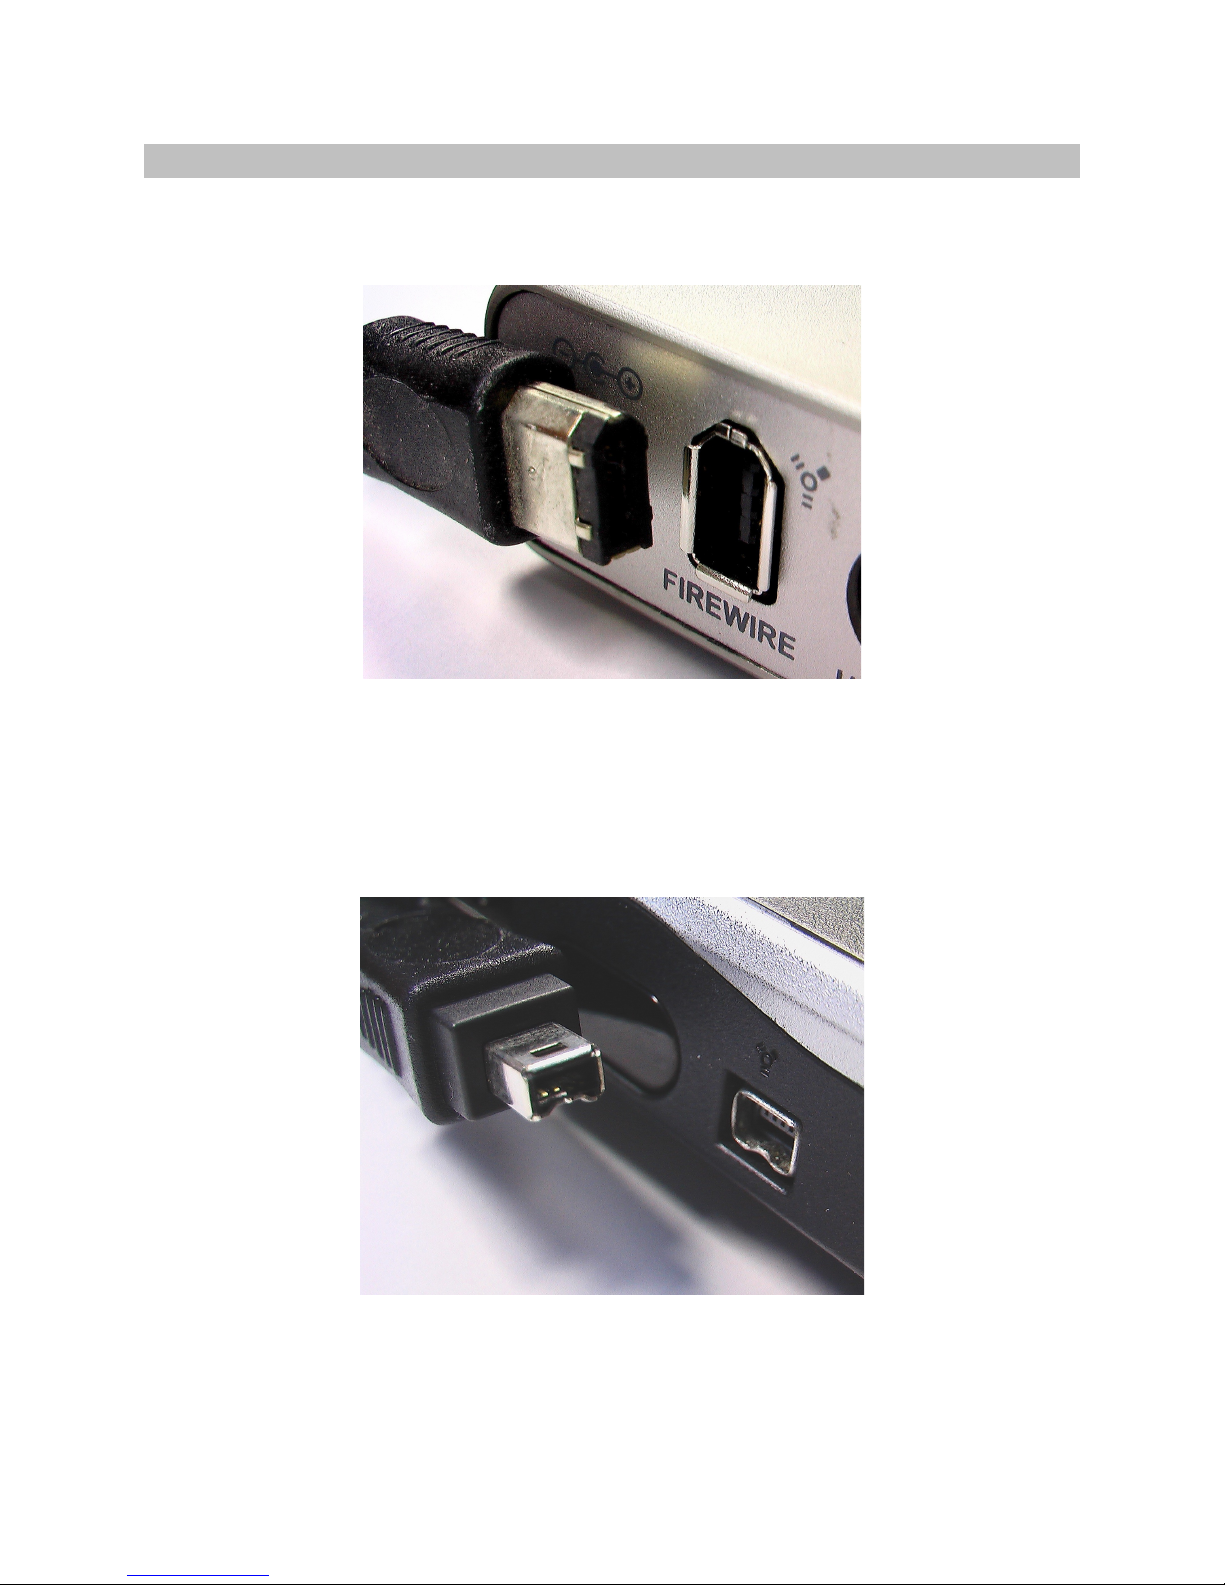
Caution: FireWire Connector Orientation
6-pin FireWire connectors have one straight edge and one curved edge. These fit into
matching straight and curved sections in the computer’s FireWire port.
6-pin FireWire connectors (male on the left, female on the right). Note how the bottom is
straight, and the top is curved (angled). Make sure the male and female connectors
match up when you plug in.
4-pin FireWire connectors have a small “notch” in one side. This fits into a matching
“ridge” in the computer’s FireWire port.
4-pin FireWire connectors (male on the left, female on the right). Note how the bottom of
the male connector has a groove that fits into the corresponding ridge in the female
connector.
Page 9

Plug the cable straight in. If you feel that you need to force it, stop immediately and look
carefully at the connectors to make sure they’re aligned properly. Plugging in either type
of cable incorrectly could damage your RIP, computer, FireWire adapter, or all three.
RIP Requires Its AC Adapter
Bus-powered FireWire devices obtain their power from the FireWire port itself. RIP is not
bus-powered because it also needs current to charge Dark Fire’s battery. Always use
RIP with the AC adapter provided with Dark Fire. Do not use other AC adapters.
Make FireWire Connections When the Computer and RIP
Are Turned Off
In theory, you can plug and unplug FireWire devices with power applied (called “hotswapping”). In practice, this is not always true and may damage your computer’s
motherboard or the RIP. Make connections when the computer is turned off to prevent
potential damage.
Connect to a FireWire Port on the Computer Itself, or a
FireWire Card Installed in the Computer
Some FireWire devices, such as hard drives, have two FireWire ports so you can
“daisy-chain” additional peripherals. Do not use these. RIP wants the most direct path
possible to your computer.
RIP Automatic Fault Detection
RIP can detect faulty cables or bad FireWire connections. If you open the Gibson RIP
virtual mixing Console and the console GUI (Graphic User Interface) does not appear,
check your connections. If the Console disappears for no apparent reason while the
application is open, the FireWire cable has likely been unplugged, become slightly
unseated from its connector, or the RIP’s AC adapter has been disconnected. Restoring
these connections restores the Console’s GUI.
Read the FireWire Tips in Appendix B
Even if you’re not having trouble with RIP and your computer, these tips may help you
optimize performance.
Page 10

Chapter 3: Macintosh Installation
1. With the Mac powered off and RIP’s AC adapter disconnected, plug the included
FireWire cable between the FireWire port on the back of the RIP, and an empty
FireWire port on your Mac (there is usually one on the Mac’s front panel;
otherwise, check the rear panel).
2. Make sure you have selected the proper AC adapter plug that fits into the type of
wall socket used in your country, then connect the AC adapter to RIP.
3. Plug in the RIP AC adapter, then power-up your Mac.
4. Insert the installation DVD-ROM into your Mac’s DVD-ROM drive.
5. Double-click on the DVD-ROM’s icon when it appears on the Desktop.
6. Locate the DVD-ROM file called “Gibson RIP Console,” then drag its icon into the
Applications folder shortcut next to the Console icon. (If for any reason this does
not work, locate the top menu bar in the Mac’s Finder, click on Go, then select
Applications. The Applications folder opens; drag the “Gibson RIP Console” file
icon into this folder.)
7. Double-click on the Gibson RIP Console icon in the Applications folder.
8. The RIP Console appears.
Macintosh installation is now complete, and the virtual mixing Console opens
automatically.
If a window appears that says “The firmware for this device is out of date,”
proceed to Chapter 6, “Updating RIP Firmware.”
If this window does not appear, proceed to Chapter 7, “Connecting to Dark Fire.”
Page 11

Chapter 4: Windows XP Installation
1. Power-up your Windows XP computer, and log in as an Administrator—either
with the “Administrator” account or any other account with administrative
privileges. Otherwise, you will not be able to install the RIP software. CAUTION:
DO NOT connect the Gibson RIP to your computer’s FireWire port yet.
2. If RIP is connected to your computer, disconnect it now. Insert the Gibson
installation DVD-ROM into your computer, and the main install window should
appear automatically. If not, double-click on the “My Computer” icon, then
double-click on your DVD-ROM drive icon to open the main install window.
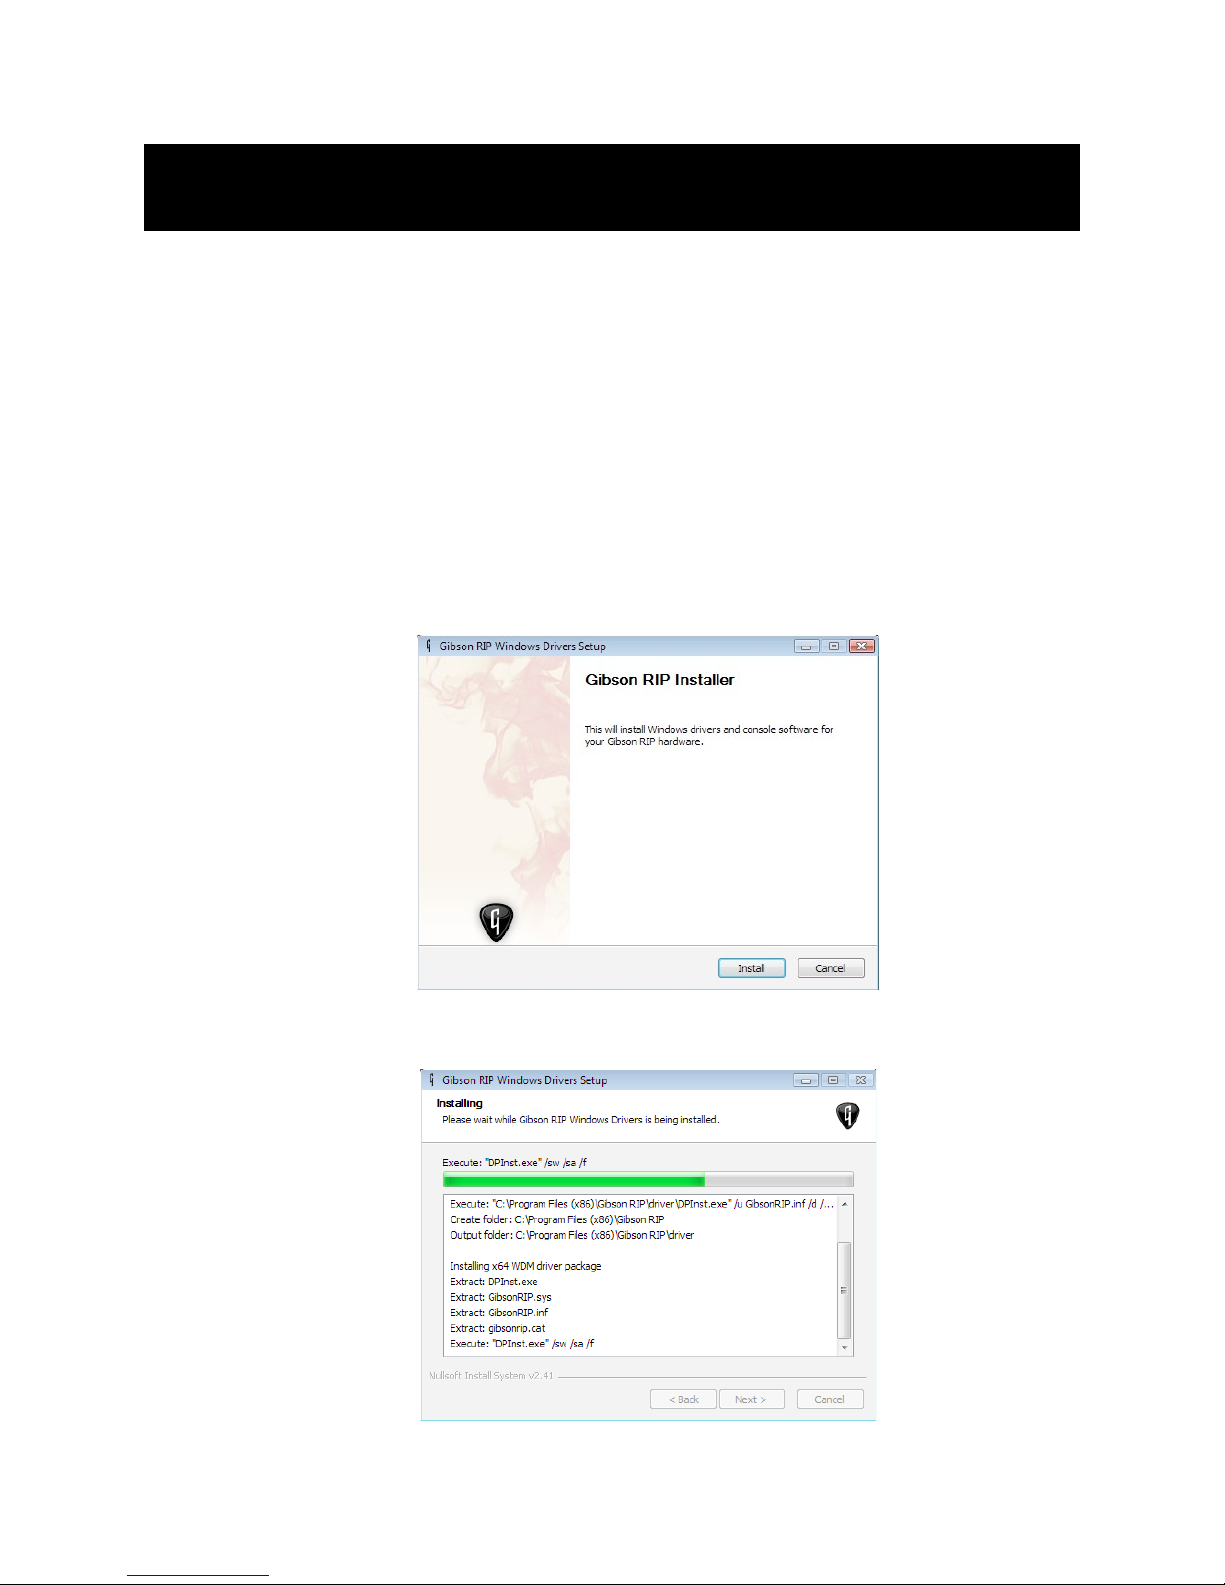
3. Double-click on the icon that says Setup Gibson RIP. When the Gibson RIP
Installer screen appears, click on “Install.”
4. A window shows the install progress.
Page 12
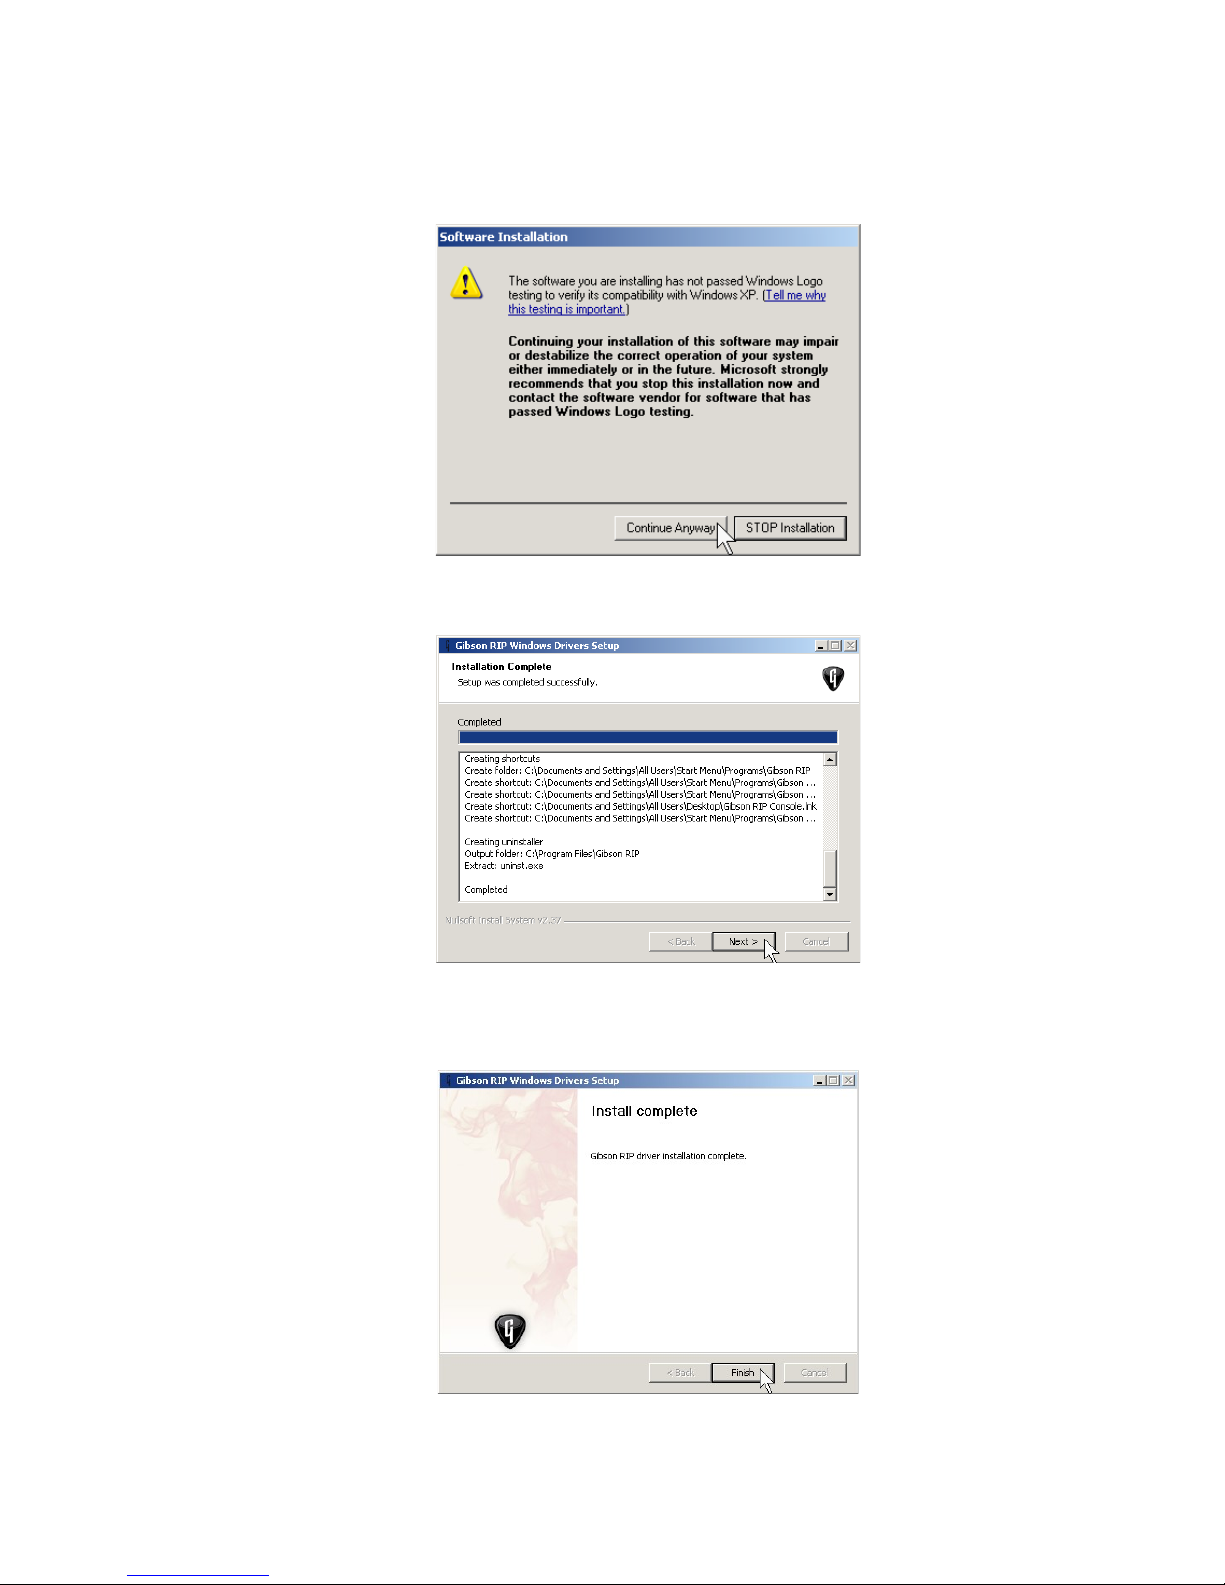
5. The “Windows Logo Testing” window appears. Click on “Continue Anyway.”
6. The “Installation Complete” window appears. Click on “Next.”
7. When the “Install Complete” window appears, click on “Finish.” Now that the
software is installed, turn off your computer.
Page 13
8. Locate the Gibson RIP, the power supply adapter included with your Dark Fire
guitar, and the FireWire cable. Plug one end of the FireWire cable into the
FireWire connector on the rear of the Gibson RIP. Attach the other end of the
FireWire cable to an open FireWire port on your computer.
9. Make sure you have selected the proper AC adapter plug that fits into the type of
wall socket used in your country, then connect the AC adapter to RIP. Plug in the
adapter, then turn your computer back on.
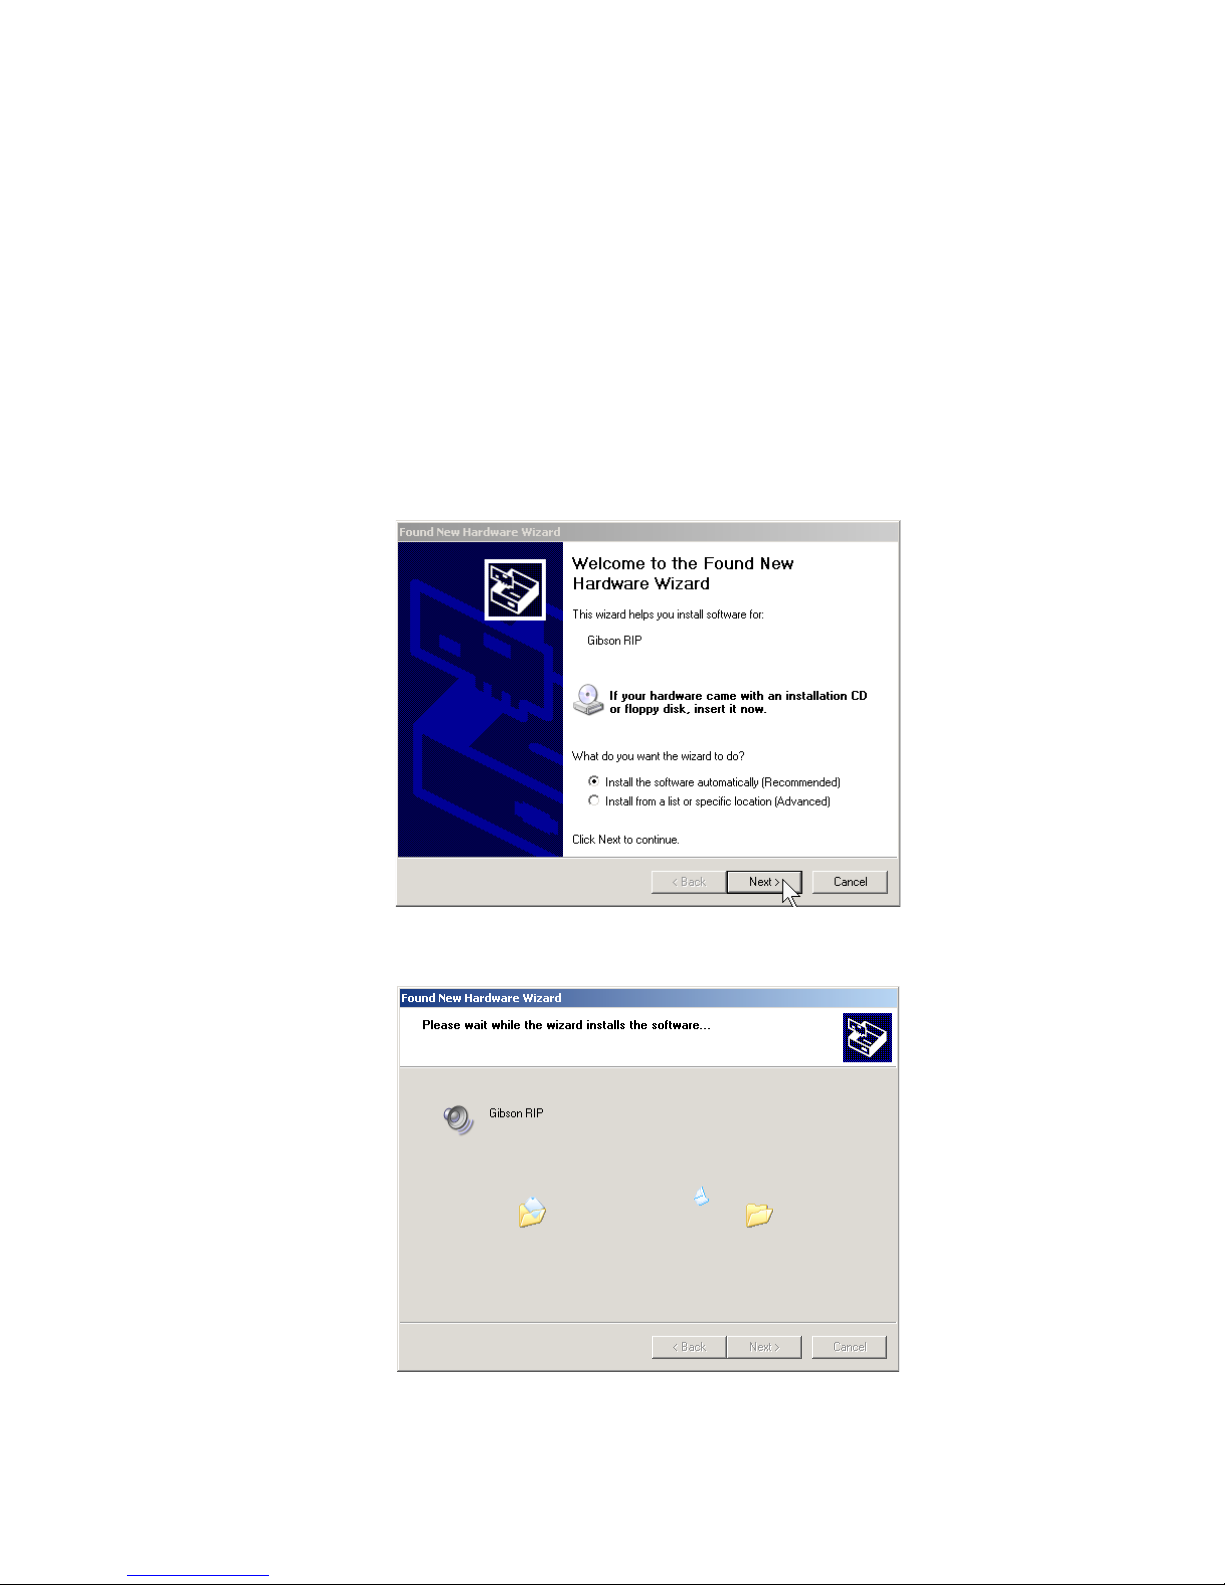
10.Windows will detect RIP, and the “Welcome to the Found New Hardware Wizard”
dialog box appears. If the option “No, not this time” appears, click on it. If not,
you’ll see an option to “Install the software automatically (Recommended).”
Select this, then click on “Next.”
11.The software will install automatically.
Page 14
12.If the “Windows Logo Testing” window appears again, ignore it and click on
“Continue Anyway.” Automatic installation continues.
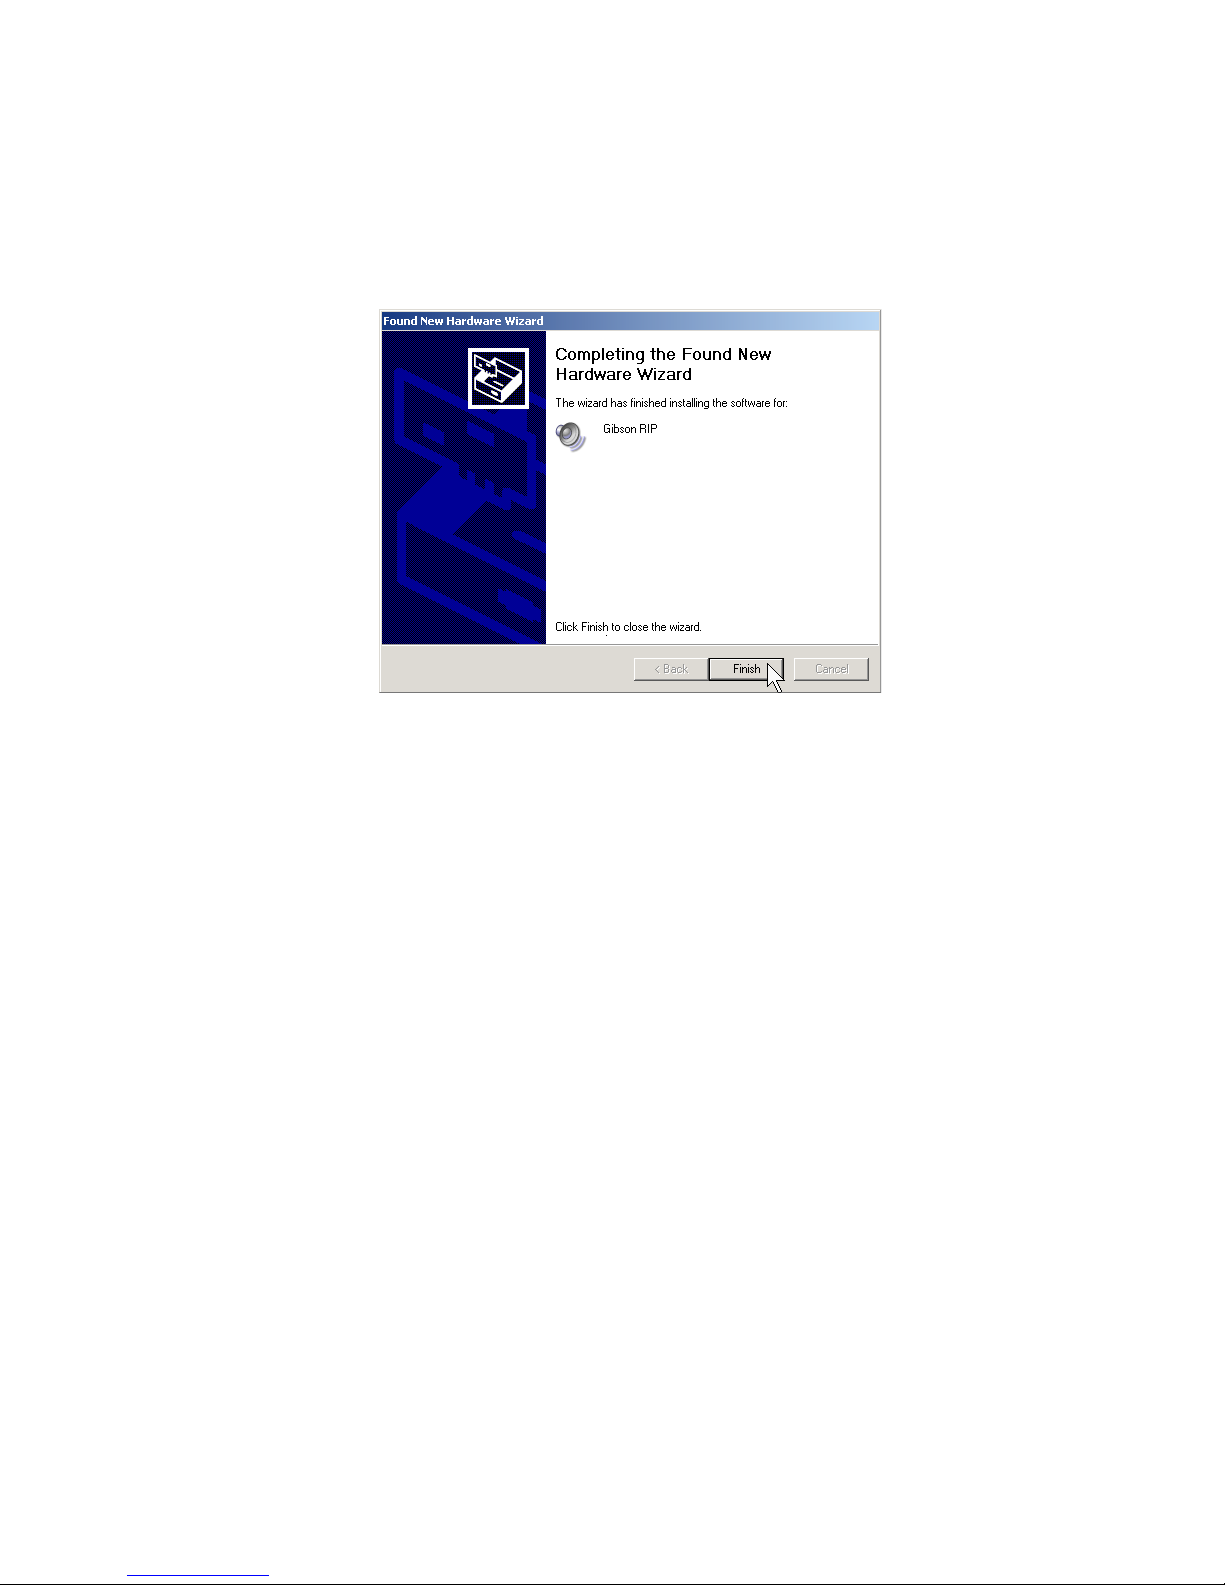
13.When the “Completing the Found New Hardware Wizard” appears, click “Finish”
to close the wizard.
Installation for Windows XP is now complete. Proceed to Chapter 6, “Updating RIP
Firmware.”
Page 15
Chapter 5: Windows Vista (32/64-bit)
Installation
1. Power-up your Windows Vista computer, and log in as an Administrator—either
with the “Administrator” account or any other account with administrative
privileges. Otherwise, you will not be able to install the RIP software. CAUTION:
DO NOT connect the Gibson RIP to your computer’s FireWire port yet.
2. If RIP is connected to your computer, disconnect it now. Insert the Gibson
installation DVD-ROM into your computer, and the main install window should
appear automatically. If not, double-click on the “Computer” icon, then doubleclick on your DVD-ROM drive icon to open the main install window.
3. Double-click on the icon that says Setup Gibson RIP. When the Gibson RIP
Installer screen appears, click on “Install.”
4. A window shows the install progress.
Page 16

5. The “Windows Security” window appears. Click on “Install.”
6. The “Installation Complete” window appears. Click on “Next.”
7. When the “Install Complete” window appears, click on “Finish.” Now that the
drivers are installed, turn off your computer.
Page 17

8. Locate the Gibson RIP, the power supply adapter included with your Dark Fire
guitar, and the FireWire cable. Plug one end of the FireWire cable into the
FireWire connector on the rear of the Gibson RIP. Attach the other end of the
FireWire cable to an open FireWire port on your computer.
9. Make sure you have selected the proper AC adapter plug that fits into the type of
wall socket used in your country, then connect the AC adapter to RIP. Plug in the
adapter, then turn your computer back on.
10.Windows will detect RIP, and install the software automatically. When the
process is complete, a “bubble” comes out of the Taskbar that says “Your
devices are ready to use.” This bubble will disappear automatically after a few
seconds.
Installation for Windows Vista is now complete. Proceed to Chapter 6, “Updating RIP
Firmware.”
Page 18

Chapter 6: Updating RIP Firmware
Firmware is RIP’s “brain,” and may be updated from time to time to optimize
performance. Firmware updates may occur when the virtual mixing Console opens for
the first time after a software update. Here’s how to open the Console after installation.
Mac: The Console opens automatically when Mac installation is complete.
Windows XP: After installation, go Start > Programs > Gibson RIP, then click on
Gibson RIP Console.
Windows Vista: After installation, go Start > All Programs > Gibson RIP, then
click on Gibson RIP Console.
Now that the Console is open, it will check whether RIP has the latest firmware. If the
firmware is not up to date, the following window will appear.
Click “Yes” to install new firmware. Do not turn off or unplug your Gibson RIP or
your computer while the firmware is being installed! This can leave RIP in a nonfunctional state that requires returning it to the factory. If possible, connect your
computer and RIP to an Uninterruptible Power Supply while updating firmware. A
window shows the updating progress.
Once the firmware update is complete, turn off power to the RIP, wait 10 seconds (or
more), then reconnect power to load the new firmware.
Page 19

Chapter 7: Connecting to the Gibson RIP
RIP is a versatile interface that also works with guitars other than Dark Fire.
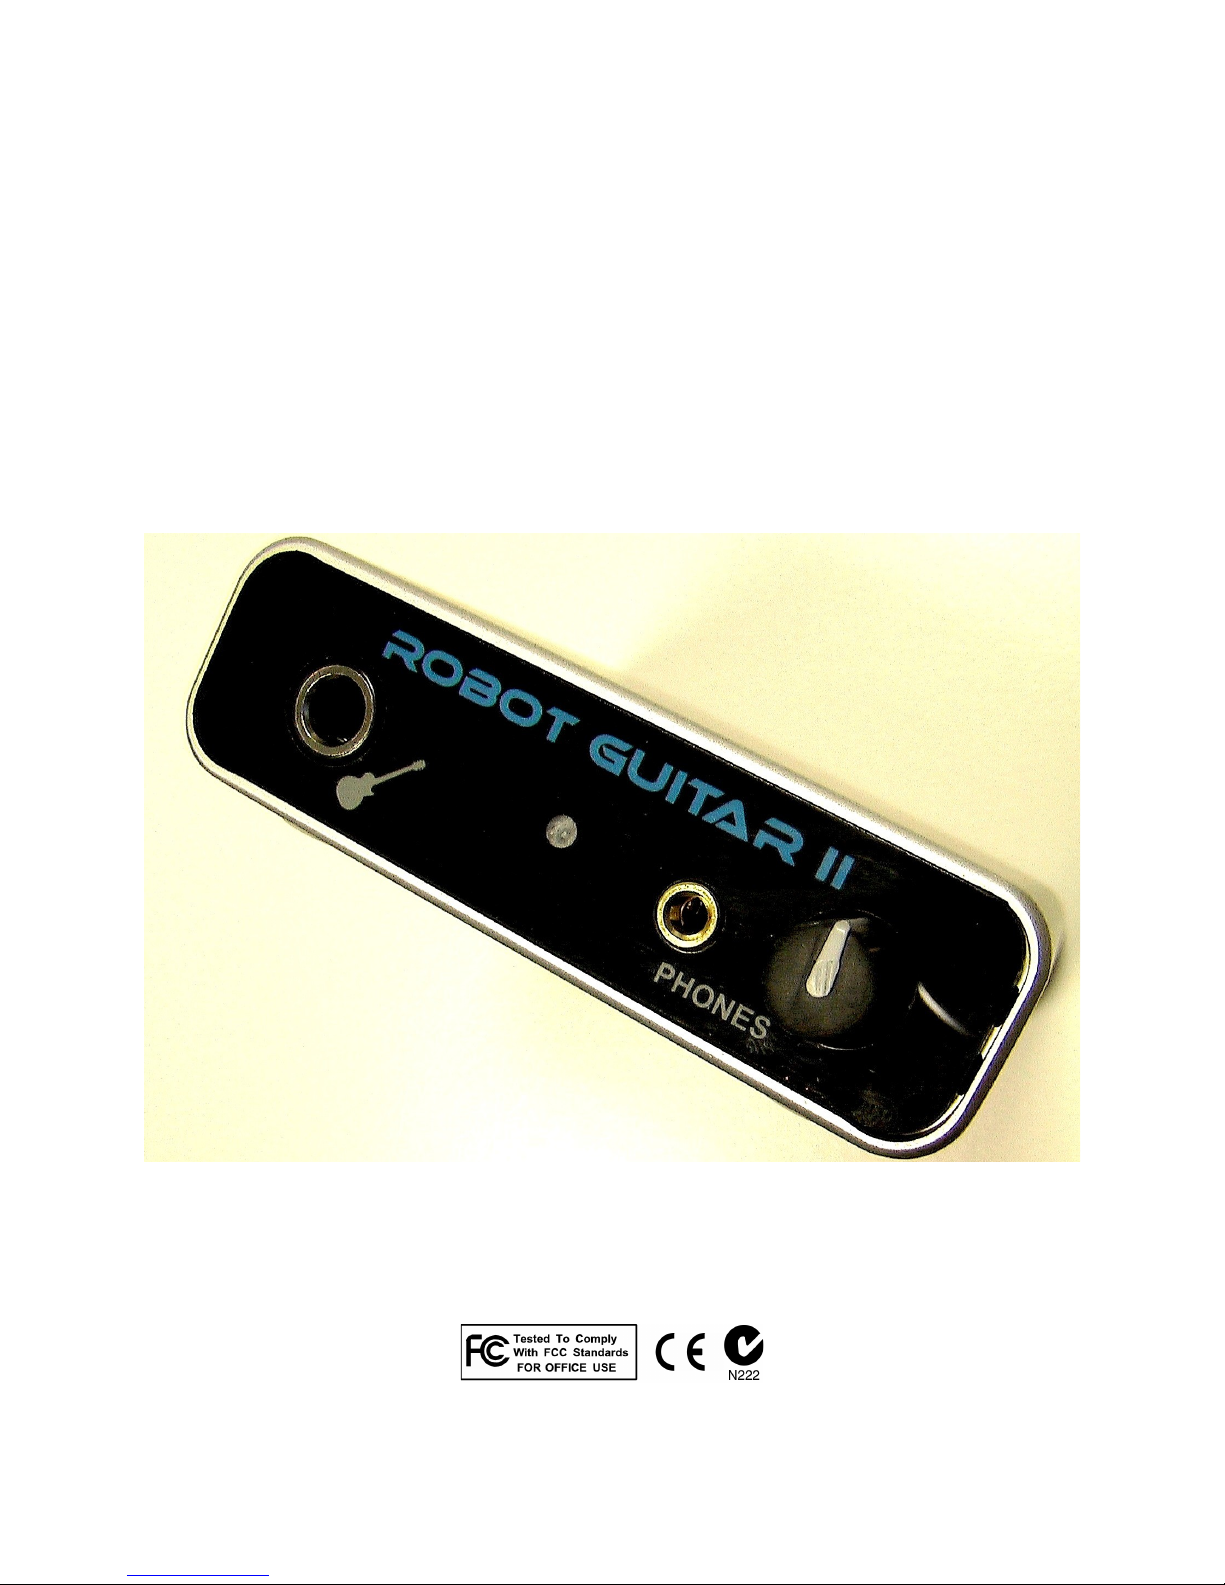
Guitar Input and Analog Outputs
Gibson RIP’s front panel has (left to right) a guitar input, indigo power indicator light, and
1/8” stereo headphone output jack with a corresponding volume knob. The guitar input’s
1 Megohm impedance prevents loading down your pickups, thus preserving the guitar’s
tone.
RIP has two rear-panel 1/4” analog line outputs. These are compatible with balanced or
unbalanced cables. By default, the outputs send a +4dBu (high-output, pro studio level)
signal. You can trim the output level if needed in the RIP Console (see Chapter 8).
Typically, the outputs would go into a mixing console, powered monitors, PA system,
etc.
Hex Output
The Hex output provides outputs from each string and is compatible with guitar-to-MIDI
converters made by Axon, Roland, and others. To patch RIP to the guitar-to-MIDI
converter, you’ll need a custom cable from Gibson; for additional information, go to the
Gibson web site at www.gibson.com.
Page 20

FireWire Connector
The RIP’s rear-panel FireWire connector is a 6-pin IEEE 1394a connector that operates
at 400 Mbps. It connects the audio interface to your computer.
Connecting Your Guitar to RIP
Standard guitars: Connect your guitar to the front-panel 1/4" jack using a standard,
1/4" mono guitar cable.
Dark Fire, magnetic pickups only: Connect your guitar to the same jack using a
standard, 1/4” mono guitar cable. (Note: You can also blend in the piezo pickup sound
in this mode; refer to the Dark Fire manual.)
Dark Fire, all available pickup outputs (magnetic pickups, piezo pickup, hex
pickup): Connect your guitar to the same jack using the stereo (TRS) 1/4” cable
supplied with Dark Fire.
The plugs used with a stereo cable have tip, ring, and sleeve (TRS) connections.
Page 21

Chapter 8: Console Application (Outputs Tab)
The installation process adds a “virtual control surface” application called Console. This
allows controlling the audio I/O (output levels and input monitoring) and several digital
audio-oriented functions of RIP, while bringing these controls to a single, easy-to-use
location.
Opening the Console
The RIP Console, with the Outputs tab selected.
Here’s how to open the console.Note: A shortcut (alias) should have been placed on
your desktop during installation. Double-clicking on this is the same as any of the
following methods.
Mac: Open the Applications folder and double-click on the Gibson RIP Console icon.
Windows XP: Click on the Start menu and choose Programs > Gibson RIP > Gibson
RIP Console.
Windows Vista: Click on the Start menu and choose All Programs > Gibson RIP >
Gibson RIP Console.
Page 22

The System Tray Icon (Windows Only)
Opening the console adds an icon to the system tray.
Clicking the left mouse button on the tray icon brings the console window to the
foreground if it is minimized.
Output Bus Controls
The console interface works like a digital mixer. The Analog Out 1 and Analog Out 2 bus
faders toward the right control the master level going to RIP’s two 1/4” line-level outs.
The audio output from your recording application (e.g., Ableton Live) can feed this bus,
as can any Dark File signal (magnetic pickups, piezo pickup, individual string outputs).
Think of these controls as the “master volume.”
The Console, with the output bus highlighted.
Page 23

The green label fields default to “Left” and “Right” but you can edit these and save the
new labeling in a console session (see below).
The Mute buttons and Faders below the green label fields affect everything being
mixed to this bus. Thus, pulling the faders down will reduce the level of your
application’s output as well as any RIP output signals being monitored, as described
later. The level meters display the amount of signal going to the outputs, and the
number fields below the faders show the precise fader settings.
Enabling the Gang button ties the two sets of channel controls together. For example,
clicking the Mute button on one channel also enables the Mute button on the other
channel. Ganging ties the Faders together as well; they maintain their placement relative
to each other when either one is moved.
Guitar, Piezo, and String Inputs
The guitar input controls are on the left side of the console. These monitor the Dark Fire
signals and mix them directly to the output, bypassing the computer or any application
that’s running. This lets you hear the straight, unprocessed guitar sounds without any
latency (see Appendix D) caused by going through the computer.
The guitar string channel strips.
Page 24

There is one strip, or input channel, for each guitar signal. Note that none of these
controls affect the recording process; they determine only how the signal will be
monitored at the output bus. Each input channel has:
Green label. You can edit and save this if you want to change the name. For
example, to make it easier to remember which gauge strings you use, you can
enter the diameter in the string field.
The guitar string channel strips have been renamed to show string gauges.
Pan knob (with pan position readout directly below), The places the string
anywhere in the output bus stereo field, from left to right. Holding the Ctrl key and
clicking on a pan knob sets it to the center position. Below each pan knob, a noneditable green field shows the pan knob’s current setting.
Solo button. When selected, any channels that aren’t soloed are silenced and
will not appear in the output.
Mute button. When enabled, this silences the muted channel.
Input level meter. Always displays the incoming signal level at the various
inputs.
Faders. Control the level of the signals feeding the output bus. Note that these
also have Gang buttons that work similarly to the Gang button on the output bus
control.
DAW Playback Controls
The Playback controls (to the left of the Output bus controls and the right of the input
channels) affect the level of Live’s stereo output, or that of any other application whose
output feeds RIP.
Page 25

The Playback controls.
The channel names default to Left and Right, as shown in the green fields. These can
be edited and saved with a Console session, as described later. The controls operate
the same way as the input monitor controls, except there are no pan knobs or level
meters.
Adjusting Playback Volume
Output volume adjustments affect the digital resolution because lowering a volume fader
below 0dB decreases the number of available bits, reducing the system’s potential
dynamic range. While this doesn’t make too much difference due to RIP’s overall high
resolution (24 bits), for best results leave the Playback and Output faders at 0dB. If you
need to lower the level, do so at your monitoring system (mixer, level controls on
powered speakers, the RIP headphone level control, etc.).
Page 26

Console Sessions
You can save the state of the Gibson RIP to a file called a “Session.” To save or load a
session, click on the “Save” or “Load” button respectively at the top of the Console
window. The “Reset” button restores the Console to its default state. However, the
“Gang” buttons, “Core Audio sample rate” buttons, and “Locked” sample rate button (in
Windows XP only) do not reset.
The three session control buttons.
Sessions default to being saved in the following locations. However, you can create a
new folder for Sessions, and navigate to it while saving. The console remembers the
last folder used to save or load a session.
Windows XP: Sessions are stored in the Administrator’s “My Documents” folder, in a
sub-folder named “RIP sessions.”
Page 27

Windows Vista: Sessions are stored in the User’s “Documents” folder, in a sub-folder
named “RIP sessions.”
Mac: Sessions are stored in the User’s “Documents” folder, in a sub-folder named “RIP
sessions.”
Hot Keys (Shortcuts)
Several “hot keys” (shortcuts) can Control the console when its window is active. (Note:
The following shortcuts are for Windows. For the Mac, use the Apple/Command key
instead of Ctrl.)
Ctrl-S saves or quick-saves the current session
Ctrl-O loads a session
Ctrl-click a Fader to set to 0 dB
Ctrl-click a Pan knob to set it to center
Ctrl-click on a Mute button to select all or deselect all
(Windows only) Left-click on the System Tray icon to restore the Console view
if it has been minimized
(Windows only) Right-click on the System Tray icon for various console view
Click on the numerical readout below each Console fader to enter a value. Press your
computer keyboard’s Tab key to step between each Fader readout.
Page 28

Typical Console Scenarios
The following assume that the Playback and Output level controls are at 0dB except as
noted.
You want to practice Dark Fire without any processing, and be able to listen to
any of the string and pickup options through a monitoring system (including
headphones plugged into RIP’s front panel): Turn up the individual string/pickup
faders. For example, if you want to hear just the Piezo pickup, turn up the Piezo
channel. To hear the Hex pickup outputs and pan the strings across the stereo field, turn
up the individual string faders and set the panpots as desired. You will hear no latency
with the guitar signal in this scenario.
You want to play Dark Fire only through the processors in your computer (e.g.,
Guitar Rig 3, the processors in Ableton Live Lite, or other applications) and not
hear the direct string sounds: Turn down all string channel level controls. The guitar
signal will have some latency with this scenario.
You want to play Dark Fire through the processors in your computer and blend in
the direct string sounds: Turn up the individual string channel faders as desired to
hear the direct sound. To adjust the blend between the direct guitar sound and the
processed sound, bring down the Playback fader if the processed sound is too loud, or
bring down the string faders if the direct sound is too loud. The direct guitar signals will
have no latency, but the processed sounds will.
Page 29

Chapter 9: Console Application (Settings Tab)
Click on the “Settings” tab to access RIP’s system settings. Note that it’s best to adjust
Console settings before opening any applications that access RIP so that the
application “sees” these settings when it opens. If the application is already open, close
it and re-open after changing any settings.
Settings tab for (top to bottom) Windows XP, Windows Vista, and Mac. All three also
have an “About” button which when clicked, gives details about the Console software
version and other information.
Page 30

The About Button
This displays the console version and driver version numbers, and provides a link to
Gibson’s home page.
The upper picture shows the About window for Windows XP and Vista, while the lower
one shows the About window for Mac OS X.
If you encounter problems, customer service may ask for the version information in the
About page. You can copy this information to your clipboard by clicking on “Copy to
clipboard,” then paste it into an e-mail to send to customer service.
On this page, you can also verify that the firmware is up-to-date by clicking on the “Flash
Update” button.
Buffer Size Settings (Windows XP and Vista)
This slider sets the buffer size for all audio software that works with RIP, and has a
direct effect on latency (Appendix D) because smaller buffer sizes give lower latencies.
However, too small a setting will introduce clicks and pops into the audio (and in
extreme cases, turn off the audio engine) because this places excessive demands on
your computer. So, choose the smallest value possible consistent with having no audio
problems. Most modern computers can handle 256 samples. Older, slower machines
Page 31

may require 512 to 1024 samples. Fast multicore computers can often use latencies as
low as 96 or 64 samples.
Buffer Size Settings (Mac)
The buffer size is set within the application, not the console. For example, with Ableton
Live Lite 7 Gibson Studio Edition:
1. With Live open, click on Live in the menu bar and select Preferences. The
Preferences window opens.
2. Click on the Audio tab.
3. Click in the Buffer Size tab, and drag up or down to change the buffer size.
Page 32

About Sample Rates
The sample rate provides a reference to which all audio is synchronized, and is roughly
twice the highest frequency you want a system to be able to reproduce or record. For
example, a sample rate of 44.1kHz was chosen for the CD because half of that is in
most cases the upper limit of human hearing. However, other sample rates are
commonly in use, and can be selected in RIP.
44.1kHz: The most common sample rate used in music projects, and the same sample
rate used by CDs.
48kHz: Typically used with music for video projects, but also in some music projects
because of the belief that the higher sample rate means higher fidelity. However, this is
not a dramatic difference; you may not notice any difference at all.
88.2kHz: The less common of two “high-resolution” sample rates (neither is available in
Ableton Live Lite 7 Gibson Studio Edition). Recording at 88.2kHz creates files that are
twice as large as those created when using 44.1kHz. Also, some plug-ins used in audio
applications may not work as well at 88.2kHz, or you may be able to use fewer
instances. However, latencies are lower if your computer is up to the task of handling
high-resolution sample rates.
96kHz: The most common “high-resolution” sample rate, although it’s still not as
common as 44.1 and 48kHz sample rates. Recording at 96kHz creates files that are
2.18 times as large as those created when using 44.1kHz. All other comments regarding
88.2kHz apply here as well.
Sample Rate (Macintosh)
Click on a sample rate button to select it. It's often best to do this before opening any
audio application. After opening the application, set its sample rate to the same value.
Sample Rate (Windows XP)
Click on a button to select a sample rate. It's recommended that you do this before
opening an audio application. After the application is open, set its sample rate to the
same value.
Enabling the “Locked” setting (available only in the Windows XP Console) blocks
software from changing your selected sample rate. Note: Locking the sample rate is not
really necessary for applications (such as Live Lite 7 Gibson Studio Edition) that use
ASIO. However, locking can be important when using RIP as a “sound card.” See
Appendix E.
Page 33

Sample Rate (Windows Vista)
With ASIO applications such as Live Lite 7 Gibson Studio Edition, Sonar, Acid, Reason,
etc., set the sample rate in the application itself. For example, in Live you set the sample
rate by going to Preferences, then clicking on the Audio tab:
Guitar Rig 3 also sets the sample rate for stand-alone operation in its Preferences
window:
(Note that when used as a plug-in, Guitar Rig 3 automatically adopts the host’s sample
rate.)
Page 34

After you set the sample rate and play or record audio in your application, the Sample
Rate field on the Console’s Settings tab will show the sample rate you selected.
You do not need to adjust sample rate in the Core Audio sample rate section except
when using RIP as a more traditional Windows sound card. See Appendix E.
Optimizing ASIO Performance with Windows Vista
The ASIO driver supports Windows Vista’s multimedia thread scheduler (also called
MMCSS), which allows more reliable, lower latency performance.
The ASIO driver automatically uses MMCSS, which is highly recommended. However,
you can disable it if you want to give priority to another application that’s running at the
same time.
Open your application’s ASIO control panel, usually accessible from within an audio
Preferences window. It may be called ASIO Panel, ASIO Control, Hardware Setup, etc.
For example, with Live Lite 7 Gibson Studio Edition, the ASIO panel is located in the
Audio tab under Preferences (located under the Options menu) and called Hardware
Setup.
Uncheck “Use Vista multimedia priority boost” to disable MMCSS.
Uncheck “Lower Vista window manager priority” to prioritize drawing windows on
the screen over audio.
Page 35

Stand-Alone Console Mode
When you close the Console, it saves all the RIP mixer settings in RIP’s flash memory.
When you reboot RIP or move it to another computer, RIP will recall these settings.
RIP need not be connected to a computer to operate. This is called stand-alone mode.
Simply set the mixer setting as desired in the console, then close the console to save
those settings to flash memory. Then, when you turn on your Gibson RIP, those settings
will automatically be loaded into the RIP’s internal mixer. This is useful for live
performance if, for example, you’ve crafted a perfect mix of all the Dark Fire outputs,
and you want to feed them into an amp. You can do so simply by powering RIP; no
computer is necessary.
LED Diagnostics
RIP’s front panel blue LED provides feedback on what’s happening inside RIP.
LED flashes quickly five times: This happens immediately after power-up.
LED dim: RIP is active (playback and magnetic pickups input are functional) but
RIP is not currently receiving a signal from the Dark Fire piezo/hex pickup
LED bright: RIP is detecting the piezo/hex signal from Dark Fire
LED cycles slowly from bright to dim: Dark Fire is being charged. You will not
hear audio until you play Dark Fire for more than a second; this alerts RIP to stop
charging and instead, “listen” to Dark Fire.
LED flashes rapidly and continuously: This means the FireWire chip inside
RIP has failed to boot up. Remove power for 15 seconds and re-connect. If the
LED still continues to flash continuously, there is a hardware problem that needs
to be referred to a service center.
Page 36

Chapter 10: FireWire Analyzer (Windows Only)
The FireWire Analyzer utility included with RIP is intended for advanced users and
provides detailed timing information about how ASIO applications perform with RIP;
leave it running while you use your ASIO-compatible audio software.
Here’s how to open the Analyzer.
Windows XP: Go Start > Programs > Gibson RIP and click on “FireWire Analyzer.”
Windows Vista: Go Start > All Programs > Gibson RIP and click on “FireWire
Analyzer.”
The FireWire Analyzer is test equipment for analyzing FireWire performance on
Windows computers.
Page 37

Status
The upper area of the FireWire Analyzer window displays your current sample rate and
buffer size, as selected in the Console or an audio application. Below that is the
calculated buffer time in milliseconds.
Playback
The playback section shows the number of buffers sent to the hardware, the maximum
buffer time, and the average buffer time. If you are running off the computer application’s
internal clock, the average buffer time should be close to the expected buffer time. The
important spec here is that the average playback buffer time should be close to the
average record buffer time.
Record
This is similar to the playback section. The average buffer time here will tell you how fast
your hardware is actually running and should closely match the playback time.
ASIO Wakeup
The ASIO wakeup statistics shows how quickly the ASIO driver responds to the
hardware, e.g., how long it takes to inform an audio application that new audio data is
available. For low-latency ASIO performance, this number should be as low as possible.
If the wakeup time is more than a few tenths of a millisecond, then another driver in your
system is hogging the processor and preventing your audio app from running efficiently.
Unfortunately, there’s no straightforward way to isolate which driver is responsible. Try
going into Device Manager and disabling any hardware that you don’t absolutely need,
such as web cams, wireless cards, external hard drives, etc.
For example, one test machine had a USB camera hooked up. With the camera hooked
up and running, the maximum ASIO wakeup time was several milliseconds.
Disconnecting the camera brought the ASIO wakeup time back down to a normal range.
ASIO Host
The ASIO host statistics show how long an audio application takes to process each
buffer.
Page 38

Firmware
The firmware statistics display RIP’s internal state. The analyzer will periodically query
RIP and show the results.
Warning Signs
If your audio is glitching, popping, or crackling, use the Analyzer to see if:
The average playback time is substantially different from the average record time
The ASIO wakeup time is too long.
The ASIO host time is too long.
To get glitch-free playback, the wakeup time plus the host time must be less than the
average buffer time. If your ASIO host time is too long, try running fewer tracks or fewer
plug-ins in your audio software.
Saving a Report
Clicking the “Save” button will write a report containing all of this information to your “My
Documents” folder on Windows XP or your “Documents” folder on Windows Vista. The
FireWire Analyzer adds the PCI vendor ID and device ID for all the FireWire host
controllers in the system to the report, which can be very useful for tech support and for
pinpointing the 1394 host controller's specific make and model.
Page 39

Appendix A: Troubleshooting Guide
Problem: You cannot install your Gibson RIP under Windows 95/98/ME/2000 or Mac
OS9.
Solution: There is no driver support for the RIP under Windows 95/98/ME/2000 or OS9.
You need at least Windows XP, Vista, Server, or Mac OS X (10.3.9 or later) to use your
RIP.
Problem: After installation on a Windows XP or Vista system, the interface doesn’t work
properly.
Solution: Did you try to install the software while the RIP was connected? If so,
uninstall the RIP software as described in Appendix B, then restart your computer.
Install again, this time following the instructions.
Problem: When you try to install the drivers from the CDROM, Windows gives an error
message.
Solution: You must be logged in as an Administrator to install the Windows drivers.
Another possibility is that you may have an ASIO application open in the background.
Close all audio applications, restart your computer, and attempt to install the driver
again.
Problem: Your Windows computer spontaneously reboots on you.
Solution: You have probably experienced what Microsoft calls a “bug check,” but what
everyone else calls the Blue Screen of Death (BSOD). The default setting for the BSOD
is not to show the BSOD, but to reboot the computer. This isn’t very helpful for tracking
down problems. If you are experiencing blue screens, here’s how you can help us track
it down:
1. Go Start > Settings > Control Panel and double-click on System.
2. Click on the Advanced tab, then in the “Startup and Recovery” section, click on
the “Settings” button.
3. Uncheck “Automatically restart.”
4. In the “Write debugging information” section select “Small memory dump” from
the dropdown menu.
5. Click “OK.”
Now, next time you get a blue screen, look at it and see if the crash occurred in
GibsonRIP.sys . If so, then it’s probably something we need to fix. Restart your
computer and find the most recent .dmp file—this is the memory dump. It’s probably in
C:\WINDOWS\Minidump. Zip up this .dmp file and if requested by your local service
center, email it along with a description of how it happened. This will really help track
down the problem.
Problem: When you play an audio file, it plays at an altered pitch.
Solution: Try changing the sample rate under the Settings tab.
Page 40

Problem: You hear pops and clicks when you play and record audio.
Solution: Try changing the buffer size. If this doesn’t help, run the FireWire Analyzer as
described previously. If you are using a built-in FireWire port on your laptop, you may
need to purchase a third-party ExpressCard or PCMCIA FireWire adapter. Our users
have encountered the fewest problems with Texas Instruments FireWire chips.
Problem: The sound cuts in and out, or the left or right channel doesn’t work.
Solution: You may have a bad audio cable. Try using a different cable in the problem
channel.
Problem: There is no sound unless you pull the audio plug out a little.
Solution: Not all 1/4” plugs are made to the exact same dimensions. Try a plug/cable
from a different manufacturer.
Problem: You call up the Console, but its screen does not appear.
Solution: If RIP detects a problem with the FireWire connection, it will not show the
Console. Check your FireWire connections. If they are solid, substitute a different
FireWire cable.
Problem: No matter what you do, you can't seem to solve the problem.
Solution: Contact Gibson customer service.
US (Toll Free) 1-800-4GIBSON
US (Local) 1-615-871-4500
- Email .service@gibson com
Europe 00800-4GIBSON1
- Email . .serviceeurope@gibson com
Japan 03-3434-5670
- Email . .servicejapan@gibson com
China 800-820-8841 (in China only)
- Email . .servicechina@gibson com
Page 41

Appendix B: FireWire Tips
Some say that FireWire was never really intended for audio interfaces, but it’s here, it’s
universal, and it works…well, mostly. Some people have a hard time getting FireWire to
play nice, but these tips can help.
There are different FireWire chip sets. Find out what type your computer uses,
then check the Echo web site to see if there are any known issues (most
companies recommend the TI chip set). To find the chip set used in a Windows
XP computer, right-click on My Computer, select Properties, click on the
Hardware tab, then click on Device Manager. Expand “IEEE 1396 Bus host
controllers” in the device tree by clicking on the little (+) sign, and Windows will
show the chip set being used.
This Windows computer uses a Texas Instruments chip set, which is recommended by
most manufacturers.
Page 42

Adding a PCI FireWire card (available at stores like Best Buy, Office Depot, Fry’s,
etc.) might give better results than using your motherboard’s on-board FireWire
port. But avoid combo USB/FireWire cards, as some users report iffy results with
these.
Remember that RIP requires its power supply. RIP cannot be powered from the
FireWire bus.
Connect FireWire devices while the computer and device are powered-down. In
theory, you should be able to hot-swap FireWire devices; in practice, this isn’t
always true, with potentially disastrous results (e.g., a fried motherboard).
Follow installation instructions to the letter. Sometimes you need to install the
software first, as with RIP, and sometimes you need to connect the device first.
Power-up the FireWire device before turning on your computer.
Mac owners, upgrade to at least OS X 10.4.10. FireWire performance is much
improved compared to earlier versions.
Dedicate a FireWire port to audio devices, and don’t run other devices on the
same port.
Use a high-quality cable. If the cable gets crushed or stepped on, it might not
work.
If you do encounter problems, don’t bang your head against the wall trying to
troubleshoot without first checking the Gibson web site. There may be known issues that
can be fixed with a simple driver download, or by disabling a conflicting device.
Page 43

Appendix C: Uninstalling the RIP Drivers
and Console
There are few reasons to uninstall the RIP software unless it somehow becomes
corrupted (e.g., due to hard drive deterioration). Uninstalling can also do “brute force”
troubleshooting: Uninstalling and re-installing the software may solve various problems.
It’s also possible that in the future, updated RIP software will require uninstalling
previous versions.
Macintosh: Drag the Gibson RIP Console icon out of the Applications folder and into
the trash.
Windows XP: Go Start > Programs > Gibson RIP > Uninstall.
Windows Vista: Go Start > Programs > Gibson RIP > Uninstall.
Page 44

Appendix D: Computer Latency and Recording
When playing guitar through a computer, there’s a slight delay that occurs between the
time you play a note, and when you hear it come out of the speakers. This is called
latency, and occurs because even the most powerful processor can only do so many
millions of calculations per second. You want the best possible “feel” when playing Dark
Fire, so let’s investigate how to obtain the lowest possible latency.
Minimizing Latency
The faster the processor, the lower the potential latency. Multicore processors can help
tremendously in reducing latency.
Use an audio protocol designed for low latency. Steinberg devised the first low-latency
protocol for sound cards, based on their ASIO (Advanced Streaming Input Output)
drivers. These tied in closely with the CPU, bypassing various layers of both Mac and
Windows operating systems. At that time the Mac used Sound Manager, and Windows
used various protocols that were equally unsuited to musical needs.
Starting with OS X, Apple gave us Core Audio, which was tied in even more closely with
low-level operating system elements. It’s now possible to obtain latencies of around 1.5
to 3 ms with a fast processor and a sound card that supports low-latency drivers like
ASIO on Windows, or Core Audio on the Mac.
Caution: Windows machines have their own sound protocols, such as MME and
DirectSound. When selecting the desired audio interface type using a DAW like Ableton
Live, these options will often show up along with ASIO. They are not suitable for music
—always use ASIO for the best results. Also, avoid any options like “Emulated ASIO.”
They are not true ASIO drivers.
The bottom line with Windows machines is always choose “Gibson RIP ASIO” for the
lowest latency, and adjust latency to the lowest possible value short of audio problems
under the Console’s “Settings” tab.
Why Direct Monitoring Isn’t Always the Answer
RIP includes a feature called “direct monitoring,” where you can listen directly to your
Dark Fire outputs without having them go through the computer. The faders toward the
left of the Console control these levels. This results in no latency, but the tradeoff is that
you will no longer hear Dark Fire through any of your processors as they require that the
signal go through the computer.
Page 45

How Low Can You Go?
1.5 ms of latency approaches the theoretical minimum, because it will always take a
finite amount of time to convert analog to digital at the input, and digital to analog at the
output. Unfortunately, though, ultra-low latency settings (or higher sampling rates, for
that matter) make your computer work harder, so you’ll be limited as to how many plugins can run before your computer audio starts to sputter, crackle, or mute. As latency will
continue to be a part of our musical lives for the foreseeable future, here are some tips
on living with latency.
Set latency to the highest comfortable value. 5.6 ms feels very responsive, and
makes the computer work less hard compared to choosing 2 or 3 ms. If you’re
using a DAW like Ableton Live, a higher latency settings means you can also
have more tracks, use software synthesizers more readily, etc.
Every millisecond of latency is approximately equivalent to moving 1 foot away
from your speaker. So, if you wear headphones with a system that has 5 ms of
latency, you’ll experience the same amount of delay as if your head was 5 feet
away from your monitor speakers.
Periodically go to http://www.gibson.com/downloads/software to check for
updated drivers that may improve performance.
If you also use software synthesizers, use your DAW’s “freeze” function (if
available) to disconnect some synths from the CPU. Or, render a soft synth’s
output as a hard disk audio track (then remove the soft synth), which is far less
taxing on your processor. Hint: If you retain the MIDI track driving the soft synth,
which places virtually no stress on your CPU, you can always edit the part later
by re-inserting the soft synth. Freezing frees up CPU power for additional
processors like Guitar Rig 3.
Page 46

Appendix E: Using RIP With Non-ASIO
Windows Applications
RIP is designed to work with ASIO applications on Windows XP and Vista because
these are optimized for music and provide the lowest possible latency. However, many
“consumer-oriented” Windows applications, like Windows Media Player, are not ASIOcompatible but instead use protocols like MME, DirectX, and WDM. RIP is compatible
with these and can be used similarly to a Windows sound card for playback (although
with much better fidelity).
Windows XP
In general, we recommend first setting the sample rate in your audio application, then
choosing the same rate in the Console under the “Settings” tab and clicking on the
“Locked” button to lock it in. Next:
1. Go Start > Settings > Control Panel and double-click on “Sounds and Audio
Devices.”
2. Click on the Audio tab and for Sound Playback, default device, select “RIP
Analog Out” from the drop-down menu. (You can also select a RIP guitar input—
pickups, piezo, or all hex strings—for the Sound Recording option.)
3. Click on Sounds and for Sound Scheme, select “None.” While this isn’t essential,
Windows system sounds like beeps and such tend to be loud and distracting
when played through RIP.
If RIP is open (it doesn’t need to be), you can control the output level with the RIP
Console’s Playback or Analog output controls, Otherwise, use the standard Windows
XP volume control—go Start > Programs > Accessories > Entertainment > Volume
Control. If both are open, the level controls work in tandem; for example, lower the RIP
Playback controls, and the Windows volume control changes along with them.
Note that locking the sample rate (by clicking on the Locked button in the Console
settings page) can be important in non-ASIO applications, as Windows will frequently try
to set the hardware to the highest supported sample rate. Then, Windows sample rate
converts between that rate and the rate at which you are playing or recording. For
instance, you may be trying to play at 44.1kHz, but Windows sets the hardware to
96kHz and converts between the two. This is undesirable because you may be trying to
do a transfer at a specific rate; furthermore, sample rate conversion will reduce your
audio quality and consume a great deal of CPU power. Locking the sample rate forces
Windows to only use the hardware at the locked rate.
Page 47

Windows Vista
In general, we recommend first setting the sample rate in your audio application, then
choosing the same rate in the Console under the “Settings” tab and clicking on the
“Locked” button to lock it in. Next:
1. Go Start > Control Panel.
2. Double-click on “Sound.”
3. Click on the Playback tab, then click on Analog Out, 2 – Gibson RIP, then click on
Set Default. RIP is now the default for system sounds and applications such as
Windows Media Player. (You can also select a RIP guitar input—pickups, piezo,
or all hex strings—for the Sound Recording option.)
4. Click on Sounds and for Sound Scheme, select “No Sounds.” While this isn’t
essential, Windows system sounds like beeps and such tend to be loud and
distracting when played through RIP.
If RIP is open (it doesn’t need to be), you can control the output level with the RIP
Console’s Playback or Analog output controls, Otherwise, use the standard Windows
Vista volume control—click on the Speaker icon in the Taskbar, and adjust the slider. To
adjust other sound sources, while the volume control is open, click on Mixer.
If both the RIP console and Vista volume controls are open, the level controls work in
tandem; for example, lower the RIP Playback controls, and the Windows volume control
changes along with them.
Note: If you open the application and begin playback, the RIP console will automatically
switch to the correct Core Audio sample rate.
 Loading...