

Page 1
OWNER'S GUIDE
MANUAL OVEN CONTROLS
CERAMIC-GLASS SMOO THTOP
SELF-CLEANING OVEN
READANDSAVETHESEINSTRUCtiONS
ELECTRICRANGE
Page 2
Product Registration
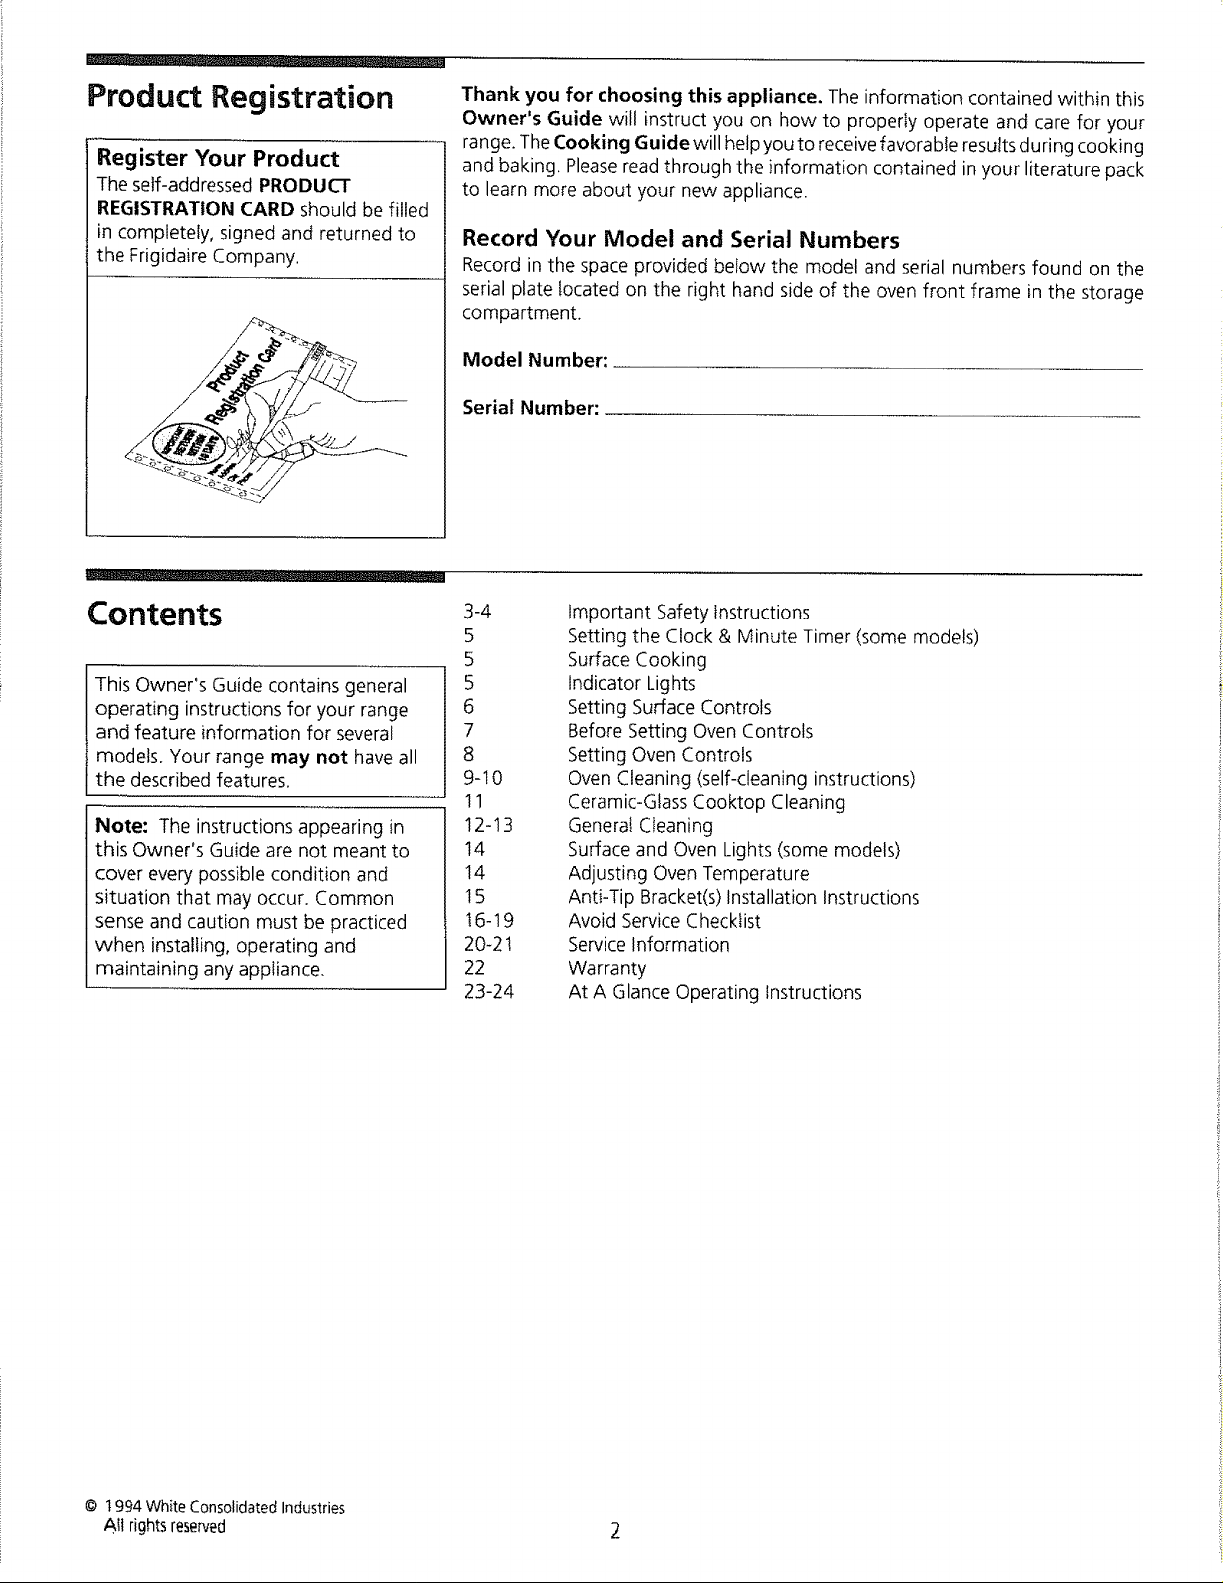
Register Your Product
The self-addressed PRODUCT
REGISTRATION CARD should be filled
in completely, signed and returned to
the FrigidaireCompany.
Thank you for choosing this appliance. The information contained within this
Owner's Guide will instruct you on how to properly operate and care for your
range. The Cooking Guide will help you to receive favorable results during cooking
and baking. Pleaseread through the information contained in your literature pack
to learn more about your new appliance.
Record Your Model and Serial Numbers
Record inthe space provided below the model and serial numbers found onthe
serial plate located on the righthand side of the oven front frame in the storage
compartment.
#-9: _:
Contents
This Owner's Guide contains general
operating instructions for your range
and feature information for several
models. Your range may not have all
the described features.
Note: The instructions appearing in
this Owner's Guide are not meant to
cover every possible condition and
situation that may occur. Common
sense and caution must be practiced
when installing, operating and
maintaining any appliance.
Model Number:
Serial Number:
3-4
5
5
5
6
7
8
9-10
11
12-13
14
14
15
16-19
20-21
22
23-24
Important Safety Instructions
Setting the Clock & Minute Timer (some models)
Surface Cooking
Indicator Lights
Setting Surface Controls
Before Setting Oven Controls
Setting Oven Controls
Oven Cleaning (self-cleaning instructions)
Ceramic-Glass Cooktop Cleaning
General CIeaning
Surface and Oven Lights (some models)
Adjusting Oven Temperature
Anti-Tip Bracket(s)Installation Instructions
Avoid Service Checklist
Service Information
Warranty
At A Glance Operating Instructions
© 1994 White ConsolidatedIndustries
All rightsreser,_ed 2
Page 3
IMPORTANT SAFETY INSTRUCTIONS
Read all instructions before using this appliance.
Thisguide containsimportant safety symbols and instructions. Pleasepay specialattention to thesesymbols and follow allinstiuctionsgiven.
Here is a brief explanation of the use of these symbols.
_rI_This symbol will help alert you to situations that may
cause serious bodily harm, death or property damage.
• Remove all tape and packaging wrap before using the
range. Destroy the carton and plastic bags after unpacking
the range. Never allow children to play with packaging material.
o Proper Installation--Be sure your appliance is properly
installed and grounded by a qualified technician in
accordance with the National Electrical Code
ANSi/NFPA No. 70--latest edition and local code
requirements. Install only per installation instructions provided
in the literature package for this range,
Ask your dealer to recommend a qualified technician and an
authorized repair service. Know how to disconnect the electrical
power to the range at the circuit breaker or fuse box in case of an
emergency.
• User Set€icing--Do not repair or replace any part of the
appliance unless specifically recommended in the manuals.
All other servicing should be done only by a qualified technician
to reduce the risk of personal injury and damage to the range.
• Never modify or alter the construction of a range by
removing leveling legs, panels, wire covers, anti-tip
brackets/screws, or any other part of the product.
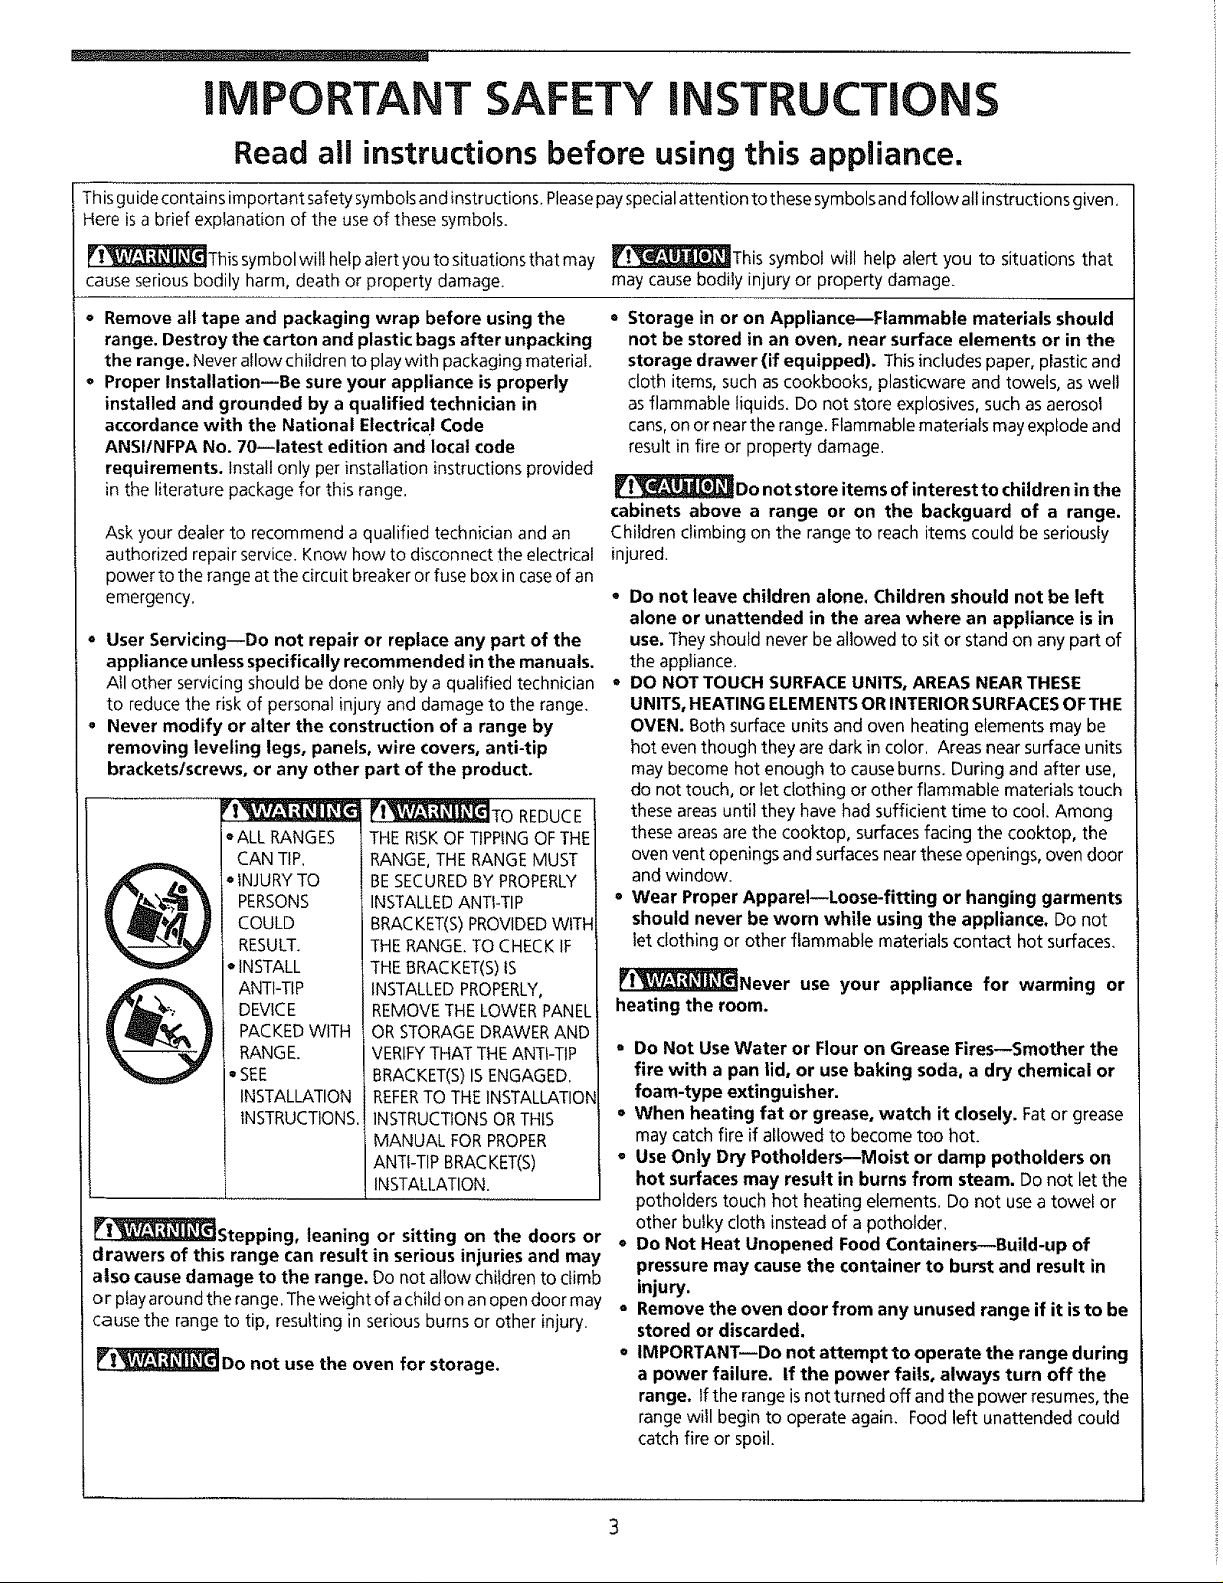
I__TO REDUCE
THE RISKOFTIPPINGOF THE
CAN TIP,
• INJURYTO
PERSONS
COULD
RESULT.
eINSTALL
ANTI-TIP
DEVICE
PACKEDWITH
RANGE.
SEE
INSTALLATION
INSTRUCTIONS, INSTRUCTIONSOR THIS
_Stepping, leaning or sitting on the doors or
drawers of this range can result in serious injuries and may
also cause damage to the range. Do not allow children to climb
or play around the range. The weight of achild on an open door may
cause the range to tip, resulting in serious burns or other injury.
_Do not use the oven for storage.
RANGE, THE RANGE MUST
BESECUREDBY PROPERLY
INSTALLEDANTI-TIP
BRACKET(S)PROVIDEDWITH
THE RANGE. TO CHECK IF
THE BRACKET(S)tS
INSTALLEDPROPERLY,
REMOVETHE LOWER PANEL
OR STORAGEDRAWER AND
VERIFYTHAT THE ANT!-TtP
BRACKET(S)IS ENGAGED.
REFERTO THE INSTALLATION
ANTI-TIP BRACKET(S)
j MANUAL FOR PROPER
INSTALLATION.
_This symbol will help alert you to situations that
may cause bodily injury or property damage.
= Storage in or on Appliance--Flammable materials should
not be stored in an oven, near surface elements or in the
storage drawer (if equipped). This includespaper, plastic and
cloth items, such as cookbooks, plasticware and towels, as well
asflammable liquids.Do not storeexplosives, such as aerosol
cans,on or near the range. Flammable materials may explode and
result in fire or property damage.
_Do not store items of interest to children in the
cabinets above a range or on the backguard of a range.
Children climbing on the range to reach items could be seriously
injured,
o Do not leave children alone, Children should not be left
alone or unattended in the area where an appliance is in
use, They should never be allowed to sit or stand on any part of
the appliance.
° DO NOT TOUCH SURFACE UNITS, AREAS NEAR THESE
UNITS, HEATING ELEM ENTSOR INTERIOR SURFACESOF THE
OVEN. Both surface units and oven heating elements may be
hot even though they are dark in color. Areas near surface units
may become hot enough to causeburns. During and after use,
do not touch, or let clothing or other flammable materials touch
these areas until they have had sufficient time to cool. Among
these areas are the cooktop, surfaces facing the cooktop, the
oven vent openings and surfaces near these openings, oven door
and window.
° Wear Proper Apparel--Loose-fitting or hanging garments
should never be worn while using the appliance. Do not
let clothing or other flammable materials contact hot surfaces.
_Never use your appliance for warming or
heating the room.
° Do Not Use Water or Flour on Grease Fires--Smother the
fire with a pan lid, or use baking soda, a dry chemical or
foam-type extinguisher.
• When heating fat or grease, watch it closely. Fat or grease
may catch fire if allowed to become too hot.
• Use Only Dr/Potholders--Moist or damp potholders on
hot surfaces may result in burns from steam. Do not let the
potholders touch hot heating elements. Do not use a towel or
other bulky cloth instead of a pothotder,
e Do Not Heat Unopened Food Containers--Build-up of
pressure may cause the container to burst and result in
injury.
• Remove the oven door from any unused range if it isto be
stored or discarded.
° IMPORTANT--Do not attempt to operate the range during
a power failure. If the power fails, always turn off the
range, If the range isnot turned off and the power resumes, the
range will begin to operate again, Food left unattended could
catch fire or spoil.
3
Page 4

iMPORTANT
AFETY IN STRU CTIO N S(continued)
IMPORTANT INSTRUCTIONS FOR USING YOUR
COOKTOP
• Know which knob controls each surface heating unit.
• Use Proper Pan Size--This appliance isequipped with one or
more surface units of different sizes. Select utensils having flat
bottoms large enough to cover the surface unit heating element,
The useof undersized utensilswill expose aportion ofthe heating
element to direct contact and may result in ignition of clothing.
Proper relationship of utensil to element will also improve
efficiency.
• Utensil Handles Should Be Turned Inward and Not Extend
Over Adjacent Surface Elements--To reduce the riskof
burns, ignition of flammable materials, and spillage due to
unintentional contact with the utensil, the handle of the utensil
should be positioned so that it is turned inward, and does not
extend over adjacent surface elements.
Never Leave Surface Elements Unattended at High
Settings--Boilovers cause smoking and greasy spillovers that
may ignite, or a pan that has boiled dry may melt.
. Protective Liners--Do not use aluminum foil to line oven
bottom or any other part of the range. Only use aluminum foil
as recommended in the Cooking Guide. Any other use of
protective liners or aluminum foil may result in a risk of electric
shock or fire.
- Glazed Cooking Utensils--Only certain types of glass,
glass/ceramic, ceramic, earthenware, or other glazed utensilsare
suitable for rangetop service without breaking due to the
sudden change in temperature. Check the manufacturer's
recommendations for rangetop use.
FOR GLASS COOKTOPS ONLY
o Do Not Cook on Broken Cooktop--tf cooktop should break,
cleaning solutions and spillovers may penetrate the broken
cooktop and create a risk of electric shock. Contact aqualified
technician immediately.
• Clean cooktop with Caution--If awet sponge orcloth isused
to wipe spills on a hot cooking area, be careful to avoid a steam
burn. Some cleanerscan produce harmful fumes if applied to a
hot surface.
IMPORTANT INSTRUCTIONS FOR USING YOUR
OVEN
• Use Care When Opening Door--Stand to the side of the
range when opening the door of a hot oven, Let hot air or
steam escape before you remove or replace food in the oven.
• Keep Oven Vent Ducts Unobstructed. The oven is vented
between the cooktop and the backguard. Touching the surfaces
in this area when the oven isoperating may cause severe burns.
Also, do not place plastic or heat-sensitive items on or near the
oven vent. These items could melt or ignite.
o Placement of Oven Racks. Always place oven racks in desired
location while oven iscool. If rack must be moved while oven is
hot, use extreme caution. Use potholders and grasp the rack
with both hands to reposition, Do not let potholders contact the
hot oven element or interior of the oven, Remove all utensils from
the rack before removing rack,
, Do not use the broiler pan without its insert. The broiler pan
and grid allow dripping fat to drain and be kept away from the
high heat of the broiler.
• Do not cover the broiler grid with aluminum foil. Exposed
fat and grease could ignite.
o Do not touch a hot light bulb (some models) with a damp
cloth. Doing so could cause the bulb to break. Disconnect the
range or turn off the power to the range before removing and
replacinglight bulb.
IMPORTANT INSTRUCTIONS FOR CLEANING
YOUR RANGE
• Clean the range regularly to keep all parts free of grease
that could catch fire. Exhaust fan ventilation hoods
and grease filters should be kept clean. Do not allow grease to
accumulate. Greasy deposits in the fan could catch fire. Refer to
the hood manufacturer's instructionsfor cleaning.
SELF-CLEANING OVENS:
• Clean in the self-cleaning cycle only the parts of the oven
listed in this owner's guide. Before self-cleaning the oven,
remove the broiler pan and any utensils stored in the oven.
, Do not clean the oven door gasket, The door gasket is essential
for a good seal.Care should be taken not to rub, damage or move
the gasket.
• Do not use oven cleaners, No oven cleaner or oven liner
protective coating of any kind should be used in or around
any part of the oven.
SAVE T
ESEU
STRUCTiONS
4
Page 5

Setting the Clock and
Minute Timer (somemodels)
Figure 1
12
Stop Start
Push to sot timer tunctior_
Your model is equipped with the clock shown in the side column. Follow the
instructions below to set the clock and minute timer on your range.
To Set the Clock (Figure 1)
1. Pushin and turn control knob Ato set the time of day, The minute timer hand
will turn asthe clock is set.
2. After the clock is set, releasethe control knob and return the minute timer hand
to OFF.
To Set the Minute Timer (Figure 1)
The minute timer does not start or stop cooking. It simply servesasa handy kitchen
timer that buzzes when the set time has run out.
1. Turn control knob A to set the desired number of minutes. For best accuracy,
turn the minute timer hand beyond the setting, then back to it. DO NOT push
in on the control knob when setting the minute timer. Doing so will change
the clock.
2. When the set time has passed,the buzzer will sound. Turn the control knob to
OFF.
Surface Cooking
Ceramic-Glass Cooktop
The ceramic-glass cooktop has electric heating coils located below the surface of
the glass.The design of the glasscooktop outlines the area of the element below.
Most importantly, make sure the diameter of the pan matches the diameter of the
element. Heat istransferred up through the surface of the cooktop to the cooking
utensil. Onlyfiat-bottomed pansshould be used. Thetype and sizeof the cookware,
number of elements in use and the settings of the elements are factors that will
affect the amount of heat that will spread to areas surrounding the elements. The
areas surrounding the elements may become hot enough to cause burns.
The cooktop should not be used asa cutting board or work surface in the kitchen.
Dropping heavy or hard objects on the cooktop may crack it. Pans with rough
bottoms may scratch the cooktop surface. Placing foods directly onthe smoothtop
surface (without cooking utensils) is not recommended as uneven cooking and
more difficult cleaning will result.
Radiant Elements
The radiant element is a group of heating coils enclosed in a ceramic fixture below
the glass cooktop. The element temperature rises gradually and evenly. As the
temperature rises,the element wilt glow red. To maintain the selected setting, the
element wi!f cycle on and off. The heating element retains enough heat to provide
a uniform and consistent heat during the off cylce. The ceramic fixture thermally
insulatesthe heating element, concentrating heat in the heating zone. Forefficient
cooking, turn off the element several minutes before cooking iscomplete. Thiswill
allow residual heat to complete the cooking,The amount of residual heat depends
on the type and quality of cooking utensil, the quantity of food being cooked and
the selected heat setting. SeeSelecting Surface Cooking Utensils and Specialty
Pans and Trivets in your Cooking Guide.
Undicator Light(s)
There are two different surface control lights that will glow on your range_a
surface signal light and a hot surface signal light.
The surface signal light, located on the Control panel, glows when any surface
element isturned on. A quick glance at the light after cooking is an easy check to
be sure all surface controls are turned off.
Thehot surface signal light, located under the glasscooktop, will come on asthe
surface cooking area heats up and will continue to glow until the glasscooktop has
cooled down to a moderate level.
Page 6
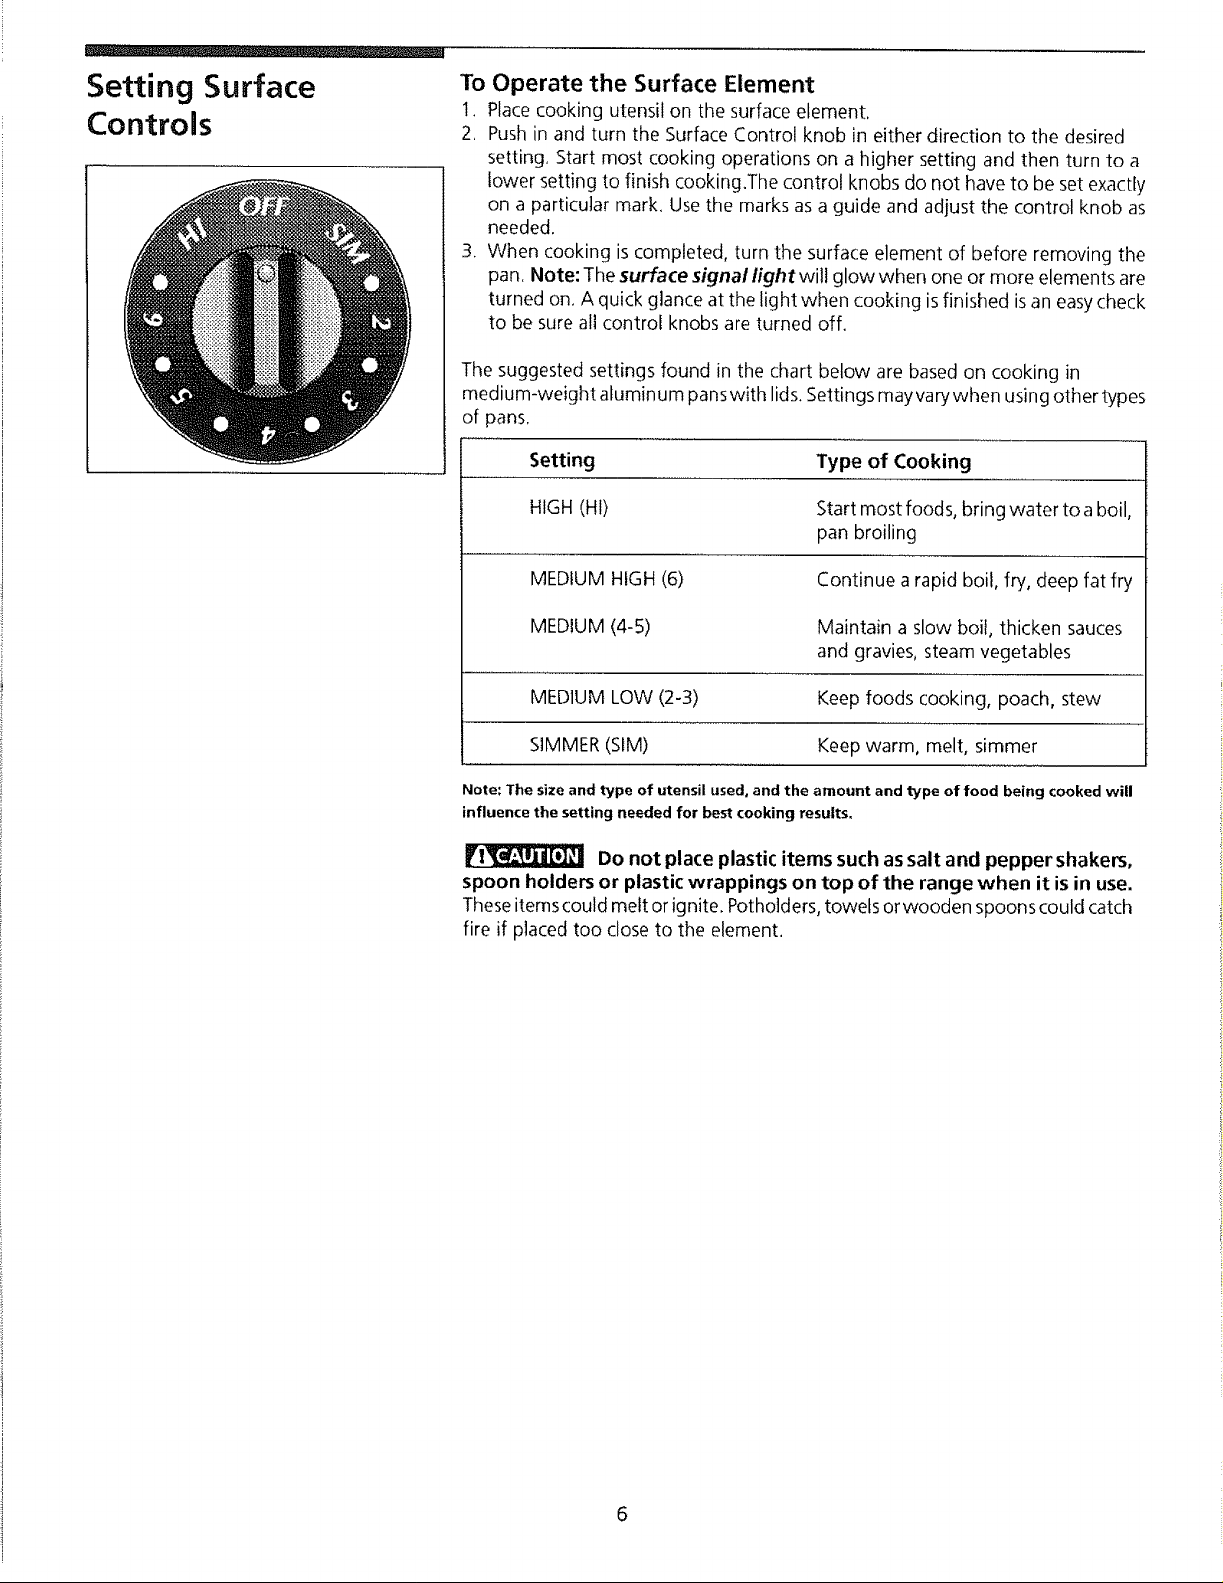
Setting Surface
Controls
To Operate the Surface Element
1. Place cooking utensil on the surface element.
2, Push in and turn the Surface Control knob in either direction to the desired
setting. Start most cooking operations on a higher setting and then turn to a
lower setting to finish cooking.The control knobs do not have to be set exactly
on a particular mark. Use the marks as a guide and adjust the control knob as
needed.
3. When cooking is completed, turn the surface element of before removing the
pan. Note: The surface signal lightwitt glow when one or more elements are
turned on. A quick glance at the light when cooking isfinished is an easycheck
to be sure all control knobs are turned off.
The suggested settings found in the chart below are based on cooking in
medium-weight atuminum panswith lids.Settings mayvary when using other types
of pans,
Setting Type of Cooking
HIGH (HI) Start most foods, bring water to aboil,
pan broiling
MEDIUM HIGH (6) Continue arapid boil, fry, deep fat fry
MEDIUM (4-5)
MEDIUM LOW (2-3) Keep foods cooking, poach, stew
SIMMER (StM) Keep warm, melt, simmer
Note: The size and type of utensil used, and the amount and type of food being cooked will
influence the setting needed for best cooking results.
Do not place plastic items such assalt and pepper shakers,
spoon holders or plastic wrappings on top of the range when it is in use.
Theseitems could melt or ignite. Potholders, towels or wooden spoonscould catch
fire if placed too close to the element.
Maintain aslow boil, thicken sauces
and gravies, steam vegetables
6
Page 7
Before Setting Oven
Controls
Oven Vent Location
The oven is vented between the cooktop and the backguard. When the oven
ison, warm air isreleasedthrough the vents. This venting isnecessary for proper
air circulation inthe oven and good baking results.
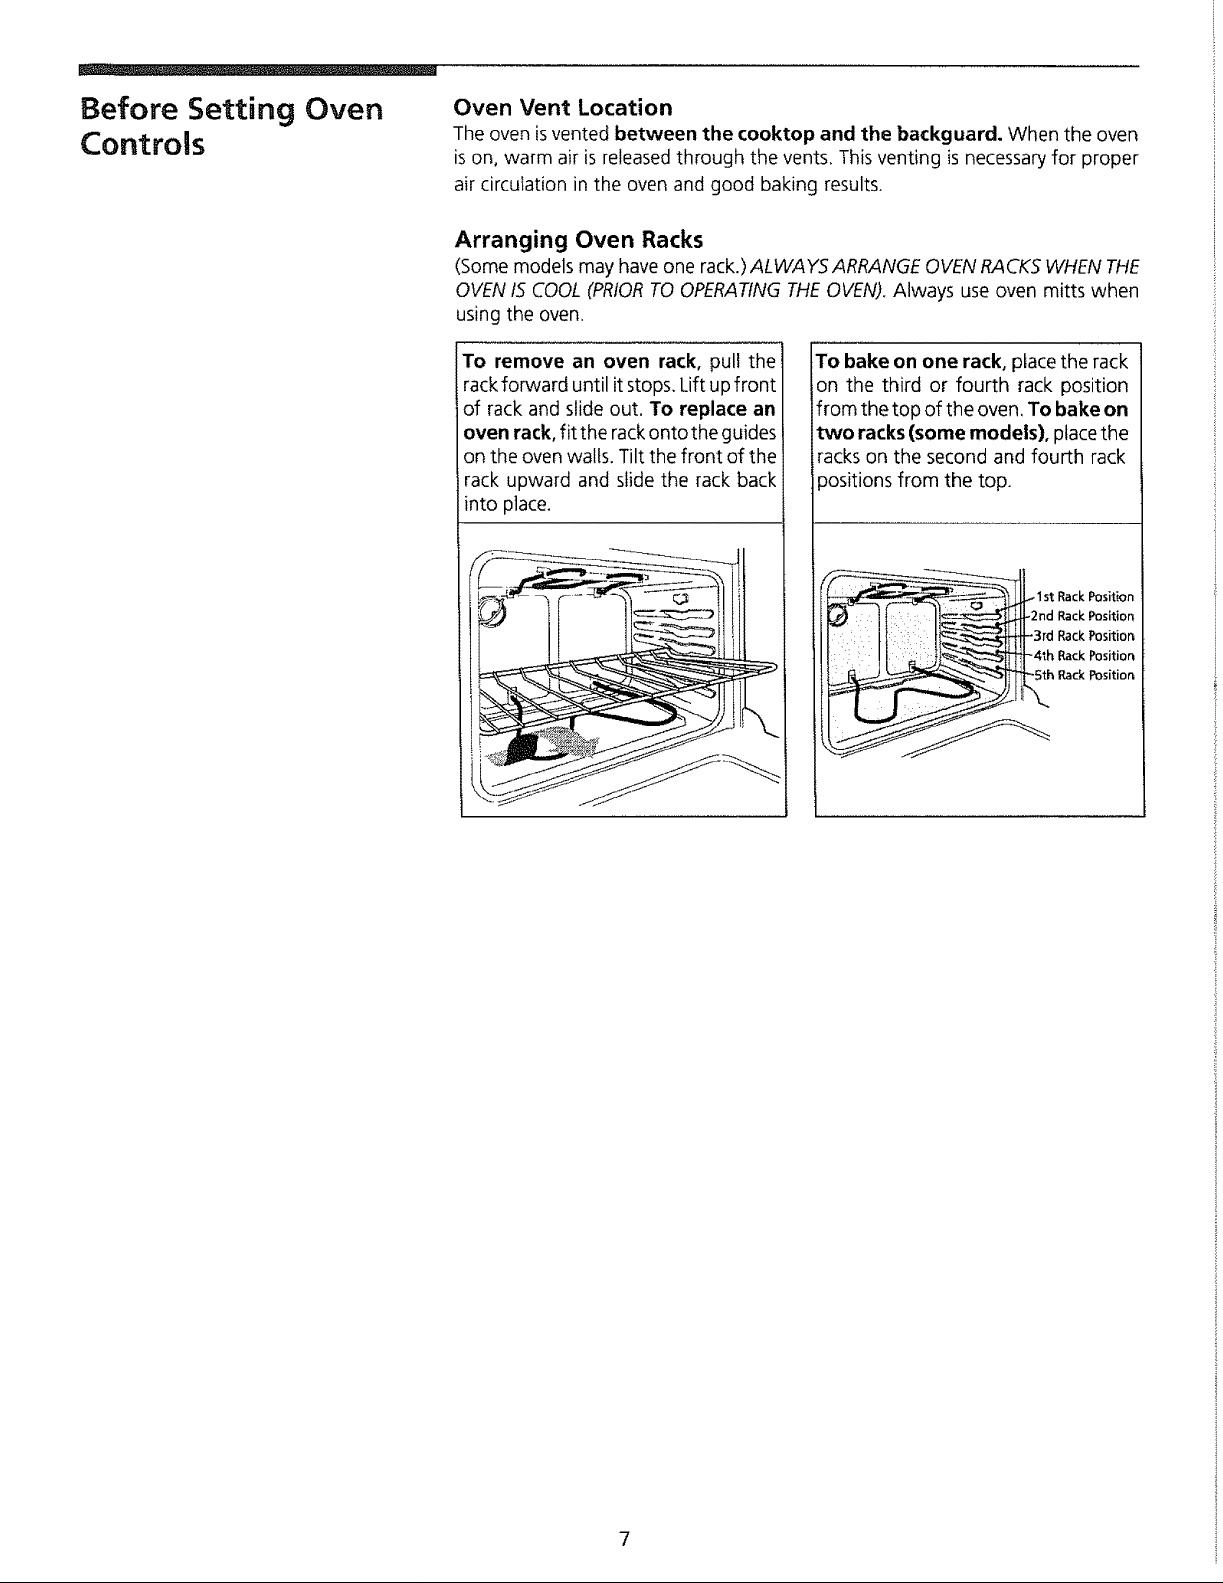
Arranging Oven Racks
(Some models may have one rack.)ALWAYS ARRANGE OVEN RACKS WHEN THE
OVENIS COOL (PRIORTO OPERATINGTHEOVEN). Always use oven mitts when
using the oven.
To remove an oven rack, pull the
rackforward until it stops. Lift up front
of rack and slide out. To replace an
oven rack, fit the rackonto the guides
on the oven walls. Tilt the front of the
rack upward and slidethe rack back
into place.
To bake on one rack, place the rack
on the third or fourth rack position
from the top of the oven.To bake on
two racks (some models), placethe
rackson the second and fourth rack
3ositions from the top.
nd RackPosition
rd RackPosition
th i1_:: P°pt:_o:iittii;:
1st Rack Position
Page 8
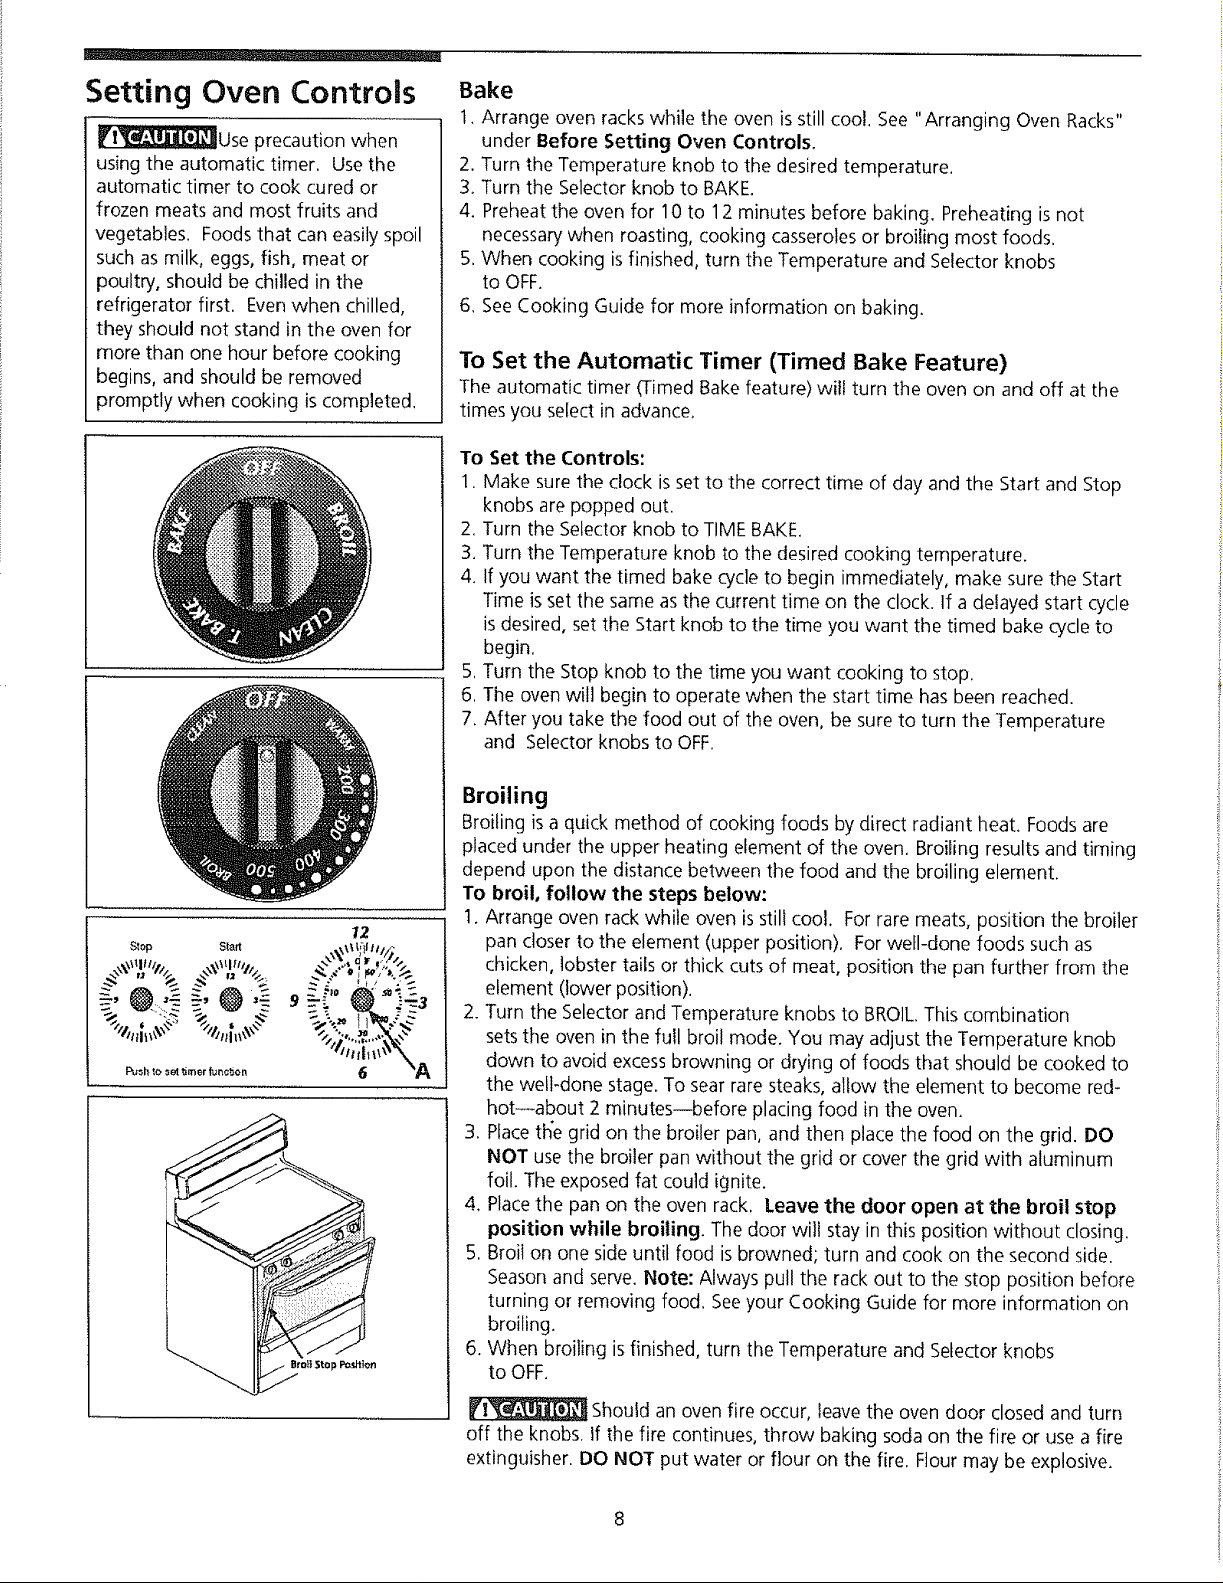
Setting Oven Controls
_Use precaution when
using the automatic timer. Use the
automatic timer to cook cured or
frozen meats and most fruits and
vegetables. Foods that can easily spoil
such as milk, eggs, fish, meat or
poultry, should be chilled in the
refrigerator first. Evenwhen chilled,
they should not stand in the oven for
more than one hour before cooking
begins, and should be removed
promptly when cooking is completed.
Bake
t. Arrange oven racks while the oven is still cool. See "Arranging Oven Racks"
under Before Setting Oven Controls,
2. Turn the Temperature knob to the desired temperature.
3. Turn the Selector knob to BAKE.
4. Preheat the oven for 10 to 12 minutes before baking. Preheating is not
necessarywhen roasting, cooking casserolesor broiling most foods.
5. When cooking is finished, turn the Temperature and Selector knobs
to OFF.
6, See Cooking Guide for more information on baking.
To Set the Automatic Timer (Timed Bake Feature)
The automatic timer (Timed Bakefeature) will turn the oven on and off at the
times you select in advance.
To Set the Controls:
1. Make sure the clock is set to the correct time of day and the Start and Stop
knobs are popped out.
2. Turn the Selector knob to TIME BAKE.
3. Turn the Temperature knob to the desired cooking temperature.
4. If you want the timed bake cycle to begin immediately, make sure the Start
Time isset the same as the current time on the clock. If a delayed start cycle
isdesired, set the Start knob to the time you want the timed bake cycle to
begin.
5. Turn the Stop knob to the time you want cooking to stop.
6. The oven will begin to operate when the start time has been reached.
7. After you take the food out of the oven, be sure to turn the Temperature
and Selector knobs to OFF.
12
--L _--3
/,_1;1__ /I//jl_l__ "/ "., _ • " _x
l_sh tO set _rner lul_c_on _ "_A
Broiling
Broiling is a quick method of cooking foods by direct radiant heat. Foods are
placed under the upper heating element of the oven. Broiling resultsand timing
depend upon the distance between the food and the broiling element.
To broil, follow the steps below:
t. Arrange oven rack while oven is still cool. For rare meats, position the broiler
pan closer to the element (upper position). For well-done foods such as
chicken, lobstertails or thick cuts of meat, position the pan further from the
element (lower position).
2. Turn the Selector and Temperature knobs to BROIL.This combination
setsthe oven in the full broil mode. You may adjust the Temperature knob
down to avoid excess browning or drying of foods that should be cooked to
the well-done stage. To sear rare steaks, allow the element to become red-
hot--about 2 minutes--before placing food in the oven.
3. Placethe grid on the broiler pan, and then place the food on the grid. DO
NOT usethe broiler pan without the grid or cover the grid with aluminum
foil. The exposed fat could ignite.
4, Placethe pan on the oven rack, Leave the door open at the broil stop
position while broiling. The door wilt stay in this position without closing.
5. Broil on one side until food is browned; turn and cook on the second side.
Seasonand serve. Note: Always pull the rack out to the stop position before
turning or removing food. Seeyour Cooking Guide for more information on
broiling.
6. When broiling is finished, turn the Temperature and Selector knobs
to OFF.
Should an oven fire occur, leave the oven door closed and turn
off the knobs. If the fire continues, throw baking soda on the fire or use a fire
extinguisher. DO NOT put water or flour on the fire. Flour may be explosive.
Page 9

Oven Cleaning
(seif-deaning instructions)
r!i_During the self-cleaning
cycle, the outside of the range can
become very hot to the touch. DO NOT
leavesmall children unattended near the
appliance.
DO NOT line the oven
walls, racks, bottom or any other part of
the range with aluminum foil. Doing so
will destroy heat distribution, produce
poor baking results and cause
permanent damage to the oven interior
(aluminum foil will melt to the interior
surface of the oven).
_ ......
1 !!_ "'-. I_ --DOHAND
Self-Cleaning OvensiA General Description
A self-cleaning oven cleansitself with high temperatures (well above cooking
temperatures) which eliminate soil completely or reduce it to a fine powdered ash
you can whisk away with a damp cloth.
Preparing the Oven for Self-Cleaning
1. Adhere to the following cleaning precautions:
°Allow the oven to cooi before precleaning.
°Wear rubber gloves when predeaning and while wiping up the residue after
the self-dean cycle.
=DO NOT useoven cleaners or oven protective coatings in or around any part
of the self<leaning oven.
,,DO NOT clean the oven door gasket. The woven material of the oven door
gasket is essential for a good seal. Care should be taken not to rub, damage
or remove the gasket.
°DO NOT useany cleaning materials on the oven door gasket. Doing socould
damage it.
2. Removethe broiler pan and insert, all utensils and any aluminum foil. These
items cannot withstand high cleaning temperature.
3. Oven racks may be left in the oven or may be removed. If they go through the
cleancycle their color will turn slightly blue and the finish will be dull. After the
cycleis completed andthe oven has cooled, rub the sidesof the rackswith wax
paper or acloth containing a small amount of babyoil or saladoil. Thiswill make
the racks glide easier onto the rack supports.
4. Removeany excessspillovers in the oven cavity before starting the self-cleaning
cycle.Toclean, use hot soapywater and acloth. Large spillovers cancause heavy
smoke or fire when subjected to high temperatures. DO NOT allow food spills
with a high sugar or acidcontent (suchasmilk, tomatoes, sauerkraut, fruit juices
or pie filling) to remain on the surface asthey may cause adulf spot even after
cleaning.
5. Clean anysoilfrom the oven frame, the door liner outside the oven seal strip and
the small area at the front center of the oven bottom. These areas heat
sufficiently to burn soil on. Clean with soap and water.
51_p Stab
@
%,,I,,,,,
Pt_h Io _ I[_er f_nellon
Stopping or Interrupting a Self-Cleaning Cycle
If it becomes necessary to stop or interrupt a self-cleaning cycle due to excessive
smoke or fire:
1. Turn the Temperature and Selector knobs to OFF.
2. Pushin and turn the Stop Time knob to the time of day set on the clock, The
knob wilt then pop out.
3. Once the oven has cooled below 550°F and the "Lock" light has gone out, the
oven door can now be opened.
DO NOT force the oven door open. This can damage the automatic
door locking system. Use caution when opening the door after the self-cleaning
cycle iscompleted. The oven may still be VERYHOT.
4. Correct the condition which caused the smoking.
5. Restart the self<Iean cycle once all conditions have been corrected.
12.
,-%."°:t_.'X_
6 "A
9
Page 10

Oven Cleaning
(self-cleaning instructions,
continued)
To Start the Self-Clean Cycle
*We recommend a2hour self<lean cyclefor light soils, a3 hour cyclefor average
soils, and a 4 hour cycle for heavy soils (to assure satisfactory results).
To Set the Controls:
1. Make surethe clock isset to the correct time of day and the Start and Stop knobs
are popped out.
2. Turn the Temperature and Selector knobs to CLEAN.
3, The motor driven lock will begin to closeautomatically and the "Lock" light will
come on assoon asthe asthe door locks, (Ittakes about 15 seconds for the lock
to close.)
4. If you want the clean cycle to begin immediately, make sure the Start Time is
set the same asthe current time on the clock, Ifa delayed start cycle isdesired,
push in and turn the Start Time knob to the time you want the clean cycleto
begin.
5. Pushin and turn the Stop Time knob at least 2 hours beyond the time shown
on the Start Time knob. Set the cleaning time based on the amount of soil you
have--light, medium or heavy. *See above.
6. The "Oven" light will come on and cycle with the oven elements.
7. After the desired cleaning time has elapsed, the Stop Time knob wilt pop out.
8. Turn the Temperature and Selector knobs to OFF.
9. Once the oven hascooled below 550°F and the "Lock" light hasgone out, the
oven door can now be opened.
!__ DO NOT force the oven door open. This can damage the automatic
door locking system. Use caution when opening the door after the self-cleaning
cycle iscompleted. The oven may still be VERYHOT.
s_p st_t 3_\_ _[IJtlt/_
12
,<,,.
_Use care when opening
the door after the self<leaning cycle.
Stand to the side of the oven to allow
hot air or steam to escape.
Note: Be sure to turn the Temperature
and Selector knobs to OFFwhen the
self-cleaning cycle is completed.
10
Page 11

Ceramic-Glass Cooktop
Cleaning
Correct and consistent cleaning are essential to maintaining your ceramic_glass
cooktop. Iffood spills, greasespatters and metal rug-off from aluminum cookware
are not removed, they will be burned onto the surface of the cooktop and cause
permanent discoloration.
DO NOT use a cooktop
cleaner on a hot cooktop. Thefumes can
be hazardous to your health, and can
chemically damage the ceramic-glass
surface.
Daily Cleaning:
For normal soil:
t. Allow cooktop surface to cool.
2, Wipe up spills and spatters using a clean paper towel. Always use a new, clean
paper towet when cleaning the ceramic-glass cooktop.
3. Rub a few drops of a recommended ceramic-glass cooktop cleaning cream
onto soiled area using a clean, damp paper towel. Buff with adry paper towel
until all soil and cream are removed, Frequent cleaning leaves a protective
coating of silicone which helps in preventing scratches and abrasions. Clean
sudace with the cooktop cleaning cream after each use.
4. Rinsewith another clean damp, paper towel. Buff dry with a dry paper towel.
For heavy, burned-on soil."
1. Allow cooktop surface to cool.
2. Carefully scrape soil with a metal razor blade scraper. Hold razor blade scraper
at a 30° angle to the cooktop.
3. Remove loosened soil with a clean paper towel.
4. Apply cooktop cleaning cream as described for normal soil.
5. If any soil remains, repeat the steps listed above. After all soil has been
removed, polish the entire surface with the cooktop cleaning cream.
For sugary spiilovers:
Sugary spillscan cause pitting of your cooktop surface. Therefore, you must begin
cleaning the spillswhile the cooktop isstill hot. Usecaution when following the steps
below.
1. Turn off all surface units and remove all pans immediately.
2. Wearing an oven mitt, use a razor blade scraper to scrape the hot spill out of
the cooking zone to a cooler area on the cooktop.
3. Allow the cooktop to cool.
4. Follow the instructions above for heavy, burned-on soil.
DO NOT use the following on the ceramic-glass cooktop:
o Abrasive plastic, nylon, metal scouring or cloth pads. They may scratch the
cooktop and make it more difficult to clean later.
• Sponges, cloths or dish towels. Lint or soil remaining on the cooktop from a
clothor sponge can burn and cause discoloration.
• Anything that may melt (plastics, aluminum foil).
o Cleansersother than a recommended ceramic-glass cooktop cleaning cream.
o Chlorine bleach, ammonia, hydrofluoric acid, chemical oven cleaners or any
other kind of chemical cleaner. They may etch or discolor the cooktop.
tl
Page 12

General Cleaning
Surfaces
Aluminum (Trim Pieces)&
Vinyl
Cleaning Various Parts of Your Range
Before cleaning any part of the range, be sure all controls are turned OFFand
the range is COOL. Remove spillovers and stains as soon as they occur. REMOVE
SPILLOVERSAND HEAVY SOILINGAS SOONAS POSSIBLE.REGULAR
CLEANINGSWILL REDUCETHE NUMBER OF MAJOR CLEANINGS LATER.
HOW to Clean
Use hot, soapy water and a cloth. Dry with a clean cloth.
Glass, Painted and Plastic
Control Knobs, Body Pieces,
and Decorative Trim
v..
Panel_
Control
Porcelain Enamel
Cooktop, Under Cooktop,
Broiler Panand Insert, Door
Liner, Body Pieces
Stainless Steel, Chrome
Decorative Trim
Oven Racks
For general cleaning, usehot soapy water and a cloth. For more difficult soils and
built-up grease, apply a liquid detergent directly onto the soil. Leave on soil for 30 to 60
minutes. Rinsewith adamp cloth and dry. DO NOT use abrasive cleaners on any of these
materials; they can scratch.
Before cleaning the controlpanel, turn alt controls to OFFand remove the control knobs.
To remove, pull eachknob straight off the shaft. Clean using hot, soapy water and a cloth.
Be sure to squeeze excesswater from the cloth before wiping the panel; especially when
wiping around the controls. Excesswater in or around the controls may cause damage to
the appliance_ To replace knobs after cleaning, line up the flat sides of both the knob and
the shaft; then push the knob into place,
Gentle scouring with a soapy scouring pad will remove most spots. Rinsewith a solution
made of equal parts ammonia and water. If necessary, cover difficult spots with an
ammonia-soaked paper towel for 30 to 40 minutes. Rinsewith clean water and a damp
cloth, and then scrubwith asoap-filled scouring pad. Rinseandwipe drywith a clean cloth.
Removeall cleanersor the porcelain may become damaged during future heating. DO NOT
use spray oven cleaners on the rangetop.
Cover stubborn spots with an ammonia-soaked paper towel for 30 to 40 minutes. Rinse
with cleanwater and a cloth. Cleaners made especiallyfor stainless steel, chrome or copper
are also recommended. Rinseall cleaners before operating range. Bluish stains may result
due to heat combining with the cleaning material and they cannot be removed.
Oven racksmay be removed or left in the oven during the self-clean cycle for cleaning. If
removed, clean by using a mild, abrasive cleaner following manufacturer's instructions.
Oven Door
If the racks are cleanedin the self-clean cycle,their color will turn slightly blue and the finish
will be dull. After the self-clean cycle iscompleted and the oven hascooled, rub the sides
of the rackswith wax paper or a cloth containing a small amount of baby oil or saladoil.
This will make the racks glide easier into the rack positions.
Remove oven door. Follow the instructions provided in the General Cleaning section in
this Owner's Guide. See "To Remove and ReplaceOven Door." To clean oven door, wash
with hot, soapywater and a clean cloth, DO NOT immerse the door in water.
t2
Page 13

.- "'" _ .
General Cleaning
(Continued)
_J__ Thedoor isheavy. Forsafe,
temporary storage, lay the door flat.
To Remove and Replace Oven Door
To Remove Oven Door
1, Open the door to the fully opened position.
2. Remove the screws (A) on each side of the oven door.
3. Close the door about three-fourths of the way to the quarter-open position.
Grasp the door firmly on both sidesand lift up and off the hinges.
4. To clean oven door, follow the instructions provided in the cleaning chart
under General Cleaning.
To Replace Oven Door
1. Besurethe hinge armsare in the quarter-open position. Becareful if pulling the
hinges open by hand, The hinges may snap back against the oven frame and
could pinch fingers.
2. Hold the door at the sidesnear the top, Insert the hinge arms into slots at the
bottom of the door.
3. Hinge arms must go into the range slots evenly, The hinge arms should be
inserted into the bottom corners of the door as far as they can go.
4. If the door is not in line with the oven frame, remove it and repeat the above
steps.
5. Be sure to replace the screws on the oven door,
13
Page 14

Surface and Oven
Lights (some models)
_Be sure the range is
unplugged and all parts are COOL
before replacing the fluorescent or
oven lights.
Changing the Fluorescent Light (some models)
A switch on the control panel turns the cooktop light on and off. To replace,
follow these instructions:
1,Turn power off at the main source or unplug the range.
2. Grasp the front edge of the canopy cover as illustrated in the side column.
Pull forward and lift the cover up and off toward rear of range,
3. Remove bulb by rolling up and out. Install the new bulb by sliding down
into place and rolling toward front of range.
4, Align front edge of light cover with inside lip of end cap. Lower rear of
cover into place and snap down,
5.Turn power back on at the main source (or plug range back in),
Oven Light (some models)
The oven light automatically turns on when the door is opened and
automatically turns off when the door isclosed (some models), Use the switch
(some models) located on the control panel to turn the light on when the door is
closed.
Changing the Oven Light
The oven Iight is located at the rear of the oven. To replace, follow these
instructions:
t, Turn electrical power off at the main source or unplug the range. BESURE
ALL OVEN PARTSARECOOL BEFOREREMOVING BULB,
2.Wear a leather-faced glove for protection against possible broken glass,
3. Presswire holder to one side to release the glass shield.
4. Replacebulb with a new 40 watt appliance bulb.
5. Replaceglass shield in socket and snap wire holder into place,
6.Turn power back on again at the main source (or plug the range back in),
7.The clock (if equipped) will then need to be reset, Follow instructions under
Setting the Clock and Minute Timer.
Adjusting Oven
Temperature
Figure 1: Back of Control Knob
Note position of pointer
to marks before adjustment
The temperature in the oven has been set at the factory, When first using the
oven, be sure to follow recipe times and temperatures, Ifyou think the oven is
too hot or too cool, the thermostat can be adjusted. Before adjusting the knob,
test a recipe by using a temperature setting higher or lower than the
recommended temperature, The baking results should help you to decide how
much of an adjustment is needed, The knob can be adjusted in increments as
indicated on the back of the knob.
To Adjust the Oven Temperature:
1. Check to be sure the Temperature knob isin the OFFposition,
2. Pull the knob straight off the shaft,
3. Loosen the two screws at the back of the knob (Figure 1),There isa series
of small indicator lines directly opposite the OFFposition, One of these
indicator linesis positioned next to a tiny pointer, Note the position of the
pointer, Note: If knob does not have 2 screws, it is not adjustable.
4. Adjust the temperature accordingly. To increase or decrease the
temperature, move the pointer in the direction of "H" to raise or "L" to
lower the temperature.
5. When the desired adjustment isreached, tighten both screws,
6. To replace the knob, line up the flat sidesof both the knob and the shaft.
Pushthe knob into place. DO NOT force the Temperature knob onto the
shaft or you may damage the back of the knob.
Note: Once an adjustment is made, the OFFposition will vary from the
reference mark on the backguard depending on the amount of adjustment,
14
Page 15

Anti-Tip Bracket(s)
mnstallation instructions
Important Safety Warning
To reduce the risk of tipping of the range, the range must be secured to the floor
by properly installed anti-tip bracket(s) and screws packed with the range. Failure
to install the anti-tip bracket(s) could allow the range to accidentally tip over if
excessiveweight is placed on an open door or if a child climbs upon it. Serious injury
might resultfromspilled hot liquids or from the range itself. Referto the instructions
below for proper installation.
Your range will be equipped with either one or two anti-tip bracket pieces as
pictured below. Follow the instructions below to install either type.
One Piece Bracket (some models)
; ANTi-TIP
BRACKET
.....
i i_ / s° ¢"
i ..._//" PANEL
....
IF THE RANGE IS EVER MOVED TO A
DIFFERENT LOCATION, the anti-tip
bracket(s) must also be moved and
installedwith the range.
Tools Required:
5/16" Nutdriver or Flat Head Screwdriver
Adjustable Wrench
Electric Drill & 3/16" Diameter Drill Bit
3/16" Diameter Masonry Drill Bit
(if installing in concrete)
Figure 1: Leveling Leg Instructions
SUDE
BACK
Two Piece Bracket (some models)
.......'_ 2_ LOCATION
; ANTI-TIP
Op _ BeACKET
• %A_ ° / .... _<zr_./,'--.,*....
i
i f'\..,-7" ,"
i',_ ....... / RANGE SIDE
i ..-'_..._./_-._ PANEL
"_..._ LOCATION
........-..C:F
Anti-Tip Bracket(s) Installation Instructions
The bracket(s) attach to the floor at the back of the range to hold both rear leg
levelers. When fastening to the floor, be sure that the screws do not penetrate
electrical wiring or plumbing. The screws provided will work in either wood or
concrete.
1. Unfold the paper template and place it flat on the floor with the back and side
edgespositioned exactlywhere the back and sidesof rangewill be locatedwhen
installed. Usethe diagram(s) above to locate the bracket(s) if a template is not
available.
2. Mark on the floor the location of the 2 (4) mounting holes shown on the
template. Foreasier installation, 3/16" diameter pilot holes, a 1t2" deep can be
dritled into the floor.
3. Removethe template and place the bracket(s)on the floor with the turned-up
flange to the side. Line up the holes in the bracket(s) with the marks on the floor
and attach with the screws provided. The bracket(s) must be secured to a solid
floor. If attaching to a concrete floor, first drill 3/16" diameter pilot holes using
a masonry drill bit.
4. Levelthe range if necessary by adjusting the 4 leg levelerswith a wrench. See
Figure t, side box. A minimum clearance of 118" is required between the
bottom of the range and the rear leveling feet,
5. Slide the range into place making sure the rear legs are trapped by the ends of
the bracket(s). Therange mayneed to beshifted slightly to one sideas it isbeing
pushedback to allow the rear legsto align with the bracket(s). Remove the lower
panel or storage drawer to inspect the bracket(s), or grasp the top rear edge of
the range and carefully attempt to tilt it forward to make sure the range is
properly anchored.
15
Page 16

Avoid Service ChecMist Beforeyou call for service, review this list. ft may saveyou time and expense. The
list includes common occurrences that are not the result of defective workmanship
or materials in this appliance.
OCCURRENCE
INSTALLATION
Range is not level.
Cannot move appliance easily.
Appliance must be accessible for
service.
POSSIBLE CAUSE
Poor installation.
Weak, unstable floor.
Kitchen cabinet misalignment may Be sure cabinets are square and have
make range appear to be unlevel, sufficient room for range clearance.
Cabinets not square or are built in too Contact builder or installer to make
tight, appliance accessible.
Carpeting interferes with range.
SOLUTION
Placeoven rack in center of oven. Place
a level on the oven rack. Adjust leveling
legs at baseof range until level indicates
that the rack is level.
When oven is leve!, cooktop may not
appear to be level with countertop.
Be sure floor islevel and can adequately
support range.
Contact acarpenter to correctsagging or
sloping floor.
Contact acabinet maker to correct
problem.
Provide sufficient space so range can be
lifted over carpet.
SURFACE ELEMENTS
Surface element too hot or not hot
enough.
Surface element does not heat.
Incorrect control setting.
Lightweight or warped pans.
No power to appliance.
Adjust control setting. Raise or lower
setting until proper amount of heat is
obtained. Dial markings are an indicator
of "relative" heat settings and will vary
slightly.
Use only flat, evenly balanced, medium
or heavyweight cookware. Flatpans heat
better than warped pans. Cookware
materials and weight of the material
affect heating. Heavy and medium-
weight pans heat evenly.B e c a u s e
lightweight pans heat unevenly, foods
may burn easily.
16
Page 17

OCCURRENCE POSSIBLE CAUSE SOLUTION
SURFACE ELEMENTS (continued)
Surface element does not heat.
No power to appliance. ChecWresetcircuit breaker or replacefuse.
If the problem is a circuit overload, have
this situation corrected by a qualified
technician.
OVEN AND/OR LIGHTS (if equipped)
DOES NOT WORK
Oven light or cooktop light (some
models) does not work.
Entire oven does not operate.
BROILING
Oven smokes
excessively during Control(s) not set properly, Follow instructions under Setting Oven
broiling,
Incorrect control turned on,
Be sure to usethe correct control for the
element to be used.
Burned-out or loose bulb.
See Surface and Oven Light (some
models) in this Owner's Guide to replace
or tighten the bulb.
Cord/Plug not plugged into the
Make sure it isplugged tightly into outlet.
wall/floor receptacle.
Servicewiring not complete. Contact servicer or dealer.
Power outage. Check house lights to be sure. Call your
local electric company for service.
Controls tOset the controls.
Oven door closed. Door should be opened to broil stop
position.
Meat too close to the element. Reposition the rack to provide proper
clearance between the meat and the
element. Preheat broil element for quick
searing operation.
POOR BAKING RESULTS
Meat not properly prepared,
Grid on broiler pan wrong side-up.
Grease does not drain into broiler
pan,
Oven needs to be cleaned. Grease
has built up on oven surfaces.
Many factors affect baking results,
17
Remove excessfat from meat. Slash
remaining fatty edgesto prevent curling,
but do not cut into lean.
Always place the grid on the broiler pan
with the ribs up and the slots down to
allow grease to drip into pan.
Regular cleaning is necessary when
broiling frequently. Old grease or food
spatters cause excessive smoking.
Reviewthe BAKINGsection in the Cooking
Guide for hints, causes and corrections.
Page 18

OCCURRENCE POSSIBLE CAUSE SOLUTION
SELF-CLEANING INSTRUCTIONS
Self<leaning cycle does not work.
Controls not set properly.
Follow instructions under Oven
Cleaning (self-cleaning
instructions).
Soil not completely removed after
self-cleaning cycle.
Flames inside oven or smoking from
vent,
Self-cleaning cycle was interrupted.
Failureto clean bottom, front top of
oven, frame of oven or door area
outside oven seal. These areas are
not in the self-cleaning area, but get
hot enough toburn on residue.Clean
these areasbefore the self-cleaning
cycle is started,
Excessivespillovers in oven.
Excessivespillovers in oven.
Stop time must be set 3 to 4 hours past
the start time.
Follow steps under "Stopping or
Interrupting a Self-Clean Cycle" under
Oven Cleaning (self-cleaning
instructions).
Burned-on residue may be cleaned
with astiff nylon brush and water or a
nylon scrubber. Be careful not to
damage the oven seal.
Setself-clean cyclefor aIongercleaning
time.
This is normal, especially for pie
spilloversor for largeamounts of grease
18
Page 19

OCCURRENCE POSSIBLE CAUSE SOLUTION
SCRATCHED OR DISCOLORED
SURFACE
Scratches or abrasions on
cooktop surface.
Coarse particles(such assalt, sand)are
between cooktop and utensil.
Cleaning materials not recommended SeeCeramic-Glass Cooktop Cleaning
for ceramic-glass cooktop have been section.
used.
Cookware with rough bottom has Useflat, smooth utensils. See"Selecting
been used. Surface Cooking Utensils" in the
Be sure cooktop surface and bottoms of
utensils are clean before usage. Small
scratches do not affect cooking and will
become less visible with time.
Cooking Guide.
Metal marks.
Brown streaks and specks.
Areas of discoloration with
metallic sheen.
Sliding or scraping of metal utensils on
cooktop surface.
Boilovers have cooked onto surface.
Mineral deposits from water and Remove using a ceramic-glass cooktop
food. cleaning creme. Use cookware with
Do not slide metal utensils on cooktop
surface, Use a ceramic-glass cooktop
cleaning creme to remove the marks.
SeeCeramic-Glass Cooktop Cleaning
section.
Use razor blade scraper to remove soil.
See Ceramic-Glass Cooktop Cleaning
section.
clean, dry bottoms.
19
Page 20

No One Knows How
To Service
Our Appliances Better
With regular use and care, your appliance will
arovide a long life of service. However, if you need
help or information, call on the people who made
your appliance.
Avoid Unnecessary Cost
And Inconvenience
Make a few simple checks before calling for
service. Common occurrences and their solutions
can be found in the "Avoid Service Checklist"
included in this owner's guide. All service should
be performed by a qualified servicer to assure safe
and proper operation.
If Service Is Necessary
Before you call, have your model number,
serial number, date of purchase, and a
description of your problem ready. This
information will help us to serve you quickly. For
prompt, professional service:
Than We Do
Rely On Frigidaire Company
Genuine Renewal Parts
To maintain your original appliance warranty,
make sure repairs are completed with only
Genuine Renewal Parts. Only Frigidaire Company
Genuine Renewal Parts are guaranteed for
maximum quality, durability, and performance.
For the location of your nearest genuine parts
source, refer to the Service Center listing included
in this manual, or call 1-800-458-1445 for the
Frigidaire Company Authorized Parts Distributor
nearest you.
[]
Refer to the Service Center listing included in
this manual.
[]
Or, call toll-free 1-800-458-1445 for the
Frigidaire Company Service Center or
authorized servicer nearest you.
mFRIGIDAIRE
WFRtGUDAIRE
_[P'_,_:_I_ W White.Westinghous e GibSOn E_'_,_'v__o_
Extend The Life Of Your Warranty
Purchase our Service Contract while your
warranty is still in effect, and we
will give you a discount on the
extended coverage. Keep
your appliance in good
operating condition and
avoid unexpected repair
bills. Just call toll-free
1-800-858-1445 to initiate
your continued coverage.
COMPANY
2O
Page 21

Service Center Locations
Frigidaire Company maintains a national network
of company-owned Service Centers and authorized
servicers to provide prompt, professional service for
your appliance anywhere you live or move in the
U.S.A. if you reside in one of our Service Center areas
Call Us Toll-Free, 1-800-458-1445
(see directory below), you can contact the Service
Center directly to obtain quick, professional repair of
your product. If a Service Center is not located in your
area, call the toll-free number below for the authorized
independent servicer nearest you.
@
® •
®
Atlanta area Columbus area Houston area Newark area San Diego area
4795 Fulton Industrial Blvd. 2541 Weslbelt Drive 9151 WalfJsville Road 100 Naylon Avenue 4685 Cardin Street
P.O. Box 43807 (zip 30378-6201) Columbus, OH 43228 Houston, TX 77029 Livingston, N_07039 San Diego, CA 92111
Atlanta, GA 30336 (614) 876-4644 (7t3) 674-1444 (201) 994-7222 (518) 571o1081
(404) 69 !- 1334
8altimoreP, Nashington area (2 t6) 663-8182 9101 Cody 5600 Jansen Street
8332 Bristol Court 1.800-678.6644 Overland Park, KS 66214 Harahan, LA 70123
Jessup, MD 20794 (913) 894-6100 (504) 733-7900
(410) 792-4400 DaltastFt. Worth area
Boston area Grand Prairie. _X 75050 Airport Trade Center, Suite C 603 Cantiague Rock Road
34 SL Martin Drive. (2t 4} 988-037 t 4750 Criltendon Drive Westbury, NY ! 1590
Marlborough, MA 01752 Louisville, KY 40209 {516} 997-9560
(508) 485-0833 Detroit area (502) 361-5282
Chattanooga area Oak Park, M_ 48237 LOSAngeles area 1610 Republic Road
(615) 622-1023 (3t3) 542-5780 1671 South Champagne P.O. Box 223
1-800-944-4086 Ontario, CA 91761 Huntingdon Va_tey, PA
Chicago area
899 Carol Court
Carol Stream, IL 60188
{708) 752-9000
CincinnatilDayton area
11325 Reed Hartman H_y.
Suile 130
Cincinnati, OH 45241
(513) 489-92 l 0
Cleveland area Kansas City area New Orleans area
901 W North Carrier Pkwy. Louisville area New York City area
!32t I Nor_hend Philadelphia area
Ft, LauderdalefMiami area
1203 N.W, 651h Race
Ft, lauderda_e, PL33309-2144
(305) 972-2741
Hartford area
t00 Producbon Cou_t
New Britain, CT 06051
{203) 225-081 I
(909) 986-8991 19006
Minneapolis area
9160 Zachary Lane North Phoenix area
Maple Grove, MN 55369 3602 W. Thomas Road #15
{612) 493-2537 Phoenix, AZ 85019
Nashville area
1t20 Elm Hilt Pike, SuRe 165
Nashville, TN 37210
(615) 742-1163
(215) 322-8210
(502) 269-6235
MFRIGIDAIRE
COMPANY
mFRIGIDAIRE
_rYj_P_[_'N W White-Westinghouse
Gibson
San Francisco area
20969 Cabot Bird
Hayward, CA 94545
(510} 887-1790
Seattle area
6805 South 220th Street
Kent, WA 98032
1206) 872-2170 (Alaska alsc
St, Louis area
4685 World Parkway Circle
Berkeley, MO 63134
(314) 429-8600
Tampa Bay area
5060 Great Oak Drive
Lakeland, FL 33801
(813) 879-4881
21
Page 22

GIBSON SMOOTHTOP RANGE WARRANTY
Your Gibson product is protected by this warranty
WARRANTY GIBSON, THROUGH I'r'5"AUTHORIT-I:D THECONSUMER WILL BE
, ,, 0...........
FULL ONE-YEAR One year from original Pay all costs for repairing or replacing any parts of this Costs ofservicecallsthatarelisted under NORMAL
WARRANTY purchase date. appliance which prove to be defective in materials or RESPONSIBILITIES OF THE CONSUMER.*
LIMITED 2ND - 5TH Second through fifth Provide a replacement for any defective surface and oven Diagnostic costs and any transportation and labor
YEAR WARRANTY years from original heating element, surface and oven element switch, oven costs which are required because of service.
(Glass Smoothtop) purchase date. thermostat, or glass smoothtop that cracks due to thermal
LIM1TEDWARRANTY" Timeperiodslistedabove. Alloftheprovisionsofthefultandlimitedwarrantiesabove Costsofthetechnician'straveltothehomeandany
(Applicable to the and the exclusions listed below apply, costs for pick up and delivery of the appliance
State of Alaska) required because of service.
Your appliance is warranted by Frigidaire Company, a division of White Consolidated Industries, Inc. We authorize no person to change or add to any
of our obligations under this warranty. Our obligations for service and parts under this warranty must be performed by Frig idai re Company Consumer
Services or an authorized Gibson servicer.
*NORMAL
RESPONSIBILITIES
OF THE CONSUMER
EXCLUSIONS
.......... ,,,,,H, ...........
PERIOD SERVICERS,WILL: RESPONSIBLEFOR:
workmanship.
breakage (not customer abuse).
This warranty applies only to products in ordinary household use, and the consumer Is responsible for the items
listed below:
1. Proper use of the appliance in accordance with instructions provided with the product.
2. Properinstallation byanauthorized servicerin accordancewith instructionsprovidedwiththeapplianceand in accordance
with all local plumbing, electrical and/or gas codes.
3. Proper connection to a grounded power supply of sufficient voltage, replacement of blown fuses, repair of loose
connections or defects in house wiring.
4. Expenses for making the appliance accessible for servicing, such as removal oftrim, cupboards, shelves, etc., which are not
a part of the appliance when it was shipped from the factory_
5, Damages to finish after instalfation.
6. Replacement of light bulbs and/or fluorescent tubes (on models with these features).
This warranty does not cover the following:
............. ,,,,,
1. CONSEQUENTIAL OR INCIDENTAL DAMAGES SUCH AS PROPERTY DAMAGE AND INCIDENTAL EXPENSESRESULTING
FROM ANY BREACH OF THIS WRITTEN OR ANY IMPLIED WARRANTY.
Note: Some states do not allow the exclusion or limitation of incidental or consequential damages, so this limitation or
exclusion may not apply to you,
2. Service calls which do not involve malfunction or defects in workmanship or material, or for appliances not in ordinary
household use. The consumer shall pay for such service calls.
3. Damages caused by services performed by persons other than authorized Gibson servicers; use of parts other than
Frigidaire Company Genuine Renewal Parts; obtained from persons other than such servicers; or external causes such as
abuse, misuse, inadequate power supply or acts of God.
4. Products with original serial numbers that have been removed or altered and cannot be readily determined.
SERVICE
Keep your bill of sale, delivery slip, or some other appropriate payment record. The date on the bill establishes the warranty
period should service be required. If service is performed, it isin your best interest to obtain and keep all receipts. This written
warranty givesyou specific legal rights. You may also have other rig htsthat vary from stateto state. Service under th iswarranty
must be obtained by following these steps, in order:
1. Contact the dealer where you purchased your appliance, Frigidaire Company Consumer Services (check listing in this
manual), or an authorized Gibson servicer.
2. _fthereisaquesti_nast_wheret__btainservice_ca___rwdte_urC_nsumerRe_ati_nsDepartmentatthet___-freenumber
or address in the side column.
Gibson
P.O. Box 7181
Dublin, Ohio 43017
(BOO) 458.1445
Gibson
Product features or specifications as described or illustrated are subject to change without notice. All warranties are made by
White Consolidated Industries, Inc. This warranty applies only in the 50 states of the U.S,A. and Puerto Rico.
22
Page 23

At A Glance Operating instructions
This operating card provides quick, brief operating instructions. For additional information and important safety information refer to this Owner's
Guide and your Cooking Guide.
' ',m f' '111 Ill'l! li' q'l ' I II If' _1li_l _lll
12
Stop Start
,,\\\_II//i/ _\\\_IIi/l_
12
Pushto set timerfunction
To Set the Clock
1.
Push in and turn control knob A to the right to set the time
of day. The minute timer hand will turn as the clock is
set.
.
After the clock is set, release the control and return the
minute timer hand to OFF,
To Set the Minute Timer
The minute timer does not start or stop cooking. It simply serves
asa handy kitchen timer that buzzes when the set time has run
out.
1. Turn control knob A to the leftt to set the desired number of
minutes, DO NOT push in on the control when setting
the minute timer. Doing sowill change the clock. For
best accuracy, turn the minute timer hand beyond the
setting, then back to it.
2. When the set time has passed, the buzzer will sound.
Turn the controt to OFF.
6 "A
To Set the Surface Controls
1. Placecooking utensil on the surface element.
2. Push in and turn the Surface Control knob in either
direction to the desired setting. Start most cooking
operations on a higher setting and then turn to a lower
setting to finish cooking. The controls do not have to be
set exactly on a particular mark. Use the marks as a
guide and adjust the control as needed.
3. Turn the surface element off before removing the pan
and when cooking is completed. Note: The surface
signal tightwilt glow when one or more elements are
turned on, A quick glance at the light when cooking is
finished is an easy check to be sure atl controls are turned
off.
To Set the Oven Controls
Bake
1. Arrange oven racks,
2. Turn the Temperature knob to the desired
temperatu re.
3. Turn the Selector knob to BAKE,
4. Preheat the oven for 10 to t2 minutes before baking.
5. When cooking isfinished, turn the Temperature and Selector
knobs to OFF,
6, See Cooking Guide for more information on baking.
Pushtoset timerfunction
To Set the Automatic Timer (Timed Bake Feature)
1. Make sure the clock is set to the correct time of day and
the Start and Stop knobs are popped out.
2. Turn the Selector knob to TIME BAKE.
3. Turn the Temperature knob to the desired cooking
temperature.
4. If you want the timed bake cycle to begin immediately,
make sure the Start Time is set the same as the current
time on the clock. If a delayed start cycle is desired, set
the Start knob to the time you want the timed bake cycle
to begin.
5. Turn the Stop knob to the time you want cooking to
stop.
6. The oven wilt begin to operate when the start time has
been reached.
7. When cooking isfinished, turn the Temperature and Selector
knobs to OFF.
Broiling
1. Arrange the oven rack while oven is still cool.
2. Turn the Temperature and Selector knobs to BROIL.
This combination setsthe oven in the full broil mode. You may
adjust the Temperature knob down to avoid excess
browning or drying of foods that should be cooked to the
well-done stage.
3. Place the grid on the broiler pan, and then place the food on
the grid.
4, Placethe pan on the oven rack. Leavethedooropen atthe
broil stop position while broiling. The door wilt stay in this
position without closing.
5. Broil on one side until food is browned; turn and cook on the
second side. Season and serve. Note: Always pull the rack
out to the stop position before turning or removing food. See
6 "A
your Cooking Guidefor more information on broiling.
6. When broiling is finished, turn the Temperature and Selector
knobs to OFF.
Page 24

At A Glance Operating Instructions
This operating card provides quick, brief operating instructions. For additional information and important safety information refer to this Owner's
Guide and your Cooking Guide.
12
Stop Start
\\_ulU!// \\\\qu/t/
,_\\\W t//P,
,,_
%..o_o
/, %, _ .._N,x"
Push to set timer function
6 _A
Preparing the Oven for Self-Cleaning
Adhere to the following cleaning precautions:
• Allow the oven to cool before precleaning.
•Wear rubber gloves when precleaning and while wiping
up the residue after the self-clean cycle.
oDO NOT useoven cleanersor oven protective coatings in
or around any part of the self-cleaning oven.
• DO NOTclean the oven door gasket. Thewoven material
of the oven door gasket isessentialfor a good seal. Care
should be taken not to rub, damage or remove the oven
door gasket.
,,DO NOT use any cleaning materials on the door gasket.
Doing so could damage it.
• SeeOwner's Guide for more information on this section.
Stopping or Interrupting a Self-Cleaning
Cycle
If it becomes necessaryto stop or interrupt a self-cleaning
cycle due to excessive smoke or fire:
1. Turn the Selector and Temperature knobs to OFF.
2. Pushin and turn the Stop-f]me knob to the time of day
set on the clock. The knob wilt then pop out.
3. Once the oven hascooled below 550°F and the "Lock"
light has gone out, the oven door can now be opened.
4. Correct the condition which caused the smoking.
5. Restart the self-clean cycleonceal!conditions have been
corrected.
To Start the Self-Clean Cycle
oWe recommend a 2 hour self-dean cyclefor light soils,
a 3 hour cycle for average soils, and a 4 hour cycle for
heavy soils (to assure satisfactory results).
To Set the Controls:
1. Make sure the clock issetto the correct time of day and
the Start and Stop knobs are popped out.
2. Turn the Temperature and Selector knobs to CLEAN.
3. The motor driven lock will begin to close automatically
and the "Lock" light will come on as soon as the
door locks. (it takes about t 5 seconds for the lock to
close.)
4. If you want the clean cycleto begin immediately, make
sure the Start Time is set the same as the current time
on the clock. If a delayed start cycle is desired, push
inandturnthe StartTimeknobto the timeyouwant the
clean cycle to begin.
5. Push in and turn the Stop Time knob at least 2 hours
beyond the time shown on the Start Time knob. Setthe
cleaning time based on the amount of soil you have_
light, medium or heavy.
6. The "Oven" light will come on and cycle with the oven
elements.
7. After the desired cleaning time has elapsed, the Stop
Time knob will pop out.
8. Turn the Temperature and Selector knobs to OFF.
9. Once the oven has cooled below 550% and the
"Lock" light has gone out, the oven door can now be
opened.
 Loading...