

Page 1

User Guide
Sm ar t Rock
Wireless Concrete Quality Control
Sm ar t Concr et e Test ing Technol ogies
Page 2

Page 3
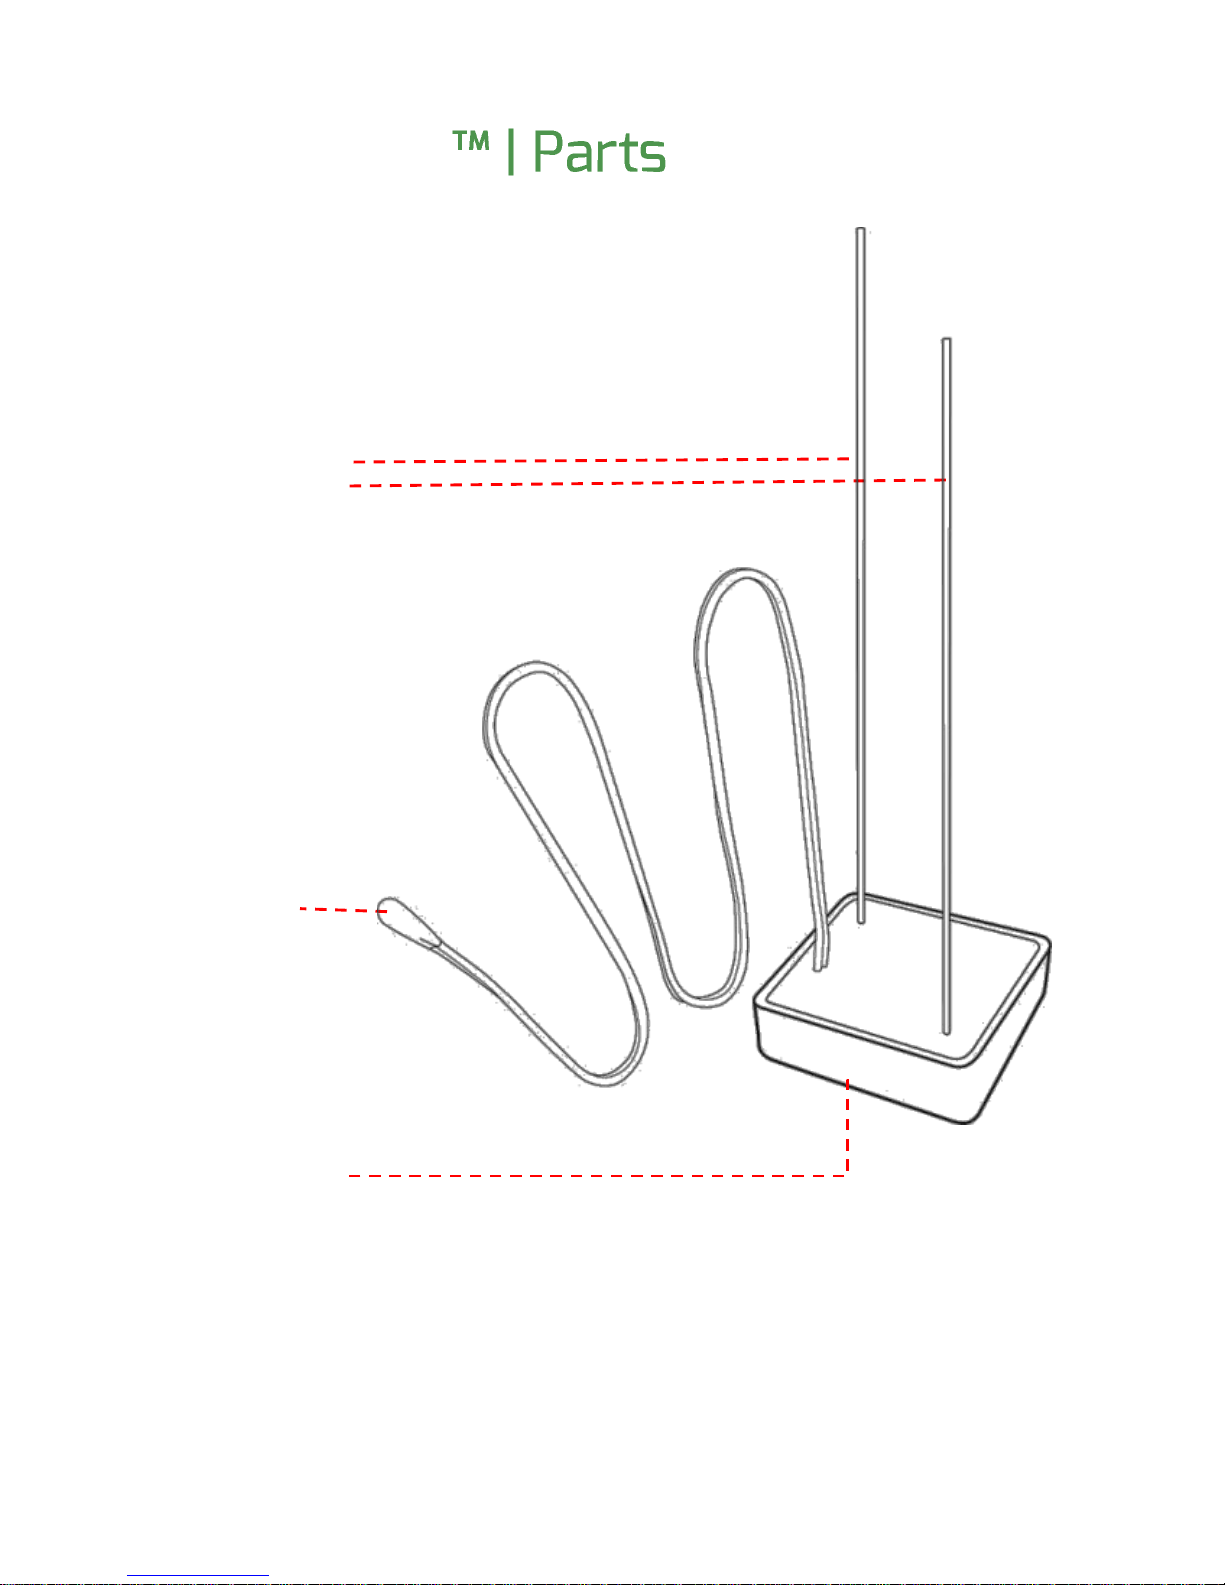
Sm ar t Rock
Activation
wires
Temperature
Sensor
Wireless
Transmitter / Logger
Page 4

Quick St ar t
1- Tag sensor
2- Inst all sensor
3- Connect
4- Obt ain results
4
Page 5

Dow nl oad and Inst al l t he App
From the Go o g l e P l a y or the Apple App Store, sear ch f or
1
Gi a t e c Sm ar t Ro c k . Dow nl oad and inst al l the latest version
of the app on your device.
Af ter the inst al l at ion is complete, click on the Giatec
Sm ar t Ro c k icon to launch t he app.
Not e: If y ou hav e pr ev iousl y inst al l ed t he app, skip t o the
next step.
Gi a t e c S c i e n t i f i c I n c . 1
Page 6
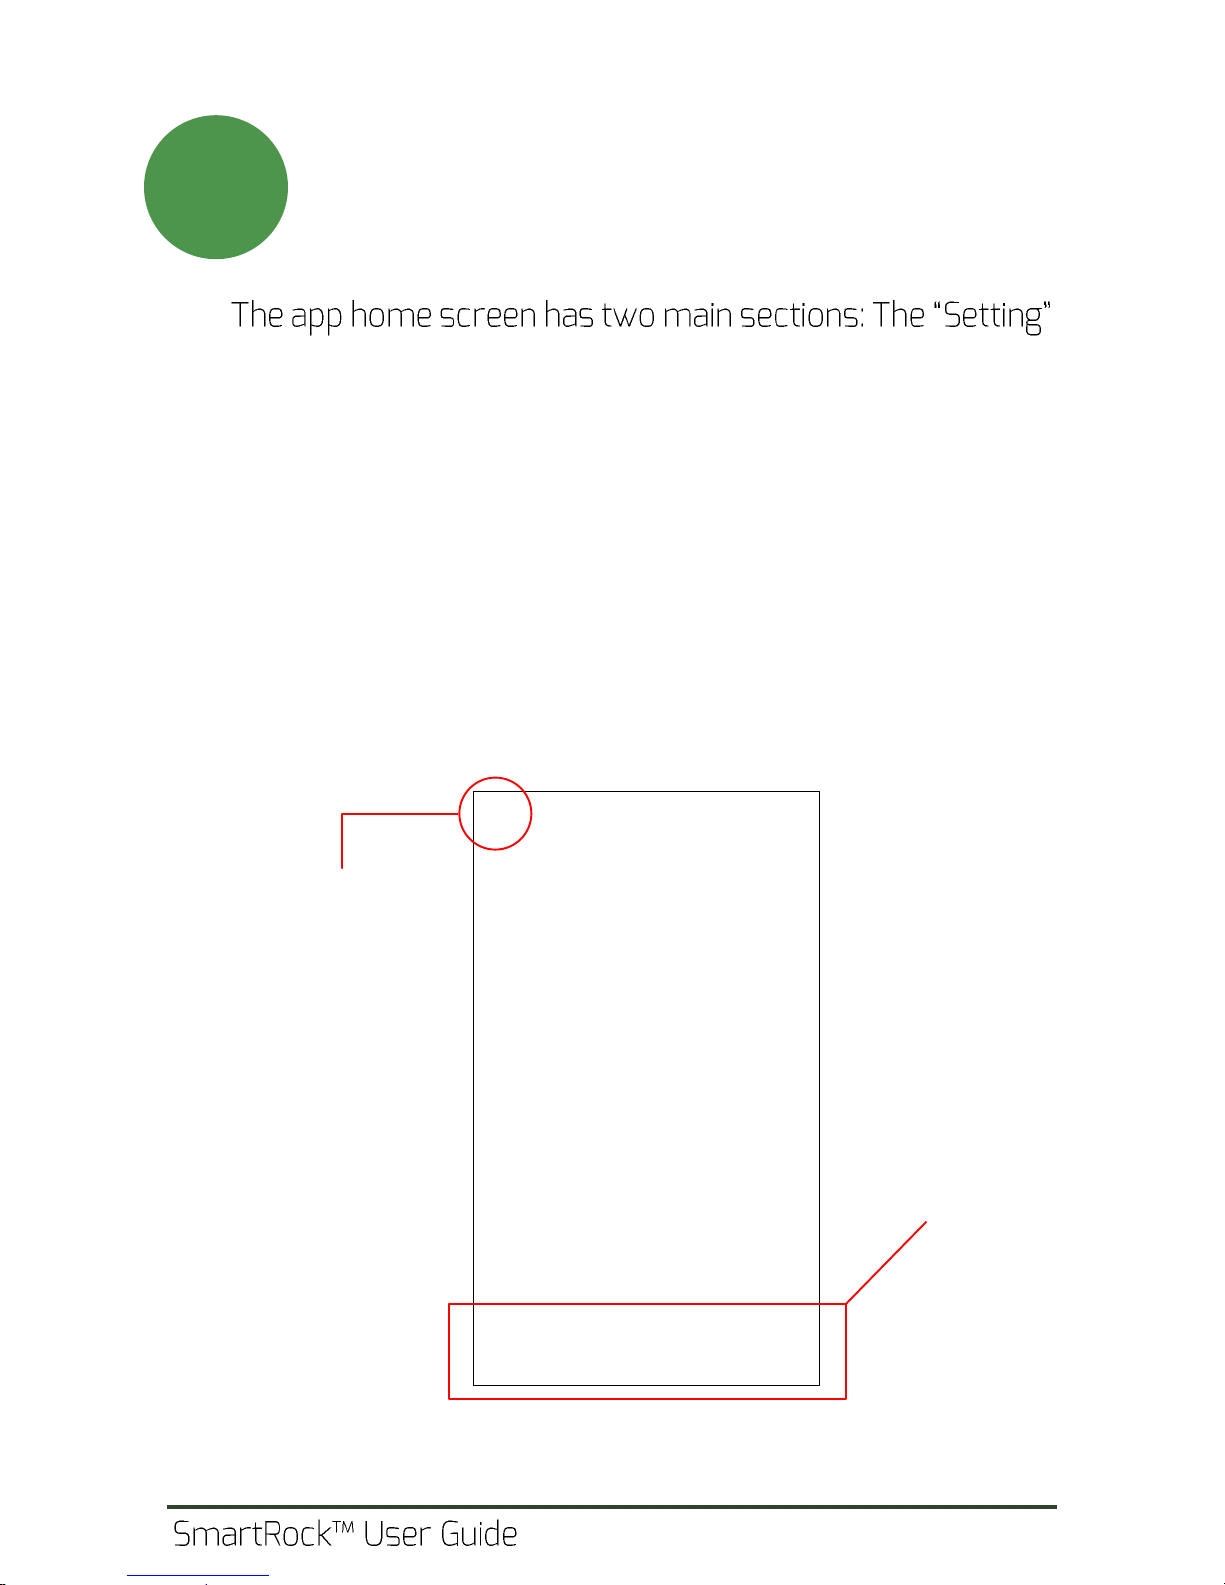
Launch the App
2
Ge n e r a l S e t t i n g s
Navigat ion Pane
menu bar located at the top of the page and the navigation
pane at the bottom of the page which incl udes the
following main functions:
Tagging: used t o assign a Nam e or ID t o a sensor .
Co n n e c t : used to wirelessly connect to a previously
tagged sensor.
View: wher e t he user can see t he pl ot s of
downloaded dat a fr om the sensor.
Not e: Make sur e the Bluet oot h on your phone is t ur ned on.
2
Page 7

Tur n On The Sensor
St icking out o n the bottom side of t he sensor , there are
3
two electrical wires (exposed metal). These wires ar e
used to instal l and fix the location of the sensor, and also
turn on the sensor at the sam e tim e.
A comm on inst all at ion practice is schematically shown in
the figure below. Twist the exposed wires around the
reinforcing bar (this will also tur n on the sensor ) and
ensure that the wires are not loose.
Tip 1: Co n n e c t i o n w i r e s a r e d e l i c a t e . Pl e a s e h a n d l e w i t h c a r e
when connecting/disconnecting these wires.
Tip 2: In or der t o m axim ize t he w ir el ess ant enna r ange, do
concrete surface. This will incr ease t he range of sensor
visibility (especially in the early age).
Not e: If st eel w ir es ar e disconnect ed f r om each ot her , t he
sensor turns off and memory is cleared.
Gi a t e c Scient if ic Inc . 3
Page 8
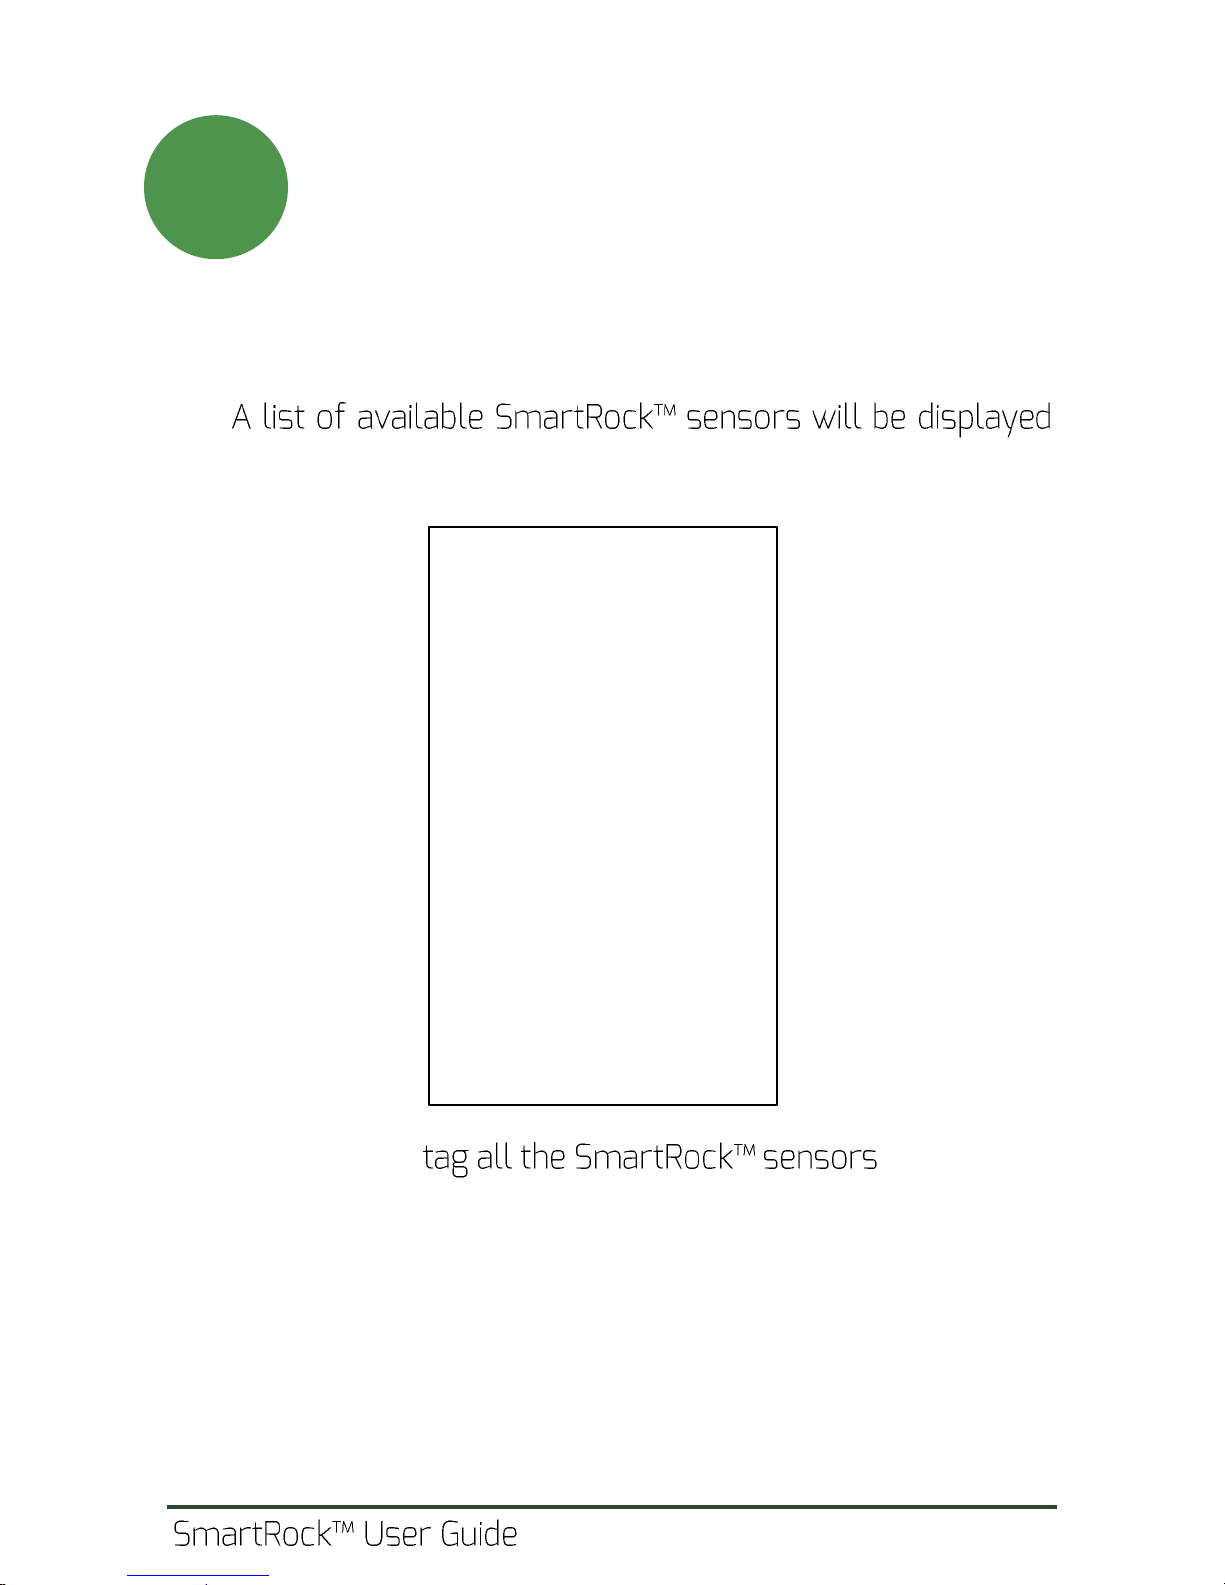
Tag The Sensor
From the home screen on your smartphone, click on the
4
Tagging key on the screen to go t o the tagging page.
on the screen.
Tip: You should in the of f ice
befor e using them in concrete. For this, you need to
act ivate/ deact ivat e t hem one by one (in t he of f ice) and t ag
them on the app as they appear on the screen separately. You
can write the tag name on the sensor label in order to make
the field installation process easier.
4
Page 9

Tag The Sensor -continued
Ent er a l ab el f or t he sensor in t he Sensor Tag f iel d.
4
1) Ent er Tag nam e
2) Tap to create
Af ter creating the sensor tag, the app will show the list of
tagged sensors in t he connect page.
Not e: Pr ev io usl y t ag g ed s enso r s w il l not appear in t he
Tagging tab. They can be accessed f r om the Connect tab.
Gi a t e c Scient if ic Inc . 5
Page 10

Co n n e c t i n g t o Se n s o r
a list of tagged sensors is shown.
5
To connect to a sensor, stand within visibility range of the
sensor (up t o 8 meters if the sensor is installed within
5cm from the concrete surface) and wait for the sensor
to establish a communication with the smartphone. This
can be verified by checking the status of the Bluetooth
signal on the right side of the sensor tag. When the sensor
is f ound, the gray signal icon turns into blue.
6
Page 11

Co n n e c t i n g t o Se n s o r Co n t i n u e d
5
Tap on t he sensor t ag t o connect to the sensor .
To f ind a previously tagged sensor , use smart filtering by
The l ist of sensor s can be r ef reshed by dragging down the
list while pressing on the screen.
Tip: You can delete a tag by long-pressing on the tag name
and f ol l ow ing the opt ions on t he popup window.
Gi a t e c Scient if ic Inc . 7
Page 12

Dat a Monit or ing
Af ter the app is connected to t he sensor, data will be
6
right of the screen indicates that the data is in real-time.
The real-time temperat ur e val ue wil l be t r ansm itted t o
the smartphone and displayed on the screen.
In or der t o see the maturity index and predicted strength
of concrete, the user needs to enter the pouring time and
select the appropriate strength-maturity relationship
(known as mix calibration).
You can stil l view the temperature history by clicking on
the View tab.
8
Page 13

Pour ing Tim e
Pou r ing t im e is t he time that concrete is act ually placed in
7
(a) Android
(b) iOS
the formwork and cam e int o contact wit h the
temperature sensor. Ent er t he po ur ing dat e and t he t im e.
Foll ow t he pr ocedur e t o set t he date and t ime.
Gi a t e c Scient if ic Inc . 9
Page 14

Add a Mix Ca l i b r a t i o n
In or der f or t he app t o be abl e t o cal cul at e and displ ay t he
8
predicted strength, the user has to define and select a
calibrated mix in the app.
The calibrated mix def ines the strengt h-maturity
relationship for each concrete mixture.
To def ine a new Calibrated mix, go to the settings menu
(the home screen), and tap on the calibrated mixes.
Cl i c k o n + to define a new calibrated mix.
To define a new mix, the user needs t o know t he str engt h-
maturity relationship. This can be derived accor ding to t he
procedure described in the ASTM C 10 7 4 .
A common pr actice is to use the Nurse-Saul l inear
relationship between the strength and logarithm of the
maturity index (ASTM C 1074, Method A)
10
Page 15

Add a Mix Ca l i b r a t i o n continued
For t his rel at ionship, t he user needs to know the following
8
three parameters (obtained in the lab prior to field work):
Dat um Tem per at ur e
St r engt h at certain ages (e.g. 1, 3 , 7 , 14 , a n d 2 8 d a y s )
Temperatur e history of concrete (cured at room
temperature) measured at certain time intervals
(minimum of 30 minutes for t he first 48 hours, and 60
minutes afterwards). The area under the temperature
curve is defined as the maturity index.
Gi a t e c Scient if ic Inc . 11
Page 16

Add a Mix Calibrat ion continued
The r elationship between t he st r ength and the logarithm
8
of the maturity index is approximated with a linear
equation in t he app. The intercept (a) and the slope (b) are
calculated by the app for the input data set. These values
will be used to predict the strength of in-place concrete.
Ent er t he dat um t em per at ur e, and t he dat a f or t he
strength-maturity relationship. When you are done, tap on
Cr e a t e . T h e m i x w i l l b e a d d e d t o t h e l i s t o f avail able mixes.
12
Page 17

Test Result s
When the pouring date and time are set, and an
9
St r engt h
My Mix
Mat ur it y
Min / Max
Temperatur e
appr opriate mix is selected, the test r esults will appear on
the screen.
Not e: You can change t he display units between metr ic and
im per ial f r om the app setting section shown in Step 8.
Gi a t e c Scient if ic Inc . 13
Page 18

View Test Result s - Ch ar t s
In t he View page, t he user can m onit or t he t est r esul t s in
(a)
(b)
(c)
Temperatur e- Time
Mat ur it y Index- Time
St r engt h - Time
10
a chart format. The variations of temperature, maturity
index and st r engt h will be illustrated as charts.
Cl i c k o n a n y p o i n t o n t h e c h a r t t o s e e t h e t e m p e r a t u r e ,
maturity index and strength values.
You can pinch and zoom acr oss t he char t t o see t he
details.
The pouring t ime will be displ ayed as a r ed dash-line.
The period befor e pouring time is shaded in gr een.
14
Page 19

Sav e and Shar e
The user can select to save the test results (on Android
(a) Save or Share test
results
(b) Select save/share
option
11
Sav e
Shar e
devices only) or share the test results (on both iOS and
Android). Cl ick on sav e/ shar e but t on, and a dial og box w il l
help you choose saving or sharing options on your device.
The results will be saved as com m a-separated values
(csv) format that can be opened by Microsof t Excel.
Gi a t e c Scient if ic Inc . 15
Page 20

Ca u t i o n
Gi a t e c Sm ar t Rock sensor is designed to record the
temperature history of concrete in situ and estimate its
strength based on the ASTM C 10 7 4 s t a n d a r d s p e c i f i c a t i o n . I t
should be noted that the strength estimation is made based
on a calibrated maturity-strength correlation f or a specific
concrete mixture. If the mix design, water content, cement
source, etc. is changed, a new calibration should be
performed. Moreover, as per Section 9 in ASTM C 10 7 4 , i t i s
required that the strength estimated by the maturity method
(using the Sm artRock mobile app) is verified by other test
methods before performing any critical operations. As per
ASTM C 10 7 4 ( S e c t i o n 9 . 5 . 4 ) , i t i s r e q u i r e d t o c a s t f i e l d -molded
cylinders and subject them to standard curing condition in
order to compare t he m at urit y index and st r ength of t hese
specimens with those estim ated in the field. If the dif f erence
consistently more than 10%, a new strength-maturity
correlation should be developed.
Terms and Condit ions
By using t he Sm ar t Rock concr ete sensor and the
Sm ar t Rock mobile application, you agree to the active
http:// www.giatecscientific.com/terms-and-conditions
License
:
16
Page 21

Not es
Gi a t e c Scient if ic Inc . 17
Page 22

Not es
18
Page 23

Pr int ed in CANADA V 3.0
Page 24

Pr int ed in Canada V 3.0
20
 Loading...