

Page 1
Faith SERIES
DUAL-SUSPENSION BIKE
Technical Manual
1
Page 2

CONTENTS
PRODUCT FEATURE
SECTION 1. SIZING
SECTION 2. REAR SHOCK
SECTION 3. TORGUE SETTING
SECTION 4. EXPLOADE DRAWING
2
Page 3

Faith Product feature
This bike is positioned as a freeride bike . Mpre travel and big hit capability, however not as heavy
and slow as the DH.
This bike can use triple or double chain ring for pedaling uphill from obstacle to obstacle.
The rear suspension system is a new design which is called maestro, this maestro feature is vpp
design and to get the overall suspension behavior to the best not only one point is the best.
1. Minimal power loss
2. Low kickback
3. Minimal brake lockout
4. Linear rising rate suspension design
5. Best traction
The Faith has some features as below
1. 8” rear travel and 7” front fork
2. Full cartridge bearing design
3. For better rigidity the frame design is like below
BB shell : 83mm
Chain line : 57.5mm
Rear old :150mm with 12mm through axle
4. For extreme freeride conditions , like North Shore , Red Bull Rampage
5. Compatible with FD , either double or triple chain rings
6. Chainguide compatible with I.S.C.G
7. Aluxx SL tube
3
Page 4
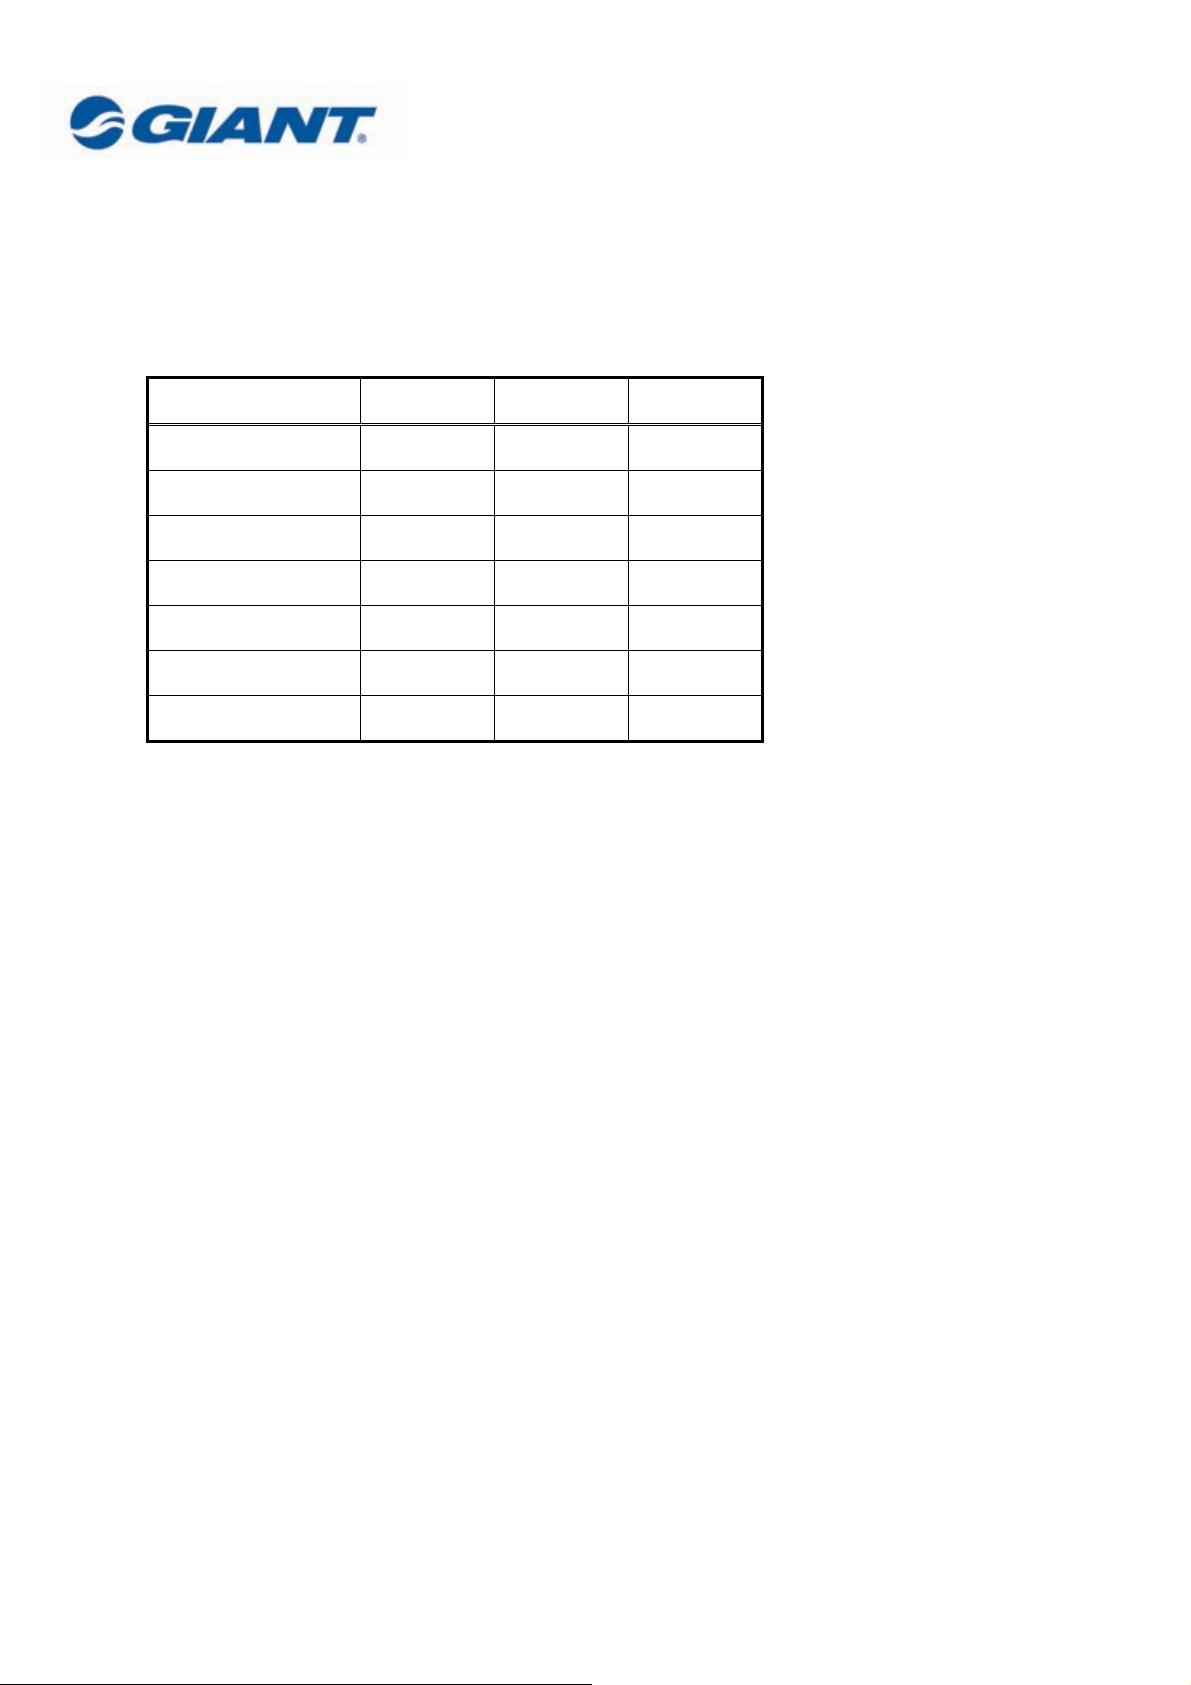
1. Sizing
The actual frame measurements and geometries are listed below.
Size
Top Tube (mm) 550 585 613
Seat Tube (mm) 441 457 457
Seat Angle
Head Angle
B.B. Drop (mm) -28 -28 -28
Rear Center (mm) 445 445 445
Wheel Base (mm) 1158.3 1134.4 1159.3
17〞 18〞 20〞
66° 66° 66°
71° 71° 71°
2.Rear shock
This bike use Manitou and Fox coil spring shock for better linear spring curve and the shock spec
as below
Shock Spec
1. Eye to eye length: 222.3mm(8.75”)
2. Shock travel: 69.85mm(2.75”)
3. Hard ware: 44mmx8mm/35mmx8mm
4
Page 5

2-1 Manitou swinger shock setup
SPV shock
Pump
5
Page 6

SPV SET-UP QUICK REFERENCE GUIDE
This quick reference guide is to be used for setting up the any Swinger shock. Follow this order to
ensure the best possible tuning.
* Coil and Air Shock Initial Set Up
1. Adjust Sag:
Sag is the amount the shock compresses under normal body weight. On the air shock, there are sag
incrementations on the inside of the shock that can be used to help adjust sag.
Cross country: 25-30% Sag
Freeriding: 30-40% Sag
2. Set SPV Pressure:
Range should be between 75 and 150 psi. Pressure should be between 50-70% of body weight.
More pressure will create more compression damping, hold the bike up more and pedal better. Less
pressure will create less compression damping, allow more sag, and be more responsive and supple.
3. Set SPV Volume:
You should begin with the 16mm adjuster completely backed out. Turning the volume adjuster
inwards will create a more progressive damping effect making the suspension firmer from the
middle to bottom out. Turning the volume adjuster outwards will make the rear shock more linear
in compression damping and be a softer finish.
4. Rebound Damping:
Turn the blue knob located on the eyelet mount clockwise to increase rebound damping.
5. Low Speed Compression Damping (6-way adjust only):
Turn in the red adjustment knob to increase chassis stability (also may decrease supply feel of
shock).
6. High Speed Compression Damping (6-way adjust only):
Turn in the black adjustment knob to increase high-speed bottom resistance.
*Note:
On the 6-way shock, please make sure that the two compression adjuster knobs on the reservoir are
fully open when setting the shock pressure and volume. You can turn them after you set up the
pressure and volume adjuster to achieve more compression damping
6
Page 7

Faith sag amount is 30% travel of shock ,it’s equal to 23mm .the eye
to eye length is about 199mm when you have correct sag setting
7
Page 8

Spring rate table
Spring rate rider weight range
400 lbs./in. 60-75 kg
450 lbs./in. 75-90 kg
500 lbs./in.
90 kg →
2-2 Fox DHX Series shock setup
8
Page 9

9
Page 10

10
Page 11

3. Torque settings
The bolts used to attach the rear suspension unit are very high grade products factory installed to
specific torque specification. If it becomes necessary to remove or tighten the pivot bolts extreme care
should be taken when re-tightening them.
All bolts should be cleaned and re-set using LocTite Primer (﹟243)
All bolts location and tighten torque please refer to the illustration below.
2
5
3
6
Torque settings:
1. Main pivot 120 -150 Kgf/cm. ( 104 -130 in-lbs )
2. Seatstay pivot 120 -150 Kgf/cm. ( 104 -130 in-lbs )
3. Main linkage pivot 120 -150 Kgf/cm. ( 104 -130 in-lbs )
4. Upper shock mount 120 -150 Kgf/cm. ( 104 -130 in-lbs )
5. Lower shock mount 120 -150 Kgf/cm. ( 104 -130 in-lbs )
6. Chainstay pivot 120 -150 Kgf/cm. ( 104 -130 in-lbs )
4
1
4.Explode Drawing
11
Page 12

THE DRAWING BELOW SHOWS RELATIONS OF EVERY PARTS AND FRAME
12
 Loading...