

Page 1
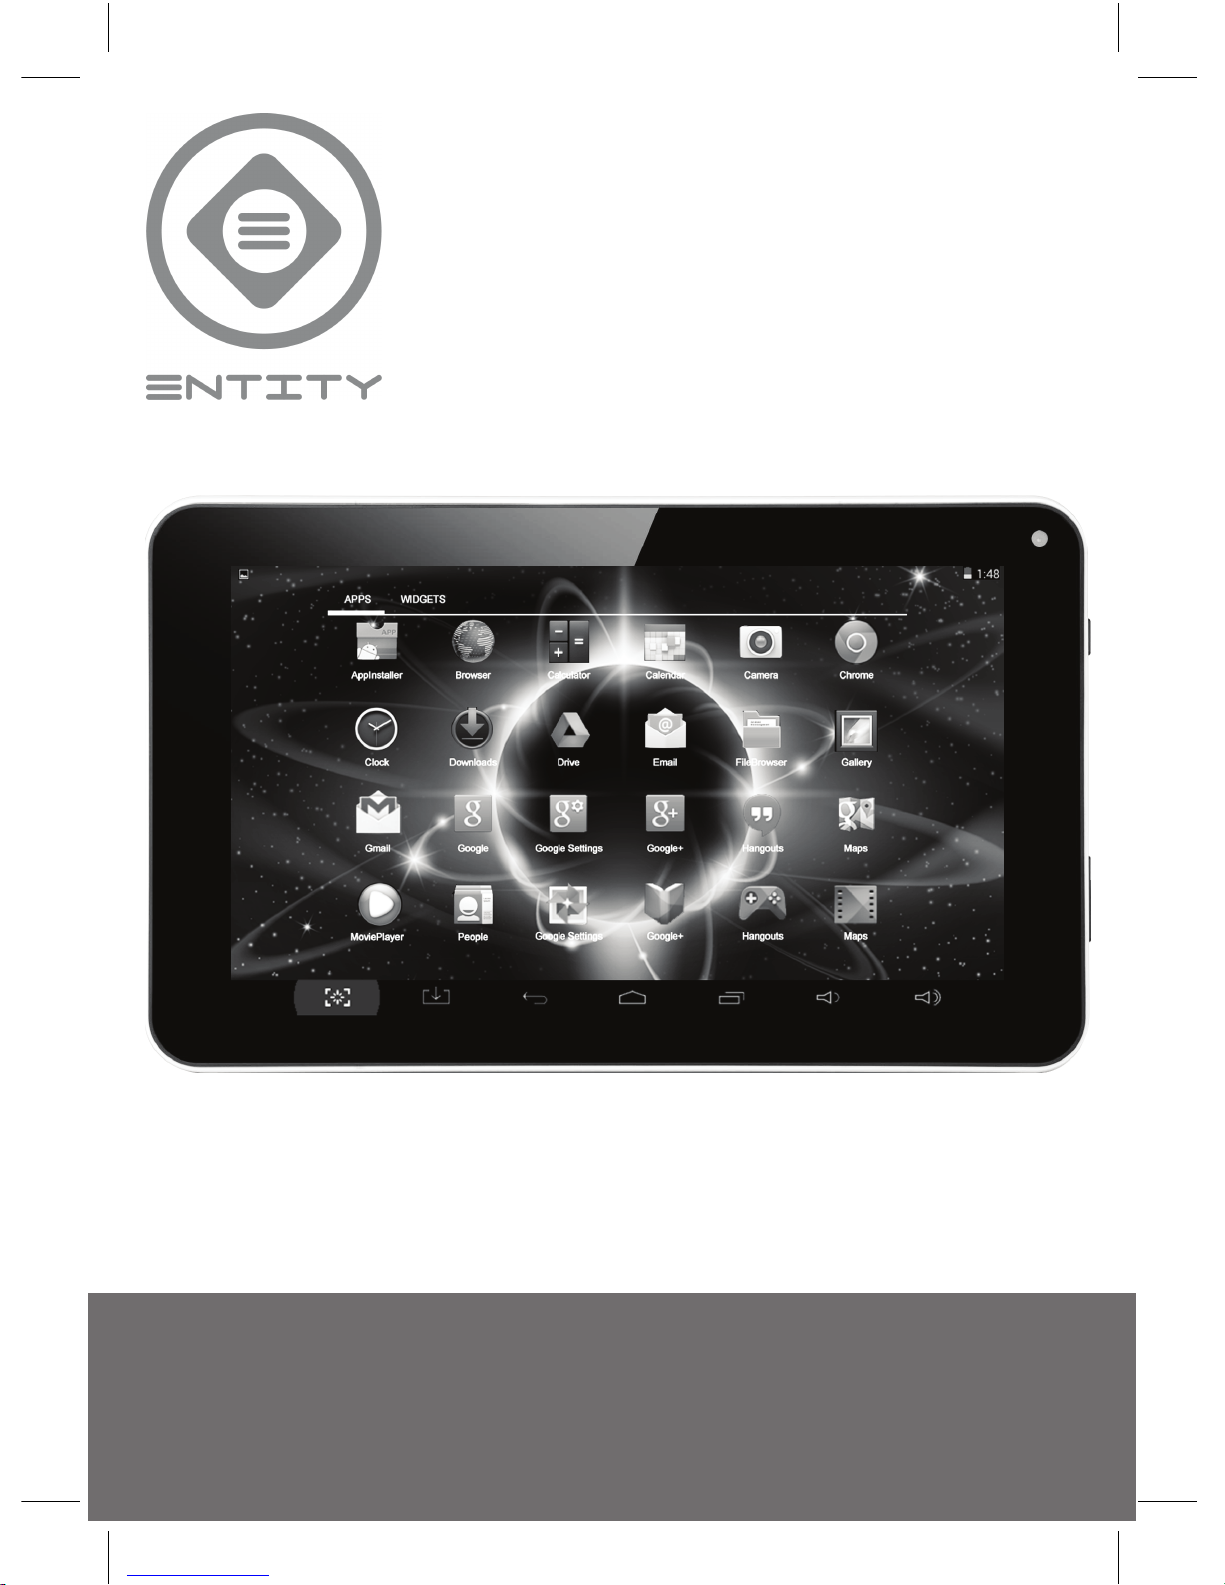
Instruction Manual
Model Reference: GEM10704
GEM10704 30062017
7” CAPACITIVE TOUCHSCREEN TABLET PC
Page 2
1.0 Introduction
1.1 Notice
1.2 Declaration
2.0 Warnings & Important Information
3.0 Safety & Important Information
3.1 Safety Precautions
3.1 Safety Precautions
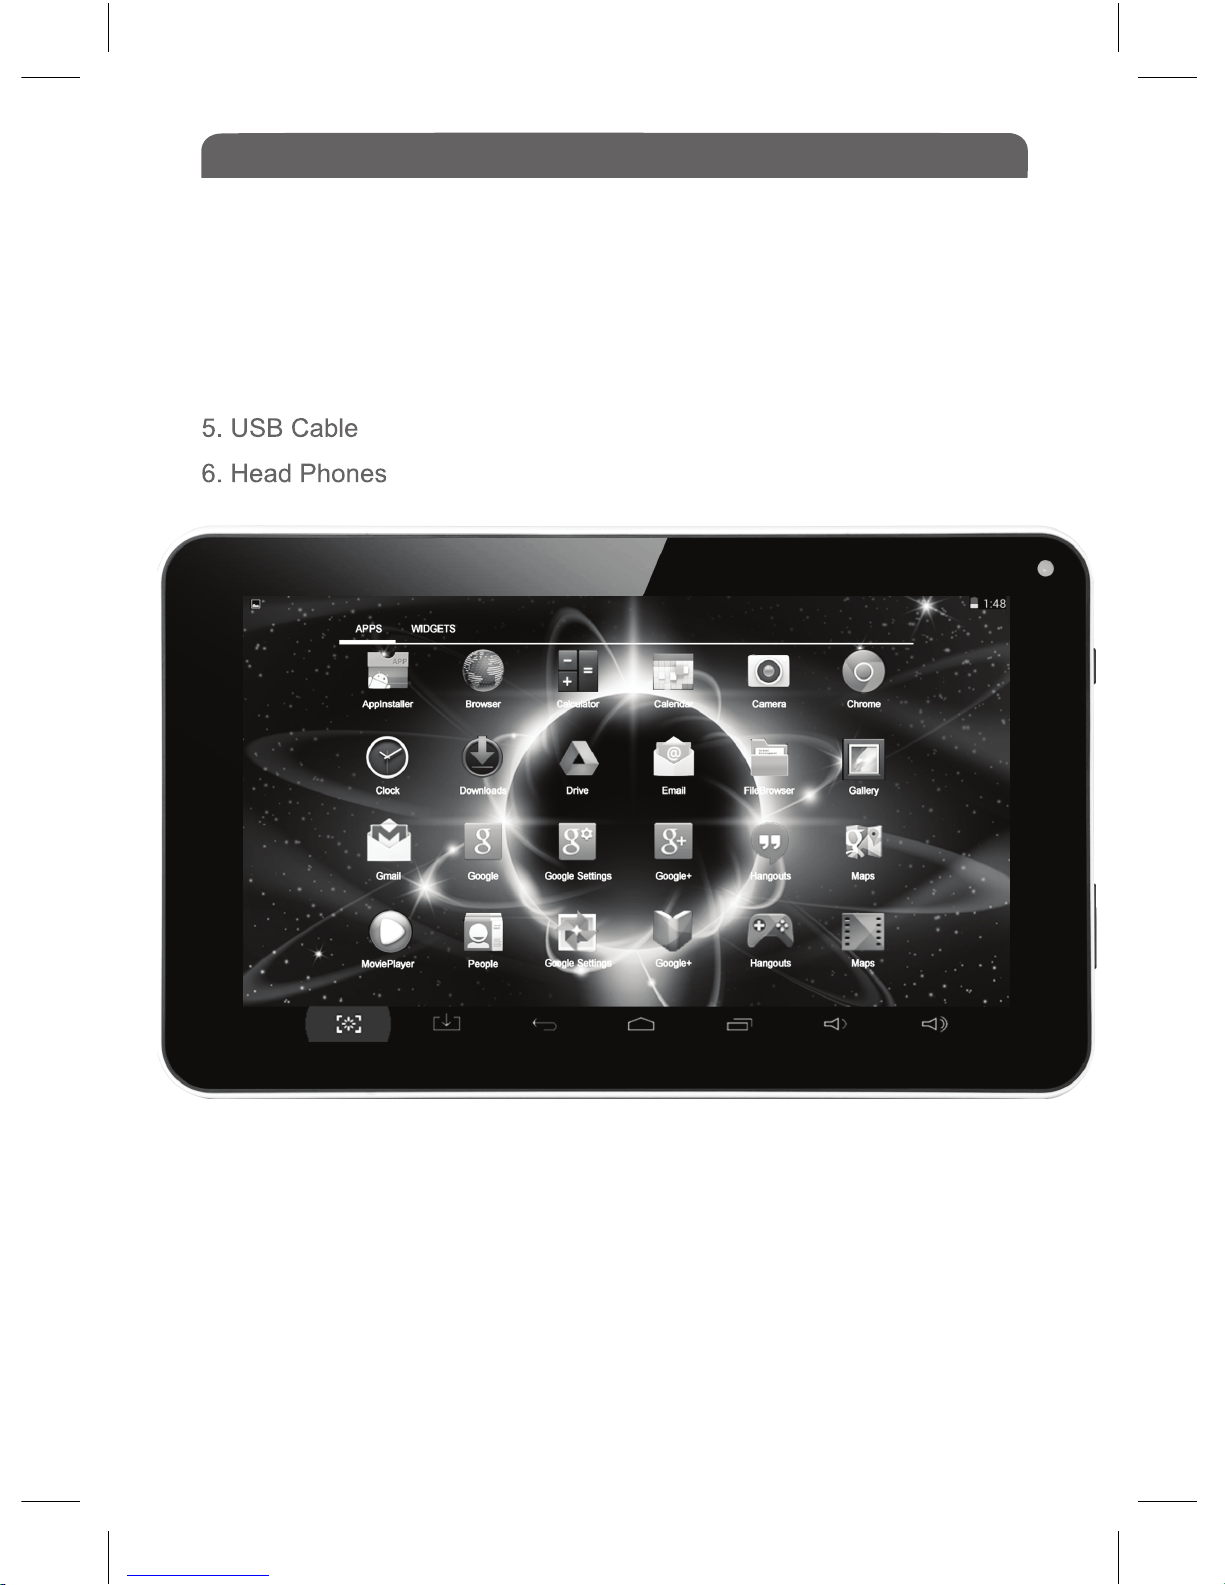
4.0 Box Content
5.0 Features
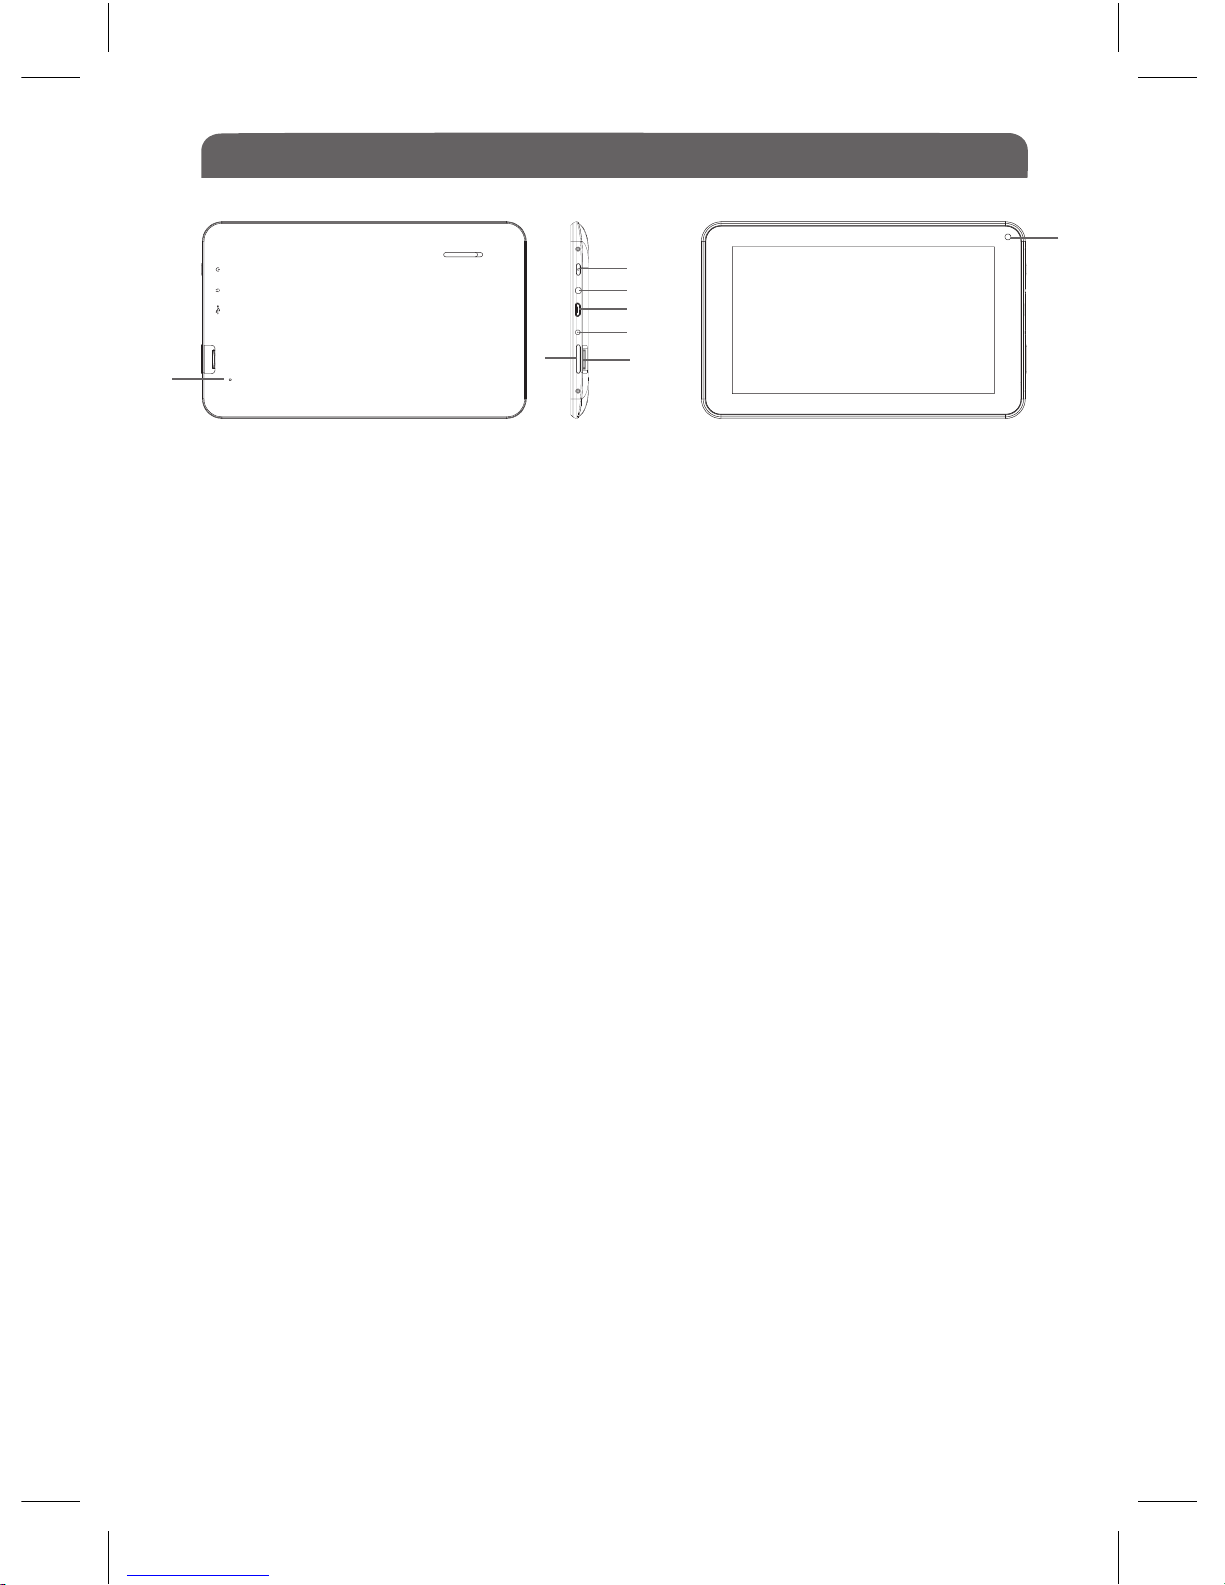
6.0 Unit at a Glance
7.0 Factory Reset
8.0 Before You Start
8.1 Charging the Battery
8.2 Getting Started
8.3 Screen Orientation
8.4 Touch Screen Usage
9.0 Getting Started
9.1 Unlocking the Home Screen
9.2 Home Screen Overview
9.3 Home Screen Icons Explained
9.4 Apps Screen Overview
9.5 Full Apps Screen Applications Explained
9.5 Full Apps Screen Applications Explained
9.6 Installing Applications
9.7 Using Applications
9.8 Changing the Wallpaper
Contents
Page no.
01
01
01
02
03
03
04
05
06
07
08
09
09
09
10
10
11
11
11
12
13
14
15
16
16
16
Page 3
10.0 Using the Internet
10.1 Opening a Web Browser
10.2 Viewing Video, Animations or Flash Games
11.0 Emails
11.1 Connecting to an Existing Email Account
11.2 Removing an Email Account from the Tablet
11.3 Composing & Sending Emails
12.0 Managing Files
12.1 Browsing & Managing Files
13.0 Play Music
14.0 Play Books
15.0 Calendar
16.0 Camera Application
16.1 Using the Camera
16.2 To Take Videos
17.0 Settings
17.1 Wireless & Networks
17.2 Sound
17.3 Display
17.4 Storage
17.5 Battery
17.6 Apps
17.7 Accounts & Sync
17.8 Location Services
17.9 Security
17.10 Language & input
17.11 Backup & Reset
17.12 Date & Time
17.13 Accessibility
17.14 Developer Options
17.15 About Tablet
Contents
Page no.
17
17
17
17
17
18
18
19
19
20
20
21
22
22
22
23
23
23
23
23
23
24
24
24
24
24
24
24
24
24
24
Page 4
18.0 Miscellaneous Applications
18.1 Calculator
18.2 Clock
18.3 Play Movies
18.4 Voice Search
18.5 Play Store
18.6 Downloads
19.0 Connecting to your PC
20.0 Specifications
21.0 Troubleshooting
21.1 Device cannot connect to Wi-Fi
21.2 Device doesn’t turn on
21.3 Over Heating
21.4 System isn’t working correctly
21.5 Cannot set Email or Registration Application
21.6 Cannot Record
21.7 The Stand-By time of the device is too short
21.8 No Sound via Earphones
21.9 Colour distoration of Video or Picture Display
21.10 Can’t Copy Files
Contents
Page no.
25
25
25
25
25
25
25
26
27
27
27
27
27
27
28
28
28
28
28
28
Page 5
1.0 Introduction
Congratulations on choosing to purchase the Entity 7” Tablet PC. This tablet
is built on the Google Android Operating System. Through integrated wireless
access and capacitive touch screen, you can read books, get the latest news,
sports and weather, manage data, browse maps, play games at any time,
anywhere.
1.1 Notice
• This manual contains important safety and operation instructions, read this
manual carefully before using the tablet, and keep safe for future reference.
• The description in this user guide is based on the default settings.
• Due to software being continually updated, pictures and screenshots in this
user guide may differ from your product.
• The content in this user guide may differ from the product and software
provided by the service provider. It is subject to change without prior notice.
• The format and information of this user guide is based on the Google
Android Operating System, which may differ from the user operating system.
• The applications and their functions vary according to the country, region or
hardware specifications. JDW is not responsible for problems in performance
caused by third party applications.
• The audio, wallpapers and pictures provided in this device are only provided
for JDW and respective owners. It will violate copyright law if any data is
referenced and used for commercial or other purposes. JDW is not
responsible for such copyright infringement.
1.2 Declaration
The company reserves the right to make changes to the products specification and design due to technical improvements. The information provided is
subject to change without prior notice. All images in this manual are for
reference only.
Please note that all downloaded material may be subject to copyright laws,
any material downloaded is
at your own discretion and you will be soley
responsible for that material.
01
Page 6
2.0 Warnings and Important Information
02
2.1 Warnings & Important Information
This device complies with part 15 of the FCC rules. Operation is subject to the
following condition:
(1) This device must accept any interference received, including interference
that will cause undesired operation.
Note:
This device has been tested and found to comply with the limits for a class B
digital device, pursuant to part 15 of the FCC Rules. These limits are
designed to provide reasonable protection against harmful interference in a
residential installation.
This device generates, uses and can radiate radio frequency energy and if
not installed and used in accordance with the instructions, may cause harmful
interference to radio communications. However, there is no guarantee that
interference will not occur in a particular installation. If this device does cause
harmful interference to radio or television reception, which can be determined
by turning the device off and on, the user is encouraged to try to correct the
interference by one or more of the following measures:
● Adjust the receiving antenna of the radio or television.
● Increase the separation between the device and receiver.
● Connect the device into an outlet or on a different circuit from that to which
the receiver is connected.
● Call: 0161 480 6204 for technical help.
WARNING: THE MANUFACTURER IS NOT RESPONSIBLE FOR ANY RADIO OR TV INTERFERENCE CAUSED
BY UNAUTHORISED MODIFICATIONS TO THE DEVICE. ANY SUCH MODIFICATIONS COULD VOID THE
USER’S AUTHORITY TO OPERATE THE EQUIPMENT.
Page 7
3.0 Safety and Important Information
03
3.1 Safety Precautions
This handbook contains basic safety precautions and instructions for use.
Please read the manual carefully before using the device to reduce the risk of
product damage and personal injury.
● Do not expose the device to high temperatures, direct sunlight, moisture,
rain or a highly dusty environment.
● Never apply any heavy impact on the device such as dropping or shaking.
● Keep away from magnetic sources.
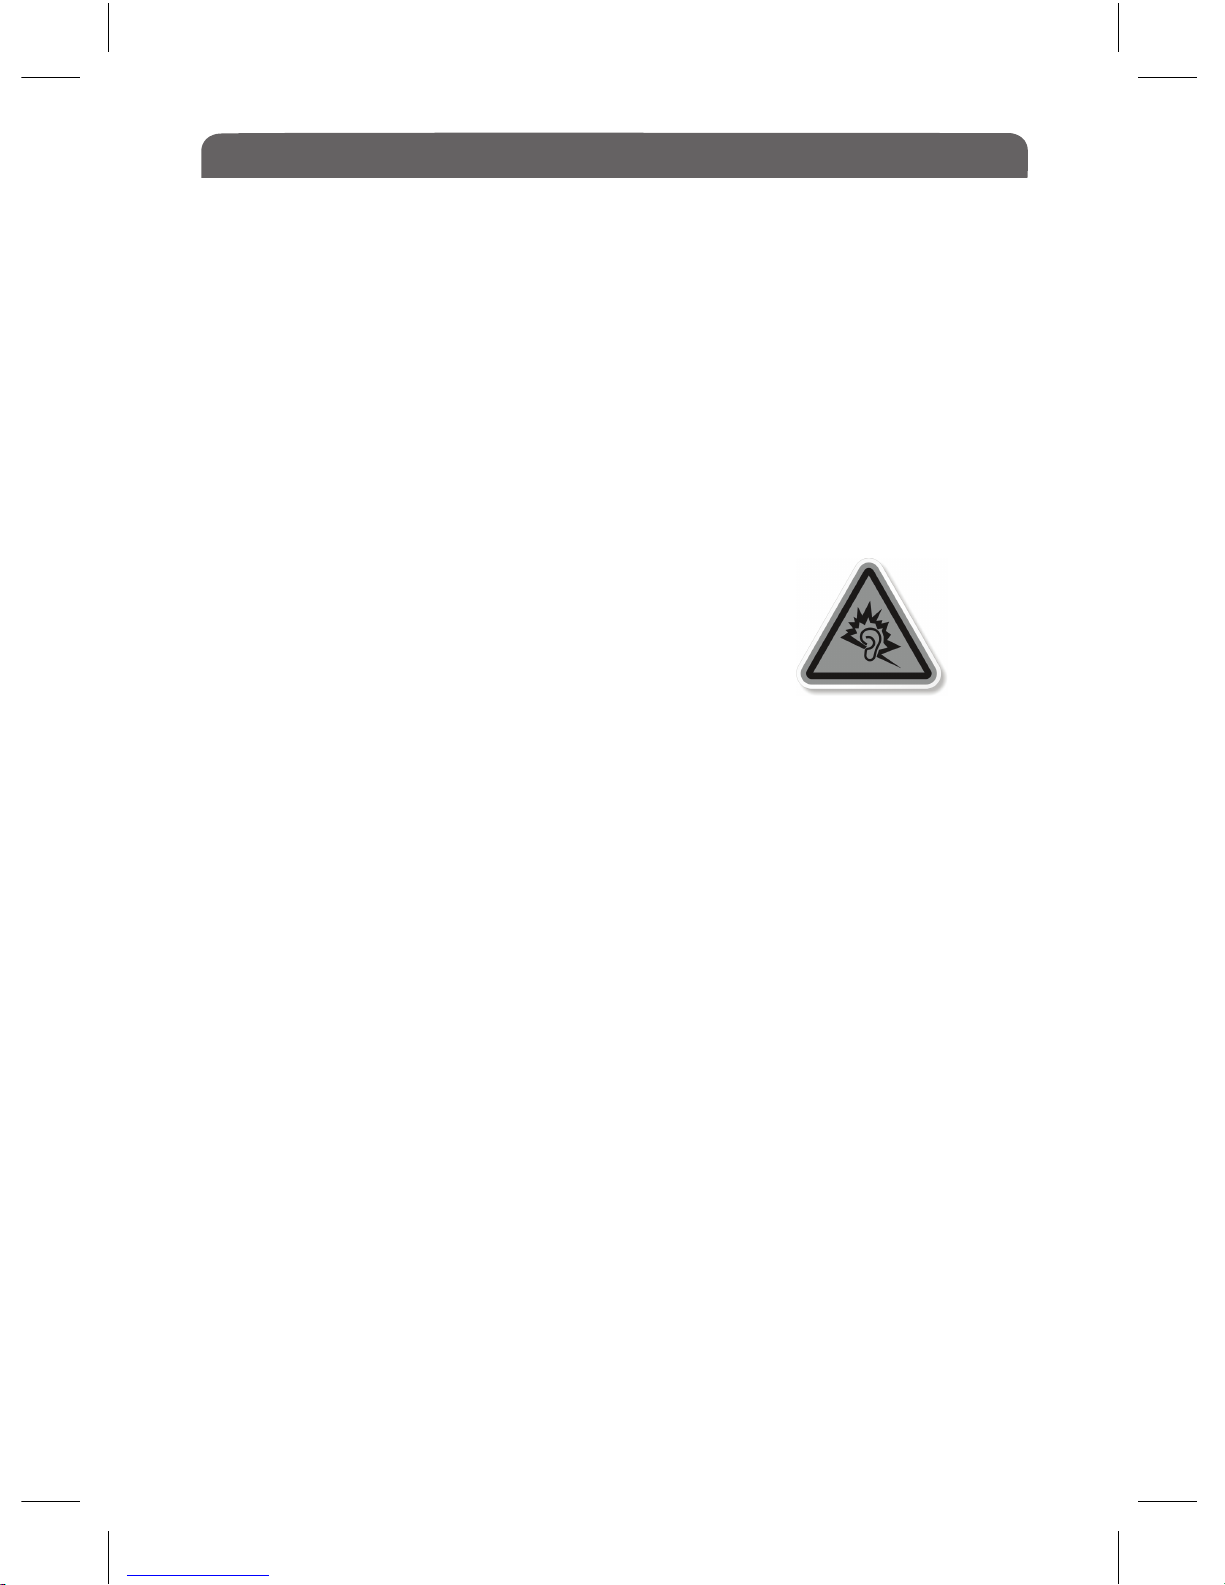
● It is not recomended to use the headphones at a
high volume for an extended period of time as this
may cause damage to your hearing.
● Charge the device when:
a) The battery power icon indicates power is low
b) The system automatically shuts off.
c) Operation buttons do not respond
d) Red icons are displayed at the top right of the screen.
● Do not disassemble, repair or modify the device by yourself. Refer servicing
to qualified personnel only. Once the casing has been tampered with the
company shall not be liable for any resulting damages or faults.
● Route the USB so that people and pets are not likely to accidentally trip or
pull the cable whilst moving around the area.
● Clean with a dry cloth only. Make sure the device is turned off before
cleaning. Do not use liquid or abrasive cleansers.
● Do not use the device in prohibited areas ( ie; airplanes)
● Do not use the device whilst driving or walking.
● Do not dispose of the device in a fire to avoid explosion.
Page 8
Safety and Important Information Continued
Avoid dropping the Entity Tablet. Do not allow the HD display screen to
become damaged as this cannot be replaced/repaired.
When the device is formatting or a file is uploading or downloading, do not
suddenly disconnect the Entity Tablet from the external sources as this could
cause an application error.
Do not attempt to disassemble the product, or use alcohol, thinners or
benzene to clean the Entity Tablet as this will cause damage to the unit.
The company reserves the right to improve the product, product specification
and design. The information is subject to changes without prior notice.
(This tablet has no waterproof function)
All pictures in this manual are just for your reference.
04
•
•
•
Page 9
4.0 Box Contents
1. 7” Entity Tablet
2. User Manual
3. Quick Start Guide
4. BS Plug Adapter
5. USB Cable
6. Head Phones
05
5. USB Cable
6. Head Phones
Page 10
5.0 Features
Browse the Web
Visit your favourite websites
Check your E-Mail
Keep in touch with friends and family
Watch You Tube videos
Browse the world’s most popular videosharing community
Read your favourite books
Download thousands of books with the included E-book reader*
Discover thousands of apps for Android
Games, applications, and more with marketplace
Connect to the internet wirelessly
High-speed Wi-Fi 802.11 b/g/n networking
Enjoy your media library anywhere
Portable powerhouse plays music, video and photo formats
Micro SD memory card reader
Increase your storage capacity (up to 32GB supported)
Built-in camera
Convenient front-facing camera (0.3MP)
Automatic orientation detection
Read any way you want; the display adjusts automatically
*Reading books in the ePub format requires the included E-book reader
application
Streaming video quality will be affected by the source, and the quality
and condition of your network connection
06
TM
TM
Page 11
6.0 Unit at a Glance
1. Power
Press to turn the unit on, or to turn the screen on or off.
Press and hold to access the Power Off menu.
2. Headphone
Audio output connection for headphones.
3. USB
Connect to a USB device or a computer to transfer data (eg. music, videos,
photos, files).
4. DC in 5V
Connect to an adapter
5. Micro SD Card
Load external Micro SD Cards here.
6. VOL+/VOL-
Press VOL+ to increase the volume level.
Press VOL- to decrease the volume level.
7. Reset
Press this button to restart your Tablet if the device stops functioning.
8. Camera
Use it to take pictures or capture videos.
Important Notice:
If you enter a password onto your Tablet, it must be written down and kept
in a safe place. If by chance you misplace or forget your password, you will
need to take the Tablet back to it’s Factory Settings.
07
+
-
TF CARDD
C IN 5V
R
1
8
2
3
4
5
6
7
Page 12
PLEASE NOTE, PERFORMING A FACTORY RESET WILL DELETE
ALL DATA ADDED.
The Factory Reset will take your tablet back to the standard settings
when purchased. All subsequent files/downloads/Apps not included on the
Tablet at the time of purchase will be deleted. Make sure that you back up
all current files before performing a factory reset.
Please follow the below procedure to reset your Tablet to it’s Factory Settings
in the case of a forgotten password:
Press VOL+ and ON/OFF for 5 seconds to enter into recovery mode,
then choose Factory Reset in recovery mode.
If for whatever reason you wish to perform a Factory Reset, you can do this
via the Settings app under Back up and Reset.
08
7.0 Factory Reset
Page 13
8.0 Before You Start
8.1 Charging the Battery
● Before first use, make sure that the battery is fully charged.
● Recommended temperature for battery charging is 0 - 35˚C.
● Connect with the BS 3 pin plug adaptor supplied to a suitable power source,
or connect the device with the USB cable, the charge will begin automatically.
● Charging time is at least 6 hours the first time, 4 hours thereafter.
Note: This tablet contains a Built-in type rechargeable Li-poly battery, the charger must be a
standard adaptor (Input: AC110~240V 50/60Hz), this device includes DC charging. USB
interface can charge, choose USB interface to charge. During the charging, the battery icon will
scroll
When the Entity Tablet has finished charging, the battery icon will become
green and stop scrolling
In order to prolong the service life of the Entity Tablet, we recommend using
the full battery power until flat before recharging it.
Note:
● The Device should be in standby status while charging. Unless the battery has completely
drained you can use the device whilst charging but the charging process will take longer.
● It is normal that the device may become warm during charging.
● If you don’t use this tablet for a long time, to avoid power consumption damage, please
charge/use the battery once a month.
8.2 Getting Started
Turning the Tablet On and Off
To turn the Tablet ON: Press and hold the Power key until the LCD screen
turns on. Wait until the Home screen appears; the Tablet is now ready.
To turn the Tablet OFF:
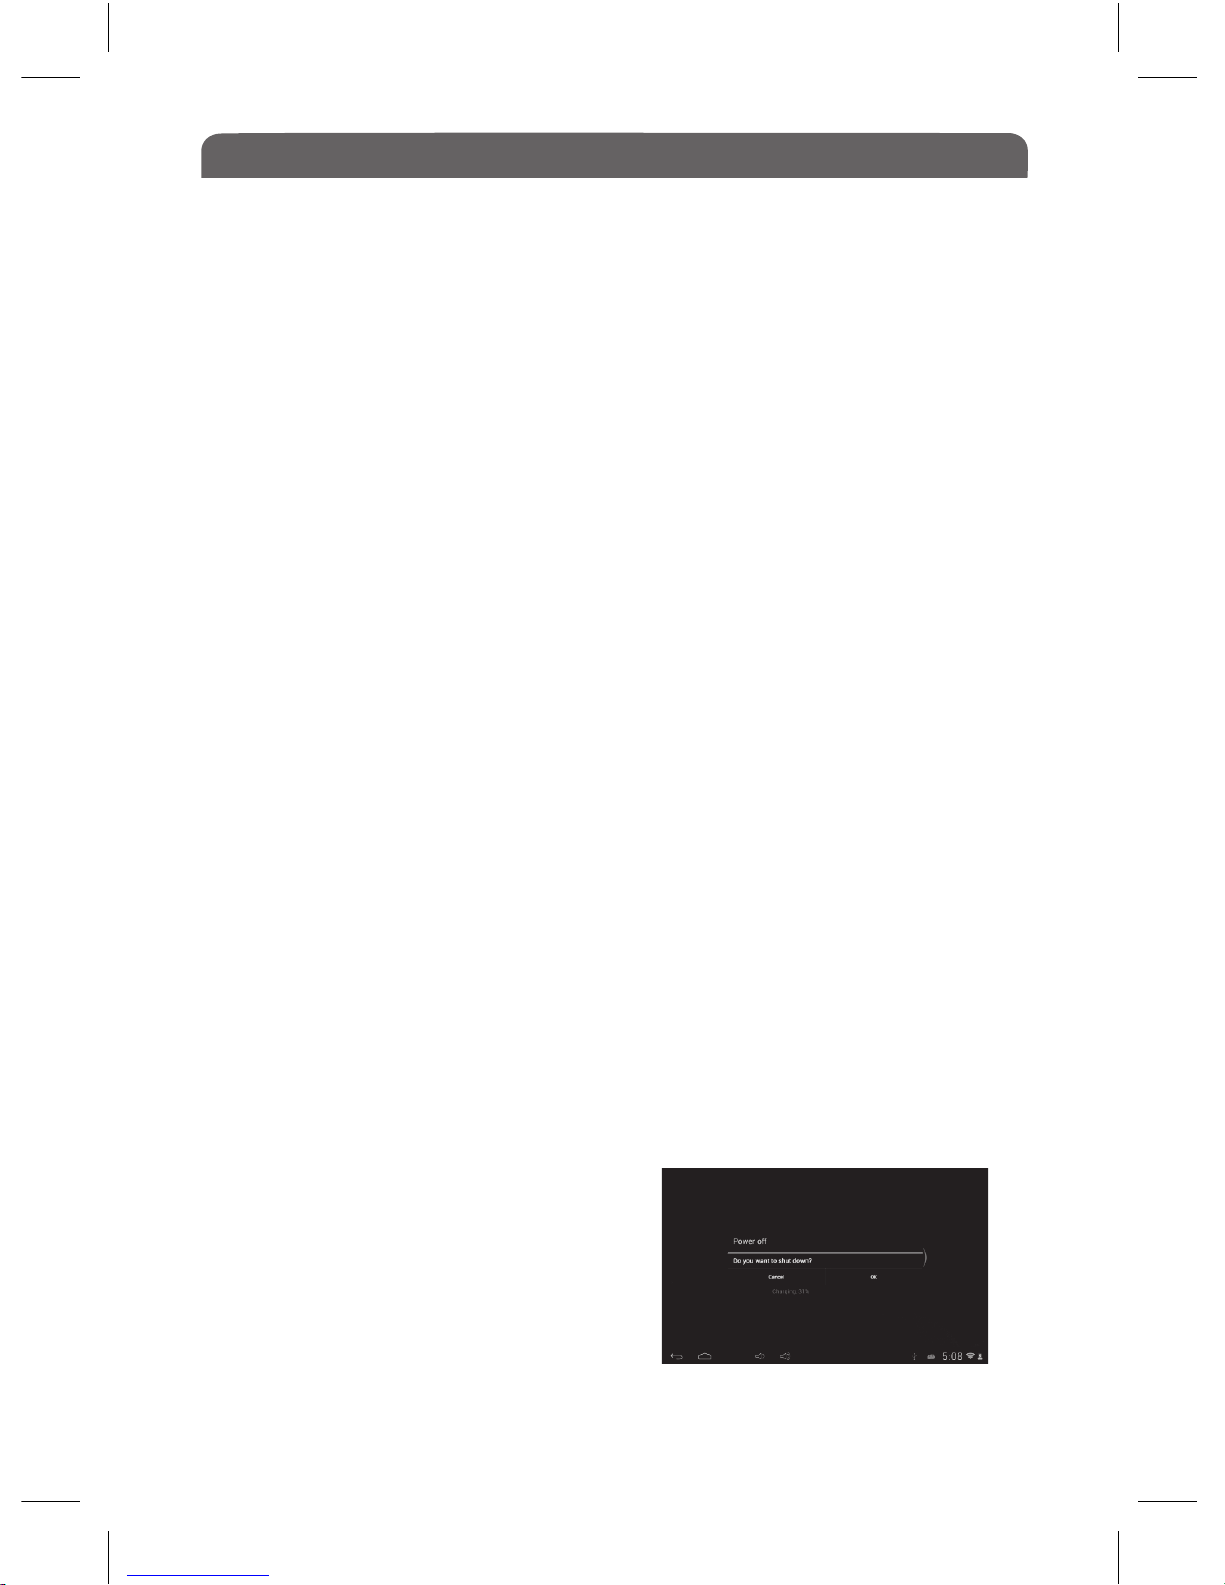
Press and hold the Power key until the
Device Options menu appears.Tap OK
on the screen to turn off the Tablet.
Please note: This section contains some of the fundamental elements that
you will need to know before using the Entity 7” Touch Screen Tablet PC.
Please read this section carefully before operating the device.
09
Page 14
Before You Start
Turning the Screen On and Off (Standby)
When the Tablet is on, you can turn off the screen to conserve battery power.
Simply press the Power key once to turn the screen OFF. Press the Power key
again to turn the screen back ON.
10
!
To conserve battery power, the screen can be set
to turn off automatically when the tablet is not in
use (between 15 seconds and 30 minutes).
This Screen timeout option can be found in Settings
under Display (Sleep)
To Conserve Battery Life
Certain functions consume more energy, ways to prolong the battery life are:
● reducing the brightness of display: Go to Settings - Display - Brightness , and move
the slider to the left.
● The battery will drain quicker if Wireless is running in the background.
8.3 Screen Orientation
The Entity Tablet has a built in automatic orientation detection. Read your screen anyway
you want, the display will adjust automatically. To change the automatic orientation, go to
Settings. Scroll to System tab in Accessibility and tick or untick Auto Rotate Screen
depending on you preference.
8.4 Touch Screen Usage
This tablet has an 7” capacitive touch screen, allowing you to select items and execute
functions easily. Before using, please note the following:
• Do not operate with a stylus, pen or any sharp object as this will scratch the touch screen.
• Do not place the touch screen in contact with other electronic devices as this may cause
failure of the touch screen.
• Do not allow the touch screen to come into contact with water, moisture or be used in a wet
environment as this will cause failure.
• For best results, please touch the screen lightly using your fingertips.
The following methods can be used to control the touch screen:
• Tap: tap once to select or start a function, option or application.
• Tap and hold for at least two seconds: on an app icon to move or delete, on a file to
delete, copy, rename, move or email, on a webpage image to save, view or save the
image as wallpaper
• Drag and drop: tap, hold and drag an item and drop at desired position.
• Double tap: quickly tap an item twice to open.
• Slide: slide up, down, left or right to browse a list or the screen
• If there is no operation for a specified time, the screen will go into sleep mode. Press the
power button on quickly to wake up the screen.
Page 15
9.0 Getting Started
9.1 Unlocking the Home Screen
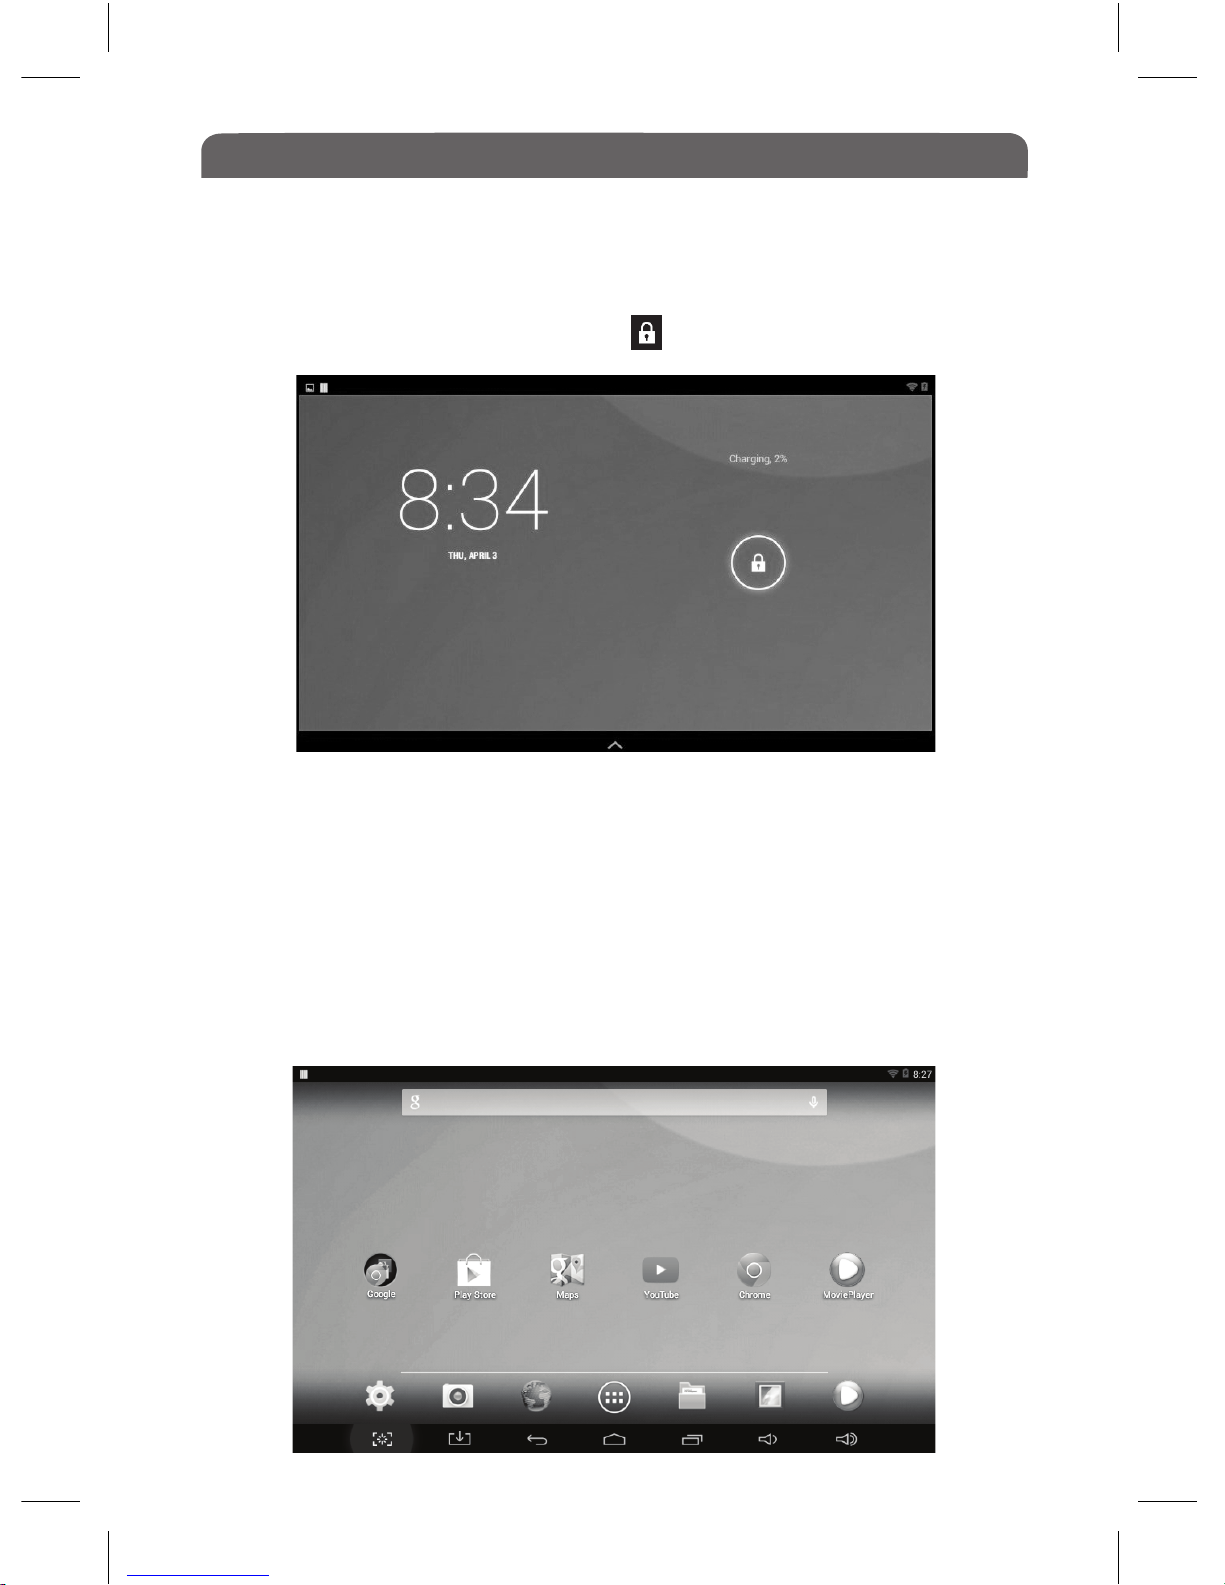
When you have powered up the device the screen will display the device lock
screen, you will notice the ‘Locked’ icon on the right as below:
Press your finger lightly on the Lock icon and drag it to the right, then release.
The system will be unlocked and will then enter the home screen. If you drag
the Lock icon to the left, the system will enter Camera mode. If you drag the
Lock icon up, you will automatically go to Google.
9.2 Home Screen Overview
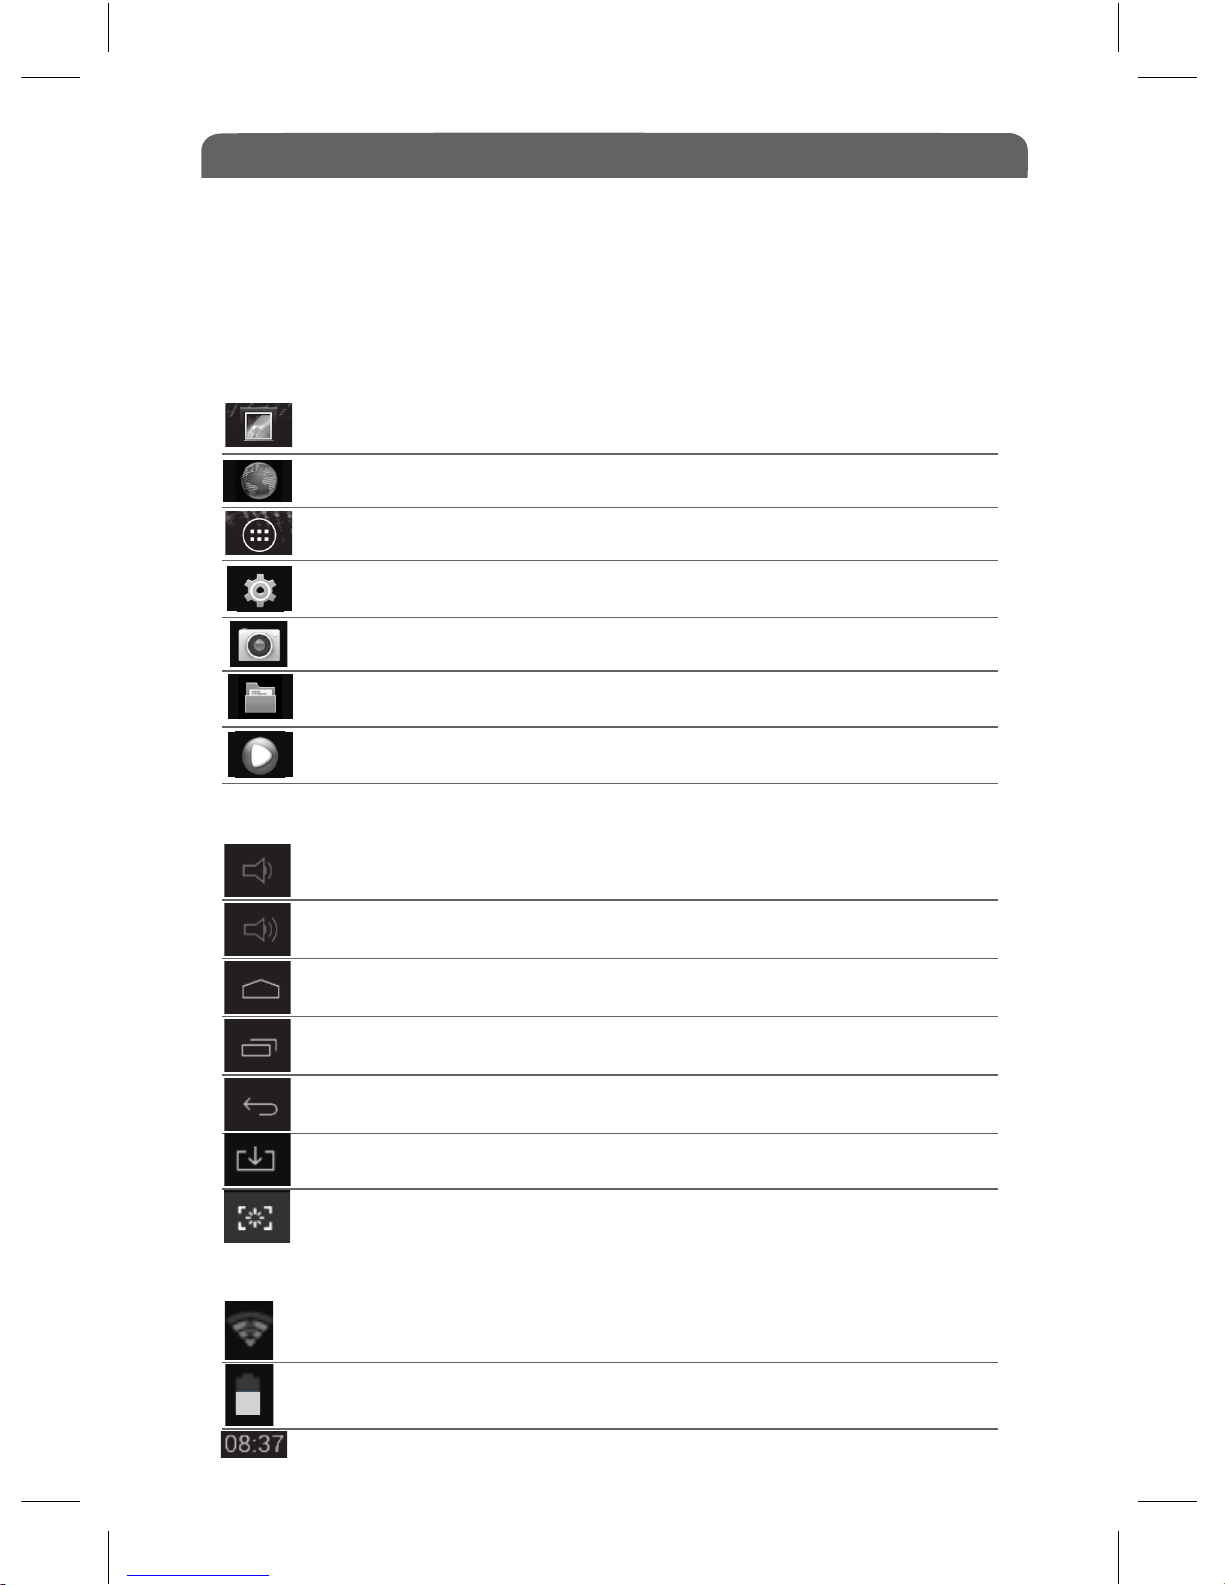
Once you have unlocked the screen, you will be taken to the Home Screen as
below.
11
Page 16
Getting Started
9.3 Home Screen Icons Explained
Note: Icons above the line are Apps that have been added as shortcuts
from the Apps tab.
Across the bottom of the Home Screen you will see 7 App icons that
are a simple shortcut to the most popular apps. These are:
12
Gallery
Internet Browser
Full apps screen
Settings
Camera
FileBrowser
MoviePlayer
Volume - Tap to decrease
Volume - Tap to increase
Home - Return to main interface
Running Apps - Opens a list of running applications
Back - Tap to return to previous interface
Downloads files from the internet
Takes a Screen Shot
Wifi Signal Strength
Battery
Clock
On the bottom of the Home Screen you will see the following symbols:
Across the top of the Home Screen you will see the following symbols:
Page 17
Getting Started
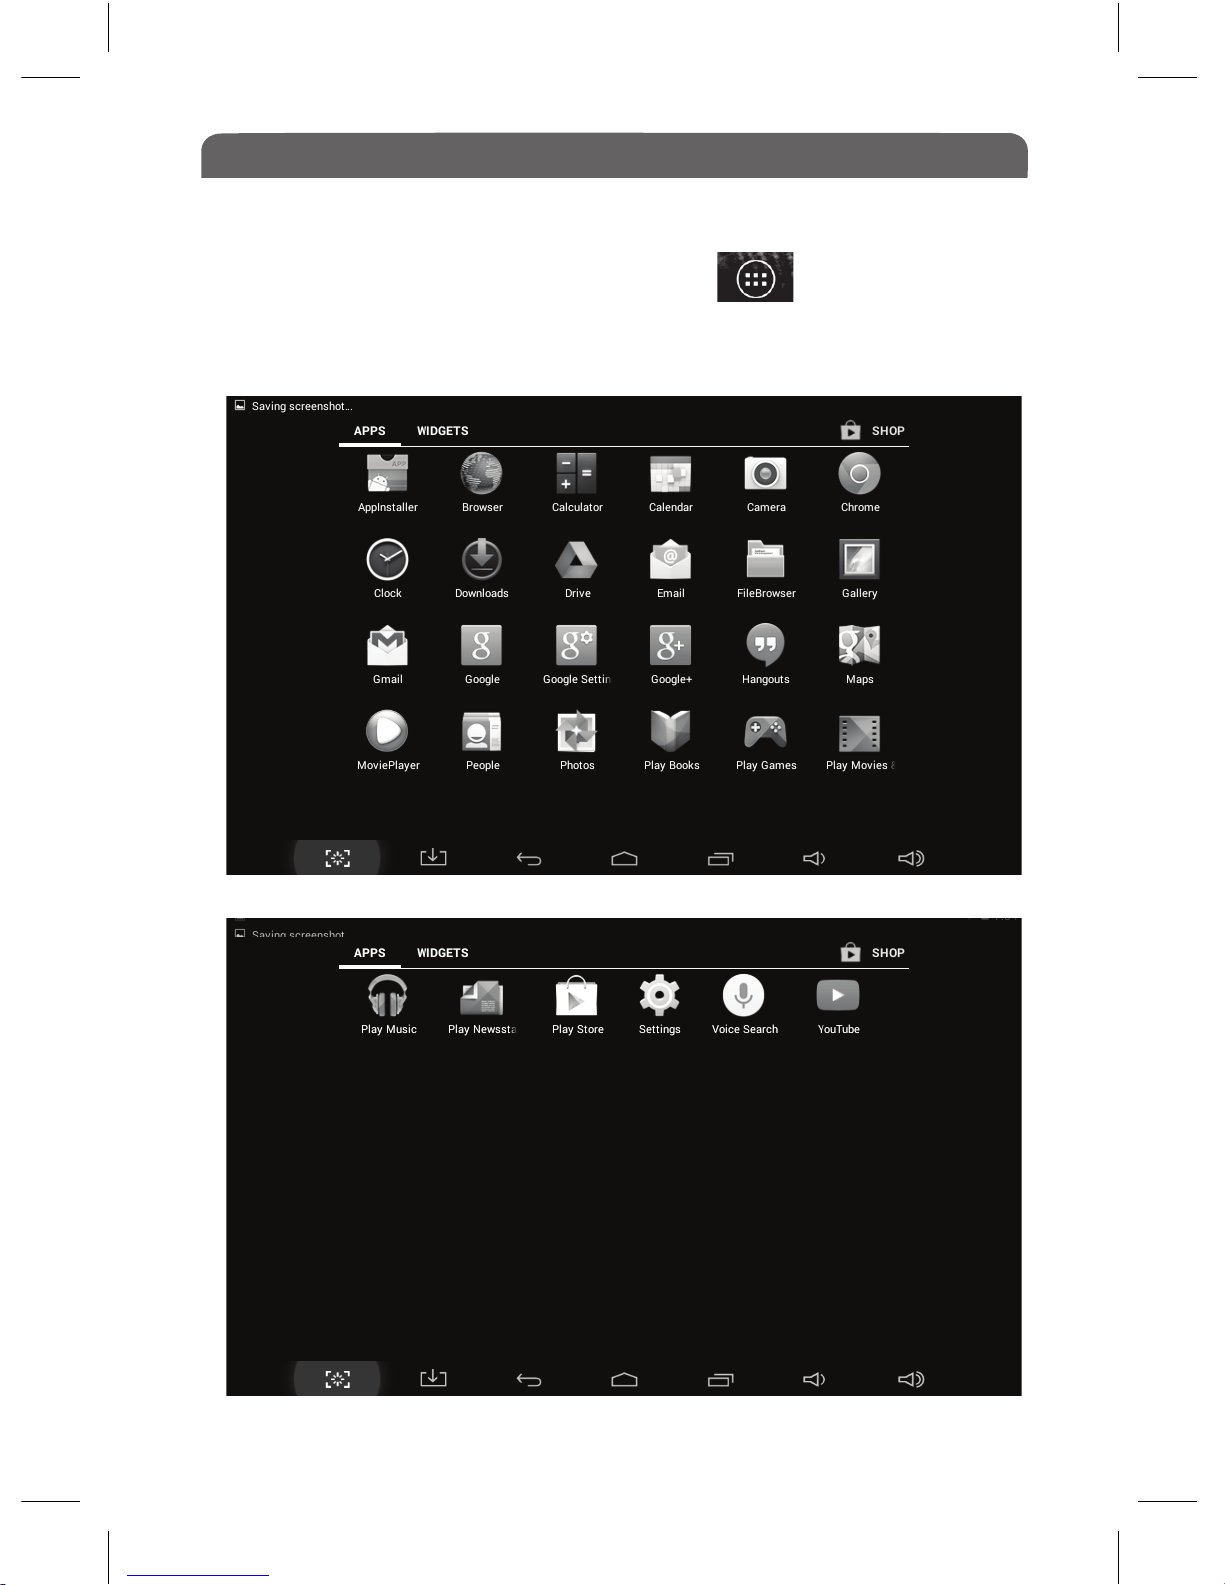
9.4 Apps Screen Overview
To access the full Apps screen, tap on the icon in the centre
of the Home Screen shortcut bar. You will then see the full list of Apps
included on the Entity Tablet on the screen as below.
13
Page 18
Getting Started
14
Browser
Email
Calendar
Google Play
Music
Camera
People
Gallery
Downloads
Calculator
Clock
FileBrowser
Chrome
Settings
MoviePlayer
Appinstaller
Play Store
Application Icon What it Does
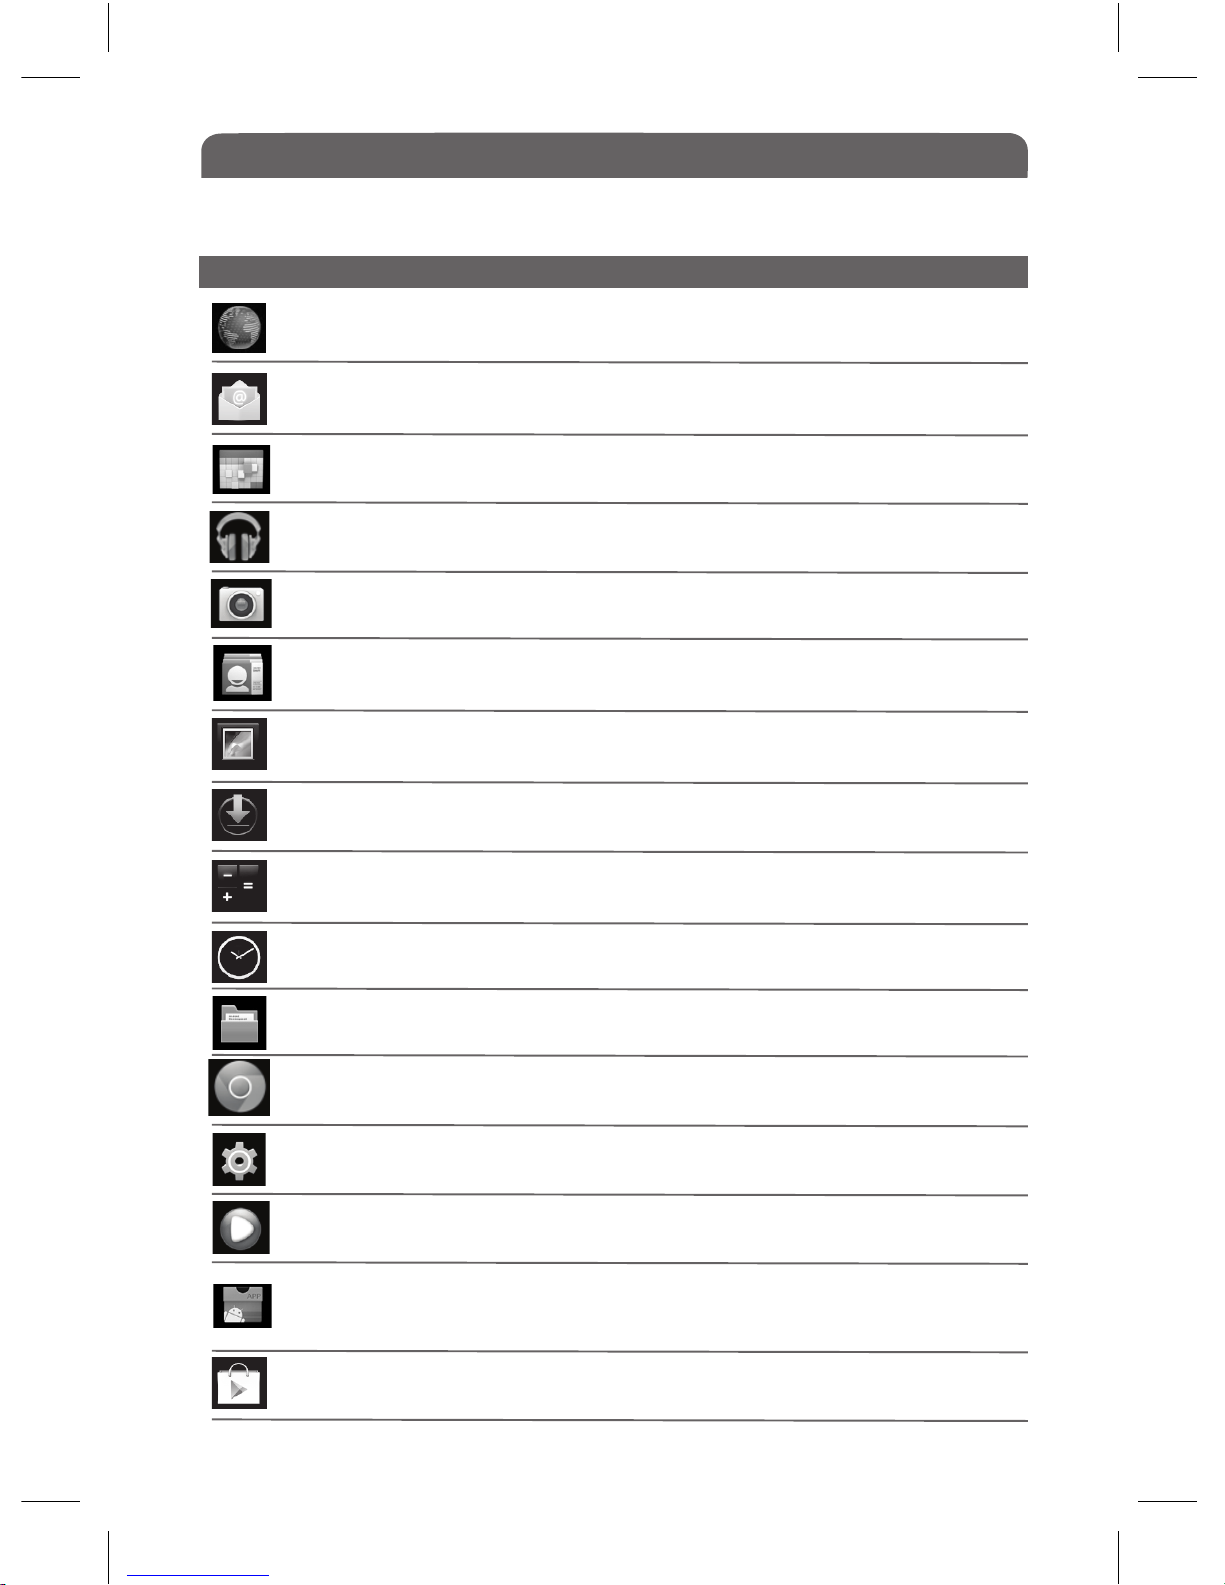
9.5 Full Apps Screen Applications Explained
This will direct you to the Google Chrome web browser
This is where all of the Device Settings can be found
This allows you to view your Videos
This allows you to install applications from your external
storage (eg. SD Card). You can also uninstall applications
or backup applications to external storage
Download Apps that you wish to use on your Entity Tablet by
creating an Online Account
Google Play Music makes it easy to discover, play & share
music. Play millions of songs & listen to the radio.
A 24/12 hour clock that has the option for setting alarms
This opens a basic digital calculator
Allows you to view all files that have been downloaded
This allows you to view any photos that you have taken
with the Camera App.
This allows you to access and edit your contacts
There is a front in-built 0.3MP camera that can take still
pictures and records video content
This application lets you create events,meetings and set
reminders using a day/week/month view.
This Icon takes you to your e-mail account. You can send
and receive e-mails.
This icon will direct you to the internet browser.
This is your file manager
Page 19
Getting Started
15
Drive
Gmail
Google
Google Settings
Google+
Hangouts
Maps
Photos
Google
Play Books
Google
Play Games
Google
Play Newstand
Play Movies
Voice Search
YouTube
Application Icon What it Does
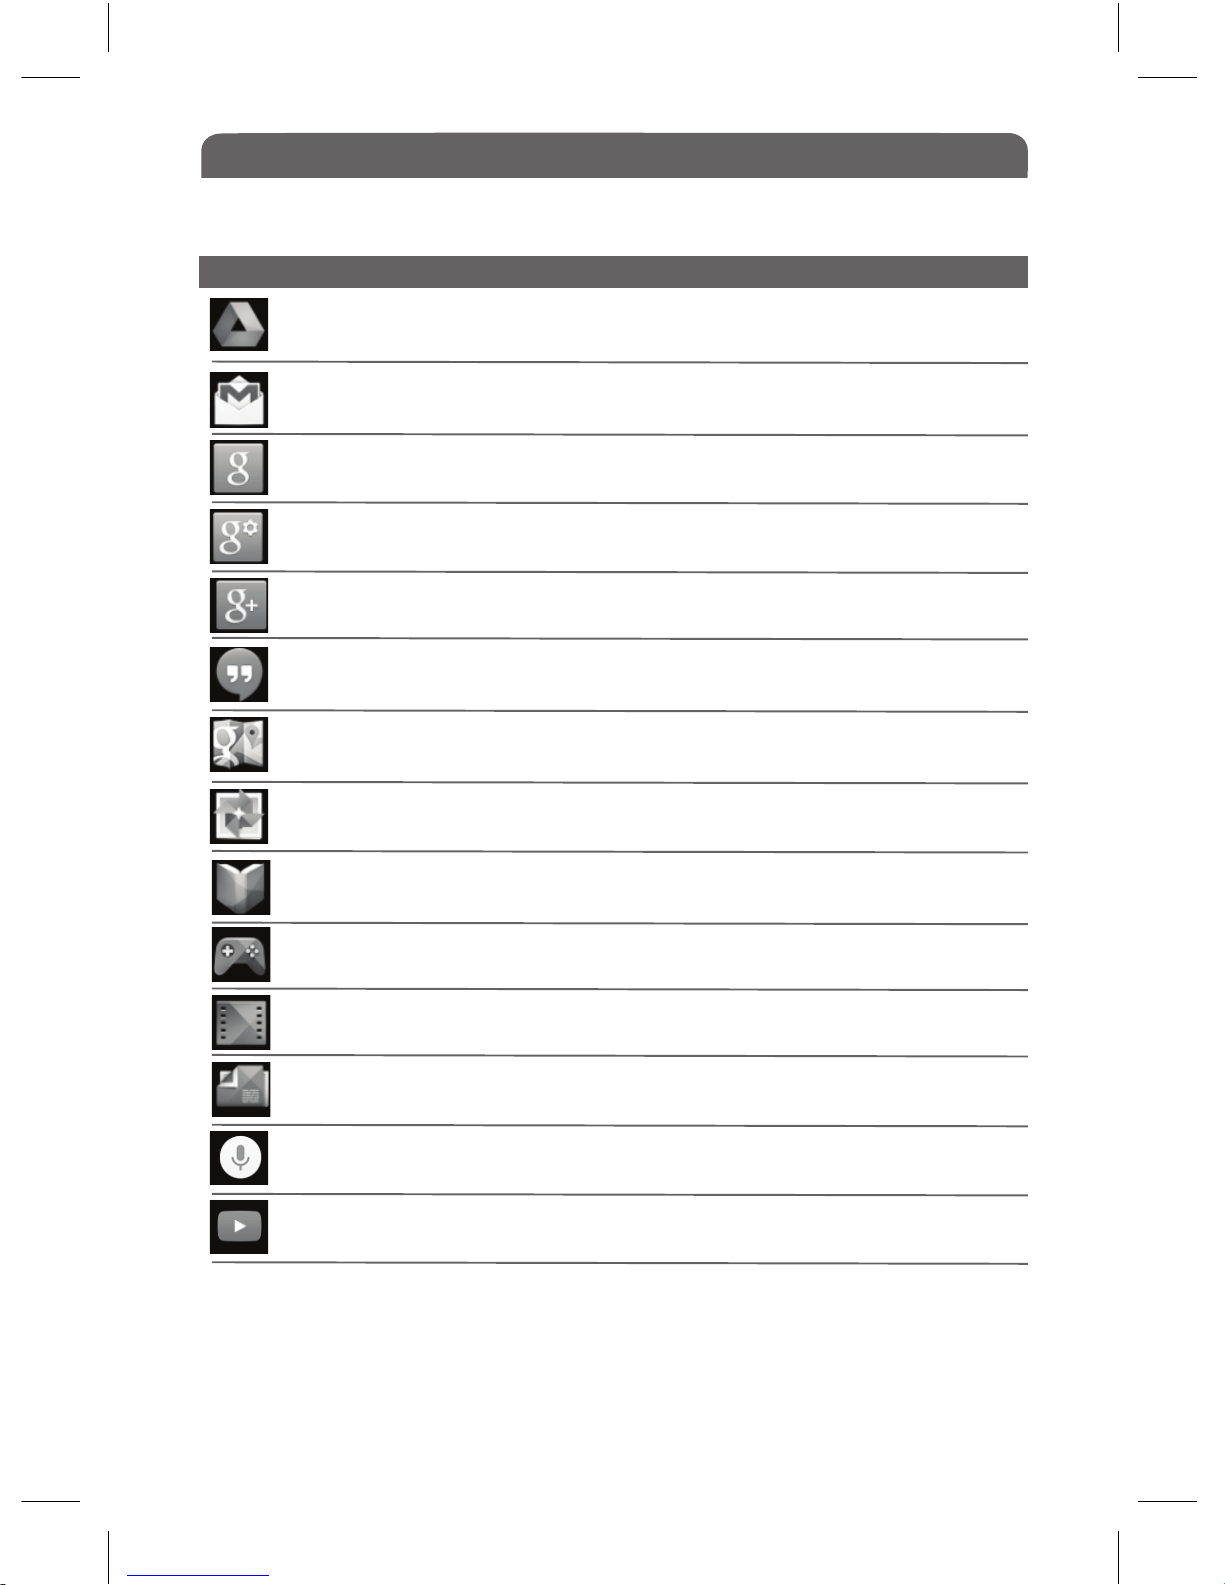
Full Apps Screen Applications Explained
This App will direct you to YouTube where you can access
your own YouTube account and watch videos online.
This will allow you to configure your Google Settings.
This App is the easiest way for you to discover new games, track
achievements & scores & play with friends around the world
This will enable you to access Google Maps.
Manage your Google+ photos, albums and videos here.
This will direct you to the Google web browser.
This Icon takes you to your Gmail account. You can send
and receive e-mails.
Allows you to store all your files in one place, so you can
access them from anywhere and share them with others.
Allows you to follow what friends, family and people around
the world are sharing.
This App brings one-on-one and group conversations to life
with photos and video calls for free.
Choose from millions of books including new releases,
bestsellers, textbooks and free classics.
Discover more of the news and magazines you care about all
in on App.
Quickly search your phone, the web and nearby locations by
speaking, instead of typing.
This App allows you to watch movies & TV shows purchased
on Google Play
Page 20
Getting Started
16
9.6 Installing Applications
One of the best sites to visit is Play Store which provides thousands of apps
many of which are free to download. First tap on the Play Store icon, this will
open the Play Store app where you will be prompted to set up a NEW Google
Account or log in to an EXISTING Google Account. Once Login is complete you
can then browse the Apps available. When you find the app you want, tap on it
to open it and then tap on ‘download’ and then ‘Install’. Your app will appear on
the App Interface screen, simply tap on it to begin using.
Note:
JDW is not responsible for Third Party Apps these apps are installed at users
own discretion.
The Tablet must be set to allow installation of applications from non-market
sources. The Unknown sources option can be set in the Application settings
menu.
9.7 Using Applications
Users can add, delete or install Applications on the desktop, as well as adjust
the position of icons; the icons can be dragged between operation areas, or
between the operation area and the shortcut bar.
To Open: Tap the application icon.
To Move: Press, hold and drag the Application Icon until you see alternative
locations appear in the background, you can now move the icon and it will move
it onto the new location.
To Delete: press and hold the App and drag it to the X at the top of the screen
and release when it turns red.
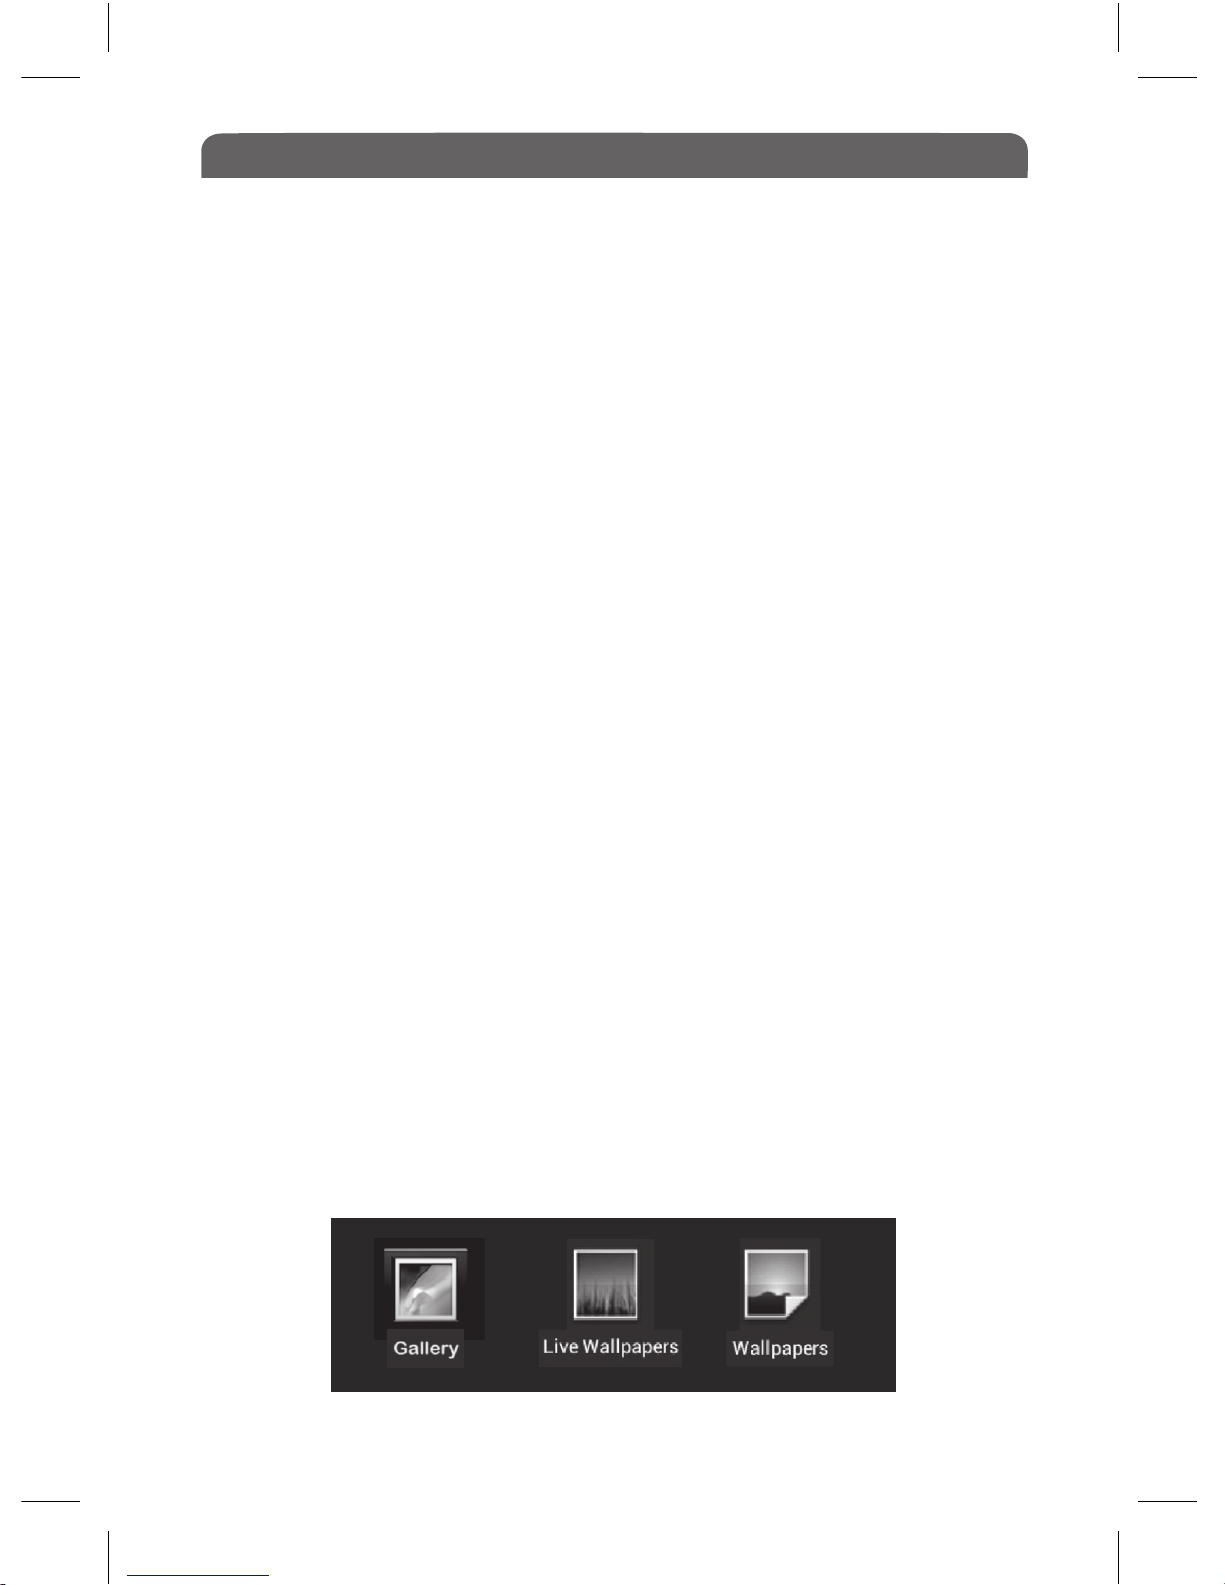
9.8 Changing The Wallpaper
To change your wallpaper, lightly press and hold your finger on the Home Screen,
a pop up menu will appear, select ‘Wallpaper’ the following options will be shown:
Choose an image to set as your wallpaper from the options above.
Page 21
10.0 Using The Internet
10.2 Viewing Video, Animation or Flash Games on the Internet
On the Apps Screen you will see the ‘Browser’ Icon, this will allow
you to access the Internet. Tap this icon to open a web browser.
The browser will open to www.google.co.uk when first used but you can
navigate away from here to any other website. The next time you connect to
the internet it will open at the last site visited.
In order to stream video content, animation or flash based games on the
internet, tap on the symbol in the top right hand corner of your browser
and select ‘Request Desktop Site’, this should now have a tick in the check
box next to it. If your Entity Tablet has been switched off you must re-tick this
box when you next go onto the internet and wish to view video content,
animation or flash based games.
10.1 Opening a Web Browser
17
On the Desktop you will see the ‘Email’ Icon, Tap this icon to:
● Set up E-mail accounts
● Send and Receive E-mails
● Download or open attachments.
● Tap on the ‘Email’ Application
● Enter your email address ie; [email protected]
● Enter your password into the password field and press ‘Next’
● The Device will check for incoming server settings and, if all details have
been entered correctly, you should now have your email account set up on
this device.
11.1 Connecting to an Existing Email Account
11.0 Emails
Page 22
Emails Continued
● Tap on and select ‘Settings’
● Scroll down the list on the right and select ‘Remove Account’
Tap on the Email Application. You will automatically be taken to your email
inbox. On the top bar you will see the following icons:
When you open an email you will see and on the top bar, use these
to navigate forwards and backwards through your emails, tap the icon to
delete and the to move the email to a specific folder.
11.2 Removing an Email Account from the Tablet
11.3 Composing and Sending Emails
+
Tap to compose emails
Tap to search emails
Tap to view folders
Tap to refresh
Tap to bring up settings
18
Page 23
19
12.0 Managing Files
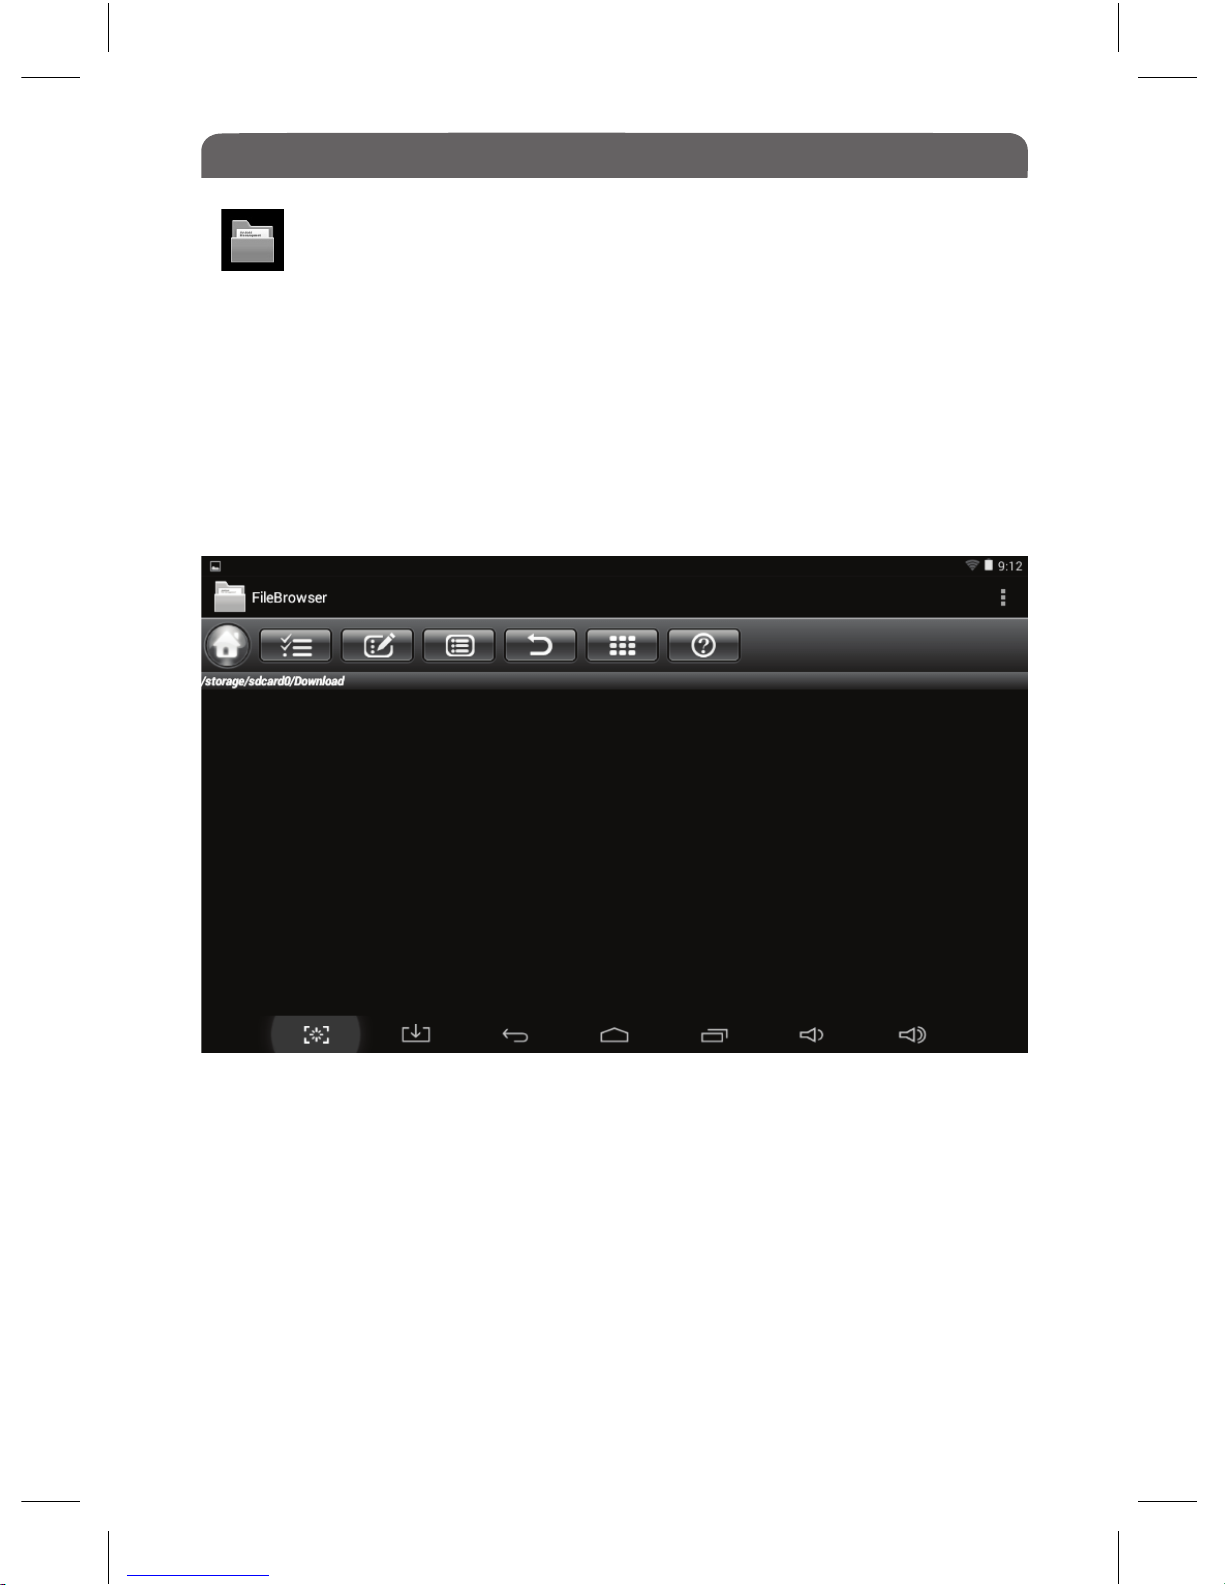
Contains all of the files in the devices local memory. You can browse
through your files, videos and photos. This is where your downloaded apps,
ebooks etc will be found.
You can copy and paste files from one folder to another: press and hold the
desired file until a menu appears giving you the options to Delete, Rename,
Copy, Move or Email the file.
12.1 Browse & Manage Files
Page 24
13.0 Play Music
14.0 Play Books
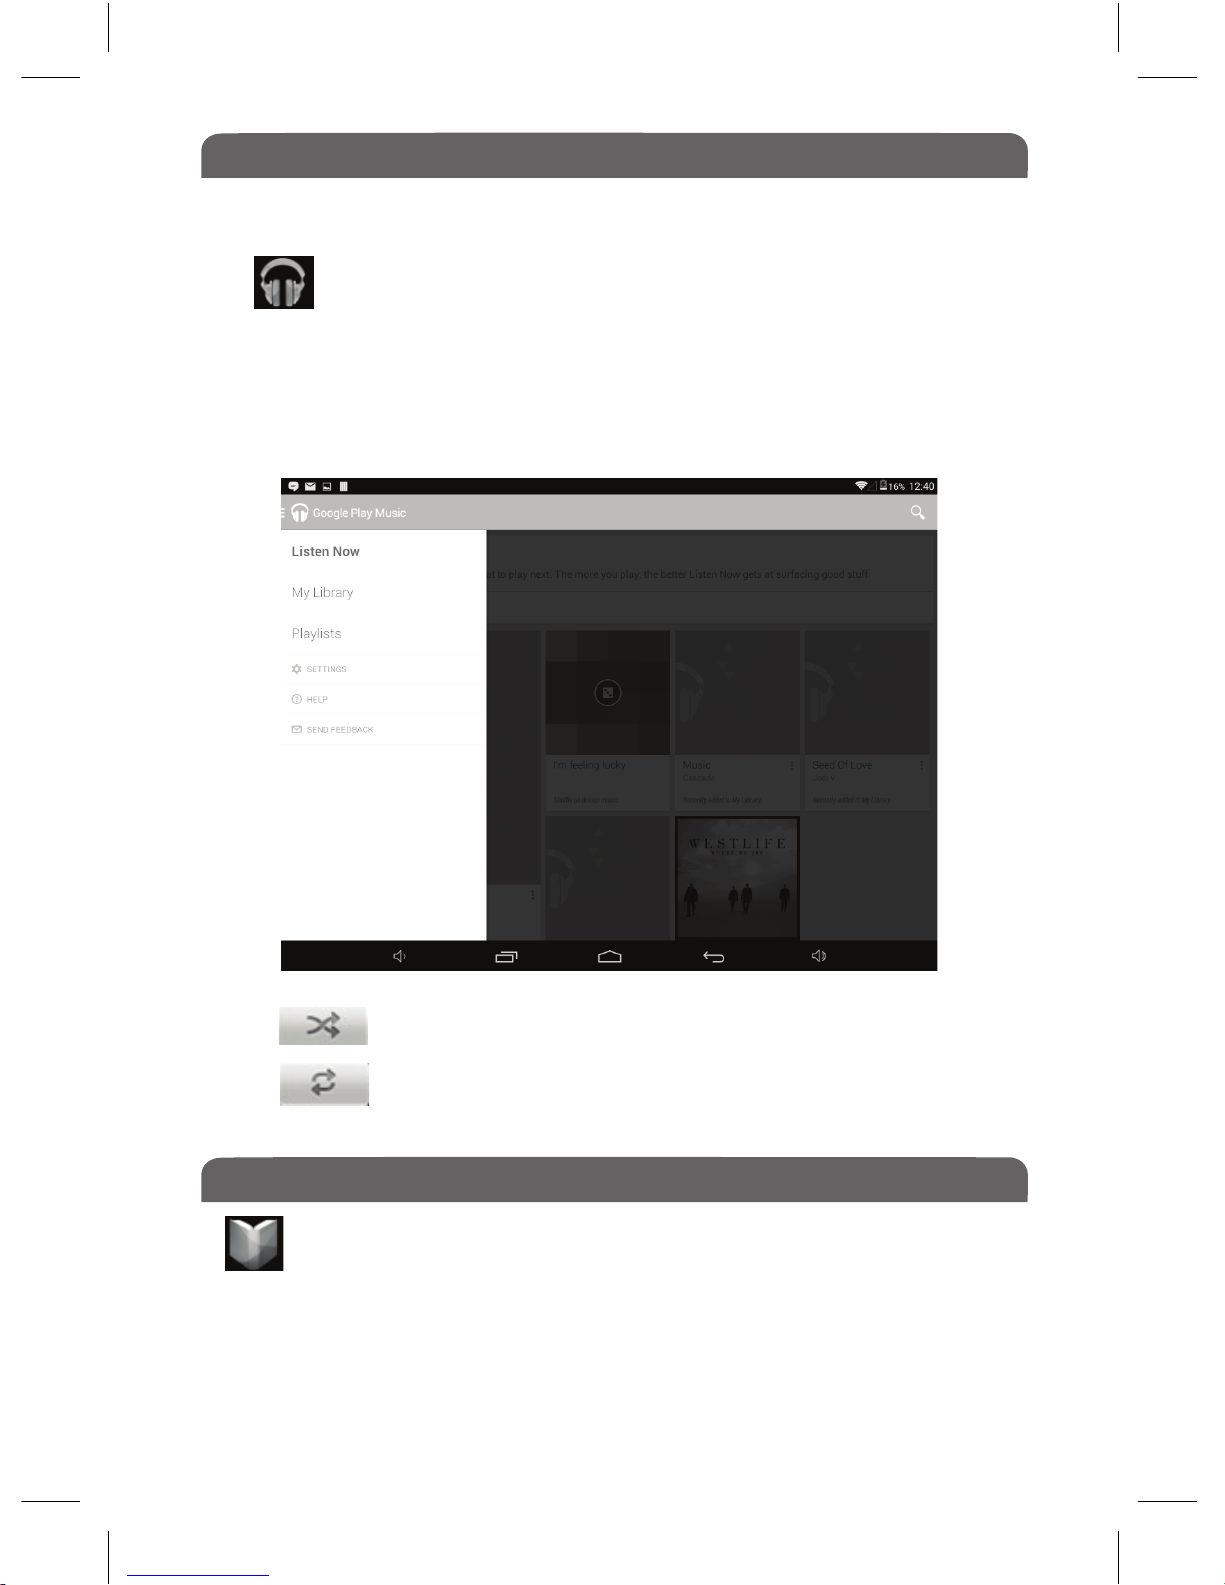
Tap on the Google Play Music application, this allows you to play
audio files You can listen to these files either through the inbuilt speaker or
through connected headphones.
The Play Music App lets you view your audio files by Artists, Albums, Songs
or Playlists, you can scroll through your audio files by dragging with your
finger on the screen and then tap to select your desired track.
● Tap icon for random play mode.
● Tap icon for loop mode, press again to exit loop mode.
If you want to read eBooks on the Entity Tablet, you must click in the
Play Books app, there are lots of free apps available which allow you to read
eBooks in many different formats.
13.1 Play Music
20
Page 25
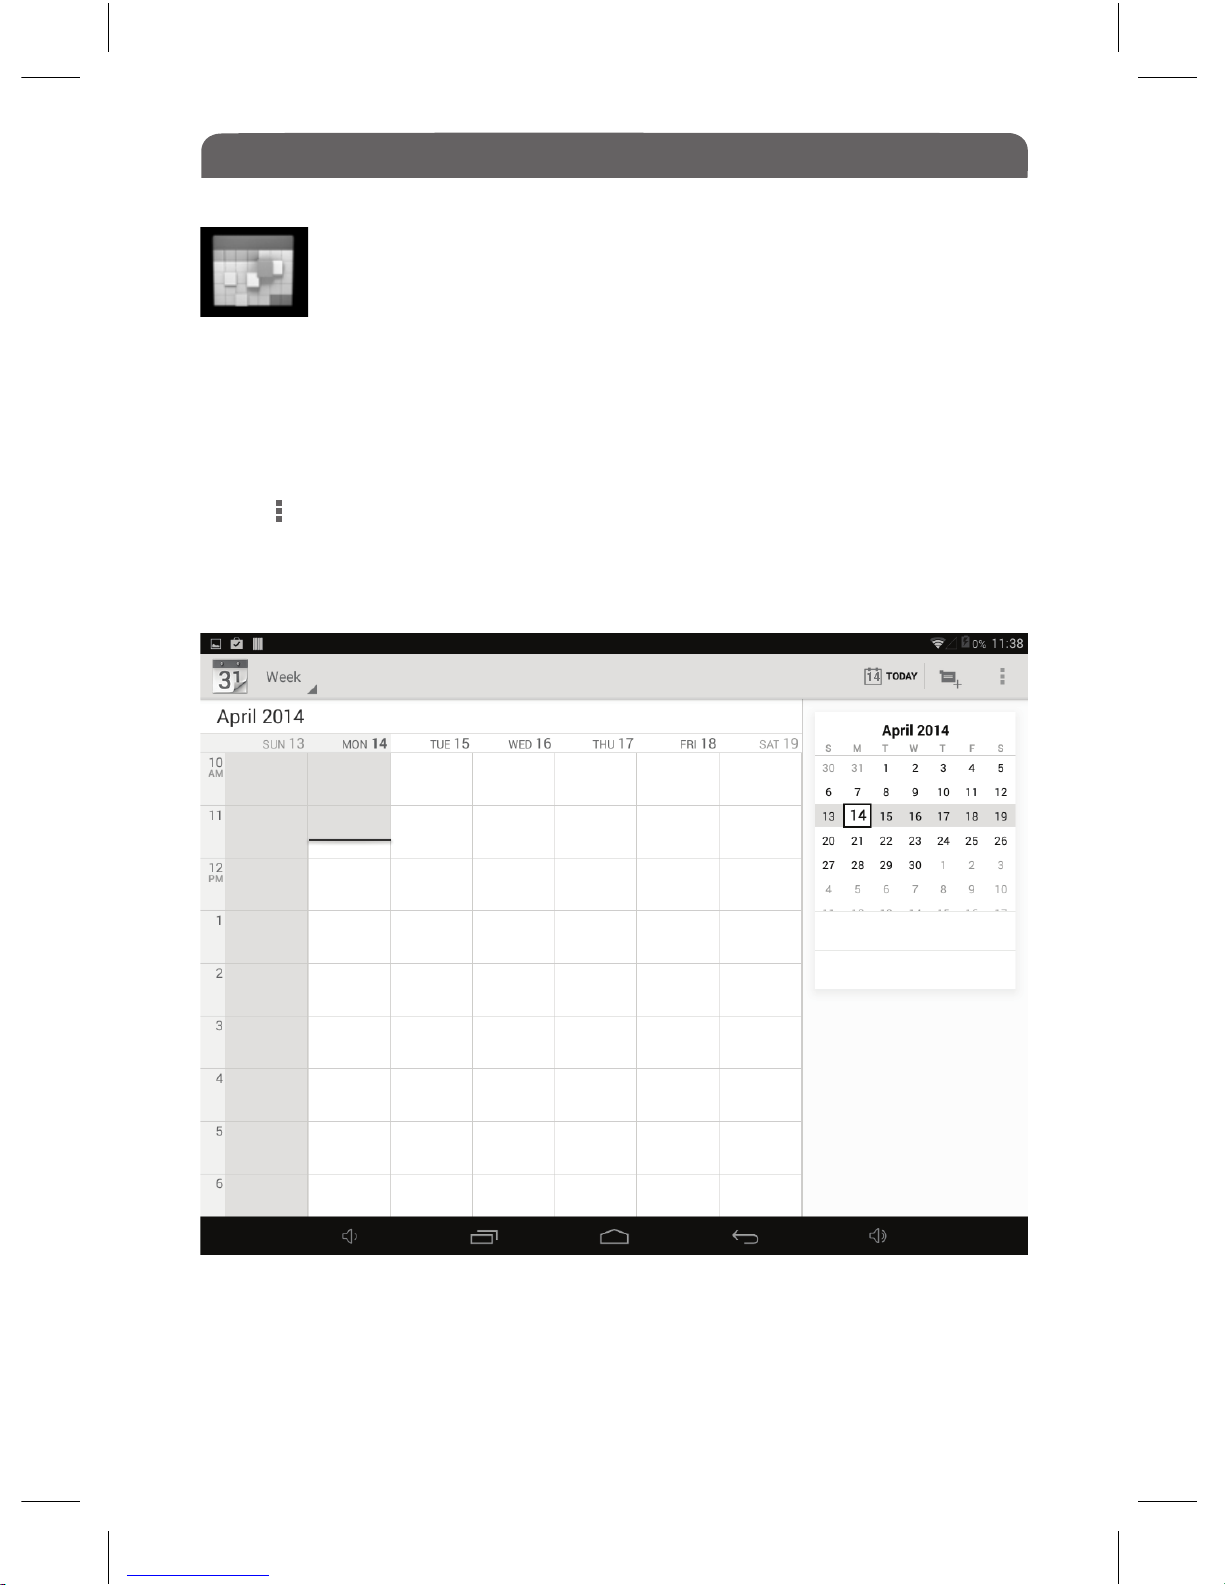
15.0 Calendar
Tap on the Calendar application, here you can check the time and
date as well as being able to enter events and reminders and you
can view your events by day, week or month. To be sent notifications of events
you must set up your email account on the Tablet first. You must enter your
Exchange account, E-mail address and Password so that you can be sent
notifications of your saved events. Double click on the date on the calendar
page to add an event and click done when finished.
Click in the top right hand corner to access various settings to customise
your calendar view and sounds.
21
Page 26
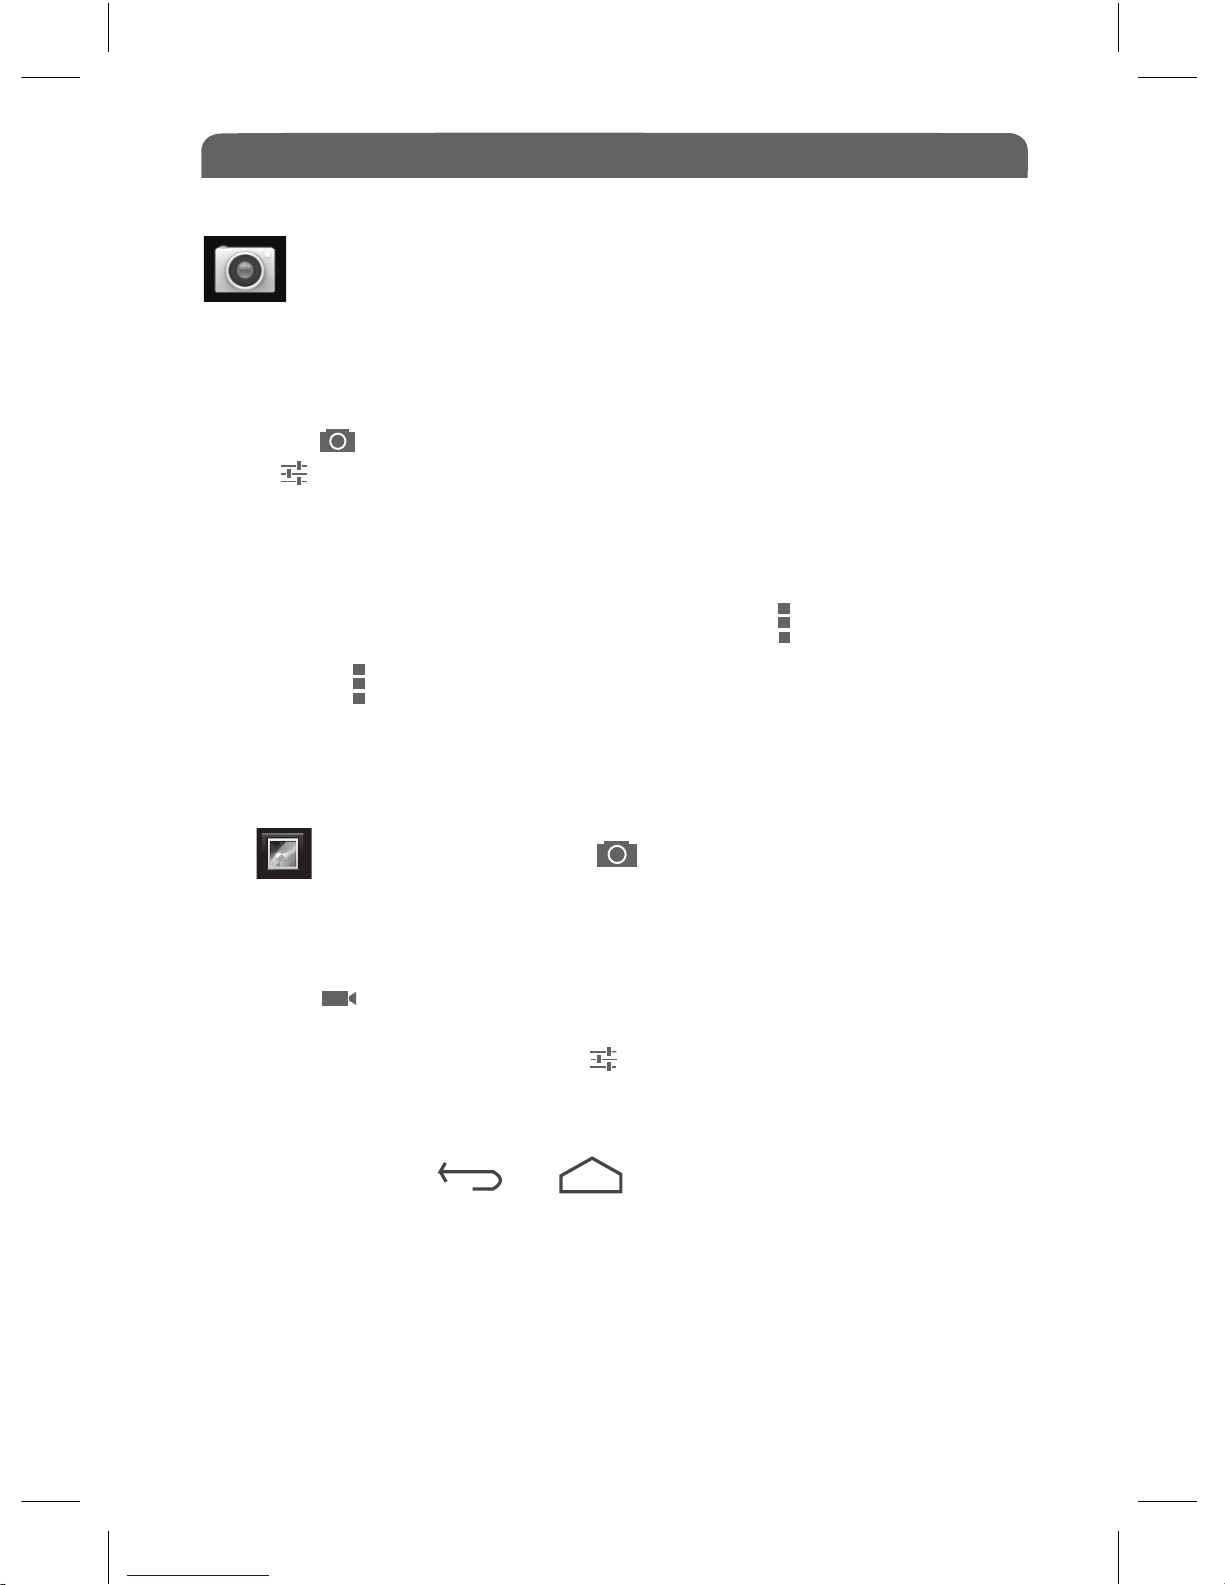
16.0 Camera Application
To Take Still Photos
● Tap the icon in the bottom right corner.
● Tap to alter the settings such as white balance and exposure
● Tap again to close the settings options
● Drag the slider up and down to zoom in/out
● Tap the circuler button to take the photograph
● The photos you take are shown as a small window in the top right of the
screen, tap on it to open it and you will see this icon which enables you to
edit your photo.
● Next to the icon is a Trash symbol which allows you to delete the selected
photo.
● You can slide your fingers either left or right to view the images in your
album.
Tap in the top left corner and to return to Shooting mode.
16.2 To Take Videos
● Tap the icon in the bottom right corner to take videos.
● Tap the red circular button to begin recording and tap again to stop recording, there are various settings under and a slider on the screen for zooming
in/out.
TO EXIT CAMERA MODE: Tap the bottom of the screen, 5 icons will
appear. Press either or to return to home screen.
Tap the Camera Application to enter Shooting mode. The camera
can be used to take both still photos and videos.
16.1 Using the Camera
22
Page 27
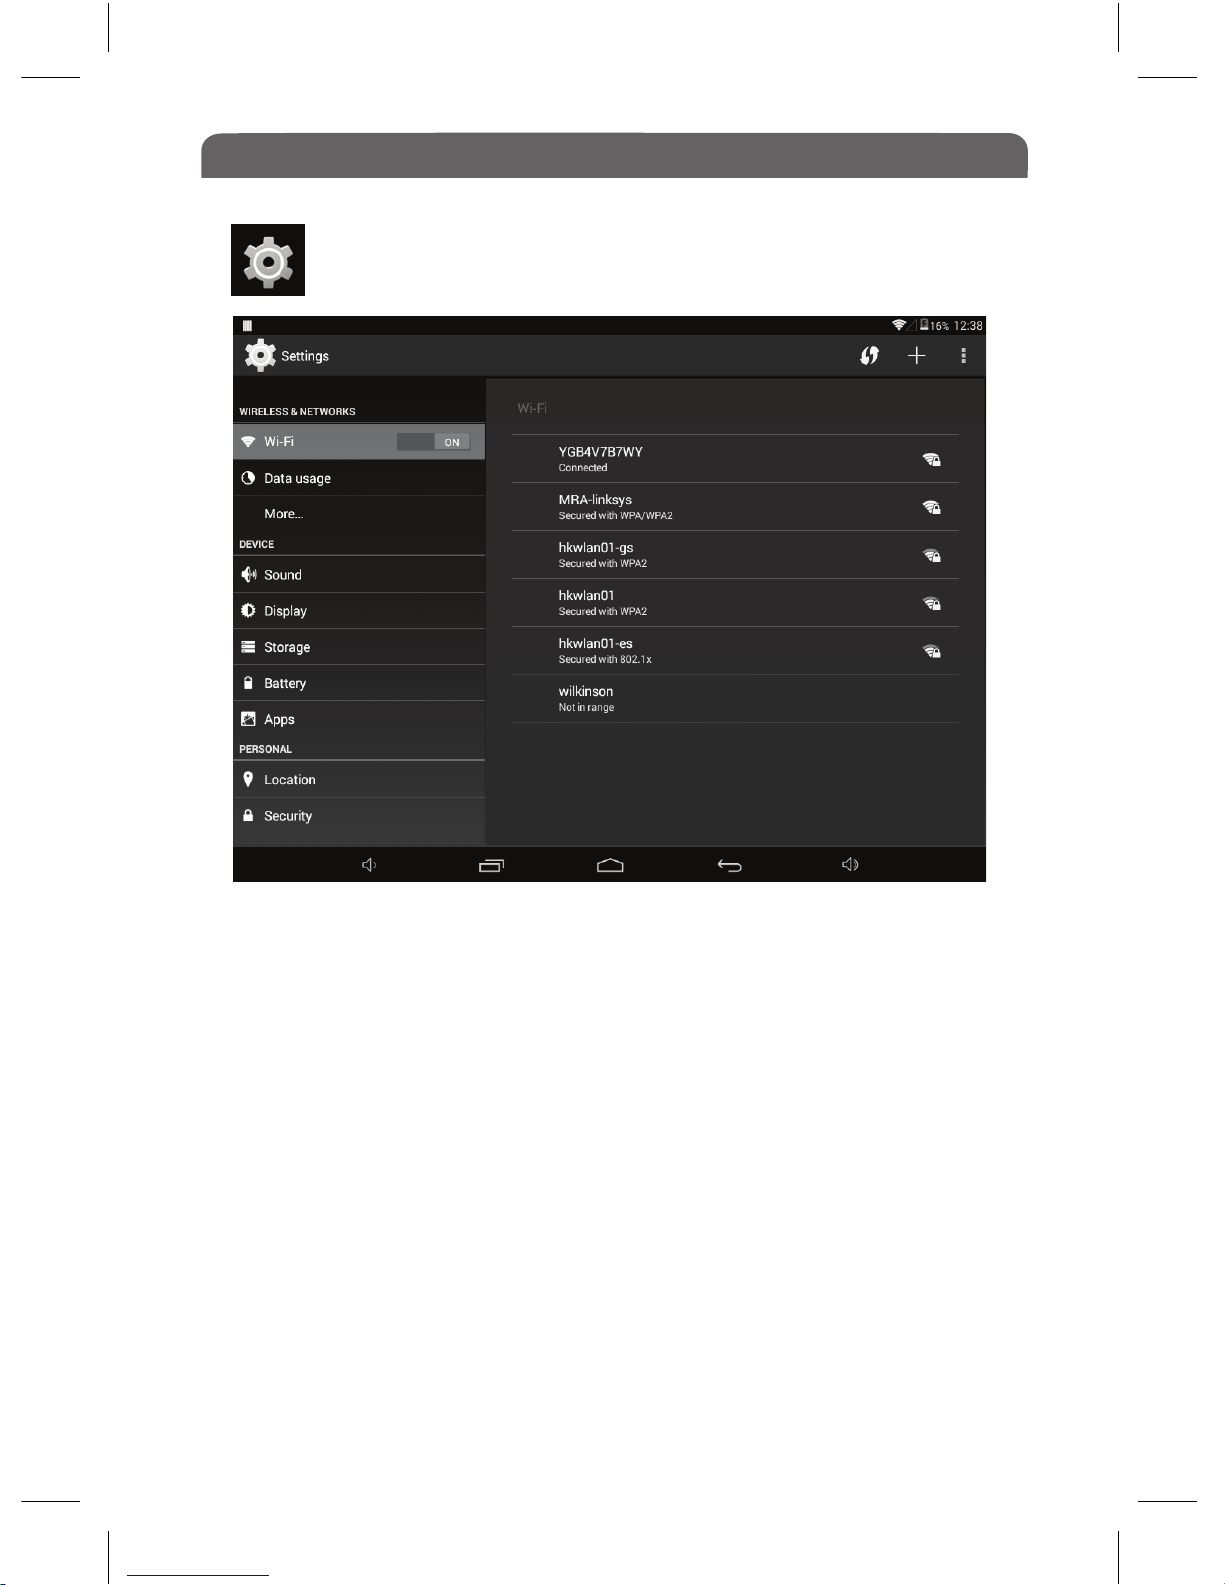
17.0 Settings
Tap the Settings Application icon to view all of the device settings.
17.1 ● Wireless & Networks
Here you can view all available Wi-Fi, Ethernet, VPN & Mobile Networks
and choose which network to connect to
17.2 ● Sound
Set the device sounds to on or mute, choose your alarms etc
17.3 ● Display
Alter the Brightness of the display, Backlight, Sleep, Auto Rotate the
screen, font size and screen display size.
17.4 ● Storage
This will show how much memory is used and available
17.5 ● Battery
will show the status of your battery life
23
Page 28
Settings
17.6 ● Apps
Here you will find all the information about your stored, downloaded &
running Apps
17.7 ● Accounts & Sync
Here you will be able to view all available accounts and sync with them.
17.8 ● Location Services:
Lets apps use data from sources such as Wi-Fi and mobile networks to
determine your approximate location.
17.9 ● Security
Set the screen lock, owner info, pin & make passwords visible etc
17.10 ● Language & Input
Choose your language zone, keyboard language and auto correct
function.
17.11 ● Backup & Reset
Set device to backup your data, reset passwords and factory reset.
17.12 ● Date & Time
Set the date, time and time zone.
17.13 ● Accessibility
Text size, auto rotate screen, speak passwords, touch & hold delay
etc
17.14 ● Developer Options
debugging your USB, screen stay awake, user interface options etc
17.15 ● About Tablet
status, legal info, model no etc
24
IMPORTANT: Before performing a Factory Data Reset it is strongly
recommended to back up any data from your tablet’s internal memory,
as all such data will be lost.
Page 29
18.0 Miscellaneous Applications
18.1 Calculator
The Calculator Application allows you to use the simple calculator to perform
calculations, press the Home button to exit.
18.2 Clock
The Clock Application shows you the time in 12 or 24 hour clock with day and
date displayed. You can also set an alarm clock and listen to music whilst in
this application. To set the time go to ‘Settings’> ‘Date & time’. Select
Automatic Time Zone, if you wish the time and date to be set automatically
according to your location. To manually set the date and time, deselect this
option and tap on date or time to adjust.
18.3 Play Movies
The Play Movies Application will play HD videos and will display all of the
images on your device’s Micro SD Card.
18.4 Voice Search
The Voice Search Application allows you to make voice memos and store
them. Tap on the Voice Memo App and then tap the to record, the to play
back and the to stop. Your files will be saved in File Manager as recordings,
tap on the file to play.
18.5 Play Store
A comprehensive Android market which offers a wide range of free and
premium apps from app developers around the world.
18.6 Downloads
This application will show you the status of the download in progress.
25
Page 30
19.0 Connecting To Your PC
Connect the Tablet to a computer to transfer files.
1. Connect your tablet to the computer.
With the included USB cable: Plug the small end of the cable into the USB 2.0
high speed connector of the tablet. Plug the large end of the cable into an
available USB 2.0 high speed port on the computer.
2. When your Tablet is connected it will pop up to show it is connected to a
device. Tap open the USB symbol.
You can now exchange files, photo’s, music etc to and from your PC and
Tablet.
26
Page 31
20.0 Specications
.
21.0 Troubleshooting
21.1 Device can not connect to Wi-Fi
Ensure the wireless network is working by testing it using another wireless device.
Ensure the device and the wireless router is within the range of the wireless network and
to be connected too. Walls or other obstructions will reduce the possible distances
between wireless devices.
21.2 Device doesn’t turn on
You can not turn on the device when the battery charge is below the critical level. Make
sure you charge the battery.
Press the RESET button on the back of the device to restart it.
Check if the adaptor is connected correctly.
21.3 Over Heating
When running many applications, or setting the screen on the highest brightness, or when
being charged, this device can become quite hot.
This is normal and should not cause any inconvenience when in use.
21.4 System isn’t working correctly
Installing some third-party applications may cause the Tablet to not operate correctly.
Press the RESET button or press system reset to resolve this issue.
27
Product Features/Specification
Android 4.4 Operating System
Amlogic 8726-MX-S Dual Core 1.5 GHz (Cortex A9)
7” TFT LCD (800x480) Capacitive Touchscreen
DDR3 1GB RAM Memory
8GB Flash Built-In Memory
External Memory Micro SD Card upto 32GB (Not Included)
Wi-Fi Networking: IEEE 802.11 b/g/n
Audio Output: 3.5mm Headphone
PC Interface: USB 2.0 High Speed
Built-In Microphone
Front Facing Camera (0.3MP)
1x1W Speaker
Rechargeable Li-poly Battery Power Adapter (DC 5V, 1.5A)
Up to 6 Hours Music, 2.5 Hours Video, 2.5 Hours Web Browsing
Includes: BS 3 Pin Charger, USB Cable, Headphones & Manuals
Page 32
Troubleshooting Continued
21.5 Cannot set E-mail or registration application
Make sure that the Tablet is connected to a Wi-Fi network and can connect to the internet.
Your E-mail settings have been entered correctly for the account being accessed.
Make sure your system time and local time are correct.
21.6 Can not record
Press the RESET button on the back of the device, then check if the record function works
correctly.
21.7 The Stand-By time of the device is too short
The duration of the lithium battery varies with environmental temperature changes and the
service conditions. If the environment temperature is too low or too high, the duration of
the battery will be affected. It is recommended to use this device at normal temperature.
Battery life is dependent on the usage of the Tablet.
High volume, Wi-Fi and frequent use may cause the battery to be drained at a higher rate.
21.8 No Sound via Earphones
Please check if the volume setting is above 0.
Please check if audio files are broken and try to play another audio file to confirm. If the
audio files are broken, it may cause critical noise or static.
21.9 Colour distoration of video or picture display
Press the RESET button on the back of the Tablet to resolve this issue.
21.10 Can’t copy files
Please check if the device is connected to the computer correctly.
Please check if the memory space is full.
Please check if the USB cable is intact.
28
Page 33
Product Model: GDENTMY7317
Made in China
Page 34
Email-
 Loading...