

Page 1

GI FLY
Digital Satellite HD
Multimedia Android STB
Page 2

Contents
Safety Rules……………………………………………………………………………2
1. Summarization……………………………………………………………………3
1.1 Preface:…………………………………………………………………………3
1.2 Main Features…………………………………………………………………3
2. Hardware……………………………………………………………………………4
2.1 Front panel……………………………………………………………………4
2.2 Side panel……………………………………………………………………4
2.3 Rear panel……………………………………………………………………5
2.4 Remote Control……………………………………………………………6
2.5 Air mouse……………………………………………………………………7
3. System Connection………………………………………………………………8
4. Quick Installation Guide………………………………………………………8
5. Functions……………………………………………………………………………9
5.1 Starting Up Guidance………………………………………………………9
5.2 TV Interface…………………………………………………………………9
5.2.1 Main UI and EPG………………………………………………………………………9
5.2.2 Switch Channel………………………………………………………………………10
5.2.3 Program List……………………………………………………………………………10
5.2.4 Program Search………………………………………………………………………10
5.2.5 Volume…………………………………………………………………………………10
5.2.6 Parent Lock……………………………………………………………………………11
5.2.7 Audio Settings…………………………………………………………………………11
5.2.8 Video Aspect Ratio…………………………………………………………………11
5.2.9 Program Info…………………………………………………………………………12
5.3 Main UI………………………………………………………………………12
5.3.1Program Management………………………………………………………………12
5.3.2 Internet…………………………………………………………………………………18
5.3.3 Multimedia………………………………………………………………………………18
5.3.4 More Applications ……………………………………………………………………18
5.3.5 Games……………………………………………………………………………………19
5.3.6. System Setup…………………………………………………………………………19
5.4 Application Function………………………………………………………19
5.5 System Setup………………………………………………………………20
5.5.1 Wireless & Internet…………………………………………………………………20
5.5.2 Ethernet Settings ……………………………………………………………………20
5.5.3 Sound Setup……………………………………………………………………………21
5.5.4 Display Setup…………………………………………………………………………21
5.5.5 SD Card and Storage Device……………………………………………………21
5.5.6 Applications……………………………………………………………………………21
5.5.7 Personal Settings……………………………………………………………………22
5.5.8 System Update………………………………………………………………………22
6. Technical Parameter……………………………………………………………23
7. Abnormal phenomenon and ruled out……………………………………24
8. Glossary……………………………………………………………………………25
Appedix Accessories……………………………………………………………25
Safety Rules
1. Please do read user manual before you operate this machine.
2. Please don’t open the case of the machine by yourself in case of electric shock and
damage to the machine, unless you are professional.
3. Please keep the machine power off when not working, don’t use damaged power line.
4. Don’t touch the power line with wet hands. When liquid permeated in the box by
accidental, please shut down power immediately, at the same time get contact with our
after sale service to repair it.
5. Please keep the machine away from heat source, a ventilate place will better.
6. Please keep the machine in horizontal.
7. When move machine into another place where the temperature varies a lot, please
don’t turn on at once until 1-2 hours later.
8. Please pay attention to putting the machine in certain place that should be: ventilate
appropriate temperature; avoiding under sunshine, water penetrating and severe vibrating.
9. Please don’t put heavy stuff onto the machine.
10. Please don’t make water splash on the machine, and put the container filled with water
away from this machine, e.g. vase, wine, drinks.
11. When the main plug or appliance connector are detachable device, please keep it
under easy operate situation
2
Page 3
2
Notice
The USB electrostatic discharge is C Level, when electrostatic discharge,
it may lead USB storage device can’t work properly. If so, you need to pull out USB
device or reboot the machine.
1.Summarization
1.1 Preface:
Thanks for choosing our Android TV box.
This Android TV BOX is based on Android 4.0 version, with CPU A9-1GHz and GPU Mail-400 that
can fluently run all Android 2D/3D application. Fully support HD H.264 decoding and HDMI high
definition digital video output, giving you the cinema–class audio and visual enjoyment. This Android
TV BOX also enables you easy to use user interface to surf the internet and experience a variety of
Android software application.
This user manual will give you specific guidance on installation, use, and maintenance. To ensure
you can fully enjoy every feature of this machine, please read this manual carefully before using.
Disclaimer
The c ompany reserves the right to improve the content. If there has
discrepancy between pictures and text, please subject to the final in-kind operation.
1.2 Main Features
Android 4.0 DVB-S2 STB
Support MPEG2、H.264、
AVS Full 1080P HD Decode
Fully compliant HD DVB-S2 standard
Support USB 2.0
Support HDMI 1.4、CVBS Output
Support HTML5 HLS
Support EPG、Subtitle、Teletext, Time shift, Playback
Support Whole Satellite Channel Search
Support PVR into outside storage device through USB
Support Youtube、Youku etc.
Support Skype、QQ、MSN etc.
Support multi-screen interactive function with DLNA and Airplay protocols
Support airmouse, game handle and voice recognition control
XBMC multimedia center
2.Hardware
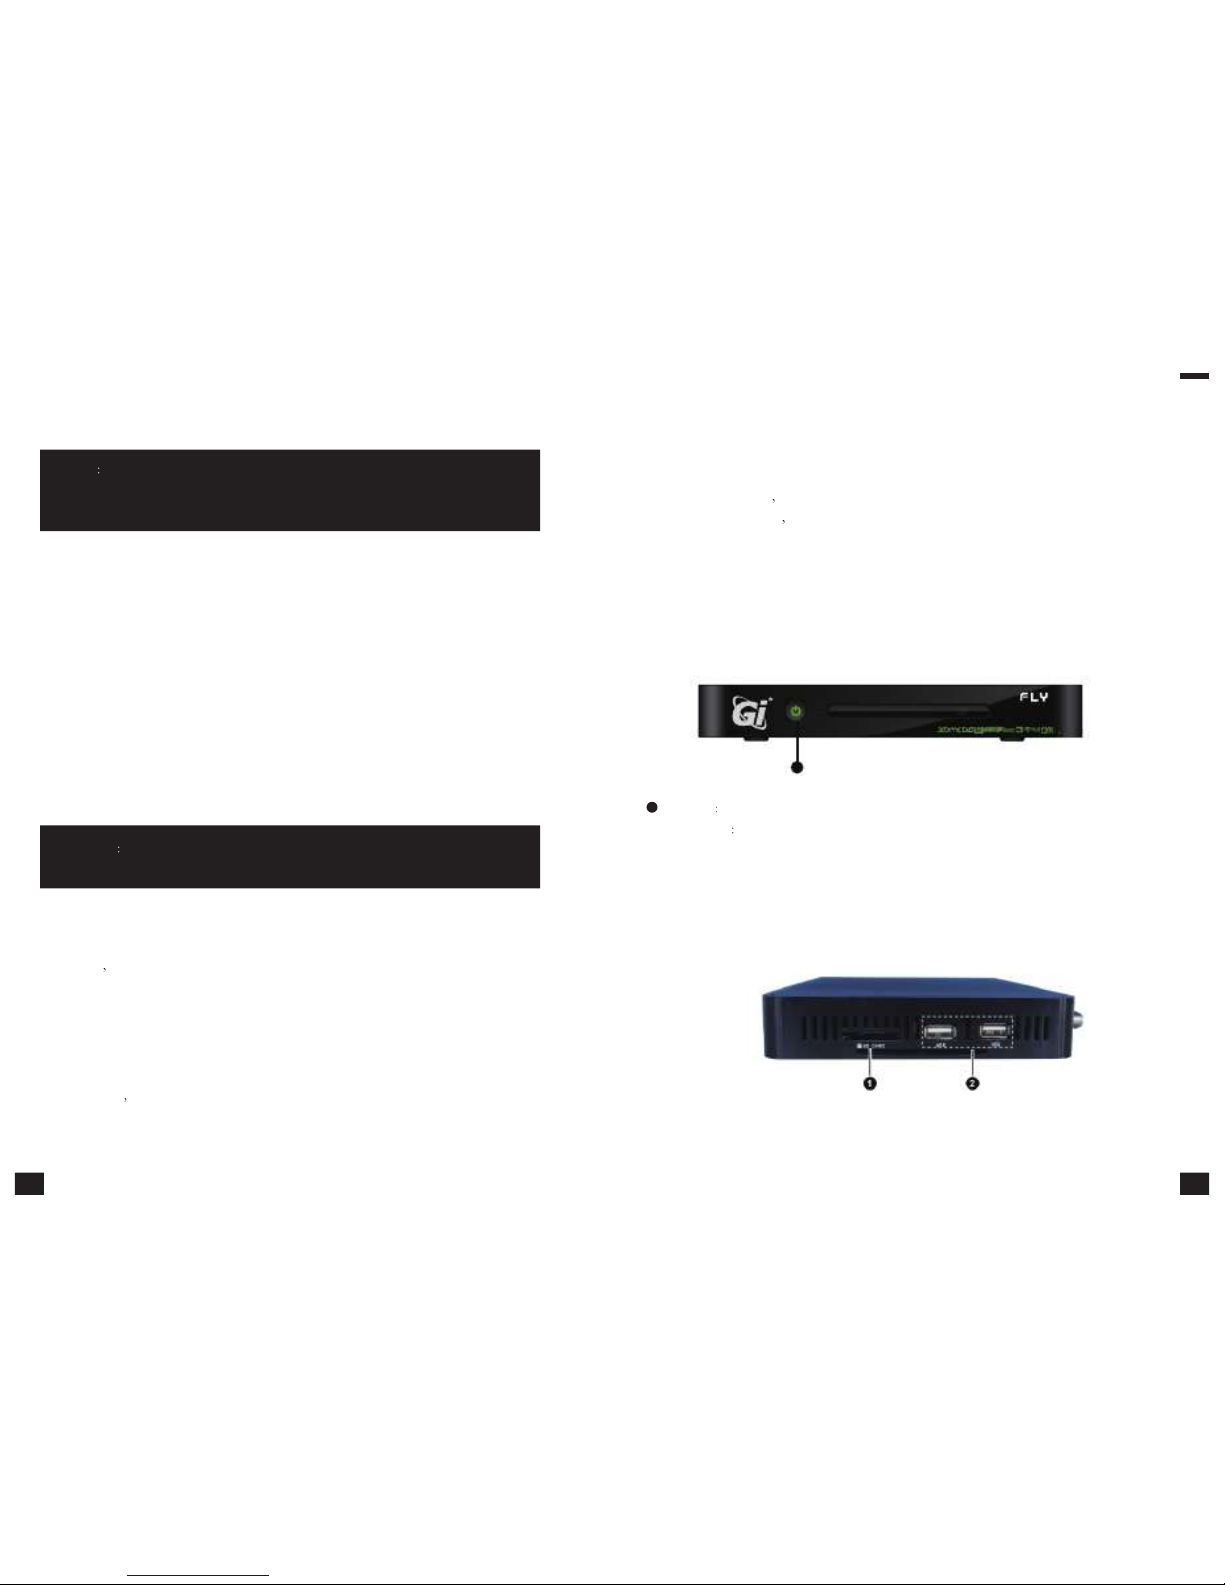
2.1 Front panel
1
1 STANDBY
Standby Button
INDICATOR
Run:Green; Standby:Red
2.2 Side panel
3 4
Page 4
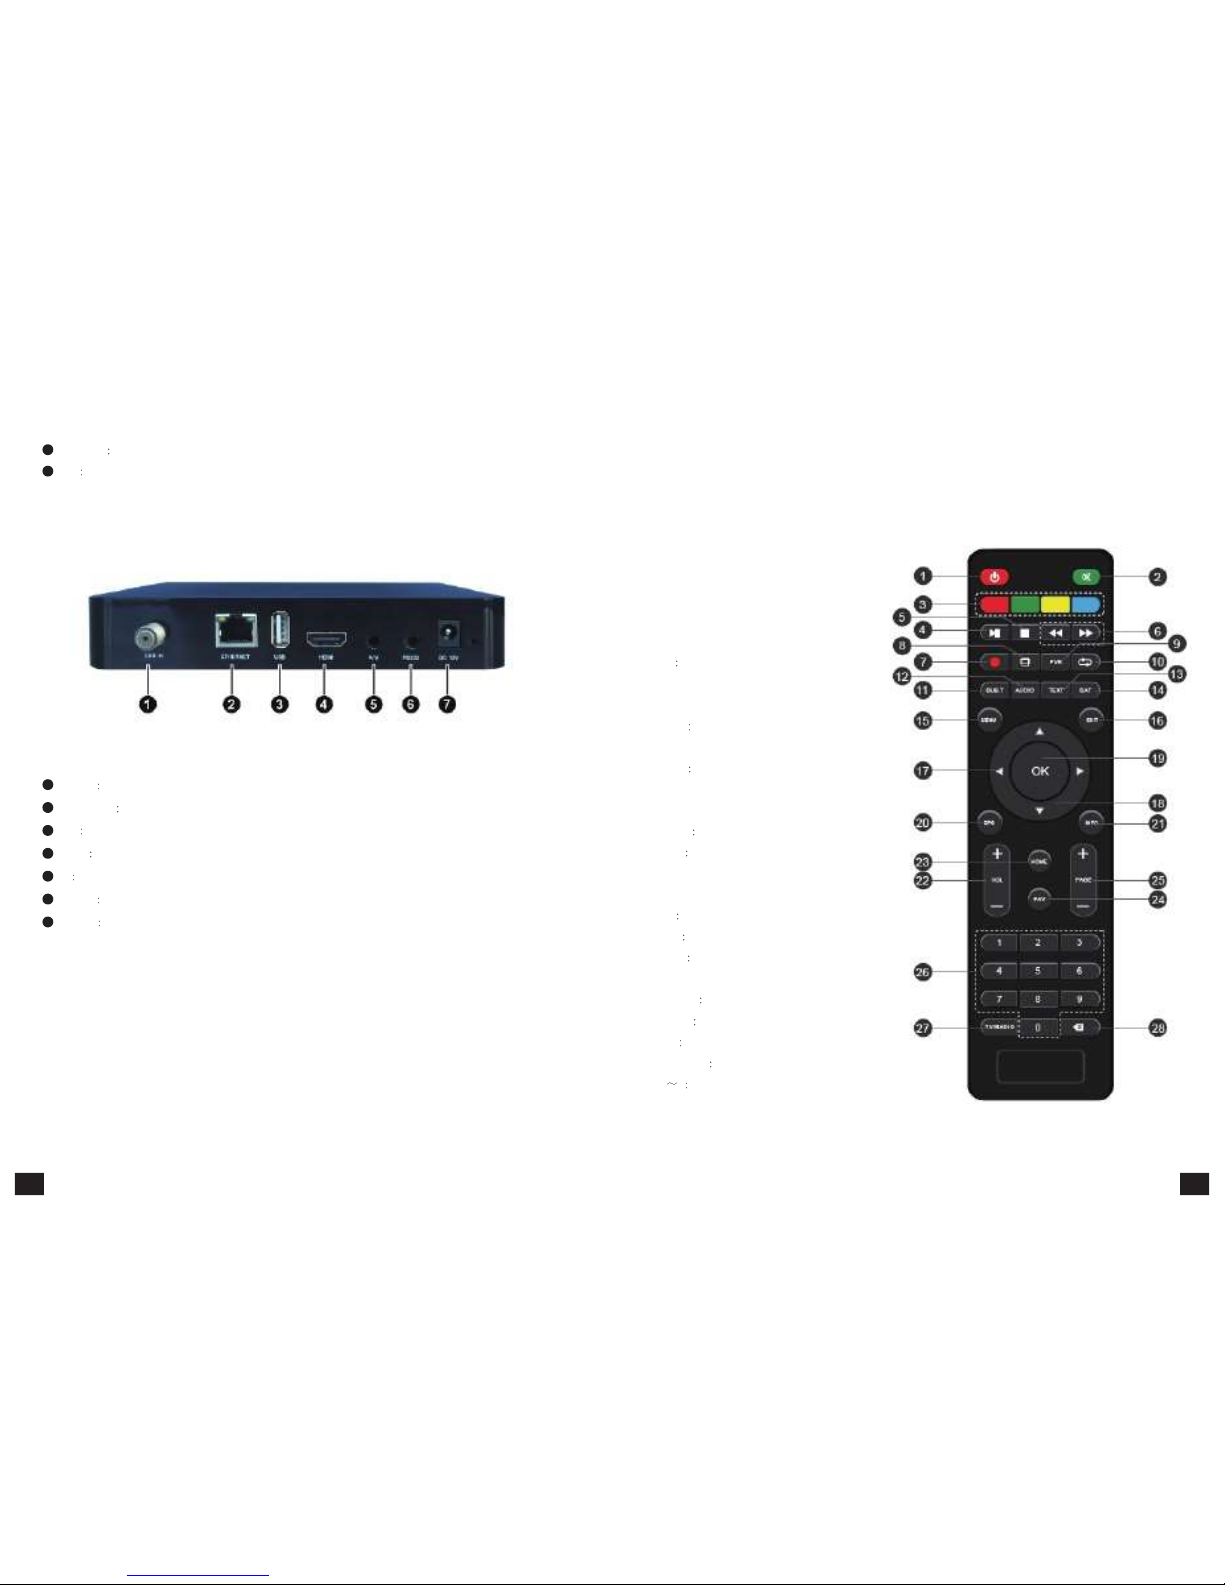
1 SD CARD
SD Card Slot
2 USB
USB Slot
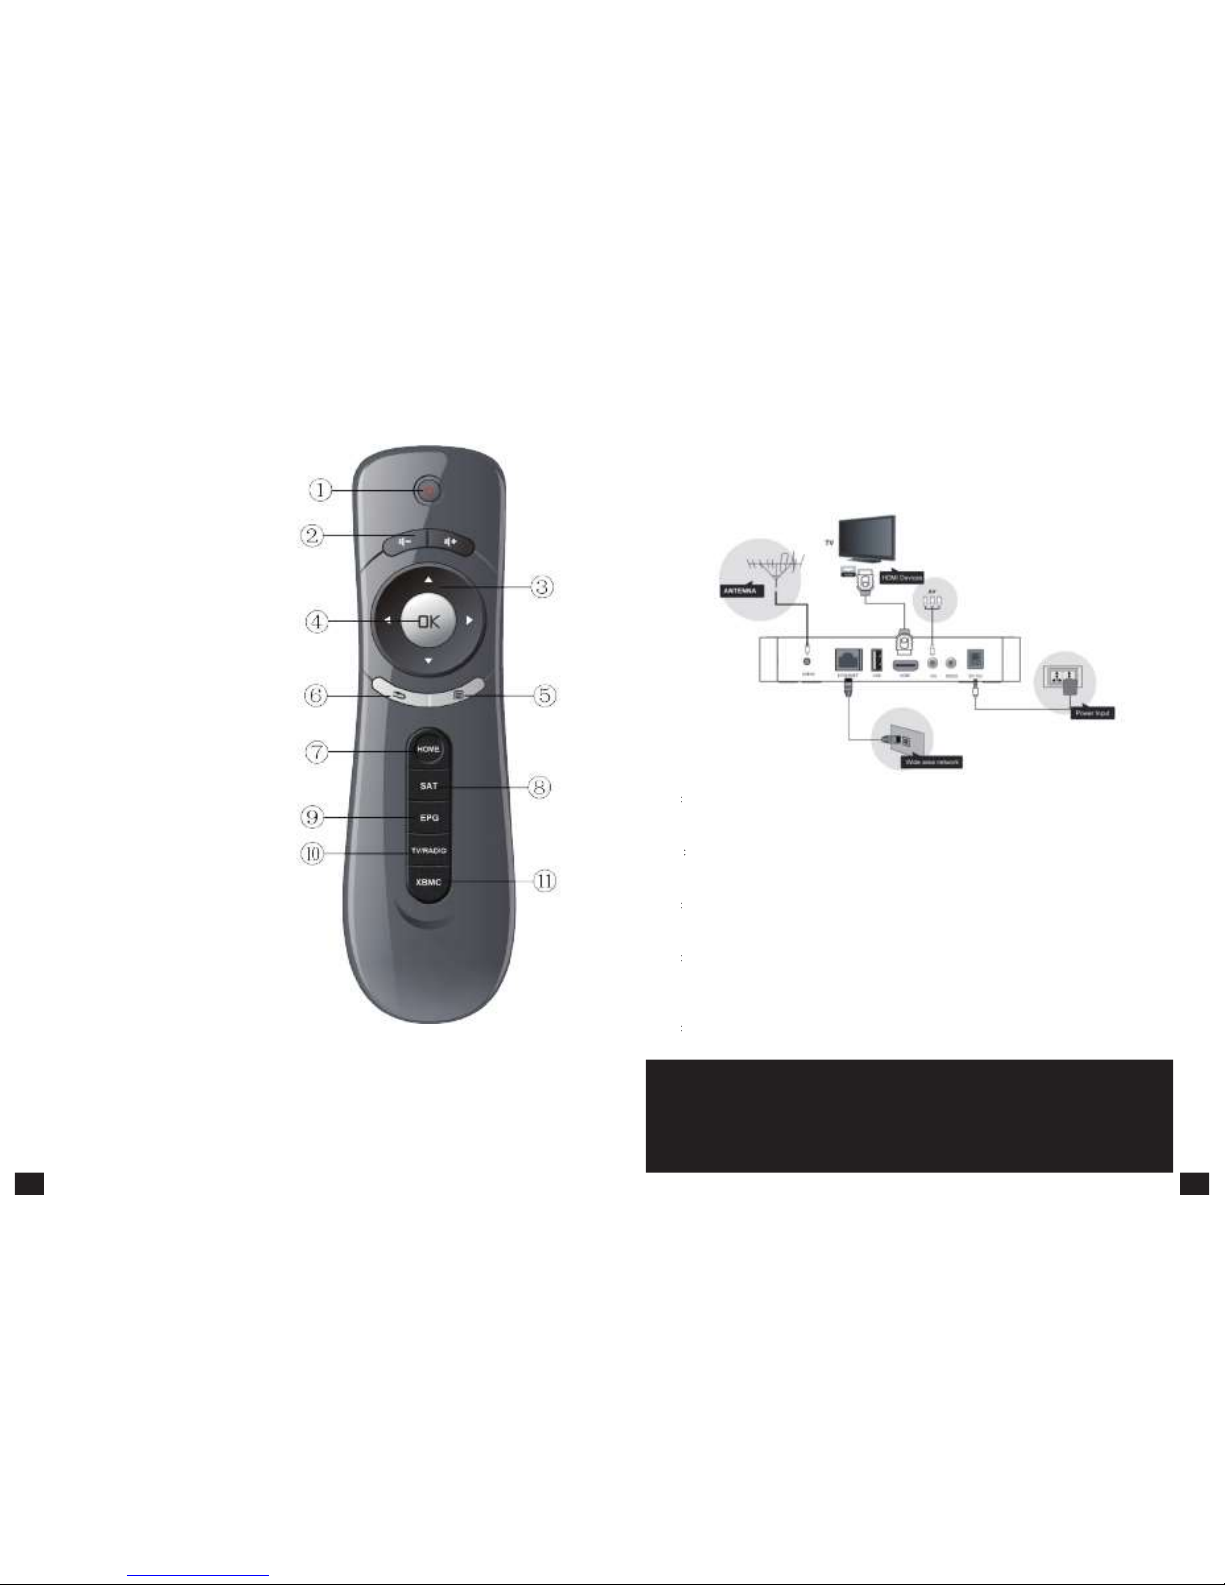
2.3 Rear panel
1 LNB IN
Signal Input
2 ETHERNET
Ethernet Slot
3 USB
USB Slot
4 HDMI
HDMI Output
5 AV
AV Output
6 RS 232
Serial Port
7 DC 12V
DC 12V Input
2.4 Remote Control
1.Power/Standby key
2.Mute key
3.Their functions depend on certain application
4.Pause key
5.Stop key
6.Fast backward /Fast forward
7.Record key
8.V.RATIO: video aspect ratio settings
9.PVR Access to recorded content in USB
storage device
10.Recall key: Back to the last program
11.SUBT Switch/turn off subtitle
12.AUDIO: Audio settings
13.TEXT Teletext
14.SAT: Their functions depend on certain
application
15.MENU Menu shortcut key
16.EXIT Exit key
17.Left and right key
18.Up and down direction key
19.OK Confirm key
20.EPG Electronic program guide
21.INFO Display the information of current
program
22.VOL+/- Volume +/-
23.HOME HOME shortcut key
24.FAV Favourite program
25.PAGE +/- page up/ down
26.0 9 Numeric Key
27.TV/RATIO: switch between TV and Ratio
28.Delete key
5 6
Page 5
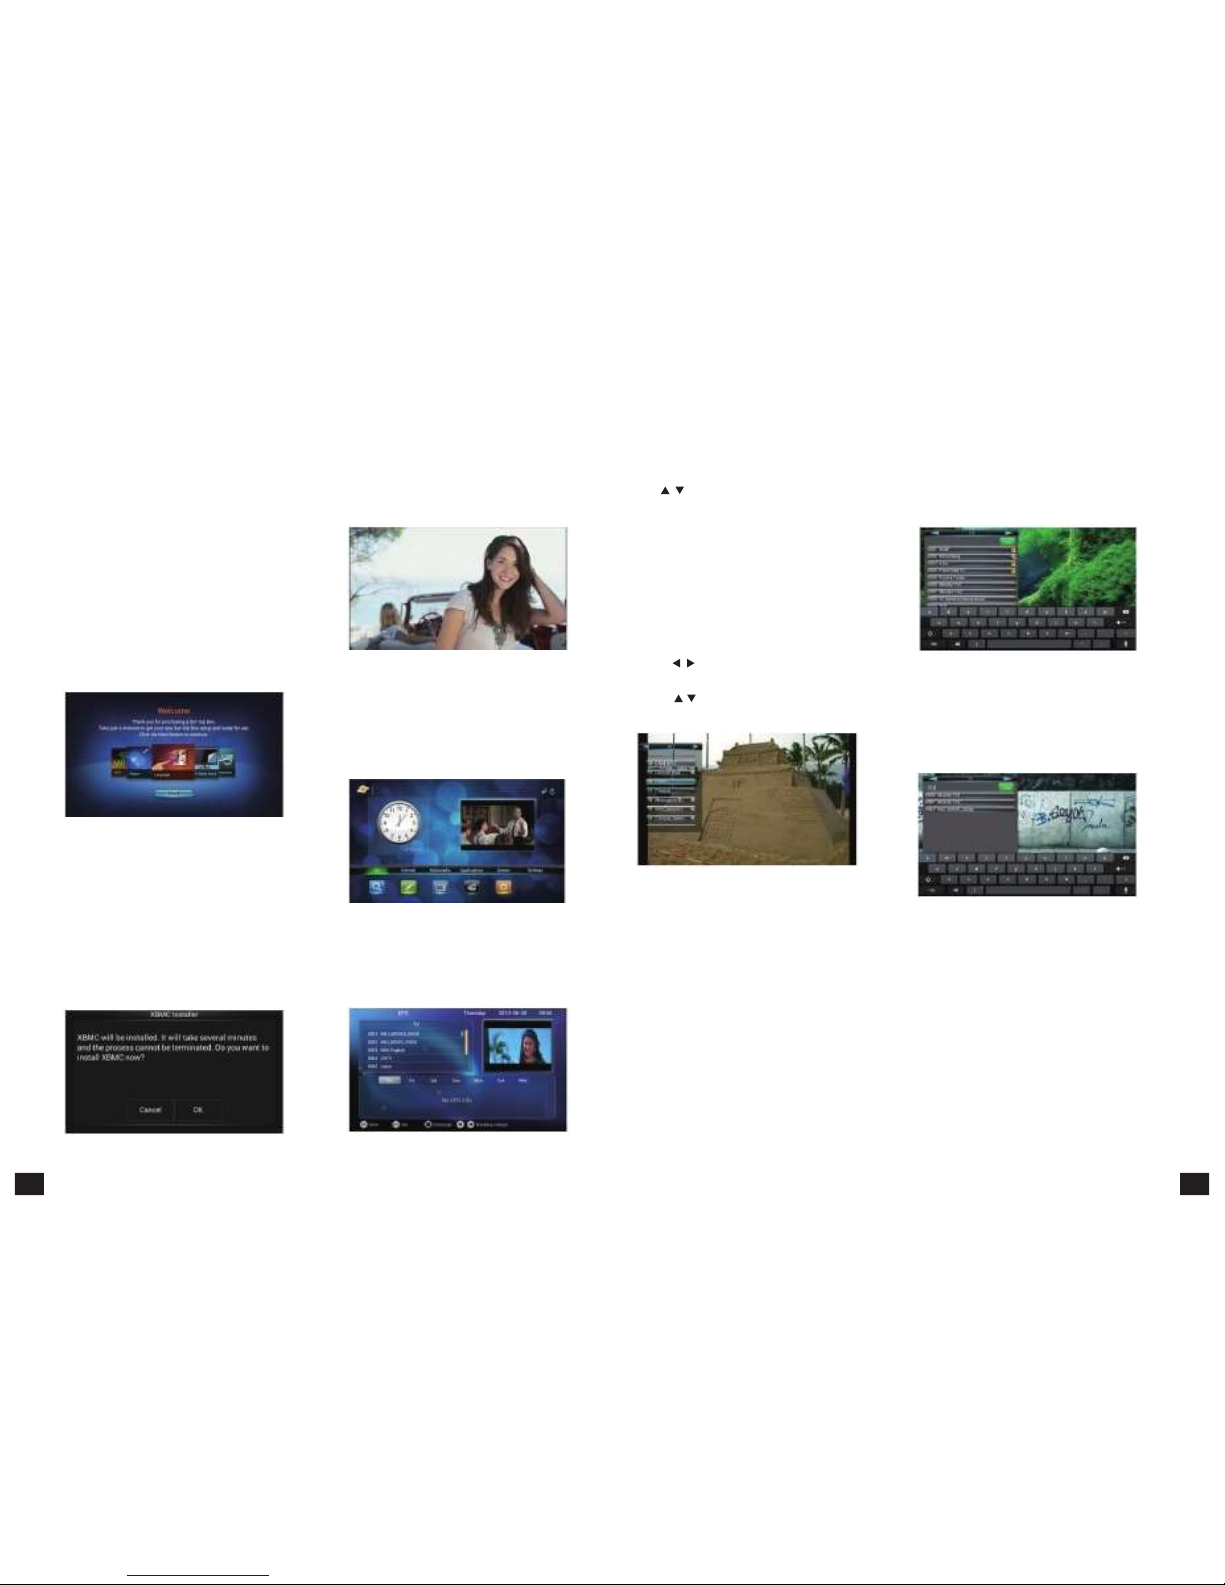
2.5 Air Mouse
1.Power/Standby Button
2.Volume +/- Button
3.Direction Button
4.Mouse Left Click Button
5.Exit Button
6.Menu Button
7.Home Button
8.Satellite Button
9.Electronic Program Guide Button
10.TV/Radio Switch Button
11.XBMC Button: Launch XBMC Application
3.System Connection
Please connect with your power, TV set, and other related devices according to the picture shows
below, if you need to connect with more devices, please contact with your local operator.
4.Quick Installation Guide
Step 1 Check system connection
Please make sure antenna, TV, STB connected correctly, you can take a reference on system
connection picture.
Step 2 Switch TV into Video Status
Make sure all the port in rear panel connect properly, turn on the TV, and switch the TV into
Video Status.
Step 3 Plug the power line of Android box, turn on the box.
After power line connected, press POWER button to power on the BOX, the indicator LED
light in front of panel will on.
Step 4 Standby and Standby Recovery
When machines in turned on ,press standby button ,machine will in standby mode ,and Standby
indicator light will on, the box will in low power consumption status .Press standby button
again will end standby mode and recover to normal working mode .
Step 5 Power off
After powered off, please pull up the power line.
Note:
All features can be achieved through your remote control buttons, also
you can achieve parts of functions through the buttons in front panel of the box,
if you have difficulty on using this unit, please refer to the instructions in the relevant
chapters. If you still can not resolve the problems encountered, please contact the
operator to find a solution.
7 8
Page 6
5.2.5 Volume
2. Press【MUTE】to turn off the sound. Press 【MUTE】
5. If you are using the air mouse, most icons of
5.Functions
5.2 TV Interface
5.2.2 Switch Channel
5.2.4 Program Search
This Android TV box is based on Android 4.0
operating system of smart phone, aiming at
providing full variety of Internet applications,
keeping your family in heart full of enjoyment
on widescreen beyond which smart phone can
bring to you.
5.1 Starting Up Guidance
When first booting or after upgrading the system,
it will enter a simple setting up interface which
guides users to some basic settings of system in
order to facilitate the use of in the future.
After setting up boot guidance interface, it will
enter into the full-screen broadcasting TV program
interface, as shown in figure 5-2-1:
Figure
5-2-1
5.2.1 Main UI and EPG
1. Press【MENU】, skip to main interface. Press
【EXIT】or【MENU】to return to televise interface,
The main UI as shown in figure 5-2-2:
1. Press【OK】or【FAV】, program list pops up.
Press【 / 】to switch channel. Press【OK】to
enter into the channel.
2. Press【CH +/-】to switch channel.
3. Press numeric keys to skip to the corresponding
channel.
4. Switch channel on EPG interface. (Please refer
to the EPG function for detailed information)
5.2.3 Program List
1. Press【OK】or【FAV】, program list pops up.
2. Press【 / 】 to view TV program list or all the
program lists.
3. Press【 / 】to select the program on the list.
Press 【OK】to enter in the selected program.
1. Press【OK】or【FAV】, program list pops up.
2. Press【RED】key to search the program, as shown
in figure 5-2-5:
Figure
5-2-5
3. Input key words or letters into input field, matched
programs will appear below. Choose your demanded
program in the search results, press【OK】to enter in.
As shown in figure 5-2-6:
Figure 5-1-1
In this guidance, you can setup the system
language, the region, country, city and time-zone
of your place. Besides, you can set the display
position to adjust the video output with your TV
Set. What’s more, you can setup the configuration
of the network.
You can choose to install the XBMC in the
guidance.
Figure 5-1-2
Figure
5-2-2
2. On televise interface, press【EPG】, jump to EPG
interface, then press【EXIT】, return to televise
interface. EPG interface is shown in figure 5-2-3:
Figure
5-2-3
Figure 5-2-4
4. If you are using the air mouse, click the left part Figure
5-2-6
of the screen to call the program list, click the right
part of the screen to call the favorite program list,
click the bottom part of the screen to call the
1.
Press【VOL+/-
】
to adjust the volume. Above the
information bar and click the top part of the screen
screen will display the volume progress bar.
to call the function panel.
again to turn on.
the remote control buttons which are showing on
screen can be clicked by air mouse. This is also
available on the other UI.
9 10
Page 7
Figure
5-2-7
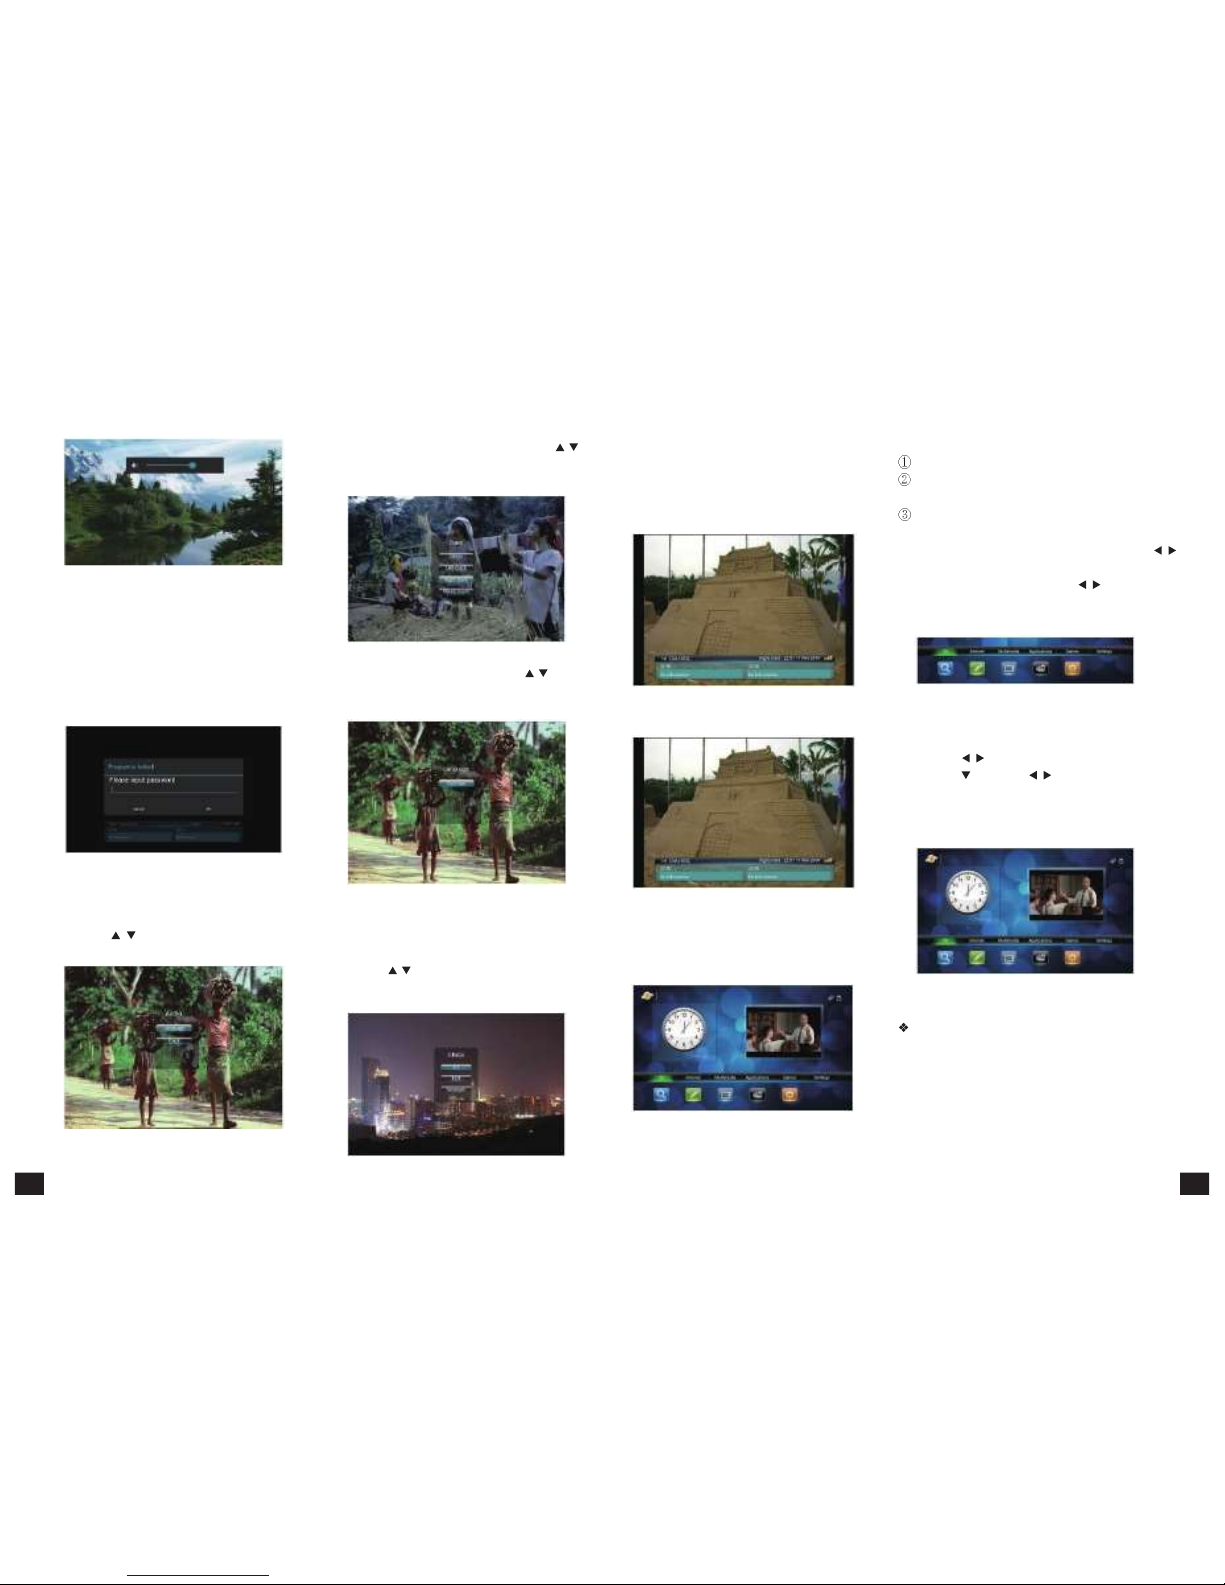
5.2.6 Parent Lock
This function is to encrypt programs. (For
encryption steps, please refer to the program
editing and parent lock settings section). Only by
inputing correct password can play the encrypted
programs.
2. When setting up sound track, press【 / 】to
select track types and【OK】to confirm. Press
【EXIT】 to quit setting without saving.
Figure
5-2-10
3. When setting up language, press【 / 】to select
and 【OK】to confirm. Press 【EXIT】 to quit
setting without saving.
5.2.9 Program Info
1. Press 【INFO】, program info pops up.
2. When switching channel, program info pops up.
The info includes the current playing program info
and next two programs info of the channel.
Figure
5-2-13
If there is no info, it will show as:
There are three parts:
Time: show the current time and date.
Televising contractible window: press 【EXIT】to
back to the full-screen televising state.
Main menu: on the bottom of main UI, as shown
in 5-3-2. There are six options: TV, Internet, Multimedia,
Applications, Games and Settings. By pressing【 / 】,
you can select the between the options. Each option
has several son options. Press【 / 】and【OK】to
enter into the chosen son option. Press【EXIT】to
return to televising interface.
Figure
5-3-2
5.3.1Program Management
1. Press 【 / 】to move the cursor to "TV" option.
2. Press 【 】, and 【 / 】to select between son
options of "Program Edit", "Program Search", "EPG",
"PVR", "Manual Search", and "TV Settings".
3. Press 【OK】to enter in.
Figure
5-2-8
5.2.7 Audio Settings
1. Press【AUDIO】, the audio setting menu pops
up, press【 / 】to choose language or sound
track, then press【OK】.
Figure
5-2-11
5.2.8 Video Aspect Ratio
1. Press【V.RATIO】, the video aspect ratio setting
menu pops up .
2. Press 【 / 】to aspect ratio types.
3. Press【OK】to confirm; press 【EXIT】 to quit
setting without saving.
Figure
5-2-14
5.3 Main UI
Under televising state, press【MENU】, then
the main UI will pops up as in figure 5-3-1:
Figure
5-3-3
Program Search
Click into program search, then the auto search
interface pops up as shown in figure 5-3-4 below.
The satellite list lies left and antenna settings lies right.
Figure
5-3-1
Figure
5-2-9
Figure
5-2-12
11 12
Page 8
EPG
Figure
5-3-4 Figure 5-3-7
1) Press【 / 】to choose satellite. 5) According to the caption below, at theselected
2) Press【PLAY】to jump to the satellite frequency frequency point, pressing【BLUE】key means searching
Program Edit
Program edit function includes lock, favourite,
sequencing, move and delete.
Program lock and FAV
1) Move the cursor to "Program Edit" option, press
【OK】to confirm into. It reminds you to input
password. When first entering, the user can set
up an initial password. If you want to change the
password, please refer to the parent lock settings
part.
4) Choose "favourite" will pop a list of the favourite
groups and press 【OK】to choose a group that you
want which group that the program belongs to, then
the program is highlighted . While choosing "lock",
the program is locked with mark. If selecting
"favorite" and "lock" at the same time, the program
is both locked and set to be favorite program. (Note:
When you want to watch the locked programs, you
need to input the password same to the one settled.)
5) Directly pressing【YELLOW】key can also set
programs to be locked. Similarly, pre ssing【FAV】
key can set the programs to be favourite.
point list.
Figure
5-3-5
the programs at the point, while at selected satellite,
pressing【BLUE】key means searching programs
at all the satellitic frequency points. A hint window
will appear to guide the types to be searche d,
including TV, Radio, free channel and whole channel.
As shown in figure 5-3-8
Program Move
Press【 / 】to move cursor to the program; press
【GREEN】to choose. Then press【 / 】to move
the program to the desired place. Press 【EXIT】to
quit without saving.
Figure
5-3-10
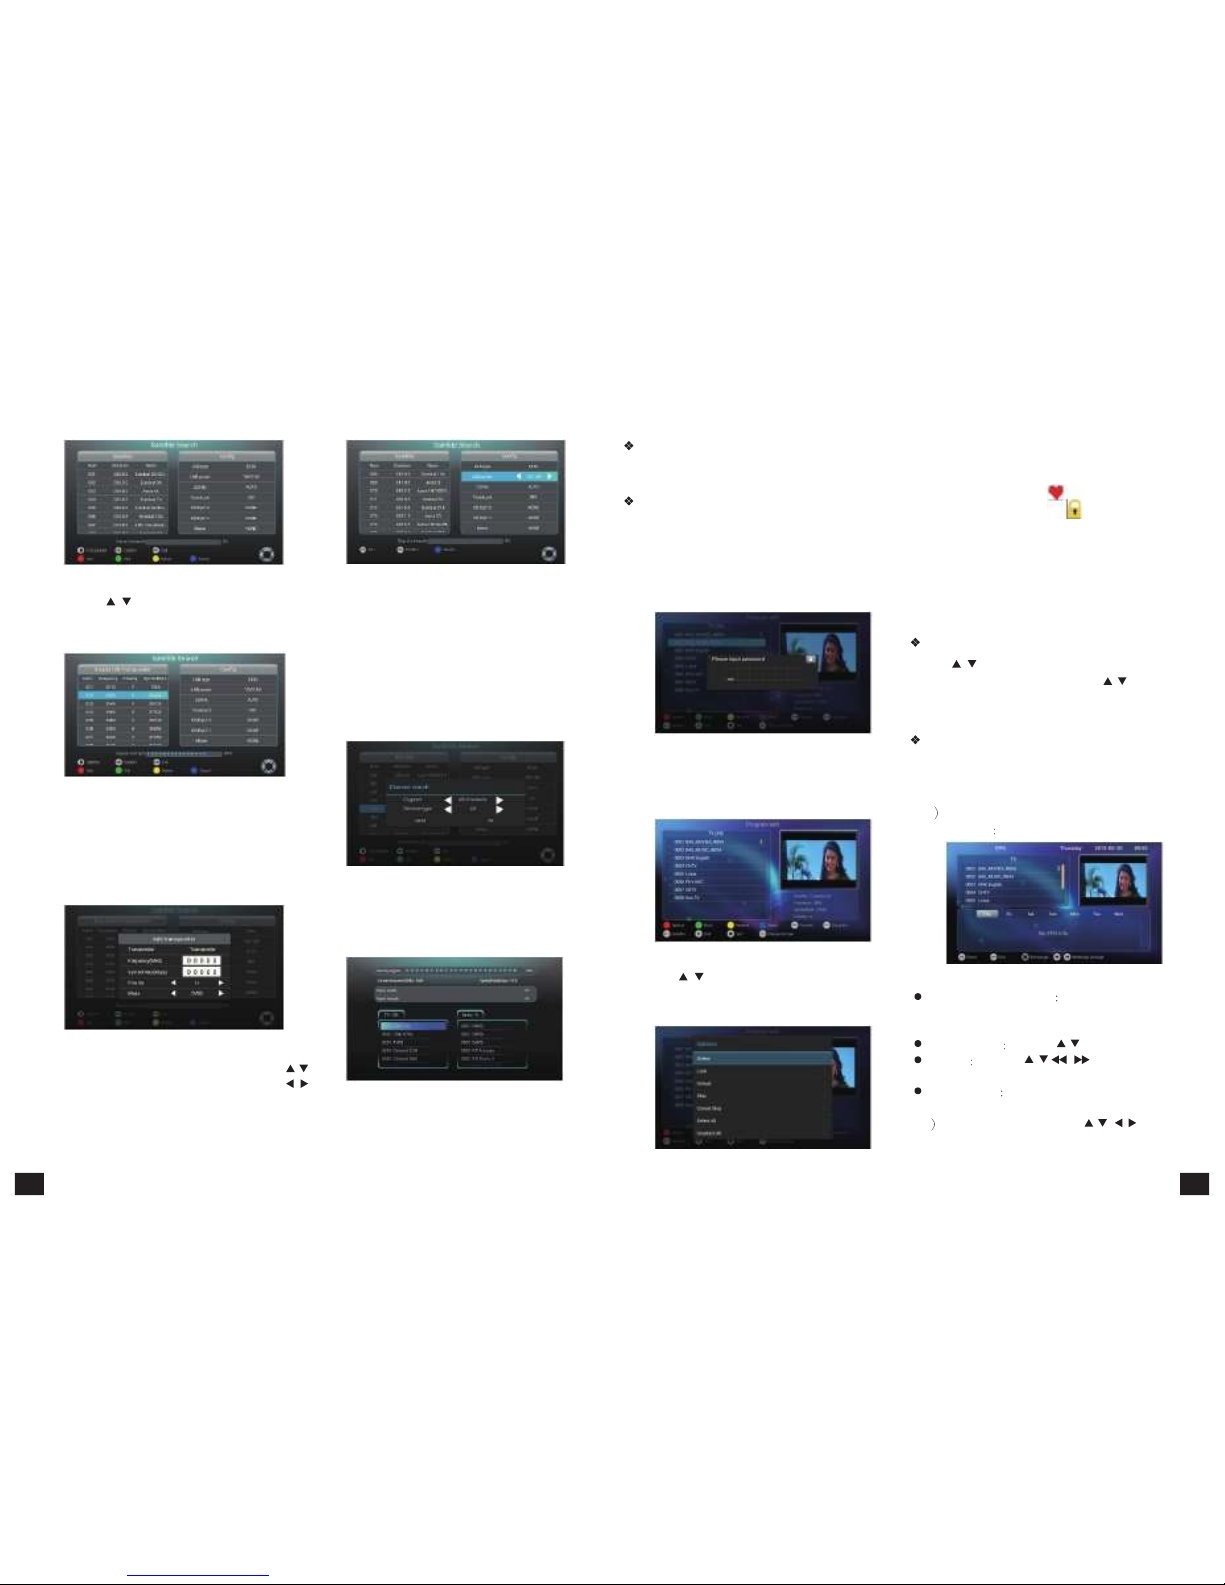
The box provides 7 days EPG, convenient for you
2) After inputing the correct password, press
【OK】
to get the details of all the programs from Monday
to enter the program editor interface, as shown in
to Sunday.
3) According to the caption below,【RED】,
【GREEN】,【YELLOW】and【BLUE 】keys
separately present ADD, EDIT, DELETE and
SEARCH functio ns. When pressing 【RED】,
the following figure pops up.
Figure
5-3-6
4) At antenna configuration interface, press【 / 】
to choose option need to be set up; press【 / 】
to change the parameters; press【EXIT】to turn
back.
Figure
5-3-8
6) Press【OK】to enter into search progress interface
shown in figure 5-3-9. Click the program below to
enter into the televising interface
Figure
5-3-9
figure 5-3-11:
Figure
5-3-11
3) Press【 / 】to move the cursor to the program to
be edited. Then press 【RED】and editing options
pops up as shown in the figure 5-3-12.
Figure
5-3-12
1 Press 【EPG】 to enter into EPG main menu
as figure 5-3-13
Figure
5-3-13
Small televising window There is a movable
window to broadcast the selected program on
EPG menu.
Select program Press【 / 】to select program
EPG info Press【 / 、 / 】to see the EPG
info of each time.
Time and date Press【RED】and【GREEN】to
adjust the time and date。
2 In EPG interface, press【 / 、 / 】to get
the program info; press【OK】to operate the
current program.
13 14
Page 9
Clock background
Press【EXIT】to quit without saving.
3 You can also add task for playing or recording
for the selected program.
4 On EPG interface, press【EXIT】to back
to the last interface
PVR
This machine offers convenient PVR program
recording function. You can press 【PVR】 key or
select "PVR" on the main menu to jump to PVR
interface.
1)
Time shift
: Press【PAUSE】to suspend the
real-time broadcasting program. Press 【PAUSE】
again to replay from the stopped point. Press
【STOP】to recover real-time televising and stop
time shift function. By pressing【FF】and 【FB】
can realize forward and backward functions in time
shift.
2 Recording function
Press 【PVR】or select "PVR" on the main
menu to jump to PVR interface. The recorded
program can be checked in play list.
Figure
5-3-16
In "Schedule", press【 / 、 / 】and【OK】
to edit the attribute.
Figure
5-3-17
Press【 / 】and【OK】to select the region. Press
【EXIT】to quit without saving.
Figure
5-3-19
Time Zone
Press【 / 】and【OK】to select the time zone.
Press【EXIT】to quit without saving.
2) Parent Lock
1
Setting password can lock program and realize
program edit function.
2
Press【 / 】and【OK】 buttons to set a new
password or parent lock grade. Press【EXIT】to
quit without saving.
Figure
5-3-22
Figure
5-3-14
By pressing【 / 、 / 】and【OK】to play or
delete the recorded program.
Figure
5-3-15
In task list, press【 / 、 / 】and【OK】to
play or delete the task.
TV Setup
Press【 / 、 / 】and【OK】to enter in "DTV
Settings". As shown in the following picture.
Figure
5-3-18
Detailed setting methods will be explained as follows.
1) General Settings
Press【 】and【OK】to enter in son option setting.
Region:
Figure 5-3-20 Figure
5-3-23
Daylight Saving Time(DST): 3) Video & Audio
Press
【
/
】
and【OK】to enter in DST option. Press
Press【 / 】and【 】to enter in Video & Audio
【EXIT】to quit without saving.
settings.
Programs sort:
Use up ,down button to sort programs, press【OK】
button to confirm. Press【EXIT】to quit without saving.
Figure
5-3-24
Video aspect ratio:
Figure 5-3-21
Press【 / 】and【OK】or【V.RATIO】to enter
in video aspect ratio setting. Press【 / 】and
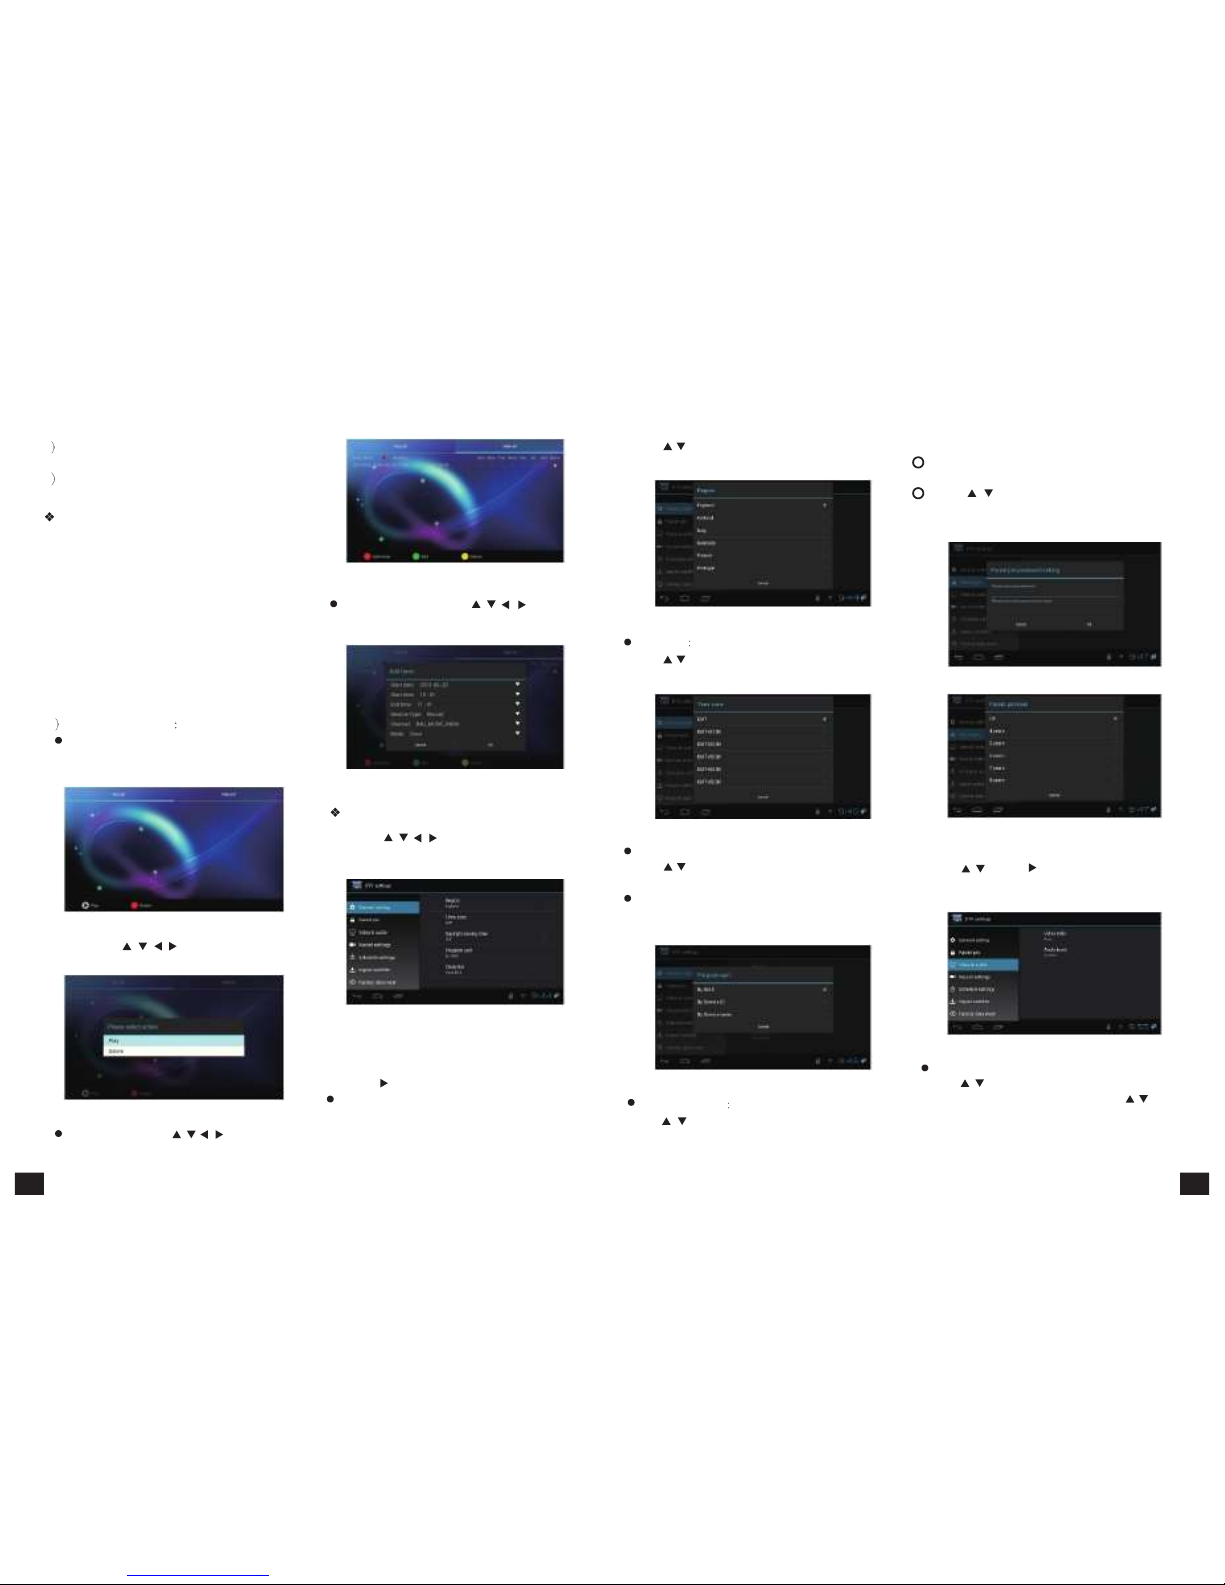
Press【 / 】and【OK】to select the clock background.
【OK】
to choose the 4:3, 16:9 or auto ratios.
Press【EXIT】to quit without saving.
15 16
Page 10
Figure
5-3-25
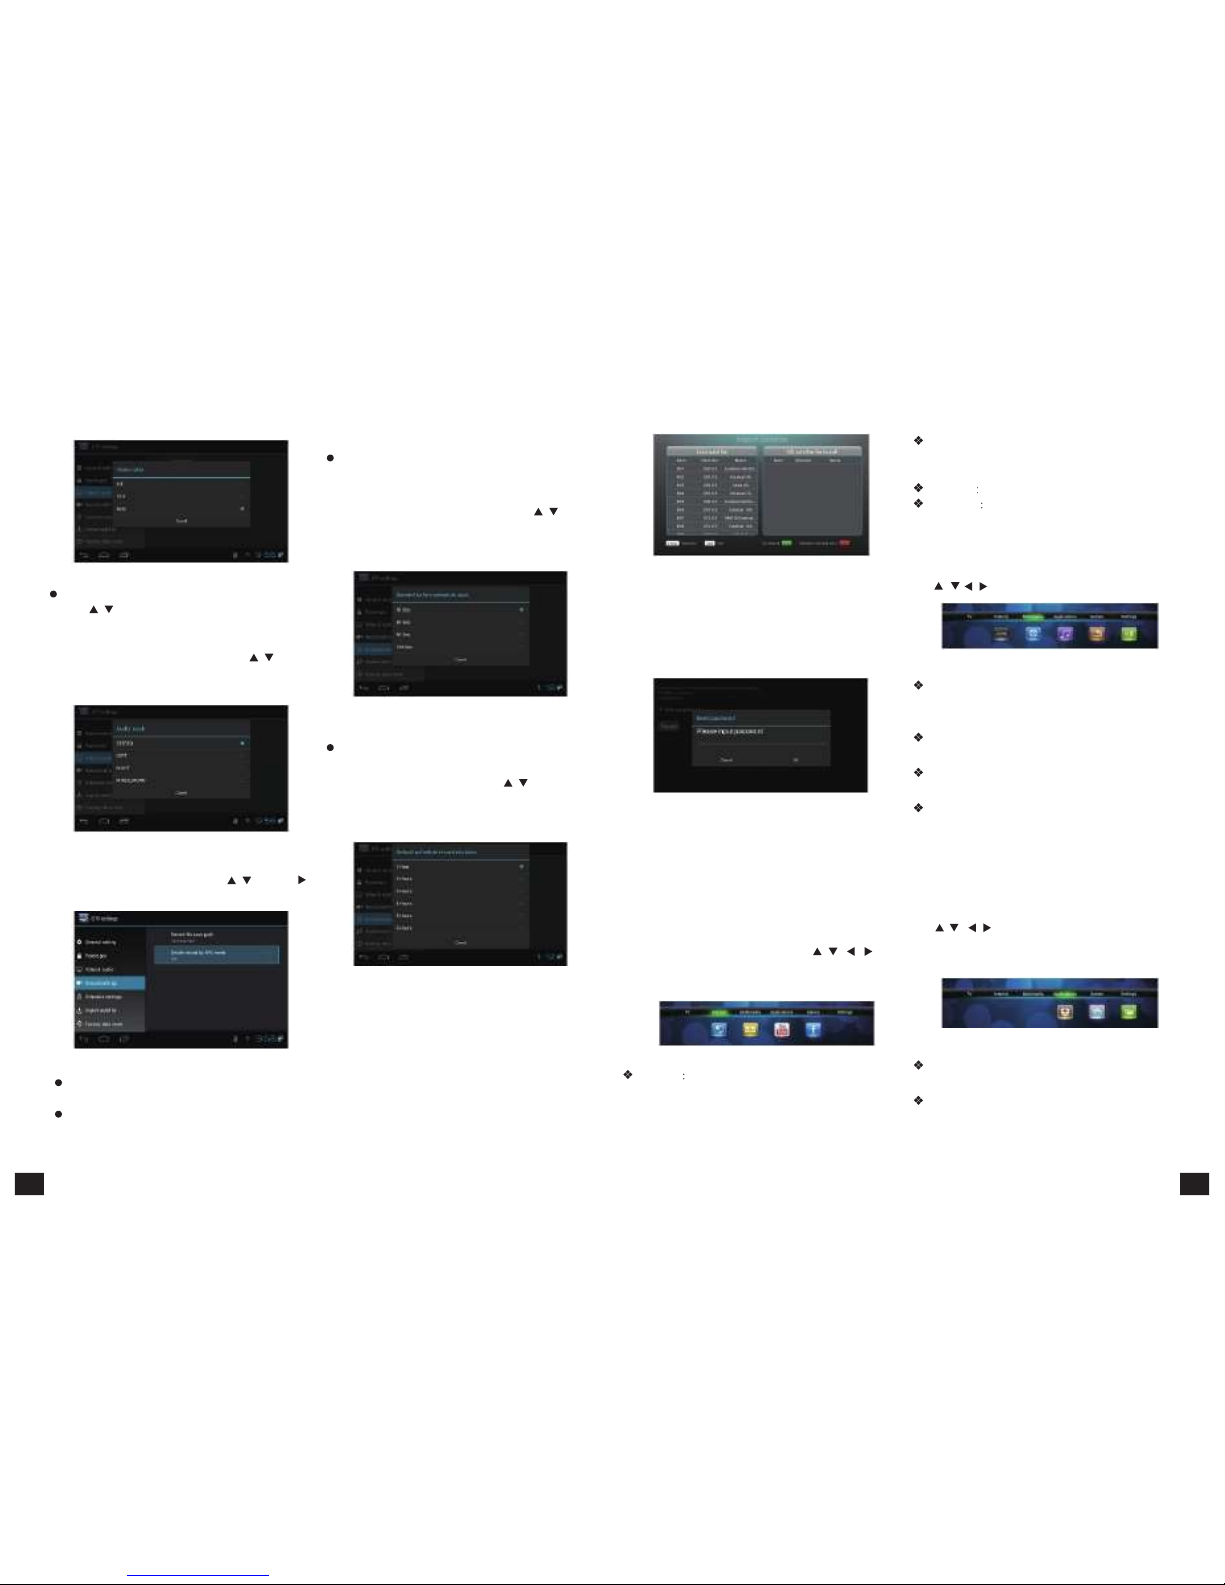
Audio track:
Press【 / 】and【OK】or【AUDIO】to enter in
audio track setting, as shown in picture 5-3-26.
Audio track can be adjusted to stereo, left track,
right track and mixed sound. Press【 / 】and
【OK】to confirm. Press【EXIT】to quit without
saving.
Figure
5-3-26
4) Record Settings
On TV settings interface, press【 / 】and【 】
to enter in record settings .
5) Schedule Settings
Remind before schedule start:
This function is mainly to remind users of scheduled
operation of program in advance and whether to
schedule the programs or not. Press【 / 】and
【OK】to confirm the option. Press 【EXIT】to
quit without saving. As shown in picture 5-3-28.
Figure
5-3-28
Default schedule record duration:
Schedule record duration is mainly to set the length
of program record time. Press【 / 】and【OK】
to confirm the option. Press【EXIT】to quit without
saving. As shown in picture 5-3-29.
Figure
5-3-29
Figure
5-3-30
7) Factory Default
It is a simple factory resetting function, just restoring
DTV related information, and not deleting users’
application and files. Press【OK】button to enter in
factory resetting, as shown in picture 5-3-31.
Figure
5-3-31
After factory default, input password to enter
"Boot guidance settings" interface, reset language,
region and parent lock according to prompting.
Return to TV settings interface after finish setting.
5.3.2 Internet
In the main menu, Internet option has four son
options of "Browser", "Email", "YouTube" and "Facebook"
as shown in figure 5-3-32. Press【 / 、 / 】to
move the cursor to the son option; press【OK】to
enter in.
Email
: Build-in email software, send and receive
emails at any time. Input correct Email address
and password, click NEXT and log in.
YouTube
Online video website.
Facebook
Famous social contact website.
5.3.3 Multimedia
Multimedia includes video, music, picture and
file browser as shown in figure 5-3-33. Press
【 / 、 / 】and【OK】to enter in.
Figure
5-3-33
Video player
: Play all the videos from storage
device, including SD card, USB, etc, support
various mode of AVI、WMV、MPEG.
Music player
: Support various formats of music,
play your favorite song at any time.
Picture browser
: Clear picture browsing modes
help you browse local pictures quickly.
File browser
: Manage the files in built-in SD
card and outside storage device. Below is the
file browser interface.
5.3.4 More Applications
More Applications are mainly divided into
"Application" and " Applied installation" . Use
【 / 、 / 】or fly mouse to move cursor to
sub menu, press【OK】button to enter in. As
picture 5-3-34 shows:
6) Import satellite
Figure
5-3-27
Recorded file save path:
Set the position of recorded files.
Divide record by EPG event:
Open or close Divide record by EPG event function.
This function can import satellite info in external
equipment into existed satellite list. Press【OK】
button to enter "Import Satellite" interface, as
shown in picture 5-3-30.
Figure
5-3-32
Browser
IE Browser, connecting Google by default.
If you want to log in other website, please use
remote control or fly mouse to input the website
address you want, for detailed information please
take a reference on Internet Function part.
Figure
5-3-34
Application
: Please refer to the application
function in 5.4 part.
Application installatio n
: Please refer to the
application function in 5.4 part.
17 18
Page 11
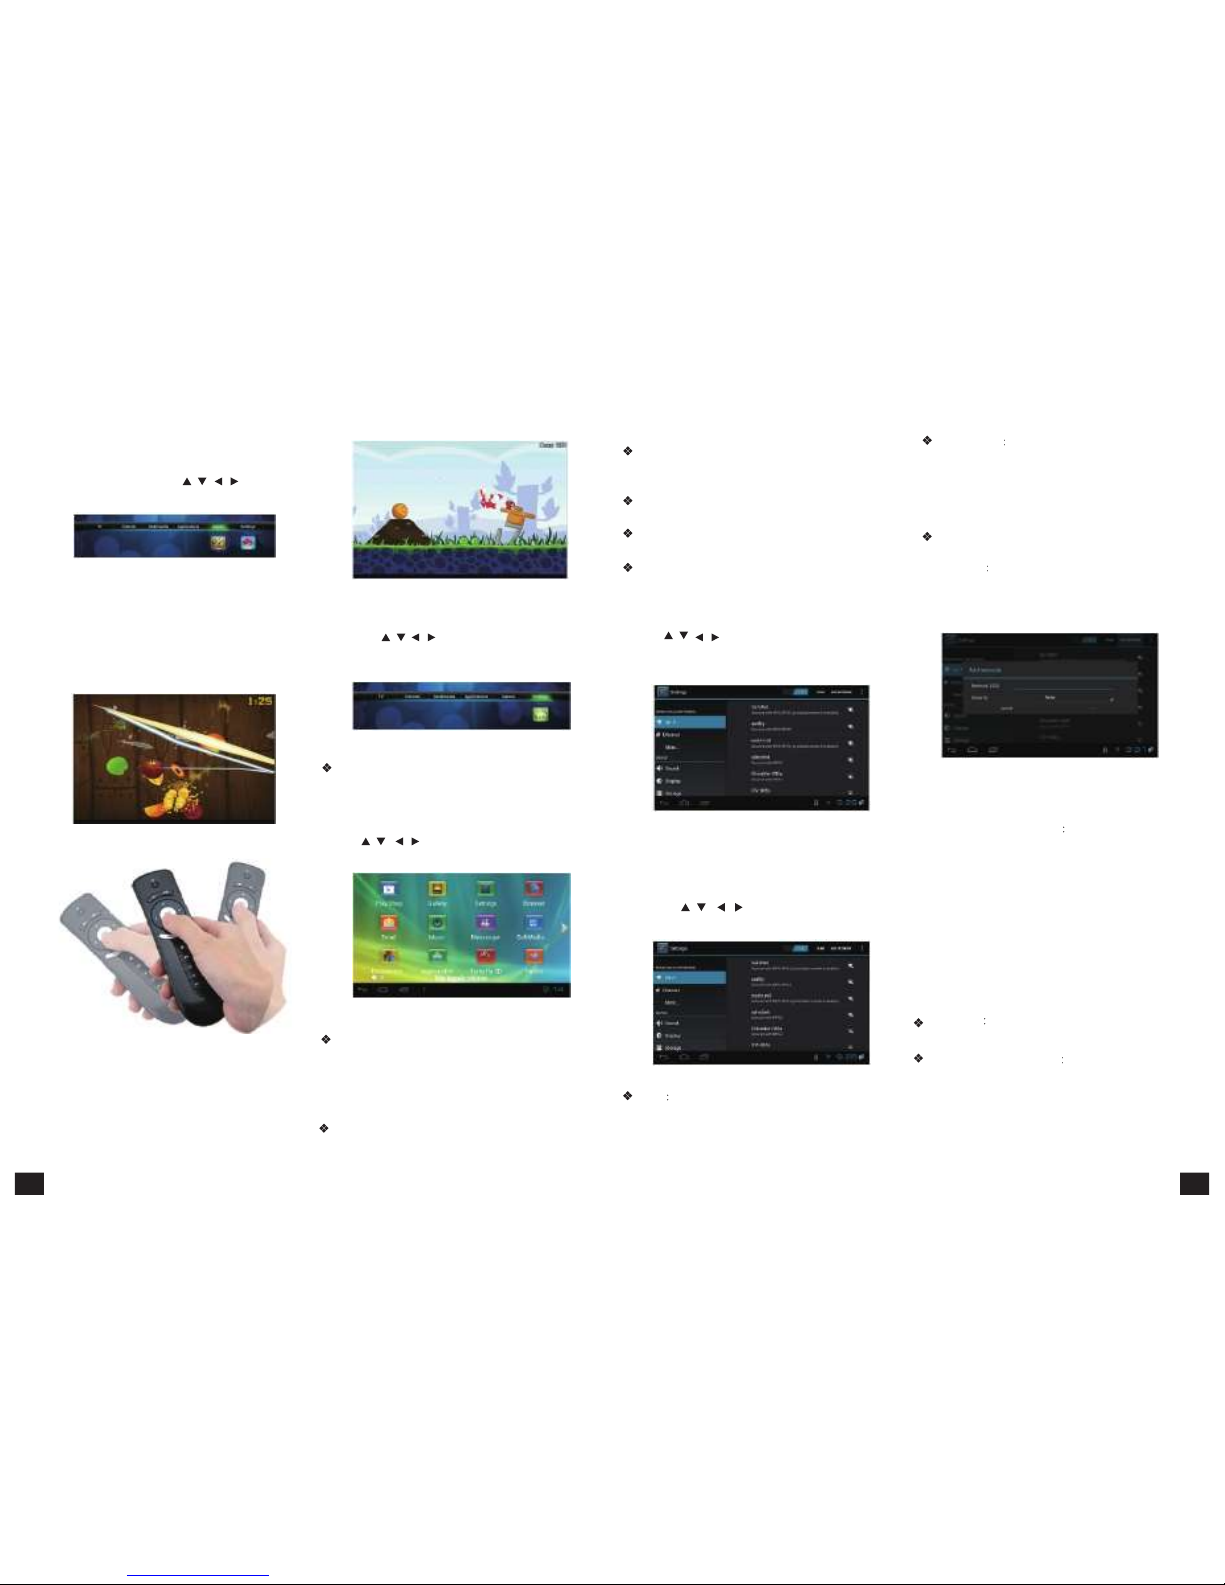
5.3.5 Games
Games includes the well-known “Fruit Ninja”
and “Angry Birds”. Press【 / 、 / 】and【OK】
to enter in. As picture 5-3-35 shows:
Figure
5-3-35
Using Air Mouse RCU you may easily manage the
OSD game interface. You have only to use central
OK button and your own hand movement as this
RCU has integrated movement sensor.
“Fruit Ninja” – the aim of the game is to chaff as
many fruits as possible.
Video player
: Play all the videos from storage
device, including SD card, USB, etc, support various
mode of AVI、WMV、MPEG.
Music player
: Support various pattern of music,
play your favorite song at any time.
Picture browser
: Clear picture browsing modes
help you browse local pictures quickly.
Installation
: Read the installation file from the
storage device, click to install the software you want.
5.3.6. System Setup
5.5 System Setup
Press【 / 、 / 】and【OK】to enter in sub Press【 / 、 / 】and【OK】to enter in “System
menu of "Settings", seeing picture 5-3-36. Setup”. Then you can use the same way to enter
in from main UI.
Figure
5-3-36
System Setup: Please refer to the System Setup
of 5.5 part.
Wi-Fi Setting
Setup and manage wireless
access point.
System will auto search Wi-Fi Internet when
Wi-Fi is open and display the result on Interface.
If no internet is se arched, you can add WLAN
access point by hand.
Adding WLAN access point by hand:
Following options are in Wi-Fi list:
Scanning
Automatically scan WIFI wireless
internet
Add network: Press【OK】button, the
dialog box pops up, as shown in picture 5-5-3:
Figure
5-5-3
“Angry Birds”
. The player has to shoot from
slingshot by birds to shatter different fortifications.
Game management: Press and keep【OK】 button
to activate the slingshot.
5.4 Application Function
Press【 / 、 / 】and【OK】to enter in application
interface as shown in picture 5-4-1.
Figure
5-4-1
IE Browser, connecting Google by default. If you
want to log in other website, please use remote
control or fly mouse to type the website address
you want, for detailed information please take a
reference on Internet Function part.
Email
: Build-in email software, send and receive
emails at any time. Input right correct account number
Figure
5-5-1
Detailed setting method will be explained as
following.
5.5.1 Wireless & Internet
Press【 / 、 / 】and【OK】to enter in
“ Settings”, seeing picture 5-5-2:
Figure
5-5-2
Wi-Fi
Turn on or turn off WLAN function
Choose upper right "BLUE" button, then press
【OK】button. WIFI is open when it shows “ON”.
Advanced setup Interface is as below:
Choose Static state IP
Choose whether to
use Static state IP mode.
If choose static state IP mode, the IP address,
Gateway, Netmask and DNS become available,
you need to setup this parameter correctly. If not,
all these settings are invalid.
Use IR remote control to choose static state IP,
press【OK】button to enter in.
5.5.2 Ethernet Settings
Ethernet
Click this option , press【OK】button
to turn on or off Ethernet.
Ethernet configuration
Set Internet IP and
other parameters.
Click this option, entering Ethernet configuration
interface. Like picture 5-5-4 shows:
and password, click NEXT, set up mailbox and log in.
19 20
Page 12
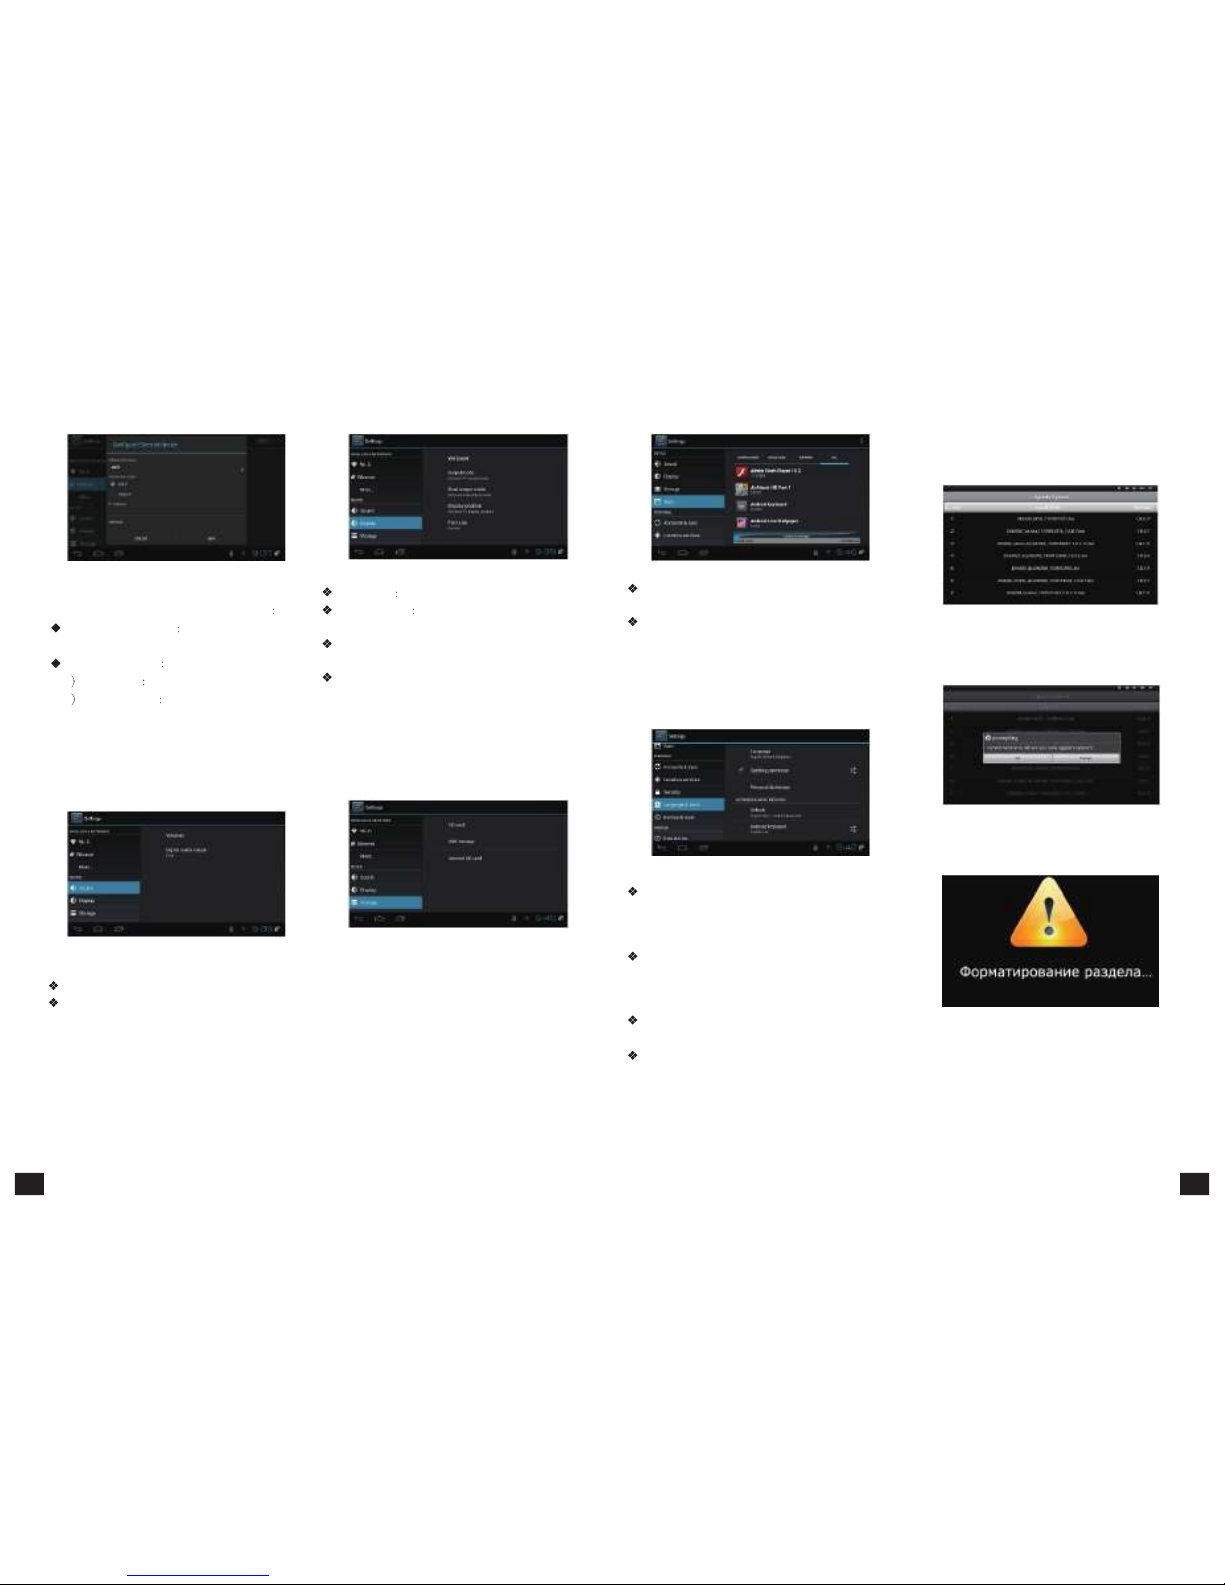
Connecting mode
1 DHCP Mode Auto obtain IP address mode.
Figure
5-5-4
Figure 5-5-6
Wallpaper
Set the system wallpaper
In the interface of Ethernet configuration
Output mode
Set TV output mode, including
Ethernet Equipment
Currently can be
720p, 1080p, etc.
applied Ethernet equipment "eth0" acquiescently.
Display position
: Set TV representation rate to
adjust screen size.
Font Size
: Set system font size.
Figure
5-5-8
Downloaded
: Display users' personal downloaded
and installed applications
Running
: Examine currentlyrunning service, visit
and manage the service.
5.5.7 Personal Settings
Personal settings include Account & Synchronization,
2. Choose Setting ->system setting->system
upgrading into the system upgrading interface,
see as picture 5-5-10.
Figure
5-5-3
3. Click the right upgrading among all listed
upgrade packages, then a confirmation dialogue
pops up , as shown in picture 5-5-11:
2 Static state IP Static IP mode
When choose Static state IP mode, you need
to setup all IP parameters correctly and save it.
5.5.3 Sound Setup
Press【OK】button to enter in "Sound".
Figure
5-5-5
Volume: Set the system volume;
Sound Output Mode: Choose PCM or RAW model.
5.5.4 Display Setup
Press【OK】to enter in "Display".
5.5.5 SD Card and Storage
Device
Show SD card and storage device and internal
memory information, and operations of unloading,
Installation and formatting.
Figure
5-5-7
Note: Please unload it safely before formatting Hard
Disk.
5.5.6 Applications
Choose "Apps" and press【OK】to enter in,
like Picture 5-5-8 shows:
LBS, Safety, Language & Input, Backup & Reset, as
shown in picture 5-5-9.
Figure
5-5-9
Account & Synchronize:
All kinds of accounts can be added, including Google,
Skype, Twitter and so on, realizing the synchronization
of data
Location Based Services
: Set whether to open
Google's location service or not
Safety: Set password visible, equipment control,
application installation, etc.
Language & Input
: Set system language and
default input method.
Backup & Reset:
Back up data and restore
factory setting.
Figure
5-5-11
4. Click "OK" to upgrade. system will reboot then
into the uploading interface, as picture 5-5-12:
Figure
5-5-12
5. The machine starts to clear FLASH and showing
completely loading the upgrade files, see as picture
5-5-13.
5.5.8 System Update
1. Insert the SD card or U-disk that store upgrading
files.
21 22
Page 13
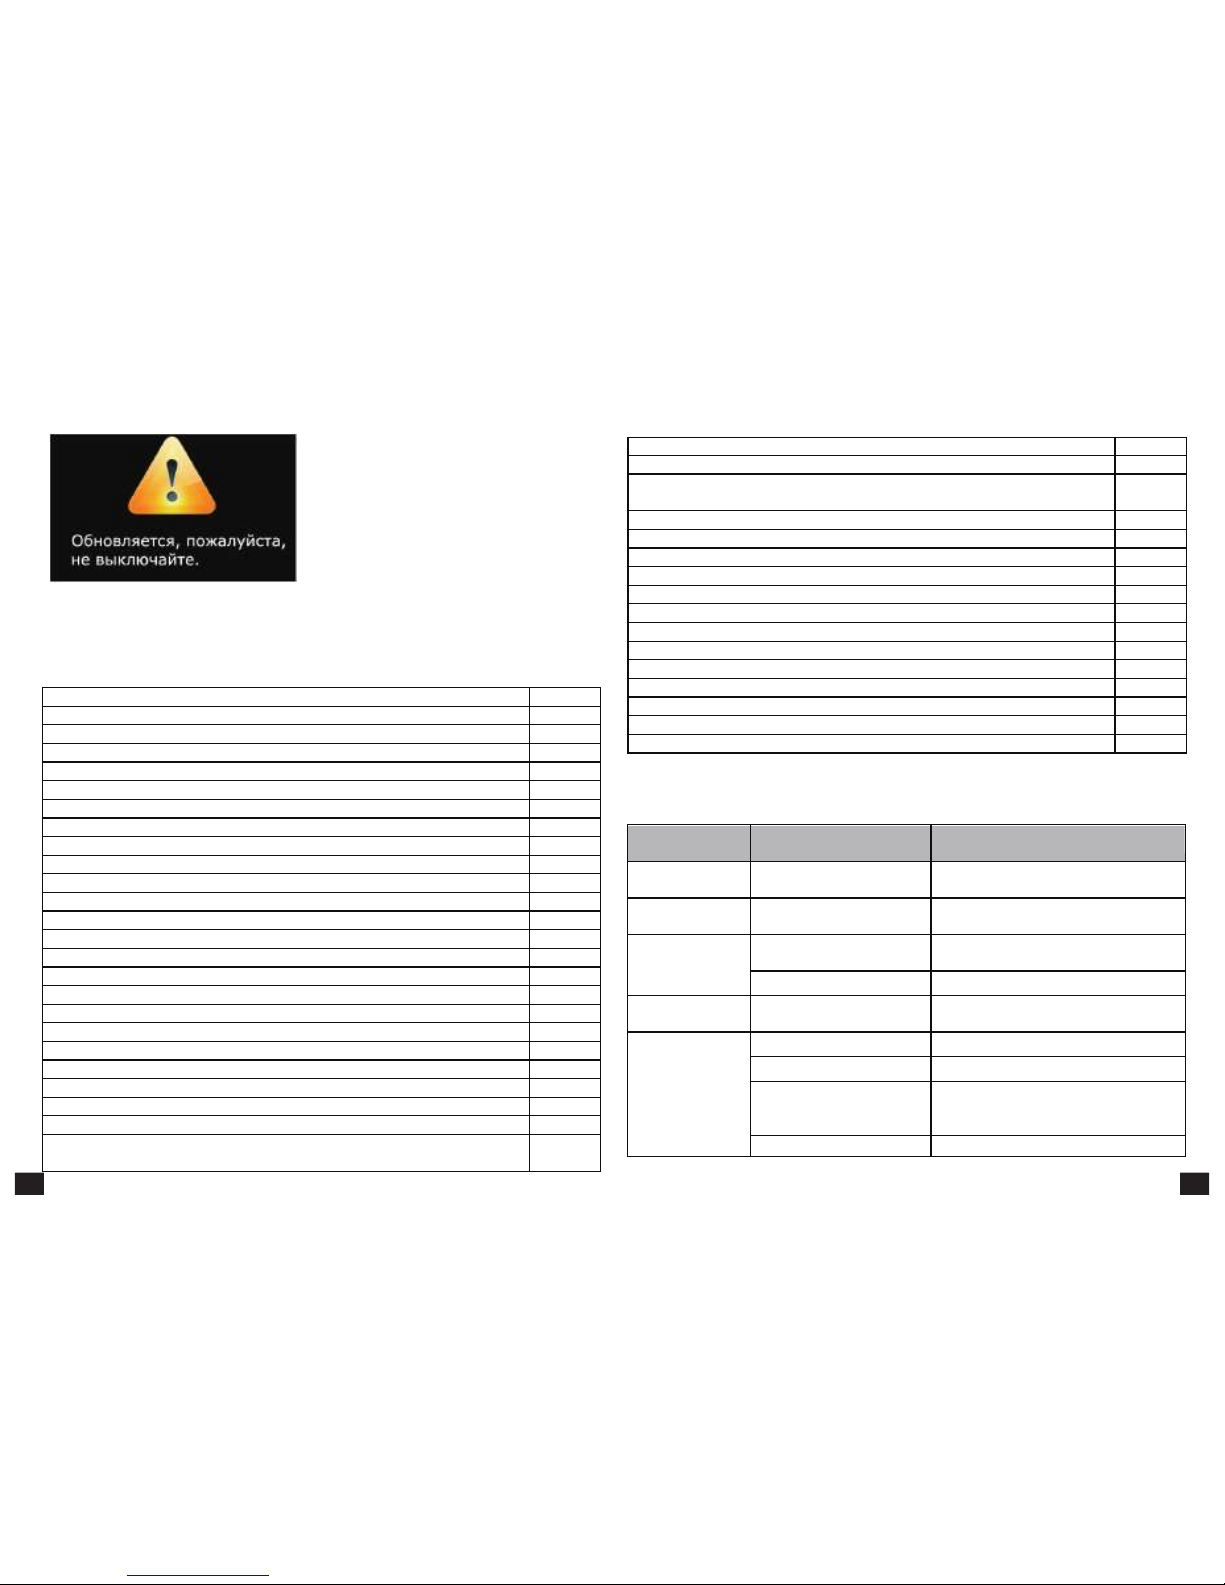
6.Technical Parameter
7.Abnormal phenomenon and ruled out
23
24
completes.
Note: Do not power off when in process of
upgrading
Figure
5-5-13
6. System will automatically reboot and the new system start to running after the whole upgrading
Features: Standard
Android 4.0 System
YES
Support local multimedia playing
YES
Support HMTL5 or RTSP video and audio playing
YES
Support hardware accelerating OpenGL2.0
YES
Support Android 2D/3D games
YES
Support video formats:mpeg、avi、mov、mp4、rm、rmvb、mp3
YES
Support picture formats: jpeg、bmp、png、gif
YES
Resolution 720P, 1080P
YES
Support Multilanguage English, Chinese, Spanish, Polish, Portuguese, Persian
YES
Support USB 2.0 interface×3
YES
Support updating by USB device or SD card.
YES
Support USB HDD and SD card devices(FAT32、NTFS
)
YES
Support IR remote control
YES
Support USB wireless keyboard and mouse
YES
Support USB WIFI Dongle
YES
Support built-in WIFI
YES
Support HDMI output
YES
Support HD DVB-S2
YES
Support USB PVR
YES
Support 7 days EPG
YES
Support timing playing
YES
Support program playback
YES
Video Decoding
Standard
Support MPEG-1/2/4 ASP,DivX 3/4/5,XviD,H.264(1920x1080p @ 30fps),VC-1,WMV,H.263 video
formats
YES
Fault Phenomenon
Possible reason Solution
After start, without
any display
The power cord didn't connect
or socket without electricity
Connected power plug, ensure normal
voltage electrical outlet
No Voice and
Images
Play box in standby mode
Please press the POWER button of the RCU
switch to the operation condition
Channel selection,
showing no signal
Wrong signal connection
Please re-connect signal refer to the system
connection
Television station has no signal
Please try later when having signal
TV with Voice
without Images
Video line goes off
Please re-connect the video cables
TV images without
Voice
Audio wire has no connection
Re-connect the Audio lines
Play Box in quiet state
Please press mute button to restore volume
Audio setting is abnormal
Please enter the audio and video Settings
menu, select the appropriate sound channel
and language
Volume , down to minimum
Up the volume
Support 4:3 and 16:9 screen ratio
YES
Audio Decoding
Standard
Support MPEG 1/2/2.5, Audio Layer 1/2/3,WMA Version 4, 4.1, 7, 8, 9, WMA Pro,PCM,Vorbis,Flac
,
ALAC,APE,AAC-LC, AAC-HE,AC-3,DTS,Real Audio formats
YES
Sample rate:8~48KHz
YES
Tuner parameter
Standard
Tuner Model: AV2012+AVLINK 6211
YES
Fully compliant with HD DVB-S2 standard
YES
Reception frequency range:(MHZ):950 ~ 2150MHz
YES
RF input(dBm):-65dBm ~ -25dBm
YES
Input impedance:75Ω
YES
Main Board
Standard
SOC:Amlogic 8726 M3
YES
CPU:ARM A9 1GHz
YES
GPU:MAIL-400
YES
DDRIII Memory:DDR3 1G
YES
Flash Memory:MLC 4GB
YES
Page 14

Page 15

8.Glossary
Appendix Accessories
STB×1
Adapter ×1
HDMI Cable ×1
RCU×1
Battery×2
Air mouse ×1
User Manual×1
Warranty Card×1
25
HDMI
High Definition Multimedia Interface
EPG
Electronic Program Guide
MHz
Frequency unit
RF
Radio Frequency(It is also called HF in some countries
)
Standby
STB no longer plays program or outputs any video and audio signals, also don't accept command
of any key except on/off button.
Parent Lock
Allow parents to lock programs unfavourable to children
Set-top-box (STB)
A kind of equipment that can decode and tune digital signal, and turn these signals into formats
TV can accept. In addition to decoding signal, it can also verify viewers' access rights.
Smart Card
A kind of card contains integrated electronic circuit. It can provide you with all kinds of service
together with set-top box.
Encrypted
Programs
Some TV or music are encrypted. You need smart card to watch or listen to them.
Consistent Voice
with content
Inconsistent Track
Please setting in the audio and video
Settings menu, select sound channel
Images pause Or
Mosaic
phenomenon
The network speed not enough
or unstable
Contact to network operator
Controller failure
RCU not aimed the receiving
head of the front penal
Please aim at the front's ' SENSOR', then try
again
Shortage power of Remote
control batteries
Please change the batteries
Remote control is possibly
damaged
Please send it to the local maintenance
station for checking
 Loading...