

Page 1
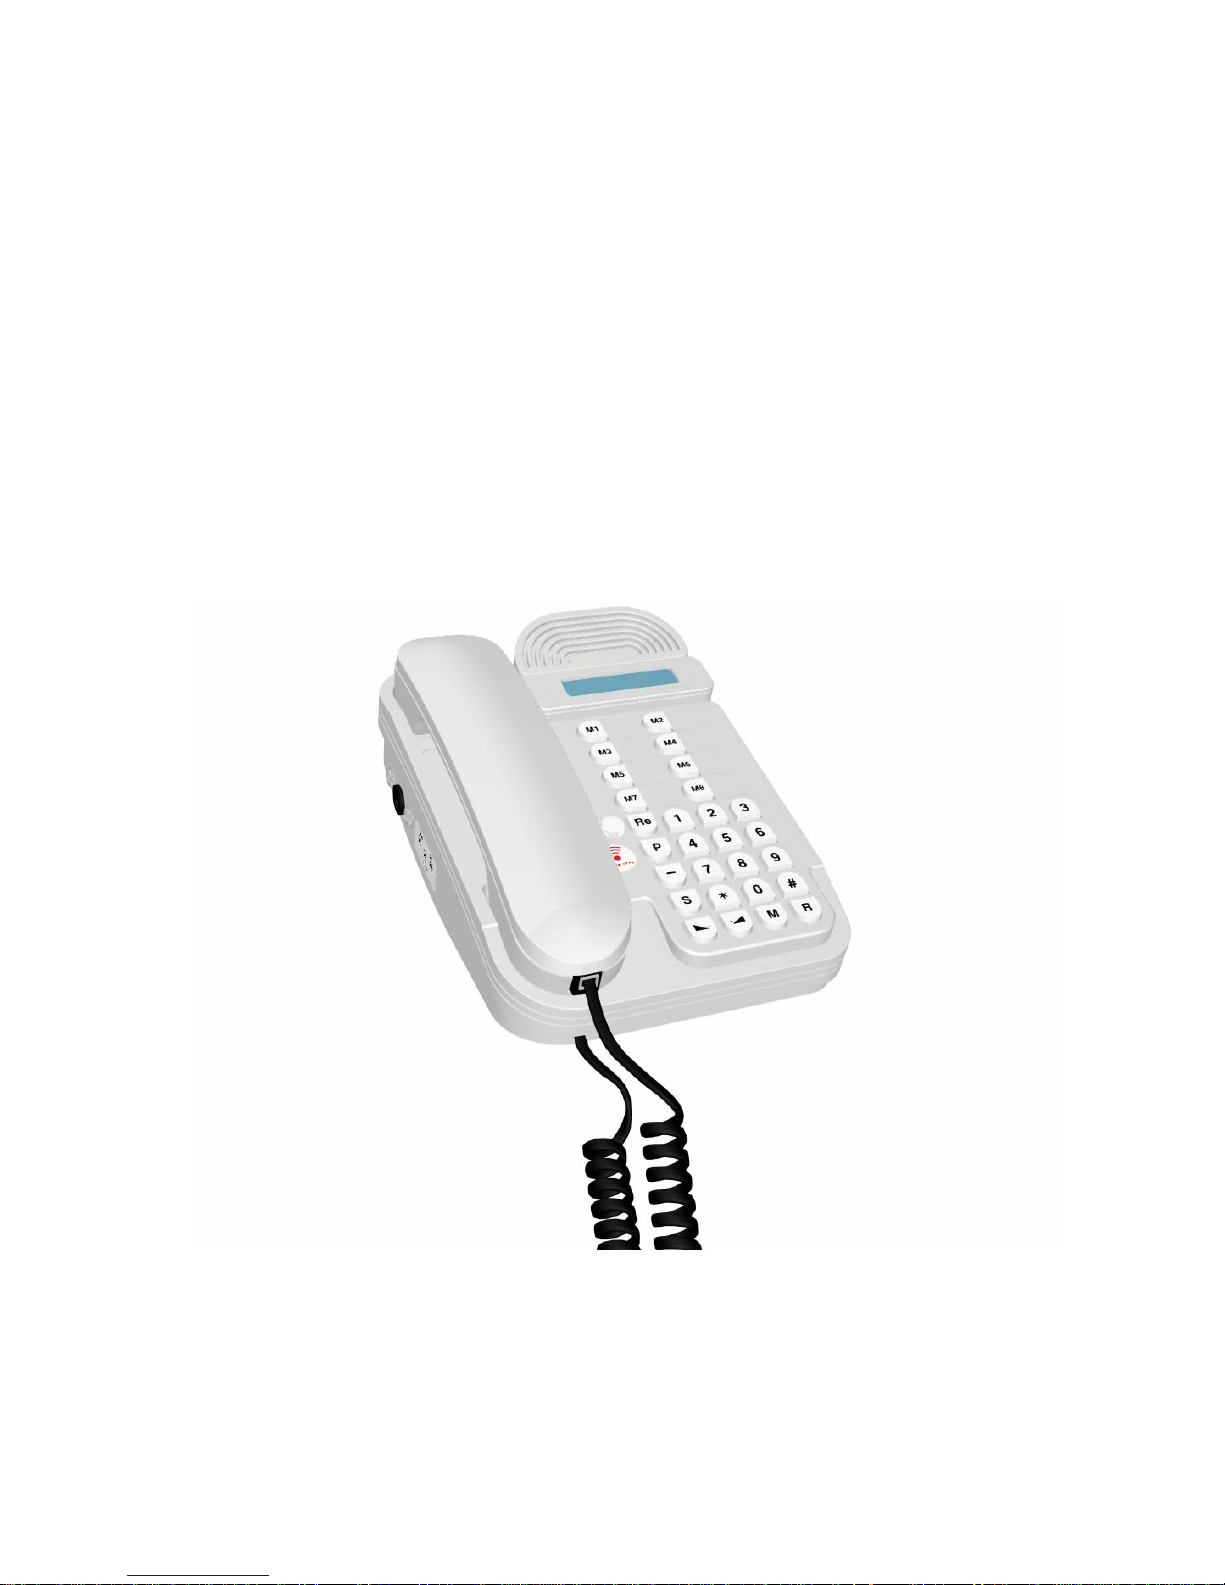
Instructions for Gewa Jupiter
Page 2

2 (20)
INTRODUCTION.........................................................................................................................3
BENEFITS AND FEATURES OF GEWA JUPITER.................................................................................3
CONNECTION AND DESCRIPTION ....................................................................................... 4
CONNECTING JUPITER ................................................................................................................... 4
JUPITER’S KEYS AND OTHER COMPONENTS....................................................................................4
PROGRAMMING DIFFERENT SETTINGS ...........................................................................6
PROGRAMME TELEPHONE NUMBERS..............................................................................................6
Programme direct dial keys M1-M8......................................................................................... 6
Programme abbreviated numbers K10-K49.............................................................................7
ADJUST VOLUME OF RING SIGNAL ................................................................................................. 7
ADJUST TONE OF RING SIGNAL ......................................................................................................7
KEYBOARD LOCK .......................................................................................................................... 8
Programme personal code........................................................................................................8
Lock/unlock keyboard............................................................................................................... 8
PROGRAMMING REMOTE-CONTROLLED FUNCTIONS ...............................................9
F
UNCTION TABLE ..........................................................................................................................9
P
REPARING FOR PROGRAMMING..................................................................................................12
PROGRAMMING ........................................................................................................................... 12
USING JUPITER ........................................................................................................................13
RING WITH THE HANDSET............................................................................................................ 13
Ring normally .........................................................................................................................13
Ring last-dialled number ........................................................................................................13
Ring the second-last dialled number ...................................................................................... 13
Ring with direct dial buttons ..................................................................................................13
Ring with abbreviated numbers..............................................................................................14
RING WITH THE LOUDSPEAKER FUNCTION...................................................................................14
ANSWER A CALL ......................................................................................................................... 14
TERMINATE A CALL.....................................................................................................................14
CHECK DIRECT DIAL NUMBERS AND ABBREVIATED NUMBERS.....................................................14
Direct dial numbers................................................................................................................14
Abbreviated numbers..............................................................................................................14
SAVE TELEPHONE NUMBERS TEMPORARILY ................................................................................15
S
WITCH BETWEEN HEADSET AND LOUDSPEAKER MODULE ..........................................................15
L
ISTEN-IN ................................................................................................................................... 15
ADJUST SOUND VOLUME DURING ONGOING CALL ....................................................................... 15
With headset ...........................................................................................................................15
With loudspeaking function .................................................................................................... 15
PRIVACY (MUTE) ........................................................................................................................ 16
ANSWER AND CALL WITH IR TRANSMITTER ................................................................................ 16
OTHER INFORMATION.......................................................................................................... 17
QUICK GUIDE SUMMARY .............................................................................................................17
BATTERY FUNCTION.................................................................................................................... 17
Check battery status ...............................................................................................................17
Change batteries..................................................................................................................... 18
C
LEANING...................................................................................................................................18
A
PPLICATION ENVIRONMENT ......................................................................................................18
TECHNICAL DATA .......................................................................................................................18
DECLARATION OF CONFORMITY .....................................................................................19
Page 3

3 (20)
Introduction
Gewa Jupiter is a remote-controlled loudspeaker telephone, which means that the
different keys on the telephone can be operated from an IR transmitter. Users with
disabilities do not need to lift the handset and press the keys, as the telephone can
be operated remotely from its IR transmitter. To dial a number, the number is
entered in the digital window and sent. The built-in IR receiver is used to
programme the keys that are operated from the IR transmitter. The telephone can
thus be individually adapted to the needs of a disabled user. Gewa Jupiter is part of
the Gewa Smart House system, which means that everything can be guided from
one remote control.
Benefits and features of Gewa Jupiter
• An IR transmitter that controls all the telephone’s functions
• The choice of using selected and simple functions from the IR transmitter, such
as only direct dial numbers with automatic connection.
• Free disposition of IR channels.
• Simple programming.
• Loudspeaker telephone that enables full speech communication without lifting
the handset.
• Good sound quality (good speech switchover).
• Back up batteries for power failure.
• Telephone numbers that can be built up before the line is opened.
• Character display that shows telephone number and other characters.
Page 4

4 (20)
Connection and description
Connecting Jupiter
1. Place the batteries that are supplied (4 1.5 V Alk) in the correct position in the
battery compartment on the back of Jupiter. Use Alkaline batteries only.
2. Connect the battery eliminator to the contact on Jupiter and a socket outlet.
Only the battery eliminator that is supplied should be used (type: Vanson
Regulated AC/DC Adaptor 230V AC /7.5V DC).
3. Connect the supplied cord with the plug contact with the contact underneath
Jupiter and then connect the plug contact to the telephone line.
As Jupiter is approved for two-wire connection, any subsequent telephones will
be disconnected. To alleviate this problem, choose one of the following
alternatives:
• Set Jupiter in the last jack.
• Remove the white plastic pin from Jupiter’s plug contact.
• Connect the jack parallel.
4. Check that there is a tone when the handset is lifted, or the S key is pressed.
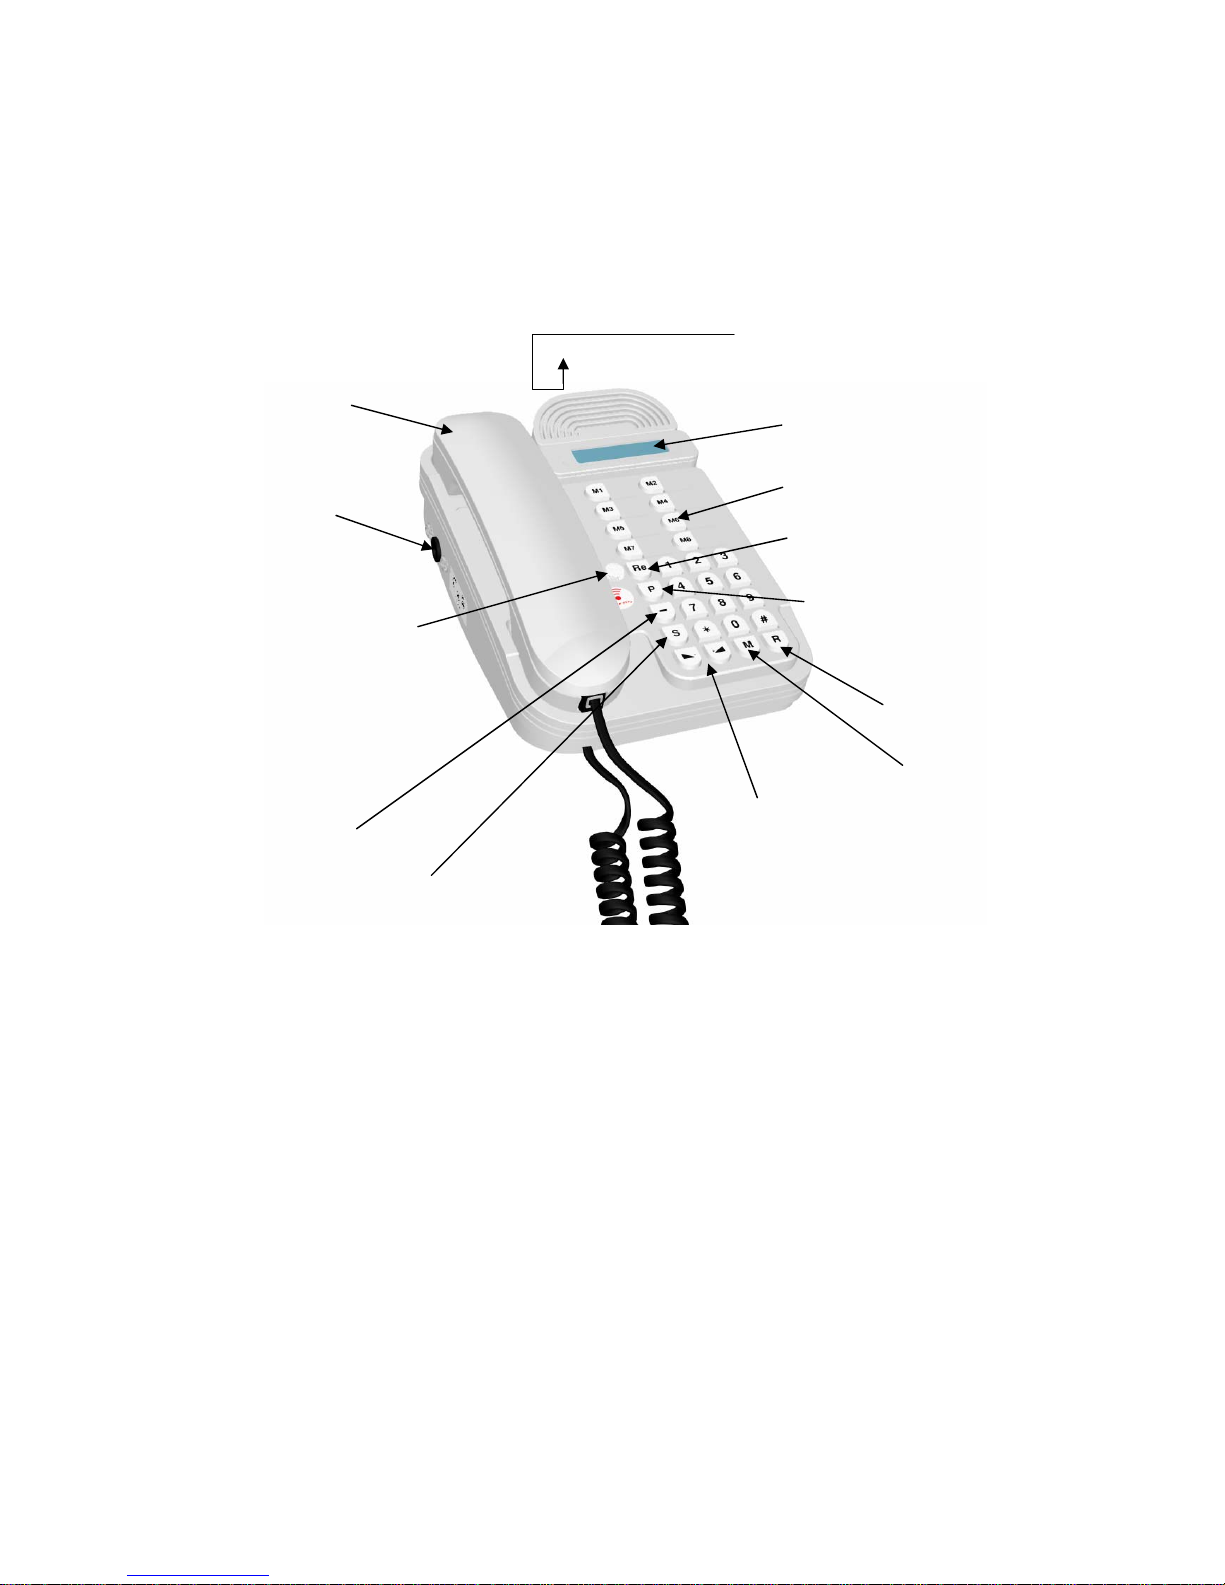
Jupiter’s keys and other components
Jupiter has 16 special keys, in addition to 0-9, # and *.
M1-M8 Direct dial keys 1-8, with memory.
Re (Redial) For redialling the last/second-last dialled number (two presses
for second-last number). When the line is opened with the S key, the
number is dialled.
R Register button, used for different AXE services.
P Programming key, used to programme the telephone’s different
functions.
—
Pause, and function for recalling abbreviated numbers
S (Speaker) Connection, i.e. answer/terminate via the loud speaking
function. If the saved number is already in the character display, it is
sent when the S key is pressed.
Increases the sound volume in the loudspeaker/handset.
Reduces the sound volume in the loudspeaker/handset.
M (Mute) Privacy, turns off Jupiter’s microphone.
Page 5
5 (20)
Contact for connecting the cord
with the telephone jack with the
telephone line (underneath
Jupiter)
Handset
Pause key and
abbreviated number function
(Speaker) Connection
Sound volume +/-
(Mute) Privacy
IR eye/Indicating lamp
The IR eye receives the
IR signals and should
never be hidden or
concealed
Register key
Programming key
Redial
Character display
Direct dial keys M1-M8
Connection for power
supply
Page 6

6 (20)
Programming different settings
Programme telephone numbers
Using Jupiter is easy, as telephone numbers are saved in different memories. 8
telephone numbers can be saved in the direct dial keys M1-M8, and 40 telephone
numbers can be saved as abbreviated numbers in memories K10-K49. A maximum
of 20 digits and characters can be programmed into each memory.
If Jupiter is connected to an internal switch that requires a prefix, a pause must be
added between the prefix and the telephone number. This prefix could be a zero,
for example, and pressed first where after the desired number is pressed.
Pause key
0
5
9
4
6
9
4
0
0
On rare occasions, Jupiter can send a number that is saved on a direct dial key or as
an abbreviated number when automatic connection is used. Read more about
automatic connection in the “Programme remote-controlled functions”. To avoid
this problem, a time-delay should be added by pressing a pause before the actual
telephone number.
Time-delay=pause key
5
9
4
6
9
4
0
0
Programme direct dial keys M1-M8
1. Press
P
.
2. Choose and press a direct dial key
M 1
-
M 8
.
3. Press
P
.
4. Press the desired telephone number.
5. Press
P
.
Quick guide
Programme M1-M8:
P
,
M 1
-
M 8
,
P
, the desired telephone number,
P
.
Page 7

7 (20)
Programme abbreviated numbers K10-K49
1. Press
P
.
2. Choose an abbreviated number by pressing a number between 10-49.
3. Press
P
.
4. Press the desired telephone number.
5. Press
P
.
Quick guide
Programme K10-K49:
P
,
K X
,
P
, the desired telephone number,
P
.
Adjust volume of ring signal
The volume of the ring signal can be set at either high or low.
1. Lift the headset.
2. Press
P
.
3. Press
S
.
4. Press
for high volume or for low volume. H or L are shown in the
character display to indicate high/low volume.
5. Replace headset.
Quick guide
High/low volume of ring signal: Lift the headset,
P
,
S
,
or , replace headset.
= High volume. = Low volume.
Adjust tone of ring signal
The tone of the ring signal has four alternative settings.
1. Lift the headset.
2. Press
P
.
3. Press
S
.
4. Choose and press
M 1
-
M 4
to change the tone of the ring signal. d1-d4 are shown
in the character display.
5. Replace headset.
Quick guide
Adjust tone of ring signal: Lift the headset,
P
,
S
,
M 1
-
M 4
, replace headset.
Page 8

8 (20)
Keyboard lock
The keyboard lock is used to bar outgoing calls. It is still possible to ring the
telephone numbers saved on the direct dial keys and abbreviated numbers.
Incoming call are not affected. If the keyboard is locked, a key symbol appears in
the character display. A code is needed to lock the keyboard. On delivery, the code
is 000. This can be changed to a personal code.
Programme personal code
1. Press
P
.
2. Press
S
.
3. Press 000. *** is shown in the character display. If the wrong code is pressed,
Error appears.
4. Press
P
.
5. Press a new three-digit code.
6. Repeat the new code
Quick guide
Programme personal code:
P
, S, 0, 0, 0,
P
, new three-digit code, repeat code.
Lock/unlock keyboard
1. Press
P
.
2. Press
S
.
3. Press personal code. *** is shown in the character display. If the wrong code is
pressed, Error appears.
4. Press
*
to lock or # unlock.
Quick guide
Lock/unlock keyboard:
P
, S, code, * or #.
*
= lock. # = unlock.
Page 9

9 (20)
Programming remote-controlled functions
Jupiter can be operated from an IR transmitter via a built-in IR receiver. The
desired functions and channels must be programmed in the IR receiver.
Function table
Tables 1 and 2 show the different functions/alternatives that are operable from an
IR transmitter. Please observe the following:
• Only R, Re, P and with/without automatic connection differ from alternatives 1-
4.
• Alternatives 5-6 are reserved for future applications.
• Alternative 7 is the simplest alternative with only direct dial /abbreviated
numbers and automatic connection.
• Automatic connection means that when the keyboard is pressed from the IR
transmitter, Jupiter rings a direct dial/abbreviated number and the line is opened
automatically.
• Check the table to see which IR transmitter is most appropriate for the different
alternatives. Only IR transmitters from Gewa AB can be used.
• The factory setting for Jupiter = Channel 16 on the first key, alternative 3 and
group 4.
• When programming Jupiter, choose the alternative and the number of functions
in the alternative that are to be accessed from the IR transmitter. For example, if
group 5 in alternative 1 is chosen, all functions in groups 1 to 5 are accessible;
if group 8 in the same alternative is chosen, the maximum number of functions
is accessible, i.e. groups 1 to 8.
• In alternatives 1-4, at least group 4 must be chosen.
Page 10

10 (20)
Table 1
Only IR transmitters IR 17SO, IR 17SP and Gewa Prog III are suitable for the following
alternatives.
Group Key on
transmitte
r
Alt. 1
Without automatic
connection on
M 1- M8, but with
automatic
connection on
K10-K11.
Alt. 2
Without automatic
connection on
M 1- M8 but with
automatic
connection on
K10-K11.
Alt. 3
With automatic
connection on
M 1- M8 and
K10-K11.
Alt. 4
With automatic
connection on
M 1- M8 and
K10-K11.
1 1 1 1 1
Grp 1
2 2 2 2 2
3 3 3 3 3
4 4 4 4 4
5 5 5 5 5
Grp 2
6 6 6 6 6
7 7 7 7 7
8 8 8 8 8
9 9 9 9 9
Grp 3
0 0 0 0 0
* * * * *
# # # # #
A S S S S
Grp 4 B Re R Re R
C — — — —
D M 1 M 1 M 1 M 1
1 M 2 M 2 M 2 M 2
Grp 5 2 M 3 M 3 M 3 M 3
3 M 4 M 4 M 4 M 4
4 M 5 M 5 M 5 M 5
5 M 6 M 6 M 6 M 6
Grp 6 6 M 7 M 7 M 7 M 7
7 M 8 M 8 M 8 M 8
8 K 10 K 10 K 10 K 10
9 K 11 K 11 K 11 K 11
Grp 7 0 R R R R
* V- V- V- V # V+ V+ V+ V+
A S S S S
Grp 8 B P P —————— —————
C M M M M
D M 1 M 1 M 1 M 1
Page 11

11 (20)
Table 2
All types of Gewa transmitters can be used in alternative 7
Group Alt. 5
(reserved for
future
additions)
Alt. 6
(reserved for
future
additions)
Alt. 7
With automatic connection on M 1M8, K10-K32.
S
Grp 1 M 1
M 2
M 3
M 4
Grp 2 M 5
M 6
M 7
M 8
Grp 3 K 10
K 11
K 12
K 13
Grp 4 K 14
K 15
K 16
S
Grp 5 M1
K 19
K 20
K 21
Grp 6 K 22
K 23
K 24
K 25
Grp 7 K 26
K 27
K 28
K 29
Grp 8 K 30
K 31
K 32
Page 12

12 (20)
Preparing for programming
• Together with the user, test the model of the IR transmitter that will be used and
the keys/functions on the telephone that will be operated from the IR
transmitter. Choose a suitable alternative from the table.
• Choose the channel area in the IR transmitter (read directions for the IR
transmitter). Avoid using channel 62 because this channel is a stop code, and
the channel has no function. When programming, Jupiter automatically learns
the channels that have been chosen in the IR transmitter.
• Programme telephone numbers on the direct dial buttons and abbreviated
numbers. See the section below.
Programming
(Ignore ”Error” if it appears in the digital window when programming)
1. Press
on Jupiter.
2. Hold the first channel down on the IR transmitter for 5 seconds until the
indicating light starts to flash on Jupiter. The first channel is the channel where
the first function will be saved.
3. Press
*
, 0,
#
on Jupiter within 3 seconds.
4. Press the digit for the alternative in the table, i.e. 7
for alternative 7.
5. Press the digit for the number of functions you want
to access (groups in the table).
6. Conclude with
#
.
7. If the programming has been successful, the
indicating light on Jupiter flashes 3 times slowly. Check that Jupiter has learnt
all of the functions by testing with the IR transmitter. If the programming is
unsuccessful, repeat the procedure. You may find it easier to write down the
moves on a piece of paper in order to carry them out quickly.
8. Document all the functions that can be operated from the IR transmitter and
instruct the user.
Quick guide
Programming of IR functions on Jupiter:
, send the first channel on the
transmitter,
*
, 0, #, Choose alt, choose group, #.
Steps 4-6 must be
carried out within
10 seconds
Page 13

13 (20)
Using Jupiter
Ring with the handset
Ring normally
1. Lift the headset.
2. Wait for the tone.
3. Dial the telephone number.
Ring last-dialled number
1. Lift the handset.
2. Wait for the tone.
3. Press
RE
. The last-dialled number will now be sent.
Ring the second-last dialled number
1. Lift the handset.
2. Wait for the tone.
3. Press
.
4. Press
RE
. The last-dialled number appears in the display window. Press RE again
and the second last number appears. The number can be removed from the
character display by pressing
twice.
5. Press
S
.
The number will now be sent.
Ring with direct dial buttons
1. Lift the headset.
2. Wait for the tone.
3. Press the chosen direct dial button,
M 1
-
M 8
. The number will now be sent.
OR, if you want to check the number before it is sent.
1. Lift the headset.
2. Wait for the tone.
3. Press
.
4. Press the chosen direct dial button
M 1
-
M 8
. The direct dial number is now shown
in the character display. Check the number or choose a new direct dial number.
5. Press
S
. The number will now be sent.
Page 14

14 (20)
Ring with abbreviated numbers
1. Lift the headset.
2. Wait for the tone.
3. Press
.
4. Press the desired abbreviated number
K10
-
K40
.
The abbreviated number now appears in the character display. Check the
number or choose a new abbreviated number.
5. Press
S
. The number will now be sent.
Ring with the loudspeaker function
1. Press S.
2. Wait for the dial tone.
3. Dial the telephone number or press the direct dial button, alternatively the
abbreviated number.
OR, check the number before it is sent.
1. Dial the telephone number, or press the direct dial button or abbreviated
number.
2. Press
S
.
The number will now be sent.
Answer a call
Lift the handset or press
S
.
Terminate a call
Replace the handset or press
S
.
Check direct dial numbers and abbreviated
numbers
Direct dial numbers
By pressing one of the direct dial buttons
M 1
-
M 8
you can check the saved number
in the character display.
Abbreviated numbers
By pressing and the abbreviated number, you can check the saved number.
Page 15

15 (20)
Save telephone numbers temporarily
Telephone numbers can be saved during ongoing calls. The number is saved in the
automatic recall memory and can be used again after the call. To recall the number,
press
RE
.
1. Press
P
.
2. Press
RE
.
3. Press the telephone number.
Quick guide
Save telephone number temporarily:
P
, RE, telephone number.
Switch between headset and loudspeaker
module
Hold S down until two short beeps are heard.
Replace the handset, the call now continues in the loudspeaker module.
IMPORTANT!
Do not switch between the headset and the loudspeaker module while the number
is being sent. Wait until after the number is sent!
Listen-in
If several parties want to listen to an ongoing call, the loudspeaker function can be
connected by pressing
S
. Disconnect the loudspeaker function by pressing S.
When the handset is replaced, the loudspeaker function is deactivated.
Adjust sound volume during ongoing call
With headset
Adjust the sound volume during an ongoing call with and in 3 steps.
With loudspeaking function
Adjust the sound volume for the loudspeaker function during an ongoing call with
and in 8 steps.
NB! Avoid using maximum sound volume as words and sentences may become
distorted.
Page 16

16 (20)
Privacy (Mute)
The privacy key is used to disconnect the microphone on Jupiter. This can be used
to speak without the other person hearing. Works with both the headset and loud
speaking function. Mute appears in the character display when the function is
activated.
Press
M
and the microphone will be disconnected, alternatively connected.
Answer and call with IR transmitter
The idea is that a users with disabilities can use an IR transmitter to operate
Jupiter’s different functions, for example, answer a call, ring individual numbers or
ring direct dial/abbreviated numbers. Jupiter is a loudspeaker telephone, which
means that users with disabilities do not need to lift the handset to make or answer
a call. To make calls with the loudspeaker function, the user should not sit more
than about 2 metres from the telephone in order to hear properly. The quality of the
sound depends on the acoustics in the room, surrounding noise levels and the
volume of the speaker’s voice. Users with disabilities can operate Jupiter’s
different functions with the IR transmitter as long as they are in the same room.
• To dial individual numbers, the numbers are first built up in the digital window,
then the line is opened with the IR transmitter. The telephone then rings the
number.
• To use direct dial /abbreviated numbers with automatic connection, press the
respective key on the IR transmitter. The line then opens automatically and the
chosen direct dial /abbreviated number is rung.
Page 17

17 (20)
Other information
Quick guide summary
Programme direct dial keys M1-M8:
P
,
M 1
-
M 8
,
P
, the desired telephone
number,
P
.
Programme abbreviated numbers K10-K49:
P
,
K X
,
P
, the desired
telephone number
,
P
.
Adjust tone of ring signal: Lift the headset,
P
,
S
,
M 1
-
M 4
, replace headset.
Programme personal code:
P
, S, 0, 0, 0,
P
, new three-digit code, repeat code.
Lock/unlock keyboard:
P
, S, code, * or #.
*
= lock. # = unlock.
Programme IR functions on Jupiter:
, send the first channel on the
transmitter
, *, 0, #, Choose alt, choose group,
#
.
Save telephone number temporary:
P
, RE, telephone number.
Battery function
Jupiter normally runs on a battery eliminator that is connected to the mains supply.
Jupiter comes with 4 1.5 V Alkaline LR6 (AA) batteries to guarantee function
when the power fails.
Direct dial numbers, abbreviated numbers and IR settings are saved even when the
battery eliminator is not connected and the batteries have run out.
Check battery status
Lift the headset and look for the battery symbol in the character display. If the
battery symbol appears, the batteries must be replaced immediately. Check the
status of the batteries regularly.
Page 18

18 (20)
Change batteries
Follow these instructions to change the batteries:
1. Loosen the screw of the battery compartment on the back of Jupiter.
2. Place the batteries in the battery compartment according to the instructions in
the battery compartment. The direction of the batteries must comply with these
instructions and only Alkaline batteries should be used!
3. Replace the battery compartment.
4. Lift the handset to start Jupiter.
Cleaning
Jupiter is cleaned with a cloth wrung-out in water and a small amount of detergent.
Application environment
Jupiter should only be used indoors in a dry environment.
Technical Data
Rated voltage, battery eliminator: 230 AC
Rated voltage, Telephone: 7.5V DC (minus centre pin, 2.1 etc)
Standard current, excl. battery eliminator: App 3.5 mA
Power consumption together with
headset:
App 7.5 mA
Power consumption together with loud
speaking function:
25-50mA
Type of batteries for backup: 4 x LR6 (AA), 1.5 V Alkaline
Maximum life of batteries when Jupiter
is idle:
App 350 hours
Programming channels: GewaLink channels 00-127. Channel
62 is a stop code and has no function.
Measurement, L x B x H: 222 x 153 x 90 etc
Weight incl. batteries and battery
eliminator:
1350 gr
Application environment: Indoors in dry environment
Page 19
19 (20)
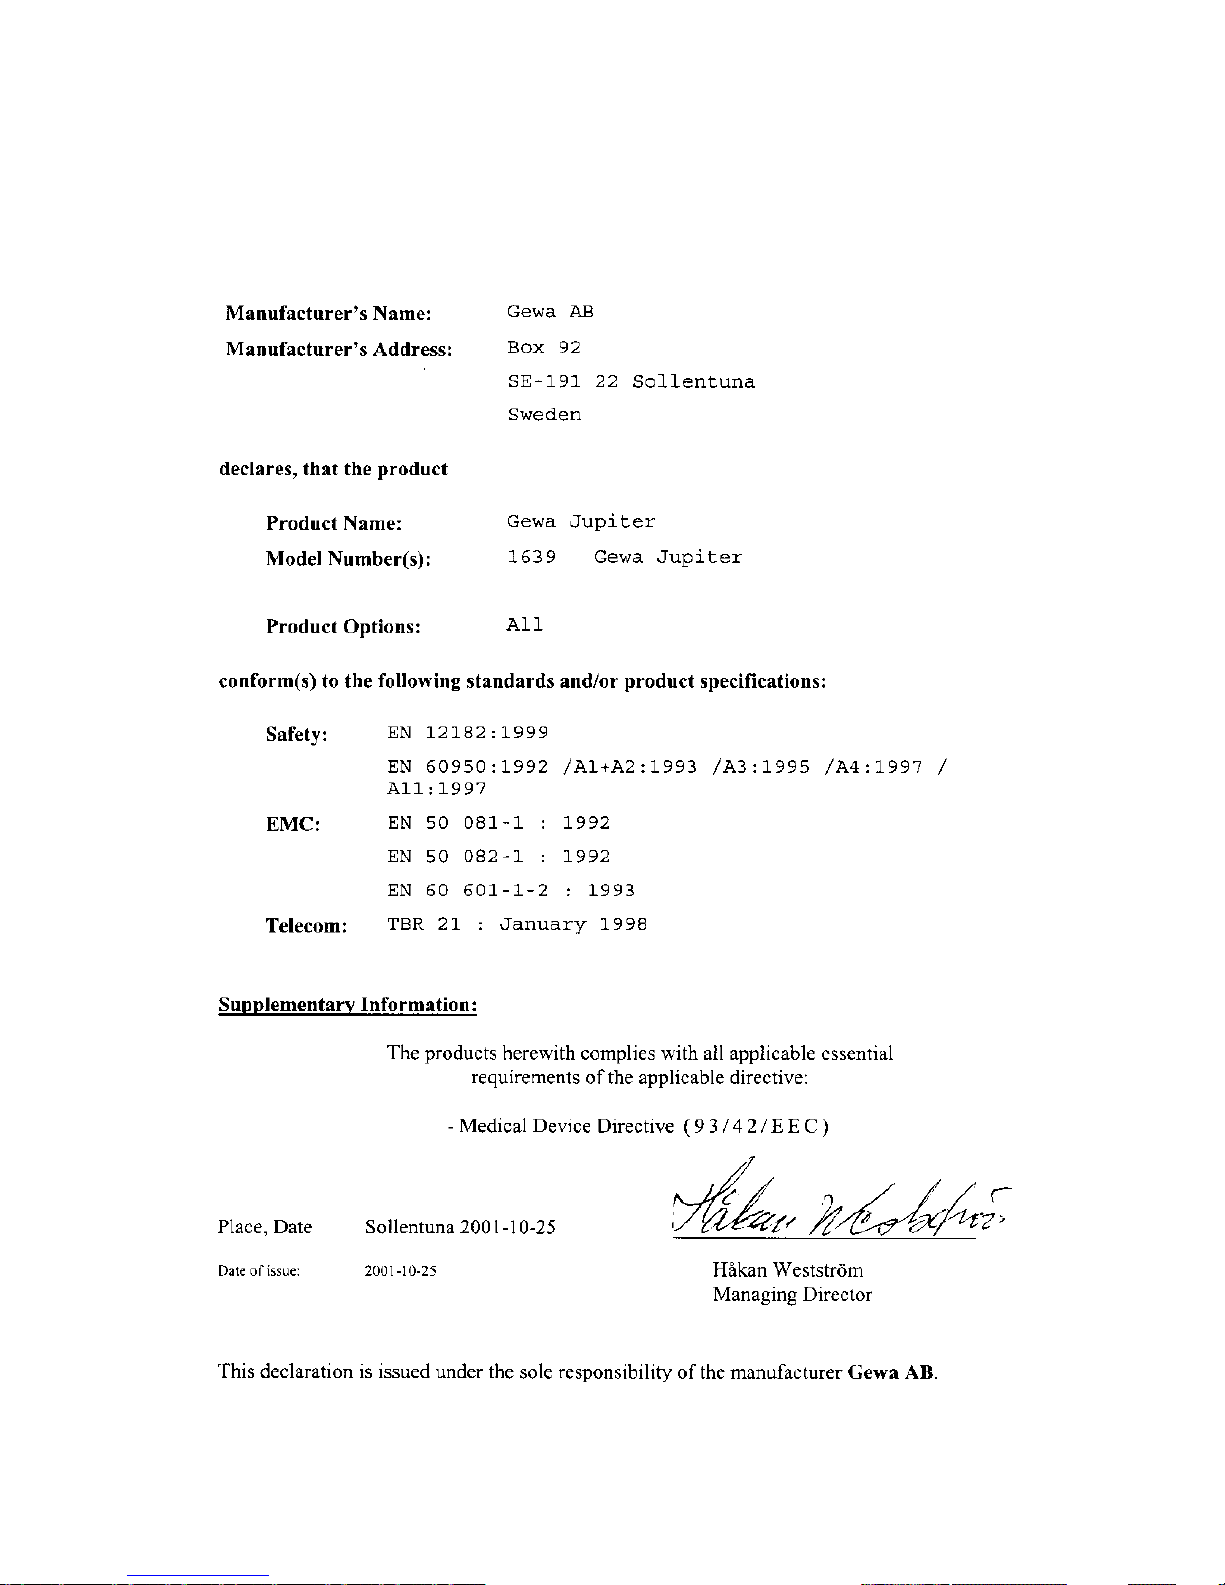
DECLARATION OF CONFORMITY
Page 20

20 (20)
Gewa AB
BOX 92, SE-191 22 SOLLENTUNA, SWEDEN
T
EL: +46 (0)8-594 694 00 • TEXTTEL: +46 (0)8-594 694 18
F
AX: +46 (0)8-594 694 19
E-
MAIL: [email protected] • WEB: www.gewa.se
Article number: 808535. Document: 980914-0850PL Gewa Jupiter Eng.
Version: E. Date: 2001-11-22.
 Loading...