

Gestion Econoplus ELD-A100 User Manual

AVLTRACK ELD SOLUTION
by Gestion Econo Plus Inc.
User Manual
Version 1.1
01/23/2020
Important: FMCA regulations requires this manual to remain in the vehicle at all times.

Gestion Econo Plus Inc (AVLTRACK) Table of Contents
UM Version 1.0 ii AVLTRACK ELD SOLUTION
Table of Contents
User Manual .................................................................................................................... i
Table of Contents .......................................................................................................... ii
List of Tables ................................................................................................................ iii
1. Introduction ....................................................................................................... 1
2. Overview ........................................................................................................... 2
2.1 Product Information .................................................................................... 3
2.2 Copyright & Disclosure ............................................................................... 3
3. Getting Started .................................................................................................. 4
3.1 Set-up Considerations ................................................................................ 4
3.2 User Access Considerations ....................................................................... 4
3.3 Accessing the System ................................................................................ 4
3.4 System Organization & Navigation ............................................................. 5
3.4.1 Right-side menu ..................................................................................... 5
3.4.2 Main view ............................................................................................... 6
3.4.2.1 Top navigation bar ............................................................................ 6
3.4.3 Left-side menu ....................................................................................... 7
3.5 Exiting the System ...................................................................................... 8
4. Using the System .............................................................................................. 9
4.1 Dashboard ................................................................................................ 10
4.1.1 Team logs ............................................................................................ 11
4.1.1.1 3 simple steps to select a co-driver from the dashboard ................. 11
4.1.1.2 How to access your team logs ........................................................ 12
4.1.1.3 How to transfer an automatic driving event to your co-driver .......... 13
4.1.2 Unidentified logs ................................................................................... 14
4.1.2.1 How to reassign an unidentified driving event and why it’s important
14
4.1.3 Uncertified days ................................................................................... 16
4.1.4 Carrier suggestion ................................................................................ 16
4.1.4.1 How to accept or refuse suggestions .............................................. 16
4.2 Time remaining ......................................................................................... 17
4.3 Change of Duty Status .............................................................................. 18
4.3.1 How to change your current duty status ............................................... 18
4.4 Information (Trip, Ecm, Driver, Carrier) ..................................................... 19
4.4.1 How to change your trip information ..................................................... 20
4.5 RoadSide DOT inspection ........................................................................ 21
4.5.1 How to access the roadside DOT inspection view ............................... 21
4.6 Diagnostic and malfunction ....................................................................... 22
4.6.1 What to do if a malfunction is not resolved within 24 hours .................. 23
4.6.1.1 Malfunction and Data Diagnostic Event Definitions ......................... 23
4.6.2 Tips on how to fix malfunctions or data diagnostic on your own ........... 25
4.7 Logs .......................................................................................................... 26
4.7.1 HOS graphic ......................................................................................... 26
4.7.2 Records ................................................................................................ 27

Gestion Econo Plus Inc (AVLTRACK) Table of Contents
UM Version 1.0 iii AVLTRACK ELD SOLUTION
4.7.3 How to edit an event............................................................................. 28
4.7.4 How to add a past event ....................................................................... 29
4.7.5 How to certify your logs ........................................................................ 30
4.7.6 Compliant report display ....................................................................... 31
4.8 Settings ..................................................................................................... 33
4.9 Alerts ........................................................................................................ 34
4.10 Truck Inspection form ............................................................................... 35
5. Troubleshooting & Support ............................................................................. 36
5.1 Error Messages ........................................................................................ 36
5.2 Special Considerations ............................................................................. 36
5.3 Support ..................................................................................................... 36
What to do if a malfunction is not resolved within 24 hours ............................... 39
Malfunction Event Definitions ........................................................................ 39
5.3.1 How to transfer a roadside DOT inspection .......................................... 40
List of Tables
Table 1 - Support Points of Contact .............................................................................. 36
Table 2 - Record of Changes ........................................................................................ 37
Table 3 - Acronyms ....................................................................................................... 37

Gestion Econo Plus Inc (AVLTRACK) Introduction
UM Version 1.0 1 AVLTRACK ELD SOLUTION
1. Introduction
This User Manual (UM) provides the information necessary for drivers to effectively use the
AVLTRACK ELD Solution.
This manual focuses exclusively on the ELD functionality within AVLTRACK ®. If you have
questions about the additional AVLTRACK® features, please visit www.avltrack.com or contact
our sales team by email at info@avltrack.com or by phone at 1 514-881-2851.
Please note that some screenshots in this guide may look slightly different than what you see on
your device. This is due to the differences in hardware and screen sizes of the many Android
devices that AVLTRACK ELD SOLUTION supports.

Gestion Econo Plus Inc (AVLTRACK) Overview
UM Version 1.0 2 AVLTRACK ELD SOLUTION
2. Overview
The AVLTRACK ELD-A100 is an application that is compliant with the FMCSA ELD MANDATE.
The system uses is using GPS technology connected to the truck’s ECM to register the driving
hours of service automatically.
ELD-100 can accommodate 2 drivers per truck.
Provides separate accounts for drivers and administrative (non-driver) ELD users.
Has “integral synchronization” with the engine control module to automatically record engine
power status, vehicle motion status, and other data.
Automatically records all driving time at intervals of 60 minutes. Records date, time, location,
engine hours, vehicle miles, and driver identification.
Records location with an accuracy of a one-mile radius during on-duty driving periods. Reduces
location accuracy to a 10-mile radius when the vehicle is used for authorized personal use.
ELD time is synchronized with UTC (coordinated universal time).
Retains data for the current 24-hour period and the previous 7 consecutive days.
Prevents tampering; does not allow anyone to alter or erase information originally collected for
driver ELD records.
Requires driver to review unidentified driver records – and either acknowledge assignment of
this driving time or indicate that the records do not belong to the driver. Allows a driver to obtain
a copy of his/her ELD records on demand – either through a printout or electronic file. Supports
the Telematic type transfert: using wireless web services .
Displays all required standardized data to authorized safety officials on demand – through a
screen display or printout that includes three elements: a daily header, graph grid showing
driving duty status changes, and detailed daily log data. The graph grid, if printed, must be at
least 6 inches by 1.5 inches.
Requires driver certification and annotation (written explanation) for any edits to records that are
made by the driver or any other ELD user. Requires certification of driver records at the end of
each 24-hour period.
The ELD provider furnishes the user manual, instructions for handling malfunctions and recordkeeping during malfunctions, and instructions for transferring ELD hours of service records to
safety officials. Volume control or mute option is included for any audio feature. Failure to
perform the instructions in this user guide could result in inaccurate HOS driver activity capture
and recording on the ELD and cause compliance implications.
The ELD Rule provides several provisions to help prevent harassment.
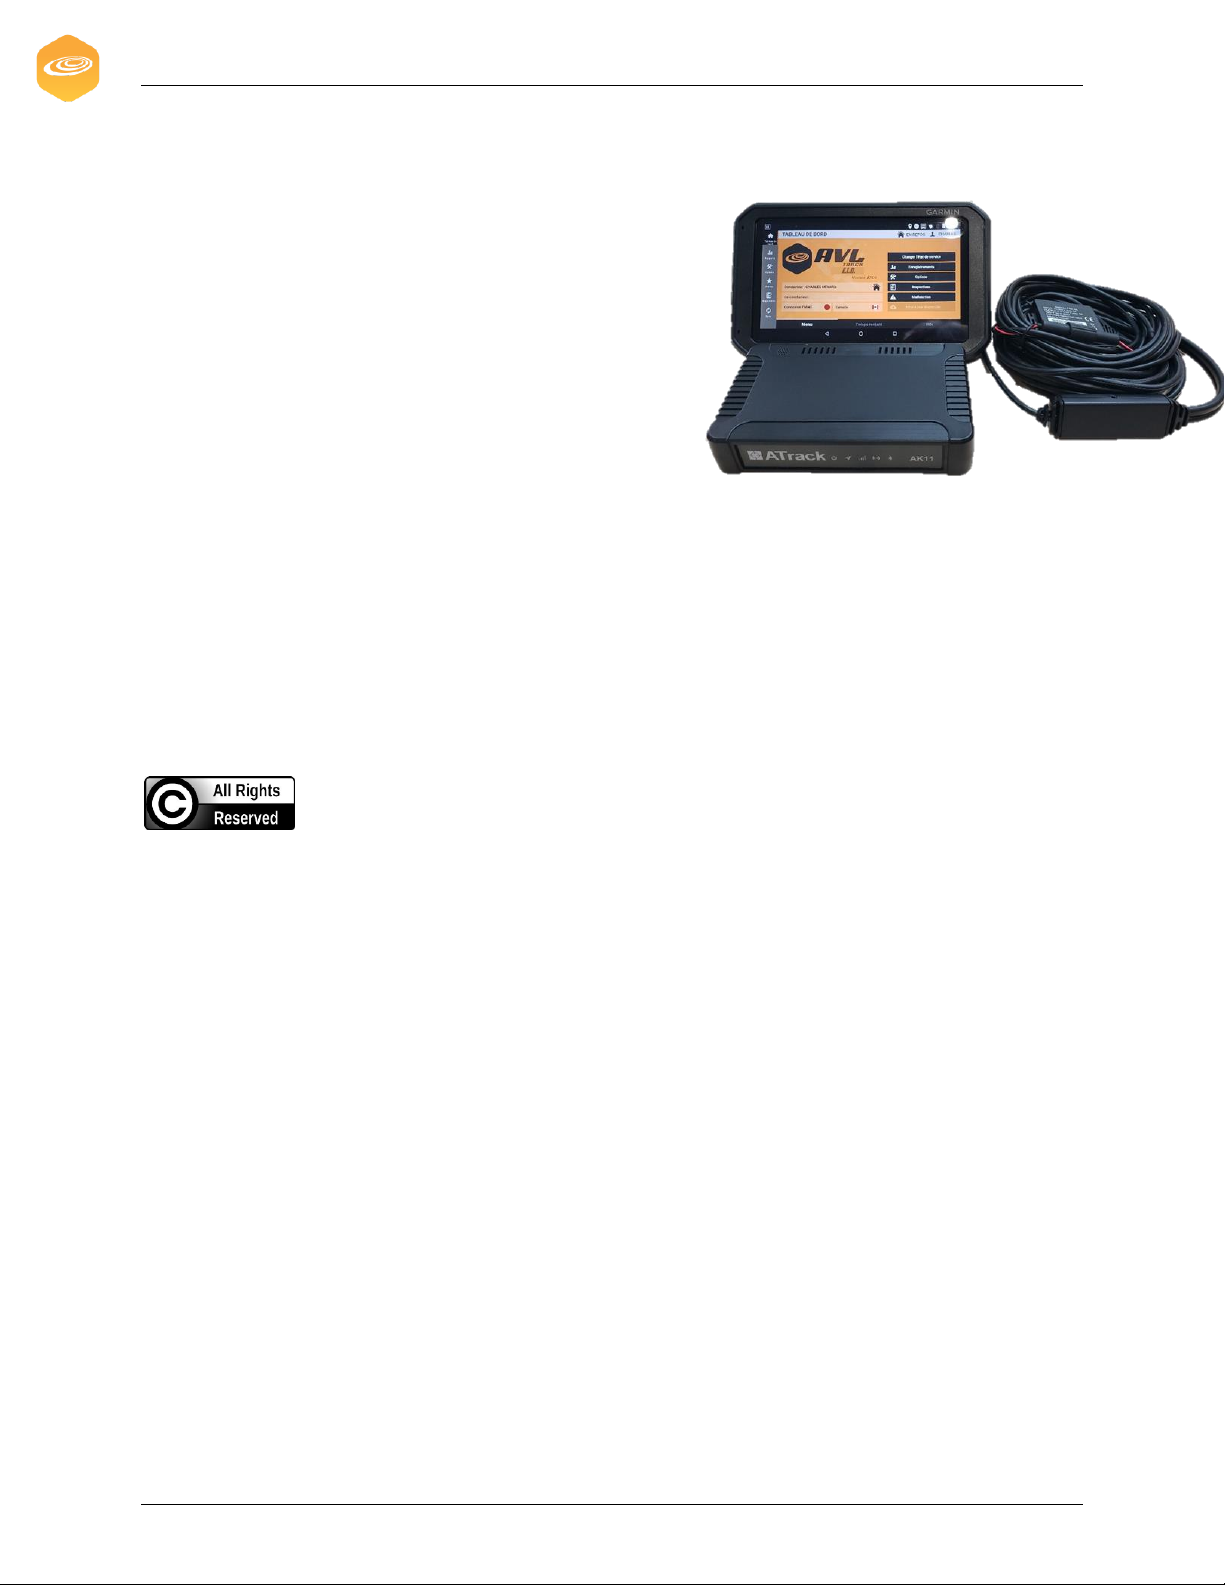
The application is Android based and can be installed on the Garmin Fleet 670/790.
Gestion Econo Plus Inc (AVLTRACK) Overview
UM Version 1.0 3 AVLTRACK ELD SOLUTION
2.1 Product Information
Manufacturer name: Gestion Econo Plus Inc (AVLTRACK)
Model number: ELD-A100
Software version :1.1.2
ELD Identifier: AVLT01
Necessary Hardware:
• Modem Atrack AK11
• J1939 Cable
• FMI 45 Cable
• Garmin Fleet 670/790 Android Display
2.2 Copyright & Disclosure
Gestion Econo Plus disclaims all liability for any use of the ELD in a way that may cause
accidents, damage or violation of the Law.
All information written in this manual is the property of Gestion Econo Plus and should not be
reproduced without its written permission.
NON-DISCLOSURE AGREEMENT
This Agreement will apply to any and all information disclosed by the disclosing party to the
receiving party, including, without limitation, the terms and conditions of this Agreement, the
existence of the discussions between the parties, trade secrets, any nonpublic information
relating to the disclosing party’s products, product plans, designs, ideas, concepts, costs, prices,
finances, marketing plans, business opportunities, personnel, research, development, or knowhow, and any other non public technical or business information, that the receiving party knows
or has reason to know that the disclosing party would like to treat as confidential for any
purpose, such as maintaining a competitive advantage or avoiding undesirable publicity
(“Confidential Information”).
Gestion Econo Plus Inc (AVLTRACK) Getting Started
UM Version 1.0 4 AVLTRACK ELD SOLUTION
3. Getting Started
3.1 Set-up Considerations
Typically, the installation technician performs the first-time boot-up, downloads and any
necessary updates.
3.2 User Access Considerations
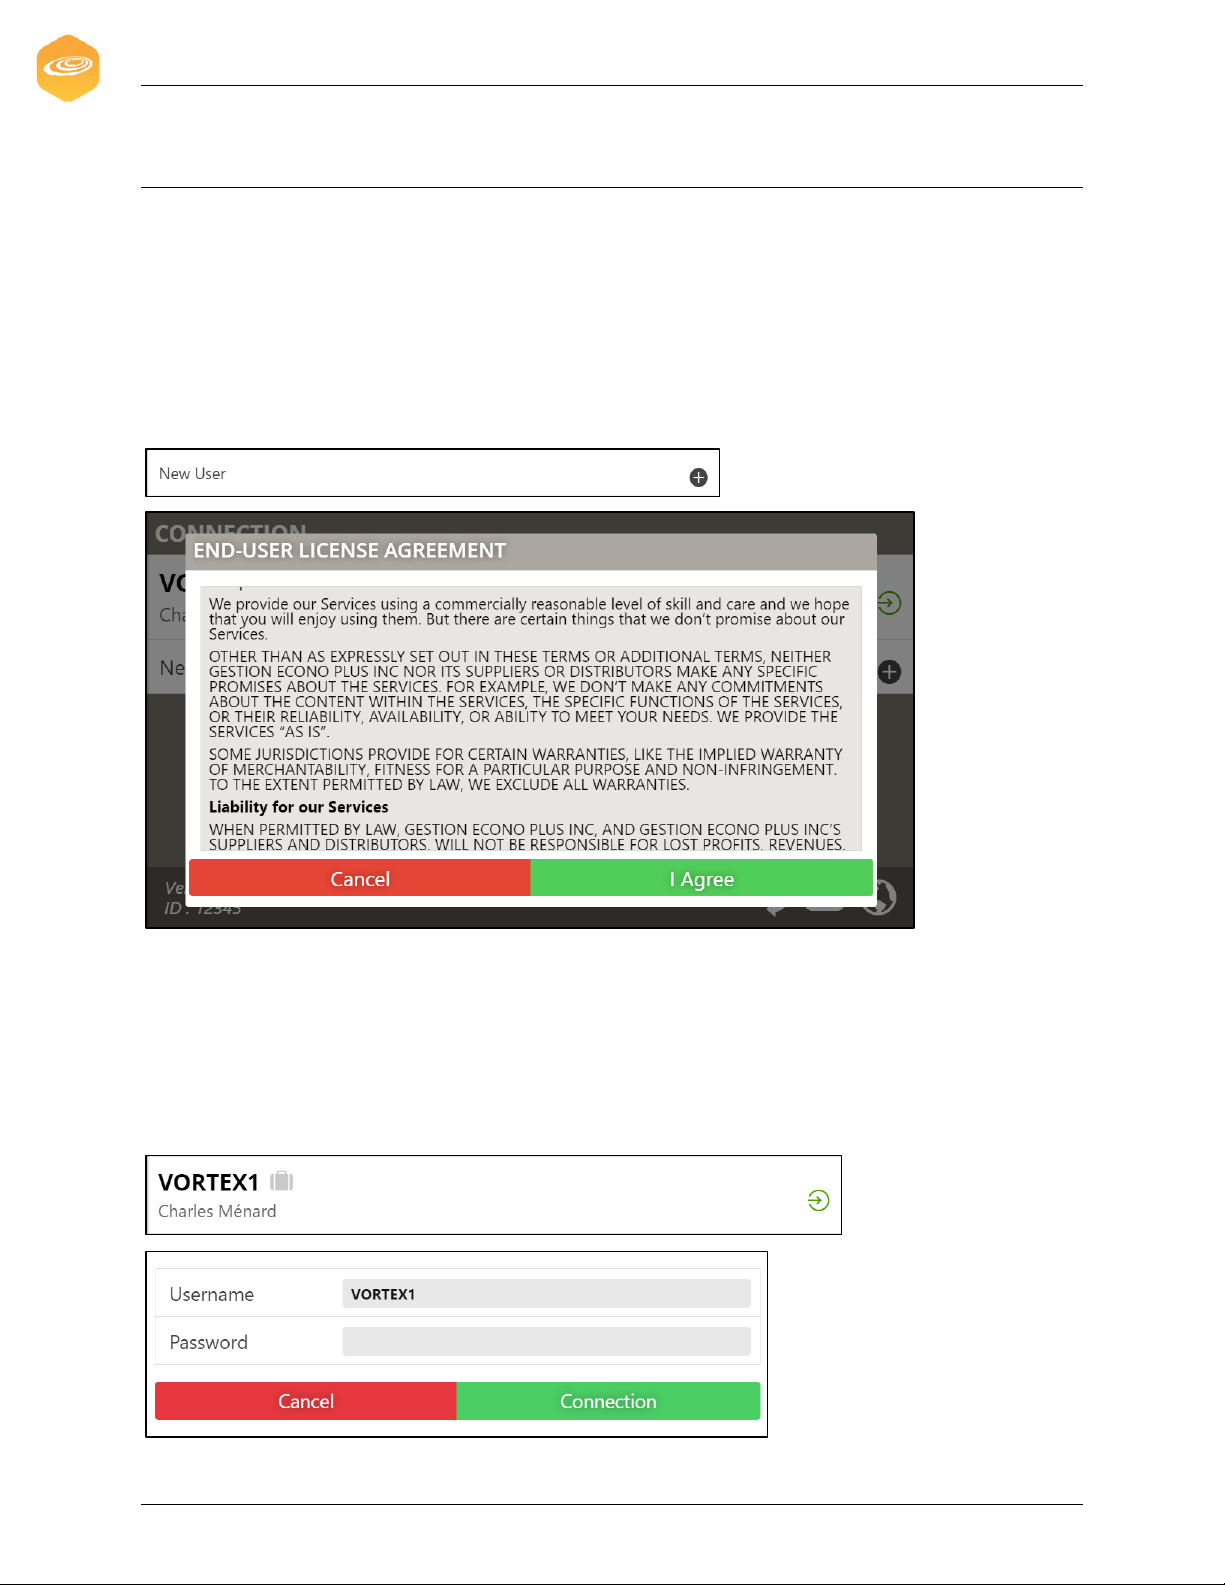
When accessing the device for the first time, the new user must agree to the license agreement.
Also, any new user’s login to the device must have access to the Internet.
3.3 Accessing the System
To access the system, your carrier should have created your user in the back-end system and
provide you with the authentication information (Username/Password) to log into the ELD
application. Please start the vehicule engine only after having logged in.
If your user account is already registered on the application, simply click on your username in
the user list to show the authentication pop-up (your username will be prepopulated).
Gestion Econo Plus Inc (AVLTRACK) Getting Started
UM Version 1.0 5 AVLTRACK ELD SOLUTION
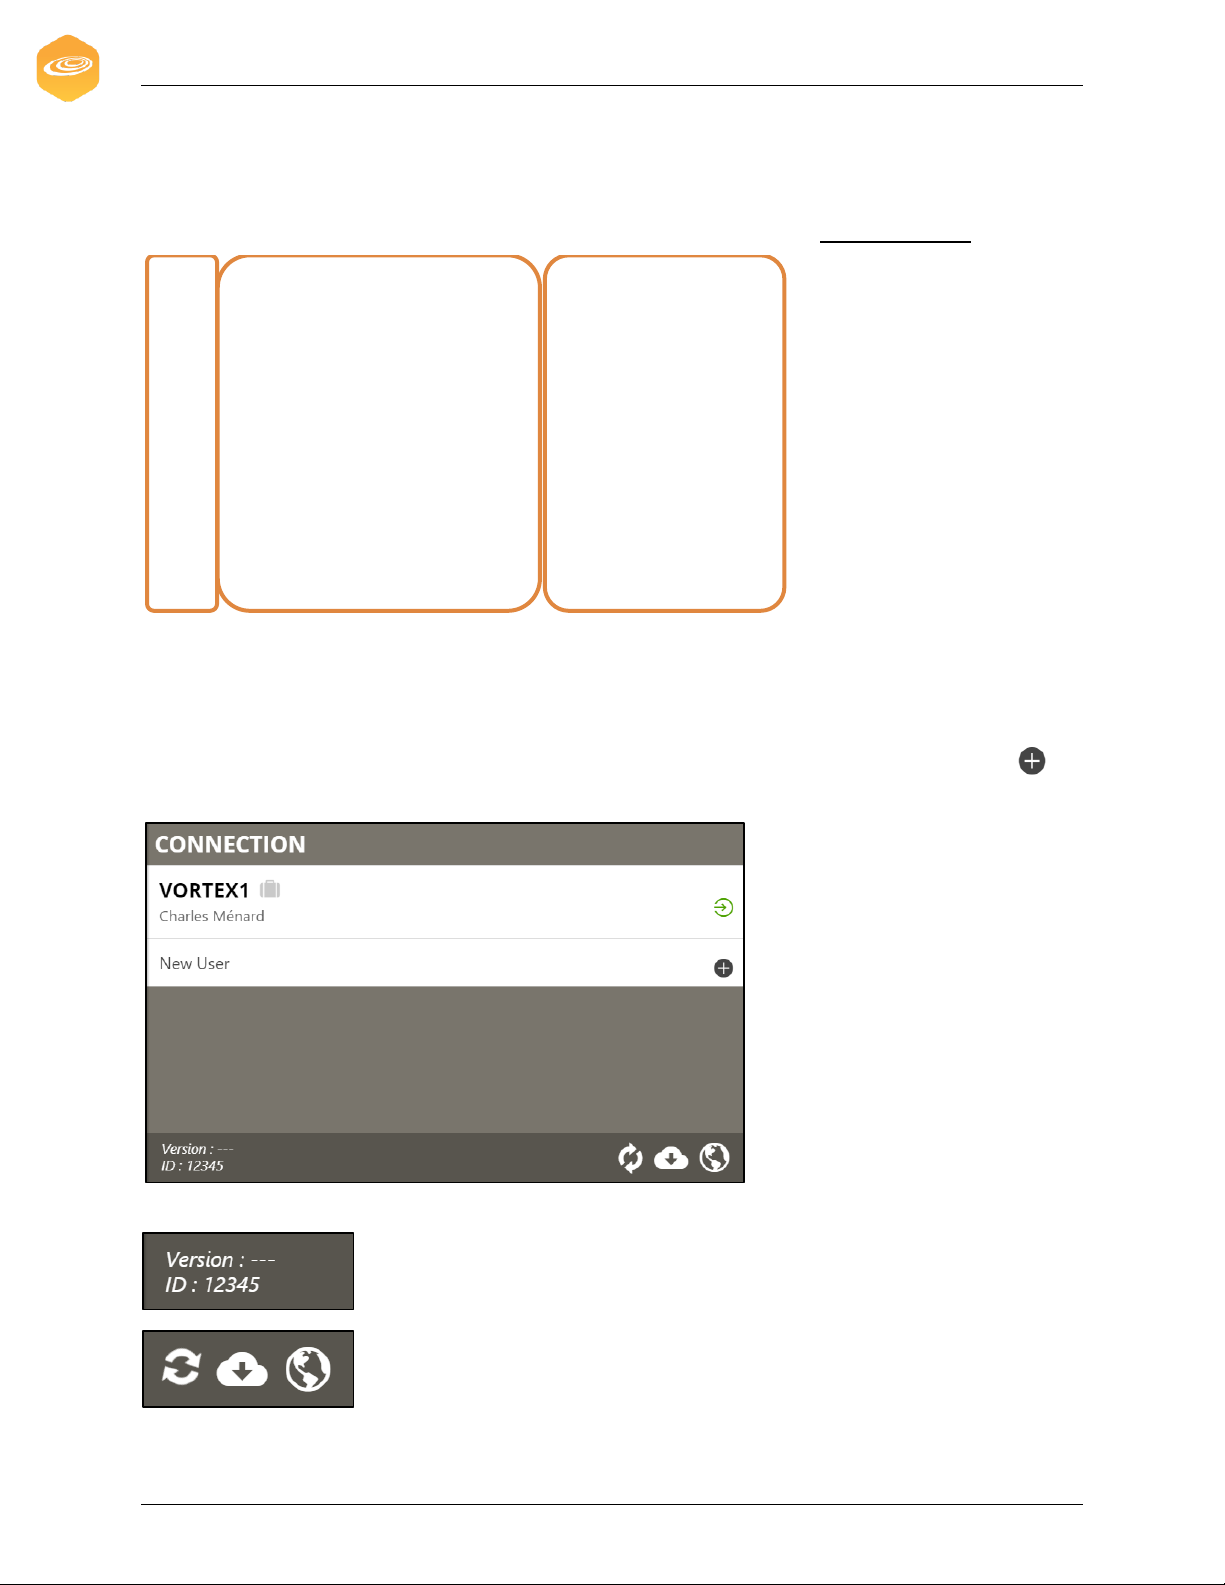
3.4 System Organization & Navigation
The system has two side-menus and one main view. The first page to load after a new startup
of the application will be the connection page (also referenced as the right-side menu).
3.4.1 Right-side menu
The right-side menu occupies the entire screen when no user is logged in. This view also gives
the user the ability to log in or register a new user on the device.
1. Connection view (Lists all previous users, with the option to add a new user at
the end of the list)
2. Lower bar option
Displays the application version and Garmin ID
The right side menu shows 3 buttons to, respectively, synchronize
with the server, update the application and check internet
connectivity.
Left
-side menu
Main View
Right-side
menu
Gestion Econo Plus Inc (AVLTRACK) Getting Started
UM Version 1.0 6 AVLTRACK ELD SOLUTION
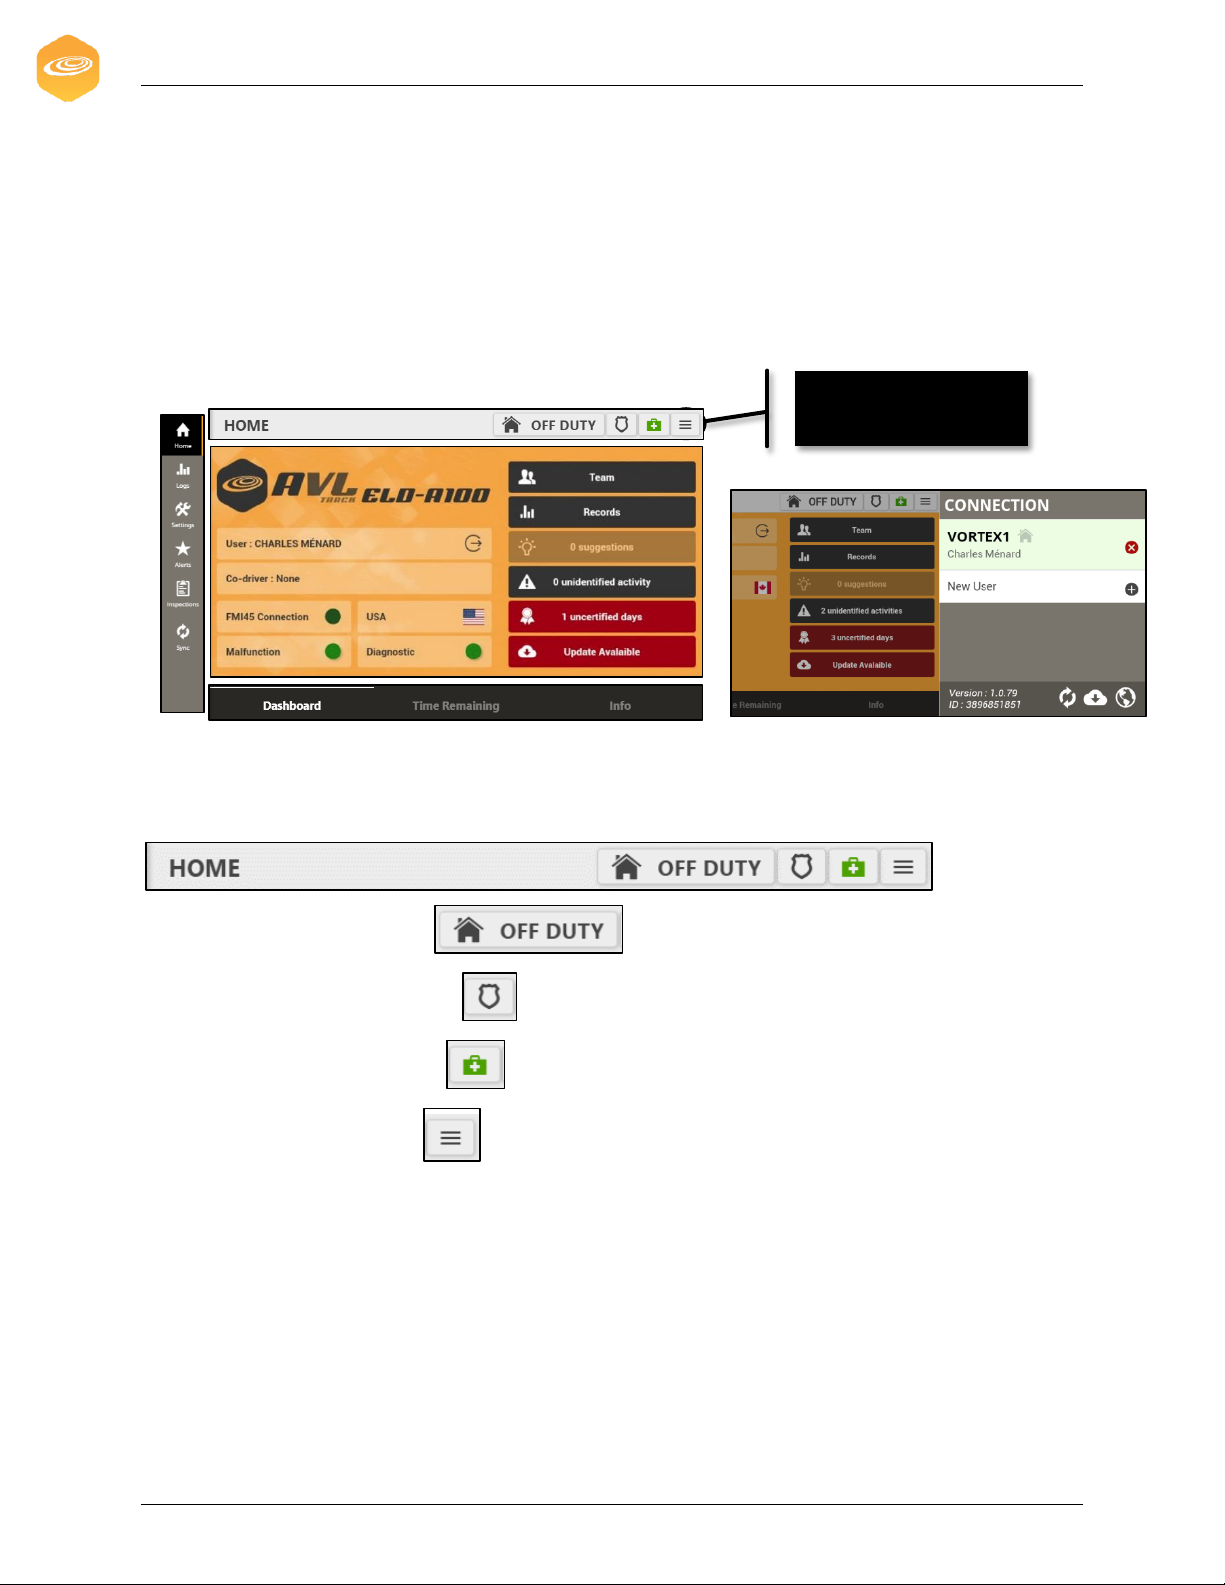
3.4.2 Main view
The main view is composed of a top navigation (displayed permanently when logged in) and a
bottom tabulation menu that offers up to three more views in the same page.
*The dashboard tab in the home page is the default view after the user has logged in.*
1. Home page with dashboard tab selected
3.4.2.1 Top navigation bar
The top navigation (displayed permanently when logged in) offers the user multiple options:
1.Change current duty status .
2.Open the DOT inspection view .
3.Open the device health view .
4.Open the connection view .
Press the burger menu to
open the connection page
2. Split view with the right-side menu

Gestion Econo Plus Inc (AVLTRACK) Getting Started
UM Version 1.0 7 AVLTRACK ELD SOLUTION
3.4.3 Left-side menu
Goes to home page (Dashboard, Time remaining, Trip information)
Goes to logs page (HOS graph, Event list, DOT Report)
Goes to the settings page (Language, Unit of measure, Country, Volume)
Goes to the alerts page (HOS infractions)
Goes to the truck inspection page
Shows/Activates a synchronization to the back-office server
Gestion Econo Plus Inc (AVLTRACK) Getting Started
UM Version 1.0 8 AVLTRACK ELD SOLUTION
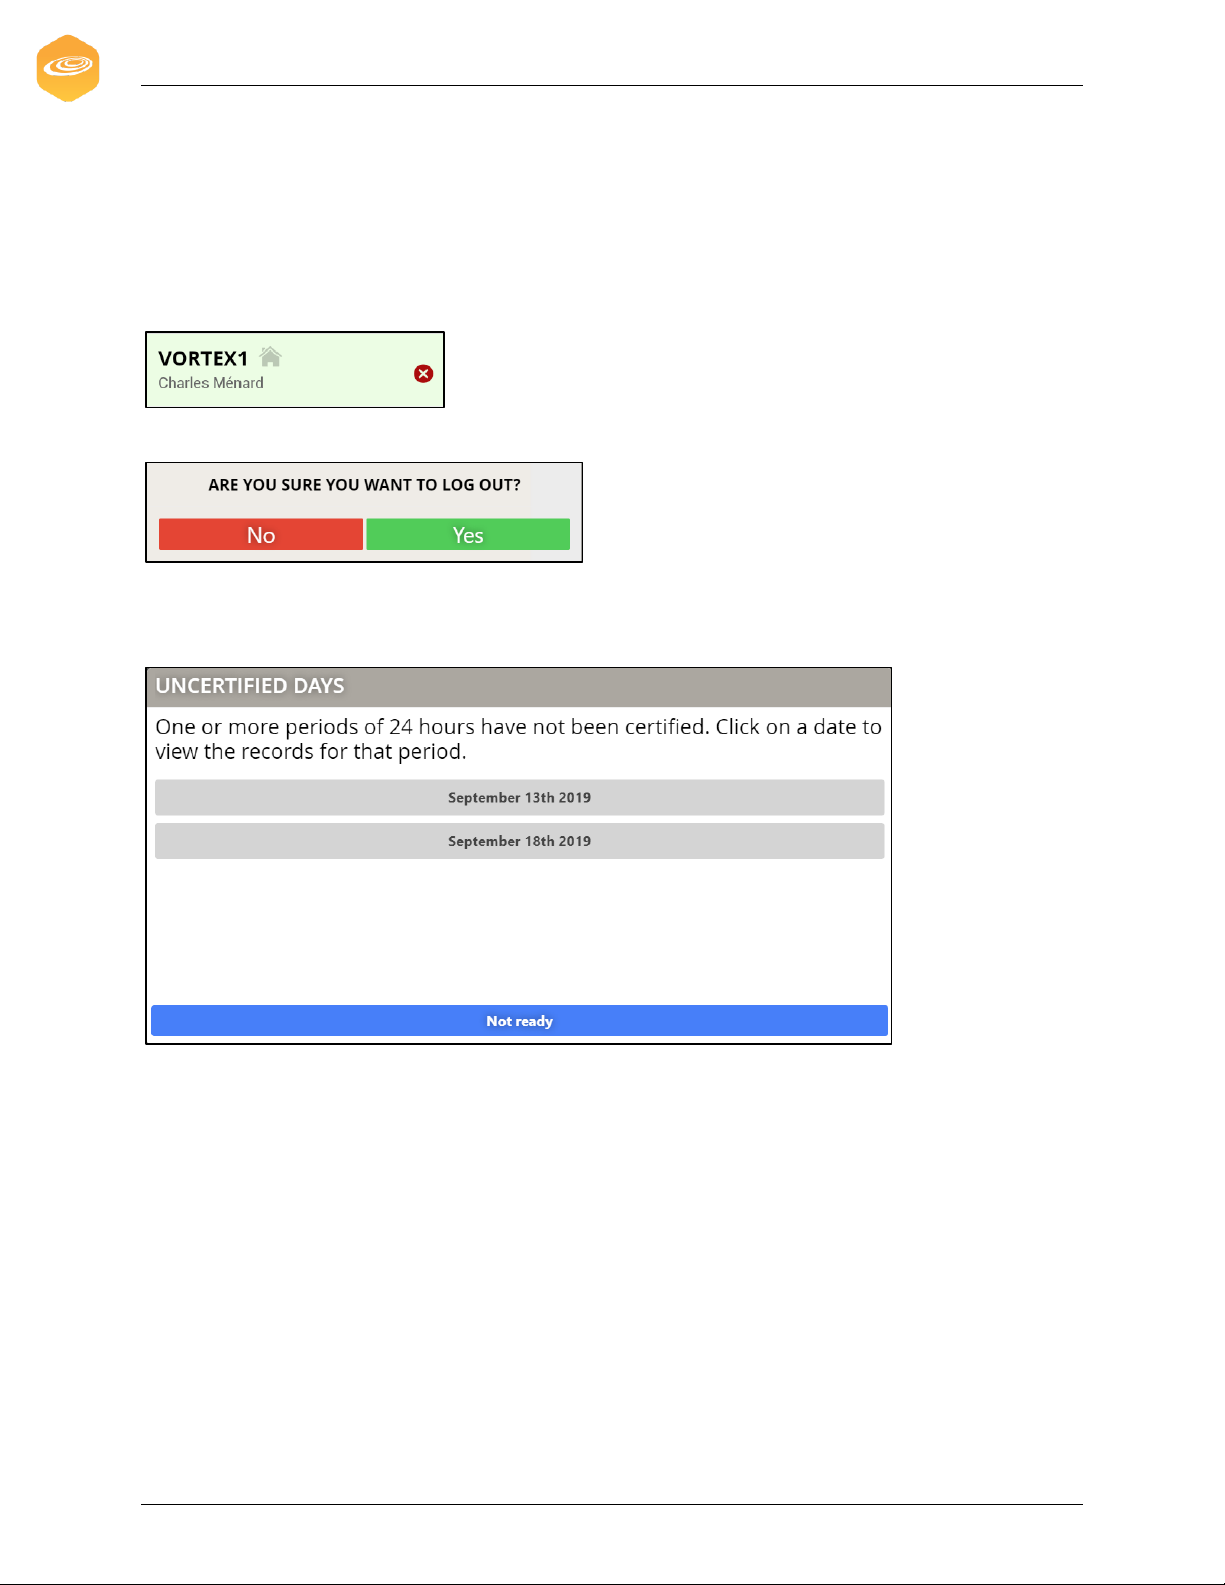
3.5 Exiting the System
To exit the system correctly, turn off your engine, verify your logs and proceed to log out of your
account (if needed, follow the reminder to certify your logs).
1.To log off, press your username in the connection list.
2.Confirm that you want to log out to start the logout process.
3. A pop-up will show up during the logout process if some uncertified days are present. Select
a date in the list to go back to the application or press the button labelled “Not Ready” to finish
the logout process.
4. When your engine is turned off and no one is logged in the application, you can close the
ELD application. Do not forget to start the application before using your CMV.

Gestion Econo Plus Inc (AVLTRACK) Using the System
UM Version 1.0 9 AVLTRACK ELD SOLUTION
4. Using the System
To use the system properly, be sure to boot up the ELD device and log yourself in the
application before starting your engine.
Also, be sure to verify the health indicator in the top navigation bar and the information
displayed on the dashboard and on the trip information tab before putting your CMV in motion.
If you have any issues or questions, please browse this document to find all the information
available to help you before contacting your carrier or the support contact also provided in this
document.
Gestion Econo Plus Inc (AVLTRACK) Using the System
UM Version 1.0 10 AVLTRACK ELD SOLUTION
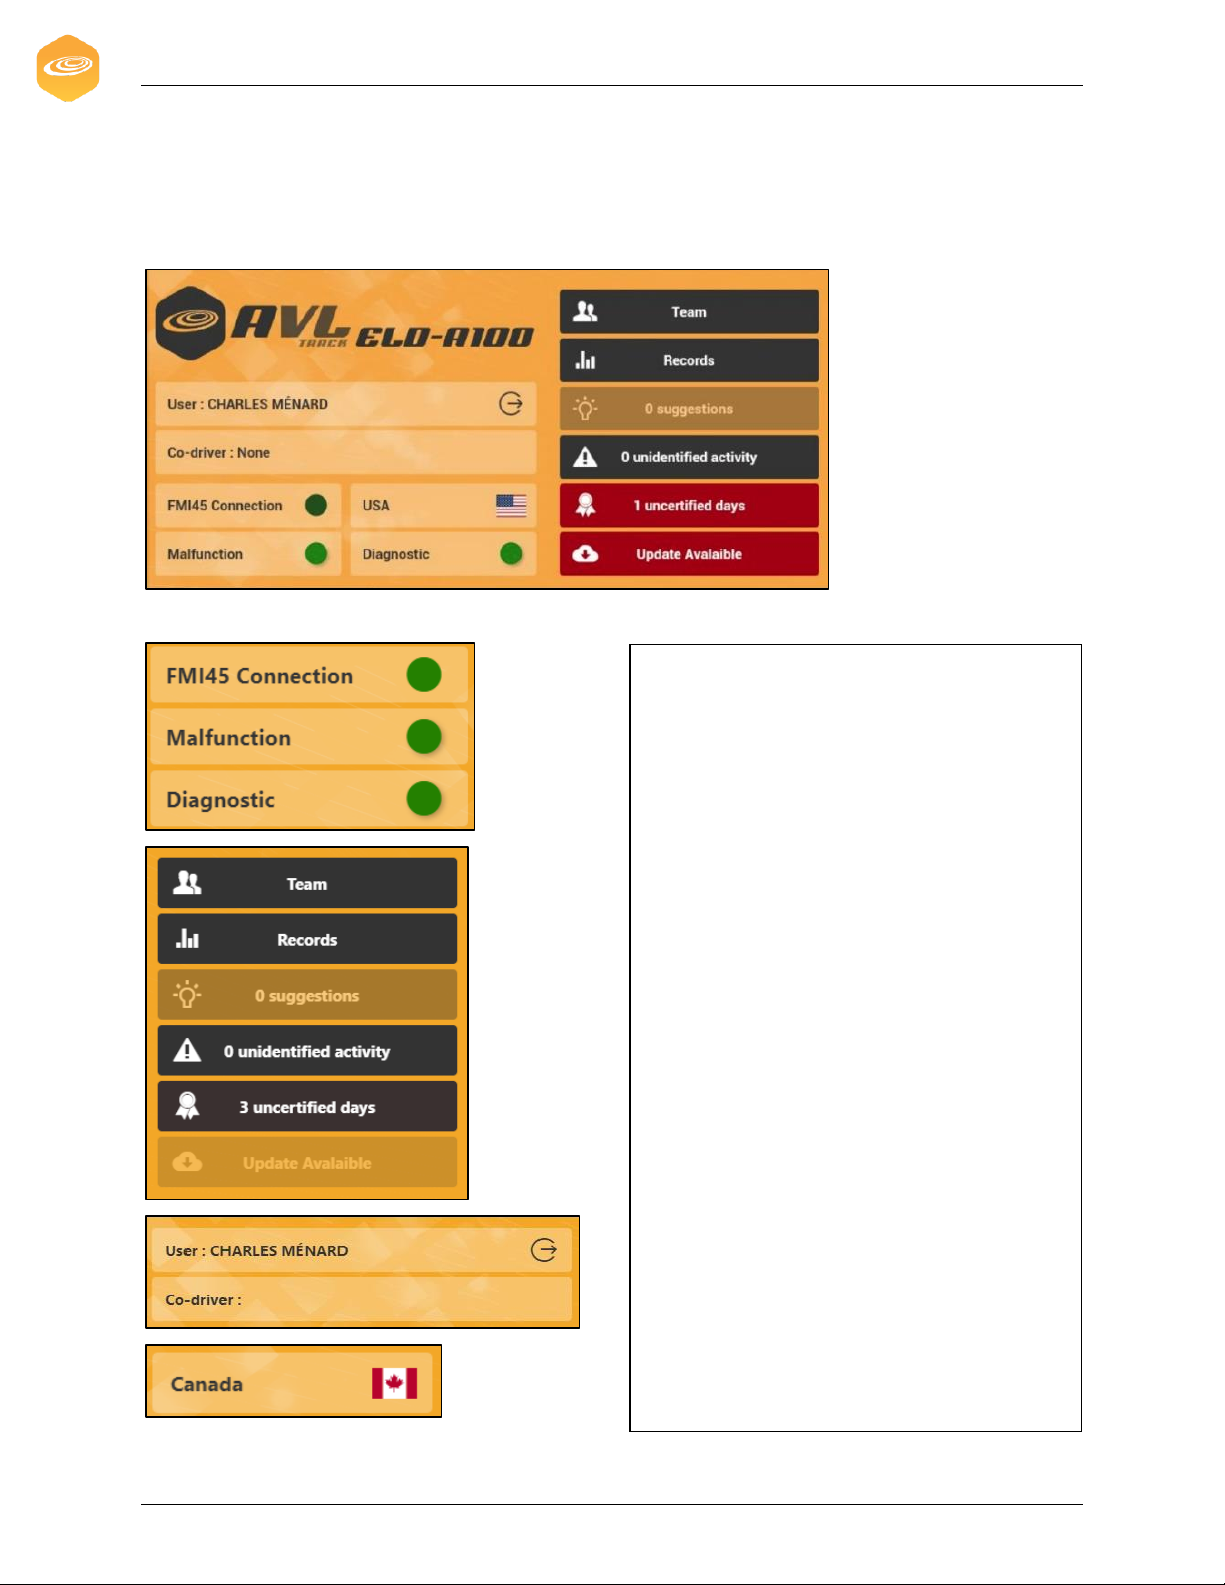
4.1 Dashboard
On the dashboard, you will find multiple visual indicators and buttons.
1.
2.
3.
4.
5.
6.
7.
8.
9.
10.
11.
12.
1. The FMI45 connection indicator communicates visually
the data reception from the ECM. When the Garmin is
untethered, the indicator will be red (could cause a
malfunction if the engine shutdown event was not
registered correctly).
2. The ELD malfunction indicator will be clearly illuminated
in red when there is
an active malfunction on the ELD.
3. The ELD diagnostic indicator will communicate visually
the existence of active data diagnostics events for the
applicable driver.
4.When pressed, this will show a pop-up to let you see your
team logs.
5.The Records tab will redirect the user to the logs page on
the records tab.
6.The Suggestions button will show the number of carrier
suggestions unreviewed. When pressed, a pop-up will be
shown to let you see the suggestion logs.
7. The Unidentified activity tab will show the number of
unidentified activities on the device. When pressed, a popup will be shown to let you see the unidentified logs.
8. The Uncertified days tab will show the number of carrier
suggestions not reviewed by the driver. When pressed, a
pop-up will be shown to let you see the unidentified logs.
9. The Update available tab will open a popup to update the
application.
10.Shows the current user logged in. When pressed, it will
trigger the connection view.
11.Shows the selected co-driver in the trip information.
When pressed, the trip information view will be shown to let
you update your information.
12.Will show the current selected country. When pressed,
you will be redirected to the option page.
 Loading...