

Gestetner DSm635sp, DSm635, DSm645, DSm645sp Fax Manual

6. LAN-Fax Features
Sending Fax Documents from Computers
The optional printer/scanner unit is required.
Using computers connected to the machine through parallel ports, IEEE 1394 (IP
Over 1394) ports, LANs, or wireless LANs, you can fax documents, created using Windows applications, to other fax machines over a telephone line.
• To send a fax, simply select [Print] from the Windows application, then select
LAN-Fax as the printer, and then specify a destination.
• In addition to sending faxes, LAN-Fax Driver allows this machine to be used
for printing out documents prepared on a computer for proof checking.
• To use LAN-Fax Driver, connect this machine to a LAN and make the necessary network settings, and then install LAN-Fax Driver and related utilities
on your computer.
Important
r Errors occurring when the machine is used as a LAN-Fax will not be dis-
played on the computer. Check the help menus using a Web browser.
GFIFAX5E
107
LAN-Fax Features
6
Before Use
To use these features, a LAN-Fax
Driver must be installed on your computer. Use the LAN-Fax driver included on the printer CD-ROM. You
must also make the required computer to fax network settings on the machine, according to the type of
connection.
Reference
When a personal computer and the
machine are connected in parallel:
See "System Settings (Parallel Connection)", Printer Reference 2.
When using Ethernet, IEEE 1394
(IP over 1394), or IEEE 802.11b
(wireless LAN):
See "User Tools (System Settings)",
Network Guide.
Installing the Software
You need to install LAN-Fax Driver
on your computer before using the
LAN-Fax functions. LAN-Fax Driver
is on the CD-ROM included with the
printer.
Address Book and LAN-Fax Cover
Sheet Editor are installed with LANFax Driver. Address Book helps you
edit LAN-Fax transmission destinations. LAN-Fax Cover Sheet Editor
helps you edit LAN-Fax cover sheets.
Note
r The following explanation as-
sumes that you are familiar with
general Windows procedures and
practices. If you are not, see the
documentation that comes with
Windows for details.
Auto run program
With Windows 95/98/Me, Windows
2000/XP, and Windows NT 4.0, the installers for various drivers and utilities
launch automatically as Auto Run programs when you insert the CD-ROM.
If your operating system is Windows
2000/XP or Windows NT 4.0, installing a printer driver using Auto Run requires Administrator permissions.
When you install LAN-Fax Driver using Auto Run, log on using an account
that has Administrator permissions.
Note
r If the plug and play function starts,
click [Cancel] in the [New Hardware
Found], [Device Driver Wizard], or
[Found New Hardware Wizard] dialog
box, and then insert the CD-ROM.
The [New Hardware Found] or [Found
New Hardware Wizard] dialog box ap-
pears depending on the system
version of Windows 95/98/Me,
Windows 2000, or Windows XP.
r Auto Run might not work auto-
matically with certain OS settings.
If this is the case, double-click “Setup.exe”, located on the CD-ROM
root directory.
r If you want to cancel Auto Run,
hold down the {SHIFT} key (when
your system is Windows
2000/Windows XP, hold down the
left {SHIFT} key) while inserting
the CD-ROM. Keep the {SHIFT}
key hold down until the computer
stops reading the CD-ROM.
r Clicking [Cancel] during installa-
tion aborts the installation. If you
cancel the installation, restart your
computer and install the rest of the
software or printer driver.
108
LAN-Fax Driver, Address Book, and
LAN-Fax Cover Sheet Editor can be
installed by Auto Run.

Sending Fax Documents from Computers
Installing individual applications
Preparation
Before installing the above applications, install SmartNetMonitor
for Client. See “Installing SmartNetMonitor for Client/Admin”,
Printer Reference 1.
Use the following procedure to install
LAN-Fax Driver, Address Book, and
LAN-Fax Cover Sheet Editor at one
time.
A Quit all applications currently
running.
B Insert the CD-ROM included
with this machine into the CDROM drive of your computer.
The installer launches automatically, and the language selection window appears.
E Read all of the terms and, if you
agree, select [I accept the agreement],
and then click [Next].
Note
r If you select [I don't accept the
agreement], you cannot complete
the installation.
F Click the [LAN-Fax Driver] check
box, and then click [Next].
G Confirm that the [Printer
Name:<LAN-Fax M3>] check box has
been selected, and then click [Con-
tinue].
Note
r Select the desired port.
H Click [Finish].
The installation completion dialog
box appears.
6
Note
r Depending on your operating
system settings, the installer
may not launch automatically.
If it does not, double-click “SETUP.EXE” in the CD-ROM root
directory to launch the installer.
C Select the interface language of
the software, and then click [OK].
D Click [LAN-Fax Driver].
The software license agreement
window appears.
I Click [Finish].
J Click [Exit].
109

LAN-Fax Features
6
Applications Stored on the
CD-ROM
This section provides information
about LAN-Fax Driver, Address
Book, and LAN-Fax Cover Sheet Editor.
LAN-Fax Driver
This driver allows you to use LANFax functions.
v Location of the File
The following folders are on the
CD-ROM:
• LAN-Fax Driver for Windows
95/98/Me
DRIVERSLANFAXWIN9X_Me
• LAN-Fax Driver for Windows
2000/XP
DRIVERSLAN-FAXWIN2K_XP
Limitation
r All operations cannot be guaran-
teed depending on the system environment.
r When you use Windows NT,
LAN-Fax Driver will not work in
an RISC base processor (MIPS R
series, Alpha AXP, PowerPC) environment.
Note
r Before beginning installation, exit
all other applications.
Address Book
Address Book helps you edit LANFax transmission destinations.
v Operating Systems
Microsoft Windows 95/98/Me
Microsoft Windows 2000/XP
Microsoft Windows NT 4.0
• LAN-Fax Driver for Windows
NT 4.0
DRIVERSLAN-FAX T4
v Operating Environment
•Computer
PC/AT Compatible
• Operating Systems
Microsoft Windows 95/98/Me
Microsoft Windows 2000/XP
Microsoft Windows NT 4.0
•Display
VGA 640×480 dots or more
LAN-Fax Cover Sheet Editor
LAN-Fax Cover Sheet Editor helps
you edit LAN-Fax cover sheets.
v Operating Systems
Microsoft Windows 95/98/Me
Microsoft Windows 2000/XP
Microsoft Windows NT 4.0
110
Sending Fax Documents from Computers
Setting LAN-Fax Properties
This section describes how to make
settings such as paper size, resolution, and options.
• Paper size
•Orientation
•Tray
•Resolution
•Gray scale
• Printing images of True Type fonts
When this machine is connected to a
network, selections for the option
configuration are automatically performed.
For details, see Help.
Note
r If the options on this machine are
not configured as instructed, LANFax functions may fail to work as
intended.
r If your operating system is Win-
dows 2000/XP or Windows NT
4.0, log on using an account that
has Administrator permissions.
A On the [Start] menu, point to [Set-
tings], and then click [Printers].
B Double-click [LAN-Fax M3], and
then click [Properties] on the [File]
menu.
Note
r With Windows NT, click [Docu-
ment Default] on the [File] menu.
C Make settings for the option con-
figuration.
When using Windows 95/98/Me
A Click the [Paper] tab.
B Click [Accessories…].
When using Windows 2000,
Windows XP, or Windows NT
A Click the [Advanced] tab.
B Click [Printing Defaults…].
C Click [Accessories…].
D Confirm the settings for the op-
tion configuration.
When using a network
A If the settings do not match the
installed optional units, click
[Reload from Device].
6
Note
r With Windows XP Professional,
select [Printers and Faxes] on the
[Start] menu.
r With Windows XP Home Edi-
tion, select [Control Panel] on the
[Start] menu. Next select [Printers and Other Hardware], and then
[Printers and Faxes].
When not using a network
A Select the check box besides
the installed optional units.
E Click [OK].
The settings for the option configuration are completed.
F Click [OK].
111
LAN-Fax Features
6
Basic Transmission
This section describes how to send fax
documents created using Windows
applications.
To send a fax, simply select [Print]
from the Windows application, then
select [LAN-Fax] as the printer, and
then specify a destination in the [LAN-
Fax] dialog box.
Open the application document you
want to send or create a new document, and then perform the following
procedure.
For details, see Help.
Limitation
r When using SmartNetMonitor for
Client, you cannot send documents to this machine using more
than one LAN-Fax at the same
time.
Note
r To send to an Internet Fax destina-
tion, the destination must be set in
the destination list of this machine
beforehand. Use this machine's
destination list to specify Internet
Fax destinations. E-mail addresses
cannot be entered in the LAN-Fax
dialog box.
A On the [File] menu, click [Print].
B Select [LAN-Fax M3] in [Printer
Name].
C Click [OK].
The LAN-Fax dialog box appears.
D Specify the destination.
Use one of the following procedures to specify a destination. For
details, see Help.
Note
r You can select the appropriate
line in the [Line:] list.
r You can specify up to 500 desti-
nations.
r The machine can hold up to 64
documents sent using LANFax, as those to be transmitted.
Specifying a destination using a
destination list
A Enter a destination in the [Fax
Number:] box.
When using a destination list:
Enter [#] and the registration
number.
B Click [Next Number].
The entered destination is add-
ed and displayed in the [List of
Destinations:] box.
Note
r If you do not want the en-
tered destination to be added
to the list, skip this step. Also
when this step is skipped, the
document will be sent to the
number entered in the [Fax
Number:] box.
C To specify more destinations,
repeat steps A and B.
Note
r The setting method may differ
depending on the application
you are using. In all cases, select
[LAN-Fax M3] for the printer.
112
Specifying a destination by
directly entering a fax number
A Enter a fax number in the [Fax
Number:] box.
Note
r
To enter a pause, click [Pause].
Sending Fax Documents from Computers
B Click [Next Number].
The entered destination is add-
ed and displayed in the [List of
Destinations:] box.
Note
r If you do not want the en-
tered destination to be added
to the list, skip this step. Also
when this step is skipped, the
document will be sent to the
number entered in the [Fax
Number:] box.
C To specify more destinations,
repeat steps A and B.
Specifying a destination using
Address Book
In order to use this method, you
need to register destinations in the
address list using Address Book.
See p.110 “Address Book”.
A Select a CSV file containing
the desired address list, from
the drop-down menu.
D To specify more destinations,
repeat steps B and C.
E Specify options.
Reference
See p.113 “Attaching a cover
sheet”.
See p.116 “Specifying Two-Sided Printing”.
See p.114 “Previewing fax images”.
See p.115 “Printing and Saving”.
See p.114 “Specifying options”.
If you do not want to specify options, proceed to step
F
.
F Click [Send].
Note
r When you click [Print & Send], a
fax will be transmitted to the
destination and a copy of the
document you send will be
printed from your machine.
6
Note
r Up to three files used most
lately appear in the dropdown menu. To use an address list that did not appear,
click [Browse...], and then se-
lect the file.
B In the [Name:] list select [Con-
tact], [Company], or [Group], and
then select [ALL] or an initial
letter.
The destinations matching the
selected parameters appear.
C Click the destination to high-
light it, and then click [Set as
Destination].
The entered destination is add-
ed and displayed in the [List of
Destinations:] box.
Attaching a cover sheet
Selecting the [Attach a Cover Sheet]
check box causes a cover sheet to be
attached to the top of the fax document.
The cover sheet includes the following items:
• Company name as destination info.
• Department name as destination
info.
• Person name as destination info.
• Title of address as destination info.
• Company name as sender info.
• Department name as sender info.
• Person name as sender info.
113
LAN-Fax Features
6
• Telephone number as sender info.
• Fax number as sender info.
•Date
• Message
Note
r To edit the cover sheet, click [Cover
Sheet...]. See p.118 “Editing Fax
Cover Sheets”.
Previewing fax images
Selecting the [Preview] check box al-
lows you to check how the fax document will be output at the
destination.
A Select the [Preview] check box, and
then click [Print] or [Send].
The [Preview] window appears.
B Check the image, and then click
[OK].
Note
r To cancel printing or sending,
click [Cancel].
Images on the Preview window
are not exactly the same as images
to be output.
A Click [Option...].
B Specify options you want to use.
v To send the fax document at a spe-
cific time:
Select the [Sending at Specific
Time] check box, and then speci-
fy a transmission time.
v To send with a user code:
Enter a user code into the [User
Code] field.
v To distinguish fax documents for
each user:
Enter a user ID into the [User ID:]
field. Use this option when
checking the job history using
SmartNetMonitor for Client.
v To have the header printed on the
fax document:
Select the [Print Fax Header]
check box.
v To store the fax document on the
Document Server:
Select the [Send to Document Serv-
er] check box, and then enter a
user name, file name, and password.
Specifying options
You can specify the following options:
For details, see Help.
• Sending at a Specific Time
•User Code
•User ID
•Print Fax Header
• Document Server
114
Note
r The user code you specified for
this machine must be the same
as the one entered in this machine. See General Settings Guide.
r If [Hard Disk Unit] has not been
selected in the [Accessories]
window, you cannot perform
selection for "Document Server". See p.111 “Setting LAN-Fax
Properties”.
C Click [OK].
-Transmission result notification
After you have sent faxes, this function informs you whether the fax was
successfully transmitted to its destination or not.
Sending Fax Documents from Computers
Printing and Saving
You can print documents created using Windows applications.
You can also save documents in TIF
format.
When you store documents in the
Document Server or use this machine
just as a printer, this function also informs you whether data was successfully transmitted to this machine or
not.
Note
r You cannot receive notification
when using SmartNetMonitor for
Client version 5.0 or earlier.
r Transmission results are informed
only when connected with a network using SmartNetMonitor for
Client.
-Managing transmission using
LAN-Fax Driver
From “SmartNetMonitor for Admin”,
“SmartNetMonitor for Client”, or a
Web browser, you can manage transmissions using LAN-Fax Driver. You
can view the following information
on transmitted files using LAN-Fax
Driver.
•User ID
•Status
•Number of pages
•Start time
Open the application document you
want to print or create a new document, and then perform the following
procedure.
For details, see Help.
Note
r You can select whether to cause
the machine to automatically restart printing when problems such
as paper running-out or paper
jams are resolved. The machine
may not allow LAN-Fax Driver to
send documents until it finishes reprinting. See p.159 “User Parameters” (switch 20, bit 1).
r You can select the time delay after
problems are resolved until the
machine restarts printing. See
p.159 “User Parameters” (switch
20 , bit 2/3/4/5).
A On the [File] menu, click [Print...].
B Select [LAN-Fax M3] in [Printer
Name], and then click [OK].
The [LAN-Fax] dialog box appears.
Note
r The setting method may differ
depending on the application
you are using. In all cases, select
[LAN-Fax M3] for the printer.
6
• File No.
Reference
For details, see Help.
Printing
A Click [Print].
115

LAN-Fax Features
6
Specifying Two-Sided Printing
A Selecting the [Duplex printing]
check box.
B Click [Print].
Saving as Files
You can save the fax document in
TIF format.
A Select the [Save as file] check
box.
B Click [Save to...].
C Select a folder on the folder
tree.
D Select a file naming method.
Note
r To manually enter a file
name, select the [Specify file
name when saving] check box.
To have the program itself
name the file, select the [Auto-
matically create a new file]
check box.
E Click [OK].
F Click [Save].
If you have selected [Automati-
cally create a new file], the image
file is assigned a name and
saved under the specified folder. The file name will be RicHHMMSS.tif (HH: hours, MM:
minutes, SS: seconds).
G Enter a file name.
Note
r You can also change the fold-
er in this step.
H Click [Save].
The image file is saved in the
specified folder.
Editing Address Book
You can program and edit destinations in the address list using the Address Book.
For details, see Help.
A On the [Start] menu, point to [Pro-
grams], [LAN-Fax Utilities], and then
click [Address Book].
The Address Book display appears.
Note
r If LAN-Fax Driver has already
started up, click [Address
Book...].
B Click [New/Browse], and then se-
lect the CSV file containing the
address list to be edited.
C Edit an existing destination or
program a new one.
Note
r
You can use files created in CSV
format, as Address Book data.
For this purpose, create CSV files
that conform to a certain format.
For more information, see Help.
r You can register the Address
Book data of this machine in the
LAN-Fax's Address Book.
Programming new destinations
A Enter the destination.
Note
r For [Line:], select the appro-
priate line type; G3, G3-2, or
G3-3, G3 Dir. Auto, G3 PABX
Auto. Do not select G4 and IG3, which is unavailable on
this machine.
116
B Click [Add].
Editing programmed destinations
A Select the destination you
want to edit in the list.
The company name should appear in gray.
B Edit the data.
C Click [Update].
Deleting programmed
destinations
A Select the destination you
want to edit in the list.
The company name should appear in gray.
B Click [Delete].
C Click [Yes].
D Click [Close].
E If you made changes to a destina-
tion, a confirmation message appears. To save the changes, click
[Yes].
If you do not want to save the
changes and want to quit editing,
click [No].
To return to the editing display,
click [Cancel].
Sending Fax Documents from Computers
-Using the machine's Address
Book data as the LAN-Fax's
Address Book data
You can retrieve the Address Book
data of this machine using SmartNetMonitor for Admin and edit it to register in the LAN-Fax's Address Book.
Reference
For more information, see Help on
SmartNetMonitor for Admin.
-Managing the facsimile
functions using
SmartNetMonitor for Admin
Using SmartNetMonitor for Admin,
you can check information about the
machine's facsimile functions and
save the information on the computer.
SmartNetMonitor for Admin provides
the following management functions:
Using [Address Management Tool], you
can check the information about destinations programmed on the machine and change the fax numbers
and names of these destinations. You
can also register a new destination.
6
Note
r The confirmation dialog box
does not appear when you have
not made any changes after
starting Address Book.
Using [Address Management Tool], you
can retrieve destinations programmed
on the machine and save them on the
computer as CSV files. You can then
export the saved CSV files to the Address Book of LAN-Fax Driver using
the Address Book application.
Note
r For the method of installing Smart-
NetMonitor for Admin, see the
Printer Reference 1.
r For detailed operations, see Net-
work Guide and Help on SmartNet-
Monitor for Admin.
117
LAN-Fax Features
6
Editing Fax Cover Sheets
LAN-Fax Cover Sheet Editor allows
you to edit the format for fax cover
sheets. It is necessary to create a cover
sheet file before attaching a cover
sheet to fax messages using LAN-Fax
Driver.
Creating a cover sheet
Use the following procedure to create
a fax cover sheet.
You can edit the items below using
LAN-Fax Cover Sheet Editor.
• Company name as destination info.
• Department name as destination
info.
• Person name as destination info.
B Edit the cover sheet.
Note
r For details about operations, see
Help.
C Click [Save as...] on the [File] menu.
D Select a folder, and then enter a
file name.
E Click [Save].
Attaching a created cover sheet
Use the following procedure to attach
a created cover sheet file to a fax message.
A On the [File] menu, click [Print...].
B Select “LAN-Fax M3” in “Printer
Name”, and then click [OK].
118
• Title of address as destination info.
• Company name as sender info.
• Department name as sender info.
• Person name as sender info.
• Telephone number as sender info.
• Fax number as sender info.
•Date
• Message
Note
r Cover sheet data is stored in its
own format (using "fcp" as its extension)
A On the [Start] menu, point to [Pro-
grams], [LAN-Fax Utilities], and then
click [Cover Sheet Editor].
The dialog box of LAN-Fax Cover
Sheet Editor appears.
The [LAN-Fax] dialog box appears.
C Click [Cover Sheet...].
The [Cover Sheet...] dialog box ap-
pears.
D Select a cover sheet file from the
drop-down list or after clicking
[Browse...] in [Select Cover Sheet].
Note
r The selection made in [Select
Cover Sheet] is not canceled un-
less you select another file. If
you want to change only destination information, skip this
step and proceed to step
E
Enter the destination information.
Note
r You can select [(Import from) Ad-
dress Book], [To Whom It May Concern], [Edit Names], or [None].
Selecting [Edit Names] allows
you to enter company, department, and person names.
E
.
Sending Fax Documents from Computers
F To print the date, select the [With a
Date] check box.
H Click [OK].
I Specify a destination.
G Enter the sender information.
J Select the [Attach a Cover Sheet]
Note
r You can enter company, depart-
ment, and person names, and
telephone and fax numbers.
r To add a message, select the
[With a Message] check box, and
then enter a message.
LAN-Fax Operation Messages
Note
r You can have the LAN-Fax Error Report printed when options are not prop-
erly selected, or there is a communication error with a computer. See p.159
“User Parameters” (switch 20, bit 0).
check box.
K Click [Send].
Message Causes and Solutions
Cannot access the printer. Click [retry] to send
the data again.
The number of entries in
Destinations exceed the
limits. Up to 500 entries
can be entered.
“LAN-Fax” has already
been launched. Cannot
launch it again.
Failed to allocate memory.
6
Check the network connection.
Check that the power is turned on.
The number of destinations specified exceeds the maximum possible. The maximum number of destinations
that can be specified at one time is 500.
The [LAN-Fax] dialog box is already open. Quit LAN-Fax
once, and then start it up again.
Available memory on the computer is insufficient. Quit
applications currently not in use.
119
LAN-Fax Features
LAN-Fax Error Report
This report is printed when options are not properly selected, or a communication error with a computer occurs. Check the error message of the report.
If you entered a user code in the [Options] dialog box, this report can be sent to
you by e-mail, provided your e-mail address is programmed in the machine.
However, if User Code Management is on for fax, the report is not sent.
Note
r You can select whether or not a LAN-Fax Error Report is printed. See p.159
“User Parameters” (switch 20, bit 0).
LAN-Fax Result by E-mail
If you entered a user code in the [Options] dialog box, the result can be sent to you
by e-mail, provided your e-mail address is programmed in the machine.
6
Note
r You can select whether or not a LAN-Fax Result is sent to the specified e-mail
address. See p.159 “User Parameters” (switch 20, bit 7). If the message failed
to be sent to one or more of the specified destinations, the result is sent regardless of this setting.
120
Viewing Fax Information Using a Web Browser
Viewing Fax Information Using a Web
Browser
The optional printer/scanner unit is required.
You can view received fax messages
and their lists or print these messages
using a Web browser on a network
computer.
Note
r You need to select "Store" as the
"Reception File Setting" in the Facsimile Features menu. See p.184
“Storing or Printing Received Documents”.
r You can also check and manage
the documents using DeskTopBinder V2 Lite. See p.135 “Managing Documents Saved in the
Document Server from a Computer”.
Viewing, Printing, and Deleting
Received Fax Messages Using
a Web Browser
Use the following procedure to view
and/or print received fax messages
using a Web browser.
Viewing received fax messages using a
Web browser
A Start a Web browser.
B Enter the machine's IP address in
the [Address] field.
6
Reference
“Configuring the Network Interface Board using a Web Browser”,
Network Guide
C Click [Fax Received File].
With a user code programmed
A If you have programmed a user
code, enter the code, and then
press [OK].
A list of the received fax messages appears.
Note
r If the programmed user code
has been deleted using the
Address Book Management
function under System Settings, a message indicating
incorrect user code entry appears. If this is the case, reprogram a user code. See
p.186 “Setting a User Code
for Viewing Received and
Stored Documents”.
121

LAN-Fax Features
6
D Click the Property icon of the de-
sired fax message.
Information such as reception
dates, senders, line types, number
of pages, and file numbers appear
in addition to preview images.
Note
r You can select the thumbnail
display, details display, or icon
display. Click [Thumbnails], [De-
tails], or [Icons].
E View the content of the fax mes-
sage.
Note
r To enlarge the preview image,
click [Enlarge Image]. Enlarge-
ment cannot be performed
without Acrobat Reader installed. For more information,
see Help on the Web browser.
Printing fax information using a Web
browser
A Start a Web browser.
B Enter the machine's IP address in
the [Address] field.
C Click [Fax Received File].
The list of received fax messages
appears.
D Click and select the check box be-
side the fax message to be printed.
Note
r You can select the thumbnail
display, details display, or icon
display. Click [Thumbnails], [De-
tails], or [Icons].
E Click [Print].
F To download the received fax
message, click [PDF] or [Multi-page
TIFF].
Clicking [PDF] causes Acrobat
Reader to be started and the message to be displayed.
Clicking [Multi-page TIFF] causes a
downloading confirmation window to appear.
Note
r The method for downloading
differs depending on the selected format. For more information, see Help on the Web
browser.
F Click [Start Print].
Note
r To cancel printing, press [Can-
cel] before clicking [Start Print].
r You can change the printing or-
der of selected multiple messages. You can also have messages
printed on both sides of paper.
For more information, see Help
on the Web browser.
G Click [OK].
The display returns to that of step
.
D
122

Deleting fax information using a Web
browser
A Start a Web browser.
B Enter the machine's IP address in
the [Address] field.
C Click [Fax Received File].
The list of received fax messages
appears.
D Click and check the check box be-
side the fax message to be deleted.
Note
r You can select the thumbnail
display, details display, or icon
display. Click [Thumbnails], [De-
tails], or [Icons].
Viewing Fax Information Using a Web Browser
6
E Click [Delete].
F Click [Delete File].
Note
r To cancel deletion, press [Can-
cel] before clicking [Delete File].
r After selecting multiple mes-
sages, you can also cancel deletion of some of the selected
messages. For more information, see Help on the Web
browser.
G Click [OK].
The display returns to that of step
.
D
123
6
124
LAN-Fax Features
Viewing Received Messages on a
Computer
ScanRouter V2 Professional (sold separately) is also required as a delivery server. DesktopBinder V2 Professional Lite or DesktopBinder V2 Professional software (both sold
separately) must be installed on your computer.
• You can check or download
Delivering Received Messages
Messages received by the machine
can be viewed on or downloaded to a
computer with the network delivery
server, ScanRouter V2 Professional.
This is a useful function, enabling you
to view and store messages on your
computer without printing them.
Using the delivery server, you can
eliminate the task of retrieving and
delivering messages.
v Functions
Delivery server provides the following functions:
•
Use the delivery server to associate incoming messages (Confidential ID, SUB Code, Own Name,
and Own Fax Number) with receivers, so messages are delivered
to the intended receivers.
• You can select the delivery
method for incoming messages:
"Save in the delivery server inbox," "Send as an e-mail attachment," or "Save in the
designated PC folder." Incoming messages with no Confidential ID, SUB Code, Own Name,
or Own Fax Number are saved
in the delivery server inbox.
You can also set so that the received messages are stored in
the specified delivery server inbox according to the used line
for reception.
received messages stored in the
delivery server inbox using DesktopBinder V2 Professional Lite or
DesktopBinder V2 Professional.
Limitation
r
Confidential messages are also
forwarded to the delivery server.
Note
r
To view or download messages stored in the delivery server inbox, you need to install
the separately sold DesktopBinder V2 Professional Lite or
DesktopBinder V2 Professional on your computer.
r
To send received messages to
your computer as e-mail attachments, you need to have a
ScanRouter V2 Professionalcompatible e-mail program on
your computer.
r
To create a network using the
delivery server, settings must be
specified in the User Tools of the
machine. Settings must also be
specified on the delivery server.
See “Settings You Can Change
with User Tools - File Transfer”,
Network Guide
r
See ScanRouter V2 Professional
Help or instructions for more information on the delivery server
(ScanRouter V2 Professional).
r
For information about DesktopBinder V2 Lite/Professional, see
DesktopBinder V2 Lite/Professional Help or instructions.
.

7. Simplifying the Operation
Programs
If you regularly send messages to a
particular destination or transmit using the same functions, you can save
repetitive keypad operations by registering this information in a Keystroke Program.
Registering and Changing
Keystroke Programs
Keystroke Programs can be recalled
by just pressing a Quick Dial key. The
following procedure can be used to
program a new Keystroke Program or
overwrite an old one.
You can register the following items
in Keystroke Programs:
• Memory Transmission, Internet
Fax transmission, Difference size
originals, Immediate Transmission, destinations (up to 500 numbers), resolution, original type, G3
communication mode, Stamp,
Send Later, Default ID, Auto Image Density, Manual Image Density, Scan Area, Auto Document,
Book Fax, Polling Transmission,
Polling Reception, Transfer Request, two-sided transmission, entering text, reception confirmation
settings, and BCC transmission
settings, optional functions
• Program name (up to 20 characters)
Note
r The maximum number of pro-
grams you can register is 100 (200
with the optional fax function upgrade unit).
r Use the same procedure to register
and change programs. Follow the
procedure for the items you want
to change.
r The method of registering or
changing programs for the copy
function is different from that of
the fax function.
r You cannot register the following
using program No.1:
•Any destination
• Polling Transmission
• User Transmission
•Store File
• Specifying a stored file
• Enter Subject of Mail Options
A Make sure that the machine is in
facsimile mode and the standby
display is shown.
Note
r If the standby display is not
shown, press the {Facsimile}
key.
B Prepare for registering the pro-
gram.
Note
r The procedure for program-
ming differs depending on the
items you want to register.
r Press the {Clear Modes} key to
cancel programming.
125
Simplifying the Operation
Example of registering a program
using Send Later with the fax
number “0123456789”
A Press {0}, {1}, {2}, {3}, {4}, {5},
{6}, {7}, {8}, {9} using the
number keys.
B Perform the Send Later setting
till the procedure of pressing
[OK] key to return to the stand-
by mode.
Reference
p.3 “Sending at a Specific
Time (Send Later)”
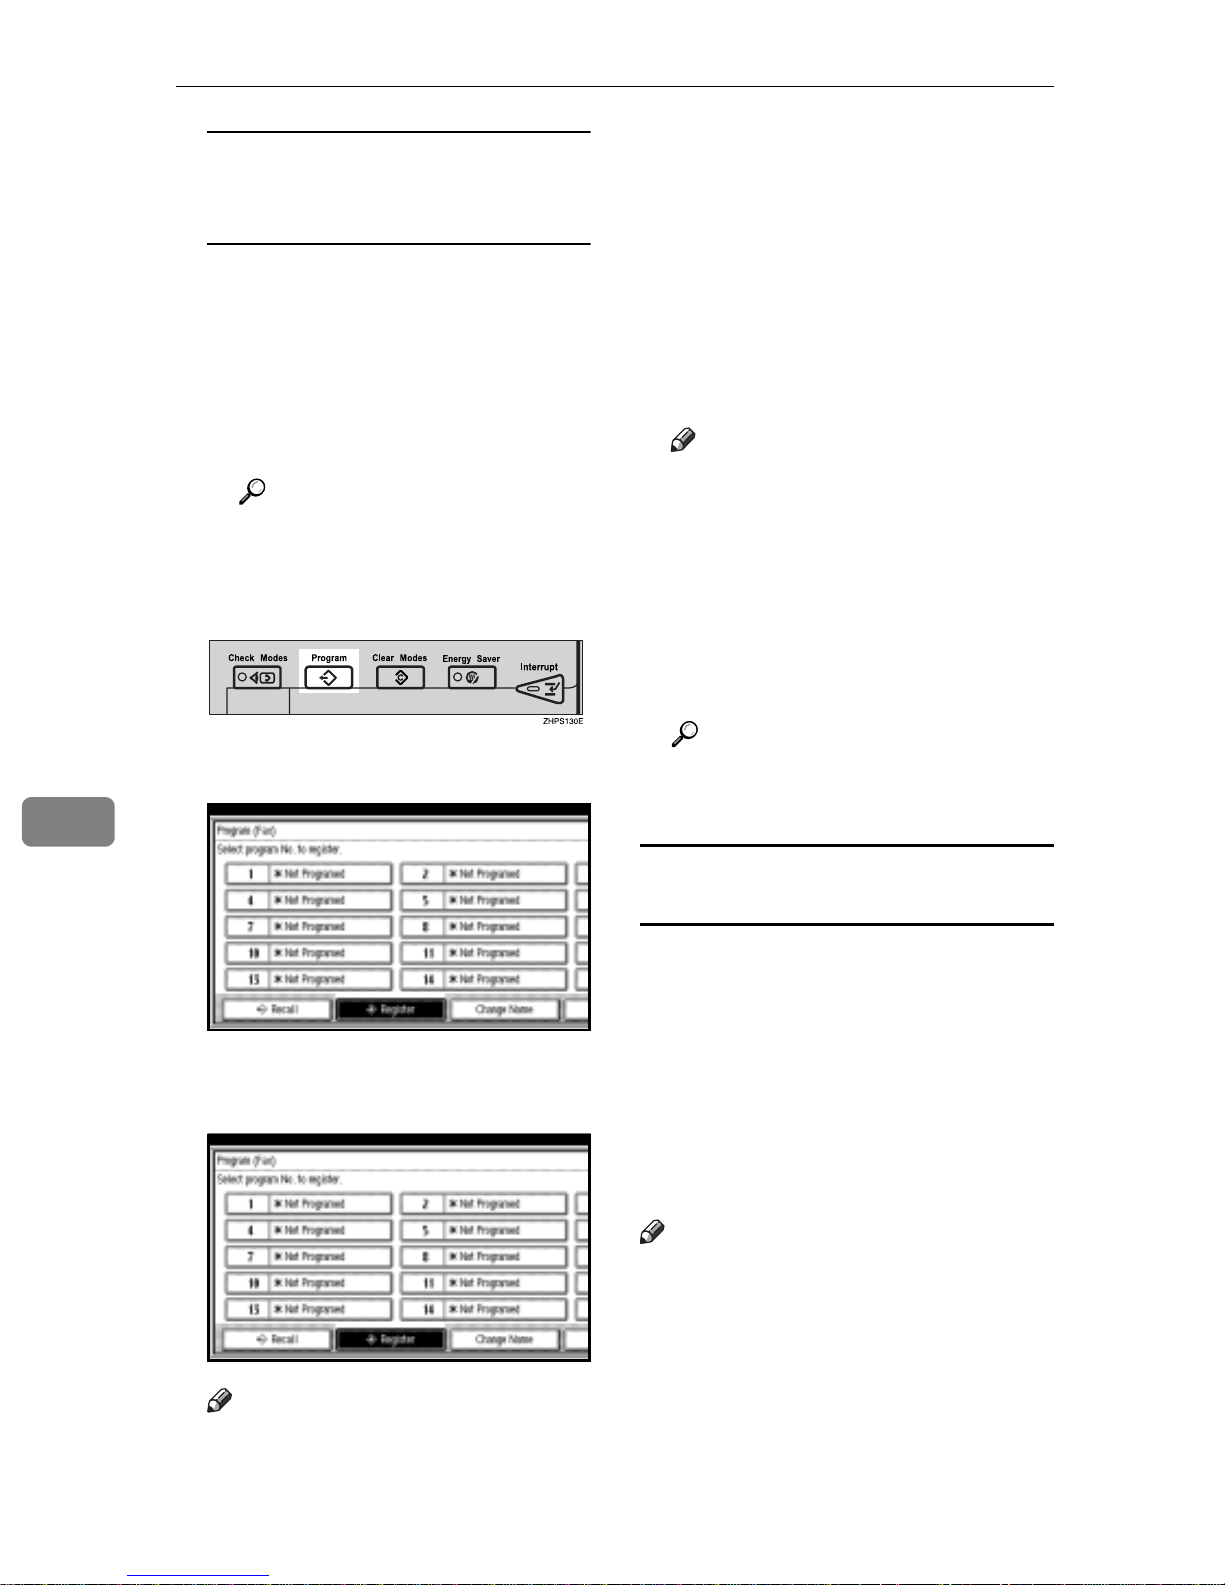
C Press the {Program} key.
r When you change a Keystroke
Program, press [Register] after
pressing the program number
you want to change. If you
make a mistake, press [Do not
Register] and return to step
E
.
F Enter the program name, and then
press [OK].
The standby display appears.
Note
r If you make a mistake, press
[Backspace] or [Delete All], and
then try again.
r You should register the pro-
gram name.
r To cancel a programmed pro-
gram, press [Cancel]. The dis-
play returns to that of step
E
.
7
D
Make sure that [Register] is selected.
E
Select a program number in which
“*Not Programed” is shown
Note
r If you make a mistake, press
[Cancel] and select a program
number again.
Reference
"Entering Text", General Settings
Guide
Registering a priority function using a
program
You can select whether or not the
function registered in program No. 1
will be set after the power is turned
on or the {Clear Modes} key is pressed.
After registering a function in pro-
.
gram No. 1, select [Program No.1] for
[Change Initial Mode] on the Facsimile
Features menu. See p.142 “General
Settings/Adjustment”.
Note
r For this purpose, program No.1
does not allow you to program
destinations, Polling Transmission, User Transmission, Store File,
Scan Area, resolution, Image Density and Send Stored-file functions.
126
Programs
Changing a program name
A Make sure that the machine is in
facsimile mode and the standby
display is shown.
Note
r
If the standby display is not
shown, press the
{
Facsimile} key.
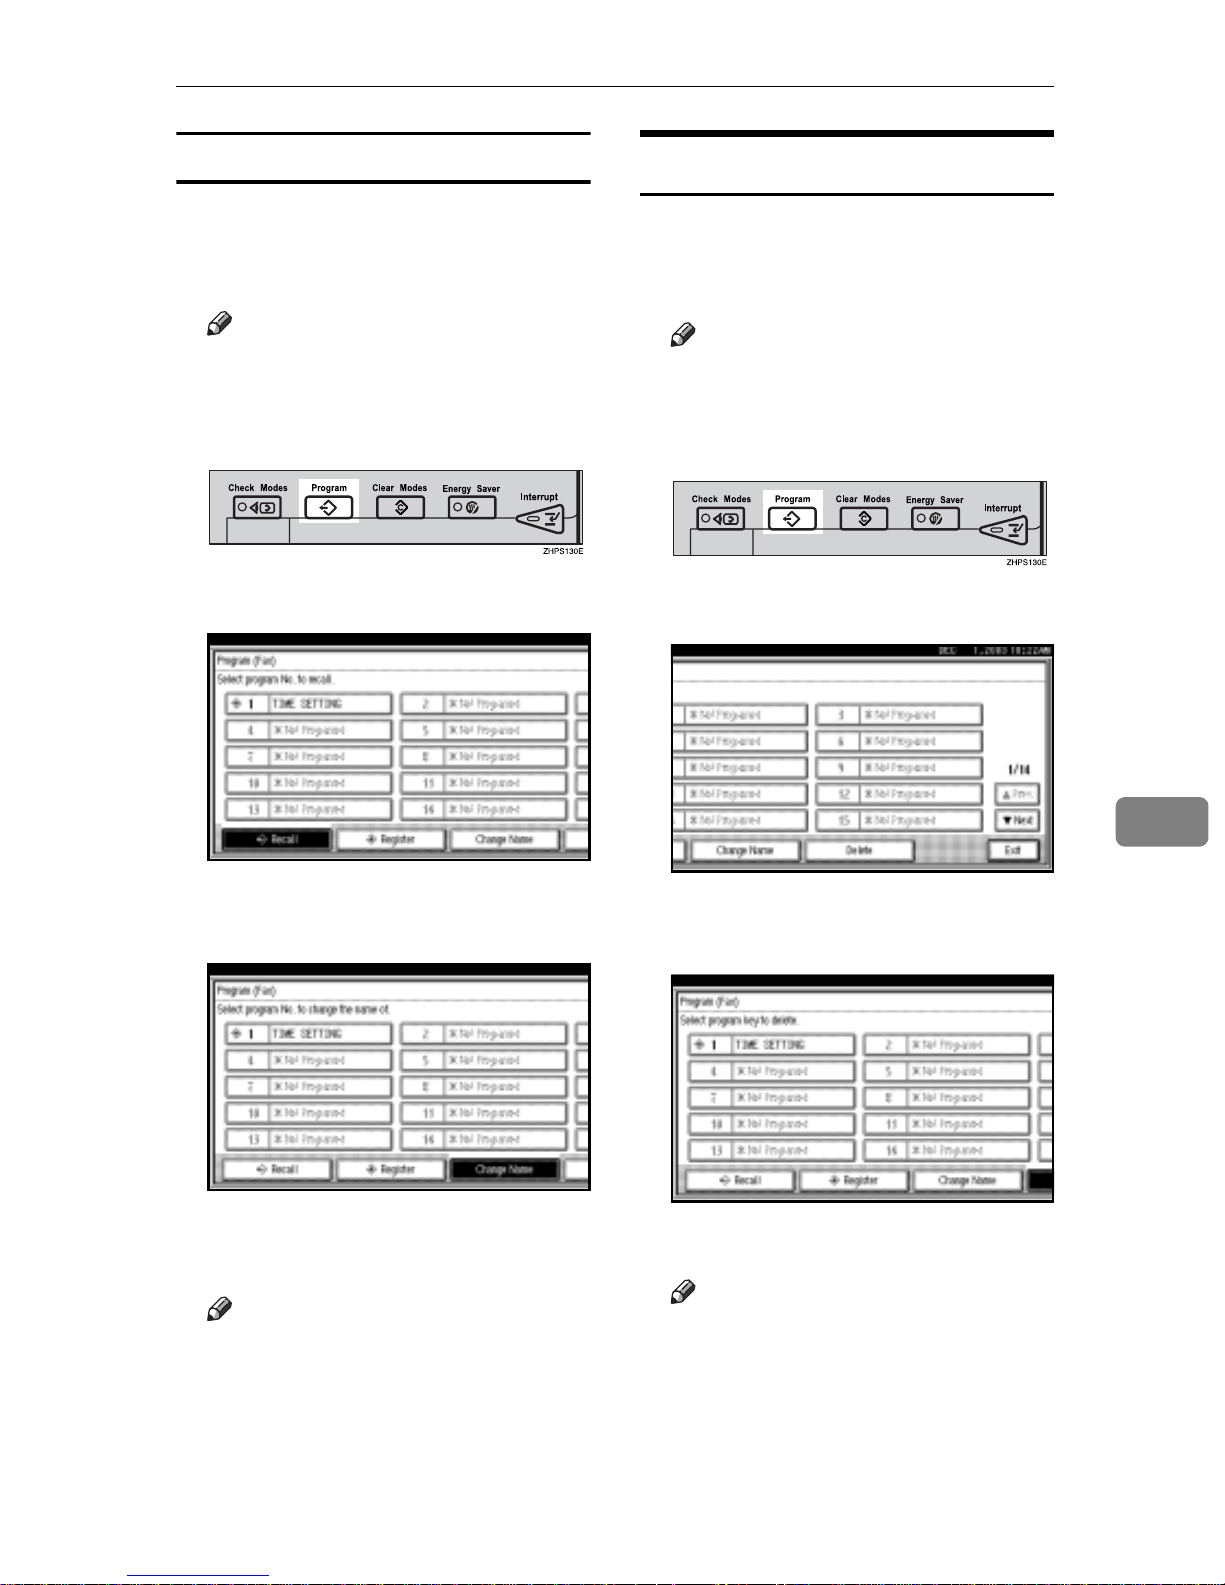
B Press the {Program} key.
C Press [Change Name].
Deleting a Program
A Make sure that the machine is in
facsimile mode and the standby
display is shown.
Note
r
If the standby display is not
shown, press the
{
Facsimile} key.
B Press the {Program} key.
C Press [Delete].
D Select the program number of the
name you want to change.
E Enter a new program name, and
then press [OK].
Note
r
Press [Cancel] to cancel the change,
and proceed to step
F
.
D Select the program number you
want to delete.
E Press [Yes].
Note
r Press [No] not to delete the pro-
gram. The display returns to
that of step
C
.
7
F Press [Exit].
The standby display appears.
F Press [Exit].
The standby display appears.
127
Simplifying the Operation
Using a Program
Then, the programmed fax number is shown. Transmission Mode
is selected.
7
Note
r Using the program causes the pre-
vious settings to be cleared.
Example of executing a program
using Send Later with the fax
number “0123456789”
A Make sure that the machine is in
facsimile mode and the standby
display is shown.
Note
r If the standby display is not
shown, press the {Facsimile}
key.
B Place the original.
Note
r If you have no programmed
destinations or scan settings as
programs, enter the fax number
of the destination and select the
scan settings you require.
E Press the {Start} key.
The fax number and specified time
are shown on the display, and the
machine starts to scan the original.
Transmission will start at the specified time.
128
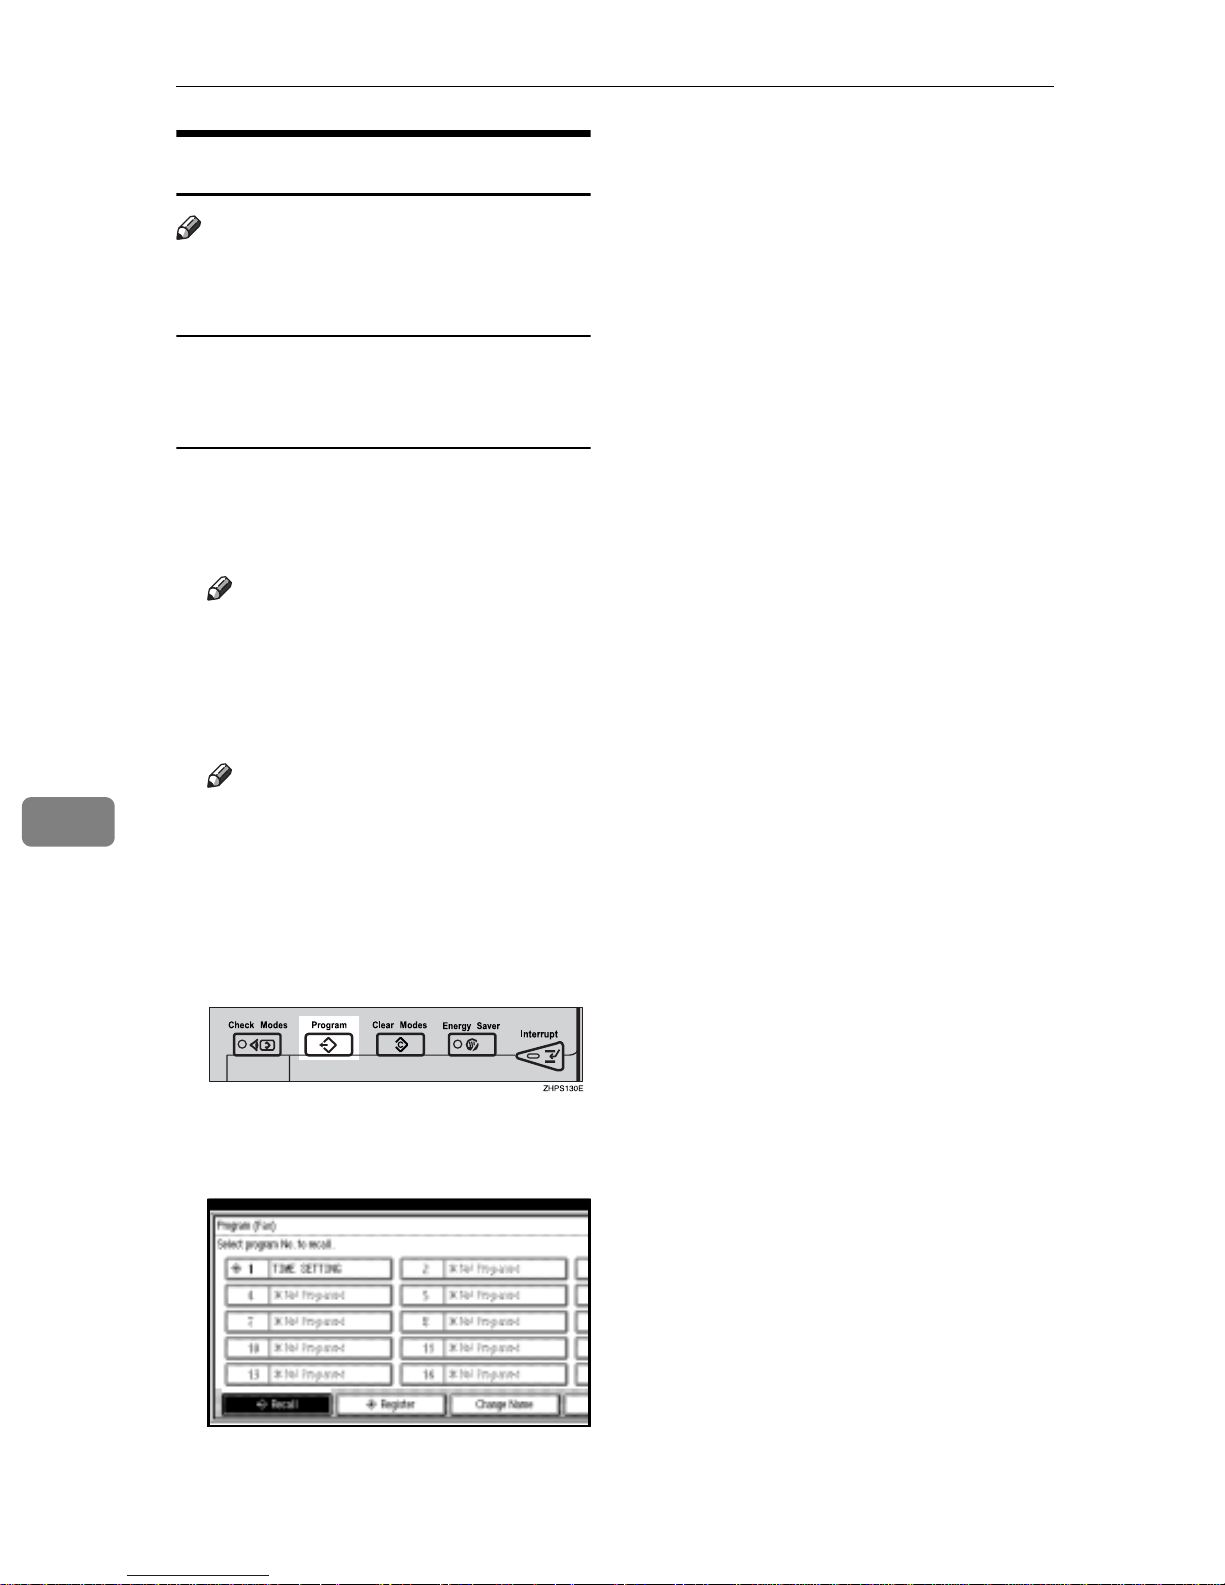
C Press the {Program} key.
D Select the program number you
registered.
The standby display appears.
Using the Document Server
Using the Document Server
Use this function to store documents
in the Document Server on this machine.
The Document Server can store documents from various applications.
The documents that are stored using
the facsimile function are available to
transmit by facsimile.
Storing in the Document Server enables the following:
• Once stored, a document can be
sent out as many times as you
want, just by selecting it.
• Storing a document does not use
facsimile memory.
You can send and print multiple
stored documents as a single document, and also send them with
scanned originals at the same time.
Follow the instructions under [Select
Stored File] in [Sub TX Mode] when
sending or printing stored documents. See p.67 “Sending a Stored
File”.
Reference
"What You Can Do with This Machine", General Settings Guide
Important
r Data stored in the machine might
be lost if some kind of failure occurs. The manufacturer shall not
be responsible for any damage that
might result from the loss of data.
r You can specify whether or not the
machine automatically deletes
documents from the Document
Server after a certain number of
days. The delete function is preconfigured with the software and
automatically deletes any stored
document that is more than three
days (72 hours) old. You can
change the setting with “Auto Delete File”under “Key Operator
Tools” . See “Key Operator Tools
— Auto Delete File”, General Set-
tings Guide.
r You can store approximately 9,000
pages (ITU-T No.4 chart) in the
Document Server, using the copy,
facsimile, printer, and scanner
functions.
r The fax feature has a memory ca-
pacity of approximately 3,000 documents.
r You can store up to 1,000 pages per
document.
r You cannot check received and
stored documents through the
Document Server. See p.34 “Printing Received and Stored Documents” .
7
Note
r Stored documents are not deleted
even when there is a power failure,
or the main power switch is turned
off.
129
Simplifying the Operation
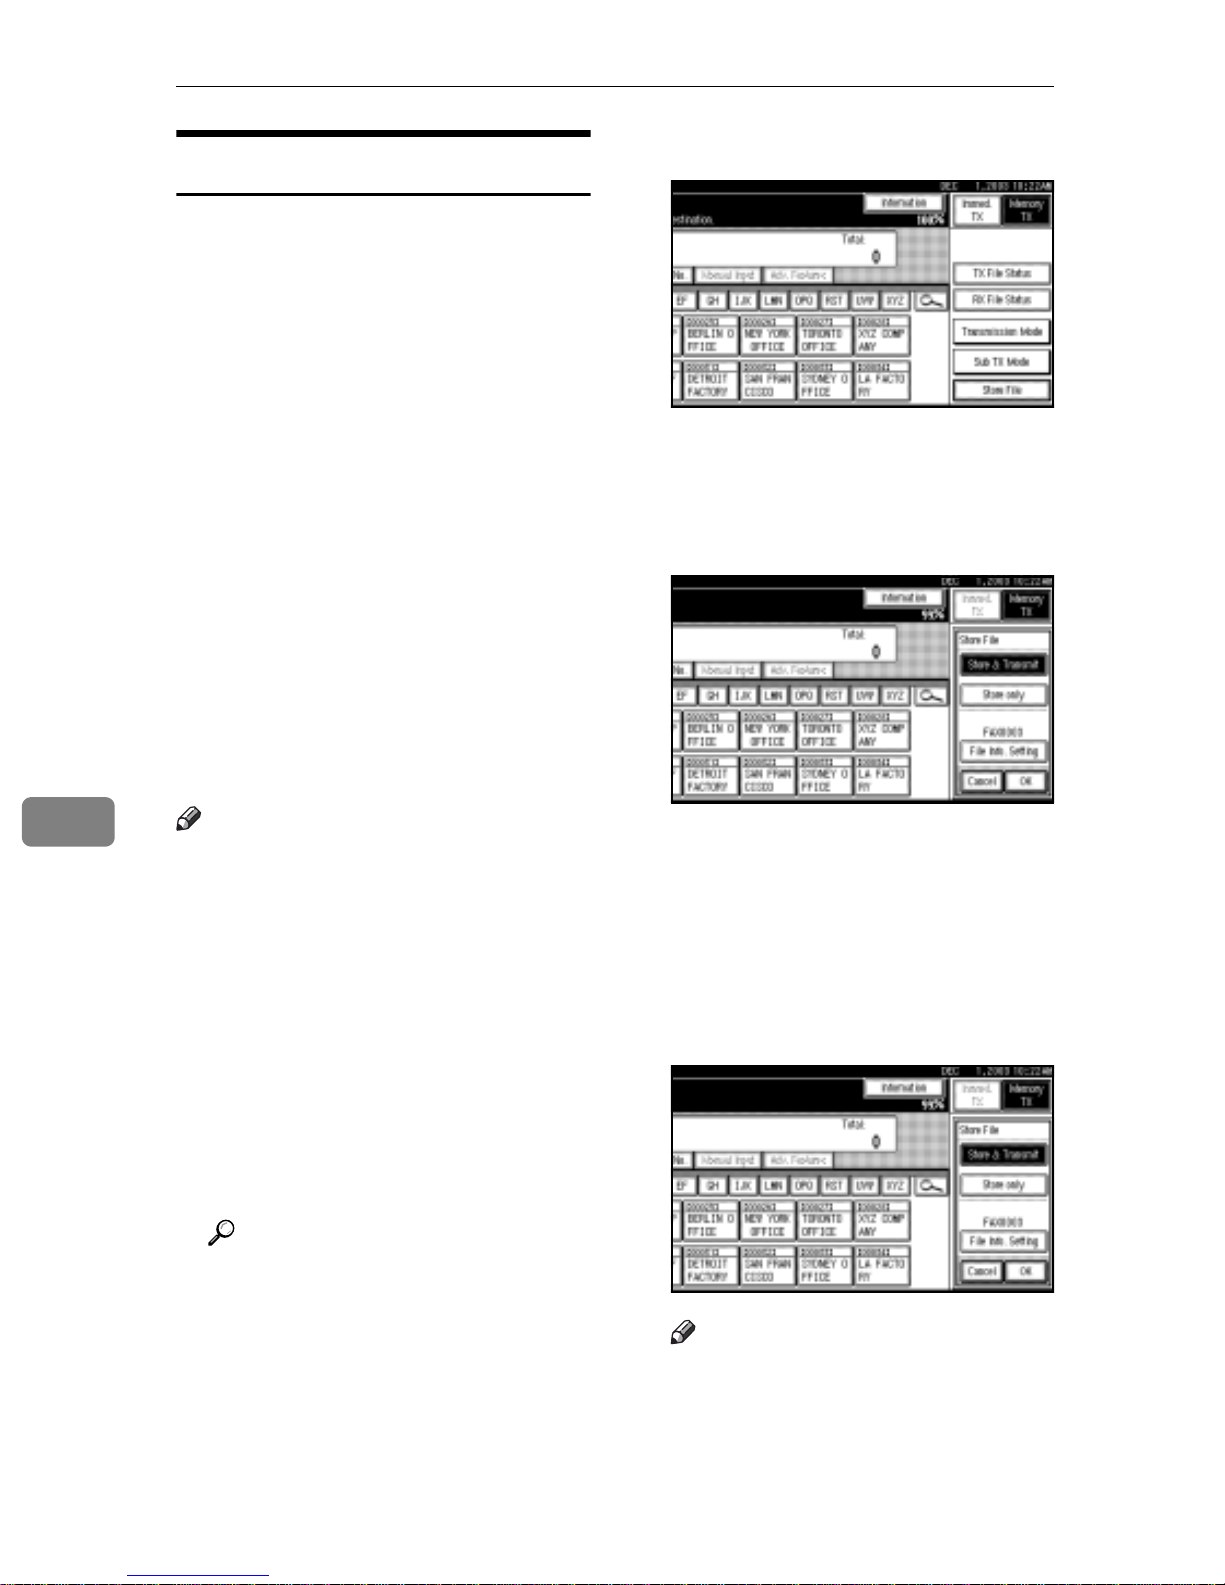
Storing a Document
You can store and send a document at
the same time. You can also just store
a document.
v File names
Scanned documents are automatically assigned names like
“FAX0001” or “FAX0002”. See
p.131 “Setting a file name”.
v User Names
You can set this function if necessary to know who and what departments stored documents in the
machine. See p.131 “Programming
a user name”.
v Password
You can set this function so as not
to send to unspecified people. See
p.131 “Setting a password”.
C Press [Store File].
D Select [Store & Transmit] or [Store
only].
Select [Store & Transmit] to send
documents after they are stored.
7
Note
r You can change file names and
user names. See p.132 “Changing
Information of Stored Documents”.
A Make sure that the machine is in
facsimile mode and the standby
display is shown.
If the standby display is not
shown, press the {Facsimile} key.
B Place the original, and then select
the scan settings you require.
Reference
p.15 “Placing Originals”, Facsimile Reference <Basic Features>
p.33 “Scan Settings”, Facsimile
Reference <Basic Features>
Select [Store only] to store docu-
ments.
When [Store only] is selected,
“
pppppppppp” is shown.
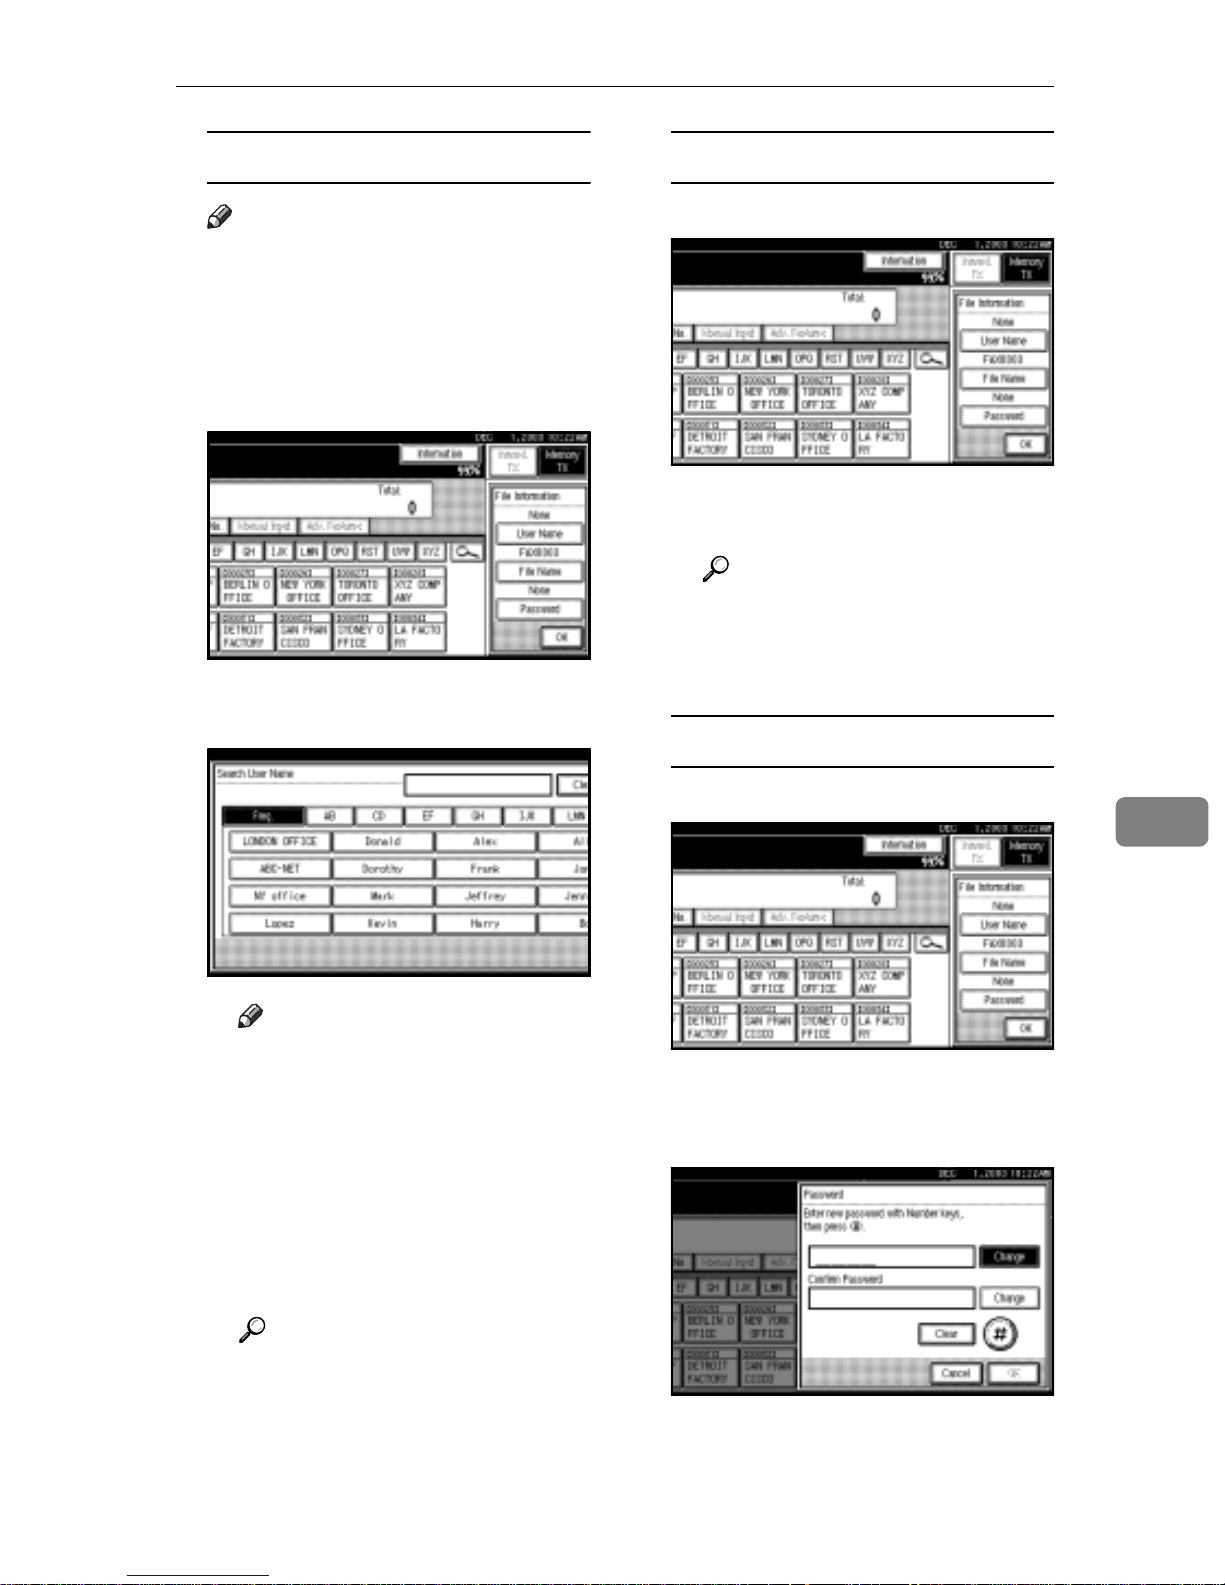
E Press [File Info. Setting], and then
set the user name, file name, and
password as necessary.
Note
r If you are not setting a user
name, file name, or password,
proceed to step
r You cannot change multiple
documents at once.
F
.
130
Using the Document Server
Programming a user name
Note
r Set a user name from those pro-
grammed in the user code. User
code is programmed in System
Settings. See General Settings
Guide.
A Press [User Name].
B Press the user name to be pro-
grammed, and then press [OK].
Setting a file name
A Press [File Name].
B Enter the file name, and then
press [OK].
Reference
“Entering Text”, General Settings Guide
C Press [OK].
Setting a password
Note
r Press the title key to switch
between titles.
r To set an non-programmed
user name, press [Non-pro-
grammed Name], and then en-
ter the name. User names
entered by pressing [Non-pro-
grammed Name] are not pro-
grammed into the user code.
Reference
“Entering Text”, General Settings Guide
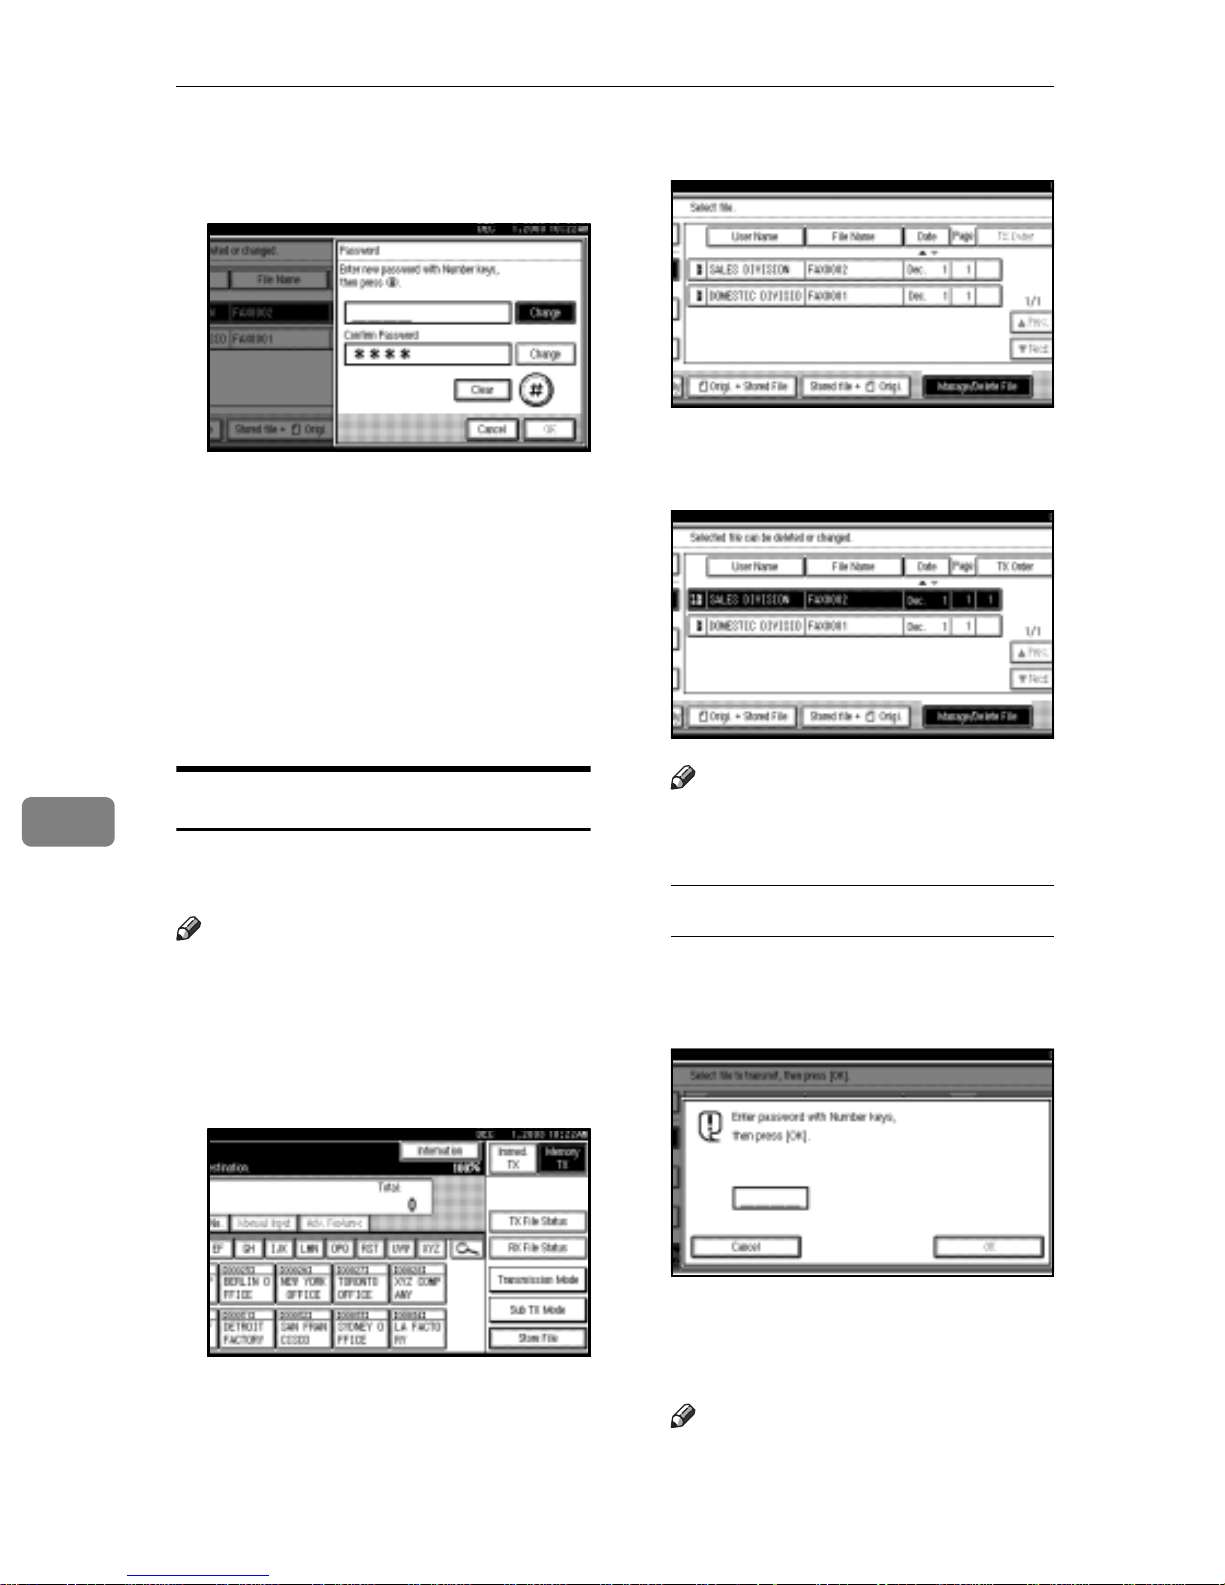
A Press [Password].
7
B Enter a password using the
number keys, and then press
[#].
C Press [OK].
131
Simplifying the Operation
Note
r If you make a mistake, press
[Clear] or the {Clear/Stop} key
before pressing [OK], and
then reenter your password.
r You can enter up to four dig-
its.
C Enter the password again, and
then press [#].
D Press [OK].
Note
r Press [Change] to enter a dif-
ferent password.
E Press [OK].
F Press [OK].
G If you have selected [Store & Trans-
mit], specify the receiver.
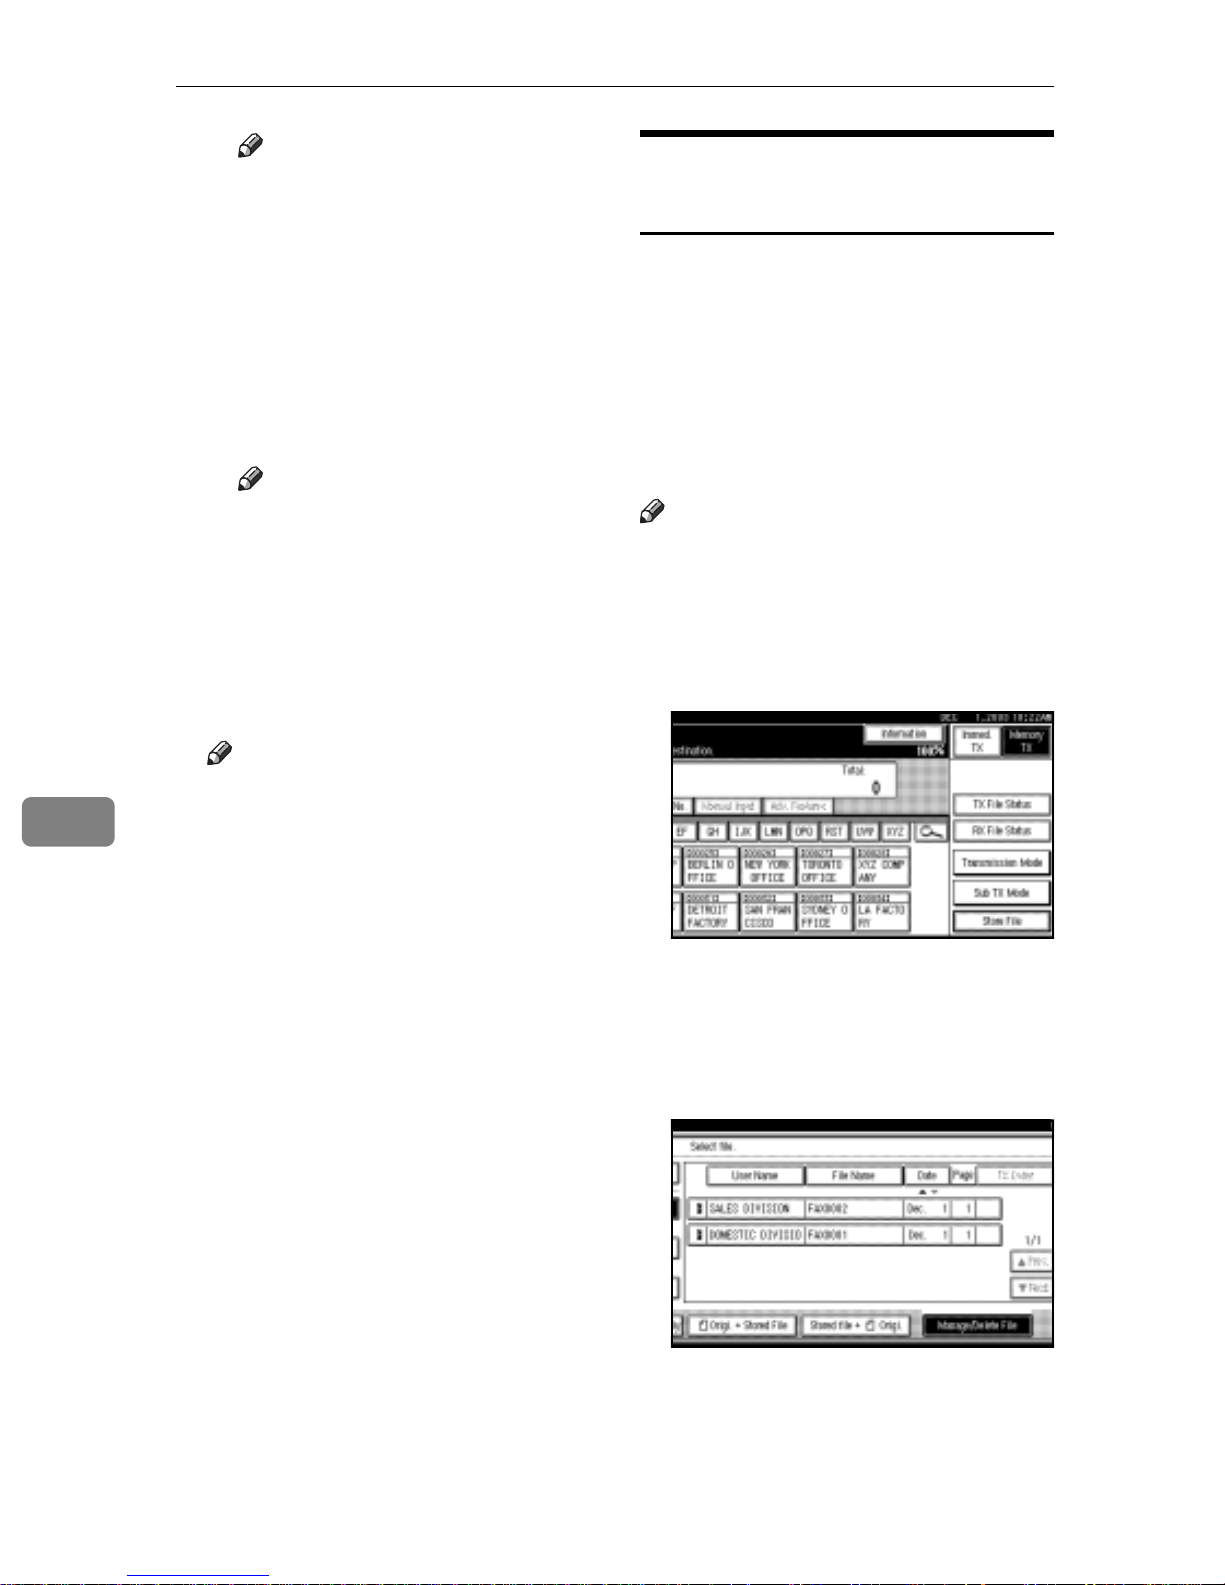
Changing Information of
Stored Documents
You can change the file name, user
name, and password of stored documents.
To change a stored document, delete
the document you no longer need,
and then reprogram the new document. See p.134 “Deleting a Stored
Document”.
Note
r You can program one of the Quick
Operation keys with operations for
this function. Using the key allows
you to omit steps A and B.
A Press [Sub TX Mode].
7
Note
r If you have selected [Store only],
proceed to step
H
.
H Press the {Start} key.
B Select [Select Stored File].
C Select [Manage/Delete File], and
then press the document to be
changed.
132
Using the Document Server
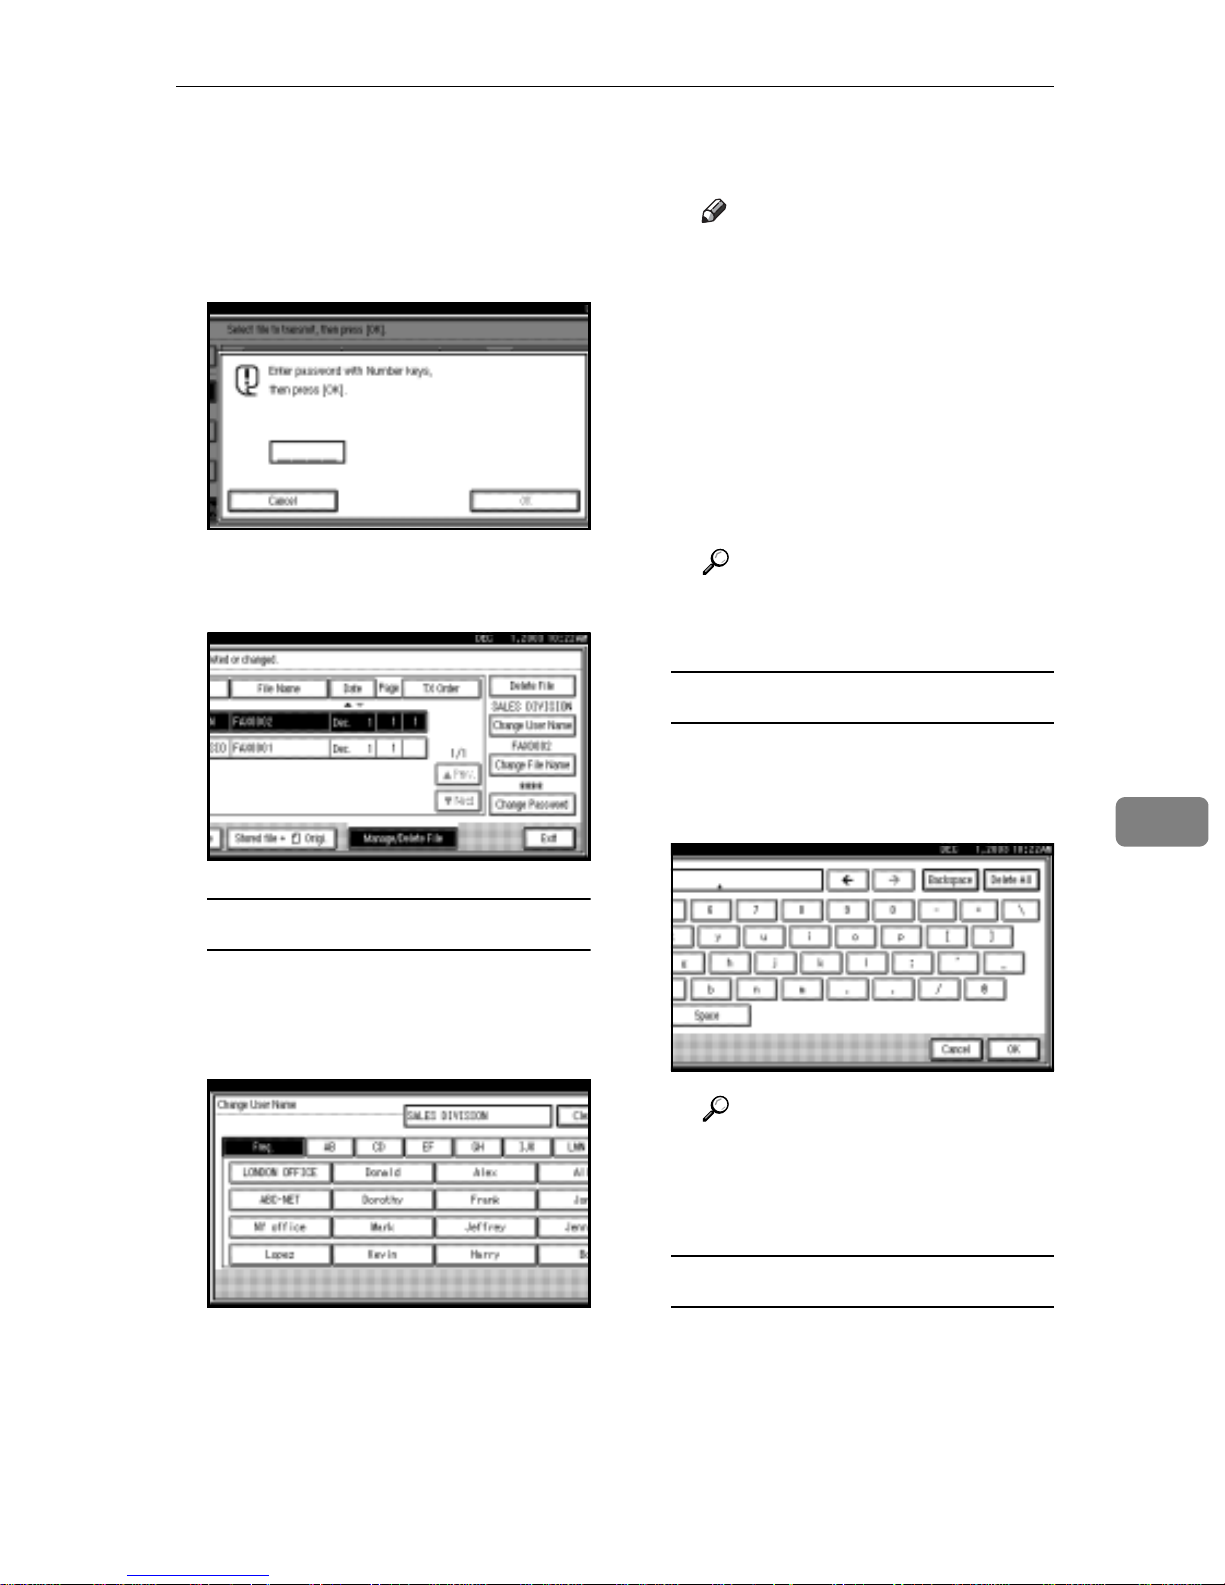
D
If you select a document for which
a password is set, enter the password, and then press
When a selected file does not have
a password, proceed to step
[OK]
.
.
E
E Change the desired information
of the stored document.
C Enter the new user name, and
then press [OK].
Note
r Press the title keys to switch
between titles.
r To set a non-programmed
user name, press [Non-pro-
grammed Name], and then en-
ter the name.
r User names entered by press-
ing [Non-programmed Name]
are not programmed into the
user code.
Reference
“Entering Text”, General Settings Guide
Changing the file name
Changing a user name
A Press [Change User Name].
B Press [Clear].
The user name is deleted.
A Press [Change File Name].
B Press [Backspace] or [Delete All],
and then re-enter the file name.
Reference
“Entering Text” General Settings Guide
C Press [OK].
Changing the password
7
A Press [Change Password].
B Press upper [Change].
133
Simplifying the Operation
C Enter a new password using
the number keys, and then
press [#].
D Press lower [Change].
E Enter the password again, and
then press [#].
F Press [OK].
F Press [Exit].
G Press [OK].
C Press [Manage/Delete File].
D Select the document you want to
delete.
7
The standby display appears.
Deleting a Stored Document
Use this function to delete stored documents.
Note
r You can program one of the Quick
Operation keys with operations for
this function. Using the key allows
you to omit steps A and B.
A Press [Sub TX Mode].
Note
r You can also delete multiple
documents at once.
With a programmed password
A Enter a password using the
number keys, and then press
[OK].
B Press [Select Stored File].
134
E Press [Delete File].
F Press [Delete].
Note
r If you do not want to delete the
document, press [Do not Delete].
Using the Document Server
G Press [Exit].
H Press [OK].
The standby display appears.
Managing Documents Saved
in the Document Server from a
Computer
Using DesktopBinder
Fax documents saved in the Document Server can be viewed and controlled from a network computer
with DesktopBinder V2 Lite or DesktopBinder V2 Professional installed.
The following operations are available using the computer:
Using a Web browser
Fax documents saved in the Document Server can be viewed using a
Web browser on a network computer.
These fax documents can also be
downloaded to the computer's hard
disk. See p.121 “Viewing Fax Information Using a Web Browser”.
•
Displaying documents (Easy Viewer)
• Displaying document properties
(Properties)
• Deleting documents (Delete)
• Copying documents to a computer
(Copy)
• Printing documents (Print from
Document Server)
• Exporting documents as files (Export Document)
For more information, see DesktopBinder V2 operating instructions and
Help.
Note
r Settings made in System Settings
enable you to send documents to
the delivery server. See “Setting up
the Machine on a Network”, Net-
work Guide.
7
135

Simplifying the Operation
7
136
 Loading...