

Page 1
DRAFT 2002/08/02
67
3. User Tools
Accessing User Tools
You can change or set the machine's
default with User Tools. This section
is intended for the machine administrator.
Reference
For the User Tools menu, see ⇒
p.69 “User Tools Menu”.
AAAA
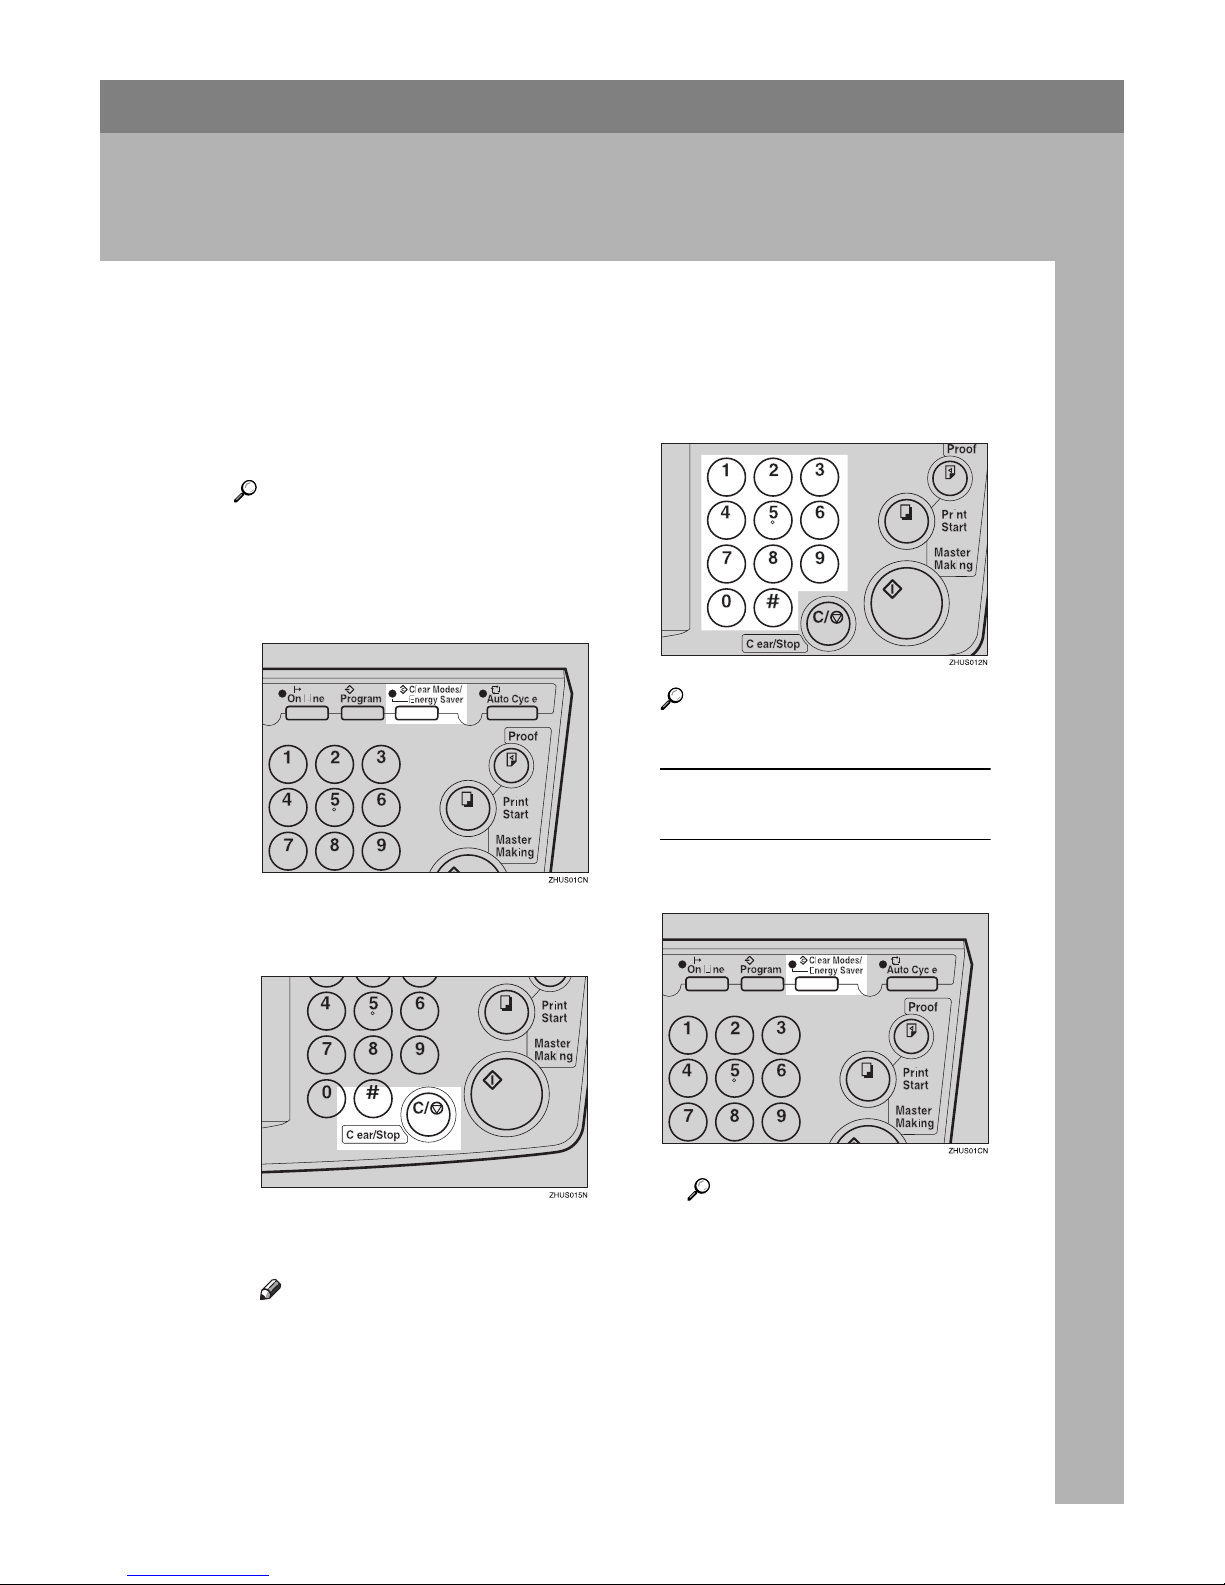
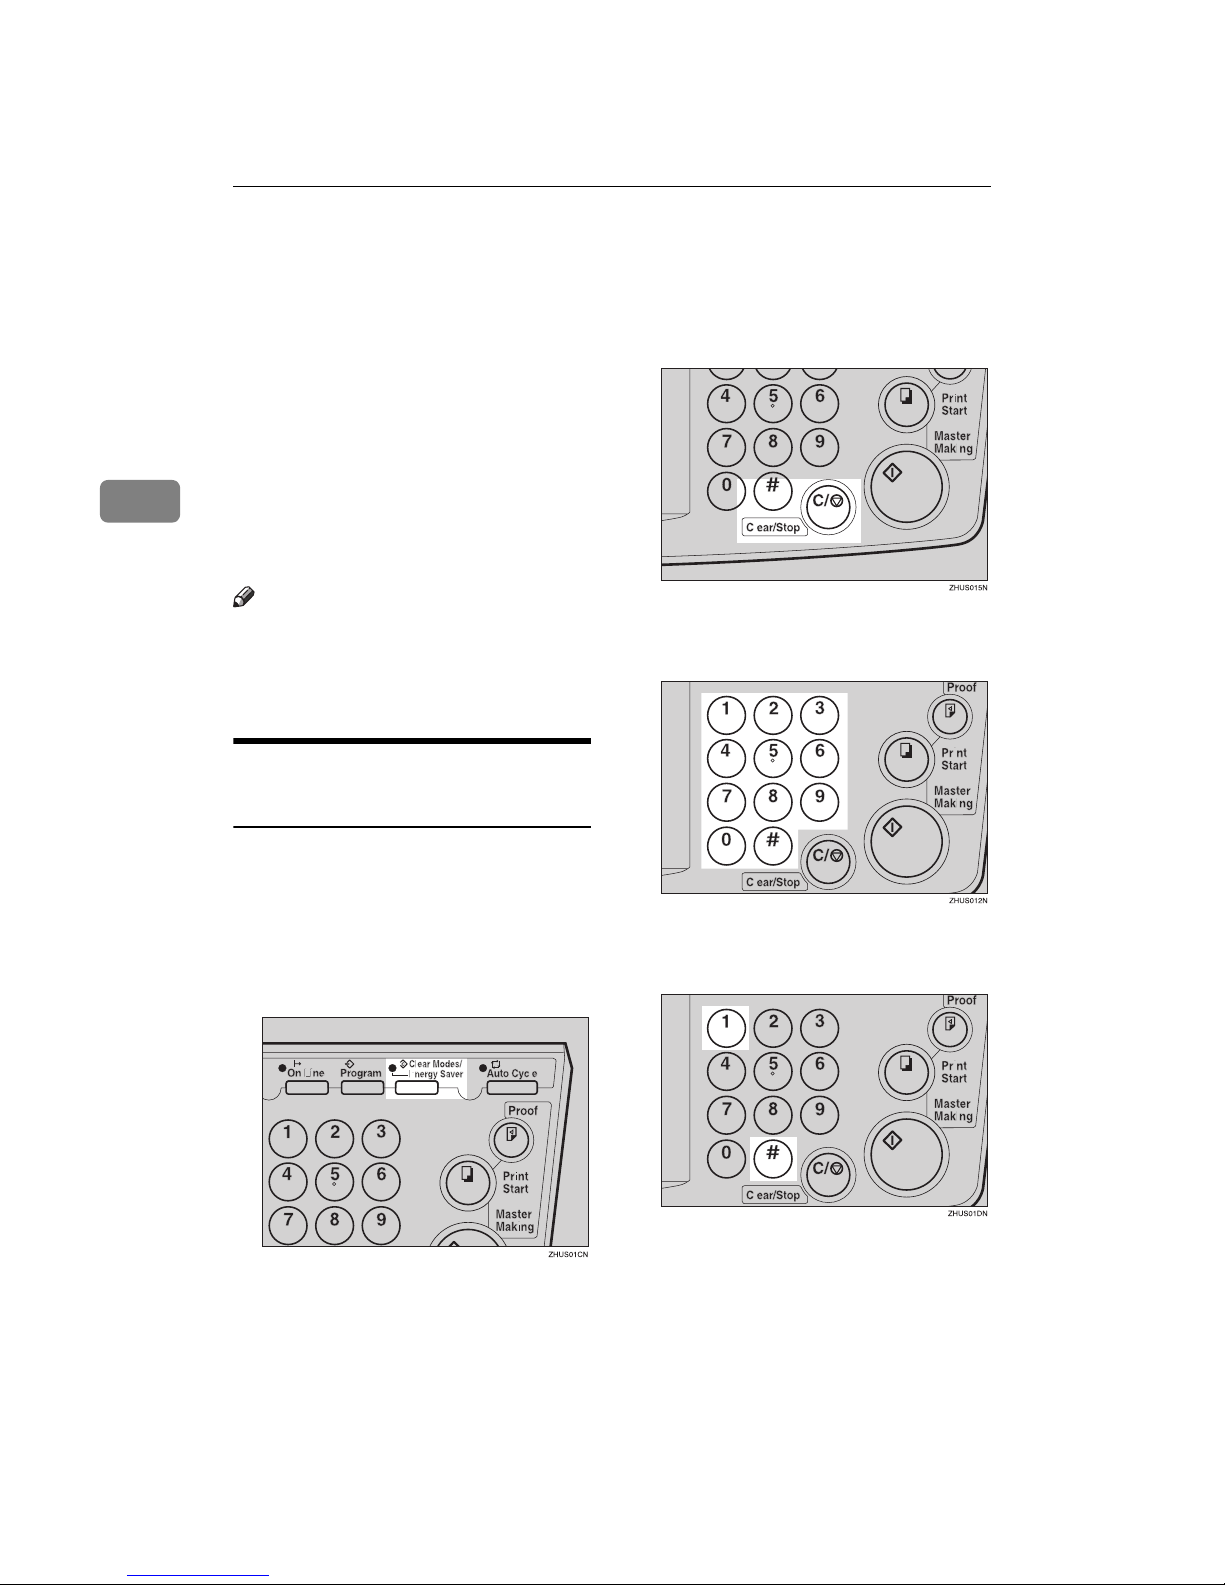
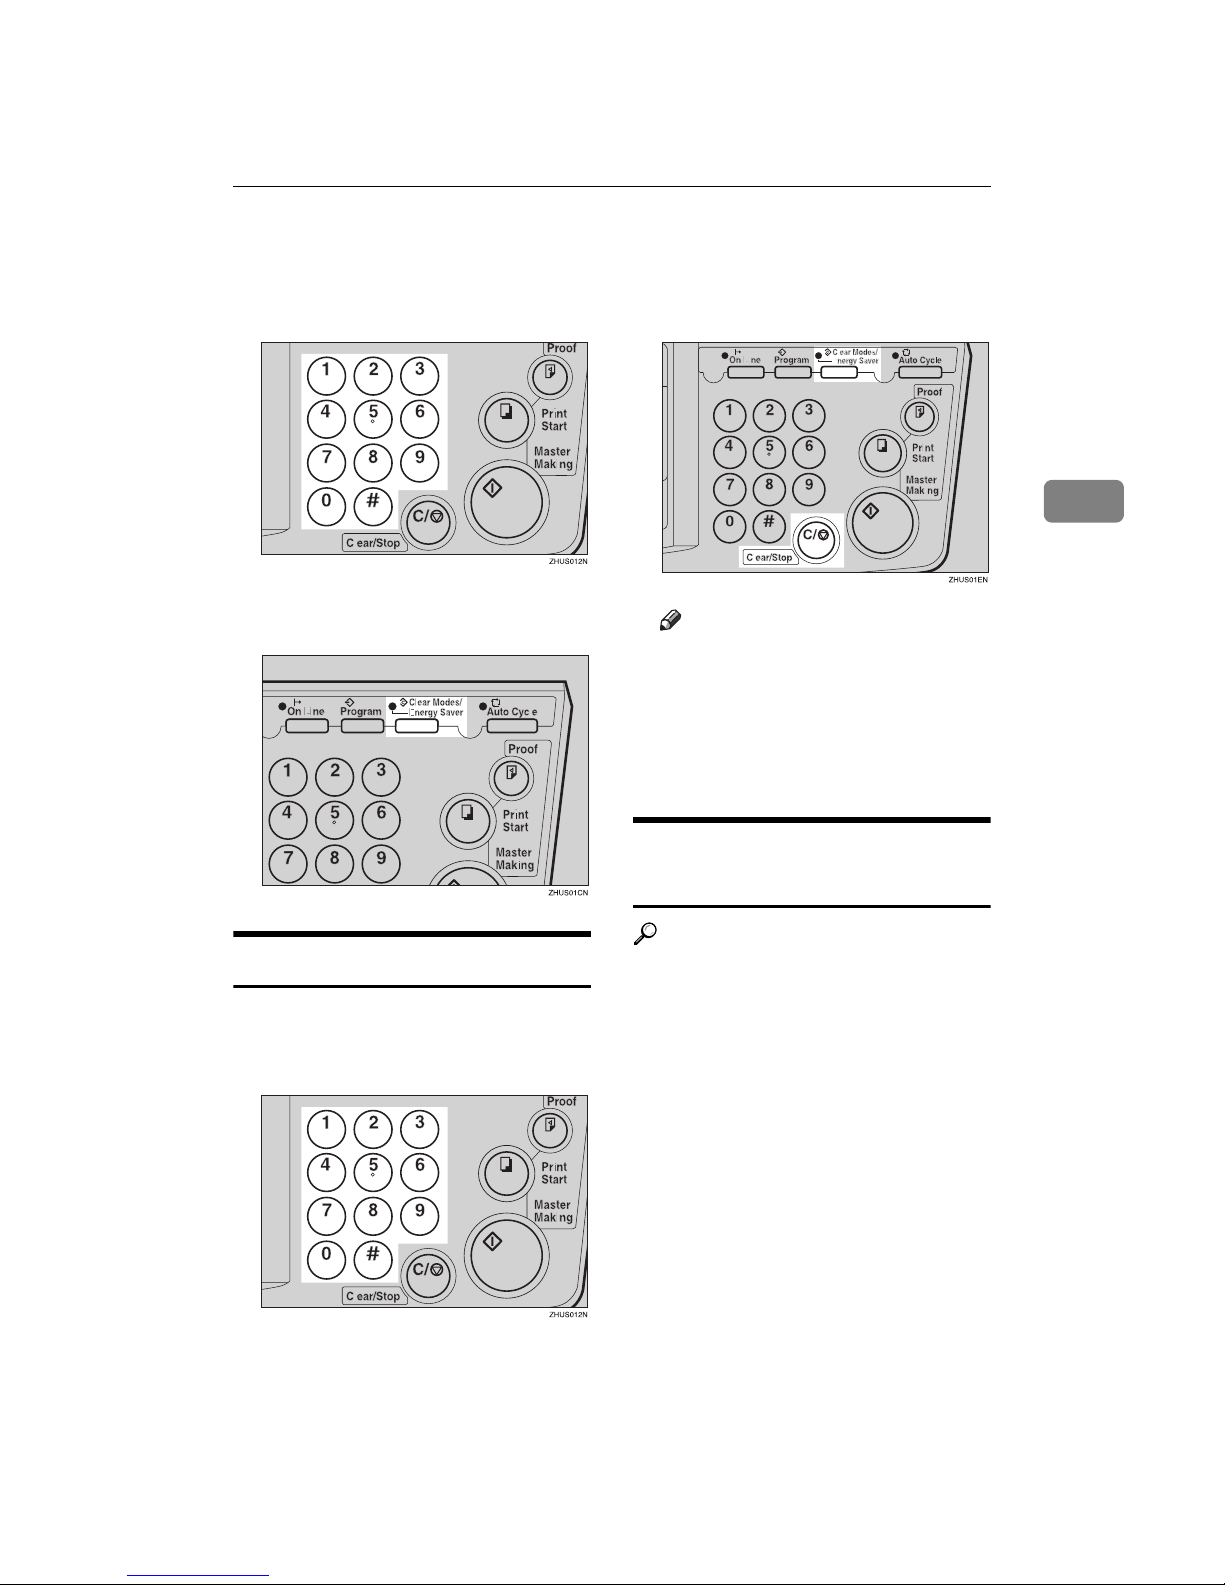
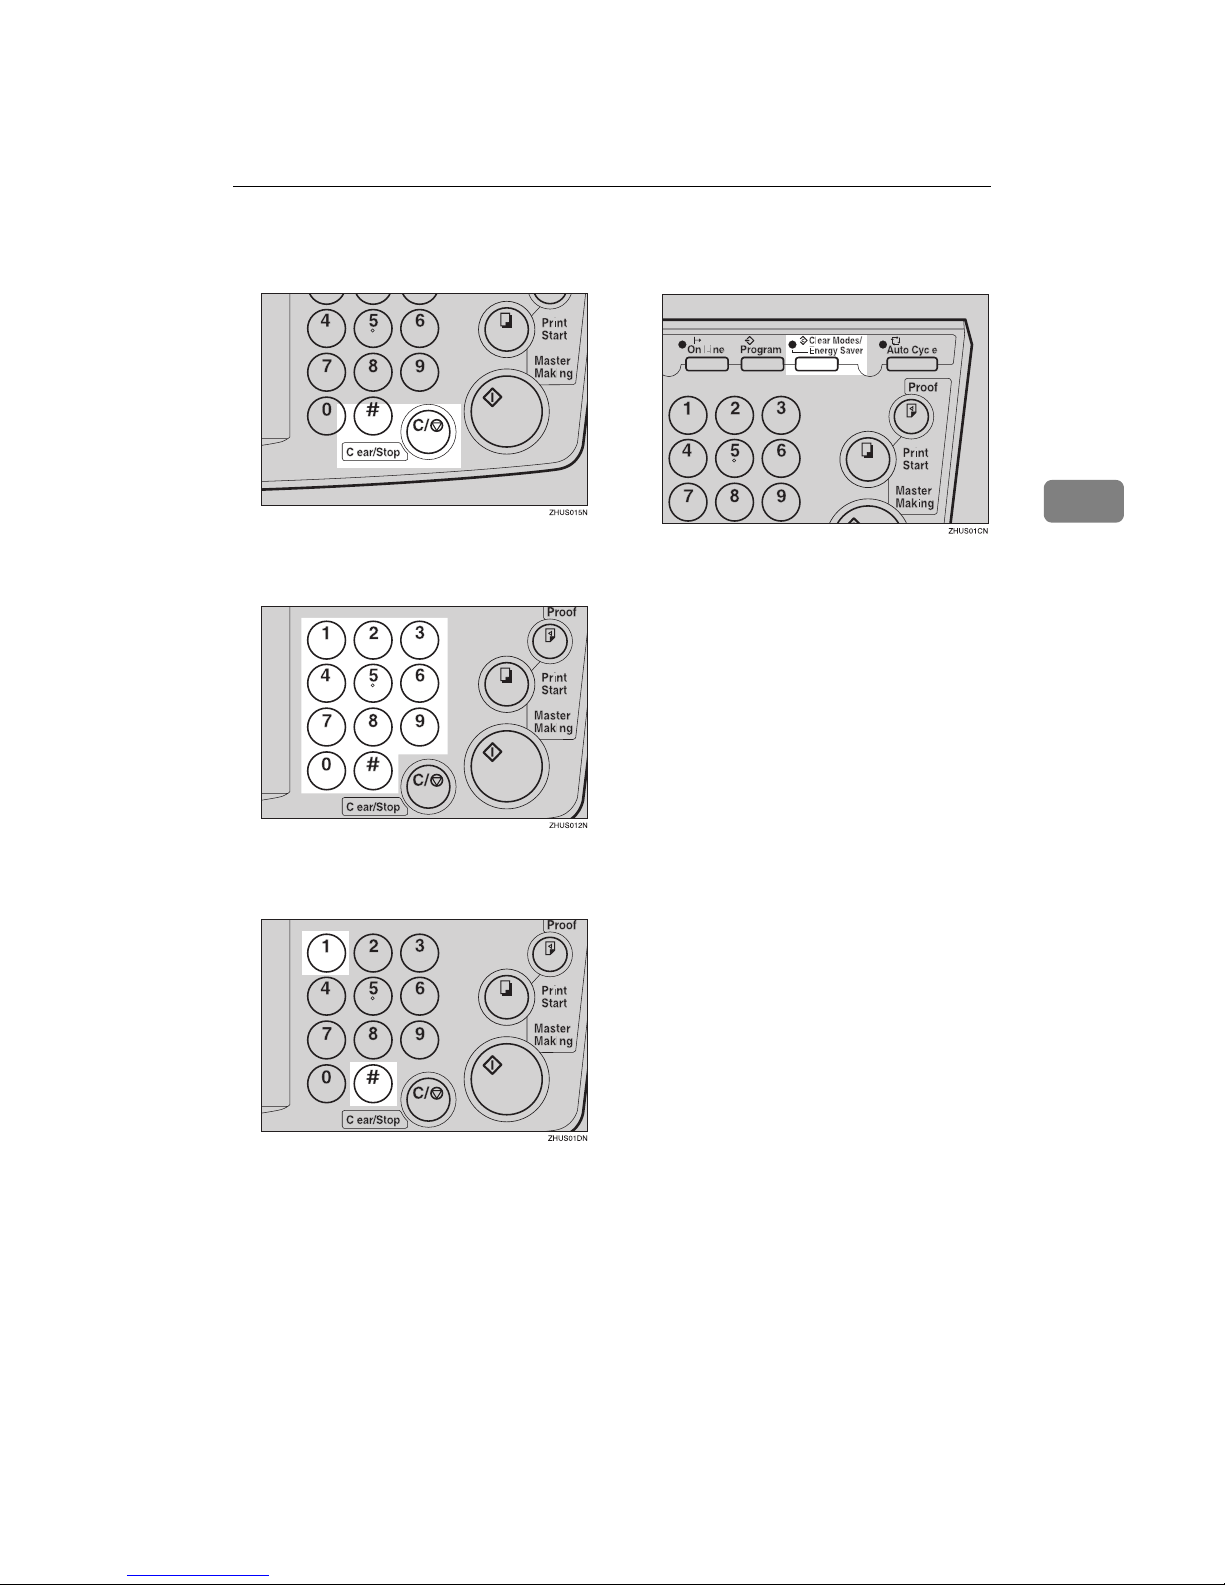
Press the {{{{Clear Modes/Energy Saver}}}} key.
BBBB
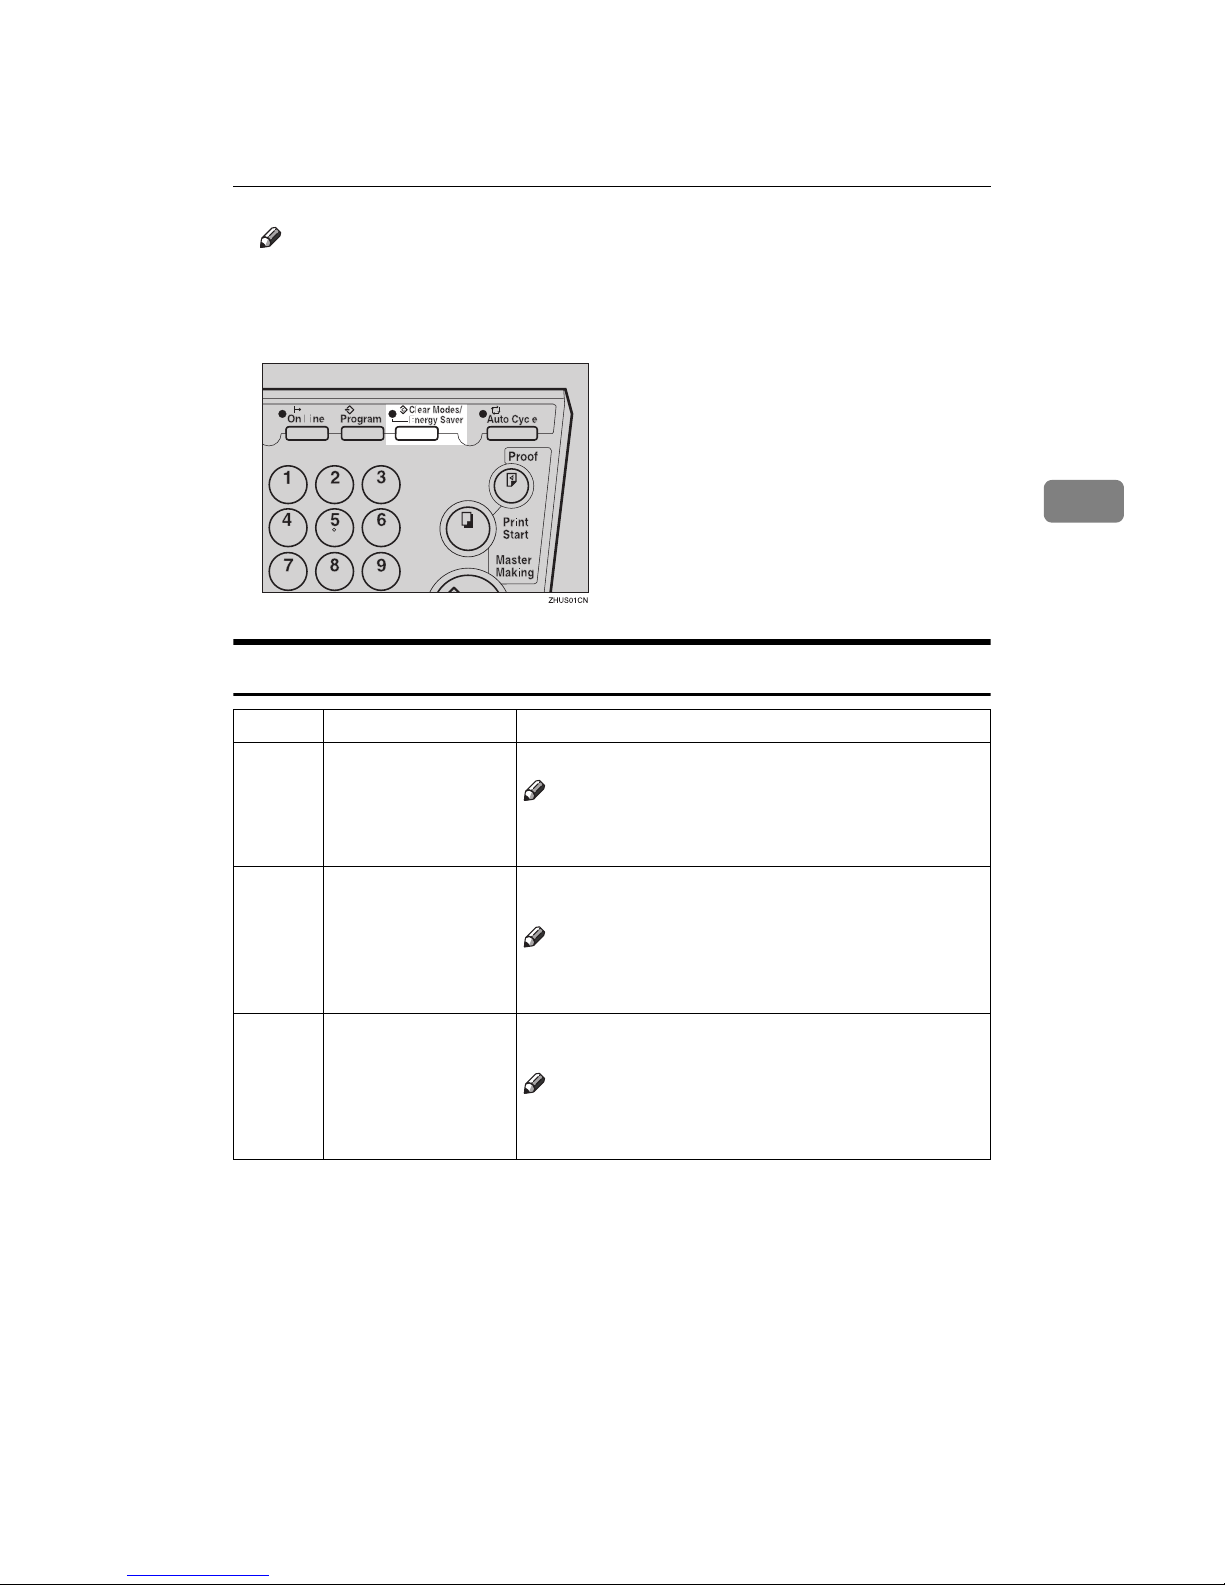
Hold down the {{{{Clear/Stop}}}} key
for at least 3 seconds.
The User Tools display appears on
the guidance display.
Note
❒ If you press the wrong key, try
pressing the above keys from
the beginning.
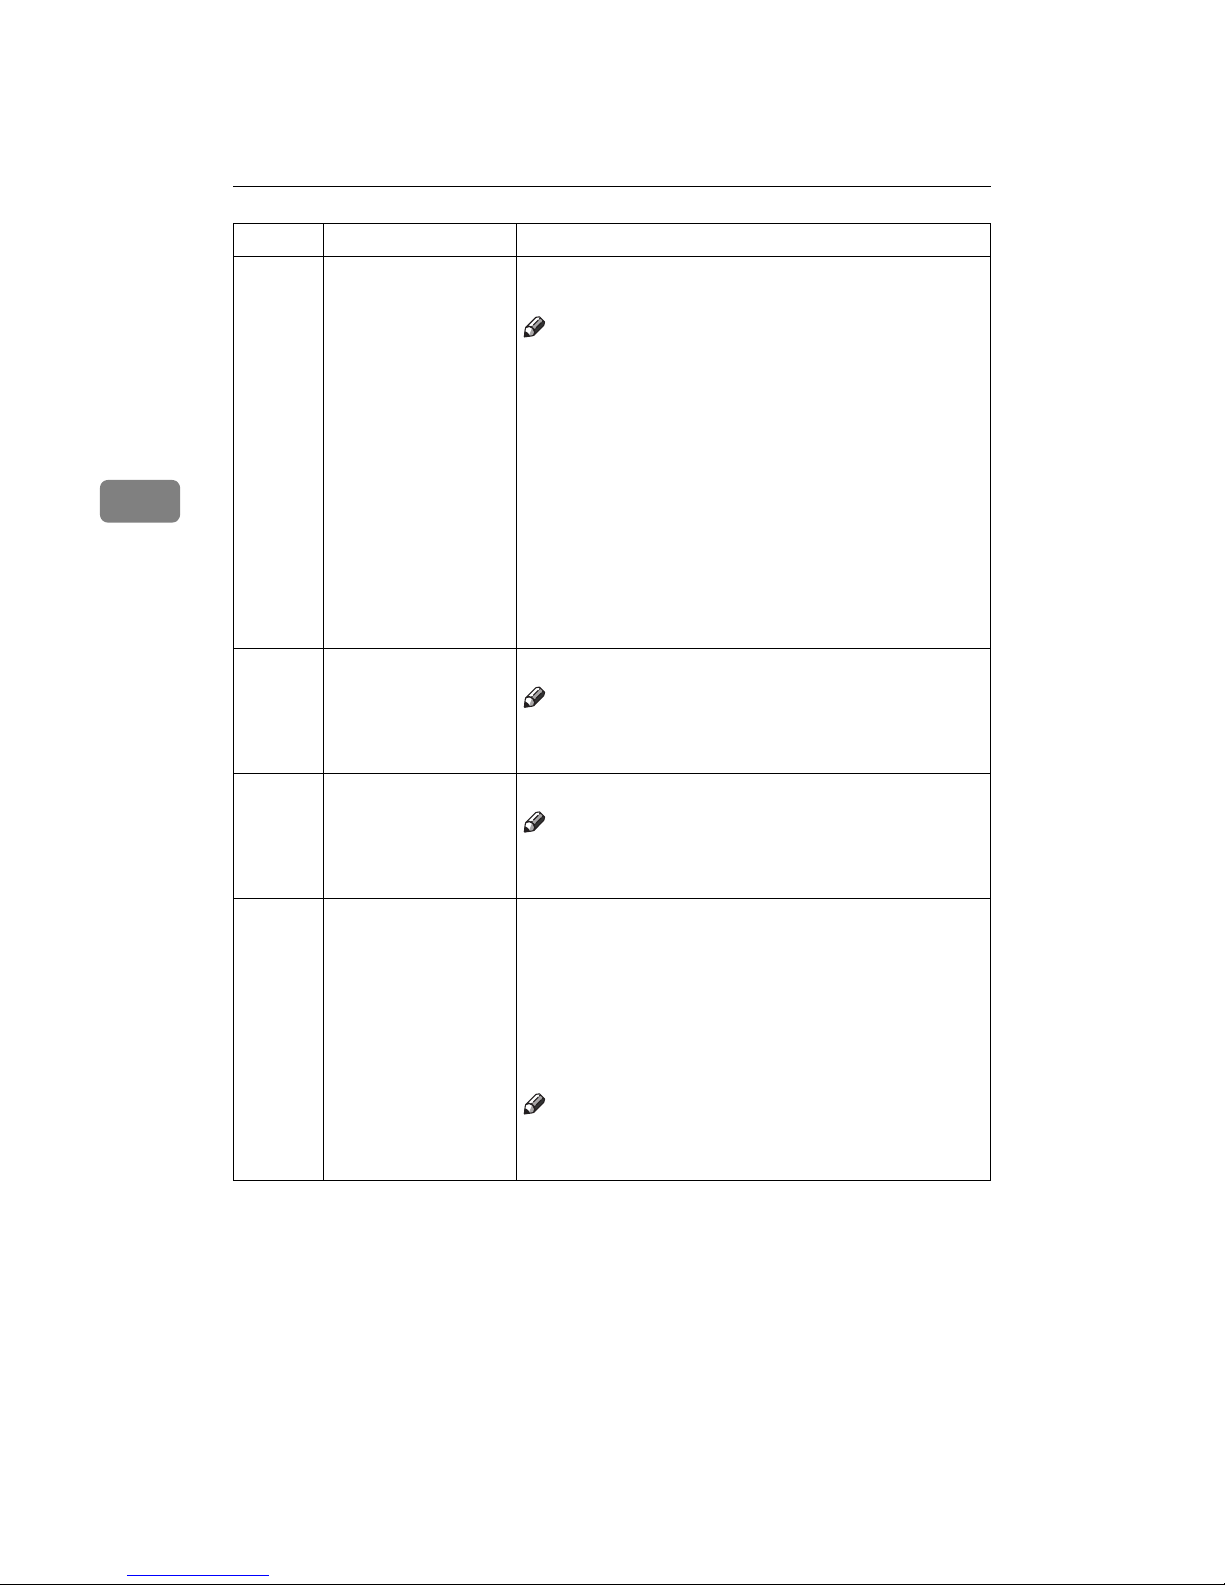
CCCC
With the number keys, enter the
desired user tool number.
Reference
See ⇒ p.69 “User Tools Menu”.
When you want to leave User
Tools
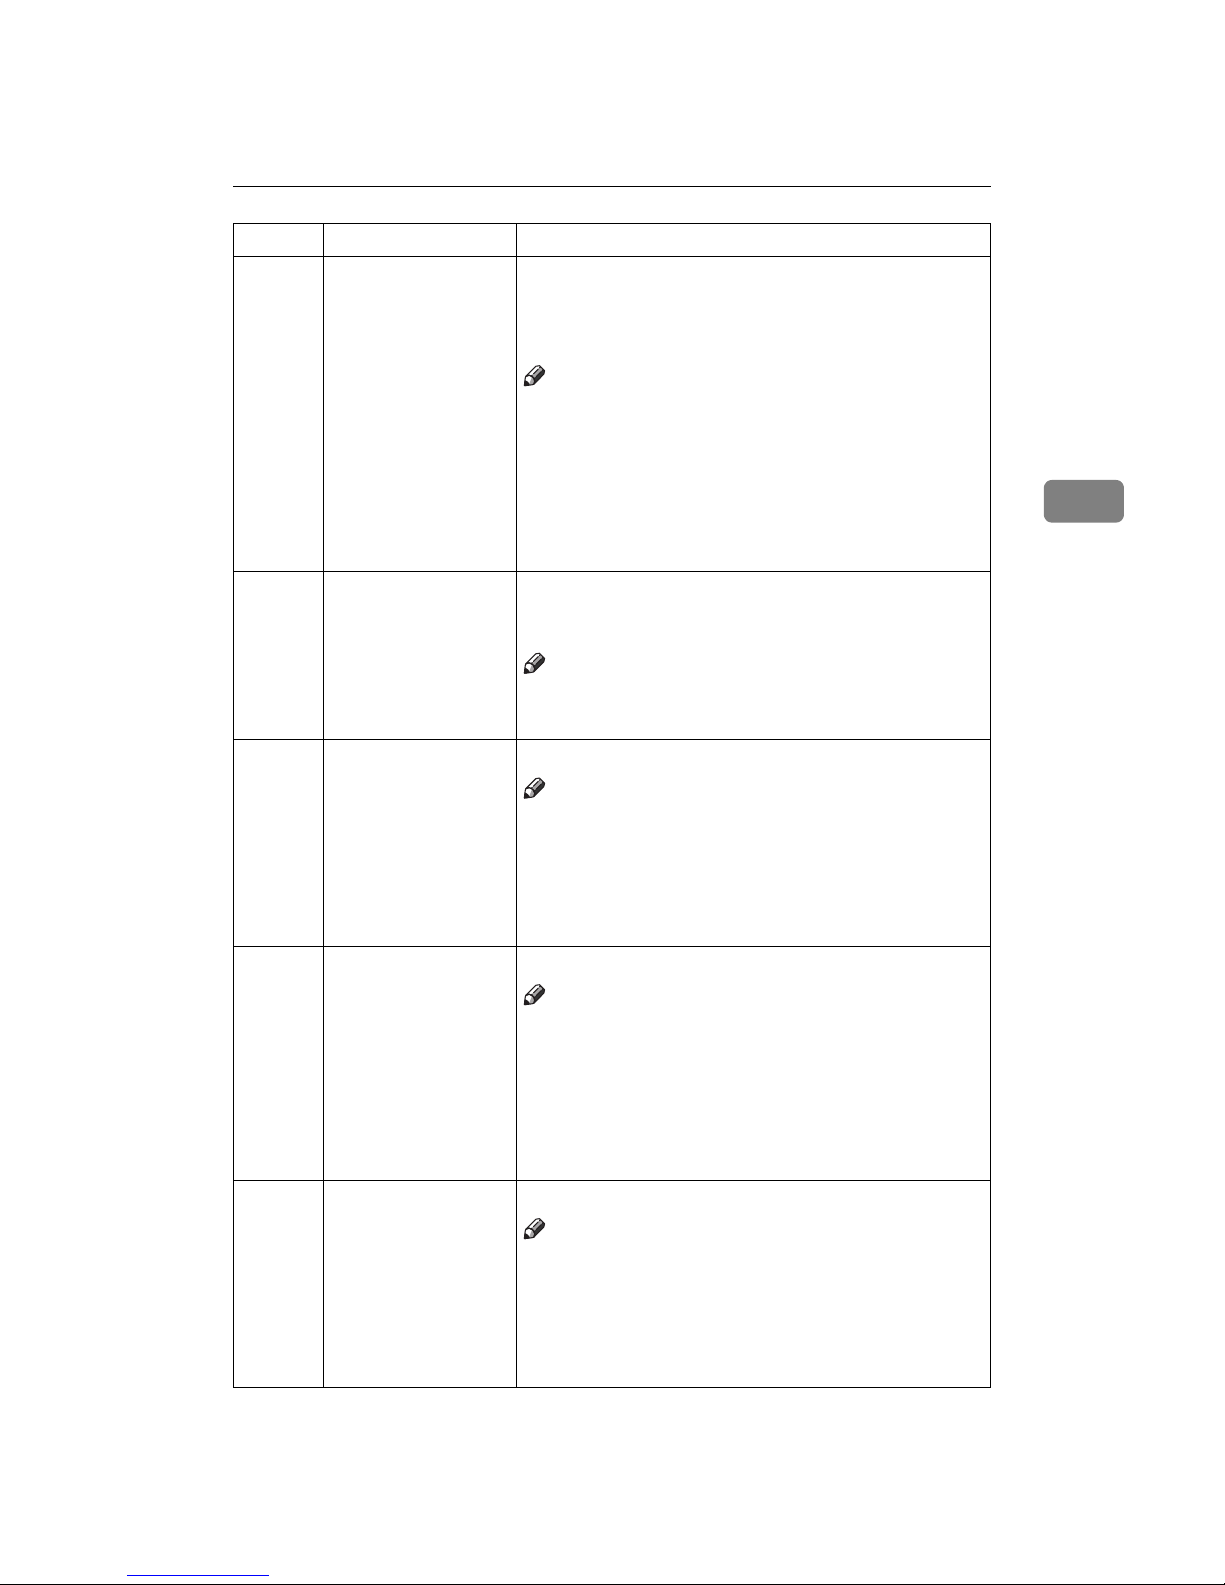
A Press the {{{{Clear Modes/Energy
Saver}}}} key.
Reference
If you want to change the settings of a selected user tool
number, see ⇒ p.68 “Chang-
ing the Settings of User
Tools”.
Page 2

DRAFT 2002/08/02
User Tools
68
3
Changing the Settings of User Tools
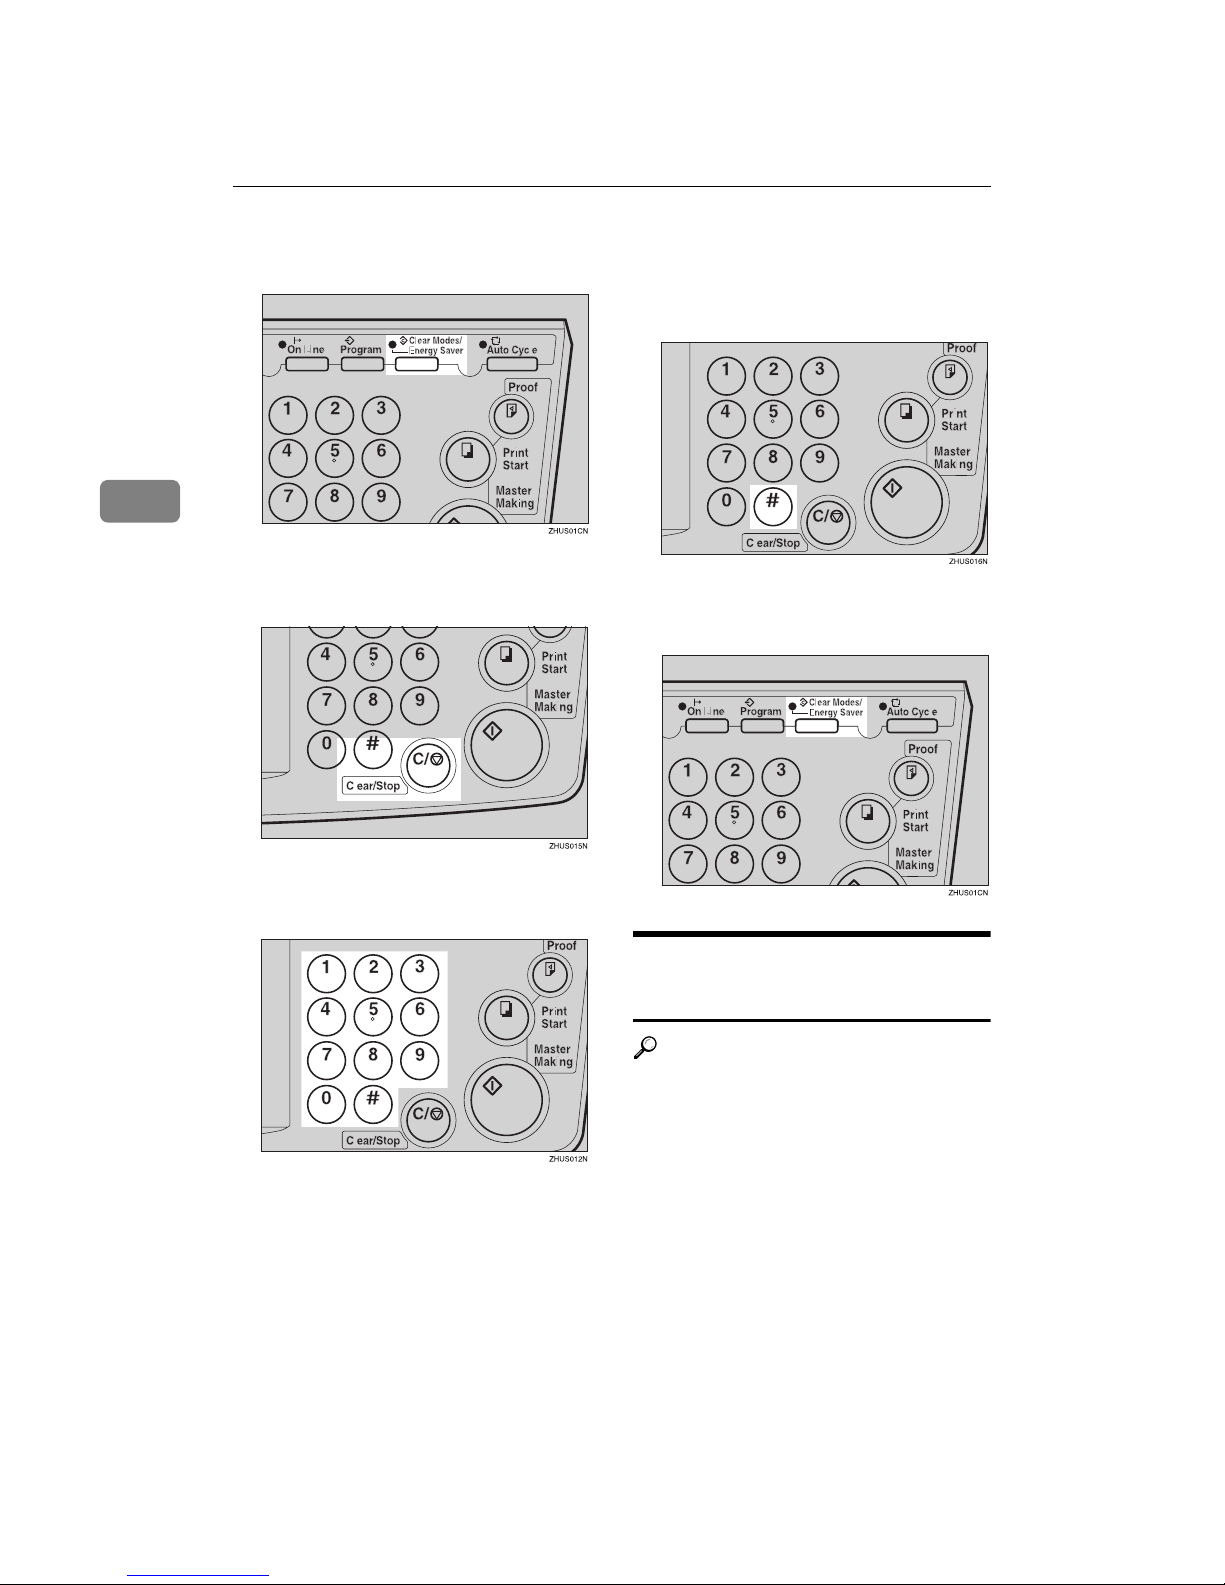
AAAA
After entering the desired user tool number, press the {{{{qqqq}}}} key.
The value or mode set at the factory will be displayed at the end of the second
line on the guidance display.
Note
❒ If you designate the wrong number, press the {{{{Clear Modes/Energy Saver}}}}
key. Then, re-enter the desired number.
BBBB
Enter the desired value or mode with the number keys.
CCCC
Press the {{{{qqqq}}}} key to store the desired value or mode.
Page 3
DRAFT 2002/08/02
Changing the Settings of User Tools
69
3
Note
❒ If you enter the wrong value or mode, press the {{{{Clear Modes/Energy Saver}}}}
key. Then, go back to step A.
DDDD
Press the {{{{Clear Modes/Energy Saver}}}} key to leave User Tools.
User Tools Menu
No. Mode Function
5 Tape Marker Off Specifies whether the optional tape dispenser can be used.
Note
❒
Default: 0
❒ Adjustment value: 0: No 1: Yes
10 Min. Print Specifies the minimum number of prints that can be en-
tered with the number keys.
Note
❒ Default: 0
❒ Adjustment value: 0 to 9999
11 Max. Print Specifies the maximum number of prints that can be en-
tered with the number keys.
Note
❒ Default: 0
❒ Adjustment value: 0 to 9999
Page 4
DRAFT 2002/08/02
User Tools
70
3
12 Set Language If you want to change the language used by the guidance
display, select the language version.
Note
❒ Default: 1
❒ Adjustable value:
• 0: Japanese
• 1: English
• 2: German
• 3: French
• 4: Italian
• 5: Spanish
• 6: Chinese
• 7: Dutch
• 8: Portuguese (BRAZIL)
13 Set Size Mode Change the size mode.
Note
❒ Default: 0
❒ Adjustment value: 0: mm 1: Inch
20 Buzzer On Turns the buzzer ON or OFF.
Note
❒ Default: 0
❒ Adjustment value: 0: No 1: Yes
21 Prints/Master Cost The optional key counter usually counts the number of
prints made regardless of the number of masters used. For
accounting purposes, it is possible for the key counter to be
incremented by a value between 0 and 50 whenever a new
master is used.
Example: The key counter is adjusted to increase by 20 for
each master fed. If 100 copies have been made and the master is replaced, the key counter will increase by 120.
Note
❒ Default: 0
❒ Adjustment value: 0 – 50
No. Mode Function
Page 5
DRAFT 2002/08/02
Changing the Settings of User Tools
71
3
25 Clear 2 In 1 By default, when master making is finished in Combine
Copies mode, this mode stays selected for the next master
making.
If you want master making turned off, select “1”.
Note
❒ Default: 0
❒ Adjustable value: 0: No 1: Yes
❒ Even if you select “1” in this mode, Combine Copies
mode is not cleared when the next original are set in the
optional document feeder.
❒ For details about Combine Copies, see ⇒ p.46 “Com-
bine—Combining 2 Originals onto One Print”.
29 Pht Backgrnd Correct When you make prints in Photo or Letter/Photo mode, the
background of the prints might become dirty. You can prevent this using this function.
Note
❒ Default: 0
❒ Adjustment value: 0: No 1: Yes
40 Original Specifies the image mode at power on.
Note
❒ Default: 0
❒ Adjustment value:
• 0: Letter mode
• 1: Letter/Photo mode
• 2: Photo mode
41 Image density Specifies the image density at power on.
Note
❒ Default: 1
❒ Adjustment value:
• 0: Light
• 1: Standard
• 2: Dark
• 3: Darker
42 Print Speed Specifies the printing speed at power on.
Note
❒ Default: 2
❒ Adjustment value:
• 1: 80 sheets/minute
• 2: 100 sheets/minute
• 3: 130 sheets/minute
No. Mode Function
Page 6

DRAFT 2002/08/02
User Tools
72
3
43 Auto Cycle Mode Specifies whether Auto Cycle mode is selected at power
on.
Note
❒ Default: 1
❒ Adjustment value: 0: No 1: Yes
46 Fine Mode Specifies whether Fine mode is selected when the power is
turned on.
Note
❒ Default: 0
❒ Adjustment value: 0: No 1: Yes
47 Swap Master Making
Key
Specify to switch between Print Start key and Master Making key functions.
Note
❒ Default: 0
❒ Adjustment value: 0: No 1: Yes
81 Quality Start No. You can select how many times Quality Start mode is car-
ried out for each master making.
When you set the Quality Start function, the bold letter or
solid images might be light.
Note
❒ Default: 0
❒ Adjustment value: 0 to 3 times
82 Skip Feed No. When you use the Skip Feed Printing function, you can se-
lect how many times the drum rotates while one sheet of
paper is fed.
Note
❒ Default: 2 times
❒ Adjustment value: 1 to 9 times
84 Auto Multi copy If you set an original on the exposure glass and press the
{{{{Combine }}}} key and {{{{Master Making}}}} key, two identical images are printed on one sheet.
Note
❒ Default: 0
❒ Adjustment value: 0: No 1: Yes
❒ For details about Combine, see ⇒ p.46 “Combine—
Combining 2 Originals onto One Print”.
No. Mode Function
Page 7
DRAFT 2002/08/02
Changing the Settings of User Tools
73
3
87 Memory Print Each print set or stack will contain the number of prints
you program in Memory mode.
If set to Memory, Memory mode will work.
If set to Stack, Stack mode will work.
Note
❒ Default: 0
❒ Adjustment value: 0: Memory 1: Stack
❒ For details about Memory mode, see ⇒ p.43 “Memory
Mode—Group Printing from Different Originals”.
88 Auto Memory/Class In this function, the machine stops printing for 2 seconds
after one set of prints are completed in Memory mode and
Class mode. This gives you the chance to separate each set
when you do not have an optional tape dispenser.
For example, you can remove prints one by one from the
paper delivery tray or insert one sheet of paper between
the prints.
Note
❒ Default: 0
❒ Adjustment value: 0: No 1: Yes
113 Resettable Count Used to display the total number of masters and prints.
• M: Total number of masters
• P: Total number of prints
114 CLR Resettable Count Clears the resettable master/print counter.
Note
❒ Default: 0
❒ Adjustment value: 0: No 1: Yes
120 User Code Mode Selects user code mode. When you set this function, you
have to also specify the auto reset time. For details about
user code mode, see ⇒ p.76 “User Codes”.
Note
❒ Default:
• User Code mode: 0
• Auto Reset time: 0
❒ Adjustment value:
• User Code mode: 0: No 1: Yes
• Auto Reset time: 0: No, 1 – 5 minutes
No. Mode Function
Page 8
DRAFT 2002/08/02
User Tools
74
3
121 UC Count Displays the number of masters and prints made in each
user code.
Note
❒ M: Number of masters
❒ P: Number of prints
122 Clear UC Count Clear each user code counter.
Note
❒ Default: 0
❒ Adjustment value: 0: No 1: Yes
123 Total UC Count Display the total number of masters and prints for all the
20 user codes.
Note
❒ M: Number of masters
❒ P: Number of prints
124 Clear Total UC Count Clear the total user code counter.
Note
❒ Default: 0
❒ Adjustment value: 0: No 1: Yes
125 Auto Energy Saving You can set the time until the Energy Saver mode starts.
Note
❒ Default: 3 Min. (minutes)
❒ Adjustment value: 0: No, 1 – 120: Min
160 Side Ers. Adjust the default side edge margin width in Edge Erase
and Center/Edge Erase mode.
Note
❒ Default:
• Metric Version: 5 mm
• Inch Version: 0.2"
❒ Adjustable value:
• Metric Version: 2 – 20 mm
• Inch Version: 0.1" – 0.8"
No. Mode Function
Page 9
DRAFT 2002/08/02
Changing the Settings of User Tools
75
3
Entering decimal values in No. 160–162:
• Press the {{{{Program}}}} key to enter a decimal point.
• Press the {{{{qqqq}}}} key to fix the value.
161 Center Ers. Adjust the default center margin width in Center/Edge
Erase mode.
Note
❒ Default:
• Metric version: 10 mm
• Inch version: 0.4"
❒ Adjustable value:
• Metric version: 4 – 60 mm
• Inch version: 0.2" – 2.3"
162 Horizontal Ers. Adjust the default horizontal edge (top and bottom) mar-
gin in Edge Erase and Center/Edge Erase mode.
Note
❒ Default:
• Metric version: 5 mm
• Inch version: 0.2"
❒ Adjustable value:
• Metric version: 2 – 20 mm
• Inch version: 0.1" – 0.8"
170-172 Ers. **1L
Ers. **2L
Ers. **3L
Set up and register three original sizes for when performing edge erase of non-standard size originals, or performing center frame erase.
Note
❒ Default:
0
×
0 mm
❒ Adjustable value: 100-257 mm × 100-364 mm
No. Mode Function
Page 10
DRAFT 2002/08/02
User Tools
76
3
User Codes
If the machine is set to use the User
Code function, operators must enter
their user codes before the machine
can operate. The machine keeps count
of the number of prints made under
each user code.
In this mode, the following 20 user
codes (fixed) can be used to access the
machine: 382, 191, 182, 173, 164, 155,
146, 137, 128, 119, 482, 291, 282, 273,
264, 255, 246, 237, 228, 219
Note
❒ To prevent unauthorized users
from accessing the machine, note
down the codes and then black out
the codes from this manual.
How to Set User Code Mode (#
120)
The following procedure explains
how to set user code mode. This must
be done before a user code can be entered.
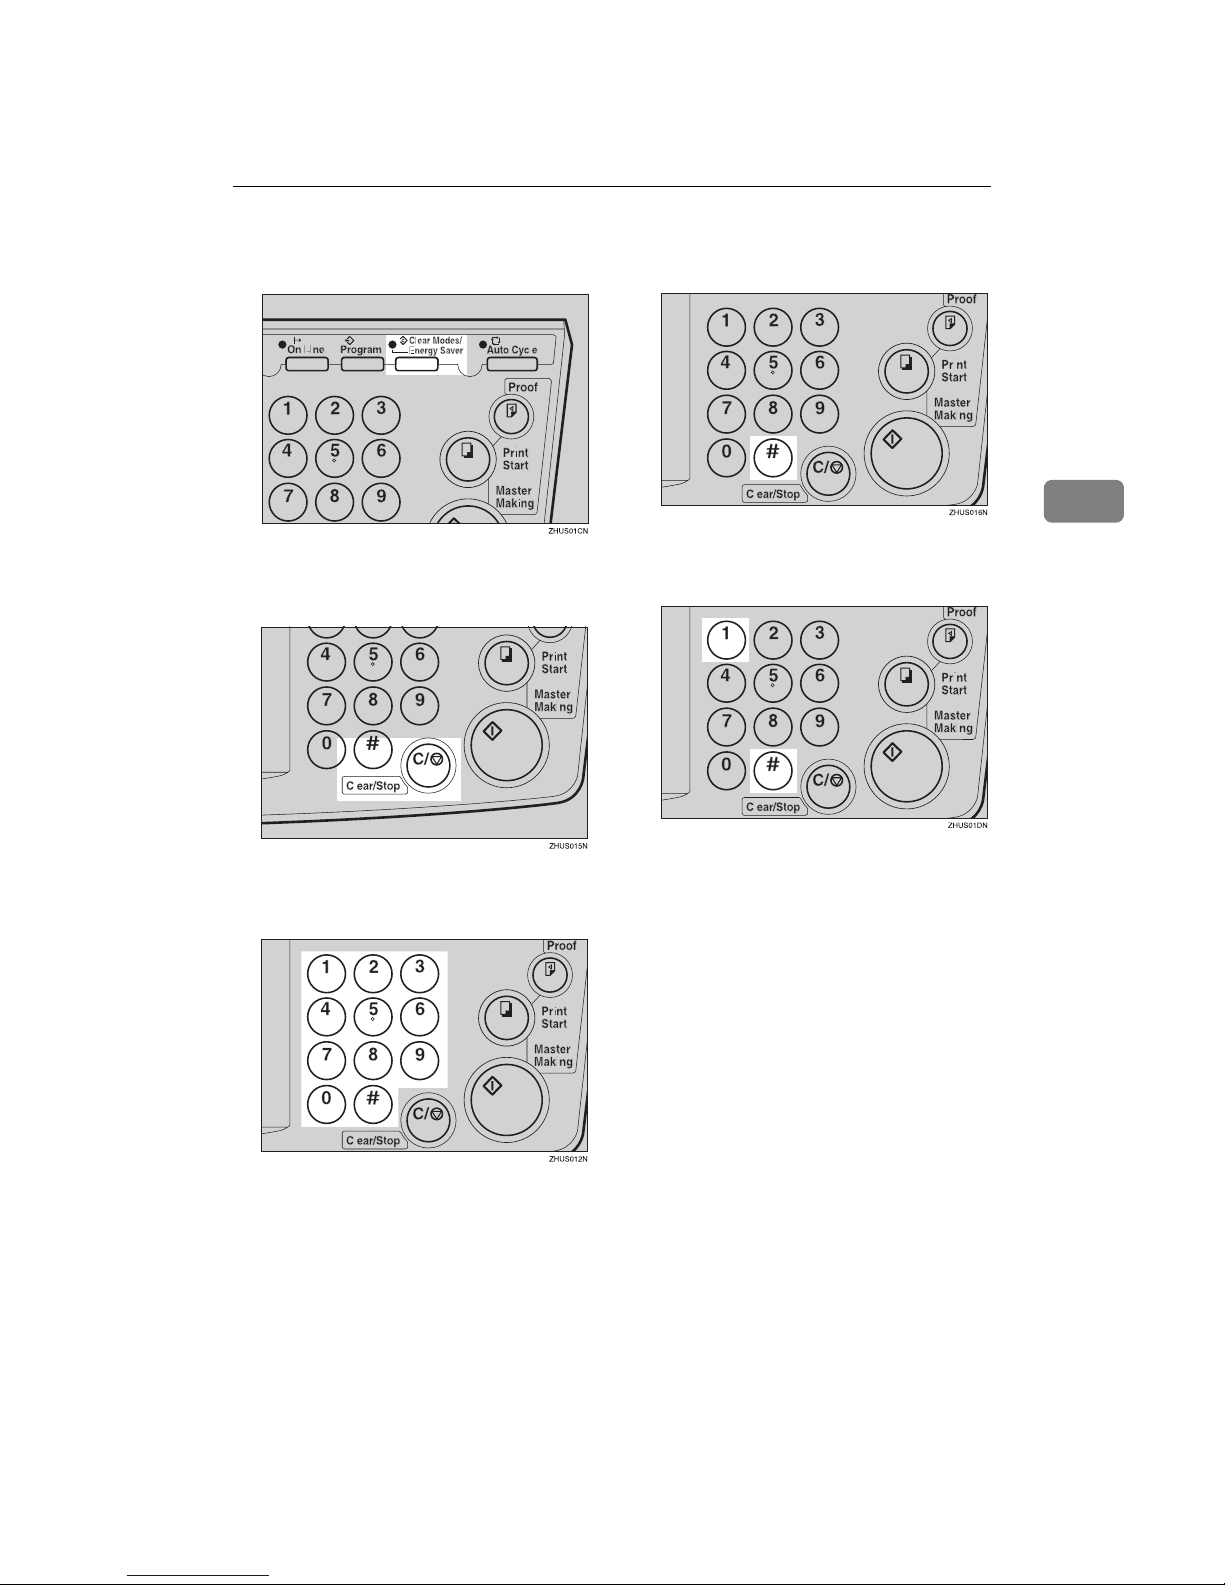
AAAA
Press the {{{{Clear Modes/Energy Saver}}}} key.
BBBB
Hold down the {{{{Clear/Stop}}}} key
for at least 3 seconds.
CCCC
Enter “120” with the number keys
and press the {{{{qqqq}}}} key.
DDDD
Enter “1” (Yes) with the number
keys and then press the {{{{qqqq}}}} key.
Page 11
DRAFT 2002/08/02
User Codes
77
3
EEEE
Specify the Auto Reset time. Enter the desired setting with the
number keys and press the {{{{qqqq}}}}
key.
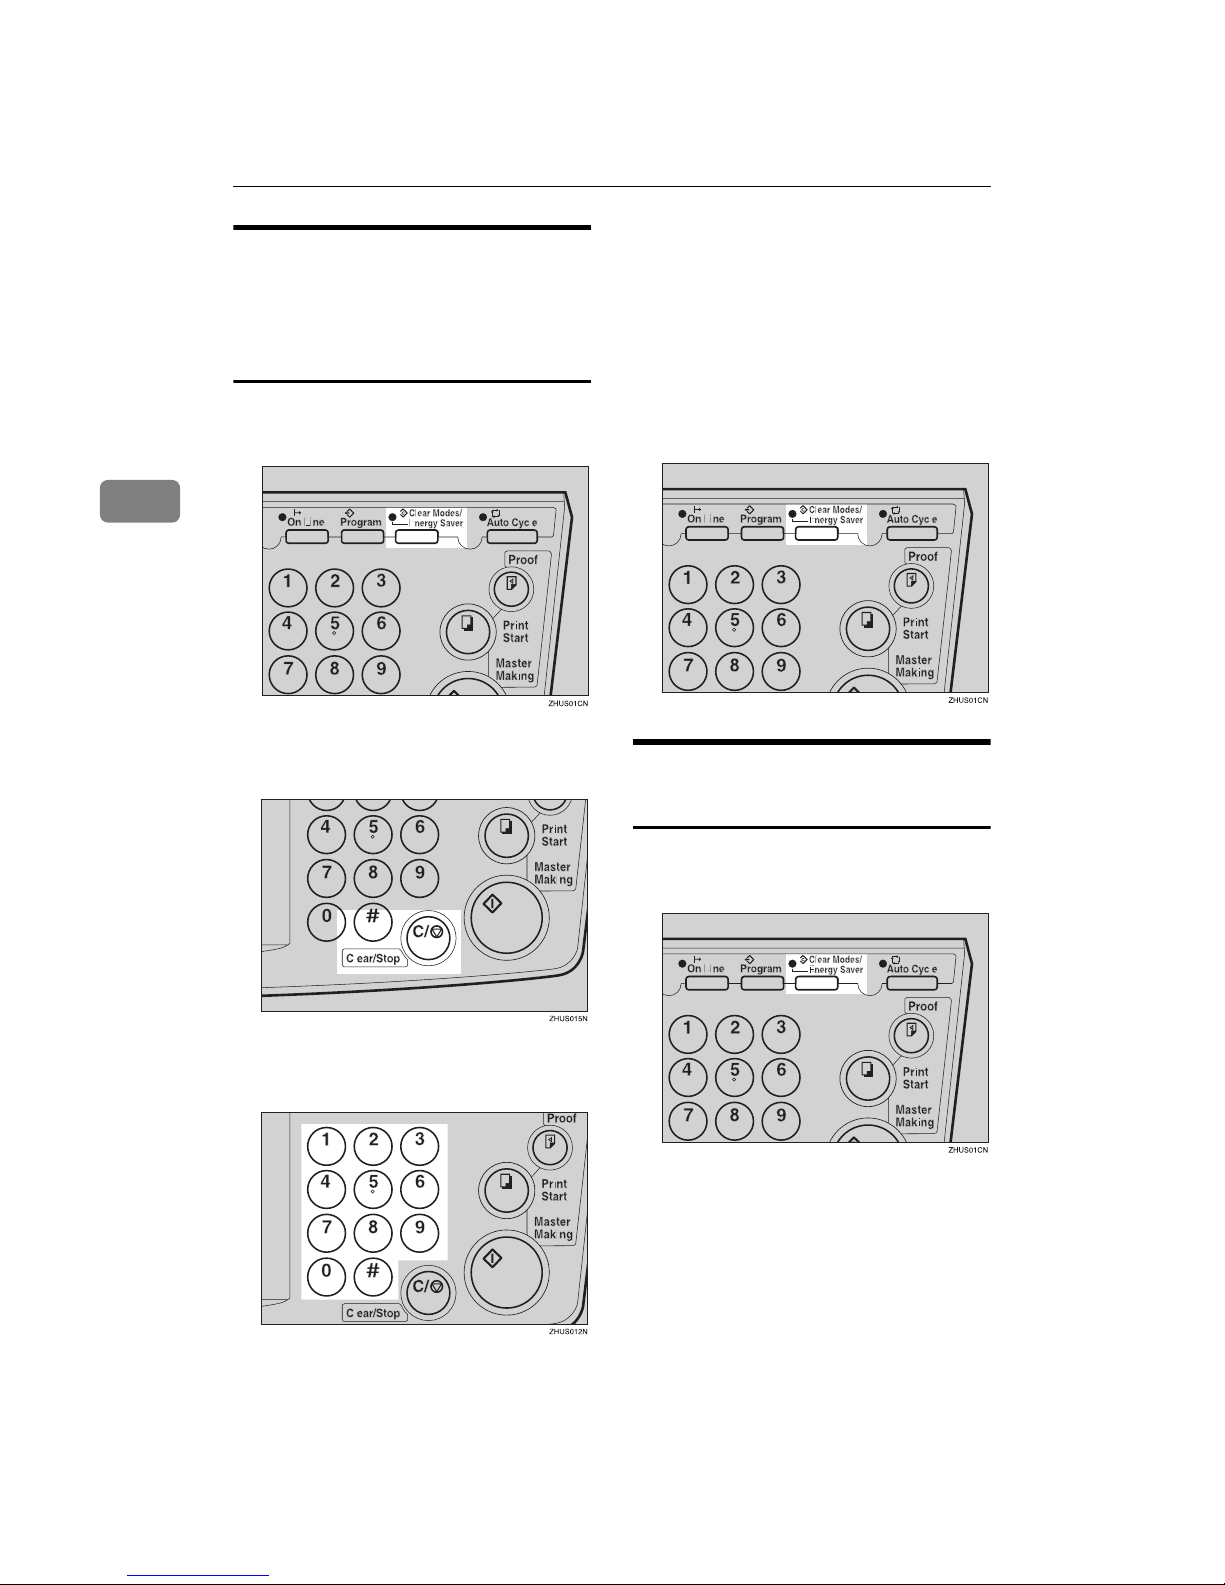
FFFF
Press the {{{{Clear Modes/Energy Saver}}}} key to leave User Tools.
How to Use User Code Mode
AAAA
Enter your assigned 3-digit user
code with the number keys, then
press the {{{{qqqq}}}} key.
BBBB
Make your prints.
CCCC
After you have finished, press the
{{{{Clear/Stop}}}} key while holding
down the {{{{Clear Modes/Energy Sav-
er}}}} key.
Note
❒ This prevents others from mak-
ing prints using your user code.
❒ If you do not follow this step,
the machine will not request the
next user for their codes unless
the auto reset time has expired.
How to Check the User Code
Counter (# 121)
Reference
If you want to check the total masters and prints made under all user
codes, see ⇒ p.80 “How to Check
the Total Number of Masters and
Prints Made Under All User Codes
(# 123)”.
Page 12
DRAFT 2002/08/02
User Tools
78
3
AAAA
Press the {{{{Clear Modes/Energy Saver}}}} key.
BBBB
Hold down the {{{{Clear/Stop}}}} key
for at least 3 seconds.
CCCC
Enter “121” with the number keys
and press the {{{{qqqq}}}} key.
The number of masters and prints
made under the user code “382”
will be displayed in the guidance
display.
DDDD
Keep pressing the {{{{qqqq}}}} key to display the number of masters and
prints made under your user
code.
EEEE
Press the {{{{Clear Modes/Energy Saver}}}} key to leave User Tools.
How to Clear the User Code
Counter (# 122)
Reference
If you want to clear every user
code counter, see ⇒ p.80 “How to
Clear the User Code Total Counter
(# 124)”.
Page 13
DRAFT 2002/08/02
User Codes
79
3
AAAA
Press the {{{{Clear Modes/Energy Saver}}}} key.
BBBB
Hold down the {{{{Clear/Stop}}}} key
for at least 3 seconds.
CCCC
Enter “122” with the number keys
and press the {{{{qqqq}}}} key.
DDDD
Keep pressing the {{{{qqqq}}}} key until
desired user code is displayed.
EEEE
Enter “1” (Yes) with the number
keys and press the {{{{qqqq}}}} key.
FFFF
Press the {{{{Clear Modes/Energy Saver}}}} key to leave User Tools.
Page 14
DRAFT 2002/08/02
User Tools
80
3
How to Check the Total
Number of Masters and Prints
Made Under All User Codes (#
123)
AAAA
Press the {{{{Clear Modes/Energy Saver}}}} key.
BBBB
Hold down the {{{{Clear/Stop}}}} key
for at least 3 seconds.
CCCC
Enter “123” with the number keys
and press the {{{{qqqq}}}} key.
The total number of masters and
prints made under all user codes
will be displayed in the guidance
display.
• M: Number of masters
• P: Number of prints
DDDD
Press the {{{{Clear Modes/Energy Saver}}}} key to leave User Tools.
How to Clear the User Code
Total Counter (# 124)
AAAA
Press the {{{{Clear Modes/Energy Saver}}}} key.
Page 15
DRAFT 2002/08/02
User Codes
81
3
BBBB
Hold down the {{{{Clear/Stop}}}} key
for at least 3 seconds.
CCCC
Enter “124” with the number keys
and press the {{{{qqqq}}}} key.
DDDD
Enter “1” (Yes) with the number
keys and press the {{{{qqqq}}}} key.
EEEE
Press the {{{{Clear Modes/Energy Saver}}}} key to leave User Tools.
Page 16

DRAFT 2002/08/02
User Tools
82
3
Page 17
DRAFT 2002/08/02
83
4. Replenishing Supplies
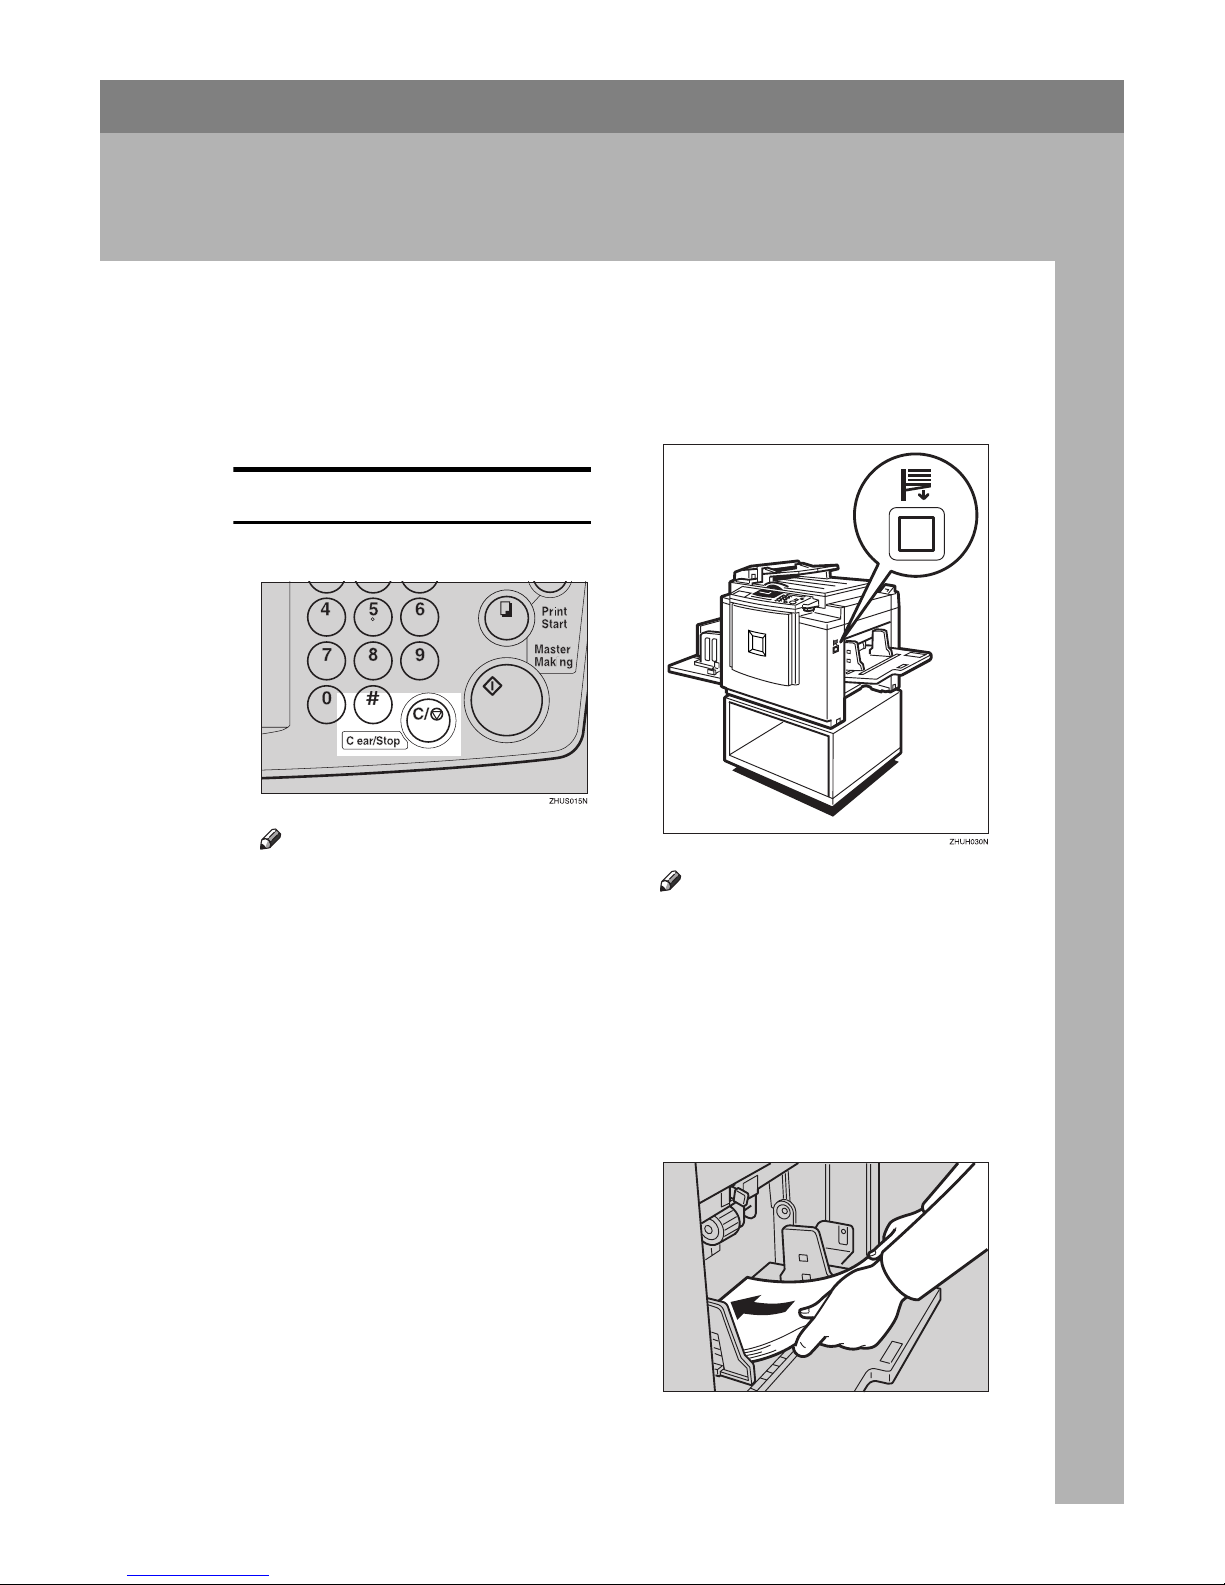
Loading Paper into the Paper Feed Tray
The Load Paper indicator (B) lights
when the paper feed tray runs out of
paper.
Replenishing Paper
AAAA
Press the {{{{Clear/Stop}}}} key.
Note
❒ This step is necessary only if
you want to pause a print run to
replenish paper.
BBBB
Press the {{{{Paper Feed Tray Down}}}}
key.
Note
❒ The paper feed tray will lower
without the key being pressed
when the printing paper runs
out.
❒ The top sheet might remain be-
tween the feed rollers. In this
case, remove the top sheet.
CCCC
Load paper into the paper feed
tray.
TSLY013E
Page 18
DRAFT 2002/08/02
Replenishing Supplies
84
4
Note
❒ Correct paper curl before set-
ting the paper.
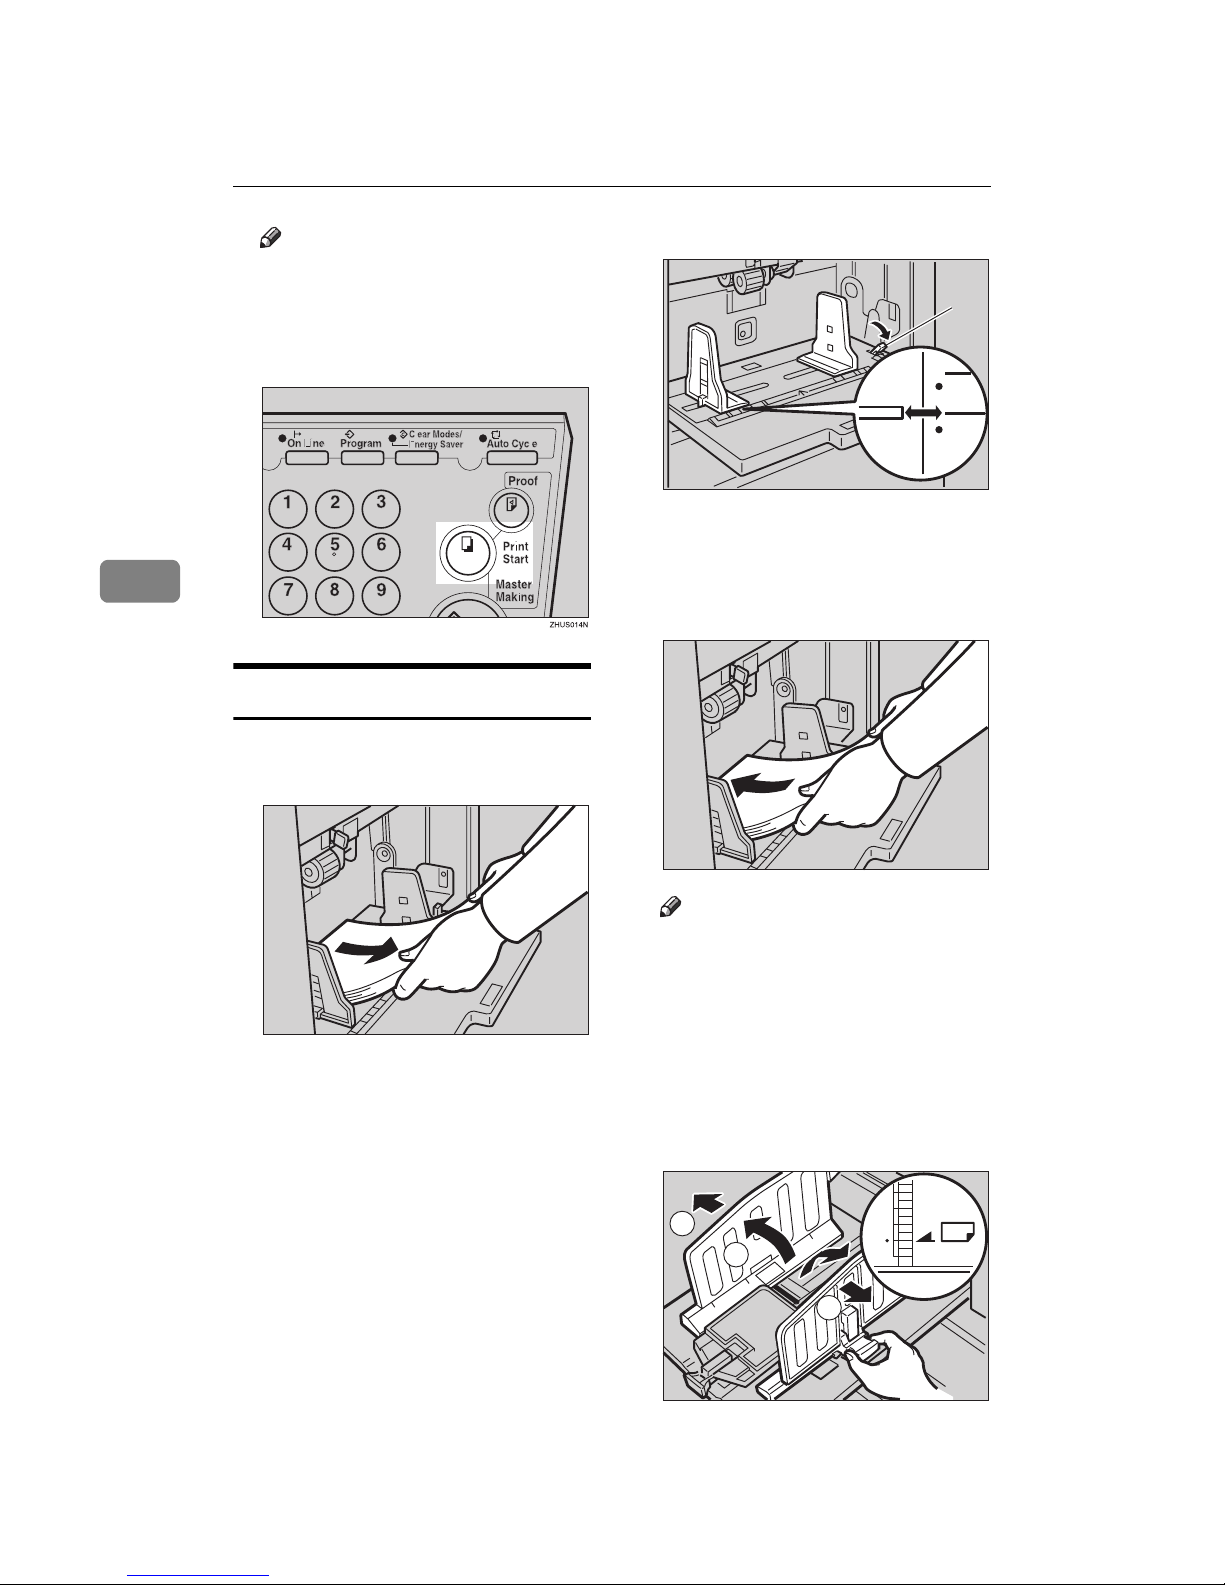
DDDD
Press the {{{{Print Start}}}} key to resume printing.
Changing the Paper Size
AAAA
Remove the paper from the paper
feed tray.
The paper feed tray will lower.
BBBB
Shift the paper feed side plates
lock lever forward. Adjust the paper feed side plates to match the
paper size.
1: Paper Feed Side Plates Lock Lever
CCCC
Load paper into the paper feed
tray.
Note
❒ Correct any paper curl before
setting the paper.
❒ Make sure that the side plates
touch the paper lightly.
❒ Shift the lock lever to its original
position.
DDDD
Adjust the side plates and the end
plate.
TSLY016E
TSLH01AE
1
TSLY013E
2
1
2
1
TSLH030E
Page 19
DRAFT 2002/08/02
When the Add Ink Indicator (j) Lights
85
4
When the Add Ink Indicator (j
jj
j) Lights
The Add Ink indicator (j) lights when it is time to supply ink.
R
CAUTION:
R
CAUTION:
R
CAUTION:
R
CAUTION:
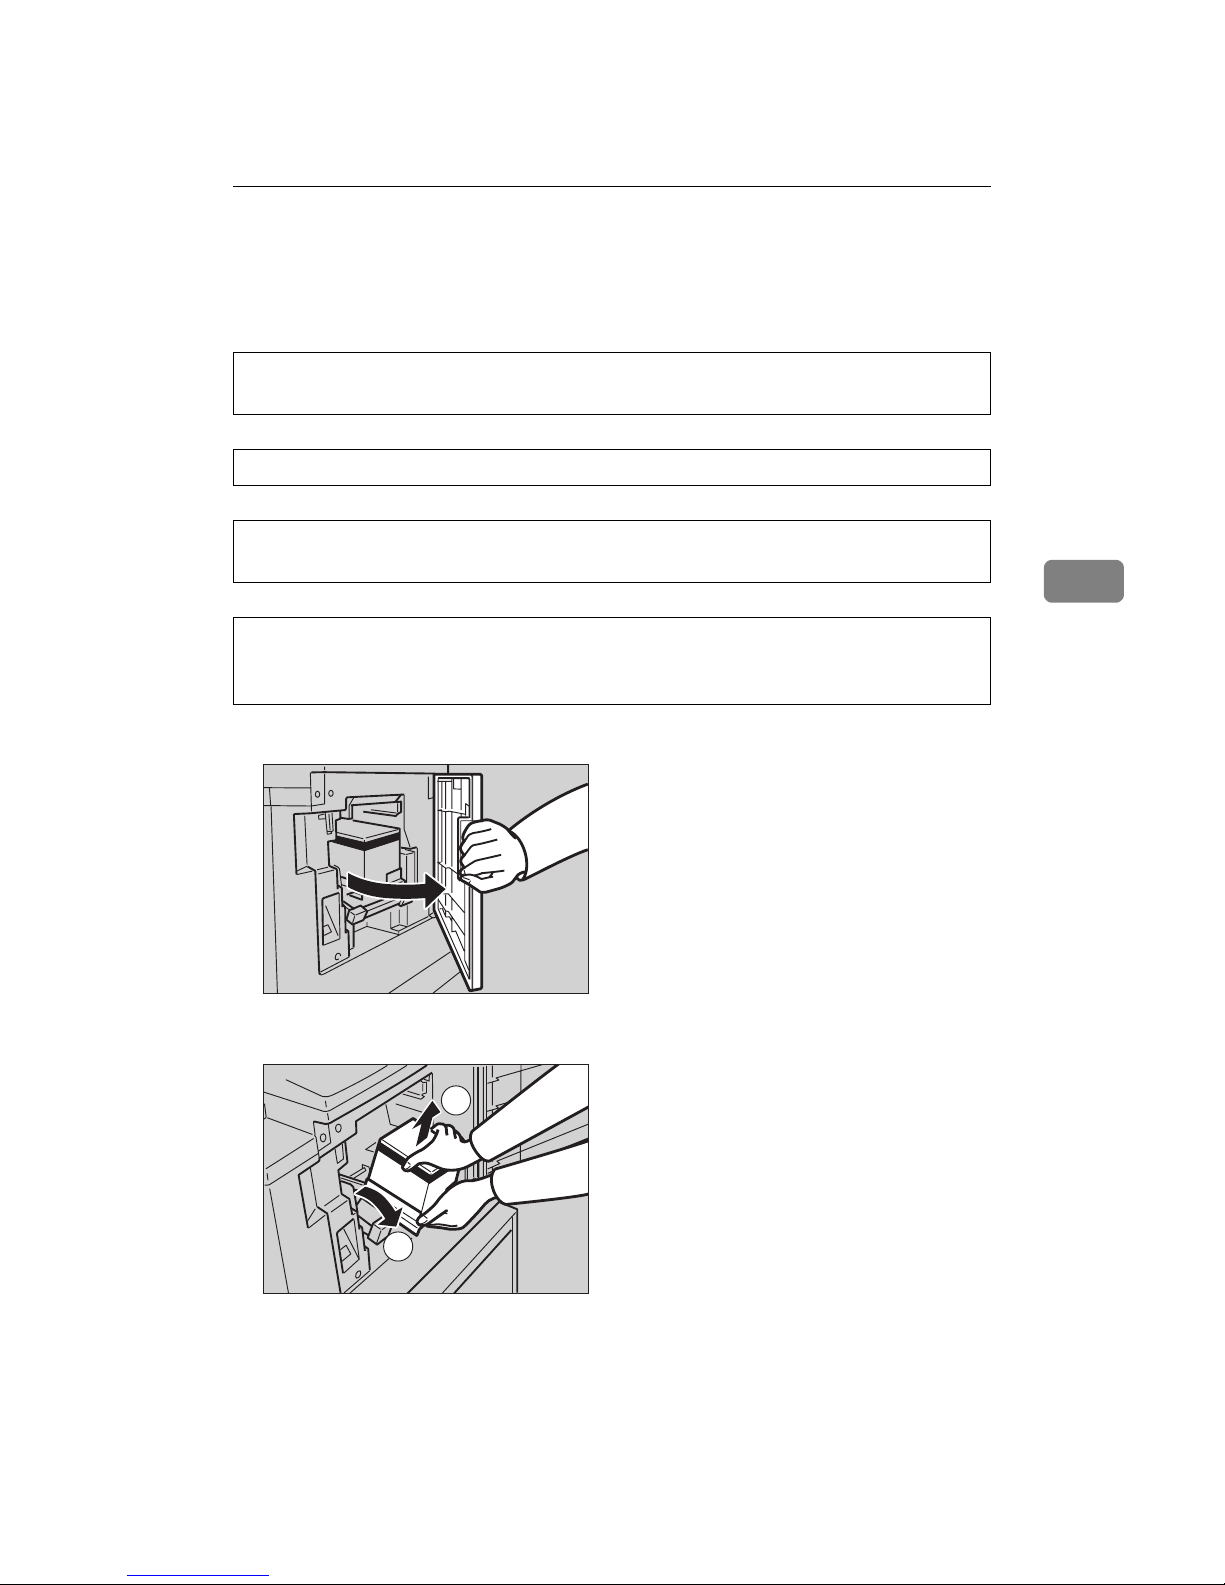
AAAA
Open the front door.
BBBB
Pull out the ink holder and remove the used ink cartridge.
• If ink comes into contact with your eyes, rinse immediately in running water.
For other symptoms, consult a doctor.
• Keep the ink or ink container out of reach of children.
• If ink is ingested, induce vomiting by drinking a strong saline solution. Con-
sult a doctor immediately.
• Our products are engineered to meet high standards of quality and functionality, and we recommend that you use only the expendable supplies available at an authorized dealer.
TSLH01IE
1
22
TSLH01JE
Page 20
DRAFT 2002/08/02
Replenishing Supplies
86
4
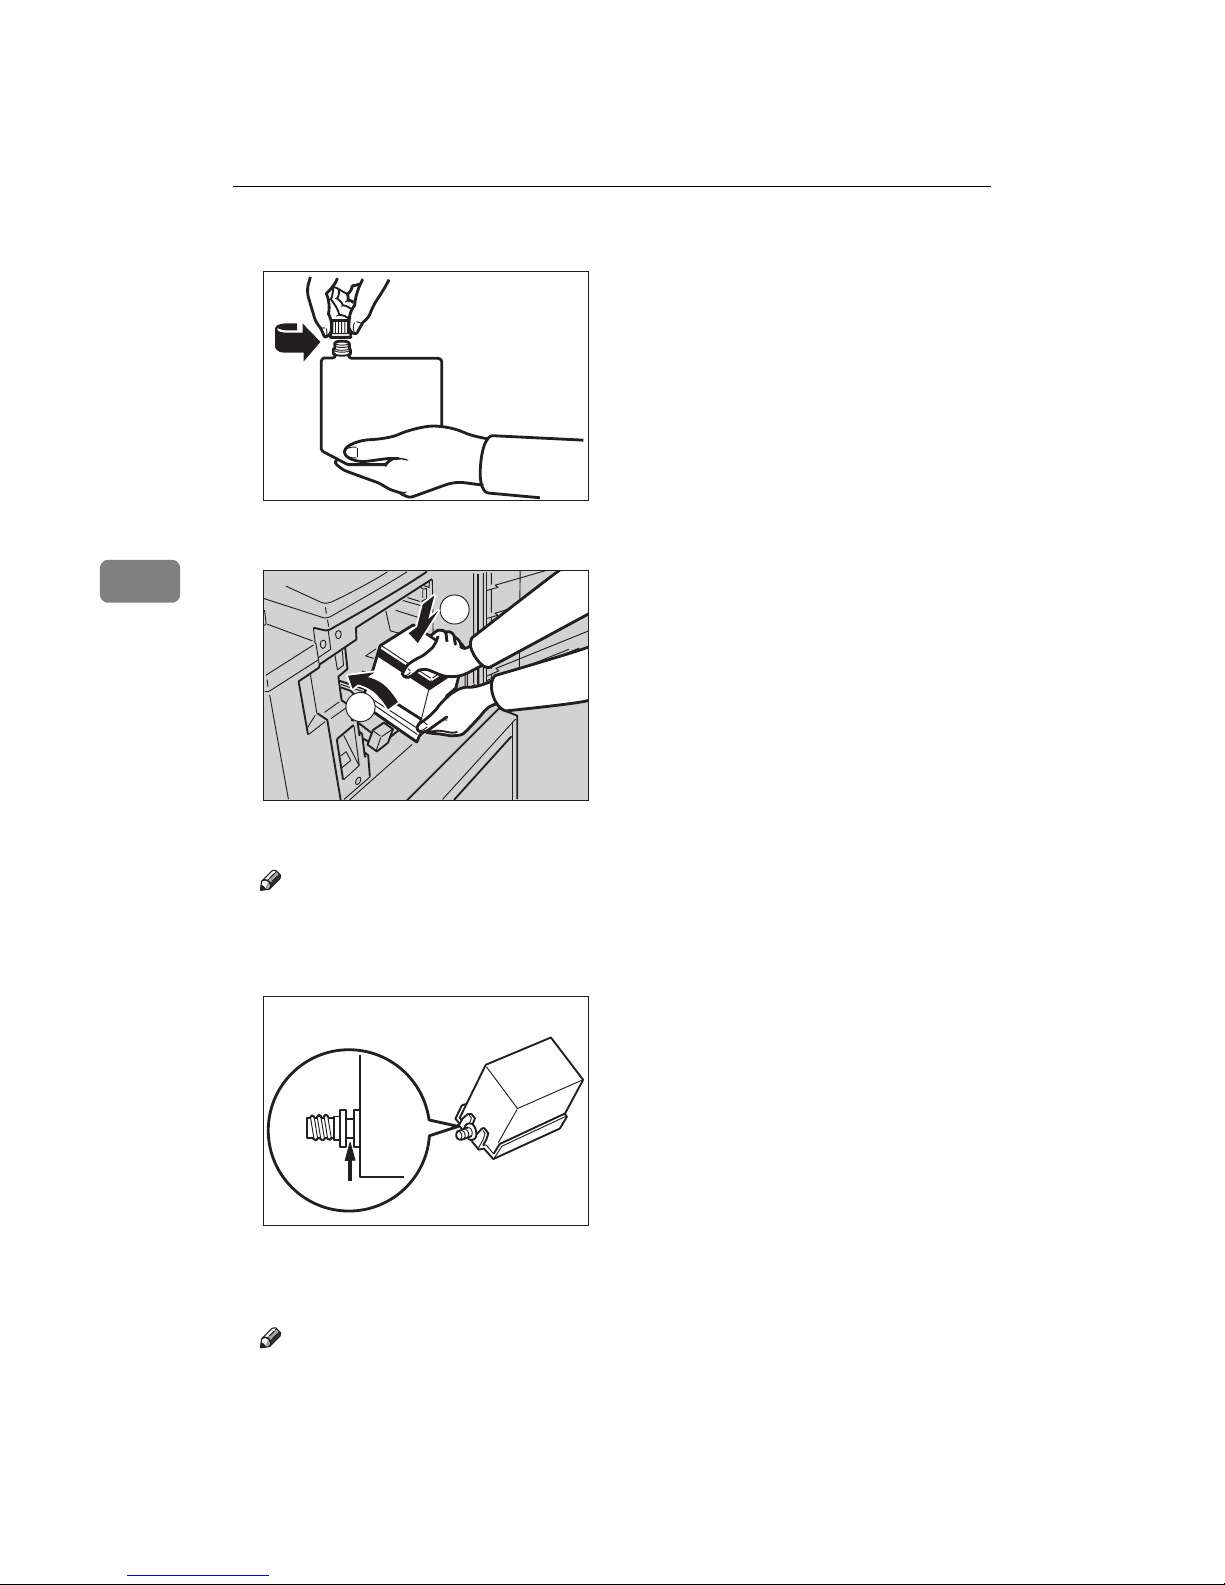
CCCC
Remove the cap of the new ink cartridge.
DDDD
Insert the new cartridge into the ink holder.
EEEE
Return the ink holder to its original position until it clicks.
Note
❒ Always supply ink of the same color.
❒ Make sure to firmly insert the part indicated by the arrow mark into the
guide.
FFFF
Close the front door.
The machine will start idling to supply ink to the drum.
Note
❒ It will stop when the correct amount of ink reaches the drum.
TSLT012E
1
22
TSLT013E
TSLT011E
Page 21
DRAFT 2002/08/02
Master Roll Replacement
87
4
Master Roll Replacement
The Master End indicator (C) is lit
when it is time to replace the master
roll.
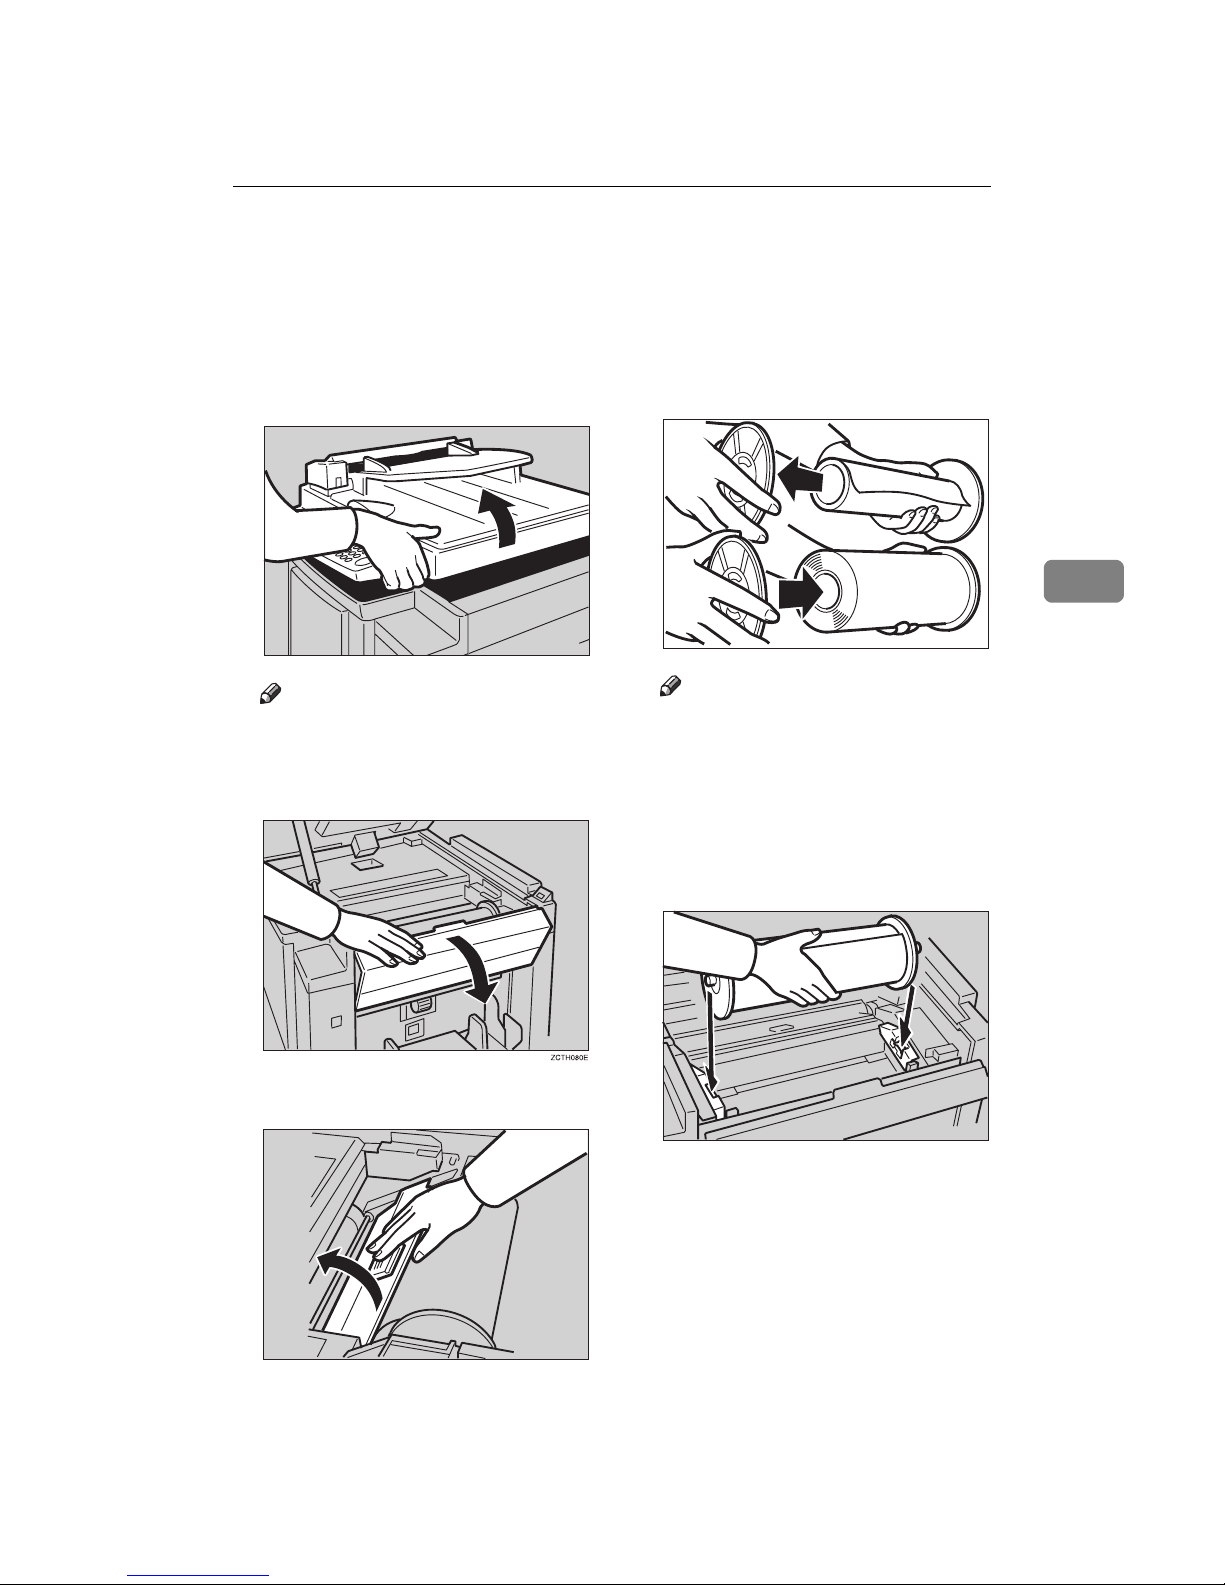
AAAA
Open the original tray.
Note
❒ Lift the original tray release le-
ver and lift the original tray.
BBBB
Open the right side cover.
CCCC
Open the plotter cover.
DDDD
Remove the used master roll and
pull out both spools. Then, insert
both spools into a new master
roll.
Note
❒ When the Master End indicator
lights, it is necessary to replace
the master roll even if some
master remains on the old roll.
EEEE
The new master roll must be positioned as shown in the illustration.
TSLH01SE
TSLH02EE
TSLT010E
TSLH01XE
Page 22

DRAFT 2002/08/02
Replenishing Supplies
88
4
FFFF
Set the paper edge of the master
roll as shown.
Note
❒ Rotate the spools backward to
take up any slack in the master.
GGGG
Close the plotter cover.
HHHH
Close the right side cover.
IIII
Return the original tray to its original position.
TSLH01UE
TSLH023E
TSLH025E
Page 23

DRAFT 2002/08/02
Placing a New Roll of Tape in the Tape Dispenser (Option)
89
4
Placing a New Roll of Tape in the Tape
Dispenser (Option)
Note
❒ Make sure that the main switch is
turned on and the power switch of
the tape dispenser is off.
AAAA
Open the cover of the tape dispenser.
BBBB
As shown, put the roll in the dispenser.
Note
❒ Make sure that the tape is in-
stalled in the proper direction. If
it is not in the correct direction,
the tape dispenser will not work
correctly.
CCCC
Feed the leading edge of the roll
in the dispensing slot until it
stops.
Note
❒ Push the tape as far as possible
through the slot.
DDDD
Turn on the power switch of the
tape dispenser.
EEEE
Press the manual cut button to
trim off the leading edge of the
tape.
TSLP010E
TSLP011E
TSLP012E
TSLP013E
On
Off
TSLP014E
Page 24

DRAFT 2002/08/02
Replenishing Supplies
90
4
Page 25

DRAFT 2002/08/02
91
5. Troubleshooting
If Your Machine does not Operate as You
Want
If a malfunction or a misfeed occurs within the machine, the following indicators
will light.
❖❖❖❖ When the misfeed indicator (xxxx) lights
Indicator Guidance Display Page
x
ORIGINAL JAM. REMOVE
ORIGINAL
REMOVE ORIGINAL
⇒ p.94 ““x” + “ORIGINAL JAM. RE-
MOVE ORIGINAL””.
x
PAPER FEED JAM. REMOVE
JAMMED PAPER
REMOVE JAMMED PAPER
⇒ p.97 ““x” + “PAPER FEED JAM. RE-
MOVE JAMMED PAPER””.
x
MASTER FEED JAM. REMOVE
JAMMED MASTER
REMOVE JAMMED MASTER
⇒ p.100 ““x” + “MASTER FEED JAM. RE-
MOVE JAMMED MASTER””.
x
PAPER WRAP JAM. REMOVE
JAMMED PAPER
REMOVE JAMMED PAPER
⇒ p.102 ““x” + “PAPER WRAP JAM. RE-
MOVE JAMMED PAPER””.
x
MASTER EJECT JAM. RE-
MOVE JAMMED MASTER
REMOVE JAMMED MASTER
⇒ p.104 ““x” + “MASTER EJECT JAM.
REMOVE JAMMED MASTER””.
x
DELIVERY JAM. REMOVE
JAMMED PAPER
REMOVE JAMMED PAPER
⇒ p.106 ““x” + “DELIVERY JAM. RE-
MOVE JAMMED PAPER””.
Page 26

DRAFT 2002/08/02
Troubleshooting
92
5
R
CAUTION:
Note
❒ To prevent misfeeds, do not leave any torn scraps of paper within the ma-
chine.
❒ When clearing misfeeds, do not turn off the main switch. If you do, your copy
settings are cleared.
❒ If misfeeds occur repeatedly, contact your service representative.
❖❖❖❖ When the open cover/unit indicator (MMMM) lights
❖❖❖❖ When the supply/exchange indicators light
❖❖❖❖ When other indicators light
• Be careful not to cut yourself on any sharp edges when you reach inside the
machine to remove misfed sheets of paper or masters.
Monitor Guidance Display and Action Page
M
CLOSE THE COVER
• Close the original tray unit.
• Close the front door.
⇒ p.107 “When the Open Cover/Unit In-
dicator (M) Lights”.
CLOSE THE PLOTTER COVER
• Close the right side cover and the
plotter cover.
CLOSE THE ADF COVER
• Close the optional ADF unit.
⇒ p.107 “When the Open Cover/Unit In-
dicator (M) Lights”.
SET THE DRUM COMPLETELY
Monitor Guidance Display and Action Page
B
LOAD MORE PAPER
⇒ p.83 “Loading Paper into the Paper
Feed Tray”.
j
LOAD NEW INK CARTRIDGE
⇒ p.85 “When the Add Ink Indicator (j)
Lights”.
C
LOAD NEW MASTER ROLL
⇒ p.87 “Master Roll Replacement”.
k
EMPTY MASTER EJECT BOX
• Remove the used master.
⇒ p.109 “When the Master Eject Indicator
(k) Lights”.
SET THE MASTER EJECT BOX
Monitor Guidance Display and Action Page
u
SET THE KEY COUNTER
⇒ p.110 “When Other Indicators Light”.
Page 27

DRAFT 2002/08/02
If Your Machine does not Operate as You Want
93
5
❖❖❖❖ When one of the following messages is displayed on the guidance display
----When a service code (E-XX) is displayed in the guidance display
Turn the main switch off and on. If a service code appears again, contact your
service representative.
Note
❒ If a service code appears on the guidance display after you turn the main
switch off and on a few times, do not continue turning it on and off. Leave the
machine off.
❒ E04 might be displayed when you make masters continuously using the orig-
inals that have solid images. In the case, turn off the main switch and wait for
a while.
Guidance Display Meaning
RE-ENTER COPY NUMBER MAXIMUM
IS XXX
The maximum number of prints that can be entered
is specified by User Tools. Change the number of
prints.
RE-ENTER COPY NUMBER MINIMUM
IS XXX
The minimum number of prints that can be entered
is specified by User Tools. Change the number of
prints.
SET THE ORIGINALS
Make prints after you confirm whether there is an
original.
INPUT YOUR ID CODE
User Code mode is set. Before printing, enter your
user code.
NO ADDITIONAL PRINTS ALLOWED
Security mode is set. If you make the next master,
Security mode is canceled.
MASTER MAKING HALTED
Master making is halted.
Press the {{{{Master Making}}}} key.
Page 28

DRAFT 2002/08/02
Troubleshooting
94
5
x
xx
x Clearing Misfeeds
Important
❒ When clearing misfeeds, do not turn off the main switch. If you do, your print
settings are cleared.
----After clearing misfeeds
Press the {{{{Clear Modes/Energy Saver}}}} key to reset the error indicators.
“
xxxx” + “ORIGINAL JAM. REMOVE ORIGINAL”
Note
❒ These indicators will light when your machine is equipped with the optional
document feeder.
AAAA
Press the ADF unit open lever and open the ADF unit.
TSLP016E
Page 29

DRAFT 2002/08/02
x Clearing Misfeeds
95
5
BBBB
Pull out the original gently.
CCCC
If you cannot remove the misfed original, pull out the original from the
side of the original tray and remove the original.
DDDD
If you still cannot remove the misfed paper, press the ADF open lever and
open the ADF unit to remove the original.
EEEE
Close the ADF unit until it locks in position.
----To prevent original misfeeds:
• Originals heavier than 90 g/m2, 23.9 lb (when setting a stack of originals)
• Originals lighter than 50 g/m
2
, 13.3 lb (when setting a stack of originals)
• Originals heavier than 120 g/m
2
, 31.9 lb (when setting one original at a time)
TSLY011E
TSLY017E
TSLY014E
Page 30

DRAFT 2002/08/02
Troubleshooting
96
5
• Originals lighter than 40 g/m2, 10.6 lb (when setting one original at a time)
• Carbon coated originals
• Damaged originals
• Originals with glue on them
• Originals perforated for ring binders
• Book originals
• Originals written with a pencil or ball-point pen
• Originals smaller than 148 mm × 105 mm, 5.8" × 4.1"
• Originals larger than 257 mm × 364 mm, 10.2" × 14.4"
• Folded, curled, creased originals
• Bound, stapled, or clipped originals
• OHP transparencies
• Translucent paper
• Pasted originals
Note
❒ If you use paste-up originals, make sure the pasted parts hold firmly to the
base sheet and press the {{{{Paste Shadow Erase}}}} key. If the thickness of the pasteup original is more than 0.1 mm, and the space between the pasted parts is
less than 2 mm, 0.08", a shadow might appear on the prints.
❒ The first 5 mm, 0.2" of the leading edge cannot be printed. Make sure the lead-
ing edge margin is at least 5 mm, 0.2".
❒ a: 5 mm, 0.2"
❒ Do not mix different sizes of originals in the optional document feeder.
❒ Clean the separation roller if it is dirty. (A dirty separation roller might slip
and cause original misfeeds.)
❒ Remove staples or clips of originals. Fan originals that have had staples or
clips removed.
Original Print
a
Page 31

DRAFT 2002/08/02
x Clearing Misfeeds
97
5
“
xxxx
” + “PAPER FEED JAM. REMOVE JAMMED PAPER”
R
CAUTION:
Misfeed in the paper feed section
AAAA
Slowly but firmly pull out the paper.
Paper is wrapped around the drum
AAAA
Pull out the drum unit.
BBBB
Remove the misfed paper.
• Be careful not to cut yourself on any sharp edges when you reach inside the
machine to remove misfed sheets of paper or masters.
TSLY010E
TSLH01QE
Page 32

DRAFT 2002/08/02
Troubleshooting
98
5
CCCC
Re-insert the drum unit until the drum unit locks in position and put the
lever back in place.
DDDD
Close the front door.
----To prevent paper misfeeds:
If the paper is curled or the originals leading edge margin is too narrow, the following action is necessary.
• When you use curled paper, correct the curl as shown.
TSLH028E
GRCURL0E
Page 33

DRAFT 2002/08/02
x Clearing Misfeeds
99
5
• If you cannot correct the paper curl, stack the paper with the curl face down
as shown.
• When the leading edge margin of the original is less than 5 mm, 0.2" or there
is a solid image on the leading edge, insert the original with the widest margin first or make a leading edge margin by making a copy.
GRMARU0E
GRBATS0E
GRLEAD0E
Page 34

DRAFT 2002/08/02
Troubleshooting
100
5
“
xxxx
” + “MASTER FEED JAM. REMOVE JAMMED MASTER”
AAAA
Open the original tray.
Note
❒ Lift the original tray release lever and slide the original tray all the way to
the left.
BBBB
Open the right side cover.
CCCC
Open the plotter cover.
TSLH01SE
TSLH02EE
Page 35

DRAFT 2002/08/02
x Clearing Misfeeds
101
5
DDDD
If you could not remove the misfed master in steps BBBB and CCCC, take out the
drum and remove the misfed master from the inside.
Reference
For how to take out the drum unit, see ⇒ p.63 “Changing the color Drum
Unit”.
EEEE
If the original misfeeds in the optional document feeder, press the ADF
open lever and open the ADF unit to remove the misfed sheet.
FFFF
Return the original tray to its original position.
Note
❒ If you follow step D, set the drum unit and close the front door.
❒ If you follow step E, close the ADF unit.
TSLH01BE
TSLY014E
Page 36

DRAFT 2002/08/02
Troubleshooting
102
5
“
xxxx
” + “PAPER WRAP JAM. REMOVE JAMMED PAPER”
R
CAUTION:
AAAA
Remove the misfeed paper.
BBBB
If the paper is completely wrapped around the drum, pull out the drum
unit and remove the misfed paper from the drum.
CCCC
Re-install the drum unit locks in position and put the lever back in place.
Note
❒ If you followed step B or C, close the front door.
• Be careful not to cut yourself on any sharp edges when you reach inside the
machine to remove misfed sheets of paper or masters.
1
22
TSLH02AE
TSLH028E
Page 37

DRAFT 2002/08/02
x Clearing Misfeeds
103
5
----To prevent paper misfeeds:
If the paper is curled or the original's leading edge margin is too narrow, the following action is necessary.
• When you use curled paper, correct the curl as shown.
• If you cannot correct the paper curl, stack the paper with the curl face down
as shown.
GRCURL0E
GRMARU0E
GRBATS0E
Page 38

DRAFT 2002/08/02
Troubleshooting
104
5
• When the leading edge margin of the original is less than 5 mm, 0.2" or there
is a solid image on the leading edge, insert the original with the widest margin first or make a leading edge margin by making a copy.
“
xxxx
” + “MASTER EJECT JAM. REMOVE JAMMED MASTER”
AAAA
Check where the misfed master is. Remove the misfed master as follows.
When a master misfeed occurs in the master eject section
A Pull out the master eject box.
GRLEAD0E
Page 39

DRAFT 2002/08/02
x Clearing Misfeeds
105
5
B Remove the misfed master.
Note
❒ Be careful not to stain your hands with ink when you touch used mas-
ters.
C Return the master eject box to its original position.
When a master misfeed occurs on the drum
A Lift the lever to unlock the drum unit and pull out the unit.
Reference
For how to remove the drum unit, see ⇒ p.63 “Changing the color
Drum Unit”.
B Grasp the drum unit handle and remove the master from the drum.
TSLY018E
TSLH01QE
TSLH02BE
Page 40

DRAFT 2002/08/02
Troubleshooting
106
5
C Pull the master out of the master clamp.
D Re-insert the drum unit until the drum unit locks in position and put the
lever back in place.
“
xxxx
” + “DELIVERY JAM. REMOVE JAMMED PAPER”
AAAA
Remove the misfed paper.
Note
❒ Make sure that the paper delivery end plate and paper delivery side plates
are in the proper position.
❒ If a jam occurs with the current printing speed, reduce the paper delivery
speed.
1
22
TSLH031E
TSLH028E
Page 41

DRAFT 2002/08/02
When the Open Cover/Unit Indicator (M) Lights
107
5
When the Open Cover/Unit Indicator (M
MM
M)
Lights
MMake sure that the following door/units are closed.
❖❖❖❖ Original Tray
Close the original tray until it locks in position.
❖❖❖❖ Front Door
Close the front door completely.
❖❖❖❖ ADF Unit (Option)
Close the ADF unit until it locks in position.
Make sure that the drum is completely set in position.
TSLH025E
TSLH024E
TSLP02AE
Page 42

DRAFT 2002/08/02
Troubleshooting
108
5
• Set the drum unit completely until it locks in position.
TSLH028E
Page 43

DRAFT 2002/08/02
When the Master Eject Indicator (k) Lights
109
5
When the Master Eject Indicator (k
kk
k) Lights
The Master Eject indicator (k) and the Reset indicator light when it is time to
empty master eject box or when you need to set the master eject box.
AAAA
Take out the master eject box and remove the used masters.
Note
❒ Spread an old newspaper, then turn the master eject box upside down on
it to remove the used masters. Then, throw away the masters.
BBBB
Re-install the master eject box. Push in the box until it touches the inside
bracket.
Page 44

DRAFT 2002/08/02
Troubleshooting
110
5
When Other Indicators Light
u
Set the key counter
The key counter (option) is not set. Insert the key counter.
Page 45

DRAFT 2002/08/02
When the Prints are Thrown Over the Paper Delivery Tray
111
5
When the Prints are Thrown Over the Paper
Delivery Tray
AAAA
Reduce the printing speed by pressing the {{{{WWWW}}}} key.
Note
❒ If a jam occurs with the current printing speed, reduce the paper delivery
speed.
Page 46

DRAFT 2002/08/02
Troubleshooting
112
5
Poor Printing
Dirt on the Back Side of Paper
Note
❒ When you use paper smaller than the original, select the proper reduction ra-
tio. Otherwise, you might get dirty background prints.
❒ When you use postcards and the like, the background might be dirty because
postcards do not absorb ink well.
❒ You might get prints with dirty background when printing at high speed and
under high temperature.
AAAA
Turn off the main switch.
BBBB
Pull out the drum unit.
GRDIRT0E
ZCTH140E
TSLH01GE
Page 47

DRAFT 2002/08/02
Poor Printing
113
5
Reference
See ⇒ p.63 “Changing the color Drum Unit”for the details.
CCCC
Clean the pressure roller with a clean cloth.
DDDD
With a clean cloth, remove any ink that has accumulated on the trailing
edge of the drum unit.
EEEE
Insert the drum unit until it locks in position, then lower the drum unit
lock lever.
FFFF
Close the front door.
TSLH01NE
TSLH02CE
TSLH028E
Page 48

DRAFT 2002/08/02
Troubleshooting
114
5
GGGG
Turn on the main switch.
Dirt on the Front Side of Paper (Black Line/Stain)
Note
❒ When black lines or stains still appear on prints even if you clean the above,
contact your service representative.
❒ If there is no margin or if there is a solid image area near the leading edge of
the original, make a margin of at least 5 mm, 0.2" at the leading edge. Otherwise, the paper exit pawl might become dirty and cause black lines on prints.
❒ Check the exposure glass cover and clean it if dirty. (See ⇒ p.123 “Exposure
Glass Cover”.)
❒ Check the exposure glass and clean it if dirty. (See ⇒ p.123 “Exposure
Glass”.)
GRBLAC1E
Page 49

DRAFT 2002/08/02
Poor Printing
115
5
White Prints or Incomplete Prints
• Make sure that the paper feed side plates touch the paper lightly. Put back the
lock lever.
• When you use the optional document feeder, make sure that the original
guides contact the originals lightly.
When you get white or incomplete prints even if you check the items above, perform the following procedure.
AAAA
Pull out the drum unit.
Reference
See ⇒ p.63 “Changing the color Drum Unit”for the details.
GRWHIT0E
TSLY015E
TSLH01GE
Page 50

DRAFT 2002/08/02
Troubleshooting
116
5
BBBB
Remove the master from the drum.
CCCC
Remove paper that is stuck to the drum.
DDDD
Insert the drum unit until it locks in position, then lower the drum unit
lock lever.
EEEE
Close the front door.
TSLH02BE
1
22
TSLH031E
TSLH028E
TSLH024E
Page 51

DRAFT 2002/08/02
117
6. Remarks
Operation Notes
General Cautions
• While printing, do not turn off the main switch.
• While printing, do not open the door or covers.
• While printing, do not unplug the power cord.
• While printing, do not move the machine.
• Keep corrosive liquids, such as acid, off the machine.
• Open and close the door and covers softly.
• Do not put anything except originals on the machine.
• Do not spill liquid on the machine.
• When opening or closing the door or covers, keep hold of them so they don't
fall.
• When removing the drum unit from the machine, be careful not to let the
drum unit fall.
• Do not modify or replace any parts other than the ones specified in this manual.
• Do not operate the machine without covers. You might get your fingers
caught in the machine, or the machine might be damaged because, for example, dust or the like might get inside.
• Since some parts of the machine are sharp and might cause injury, touch only
the parts specified in this manual.
• If you clean rubber parts with benzine, wipe them with a dry cloth afterwards.
• Always turn the machine off when you have finished printing for the day.
• If the machine must be transported by vehicle, please contact your service
representative.
• Make sure to make a few trial prints to check the image position because the
image position of the trial print might not correspond with that of the original.
• If the image registration is not consistent, slow the printing speed down to
Setting 1.
• When performing duplex or multicolored printing, leave the printed paper
for a while before the next printing in order to let the ink dry on the printed
paper. If this is not done, feed roller marks will appear on the print image.
Page 52

DRAFT 2002/08/02
Remarks
118
6
• If the machine is not used for a long period, the image density might decrease
because the ink on the drum might dry. Make extra prints until the image
density recovers.
• When the machine is used in low temperature conditions, the image density
might decrease. In this case, slow the printing speed down to step 1 or 2.
• When making duplex prints, misdetection of paper wrapping might occur if
the paper delivery sensor detects a black area at the leading edge of the back
side. Keep at least an 5 mm, 0.2" margin at the leading edge of the back side
of the printing paper.
• Press the {{{{Proof}}}} key to perform a test print as the first few prints might be
light.
• The top sheet might remain between the feed rollers when you press the
{{{{Paste Shadow Erase}}}} key. In this case, remove the top sheet.
• When making duplex prints or when using non-white printing paper, the paper end sensor might malfunction and fail to detect the paper. In this case,
place a blank sheet under the printing paper on the paper feed tray.
• The outer portion of the image might not be printed under low temperature.
In this case, slow the printing speed down to step 1 or 2, or increase the room
temperature.
• The paper exit pawl might contact the printing paper and cause black lines on
the prints. In this case, increase the printing speed or make a new master with
lighter image density mode.
• If you cannot pull out the drum, close the front cover again to rotate the drum.
Pull out the drum after it stopped at the position.
• The leading edge of the prints might become stained if the edge touches the
image of prints on the paper delivery tray.
• The ink of the print on the paper delivery tray might stick to the back side of
the next print.
• When the machine is on and the power source is less than 90% of the specified
amount, printing quality will decrease. Therefore, make sure the supply from
your electrical outlet is at least 90% of the required amount.
• As various kinds and qualities of paper exist, some paper might be wrapped
around the drum or cause misfeeds.
• If your hands are stained with ink:
• Avoid prolonged or repeated contact with skin.
• Cleanse skin thoroughly after contact, before breaks and meals, and at the
end of the work period.
• Ink is readily removed from skin by waterless hand cleaners followed by
washing with soap and water.
• Also, be careful not to get any ink on your clothing while emptying the master
eject box or while loading a new ink cartridge.
Page 53

DRAFT 2002/08/02
Operation Notes
119
6
• The image density varies according to the printing speed and the room temperature. So, adjust the printing speed or increase the room temperature.
• When you make a lot of prints from a small image, ink might ooze out from
the edges of the master, especially under high temperature and when printing in two or more colors. In this case, make a new master.
• Use ink made within one year. Ink stored for a long period tends to dry slowly and yield lower image density.
• While making a master, do not leave the exposure glass cover or optional document feeder open.
• In Letter/Photo mode, moire patterns might occur when screened originals
are printed. In this case, make prints in Letter or Photo mode.
• When you use originals with light lettering, edges of the letters might be
printed clearly and the inside of the letters might be light. In this case, increase the image density.
• When marks on the printing paper occur, clean the paper feed roller. ⇒ p.123
“Paper Feed Roller (paper feed tray)”
• If you make a print before the ink on the first print dries, the ink may adhere
to the paper feed roller and soil the print. Before printing on the reverse side
of a printed sheet or overprinting on a printed sheet, be sure that the ink on
the first print is adequately dry. ⇒ p.123 “Paper Feed Roller (paper feed
tray)”
Print Paper
• When the paper is curled, stack the paper with the curl face down, otherwise
the paper might wrap around the drum or stains might appear.
• Postcards and the like do not absorb ink well. Offset images might appear on
the rear side of subsequent prints. Solid image originals will cause offset image prints.
Originals
• If there is no margin or if there is a solid image area near the leading edge of
the original, make at least a 5 mm, 0.2", margin at the leading edge; otherwise,
the paper might wrap around the drum or the paper exit pawl might become
dirty and cause black lines on prints.
• If you use originals that have bold letters or solid images at the leading edges,
you might get prints with dirty edges. In this case, insert the widest margin
first, or raise the printing speed.
Page 54

DRAFT 2002/08/02
Remarks
120
6
• If you use paste-up originals, select Paste Shadow Erase mode (see ⇒ p.34
“Paste Shadow Erase—Erasing the Shadow of Pasted Originals”) make sure
that the pasted parts hold firmly to the base sheet. If the thickness of the pasteup originals is more than 0.1 mm and the space between the pasted parts is
less than 2 mm, 0.08", a shadow might appear on the print.
• Under the following conditions, the machine might not detect the original on
the exposure glass. If you press the {{{{Master Making}}}} key again, the machine
will start making a master anyway:
• When you set a dark original on the exposure glass.
• When the original is not centered according to the size marks on the right
scale.
• If you do not open the exposure glass cover at an angle of more than 25 de-
grees with the exposure glass when you replace originals.
• If the machine is installed under a strong light.
Page 55

DRAFT 2002/08/02
Where to Put Your Machine
121
6
Where to Put Your Machine
Your machine's location should be carefully chosen because environmental conditions greatly affect its performance.
Environmental Conditions
Optimum environmental conditions
R
CAUTION:
R
CAUTION:
R
CAUTION:
• Temperature: 10 – 30°C, 50 – 86°F
• Humidity:
• Main Frame: 20 – 90%RH
• Document feeder (option): 20 – 70%RH
• A strong and level base (a sturdy desk and cabinet etc.).
• The machine must be level within 5 mm, 0.2" both front to rear and left to
right.
• Make sure to locate this machine in a large well ventilated room that has an
air turnover of more than 30 m
3
/hr/person.
Environments to avoid
• Locations exposed to direct sunlight or strong light (more than 1500 lux).
• Locations directly exposed to cool air from an air conditioner or heated air
from a heater. (Sudden temperature changes might cause condensation within the machine.)
• Places where the machine might be subjected to frequent strong vibration.
• Dusty areas.
• Keep the machine away from humidity and dust. Otherwise a fire or an electric shock might occur.
• Do not place the machine on an unstable or tilted surface. If it topples over,
an injury might occur.
• If you use the machine in a confined space, make sure there is a continuous
air turnover.
• After you move the machine, use the caster fixture to fix it in place. Otherwise the machine might move or come down to cause an injury.
Page 56

DRAFT 2002/08/02
Remarks
122
6
• Areas with corrosive gases.
Power Connection
R
WARNING:
R
CAUTION:
R
CAUTION:
❖❖❖❖ Main Frame
• Make sure the plug is firmly inserted in the outlet.
Access to Machine
Place the machine near the power source, providing clearance as shown.
❖❖❖❖ Main Frame
1. More than 20 cm, 8.0"
2. More than 60 cm, 23.7"
3. More than 60 cm, 23.7"
4. More than 60 cm, 23.7"
• Connect the machine only to the power source described on the inside
front cover of this manual. Connect the power cord directly into a wall
outlet and do not use an extension cord.
• Do not damage, break or make any modifications to the power cord.
Do not place heavy objects on it. Do not pull it hard nor bend it more
than necessary. These actions could cause an electric shock or fire.
• Unplug the power cord from the wall outlet before you move the machine.
While moving the machine, you should take care that the power cord will not
be damaged under the machine.
• When you disconnect the power plug from the wall outlet, always pull the
plug (not the cable).
1
3
2
4
GRINST0E
Page 57

DRAFT 2002/08/02
Maintaining Your Machine
123
6
Maintaining Your Machine
To maintain high print quality, clean
the following parts and units regularly.
Main Frame
Exposure Glass
AAAA
Lift the exposure glass cover or
document feeder.
BBBB
Clean the exposure glass with a
damp cloth and wipe it with a dry
cloth.
Note
❒ If you do not clean the exposure
glass, marks on the glass will be
printed.
Exposure Glass Cover
AAAA
Lift the exposure glass cover.
BBBB
Clean the exposure glass cover
with a damp cloth and wipe it
with a dry cloth.
Note
❒ If you do not clean the exposure
glass cover, marks on the cover
will be printed.
Paper Feed Roller (paper feed tray)
AAAA
Wipe off the paper dust on the paper feed roller with a damp cloth,
then wipe it with a dry cloth.
Note
❒ If you do not clean the paper
feed roller, paper misfeeds tend
to occur.
TSLH019E
TSLH015E
TSLH017E
Page 58

DRAFT 2002/08/02
Remarks
124
6
Optional Document Feeder
Separation Roller
AAAA
Open the ADF unit.
BBBB
Clean the separation roller with a
damp cloth and wipe it with a dry
cloth.
Note
❒ If you do not clean the separa-
tion roller, original misfeeds
tend to occur.
TSLH016E
Page 59

DRAFT 2002/08/02
Combination Chart
125
6
Combination Chart
This combination chart shows which modes can be used together.
❍ means that these modes can be used together.
× means that these modes cannot be used together.
1234567891011121314
1Reduction --× ❍❍❍❍❍❍❍× ❍❍❍❍
2 Enlargement × -- ❍❍❍❍❍❍❍× ❍❍❍❍
3Auto Cycle ❍❍-- ❍❍❍❍❍❍❍❍❍❍❍
4Memory mode ❍❍❍-- × ❍❍❍❍×× ❍❍❍
5Class mode ❍❍❍× -- ❍❍❍❍×× ❍❍❍
6Combine Copies ❍❍❍❍❍-- ❍❍❍××❍❍❍
7Center/Edge Erase ❍❍❍❍❍❍-- ❍❍× ❍❍❍❍
8 Type of Original ❍❍❍❍❍❍❍-- ❍ × ❍❍× ❍
9Image Density ❍❍❍❍❍❍❍❍-- × ❍❍❍❍
10 On-Line ××❍ ЧЧЧЧЧЧ-- ❍❍××
11 Overlay ❍❍❍×××❍❍❍❍-- ❍ ××
12 Economy mode ❍❍❍❍❍❍❍❍❍❍❍-- × ❍
13 Tint mode ❍❍❍❍❍❍❍× ❍ ×× × -- ❍
14 Fine mode ❍❍❍❍❍❍❍❍❍×× ❍❍--
Page 60

DRAFT 2002/08/02
Remarks
126
6
Page 61

DRAFT 2002/08/02
127
7. Specifications
Main Frame
❖❖❖❖ Configuration:
Desk top
❖❖❖❖ Printing Process:
Full automatic one drum system
❖❖❖❖ Original Type:
Sheet/Book
❖❖❖❖ Original Size:
Maximum 257 mm × 364 mm, 10.2" × 14.4"
❖❖❖❖ Pixel Density:
300 × 300 dpi (in Fine mode 300 × 400 dpi)
❖❖❖❖ Image Mode:
Photo mode (Sand pattern)
Letter mode (Standard mode)
Letter/Photo mode
❖❖❖❖ Reduction Ratios:
• Inch version:
93%, 77%, 74%, 65%
• Metric version:
93%, 87%, 82%, 71%
❖❖❖❖ Enlargement Ratios:
• Inch version:
155%, 129%, 121%
• Metric version:
141%, 122%, 115%
❖❖❖❖ Printing Area:
• LG drum:
More than 210 mm × 355 mm, 8.2" × 14.0"
• A4 drum:
More than 210 mm × 280 mm, 8.2" × 11.3"
• B4 drum:
More than 250 mm × 355 mm, 9.8" × 14.0"
Page 62

DRAFT 2002/08/02
Specifications
128
7
❖❖❖❖ Print Paper Size:
Maximum 268 mm × 388 mm, 10.5" × 15.2"
Minimum 90 mm × 148 mm, 3.6" × 5.9"
❖❖❖❖ Leading Edge Margin:
5 mm ± 3 mm, 0.2" ± 0.12"
❖❖❖❖ Print Paper Weight:
47.1 g/m2 to 209.3 g/m2, 12.5 lb to 55.6 lb
❖❖❖❖ Print Speed:
80 – 130 rpm (3 steps)
❖❖❖❖ First Copy Time (Master Process Time):
Less than 29.0 seconds (A4L, 81/2" × 11"L)
(When setting an original on the exposure glass)
❖❖❖❖ Second Copy Time (First Print Time):
Less than 31.0 seconds (A4L, 81/2 " × 11"L)
(When setting an original on the exposure glass)
❖❖❖❖ Color Printing:
Drum unit replacement system (black, red, blue, green, brown, yellow, purple, navy, maroon, orange, teal and gray)
❖❖❖❖ Image Position Adjustment:
• Vertical:
± 10 mm, ± 0.39"
• Side:
10 mm, 0.39" (for either side)
❖❖❖❖ Paper Feed Tray Capacity:
1,000 sheets (80 g/m2, 20 lb)
❖❖❖❖ Paper Delivery Tray Capacity:
1,000 sheets (80 g/m2, 20 lb)
❖❖❖❖ Master Eject Box Capacity:
70 masters
Page 63

DRAFT 2002/08/02
Main Frame
129
7
❖❖❖❖ Dimensions (W ×××× D ×××× H):
❖❖❖❖ Weight:
• Main Frame: 65 kg, 143.3 lb
• Main Frame with optional document feeder: 68 kg, 150.0 lb
❖❖❖❖ Noise Emission *1:
Sound Power Level
Sound Pressure Level*2
*1 The above measurement made in accordance with ISO 7779 are actual value.
*2 It is measured at the position of the operator.
❖❖❖❖ Power Source:
See the inside front cover of this manual.
❖❖❖❖ Power Consumption:
Width Depth Height
Stored 607 mm, 23.9" 651 mm, 32.6" 567 mm, 22.4"
Stored with document
feeder
607 mm, 23.9" 651 mm, 32.6" 617 mm, 24.3"
Set up 1,187 mm, 46.8" 651 mm, 32.6" 567 mm, 22.4"
Set up with document
feeder
1,187 mm, 46.8" 651 mm, 32.6" 617 mm, 24.3"
Printing Speed Noise Emission
During printing 80 cpm 81 dB(A)
100 cpm 82 dB(A)
130 cpm 83 dB(A)
Stand-by -- 48 dB(A)
Printing Speed Noise Emission
During printing 80 cpm 71 dB(A)
100 cpm 72 dB(A)
130 cpm 72 dB(A)
Stand-by -- 35 dB(A)
Stand-by Less than 0.01 kW
Master Making Less than 0.24 kW
Printing: Speed 1 Less than 0.14 kW
Printing: Speed 2 Less than 0.16 kW
Printing: Speed 3 Less than 0.20 kW
Page 64

DRAFT 2002/08/02
Specifications
130
7
❖❖❖❖ Optional Equipment:
• Color Drum
LG Drum
A4 Drum
B4 Drum
• Key Counter
• Tape Dispenser
• Document Feeder
Page 65

DRAFT 2002/08/02
Document Feeder (Option)
131
7
Document Feeder (Option)
❖❖❖❖ Original Type:
Sheet
❖❖❖❖ Original Weight:
• When setting a stack of originals:
50 – 90 g/m
2
, 13.3 – 23.9 lb
• When setting one sheet at a time:
40 – 120 g/m
2
, 10.6 – 31.9 lb
❖❖❖❖ Original Size:
Max. 257 mm × 364 mm, 10.2" × 14.4"
Min. 148 mm × 105 mm, 5.8" × 4.1"
❖❖❖❖ First Copy Time (Master Process Time):
Less than 34 seconds (A4L, 81/2" × 11"L)
❖❖❖❖ Second Copy Time (First Print Time):
Less than 36 seconds (A4L, 81/2" × 11"L)
❖❖❖❖ Original Capacity:
30 sheets (80 g/m2, 20 lb)
Note
❒ Specifications are subject to change without notice.
Page 66

DRAFT 2002/08/02
Specifications
132
7
Consumables
Note
❒ Specifications are subject to change without notice.
Name Size Remarks
Master for LG drum Length: 125 m, 410ft/roll
Width: 240 mm, 9.5"
2 Rolls/case
260 masters can be made per
roll
Master for A4 drum Length: 125 m, 410ft/roll
Width: 240 mm, 9.5"
2 Rolls/case
300 masters can be made per
roll
Master for B4 drum Length: 125 m, 410ft/roll
Width: 280 mm, 11.0"
2 Rolls/case
260 masters can be made per
roll
Ink-Black 600ml/pack, 5 packs/case Environmental conditions: – 5
to 40°C, 10 to 95%RH
Ink-Red 600ml/pack, 5 packs/case
Ink-Blue 600ml/pack, 5 packs/case
Ink-Green 600ml/pack, 5 packs/case
Ink-Brown 600ml/pack, 5 packs/case
Ink-Yellow 600ml/pack, 5 packs/case
Ink-Purple 600ml/pack, 5 packs/case
Ink-Navy 600ml/pack, 5 packs/case
Ink-Maroon 600ml/pack, 5 packs/case
Ink-Orange 600ml/pack, 5 packs/case
Ink-Teal 600ml/pack, 5 packs/case
Ink-Gray 600ml/pack, 5 packs/case
Tape for Tape dispenser 35 m (114.8 ft)/roll
Page 67

DRAFT 2002/08/02
133
INDEX
A
Accessing User Tools
,
67
Access to machine
,
122
ADF unit
,
55
ADF unit open lever
,
55
Adjusting the Print Image Density
,
23
Adjusting the Print Image Position
,
21
After clearing misfeeds
,
94
Auto Cycle
,
39
{Auto Cycle}}}} key
, 11,
39
B
Behind cover
,
7
C
Center/Edge Erase
,
30
{Center/Edge Erase}}}} key
, 10, 30,
32
Changing the color Drum Unit
,
63
Changing the Paper Size
,
84
Changing the Printing Speed
,
26
Changing the Settings of User Tools
,
68
Check Indicator
,
10
Class Mode
,
41
Clearing Misfeeds
,
94
{Clear Modes/Energy Saver}}}} key
,
11
{Clear/Stop}}}} key
, 11,
27
color Printing
,
63
Combination Chart
,
125
Combine
,
46
Combine Copies with the Document
Feeder
,
58
{Combine}}}} key
, 10,
46
Consumables
,
132
Control Panel
,
10
Control panel
,
7
Counter
,
12
D
Dirt on the Back Side of Paper
,
112
Dirt on the Front Side of Paper (Black
Line/Stain)
,
114
Document Feeder
,
55
Document feeder
,
8
Document Feeder Exterior
,
55
Drum unit
,
8
Drum unit lock lever
,
8
E
Economy Mode
,
38
Edge Erase
,
32
{Enlarge}}}} key
, 10,
29
Enlargement
,
28
{Enter}}}} key
,
11
Environments to avoid
,
121
Error indicators
,
12
Exposure Glass
,
123
Exposure Glass Cover
,
123
Exposure glass cover
,
7
(E-XX)
,
93
F
Feed roller pressure lever
,
7
{Fine}}}} key
, 11,
25
Fine Mode
,
25
Front door
,
7
{Full Size}}}} key
,
10
G
Guidance display
,
12
H
How to Check the Total Number of
Masters and Prints Made Under All User
Codes
,
80
How to Check the User Code Counter
,
77
How to Clear the User Code Counter
,
78
How to Clear the User Code Total
Counter
,
80
How to Set User Code Mode
,
76
How to Use User Code Mode
,
77
I
{Image Density}}}} key
, 10,
23
{Image Position}}}} key
, 11,
21
Indicators
,
12
Ink
Add ink indicator (j)
,
85
Ink holder
,
8
K
Keys
,
10
Page 68

DRAFT 2002/08/02
134
L
Loading Paper
,
15
Loading Paper into the Paper Feed Tray
,
83
M
Machine Exterior
,
7
Machine Interior
,
8
Main Frame
,
123, 127
Main switch
,
8
Maintaining Your Machine
,
123
Making Color Prints
,
63
Master Eject Indicator
,
109
{Master Making}}}} key
,
11
Master Roll Replacement
,
87
Memory/Class indicator
,
12
{Memory/Class}}}} key
, 11, 41,
43
Memory Mode
,
43
misfeed indicator
,
91
N
Number keys
,
11
O
open cover/unit indicator
,
91
Operation Notes
,
117
Optimum environmental conditions
,
121
Options
,
9
Original guides
,
55
Originals
, 14,
55
Original tray
,
55
Original tray release lever
,
7
P
Paper delivery end plate
,
8
Paper delivery side plates
,
8
Paper delivery tray
,
8
Paper Feed Roller
,
123
Paper feed side plate lock lever
,
7
Paper feed side plates
,
7
Paper feed tray
,
7
Paper feed tray down key
,
7
Paste Shadow Erase
,
34
{Paste Shadow Erase}}}} key
, 10,
34
Photo mode
,
37
Placing a New Roll of Tape in the Tape
Dispenser
,
89
Poor Printing
,
112
Power connection
,
122
Preparation for Printing
,
15
Preset Reduce/Enlarge
,
28
Printing in Two colors
,
65
Printing Paper
,
13
{Print Start}}}} key
,
11
Program
,
50
{Program}}}} key
, 11,
50
{Proof}}}} key
,
11
Protecting a Program
,
52
R
Recalling a Program
,
51
{Reduce}}}} key
, 10,
29
Reduction
,
28
Removing Program Protection
,
53
Replenishing Paper
,
83
Restoring Paper Feed and Paper Delivery
Trays
,
19
S
Safety Information
,
1
{Scroll}}}} key
,
10
{Security}}}} key
, 10,
54
Security Mode
,
54
Separation Roller
,
124
Setting Up the Paper Delivery Tray
,
16
Shifting the Image Position Forward or
Backward
,
21
Shifting the print image to the left
,
21
Shifting the print image to the right
,
21
side plate fine adjusting dial
,
21
Side tray fine adjusting dial
,
7
{Skip Feed}}}} key
, 10,
49
Skip Feed Printing
,
49
Speed indicators
,
12
{Speed}}}} key
,
11
Standard Printing
,
17
Stop the Machine
,
27
Storing Your Settings
,
50
supply/exchange indicators
,
91
T
tape dispenser
,
89
{Tint/Economy}}}} key
, 10, 24,
38
Tint Mode
,
24
{Type of Original}}}}
,
37
{Type of Original}}}} key
,
11
Page 69

DRAFT 2002/08/02
135
U
User Codes
,
76
User Tools Menu
,
69
W
Where to Put Your Machine
,
121
White Prints or Incomplete Prints
,
115
{WWWW} or {VVVV} key
,
26
Page 70

DRAFT 2002/08/02
136
EN USA C248
 Loading...