

Page 1

6. REMARKS
Operation Notes
General Cautions
• While printing, do not turn off the main switch.
• While printing, do not open the door or covers.
• While printing, do not unplug the power cord.
• While printing, do not move the machine.
• Keep corrosive liquids, such as acid, off the machine.
• Open and close the door and covers softly.
• Do not put anything except originals on the machine.
• Do not spill liquid on the machine.
• When opening or closing the door or covers, keep hold of them so they don't
fall.
• When removing the drum unit from the machine, be careful not to let the
drum unit fall.
• Do not modify or replace any parts other than the ones specified in this manual.
• Do not operate the machine without covers. You might get your fingers
caught in the machine, or the machine might be damaged because, for example, dust or the like might get inside.
• Since some parts of the machine are sharp and might cause injury, touch only
the parts specified in this manual.
• If you clean rubber parts with benzine, wipe them with a dry cloth afterwards.
• Always turn the machine off when you have finished printing for the day.
• If the machine must be transported by vehicle, please contact your service
representative.
• Make sure to make a few trial prints to check the image position because the
image position of the trial print might not correspond with that of the original.
• If the image registration is not consistent, slow the printing speed down to
Setting 0.
• When performing duplex or multicolored printing, leave the printed paper
for a while before the next printing in order to let the ink dry on the printed
paper. If this is not done, feed roller marks will appear on the print image.
105
Page 2

REMARKS
• If the machine is not used for a long period, the image density might decrease
because the ink on the drum might dry. Make extra prints until the image
density recovers.
• When the machine is used in low temperature conditions, the image density
might decrease. In this case, slow the printing speed down to step 1 or 2.
• When making duplex prints, misdetection of paper wrapping might occur if
the paper delivery sensor detects a black area at the leading edge of the back
side. Keep at least an 5 mm, 0.2" margin at the leading edge of the back side
of the printing paper.
6
• Press the {
light.
• The top sheet might remain between the feed rollers when you press the {
per Feed Table Down
• When making duplex prints or when using non-white printing paper, the paper end sensor might malfunction and fail to detect the paper. In this case,
place a blank sheet under the printing paper on the paper feed table.
• The outer portion of the image might not be printed under low temperature.
In this case, slow the printing speed down to step 1 or 2, or increase the room
temperature.
• The paper exit pawl might contact the printing paper and cause black lines on
the prints. In this case, increase the printing speed or make a new master with
lighter image density mode.
• If you cannot pull out the drum, close the front cover again to rotate the drum.
Pull out the drum after it stopped at the position.
• The leading edge of the prints might become stained if the edge touches the
image of prints on the paper delivery table.
• The ink of the print on the paper delivery table might stick to the back side of
the next print.
• When the machine is on and the power source is less than 90 % of the specified amount, printing quality will decrease. Therefore, make sure the supply
from your electrical outlet is at least 90 % of the required amount.
} key to perform a test print as the first few prints might be
Proof
} key. In this case, remove the top sheet.
Pa-
• As various kinds and qualities of paper exist, some paper might be wrapped
around the drum or cause misfeeds.
• If your hands are stained with ink:
• Avoid prolonged or repeated contact with skin.
• Cleanse skin thoroughly after contact, before breaks and meals, and at the
end of the work period.
• Ink is readily removed from skin by waterless hand cleaners followed by
washing with soap and water.
• Also, be careful not to get any ink on your clothing while emptying the master
eject box or while loading a new ink cartridge.
106
Page 3

Operation Notes
• The image density varies according to the printing speed and the room temperature. So, adjust the printing speed or increase the room temperature.
• When you make a lot of prints from a small image, ink might ooze out from
the edges of the master, especially under high temperature and when printing in two or more colors. In this case, make a new master.
• Use ink made within one year. Ink stored for a long period tends to dry slowly and yield lower image density.
• While making a master, do not leave the platen cover or optional document
feeder open.
• In Letter/Photo mode, moire patterns might occur when screened originals
are printed. In this case, make prints in Letter or Photo mode.
• When you use originals with light lettering, edges of the letters might be
printed clearly and the inside of the letters might be light. In this case, increase the image density.
Print Paper
• When the paper is curled, stack the paper with the curl face down, otherwise
the paper might wrap around the drum or stains might appear.
• Postcards and the like do not absorb ink well. Offset images might appear on
the rear side of subsequent prints. Solid image originals will cause offset image prints.
6
Originals
• If there is no margin or if there is a solid image area near the leading edge of
the original, make at least a 5 mm, 0.2", margin at the leading edge; otherwise,
the paper might wrap around the drum or the paper exit pawl might become
dirty and cause black lines on prints.
• If you use originals that have bold letters or solid images at the leading edges,
you might get prints with dirty edges. In this case, insert the widest margin
first, or raise the printing speed.
• If you use paste-up originals, select Paste Shadow Erase mode (see ⇒ P.21
“Paste Shadow Erase—Erasing The Shadow Of Pasted Originals”) make sure that
the pasted parts hold firmly to the base sheet. If the thickness of the paste-up
originals is more than 0.1 mm and the space between the pasted parts is less
than 2 mm, 0.08", a shadow might appear on the print.
• Under the following conditions, the machine might not detect the original on
the exposure glass. If you press the {
making a master anyway:
• When you set a dark original on the exposure glass.
• When the original is not centered according to the size marks on the right
scale.
} key again, the machine will start
Start
107
Page 4

REMARKS
• If you do not open the platen cover at an angle of more than 25 degrees
with the exposure glass when you replace originals.
• If the machine is installed under a strong light.
6
108
Page 5
Where To Put Your Machine
R
R
Where To Put Your Machine
Your machine's location should be carefully chosen because environmental conditions greatly affect its performance.
Environmental Conditions
Optimum environmental conditions
CAUTION:
Keep the machine away from humidity and dust. A fire or an elec-
•
tric shock might occur.
•
Do not place the machine on an unstable or tilted surface. If it topples over, it could cause injury.
CAUTION:
•
If you use the machine in a confined space, make sure there is a
continuous air turnover.
6
• Temperature: 10 – 30°C, 50 – 86°F
•Humidity:
• Main Frame: 20 – 90 % RH
• Document feeder (option): 20 – 70 % RH
• A strong and level base (a sturdy desk and cabinet etc.).
• The machine must be level within 5 mm, 0.2" both front to rear and left to
right.
• Make sure to locate this machine in a large well ventilated room that has an
air turnover of more than 30 m
3
/hr/person.
Environments to avoid
• Locations exposed to direct sunlight or strong light (more than 1500 lux).
• Locations directly exposed to cool air from an air conditioner or heated air
from a heater. (Sudden temperature changes might cause condensation within the machine.)
• Places where the machine might be subjected to frequent strong vibration.
•Dusty areas.
• Areas with corrosive gases.
109
Page 6
REMARKS
R
R
R
R
Power connection
WARNING:
Only connect the machine to the power source described on
•
the inside front cover of this manual.
Avoid multi-wiring.
•
Do not damage, break or make any modifications to the pow-
•
er cord. Do not place heavy objects on it, pull it hard or bend
it more than necessary. These actions co uld cause an electric shock or fire.
Do not plug or unplug the power cord with your hands wet.
•
Otherwise, an electric shock might occur.
WARNING:
Make sure the wall outlet is near the machine and freely ac-
•
cessible so that in event of an emergency it can be unplugged easily.
6
CAUTION:
•
When you move the machine, unplug the po wer cord from the
wall outlet to avoid fire or electric shock.
•
When the machine will not be used for a long time, unplug t he
power cord.
CAUTION:
•
When you pull out the plug from the socket, grip the plug to avoid
damaging the cord and causing fire or electric shock.
❖❖❖❖ Main Frame
• Make sure the plug is firmly inserted in the outlet.
110
Page 7
Where To Put Your Machine
Access to machine
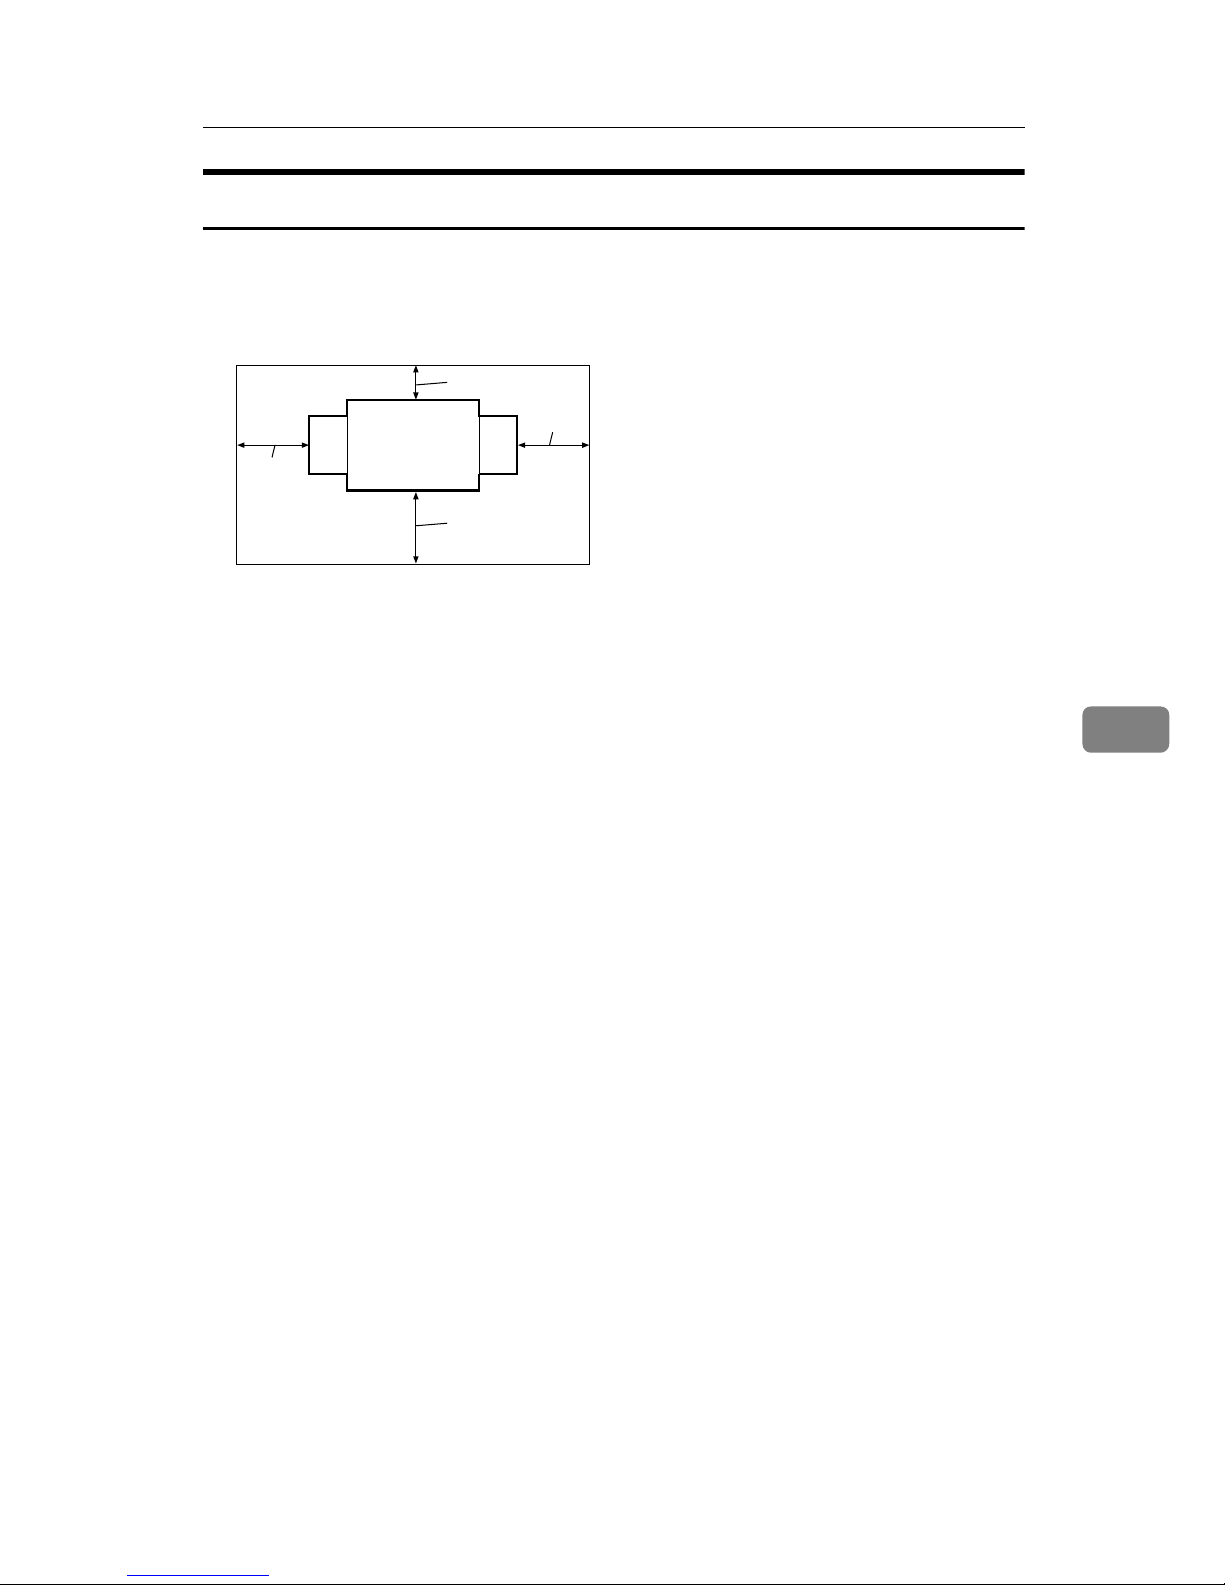
Place the machine near the power source, providing clearance as shown.
❖❖❖❖ Main Frame
1
2
4
3
GRINST0E
1. More than 20 cm, 8.0"
2. More than 60 cm, 23.7"
3. More than 60 cm, 23.7"
4. More than 60 cm, 23.7"
6
111
Page 8
REMARKS
Maintaining Your Machine
6
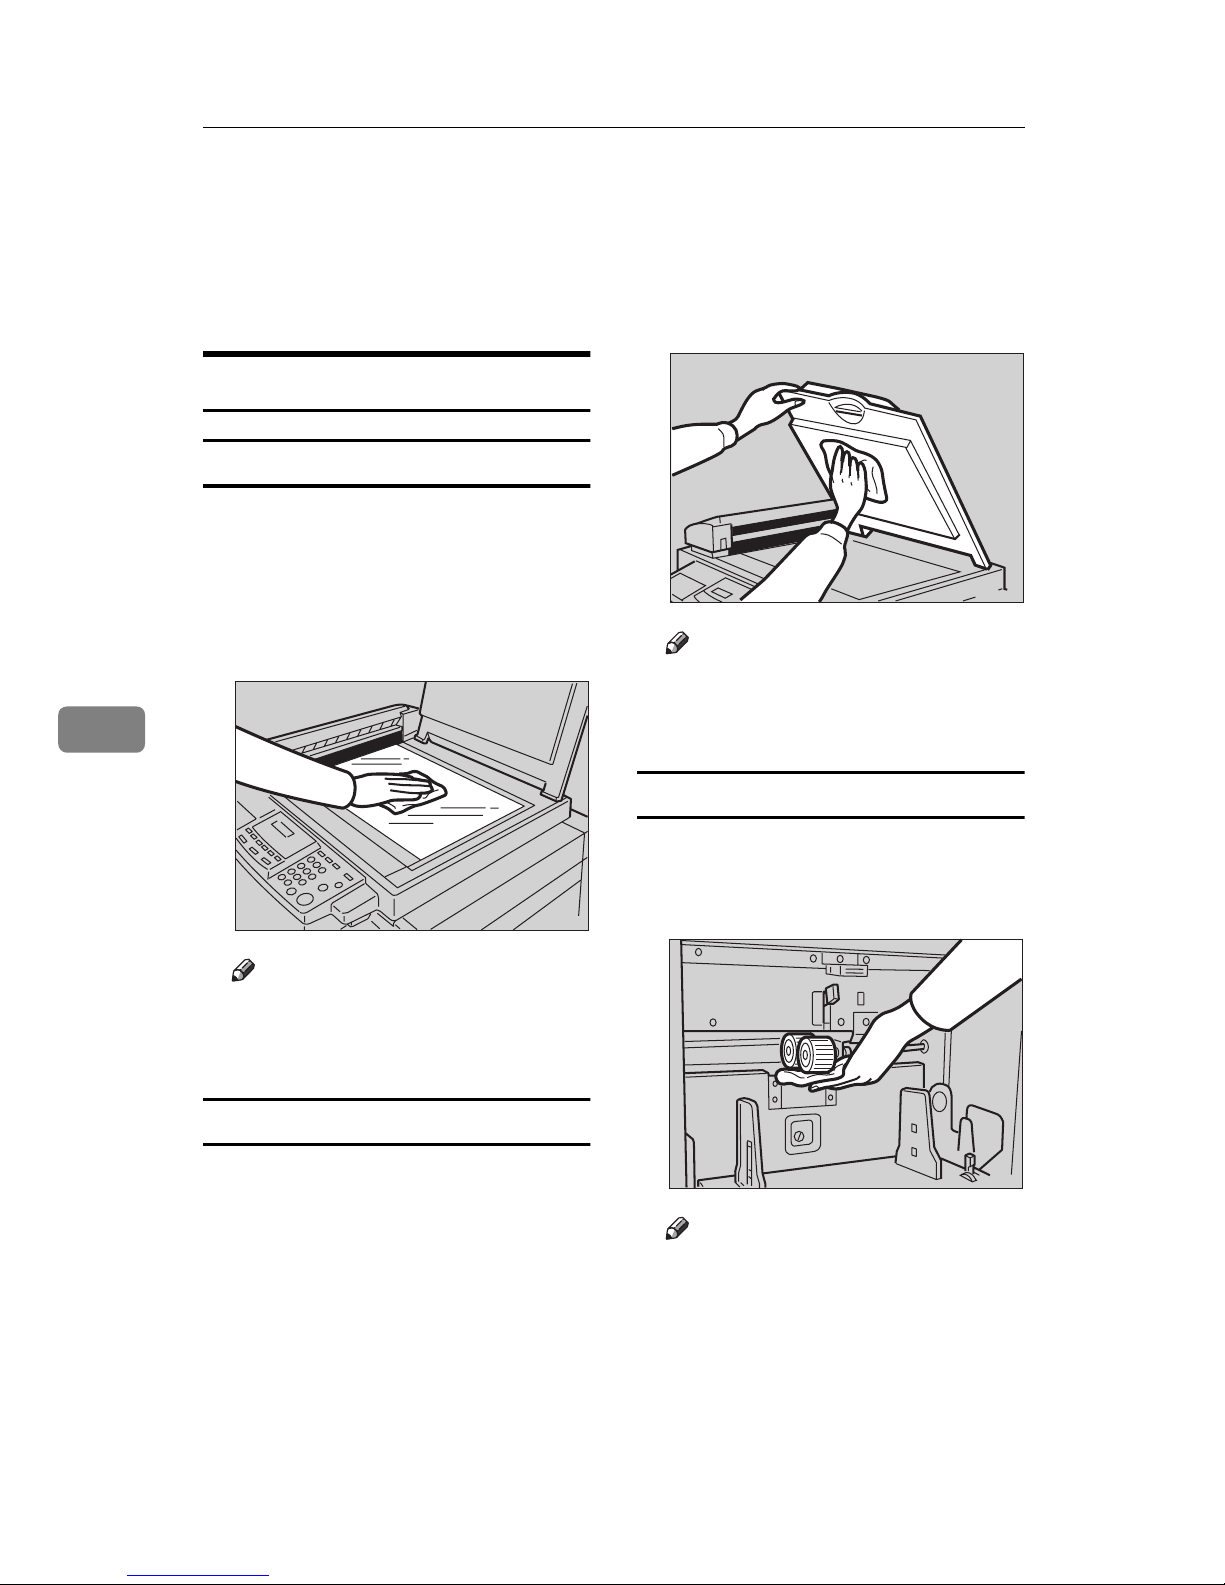
To maintain high print quality, clean
the following parts and units regularly.
Main Frame
Exposure Glass
Lift the platen cover or document
A
feeder.
Clean the exposure glass with a
B
damp cloth and wipe it with a dry
cloth.
Clean the platen cover with a
B
damp cloth and wipe it with a dry
cloth.
Note
❒ If you do not clean the platen
cover, marks on the cover will
be printed.
Paper Feed Roller (paper feed table)
TSLH015E
Note
❒ If you do not clean the exposure
glass, marks on the glass will be
printed.
Platen Cover
Lift the platen cover.
A
TSLH019E
Wipe off the paper dust on the pa-
A
per feed roller with a damp cloth,
then wipe it with a dry cloth.
Note
❒ If you do not clean the paper
feed roller, paper misfeeds tend
to occur.
TSLH017E
112
Page 9
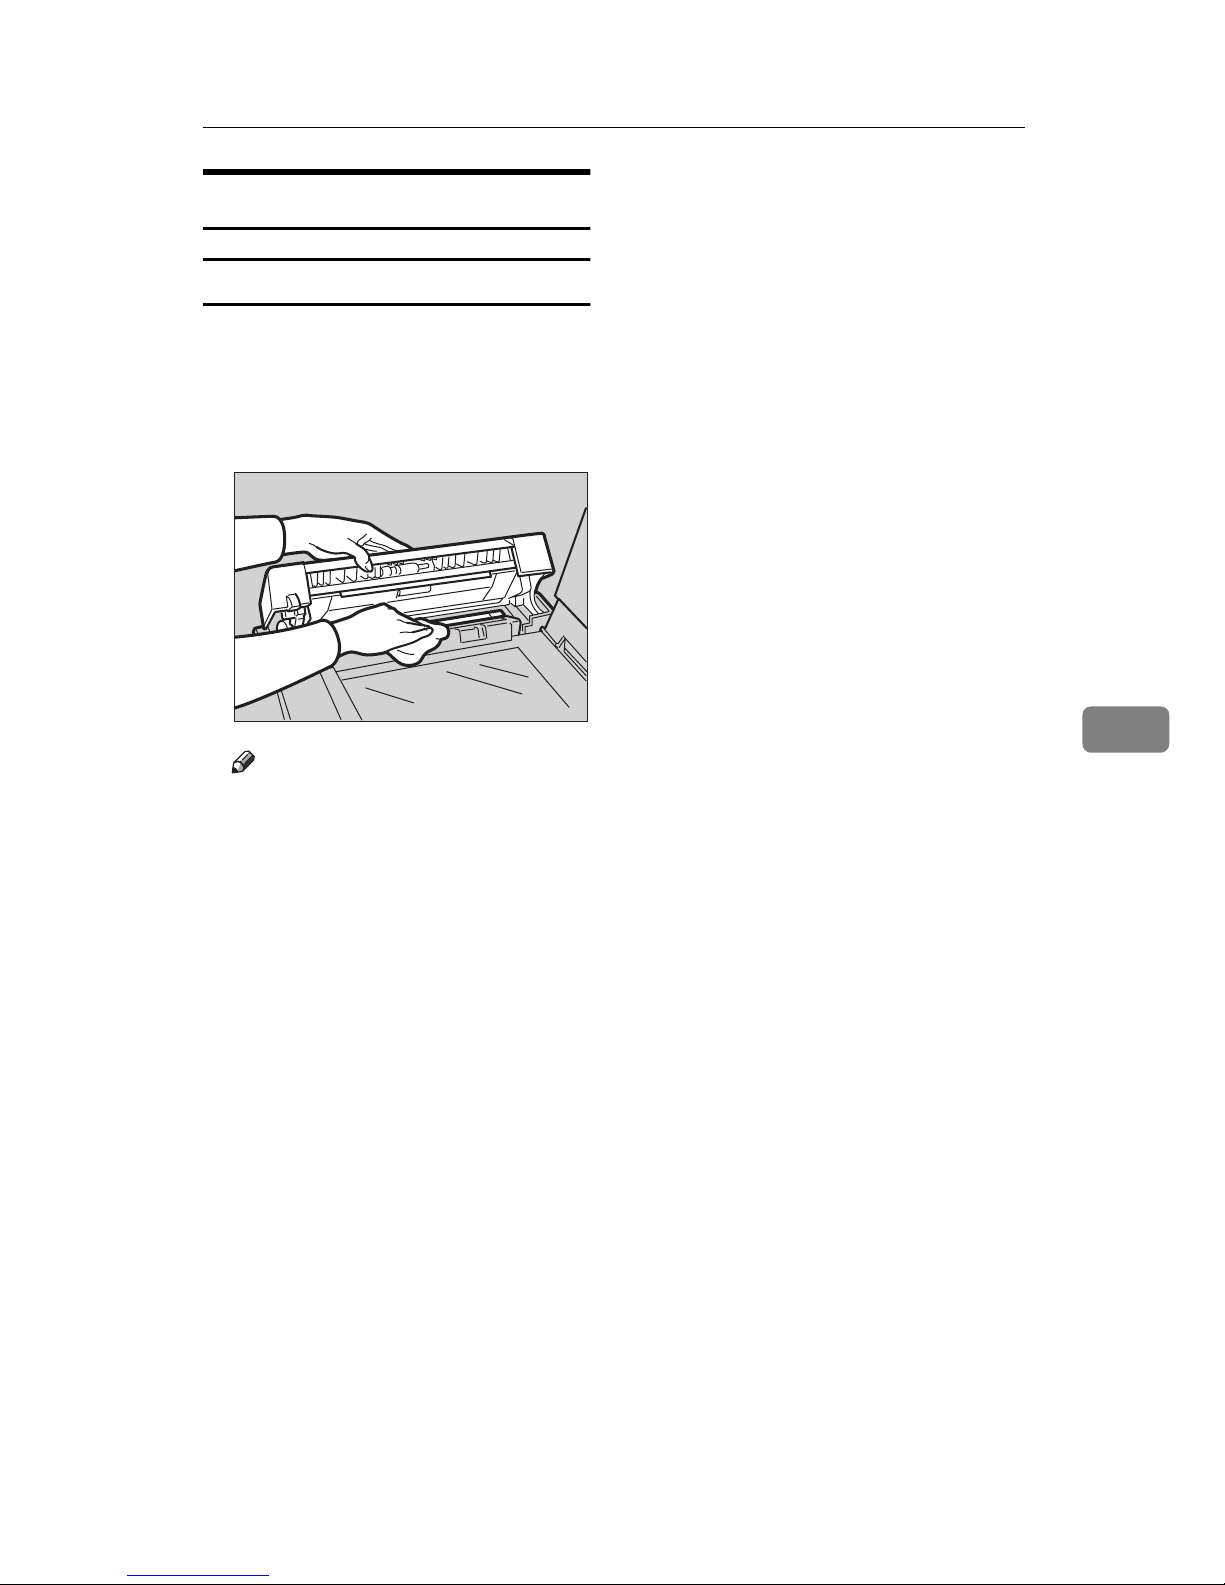
Optional Document Feeder
Separation Roller
Open the ADF unit.
A
Clean the separation roller with a
B
damp cloth and wipe it with a dry
cloth.
Maintaining Your Machine
TSLH016E
Note
❒ If you do not clean the separa-
tion roller, original misfeeds
tend to occur.
6
113
Page 10
REMARKS
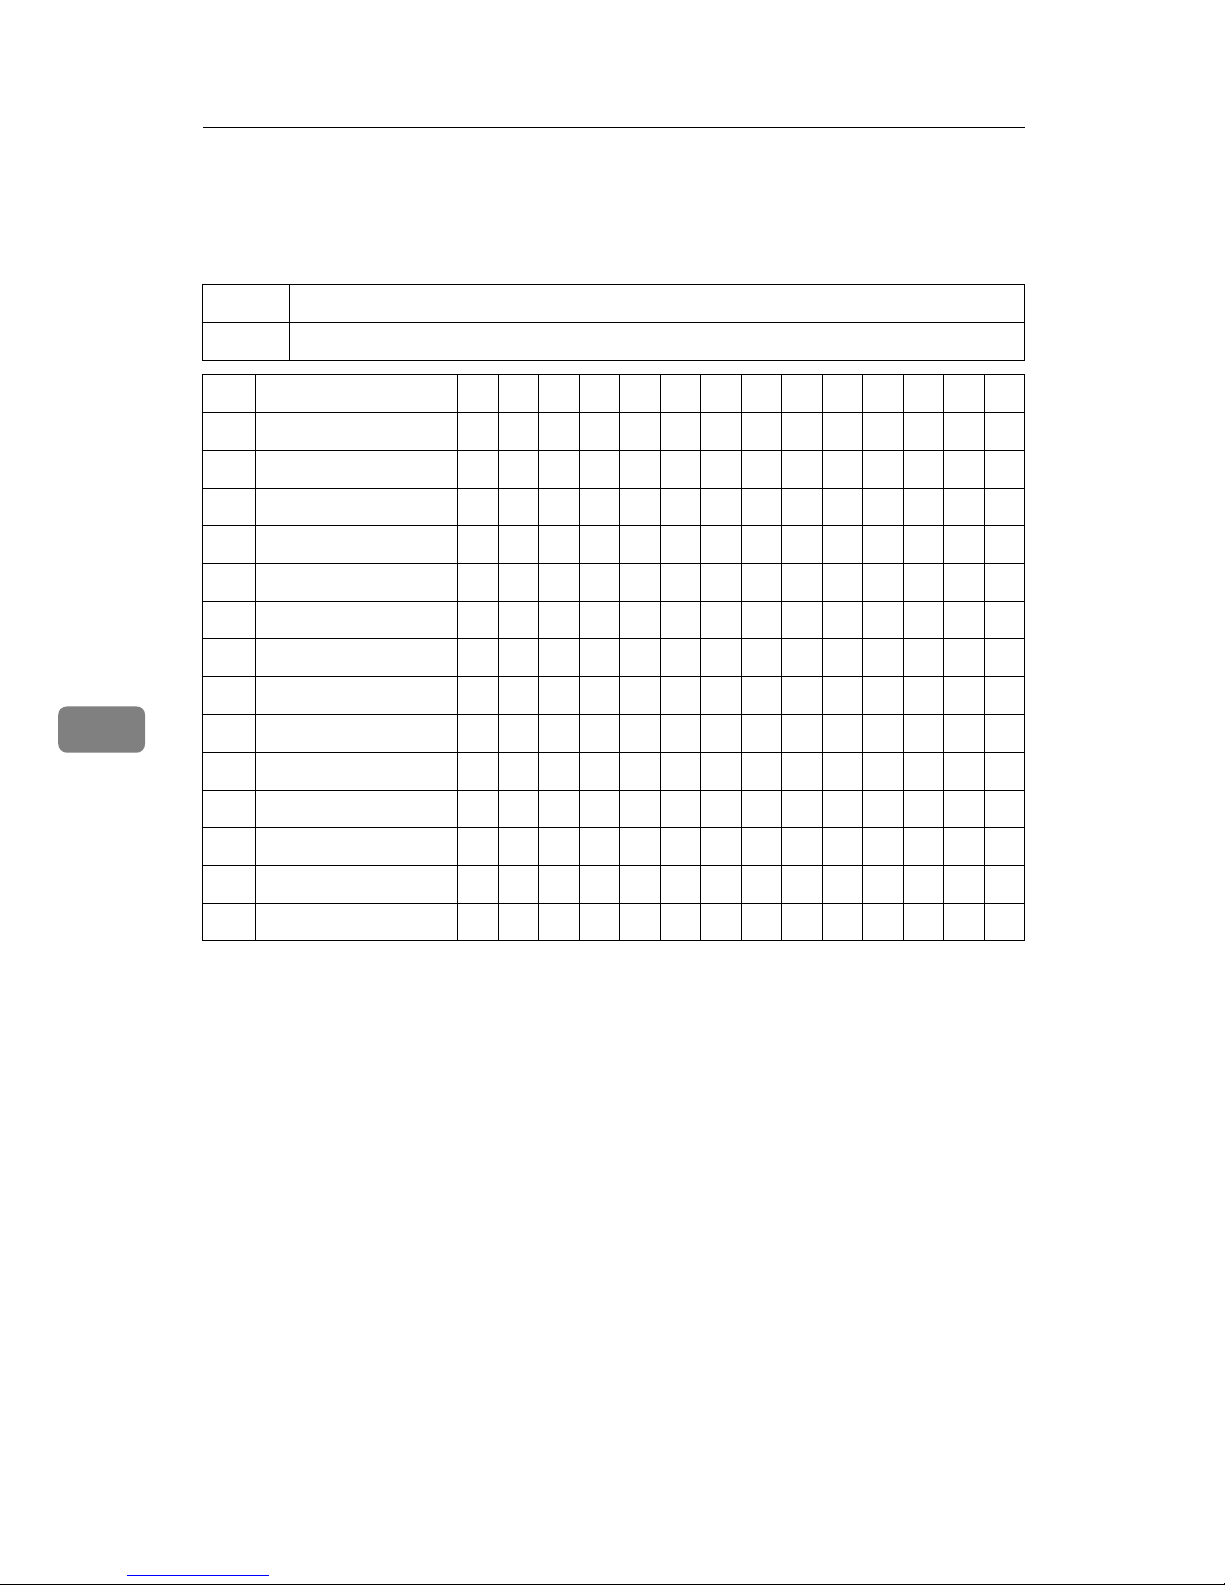
Combination Chart
This combination chart shows which modes can be used together.
6
❍
×
1 Reduction
2 Enlargement ×
3Auto Cycle ❍❍
4 Memory mode ❍❍❍
5Class mode ❍❍❍×
6 Combine Copies ❍❍❍❍❍
7 Center/Edge Erase ❍❍❍❍❍❍
8 Type of Original ❍❍❍❍❍❍❍
9 Image Density ❍❍❍❍❍❍❍❍
10 On-Line ××❍ ЧЧЧЧЧЧ
11 Overlay ❍❍❍×××❍❍❍❍
12 Economy mode ❍❍❍❍❍❍❍❍❍❍❍
means that these modes can be used together.
means that these modes cannot be used together.
1234567 8 91011121314
--
× ❍❍❍❍❍❍❍× ❍❍❍❍
--
❍❍❍❍❍❍❍× ❍❍❍❍
--
❍❍❍❍❍❍❍❍❍❍❍
--
× ❍❍❍❍××❍❍❍
--
❍❍❍❍××❍❍❍
--
❍❍❍××❍❍❍
--
❍❍× ❍❍❍❍
--
❍ × ❍❍❍❍
--
× ❍❍❍❍
--
❍❍××
--
❍ ××
--
❍❍
13 Tint mode ❍❍❍❍❍❍❍❍❍××❍
14 Fine mode ❍❍❍❍❍❍❍❍❍××❍❍
--
❍
--
114
Page 11

7. SPECIFICATION
Main Frame
❖❖❖❖ Configuration:
Desk top
❖❖❖❖ Printing Process:
Full automatic one drum system
❖❖❖❖ Original Type:
Sheet/Book
❖❖❖❖ Original Size:
Maximum 257 mm × 364 mm, 10.2" × 14.4"
❖❖❖❖ Pixel Density:
300 dpi (in Fine mode 400dpi)
❖❖❖❖ Image Mode:
Photo mode (Sand pattern)
Letter mode (Standard mode)
Letter/Photo mode
❖❖❖❖ Reduction Ratios:
• Inch version:
93 %, 77 %, 74 %, 65 %
• Metric version:
93 %, 87 %, 82 %, 71 %
❖❖❖❖ Enlargement Ratios:
• Inch version:
155 %, 129 %, 121 %
• Metric version:
141 %, 122 %, 115 %
❖❖❖❖ Printing Area:
•LG drum:
More than 210 mm × 355 mm, 8.2" × 14.0"
•B4 drum:
More than 250 mm × 355 mm, 9.8" × 14.0"
❖❖❖❖ Print Paper Size:
Maximum 268 mm × 388 mm, 10.5" × 15.2"
Minimum 90 mm × 148 mm, 3.6" × 5.9"
115
Page 12

SPECIFICATION
❖❖❖❖ Leading Edge Margin:
5 mm ± 3 mm, 0.2" ± 0.12"
❖❖❖❖ Print Paper Weight:
47.1 g/m2 to 157.0 g/m2, 12.5 lb to 41.7 lb
❖❖❖❖ Print Speed:
80 – 120 rpm (3 steps)
❖❖❖❖ First Copy Time (Master Process Time):
Less than 27.0 seconds (A4L, 81/
" × 11"L)
2
(When setting an original on the exposure glass)
❖❖❖❖ Second Copy Time (First Print Time):
Less than 29.0 seconds (A4L, 81/
" × 11"L)
2
(When setting an original on the exposure glass)
❖❖❖❖ Color Printing:
Drum unit replacement system (black, red, blue, green, brown, yellow, purple, navy, maroon, orange, teal and gray)
7
❖❖❖❖ Image Position Adjustment:
•Vertical:
More than +10 mm, –10 mm, +0.39", –0.39"
•Side:
10 mm, 0.39" (for either side)
❖❖❖❖ Paper Feed Table Capacity:
1,000 sheets (80 g/m2, 20 lb)
❖❖❖❖ Paper Delivery Table Capacity:
1,000 sheets (80 g/m2, 20 lb)
❖❖❖❖ Master Eject Box Capacity:
More than 30 masters under low temperature
More than 40 masters under high temperature
❖❖❖❖ Dimensions (W ×××× D ×××× H):
Width Depth Height
Stored 594 mm, 23.4" 601 mm, 23.1" 567 mm, 22.4"
Stored with document
feeder
594 mm, 23.4" 601 mm, 23.1" 617 mm, 24.3"
Set up 1,187 mm, 46.8" 601 mm, 23.1" 567 mm, 22.4"
Set up with document
feeder
116
1,187 mm, 46.8" 601 mm, 23.1" 617 mm, 24.3"
Page 13
Main Frame
❖❖❖❖ Weight:
• Main Frame: 65 kg, 143.3 lb
• Main Frame with optional document feeder: 68 kg, 150.0 lb
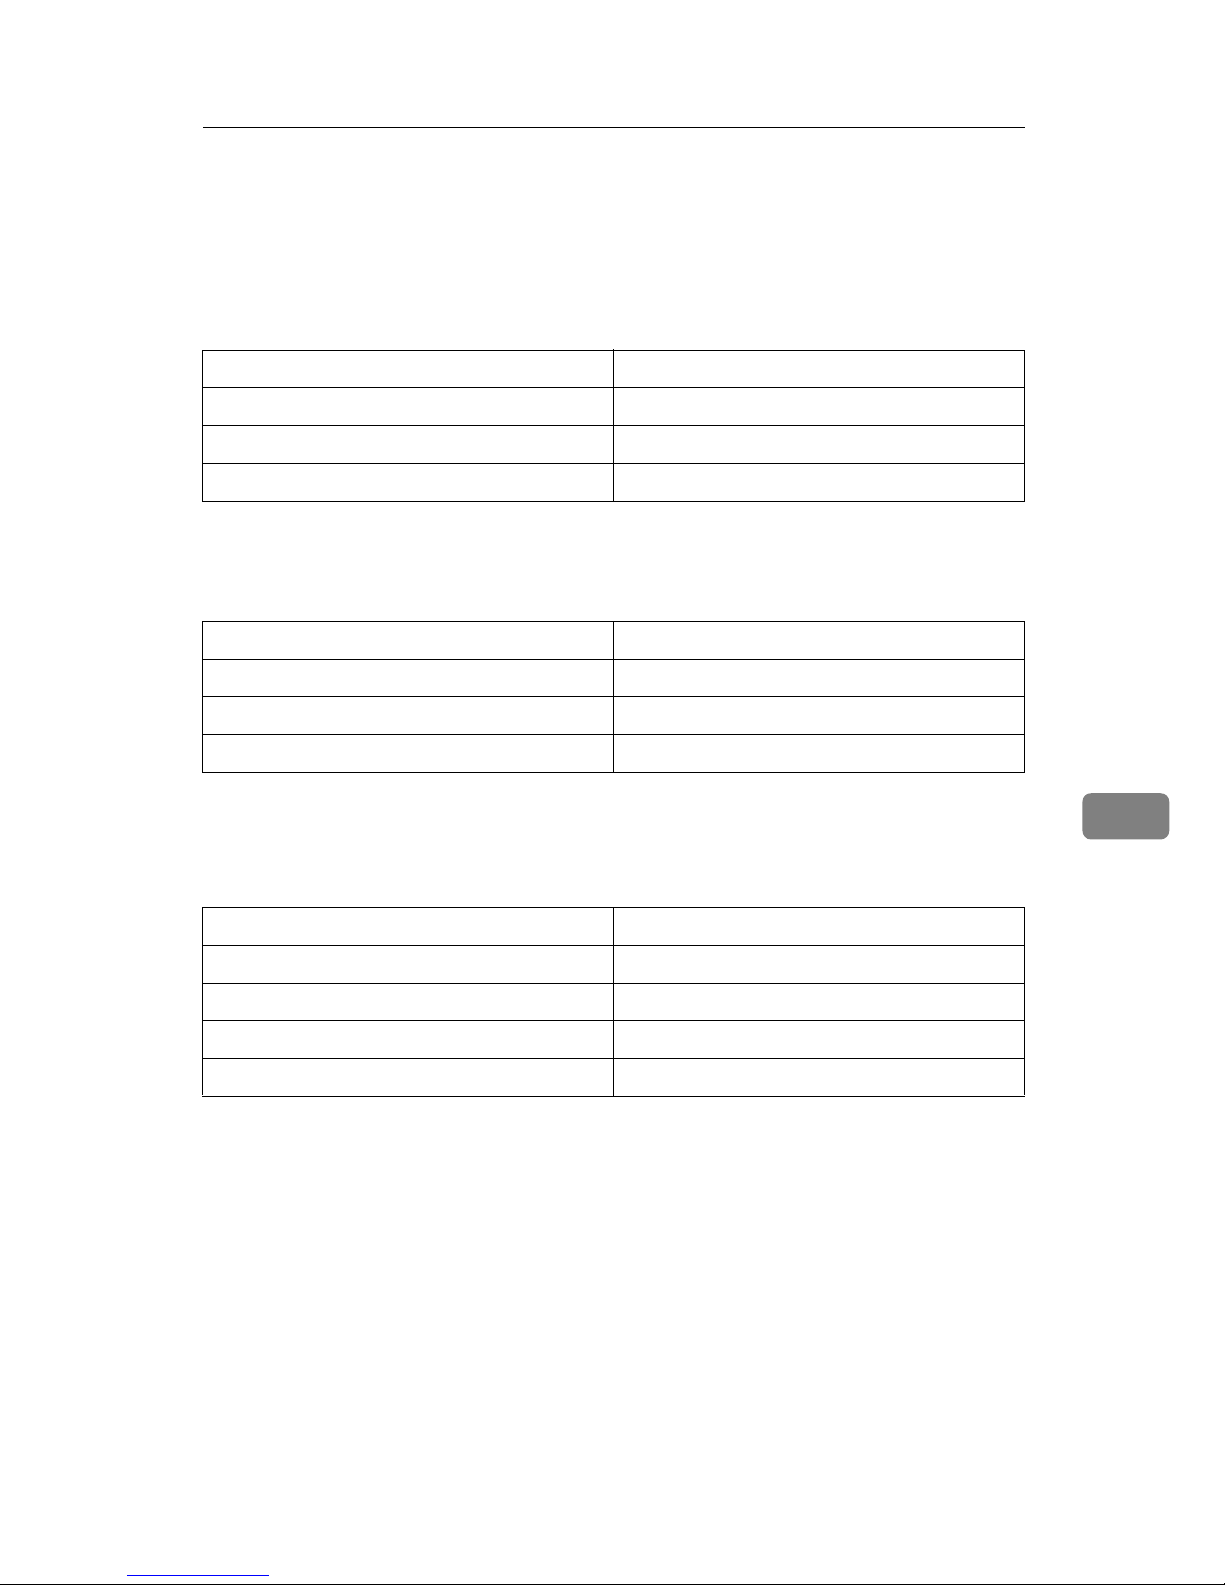
❖❖❖❖ Noise Emission:
Sound Power level (The measurements are made according to ISO 7779.)
Printing Speed
80 rpm 81 dB (A)
100 rpm 82 dB (A)
120 rpm 83 dB (A)
❖❖❖❖ Noise Emission:
• Sound Pressure level (The measurements are made according to ISO 7779
at the operation position.)
Printing Speed
80 rpm 71 dB (A)
100 rpm 72 dB (A)
120 rpm 72 dB (A)
❖❖❖❖ Power Source:
See the inside front cover of this manual.
❖❖❖❖ Power Consumption:
Stand-by Less than 0.04 kW
Master Making Less than 0.25 kW
Printing: Speed 1 Less than 0.14 kW
Printing: Speed 2 Less than 0.16 kW
Printing: Speed 3 Less than 0.18 kW
❖❖❖❖ Optional Equipment:
• Color Drum
LG Drum
B4 Drum
• Key Counter
• Tape Dispenser
7
• 30 Originals Document Feeder
117
Page 14

SPECIFICATION
30 Originals Document Feeder
❖❖❖❖ Original Type:
Sheet
❖❖❖❖ Original Weight:
7
• When setting a stack of originals:
50 – 90 g/m
• When setting one sheet at a time:
40 – 120 g/m
2
, 13.3 – 23.9 lb
2
, 10.6 – 31.9 lb
❖❖❖❖ Original Size:
Max. 257 mm × 364 mm, 10.2" × 14.4"
Min. 148 mm × 105 mm, 5.8" × 4.1"
❖❖❖❖ First Copy Time (Master Process Time):
Less than 29.0 seconds (A4L, 81/
" × 11"L)
2
❖❖❖❖ Second Copy Time (First Print Time):
Less than 32.0 seconds (A4L, 81/
" × 11"L)
2
❖❖❖❖ Original Capacity:
30 sheets (80 g/m2, 20 lb)
Note
❒
Specifications are subject to change without notice.
118
Page 15
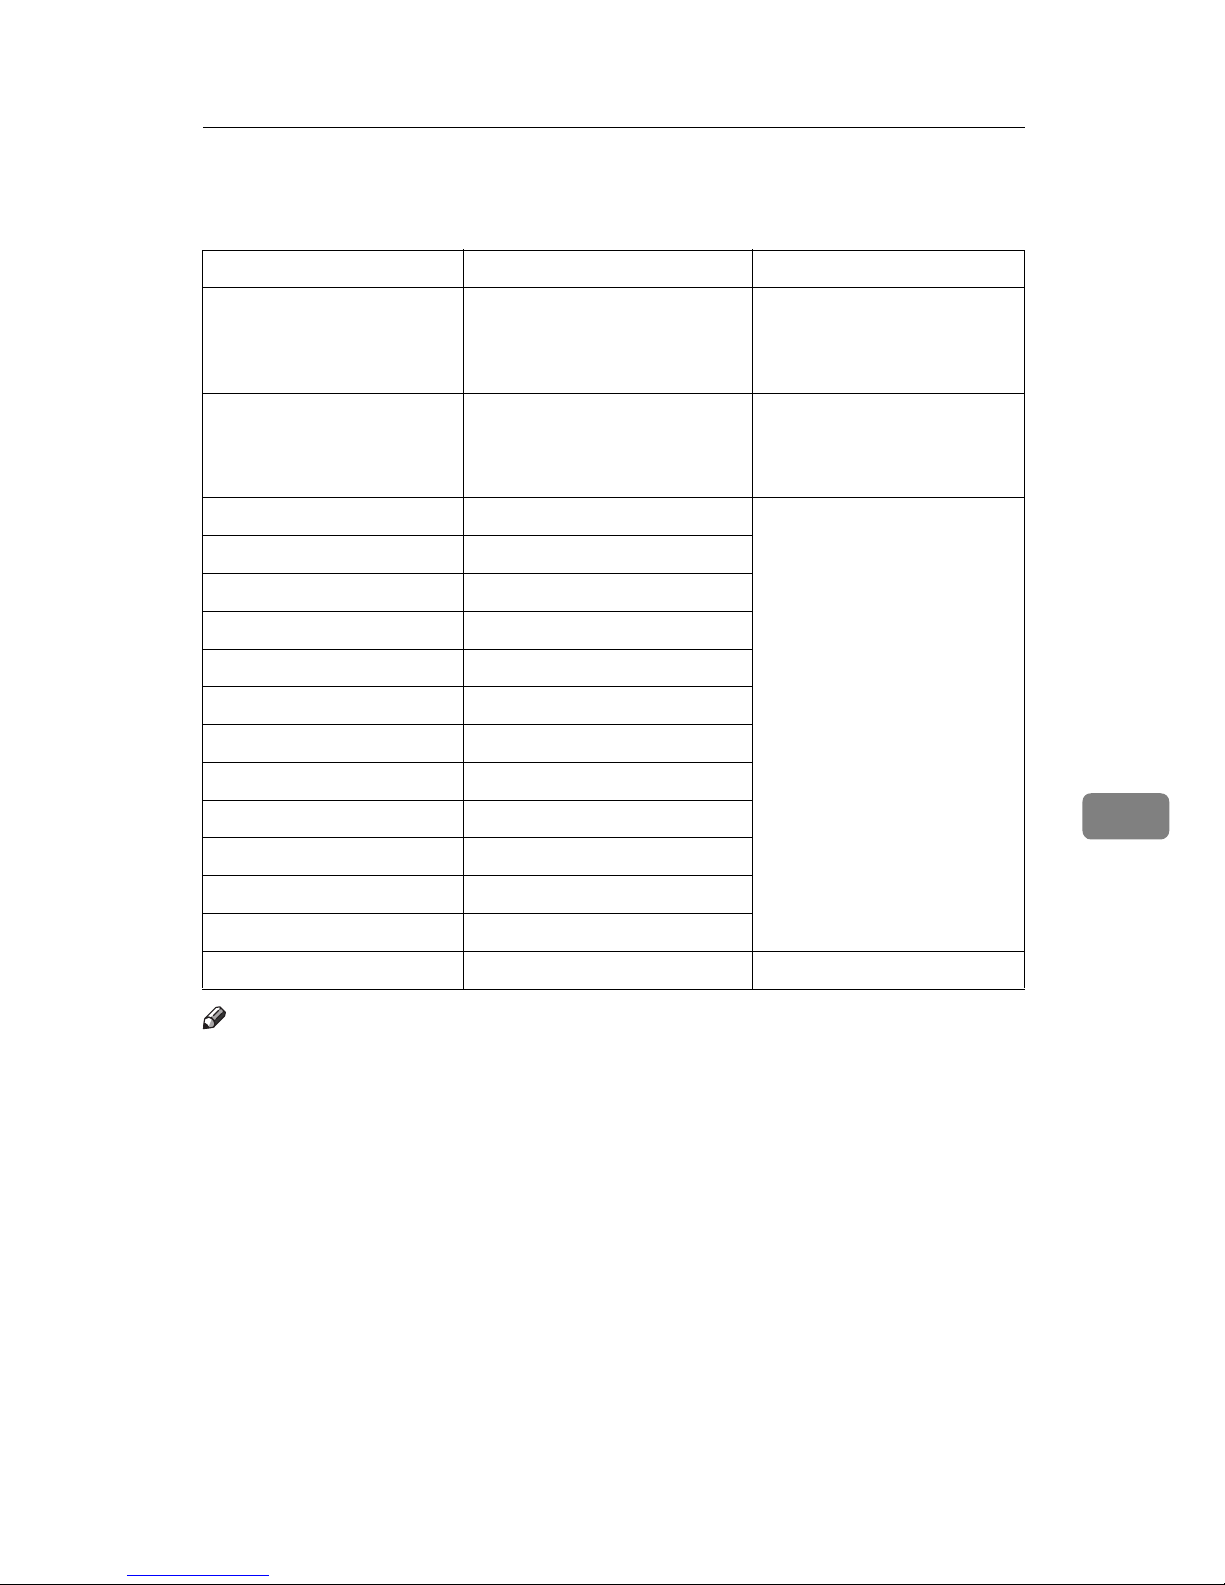
Consumables
Name Size Remarks
Consumables
Master for LG drum Length: 125 m, 410 ft/roll
Width: 240 mm, 9.5"
2 Rolls/case
Master for B4 drum Length: 125 m, 410 ft/roll
Width: 280 mm, 11.0"
2 Rolls/case
Ink-Black 600 ml/pack, 5 packs/case Environmental conditions:
Ink-Red 600 ml/pack, 5 packs/case
Ink-Blue 600 ml/pack, 5 packs/case
Ink-Green 600 ml/pack, 5 packs/case
Ink-Brown 600 ml/pack, 5 packs/case
Ink-Yellow 600 ml/pack, 5 packs/case
Ink-Purple 600 ml/pack, 5 packs/case
Ink-Navy 600 ml/pack, 5 packs/case
Ink-Maroon 600 ml/pack, 5 packs/case
Ink-Orange 600 ml/pack, 5 packs/case
260 masters can be made
per roll
260 masters can be made
per roll
– 5 to 40°C, 10 to 95 % RH
7
Ink-Teal 600 ml/pack, 5 packs/case
Ink-Gray 600 ml/pack, 5 packs/case
Tape for Tape dispenser 35 m (114.8 ft)/roll
Note
❒ Specifications are subject to change without notice.
119
Page 16

INDEX
Symbols
{#} key
{W} and {V} keys (Speed keys)
,
xiii
,
xiii
,
Drum Unit
Drum Unit Lock Lever
x
E
,
x
A
,
,
41
82
,
53
,
,
Accessing Service Programs
41
25
,
,
111
xiii, 25
Access to machine
ADF Unit
ADF Unit Open Lever
Adjusting The Print Image Density
Adjusting The Print Image Position
After clearing misfeeds
Auto Cycle
{Auto Cycle} key
,
,
B
Behind Cover
,
x
C
54
27
,
,
,
,
,
49
,
119
,
17
xii
,
82
xiii
xiii, 14
,
114
32
,
,
xii, 17, 19
,
70
34
,
,
13
49
Center/Edge Erase
{Center/Edge Erase} key
Changing The Color Drum Unit
Changing The Paper Size
Changing The Printing Speed
Changing The Settings Of Service
,
,
,
,
44
xiv
Programs
Check Indicator
Class Mode
Clearing Misfeeds
{Clear Modes} key
{Clear/Stop} key
Color Printing
Combination Chart
Combine Copies
{Combine Copies} key
Combine Copies With The Document
Feeder
Consumables
Counter
D
,
41
,
100
Dirt On The Back Side Of Paper
Dirt On The Front Side Of Paper (Black
Line/Stain)
Document Feeder
Document Feeder Exterior
,
102
, x,
41
10
8
81
,
19
,
,
,
xii, 24
,
xii, 16
15
,
,
112
24
xiv
,
109
{Economy} key
Economy Mode
Edge Erase
{Enlarge} key
Enlargement
Environments to avoid
Error Indicators
Exposure Glass
(E-XX)
,
F
Feed Roller Pressure Lever
{Fine} key
Fine Mode
Front Door
{Full Size} key
,
,
,
xiii, 12
12
ix
,
xii
,
ix
G
Guidance Display
,
xiv
H
How To Check The Total Number Of Masters
And Prints Made Under All User Codes
How To Check The User Code Counter
,
,
62
63
How To Clear The User Code Counter
How To Clear The User Code Total
Counter
How To Set User Code Mode
How To Use User Code Mode
,
66
,
I
{Image Density} key
{Image Position} key
Ink Holder
,
,
xii, 10
,
xiii, 8
x
L
Loading Paper
Loading Paper On The Paper Feed Table
,
3
M
Machine Exterior
,
ix
,
,
,
65
63
64
69
120
Page 17

,
112, 115
,
x
,
,
29
,
x
,
79
,
,
49
,
97
,
74
,
xiv
xiii, 27, 29
112
Machine Interior
Main Frame
Main Switch
Maintaining Your Machine
Making Color Prints
Master Eject Indicator
Master Roll Replacement
Memory/Class Indicator
{Memory/Class} key
Memory Mode
misfeed indicator
N
{Number} keys
,
xiii
O
xii
,
79
,
,
ix
open cover/unit indicator
Operation Notes
Operation Panel
Optimum environmental conditions
Options
Original Guides
Originals
Original Table Release Lever
Original Tray
,
, 2,
,
105
, ix,
xi
,
41
41
,
41
P
112
ix
,
110
,
,
21
x
,
,
,
,
ix
,
,
15
51
,
x
,
,
xii, 21
3
22
22
x
ix
Paper Delivery End Plate
Paper Delivery Side Plates
Paper Delivery Table
,
76
, ix,
,
xiii
36
23
,
,
,
112
100
,
1
Paper Feed Roller
Paper Feed Side Plates
Paper Feed Table
Paper Feed Table Down key
Paste Shadow Erase
{Paste Shadow Erase} key
Photo mode
Placing A New Roll Of Tape In The Tape
Dispenser
Platen Cover
Poor Printing
Power connection
Preparation For Printing
Preset Reduce/Enlarge
Printing In Two Colors
Printing On Thick Paper
Printing On Thin Paper
Printing Paper
{Print} key
Program
,
,
,
109
,
,
xiii
xiii, 36
,
38
{Program} key
{Proof} key
Protecting A Program
R
16
xii
,
,
69
37
,
39
Recalling A Program
,
7
,
,
,
15
{Reduce } key
{Reduce} key
Reduction
Removing Program Protection
Replenishing Paper
Restoring Paper Feed And Paper Delivery
Tables
S
xii
,
8
xiii
xii, 40
,
40
,
,
13
,
i
,
113
xii, 35
,
35
xiv
,
5
,
14
,
,
36
55
,
,
,
8
8
,
79
,
,
ix
Safety Information
{Scroll} key
{Security} key
Security Mode
Separation Roller
Service Program Menu
Setting Up The Paper Delivery Table
Shifting The Image Position Forward Or
Backward
Shifting the image to the left
Shifting the print image to the right
side plate fine adjusting dial
Side Table Fine Adjusting Dial
{Skip Feed} key
Skip Feed Printing
Speed Indicators
{Speed} key
Standard Printing
{Start} key
Stop The Machine
Storing Your Settings
supply/exchange indicators
,
,
,
,
T
,
,
,
,
,
22
22
xii, 11
11
76
,
xiii, 23
tape dispenser
Thick paper
Thin paper
{Tint} key
Tint Mode
{Type of Original}
{Type of Original} key
U
User Codes
,
62
4
8
121
Page 18

W
When The Add Ink Indicator Blinks
Where To Put Your Machine
White Prints Or Incomplete Prints
,
109
,
,
102
71
122
UE USA AE AE C231
Page 19
JP1230
Operating Instructions
Read this manual carefully before you use this product and k eep it handy f or fut ur e
reference.
For safety, please follow the instructions in this manual.
SilverV-EN.book Page 1 Monday, May 15, 2000 3:23 PM
Page 20
JP1230 Operating Instructions
RICOH COMPANY, LTD.
15-5, 1 chome, Minami-Aoyama, Minato-ku, Tokyo
Telephone: Tokyo 3479-3111
Overseas Affiliates
U.S.A.
RICOH CORPORATION
5 Dedrick Place
West Caldwell, New Jersey 07006
Phone: +1-973-882-2000
The Netherlands
RICOH EUROPE B.V.
Groenelaan 3, 1186 AA, Amstelveen
Phone: +31-(0)20-5474111
United Kingdom
RICOH UK LTD.
Ricoh House,
1 Plane Tree Crescent, Feltham,
Middlesex, TW13 7HG
Phone: +44-(0)181-261-4000
Germany
RICOH DEUTSCHLAND GmbH
Mergenthalerallee 38-40,
65760 Eschborn
Phone: +49-(0)6196-9060
France
RICOH FRANCE S.A.
383, Avenue du Général de Gaulle
BP 307-92143 Clamart Cedex
Phone: +33-(0)1-40-94-38-38
Spain
RICOH ESPAÑA S.A.
Avda. Litoral Mar, 12-14,
08005 Barcelona
Phone: +34-(0)93-295-7600
Italy
RICOH ITALIA SpA
Via della Metallurgia 12,
37139 Verona
Phone: +39-045-8181500
Hong Kong
RICOH HONG KONG LTD.
23/F., China Overseas Building,
139, Hennessy Road,
Wan Chai, Hong Kong
Phone: +852-2862-2888
Singapore
RICOH ASIA PACIFIC PTE.LTD.
260 Orchard Road,
#15-01/02 The Heeren,
Singapore 238855
Phone: +65-830-5888
Printed in Korea
UE USA C237-8607
SilverV-EN.book Page 1 Monday, May 15, 2000 3:23 PM
Page 21
Introduction
This manual contains detailed instructions on the o peration and maintenanc e of this machine . To get
maximum versatility from this machine all operators should carefully re ad and follow the instru ctions in
this manual. Please keep this manual in a handy place n ear the machine.
Please read the Safety Information before usin g this machine. I t contains imp ortant informa tion related
to USER SAFETY and PREVENTING EQUIPMENT PROBLEMS.
Notes:
Some illustrations might be slightly different from your machine.
Certain options might not be available in some countries . For details , please co ntact your local d ealer .
Notes:
The model names of the machines do not appear in the following pages. Ch eck the type of your machine before reading this manual.
• LG drum: JP1230
• A4 drum: Not Available
• B4 drum: Not Available
Certain types might not be available in some countries. For details, please contact your local dealer.
Two kinds of size notation are employed in this manual. With this machine refer to the inch version.
For good print quality, Ricoh recommends that you use genuine Ricoh master and ink.
Ricoh shall not be responsible for any damage or expense that might result from the use of parts other
than genuine Ricoh parts in your Ricoh office product.
Power Source
120V, 60Hz, 2.3A or more
Please be sure to connect the power cord to a power source as above. For details about power source,
see ⇒ P.112
“Power Connection”
.
SilverV-EN.book Page 1 Monday, May 15, 2000 3:23 PM
Page 22

Note to users in the United States of America
Notice:
This equipment has been tested and found to comply with the limits for a Class B digital device, pursuant to Part 15
of the FCC Rules. These limits are designed to provide reasonable protection against harmful interference in a residential installation. This equipment generates, uses and can radiate radio frequency energy and, if not installed and
used in accordance with the instructions, may cause harmful interference to radio communications. However, there
is no guarantee that interference will not occur in a particular installation. If this equipment does cause harmful interference to radio or television reception, which can be determined by turning the equipment off and on, the user
is encouraged to try to correct the interference by one more of the following measures:
Reorient or relocate the receiving antenna.
Increase the separation between the equipment and receiver.
Connect the equipment into an outlet on a circuit different from that to which the receiver is connected.
Consult the dealer or an experienced radio /TV technician for help.
Warning
Changes or modifications not expressly approved by the party responsible for compliance could void the user's authority to operate the equipment.
Warning:
Changes or modifications not expressly approved by the party responsible for compliance could void the user's authority to operate the equipment.
Properly shielded and grounded cables and connectors must be used for connections to host computer (and/or peripheral) in order to meet FCC emission limits.
This device complies with Part 15 of FCC Rules.
Operation is subject to the following two conditions:
1. This device may not cause harmful interference, and
2. This device must accept any interference received,
including interference that may cause undesired operation.
Ricoh Corporation, 5 Dedrick Place, West Caldwell, NJ 07006
973-882-2000
Note to users in Canada
Note:
This Class B digital apparatus complies with Canadian ICES-003.
Remarque concernant les utilisateurs au Canada
Avertissement:
Cet appareil numérique de la classe B est conforme à la norme NMB-003 du Canada.
In accordance with IEC 60417, this machine uses the following symbols for the main switch:
aaaa means POWER ON.
bbbb means POWER OFF.
Copyright © 2000 Ricoh Co., Ltd.
SilverV-EN.book Page 1 Monday, May 15, 2000 3:23 PM
Page 23
i
Safety Information
When using your equipment, the following safety precautions should always be
followed.
Safety During Operation
In this manual, the following important symbols are used:
R
WARNING:
R
WARNING:
Indicates a potentially hazardous situation which, if instructions
are not followed, could result in death or serious injury.
R
CAUTION:
Indicates a potentially hazardous situation which, if instructions are not
followed, may result in minor or moderate injury or damage to property.
•
Connect the power cord directly into a wall outlet and never use an extension cord.
•
Disconnect the power plug (by pulling the plug, not the cable) if the
power cable or plug becomes frayed or otherwise damaged.
•
To avoid hazardous electric shock, do not remove any covers or
screws other than those specified in this manual.
•
Turn off the power and disconnect the power plug (by pulling the plug,
not the cable) if any of the following conditions exists:
•
You spill something into the equipment.
•
You suspect that your equipment needs service or repair.
•
Your equipment's cover has been damaged.
SilverV-EN.book Page i Monday, May 15, 2000 3:23 PM
Page 24
ii
R
CAUTION:
•
Protect the equipment from dampness or wet weather, such as rain, snow,
and so on.
•
Unplug the power cord from the wall outlet before you move the equipment.
While moving the equipment, you should take care that the power cord will
not be damaged under the equipment.
•
When you disconnect the power plug from the wall outlet, always pull the
plug (not the cable).
•
Do not allow paper clips, staples, or other small metallic objects to fall inside
the equipment.
•
For environmental reasons, do not dispose of the equipment or expended
supply waste at household waste collection points. Disposal can take place
at an authorized dealer or at appropriate collection sites.
•
Be careful not to cut yourself on any sharp edges when you reach inside the
machine to remove misfed sheets of paper or masters.
•
Our products are engineered to meet high standards of quality and functionality, and we recommend that you only use the expendable supplies available at an authorized dealer.
SilverV-EN.book Page ii Monday, May 15, 2000 3:23 PM
Page 25
iii
How to Read this Manual
Symbols
In this manual, the following symbols are used:
R
WARNING:
This symbol indicates a potentially hazardous situation that might result in
death or serious injury when you misuse the machine without following the instructions under this symbol. Be sure to read the instructions, all of which are described in the Safety Information section.
R
CAUTION:
This symbol indicates a potentially hazardous situation that might result in minor or moderate injury or property damage that does not involve personal injury
when you misuse the machine without following the instructions under this
symbol. Be sure to read the instructions, all of which are described in the Safety
Information section.
* The statements above are notes for your safety.
Important
If this instruction is not followed, paper might be misfed, originals might be
damaged, or data might be lost. Be sure to read this.
Preparation
This symbol indicates the prior knowledge or preparations required before operating the machine.
Note
This symbol indicates precautions for operation, or actions to take after misoperation.
Limitation
This symbol indicates numerical limits, functions that cannot be used together,
or conditions in which a particular function cannot be used.
Reference
This symbol indicates a reference.
[]
Keys that appear on the machine's display panel.
{}
Keys built into the machine's operation panel.
SilverV-EN.book Page iii Monday, May 15, 2000 3:23 PM
Page 26
iv
What You Can Do with this Machine
Below is a quick summary of this machine's features and where to look in this
manual for more information
❖❖❖❖
Standard Printing
See ⇒ P.5 “Standard Printing”.
❖❖❖❖
Adjusting the Print Image Position
See ⇒ P.9 “Adjusting the Print Image Position”.
❖❖❖❖
Adjusting the Print Image Density
See ⇒ P.11 “Adjusting the Print Image Density”.
❖❖❖❖
Halftone Printing
See ⇒ P.12 “Tint Mode—Halftone Printing”.
❖❖❖❖
Making Clear Prints
See ⇒ P.13 “Use the
{Fine}
key to make clear prints.”.
❖❖❖❖
Changing the Print Speed
See ⇒ P.14 “Changing the Printing Speed”.
❖❖❖❖
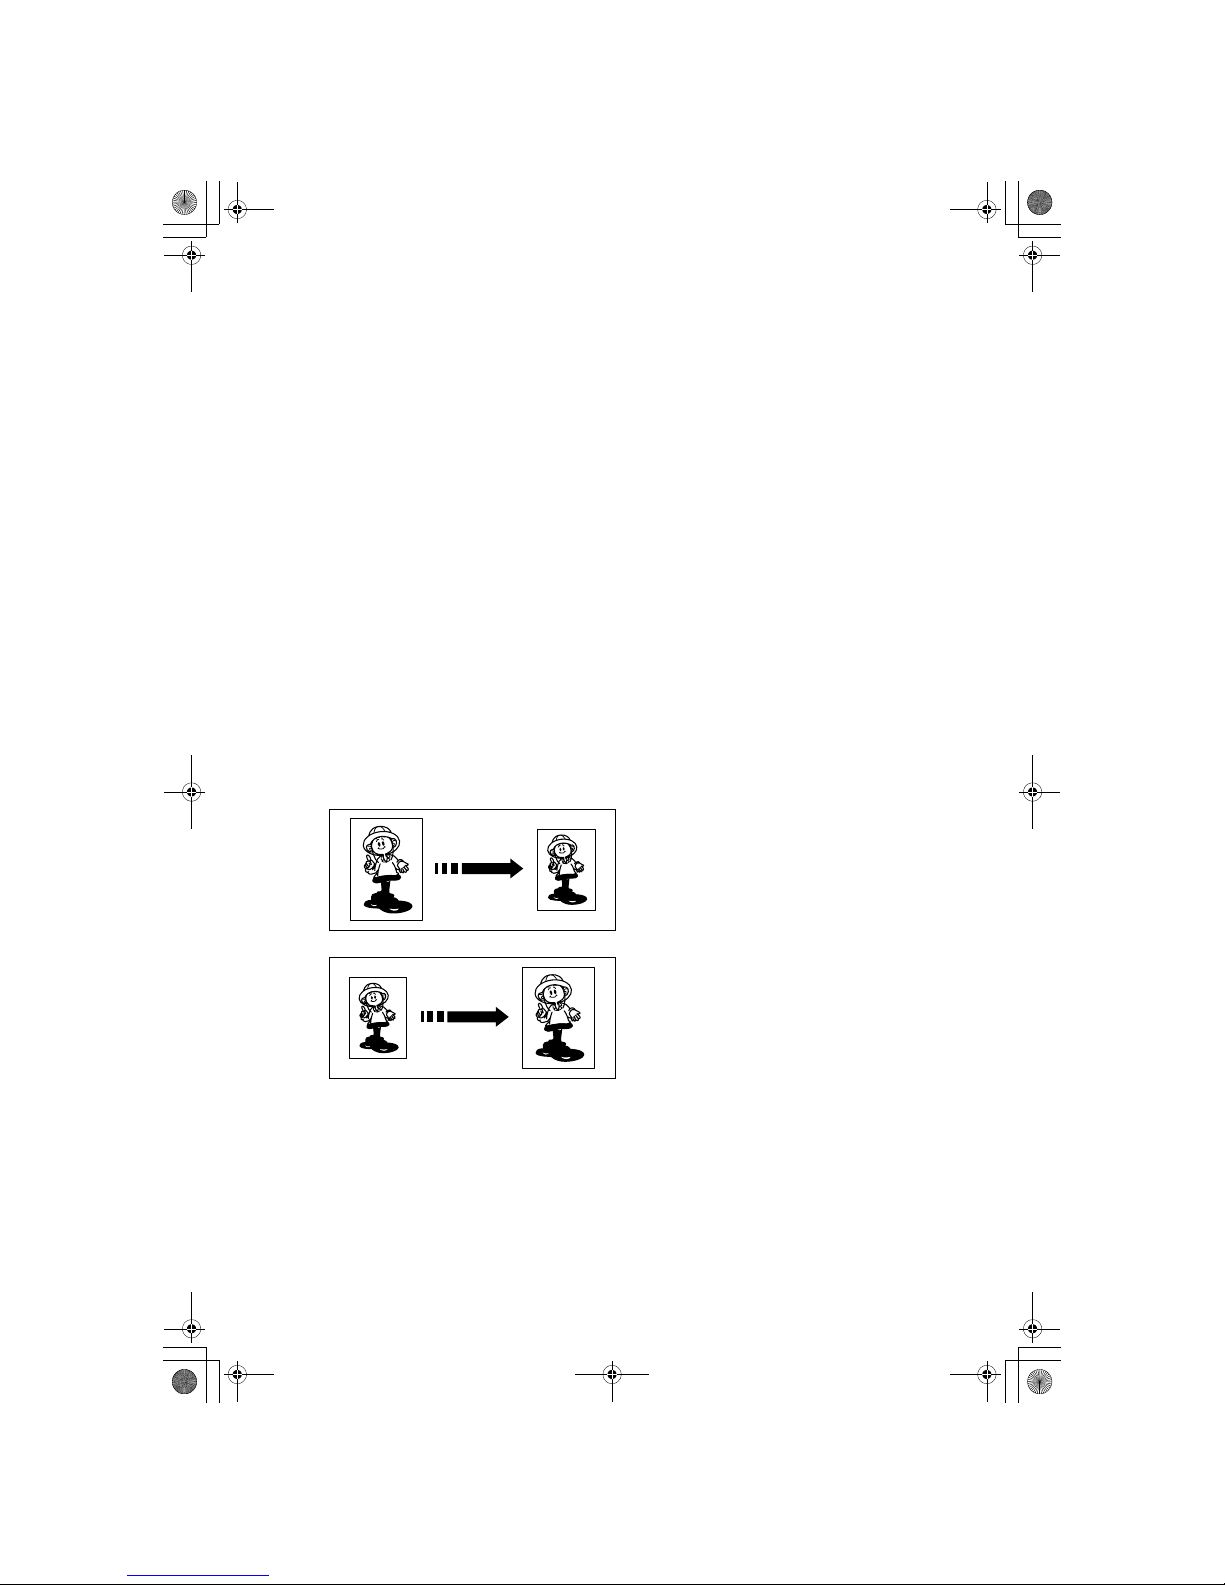
Reducing and Enlarging Using Preset Ratios
See ⇒ P.16 “Preset Reduce/Enlarge—Reducing and Enlarging Using Preset Ratios”.
GRREDU0E
GRENLA0E
SilverV-EN.book Page iv Monday, May 15, 2000 3:23 PM
Page 27
v
❖❖❖❖
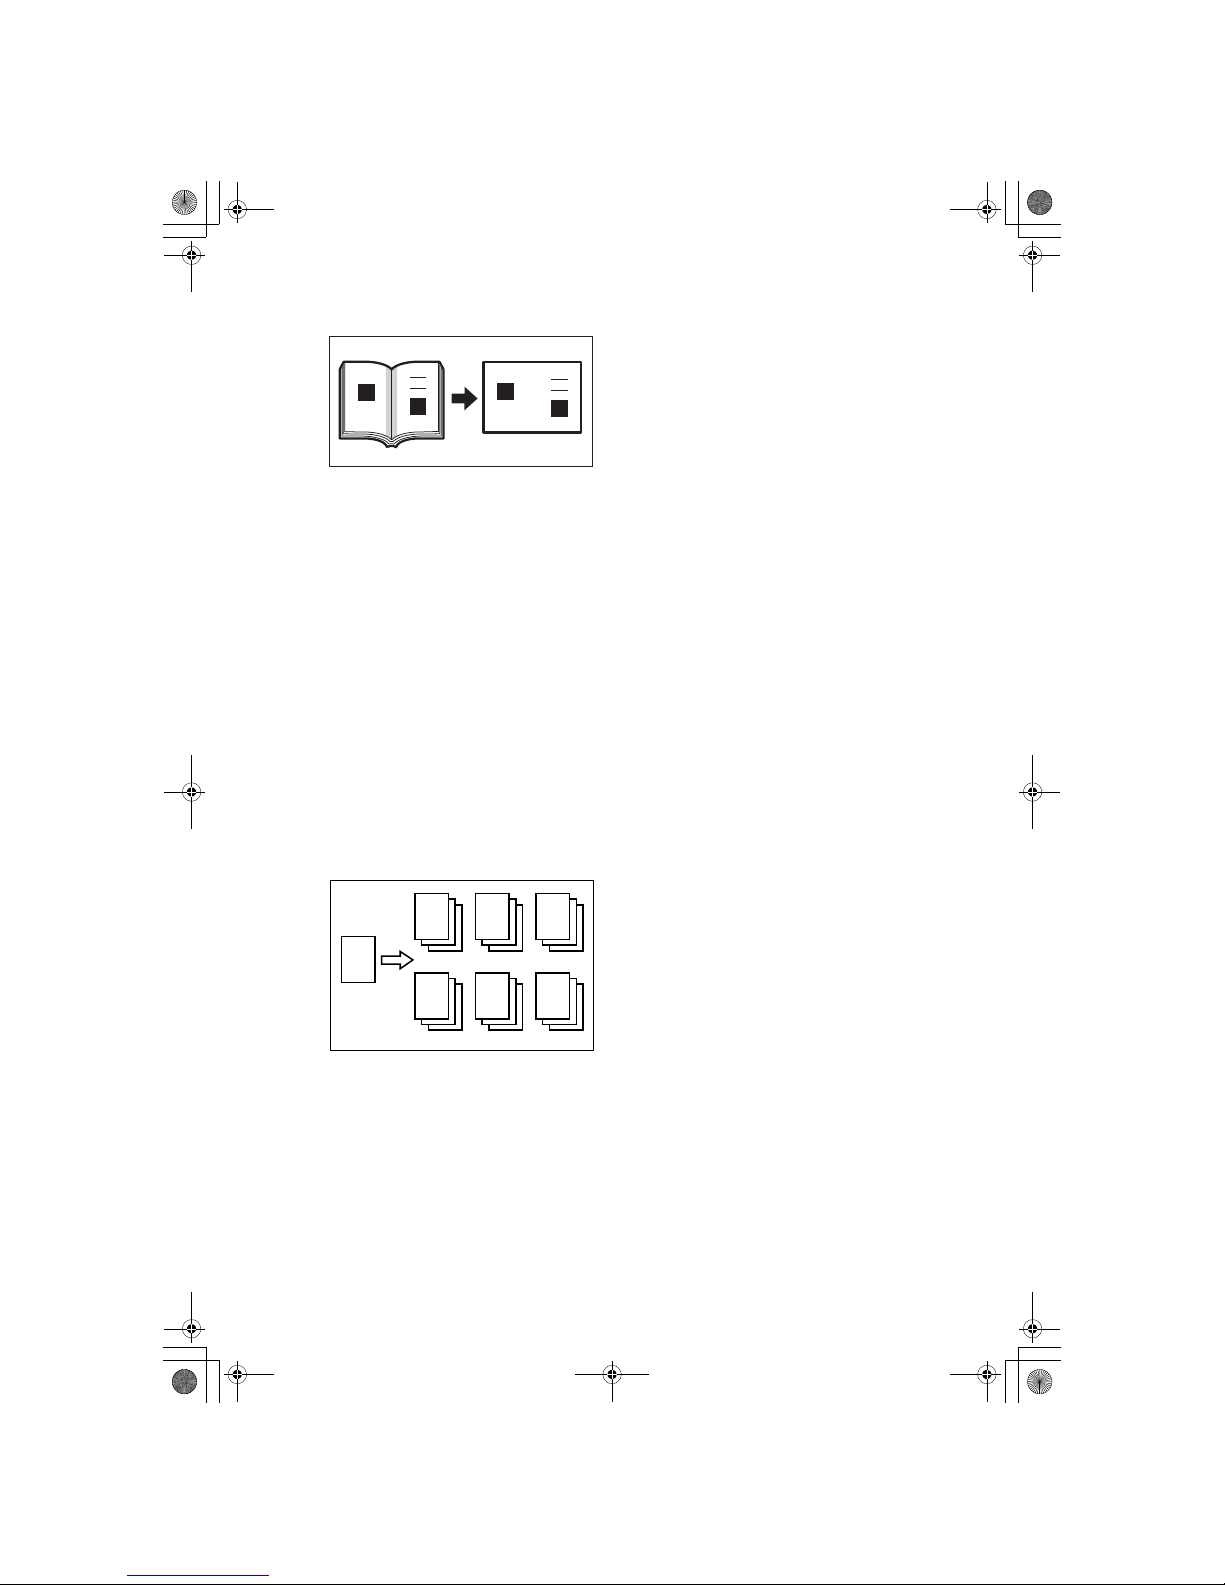
Erasing Center and Edge Margins
See ⇒ P.18 “Center/Edge Erase—Erasing center and Edge Margins”.
❖❖❖❖
Erasing Edge Margins
See ⇒ P.20 “Edge Erase—Erasing Edge Margins”.
❖❖❖❖
Erasing the Shadow of Pasted Originals
See ⇒ P.22 “Paste Shadow Erase—Erasing the Shadow of Pasted Originals”.
❖❖❖❖
Printing on Thick or Thin Paper
See ⇒ P.23 “Printing on Thick or Thin Paper”.
❖❖❖❖
Selecting Original Type
See ⇒ P.24 “Selecting Original Type”.
❖❖❖❖
Saving Ink
See ⇒ P.25 “Economy Mode—Saving Ink”.
❖❖❖❖
Printing from Several Originals at Once
See ⇒ P.26 “Auto Cycle—Printing from Several Originals at Once”.
❖❖❖❖
Group Printing from the Same Original
See ⇒ P.28 “Class Mode—Group Printing from the Same Original”.
GRMARG0E
GRCLAS0E
R
R
R R
R R R
SilverV-EN.book Page v Monday, May 15, 2000 3:23 PM
Page 28
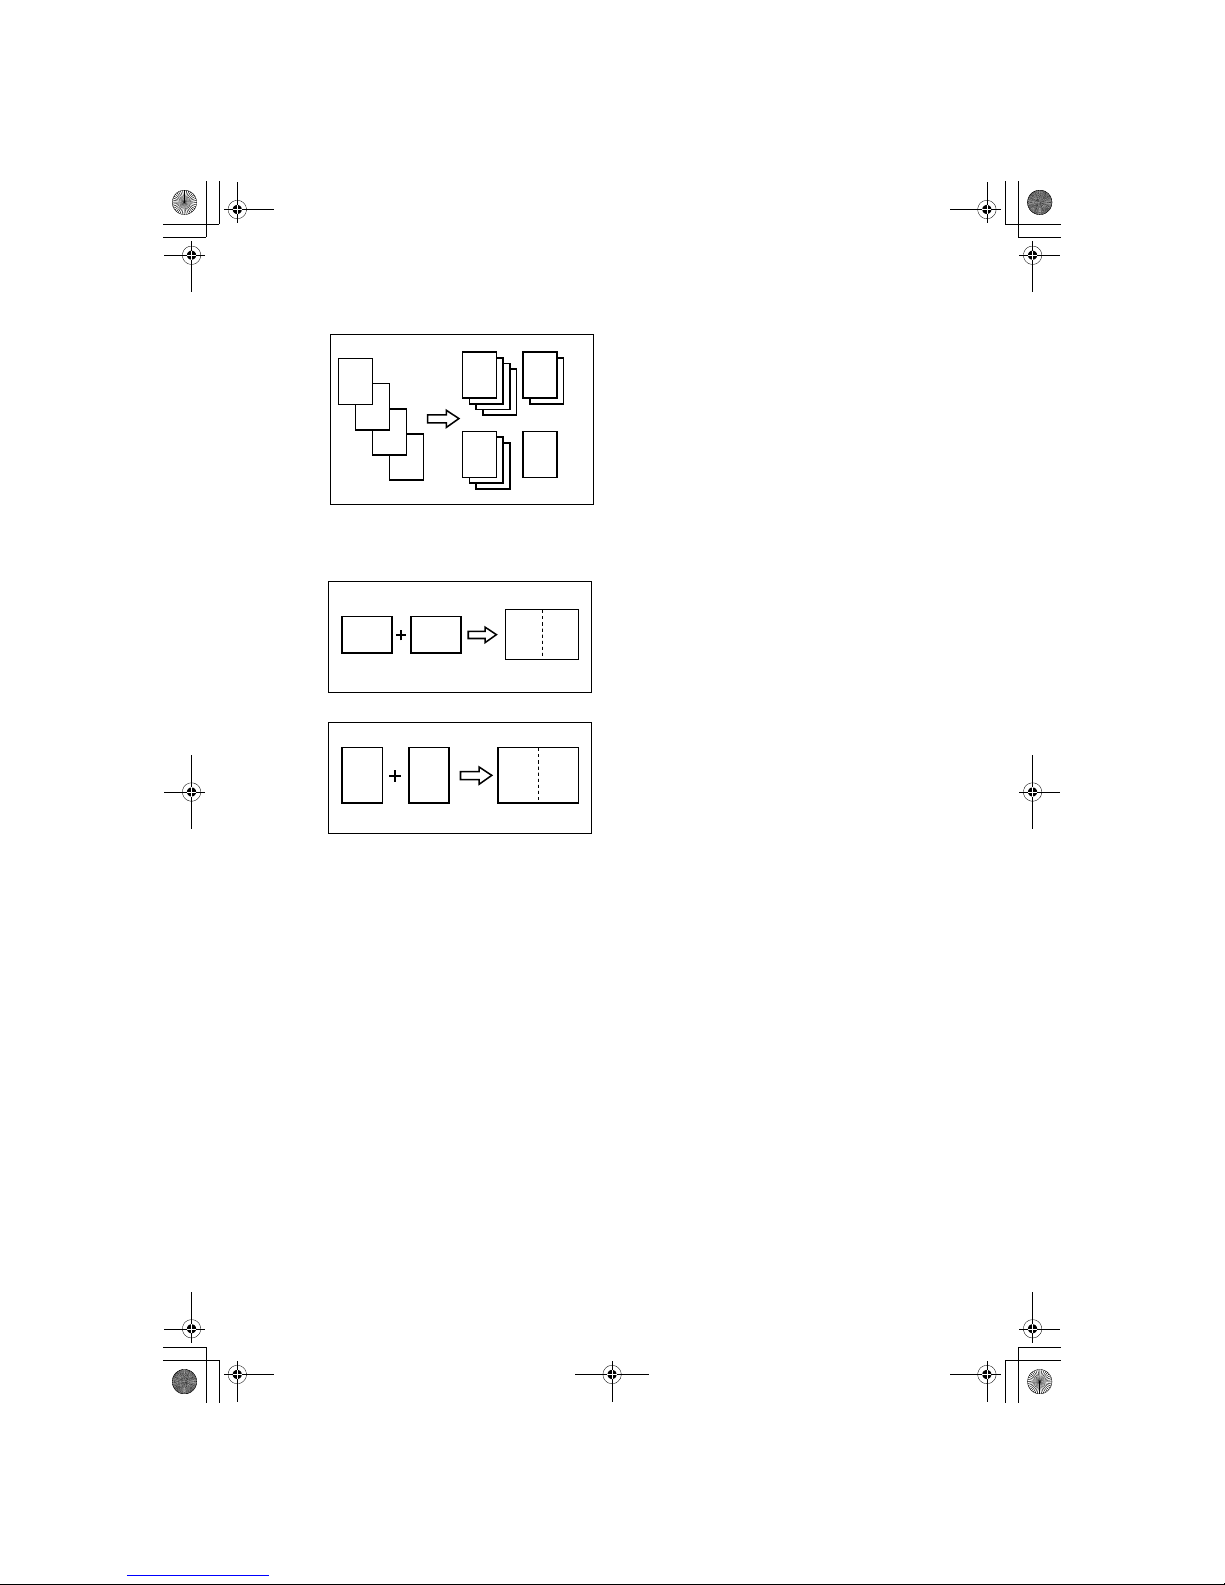
vi
❖❖❖❖
Group Printing from Different Originals
See ⇒ P.30 “Memory Mode—Group Printing from Different Originals”.
❖❖❖❖
Combining Originals onto One Print
See ⇒ P.33 “Combine—Combining 2 Originals onto One Print”.
❖❖❖❖
Skip Feed Printing
See ⇒ P.37 “Skip Feed Printing”.
❖❖❖❖
Storing Your Print Settings in Memory
See ⇒ P.38 “Program—Storing Your Print Settings in Memory”.
❖❖❖❖
Printing Secret Documents
See ⇒ P.42 “Security Mode—Printing Secret Documents”.
❖❖❖❖
Making Color Prints
See ⇒ P.52 “Making Color Prints”.
❖❖❖❖
Printing in Two Colors
See ⇒ P.54 “Printing in Two colors”.
D
C
B
GRCLAS1E
A
A
B
C D
ZCTX050E
B
A
AB
ZCTX040E
BA AB
SilverV-EN.book Page vi Monday, May 15, 2000 3:23 PM
Page 29

vii
Machine Exterior
1. Front door
Open for access to the inside of the machine.
2. Operation panel
Operator controls and indicators are located here. See ⇒ P.x “Operation Panel”.
3. Platen cover
Lower this cover over an original before
printing.
4. Original tray release lever
Use to open the original tray unit when
installing the master.
5. Feed roller pressure lever
Use to adjust the contact pressure of the
paper feed roller according to paper
thickness.
6. Paper feed side plates
Use to prevent paper skew.
7. Paper feed tray
Set paper on this tray for printing.
8. Side tray fine adjusting dial
Use to shift the paper feed tray sideways.
9. Paper feed tray down key
Press to lower the paper feed tray.
10. Behind cover
Flip up when you use the keys underneath.
SilverV-EN.book Page vii Monday, May 15, 2000 3:23 PM
Page 30
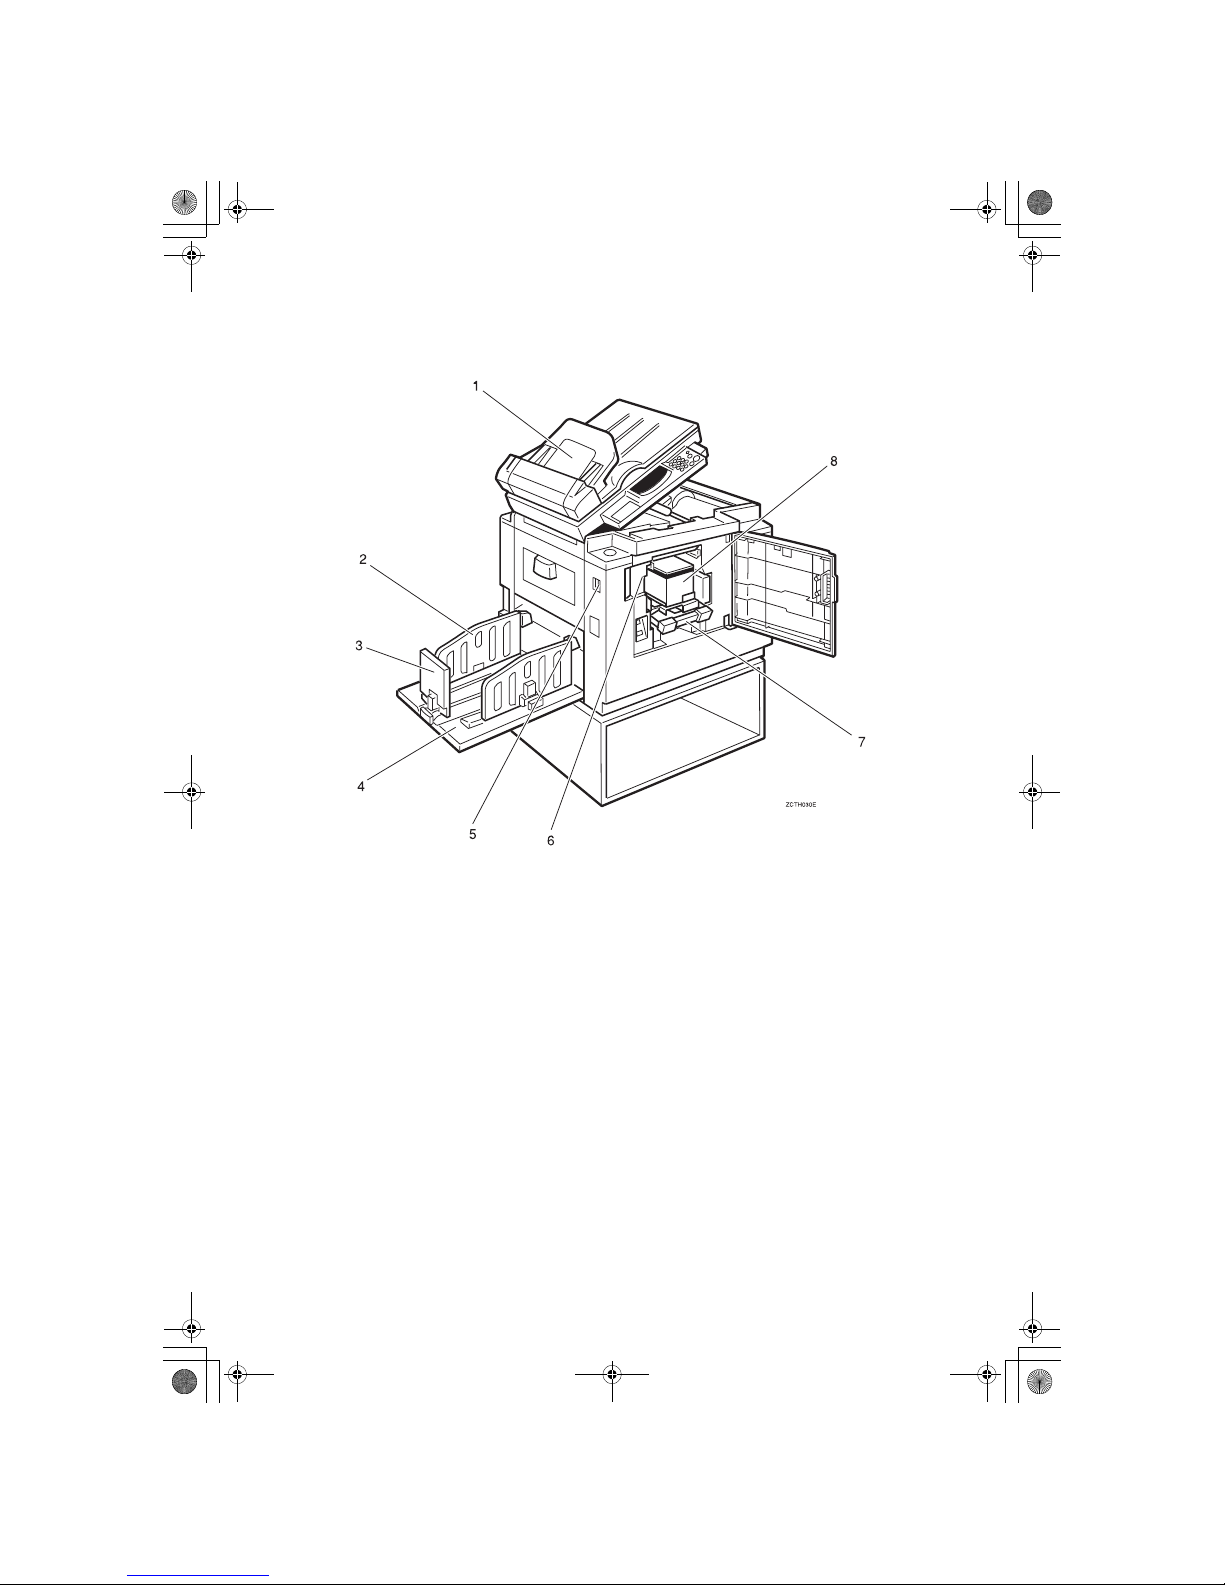
viii
Machine Interior
1. Document feeder (Option)
Original inserted into the document feeder are individually and automatically fed
onto and removed from the exposure
glass. See ⇒ P.43 “Printing Using the Op-
tional 30 Originals Document Feeder”.
2. Paper delivery side plates
Use to align the prints on the paper delivery tray.
3. Paper delivery end plate
Use to align the leading edge of prints.
4. Paper delivery tray
Completed prints are delivered here.
5. Main switch
Use to turn the power on or off.
6. Drum unit
The master is wrapped around this unit.
7. Drum unit lock lever
Lift to unlock and pull out the drum unit.
8. Ink holder
Set the ink cartridge in this holder.
SilverV-EN.book Page viii Monday, May 15, 2000 3:23 PM
Page 31
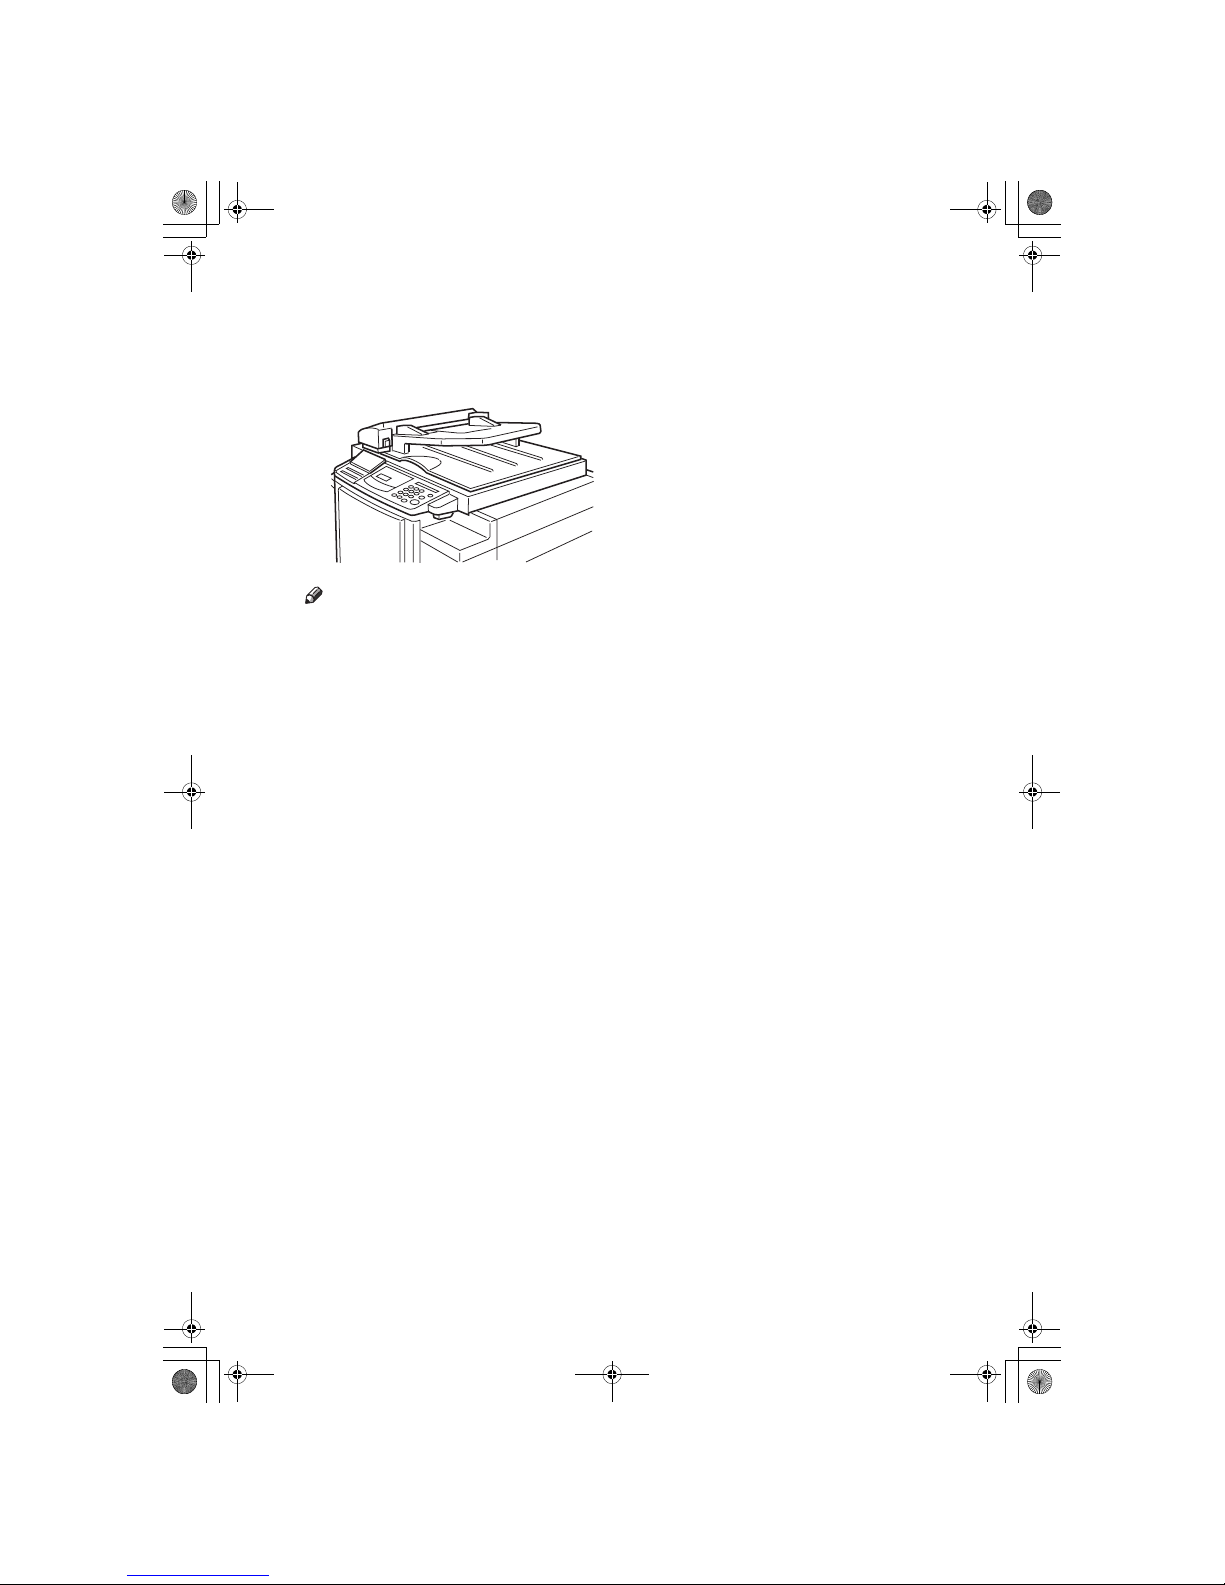
ix
Options
❖❖❖❖
30 Originals document feeder
Note
❒ Other options:
• Color Drum: LG drum
• Color Drum: A4 drum
• Color Drum: B4 drum
• Tape Dispenser
•Key Counter
TSLP015E
SilverV-EN.book Page ix Monday, May 15, 2000 3:23 PM
Page 32
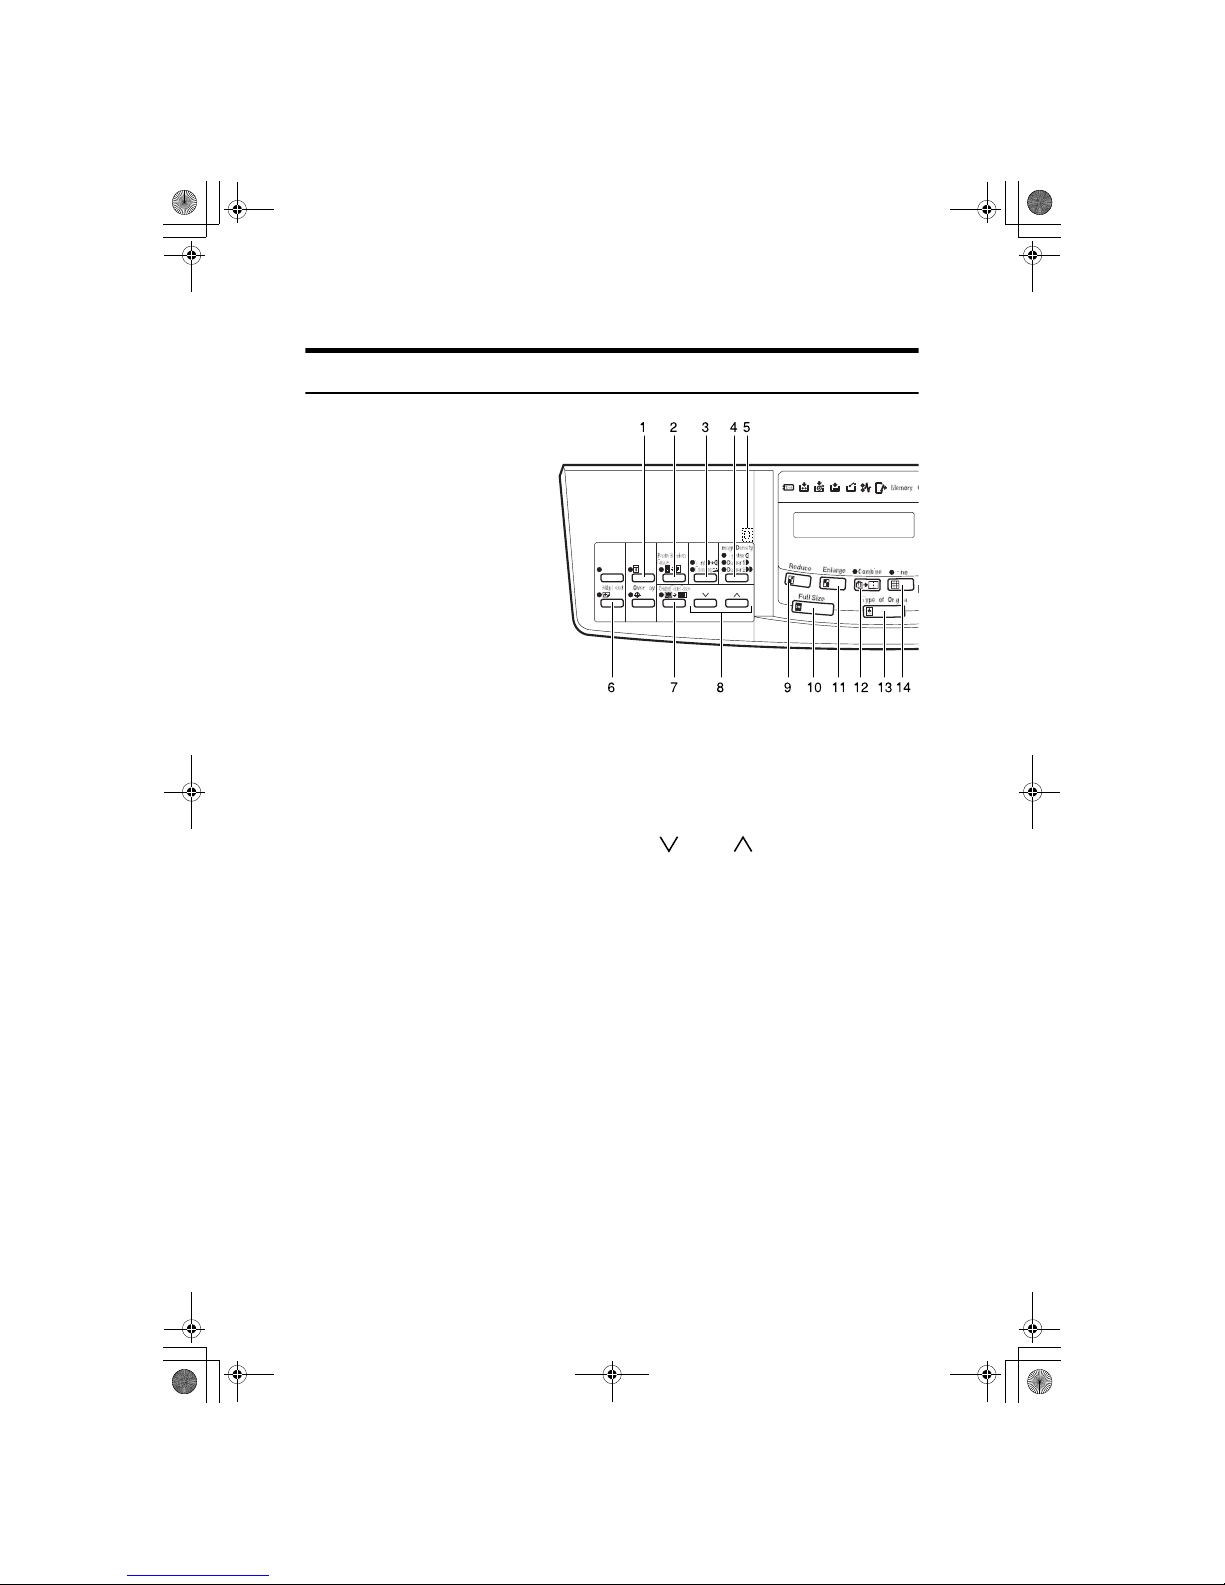
x
Operation Panel
Keys
1. {
{{
{
Security
}}}} key
Press to make prints of secret documents.
See ⇒ P.42 “Security Mode—Printing Secret
Documents”.
2. {
{{
{
Paste Shadow Erase
}}}} key
Press to erase the shadow of pasted originals. See ⇒ P.22 “Paste Shadow Erase—Eras-
ing the Shadow of Pasted Originals”.
3. {
{{
{
Tint/Economy
}}}} key
Press to make halftone prints. See ⇒ P.12
“Tint Mode—Halftone Printing”.
Press to save ink. See ⇒ P.25 “Economy
Mode—Saving Ink”.
4. {
{{
{
Image Density
}}}} key
Press to make prints darker or lighter. See
⇒ P.11 “Adjusting the Print Image Density”.
5. Check Indicator
This indicator lights when you have selected one or more of the functions accessed by
lifting the behind cover and pressing the
keys underneath (e. g. {Security
}
key,
{
Paste
Shadow Erase
}
key etc.).
This lets you know whether one or more of
these functions is selected, even if the cover
is lowered.
6. {
{{
{
Skip Feed
}}}} key
Press to select skip feed printing. See ⇒
P.37 “Skip Feed Printing”.
7. {
{{
{
Center/Edge Erase
}}}} key
Press to print book originals that have a solid image on the center or edges. See ⇒ P.18
“Center/Edge Erase—Erasing center and Edge
Margins”.
8. {
{{
{}}}} and {{{{}}}} keys (Scroll keys)
Press to select size and direction of paper or
original in Center/Edge Erase.
9. {
{{
{
Reduce
}}}} key
Press to reduce the image. See ⇒ P.16 “Preset Reduce/Enlarge—Reducing and Enlarging
Using Preset Ratios”.
10. {
{{
{
Full Size
}}}} key
Press to make full size prints.
11. {
{{
{
Enlarge
}}}} key
Press to enlarge the image. See ⇒ P.16 “Preset Reduce/Enlarge—Reducing and Enlarging
Using Preset Ratios”.
12. {
{{
{
Combine
}}}} key
Press to combine originals onto 1 print. See
⇒ P.33 “Combine—Combining 2 Originals
onto One Print”.
13. {
{{
{
Type of Original
}}}} key
Press to select Letter, Photo, or Letter/Photo mode. See ⇒ P.24 “Selecting Original
Type”.
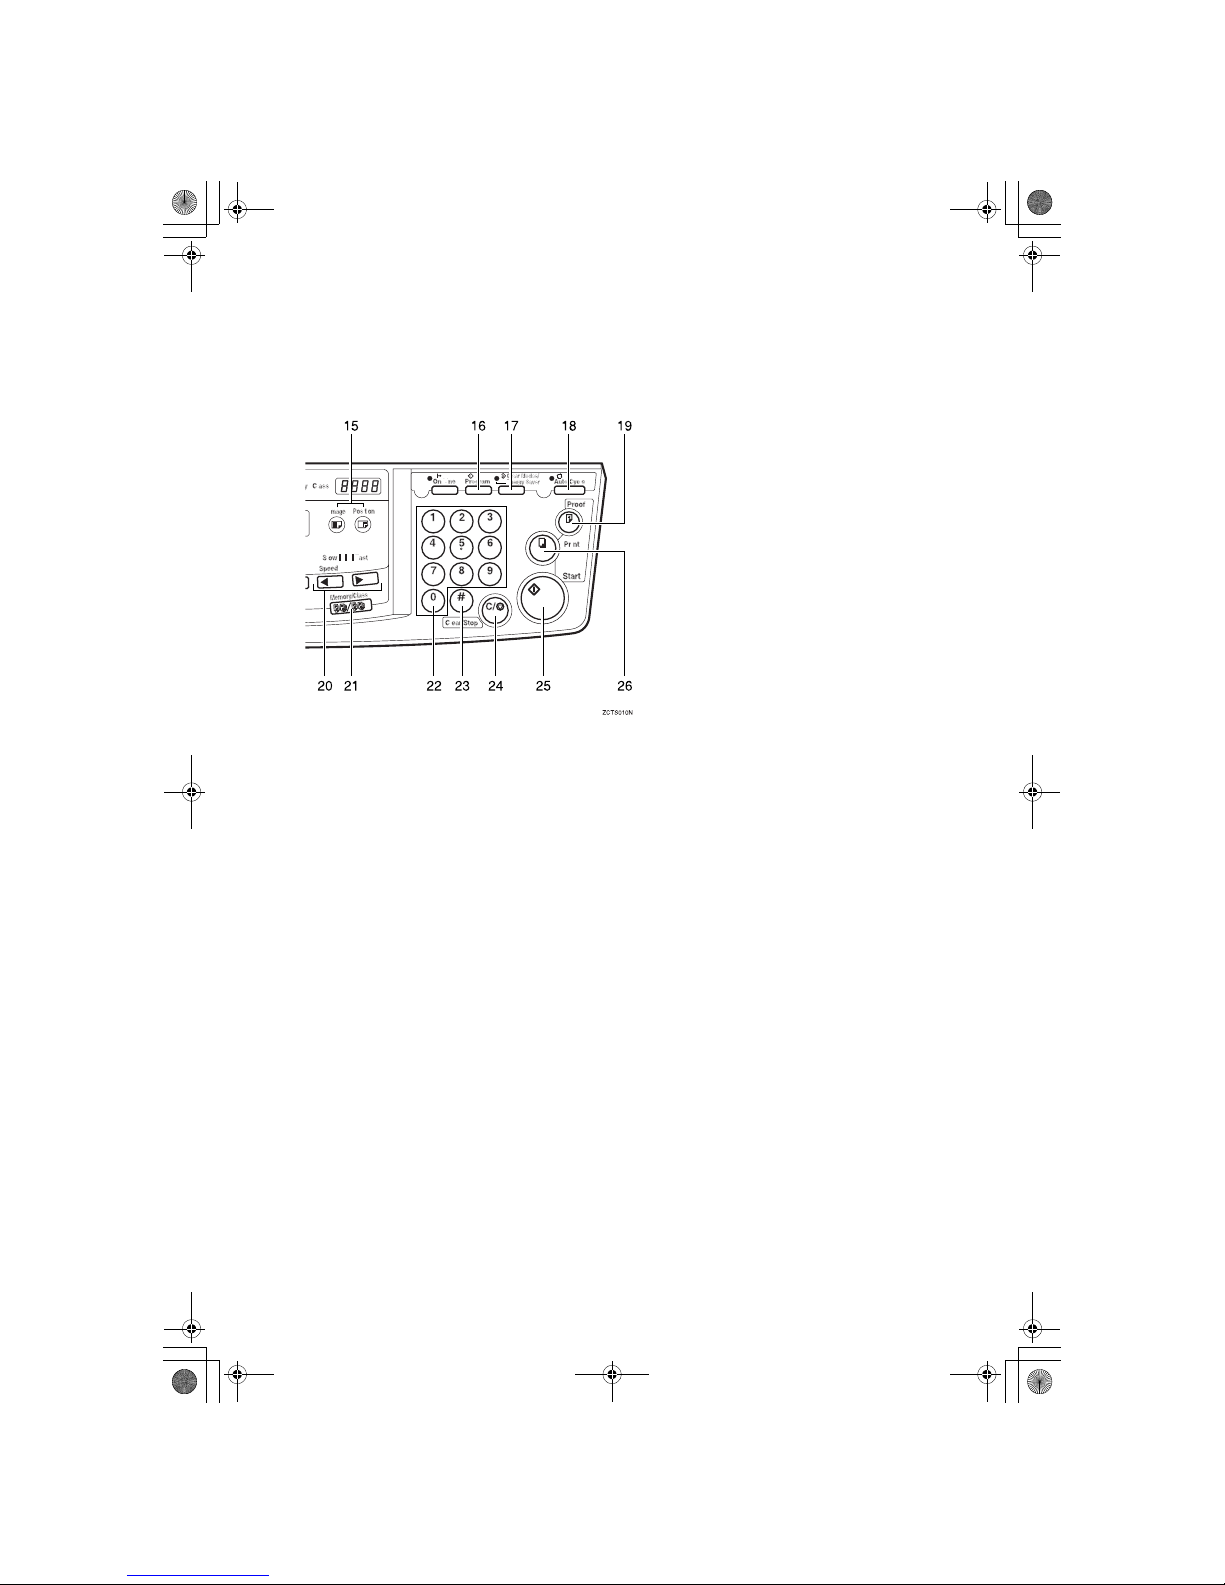
SilverV-EN.book Page x Monday, May 15, 2000 3:23 PM
Page 33
xi
14. {
{{
{
Fine
}}}} key
Press to select the fine image. See ⇒ P.13
“Fine Mode—Making Clear Prints”.
15. {
{{
{
Image Position
}}}} key
Press to shift the image forwards or backwards. See ⇒ P.9 “Adjusting the Print Image
Position”.
16. {
{{
{
Program
}}}} key
Press to input or recall user programs. See
⇒ P.38 “Program—Storing Your Print Settings in Memory”.
17. {
{{
{
Clear Modes/Energy Saver
}}}} key
•Clear Modes
Press to clear the previously entered job
settings.
• Energy Saver
Press to switch to and from Energy Saver Mode ⇒ P.8 “Energy Saver Mode —
Saving Energy”.
18. {
{{
{
Auto Cycle
}}}} key
Use to process the master and make prints
automatically. See ⇒ P.26 “Auto Cycle—
Printing from Several Originals at Once”.
19. {
{{
{
Proof
}}}} key
Press to make proof prints.
20. {
{{{WWWW}}}
} and {{{{VVVV}}}} keys (Speed keys)
Press to adjust the printing speed. See ⇒
P.14 “Changing the Printing Speed”.
21. {
{{
{
Memory/Class
}}}} key
Press to select Memory or Class mode. See
⇒ P.28 “Class Mode—Group Printing from
the Same Original”or ⇒ P.30 “Memory
Mode—Group Printing from Different Originals”.
22. Number keys
Press to enter the desired number of prints
and data for selected modes.
23. {
{{{qqqq}}}
} key
Use to enter data in selected modes.
24. {
{{
{
Clear/Stop
}}}} key
While entering numbers, press to cancel a
number you have entered.
While copying, press to stop copying.
25. {
{{
{
Start
}}}} key
Press to make a master.
26. {
{{
{
Print
}}}} key
Press to start printing.
SilverV-EN.book Page xi Monday, May 15, 2000 3:23 PM
Page 34
xii
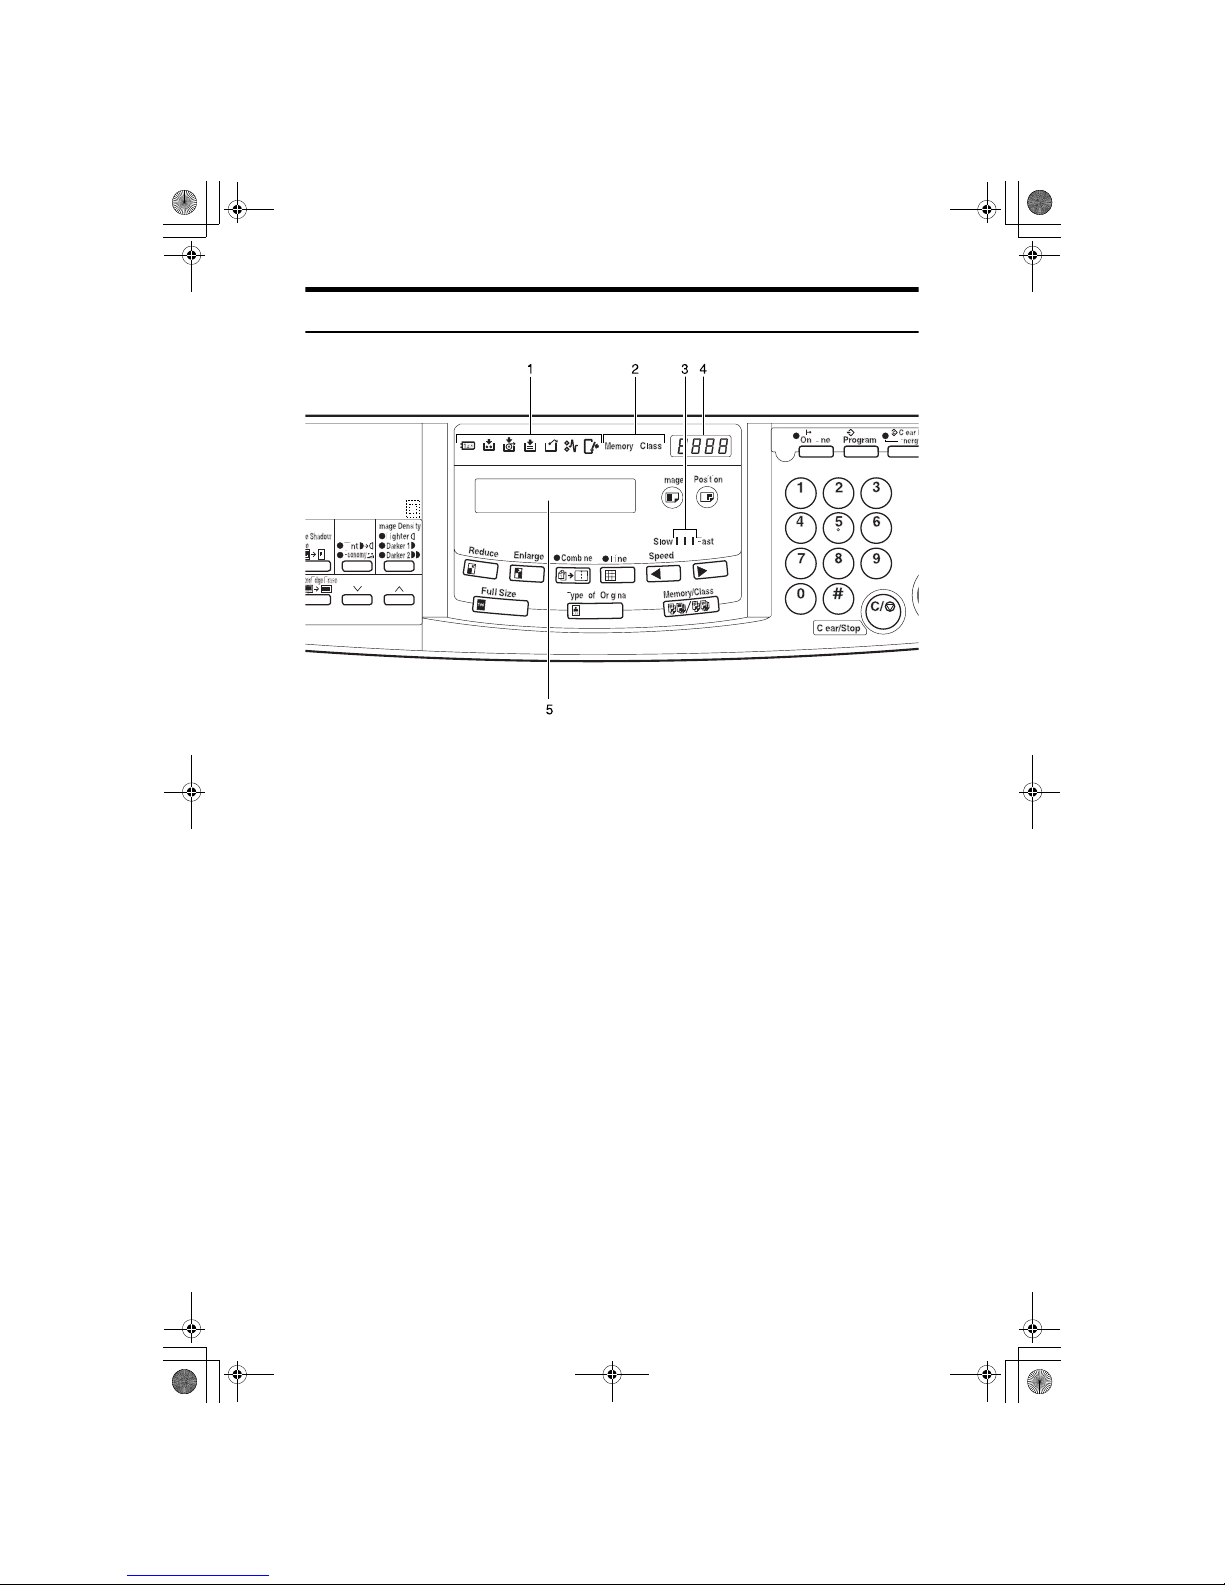
Indicators
1. Error indicators
These indicators are lit when a non-standard condition occurs within the machine.
2. Memory/Class indicator
Shows the number entered in Memory or
Class mode.
3. Speed indicators
These indicators show the printing speed
that is selected.
4. Counter
Displays the number of prints entered.
While printing, it shows the number of
prints remaining.
5. Guidance display
Display the machine's condition.
SilverV-EN.book Page xii Monday, May 15, 2000 3:23 PM
Page 35
xiii
TABLE OF CONTENTS
1.Operation
Printing Paper............................................................................................ 1
Originals..................................................................................................... 2
Preparation for Printing............................................................................ 3
Loading Paper............................................................................................... 3
Setting Up the Paper Delivery Tray............................................................... 4
Standard Printing ...................................................................................... 5
Restoring Paper Feed and Paper Delivery Trays ................................... 7
Energy Saver Mode — Saving Energy..................................................... 8
Adjusting the Print Image Position.......................................................... 9
Shifting the Print Image Position Forward or Backward................................ 9
Shifting the Print Image Position to the Right or Left .................................. 10
Adjusting the Print Image Density......................................................... 11
Before Making a Master.............................................................................. 11
After Making a Master................................................................................. 11
Tint Mode—Halftone Printing................................................................. 12
Fine Mode—Making Clear Prints............................................................ 13
Changing the Printing Speed................................................................. 14
Stopping the Machine during the Multi-print Run................................ 15
When You Want to Stop the Machine during the Multi-print Run and
Print the Next Original ............................................................................... 15
When You Want to Change the Number of Prints Entered or Check the
Completed Prints....................................................................................... 15
Preset Reduce/Enlarge—Reducing and Enlarging Using Preset Ratios ... 16
Center/Edge Erase—Erasing center and Edge Margins...................... 18
Edge Erase—Erasing Edge Margins...................................................... 20
Paste Shadow Erase—Erasing the Shadow of Pasted Originals........ 22
Printing on Thick or Thin Paper............................................................. 23
Pressure Lever Position.............................................................................. 23
Selecting Original Type........................................................................... 24
Economy Mode—Saving Ink .................................................................. 25
Auto Cycle—Printing from Several Originals at Once......................... 26
Class Mode—Group Printing from the Same Original......................... 28
Memory Mode—Group Printing from Different Originals.................... 30
Combine—Combining 2 Originals onto One Print............................... 33
Skip Feed Printing................................................................................... 37
Program—Storing Your Print Settings in Memory............................... 38
SilverV-EN.book Page xiii Monday, May 15, 2000 3:23 PM
Page 36
xiv
Storing Your Settings .................................................................................. 38
Recalling a Program.................................................................................... 39
Protecting a Program .................................................................................. 40
Removing Program Protection.................................................................... 41
Security Mode—Printing Secret Documents........................................ 42
2.Optional Functions
Printing Using the Optional 30 Originals Document Feeder............... 43
Document Feeder Exterior.......................................................................... 43
Originals...................................................................................................... 44
Setting Originals in the Document Feeder .................................................. 45
Combine Copies with the Document Feeder .............................................. 46
Memory Mode with the Document Feeder.................................................. 48
Color Printing Using the Optional Color Drum..................................... 52
Making Color Prints..................................................................................... 52
Changing the color Drum Unit..................................................................... 52
Printing in Two colors.................................................................................. 54
3.Service Program Mode
Accessing Service Programs................................................................. 57
Changing the Settings of Service Programs ........................................ 58
Service Program Menu ............................................................................... 59
User Codes............................................................................................... 66
How to Set User Code Mode (# 120).......................................................... 66
How to Use User Code Mode ..................................................................... 67
How to Check the User Code Counter (# 121) ........................................... 68
How to Clear the User Code Counter (# 122)............................................. 69
How to Check the Total Number of Masters and Prints Made Under
All User Codes (# 123).............................................................................. 70
How to Clear the User Code Total Counter (# 124).................................... 71
4.Replenishing Supplies
Loading Paper on the Paper Feed Tray................................................. 73
Replenishing Paper..................................................................................... 73
Changing the Paper Size............................................................................ 74
When the Add Ink Indicator (j) Lights................................................. 75
Master Roll Replacement........................................................................ 77
Placing a New Roll of Tape in the Tape Dispenser (Option) ............... 79
5.What to do If Something Goes Wrong
If Your Machine does not Operate as You Want................................... 81
x Clearing Misfeeds............................................................................... 84
SilverV-EN.book Page xiv Monday, May 15, 2000 3:23 PM
Page 37

xv
“x” + “ORIGINAL JAM. REMOVE ORIGINAL”.......................................... 84
“x” + “PAPER FEED JAM. REMOVE JAMMED PAPER” ......................... 87
“x” + “MASTER FEED JAM. REMOVE JAMMED MASTER”.................... 90
“x” + “PAPER WRAP JAM. REMOVE JAMMED PAPER” ........................ 92
“x” + “MASTER EJECT JAM. REMOVE JAMMED MASTER”.................. 94
“x” + “DELIVERY JAM. REMOVE JAMMED PAPER” .............................. 96
When the Open Cover/Unit Indicator (M) Lights.................................. 97
When the Master Eject Indicator (k) Lights......................................... 99
When Other Indicators Light................................................................ 100
When the Prints are Thrown Over the Paper Delivery Tray............... 101
Poor Printing.......................................................................................... 102
Dirt on the Back Side of Paper.................................................................. 102
Dirt on the Front Side of Paper (Black Line/Stain) .................................... 104
White Prints or Incomplete Prints.............................................................. 105
6.Remarks
Operation Notes..................................................................................... 107
General Cautions ...................................................................................... 107
Print Paper................................................................................................ 109
Originals.................................................................................................... 109
Where to Put Your Machine.................................................................. 111
Environmental Conditions......................................................................... 111
Power Connection..................................................................................... 112
Access to Machine.................................................................................... 112
Maintaining Your Machine.................................................................... 113
Main Frame............................................................................................... 113
Optional Document Feeder....................................................................... 114
Combination Chart................................................................................ 115
7.Specification
Main Frame............................................................................................. 117
30 Originals Document Feeder............................................................. 121
Consumables......................................................................................... 122
INDEX...................................................................................................... 123
SilverV-EN.book Page xv Monday, May 15, 2000 3:23 PM
Page 38
xvi
SilverV-EN.book Page xvi Monday, May 15, 2000 3:23 PM
Page 39
1
1. Operation
Printing Paper
The following types of print paper are not recommended for this machine.
• Paper smaller than 90mm × 148mm, 3.6" × 5.9"
• Paper larger than 268mm × 388mm, 10.5" ×15.2"
• Paper heavier than 209.3g/m
2
, 55.6 lb
• Paper lighter than 47.1g/m
2
, 12.5 lb
• Roughly-cut paper
• Paper of different thickness in the same stack
• Buckled or curled paper
• Low stiffness paper
Correct curls in the paper before setting it in the machine. When you cannot cor-
rect the paper curl, stack the paper with the curl face down. Otherwise the paper
might wrap around the drum or stains might appear.
Store paper where it will not curl or absorb moisture. Use paper soon after it is
unpacked.
Only use paper where the leading edge has two right angle corners, as shown
below.
GRPRIN0E
SilverV-EN.book Page 1 Monday, May 15, 2000 3:23 PM
Page 40
Operation
2
1
Originals
Note
❒ Originals that can be set on the exposure glass are as follows:
• Maximum size: 257 × 364mm, 10.2" × 14.4"
• Maximum total thickness: 30mm, 1.1"
• Maximum total weight: 5kg, 11.0 lb
❒ If you use paste-up originals, make sure the pasted parts hold firmly to the
base sheet and press the {
Paste Shadow Erase
} key. If the thickness of the paste-
up original is more than 0.1mm and the space between the pasted parts is less
than 2mm, 0.08", a shadow might appear on the prints.
❒ If you use originals that have bold letters or solid images at the leading edges,
you might get prints with dirty edges. In this case, insert the widest margin
first, or raise the printing speed.
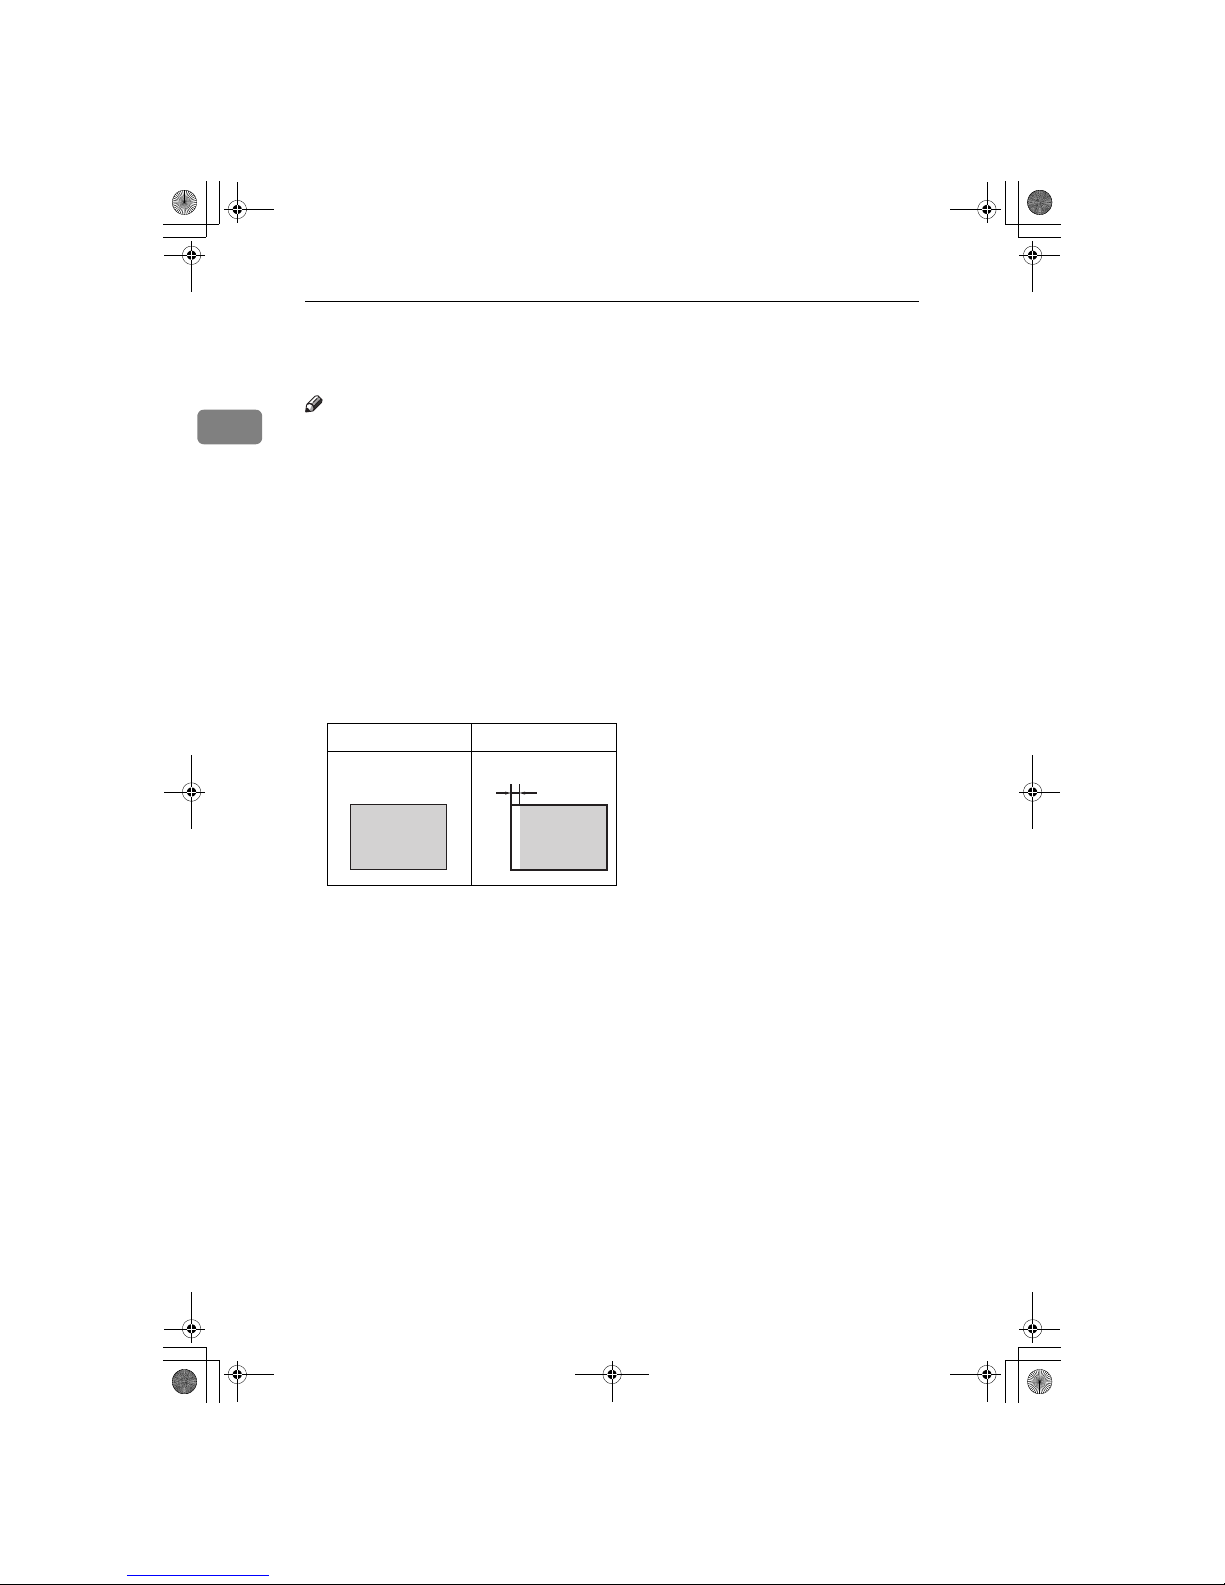
❒ The first 5mm, 0.2" of the leading edge cannot be printed. Make sure the lead-
ing edge margin is at least 5mm, 0.2".
❒ a: 5mm, 0.2"
Original Print
a
SilverV-EN.book Page 2 Monday, May 15, 2000 3:23 PM
Page 41
Preparation for Printing
3
1
Preparation for Printing
Loading Paper
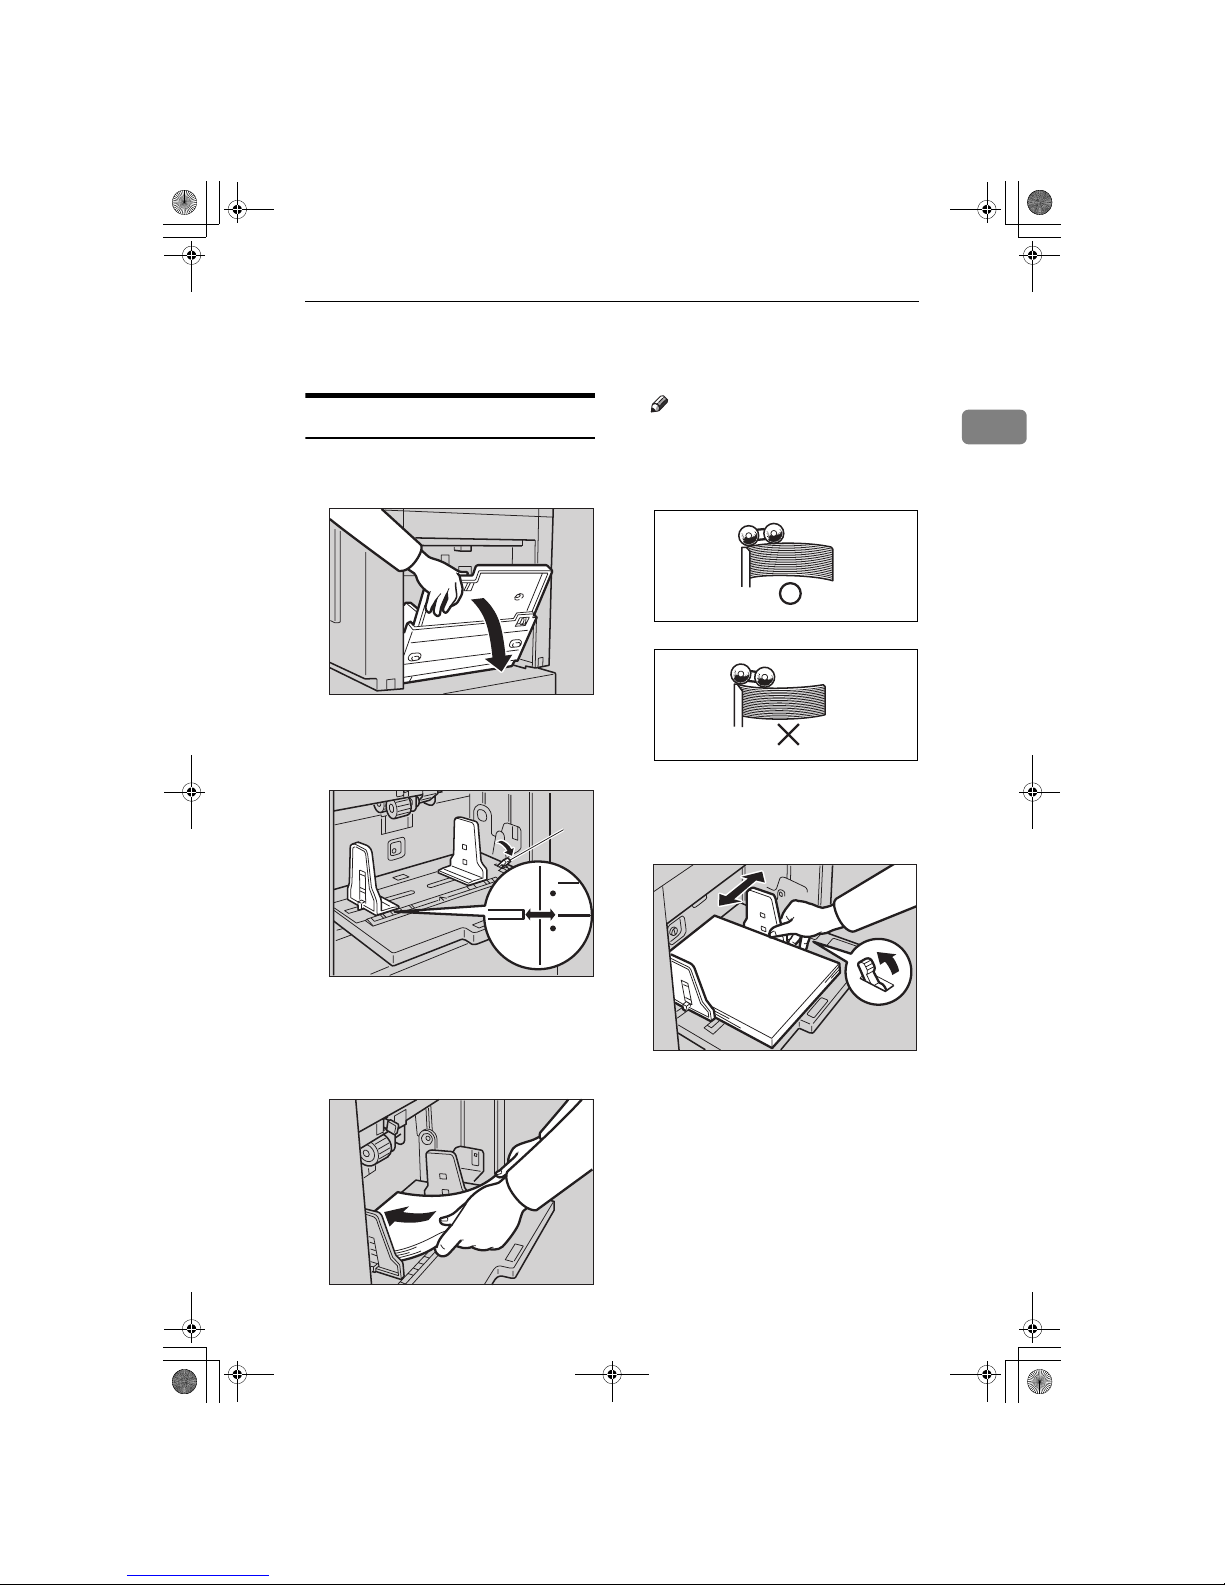
A
Carefully open the paper feed
tray.
B
Put the paper feed side plates lock
lever. Adjust the side plates to
match the paper size.
1: Paper Feed Side Plates Lock Lever
C
Place the paper on the paper feed
tray.
Note
❒ Correct the paper curl before
setting the paper. If you cannot
do so, stack the paper with the
curl face down as shown.
D
Make sure that the paper feed
side plates touch the paper lightly. Put back the lock lever.
TSLH026E
TSLH01AE
1
TSLY013E
GRMARU0E
GRBATS0E
TSLY015E
SilverV-EN.book Page 3 Monday, May 15, 2000 3:23 PM
Page 42
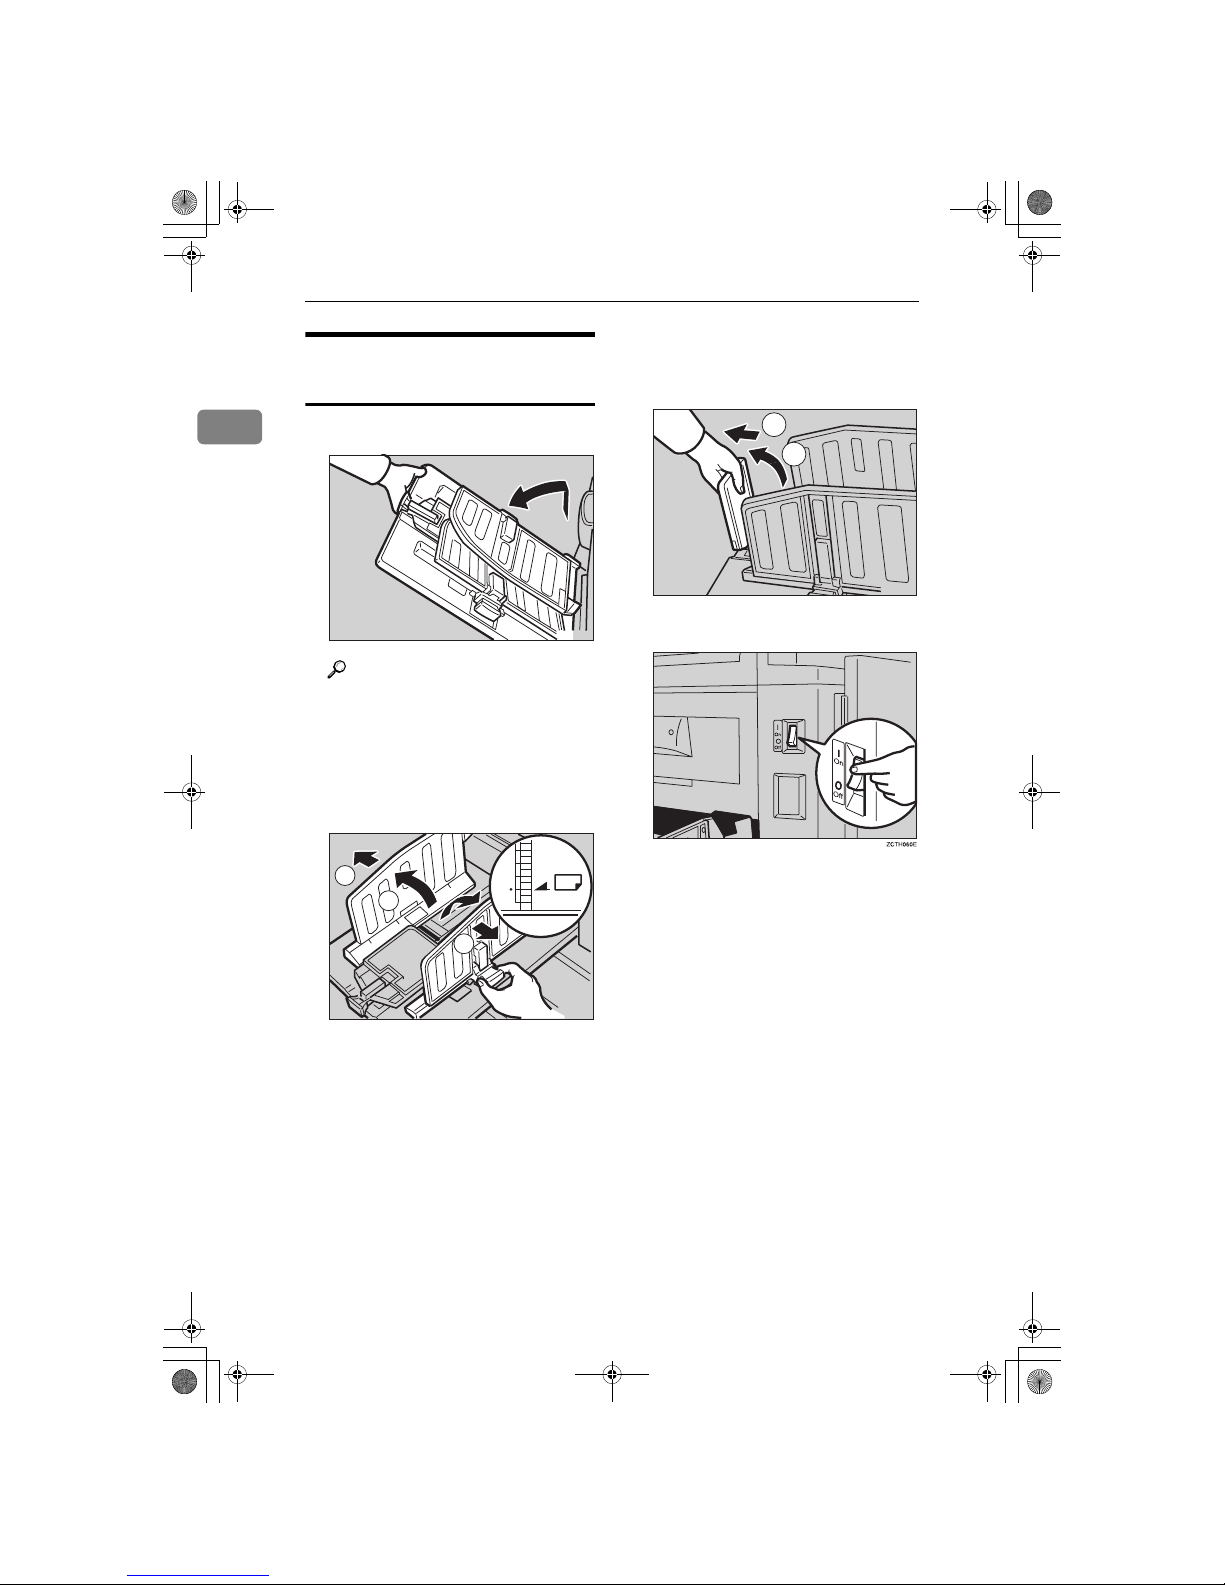
Operation
4
1
Setting Up the Paper Delivery
Tray
A
Open the paper delivery tray.
Reference
When the prints are not delivered in a neat stack, see ⇒ P.101
“When the Prints are Thrown
Over the Paper Delivery Tray”.
B
Lift the paper delivery side plates
and adjust them to the paper size.
C
Lift the paper delivery end plate
and move it to match the print paper size.
D
Turn on the main switch.
TSLH01YE
2
1
2
1
TSLH030E
22
1
TSLH01ZE
SilverV-EN.book Page 4 Monday, May 15, 2000 3:23 PM
Page 43
Standard Printing
5
1
Standard Printing
----
Printing
In this manual, the word, “Printing”
is used as opposed to “Copying” in
order to distinguish between the process that your machine uses to make
prints, and the process used by a standard copier machine.
A standard copier scans in the original for each copy set made. This machine, however, scans in your original
once and makes multiple prints from
this master.
This chapter describes the basic
pointing operations that your machine is capable of.
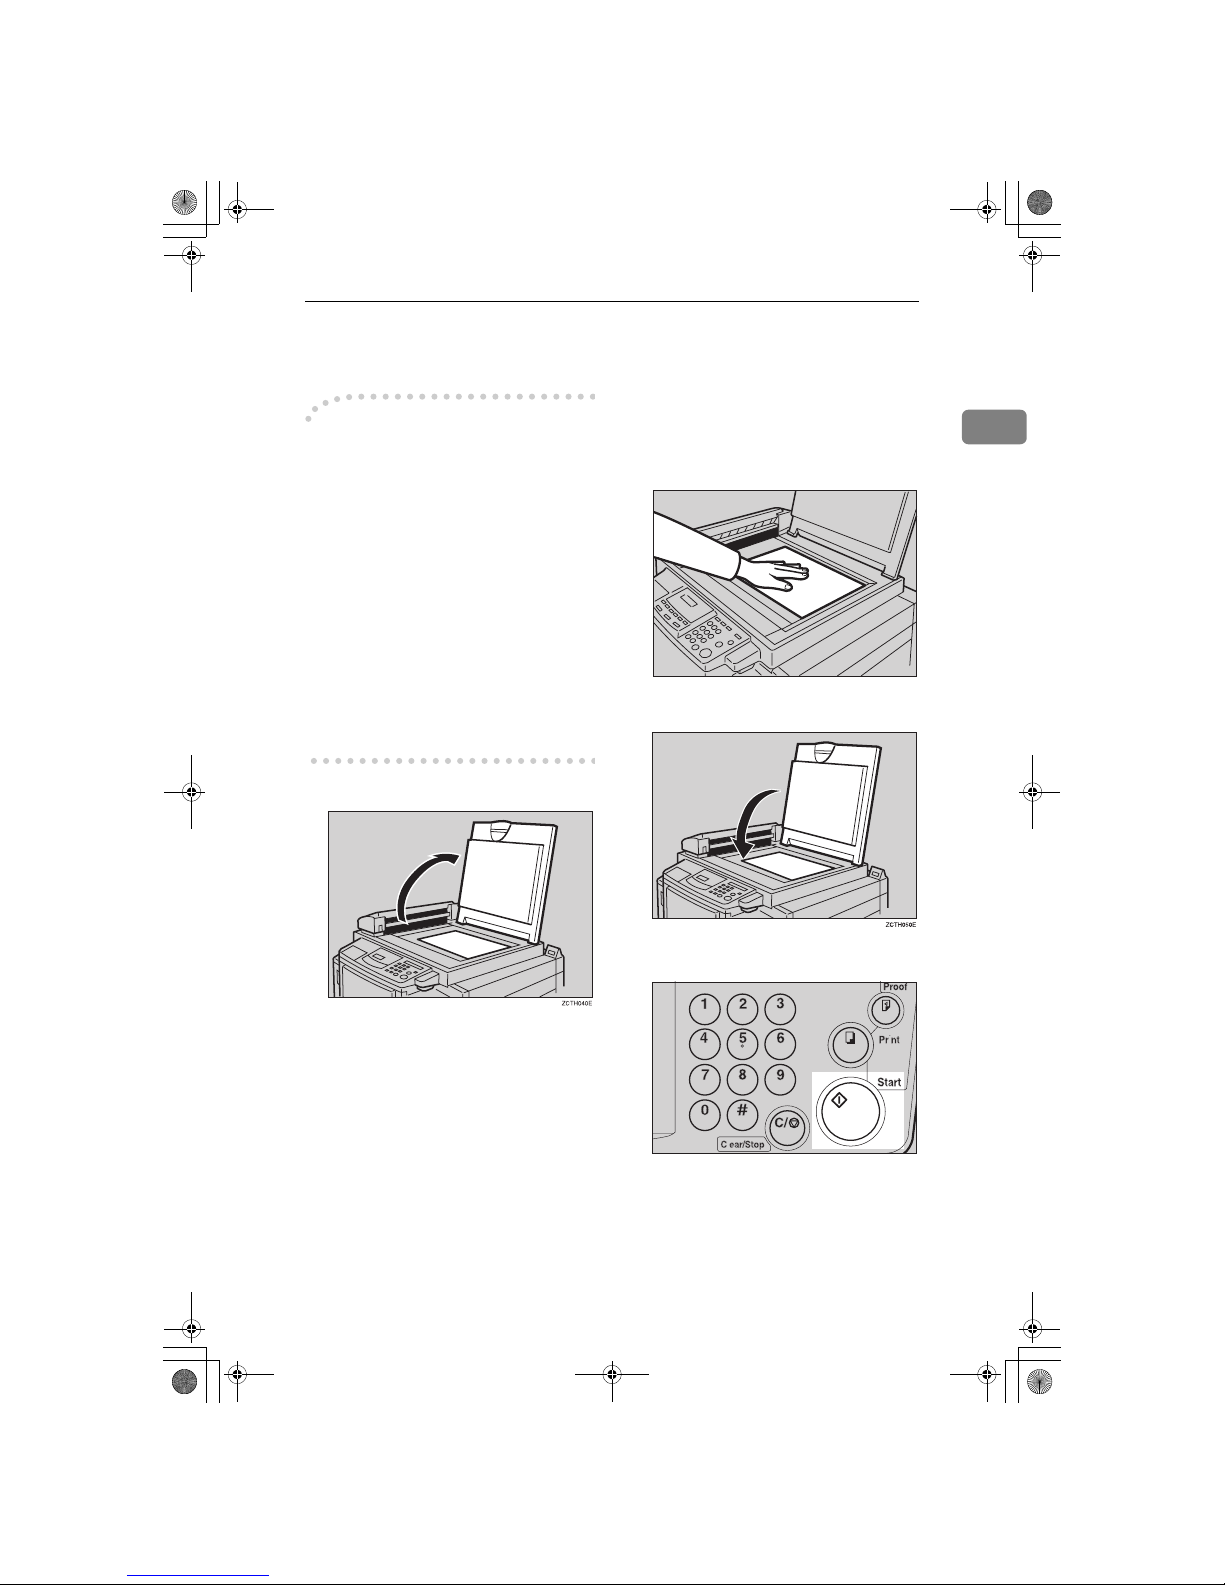
A
Lift the platen cover.
B
Set the original face down on the
exposure glass. The original
should be centered according to
the size marks on the right scale.
C
Lower the platen cover.
D
Press the
{{{{
Start
}}}}
key.
A trial print is delivered to the paper delivery tray.
TSLH010E
TSLS012N
SilverV-EN.book Page 5 Monday, May 15, 2000 3:23 PM
Page 44
Operation
6
1
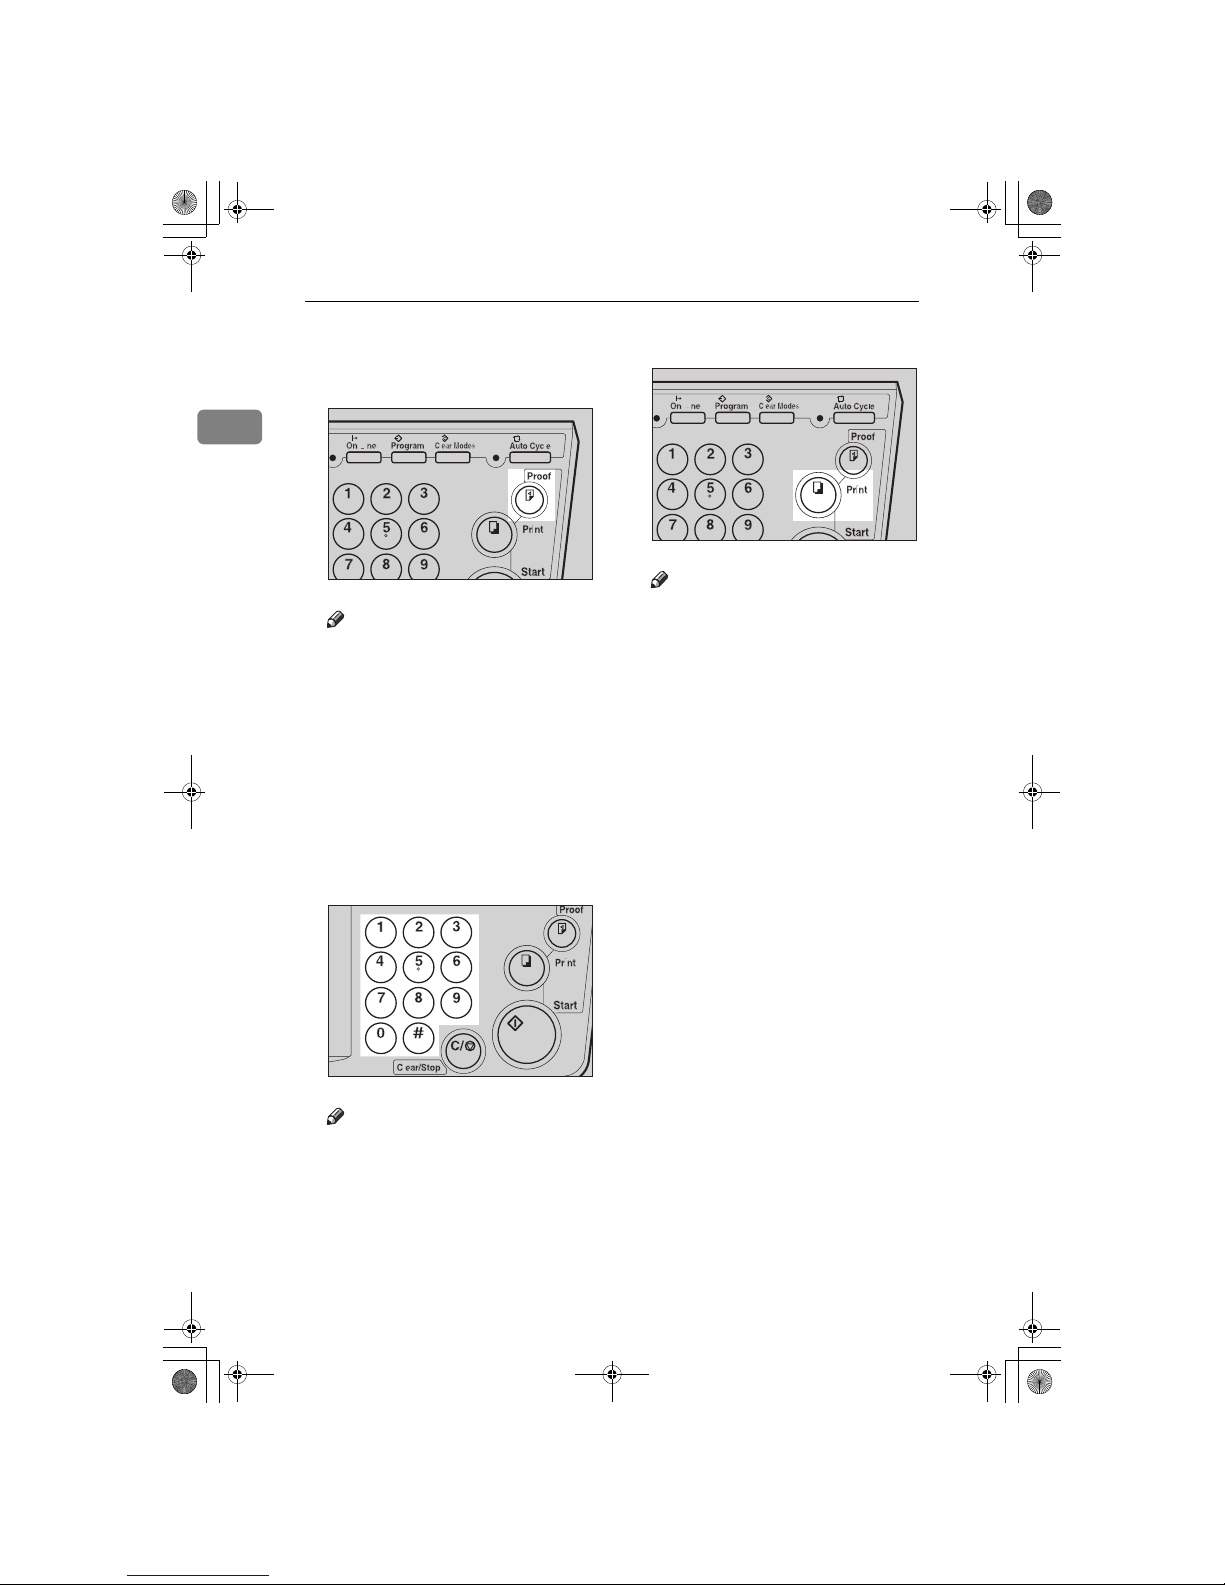
E
Press the {{{{
Proof
}}}} key and check
the image density and the image
position of the proof print.
Note
❒ If the image position is not cor-
rect, adjust it using the {
Image
Position
} keys or the fine adjust-
ment dial. See ⇒ P.9 “Adjusting
the Print Image Position”.
❒ If the image density is slightly
dark or light, adjust the image
density using the {WWWW} or {VVVV}
key. See ⇒ P.11 “Adjusting the
Print Image Density”.
F
Enter the number of prints required with the number keys.
Note
❒ Up to 9999 prints can be entered
at one time.
❒ To change the number entered,
press the {
Clear/Stop
} key and
enter the new number.
G
Press the {{{{
Print
}}}} key.
Note
❒ After printing is completed, the
same number of prints is automatically set for the next job.
❒ To stop the machine during the
multi-print run, press the {
Clear/
Stop
} key.
❒ To return the machine to the ini-
tial condition after printing,
press the {
Clear Modes/Energy
Saver
} key.
TSLS013N
TSLS011N
TSLS014N
SilverV-EN.book Page 6 Monday, May 15, 2000 3:23 PM
Page 45
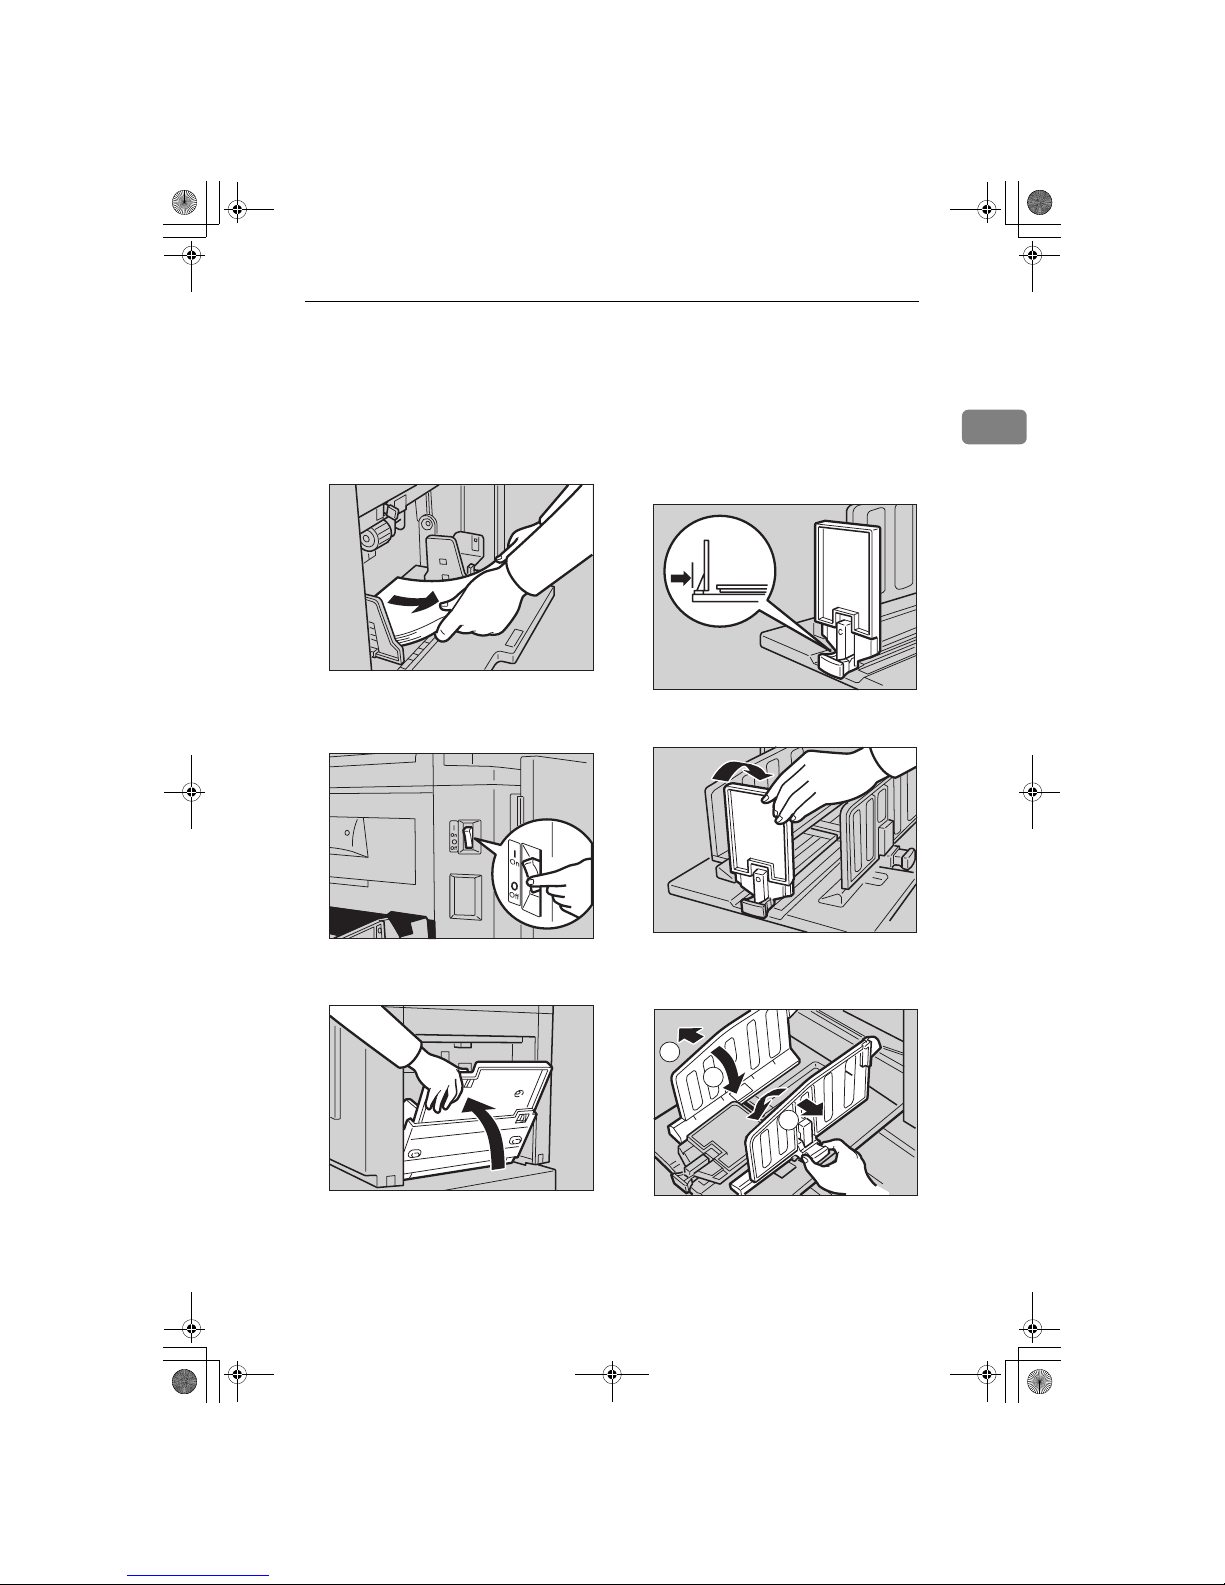
Restoring Paper Feed and Paper Delivery Trays
7
1
Restoring Paper Feed and Paper Delivery
Trays
A
Remove the paper from the paper
feed tray.
The paper feed tray will lower.
B
Turn off the main switch.
C
Close the paper feed tray.
D
Move the end plate until the plate
handle is flush with the end of
the tray.
E
Lower the end plate.
F
Move the side plates to the sides,
then lower them.
G
Close the tray.
TSLY016E
ZCTH140E
TSLH020E
TSLH021E
TSLH01VE
TSLH01ME
1
22
1
22
SilverV-EN.book Page 7 Monday, May 15, 2000 3:23 PM
Page 46
Operation
8
1
Energy Saver Mode — Saving Energy
If you do not operate the machine for a certain period after printing, or when you
press and hold the {
Clear Modes/Energy Saver
} key for three seconds, the panel
display turns off and the machine enters Energy Saver mode. When you press
the {
Clear Modes/Energy Saver
} key again, the machine returns to the ready con-
dition. In Energy Saver mode, the machine uses less electricity.
See “Auto Energy Saving” ⇒ P.59 “Service Program Menu”.
SilverV-EN.book Page 8 Monday, May 15, 2000 3:23 PM
Page 47
Adjusting the Print Image Position
9
1
Adjusting the Print Image Position
After master making, you can adjust
the print image position to suit your
needs. There are two ways:
❖❖❖❖
Shifting the Image Position Forward
or Backward
Shift the image position using the
{
Image Position
} keys.
❖❖❖❖
Shifting the Image Position to the
Right or Left
Shift the image position using the
side tray fine adjusting dial.
Shifting the Print Image
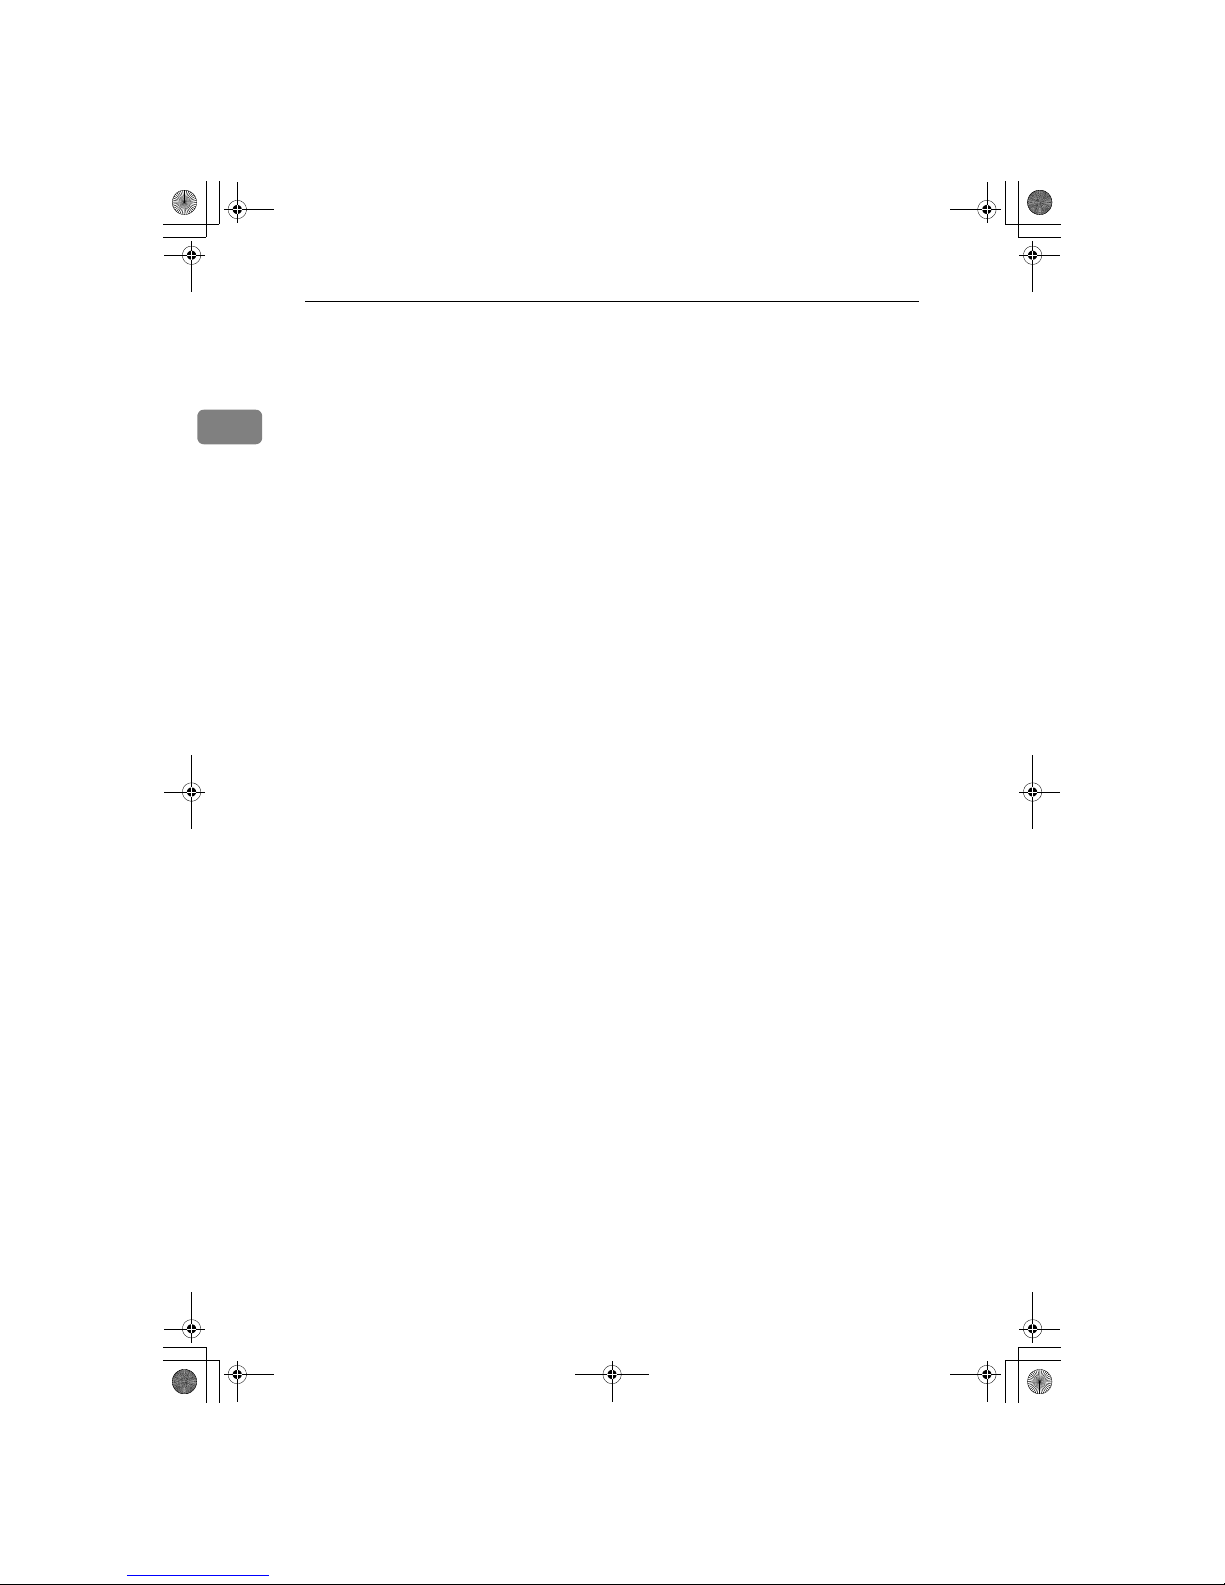
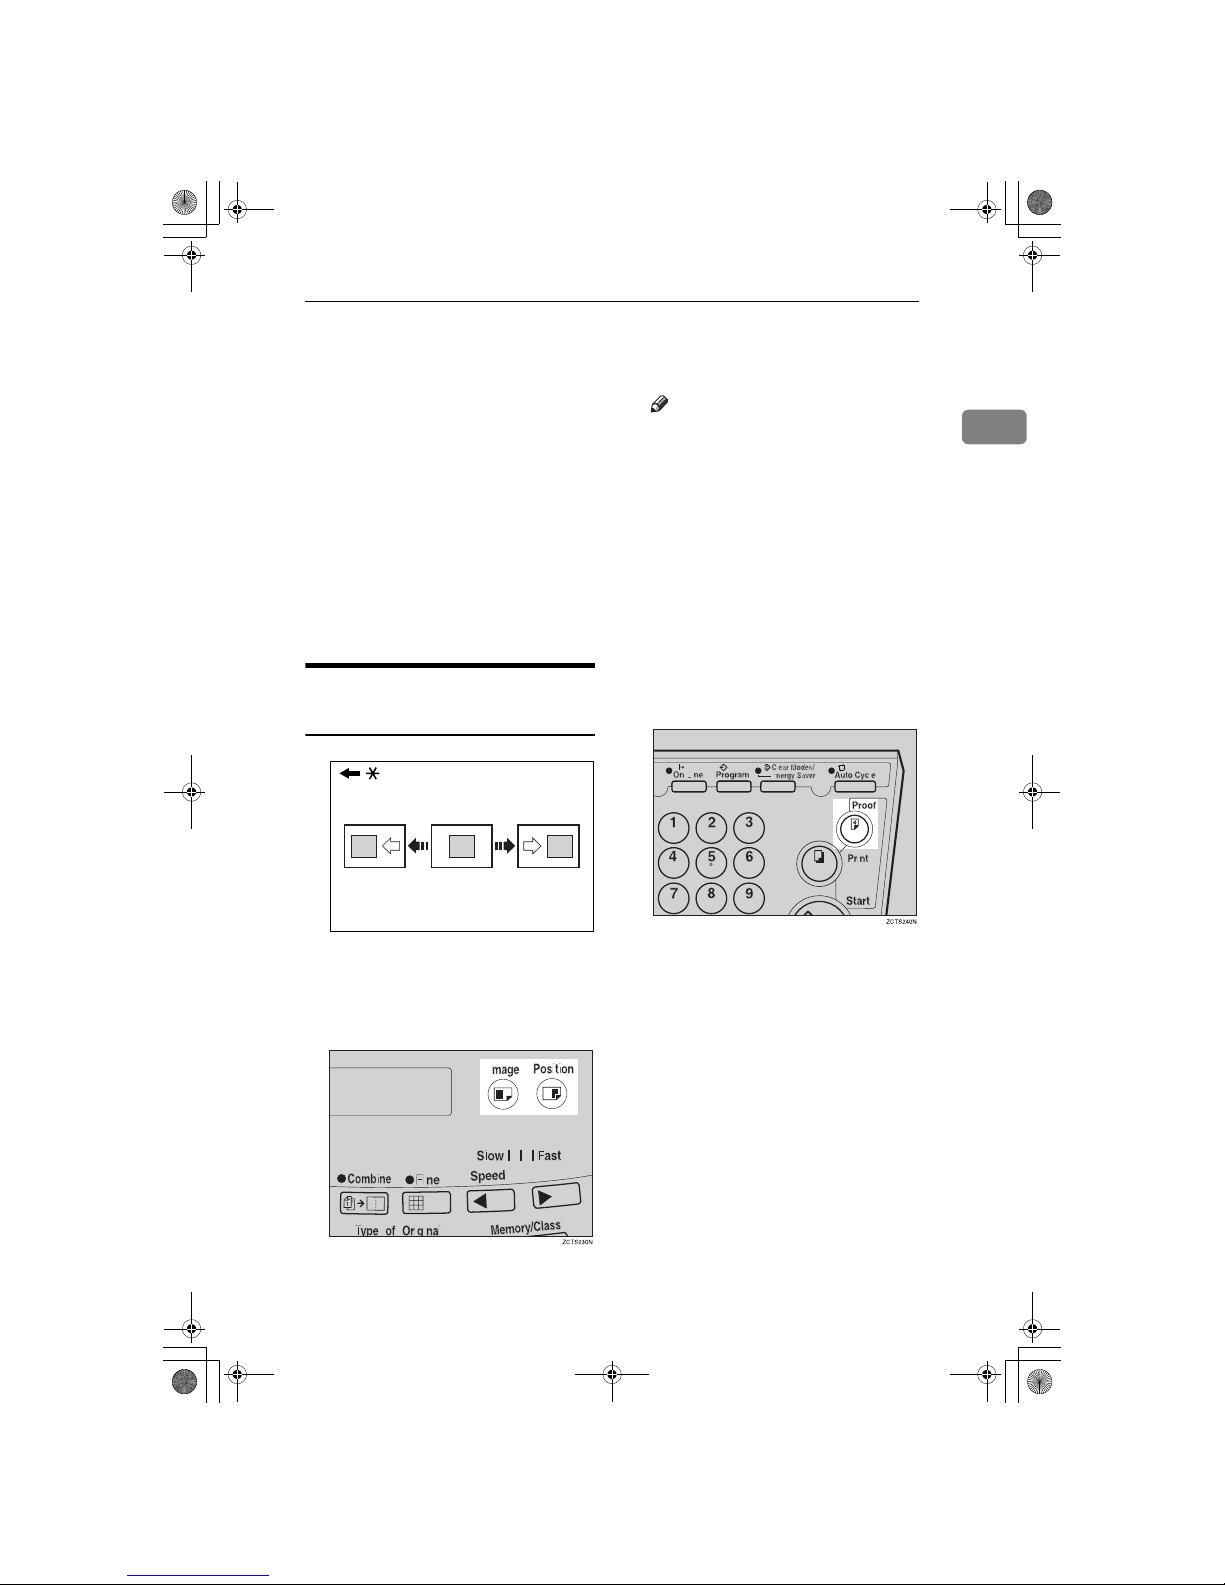
Position Forward or Backward
* Paper feed direction
A
Press the left {{{{
Image Position
}}}} key
to move the image forwards, the
right key to move it backwards.
Note
❒ When you shift the image for-
wards, leave a margin (more
than 5mm, 0.2") at the leading
edge. If there is no margin, paper might wrap around the
drum and cause a misfeed.
❒ The right or left {
Image Position
}
keys shift the image about
0.5mm, 0.02" each time they are
pressed. When the indicator
changes, the image position
shifts about 5mm, 0.2".
B
Press the {{{{
Proof
}}}} key to check the
image position.
GRFORW0E
SilverV-EN.book Page 9 Monday, May 15, 2000 3:23 PM
Page 48
Operation
10
1
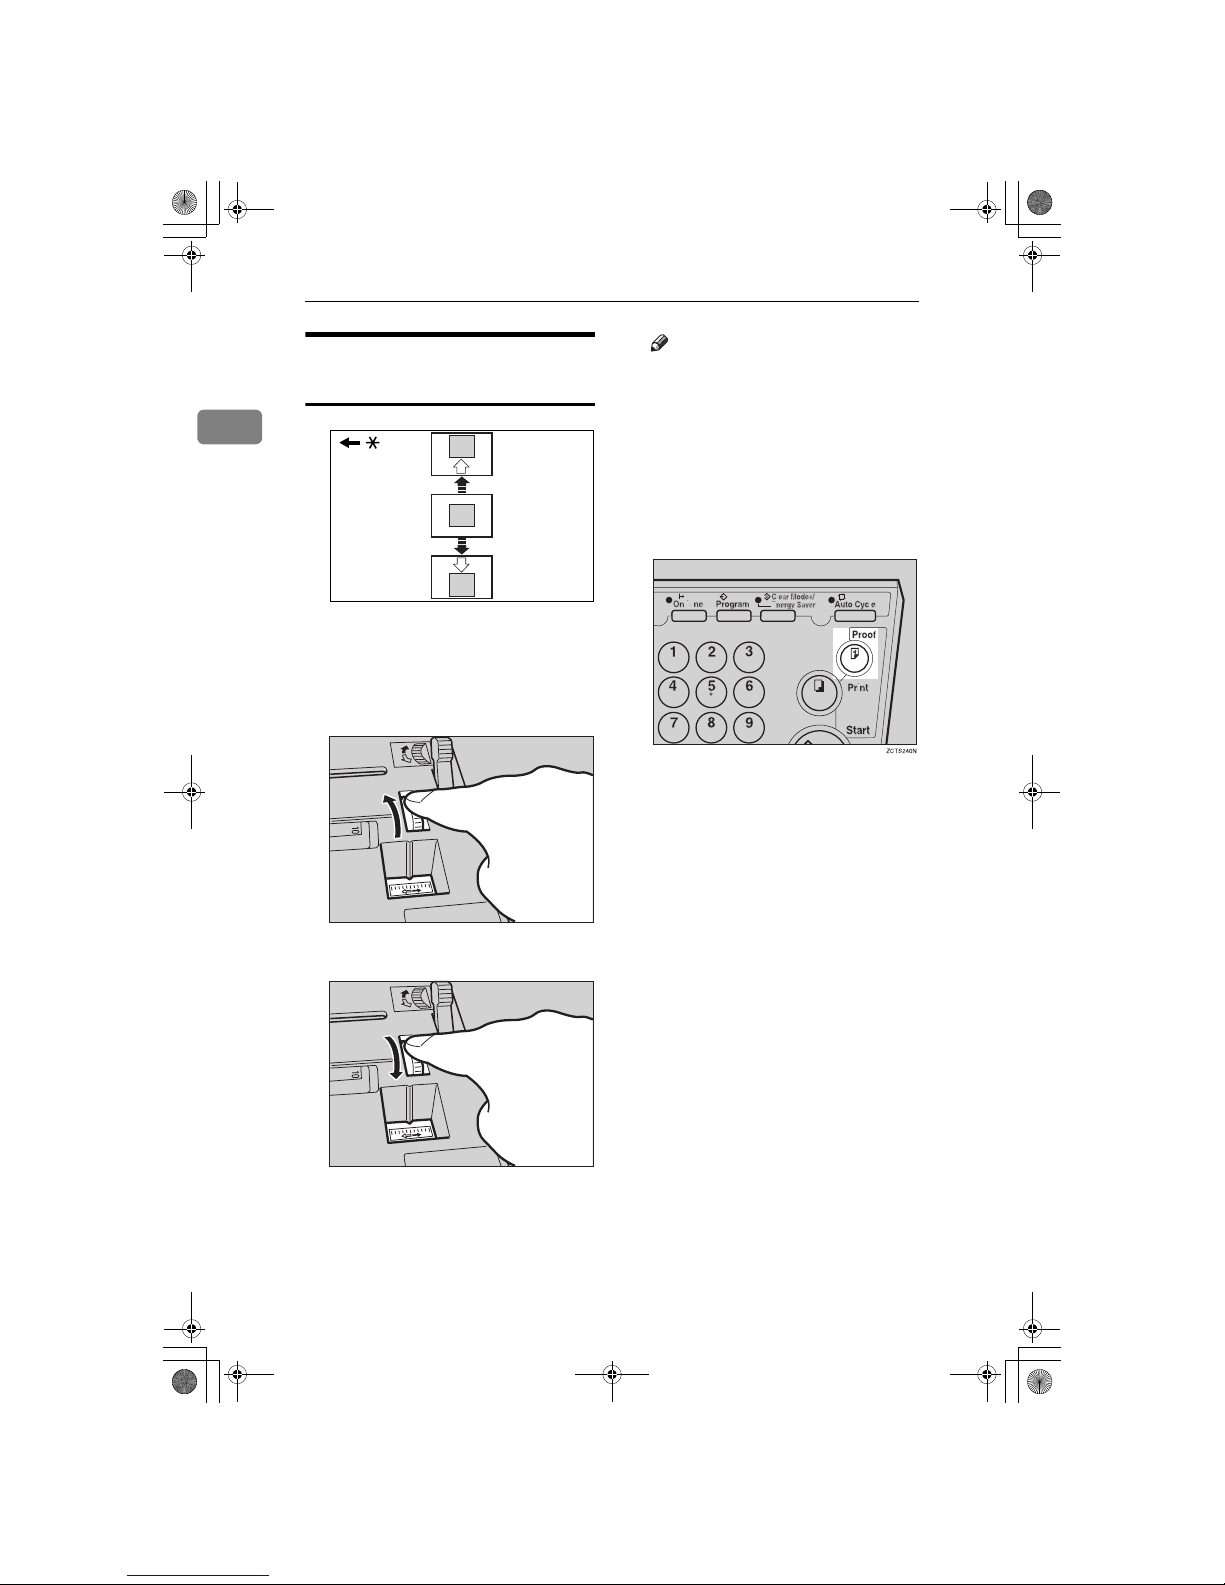
Shifting the Print Image
Position to the Right or Left
* Paper feed direction
A
Turn the side tray fine adjusting
dial as shown in the illustrations.
❖❖❖❖
Shifting the image to the right
❖❖❖❖
Shifting the image to the left
Note
❒ The image position can be shift-
ed up to about 10mm, 0.4" each
way. Each division on the scale
is 2mm, 0.08".
B
Adjust the paper delivery side
plates to the print paper position.
C
Press the {{{{
Proof
}}}} key to check the
image position.
GRLEFT0E
TSLH02IE
TSLH02JE
SilverV-EN.book Page 10 Monday, May 15, 2000 3:23 PM
Page 49
Adjusting the Print Image Density
11
1
Adjusting the Print Image Density
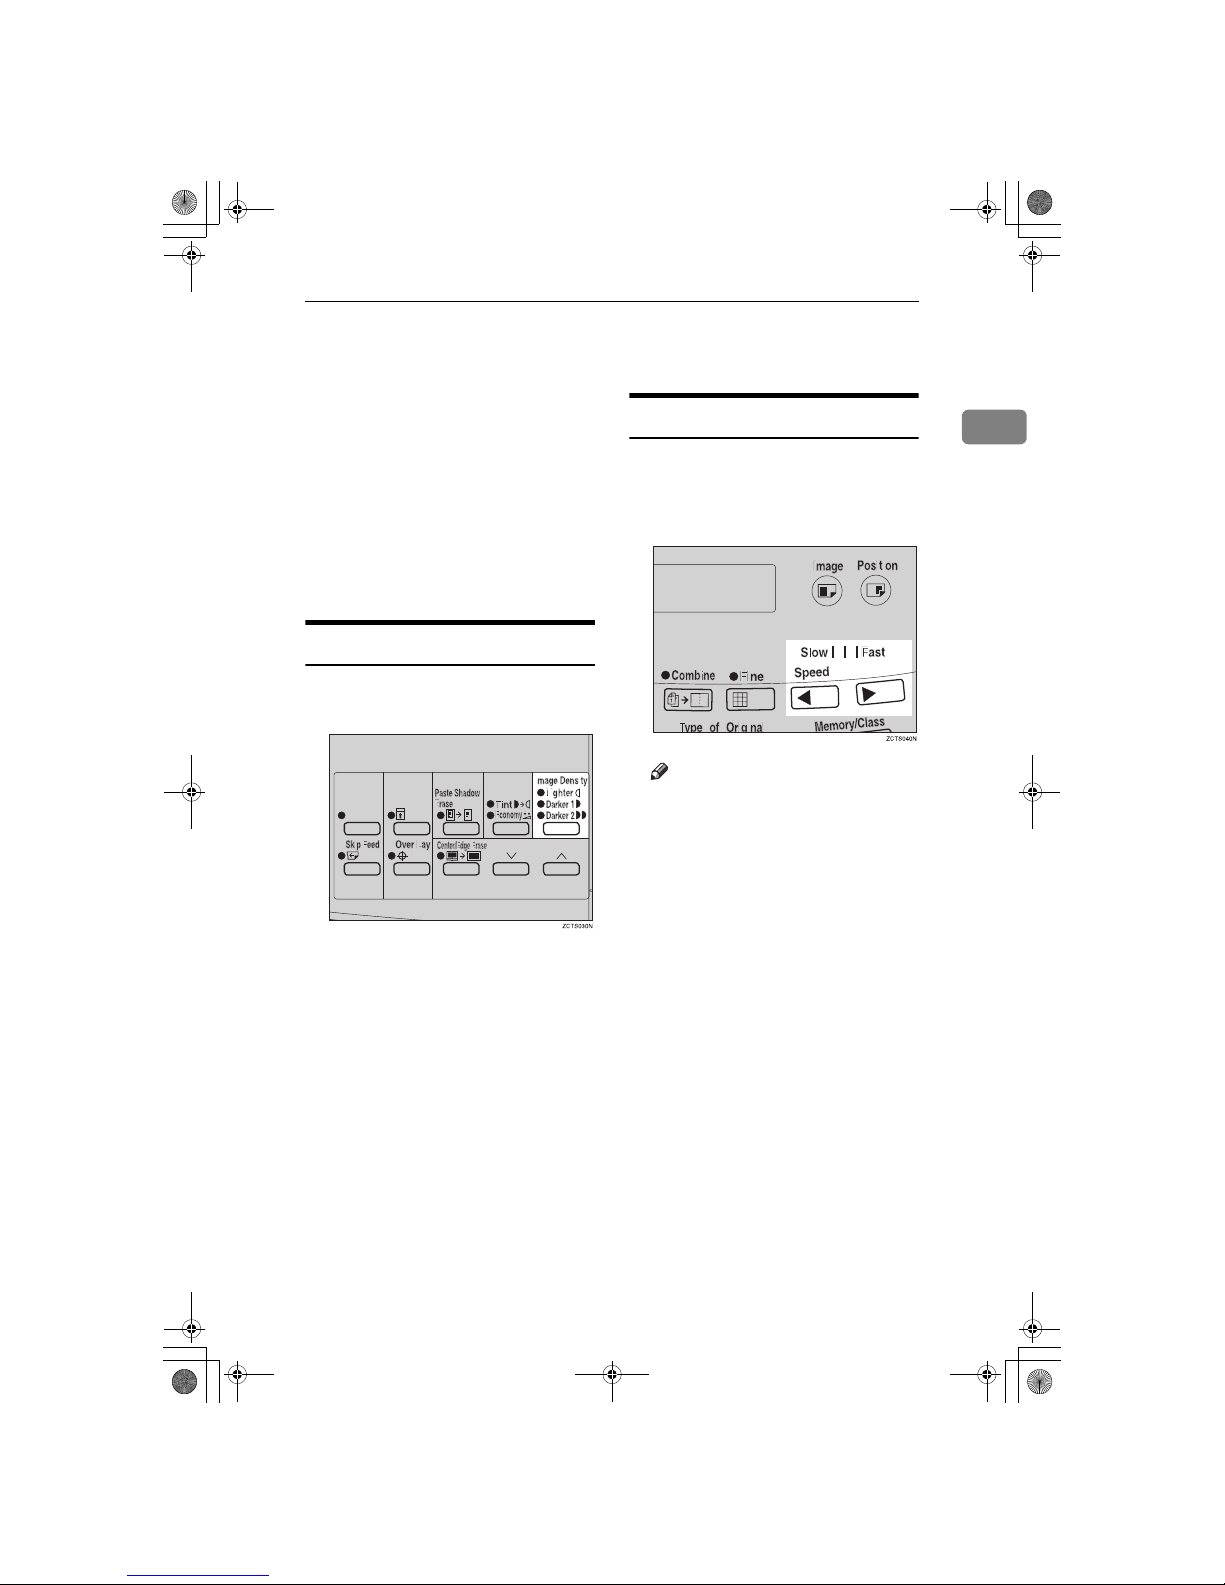
You can adjust the print image density to suit your needs. There are two
ways:
❖❖❖❖
Before Making a Master
Adjust the image density using the
{
Image Density
} key.
❖❖❖❖
After Making a Master
Adjust the image density using the
{WWWW} or {VVVV} key.
Before Making a Master
A
Use the {{{{
Image Density
}}}} key before
pressing the {{{{
Start
}}}} key.
After Making a Master
A
Press the {{{{WWWW}}}} or {{{{VVVV}}}} key. To increase the speed, press the {{{{VVVV}}}}
key. To reduce the speed, press
the {{{{WWWW}}}} key.
Note
❒ The faster the printing speed be-
comes, the lighter the printing
density is. If you want darker
prints, decrease the printing
speed.
SilverV-EN.book Page 11 Monday, May 15, 2000 3:23 PM
Page 50
Operation
12
1
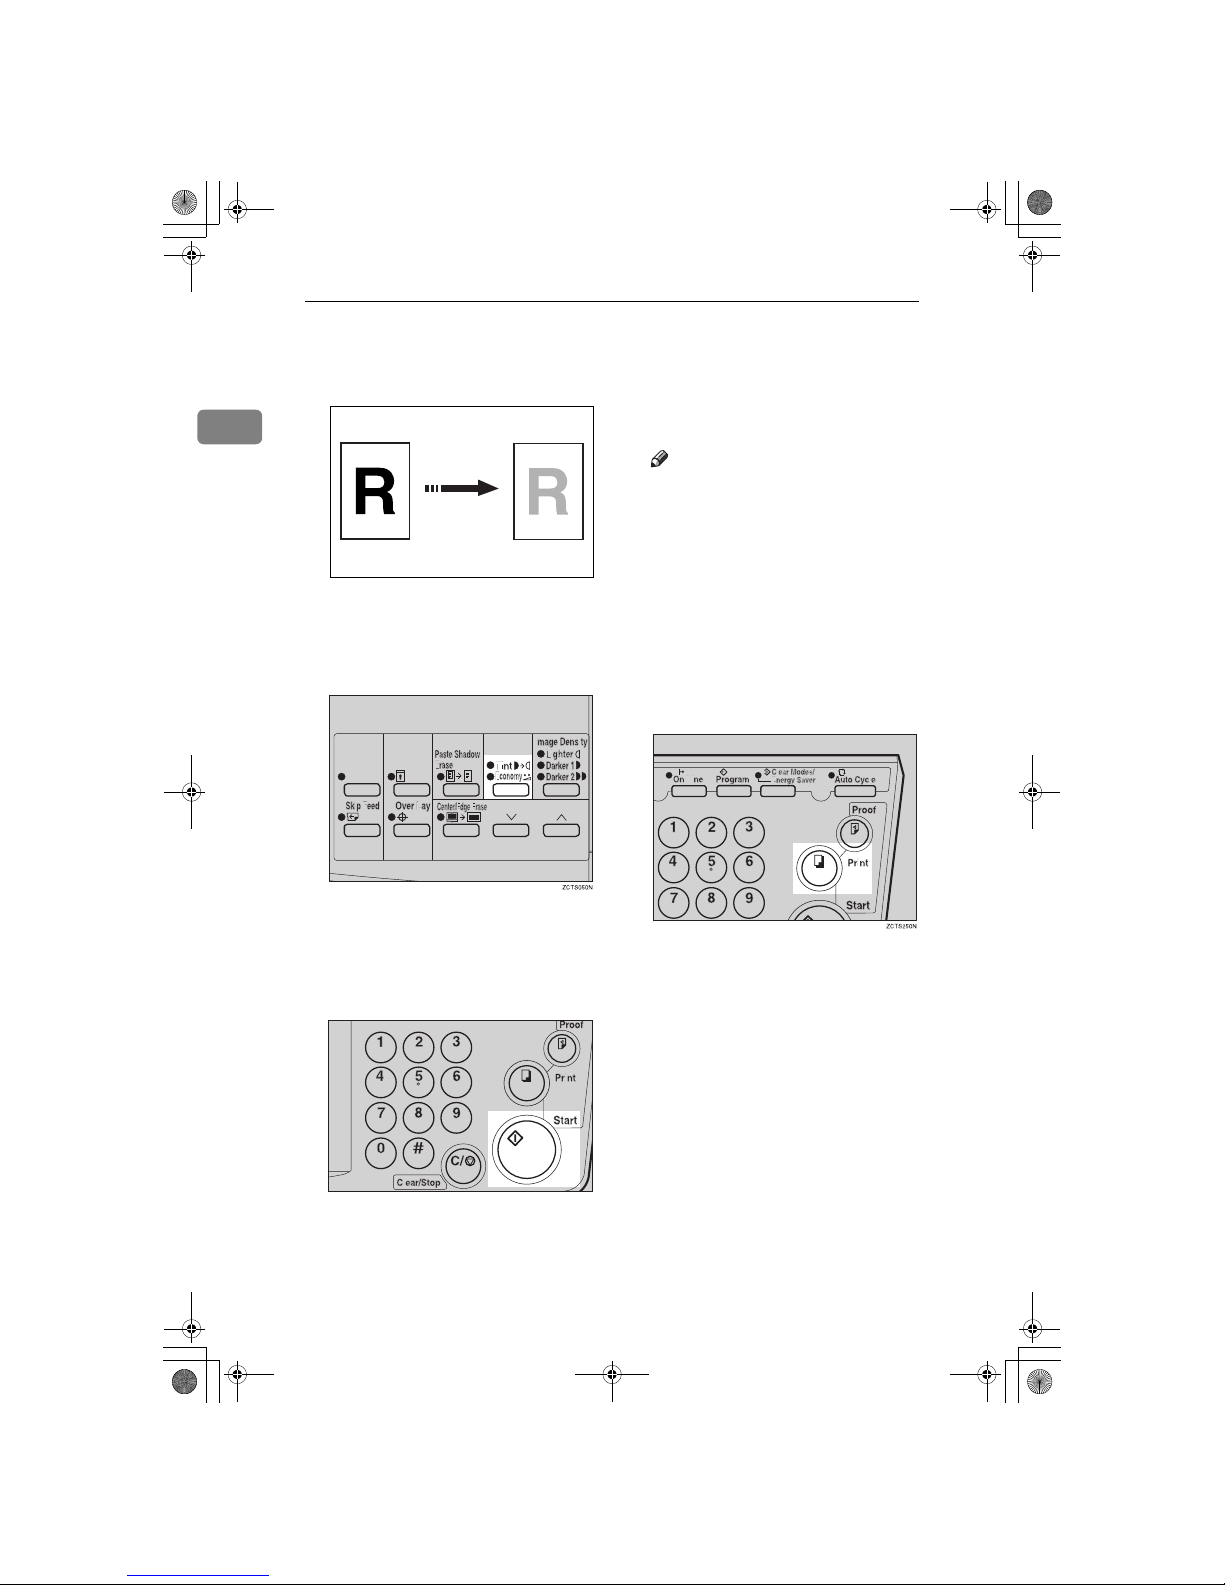
Tint Mode—Halftone Printing
Use the {
Tint/Economy
} key to make
halftone prints.
A
Press the {{{{
Tint/Economy
}}}} key to se-
lect Tint mode (Upper indicator).
B
Set your originals on the exposure
glass or in the optional document
feeder.
C
Press the {{{{
Start
}}}} key.
D
Check the image position of the
trial or proof print.
Note
❒ If the image position is not cor-
rect, adjust it using the {
Image
Position
} keys (see ⇒ P.9 “Ad-
justing the Print Image Position”)
or the side tray fine adjusting
dial (see ⇒ P.10 “Shifting the
Print Image Position to the Right
or Left”).
E
Enter the number of prints with
the number keys.
F
Press the {{{{
Print
}}}} key.
GRTINT0E
TSLS012N
SilverV-EN.book Page 12 Monday, May 15, 2000 3:23 PM
Page 51
Fine Mode—Making Clear Prints
13
1
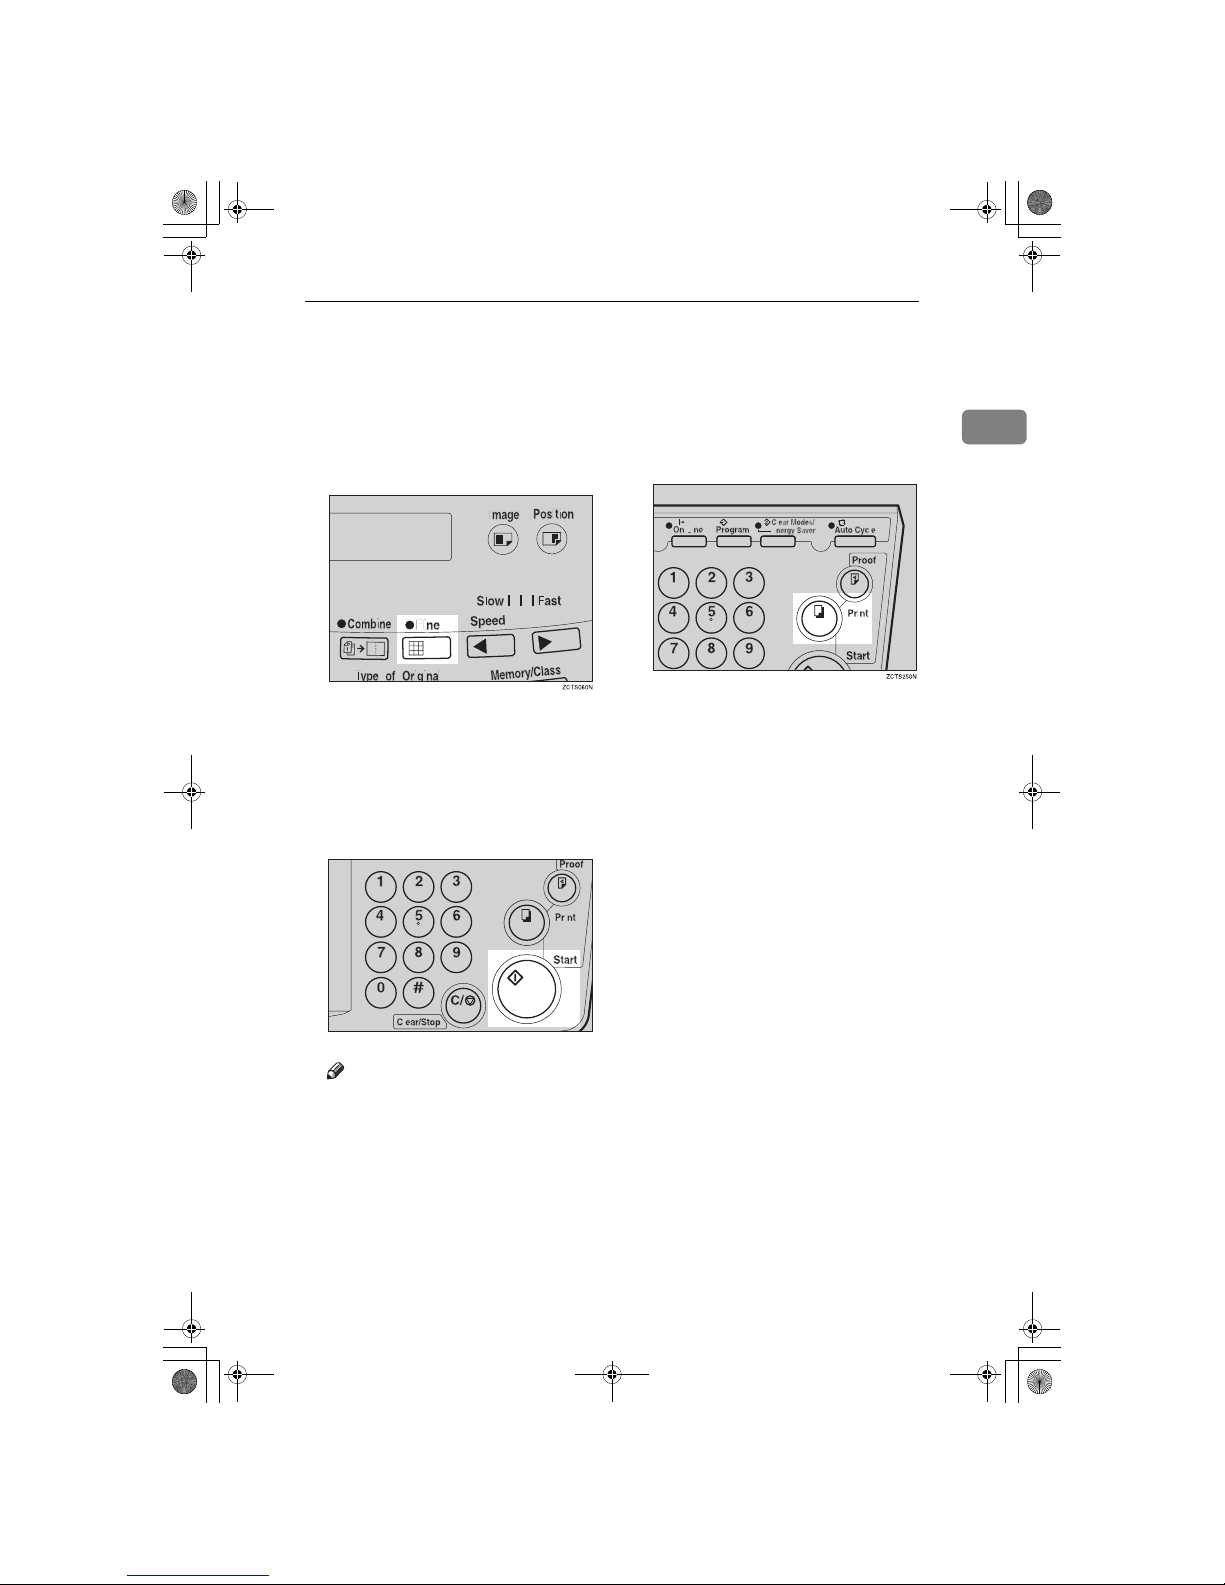
Fine Mode—Making Clear Prints
Use the {
Fine
} key to make clear
prints.
A
Press the {{{{
Fine
}}}} key to select Fine
mode.
B
Set your originals on the exposure
glass or in the optional document
feeder.
C
Press the {{{{
Start
}}}} key. Check the
image position of the trial or
proof print.
Note
❒ If the image position is not cor-
rect, adjust it using the {
Image
Position
} keys (see ⇒ P.9 “Ad-
justing the Print Image Position”)
or the side tray fine adjusting
dial (see ⇒ P.10 “Shifting the
Print Image Position to the Right
or Left”).
D
Enter the number of prints with
the number keys.
E
Press the {{{{
Print
}}}} key.
TSLS012N
SilverV-EN.book Page 13 Monday, May 15, 2000 3:23 PM
Page 52
Operation
14
1
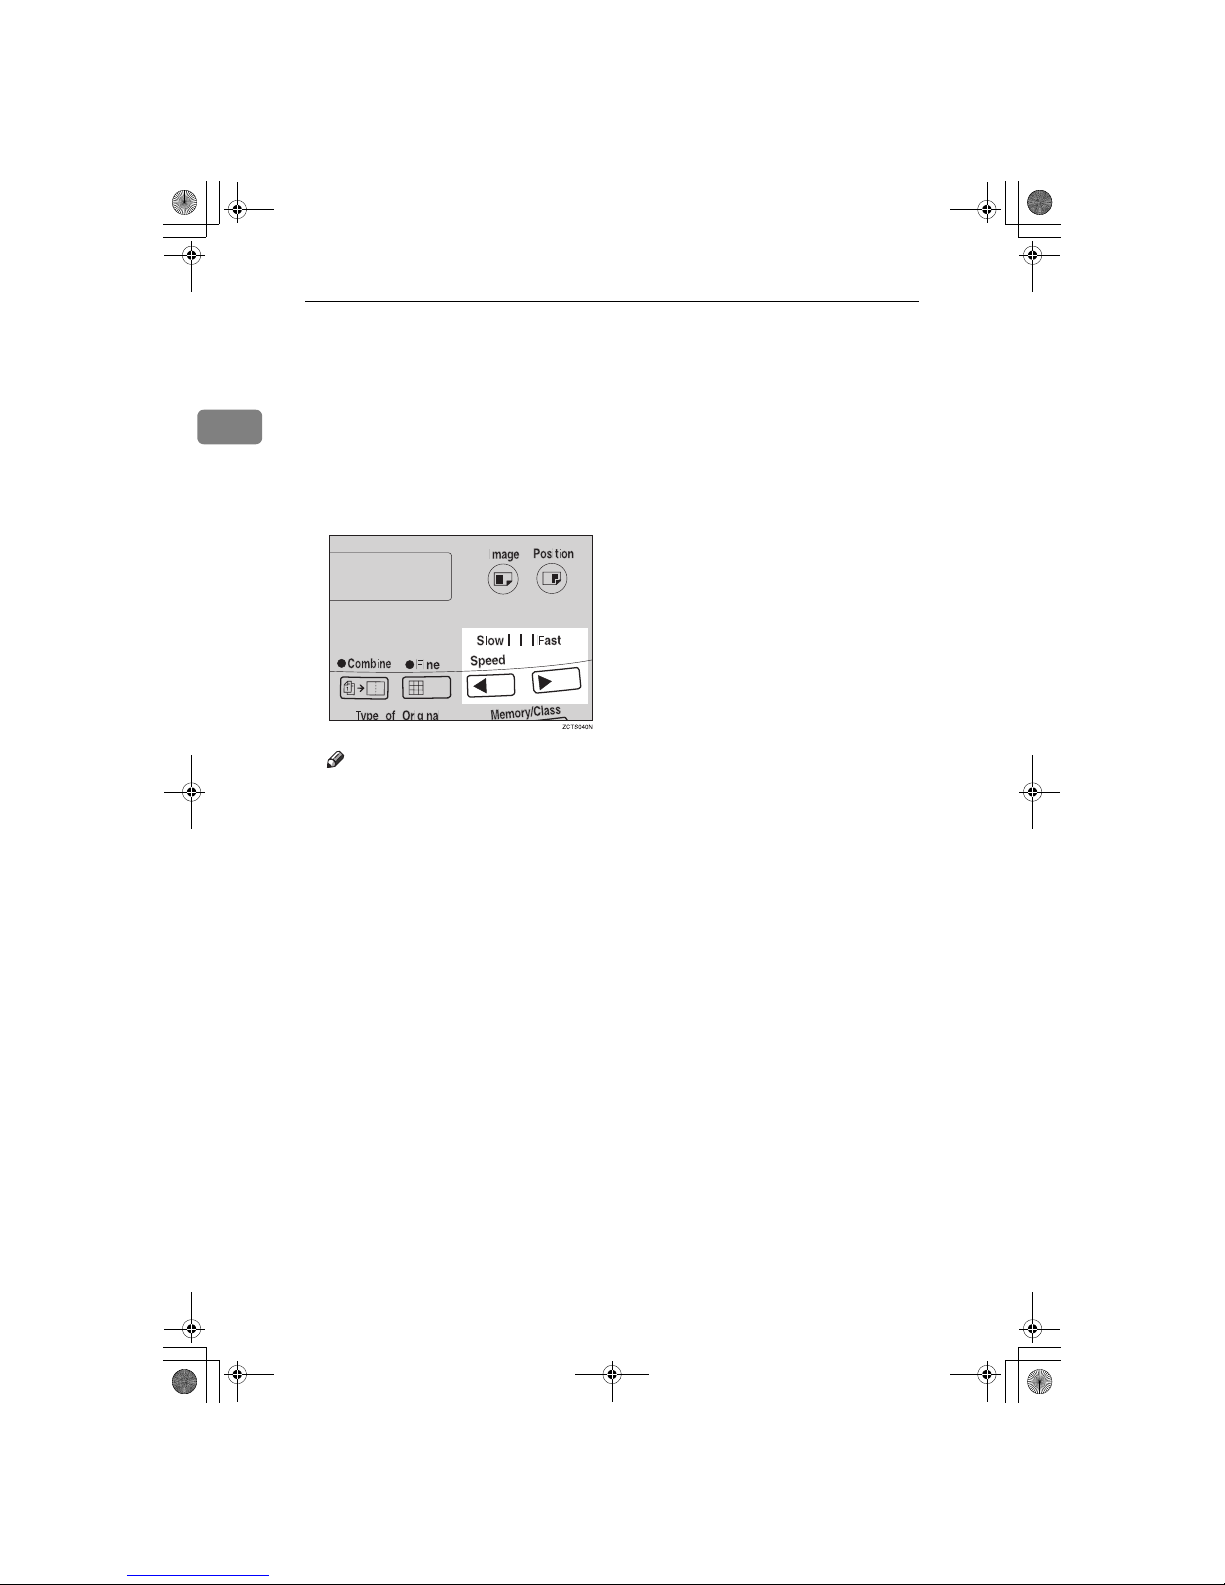
Changing the Printing Speed
Use the {WWWW} or {VVVV} key to adjust the
speed of the machine with the image
density and printing paper.
A
Press the {{{{VVVV}}}} key to increase the
speed and press the {{{{WWWW}}}} key to reduce the speed.
Note
❒ The following speeds are avail-
able:
• Setting 1:
80 sheets/minute
• Setting 2:
100 sheets/minute
• Setting 3:
130 sheets/minute
❒ As a default setting, setting 2 is
selected.
❒ The faster the printing speed be-
comes, the lighter the printing
density is, and vice versa.
SilverV-EN.book Page 14 Monday, May 15, 2000 3:23 PM
Page 53
Stopping the Machine during the Multi-print Run
15
1
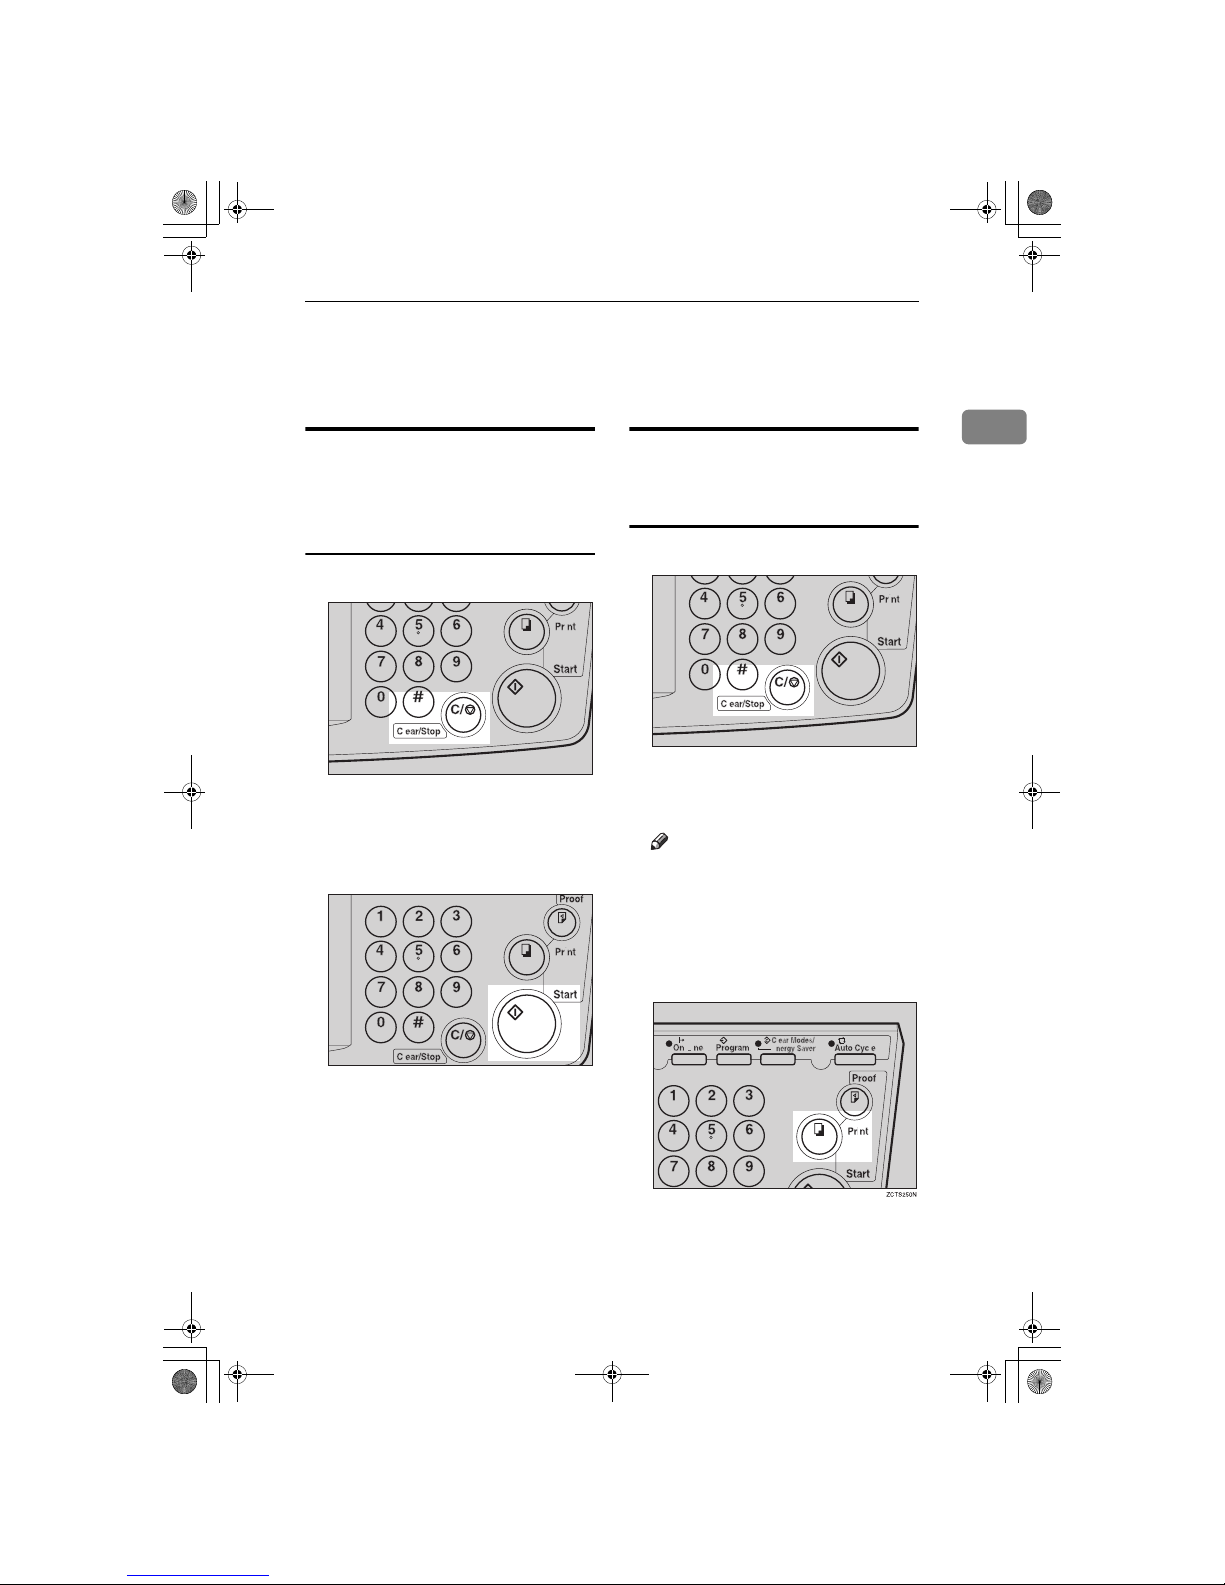
Stopping the Machine during the Multiprint Run
When You Want to Stop the
Machine during the Multi-print
Run and Print the Next
Original
A
Press the {{{{
Clear/Stop
}}}} key.
B
Set the new original.
C
Enter the number of prints and
press the {{{{
Start
}}}} key.
When You Want to Change the
Number of Prints Entered or
Check the Completed Prints
A
Press the {{{{
Clear/Stop
}}}} key.
B
Change the number of prints or
check the completed prints.
Note
❒ When you change the number
of prints, you can re-enter the
number with the number keys
after pressing the {
Clear/Stop
}
key.
C
Press the
{{{{
Print
}}}}
key.
TSLS01AN
TSLS012N
TSLS01AN
SilverV-EN.book Page 15 Monday, May 15, 2000 3:23 PM
Page 54
Operation
16
1
Preset Reduce/Enlarge—Reducing and
Enlarging Using Preset Ratios
You can select a preset ratio for printing.
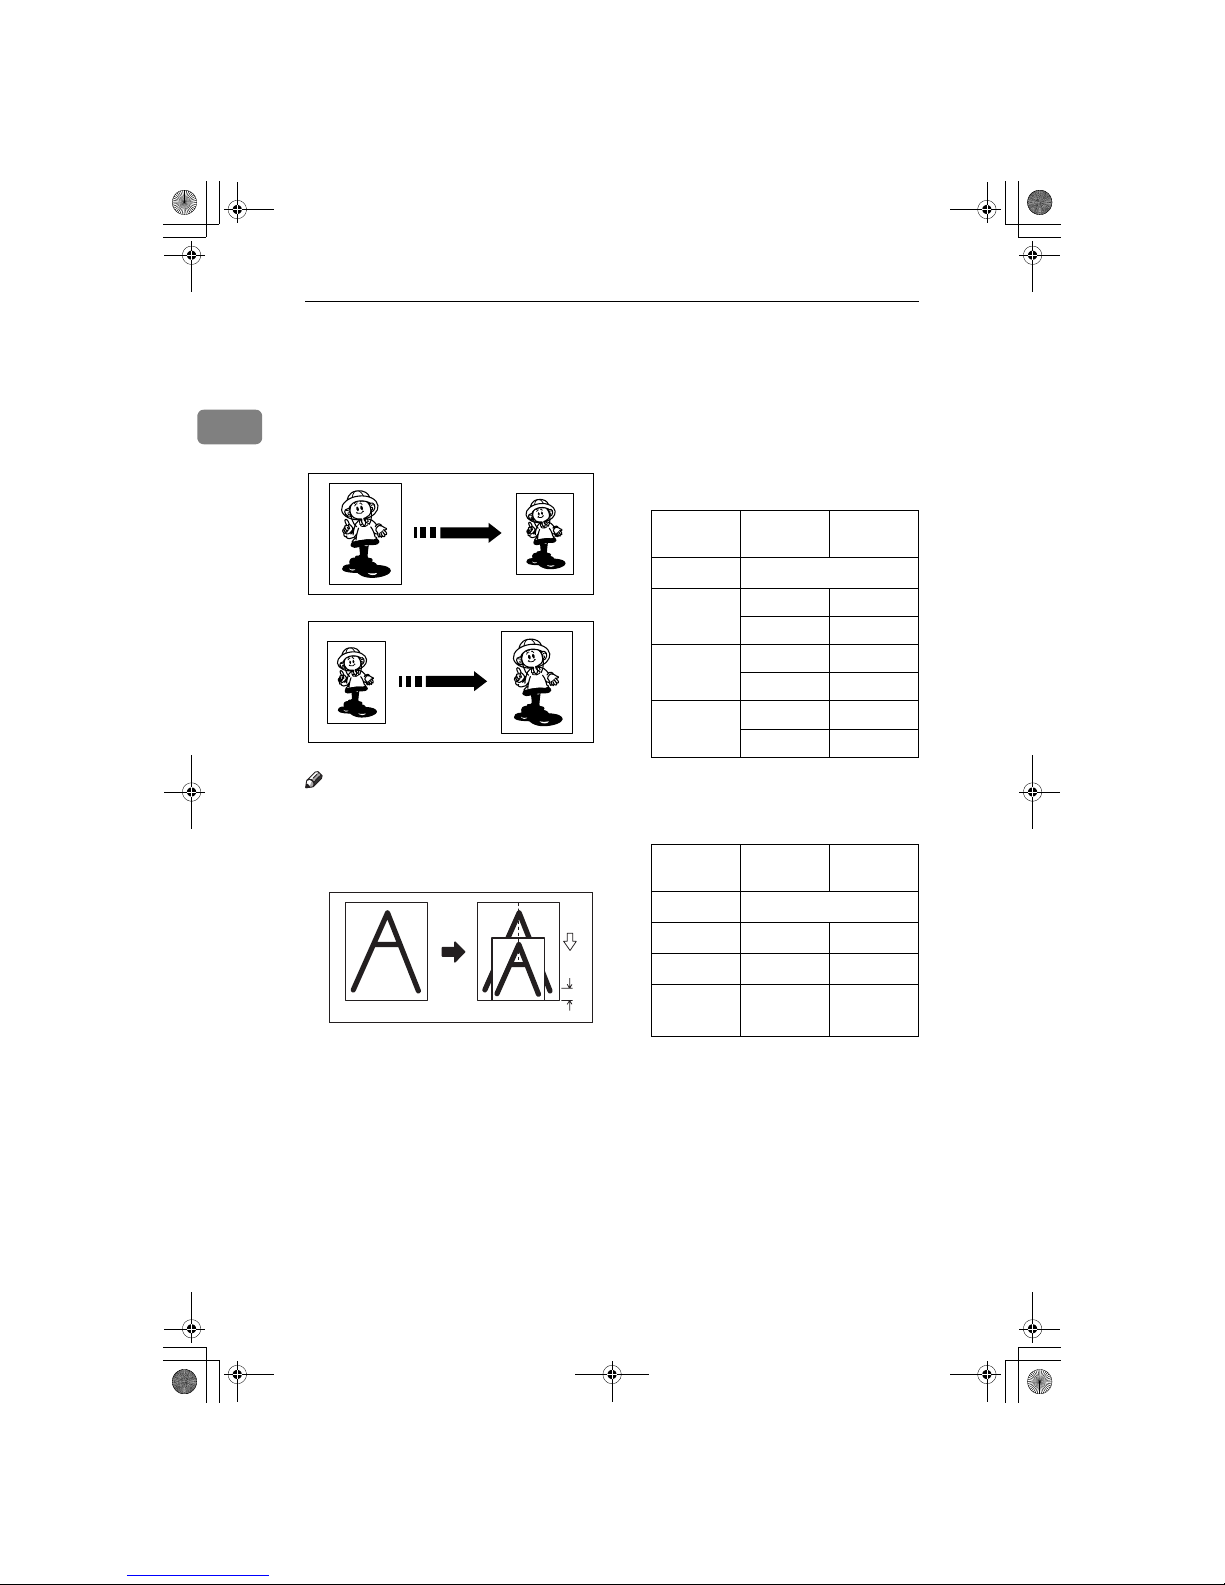
Note
❒ The center and the leading edge of
the print image do not shift when a
print image is made with this function.
a: Paper Feed Direction
b: Constant
❒ You can select one of 7 preset ratios
(3 enlargement ratios, 4 reduction
ratios).
❒ You can select a ratio regardless of
the size of an original or printing
paper. With some ratios, parts of
the image might not be printed or
margins will appear on prints.
❒ Prints can be reduced or enlarged
as follows:
❖❖❖❖
Reduction (Metric version)
*1
Select this ratio when you make
prints with a lot of edge margins.
❖❖❖❖
Reduction (Inch version)
*1
Select this ratio when you make
prints with a lot of edge margins.
GRREDU0E
GRENLA0E
GRFULLOE
a
b
Reduction Ratio
Original
Size
Print Size
93 %
*1
87 % A5 B6
A4 B5
82 % B4 A4
B5 A5
71 % A4 A5
B4 B5
Reduction Ratio
Original
Size
Print Size
93 %
*1
77 %
8
1
/2" × 14" 81/2" × 11"
74 % 10" × 14"
8
1
/2" × 11"
65 %
8
1
/2" × 11" 51/2" ×
8
1
/2"
SilverV-EN.book Page 16 Monday, May 15, 2000 3:23 PM
Page 55
Preset Reduce/Enlarge—Reducing and Enlarging Using Preset Ratios
17
1
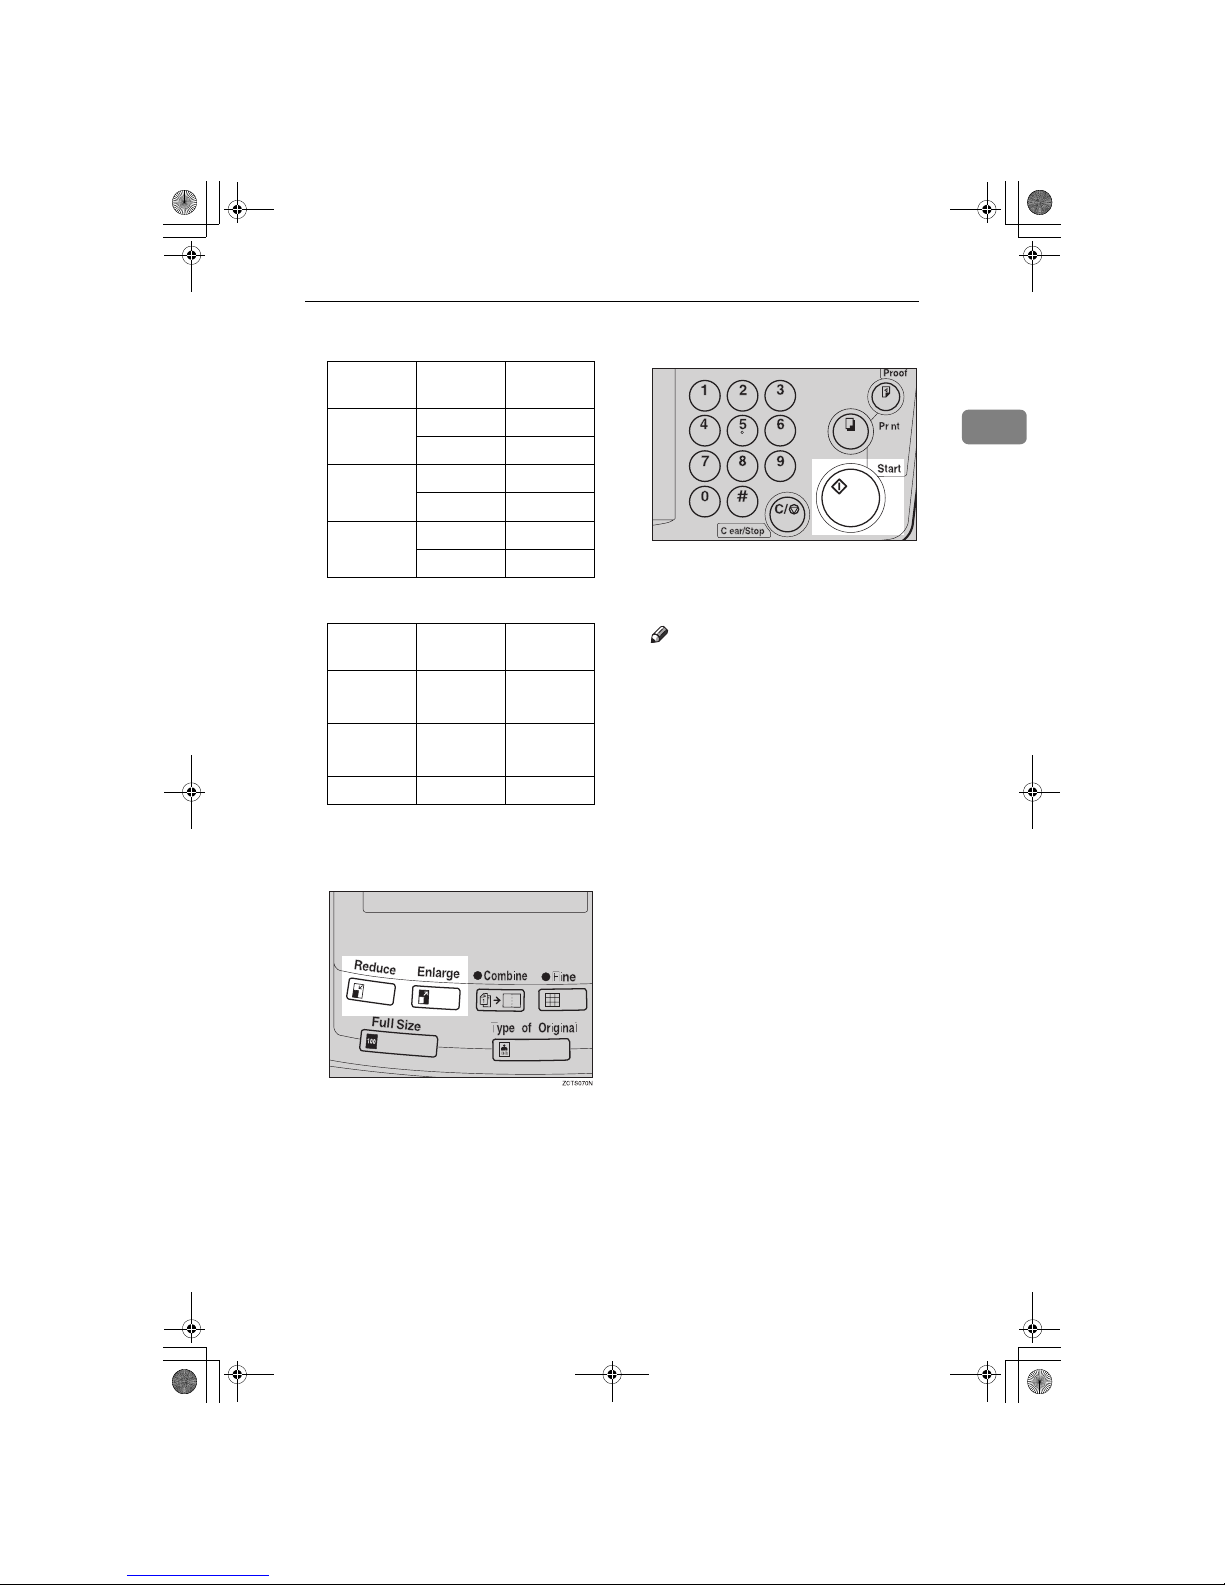
❖❖❖❖
Enlargement (Metric version)
❖❖❖❖
Enlargement (Inch version)
A
Select the desired reduction or enlargement ratio using the {{{{
Re-
duce
}}}} key or the {{{{
Enlarge
}}}} key.
B
Make sure that the original and
the print paper are the correct
size.
C
Set your originals on the exposure
glass or in the optional document
feeder.
D
Press the {{{{
Start
}}}} key.
E
Check the image position of the
trial or proof print.
Note
❒ If the image position is not cor-
rect, adjust it using the {
Image
Position
} keys (see ⇒ P.9 “Shift-
ing the Print Image Position Forward or Backward”) or the side
tray fine adjusting dial (see ⇒
P.10 “Shifting the Print Image Po-
sition to the Right or Left”).
F
Make your prints.
Enlargement Ratio
Original
Size
Print Size
141 % B5 B4
A5 A4
122 % A4 B4
A5 B5
115 % B5 A4
B6 A5
Enlargement Ratio
Original
Size
Print Size
155 %
5
1
/2" ×
8
1
/2"
8
1
/2" × 14"
129 %
5
1
/2" ×
8
1
/2"
8
1
/2" × 11"
121 % — —
TSLS012N
SilverV-EN.book Page 17 Monday, May 15, 2000 3:23 PM
Page 56
Operation
18
1
Center/Edge Erase—Erasing center and
Edge Margins
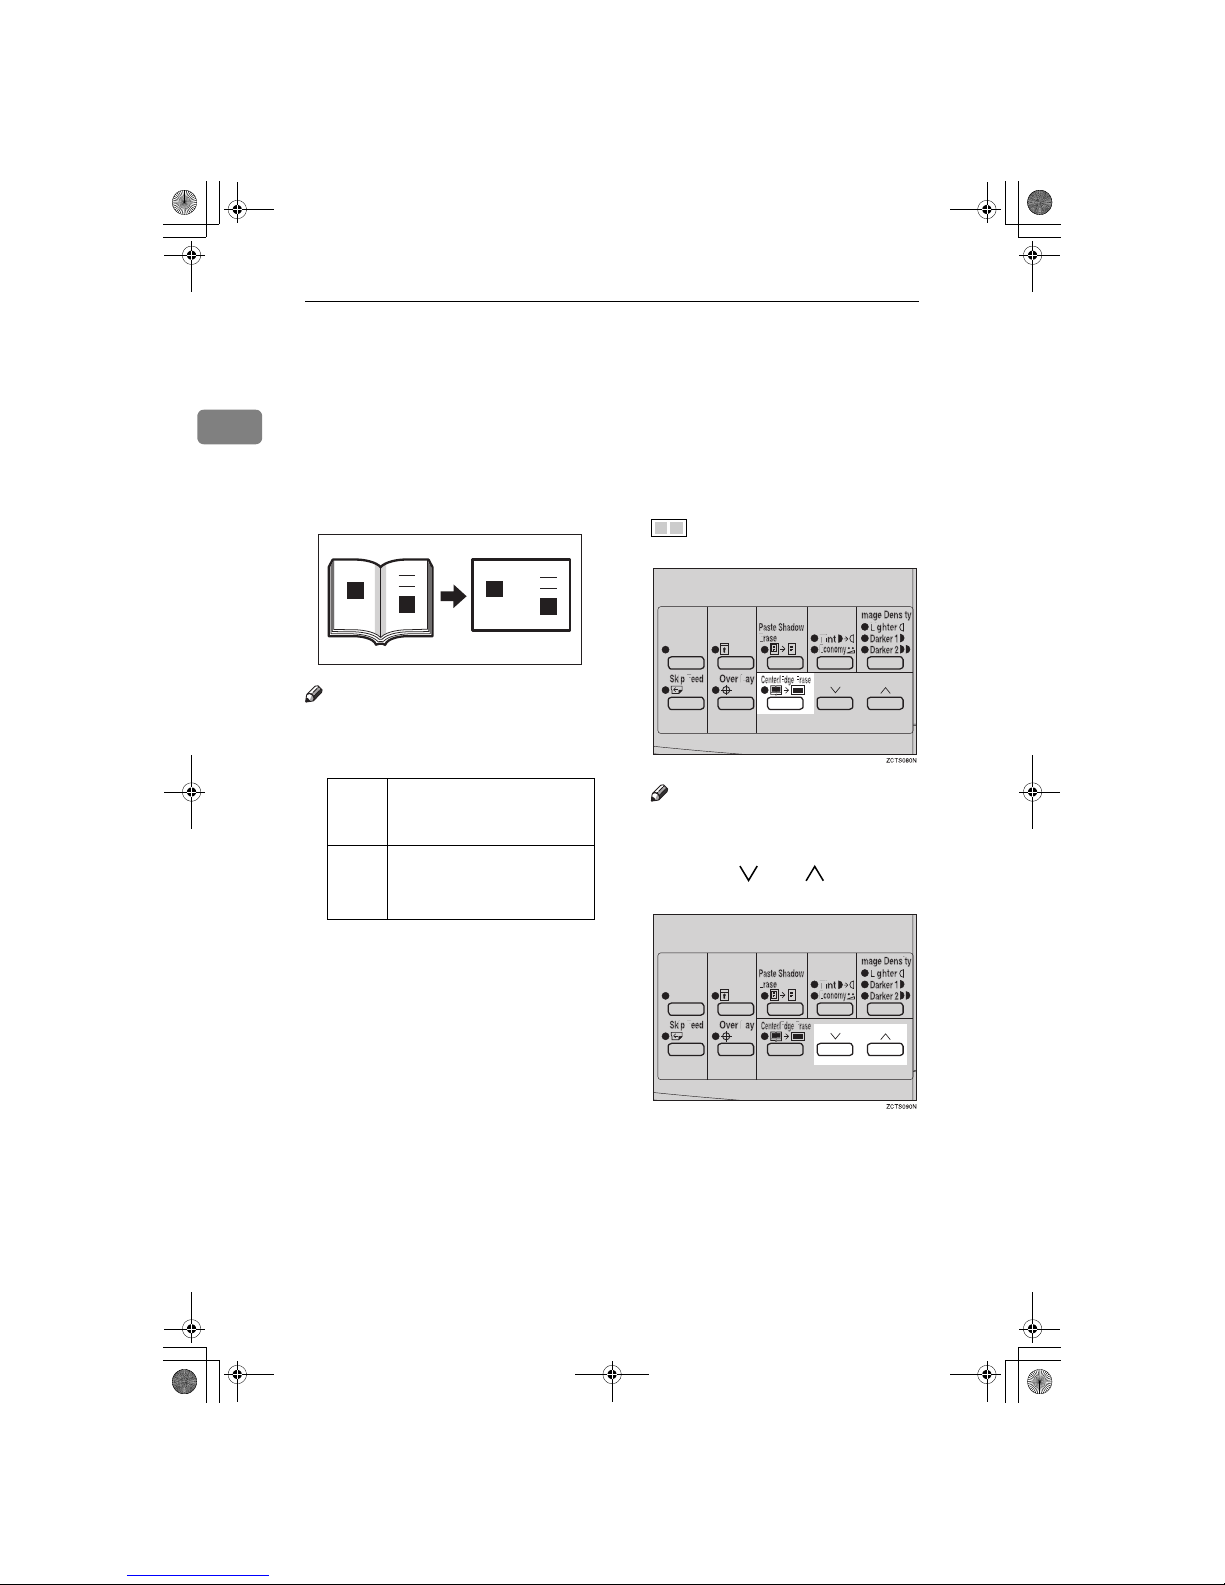
When printing from thick books, or
similar originals, the binding margin
at the center and the edges might appear on prints. To prevent this, follow
the steps below.
Note
❒ As a default setting, the paper sizes
and directions that can be used are
as follows:
❒ If you want to use other size origi-
nals, you can register the size using
Service Program mode (See ⇒ P.59
“Service Program Menu”).
❒ The margin width to be erased can
be adjusted with Service Program
mode (See ⇒ P.59 “Service Program
Menu”).
A
Press the {{{{
Center/Edge Erase
}}}} key
twice to select the Center/Edge
Erase mode.
Check Indicator is blinking and
is shown in the guidance dis-
play.
Note
❒ To cancel this mode, press the
{
Center/Edge Erase
} key again.
B
Press the {{{{}}}} or {{{{}}}} key to select the paper size and direction.
Metric
version
B4L, A4L, A5K, A5L,
B5K, B5L
Inch
version
8
1
/2" × 14"L, 81/2" × 11"L,
5
1
/2" × 81/2"L, 51/2" ×
8
1
/2"K
GRMARG0E
SilverV-EN.book Page 18 Monday, May 15, 2000 3:23 PM
Page 57
Center/Edge Erase—Erasing center and Edge Margins
19
1
C
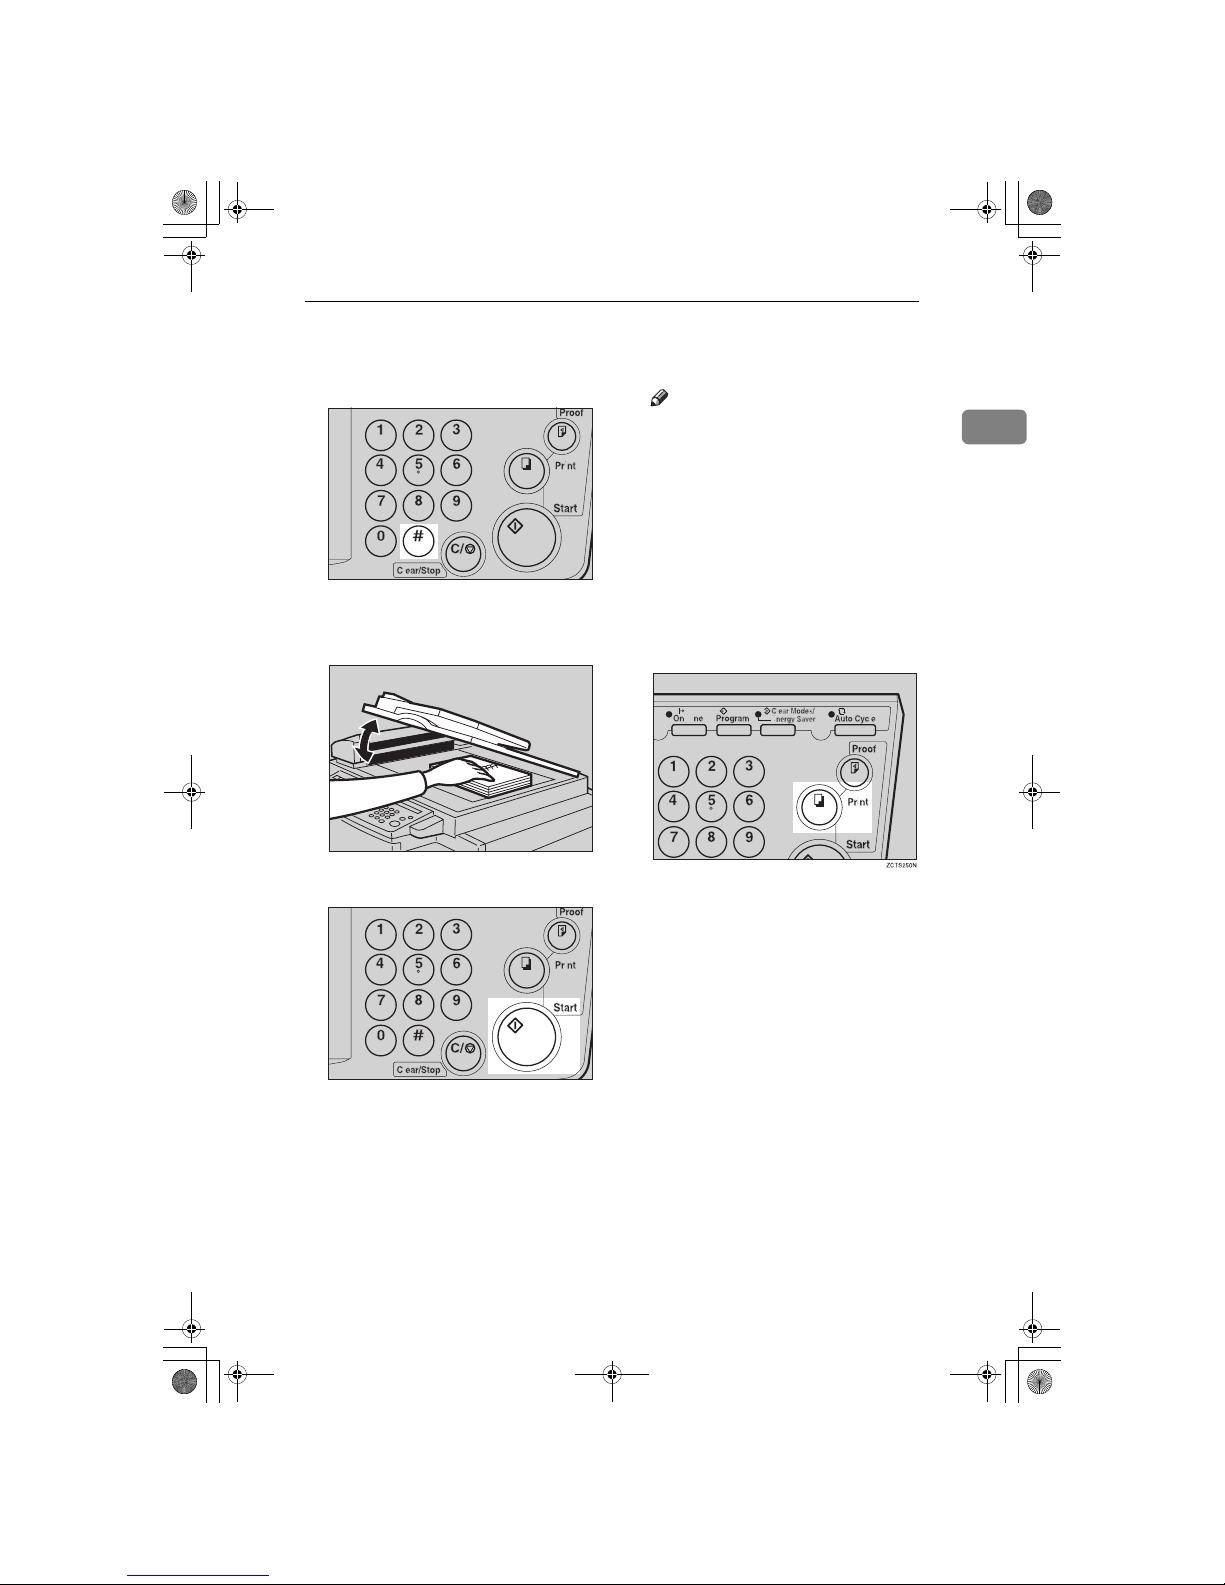
When you reach the desired paper
size and direction, press the {{{{qqqq}}}}
key.
D
Set the book on the exposure
glass.
E
Press the {{{{
Start
}}}} key.
F
Check the image position of the
trial or proof print.
Note
❒ If the image position is not cor-
rect, adjust it using the {
Image
Position
} keys (see ⇒ P.9 “Ad-
justing the Print Image Position”)
or the side tray fine adjusting
dial (see ⇒ P.10 “Shifting the
Print Image Position to the Right
or Left”).
G
Enter the number of prints with
the number keys.
H
Press the {{{{
Print
}}}} key.
TSLS01TN
TSLH014E
TSLS012N
SilverV-EN.book Page 19 Monday, May 15, 2000 3:23 PM
Page 58
Operation
20
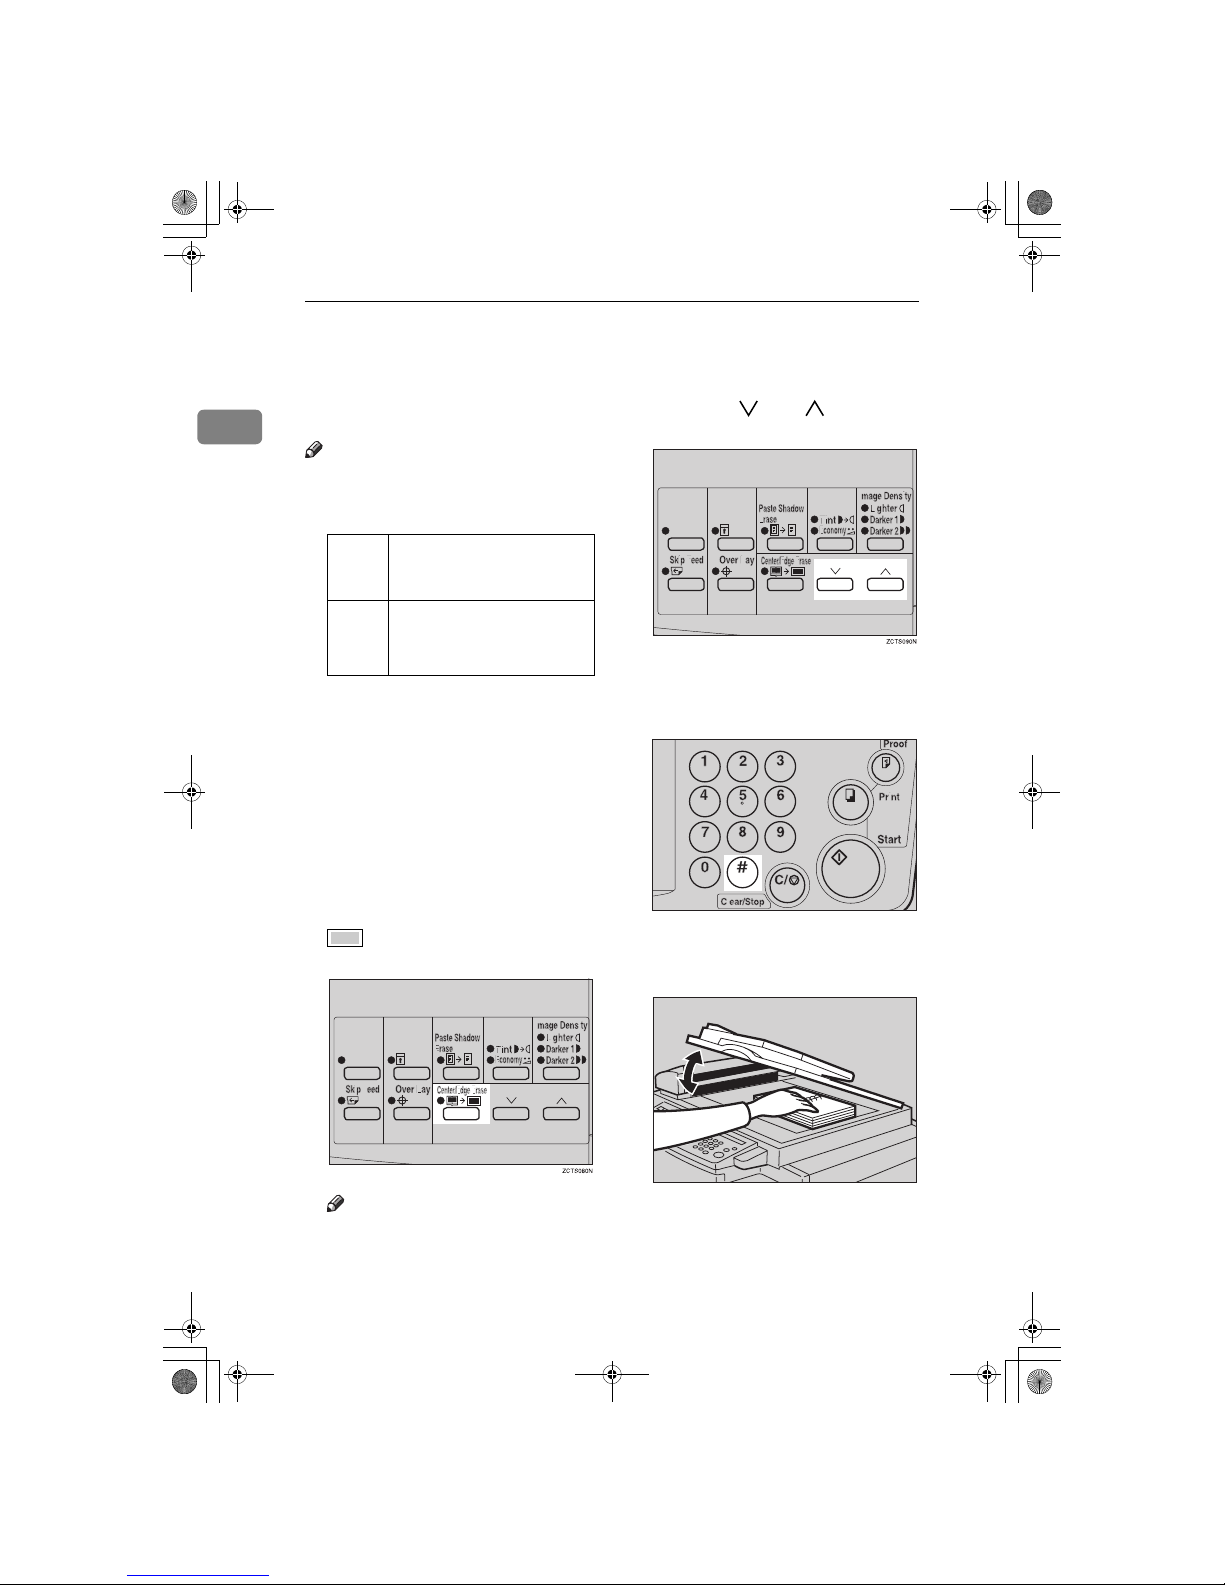
1
Edge Erase—Erasing Edge Margins
If you want to erase edge margins of a
book original, follow the steps below.
Note
❒ As a default setting, the paper sizes
and directions that can be used are
as follows:
❒ If you want to use other size origi-
nals, you can register the size using
Service Program mode (See ⇒ P.59
“Service Program Menu”).
❒ The margin width to be erased can
be adjusted with Service Program
mode (See ⇒ P.59 “Service Program
Menu”).
A
Press the {{{{
Center/Edge Erase
}}}} key
to select Edge Erase mode.
Check Indicator is blinking and
is shown in the guidance dis-
play.
Note
❒ To cancel this mode, press the
{
Center/Edge Erase
} key twice.
B
Press the {{{{}}}} or {{{{}}}} key to select the paper size and direction.
C
When you reach the desired paper
size and direction, press the {{{{qqqq}}}}
key.
D
Set the book on the exposure
glass.
Metric
version
B4L, A4L, A5K, A5L,
B5K, B5
L
Inch
version
8
1
/2" × 14"L, 81/2" × 11"L,
5
1
/2" × 81/2"L, 51/2" ×
8
1
/2"
K
TSLS01TN
TSLH014E
SilverV-EN.book Page 20 Monday, May 15, 2000 3:23 PM
Page 59
Edge Erase—Erasing Edge Margins
21
1
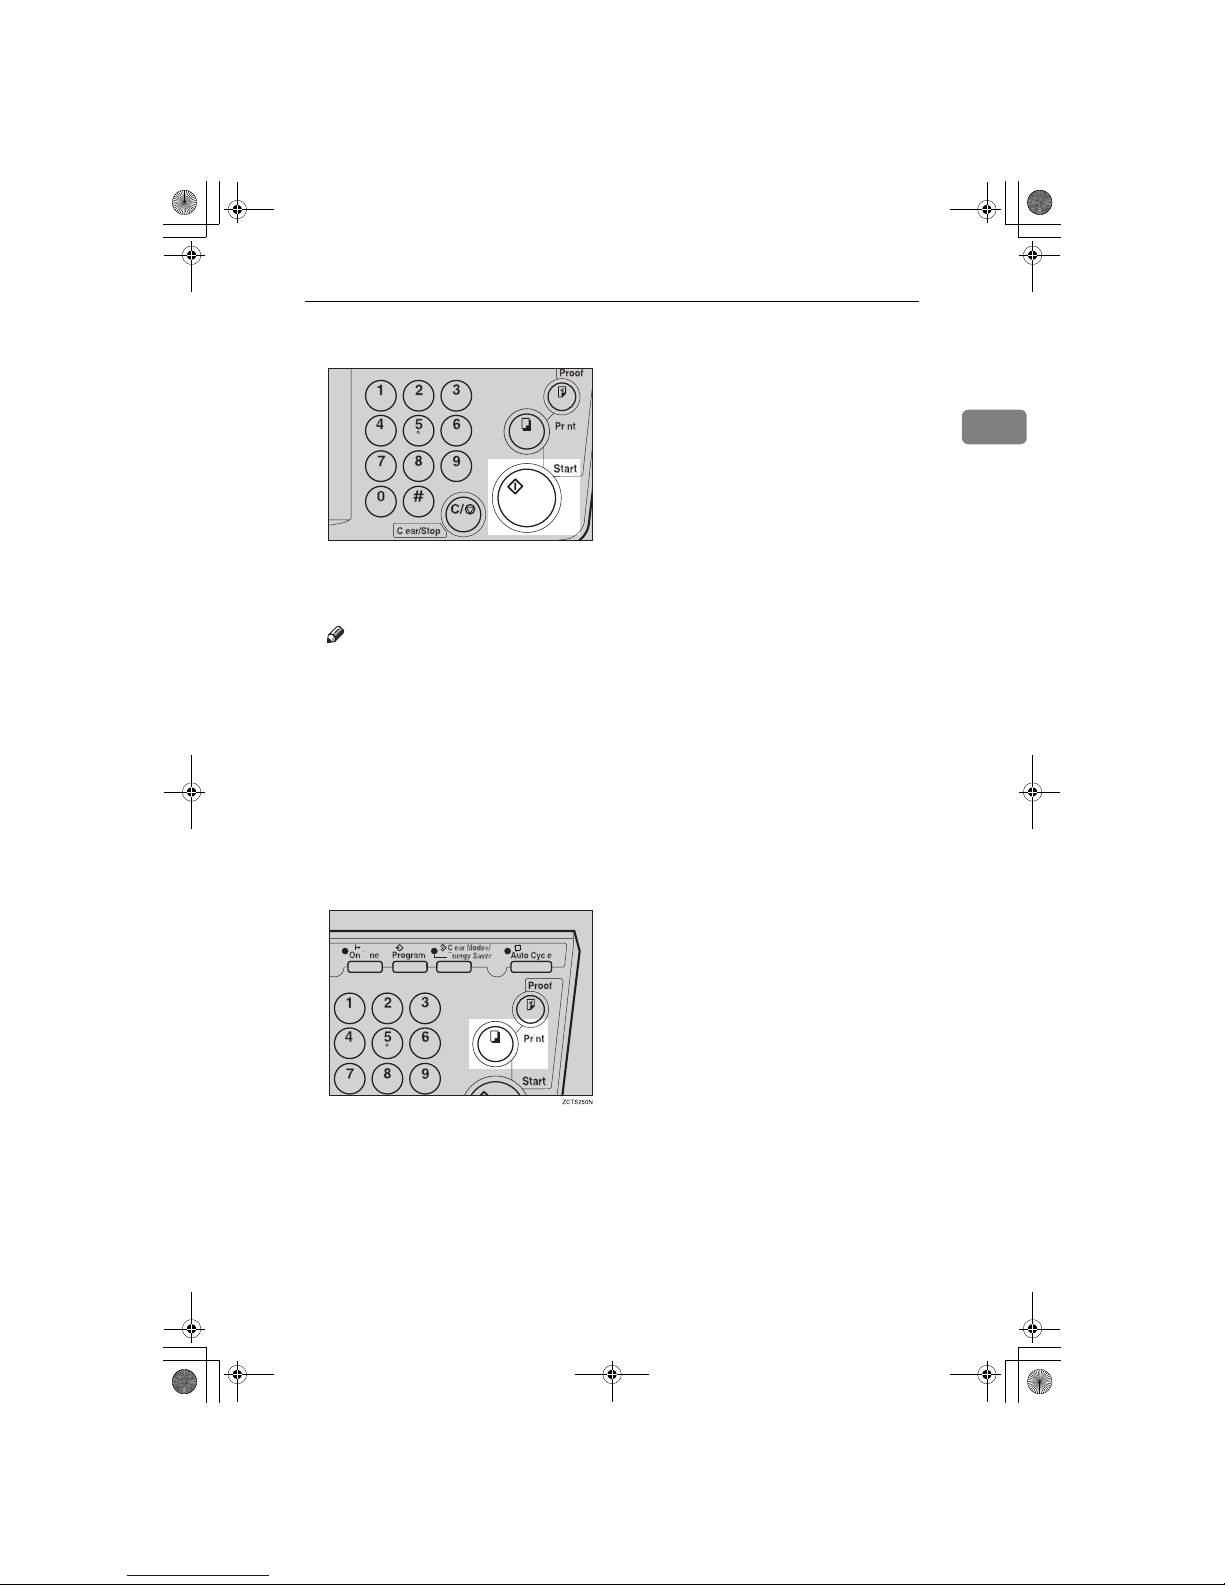
E
Press the {{{{
Start
}}}} key.
F
Check the image position of the
trial or proof print.
Note
❒ If the image position is not cor-
rect, adjust it using the {
Image
Position
} keys (see ⇒ P.9 “Ad-
justing the Print Image Position”)
or the side tray fine adjusting
dial (see ⇒ P.10 “Shifting the
Print Image Position to the Right
or Left”).
G
Enter the number of prints with
the number keys.
H
Press the {{{{
Print
}}}} key.
TSLS012N
SilverV-EN.book Page 21 Monday, May 15, 2000 3:23 PM
Page 60
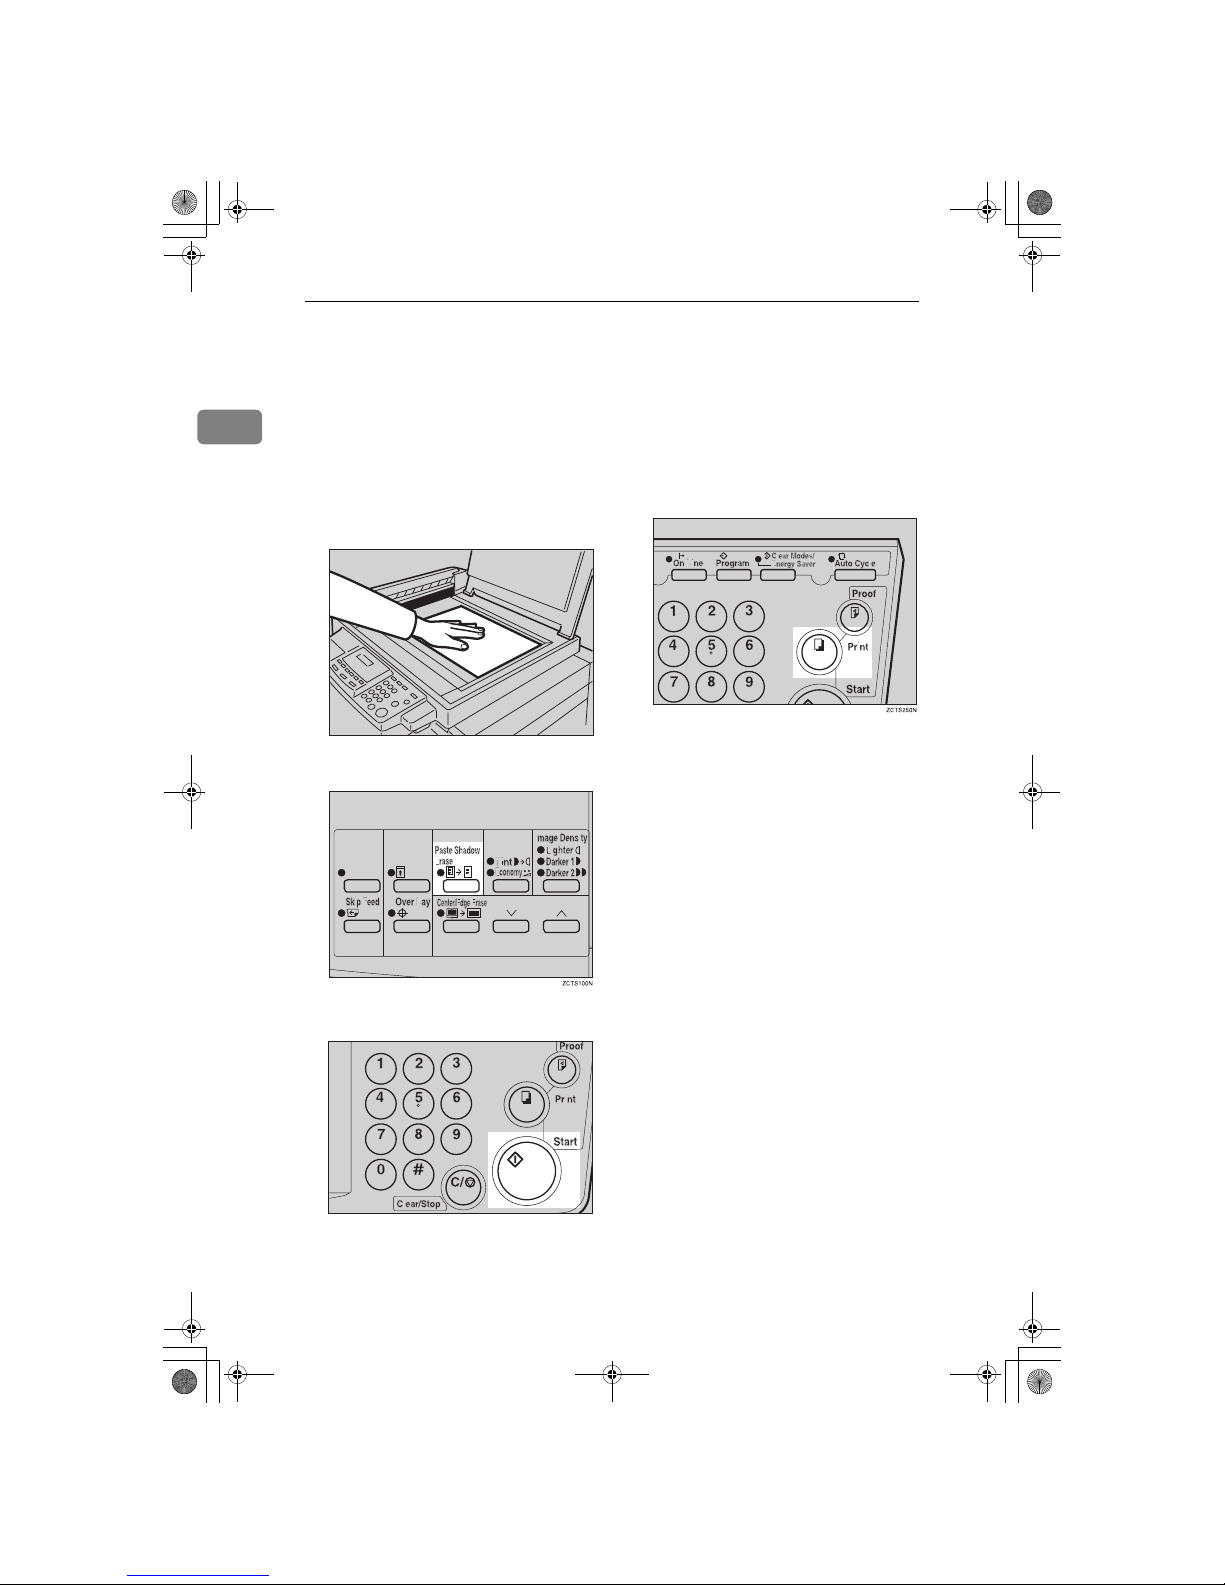
Operation
22
1
Paste Shadow Erase—Erasing the Shadow
of Pasted Originals
If you want to erase the shadow of
pasted originals, follow the steps below.
A
Set the original on the exposure
glass.
B
Press the {{{{
Paste Shadow Erase
}}}} key.
C
Press the {{{{
Start
}}}} key.
D
Enter the number of prints with
the number keys.
E
Press the {{{{
Print
}}}} key.
TSLH010E
TSLS012N
SilverV-EN.book Page 22 Monday, May 15, 2000 3:23 PM
Page 61
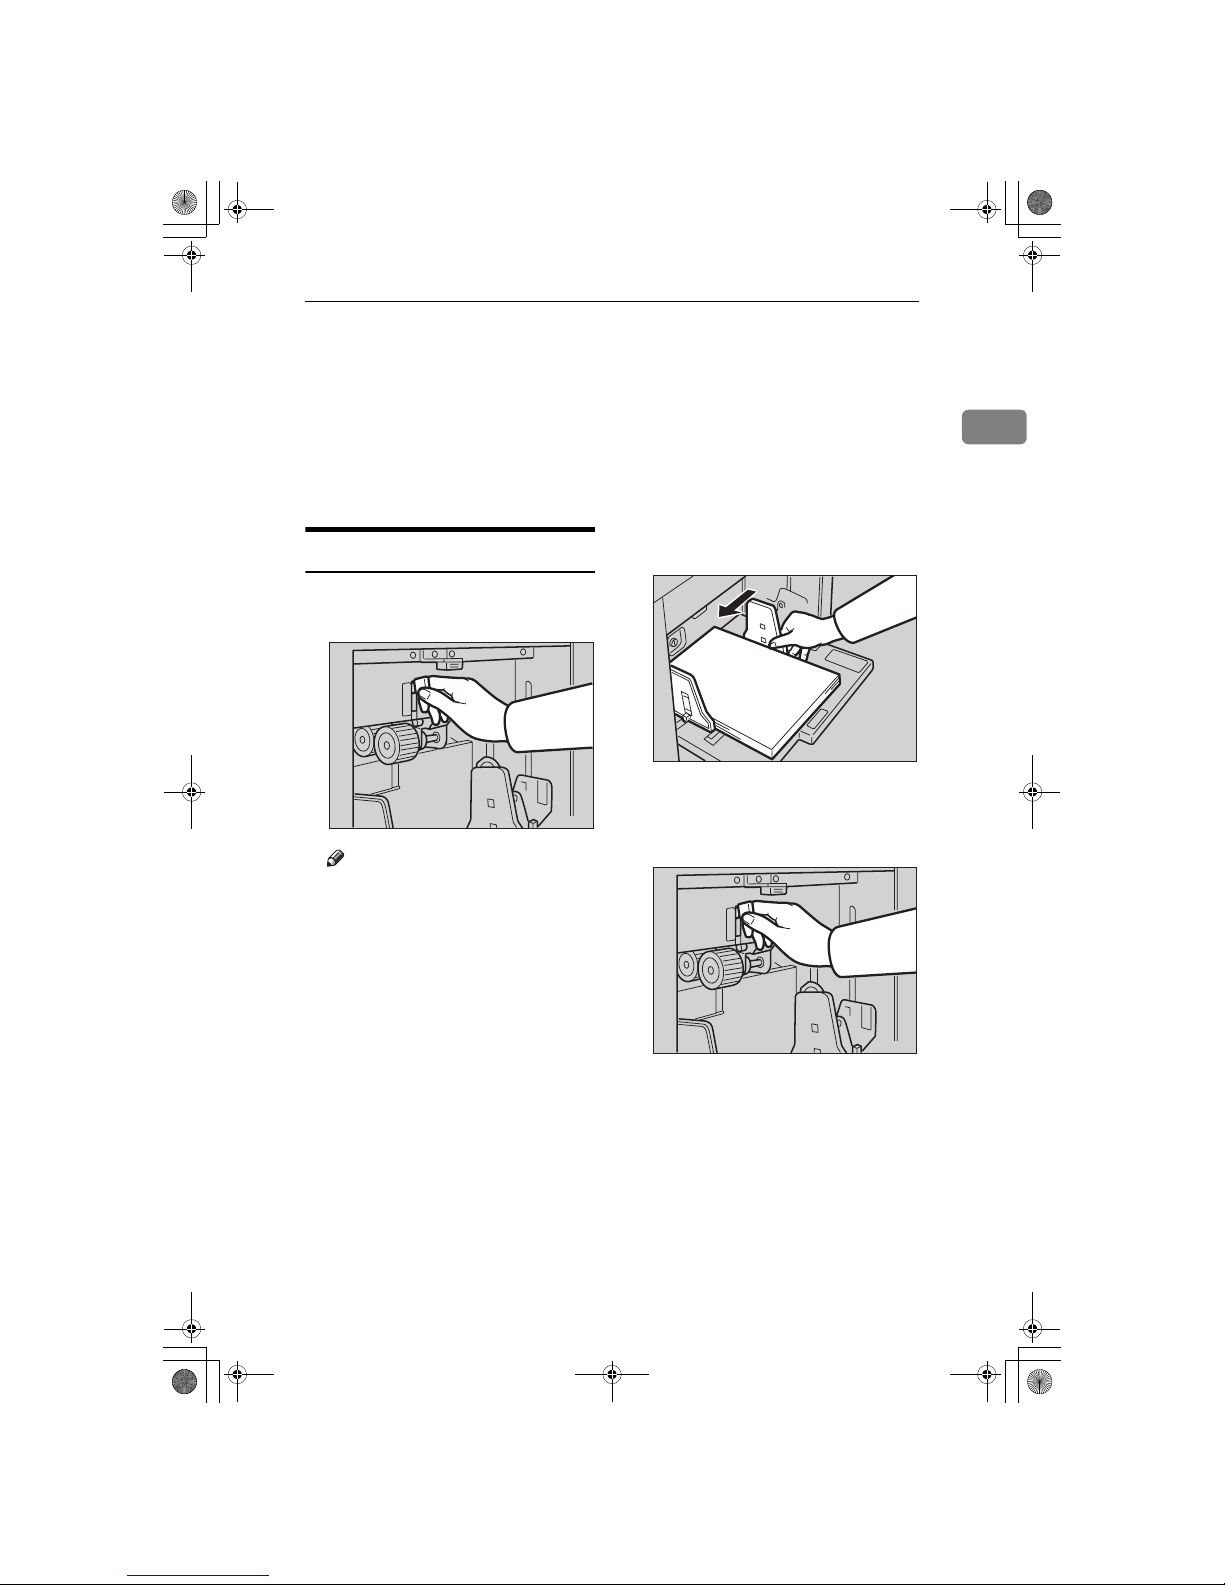
Printing on Thick or Thin Paper
23
1
Printing on Thick or Thin Paper
When you make prints on thick (127.9
to 209.3g/m
2
, 34.0 to 55.6 lb), stan-
dard (52.3 to 127.9g/m
2
, 13.9 to 34.0
lb) or thin (47.1 to 52.3g/m
2
, 12.5 to
13.9 lb) paper, perform the following
steps.
Pressure Lever Position
A
Position pressure lever to thick,
standard, or thin paper position.
Note
❒ When you use paper heavier
than 127.9g/m
2
, 34.0 lb and
lighter than 209.3g/m
2
, 55.6 lb,
position pressure lever to the
Thick paper position.
❒ When you use paper heavier
than 52.3g/m
2
, 13.9 lb and light-
er than 127.9g/m
2
, 34.0 lb, position pressure lever to the
Standard paper position.
❒ When you use paper heavier
than 47.1g/m
2
, 12.5 lb and light-
er than 52.3g/m
2
, 13.9 lb, position pressure lever to the Thin
paper position.
❒ In the case of paper smaller than
B5, 5
1
/2" × 81/2" and heavier
than 81.4g/m
2
(21.6 lb), move
the feed roller pressure lever to
the Thin paper position.
B
Make sure that the paper feed
side plates touch the paper lightly.
C
When you finish prints, position
pressure lever to the Standard paper position.
TSLH01CE
ZCTH150E
TSLH01CE
SilverV-EN.book Page 23 Monday, May 15, 2000 3:23 PM
Page 62
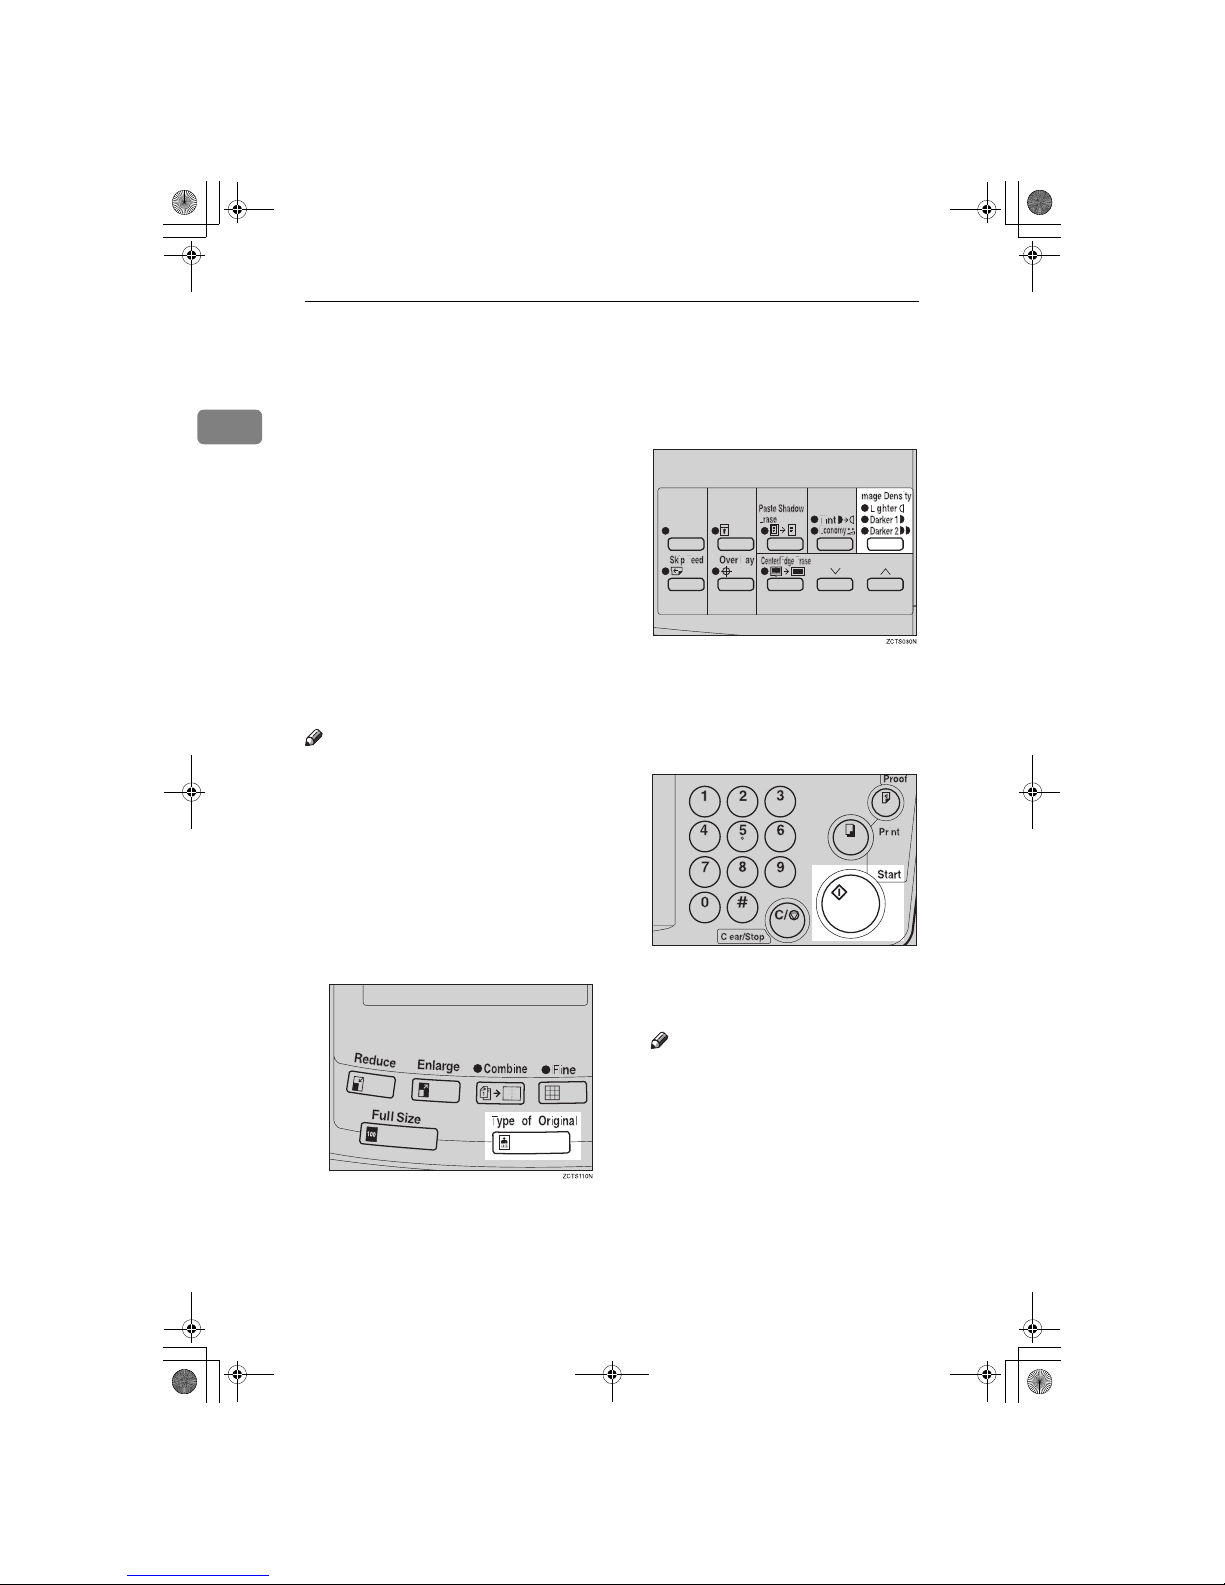
Operation
24
1
Selecting Original Type
Select one of the following three types
to match your originals:
❖❖❖❖
Photo mode
Delicate tones of photographs and
pictures can be reproduced with
this mode.
❖❖❖❖
Letter mode
Select this mode when your originals contain only letters (no pictures).
❖❖❖❖
Letter/Photo mode
Select this mode when your originals contain photographs or pictures with letters.
Note
❒ Moire patterns might occur when
screened originals are printed.
❒ When using Photo mode to print
originals with both letter and photographs, the letter will appear
lighter. To avoid this, select Letter/Photo mode with the {
Type of
Original
} key.
A
Press the {{{{
Type of Original
}}}} key to
select Photo mode.
B
Press the {{{{
Image Density
}}}} key to ad-
just the image density.
C
Set your originals on the exposure
glass or in the optional document
feeder.
D
Press the {{{{
Start
}}}} key.
E
Check the image position of the
trial or proof print.
Note
❒ If the image position is not cor-
rect, adjust it using the {
Image
Position
} keys (see ⇒ P.9 “Shift-
ing the Print Image Position Forward or Backward”) or the side
tray fine adjusting dial (see ⇒
P.10 “Shifting the Print Image Po-
sition to the Right or Left”).
F
Make your prints.
TSLS012N
SilverV-EN.book Page 24 Monday, May 15, 2000 3:23 PM
Page 63
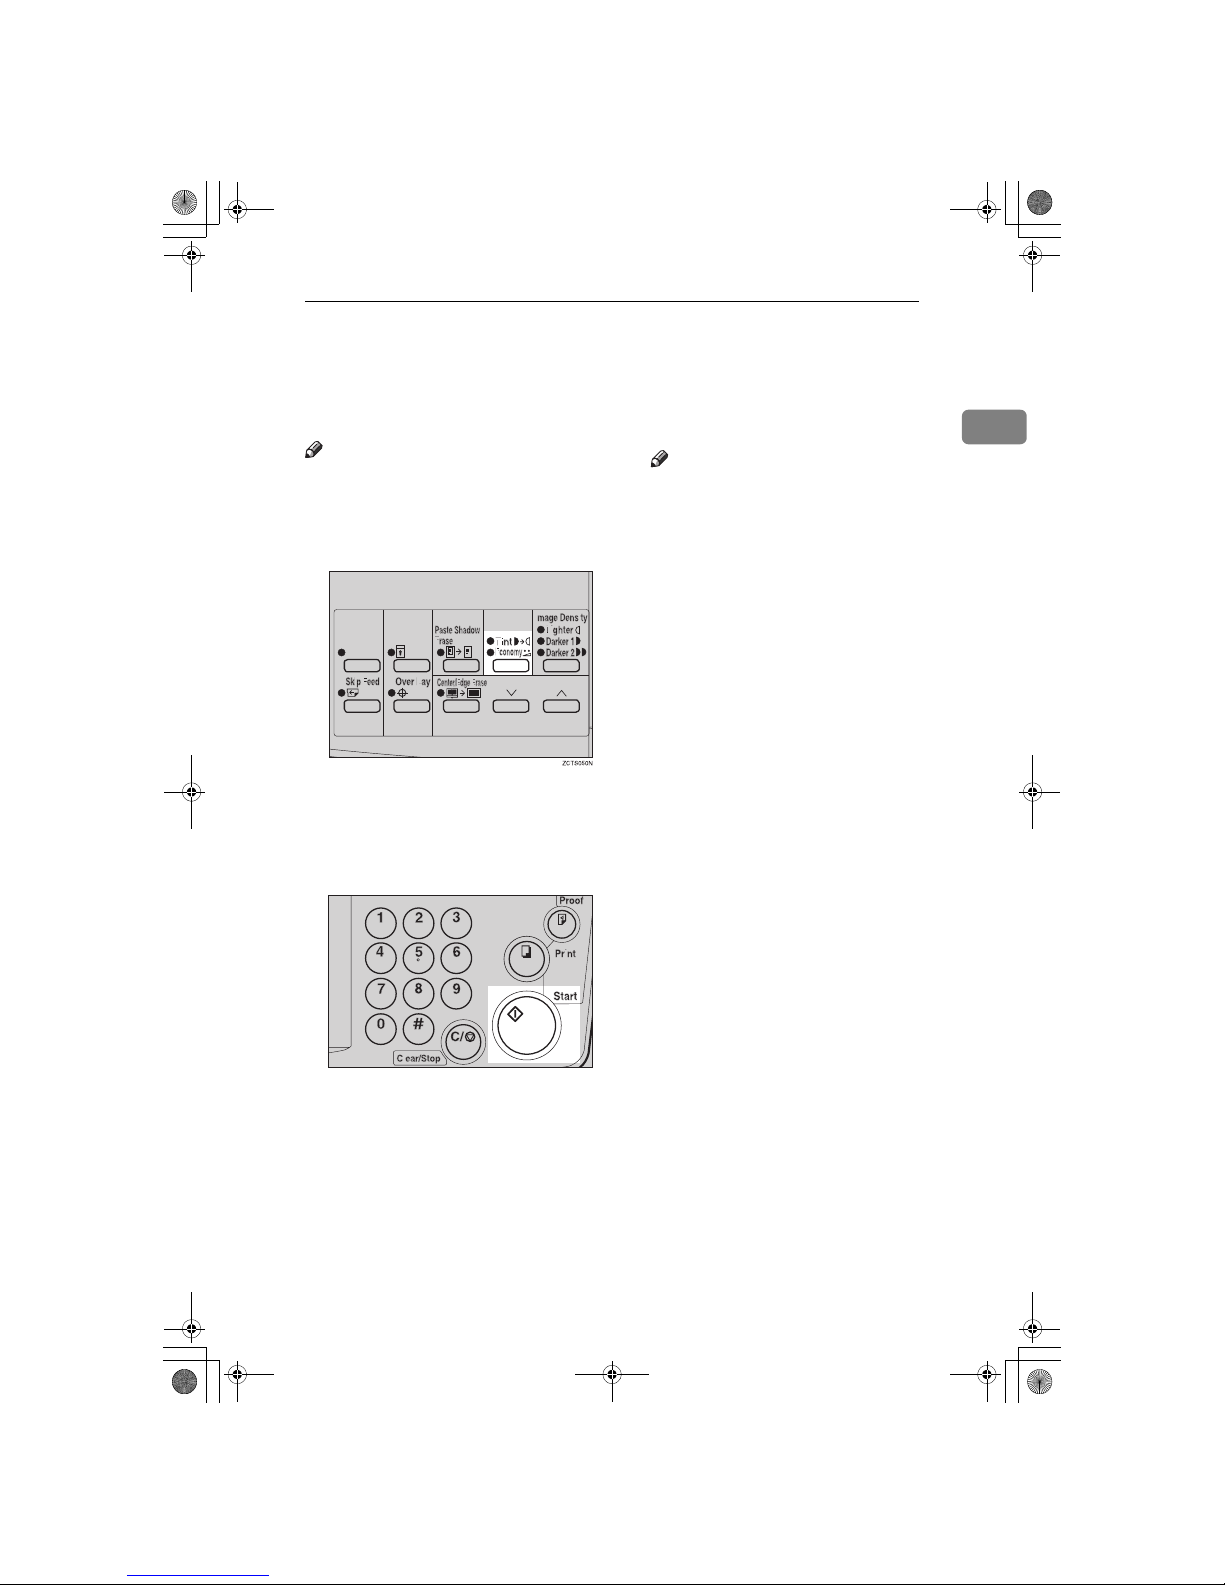
Economy Mode—Saving Ink
25
1
Economy Mode—Saving Ink
When you want to save ink, select
Economy mode.
Note
❒ Prints will come out lighter.
A
Press the {{{{
Tint/Economy
}}}} key to se-
lect Economy mode (Lower indicator).
B
Set your originals on the exposure
glass or in the optional document
feeder.
C
Press the {{{{
Start
}}}} key.
D
Check the image position of the
trial or proof print.
Note
❒ If the image position is not cor-
rect, adjust it using the {
Image
Position
} keys (see ⇒ P.9 “Shift-
ing the Print Image Position Forward or Backward”) or the side
tray fine adjusting dial (see ⇒
P.10 “Shifting the Print Image Po-
sition to the Right or Left”).
E
Make your prints.
TSLS012N
SilverV-EN.book Page 25 Monday, May 15, 2000 3:23 PM
Page 64
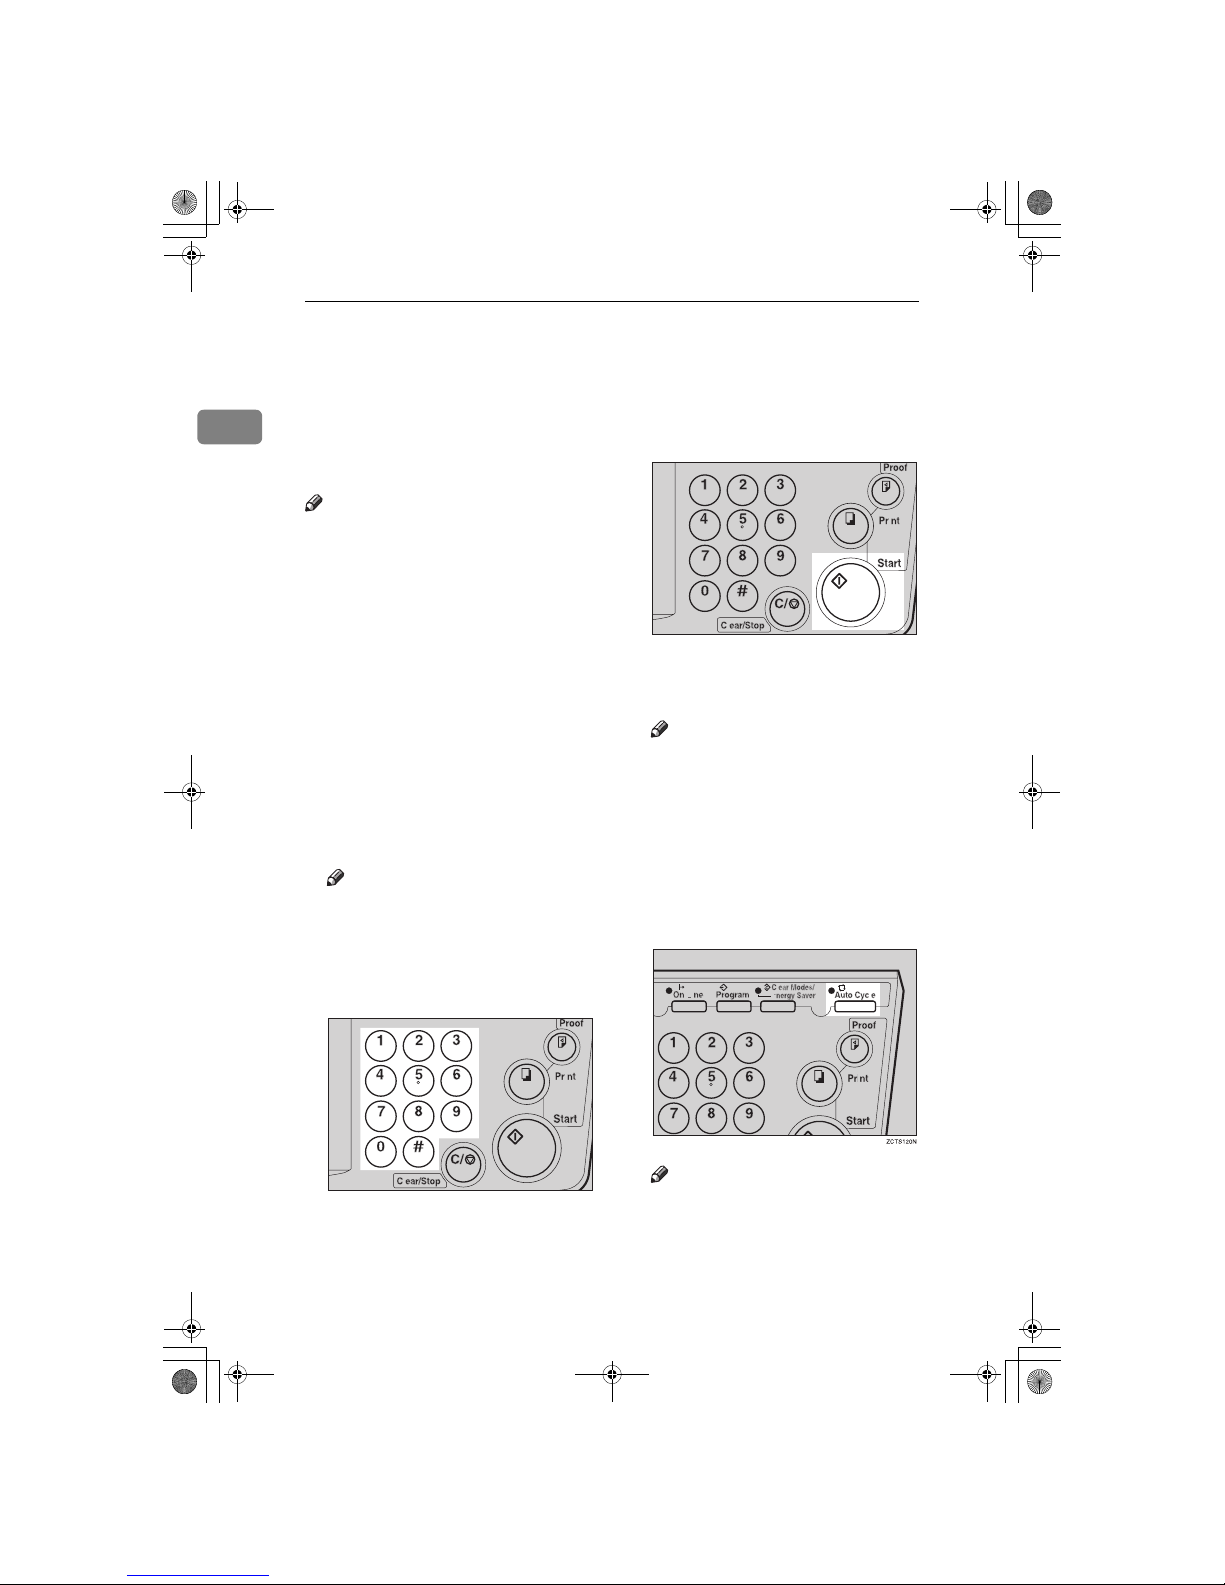
Operation
26
1
Auto Cycle—Printing from Several
Originals at Once
Use the {
Auto Cycle
} key to process
masters and make prints at one
stroke.
Note
❒ When you use the optional docu-
ment feeder, it is not necessary to
place originals one by one. All
originals are fed and prints are
completed after you press the
{
Print
} key.
❒ If you use the optional tape dis-
penser, the tape dispenser drops a
strip of paper onto the top of the
paper stack after the last page of
each printing set is fed out to the
paper delivery tray. This marks the
end of each printing group.
A
Set the original on the exposure
glass or in the optional document
feeder.
Note
❒ You can set up to 30 originals
into the optional document
feeder.
B
Enter the number of prints required with the number keys.
C
Press the {{{{
Start
}}}} key.
D
Check the image position of the
trial or proof print.
Note
❒ If the image position is not cor-
rect, adjust it using the {
Image
Position
} keys (see ⇒ P.9 “Shift-
ing the Print Image Position Forward or Backward”) or the side
tray fine adjusting dial (see ⇒
P.10 “Shifting the Print Image Po-
sition to the Right or Left”).
E
Press the {{{{
Auto Cycle
}}}} key.
Note
❒ If you press the {
Auto Cycle
}
key, you cannot make proof
prints by pressing the {
Proof
}
key.
TSLS011N
TSLS012N
SilverV-EN.book Page 26 Monday, May 15, 2000 3:23 PM
Page 65
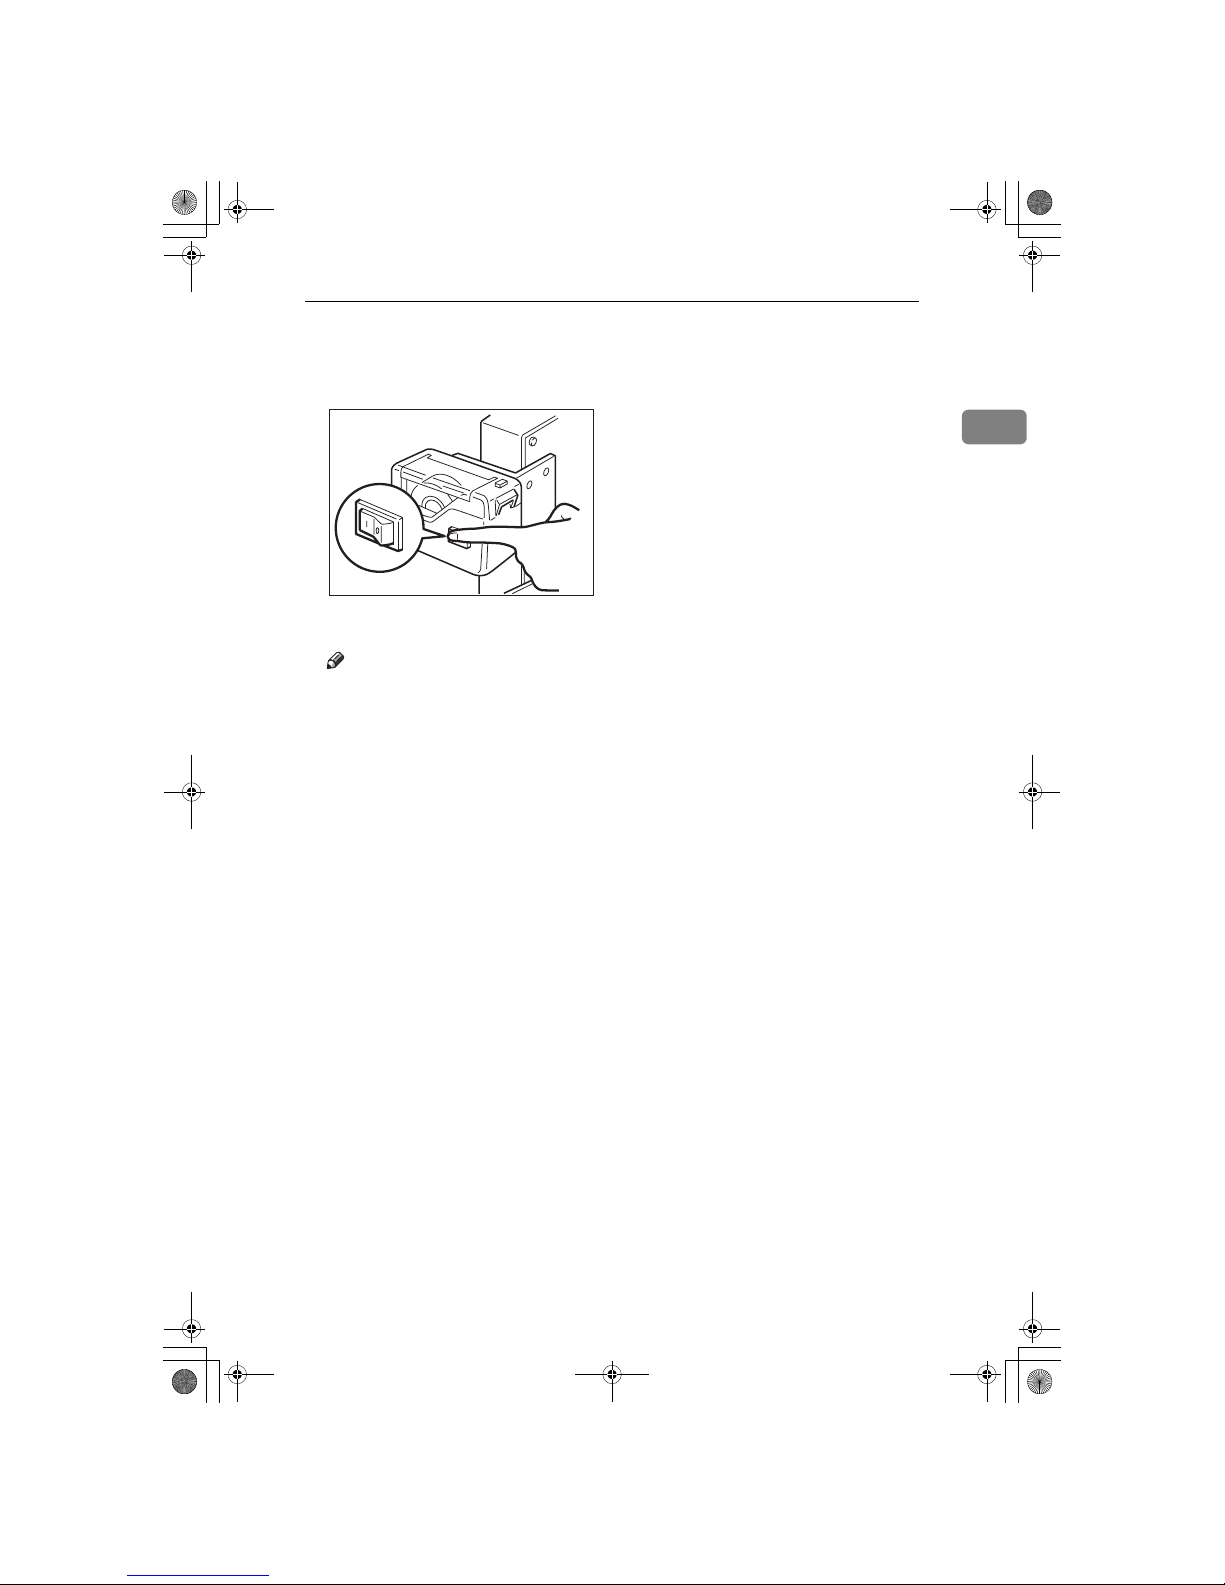
Auto Cycle—Printing from S everal Originals at Once
27
1
F
If you use the optional tape dispenser, turn on the tape dispenser
power switch.
G
Press the {{{{
Print
}}}} key.
Note
❒ Repeat steps A through C until
all originals are printed when
you set originals on the exposure glass.
❒ If you set originals into the op-
tional document feeder, originals are fed and prints are
completed automatically.
❒ After the last page of each set is
fed out to the paper delivery
tray, the optional tape dispenser
drops a strip of paper on the top
of the paper stack. The next cycle begins.
TSLP013E
On
Off
SilverV-EN.book Page 27 Monday, May 15, 2000 3:23 PM
Page 66
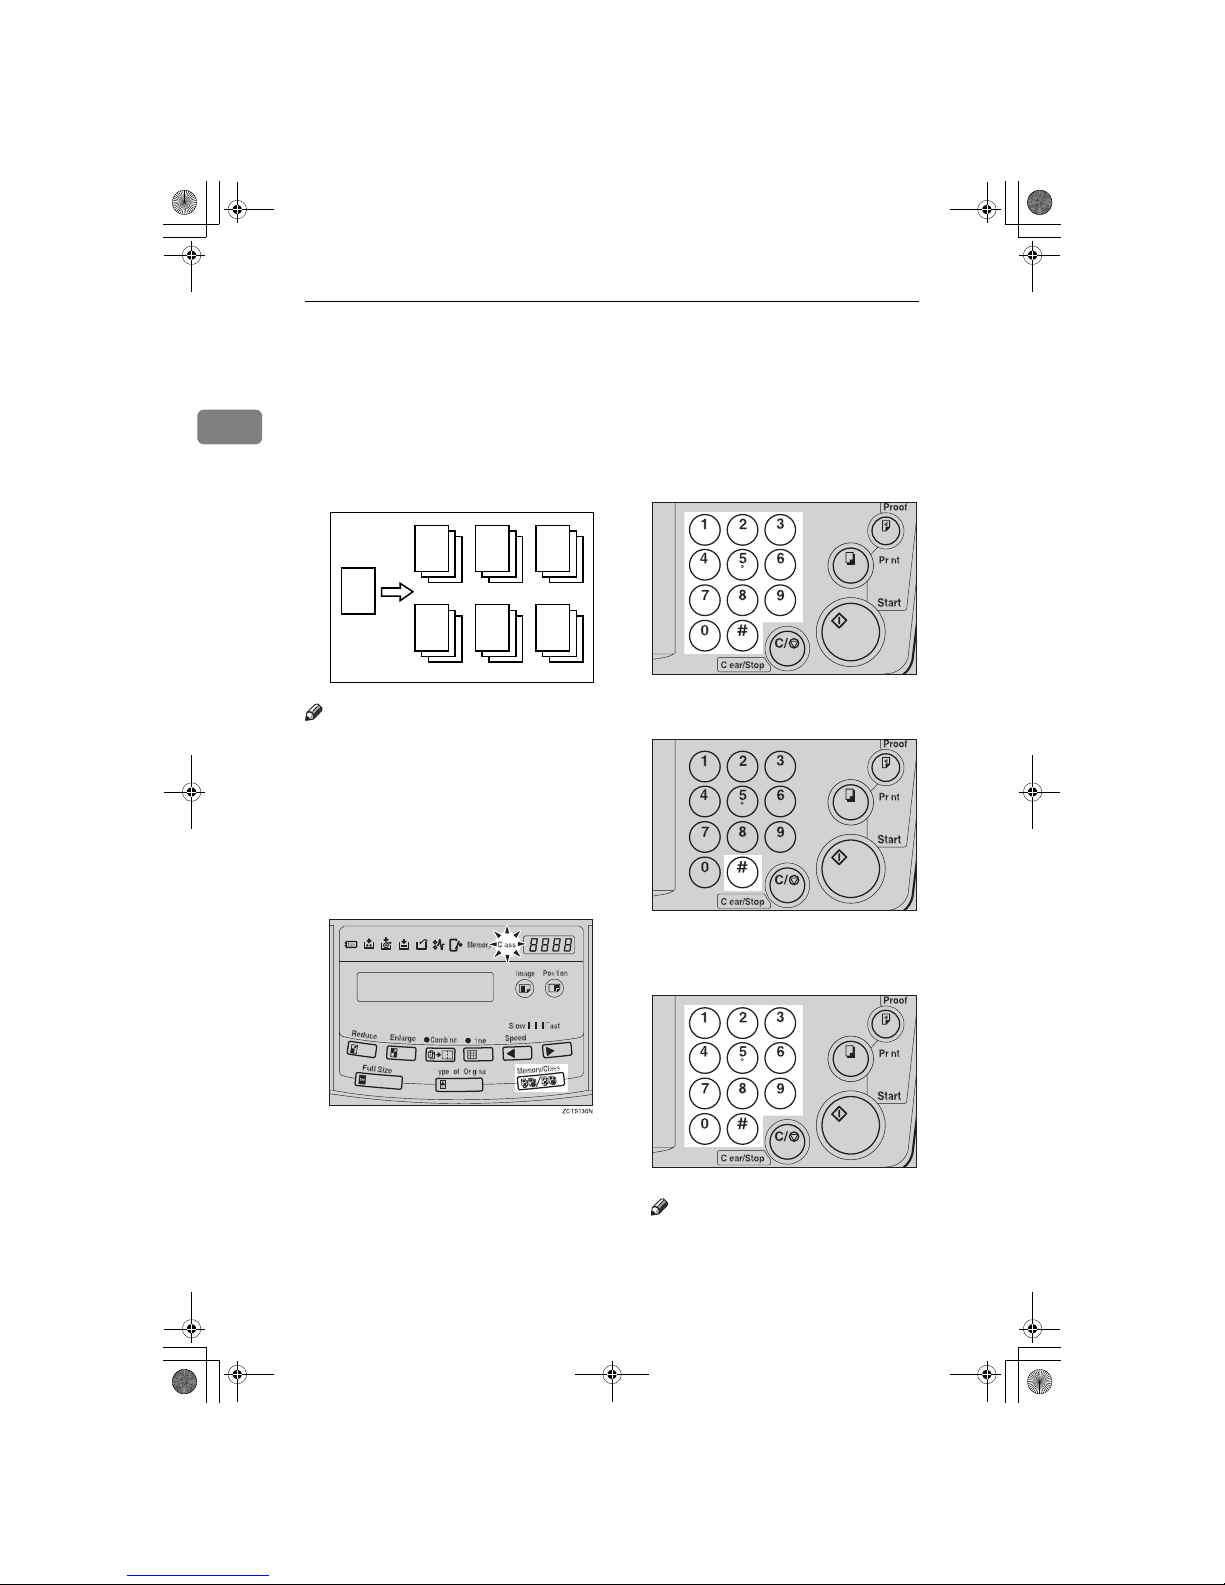
Operation
28
1
Class Mode—Group Printing from the
Same Original
Use the {
Memory/Class
} key to make
sets of prints from the same original.
The same number of prints is made
for each set.
Note
❒ The optional tape dispenser auto-
matically feeds out strips of paper
which separate the printing
groups on the paper delivery tray.
❒ Up to 20 sets of prints can be select-
ed for one original.
A
Press the {{{{
Memory/Class
}}}} key to
light the Class indicator.
B
With the number keys, enter the
number of prints for each set to be
made from the original.
C
Press the {{{{qqqq}}}} key.
D
With the number keys, enter the
desired number of sets.
Note
❒ The maximum number of sets
that can be made is 20.
GRCLAS0E
R
R R R
R R R
TSLS011N
TSLS01TN
TSLS011N
SilverV-EN.book Page 28 Monday, May 15, 2000 3:23 PM
Page 67
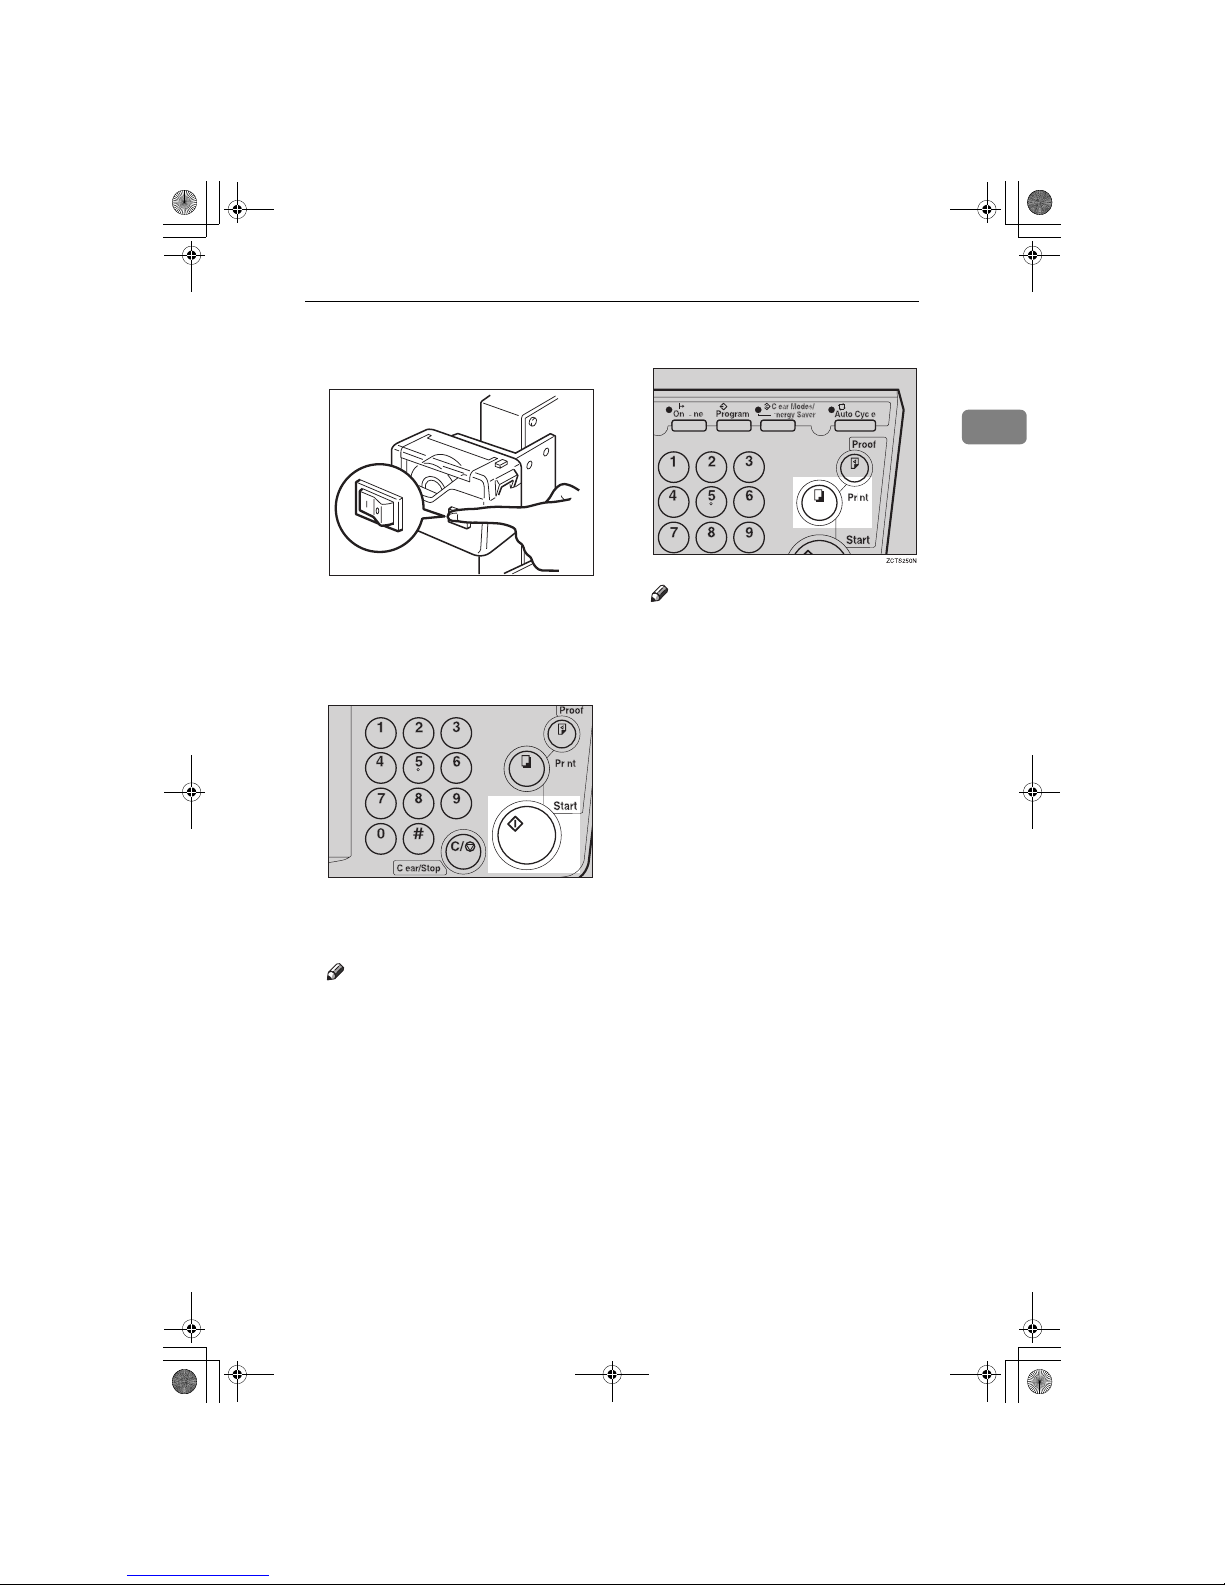
Class Mode—Group Printing from the Same Original
29
1
E
Turn on the optional tape dispenser power switch.
F
Set one original face down on the
exposure glass or in the optional
document feeder.
G
Press the {{{{
Start
}}}} key.
H
Check the image position of the
trial or proof print.
Note
❒ If the image position is not cor-
rect, adjust it using the {
Image
Position
} keys (see ⇒ P.9 “Shift-
ing the Print Image Position Forward or Backward”) or the side
tray fine adjusting dial (see ⇒
P.10 “Shifting the Print Image Po-
sition to the Right or Left”).
I
Make your prints.
Note
❒ After the last page of each print-
ing set is fed out to the paper delivery tray, the tape dispenser
drops a strip of paper on the top
of the paper stack.
❒ If the power switch of the op-
tional tape dispenser is turned
off or the tape dispenser is not
installed in your machine, the
group printing cycle stops after
each set is delivered. Remove
the set of prints from the paper
delivery tray and press the
{
Print
} key to start the next
group printing cycle.
TSLP013E
On
Off
TSLS012N
SilverV-EN.book Page 29 Monday, May 15, 2000 3:23 PM
Page 68
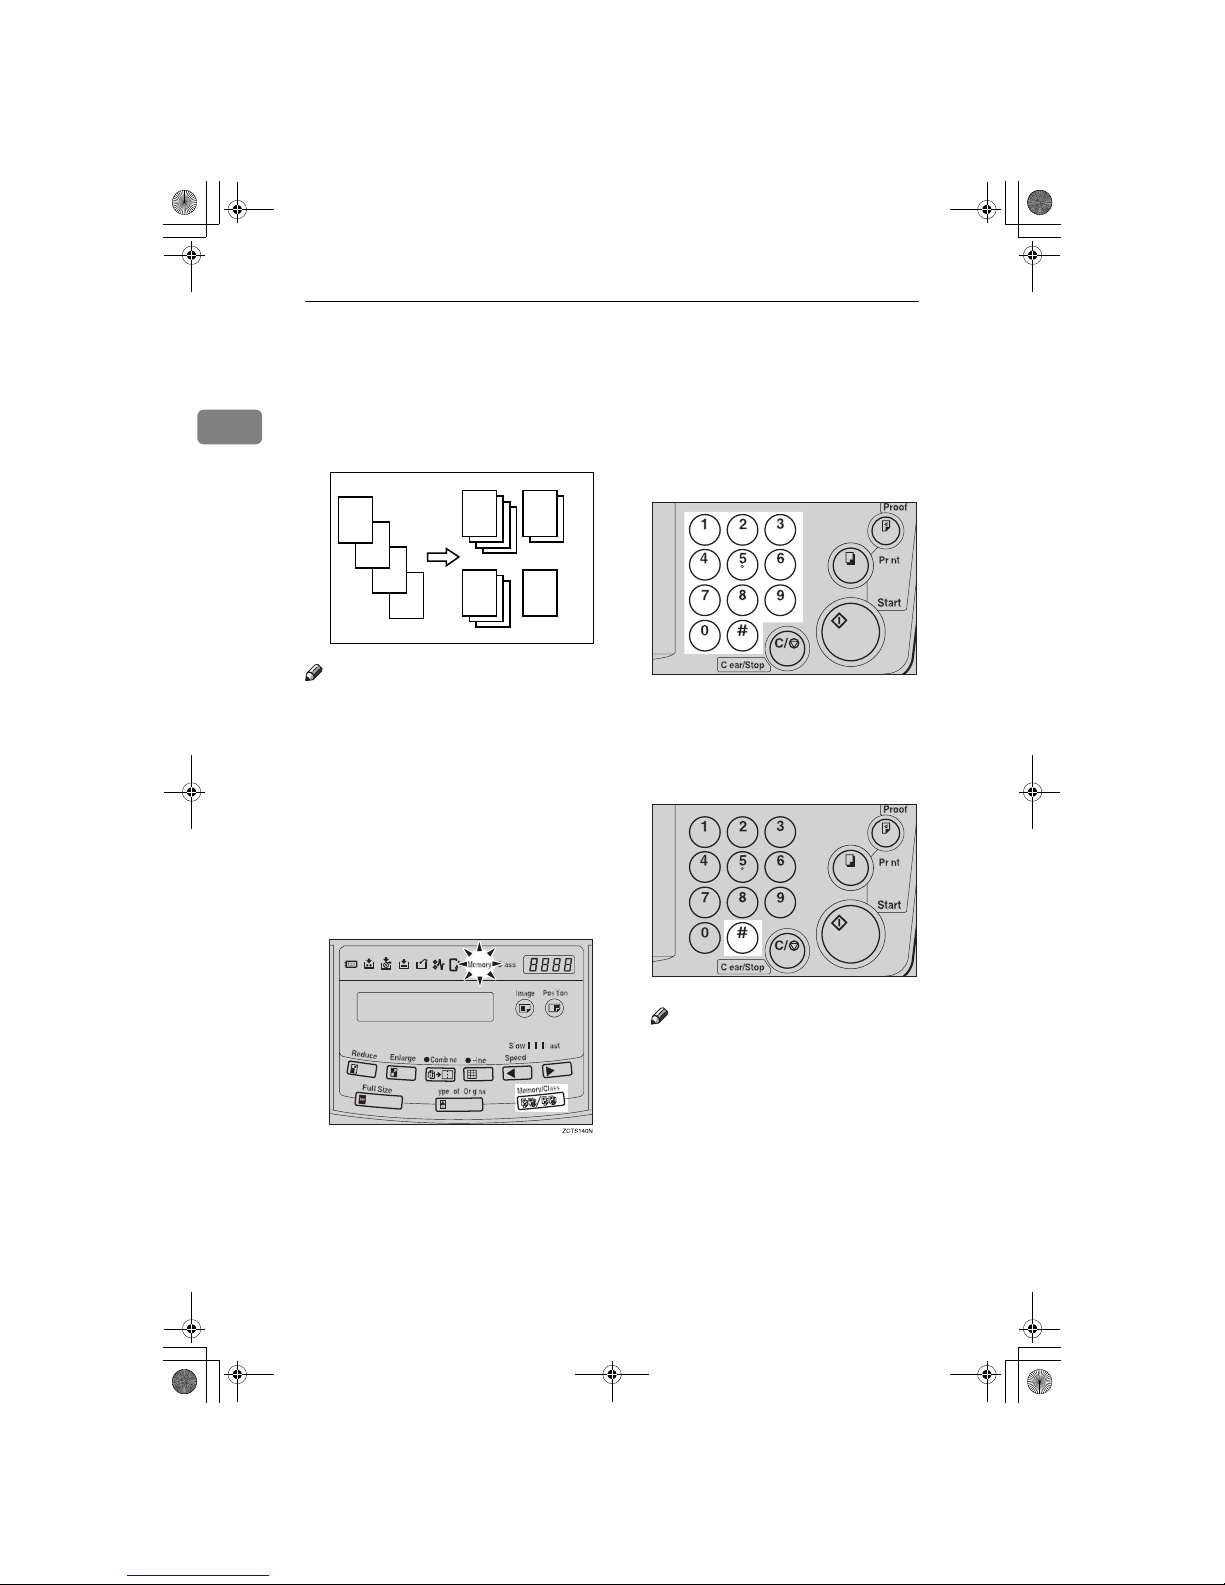
Operation
30
1
Memory Mode—Group Printing from
Different Originals
Use the {
Memory/Class
} key to make
sets of prints from different originals.
Note
❒ With the optional document feed-
er, you can set several originals
and make prints of all of them at
once. See ⇒ P.48 “Memory Mode
with the Document Feeder”.
❒ The optional tape dispenser auto-
matically feeds out strips of paper
which separate the printing
groups on the paper delivery tray.
A
Press the {{{{
Memory/Class
}}}} key to
light the Memory indicator.
B
With the number keys, enter the
desired number of prints for the
first original.
C
Press the {{{{qqqq}}}} key.
This stores the number of prints to
be made for the first original in
memory 1.
Note
❒ When the number of prints in
each set is the same, it is not necessary to input the number of
prints for each group in memory. Simply select Auto Cycle
mode and enter the desired
number of prints once.
D
C
B
GRCLAS1E
A
A
B
C D
TSLS011N
TSLS01TN
SilverV-EN.book Page 30 Monday, May 15, 2000 3:23 PM
Page 69
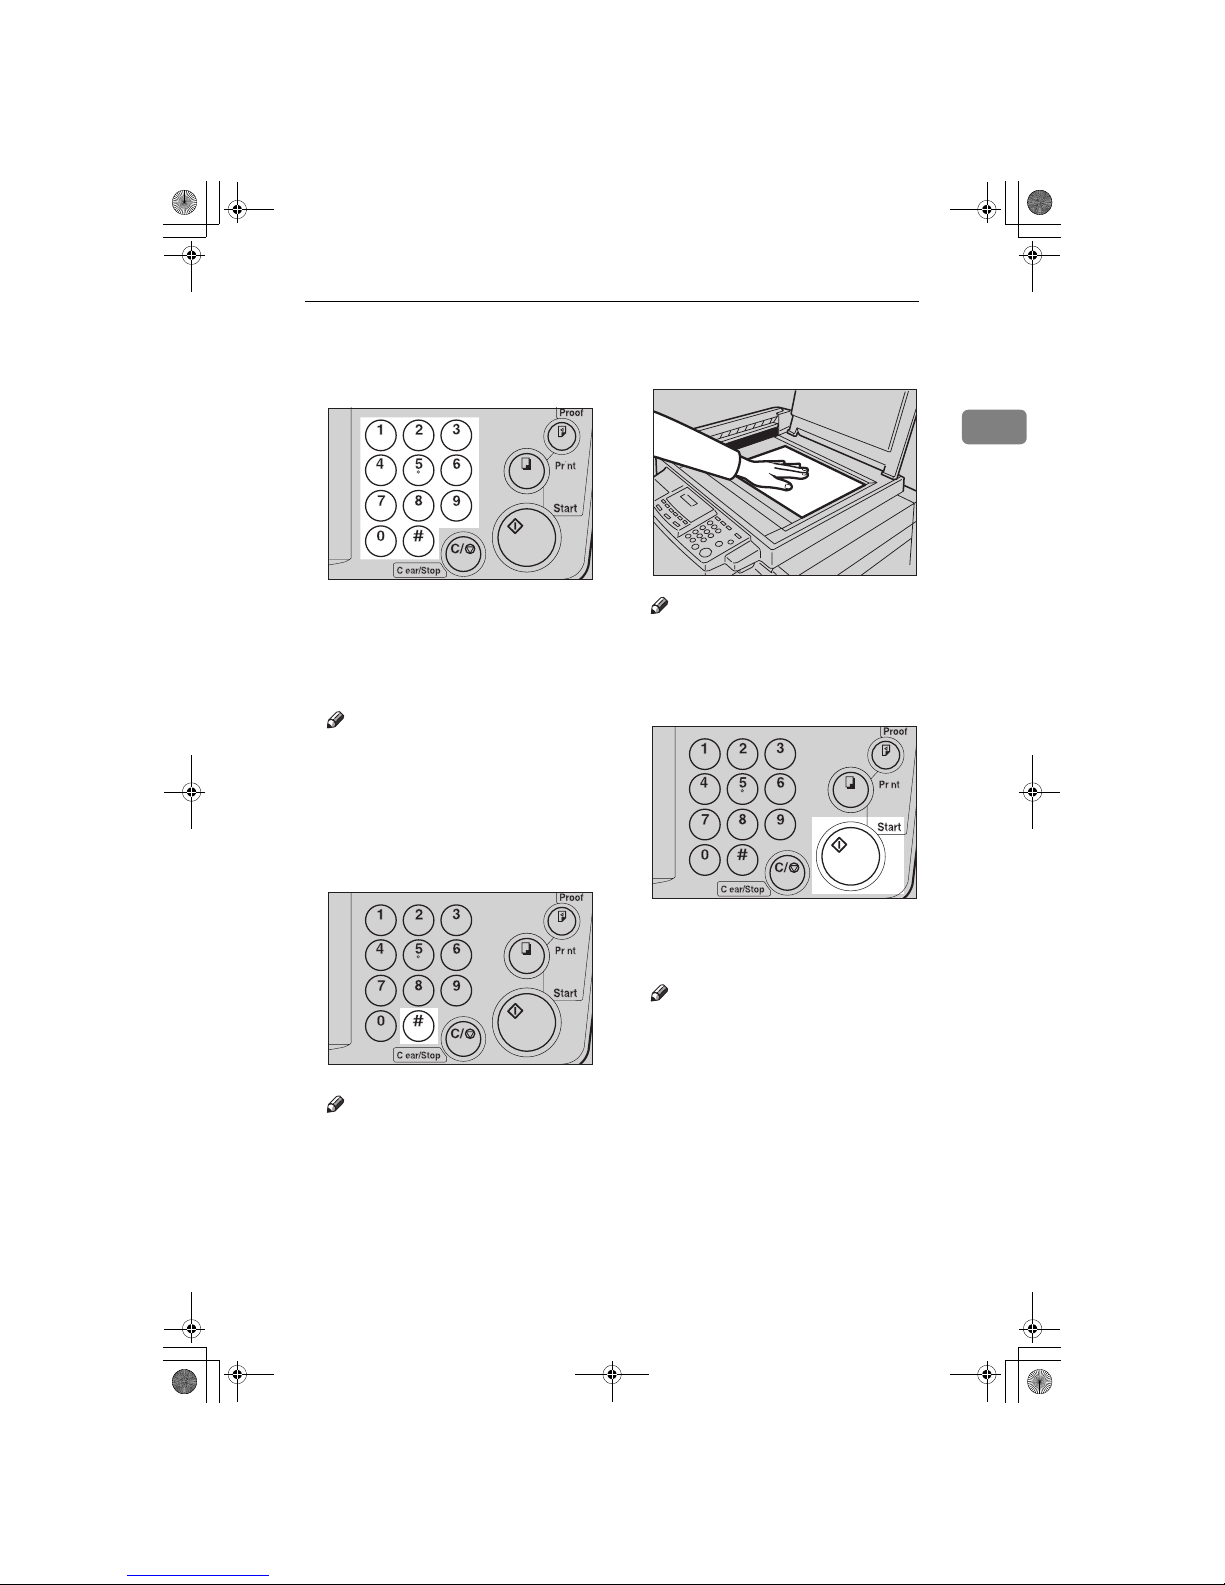
Memory Mode—Group Printing from Different Originals
31
1
D
With the number keys, enter the
number of prints for the second
original.
E
Press the {{{{qqqq}}}} key.
This stores the number of prints to
be made for the second original in
memory 2.
Note
❒ Repeat steps D and E for each
original.
❒ The number of prints for up to
20 originals can be stored.
F
Press the {{{{qqqq}}}} key again.
The memory returns to memory 1.
Note
❒ If you store the number of prints
for 20 originals, the memory
number returns to 1. It is not
necessary to press the {q} key.
G
Set the first original face down on
the exposure glass.
Note
❒ Set originals one sheet at a time
in the same order that you
stored them in memory.
H
Press the {{{{
Start
}}}} key.
I
Check the image position of the
trial or proof print.
Note
❒ If the image position is not cor-
rect, adjust it using the {
Image
Position
} keys (see ⇒ P.9 “Shift-
ing the Print Image Position Forward or Backward”) or the side
tray fine adjusting dial (see ⇒
P.10 “Shifting the Print Image Po-
sition to the Right or Left”).
TSLS011N
TSLS01TN
TSLH010E
TSLS012N
SilverV-EN.book Page 31 Monday, May 15, 2000 3:23 PM
Page 70
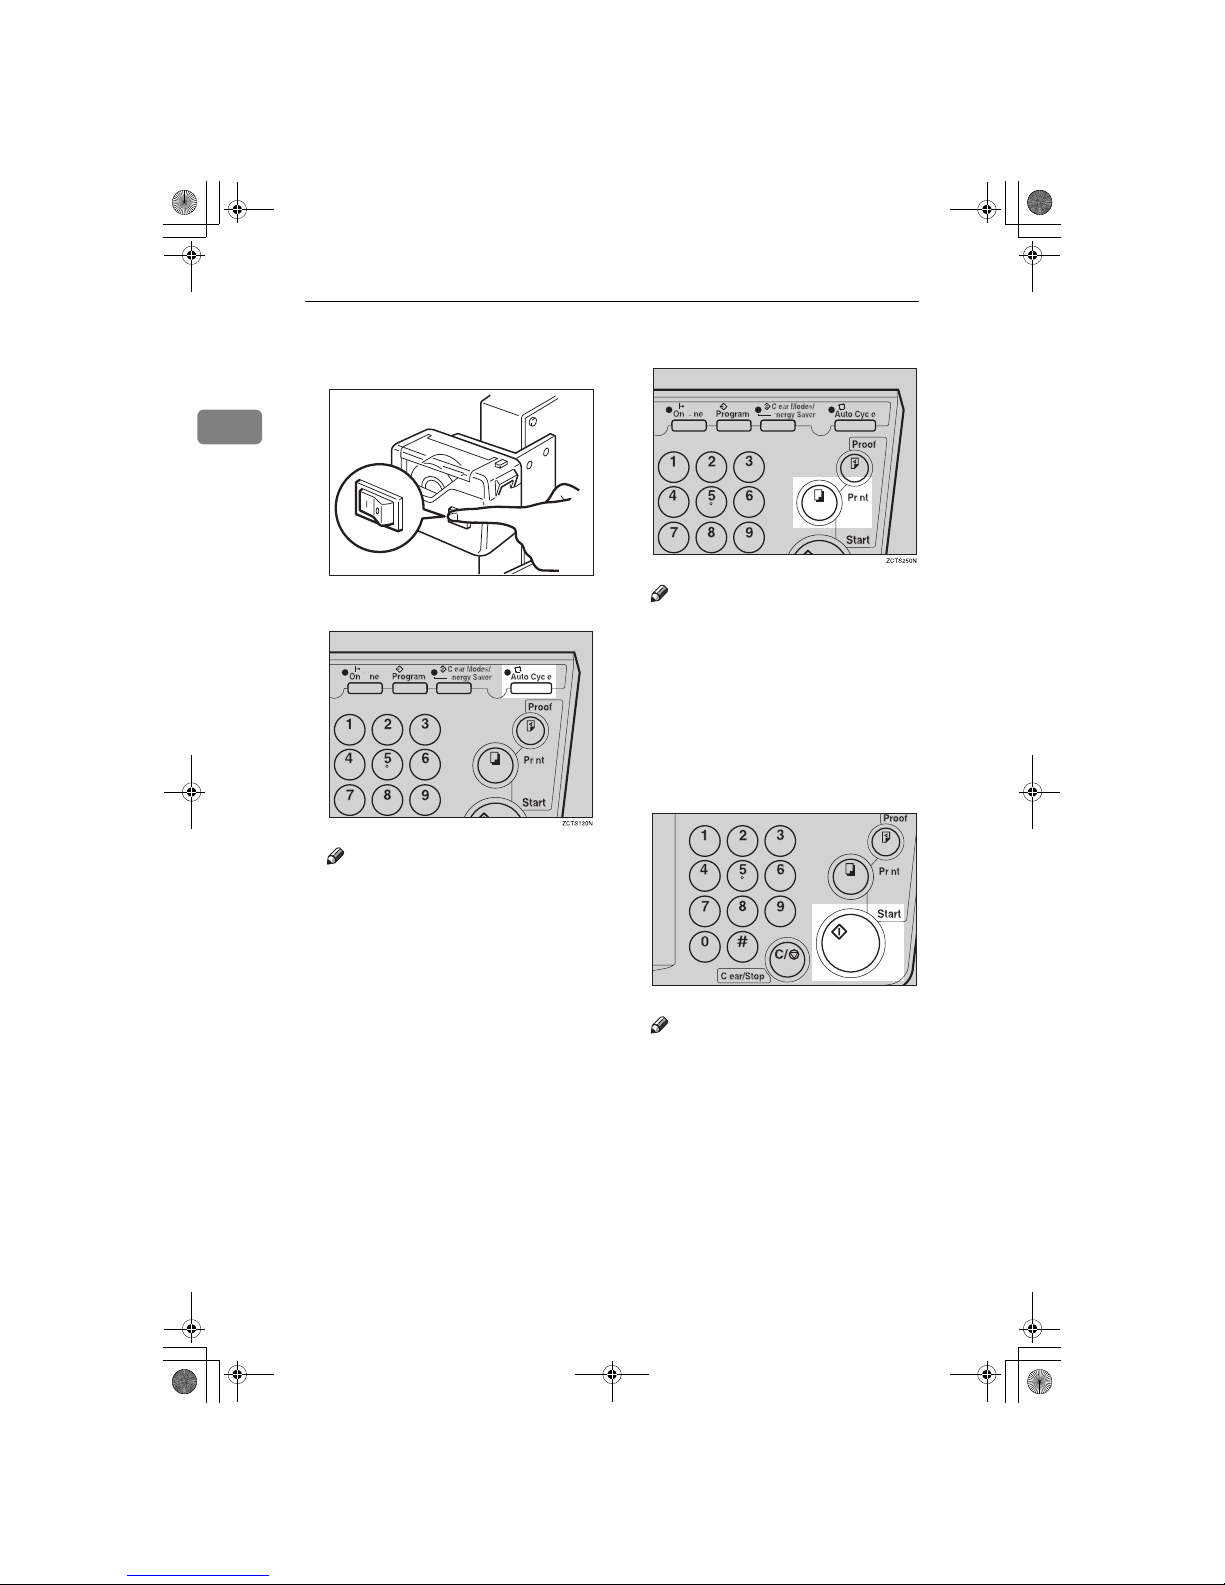
Operation
32
1
J
Turn on the optional tape dispenser power switch.
K
Press the {{{{
Auto Cycle
}}}} key.
Note
❒ If you press the {
Auto Cycle
}
key, you cannot make proof
prints by pressing the {
Proof
}
key.
L
Press the {{{{
Print
}}}} key.
Note
❒ After the first set is fed to the pa-
per delivery tray, the optional
tape dispenser drops a strip of
paper on the top of the paper
stack.
M
After the first set is completed, set
the second original on the exposure glass and press the {{{{
Start
}}}}
key.
Note
❒ Repeat this step until you have
finished printing.
TSLP013E
On
Off
TSLS012N
SilverV-EN.book Page 32 Monday, May 15, 2000 3:23 PM
Page 71
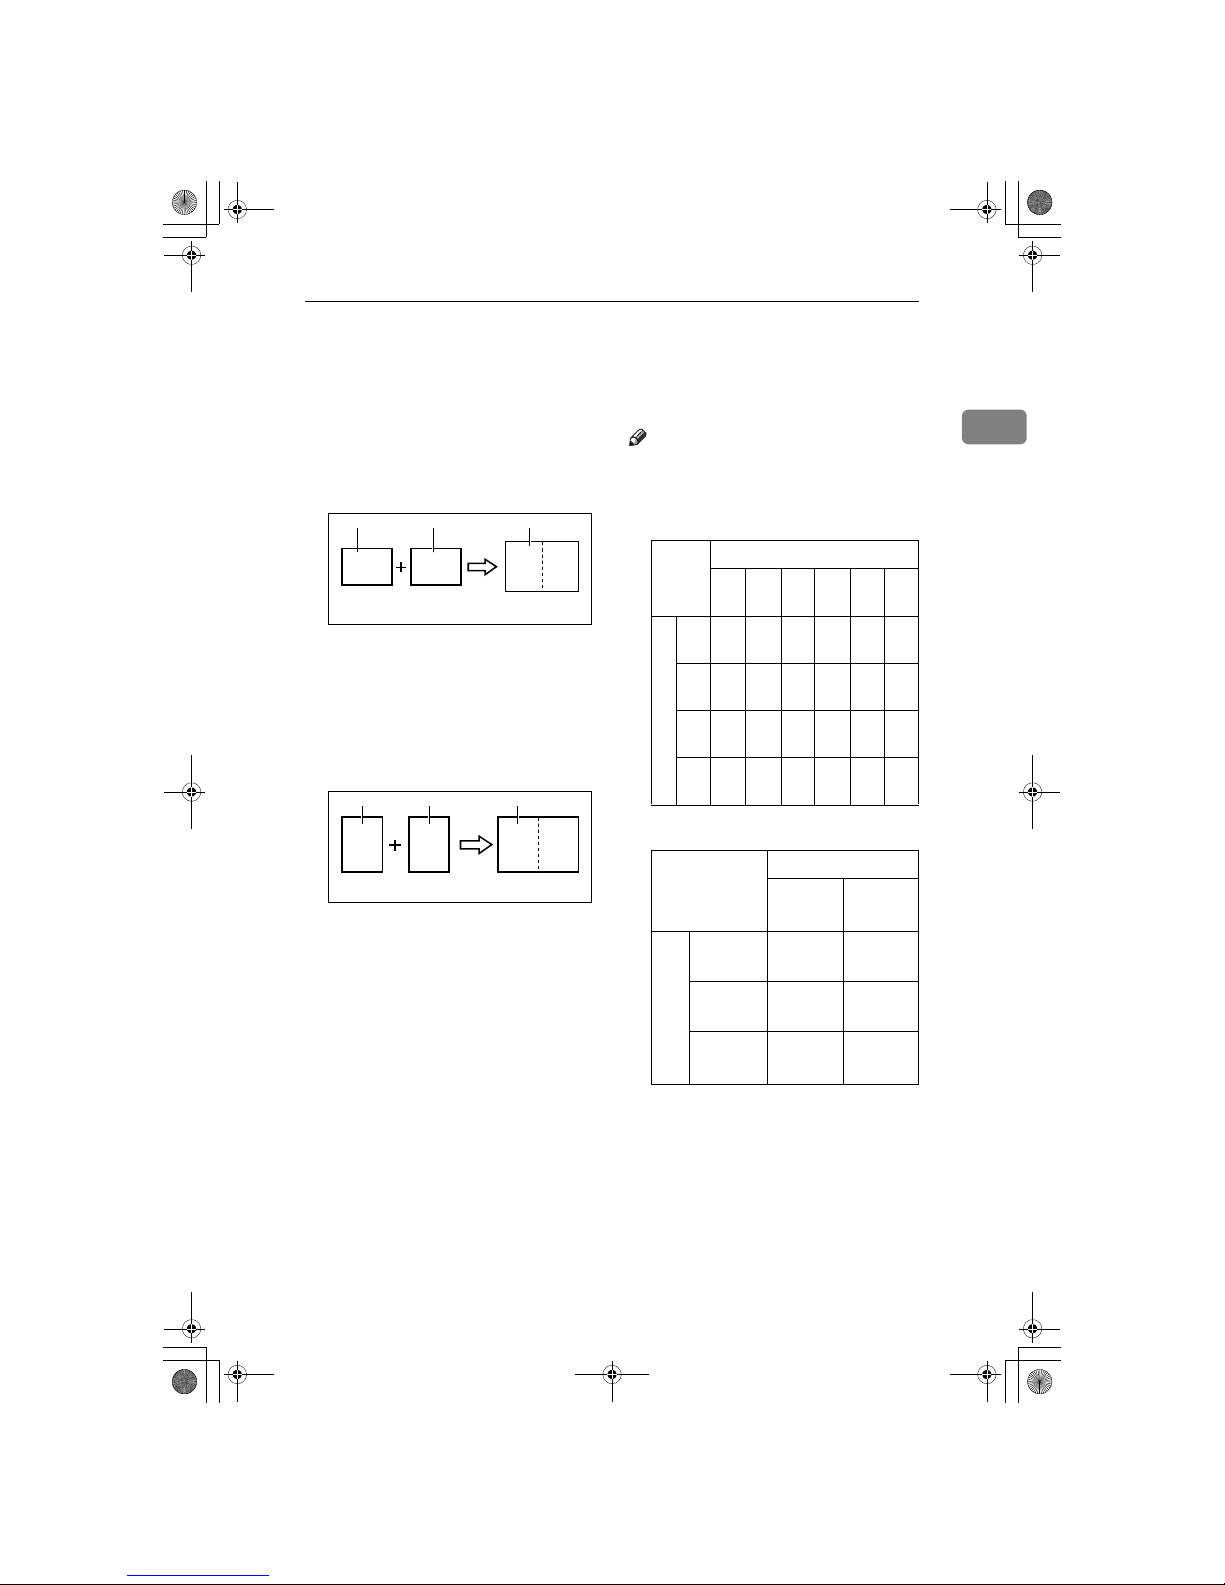
Combine—Combining 2 Originals onto One Print
33
1
Combine—Combining 2 Originals onto
One Print
You can print 2 separate originals on
a single sheet of paper. The following
diagrams show the available paper
lists and orientations.
1: 8
1
/2" × 11"K or 51/2" × 81/2"K pa-
pers are available.
2: 8
1
/2" × 11"K or 51/2" × 81/2"K pa-
pers are available.
3: 8
1
/2" × 14"L, 81/2" × 11"L or 51/2"
× 8
1
/2"L.
1: 8
1
/2" × 11"K or 51/2" × 81/2"K.
2: 8
1
/2" × 11"K or 51/2" × 81/2"K.
3: 8
1
/2" × 14"L, 81/2" × 11"L or 51/2"
× 8
1
/2"L.
Note
❒ The following tables list the repro-
duction ratios used.
❖❖❖❖
Metric version
❖❖❖❖
Inch version
❒ If the master length of the first
original is longer than the maximum allowable length, or shorter
than the minimum allowable
length, Combine Copies mode is
disabled. The following table gives
the maximum and minimum allowable master length.
ZCTX020E
B
A
AB
1 2 3
ZCTX010E
BA AB
12 3
Original Size
B4KA4KB5KA5KB6KA6
K
Paper Size
B4L71%87%100 %122 %141 %--
A4L-- 71%82
%
100 %115 %141
%
B5L-- -- 71 %87 %100 %122
%
A5L-- -- -- 71 %82 %100
%
Original Size
8
1
/2 ×
11"
K
5
1
/2" ×
8
1
/2"
K
Paper Size
81/2" ×
14"
L
77 % 100 %
8
1
/2" ×
11"
L
65 % 100 %
5
1
/2" ×
8
1
/2"
L
-- 65 %
SilverV-EN.book Page 33 Monday, May 15, 2000 3:23 PM
Page 72
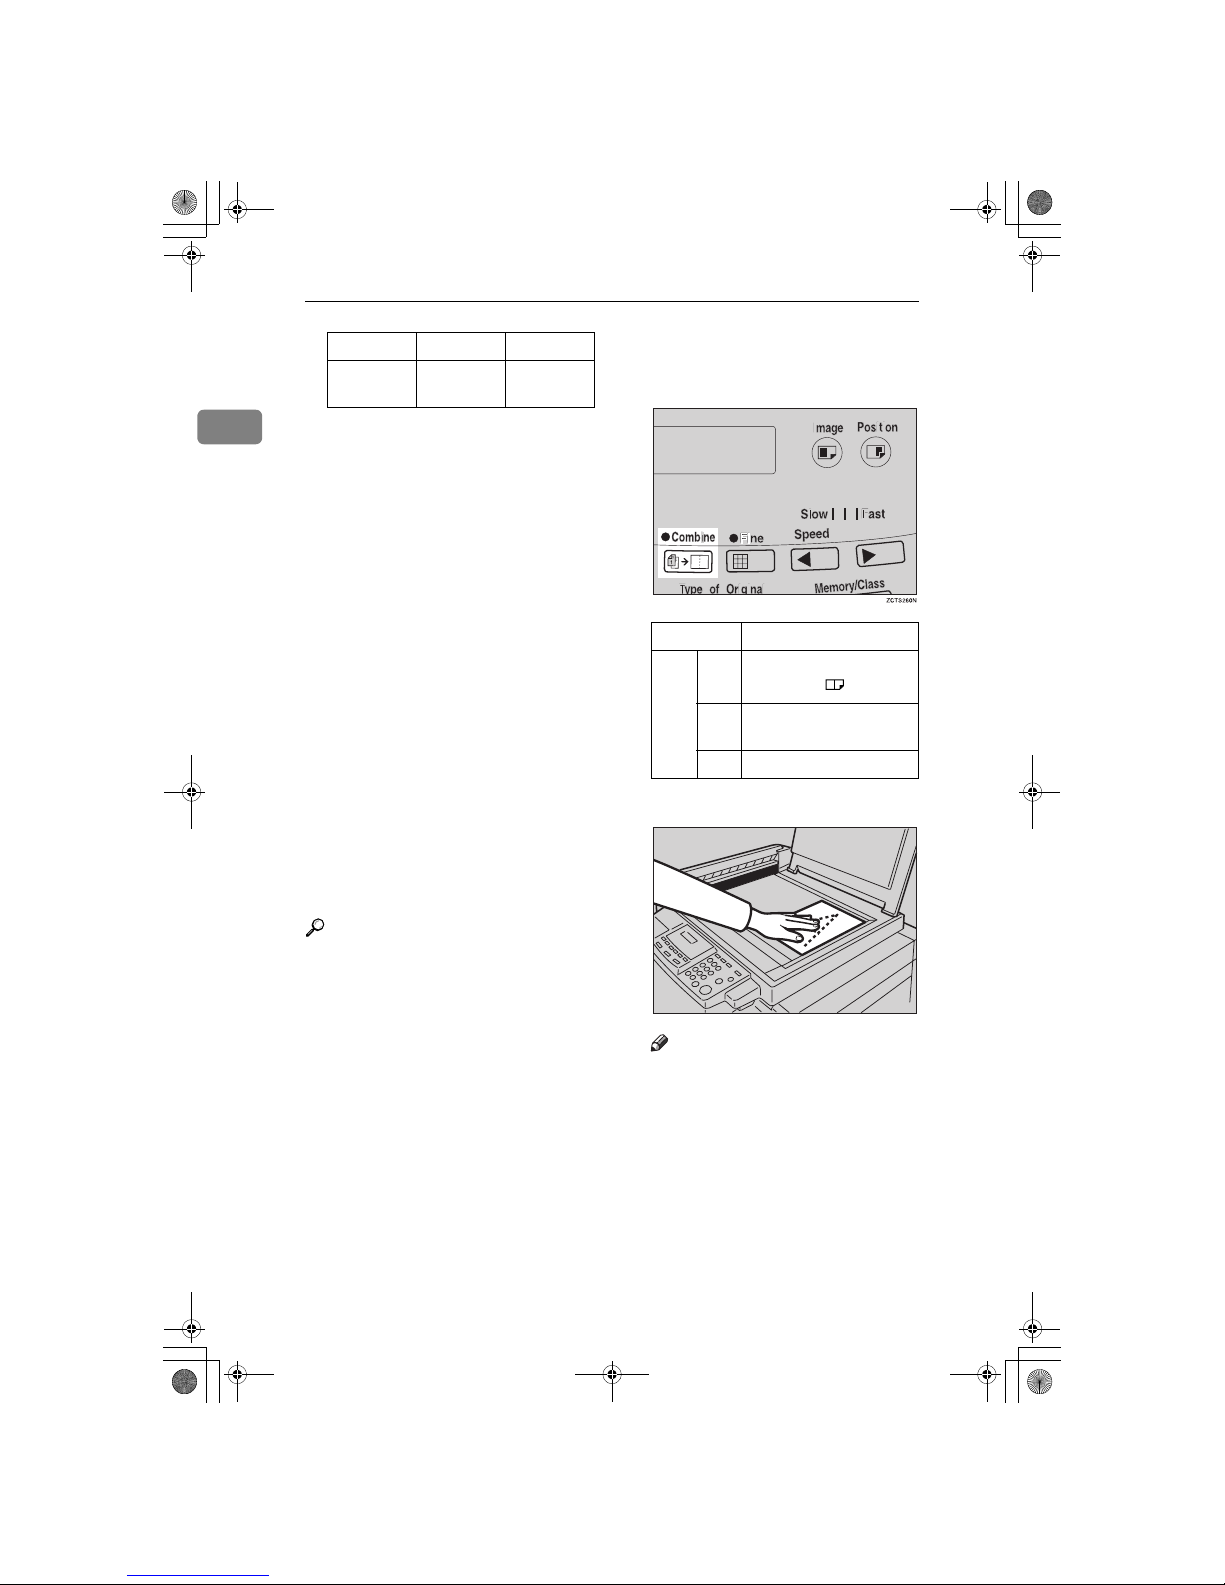
Operation
34
1
❒ Master length = actual original
length × Enlargement/Reduction
ratio
❒ Any image closer than 5mm, 0.2"
to the leading edge of the first original will not be printed. Also, any
image closer than 4mm, 0.16" to
the leading edge of the second
original will not be printed. When
the image is too close to the leading
edge, use copies of the originals
with the image shifted at least
5mm, 0.2" for the first original
(4mm, 0.16" for the second original) from the leading edge.
❒ You can select different image set-
tings for the first and second original.
❒ Make sure that the paper feed side
plates touch the paper lightly
when using the Combine Copies
function. If they do not, the two
original images will not appear at
the proper position on the prints.
Reference
For how to use the optional document feeder with this function, see
⇒ P.30 “Memory Mode—Group
Printing from Different Originals”.
A
Press the {{{{
Combine
}}}} key once or
more to select the type of combine
(see below).
B
Set the first original face down.
Note
❒ The first original will be printed
on the leading part of the print.
Minimum Maximum
LG drum
model
91 mm,
3.6"
243 mm,
9.5"
LG drum
Number of
key presses
1
8
1
/2" × 11"LL →
8
1
/2" × 14"
2 65-100% (Manual Set-
tings)
3 No Combine
TSLY01AE
SilverV-EN.book Page 34 Monday, May 15, 2000 3:23 PM
Page 73
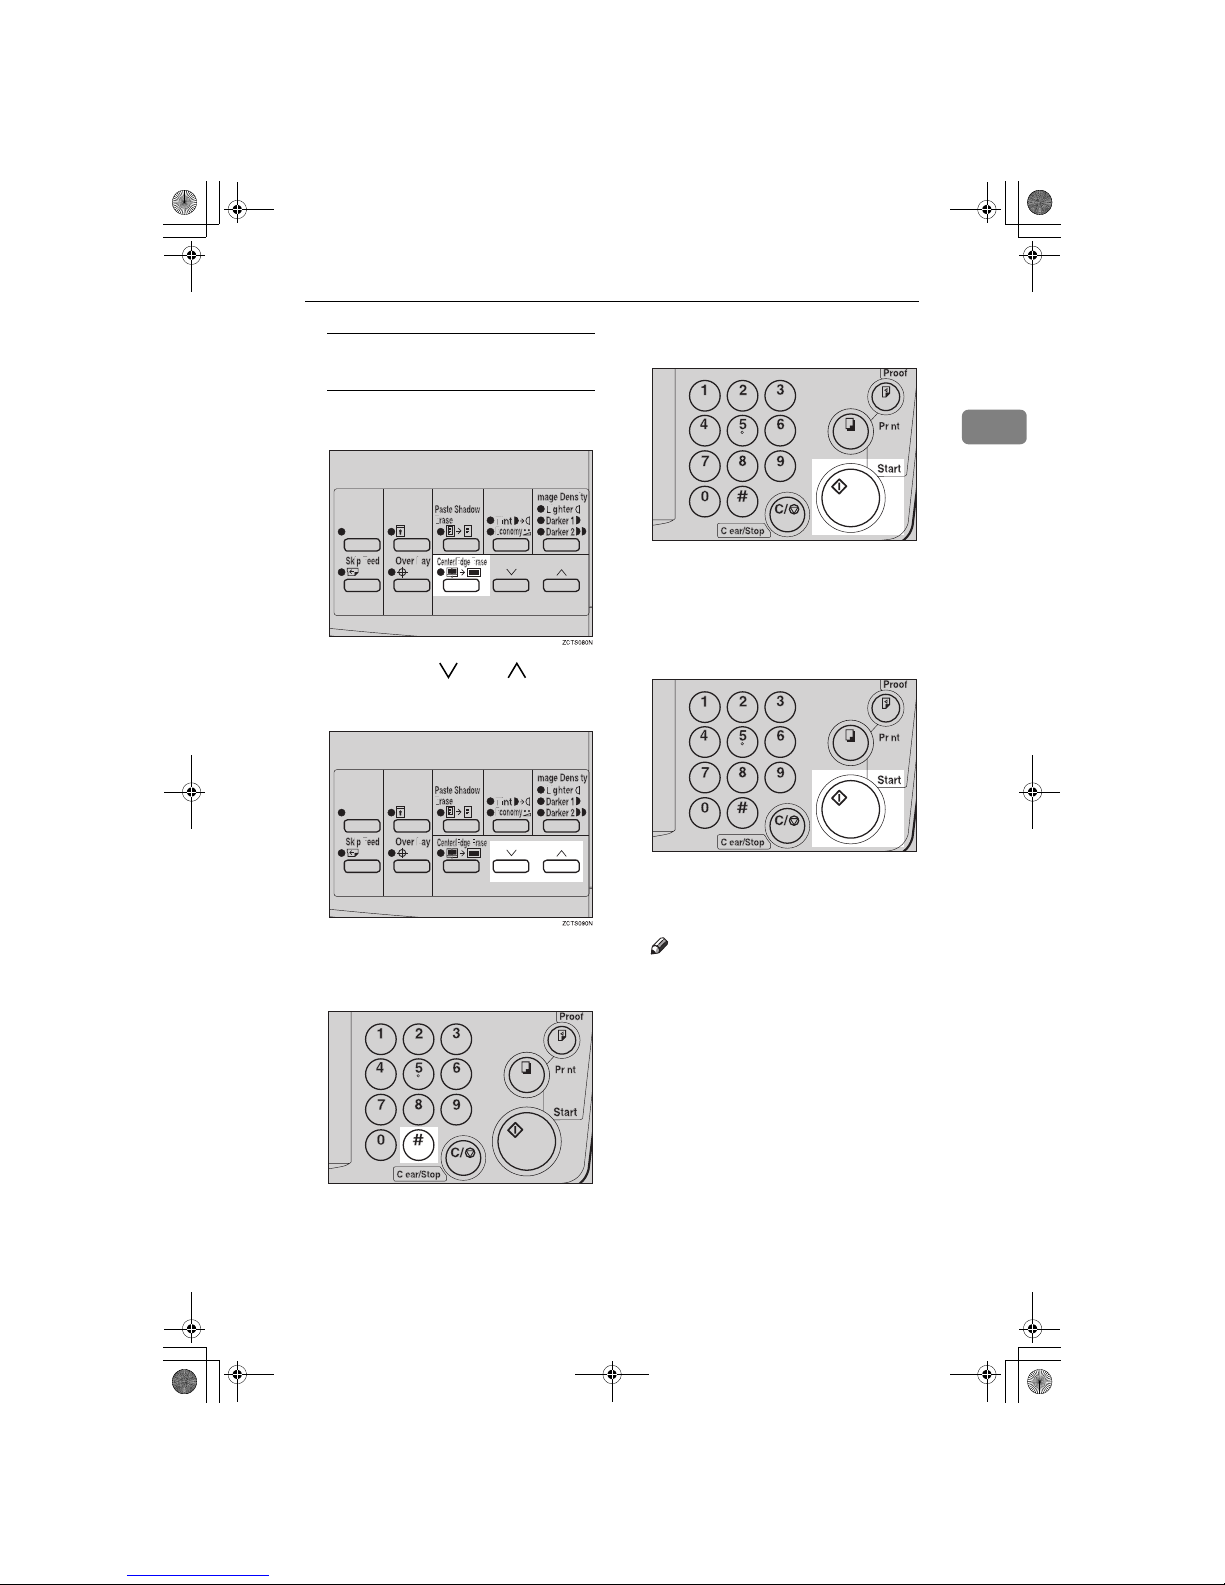
Combine—Combining 2 Originals onto One Print
35
1
To Choose a Custom
Reproduction Ratio
A Press the {{{{
Center/Edge Erase
}}}}
key twice.
B Press the {{{{}}}} or {{{{}}}} key to
select the original size and direction.
C When you reach the desired
size and direction, press the
{{{{qqqq}}}} key.
C
Press the {{{{
Start
}}}} key.
D
The beeper sounds after the first
original is on the master. Set the
second original face down.
E
Press the {{{{
Start
}}}} key.
F
Check the image position of the
trial or proof print.
Note
❒ If the image position is not cor-
rect, adjust it using the {
Image
Position
} keys (see ⇒ P.9 “Shift-
ing the Print Image Position Forward or Backward”) or the side
tray fine adjusting dial (see ⇒
P.10 “Shifting the Print Image Po-
sition to the Right or Left”).
TSLS01TN
TSLS012N
TSLS012N
SilverV-EN.book Page 35 Monday, May 15, 2000 3:23 PM
Page 74
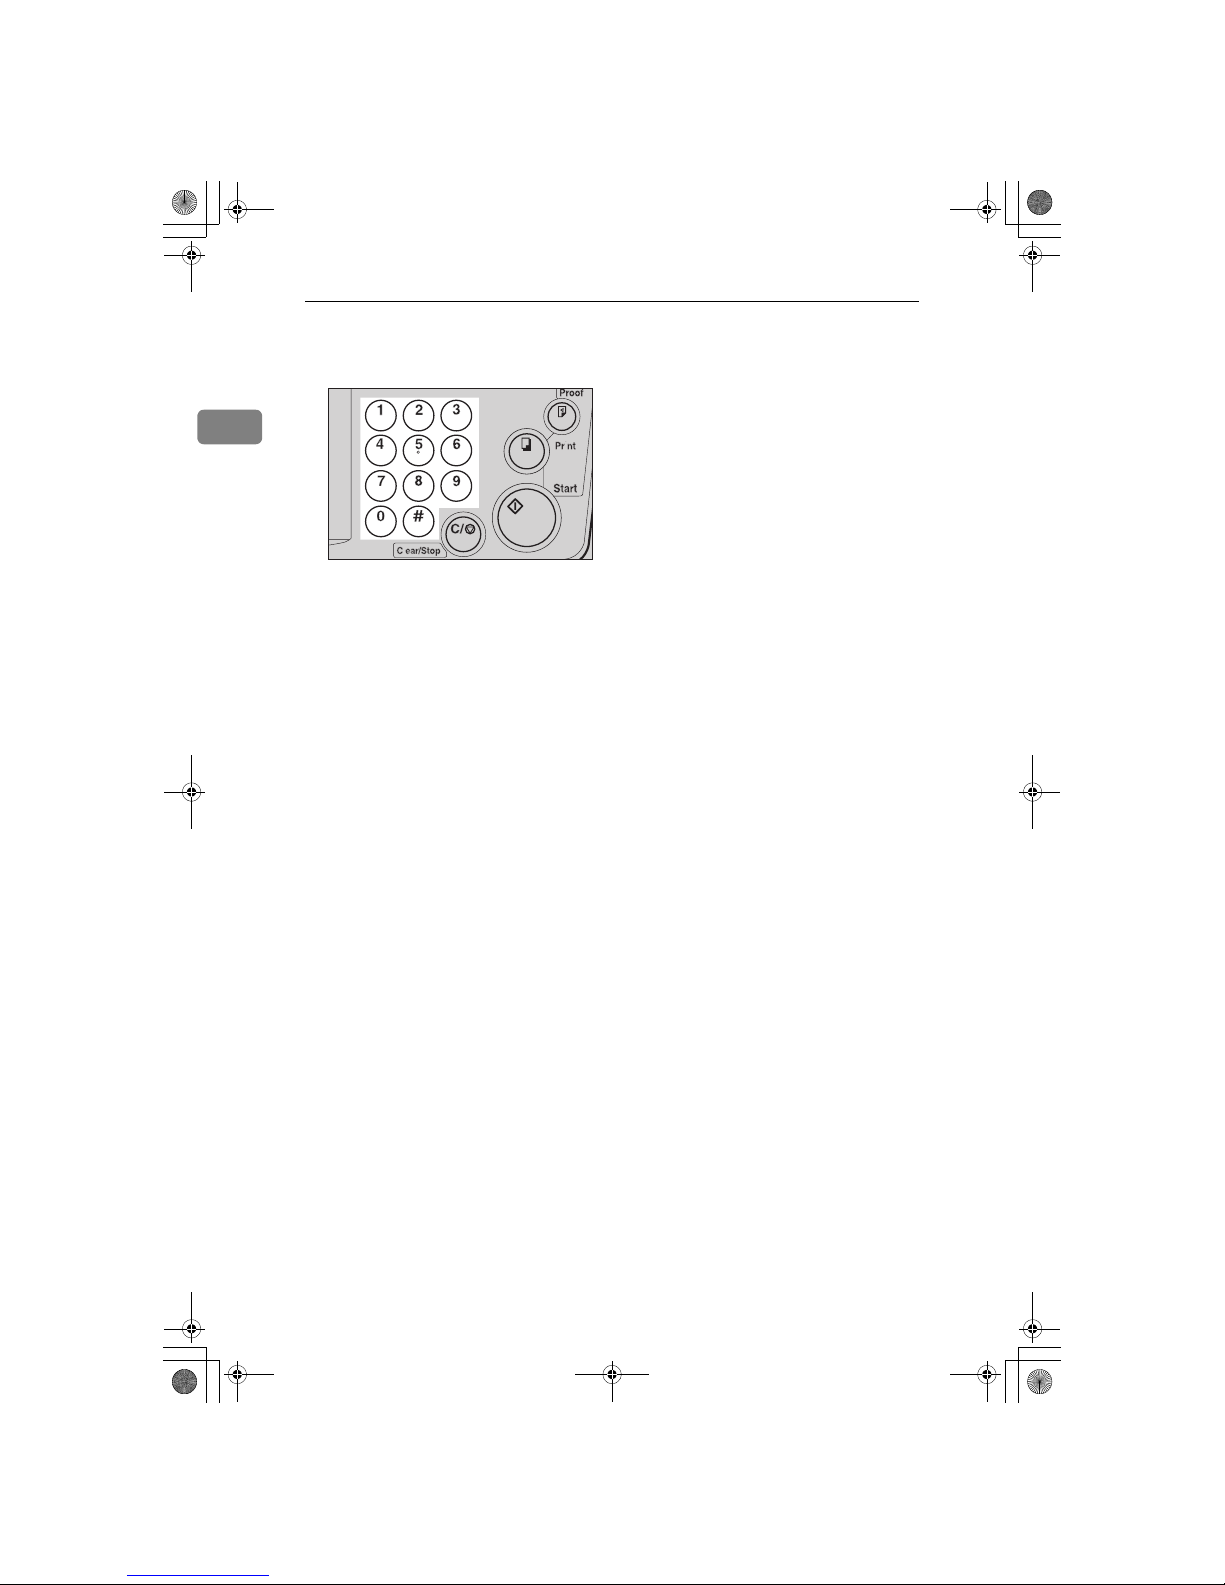
Operation
36
1
G
Enter the number of prints with
the number keys.
H
Make your prints.
TSLS011N
SilverV-EN.book Page 36 Monday, May 15, 2000 3:23 PM
Page 75
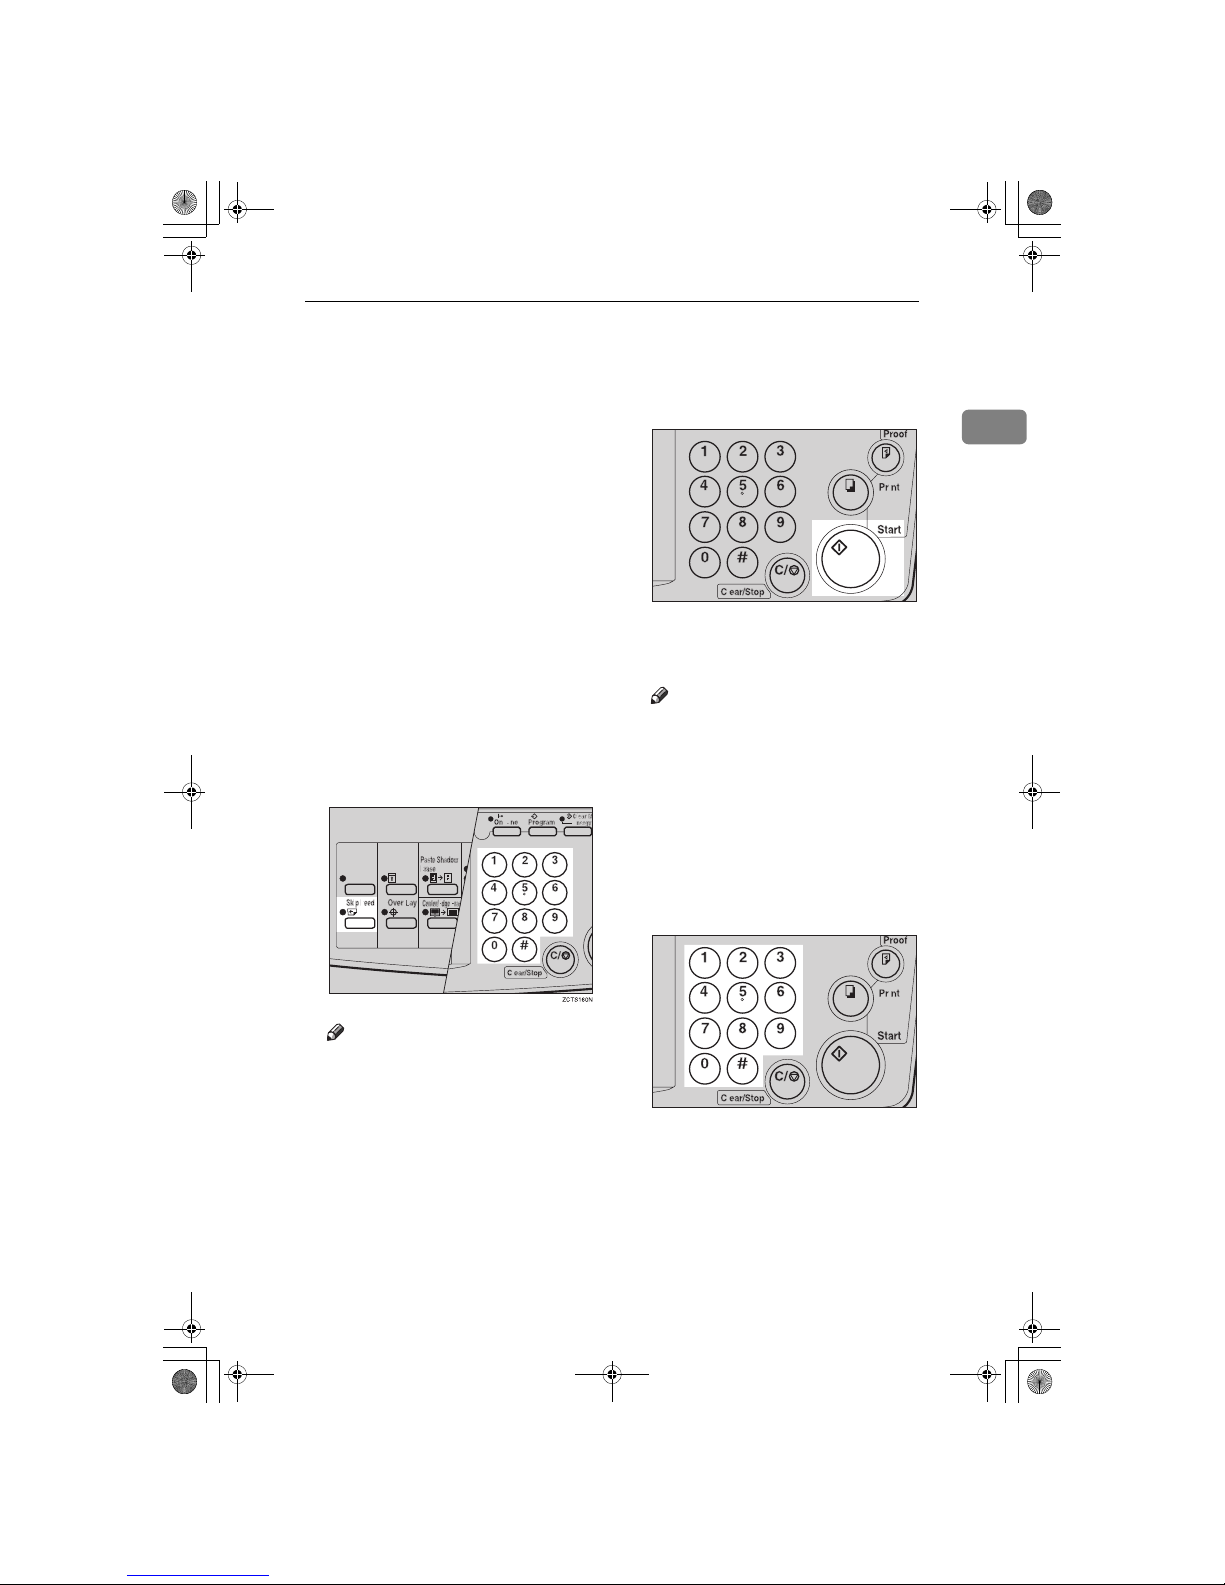
Skip Feed Printing
37
1
Skip Feed Printing
If the backs of prints are dirty, you
can increase the time between two
prints using the {
Skip Feed
} key. In
the default setting, when one sheet of
paper is fed the drum rotates twice.
However, you can select the number
of rotations of the drum. This gives
you the chance to remove prints one
by one from the paper delivery tray
or insert one sheet of paper between
two prints.
A
Set your originals on the exposure
glass or in the optional document
feeder.
B
While holding down the {{{{
Skip
Feed
}}}} key, select the number of
rotations of the drum while one
sheet of paper is fed with the
number keys.
Note
❒ You can select from 1 to 9 rota-
tions.
❒ The beeper sounds after you set
the number of rotations.
C
Press the {{{{
Start
}}}} key.
D
Check the image position of the
trial or proof print.
Note
❒ If the image position is not cor-
rect, adjust it using the {
Image
Position
} keys (see ⇒ P.9 “Shift-
ing the Print Image Position Forward or Backward”) or the side
tray fine adjusting dial (see ⇒
P.10 “Shifting the Print Image Po-
sition to the Right or Left”).
E
Enter the number of prints with
the number keys.
F
Make your prints.
TSLS012N
TSLS011N
SilverV-EN.book Page 37 Monday, May 15, 2000 3:23 PM
Page 76
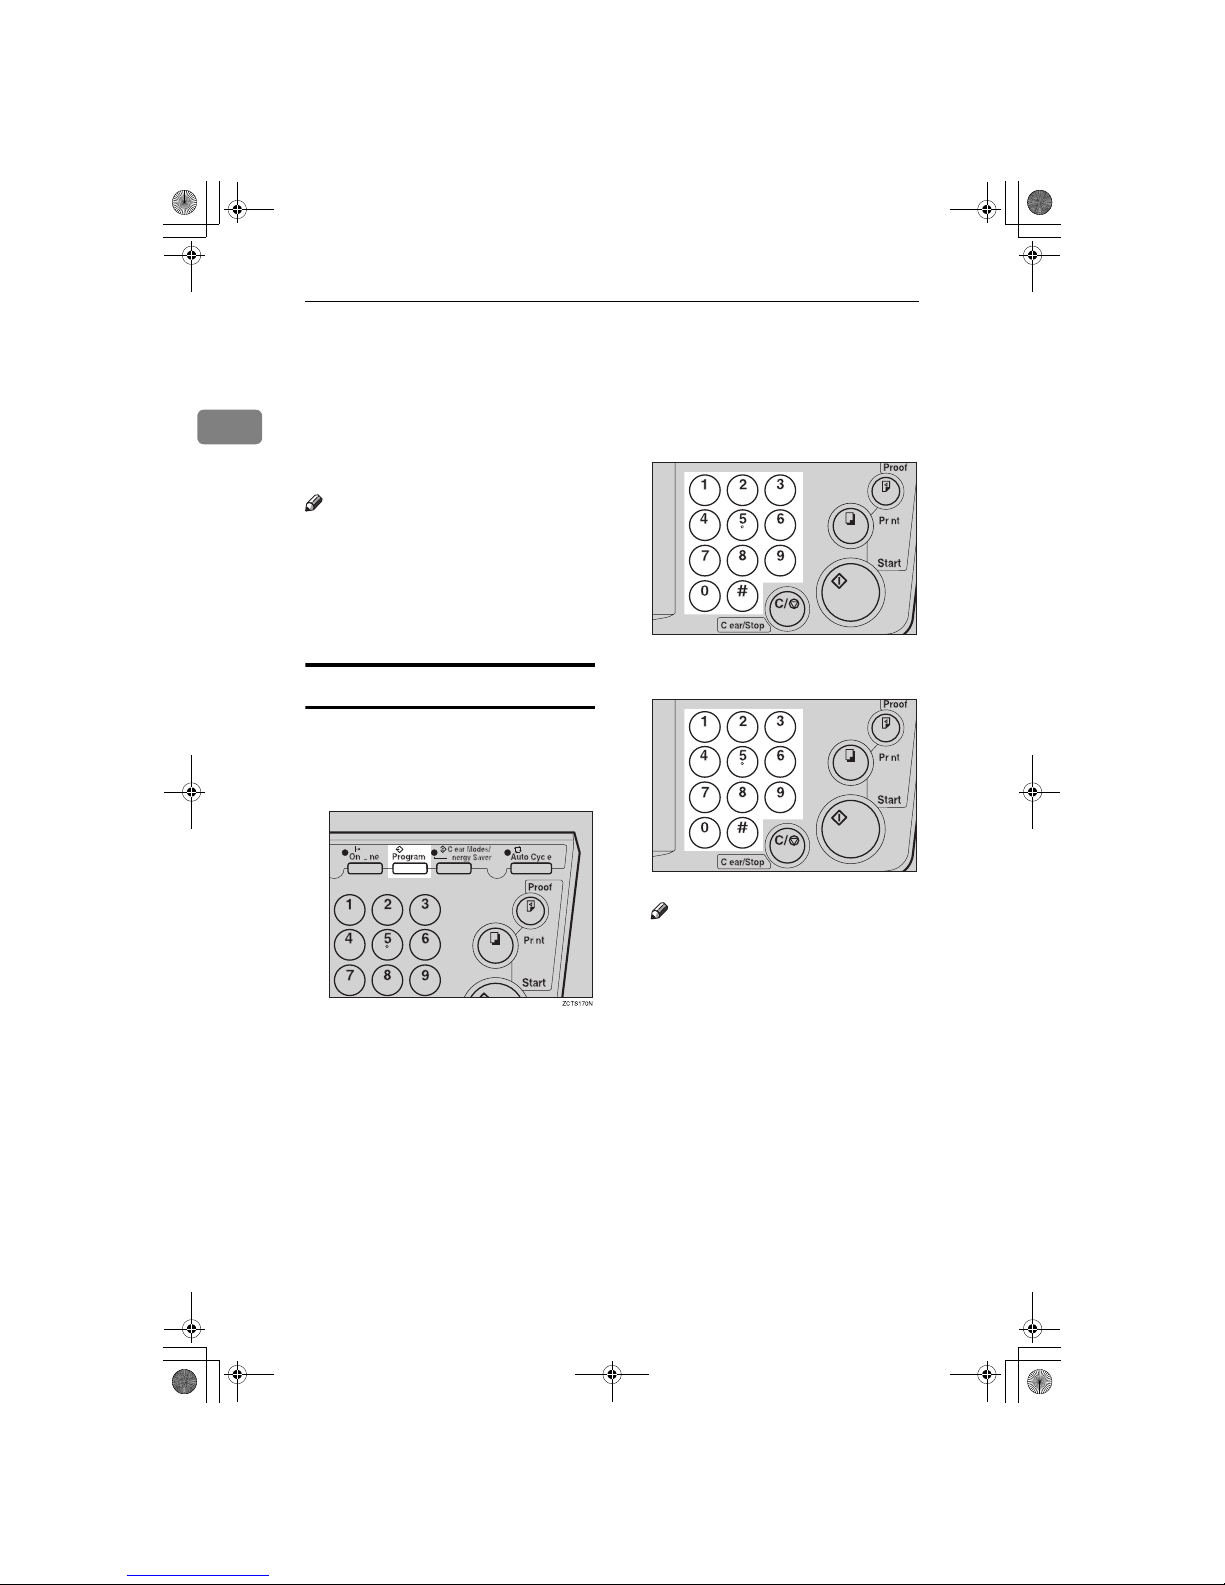
Operation
38
1
Program—Storing Your Print Settings in
Memory
You can store up to 9 frequently used
print job settings in machine memory,
and recall them for future use.
Note
❒ The stored programs are not
cleared when you turn off the main
switch.
❒ The stored programs cannot be de-
leted. If you want to change a
stored program, overwrite it.
Storing Your Settings
A
Set the print settings you want to
put into memory.
B
Press the {{{{
Program
}}}} key.
Numbers already containing a
program are displayed on the
guidance display.
C
Enter “0” with the number key.
D
Press the {{{{qqqq}}}} key.
Note
❒ The program numbers (1 to 9)
will be displayed in the guidance display.
❒ If a user program has been pro-
tected, that program number
will not appear in the display.
For how to change a protected
user program, see ⇒ P.40 “Pro-
tecting a Program”.
❒ If all the user programs have
been protected, the machine returns to the ready condition.
TSLS011N
TSLS011N
SilverV-EN.book Page 38 Monday, May 15, 2000 3:23 PM
Page 77
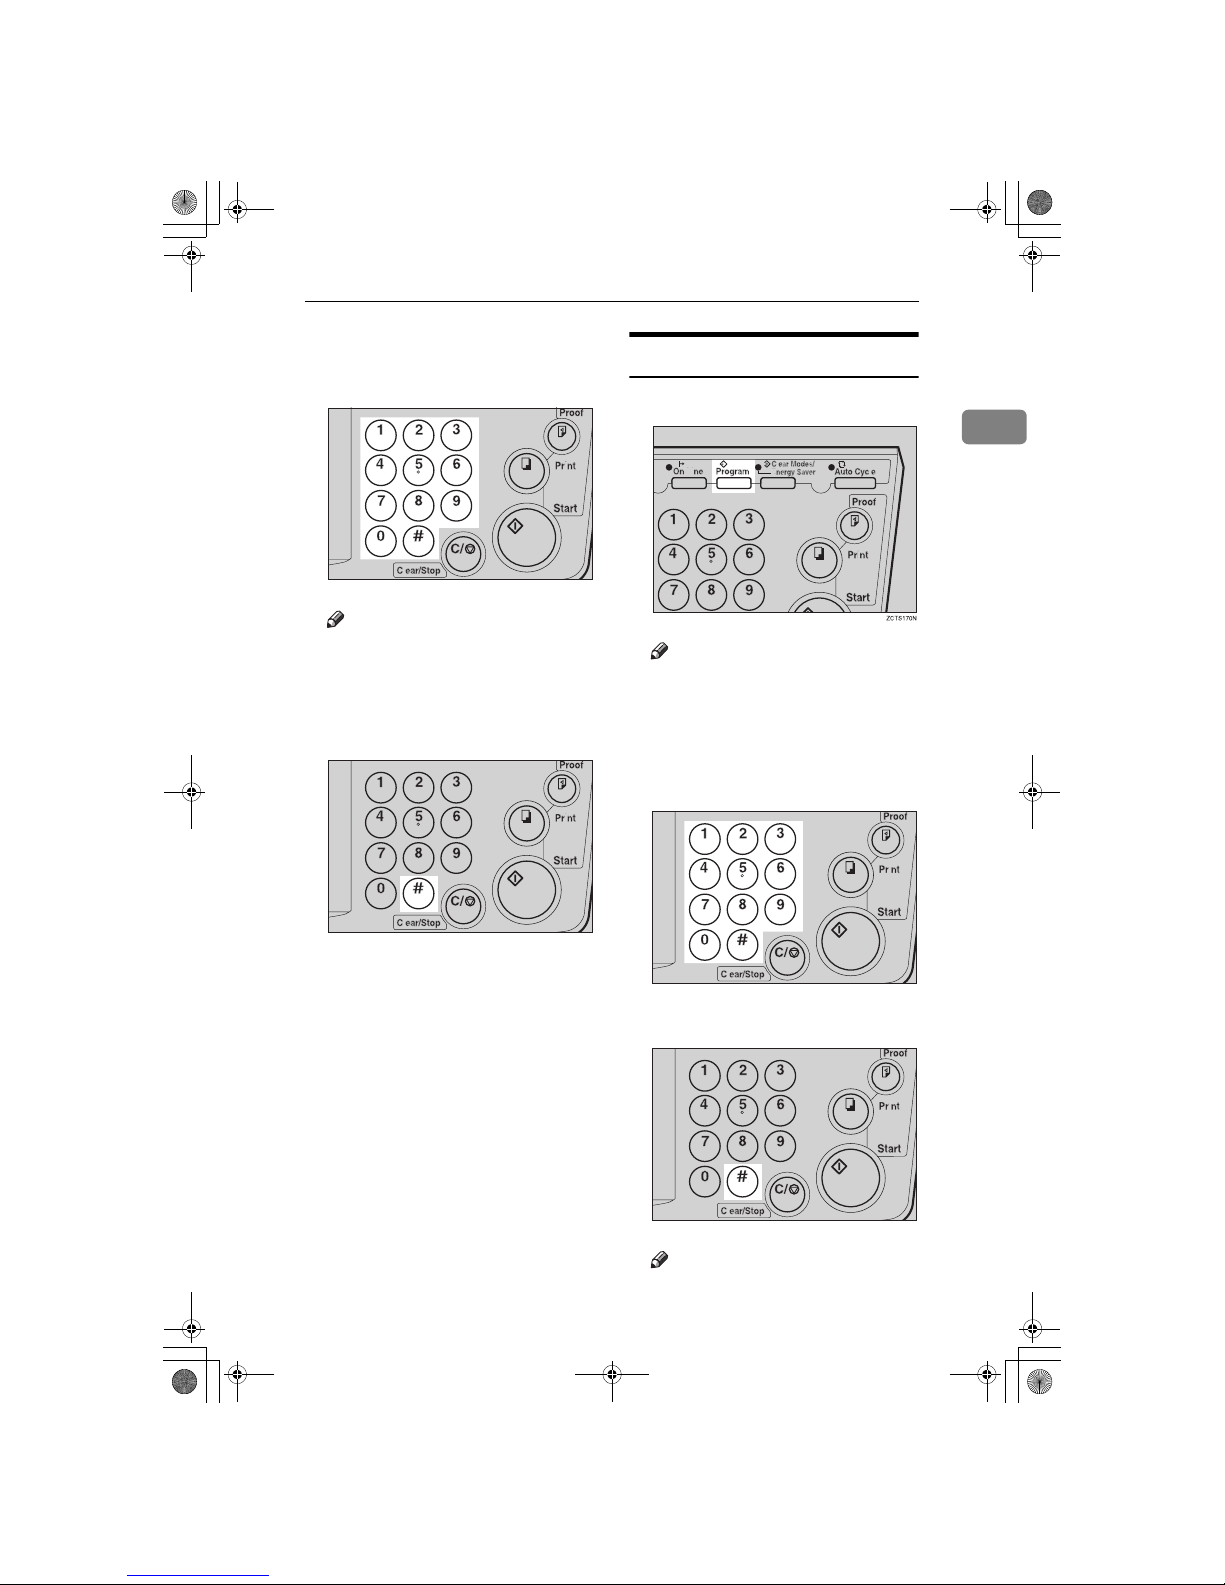
Program—Storing Your Print Settings in Memory
39
1
E
Select the program number you
want to store the settings in with
the number keys.
Note
❒ Make sure that the previous job
settings stored under the selected program number are overwritten.
F
Press the {{{{qqqq}}}} key.
Recalling a Program
A
Press the {{{{
Program
}}}} key.
Note
❒ Numbers already containing a
program are displayed on the
guidance display.
B
Select the program number you
want to recall with the number
keys.
C
Press the {{{{qqqq}}}} key.
Note
❒ The stored settings are recalled.
TSLS011N
TSLS01TN
TSLS011N
TSLS01TN
SilverV-EN.book Page 39 Monday, May 15, 2000 3:23 PM
Page 78
Operation
40
1
D
Set your originals on the exposure
glass or in the optional document
feeder.
E
Press the {{{{
Start
}}}} key.
Protecting a Program
If you want to prevent someone from
writing over your program, do the
following procedure.
A
While holding down the {{{{
Clear/
Stop
}}}} key, press the {{{{
Program
}}}}
key.
B
Enter “1” with the number keys.
C
Press the {{{{qqqq}}}} key.
Note
❒ The numbers of the programs
which are not protected will be
displayed in the guidance display.
D
Select the program number you
want to protect with the number
keys.
TSLS012N
TSLS01LN
TSLS01TN
TSLS011N
SilverV-EN.book Page 40 Monday, May 15, 2000 3:23 PM
Page 79
Program—Storing Your Print Settings in Memory
41
1
E
Press the {{{{qqqq}}}} key.
Removing Program Protection
A
While holding down the {{{{
Clear/
Stop
}}}} key, press the {{{{
Program
}}}}
key.
B
Enter “0” with the number key.
C
Press the {{{{qqqq}}}} key.
Note
❒ If no program number is pro-
tected, the machine returns to
the ready condition.
D
Select the program number you
want to remove protection from
with the number keys.
E
Press the {{{{qqqq}}}} key.
TSLS01TN
TSLS01MN
TSLS01TN
TSLS011N
TSLS01TN
SilverV-EN.book Page 41 Monday, May 15, 2000 3:23 PM
Page 80
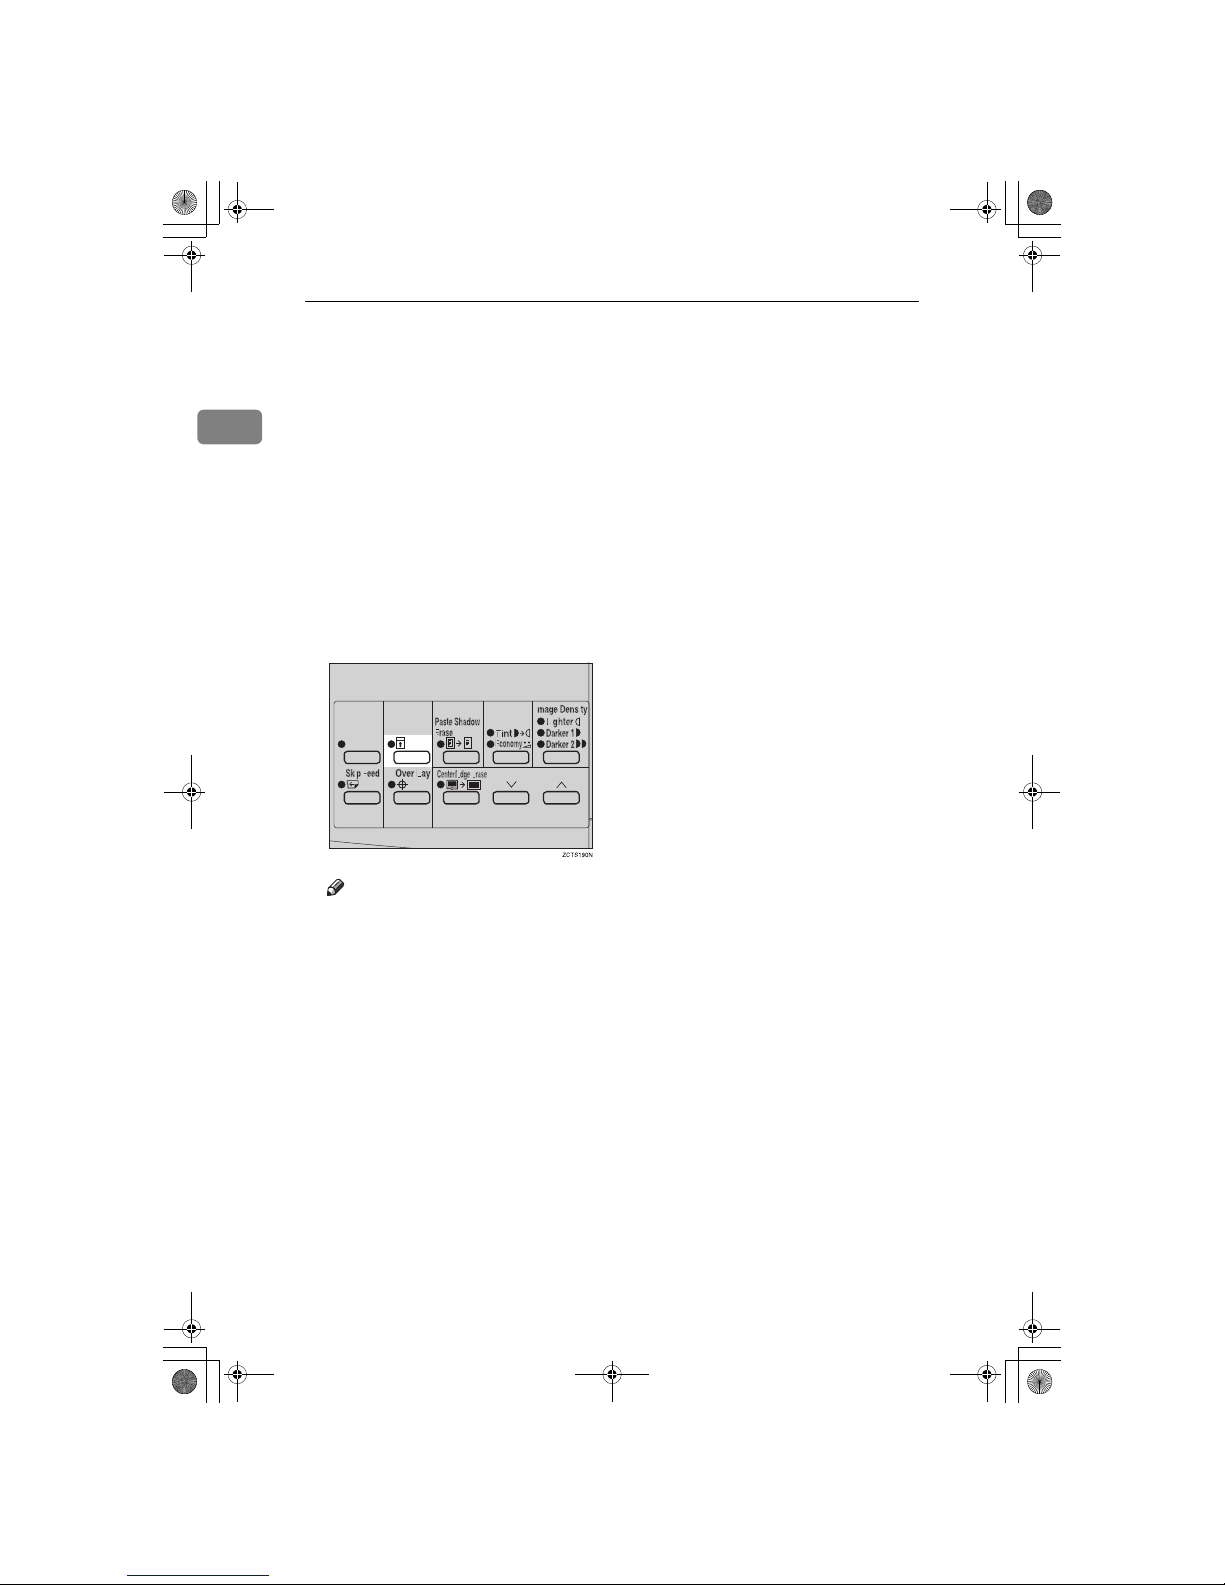
Operation
42
1
Security Mode—Printing Secret
Documents
This function prevents others from
making prints of secret documents
from the master. For example, if you
want to print some documents with
sensitive information, use this function after making your prints so that
nobody can access that master again.
A
Make your prints.
B
Hold down the {{{{
Security
}}}} key for
at least 5 seconds.
Note
❒ If you press the {
Proof
} key or
the {
Print
} key after setting Se-
curity mode, the beeper sounds
and you cannot make prints.
❒ You cannot cancel Security
mode even if you turn off the
main switch.
❒ If you make the next master, Se-
curity mode is canceled.
SilverV-EN.book Page 42 Monday, May 15, 2000 3:23 PM
Page 81
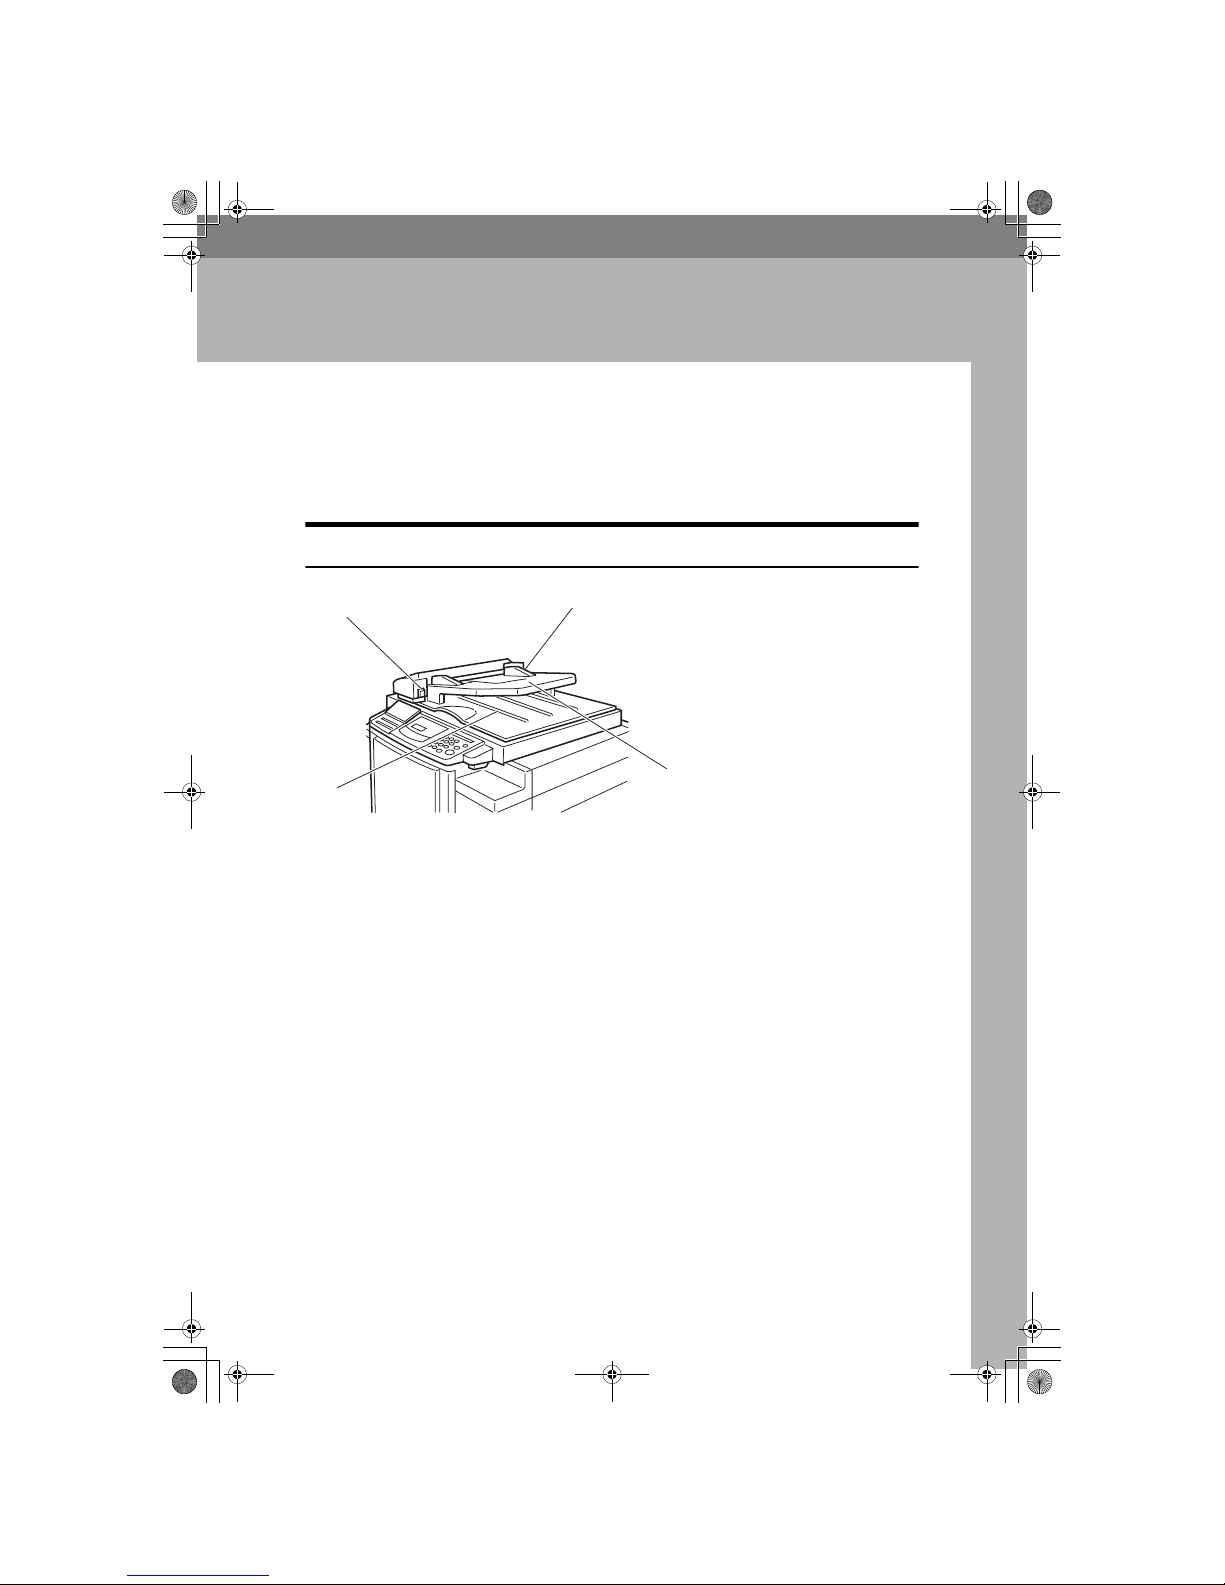
43
2. Optional Functions
Printing Using the Optional 30 Originals
Document Feeder
Insert a stack of originals in the document feeder. They will be fed automatically.
Document Feeder Exterior
1. Original tray
Original used to make masters are delivered to this tray.
2. ADF unit
Feeds the original to the master making
position.
3. Original guides
Adjust these guides to position the originals correctly.
4. ADF unit open lever
Use to open the ADF unit.
TSLP018E
1
2
3
4
SilverV-EN.book Page 43 Monday, May 15, 2000 3:23 PM
Page 82
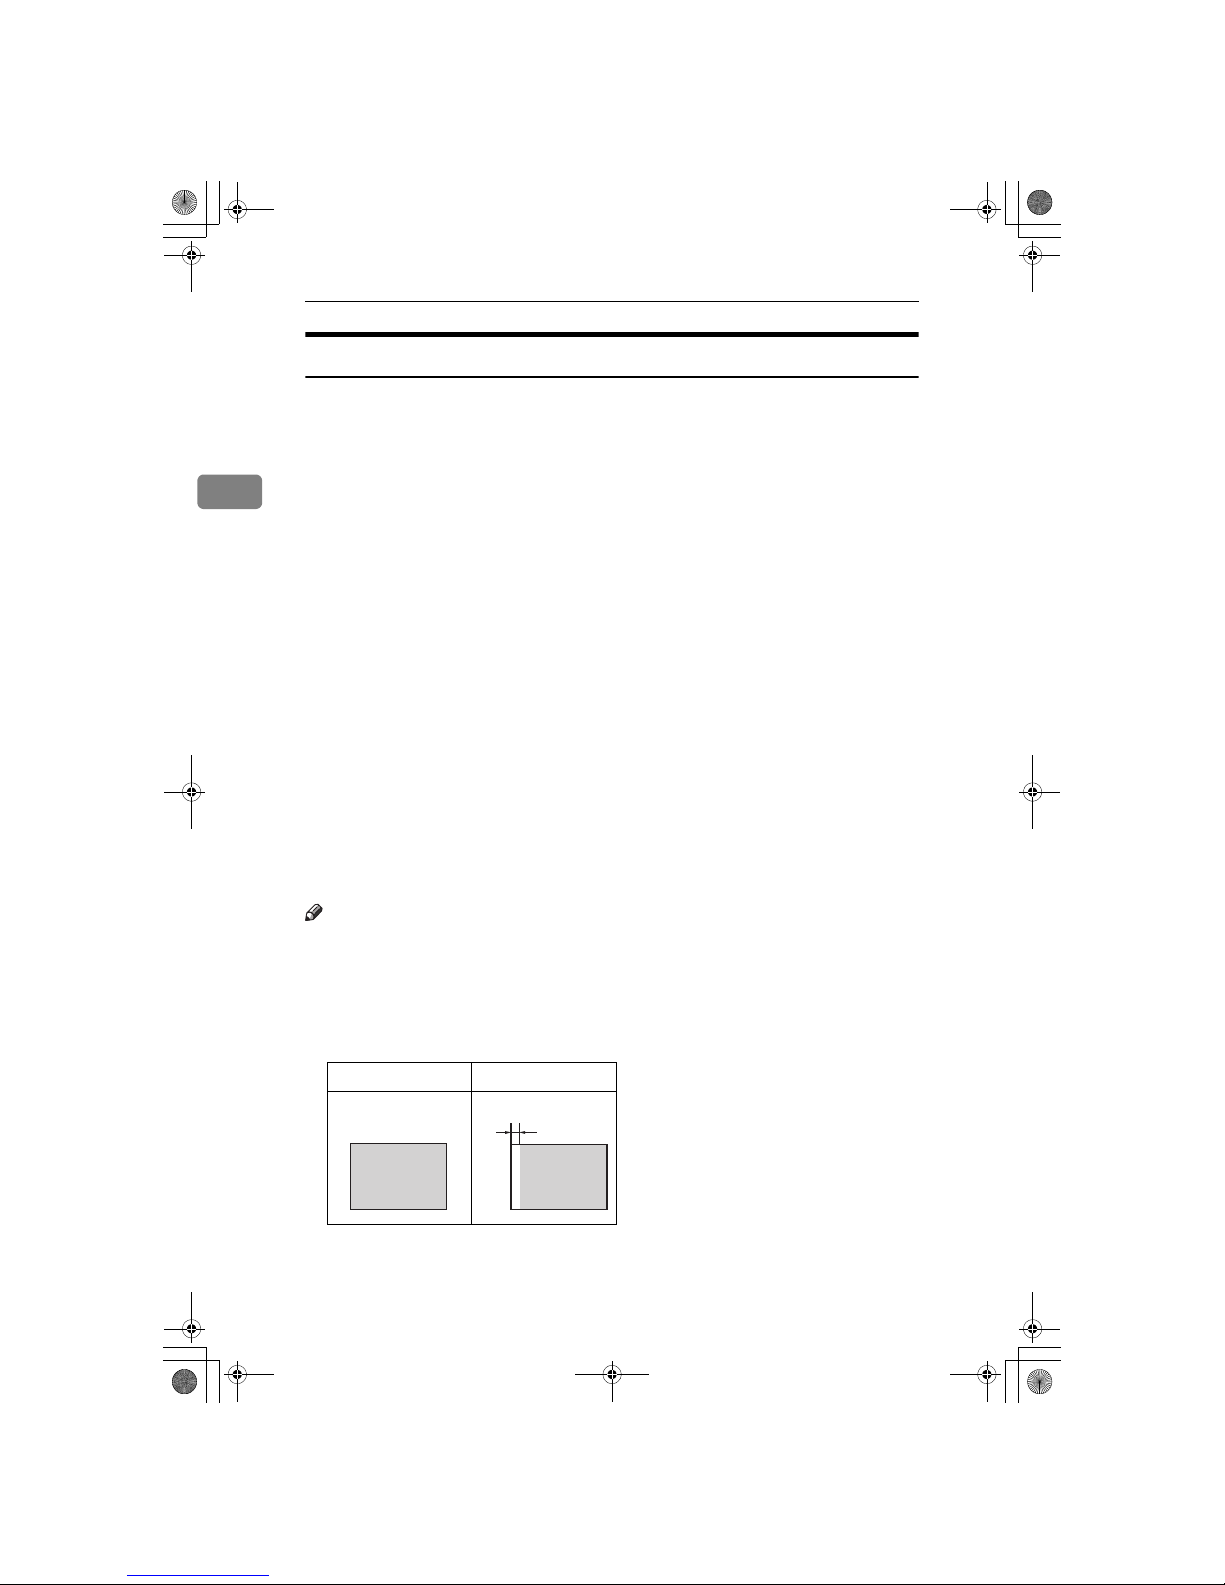
Optional Functions
44
2
Originals
Setting the following originals in the document feeder might cause original misfeeds or damage to the originals.
Set these originals on the exposure glass.
• Originals heavier than 90g/m
2
, 23.9 lb (when setting a stack of originals)
• Originals lighter than 50g/m
2
, 13.3 lb (when setting a stack of originals)
• Originals heavier than 120g/m
2
, 31.9 lb (when setting one original at a time)
• Originals lighter than 40g/m
2
, 10.6 lb (when setting one original at a time)
• Carbon coated originals
• Damaged originals
• Originals with glue on them
• Originals perforated for ring binders
• Book originals
• Originals written with a pencil or ball-point pen
• Originals smaller than 148mm × 105mm, 5.8" × 4.1"
• Originals larger than 257mm × 364mm, 10.2" × 14.4"
• Folded, curled, creased originals
• Bound, stapled, or clipped originals
• OHP transparencies
• Translucent paper
• Pasted originals
Note
❒ If you use paste-up originals, make sure the pasted parts hold firmly to the
base sheet and press the {
Paste Shadow Erase
} key. If the thickness of the paste-
up original is more than 0.1mm, and the space between the pasted parts is less
than 2mm, 0.08", a shadow might appear on the prints.
❒ The first 5mm, 0.2", of the leading edge cannot be printed. Make sure the lead-
ing edge margin is at least 5mm, 0.2".
❒ a: 5mm, 0.2"
Original Print
a
SilverV-EN.book Page 44 Monday, May 15, 2000 3:23 PM
Page 83
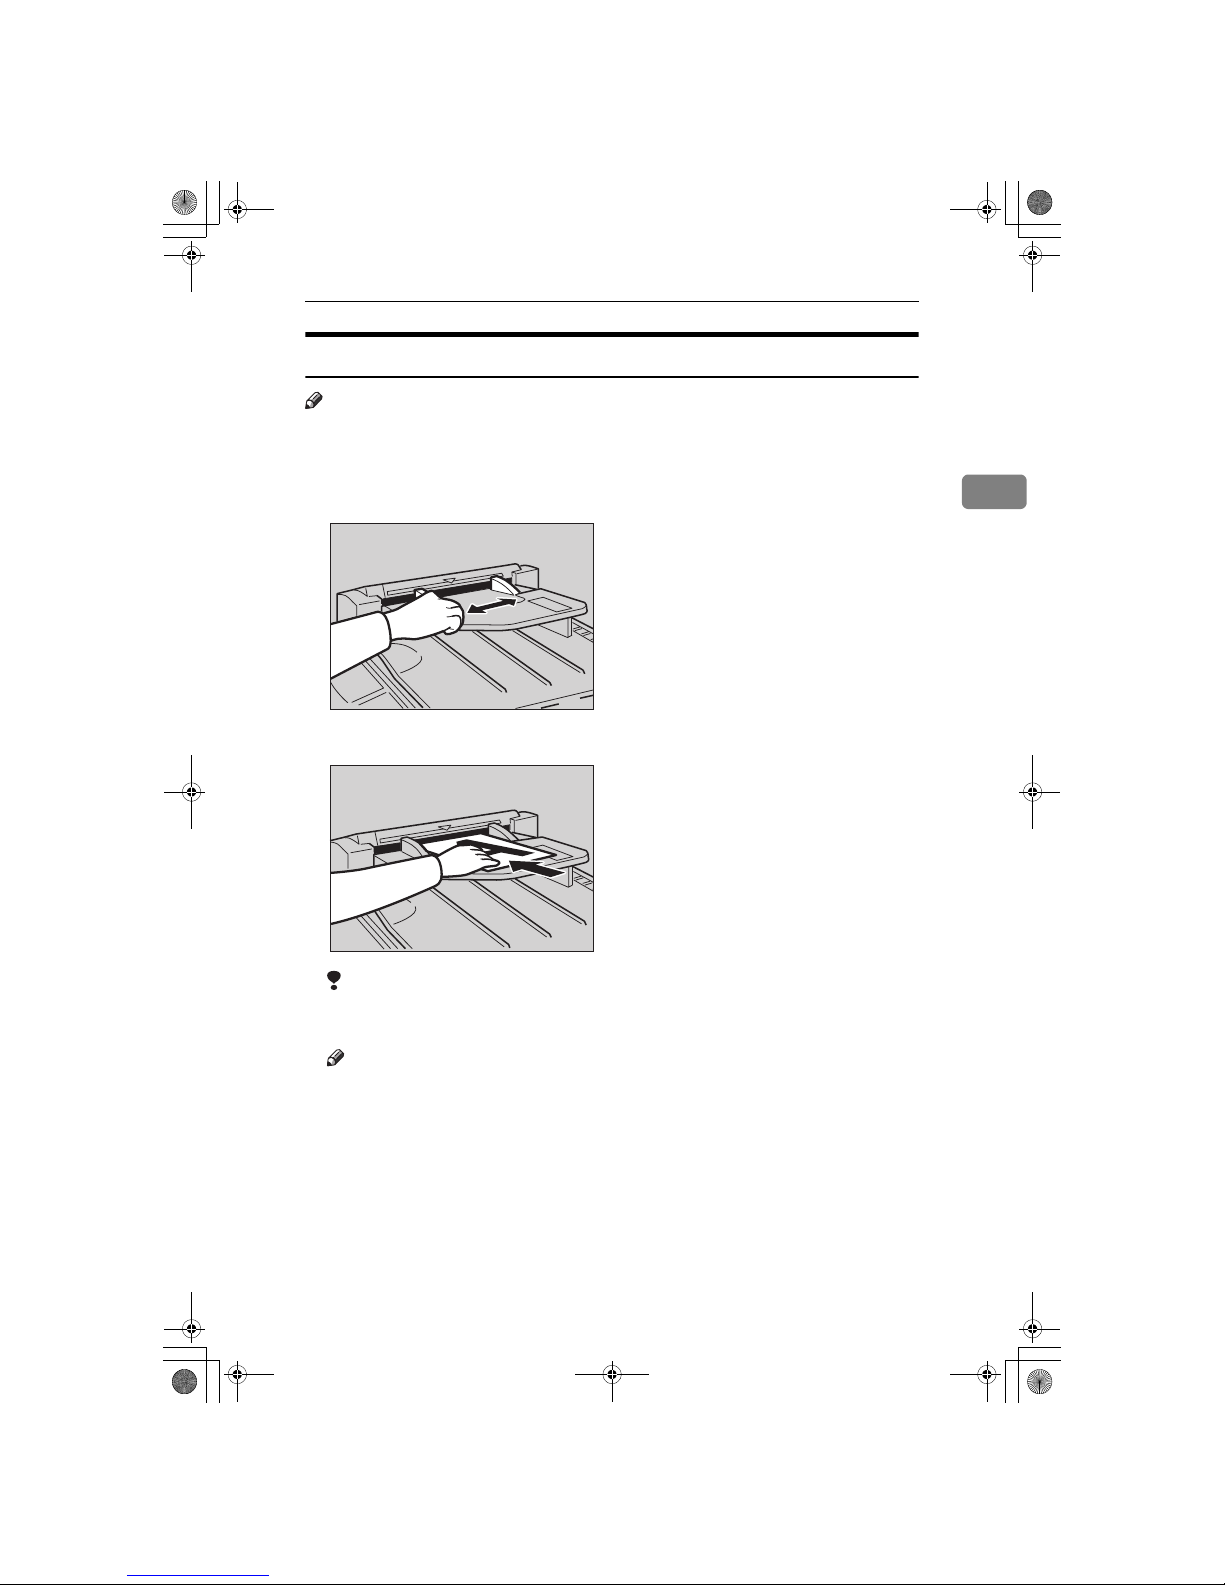
Printing Using the Optional 30 Originals Document Feeder
45
2
Setting Originals in the Document Feeder
Note
❒ If you set one original into the document feeder while another original is still
on the exposure glass, the original set into the document feeder will be
scanned first.
A
Adjust the guide to the original size.
B
Insert the aligned originals face up in the document feeder until they stop.
Limitation
❒ Approximately 30 originals (64g/m2, 17 lb) can be inserted at one time in
the 30 originals document feeder. The first (top) original will be fed first.
Note
❒ Do not insert different size originals at the same time.
❒ The guides must fit snugly against both sides of the stack.
TSLH011E
TSLH012E
SilverV-EN.book Page 45 Monday, May 15, 2000 3:23 PM
Page 84
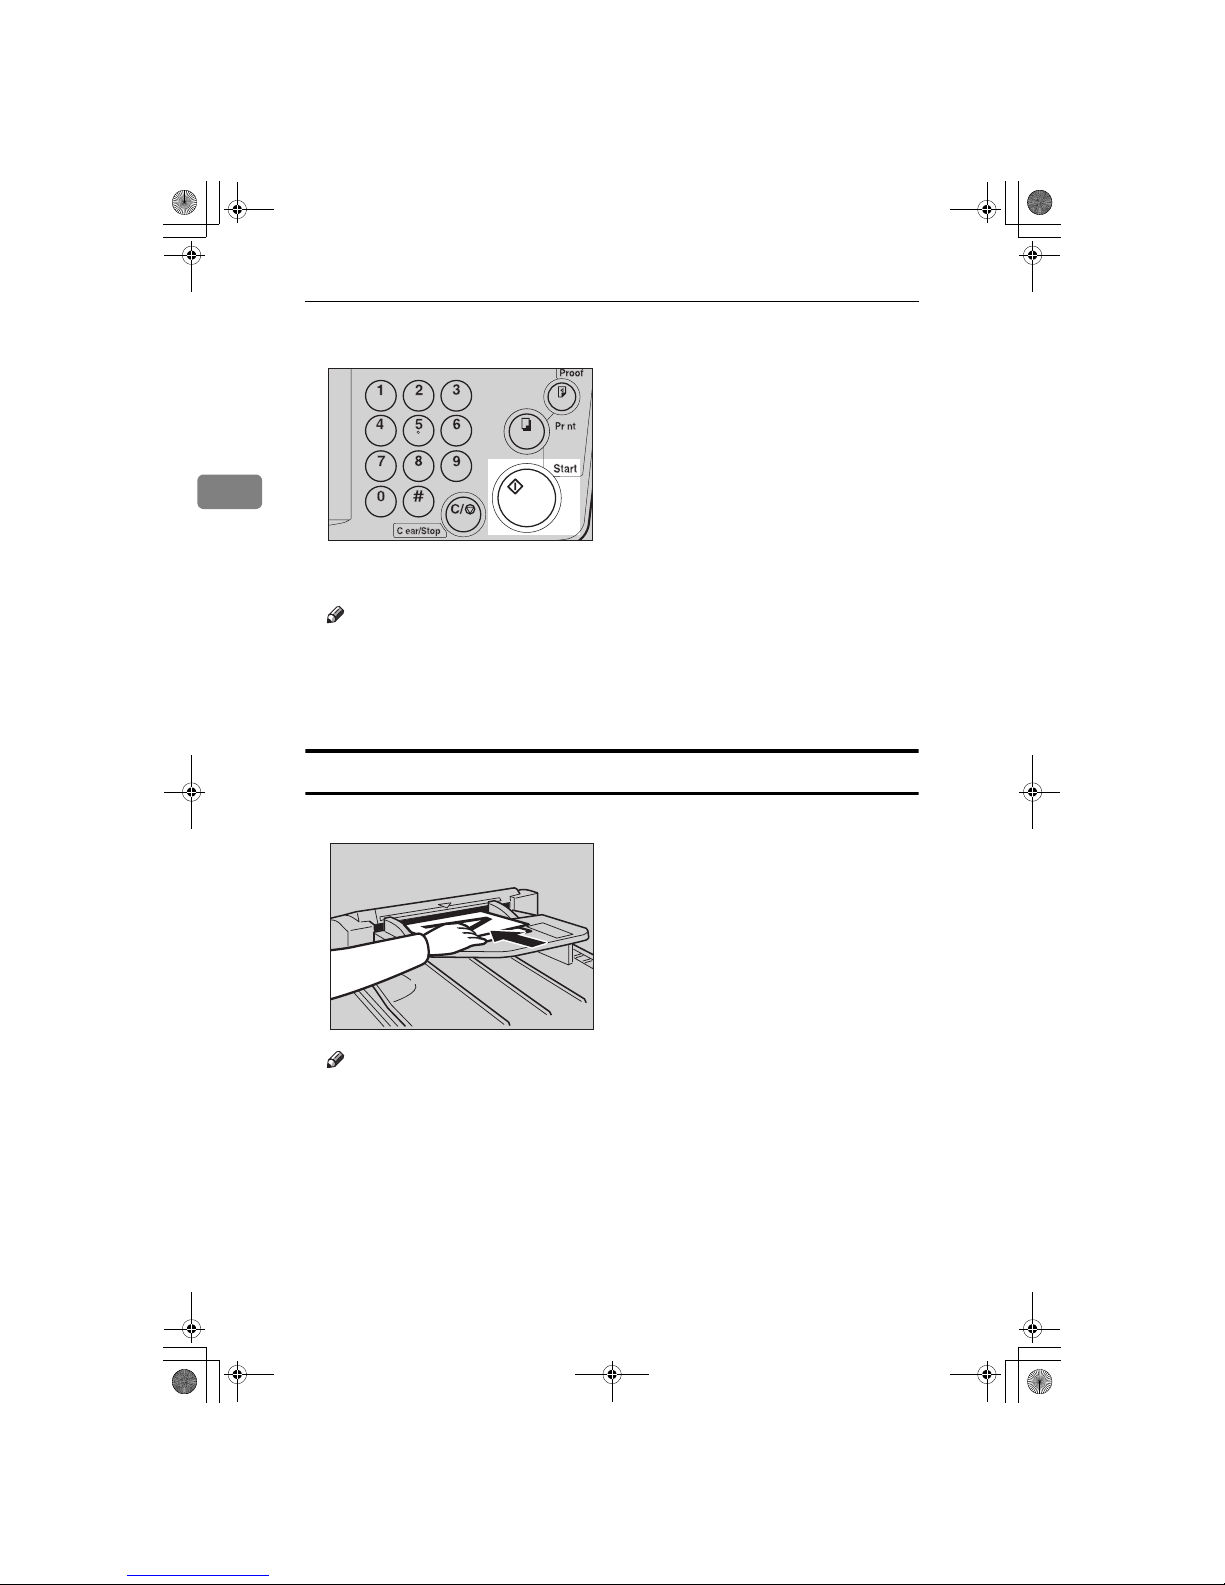
Optional Functions
46
2
C
Set the desired settings and press the {{{{
Start
}}}} key.
D
Make your prints.
Note
❒ If the next original has been set in the document feeder before the machine
stops, that original is fed automatically and a trial print is delivered to the
paper delivery tray after the print of the first original is completed. Check
the image position of the trial print of the next original. If necessary, make
proof prints using the {
Proof
} key to check the image position again.
Combine Copies with the Document Feeder
A
Insert the 2 originals face up, tops pointing towards the operation side.
Note
❒ When you use the optional 30 originals document feeder, the bottom orig-
inal will be printed on the leading part of print.
B
Check the print paper size and the reproduction ratio.
TSLS012N
TSLH013E
SilverV-EN.book Page 46 Monday, May 15, 2000 3:23 PM
Page 85
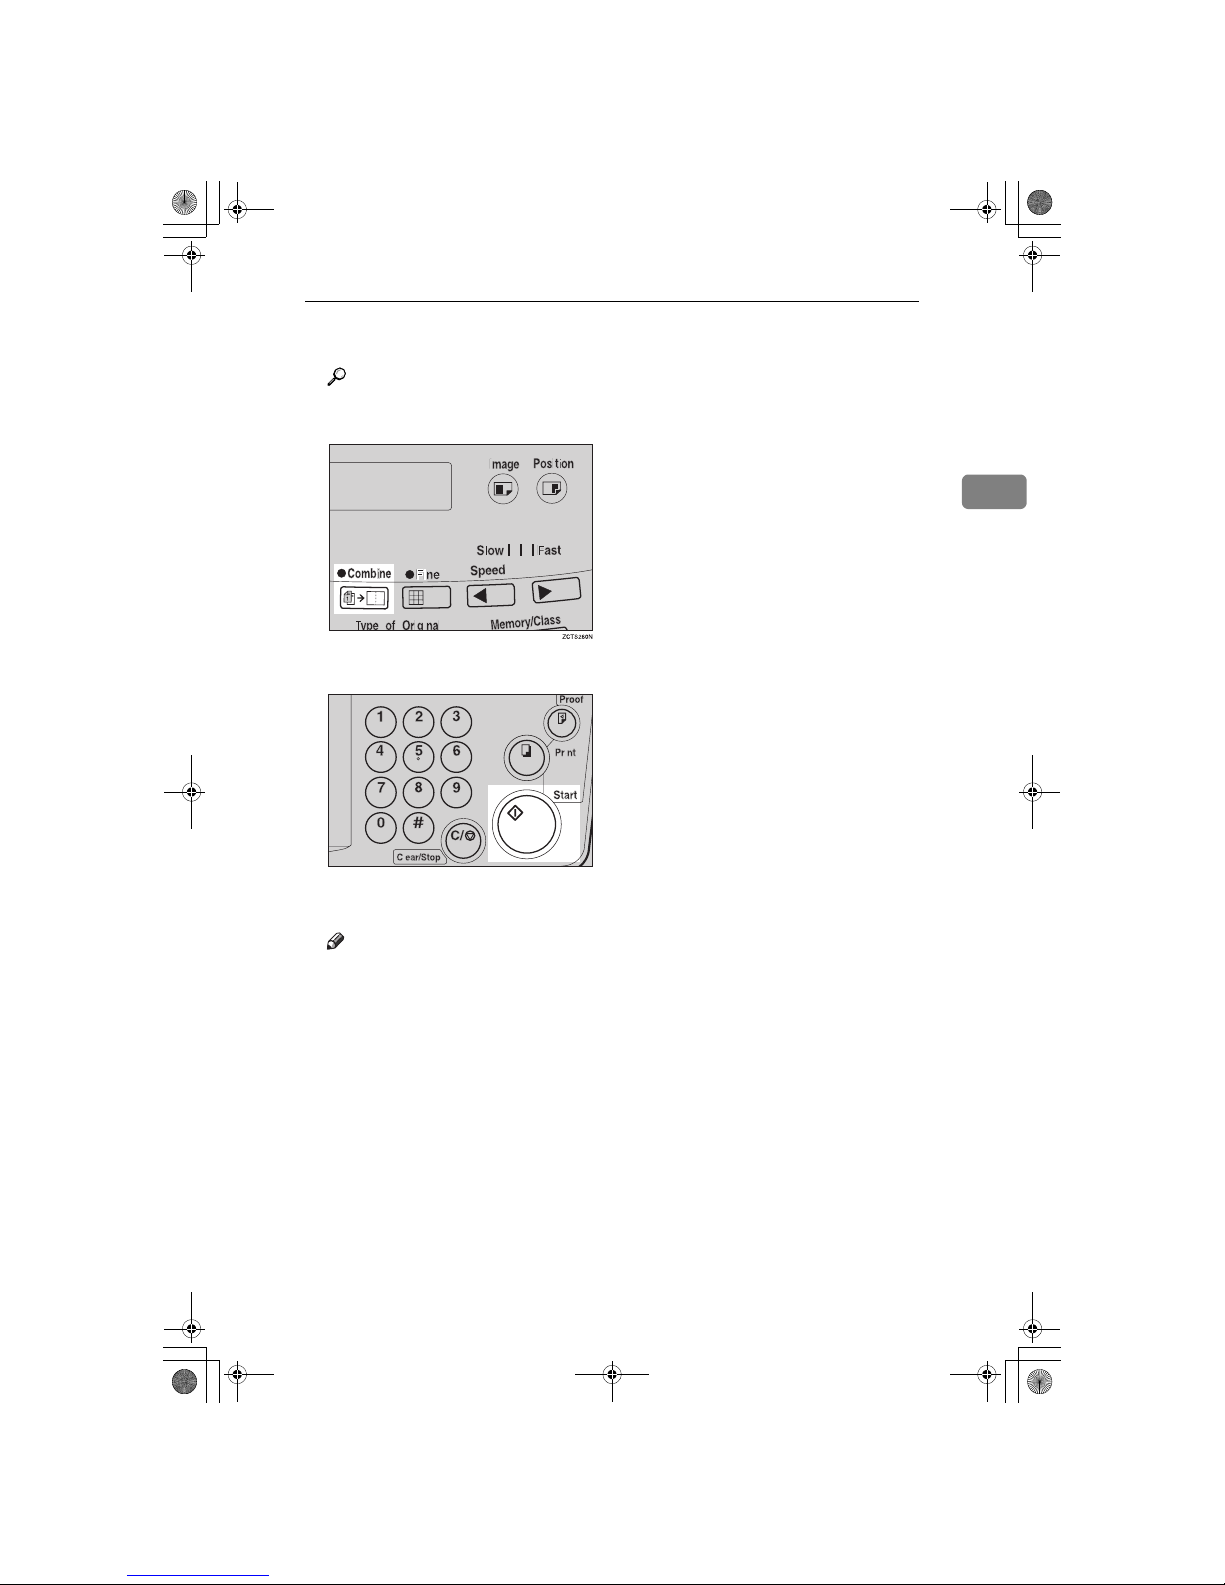
Printing Using the Optional 30 Originals Document Feeder
47
2
C
Press the {{{{
Combine
}}}} key to select your desired mode.
Reference
For the details of this function, See ⇒ P.33 “Combine—Combining 2 Originals onto One Print”.
D
Press the {{{{
Start
}}}} key.
E
Check the image position of the trial or proof print.
Note
❒ If the image position is not correct, adjust it using the {
Image Position
} keys
(see ⇒ P.9 “Shifting the Print Image Position Forward or Backward”) or the
side tray fine adjusting dial (see ⇒ P.10 “Shifting the Print Image Position to
the Right or Left”).
❒ After the first original is on the master, the second original is fed.
❒ If you set only one original, the beeper sounds after the first original is on
the master. Set the second original and the desired image settings. Then,
press the {
Start
} key.
TSLS012N
SilverV-EN.book Page 47 Monday, May 15, 2000 3:23 PM
Page 86
Optional Functions
48
2
F
Enter the number of prints with the number keys.
G
Make your prints.
Memory Mode with the Document Feeder
Note
❒ To prevent original misfeeds, do not set originals of different sizes.
❒ Do not set more than 30 originals at one time in the optional 30 originals doc-
ument feeder.
A
Press the {{{{
Memory/Class
}}}} key to light the Memory indicator.
B
With the number keys, enter the desired number of prints for the first original.
TSLS011N
TSLS011N
SilverV-EN.book Page 48 Monday, May 15, 2000 3:23 PM
Page 87
Printing Using the Optional 30 Originals Document Feeder
49
2
C
Press the {{{{qqqq}}}} key.
This stores the number of prints to be made for the first original in memory 1.
Note
❒ When the number of prints in each set is the same, it is not necessary to in-
put the number of prints for each group in memory. Simply select Auto
Cycle mode and enter the desired number of prints once.
D
Set your originals face up into the document feeder.
Note
❒ When you use the optional 30 originals document feeder, the originals are
fed from the bottom of the stack. Make sure that the originals are set in the
correct sequence with the first original on the bottom.
E
Press the {{{{
Start
}}}} key.
TSLS01TN
TSLH013E
TSLS012N
SilverV-EN.book Page 49 Monday, May 15, 2000 3:23 PM
Page 88
Optional Functions
50
2
F
Check the image position of the trial or proof print.
Note
❒ If the image position is not correct, adjust it using the {
Image Position
} keys
(see ⇒ P.9 “Shifting the Print Image Position Forward or Backward”) or the
side tray fine adjusting dial (see ⇒ P.10 “Shifting the Print Image Position to
the Right or Left”).
G
Turn on the optional tape dispenser power switch.
H
Press the {{{{
Auto Cycle
}}}} key.
Note
❒ In Auto Cycle mode, printing starts automatically after a trial print is de-
livered.
TSLP013E
On
Off
SilverV-EN.book Page 50 Monday, May 15, 2000 3:23 PM
Page 89
Printing Using the Optional 30 Originals Document Feeder
51
2
I
Press the {{{{
Print
}}}} key.
Note
❒ After the last page of each set is fed out to the paper delivery tray, the tape
dispenser drops a strip of paper on the top of the paper stack. The next cycle begins.
TSLS014N
SilverV-EN.book Page 51 Monday, May 15, 2000 3:23 PM
Page 90
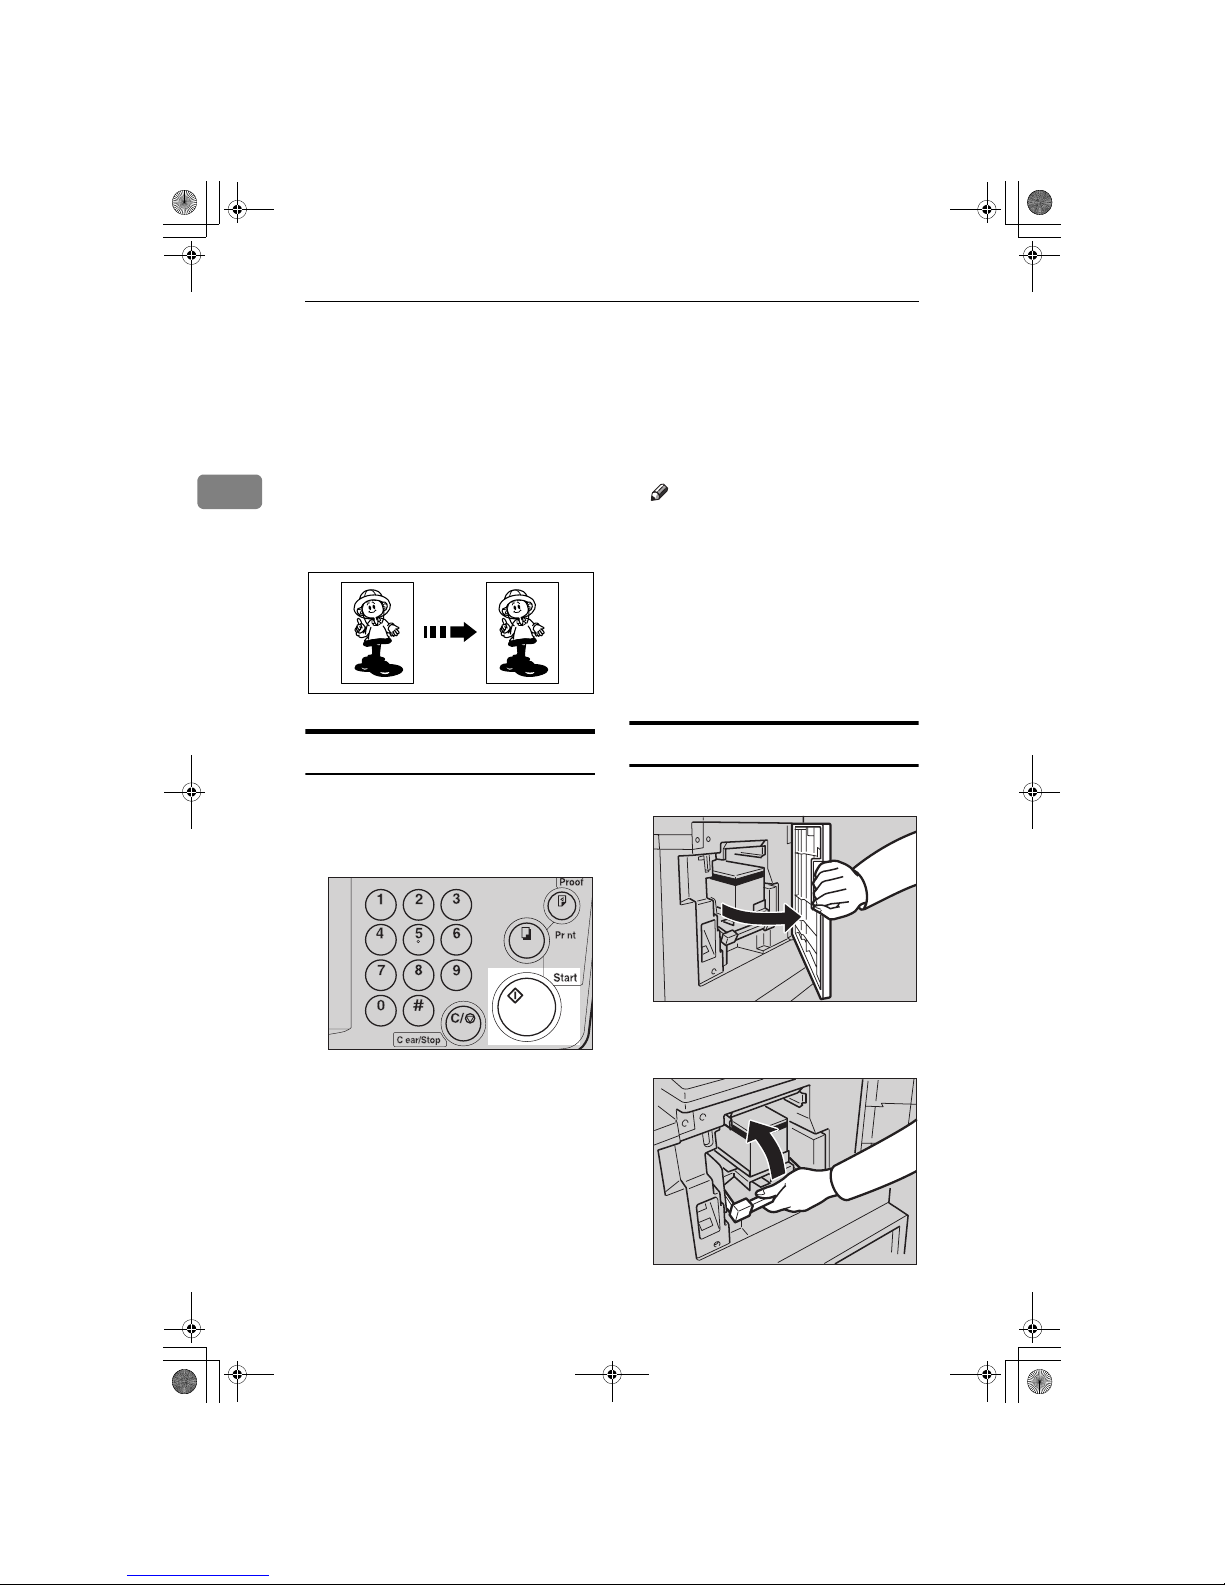
Optional Functions
52
2
Color Printing Using the Optional Color
Drum
Color drum units (red, blue, green,
brown, yellow, purple, navy, maroon, orange, teal and gray) are available as options in addition to the
standard black unit. For making color
prints, a separate drum unit is necessary for each color.
Making Color Prints
A
Make sure that the COLOR is
shown in the guidance display.
B
Press the {{{{
Start
}}}} key.
C
Check the image position of the
trial or proof print.
Note
❒ If the image position is not cor-
rect, adjust it using the {
Image
Position
} keys (see ⇒ P.9 “Shift-
ing the Print Image Position Forward or Backward”) or the side
tray fine adjusting dial (see ⇒
P.10 “Shifting the Print Image Po-
sition to the Right or Left”).
D
Make your prints.
Changing the color Drum Unit
A
Open the front door.
B
Lift the lock lever until it locks in
position.
GRCOPR0E
TSLS012N
TSLH01IE
TSLH01KE
SilverV-EN.book Page 52 Monday, May 15, 2000 3:23 PM
Page 91
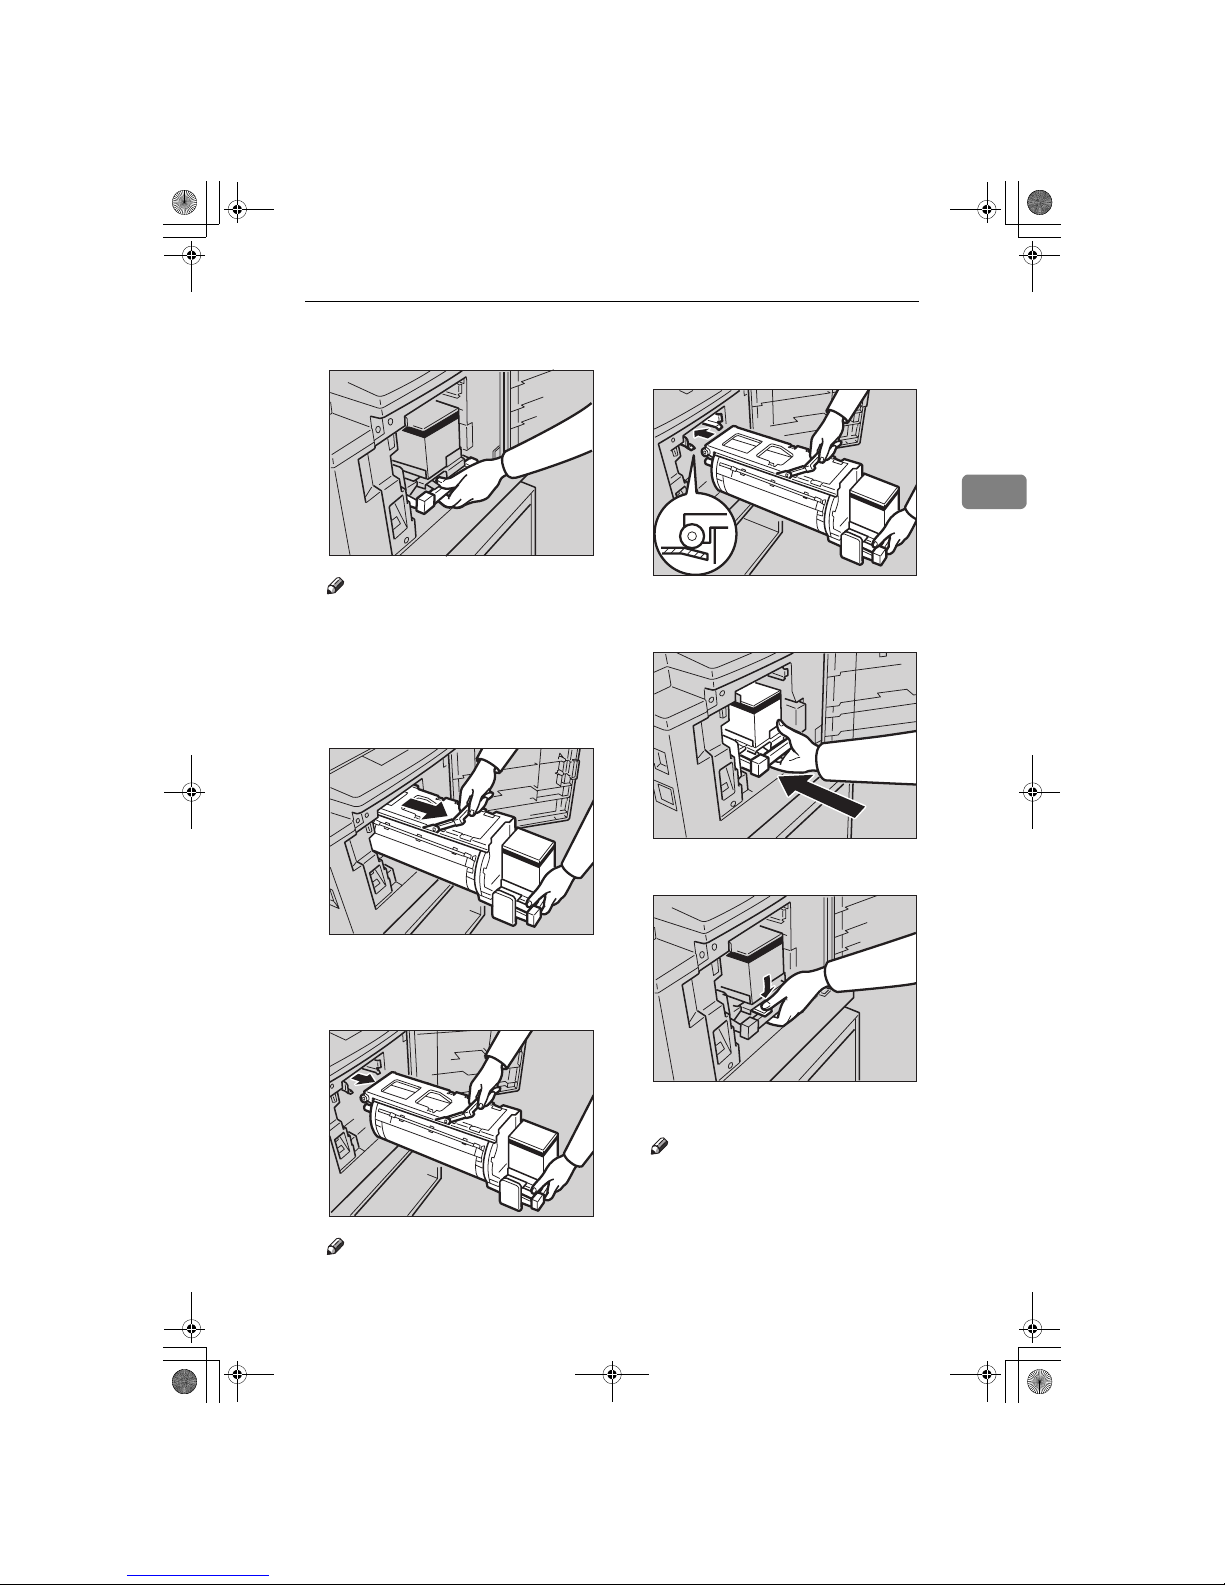
Color Printing Using the Optional Color Drum
53
2
C
Pull out the drum unit handle.
Note
❒ If you cannot pull out the drum
unit, push the drum unit handle, then pull out the drum unit.
D
Hold the rail on the drum and
slide out the drum while pulling
the release towards you.
E
Remove the drum unit from the
machine while holding the upper
drum stay.
Note
❒ Be careful not to let the drum
unit fall.
F
Insert the color drum unit along
the guide rail.
G
Slide in the drum unit until it
locks in position.
H
Lower the drum unit lock lever.
I
Close the front door.
Note
❒ Make sure that the Cover Open
indicator (M) turns off, and the
COLOR is shown in the guidance display.
TSLH01LE
TSLH01FE
TSLH01GE
TSLH01PE
TSLH01HE
TSLH027E
SilverV-EN.book Page 53 Monday, May 15, 2000 3:23 PM
Page 92
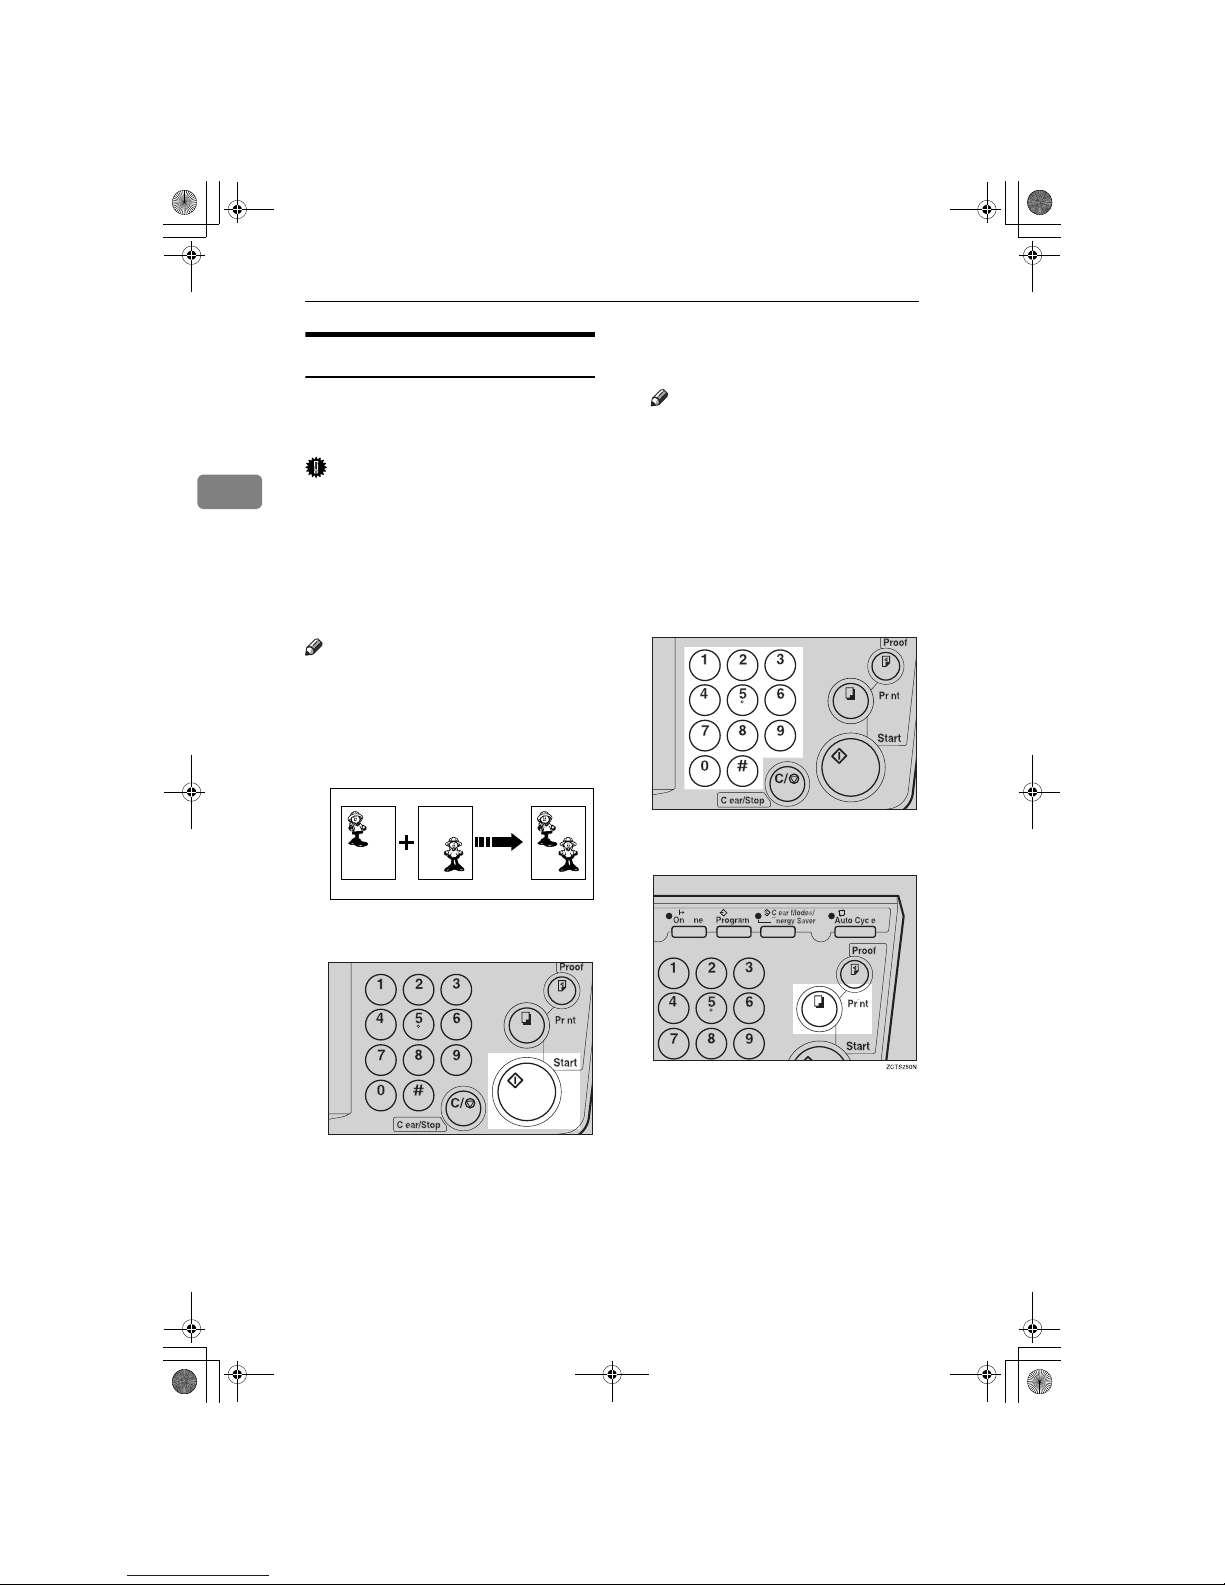
Optional Functions
54
2
Printing in Two colors
After printing in one color, you can
print in another color on the same
side of the print.
Important
❒ Leave the prints for a while before
printing on them again to let the
ink dry.
❒ If the prints are not dry, the paper
feed roller might become dirty. In
this case, wipe off the roller with a
cloth.
Note
❒ You cannot print in two colors at
one time.
A
Prepare the two originals. Set the
first original on the exposure
glass.
B
Press the {{{{
Start
}}}} key.
C
Check the image position of the
trial or proof print.
Note
❒ If the image position is not cor-
rect, adjust it using the {
Image
Position
} keys (see ⇒ P.9 “Shift-
ing the Print Image Position Forward or Backward”) or the side
tray fine adjusting dial (see ⇒
P.10 “Shifting the Print Image Po-
sition to the Right or Left”).
D
Enter the number of prints with
the number keys.
E
Press the {{{{
Print
}}}} key.
GRPREP0E
TSLS012N
TSLS011N
SilverV-EN.book Page 54 Monday, May 15, 2000 3:23 PM
Page 93
Color Printing Using the Optional Color Drum
55
2
F
Remove the prints from the paper
delivery tray and set them on the
paper feed tray again as shown in
the illustration.
G
Exchange the drum unit. See ⇒⇒⇒⇒
P.52 “Changing the color Drum
Unit”.
H
Set the second original and press
the {{{{
Start
}}}} key.
I
Check the image position.
J
Press the {{{{
Print
}}}} key.
TSLY019E
TSLH01QE
TSLS012N
SilverV-EN.book Page 55 Monday, May 15, 2000 3:23 PM
Page 94
Optional Functions
56
2
SilverV-EN.book Page 56 Monday, May 15, 2000 3:23 PM
Page 95
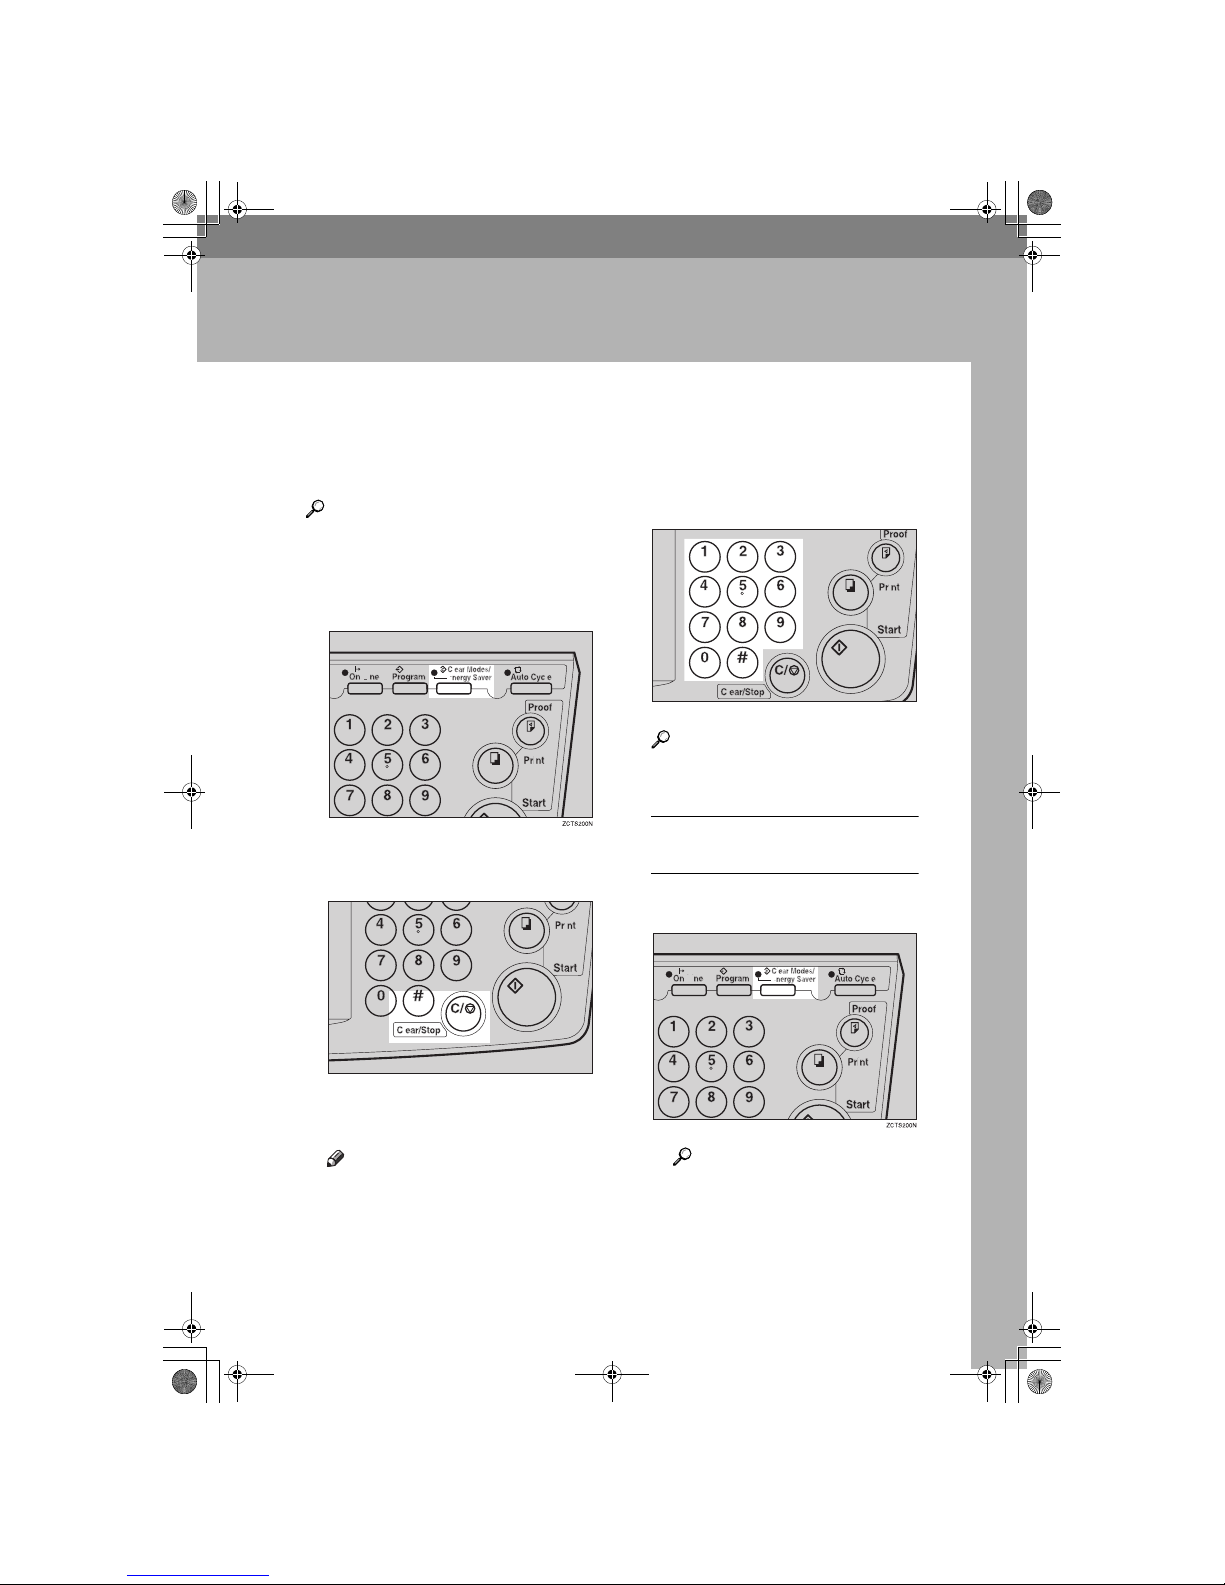
57
3. Service Program Mode
Accessing Service Programs
The service programs can be set by
following this procedure.
Reference
For the service program menu, see
⇒ P.59 “Service Program Menu”.
A
Press the {{{{
Clear Modes/Energy Sav-
er
}}}} key.
B
Hold down the {{{{
Clear/Stop
}}}} key
for at least 3 seconds.
The SP-mode display appears on
the guidance display.
Note
❒ If you press the wrong key, try
pressing the above keys from
the beginning.
C
With the number keys, enter the
desired service program number
(SP No.).
Reference
For the SP No., see ⇒ P.59 “Service Program Menu”.
When you want to leave the
service program mode
A Press the {{{{
Clear Modes/Energy
Saver
}}}} key.
Reference
If you want to change the settings of a selected service
program, see ⇒ P.58 “Chang-
ing the Settings of Service Programs”.
TSLS01AN
TSLS011N
SilverV-EN.book Page 57 Monday, May 15, 2000 3:23 PM
Page 96
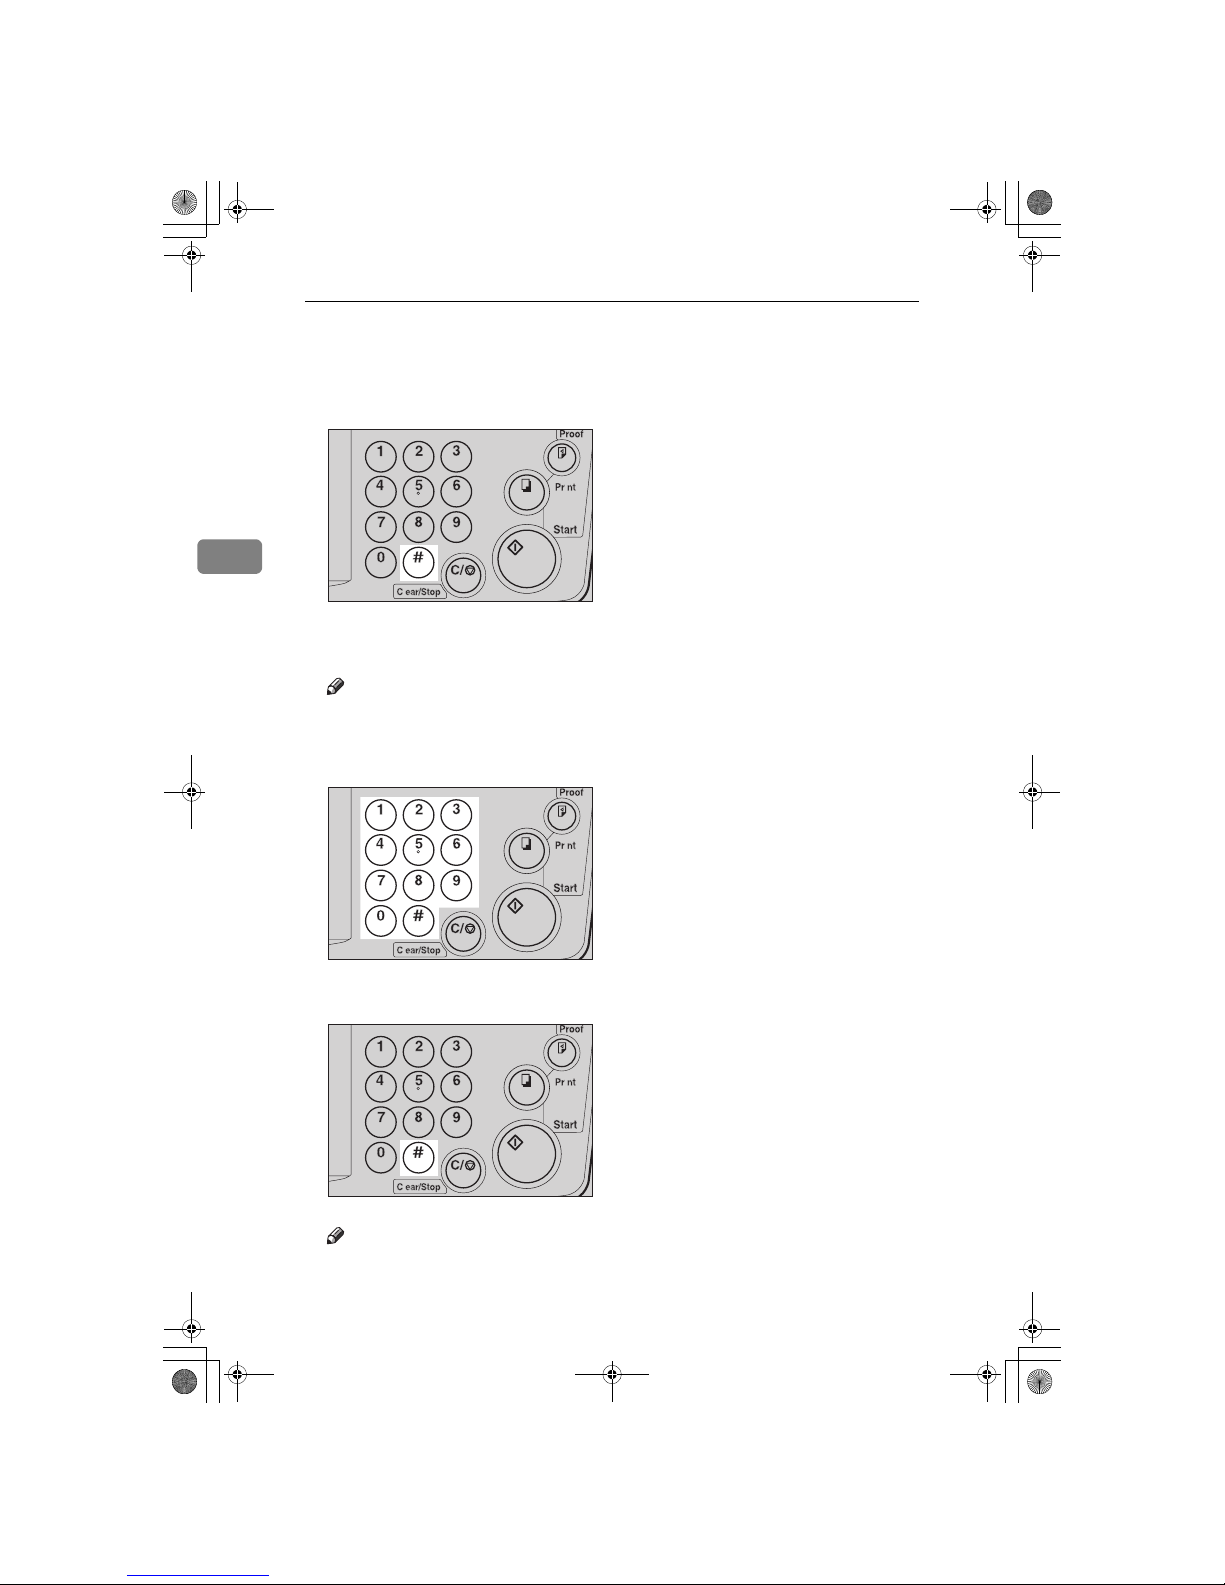
Service Program Mode
58
3
Changing the Settings of Service Programs
A
After entering the desired SP No., press the {{{{qqqq}}}} key.
The value or mode set at the factory will be displayed at the end of the second
line on the guidance display.
Note
❒ If you designate the wrong SP No., press the {
Clear Modes/Energy Saver
}
key. Then, re-enter the desired SP No.
B
Enter the desired value or mode with the number keys.
C
Press the {{{{qqqq}}}} key to store the desired value or mode.
Note
❒ If you enter the wrong value or mode, press the {
Clear Modes/Energy Saver
}
key. Then, go back to step A.
TSLS01TN
TSLS011N
TSLS01TN
SilverV-EN.book Page 58 Monday, May 15, 2000 3:23 PM
Page 97
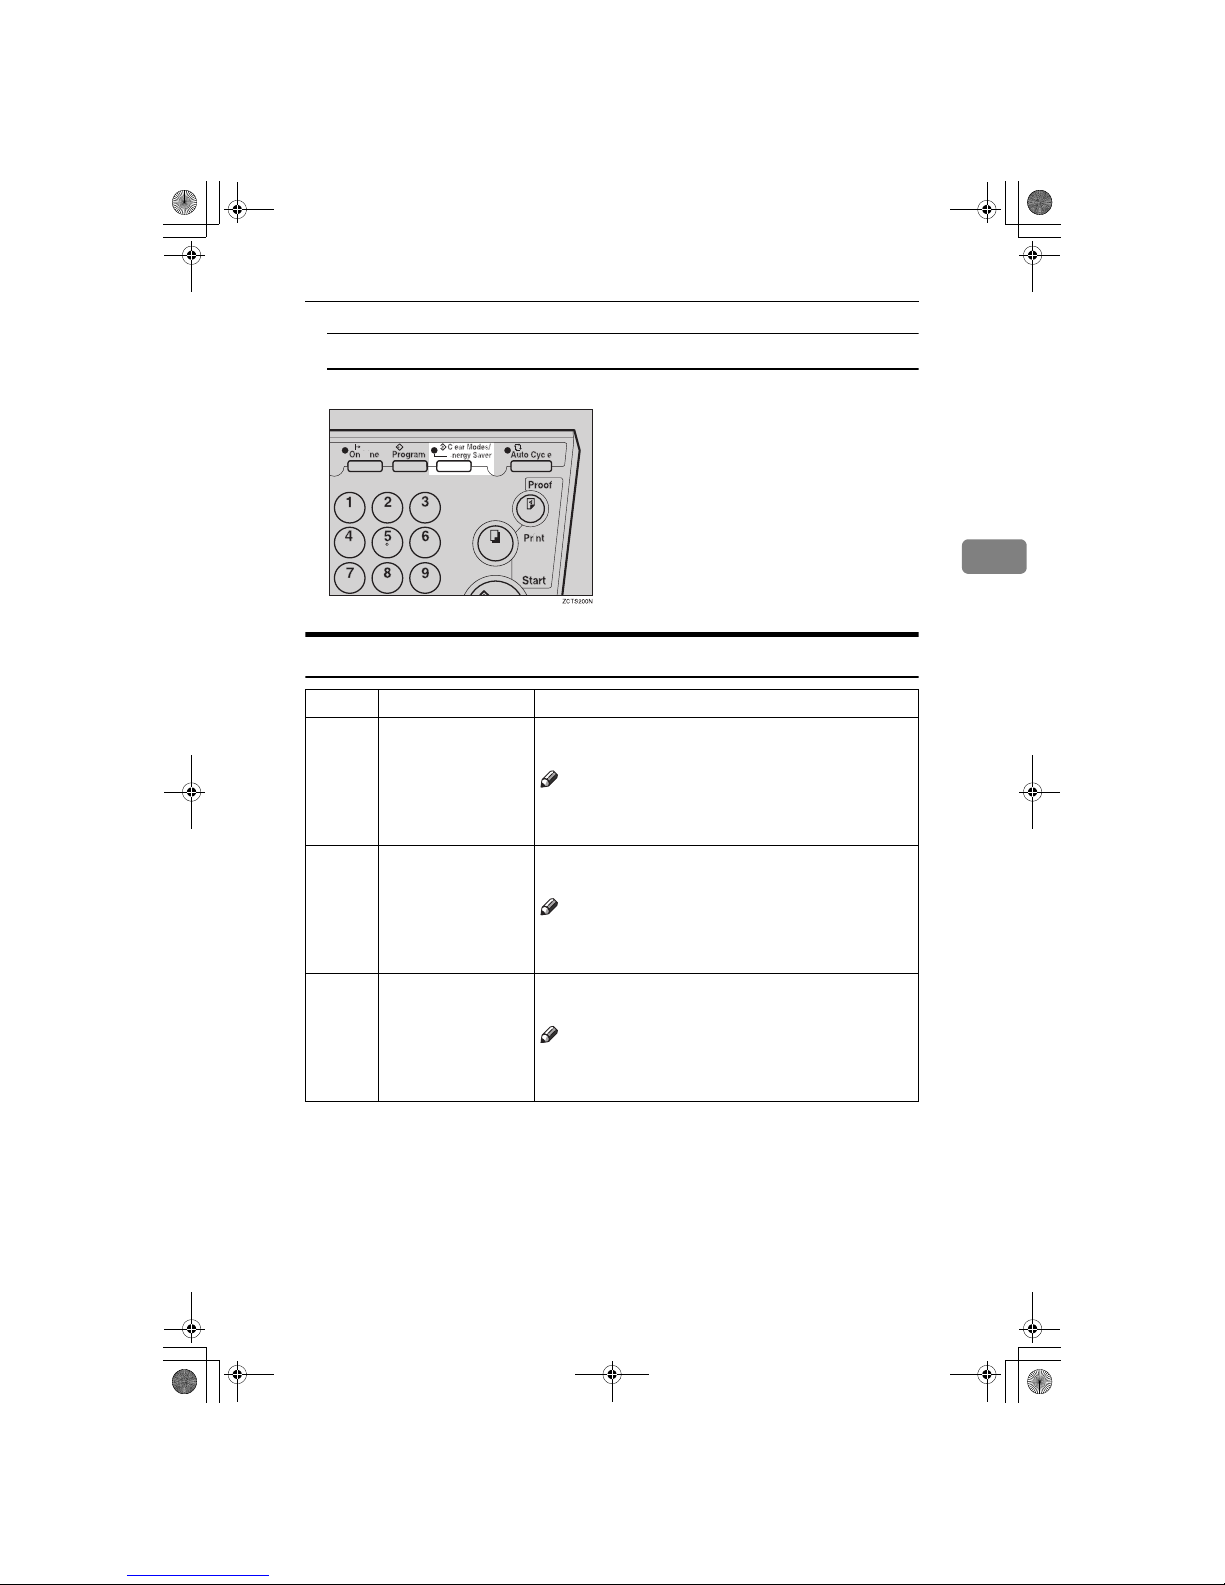
Changing the Settings of Service Programs
59
3
When you want to leave the service program mode
A Press the {{{{
Clear Modes/Energy Saver
}}}} key.
Service Program Menu
SP No. Mode Function
5 Tape Marker Off Specifies whether the optional tape dispenser can be
used.
Note
❒ Default: 0
❒ Adjustment value: 0: No 1: Yes
10 Min. Print Specifies the minimum number of prints that can be
input with the number keys.
Note
❒ Default: 0
❒ Adjustment value: 0 to 9999
11 Max. Print Specifies the maximum number of prints that can be
input with the number keys.
Note
❒ Default: 0
❒ Adjustment value: 0 to 9999
SilverV-EN.book Page 59 Monday, May 15, 2000 3:23 PM
Page 98
Service Program Mode
60
3
12 Set Language If you want to change the language used by the guid-
ance display, select the language version.
Note
❒ Default: 1
❒ Adjustable value:
• 0: Japanese
• 1: English
• 2: German
•3: French
• 4: Italian
• 5: Spanish
• 6: Chinese
• 7: Dutch
• 8: Portuguese (BRAZIL)
13 Set Size Mode Change the size mode.
Note
❒ Default: 0
❒ Adjustment value: 0: mm 1: Inch
20 Buzzer On Turns the buzzer ON or OFF.
Note
❒ Default: 0
❒ Adjustment value: 0: No 1: Yes
21 Prints/Master Cost The optional key counter usually counts the number
of prints made regardless of the number of masters
used. For accounting purposes, it is possible for the
key counter to be incremented by a value between 0
and 50 whenever a new master is used.
Example: The key counter is adjusted to increase by
20 for each master fed. If 100 copies have been made
and the master is replaced, the key counter will increase by 120.
Note
❒ Default: 0
❒ Adjustment value: 0 – 50
SP No. Mode Function
SilverV-EN.book Page 60 Monday, May 15, 2000 3:23 PM
Page 99
Changing the Settings of Service Programs
61
3
25 Clear 2 In 1 By default, when master making is finished in Com-
bine Copies mode, this mode stays selected for the
next master making.
If you want master making turned off, select “1”.
Note
❒ Default: 0
❒ Adjustable value: 0: No 1: Yes
❒ Even if you select “1” in this mode, Combine Cop-
ies mode is not cleared when the next original are
set in the optional document feeder.
❒ For details about Combine Copies, see ⇒ P.33
“Combine—Combining 2 Originals onto One Print”.
29 Pht Backgrnd Cor-
rect
When you make prints in Photo or Letter/Photo
mode, the background of the prints might become
dirty. You can prevent this using this function.
Note
❒ Default: 0
❒ Adjustment value: 0: No 1: Yes
40 Original Specifies the image mode at power on.
Note
❒ Default: 0
❒ Adjustment value:
• 0: Letter mode
• 1: Letter/Photo mode
• 2: Photo mode
41 Image density Specifies the image density at power on.
Note
❒ Default: 1
❒ Adjustment value:
•0: Light
• 1: Standard
•2: Dark
•3: Darker
SP No. Mode Function
SilverV-EN.book Page 61 Monday, May 15, 2000 3:23 PM
Page 100
Service Program Mode
62
3
42 Print Speed Specifies the printing speed at power on.
Note
❒ Default: 2
❒ Adjustment value:
• 1: 80 sheets/minute
• 2: 100 sheets/minute
• 3: 130 sheets/minute
43 Auto Cycle Mode Specifies whether Auto Cycle mode is selected at
power on.
Note
❒ Default: 1
❒ Adjustment value: 0: No 1: Yes
81 Quality Start No. You can select how many times Quality Start mode is
carried out for each master making.
When you set the Quality Start function, the bold let-
ter or solid images might be light.
Note
❒ Default: 1
❒ Adjustment value: 0 to 3 times
82 Skip Feed No. When you use the Skip Feed Printing function, you
can select how many times the drum rotates while
one sheet of paper is fed.
Note
❒ Default: 2 times
❒ Adjustment value: 1 to 9 times
84 Auto Multi copy If you set an original on the exposure glass and press
the {
Combine
} key and {
Start
} key, two identical im-
ages are printed on the one sheet.
Note
❒ Default: 0
❒ Adjustment value: 0: No 1: Yes
❒ For details about Combine, see ⇒ P.33 “Combine—
Combining 2 Originals onto One Print”.
SP No. Mode Function
SilverV-EN.book Page 62 Monday, May 15, 2000 3:23 PM
 Loading...