

Page 1
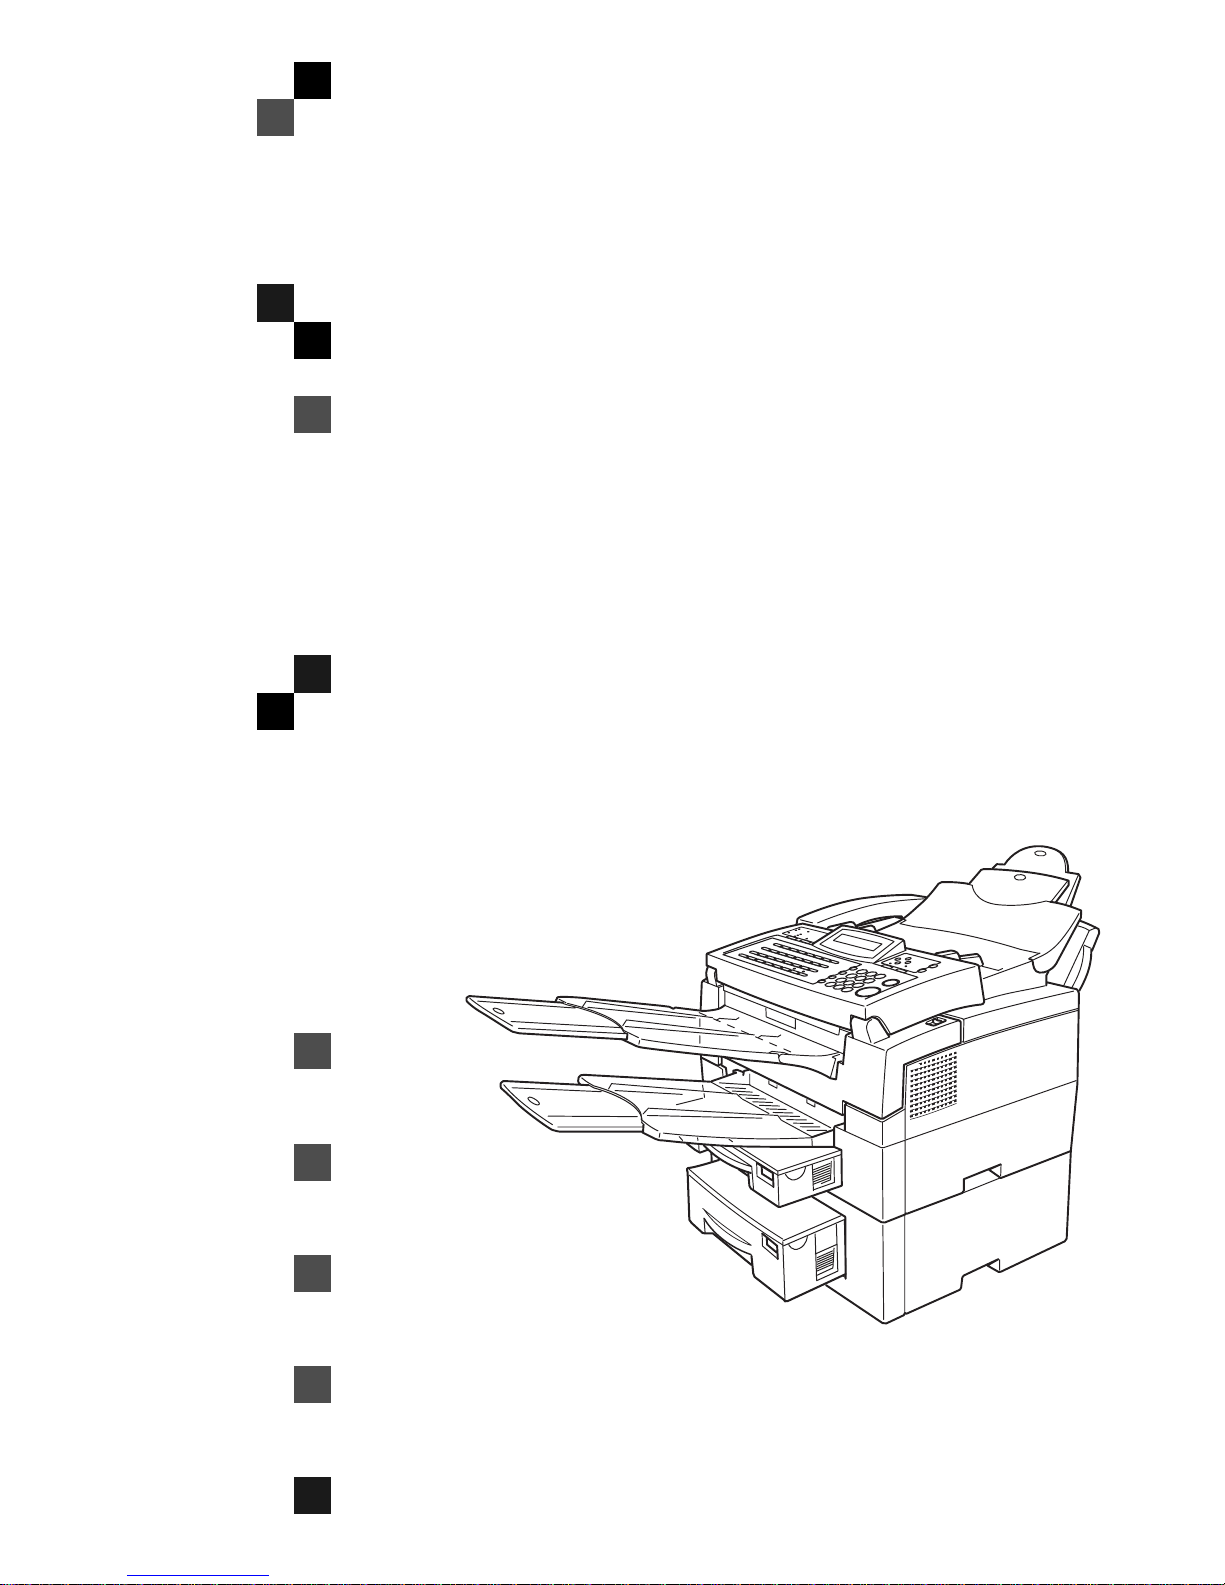
3720/9920
Operator's Manual
TSTH120N
Read this manual carefully before you use this product and keep it handy for future
reference.
For safety, please follow the instructions in this manual.
Page 2

Optional Equipment
HANDSET TYPE 100( Telephone Handset )
❖❖❖❖
This permits voi ce comm unication (over th e PSTN).
PAPER FEED UNIT TYPE 180( Second Cassette )
❖❖❖❖
A second paper feed unit can be added to the base machine.
BYPASS FEEDER TYPE 180( Multi-purpose Feeder )
❖❖❖❖
A third paper feed unit can be added to the base machine.
FAX EXP ANSION CARD TYPE 10
❖❖❖❖
A 1-Mbyte memory card can be added.
FAX EXP ANSION CARD TYPE 20
❖❖❖❖
A 1-Mbyte memory card can be added.
PC INTERFACE KIT TYPE 180
❖❖❖❖
This allows you to use the machine as a PC-Printer or PC-Scanner for an IBM or compatible personal computer. Viewing and editing various fax settings from your PC can be also available.
Page 3

USA
FCC Requirements
❖❖❖❖
1. This equipment c omplies with Par t 68 of the FCC rul es. On the c over o f this equipmen t is a l abel
that contains, among other information, the FCC registration number and ringer equivalence
number (REN) for this equipment. If requested, this information must be provided to the telephone company.
2. This equipment uses t he fol lowing USOC jack: RJ11C
3. The REN is used t o de termin e t he quant ity o f d evices which may be connec ted t o the t elephon e
line. Excessi ve REN's on the telep hone line may resul t in the device s not ringing in resp onse to
an incoming call. In most, but not all areas, the sum of the REN's should not exceed five (5.0).
Contact the tele phone company to determine the maximum REN for the calling area.
4. If this equipm ent causes harm to the telephone network, the telephone company will notify you
in advance that temporary discontinuance of service may be required. If advance notice is not
practical, the telephone com pany will noti fy the customer as soon as possible. Also, you will be
advised your right to file a complaint with the FCC if you believe it is necessary.
5. The telephone company may make changes in its facilities, equipment, operations, or procedures that could affect the operation of the equipment. If this happens, the tel ephone company
will provide advance notice in order to make necess ary modificatio ns in order to maintain uninterrupted ser vice.
6. In the event of operation problems (document jam, copy jam, communication error indication),
refer to the solving problems section in this manual.
7. If you cannot correct the problem, please contact the SAVIN CORP. CUSTOMER SUPPORT
at 1-800-756 -879 8 for repai r and war ran ty i nformat ion. If it i s causin g ha rm to the t el ephone ne twork, the telephone company may request you to disconnect the equipment from the network
until the problem is resolved.
8. This equipment ca nnot be used tel ephone com pany- pro vided coi n servi ce. Conn ect ion to Part y
Line Service is subject to state tariffs.
WHEN PR OGRAMM ING EM ERGE NCY NUMB ERS AND/ OR MAKI NG TEST CALLS T O
❖❖❖❖
EMERGE NCY NUMBERS:
1. Remain on the line and briefly explain to the dispatcher the reason for the call before hanging
up.
2. Perform such activities in the off-peak hours, such as early morni ng hours or late evenings.
CANADA
The Industry Canada label identifies certified equipment. This certification means that the equipment
meets telecommunications network protective, operational, and safety requirements as prescribed in
the appropriate Terminal Equipment Technical Requirements document(s). The department does not
guarantee the equipment will operate to th e user's satisfaction.
Before installing this equipment, users should en sure that it is permissible to be connect ed to the facilities of the local telecommunications compa ny. The equipment m ust also be installed using an acceptable method of connection. The customer should be aware that compli ance with the above conditions
may not prevent degradation of service in some situations.
Repairs to certified equipment should be coordinated by a representative designated by the supplier.
Any repairs or alterat ion s made by the use r to t his e quipm ent, o r equi pment malfun ctions , ma y give th e
telecommunications company cause to request the user disconnect the equipment.
User should ensure for their own protection that the electrical ground connections of the power utility,
telephone lines, and internal metallic water pipe system, if present, are connected together. This precaution may be particularly important in rural areas.
Caution: Users should not attempt to make such connections themselves, but should contact the appropriate el ectric inspection authority, or electrician, as appropri ate.
The Ringer E quival ence Num ber (REN) assign ed t o each te rminal device pr ovides a n indi cat ion of the
maximum number of terminals allowed to be connected to a telephone interface. The termination on
an interface may consist of any combination of device subject only to the requirement that the sum of
the Ringer Equivalence Numbers of all the devi ces does not exceed 5.
Page 4
Notice
R
CAUTION:
Use of controls, adjustments or performance of procedures other than those
specified herein may result in hazardou s radiation exposure.
Shielded interconnect cables must be employed with this equipment to ensure
compliance with the pertinent RF emission limits governing this device.
Although this equipment can use either loop disc onnect or DTMF signalling,
only the performance of the DTMF signalling is subject to regulatory requirements for correct operat ion. It is theref ore strongly recommended that the equipment is set to use DTMF signalling for access to public or private emergency
services. DTMF signalling also p rovides fast er call set up.
Direct (o r indirec t reflected eye con tact with th e laser beam may ca use serious eye
damage. Safety precautions and interlock mechanisms have been designed to prevent
any possible laser beam exposure to the operator.
Note
Some illustrations may be slightly different from you r mach in e .
❒
Certain options may not be available in some countries. For details, please
❒
contact your local dealer.
Notice about the Telephone Consumer Protection Act (Valid in USA
----
only).
The Telephone Consumer Protection Act of 1991 among other things makes it
unlawful for any person to send any message via a telephone fax machine unless
such message clearly contains in a margin at the top or bottom of each transmitted page or on the first page of the transmission, the date and time it is sent and
an identification of the business, other entity, or other individual sending the
message and the telephone number of the sending machine or such business,
other entity or individual. This information is transmitted with your docu ment
by the TTI (Transmit Terminal Identification) feature. In order for you to meet
the requirement, your machine must be programmed by following the instructions in the accompanying Operation Manual. In particular, please refer to the
chapter of Installation. A lso refer to the TTI (Tran smit Terminal Ident ification)
programming procedure to enter the business identification and telephone
number of the terminal or business. Do not forget to set the date and time.
Thank you.
i
Page 5

ENERGY SAVING INFORMATION
----
As an Energy Star Partner, we have determined that this fax model meets Energy Star guidelines for energy efficiency. This product was designed to reduce the
environmental impact associated with fax equipment. This is accomplished by
means of energy saving features such as power saving mode. Please see applicable sections of operating instructions for details.
M001
Laser Safety:
The Center for Devices and Radiological H e alth (CD R H) prohibits the repa ir of
laser-based optical unit in the field. The optical housing unit can only be repaired in a factory or at a location with the requ isite equipment. The laser subsystem is replaceable in the field by a qu alified Customer Engineer. The laser
chassis is not repairable in the field. Customer engineers are therefore directed
to return all chassis and laser subsystems to the factory or service depot when
replacement or the optical subsystem is required.
Operator Safety :
This machine is considered a CDRH class I laser device, safe for office/ EDP use.
The machine contains two 5-milliwat, 765 - 805 nanometer wavelength, GaAIAs
laser diodes. Direct (or indirect reflected) eye contact with the laser beam might
cause serious eye damage. Safety precautions and interlock mechanisms have
been designed to prevent any possible laser beam exposure to the operator.
In accordance with ISO Standard 7001, this machine uses the following symbols
for the main power swit ch:
• a means POWER ON.
• c means STAND BY.
ii
Page 6
Note to users in the United States of Am eri ca
Notice:
----
This equipment has been tested and found to comply with the limits for a Class
B digital device, purs uant to Part 15 o f the F CC Rules . These li mits are desig ned
to provide reasonable protection against harmful interference in a residential installation. T his equi pme nt ge nerat es, us es and can rad iat e radi o fr eq uency energy and, if not installed and used in accordance with the instructions, may cause
harmful interference to radio communicat ions. Howe ver, there is no guarantee
that interference will not occur in a particular installation. If this equipment does
cause harmful interference to radio or television reception, which can be determined by turning the equipment off and on, the user is encouraged to try to correct the interference by one more of the following measures:
• Reorient or relocate the receiving antenna.
• Increase the separation between the equipment and receiver.
• Connect the equipment into an outlet on a circuit different from that to which
the receiver is connected.
• Consult the dealer or an experienced radio /TV technician for help.
Warning
----
Changes or modifications not expressly approved by the party responsible for
compliance could void the user's authority to operate the equipment.
Examples Of Indications
Symbols R mean a si tuation tha t requires you take care.
Symbols v mean “Hot surface”.
Symbols n mean “Do not touch”.
iii
Page 7

TABLE OF CONTENTS
1.Safety
Important Safety Instructions................................................................... 1
When to Call Your Service Representative............................................. 3
Power And Grounding.............................................................................. 4
Power Supply................................................................................................ 4
Grou ndi ng ......... ... .... ... ... ... .... ... ... ... ... .... ......... .... ... ... ... ... .... ... ... ... .... ... ... ... ..... 4
Other Important Informations. .......... ......... ..................................... .......... 5
Genera l ... .... ... ... ... .......... ... .... ... ... ... ... .... ... ... ... .... ... ... .......... ... ... ... .... ... ... ... .... . 5
Cold Weather Power-up................................................................................ 5
Thund e rst orm s..... .... ... ... ... .... ... ... ... ... .... ... ... ... .... ... ... ... ... .......... ... .... ... ... ... .... . 5
Oper at ing P rec a ut ion s .......... ... ... ... ... .... ... ... ... .... ... ... ... ... .......... ... .... ... ... ... .... . 5
Copy Paper ................................................................................................... 6
Symb ol s & Co nv e ntio ns Use d In Thi s Man u al...... ... ... ... .... ... ... ... .... ... ... ... .... . 6
2.Machine Layout
Part Names................................................................................................. 7
Operation Panel......................................................................................... 9
3.Faxing
Recommended Types Of Document...................................................... 11
Correct Size For The Document Delivery Tray ........................................... 11
Page Condition............................................................................................ 12
Memory Transmission And Immediate Transmission......................... 13
Memory Transmiss ion (Memory Indicator Lit)............................................. 13
Immediate Transmission............................................................................. 15
Dialing with the Telephone Directory .......................................................... 16
Receiving Telephone Calls & Fax Messages (Faxes/Phone Calls)..... 17
Switching Between Auto, Fax, and Telephone Mode ................................. 17
Recei v ing th e F ax M ess a ge in the T e leph o ne Mo de..... .... ... ... ... .... ... ... ... ... 17
Setting the Auto Ring Time ......................................................................... 18
Printing Received Messages That Have Been Stored
(Substitute Reception)........................................................................... 19
Faxing A Page With Very Fine Detail..................................................... 20
Resolution & Shading.................................................................................. 20
Optional Features For Transmission..................................................... 21
Sending At A Specific Time (Send Later).................................................... 21
Printing The Page Number (Page Count) ................................................... 21
Sending Your Identification At The Top Of Your Message (TTI)................. 22
Personal Codes........................................................................................... 22
Redialing .................................................................................................. 24
iv
Page 8

Automatic Redialing .................................................................................... 24
Using the AI Redial key............................................................................... 24
Storing & Editing Fax Numbers (Functions 31 & 32)........................... 25
Storing, Editing & Erasing Quick Dial Numbers (Function31)..................... 25
Storing, Editing & Erasing Speed Dial Numbers (Function32).................... 26
Storing & Editing A Group Of Fax Numbers (Function 33) ................. 28
Erasing Groups ........................................................................................... 29
Programming The Group Key..................................................................... 29
Dial Options............................................................................................. 31
Programming The Dial Option Key............................................................. 31
Using the Di a l Opt ion s .......... ... ... ... ... .... ... ... ... .... ... ... ... ... .... ... ... ... .......... ... ... 31
Chain Dialing............................................................................................ 33
Erasing A Stored Message Before It Is Sent (Functions 21 & 22)....... 34
Printing A Stored Message (Function 51)............................................. 35
Confidential Reception .......................................................................... 36
Storing & Editing the Confidential ID........................................................... 36
Printing messages Received into Memory (Function 52)............................ 37
Sending A Fax Using The Handset........................................................ 38
Answering The Telephone...................................................................... 39
If the telephone rings continuously............................................................. 39
Phoning And Faxing On The Same Call................................................ 40
To talk before sending a fax........................................................................ 40
4.Other Features
Verifying Communications, Errors, Counters, Etc............................... 41
Automatically printed reports....................................................................... 41
Report formats ............................................................................................ 42
Coun te rs (fu nction 94).... ... .... ... ... ... ... .... ... ... .......... ... ... ... .... ... ... ... .... ... ... ... ... 43
Programming Keystrokes....................................................................... 44
Storing a keystroke program....................................................................... 44
Labeling a program ..................................................................................... 45
Using a program.......................................................................................... 45
Erasing a program / Changing the program Label...................................... 46
Batch Transmission................................................................................ 47
Changing the batch transmission on/off...................................................... 47
Programming the personal codes ......................................................... 48
Storing a personal code.......................................................................... 49
Editing or erasing a personal code........................................................ 51
Tonal Signals........................................................................................... 52
Using the tone key ...................................................................................... 52
Rejecting messages from senders who don't identify themselves .... 53
v
Page 9

Rejecting or accepting messages from specified senders
(Authorized Reception).......................................................................... 54
About A uth o riz e d Rec e pti o n . ... ... ... ... .... ... ... ... .... ... ... ... ... .... ... .......... ... ... ... ... 54
Entering A List Of Senders To Treat Differently (Function 81).................... 54
Switching authorized reception on / off (Function 62)................................. 54
Cassette Selection................................................................................... 55
About Cassette Selection............................................................................ 55
Entering A List Of Senders To Treat Differently (Function 81).................... 55
Selecting the messages to be printed from the main cassette.................... 55
Selecting the Cassette( Function 62 )......................................................... 55
Entering A List Of Senders To Treat Differently (Function 81)........... 57
Programming the list of senders (Special Senders).................................... 57
Editing the RTI/CSI for the special terminals .............................................. 58
Erasing the special terminal........................................................................ 59
Forwarding............................................................................................... 60
Programming the forwarding feature........................................................... 60
Editin g the for wa rdi n g fea tu re ........ ... .... ... .......... ... ... ... ... .... ... ... ... .... ... ... ... ... 61
Switching forwarding on / off (Function 62)................................................. 63
Selecting which messages to forward......................................................... 63
Switching local printing on / off.................................................................... 64
Enabling and disabling the forwarding mark ............................................... 64
Wild Cards................................................................................................ 65
Receiving Options................................................................................... 66
Reverse Order Printing ............................................................................... 66
Printing A Center Mark................................................................................ 66
Reports You Can Printout Yourself....................................................... 67
Journal (Function 41) .................................................................................. 67
File list (Function 42)................................................................................... 67
Telephone number list (Function 43) .......................................................... 67
Program List ( Function 44 )........................................................................ 68
Saving Energy.......................................................................................... 69
How to start the saving energy mode.......................................................... 69
How to exit the saving energy mode........................................................... 69
Whic h sav ing ene rg y mod e is best fo r you ? ......... ... ... ... .... ... ... ... .... ... ......... 69
Saving Energy With The Power Saving Timer...................................... 71
Setting the Power Saving time ( Function 71 )............................................ 71
Switching the Power Saving Timer on / off ( Function 62 ) ......................... 72
Copying.................................................................................................... 73
Calling To Request A Message (Polling)....................................... ........ 74
Picking up messages stored elsewhere (polling reception) ........................ 74
Oper at ing pr o ced u re ...... ... .... ... ... ... ... .... ... ... ... .... ... ... ... ... .... ... ... ... .......... ... ... 74
Entering a Personal Code........................................................................... 74
User Function Keys................................................................................. 76
Programming a User Function Code........................................................... 76
Using a Function Program .......................................................................... 76
vi
Page 10

Editing a Function Program......................................................................... 77
Deleting a Function Program ...................................................................... 77
Dual Access............................................................................................. 78
5.Maintaining Your Mach ine
Loading Paper In The Main Cassette..................................................... 79
Loading Paper In The Lower Cassette.................................................. 82
Loading Paper In The Optional Multi-purpose Feeder......................... 85
Replacing The Toner Cassette And Cleaning Pad............................... 86
Toner Cassette......................................................................................... 90
Cleaning The Rollers And Scanner........................................................ 91
Changing The Paper Size In The Main Cassette................................... 92
Changing The Paper Size In The Lower Cassette................................ 97
Changing The Paper Size In The Optional Multi-purpose Feeder..... 101
Changing The Paper Size Settings...................................................... 103
6.Troubleshooting
If An Indicator Lights Up On The Operation Panel............................. 105
Other Possible Problems...................................................................... 106
You Want To Remove The Document In The Feeder............................... 106
Clearing a Document Jam .................................................................... 107
Clearing a Copy, Fax, or Print Jam...................................................... 108
Clear a Jam inside the machine................................................................ 108
Clear a Jam in the Cassette Entrance ...................................................... 110
Clear a Jam in the Optional Second Cassette .......................................... 111
Clear a Jam in the Upper Rear Unit.......................................................... 112
Clear a Jam in the Lower Rear Unit.......................................................... 113
If Messages You Receive Don't Fit On Your Paper............................ 115
Breaking Down Large Format Messages.................................................. 115
Length Reduction...................................................................................... 115
Communication Problems.................................. .......... ......... ......... ...... 116
RDS (Remote Diagnostic System)....................................................... 117
Switching RDS On/Off............................................................................... 117
Adjusting the Printing Margins (Function 95)..................................... 118
Operating Difficulties............................................................................ 119
Displayed Error Messages.................................................................... 124
Error Codes............................................................................................ 125
Calling The Service Station.................................................................. 129
Sending A Service Report......................................................................... 129
vii
Page 11

7.Technical Reference
Access Code For Functions 61 To 95.................................................. 131
User Parameters.................................................................................... 132
User Parameter Hints................................................................................ 136
Adjusting The Volume Of Various Features (Function 92)................ 137
Selecting The Display's Language (Function 93)............................... 139
Entering Characters.............................................................................. 140
Entering Symbols...................................................................................... 140
Entering Numbers..................................................................................... 140
Document & Paper Specifications....................................................... 141
Documents (Using The Auto Document Feeder)...................................... 141
Docum en t F e eder Re qu ir em e nt s.......... ... ... ... .... ... ... .......... ... ... ... .... ... ... ... . 141
Paper Requirements ................................................................................. 141
Capabilities............................................................................................ 142
Store d Nu m ber s (L on g Te rm ) ........ ... .... ... ... ... .... ... ... ... .......... ... ... .... ... ... ... . 142
Store d De sti na tion s..... ... ... .... ... ... ... ... .... ... ... ... .... ... ... ... ... .... ... .......... ... ... ... . 142
File Sto rag e....... ... .... ... ... ... .... ... ... ... ... .......... ... .... ... ... ... ... .... ... ... ... .... ... ... .... 14 2
Specifications........................................................................................ 143
Base M ach in e .......... ... ... ... .... ... ... ... ... .... ... ... ... .... ... ......... .... ... ... ... .... ... ... ... . 143
Optio na l Low er Pap er Ca ss et te ........ .... ... ... ... .... ... ... ... ... .... ... .......... ... ... ... . 143
Multi-p ur p o se F eed er..... ... .... ... ... ... ... .... ... ... ... .... ... ... ... ... .... ... ... ... .......... ... . 143
8.Installation
Before Installation................................................................................. 145
Machine Environment........................................................................... 146
Location..................................................................................................... 146
Installing The Toner Cassette ............................................................. 147
Installing The Main Paper Cassette..................................................... 150
Installing The Optional Second Cassette............................................ 152
Attaching The Trays And Document Table......................................... 155
Ventilation Grill Direction........................................................................... 156
Installing The Optional Multi-purpose Feeder.................................... 157
Installing The Optional Memory Card.................................................. 159
Installing The Optional Handset........................................................... 160
Connecting The Machine...................................................................... 162
Connecting Up To The Telephone Line............................................... 163
Connecting The Power And Switching On.......................................... 164
Initial Settings & Adjustments................... ..................................... ...... 165
Initial Settings (Function 61)...................................................................... 165
Setting The Access Number ..................................................................... 167
viii
Page 12

Setting The Phone Line (Function 62) ...................................................... 167
Settin g The Da te & Tim e (F u ncti o n 91 ) . ... ... ... .... ... ... .......... ... ... ... .... ... ... ... . 167
Summer Time / Daylight Saving Time (Function 62) ................................ 168
9.Function List
Function List.......................................................................................... 169
10.Certification Label
Certification Label................... .......... ......... ......... .......... ......... ......... ...... 173
INDEX...................................................................................................... 174
ix
Page 13

This page is intentionally blank.
x
Page 14

Important Safety Instructions
1. Safety
All Safety messages in the main text
of this manual are labeled WARNING or CAUTION. These mean the
following:
WARNING: Important information
to alert you to a situation that might
cause serious injury and damage to
your property if instructions are not
followed properly.
CAUTION: Important information
that tells how to prevent damage to
your equipment or h ow to avoid a si tuation that might cause minor injury.
In addition to the warnings and cautions included in the text of this manual, please read and observe the
following safety instructions.
A Read all of these instructions.
B Save these instructions for later
use.
C Follow all warnings and cautions
marked on the product.
D Unplug this product from the w all
outlet before cleaning. Do not use
liquid cleaners or aerosol cleaners.
Use a damp cloth for cleaning.
E Do not use this p roduct near water,
for example, near bath tub, wash
bowl, kitchen sink or laundry tub,
in a wet basement or near a swimming pool.
F Avoid using a telephone (other
than a cordless type) during an
electrical storm. There may be a remote risk of electric shock from
lightning.
G Do not use a telephone in the vicin-
ity of a gas leak to report the leak.
H Do not place this p roduct on an un-
stable cart, stand, or table. The
product may fall, causing serious
damage to the product or injuring
the user.
I Slots and opening in the cabinet
and the back or bottom are provided for ventilation; to ensure reliable operation of the product and
to protect it from overheating,
these openings must not be
blocked or covered. The openings
should never be blocked by placing the product on a bed, sofa, rug,
or other similar surface. This product should not be placed in a builtin installation unless proper ventilation is provided.
J This product should be operated
from the type of power source indicated on the marking label. Using a different power source may
result in injury or accident. If you
are no t sure of the type of power
available, consult an authorized
sales person or your local power
company.
K This product is equipped with a 3-
wire grounding type plug, a plug
having a third (grounding) pin.
This plug will only fit into a
groundi ng-type power out l et. T his
is a safety feature. If you are unable
to insert the plug into the outlet,
contact your electrician to replace
your obsolete outlet. Do not defeat
the purpose of the grounding type
plug. (This does no t apply in countries in which the 2-wire, nongrounded type of plug is used.)
1
Page 15

Safety
1
L Do not allow anything to rest on
the power cord. Do not locate this
product where persons will walk
on the cord.
M If an extension cord is used with
this product, mak e sure that the total of the ampere ratings on the
products plugged into the extension cord does not exceed the extension cord ampere rating. Also,
make sure that the total of all products plugged into the wall outlet
does not exceed 15 amperes.
N Never push objects of any kind
into this product through cabinet
slots as they may touch dangerous
voltage points or short out parts
that could result in a risk of fire or
electric shock. Never spill liquid of
any kind on the product.
O Do not attempt to service this
product yourself, as opening or removing covers may expose you to
dangerous voltage points or other
risks.
Refer all servicing to qualified service personnel.
• If the product has been exposed
to rain or water.
• If the product does not operate
normally when the operating
instructions are followed. Adjust only those controls t hat are
covered by the operating instructions since improper adjustment of other controls may
result in damage and will often
required extensive work by a
qualified technician to restore
the product to normal operation.
• If the pro duct has be en dropped
or the cabinet has been damaged.
• If the product exhibits a distinct
change in performan ce, in dicating a need for service.
P Do not take apart or attempt any
modifications to this machine.
There is a risk of fire, electric
shock, explosion or loss of sight.
Q Do not incinerate used toner or
toner containers. Toner dust might
ignite when exposed to open
flame. Dispose of the used toner
containers according t o local regulations for plastics.
R Unplug this product from the w all
outlet and refer servicing to qualified service personnel under the
following conditions:
• When the power cord or plug is
damaged or frayed.
• If liquid has been spilled into
the product.
2
Page 16

When to Call Your Service Representative
When to Call Your Service Representative
WARNING: Do not attempt any
maintenance or tr oubleshoot ing other
than that mentioned in this manual.
This machine contains a laser beam
generator and direct exposure to laser
beams can cause permanent eye damage.
Unplug this product from the wall
outlet and refer servicing to qualified
service personnel under the following conditions:
A When the power cord or plug is
damaged or frayed.
B If liquid has been spilled into the
product.
C If the product has been exposed to
rain or water.
D If the product does not operate
normally when the operator's
manual are followed. Adjust only
those controls that are covered by
the operator's manual since improper adjustment of other controls may result in damage and
will often require extensive work
by a qualified technician to restore
the product to normal operation.
I After you move the machine, fix it
with the caster fixture. Otherwise
the machine might move or come
down to cause a personal injury.
J When removing misfed paper, do
not touch the fusing section because could be very hot.
1
E If the pr oduct has b een dro ppe d or
the cabinet has been damaged.
F If the product exhibits a distinct
change in performance, indicating
a need for service.
G If smoke is coming out, there is a
strange smell or anything looks
unusual.
H Do not use reuse stapled pap er. Do
not use aluminum foil, carboncontaining paper or other conductive paper. Otherwise, a fire might
occur.
3
Page 17

Safety
Power And Grounding
1
Power Supply
A Power requirements: 115 V, 60 Hz
B Insert the power plug securely into
the wall socket.
C Make sure that the wall outlet is
near the machine and readily accessible.
D Do not connect oth er equipment to
the same socket.
E Do not step on or set anything on
the power cord.
F Do not connect oth er equipment to
the same extension cord.
G Be sure that the power cord is not
in a position where it would trip
someone.
H The wall outlet must be easily ac-
cessible.
Grounding
Ground the machine and the lightning protection circuit in accordance
with regulations. Do not ground to
gas or water pipes, or to a telephone
ground plug. Proper g rounding is to
the ground terminal of the power outlet. Be sure that the ground terminal
of the power outlet is properly
grounded.
The lightning protection circuit for
the machine requires the machine to
be properly grounded. If proper
grounding is provided, about 90 % of
lightning damage can be prevented.
For safety, be sure to connect the machine to a three-prong grounded outlet.
I Do not damage, break or make any
modifications to the power cord.
Do not place heavy objects on it,
pull it hard or bend it more than
necessary. These actions could
cause and electric shock or fire.
J Do no t plug or unp lug the po wer
cord with wet hands or an electric
shock migh t occur.
K When you move the machine, un-
plug the power cord from the wall
outlet to avoid fire or electric
shock.
L When you pull out the plug from
the socket, grip the plug to avoid
damaging the cord and causing
fire or electric shock.
4
Page 18

Other Important Informations
Other Important Informations
General
A Since some parts of the machine
are supplied with high voltage,
make sure that you do not attempt
any repairs or attempt to access
any part of the machine except
those described in this manual.
B Do not make modifications or re-
placements other than those mentioned in this manual.
C When not using the machine for a
long period, disco nnect the pow er
cord.
D Keep the machine away from hu-
midity and dust . A fire or an electric shock might occur.
E Do not reuse stapled paper. Do not
use aluminum foil, carbon-containing paper or other co nductive
paper. Otherwise, a fire might occur.
Cold Weather Power-up
Avoid raising the room temperature
abruptly when it is below 57°F, or
condensation may form inside the
machine.
A Raise the room temperature to
68°F at less than 18°F per hour.
B Wait for 30 to 60 minutes.
C Turn the power on.
D Do not use the machine near a hu-
midifier.
Thunders tor ms
With proper grounding, about 90 %
of lightning damage can be prevented. However, if possible, during severe electric storms turn the power
switch off and disconnect the power
cord and telephone line cord.
1
F This machine has been tested for
safety using this supplier's parts
and consumable. We recommend
you only use these specified supplies.
G Ventilate the room around every
half an hour during a long copy
run or while p rinting a long mes-
sage.
Ozone
The machine generates ozone du ring
operation. Normally, the ozone level
is safe for operators. However, during a long copy run or while printing
a long message, ozon e odor may appear; in such a case, ventilate the
room.
Operating Precautions
• While the machine is in operation,
do not turn off th e main switch or
unplug the power cord.
• Keep corrosive liquids, such as acid, off the machine.
• Do not allow paper clips, staples,
or other small metallic objects to
fall inside the machine.
• The fusing unit may be very hot.
Be careful when
handling it.
5
Page 19

1
Safety
Copy Paper
• 16 to 24 lb. copy paper is recommended.
• Do not use damp paper, or copies
will be defective.
• Do not touch copy paper if your
fingers are wet or oily; fingerprints
may appear on the copy.
• Keep paper in a vinyl bag if it will
not be used for a long time.
• Store in a cool dry place.
• Store flat. Do not stand upright.
• The following materials cannot be
used in the paper cassettes: Post
cards, Tracing paper, OHP sheets,
Adhesive labels
step it accompanies. Other illustrations accompanying steps help
you find the ri ght key or handle, or
show you how to perfor m the ste p.
A This is a step in a procedure.
THIS CORRESPONDS TO
THE LCD DISPLAY.
• Do not overload the paper trays.
• If Multi-sheet Feeding occurs or
dog-eared copies are made when
using recycled paper in the paper
tray, fan the recycled paper and
load it in the paper tray again.
Symbols & Conventions Used
In This Manual
Documents:
❖❖❖❖
A document is anything you put
on the feed table of your machine
whether you are faxing it or copying it.
Prints:
❖❖❖❖
A print is anything that comes out
of the machine: a fax message you
received or a copy you made.
Procedures:
❖❖❖❖
Procedures are described step by
step. Perform them in order. When
you see a display, it alw ays show s
what comes after performing the
6
Page 20
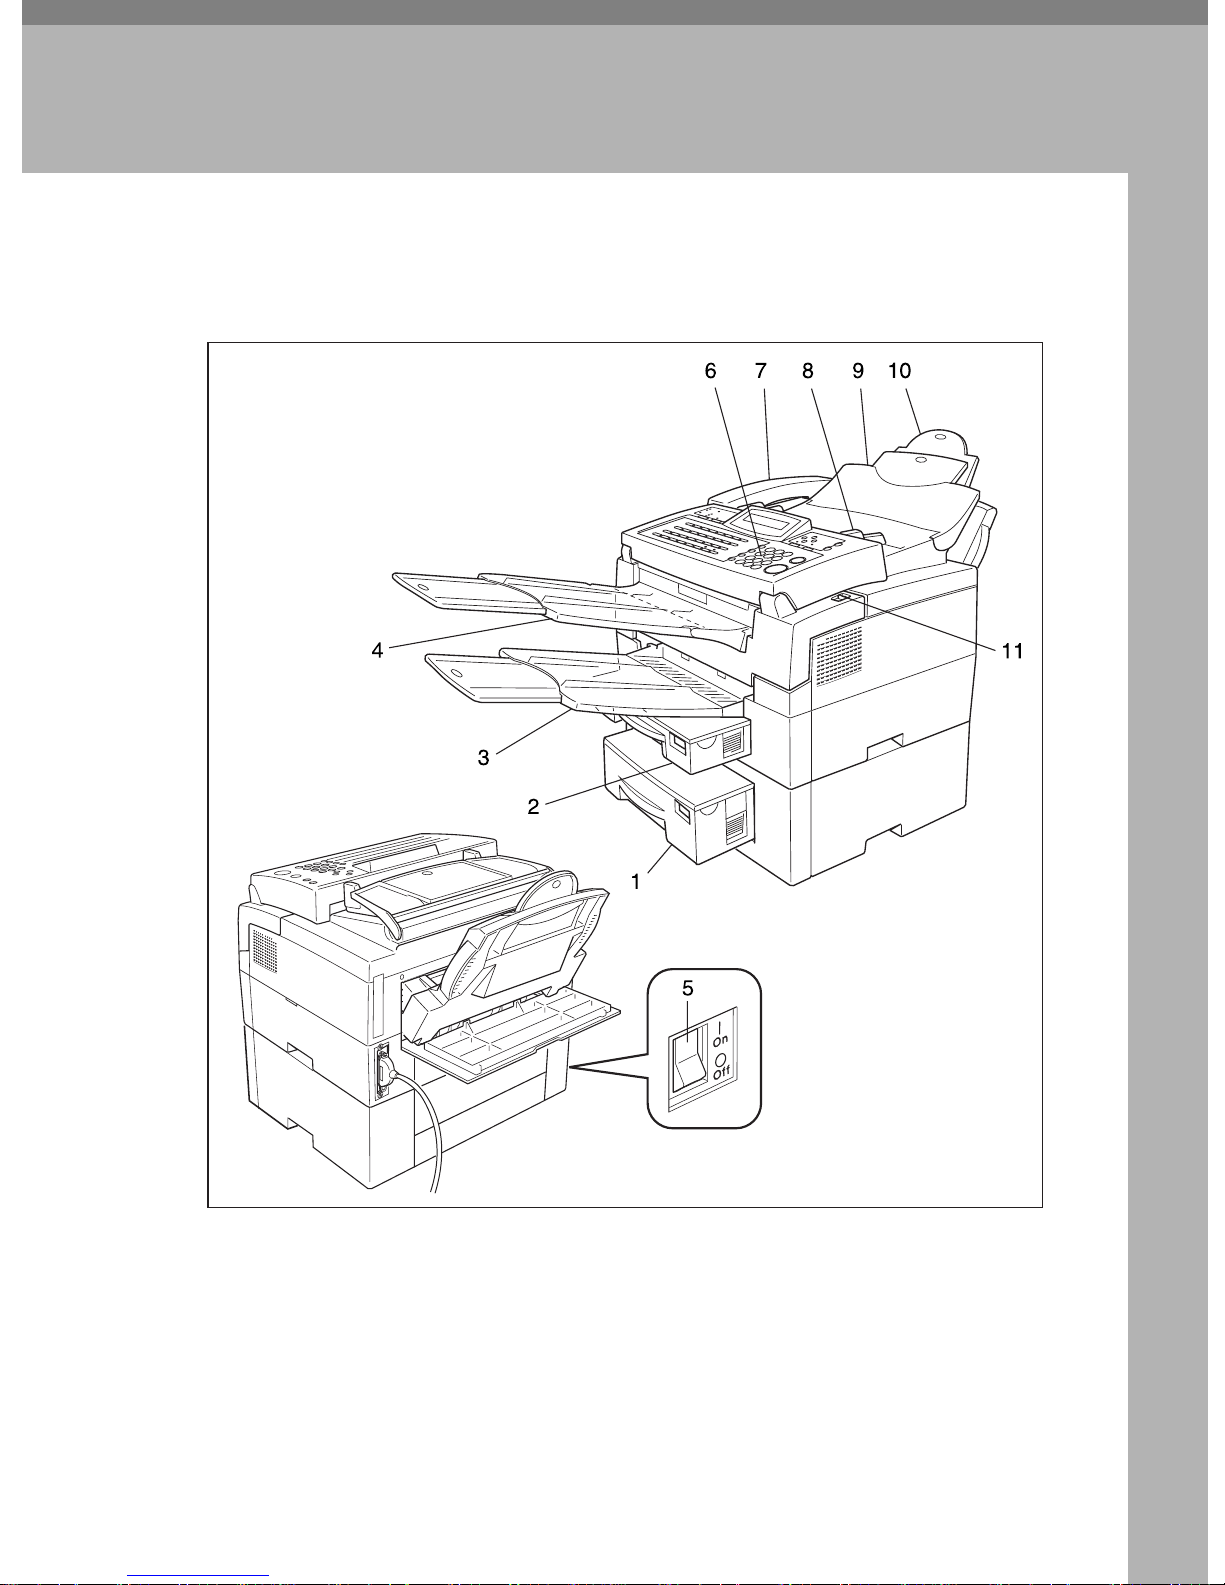
Part Names
2. Machine Layout
1.
Lower pape r cassette
The opti onal lower pa per cassette ho lds
more paper.
2. Main paper cassette
The main paper cassette holds copy paper.
TSTH060N
3.
Print delivery tray
Copies, inc oming fa xes, an d prints generated usin g the Optional PC Interface kit
are deliv e red here.
4.
Document delivery tray
Scanned documents are stacked on the
Document delivery Tray.
7
Page 21

Machine Layout
5. Main switch
The main switch turns your machine on
and off.
6. Operation panel
Key panel for operating the machine.
7. Optional Handset
2
8. Document guide
Match the document guide to the size of
your original documents.
9. Document table
Document table holds up to 30 sheets
which are fed one at a time. Place your
original documents here.
10. Multi-purpose Feeder
Multi-purpose Feeder can be loaded with
various kind of printable med ia.
11. Cover release button
Pull this catch to release the top cover.
8
Page 22
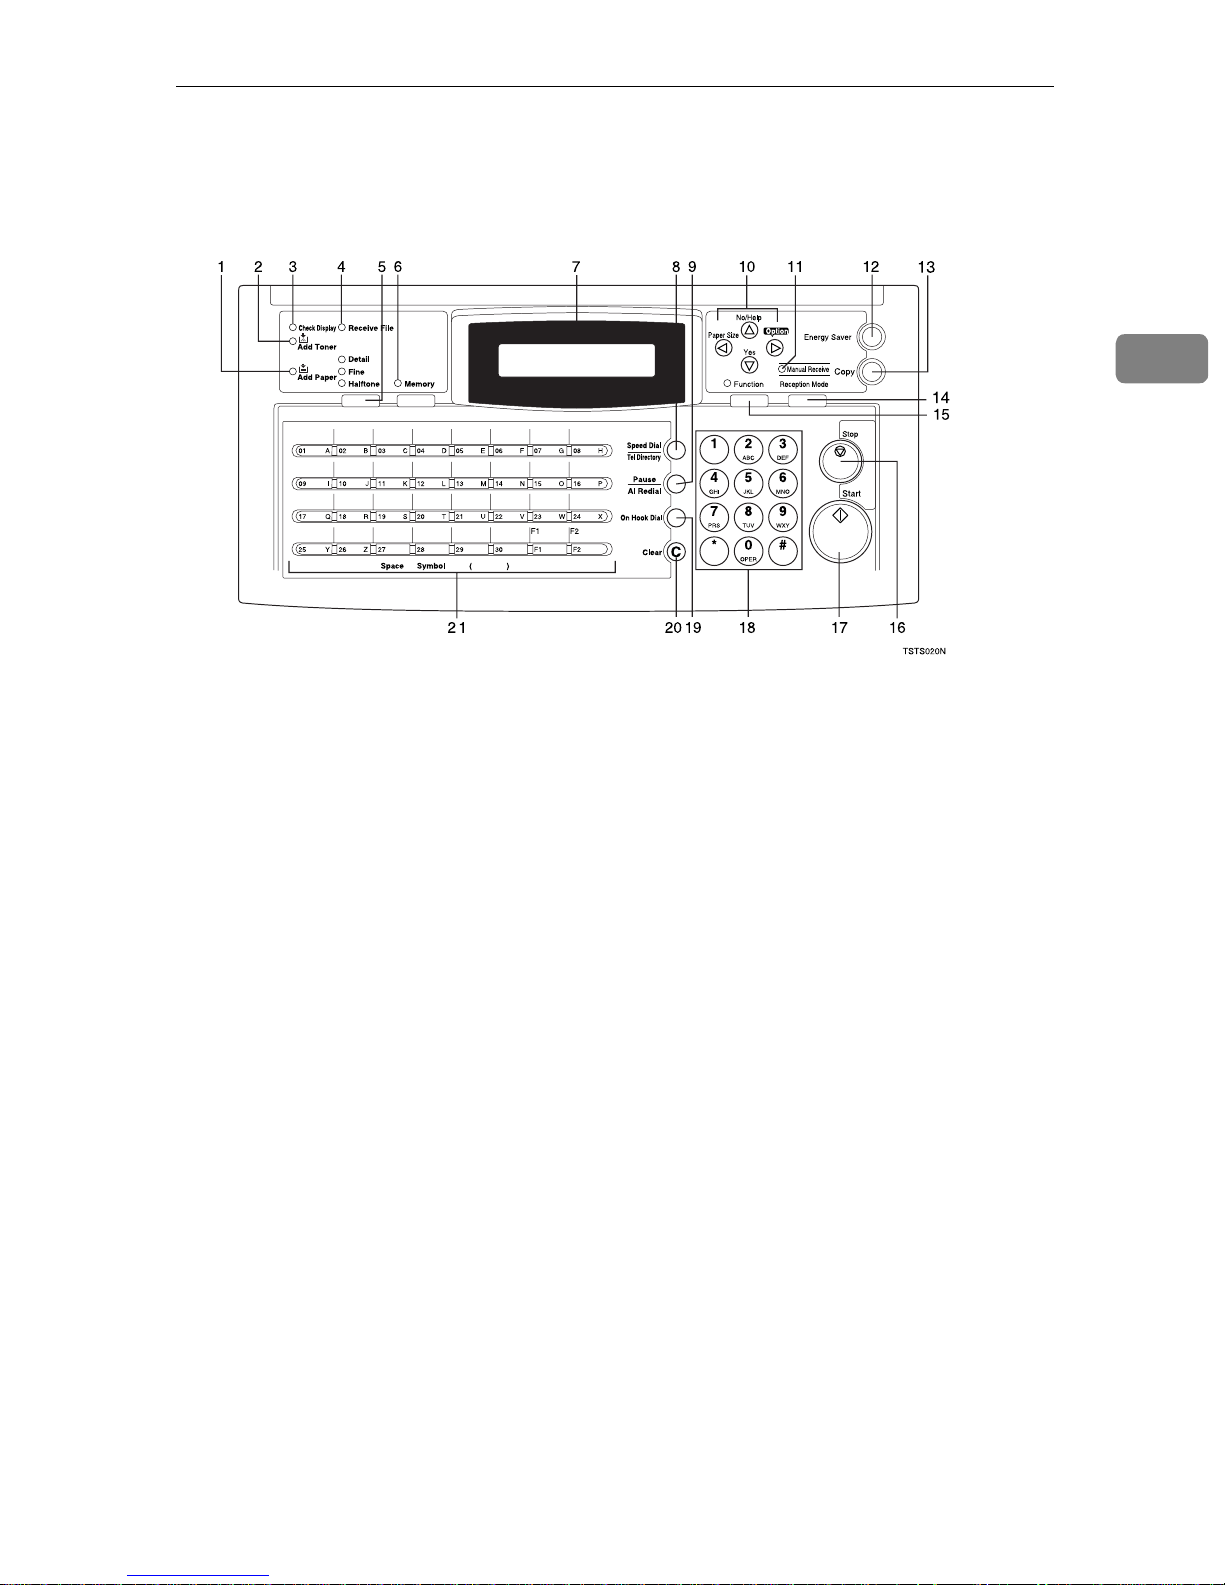
Operation Panel
Operation Panel
2
1. Add Paper indicator
Lights when a cassette is empty.
2. Add Toner indicator
Blinks when toner is about to run out and
lights continuously when toner has run
out.
3. Check Display indicator
Check Display
The
you to read the display.
Indicator lights to tell
4. Receive File indicator
Receive File
The
incoming message was received into
memory. Blinks when cinfidencial reception file is stored in the memory. ( see
P.105
Operation Panel”
5.
The reso lution / Halftone is indicated by
these three indicators and can be changed
by the resolution / Hal ftone.
“If An Indicator Lights Up On The
Resolution
{{{{
indicator lights when an
).
key.
}}}}
6. Memory indicator
When the
mem ory transmi ssion is in effect , if it is
off, immediate transmission is in effect.
Switch betw een th e tw o w it h the
ry
key.
}
Memory
indicato r is on, then
Memo-
{
7. Control panel Display
The Liquid Crystal Display guides you
through tasks and informs you of the
state of the machine. Messages appear
here. The display consis ts of t wo 20-c h aracter lines.
8.
Speed Dial/Tel Directory
{{{{
Press th e
ing Speed Dial or the Telephone Directory Feature.
9.
Pause/Al Redial
{{{{
The
{
when you are dialing or storing a fax
number. Or, press the key to redial the
last number dialed. (The redial feature
doesn't work once you've started dialing
a new number.)
10.
Arrow keys
Yes
T {
U {No}
scroll l eft
W
scroll right
V
Speed Dial/Tel Directory
{
key
}}}}
Pause/Al Redial
accept
}
reject / print help list
key inserts a pau se
}
key
}}}}
key us-
}
11. Manual Receive indicator.
Lights when the reception mode is Telephone.
9
Page 23

Machine Layout
2
12.
Energy Saver
{{{{
Hold a few seconds this to start or end the
energy saver mode.
13.
Copy
{{{{
Press this to copy the document now in
the feeder.
14.
Reception Mode
{{{{
Press this to select the reception mode
(Tel, Auto, or Fax).
15.
Function
{{{{
Press the
digit code to access functions 11 to 52.
(For functions 61 to 95, enter 6, the acc ess
code on see P.131
tions 61 To 95”
16.
Stop
{{{{
Press the
sion or a document sc anning, to sto p a reception or to stop a long copy run. The
machine will finish printing out the sheet
being printed and then stop.
key
}}}}
Function
{
key
}}}}
Stop
{
key
}}}}
key
}}}}
key
}}}}
key and enter a two
}
“Access Co de For Func -
and the function number.)
key to stop a transmis-
}
31 & 32)”
Editing A Group Of Fax Numbers (Function
33)”
characters (see P.140
ters”
Dial 29 as the Dial Option key ( see P.31
“Programming The Dial Option Key”
can also use Quick Dial 30 as a Group key
(see P.29
You can store combinations of settings
that you use on a frequently basi s in the
two User Function key s ( F1,F2 ). Wh en
you press a Us e r function key, it lights to
show you that it is selected.
) or groups (see P.28
). Yo u c an a lso us e t hes e ke ys to ent er
“Entering Charac-
). In addition you can register Quick
“Programming The Group Key”
“Storing &
). You
).
Start
}}}}
Start
{
key
key to start all tasks.
}
17.
{{{{
Press the
18. Ten key pad
Use the ten key pad (sometimes called
the ten keys) to dial fax numbers, to enter
the numbers of copies, etc.
19.
On Hook Dial
{{{{
Press the
phone call from the keypad without having to lift the phone or handset off the
hook (phone or handset option needed).
20.
Clear
{{{{
Press the
character or digit entered, or use the left
and right a rro w keys to mo ve the cur sor
and then press Clear to erase whatever is
at the cursor.
21.
Quick Dial
{{{{
On Hook Dial
{
key
}}}}
Clear
{
keys.
There are 30 Quick Dial keys. Use them to
store individual fax numbers (see P.25
“Storing & Editing Fax Numbers (Functions
key
}}}}
key to dial a
}
key to erase the last
}
keys /
}}}}
User Function
{{{{
}}}}
10
Page 24
3. Faxing
Recommended Types Of Document
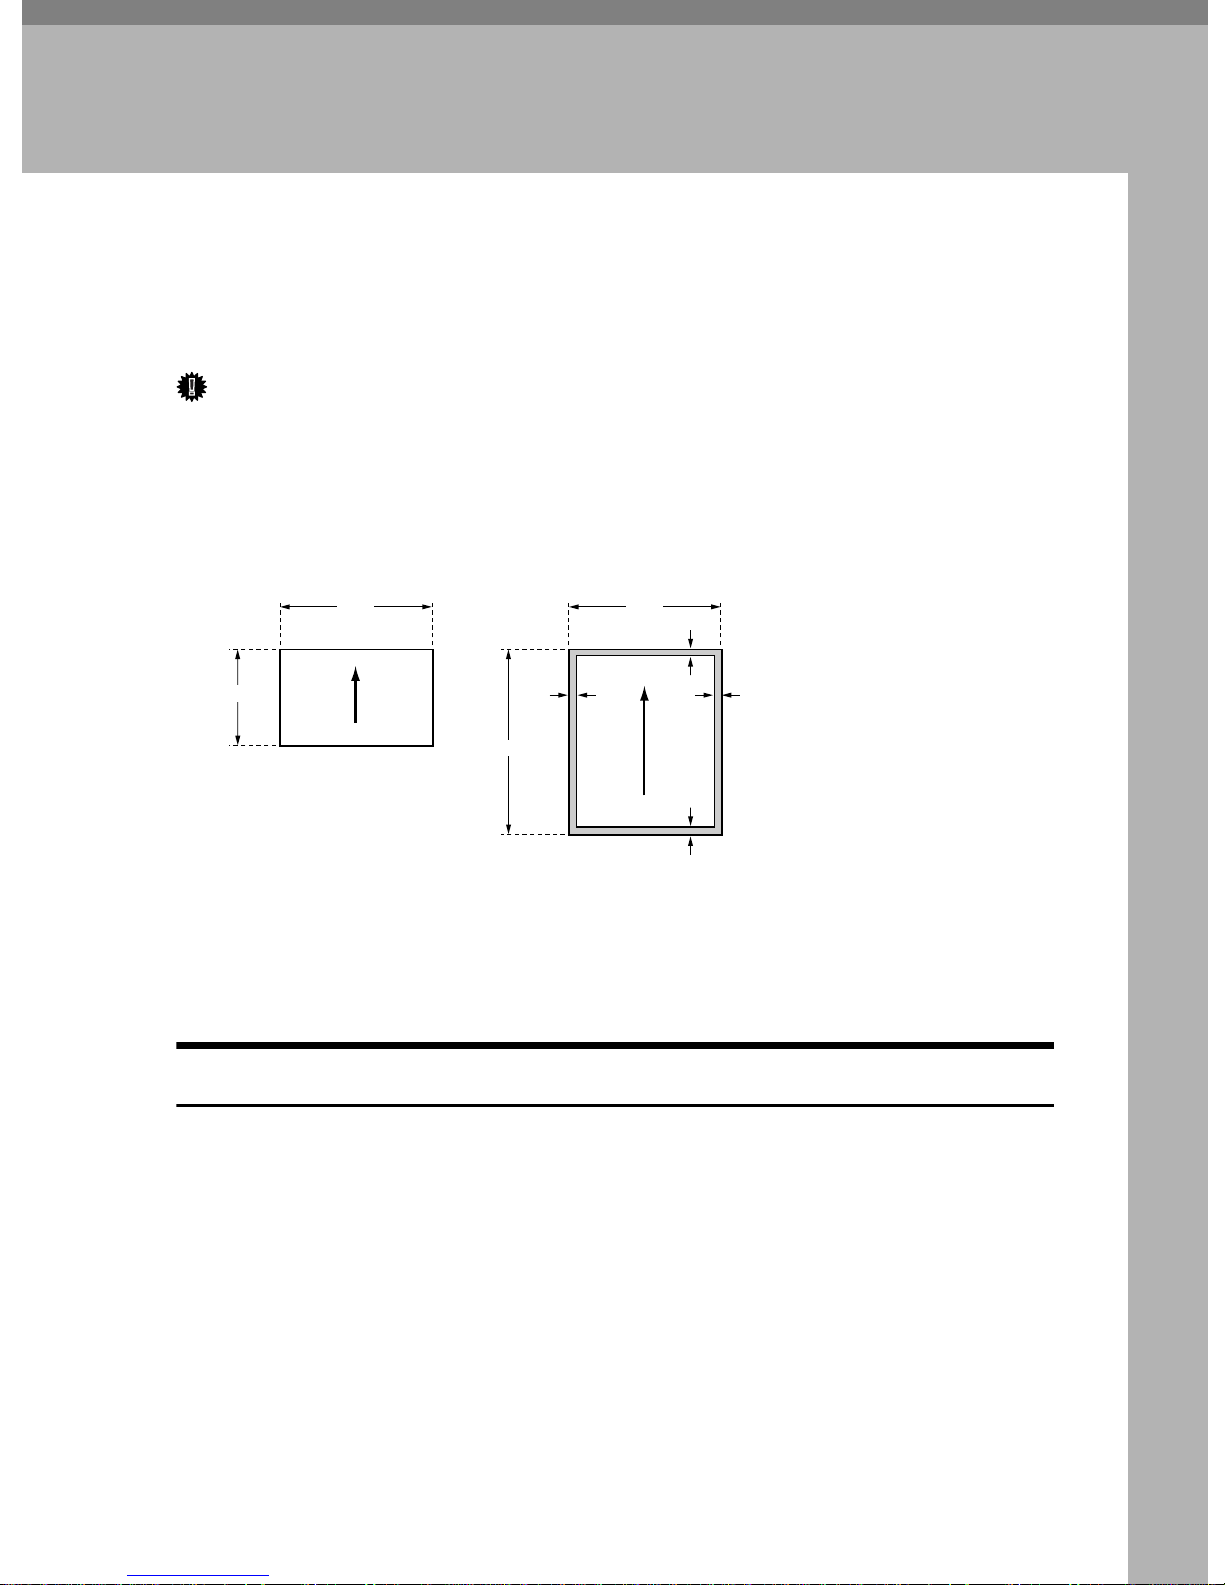
Before you send y our document, mak e sure that it meets the following requirements.
Important
Documents that do not meet these requirements can cause your machine to
❒
jam or may cause some components of the machine to become damaged or
dirty.
Scanning area
❖❖❖❖
Minimum size
5.8"
4.1"
23.6"
Scanning direction
Maximum size
0.15" 0.15"
8.5"
0.15"
0.19"
Scanning direction
GFSIZE0N
The part shaded will not be scanned, because it is outside the maximum scanning width range.
Correct Size For The Document Delivery Tray
• Thickness 0.05 to 0.2 mm ( 50 ∼ 90 g / m2, 20 lb paper)
• Length and Width: See the above diagram.
If the page is too short, pu t it inside a document c arrier or enlarge it with a
copier.
If the page is too long, divid e it into two or more sheets.
Clearly Written
• Small faint characters may not be transmitted clearly.
Uniform Page Size
• Do not use different sizes of document in the same transmission.
11
Page 25

3
Faxing
Page Condition
Do not place damaged pages in the automatic document feeder.
• If your pages are curled or dog eared, flatten them.
• If your pages are stuck together, shuffle the stack.
• If your pages are folded, torn, or patched together, mak e copies.
• If your pages have binding files, trim the edges or make copies.
Important
Do not place originals that contain the following materials in the document
❒
feeder ;
• Crayon
• Paint
• Charcoal, soft pencil
• Glue
• Thermal paper
• Clips
• OHP Sheets, vinyl-coat paper
• Wa xed paper
• Carbon paper
• Silicone oil
Note
Copies made with a cop ier that uses silicone oil may cause a misfeed. To
❒
avoid this, do not scan such copies until five or ten minutes after copying.
12
Page 26
Memory Transmission And Immediate Transmission
Memory Transmission And Immediate
Transmission
There are two ways to send a fax message.
• Immediate Transmission
• Memory Transmission
Memory Tra nsm is sio n
(Memory Indicator Lit)
Memory Transmission is convenient
because:
• Fax messages can be scanned
much more quickly (you can take
your document away from the fax
machine without waiting too
long).
• While your fax message is being
sent, another user can operate the
machine (people will not have to
wait by the fax machine too long ).
• You can send the same message to
more than one place with t he s ame
operation.
• After you press the
machine doesn't dial until all the
pages of your fax message have
been stores in the memory.
{
Start
key, the
}
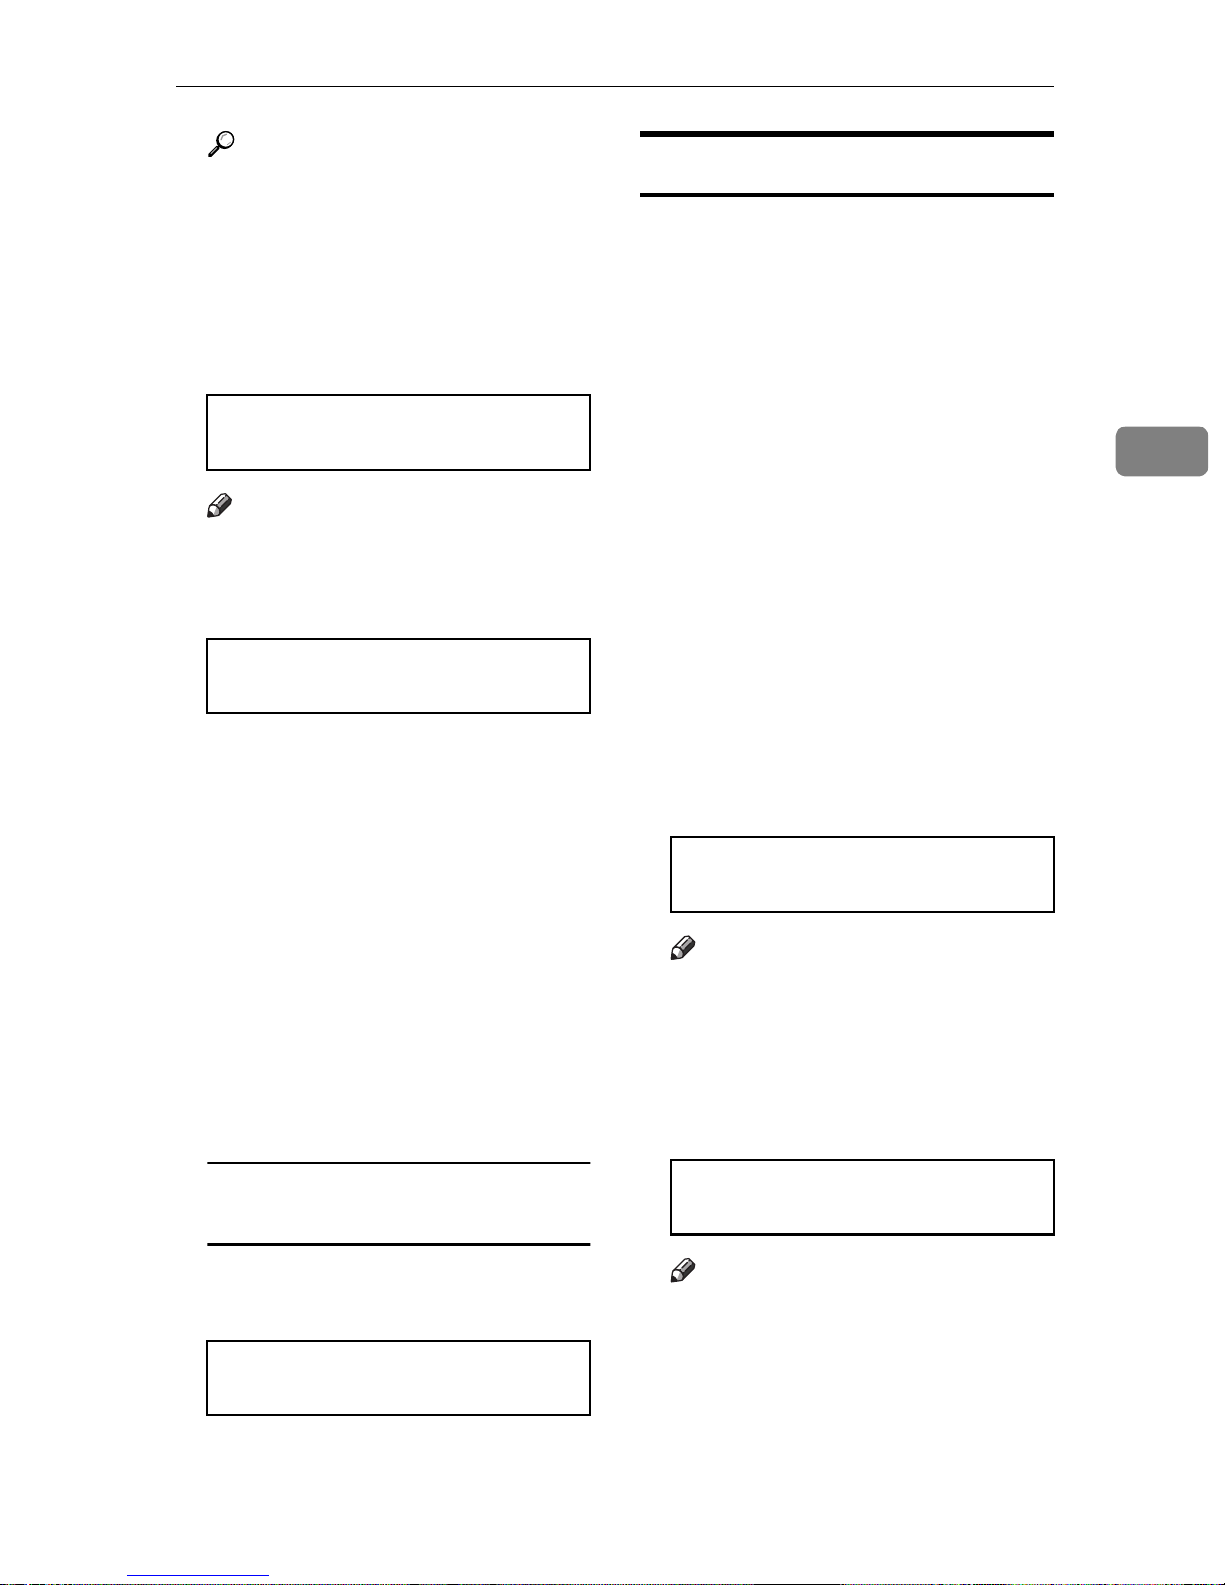
READY 100% 10:00AM
SET DOC. OR DIAL NO.
Fan your docum en t stack (at most
B
30 pages: 20 lb) to make sure all
pages are loose, then square it.
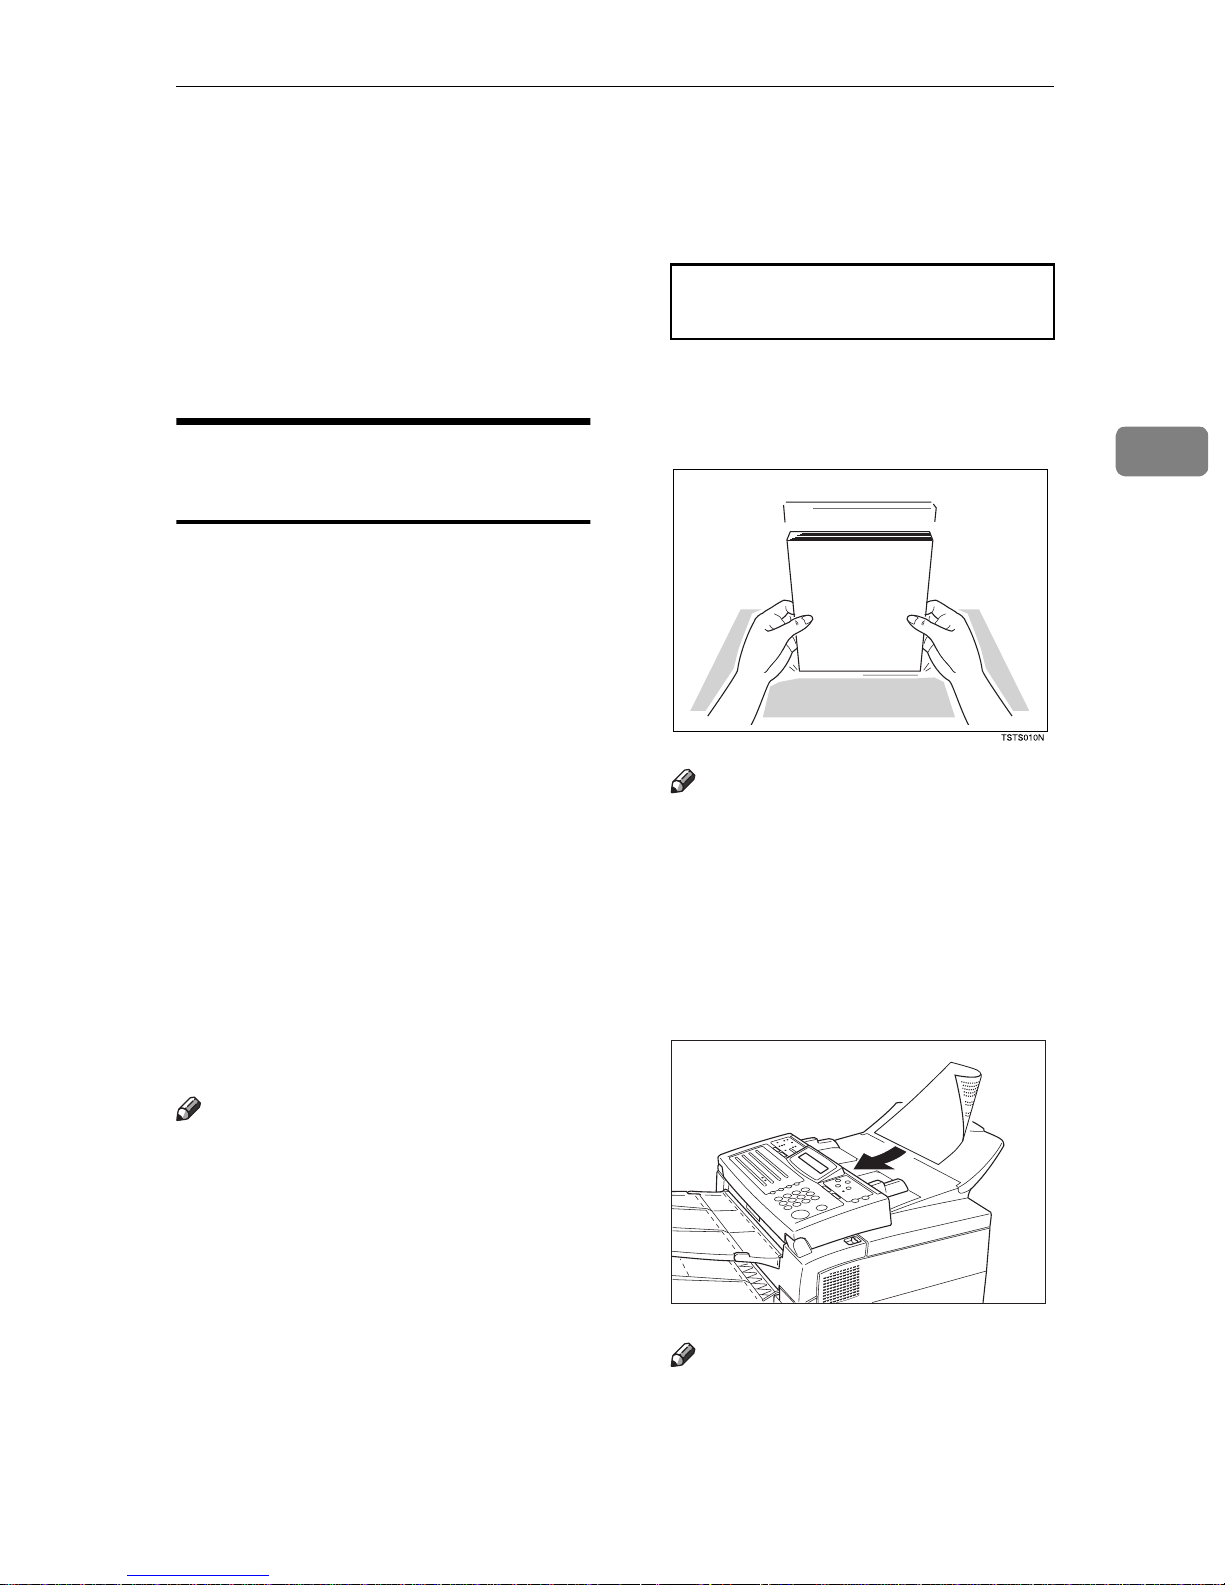
Note
All pages in your document
❒
must be one-sided and be of the
same size.
Insert the document face - down
C
into the feeder until the machine
beeps. Then adjust the guides to
match the width of the document.
3
Note
If your document gets stuck while
❒
it is being processed, press the
key, and turn to P.107
Stop
{
}
“Clearing a Document Jam”
structions on how to safely remove
the original.
Make sure that the m achine is in
A
standby mode for faxing.
The display should look like this:
for in-
Note
You can dial before you set the
❒
document. Place the document
TSTH110N
13
Page 27
Faxing
3
after you dial the number and
go to step G.
The display will look like this:
D
TRANSMIT OPTIONi
DIAL FAX NUMBER
If the memory ind icator is not lit,
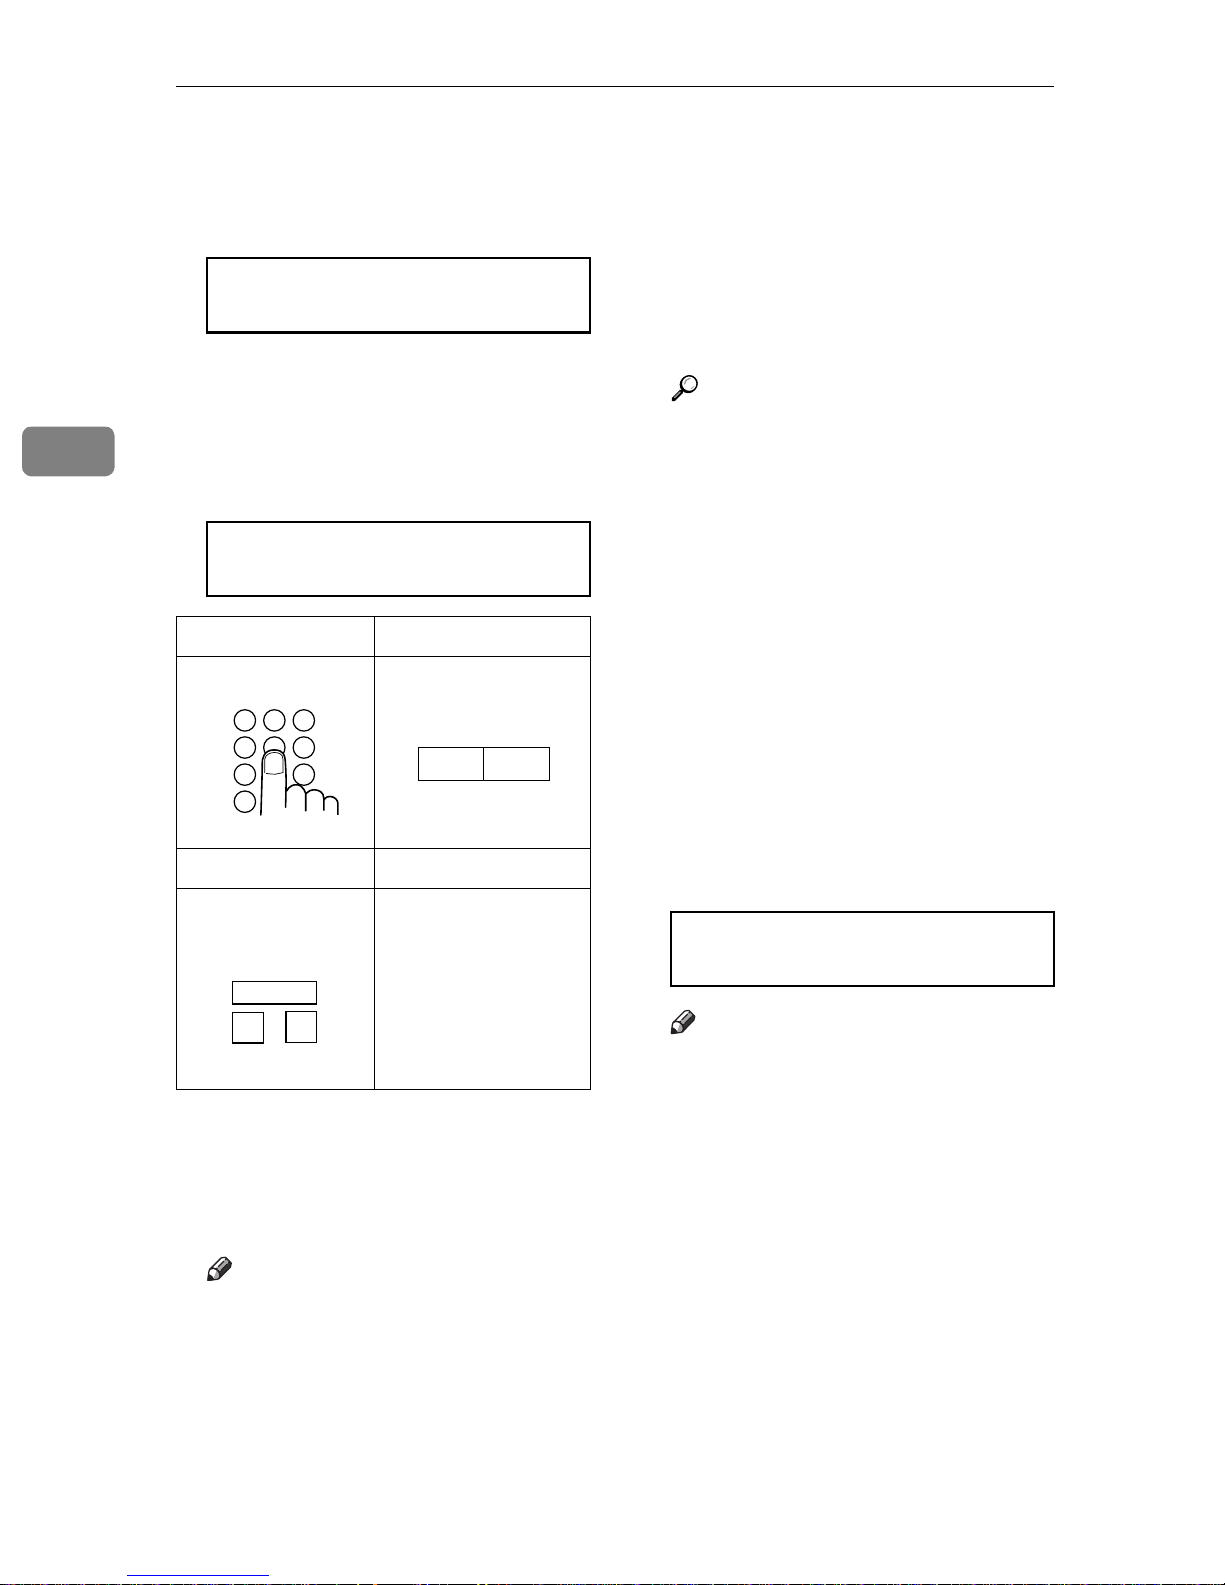
E
press the
Dial the number in one of the fol-
F
Memory
{{{{
key.
}}}}
lowing ways.
TRANSMIT Y/START
5551234kkkkkkkkkkkkk
Ten Key Pad Quick Dial
1 2 3
4 5 6
7 9
*
Speed Dial Group
GFDIAL0N
06
07
GFDIAL1N
Clear
{
the entire number, press the
key.
{No}
The maximum destinations you
❒
can dial using the t en key pad is
49. However, this limitation is
also subject to memory capacity.
Reference
Programming Quick Dial: see
P.25
Numbers (Functi ons 31 & 32)”
Programming Speed Dial: see
P.25
Numbers (Functi ons 31 & 32)”
Programming Group Dial:
seeP.28
Group Of Fax Numbers (Function
33)”
.
Programming Group key: see
P.29
Key”
.
Press the
G
other number.
key. If you want to erase
}
“Storing & Editing Fax
.
“Storing & Editing Fax
.
“Storing & Editing A
“Programming The Group
key to enter an-
Yes
{{{{
}}}}
Example:
Method
Example: Speed Dial 10
Speed Dial
0
1
GFDIAL2N
*1
In this example Group Dial is programmed in Quick Dial 08.
*2
In this example Quick Dial key 30
is programmed as the Group key,
and Group dial number 1 is programmed.
Note
If you install the handset or an
❒
Dial key 08.
Method
Dial key 30 and 1
on the ten key pad.
*1
Quick
*2
Quick
external telephone, you can
send the message manually.
Pick up the handset and dial.
If you want to erase a digit of
❒
the phone number, press the
TRANSMIT DIAL/START
DIAL NEXT FAX NUMBER
Note
Repeat steps F and G until all
❒
destinations are entered.
If you have only one destina-
❒
tion, press the
The machine stores your mes-
❒
{
sage and dials the first number
(or, if you selected Send Later, it
will return to standby mode and
the fax message will be s ent at
the time that you selected).
Start
key.
}
14
Page 28
Memory Transmission And Immediate Transmission
Reference
Send Later: see P.21
At A Specific Time (Send Later)”
.
Press the
H
The machine will dial the destination's number.
{{{{
key and wait.
Start
}}}}
“Sending
5551234
SET DOC. OR DIAL NO.
Note
If the other party's line is busy,
❒
your machine will dial
again.P.24
“Redialing”
READY 100% 10:04AM
SET DOC. OR DIAL NO.
Immediate Transmission
Immediate Transmission is convenient when:
• You wish to send a message immediately.
• You wish to quickly check whether
you have successful connected
with the other party' s f ax machi ne.
• Your machine's memory is getting
full.
The machine dials immediately after
you press the {Start} key (or at the
specified later time, if you used a
time-delay feature like Send Later).
The message is scanned and trans mitted page by page without being
stored in memory.
3
If the other party's fax machine
❒
answers, both machines will
connect and you r s will send the
message. A name or a label will
appear on the upper line.
If your line goes through a local
❒
switchboard (a PBX) remember
to dial the exit code. Press the
Pause
{
the code. If the number includ es
a country code, press the
Pause
{
code, then dial the rest of the
number.
key immediately after
}
key after the country
}
If you like to cancel the
transmission
A Press the {{{{Stop}}}} key during
communication.
A Make sure th at the machine is in
standby mode.
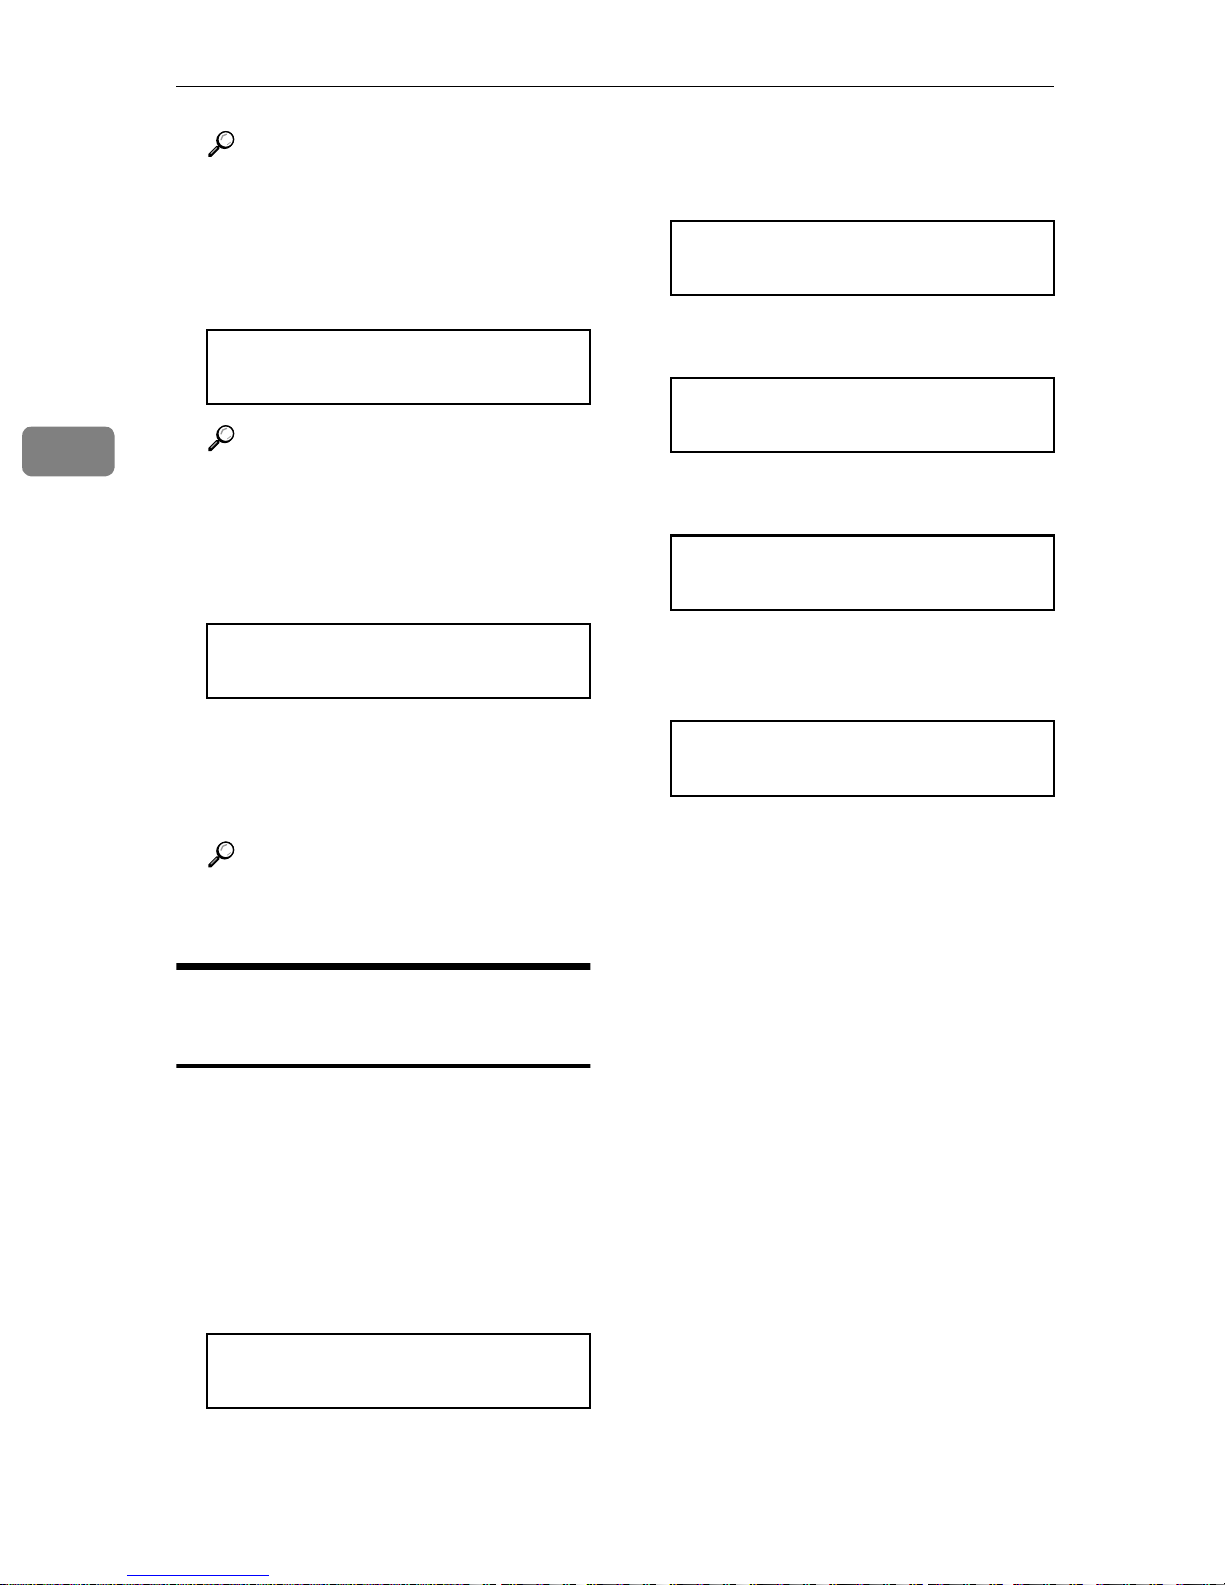
The display should look like this:
READY 100% 10:00AM
SET DOC. OR DIAL NO.
Note
❒ The memory indicator should
go out. If the memory indicator
is lit, press the {Memory} key.
B Place the entire document face
down into the feeder.
TRANSMIT OPTIONi
DIAL FAX NUMBER
Note
❒ No more than 30 pages.
5551234
STOP & CLR FILE? Y/N
B Then press the {{{{Yes }}}} key to
cancel the transmission.
❒ You can dial before you set the
document. Place the document
after you dial the number and
go to step D.
15
Page 29
Faxing
3
Reference
How to set document, see P.13
“Memory Transmission (Memory
Indicator Lit)”.
C Dial.
TRANSMIT Y/START
5551234
Reference
How to dial, see P.13 “Mem ory
Transmission (Memory Indicator
Lit)”.
D Press the {
5551234
DIALING
The machine dials and connect to
the other party. The number that
you dialed and the other party's
RTI or CSI is displayed.
Reference
RTI, CSI: see P.165 “Initial Settings & Adjustmen t s”.
{Start}}}} key.
{{
B Carefully place your fax message
into the auto document feeder.
TRANSMIT OPTIONi
DIAL FAX NUMBER
C Press {
{Speed Dial/Tel Directory}}}}
{{
SPEED DIAL 0-9/hi
PUSH NUM OR ABC
D Press the first letter of the name.
TEL DIR. Y/hi
b01 XA COMPANY
E Press {
you want.
{Yes}}}} to dial the number
{{
TEL DIR. Y/hi
b12 XYZ CO. NEW YORK
F Either :
• Dial more numbers.
• Press {Start}
Dialing with the Telephone
Directory
This can be done for any number that
you have stored as a Speed Dial code
with a label programmed for it.
Example : you wish to dial “ XYZ CO.
NEWYORK “ .
A Make sure that the machine is in
standby mo de .
READY 100% 10:00AM
SET DOC. OR DIAL NO.
16
Page 30
Receiving Telephone Calls & Fax Messages (Faxes/Phone Calls)
Receiving Telephone Calls & Fax
Messages (Faxes/Phone Calls)
The machine can treat incoming fax
messages and telephone calls in three
ways.
❖❖❖❖
Auto mode
Use this mode if your line is shared
by a fax machine and telephone.
When a call comes in, the machine
will ring a number of times to give
you the chance to pick up the
handset. If you do not pick up and
the call is a fax message, the machine will go into fax mode and
start receiving. You can choose the
number of times t he machi ne rin gs
before taking the call by altering
the Auto Ring time (see P.18 “Set-
ting the Auto Ring Time”).
❖❖❖❖
Fax mode
Use this mode if you have a dedicated fax line. The machine assumes all calls are fax messages. It
will ring once to alert you to an incoming call and then start receiving.
Switching Between Auto, Fax,
and Telephone Mode
The Manual Receive indicator is lit
when the machine is in Telephone
mode. To switch to a different mode,
follow the steps below.
A Press the {
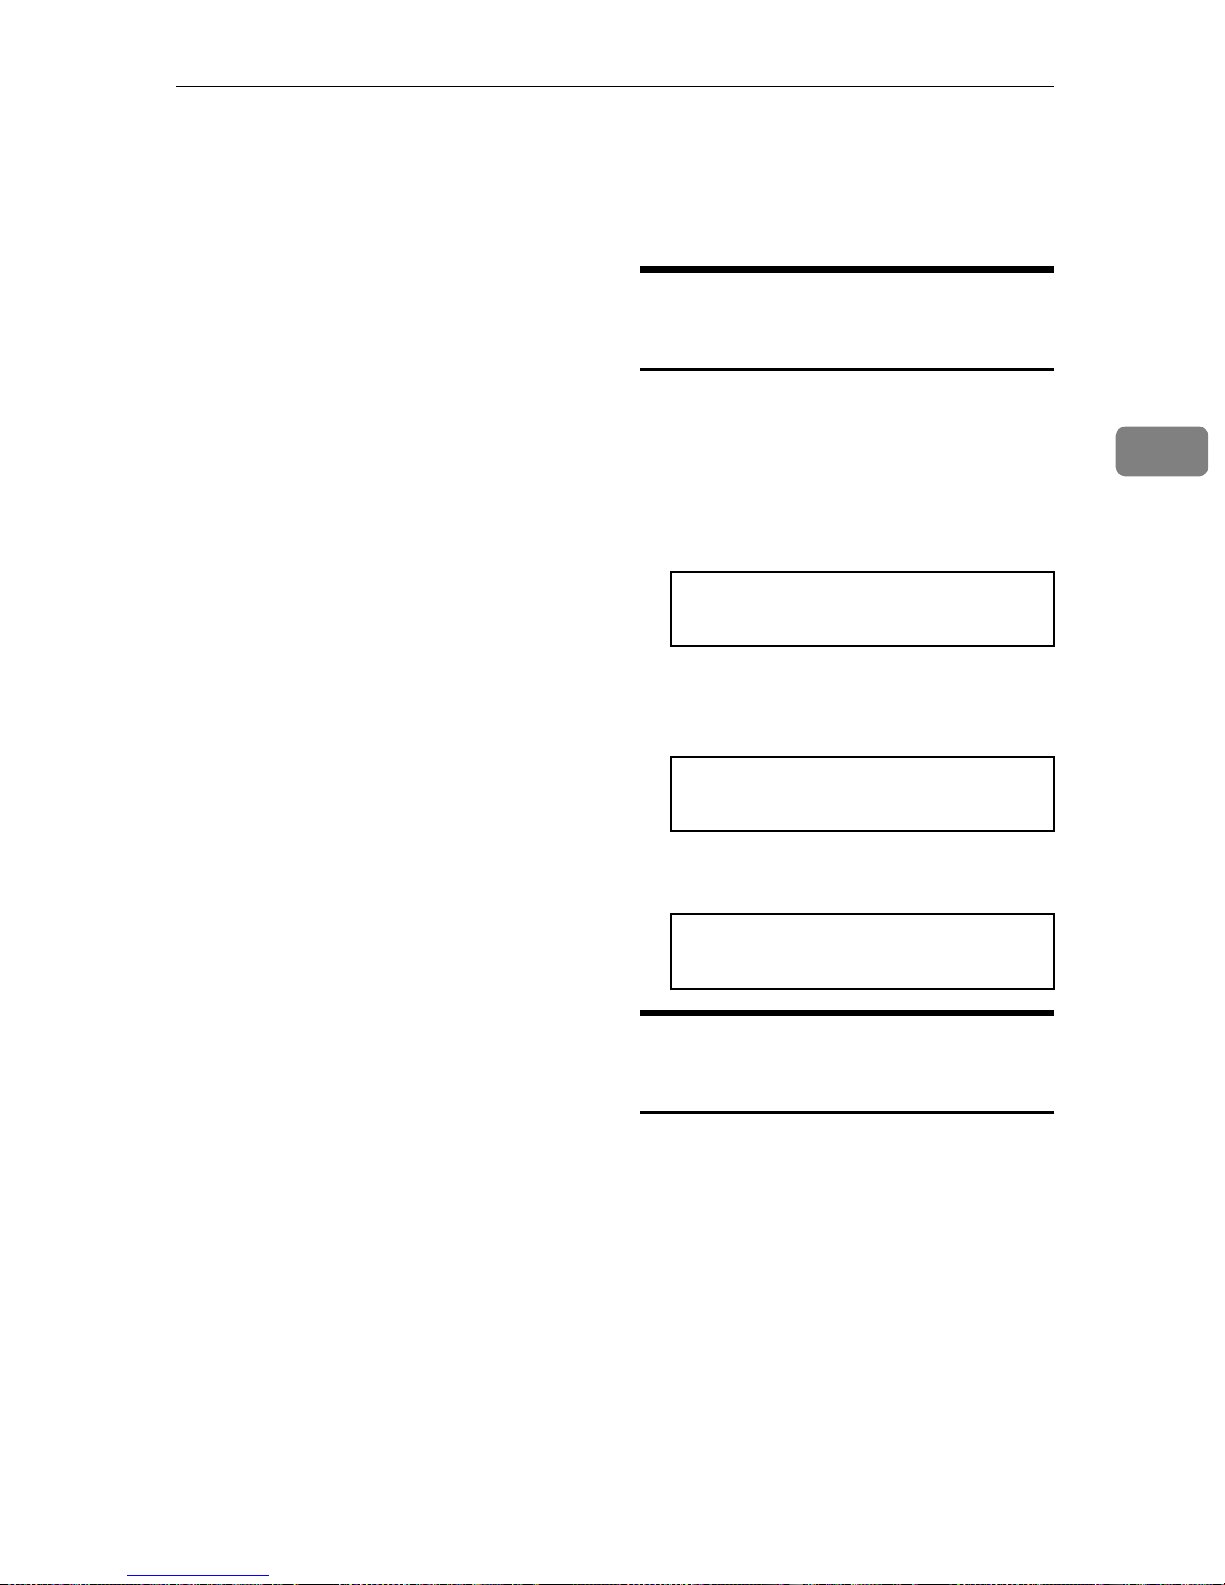
RECEIVE MODE Y/hi
iFAX TEL AUTO
B Press the W
mode you require.
RECEIVE MODE Y/hi
FAX TEL iAUTO
C Press the {
READY 100% 10:00AM
SET DOC. OR DIAL NO.
{Reception Mode}}}} key.
{{
W and VVVV key to select the
WW
{Yes }}}} key.
{{
3
❖❖❖❖
Telephone mode
Use this mode if your line is shared
by a fax machine and a telephone
but you wish to answer all calls
yourself and decide whether they
are fax messages or telephone
calls. You must manually hit the
Start key to receive a fax.
The machine will ring continuously until yo u answer the call, so you
have to be near the machine at all
times.
The Manual Receive indicator is lit
when the machine is in this mode.
Receiving the Fax Message in
the Telephone Mode
This mode is active when the Manual
Receive indicator is lit. You have to
answer the call yourself and decide
whether it is a fax or a telephone call.
The procedure for answering a call is
as follows:
A Pick up the handset of the option-
al handset or the external telephone.
B Listen to the other end.
17
Page 31
Faxing
3
If you hear a voice
A Continue your conversation as
you would normally.
If you hear a fax tone
A Remove any documents from
the feeder, press the {{{{Start}}}} key
then replace the handset.
The machine will start receiving.
Setting the Auto Ring Time
In Auto mode, the machine rings a
number of times to give you the
chance to pick up the handset before
taking the cal l auto matic ally . You ca n
alter the numb er of rings by cha nging
the Auto Ring Time.
Note
❒ If you wish to keep these set-
tings, go to step 5.
D Press the {
new number using the ten key
pad.
E Press the {
{{{{Function}}}} key.
{No}}}} key, then press the
{{
{Yes}}}} key, then the
{{
A Press the {
the access code {{{{2}}}} {{{{2}}}} {{{{2}}}} {2}.
Then press {{{{6}}}} {{{{1}}}} and the {{{{Yes }}}}
key.
{Function}}}} {{{{6}}}} then enter
{{
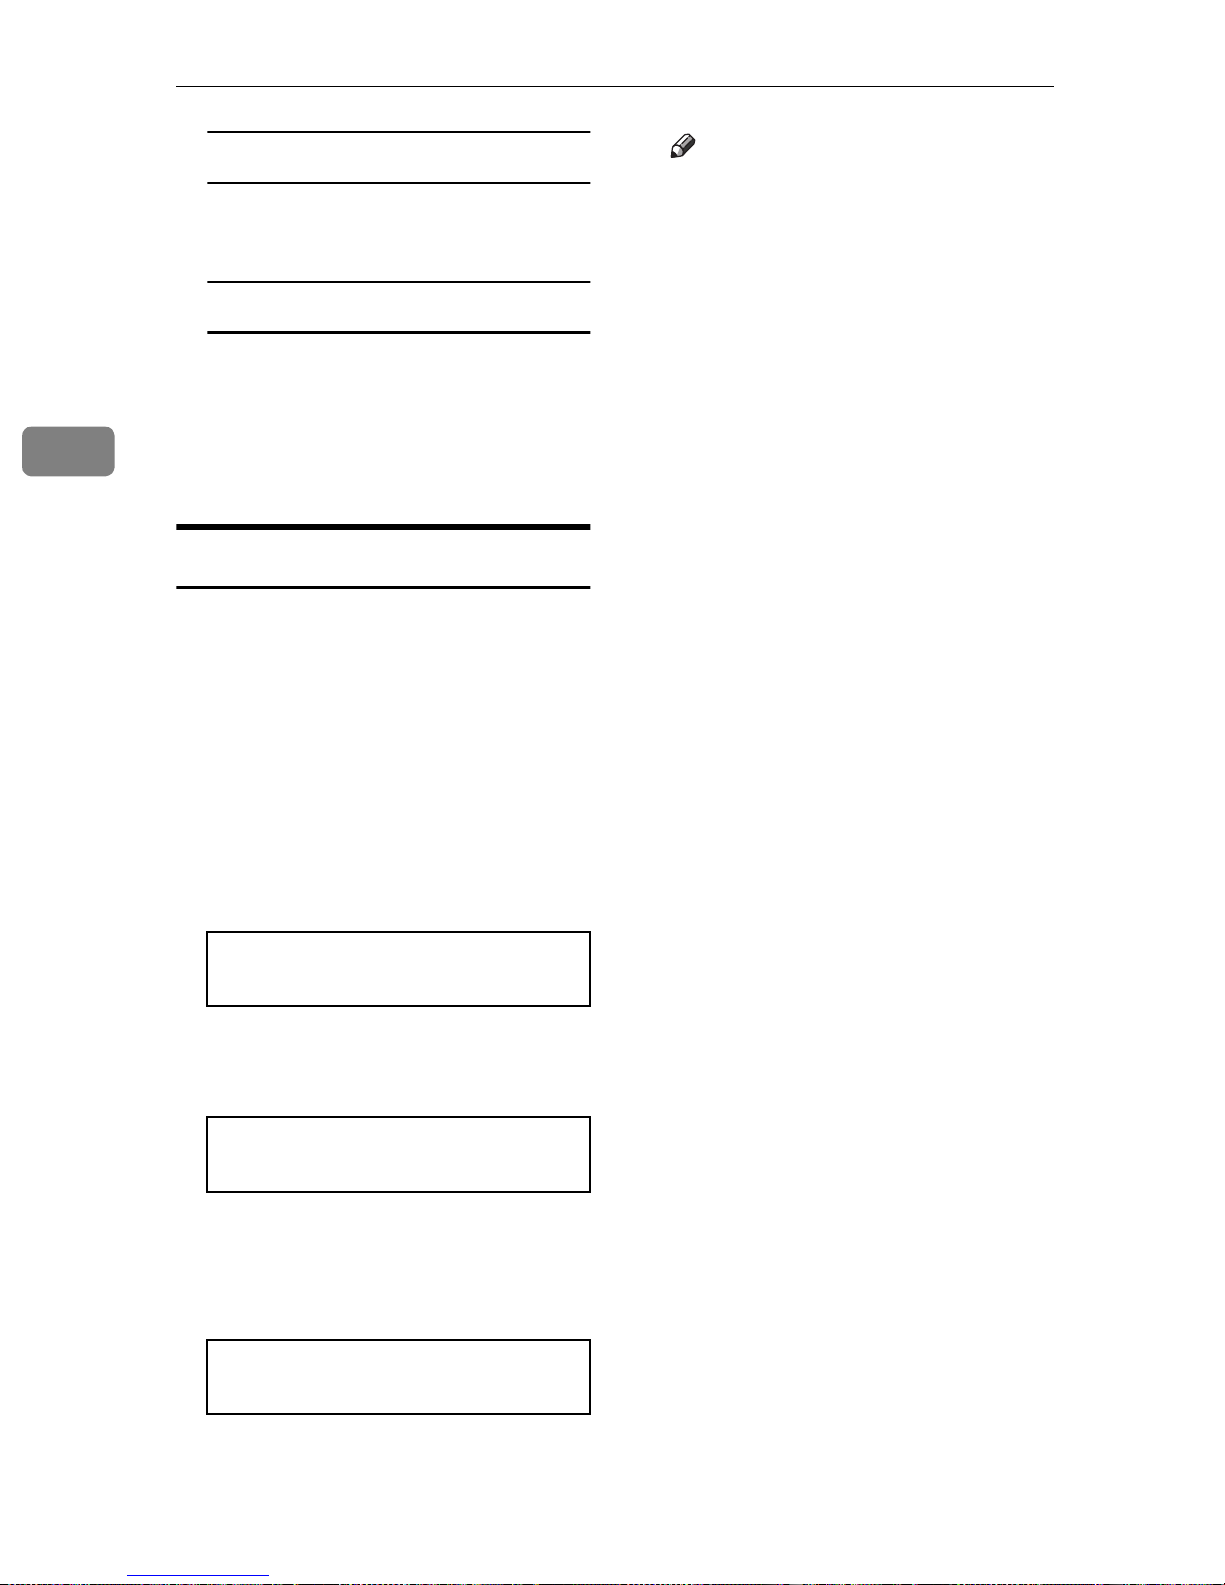
Y/NEXTi
SET OWN NUMBER
B Press V
play appears.
V until the following dis-
VV
Y/NEXTi
SET NO. OF RINGS
C Press the {
The factory setting will be displayed.
{Yes }}}} key.
{{
NO. OF RINGS Y/N
08 RINGS
18
Page 32

Printing Received Messages That Have Been Stored (Substitute Reception)
Printing Received Messages That Have
Been Stored (Substitute Reception)
If the Receive File indicator is lit, a
message was stored in memory using
substitute reception. This could be because the machine ran out of paper or
toner, or becaus e the Power Saver has
turned off the print engine.
Check the following it ems and solve
the problems, and the machine goes
back to the working condition.
• While the Power Saver (see P.71
“Saving Energy With The Power Saving Timer”) has turned off the heat-
er off, press any key for the
machine go back to the working
condition.
• When
display, your fax machine is out of
paper. Add paper (see P.79 “Load-
ing Paper In The Main Cassette”).
• When
display, your fax machine is out of
toner. Change the toner cassette
(see P.86 “Replacing The Toner Cas-
sette And Cleaning Pad”).
ADD PAPER appears in the
ADD TONER appears in the
light. The message will be printed
as soon as copy ing is done.
❒ To turn su bstitute reception off or
back on, set bit 0 of user parameter
switch 05. See P.132 “User Parame-
ters”.
3
• Otherwise, there might be a paper
jam (see P.108 “Clearing a Copy,
Fax, or Print Jam”) or an open cover.
As soon as the machine is back in
working condition, messages stored
in memory will be printed. The Receive File indicator will turn off and
the messages will be erased from
memory.
Note
❒ If a message comes in while you
are copying, the fax machine will
store the message in memory and
the Receive File indicator will
19
Page 33

Faxing
Faxing A Page With Very Fine Detail
3
So that text, diagrams and images
stand out clearly in your document,
the machine automatical ly detect s the
image density (contrast) and makes a
compensation.
However, if you need to send a document which requires optimum clarity, select the resolution setting
appropriate to your needs.
You can select different settings for
each page of your message. Simply
change the settings for page 2 while
page 1 is being scanned.
Resolution & Shading
The resolution button gives you control over document quality. The indicators above the button show the
current setting. Choose a setting that
matches your document.
Note
❒ Faxing at a higher resolution re-
quires more time. Frequent use of
high resolution could caus e an increase in your phone bill, especially for long distance transmissions.
❖❖❖❖
Standard:
Standard quality. Use for most
printed or typewritten docum e nts.
This is selected when the other resolution indicators are not lit.
❖❖❖❖
Detail:
High quality. Use for documents
with small print or fine details.
❖❖❖❖
Fine:
Very high quali ty. Use this for hig h
quality reproduction.
❖❖❖❖
Halftone:
Use this for optimum quality if
your document contains photographs/diagrams with complex
shading patterns or gray tones. If
you choose this setting, resolution
will automatically be Detail.
20
Page 34
Optional Features For Transmission
Optional Features For Transmission
❒ If you enter the wrong time,
Sending At A Specific Time
(Send Later)
press the {No} key and enter
again.
This feature is called Send Later.
Using this feature, you can delay
transmission of your fax mes sag e u ntil a specified time. This allows you to
take advantage of off-peak telephone
line charges without having to be by
the machine at the time.
Note
❒ If your machine's memory is full,
you will have to send the mes sage
from the document feeder. This
means that anybody removing
your document would automatically cancel the operation.
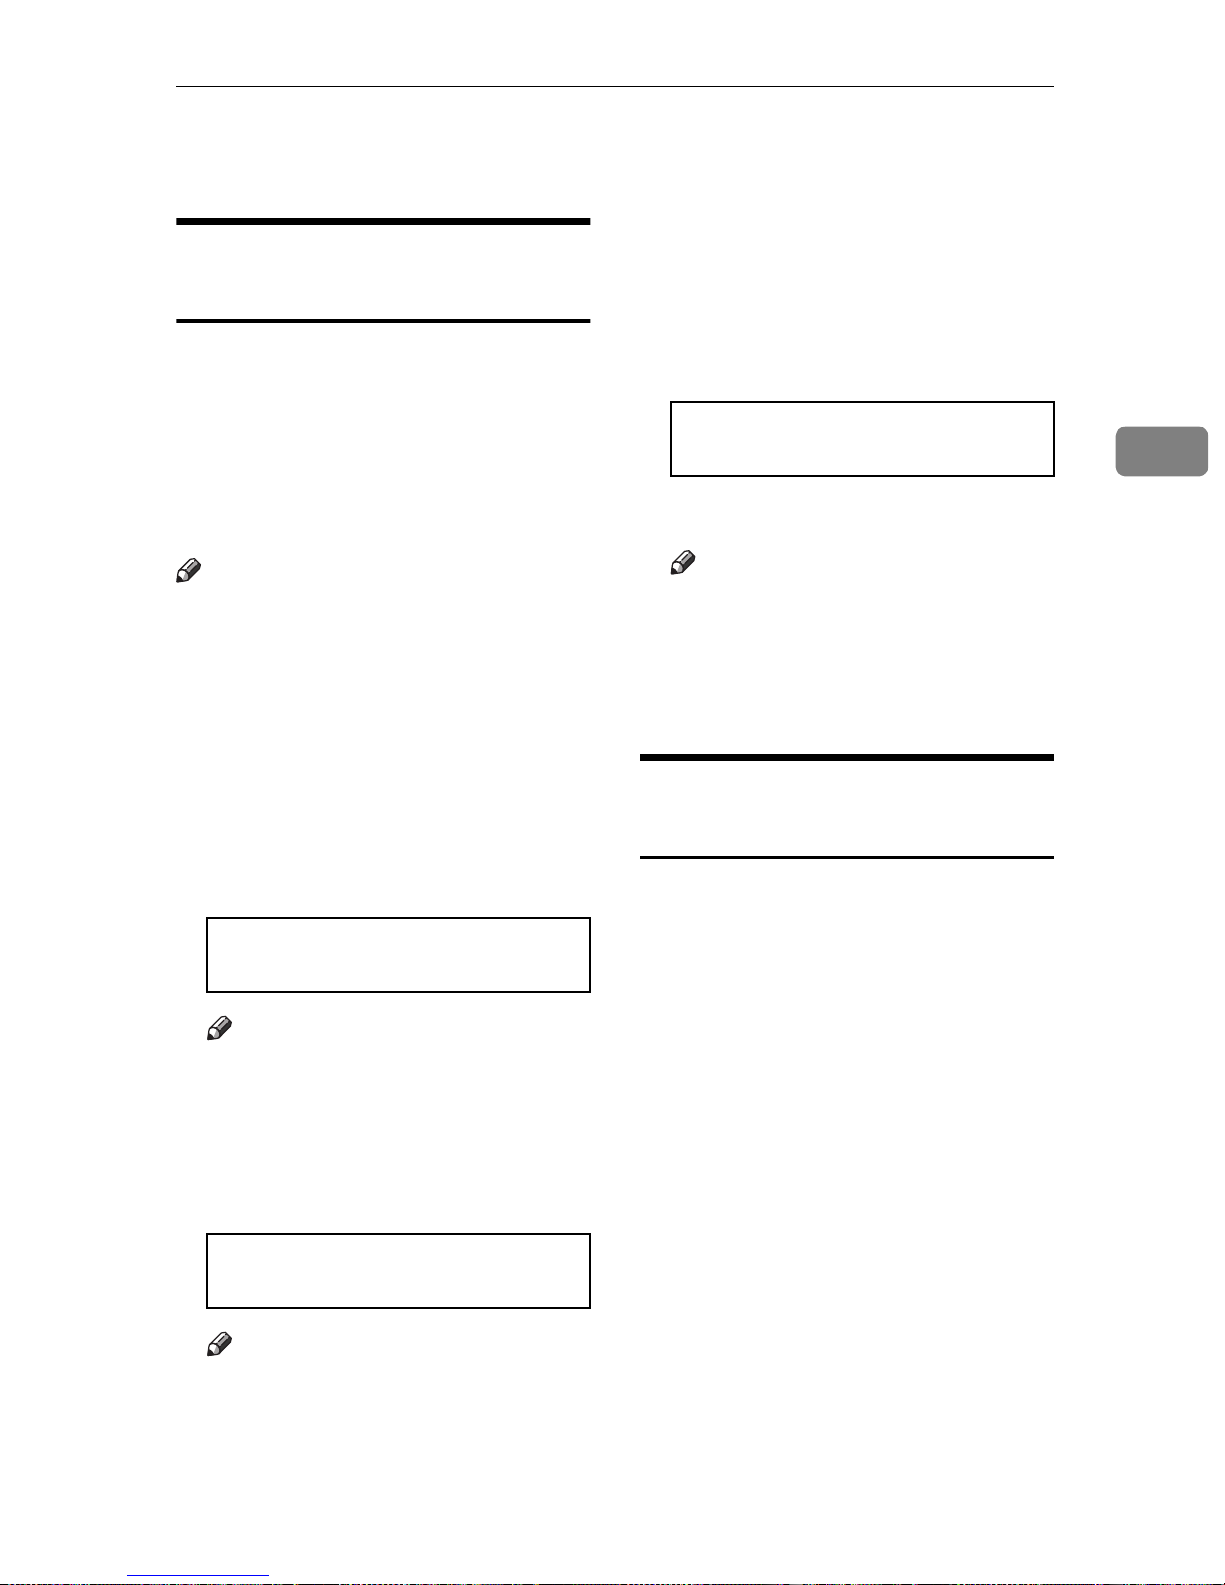
A Proceed as for a usual fax message
but don't press the {{{{Start}}}} key.
B Press V
V twice.
VV
E Press {
PM.
{*}}}} or {{{{#}}}} to change the AM/
{{
SET OPTION */#/Y
TIME 11:30PM 10:00AM
F Press the {
Note
❒ Use function 21 to erase a stored
fax message before it is sent (see
P.34 “Erasing A Stored Message
Before It Is Sent (Functions 21 &
22)”).
{Yes }}}} key.
{{
Printing The Page Number
(Page Count)
This feature is called Page Count.
3
SET OPTION Y/i
SEND LATER?
Note
❒ V is also the {Option} key.
C Press the {
{Yes }}}} key.
{{
D Enter a sending time that falls
within the following 24 hours .
SET OPTION KPAD/Y
TIME 11:30AM 10:00AM
Note
❒ For example: To send at 11:30
pm, press {1} {1} {3} and { 0}
from the key pad.
When your fax message is printed at
the other end, page numbers will be
printed on the top of each page. Using
the Page Count feat ure, yo u can se lect
the batch-numbering page numbers.
If you use Page Count, page numbers
will be printed in batch-numbering
format (for example, p1/3, p2/3, and
p3/3 for a three-page message). This
makes it easy for the other party to
see how many pages you sent, and if
any are missing. However, you have
to input the number of pages at the
ten key pad before sending.
If you do not use Page Count, page
numbers will be printed only as a sequence (for example, p1, p2, p3). This
makes it difficult for the other party
to tell at a glance whether any pages
21
Page 35
Faxing
are missing (for example, due to a
double feed in your machine's document feeder).
Sending Your Identification At
The Top Of Your Message (TTI)
3
Limitation
❒ This feature is available at Immedi-
ate Transmission.
Note
❒ If you do not select Immediate
Transmission, Page Count is automatically switched on, and the
pages are counted automatically.
❒ If the numbering with page count
appears strange, check that the
page count value matches the
number of pages in your document.
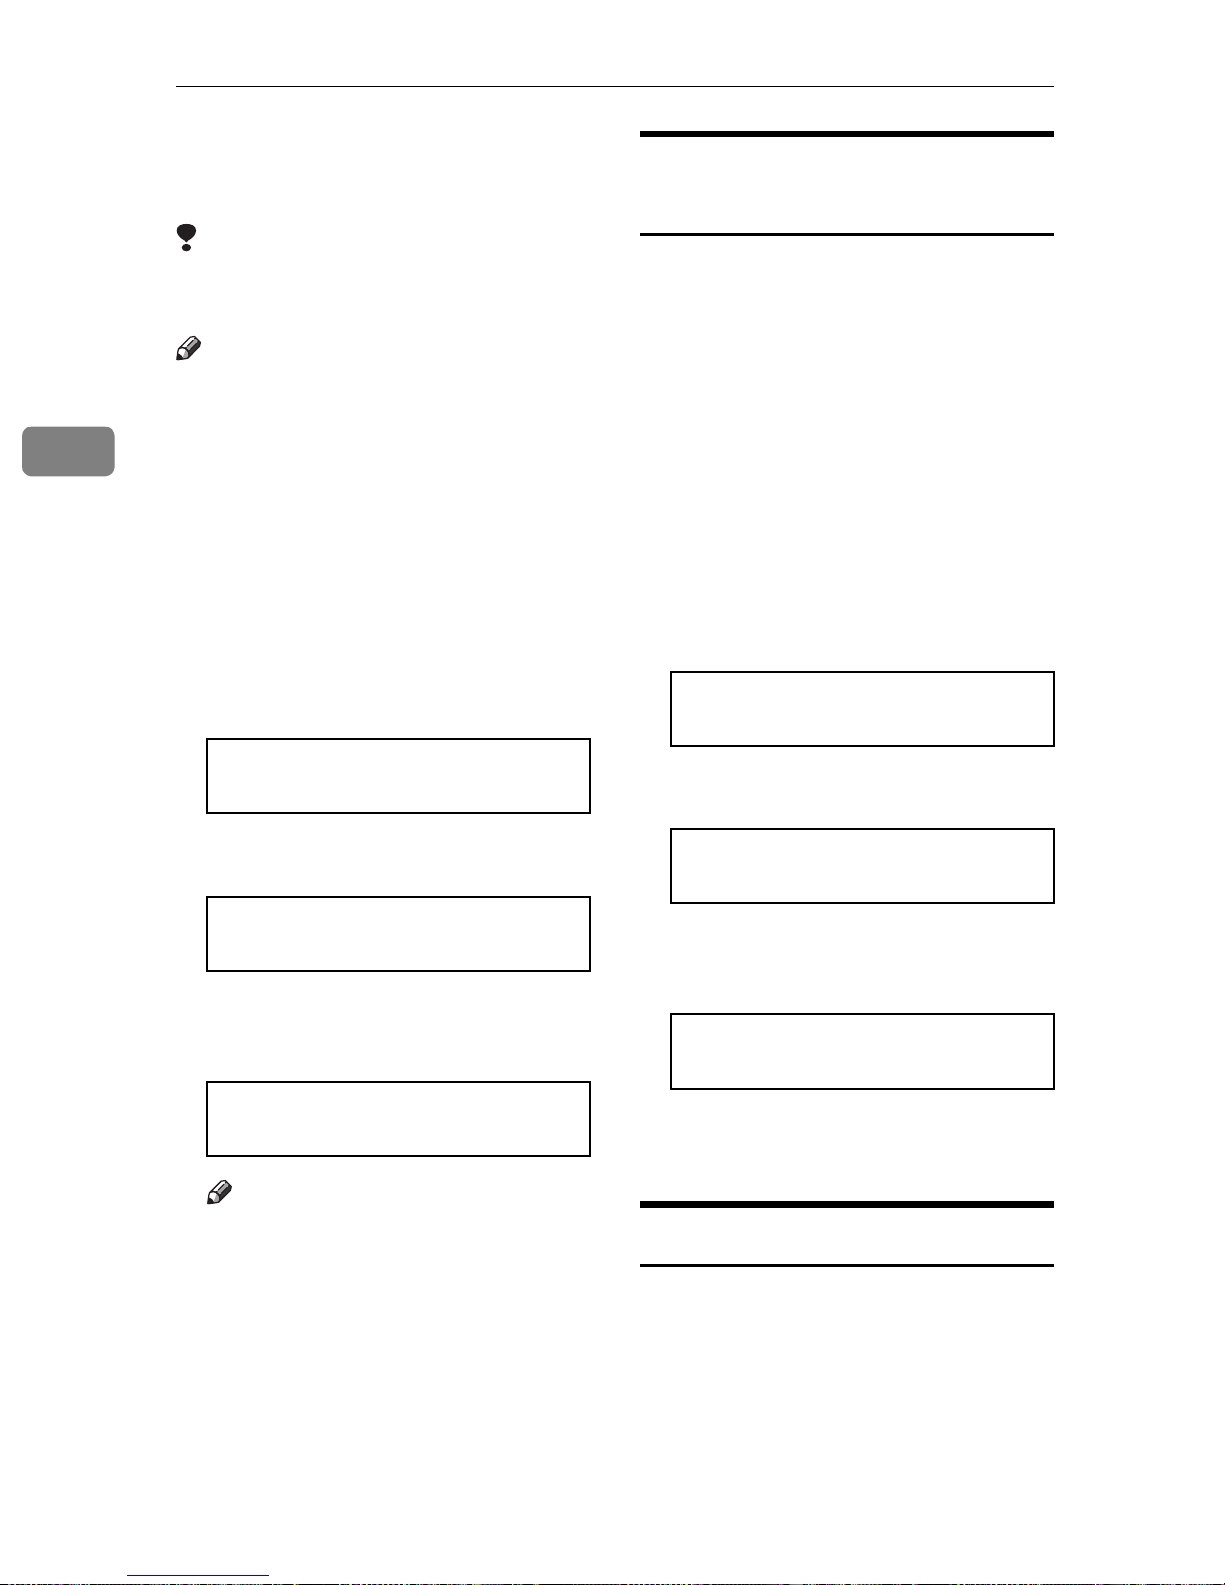
A Press V
play appears.
V until the following dis-
VV
SET OPTION Y/i
SET PAGES?
Normally, the TTI programmed in
your machine is printed at the top of
each of the pages you transmit when
they are received at the other end. The
top of the image will be overprinted if
there is no margin at the top of the
trans mitted page.
In some cases, you may wish the other party to receive an unmarked copy
of your original. In this case, you can
switch TTI off.
A Press V
play appears.
V until the following dis-
VV
SET OPTION Y/i
TTI PRINT?
B Press the {
{Yes }}}} key.
{{
B Press the {
{Yes }}}} key.
{{
SET OPTION KPAD
PAGES:
C Enter {
key pad.
{1}}}} and {{{{0}}}} using the ten
{{
SET OPTION Y/N
PAGES: 10
Note
❒ Example: 10 pages
D Press the {
{Yes }}}} key.
{{
SET OPTION Y/hi
iON OFF
C Press W
setting is correct.
W or VVVV until the displayed
WW
SET OPTION Y/hi
ON iOFF
D Press the {
have finished.
{Yes }}}} key when you
{{
Personal Codes
Personal Codes do the following.
• They allow you to keep track of
machine usage. If everybody uses
a Personal Code when t hey use t he
fax machine, the codes, or the
names programmed into the
codes, will be printed on the report
22
Page 36
that is called the Journal. This will
help you t o c hec k on who has been
using the machine, and how often.
• They allow personalization of documents and printed reports. For
example, if you use Label Insert ion
and store your name with your
Personal Code, the receiver of your
fax message will see your name at
the top of the printout. This eliminates the need for a cover page.
If you input yo ur Personal Code, your
name will appear on the JOURNAL
and Transmission Result Re port .
Reference
See P.48 “Programming the personal
codes”.
Optional Features For Transmission
3
See P.67 “Journal (Function 41)”.
Label Insertion: See P.140 “Enter-
ing Char acters”.
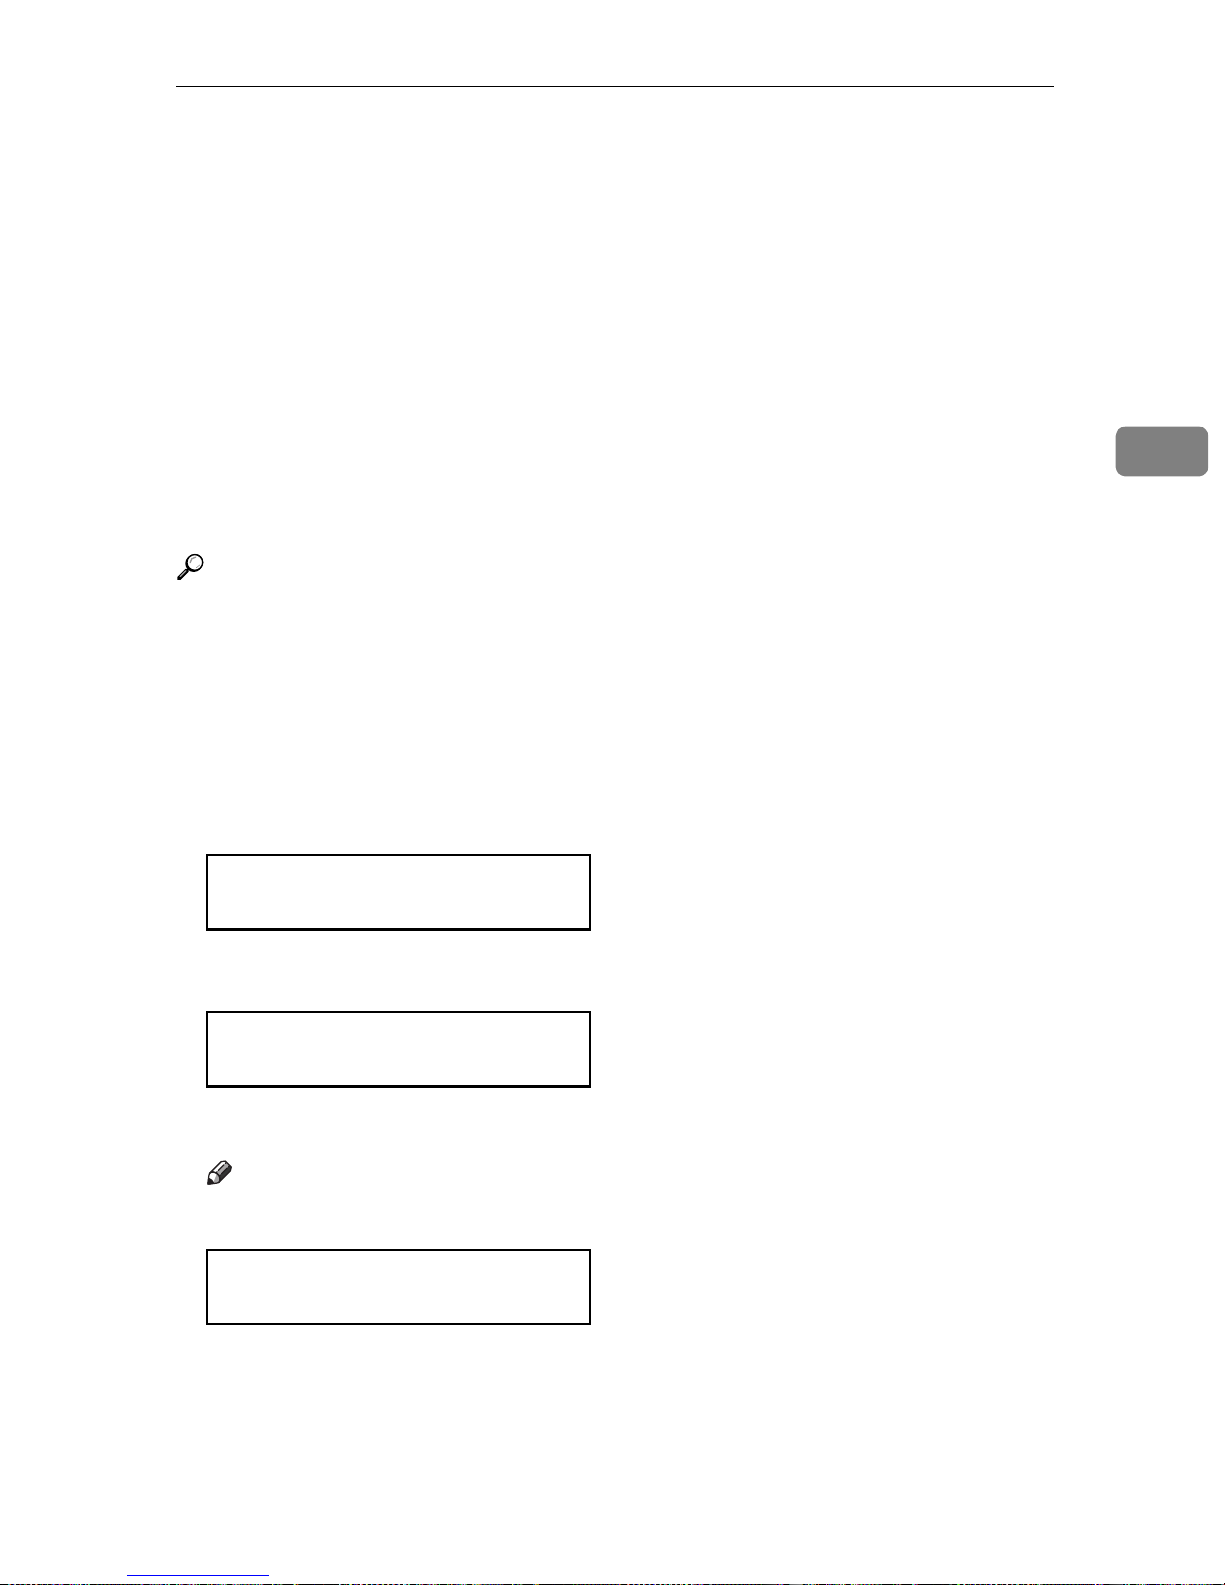
A Press V
display is as shown.
V and make sure that the
VV
SET OPTION Y/i
SET PERSONAL CODE?
B Press the {
{Yes }}}} key.
{{
SET OPTION KPAD
PERSONAL CODE:kkkk
C Enter the personal code.
Note
❒ Example: {7} {3} {6} {2}
SET OPTION Y/N
PERSONAL CODE:7362
D Press the {
{Yes }}}} key.
{{
23
Page 37
Faxing
Redialing
3
If a message was not transmitted successfully, that d oes not mean that y ou
have to enter the telephone number
again. In many cases, the machine
will redial the destination automatically. Or, with the AI Redial key, you
can redial with just a few keystrokes.
Automatic Redialing
The machine will automatically redial
the other party if any of the following
conditions occurred.
• The other party was busy
• There was no reply from the other
party
• The message was rejected by the
machine at the other end because
of excessive errors (in this case, redialing will only take place if
Memory Transmission was used)
Note
❒ Redialing is done once at 5 minute
intervals.
❒ The number of redials and the re-
dial interval may be adjusted by a
service technician.
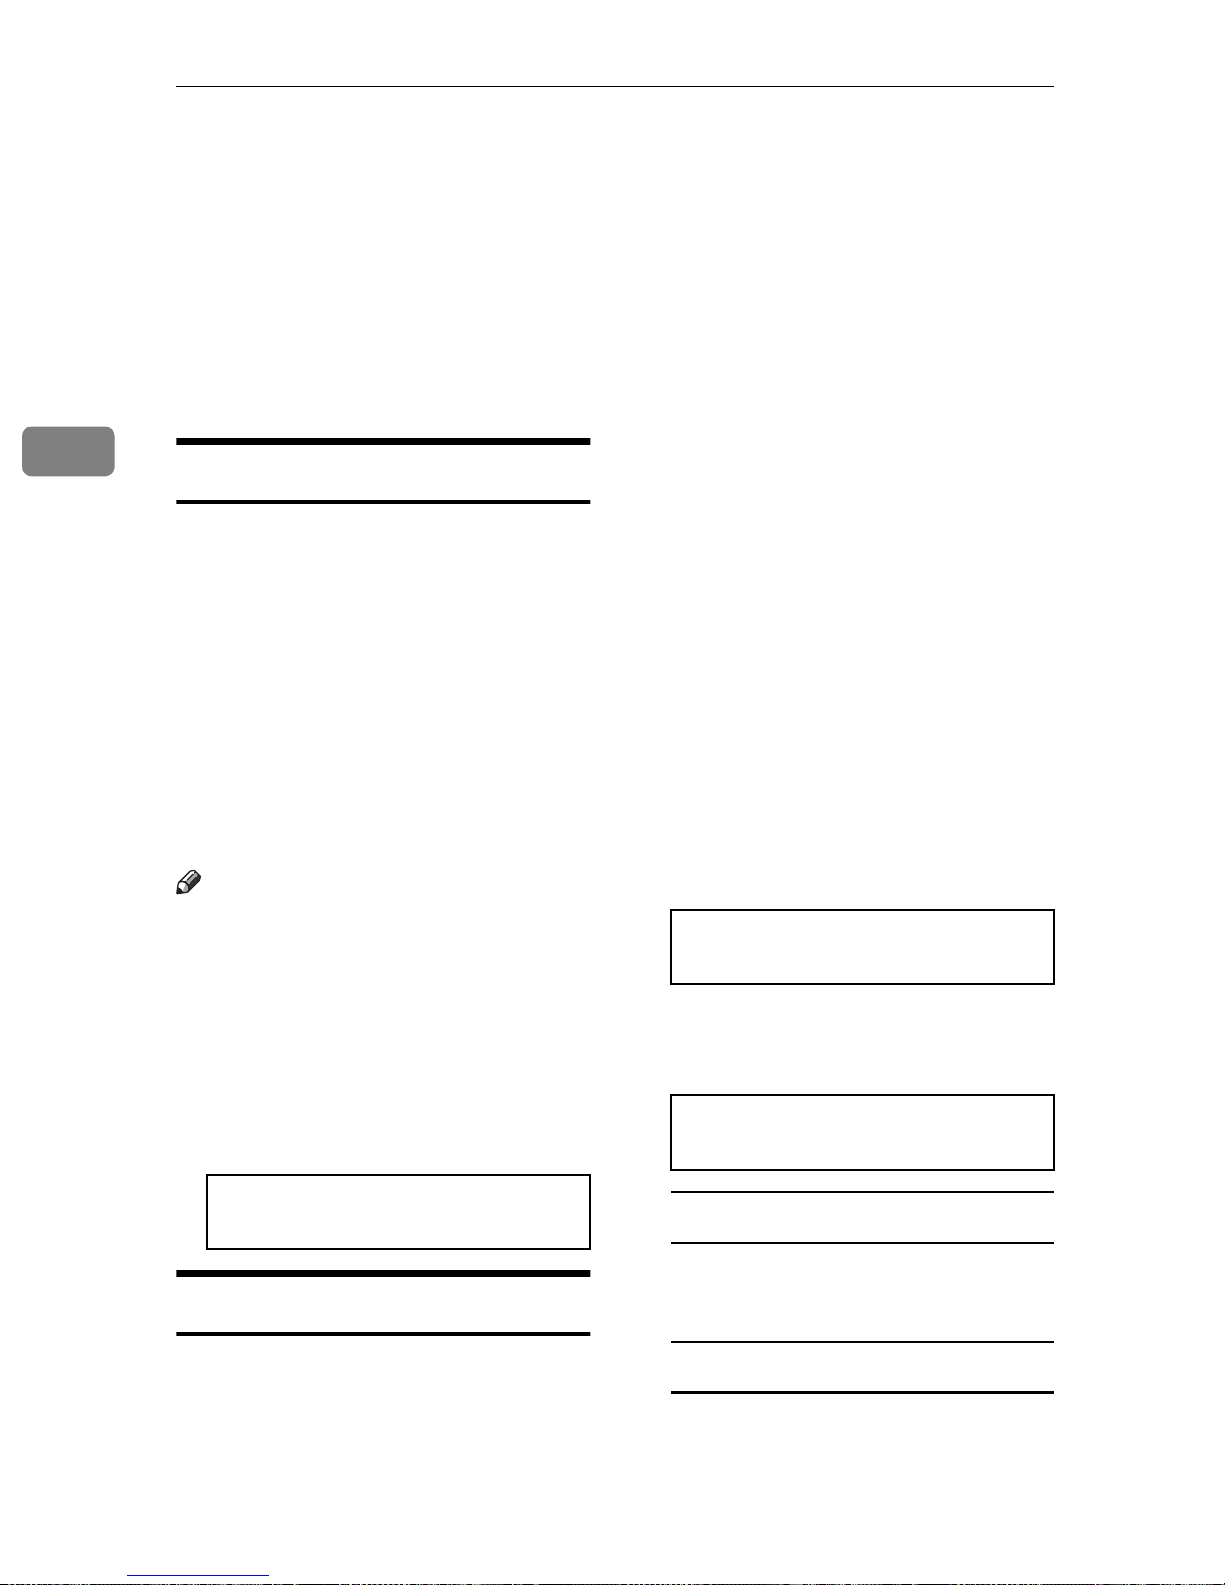
❒ During redialing, the number be-
ing dialed is displayed as shown
below.
til the required telephone number or
name is displayed, then press the
{Start} key.
This feature has the following uses .
• If the machine is waiting to redial
the other party, yo u do not have to
wait for the redialing interval to
expire. Press the {Al Red ial } key until the required telephone number
or name is displayed, then press
the {Start} key .
• If you wish to send another message to the same address that you
sent one to recently, you don't
have to dial the full number again
if it is still in the Redial memory.
Place the message in the feeder,
then press the {Start} key.
A Press the {
til the required number appears
in the display, then press the
{{{{Yes}}}} key twice.
{Pause/Al Redial}}}} key un-
{{
REDIAL Y/hi
a01 XYZ CO. NEW YORK
B Carefully place your fax message
into the Document Guide feeder.
TRANSMIT DIAL/START
DIAL NEXT FAX NUMBER
2125551234
DIALING
Using the AI Redial key
The machine remembers the last 10
telephone numbers that you input. If
you have to redial one of these numbers, just press the {Al Red ia l} key, un-
24
If you dial another party
A Select another number. (Broad-
casting)
If you dial no more party
A Press the {{{{Start}}}} key to start the
transmission.
Page 38
Storing & Editing Fax Numbers (Functions 31 & 32)
Storing & Editing Fax Numbers (Functions
31 & 32)
You can store numbers th at yo u often
use in the machine's memory. A
stored number will remain in memory even if the power is cut.
You can store numbers in two ways.
❖❖❖❖
Quick Dials
The number is assigned to its own
key. To dial that number, just press
the key. You can store up to 30
numbers in this way.
❖❖❖❖
Speed Dials
The number is given a two-digit
code. To dial the number, press the
{Speed Dial} key and enter the
code. There are 50 Speed Dial
codes available numbered 0 0 to 4 9.
Storing, Edi ting & Erasin g
Quick Dial Numbers
(Function31)
This procedure descr ibes how to store
and edit fax numbers in Quick Dial
keys.
A Press {
{{{{Yes}}}} key.
{Function}}}} {{{{3}}}} {{{{1}}}} then the
{{
• Press th e V key until the Quick
Dial you want appears on the display.
Note
❒ To print a list of all Quick Dials
and their contents, press W
{Yes} then the {Start} key.
C Press the {
{Yes }}}} key.
{{
a01 KPAD/Y/N
kkkkkkkkkkkkkkkkkkkk
D Do one of the following:
•Enter the f ax numb er yo u wi sh to
store in this Quick Dial using the
ten key pad. Then press the {Yes}
key.
a01 KPAD/Y/N
212551234kkkkkkkkkk
•To clear the number, press {No} ,
{Yes} then go to s tep J.
E Do one of the following:
•If you wish to enter or edit a label
for this Quick Dial, press the {Yes}
key.
3
ak SPEED/hi
PRINT LISTh/SEARCHi
B Select a Quick Dial in any one of
the following ways:
•Press a Quick Dial key (e.g. press
Quick Dial 01).
a01 PROGRAM? Y/hi
a01 Y/N
PROGRAM LABEL?
•If you do not wish to give this
number a label, pres s {No} then go
to step H.
F Enter or edit the label using the
Quick Dial keys and the ten key
25
Page 39
Faxing
3
pad. See P.140 “Entering Characters”
a01 ABC Y/N
NEW YORK OFFICEkkkkk
G Press {
{Yes }}}} key.
{{
a01 Y/hi
LABEL SET ON iOFF
H Press W
the label for this Quick Dial will
be printed on top of messages that
you send to this destination.
I Press {
W or VVVV a to select whether
WW
{Yes }}}} key.
{{
ak QUICK/hi
PRINT LISTh/SEARCHi
b01 PROGRAM? Y/hi
• Press the V key until the Speed
Dials you want appears on the d is play.
Note
❒ To print a list of all Sp eed Dials
and their contents, press W keys
and then {Start} keys.
C Press {
{Yes}}}} key.
{{
b01 KPAD/Y/N
kkkkkkkkkkkkkkkkkkkk
D Do one of the following:
•Enter the f ax numb er yo u wi sh to
store in this Speed Dial using the
ten key pad. Then press {Yes}.
J You now have two choices:
•To store, edit or delete another
Quick Dial, go to step B.
•To finish, press {Function}.
Storing, Edi ting & Erasin g
Speed Dial Numbers
(Function32)
This procedure descr ibes how to store
and edit fax numbers in Speed Dials.
A Press the {
the {{{{Yes}}}} key.
bk
PRINT LISTh/SEARCHi
{Function}}}} {{{{3}}}} {{{{ 2}}}} and
{{
B Select a Speed Dial in any one of
the following ways:
•Enter the Speed Dial code one the
ten key pad. (e.g. 01)
b01 KPAD/Y/N
212551234kkkkkkkkkk
•To clear the number, press {No} ,
{Yes} then go to step AJ.
E Do one of the following:
•If you wish to enter or edit a label
for this Speed Dial, press {Yes}
key.
b01 Y/N
PROGRAM LABEL?
•If you do not wish to give this
number a label, press {No} then go
to step H.
F Enter or edit the label using the
Quick Dial keys.
b01 ABC Y/N
NEW YORK OFFICEkkkkk
26
Page 40
Storing & Editing Fax Numbers (Functions 31 & 32)
G Press {
{Yes }}}} key.
{{
a01 Y/hi
LABEL SET ON iOFF
H Press W
the label for this Speed Dial will
be printed on top of messages that
you send to this destination.
I Press {
W or VVVV a to select whether
WW
{Yes }}}} key.
{{
bk QUICK/hi
PRINT LISTh/SEARCHi
J You now have two choices:
•To store, edit or delete another
Speed Dial, go to step B.
•To finish, press {Function}.
3
27
Page 41
3
Faxing
Storing & Editing A Group Of Fax Numbers
(Function 33)
❖❖❖❖
Groups
If you regularly broadcast messages to the same set of destinations,
you can combine these numbers
into a group. Then just select the
group and each number will be dialled in sequence automatically.
You can program up to 5 groups
with 100 numbers each.
This section describes how to program or edit a Group. You can also
get a printout of numbers that are already stored. In this examp le we w ill
program Group 1 into Quick Dial key
01.
You can store up to five groups num-
bered 1 to 5.
You can program up to 100 numbers
in a Group.
D To program or edit a Quick Dial
key for this group, press the {{{{Yes }}}}
key.
Note
❒ If you do not program or edit,
press the {No} key and go to
step F.
E Press the Quick Dial key you
wish to use for this group, {{{{01}}}}
for example, then press the {{{{Yes }}}}
key.
Note
❒ If you want to free up the old
Quick Dial key, press the {No}
key, then the {Yes} key.
GROUP 1 Y/N
PROGRAM LABEL?
A Press the {
the {{{{Yes}}}} key.
{Function}}}} {{{{3}}}} {{{{3}}}} and
{{
GROUP k 1-5/hi
PRINT LISTh/SEARCHi
B Enter the number of the group
you want to program or edit.
Note
❒ e.g. Group 1: Press {1}.
❒ To print a list, press W then the
{Start} key.
C Press the {
GROUP 1 Y/N
PROGRAM QUICK?
{Yes }}}} key.
{{
❒ If a message like USED AS..
flashes up, the key is already in
use. Press a different key.
F If you wish to give this group a
name, press the {{{{Yes}}}} key.
GROUP 1 ABC
kkkkkkkkkkkkkkkkkkkk
Note
❒ If not, press the {No} key and go
to step H.
G Enter or edit the name then press
the {{{{Yes}}}} key.
How to enter characters, see P.140
“Entering Characters”
GROUP 1 KPAD/N
kkkkkkkkkkkkkkkkkkkk
28
Page 42
Storing & Editing A Group Of Fax Numbers (Function 33)
H Enter a fax number.
Note
❒ Enter one in one of these ways.
• Press a Quick Dial key.
• Press the Speed Dial key followed by two digits.
• Enter a number on the ten key
pad.
I Press the {
Note
❒ If ALRE ADY PROGRAMMED briefly
flashes up on the display, either
press the {No} key to keep the
number and choose another
number, or press the {Yes} key
to overwrite.
J Press the {
ing numbers in this gr oup.
Note
❒ To enter another number, go
back to step H.
{Yes }}}} key.
{{
{No}}}} key to finish enter-
{{
GROUP 1 Y/N
PROGRAM QUICK?
C Press the {
{No}}}} key.
{{
GROUP QUICK/N
PROGRAM LABEL?
D Press the {
{No}}}} key.
{{
GROUP 1 Y/N
CLEAR?
E Press the {
{Yes }}}} key.
{{
GROUP 1 Y/N
CLEARED
F Press the {
Note
❒ To delete another number, go to
step B.
{Function}}}} key.
{{
3
K Press the {
Note
❒ To work on another group, go
to step B.
{Function}}}} key.
{{
Erasing Gro up s
These steps describe how to erase single numbers from a group.
A Press the {
the {{{{Yes}}}} key.
{Function}}}} {{{{3}}}} {{{{3}}}} and
{{
GROUP k 1-5/hi
PRINT LISTh/SEARCHi
B Enter the group number using the
ten key pad, then press the {{{{Yes }}}}
key.
Programming The Group Key
You can program the 5 groups. However, if there is no room in Quick Dial
keys, this group key is helpful. You
have to program the 30 of the Quick
Dial key as the group key. How to
transmit using the group key, see P.13
“Memory Transmission (Memory Indicator Lit)”.
A Press the {
the {{{{Yes}}}} key
ak QUICK/hi
PRINT LISTh/SEARCHi
B Press the Quick Dial {
{Function}}}} {{{{3}}}} {{{{1}}}} and
{{
{30}}}}.
{{
29
Page 43
Faxing
a 30 PROGRAM? hi
3
C Press the {
{Yes }}}} key.
{{
a 30 PROGRAM? Y/N
PROGRAM GROUP KEY?
D Press the {
{Yes }}}} key.
{{
a k QUICK/ hi
PRINT LISTh/SEARCHi
E Press the {
{Function}}}} key.
{{
30
Page 44
Dial Options
Dial Options
The Dial Options provide access to
various F-code features which are designed to allow confidential transmission and polling reception between
different makers' fax machines. Use
them if the other party's fax machine
is of a different make and supports
the F-code features. Before you can
use the Dial Options, you need to program Quick Dial key 29 as the Dial
Option key if you h ave not d one so a lready (see below for details).
Programming The Dial Option
Key
This procedure describes how to set
up Quick Dial key 29 as the Dial Option key.
A Press {
{{{{Yes}}}} key.
ak QUICK/hi
PRINT LISTh/SEARCHi
B Press Quick Dial key {
a29 PROGRAM? Y/hi
{Function}}}} {{{{3}}}} {{{{1}}}} then the
{{
{29}}}}.
{{
E Press the {
{Function}}}} key.
{{
Using the Dial Options
To use the Dial Options, do the following after you have dialed the destination fax number and before you
press the {Start} key.
A Press the Dial Option key (Quick
Dial 29) .
Y/N
SUB? (S)
B Do one of the following :
• If you wish to set the SUB code
for confidential transmission to
different makers' machines, press
the {Yes} key.
TRANSMIT Y/START
55512345
• To skip SUB, press the {No} key
then go to step D for polling reception from different makers' fax machines.
C Enter the SUB code on the ten key
pad then press the {{{{Yes}}}} key.
3
C Press the {
{Yes }}}} key.
{{
a29 PROGRAM? Y/N
PROG. DIAL OPTION?
D Press the {
{Yes }}}} key.
{{
ak QUICK/hi
PRINT LISTh/SEARCHi
Y/N
SEP? (P)
D Do one of the following:
• If you wish to set the SEP code,
press the {Yes} key.
TRANSMIT Y/START
555512345S9999P
31
Page 45
Faxing
3
• To skip SEP, press the {No} key
then go to step F.
E Enter the SEP code on the ten key
pad then press the {{{{Yes}}}} key.
Y/N
SID? (I)
F Do one of the following:
• If you wish to set the SID code,
press the {Yes} key.
TRANSMIT Y/START
2345S9999P1234IkkkkW
• To skip SID, press the {No} key
then go to step H.
G Enter the SID code on the ten key
pad then press the {{{{Yes}}}} key.
TRANSMIT Y/START
• Press th e {No} key.
K Press the {
{Start}}}} key.
{{
Y/N
PWD? (W)
H Do one of the following:
• If you wish to set the PWD code,
press the {Yes} key.
TRANSMIT Y/START
345S9999P1234IkkkkWk
• To skip PWD, press the {No} key
then go to step J.
I Enter the PWD code on the ten
key pad then press the {{{{Yes}}}} key.
Y/N
SPACE?
J Do one of the following:
• If you wish to enter a space, press
the {Yes} key.
32
Page 46

Chain Dialing
This feature allows you to compos e a
telephone number from various
parts, some of which may be stored as
Quick Dial Keys or Speed Dial Codes,
and some of which may be input at
the ten key pad.
You can program commonly used
area or country codes into Speed Dial
Codes or Quick Dial Keys.
Example: 01133-1-5553333 (From the
USA to Paris).
Assume that the following Quick Dial
and Speed Dial numbers have already been programmed.
Chain Dialing
3
• Quick Dial 01 = 01133 (Overseas to
France)
• Quick Dial 02 = 1 (Paris)
• Speed Dial 10 = 555
The machine ask you to operate.
❖❖❖❖
On Hook Dial or Handset Mode:
Press {01} {02} and the {Speed Dial} key, {1} {0} then {3} {3} {3}
{3}.
❖❖❖❖
Other:
Press {01} the {Pause} key, {02}
the {Pause} key, {Speed Dial} keys,
{1} {0}, then {3} {3} {3} {3}.
33
Page 47
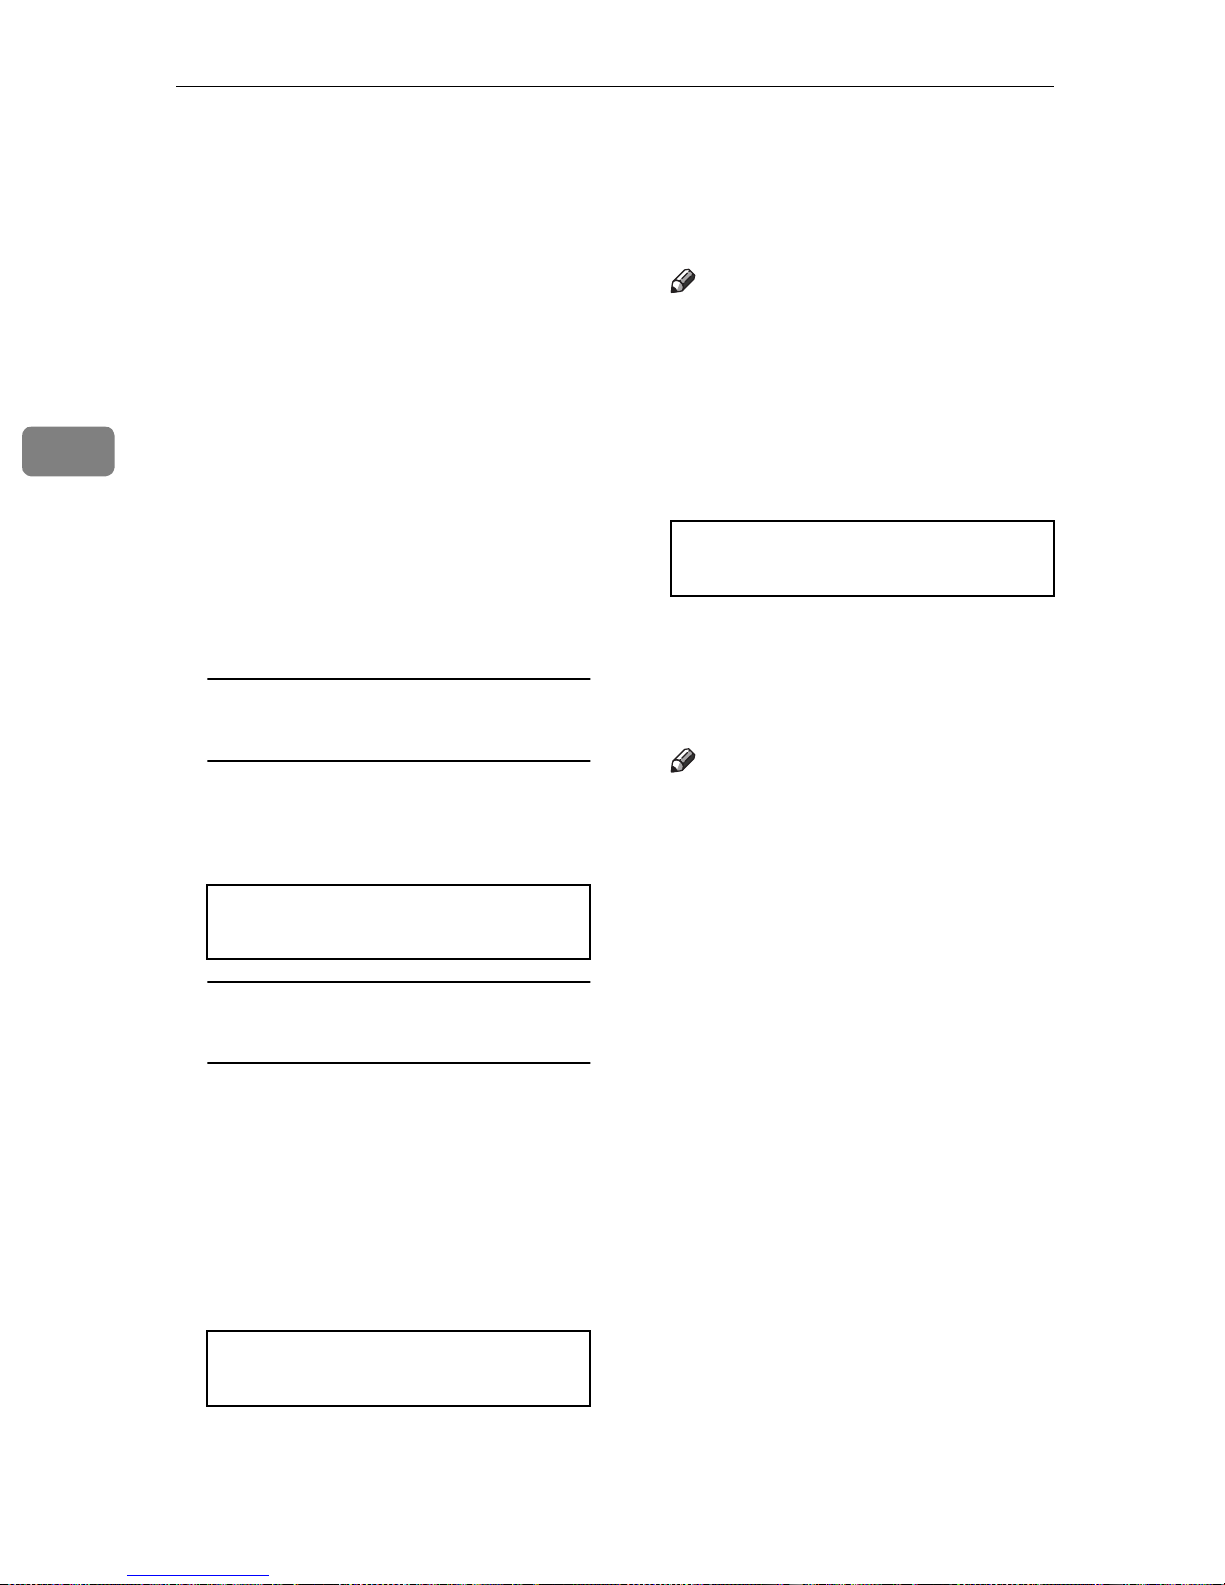
Faxing
Erasing A Stored Message Before It Is Sent
(Functions 21 & 22)
3
Every t ime yo u s to re a fa x mes s age in
your machine's memory, a new file is
created. A file is also created for storing instructions to pick up a fax message left elsewhere (polling, see P.74
“Calling To Request A Message (Polling)”). Each file is given a number.
This number appears o n the File Reserve Report, Journal and Transmission Result Report. To see which files
are currently in memory, you may
print a file list.
A Either :
To erase a fax message stored in
memory
A To erase a fax message stored
in memory; press the {{{{Func-
tion}}}}{{{{2}}}} {{{{1}}}} and the {{{{Yes }}}} key.
Note
❒ Press W to obtain a list of all the
files and their number. If you already know the number of the
file to erase, enter it directly
from the ten key pad.
C Press the {
{Yes }}}} key.
{{
FILE NO.027 Y/N
CLEAR?
D Press the {
the file.
E Press the {
Note
❒ To erase another file, go to step
B
.
{Yes}}}} key again to erase
{{
{Function}}}} key.
{{
FILE NO.kkk KPAD/hi
PRINT LISTh/SEARCHi
To erase instr uctions to pi ck up a
message (polling)
A Press the {{{{Function}}}} {{{{2}}}} {{{{2}}}}
and the {{{{Yes}}}} key.
B Press V
sages.
You'll see the display. A number or
a label will appear on the lower
line.
V to scroll through the mes-
VV
FILE NO.027 Y/hi
5551234
34
Page 48
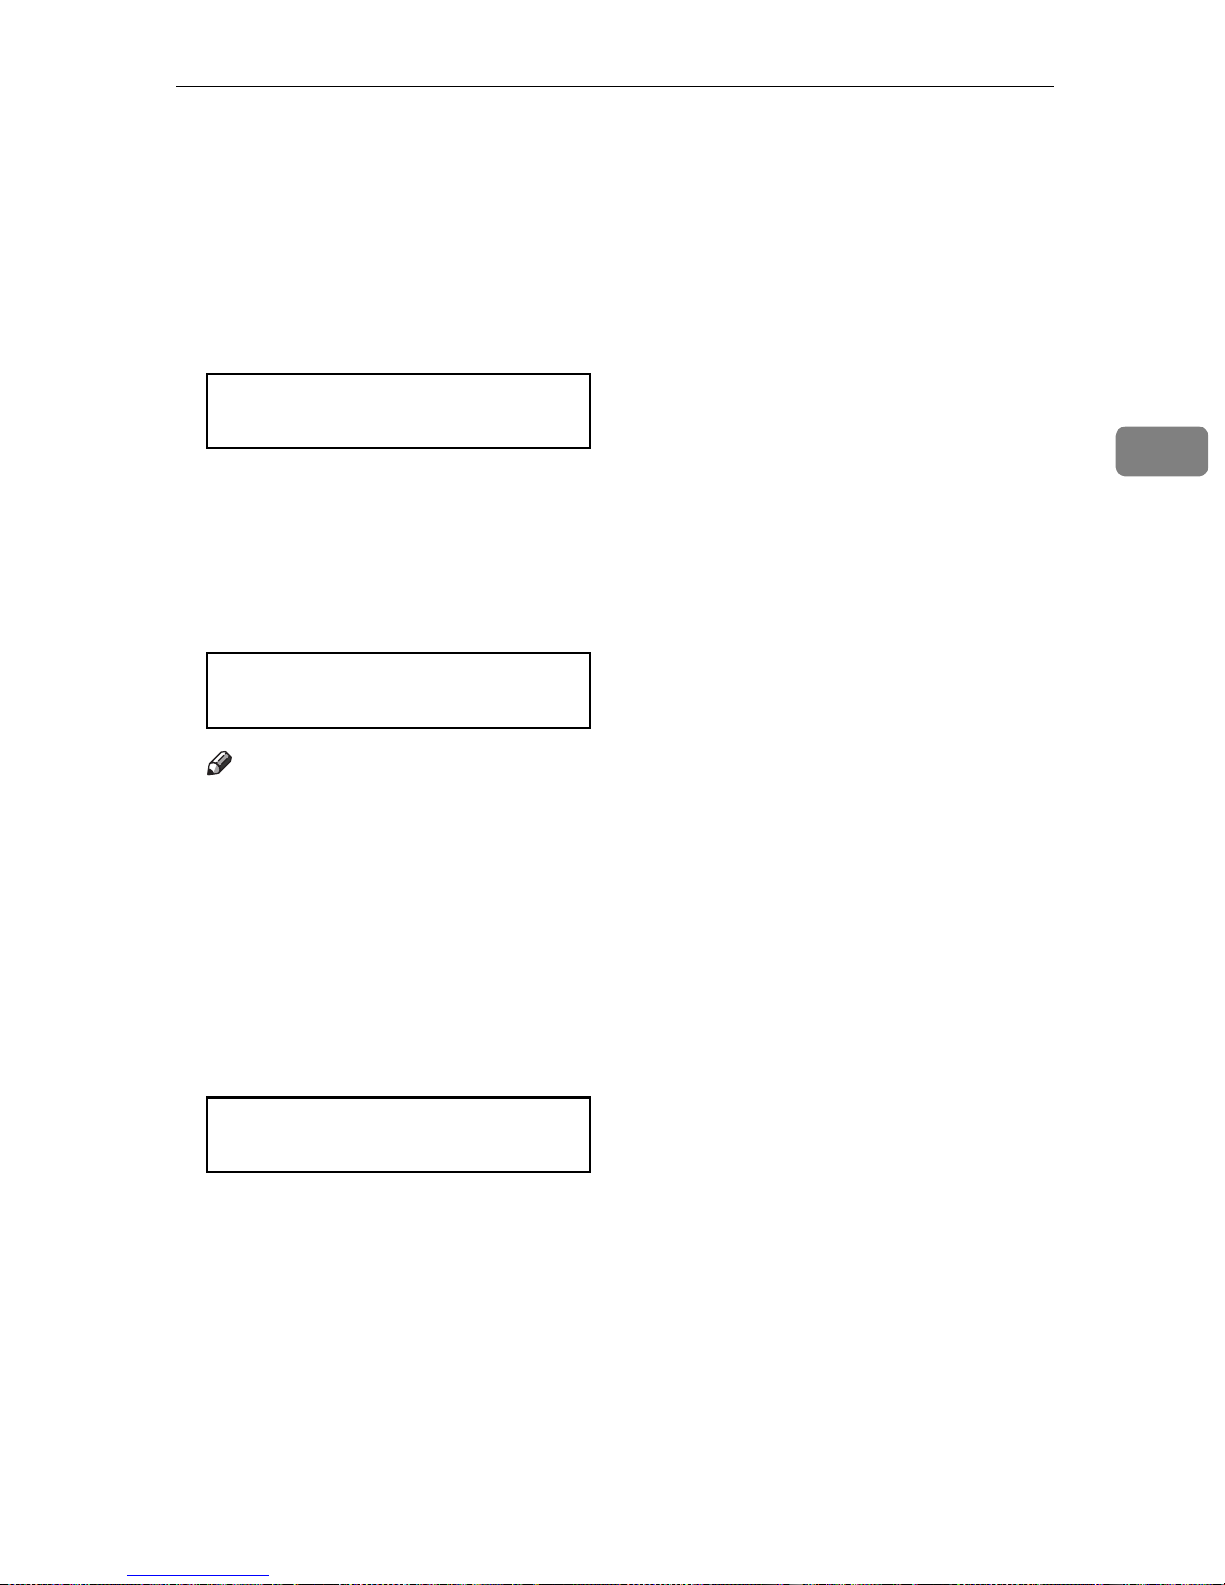
Printing A Stored Message (Function 51)
Printing A Stored Message (Function 51)
If you need to see the contents of any
files, use this feature.
A Press the {
the {{{{Yes}}}} key.
{Function}}}} {{{{5}}}} {{{{1}}}} and
{{
FILE NO.kkk KPAD/hi
PRINT LISTh/SEARCHi
B Press V
sages.
You'll see the display. A number or
a label will appear on the upper
line.
V to scroll through the mes-
VV
FILE NO.115 Y/hi
5551234
Note
❒ Press W to obtain a list of all the
files and their number. If you already know the number of the
file to print, enter it directly
from the ten key pad and skip to
step D.
3
C Press the {
A number or a label will appear on
the upper line.
{Yes }}}} key.
{{
FILE NO.115 START/N
6661234
D Press the {
message.
{Start}}}} key to print the
{{
35
Page 49
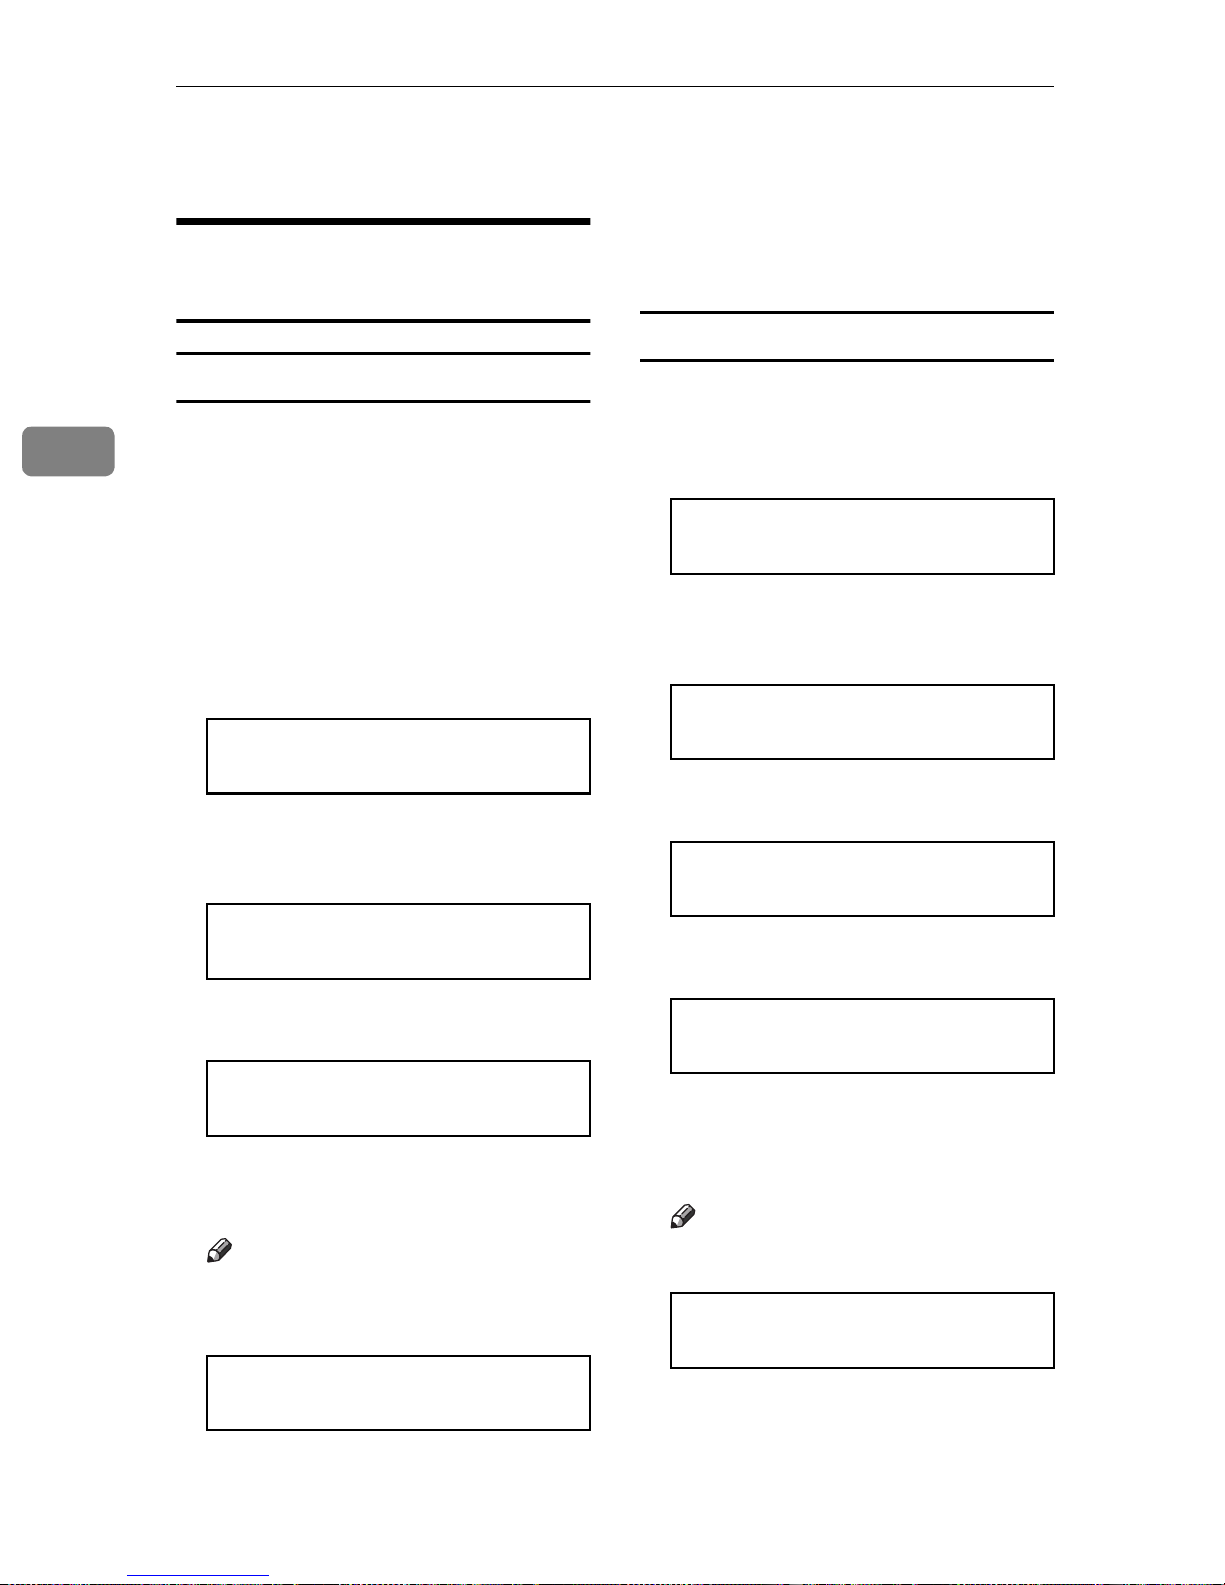
Faxing
Confidential Reception
3
Storing & Editing the
Confidential ID
Programming the Confidential ID
This can be any four-digit code except
'0000'. You must enter it to print any
messages that have been sent to your
machine using Confidential Transmission.
A Press {
the access code {{{{2}}}} {{{{2}}}} {{{{2}}}} {{{{2}}}}.
Then enter {{{{6}}}} {{{{1}}}} then press the
{{{{Yes}}}} key.
Y/NEXTi
SET OWN NUMBER
B Press V
shown opposite.
Y/NEXTi
SET CONFIDENTIAL ID
{Function}}}} {{{{6}}}} then enter
{{
V until the screen is as
VV
E Press {
tion}}}} key.
Editing the Confidential ID
A Press {
access code {{{{2}}}} {{{{2}}}} {{{{2}}}} {{{{2}}}}. Then
press {{{{6}}}} {{{{1}}}} and the {{{{Yes}}}} key.
{Yes}}}} and then press {{{{Func-
{{
{Function}}}} {{{{6}}}} then enter the
{{
Y/NEXTi
SET OWN NUMBER
B Press V
shown opposite.
V until the screen is as
VV
Y/NEXTi
SET CONFIDENTIAL ID
C Press the {
{Yes }}}} key.
{{
CONF. ID CHANGE? Y/N
6754
D Press the {
{Yes }}}} key.
{{
C Press the {
{Yes }}}} key.
{{
CONFID'L ID KPAD
kkkk
D Input the Confidential ID that
you will be using.
Note
❒ Example : {6} {7} {5} {4} from
the ten key pad.
CONFID'L ID Y/N
6754
36
CONFID'L ID Y/N
6754
E Press the {
new Confidential ID code o n the
numeric keypad.
Note
❒ Example: {8} {3} {5} {2}
{No}}}} key then input a
{{
CONFID'L ID Y/N
8352
F Press {
{Yes}}}} then {{{{Function}}}} key.
{{
Page 50
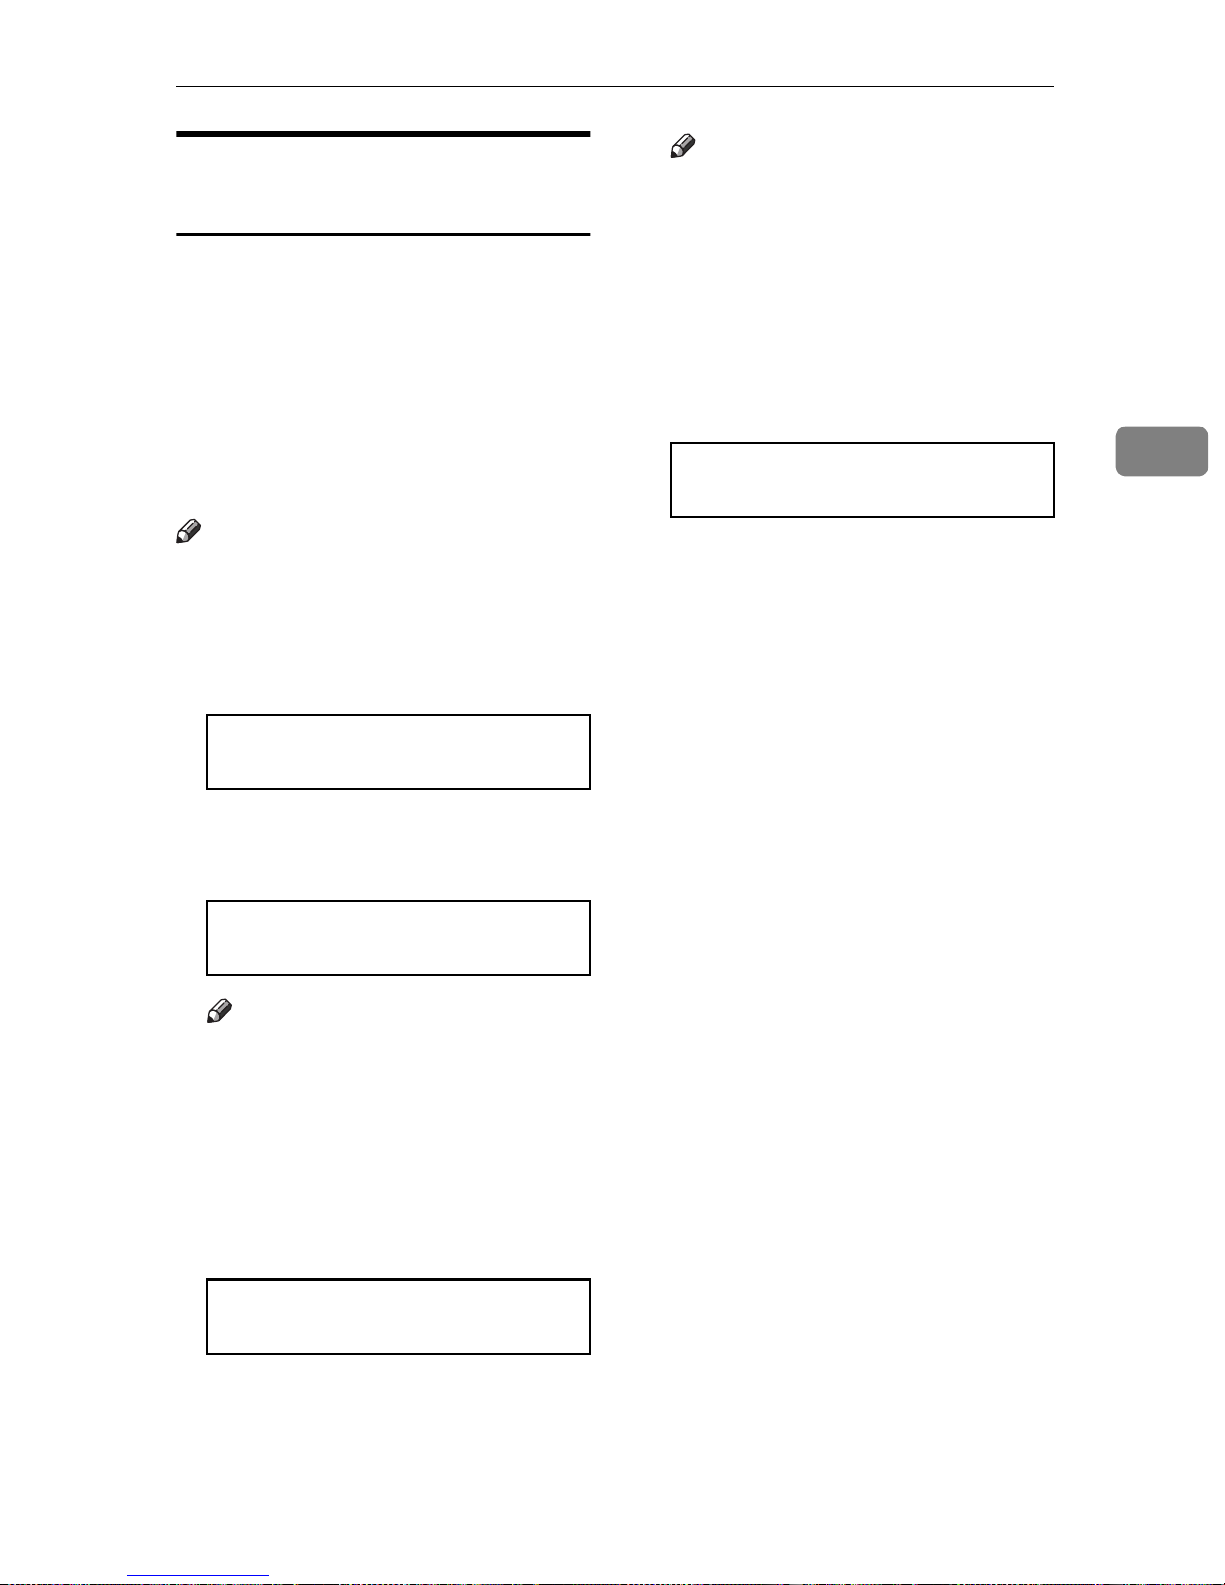
Confidential Reception
Printing messages Received
into Memory (Function 52)
If someone sends you a message using the Confidential Transmission
feature, instead of printing it out immediately, the machine stores it in
memory. The Receive File indicator
on the operation panel blinks to inform you when a confidential message has come in. To print out these
messages, follow the steps below.
Note
❒ You need to know the Co nfidenti al
ID before you start this procedure.
A Press {
{{{{Yes}}}} key.
{Function}}}} {{{{5}}}} {{{{2}}}} then the
{{
Note
❒ If more messages are stored for
this ID, repeat this step as many
times as necessary.
D To check for messages sent with
other Confidential ID codes, go to
step
{{{{No}}}} key then the {{{{Function}}}} key
to quit this function.
BBBB
. Alternatively, press the
READY 100% 10:00AM
SET DOC. OR DIAL NO.
3
CONFID'L ID KPAD
kkkk
B Enter the Confidential ID on the
ten key pad ( e.g. 1234).
CONFID'L ID START/N
kkkk
Note
❒ If no messages are stored in
memory for this Confidential
ID, the display will p rompt you
for a Confidential ID again. In
this case, go to step D.
C Press {
sage.
CONFID'L ID START/N
INVALID ID
{Start}}}} to print the f ax mes-
{{
37
Page 51

3
Faxing
Sending A Fax Using The Handset
You can send a fax message us ing the
handset. (Optional handset or external telephone is required.)
A Set the document then pick up the
handset.
B Dial the other party.
If you hear a voice
A Speak to the other party.
If you hear a high-pitched tone
instead of a voice
A Press the {{{{Start}}}} key.
C When you are ready to send your
fax message, ask the other party to
press the {{{{Start}}}} key.
D When you hear a high-pitched
tone, press the {{{{Start}}}} key.
E Replace the handset.
38
Page 52
Answering The Telephone
This feature is available when you
connect the optiona l handset or exte rnal telephone.
Note
❒ If the telephone rings just once, a
fax is coming in. Do no t pick up the
handset.
If the telephone rings
continuously
A Pick up the han dset and speak to
the other party.
Answering The Telephone
3
If you hear a high-pitched tone
A A fax is coming in. Press the
{{{{Start}}}} key then hang up.
If the caller wants to send you a
fax
A Press the {{{{Start}}}} key after
speaking. Then hang up.
Note
❒ If nothing happens after you
press the {Start} key t he telephone may not be properly
connected.
39
Page 53

3
Faxing
Phoning And Faxing On The Same Call
To talk before sending a fax
A Pick up the h andset.
B Dial.
Note
❒ Do not press the {Start} key.
C If you hear a voice speak as a nor-
mal telephone conversation.
If you hear a high-pitched tone
instead of a voice
A Place your fax message in the
feeder, then press the {{{{Start}}}}
key.
D When you are ready to send your
fax message, place your message
in the feeder, then ask the other
party to press the {{{{Start}}}} key.
E When you hear a high-pitched
tone, press the {{{{Start}}}} key.
F Replace the handset.
40
Page 54
4. Other Features
Verifying Communications, Errors,
Counters, Etc.
You can obtain reports from your machine either by having your machine
print them out automatically, or by
printing them out yourself.
Automatically printed reports
Unless otherwise indicated, the automatic printing of these reports can be
turned on or off by c hanging t he bit of
the user parameters (see P.132 “User
Parameters”).
❖❖❖❖
Journal (Switch 03, bit 7)
This report gives details on each
communication made by your terminal. It is automatically output
after 35 transmissions and receptions.
❖❖❖❖
File Reserve Report (Swit ch 03, bit 2)
If you switch this report on, it is
printed immediately after you
store a document in memory for
Memory Transmission. It gives the
file number, the time that it was
stored, and the destinations (including any Group numbers that
were selected).
❖❖❖❖
Power Failure Report (Stays on)
This report is printed if the machine's power was off for long
enough to erase files from the
memory. The report gives details
of the files that were lost. With this
information, you may store messages for transmission again, and
contact the senders of any receiv ed
messages that were lost.
Note
❒ Phone numbers stored in
Quick/Speed/Groups are not
lost.
❖❖❖❖
Communication Result Report (Memory Transmission) (Switch 03, bit 0)
This report is printed out after
memory transmission showing
whether it was successful or not. If
you have switched this report off, a
Communication Failure Report
will be printed only when a communication fails.
❖❖❖❖
Transmission Result Report (Switch
03, bit 5)
This report is printed out after immediate transmission showing
whether it was successful or not.
❖❖❖❖
Communication Result Report (Polling result report) (Switch 03, bit 4)
This report is printed after your
machine polls a message from another machine.
❖❖❖❖
Communication Failure Report (ON if
Communication Result Report is O FF)
This report is printed if a memory
transmission failure occurred, after a job is completed. It is only
printed if the Communication Result Report is switched off, and
event of a communication failure.
❖❖❖❖
Error Report (Turned on/off by a Service Technician)
This report is printed after each
unsuccessful communication. The
41
Page 55
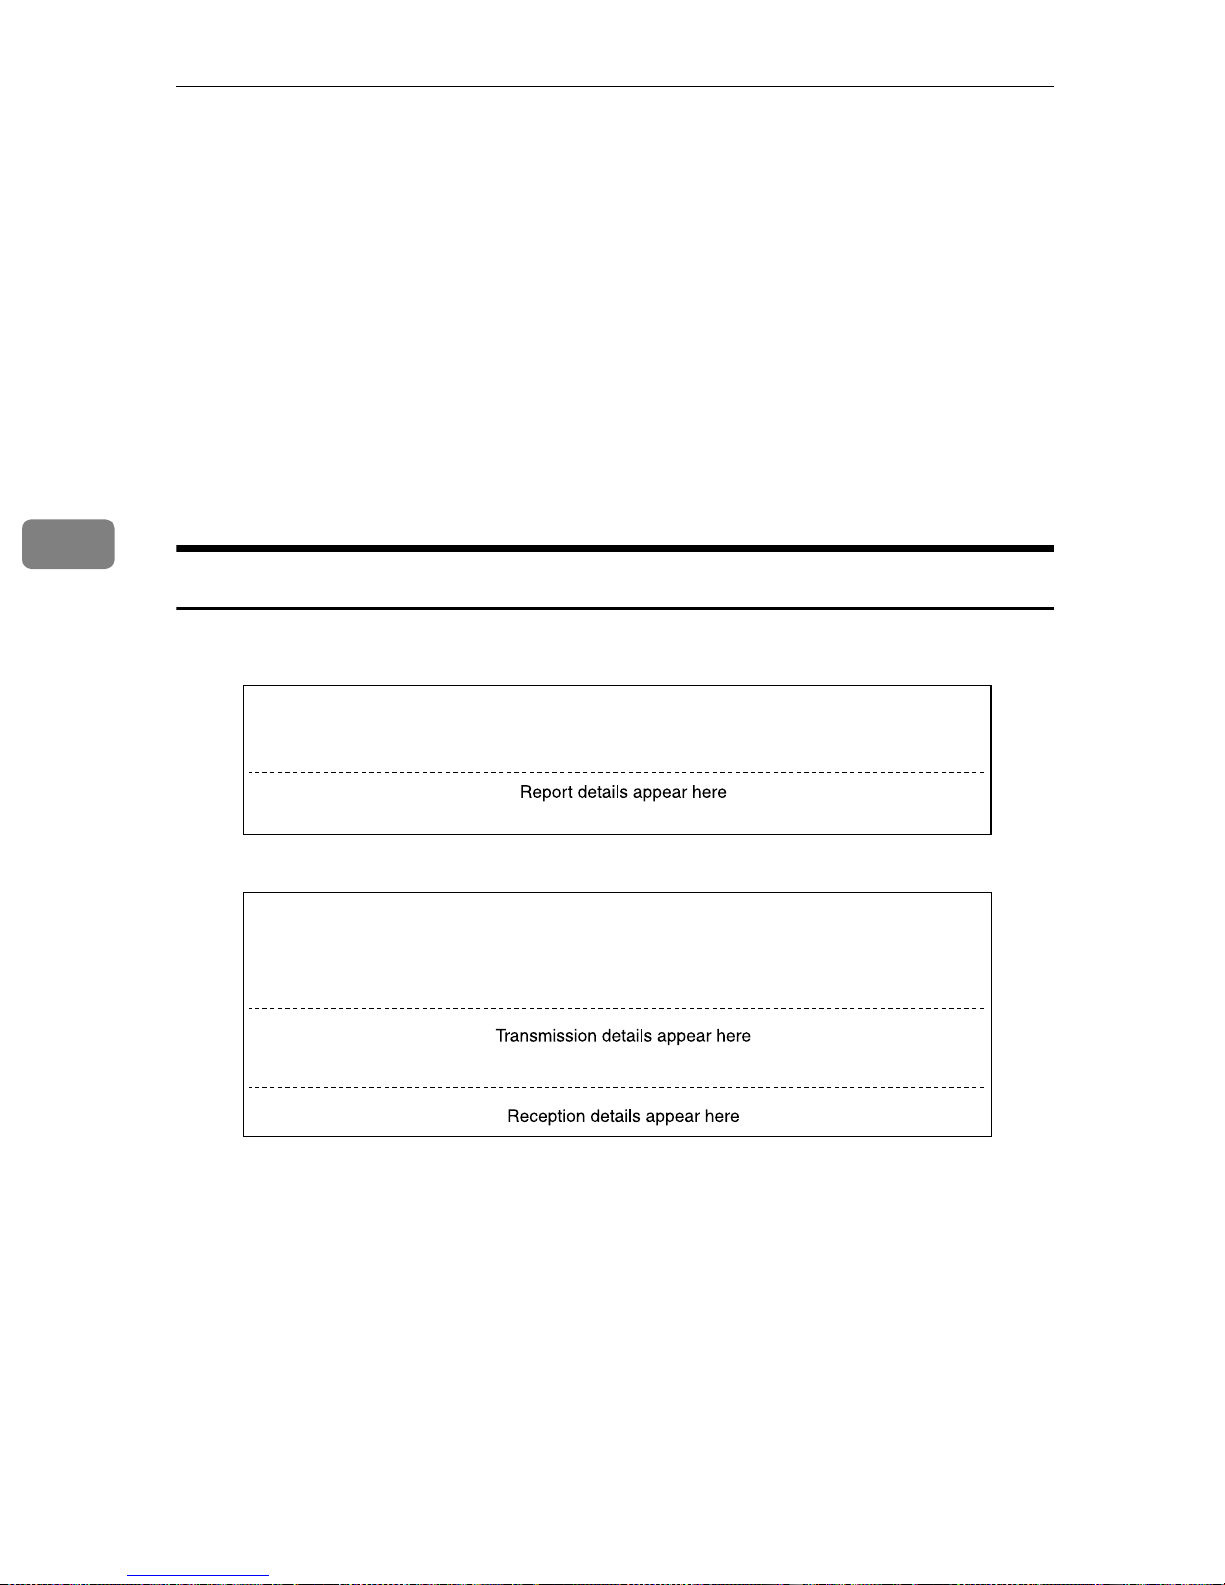
Other Features
4
communication failure report is
printed after a job has been completed. And at the end, it prints a
communication failure or transmission result report. Check it, and
retransmit any page s that were not
sent. If a particular problem continues or gets worse, keep the error
reports for the service technician.
❖❖❖❖
Polling Result Report
This report is printed after your
machine polls a message from another machine.
Report formats
* * * COMMUNICATION RESULT REPORT (NOV.24.1998 9:19PM) * * *
TTI XYZ COMPANY
FILE MODE OPTION ADDRESS (GROUP) RESULT PAGE
❖❖❖❖
Printing Part of the Image on the Report (Switch 04, bit 7)
For reference purposes, the machine prints the first few inches of
the fax message on the following
reports.
• Communication Result
• File Reserve
• Communication Failure Report
* * * JOURNAL(NOV.24.1998 11:07PM) * * *
TTI XYZ COMPANY
<TX>
DATE TIME ADDRESS MODE TIME PAGE RESULT PERS.NAME FILE
<RX>
DATE TIME ADDRESS MODE TIME PAGE RESULT PERS.NAME FILE
GFLIST0N
❖❖❖❖
The Mode Column
See the bottom of the Journal for a full listing of symbols on the Journal. On
other reports a code is given, informing the type of communication. These
codes are explained below.
❖❖❖❖
The Resu lt Co lumn
OK: Successful communication
E: An error occurred
42
Page 56
❖❖❖❖
The Footnote on the Journal
TX counter: Total number of transmitted pages
RX counter: Total number of received pages
Counters (function 94)
These counters will help you if you
wish to keep a regular check on how
many pages your machine has sent,
received, and copied. The machine
has the following counters:
❖❖❖❖
TX Counter:
The number of pages that your machine has sent (transmitted)
❖❖❖❖
RX Counter:
The number of pages that your machine has received
Verifying Communications, Errors, Counters, Etc.
4
❖❖❖❖
Scan Counter:
The number of pages that your machine has scanned (including copies)
❖❖❖❖
Print Counter:
The number of pages that your machine has printed (including copies, reports and lists.)
A Press the {
the access code {{{{2}}}} {{{{2}}}} {{{{2}}}} {2}.
Then press {{{{9}}}} {{{{4}}}} and the {{{{Yes }}}}
key.
{Function}}}} {{{{6}}}} then enter
{{
TX :003256
RX :002648
B Press the {
SCAN and PRINT counter.
{Yes }}}} key to check the
{{
SCAN : 003287
PRINT : 002703
C When you have finished, press
the {{{{Function}}}} key.
43
Page 57
Other Features
Programming Keystrokes
4
If you regularly transmit to a particular destination or set of destinations
using the same featur es, you c an sa ve
a lot of repetitive the ten key pad operation by storing the features and
destinations in a Keystroke Program.
Keystroke Programs are stored as
Quic k Dial Keys.
• If you store a Keystroke Program
into a Quick D ial Key, that Quick
Dial Key cannot be used for any
other purpose.
• Be sure to store your Keystroke
Program in a vacant Quick Dial
Key.
Example: Let us say that you normally send a daily report to locations A,
B, and C at 11 pm (using Sending at a
Specific Time). Store these instructions as a Keystroke Program. Then
every day, you will only have to place
the report in the document feeder,
then press that key to s et up the t ransmission.
Reference
Sending at a Specific Time: see P.21
“Sending At A Specific Time (Send
Later)”.
TRANSMIT OPTIONi
DIAL FAX NUMBER
Note
❒ Skip step B if you are making a
Polling Reception program.
C Select all required features and
telephone numbers as you wo uld
normally do.
Note
❒ Resolution , and halftone cannot
be stored in a keystroke program.
D Press the {
wish to store the program in.
PROGRAM Y/N
PROGRAM?
Note
❒ Example: 01 of the Quick Dial
❒ Make sure that this key is va-
cant.
E Press the {
The procedure that you just stored
will now begin.
{Quick Dial}}}} key t h at you
{{
{Yes }}}} key.
{{
Storing a keystroke program
A Make sure that the machine is in
standby mo de .
READY 100% 10:00AM
SET DOC. OR DIAL NO.
B Place a sheet of paper in the feed-
er.
44
QUICK 01 TO PROGRAM
NO KEY TO CLEAR
If you do not wish to use the
procedure now
A Press the {{{{Stop}}}} key immedi-
ately.
F Press the Quick Dial key where
this program is being stored. In
Page 58
Programming Keystrokes
this example, press the Quick
Dial {{{{01}}}}
Labeling a program
If you store a label for your keystroke
programs, the label will appear on th e
display when you use the program.
A Press the {
the {{{{Yes}}}} key.
ak QUICK/hi
PRINT LISTh/SEARCHi
Note
❒ If you press W and the {Start}
key, a Program List will be
printed.
{Function}}}} {{{{3}}}} {{{{4}}}} and
{{
Reference
How to enter the label; see P. 140
“Entering Characters”.
E Press the {
{Yes }}}} key.
{{
ak QUICK/hi
PRINT LISTh/SEARCHi
To label another program
A Go to step
To return to standby
A Press the {{{{Function}}}} key.
BBBB
.
Using a program
4
B Press the Quick Dial key that
holds the program that you wish
to label and press the {{{{Yes }}}} key.
a 01 Y/N
PROGRAM LABEL?
Note
❒ Example: {01} of the Quick Dial
Key and the {Yes} key.
C Press the {
label for this program.
{Yes}}}} key to progr am a
{{
a 01 ABC
kkkkkkkkkkkkkkkkkkkk
D Input your label, using the Quick
Dial keys.
Before using a program, make sure
that the machine is in standby mode.
Transmission program
A Place your documen t in the feed-
er.
TRANSMIT OPTIONi
DIAL FAX NUMBER
B Press the programmed {
al}}}} key.
Note
❒ The prog ram begins at once.
Free polling reception program
{Quick Di-
{{
a 01 ABC Y/N
DAILY REPORTkkkkkkkk
A Press the programmed {
al}}}} key.
{Quick Di-
{{
2125551234
SET DOC. OR DIAL NO.
45
Page 59
Other Features
4
Note
❒ The program begins at once.
Reference
Picking Up Messages Stored
Elsewhere (Polling Reception ) :
see P.74 “Calling To Request A
Message (Polling)”.
Erasing a program / Changing
the program Label
When you wish to delete a keystroke
program, do the following.
A Press the {
the {{{{Yes}}}} key.
ak QUICK/hi
PRINT LISTh/SEARCHi
{Function}}}} {{{{3}}}} {{{{4}}}} and
{{
To edit the program name
A Press the {{{{Yes }}}} key.
B Edit the program name.
C Press the {{{{Yes }}}} key.
D Either ;
ak QUICK/hi
PRINT LISTh/SEARCHi
To edit or erase another program
A Go to step
To return to standby
A Press the {{{{Function}}}} key.
BBBB
.
B Press the Quick Dial key that
holds the program that you wish
to erase, or scroll the Quick Dial
using WWWW and VVVV.
a08 CHANGE? Y/hi
USED AS PROGRAM
Note
❒ Example: {08} of the Quick Dial
Key.
C Press the {
a08 Y/N
PROGRAM LABEL?
To erase this program
A Press the {{{{No}}}} key.
{Yes }}}} key.
{{
B press the {{{{Yes }}}} key.
46
Page 60
Batch Transmission
Batch Transmission
This feature will save communication
costs if you often send more than one
message to the same location.
If various people in your office send
messages to the Tokyo branch office,
sending all these messages on separate calls can be expensive. It is cheaper to send them all together on the
same call. You can further cut costs by
sending out batches during off-peak
hours. To do so, simply create Keystroke Programs that use Send Later
to send to those common destinations.
Instruct people in y our office to store
all faxes for the Tok yo branch in the
memory, using Send Later. The selected time of transmission must be
the same for each message that you
wish to include in the batch. Then,
when that time comes, the messages
will all be sent out on the same call, or
‘batched’.
Reference
Sending at a Specific Time: see P.21
“Sending At A Specific Time (Send
Later)”.
Changing the batch
transmission on/off
To turn Batch Transmis sion on or off,
adjust bit 4 of switch 6 in the User Parameters. P.132 “User Parameters”).
4
You can set up more than one batch.
In an example, you could set up a
batch for Tokyo at, say, 1 am, a batch
for Hong Kong at 2 am, a batch for
London at 3 am, and so on.
Also, when you send a fax message, if
there is a message in the memory
waiting for transmission to the same
telephone number, it will b e sent out
with your message. This will only
happen if the message already in the
memory is waiting for retransmission
(for example, because the line was
busy on the first attempt).
Note
❒ You can have up to 35 fax messag-
es in the same batch.
47
Page 61

Other Features
Programming the personal codes
4
The main advantage of Personal
Codes is that they allow you to track
machine usage You can still use Personal Codes to personalize your fax
messages, by using the Label Insertion feature.
Each user can be given a Personal
Code. While programming, you can
store the following items with each
Personal Code:
❖❖❖❖
A name:
This will be printed on reports,
such as the JOURNA L, to identify
the users of the machine.
❖❖❖❖
A Confid e n tial ID:
This must be different for each Personal Code, and different from
your machine's Confidential ID. If
somebody sends you a confidential message, they can override
your machine's Confidential ID
with the Confidential ID stored
with your Personal Cod e, if you in form them of this ID. If so, the machine will print a Confidential File
Report that will inform you when
the message has arrived. Then, y ou
must input this Confidential ID to
print the message.
Journal: see P.67 “Journal (Fun ction
41)”.
Confidential File Report: see P.37
“Printing messages Received into
Memory (Function 52)”.
Confidential ID: see P.36 “Storing
& Editing the Confidential ID”.
Receiving Confidential Messages:
see P.37 “Prin t ing mes sa ges Re ce ive d
into Memory (Function 52)”.
Note
❒ The Personal Code is a four digit
code. It can have any value from
0001 to 9999.
❒ You cannot register more than 30
Personal Codes with Names and
Confidential IDs in this machine.
Reference
Using Personal Codes: see P.22
“Personal Codes”.
48
Page 62
Storing a personal code
Storing a personal code
A Press the {
the access code {{{{2}}}} {{{{2}}}} {{{{2}}}} {{{{2}}}}.
Then press {{{{7}}}} {{{{2}}}} and the {{{{Yes }}}}
key.
{Function}}}} {{{{6}}}} then enter
{{
SETTING? Y/hi
PRINT LISTh/SEARCHi
Note
❒ If you press W and the {Start}
key, a Personal Code List will be
printed .
B Press the {
{Yes }}}} key.
{{
PERS. CODE KPAD/hi
kkkk
C Input a Personal Code that you
want to store in your machine for
later use.
To store the label for this
personal code
A Press the {{{{Yes}}}} key and go to
EEEE
Step
If you do not program for this
personal code
A Press the {{{{No}}}} key and go to
step
.
GGGG
.
E Input a name for this Personal
Code using the Quick Dial keys
or the ten key pad.
PERSONAL ABC Y/N
JOHNSONkkkkkkkkkkkkk
Note
❒ Example: JOHNSON
4
PERSONAL CODE Y/N
5477
Note
❒ Example: {5} {4} {7} {7} from
the ten key pad.
If you input the wrong code
A Press the {{{{No}}}} key and input
again.
D Press the {
code.
{Yes }}}} key to store the
{{
PERSONAL CODE Y/N
PROGRAM LABEL?
Reference
How to enter the label; see P. 140
“Entering Characters”.
If you do not wish to store an ID
A Press the {{{{No}}}} key and go to
GGGG
step
F Press the {
name.
.
{Yes }}}} key to store the
{{
PERS. CODE KPAD/hi
SET CONFIDENTIAL ID
If you want to program the
Confidential ID for this user
A Press the {{{{Yes }}}} key.
49
Page 63

Other Features
B Input a Confidential ID for the
personal code used by this user.
C Press the {{{{Yes }}}} key.
To enter another code
4
A Go to step
G Press the {
CCCC
.
{Function}}}} key to finish.
{{
50
Page 64
Editing or erasing a personal code
Editing or erasing a personal code
A Press the {
the access code {{{{2}}}} {{{{2}}}} {{{{2}}}} {{{{2}}}}.
Then press {{{{7}}}} {{{{2}}}} and the {{{{Yes }}}}
key.
{Function}}}} {{{{6}}}} then enter
{{
SETTING? Y/hi
PRINT LISTh/SEARCHi
B Scroll the personal code using V
V.
VV
PERSONAL CHANGE? Y/N
5474
C Press the {
{Yes }}}} key.
{{
PERSONAL CODE Y/N
5474
To erase this Personal Code
A Press the {{{{No}}}} key.
B Press the {{{{Yes}}}} key and go
back to step
personal code. To finish, press
the {{{{Function}}}} key.
BBBB
to edit another
PERSONAL CODE Y/N
PROGRAM LABEL?
If you don't edit the label
A Press the {{{{No}}}} key and go back
to step
sonal code. To finish, press the
{{{{Function}}}} key.
BBBB
to edit another per-
E Edit the name stored with this
code. When the name is correct,
press the {{{{Yes }}}} key.
PERSONAL CODE Y/N
SET CONFIDENTIAL ID?
To edit the Conf idential ID stored
with this code
A Press the {{{{Yes }}}} and {{{{No}}}} key
then input the ID.
When the ID is correct
A Press the {{{{Yes }}}} key twice.
4
To edit the contents of this code
A Press the {{{{Yes}}}} key and go to
DDDD
step
.
PERSONAL CODE Y/N
PROGRAM LABEL?
D Edit the label.
To edit the label
A Press the {{{{Yes}}}} key and go to
EEEE
step
.
To enter or edit another code
A Press the {{{{No}}}} key and go back
to step
F Press the {
BBBB
.
{Function}}}} key.
{{
51
Page 65

Other Features
Tonal Signals
4
On this model the {*} key on the ten
key pad is used as the Tone key.
Some organizations offer you a special service by telephone, which you
can access by transmitt ing Touch tone
or DTMF tones. If your phone service
provides only pulse dialing, or if you
are calling over a digital network, the
ability to generate Tonal Signals will
allow you to access th ese services.
Firs t, di al the othe r par ty. W hen you
are through to the other end , press the
Tone key and enter the code number
that is needed to access the required
feature at the other terminal. You do
not need to pr ess t he T one key if y ou r
machine is set up for dialing in Tone
Dial (DTMF) mode.
Using the tone key
have finished your business w ith
the remote facility, hang up.
Note
❒ Do not press the {Start} key.
A Make sure that the machine is in
standby mode, and that there is
no document in the feeder.
B Pick up the telephone handset, or
press the {{{{On Hook Dial}}}} key.
C Dial the remote facility. Do not
press the {{{{Start}}}} key.
Note
❒ If your telephone line type is
DTMF (Tone Dial), go to step E.
D After your line is connected to the
remote facility, if your teleph one
line type is Pulse D ial, press the
{{{{*}}}} key on the ten key pad.
A dot appears in the display.
E Input the digits that you need to
use the remote facility. After you
52
Page 66

Rejecting messages from senders who don't identify themselves
Rejecting messages from senders who
don't identify themselves
Your fax machine can reject incoming
messages lacking an identifier signal.
Follow the user p a ramet er procedure
on to enter these settings.
Switch 05, bit 1
• 0: Accept such messages
• 1: Reject such messages
4
53
Page 67
Other Features
Rejecting or accepting messages from
specified senders (Authorized Reception)
This feature is called Authorized Re ception. It helps you reject junk fax
mail.
It lets you specify which terminals
you wish to receive fax messages
from; all others will be shut out.
About Authorized Reception
Entering A List Of Senders To
Treat Differently (Function 81)
How to enter a list of senders to treat
differently, see P.57 “Entering A List
Of Senders To Treat Differently (Function 81)”
4
A You must specify a list of senders
(function 81). See P.57 “Ente ring A
List Of Senders To Treat Differently
(Function 81)”.
B You must turn Authorized Recep-
tion on (function 62). See P.54
“Switching authorized reception on /
off (Function 62)”.
C You must set your machine to ac-
cept or rejec t m essag es from sen ders in that list (user parameters,
switch 08, bit 2 and 3; see P.132
“User Parameters”).
If you accept them, the general pub li c
will not have access to you r fax machine. You accept messages only from
a group of people you know.
If you reject them, everyone will be
able to send you messages except the
people in the list . This is useful to reject the junk fax mail.
You can store up to 30 identifications
with this feature. You can program
part of an identification and accept
(or reject) messages from all senders
whose identification contains that
part. See P.65 “Wild Cards”.
Switching authorized
reception on / off (Function 62)
Before you use Authorized Reception, you have to switch the feature
on.
A Press the {
the access code {{{{2}}}} {{{{2}}}} {{{{2}}}} {2}.
Then press {{{{6}}}} {{{{2}}}} and the {{{{Yes }}}}
key.
Y/NEXTi
SELECT LINE
B Press V
shown.
Y/NEXTi
AUTHORIZED ON/OFF
C Press the {
AUTHORIZED Y/hi
iON OFF
D Press W
off setting.
{Function}}}} {{{{6}}}} then enter
{{
V until the screen is as
VV
{Yes }}}} key.
{{
W or VVVV to change the on or
WW
54
E Press the {
keys.
{Yes}}}} and {{{{Function}}}}
{{
Page 68
Cassette Selection
Cassette Selection
About Cassette Selection
This feature is only available if your
machine has an optional lower cassette, you can direct fax messages
from certain senders to be printed
from the main cassette.
Note
❒ Example: Put yellow paper in the
main cassette. Then, messages
from head office can be printed out
on yellow paper; this will m ake it
easy for you t o see when a message
from head office has arrived.
A You must specify a list of send-
ers (function 81). See P.57 “Entering A List Of Senders To Treat
Differently (Function 81)”.
B You must turn Cassette Selec-
tion (function 62). See P.54
“Switching authorized reception
on / off (Fun ction 62)”.
Selecting the messages to be
printed from the main cassette
You can select the messages to be
printed from the main cassette (See
P.132 “User Parameters”) to enter the
following settings.
❖❖❖❖
Switch 08, bit 4
You have to set it “1”
❖❖❖❖
Switch 08, bit 5
• 0: Print messages from the special terminals from the main
cassette.
• 1: Print messages except from
the special terminal from the
main cassette.
Selecting the Cassette
( Function 62 )
4
C Select the messages to be print-
ed from the main cassette.
a) All messages from specified
senders
b) All messages except those
from specified senders. (user
parameters, switch 08, bit 2 and
3; see P.132 “User Parameters”).
Entering A List Of Senders To
Treat Differently (Function 81)
How to enter a list of senders to treat
differently, see P.57 “Entering A List
Of Senders To Treat Differently (Function 81)”
Before you use Cassette Selection,
you have to switch the feature on .
If you remove the lower cassette, the
cassette selection mode is automatically turned off.
A Press the {
the access code {{{{2}}}} {{{{2}}}} {{{{2}}}} {2}.
Then press {{{{6}}}} {{{{2}}}} and the {{{{Yes }}}}
key.
{Function}}}} {{{{6}}}} then enter
{{
Y/NEXTi
SELECT LINE
B Press V
shown.
V until the screen is as
VV
Y/NEXTi
CASSETTE ON/OFF
55
Page 69

Other Features
4
C Press the {
{Yes }}}} key.
{{
CASSETTE SELECT Y/hi
iON OFF
D Press W
off setting.
E Press the {
key.
W or VVVV to change the on or
WW
{Yes}}}} and {{{{Function}}}}
{{
56
Page 70
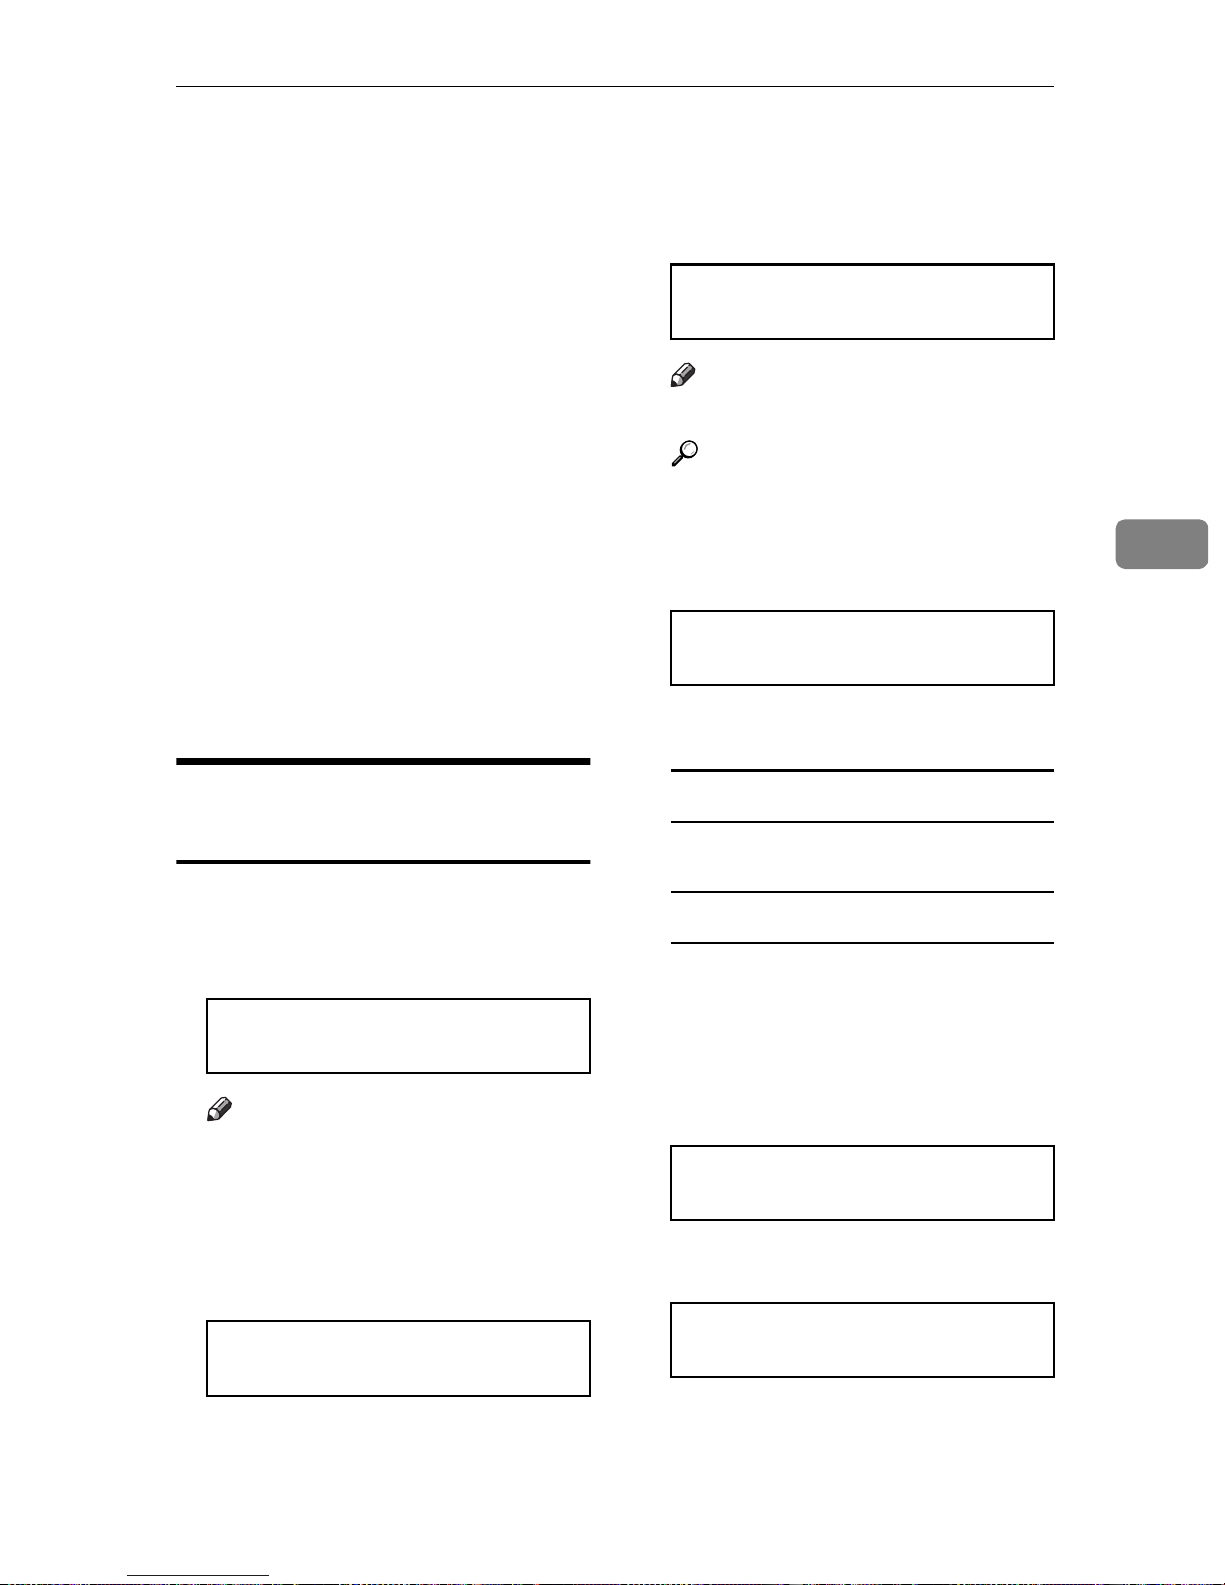
Entering A List Of Senders To Treat Differently (Function 81)
Entering A List Of Senders To Treat
Differently (Function 81)
You can enter a list of up to 30 identifications (RTI, CSI and Wild Cards)
for senders you wish to treat differently. For instance, for each identification in the list, you have the
following options.
• Authorized Re ceptio n: You can ac cept their calls and reject all others
(or vice-versa) with the Authorized Reception setting (See P.54
“Rejecting or accepting messages from
specified senders (Authorized Reception)”).
• Specified Cassette Selection: You
can choose to print their messages
from the specified cassette.
Programming the list of
senders (Special Senders)
RTI/CSI ABC Y/N
XYZ COMPANYkkkkkkkkk
Note
❒ Example: XYZ COMPANY
Reference
How to enter the character s, see
P.140 “Entering Characters”.
D Press the {
{Yes }}}} key.
{{
RTI/CSI Y/N
STORE AS WILD CARD?
E Either:
Store this RTI as a wild card
A The {{{{Yes}}}} key.
4
A Press the {
access code {{{{2}}}} {{{{2}}}} {{{{2}}}} {{{{2}}}}. Then
press {{{{8}}}} {{{{1}}}} and the {{{{Yes }}}} key.
{Function}}}} {{{{6}}}} then enter
{{
SETTING? Y/h
PRINT LISTh/SEARCHi
Note
❒ At this time, you can print a
Programmed Special Numbers
List by pressing W and the
{Start} key.
B Press the {
{Yes }}}} key.
{{
RTI/CSI ABC hi
kkkkkkkkkkkkkkkkkkkk
C Enter RTI or CSI using the Quick
Dial key and the ten key pad.
Otherwise
A The {{{{No}}}} key.
F Select whether you set this RTI/
CSI as the special terminal for authorized reception using VVVV or WWWW.
(if yes: ON, if no: OFF)
SET AUTHORIZED Y/hi
iON OFF
G Press the {
{Yes }}}} key.
{{
SET CASSE SLT Y/hi
ON iOFF
H Select whether you set this RTI/
CSI as the special terminal for
57
Page 71
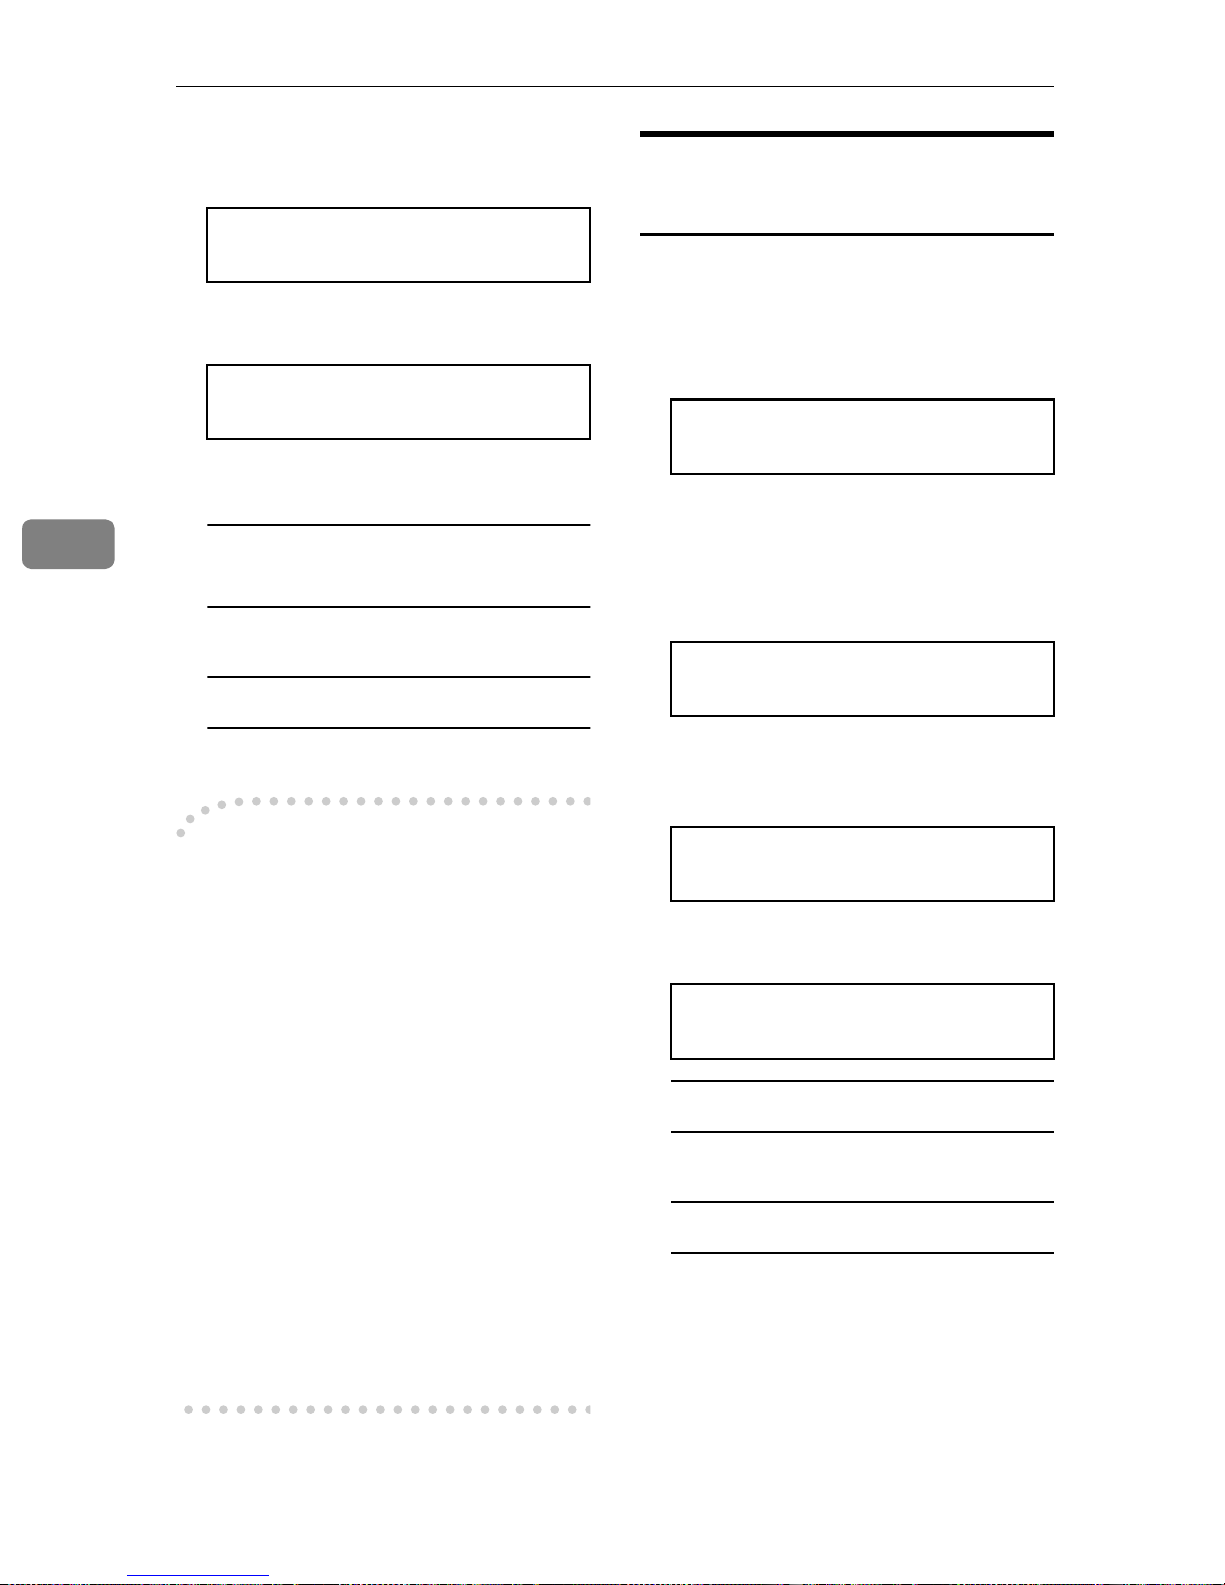
Other Features
specified Cassette Selection using
VVVV or WWWW. (if yes: ON, if no: O FF)
SET CASSE SLT Y/hi
ON iOFF
I Press the {
{Yes }}}} key.
{{
RTI/CSI ABC hi
kkkkkkkkkkkkkkkkkkkk
J Either:
Editing the RTI/CSI for the
special terminals
A Press the {
the access code {{{{2}}}} {{{{2}}}} {{{{2}}}} {2}.
Then, press {{{{8}}}} {{{{1}}}} and the {{{{Yes }}}}
key.
SETTING? Y/hi
PRINT LISTh/SEARCHi
{Function}}}} {{{{6}}}} then enter
{{
4
To program another special
terminal
A Go to step
To finish
A The {{{{Function}}}} key.
----
Hints for programming the
special senders
You must specify the sender's identification code (their CSI or RTI, see
P.165 “Initial Settings & Adjustments”)
which could be a lit tle different from
their phone number.
To get the other party's identification,
call and ask for their CSI or RTI code.
CCCC
.
B Press V
When RTI/CSI you want to
change appears, press the {{{{Yes }}}}
key.
V to scroll through the list.
VV
RTI/CSI CHANGE? Y/hi
XYZ COMPANY
C Edit the RT I or CSI an d p ress the
{{{{Yes}}}} key.
RTI/CSI ABC Y/N
XYZ COMPANY
D Either:
RTI/CSI Y/N
STORE AS WILD CARD?
Store this RTI as a wild card
Explain that you need the number
programmed into their fax machine
for identification purposes. Or, attempt a communicat ion with t heir fax
machine and print out a Journal report (function 41, see P.67 “Journal
(Function 41)”). Read the identification under the RTI or CSI heading of
the report.
58
A The {{{{Yes}}}} key.
Otherwise
A The {{{{No}}}} key.
E Select whether you set this RTI/
CSI as the special terminal for
Authorized reception using VVVV or
WWWW. (if yes: ON, if no: O FF)
Page 72
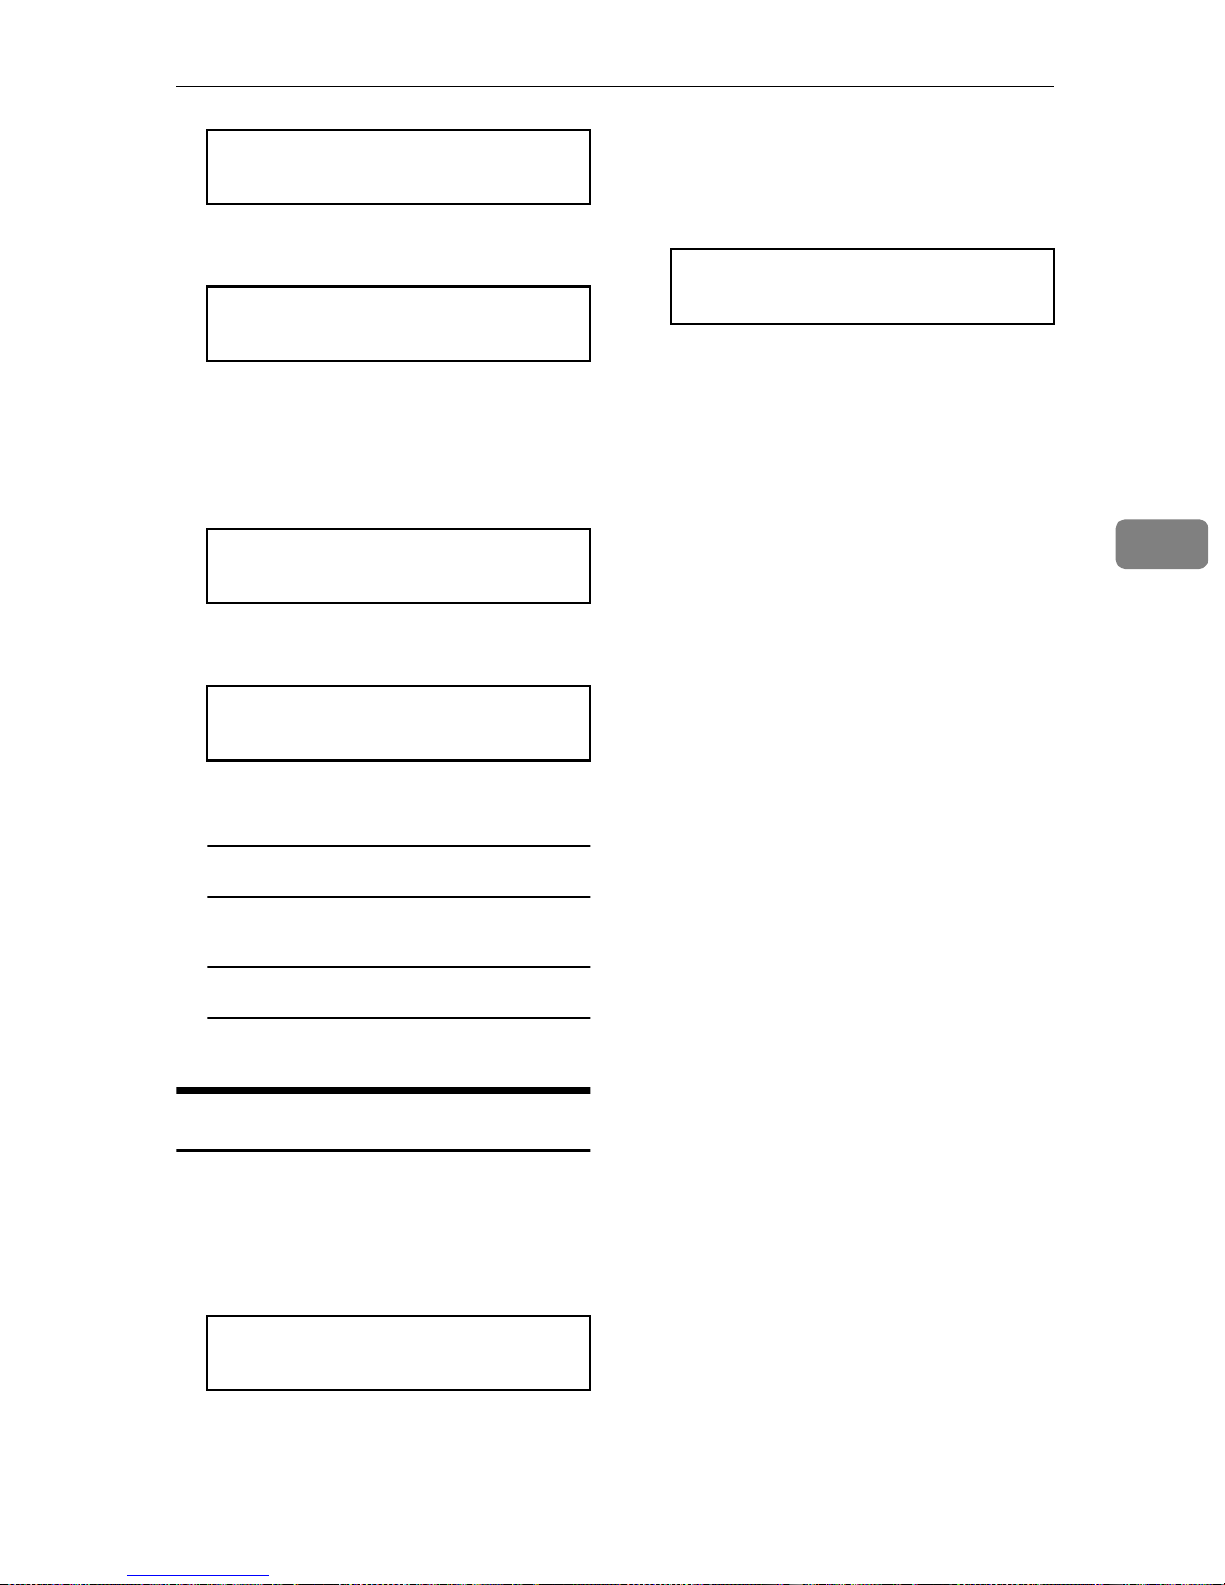
Entering A List Of Senders To Treat Differently (Function 81)
SET AUTHORIZED Y/hi
iON OFF
F Press the {
{Yes }}}} key.
{{
SET CASSE SLT Y/hi
ON iOFF
G Select whether you set this RTI/
CSI as the special terminal for
specified Cassette Selection using
VVVV or WWWW. (if yes: ON, if no: O FF)
SET CASSE SLT Y/hi
ON iOFF
H Press the {
RTI/CSI ABC hi
kkkkkkkkkkkkkkkkkkkk
{Yes }}}} key.
{{
B Press V
the RTI/CSI you want to change
appears, press the {{{{Yes }}}} key.
V scroll the RTI/CSI. And
VV
RTI/CSI CHANGE? Y/hi
XYZ COMPANY
C Press the {
D Press the {
{No}}}} and {{{{Yes}}}} key.
{{
{Function}}}} key.
{{
4
I Either:
To edit another special terminal
A Go to step 2.
To finish
A The {{{{Function}}}} key.
Erasing the special terminal
A Press the {
the access code {{{{2}}}} {{{{2}}}} {{{{2}}}} {{{{2}}}}.
Then press {{{{8}}}} {{{{1}}}} and the {{{{Yes }}}}
key.
SETTING? Y/hi
PRINT LISTh/SEARCHi
{Function}}}} {{{{6}}}}then enter
{{
59
Page 73
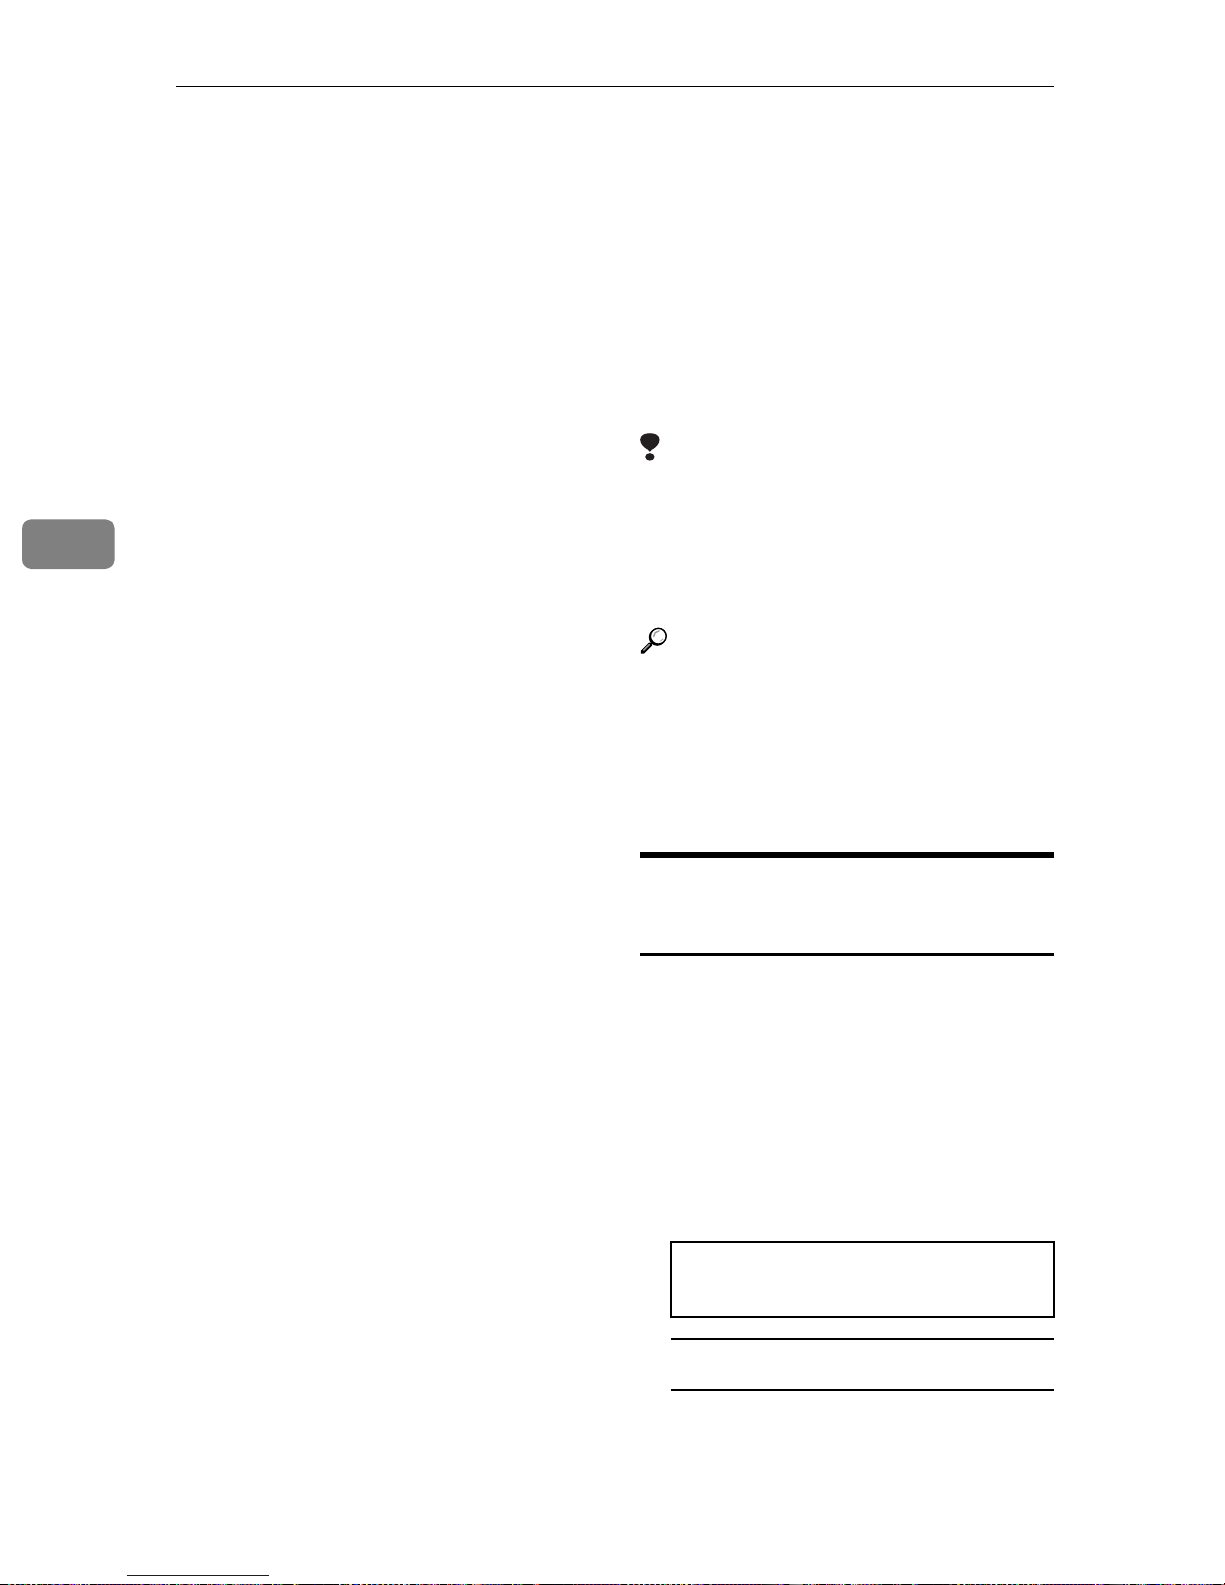
Other Features
Forwarding
4
Using this feature, you can send fax
messages coming in from certain locations on to another fax machine.
The terminals that receive your forwarded messages are called “forwarding terminals”.
If other fax machines in your organization have this feature, you can use
Forwarding to set up distribution
chains for incoming fax m e ssages.
To set up Forwarding, program your
machine as follows:
• Program the phone numbers of the
Forwarding Terminals that you
will pass o n messages to, togeth er
with the list of specified senders
for each number (Function 82).
• Specify the s enders whos e messages you want to forward (Ask the
sending party what their RTI/CSI
is. Or make a c ommu nication with
that terminal, print a Journal and
read off the RTI/CSI).
If the other party is using a machine made by another maker,
they may not be familiar with the
terms RTI or CSI. Explain that you
are interested in the telephone
number that they s tored i n t he machine for identification purposes
(Function 82).
• Switch the Forwarding on (Function 62).
• Select the messages to forward
(Function 63) .
• All messages from specified
senders.
messages that it forwards (Function 63).
• Select whether or not your machine transmits a forwarding mark
to be printed at the other end on
the top of each page of the printo ut
(Function 63).
Limitation
❒ If the RTI/CSI of the machine
sending you a fax is not the same
as any of those that you have programmed into this feature, the
message will not be forwarded.
Reference
RTI and CSI: see P.165 “Initial Settings & Adjustments”.
Journal: see P.67 “Journal (Fun ction
41)”.
Wild Cards: see P.65 “Wild Cards”.
Programming the forwarding
feature
This section shows you how to set up
your machine to forward incoming
fax messages to another location or
locations.
A Press the {
the access code {{{{2}}}} {{{{2}}}} {{{{2}}}} {2}.
Then press {{{{8}}}} {{{{2}}}} and the {{{{Yes }}}}
key.
SETTING? Y/hi
PRINT LISTh/SEARCHi
{Function}}}} {{{{6}}}} then enter
{{
• All messages except those from
specified senders.
• Decide whether you want your
machine to automatically print
60
To print a list
A Press WWWW.
B Press the {
{Yes }}}} key.
{{
Page 74
Forwarding
FORWARD KPAD/hi
kkkkkkkkkkkkkkkkkkkk
C Store a forwarding station num-
ber.
FORWARD KPAD/Y/N
2125551234kkkkkkkkkk
Note
❒ Example: {2} {1} {2} {5} {5}
{5} {1} {2} {3} {4}
❒ If your machine is behind a
PBX, add the access code before
the number, unless this forwarding station is an extension
connected to the same PBX as
your machine.
D Press the {
E Press the {
or CSIs of certain senders to be
forwarded to this station.
{Yes }}}} key.
{{
{Yes}}}} key to input RTIs
{{
B Go to step
JJJJ
.
F Type in an RTI or CSI.
RTI/CSI ABC Y/N
XYZ COMPANYkkkkkkkkk
Reference
How to enter characters, see
P.140 “Entering Characters”.
G Press the {
RTI/CSI Y/N
STORE AS WILD CARD?
H Press the {
RTI as a wild card.
FORWARD Y/N
SET RTI/CSI?
Otherwise
A Press the {{{{No}}}} key.
{Yes }}}} key.
{{
{Yes}}}} key to store this
{{
4
RTI/CSI ABC hi
kkkkkkkkkkkkkkkkkkkk
Note
❒ Messages from senders other
than these RTIs or C SIs w ill not
be forwarded to th is station.
If you wish all incoming
messages to be for warded to this
station
A Press the {{{{No}}}} key.
FORWARD Y/N
SET RTI/CSI?
Note
❒ Do not store any RTIs/CSIs
for it.
I Press the {
If you want to store another RTI/
CSI
A Press the {{{{Yes}}}} key and go
back to step
To store another forwarding
station
A Press {{{{No}}}} and go to step
J Press the {
{No}}}} key.
{{
FFFF
.
{Function}}}} key.
{{
CCCC
.
Editing the forwarding feature
A Press the {
the access code {{{{2}}}} {{{{2}}}} {{{{2}}}} {2}.
{Function}}}} {{{{6}}}} then enter
{{
61
Page 75
Other Features
4
Then press {{{{8}}}} {{{{2}}}} and the {{{{Yes }}}}
key.
SETTING? Y/hi
PRINT LISTh/SEARCHi
B Press V
tion number yo u wish to edit appears. Then press the {{{{Yes}}}} key.
V until the forwar ding sta-
VV
FORWARD KPAD/Y/N
2125551234kkkkkkkkkk
To erase this forward ing station's
number and all RT Is/CS Is stor ed
with it
A Press the {{{{No}}}} key.
C Press the {
RTI/CSI.
{Yes }}}} key to change the
{{
RTI/CSI ABC hi
kkkkkkkkkkkkkkkkkkkk
If you don't change the RTI/CSI
A Press the {{{{No}}}} key and go back
to step
warding number.
BBBB
to edit another for-
D Change the RTI/CSI.
To edit RTI's/CSI's allocated to
thi s number
A Press VVVV until the RTI/CSI you
wish to edit appears.
FORWARD KPAD/Y/N
kkkkkkkkkkkkkkkkkkkk
B Press the {{{{Yes }}}} key to erase.
C Press the {{{{Function}}}} key to fin-
ish.
If you change the forwarding
station's telephone number
A Edit this forwarding station's
telephone number.
FORWARD KPAD/Y/N
2125552234kkkkkkkkkk
B Press the {{{{Yes }}}} key.
If this forwarding station's
telephone number is correct
A Press the {{{{Yes }}}} key.
RTI/CSI CHANGE? Y/hi
XYZ COMPANY
To add RTIs/CSIs to this
E
number
A Input an RTI/CSI and press
{{{{Yes}}}}. Then go to ste p
FFFF
.
RTI/CSI ABC Y/N
XYZ COMPANY
F Press the {
the RTI/CSI.
If you edit the RTI/CSI
A Edit the RTI/CSI.
{Yes}}}} to edit or delete
{{
RTI/CSI Y/N
STORE AS WILD CARD?
FORWARD Y/N
SET RTI/CSI?
62
B Press the {{{{Yes }}}} key. Then go to
FFFF
step
.
Page 76
Forwarding
If you delete the RTI/CSI
A Press the {{{{No}}}} key.
Important
❒ If you delete all the RTIs and
CSIs for a forwarding station,
you must also delete the forwarding station (see step B).
If you do not do this, all incoming messages will be forwarded to that station.
❒
B Press the {{{{Yes}}}} key. Then go
back to step
G Press the {
wild card.
{Yes}}}} key to store it as a
{{
DDDD
.
FORWARD Y/N
SET RTI/CSI?
Otherwise
Switching forwarding on / off
(Function 62)
Before you us e Forward ing , yo u have
to switch it on using Function 62. If it
is switched off, the machine will not
forward any incoming fax messag e s.
A Press the {
ter the access code {{{{2}}}} {{{{2}}}} {{{{2}}}} {2}.
Then press {{{{6}}}} {{{{2}}}} and the {{{{Yes }}}}
key.
{Function}}}} {{{{6}}}} then en-
{{
Y/NEXTi
SELECT LINE
B Scroll through the list of features
with VVVV until the screen is as
shown.
Y/NEXTi
FORWARDING ON/OFF
4
A Press the {{{{No}}}} key.
H Press the {
Edit or input another RTI/CSI for
this forwarding station:
A Press the {{{{Yes}}}} key and Go to
step
To work on another forwarding
station:
A Press the {{{{No}}}} key. Go to step
BBBB
.
❒ If you switch the forwarding
{Function}}}} key to finish.
{{
DDDD
.
Important
on and program no RTI/CSI,
all incoming messages are
forwarded.
C Press the {
{Yes }}}} key.
{{
FORWARDING Y/hi
ON iOFF
D Change the on/off setting by
pressing WWWW or VVVV.
E Press the {
F Press the {
Selecting which messages to
forward
To choose which messages are forwarded, adjust bit 7 of switch 8 with
the User Parameters. Two settings are
available.
• Forward all incoming messages
from specified senders (bit 7=0).
{Yes }}}} key.
{{
{Function}}}} key to finish .
{{
63
Page 77

4
Other Features
• Forward all incoming messages
except those from specified senders (bit 7=1).
(See P.132 “User Parameters”).
Switching local printing on /
off
You can choose whether your machine prints c opi es o f mes s ages that it
forwards (by default, these messages
are not printed). To change this setting, adjust bit 6 of switch 11 with the
User Parameters:
• Bit 6=0 : Do not print
• Bit 6=1 : Print
(See P.132 “User Parameters”).
Enabling and disabling the
forwarding mark
The forwarding mark is printed at the
receiving end on the top of each page
of the fax messages that are forwa rded from your machine. This mark will
help the operator at the other end to
recognize messages that have been
forwarded. If you wish, you can
switch this mark off.
To switch the Forwarding Mark on or
off, adjust bit 1 of switch 2 with the
User Parameters:
• Bit 1=0 : Forwarding mark off
• Bit 1=1 : Forwarding mark on
(See P.132 “User Parameters”).
64
Page 78

Wild Cards
Wild Cards
This feature greatly enhances the effectiveness of the following features:
• Authorized Reception
• Forwarding
• Specified Cassette Selection
In each of these features, you have to
store the RTI or C SI of various terminals that you normally receive fax
messages from. Then, when your machine detects an incoming call, it
checks the RTI or CSI of the other terminal, and acts accordingly.
When you program RTI's for these
features, you can program wild cards
to greatly expand the number of terminals that you can specify.
For example, if you wish to accept
messages from all 150 branches of
XYZ Company (using Authori zed Reception), and forward them on to
head office (using Forwarding), you
don't have to store the RTI of each
branch of XYZ Company. Program
“XYZ” as a wild card for each of these
functions. If the RTIs of all XYZ
branches contain an “XYZ” somewhere in the RTI, messages coming in
from them will be accepted, and sent
on to head office.
specified senders (Authorized Reception)”.
Forwarding: see P.60 “Forwarding”.
RTI and CSI: see P.165 “Initial Settings & Adjustments”.
4
Note
❒ This feature cannot recognize
spaces. If you store MAN as a wild
card, and a terminal with an RTI
that includes MANCHESTER,
HUMAN, or HUMANE calls you,
your machine will recognize MAN
as a wild card and accept and/or
forward the messag e .
Reference
Authorized Reception: see P.54
“Rejecting or accepting messages from
65
Page 79

Other Features
Receiving Options
As receiving options, the Reverse Order Printing , Printing the Center
Mark are available.
Reverse Order Printing
Normally, the machine prints the
pages of received messages in the order that they were received uncollated.
4
However, with Reverse Order Printing, the machine will collate the sequence by printing the message from
the last page first collated. This will
make it easier to distribute the received fax messages, and more convenient for reading them.
Preparation
Reverse Order Printing will not
take place unless you switch it on
beforehand.
To switch this feature on or off, see
the User parameters . ( see P.132 “User
Parameters”).
Printing A Center Mark
If you switch this feature on, 2 marks
at the center-top and center-left are
printed on incoming fax messages.
This makes it easy fo r you t o position
the hole puncher correctly when you
file away the received fax messages.
To switch this feature on, see the User
Parameters. (see P.132 “U ser Param e-
ters”).
Note
❒ The center mark is not printed
when you use the machine for
making copies.
66
Page 80
Reports You Can Printout Yourself
Reports You Can Printout Yourself
You can print these reports at any
time by following the steps b e low.
Journal (Fun cti on 41)
In addition to the automati c output o f
this report, which we've described
earlier, you can print the Journal at
any time.
A Press the {
the {{{{Yes}}}} key.
B Press the {
the report.
{Function}}}} {{{{4}}}} {{{{1}}}} and
{{
{Start}}}} key to print out
{{
File list (Function 42)
This is a list of memory transmission,
memory reception, polling files still
in memory and confidential reception. It gives information about each
stored file, such as the fax numbers,
start time, and status.
A Press the {
the {{{{Yes}}}} key.
{Function}}}} {{{{4}}}} {{{{2}}}} and
{{
A Press the {
the {{{{Yes}}}} key.
{Function}}}} {{{{4}}}} {{{{3}}}} and
{{
ALL LISTS? START/N
QUICK/SPEED/GROUP
To print all the numbers (Quick
Dial, Speed Dial, and Group
numbers)
A Press the {{{{Start}}}} key. Then
press {{{{Function}}}} key and skip
the following steps.
Three lists will come out.
To print the Quick Dial list
A Press the {{{{No}}}} key.
SELECT LISTS Y/N
QUICK DIAL LIST?
B Press the {{{{Yes }}}} and {{{{Start}}}}
keys.
START
4
B Press the {
the report.
{Start}}}} key to print out
{{
Telephone number list
(Function 43)
You can obtain a list of all the phone
numbers stored in the machine. (You
can also obtain a list of stored numbers as you edit them. See P.25 “Stor-
ing & Editing Fax Numbers (Functions
31 & 32)” P.28 “Storing & Editing A
Group Of Fax Numbers (Function 33)”
To print the Speed Dial list
A Press the {{{{No}}}} key.
SELECT LISTS Y/N
QUICK DIAL LIST?
B Press the {{{{No}}}} key.
SELECT LISTS Y/N
SPEED DIAL LIST?
C Press the {{{{Yes }}}} and {{{{Start}}}}
keys.
67
Page 81
4
Other Features
START
To print the Group list
A Press the {{{{No}}}} key.
SELECT LISTS Y/N
QUICK DIAL LIST?
B Press the {{{{No}}}} key.
SELECT LISTS Y/N
SPEED DIAL LIST?
C Press the {{{{No}}}} key.
SELECT LISTS Y/N
GROUP LIST?
D Press the {{{{Yes}}}} and {{{{Start}}}}
keys.
START
Program List ( Function 44 )
This list shows the counters programmed as keystoroke program
with the Function 34.
A Press the {
the {{{{Yes}}}} key.
B Press the {
the program list.
{Function}}}} {{{{4}}}} {{{{4}}}} and
{{
{Start}}}} key to print out
{{
68
Page 82
Saving Energy
To print a fax message your fax machine uses a heating roller to fuse the
image to the paper. This roller must
already be hot when the paper pass es
under it. To maintain a temperature
high enough to perm it proper fusing,
electricity is consumed.
This facsimile is equipped with various energy saving modes to reduce
the consumption of electricity while
the machine is waiting for a fax message.
Letting the heating roller cool to room
temperature will reduce the amount
of electricity the fax machine consumes. However, the fax machine
will not print incoming messages
right away, it will store them in memory and print them out after the roller
warms up.
Letting the heating roller cool halfway reduces the amount of electric ity
the fax machine consumes, but not as
much as letting it cool to room temperature. On the other hand, since
warming up takes only a sh ort time,
incoming fax messages can be printed
right away.
Note
❒ If your fax mach ine enters saving
energy mode, no message appears
on the display.
Saving Energy
How to start the saving energy
mode
Your machine will enter the saving
energy mode when machine is not
used for 5 minutes.
Note
❒ If you want to change the five
minute period to one or three minutes, or if you do not want your
machine to enter the savi ng energy
mode automatically, please contact your service representative.
How to exit the saving energy
mode
Your machine exits from the energy
saving mode when a fax is re ceived or
you set the document. (If the power
Saver is on, th e message will printed
out after the Power Saver ends.)
You can also carry out some f unctions
(e.g. programming) by first holding
down a key to switch to standby
mode. If the roller th e room temperature, only the energy mode key is
available to exit the saving energy
mode.
4
❒ You can still send a fax while the
machine is in saving energy mode.
❒ The saving energy mode is related
to the Power Saver. See P.71 “Sav-
ing Energy With The Power Saving
Timer”.
Which saving energy mode is
best for you?
You have two choi ces: Yo u can let t he
roller cool to room temperature or
you can let it cool to the midpoint. To
choose which of the two settings you
would prefer, set the user parameter
switch.
69
Page 83

4
Other Features
When you allow the roller to cool to
room temperature, energy savings
are at a maximum and printing will
take a little longer since the roller will
take more time to come to printing
temperature. When you select the
midpoint, some energy savings will
still be achieved and printing will occur more rapidly.
❖❖❖❖
Switch 05 bits 6
• Letting the heating roller cool to
room temperature: Bit 6 at 0.
• Letting the heating roller cool
halfway: Bit 6 at 1.
70
Page 84
Saving Energy With The Power Saving Timer
Saving Energy With The Power Saving
Timer
You can set sleep time to let the machine go to saving energy condition
and set the wake up time when it returns to stand by mode the next morn ing. During this Power Saver mode, a
fax message received is stored in the
memory and will be printed automatically the next morning after the wake
up timer is activated.
As a typical example, you could program the heating element inside the
printer to stay off at night and over
the weekend. (You can program different settings for every day of the
week.)
To use the Power Saving timer, you
must:
• Program the timers for each day of
the week.
• Switch the Power S aving ti mer feature on.
A Press the {
access code {{{{2}}}} {{{{2}}}} {{{{2}}}} {{{{2}}}}. Then
press {{{{7}}}} {{{{1}}}} and the {{{{Yes}}}} key.
{Function}}}} {{{{6}}}} then enter
{{
SET TIMER Y/N/hi
SUN
B Use W
W and VVVV to scroll through the
WW
days of the week.
SET TIMER Y/N/hi
TUE
Note
❒ Example: Press V twice to go to
Tuesday.
C Press the {
{Yes }}}} key
{{
TIMER#1 TUE */#/Y
ON FROM 12:00AM
4
Sett i ng t h e P owe r Sa vi n g t im e
( Function 71 )
Note
❒ While the Power Saving timer is
active, all incoming calls are refused if the memory fills up.
----
Example:
For Tuesday, set the Power Saving
timer to switch the heater on at 9 am
and off at 6 pm.
D To change the ON to OFF, or the
other way round, press the {{{{*}}}} or
{{{{#}}}} keys.
Note
❒ There are two timers for each
day, each with an ON/OFF setting. “ON” means that the heater will switch on at the time
indicated. “OFF” means that the
heater will switch off at the time
indicated.
E Press V
the time.
V to move the cu rsor under
VV
TIMER#1 TUE */#/Y
ON FROM 12:00AM
71
Page 85
Other Features
4
F Input the time (9:00 AM) : Press
{{{{0}}}} {{{{9}}}} {{{{0}}}} and {{{{0}}}} from the key
pad.
TIMER#1 TUE */#/Y
ON FROM 09:00AM
G Set AM/PM using the {
key.
TIMER#1 TUE */#/Y
ON FROM 12:00PM
H Press the {
TIMER#2 TUE */#/Y
ON FROM 12:00AM
Note
❒ Repeat step E to G for the second
timer (6:00 PM)
{Yes }}}} key.
{{
{*}}}} or {{{{#}}}}
{{
A Press the {
access code {{{{2}}}} {{{{2}}}} {{{{2}}}} {{{{2}}}}. Then
press {{{{6}}}} {{{{2}}}} and the {{{{Yes}}}} key.
{Function}}}} {{{{6}}}} then enter
{{
Y/NEXTi
SELECT LINE
B Scroll through the list of features
with VVVV until the screen is as
shown.
Y/NEXTi
POWER SAVER ON/OFF
C Press the {
{Yes }}}} key.
{{
POWER SAVER ON/OFF
ON iOFF
D Change the on/off setting by
pressing WWWW or VVVV.
❒ To change AM to PM or the oth-
er way around, press the {#}
key.
❒ If you want the heater on all
day, set both timers to ON =
12:00AM. If you want the heater
off all day, set both timers to
OFF = 12:00AM.
I Press the {
keys to finish.
Note
❒ Go back to step C to program
the timer for another day.
{Yes}}}} and {{{{Function}}}}
{{
Switching the Power Saving
Timer on / off ( Function 62 )
The Power Saving timer feature must
be switched on using Function 62.
POWER SAVER ON/OFF
iON OFF
E Press the {
keys to finish.
{Yes}}}} and {{{{Function}}}}
{{
72
Page 86
Copying
Copying
If you need to make a copy of something, and there is no copier available,
use your fax machine. Just place your
original in the feeder, and press the
{Copy} key.
Note
❒ By default, copies are made at De-
tail resolution. To change to Standard or Fine, press the Resolution
key.
A Place your original in the feeder.
TRANSMIT OPTIONi
DIAL FAX NUMBER
B Press the {
COPY 01 SETS
iLT LG A4
{Copy}}}} key.
{{
COPY 03 SETS
LT iLG A4
❒ This machine makes copies in
the order P1, P1, P2, P2 (for example when making 2 copies of
a 2 page document).
E Press the {
{Start}}}} key.
{{
4
C If you have the optional lower
cassette, or optional multi-purpose feeder you can sele ct the paper size by pressing VVVV.
Note
❒ LT = letter, LG = legal
❒ The display shows that yo u se-
lect the Legal size.
COPY 01 SETS
LT iLG A4
D Input the number of copies that
you ne e d .
Note
❒ Example: 3 copies, press {3} of
the ten key pad.
73
Page 87
Other Features
Calling To Request A Message (Polling)
4
Polling means “picking up” a document that has been left for you at a remote fax terminal.
Limitation
❒ Polling can only be used when
both machines have the Polling
feature.
Note
❒ With polling, telephone line costs
are charged to the p erson receiving
the message (the Message Receiver).
Picking up messages stored
elsewhere (polling reception)
Use this feature when you wish to
poll a message from another terminal.
POLLING RECV Y/START
2125551234kkkkkkkkkk
C Press the {
{Yes }}}} key.
{{
POLLING RECV Y/START
2125551234kkkkkkkkkk
Note
❒ If you want dial more number,
go to step B.
D Press the {
{Start}}}} key.
{{
Entering a Personal Code
A Press the {
the {{{{Yes}}}} key.
{Function}}}} {{{{1}}}} {{{{1}}}} and
{{
Note
❒ The maximum number of termi-
nals that you can poll in one operation is 100.
Reference
Groups: see P.28 “Storing & Edit in g
A Group Of Fax Numbers (Function
33)”.
Programming Keystrokes: see P.44
“Programming Keystrokes”.
Operating procedure
A Press the {
the {{{{Yes}}}} key.
POLLING RECV OPTIONi
DIAL FAX NUMBER
{Function}}}} {{{{1}}}} {{{{1}}}} and
{{
POLLING RECV OPTIONi
DIAL FAX NUMBER
B Press V
V.
VV
SET OPTION Y/i
SET PERSONAL CODE?
C Press the {
{Yes }}}} key.
{{
SET OPTION KPAD
PERSONAL CODE:kkkk
D Enter the password that you wish
to use for this operation.
SET OPTION Y/N
PERSONAL CODE:2567
B Enter the Dial number .
74
Page 88
Note
❒ Example: {2} {5} {6} {7} from
the ten key pad.
Calling To Request A Message (Polling)
E Press the {
{Yes }}}} key.
{{
POLLING RECV OPTIONi
DIAL FAX NUMBER
F Dial and press the {
Limitation
❒ In theory, you can poll up to 100
different destinations using the
above procedure. However, this
number depends on how many
numbers are currently waiting
in memory to be dialed.
{Start}}}} key.
{{
4
75
Page 89
Other Features
User Function Keys
4
There are two Function keys (F1 and
F2) on the operation panel.
You can program each of these keys
with a feature that you wish to use
frequently.
Store a User Function Code in the
User Function Keys.
Programming a User Function
Code
You can program each of the User
Function Keys with one of the following functions.
Code Function
01 Journal
02 TTI ON
F2 PROGRAM?Y/hi
Note
❒ Example: Press the {F2} {Yes}
keys.
❒ If the key is already used, the
currently stored code is displayed.
C Press the {
{Yes}}}} keys.
{{
F2 KPAD/SEARCHi
CODE kk
D Enter the two-digit code for the
function that you wish to or
search with WWWW or VVVV store.
03 GROUP KEY
04 Dial Option
05 Batch Transmission
06 Forwarding
•F1 : Journal is default
To store a User Function Code, do th e
following procedure.
A Press the {
{{{{Yes}}}} key.
Note
❒ At this time, you can print a
User Function List if you press
W {Start}.
{Function}}}} {{{{3}}}} {{{{5}}}} and
{{
Fk F1-F2/hi
PRINT LISTh/SEARCHi
F2 Y/N/hi
CODE 03 GROUP KEY
Note
❒ Example: Group Dial key, press
{03}.
E Press the {
{Yes }}}} key.
{{
F2 Y/N/hi
PROGRAMMED
F Press the {
{Function}}}} Key.
{{
Using a Function Program
A Press the {F1} or {F2} key.
B Use the function as normal.
B Press one of the User Function
Keys.
76
Page 90
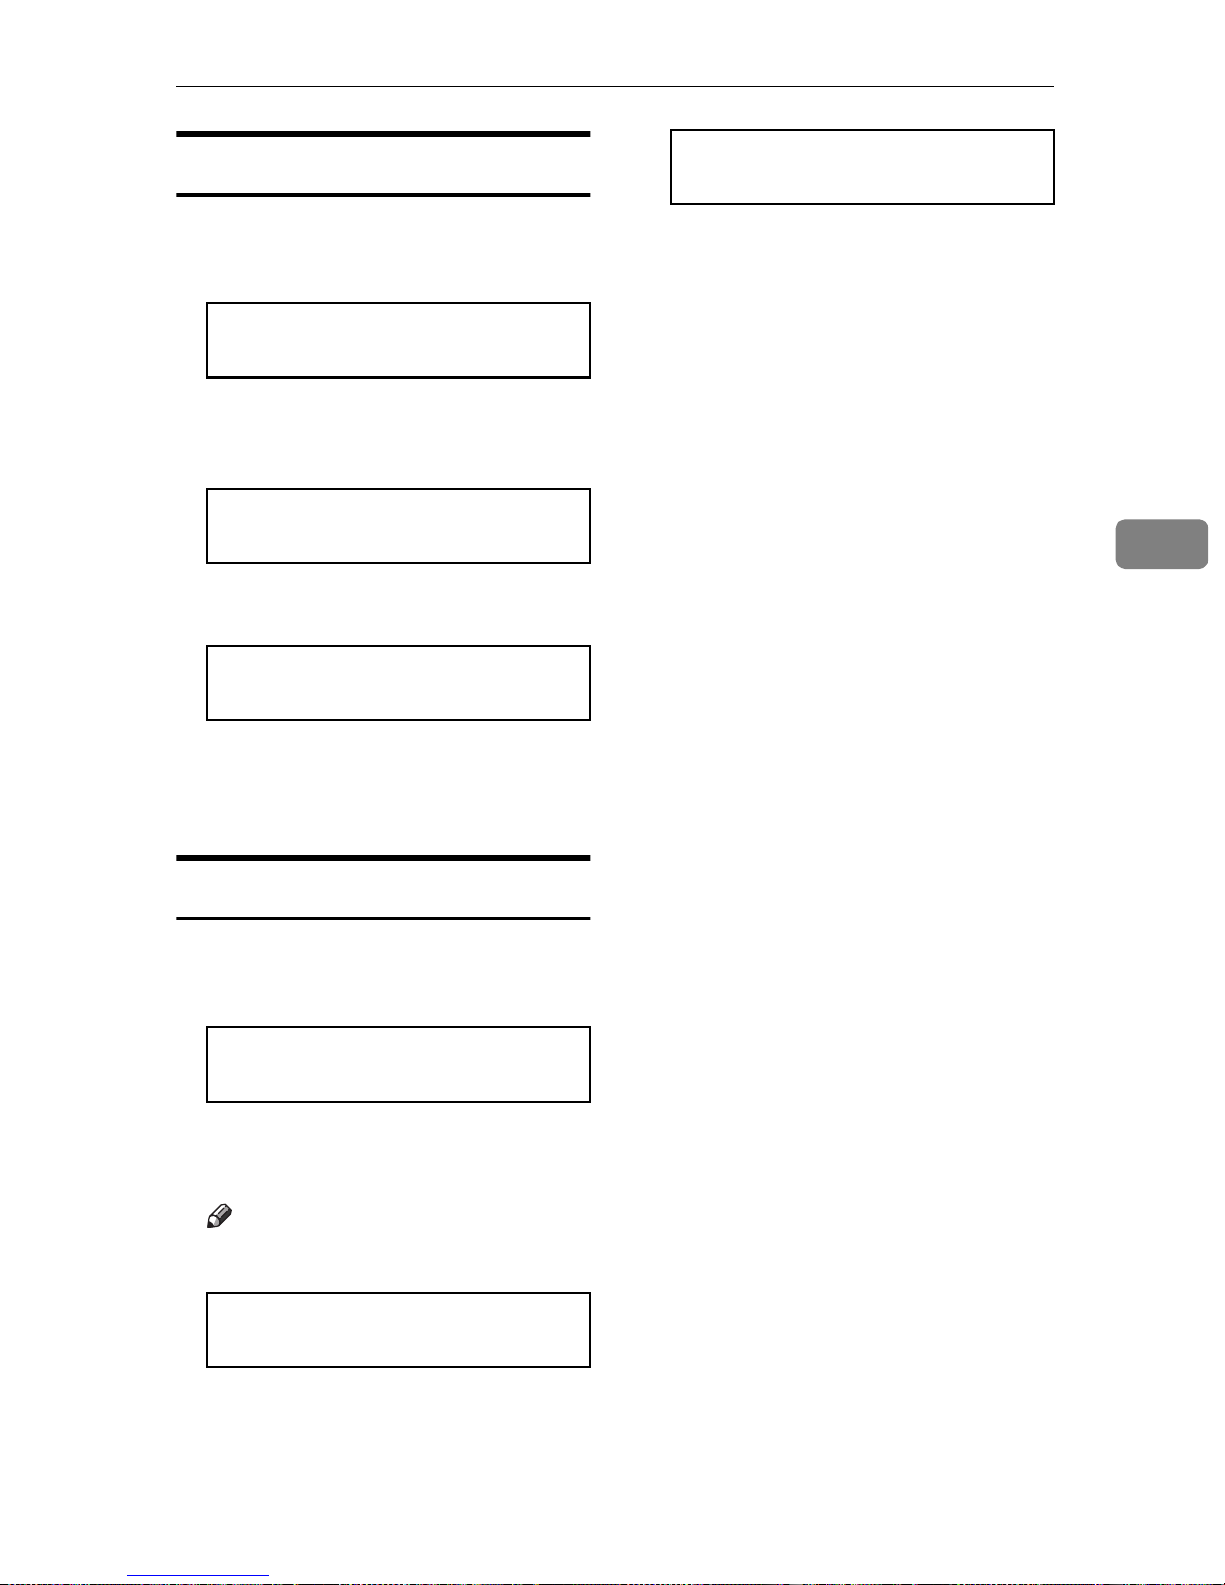
User Function Keys
Editing a Function Program
A Press the {
the {{{{Yes}}}} key.
Fk F1-F2/hi
PRINT LISTh/SEARCHi
{Function}}}} {{{{3}}}} {{{{5}}}}and
{{
B Press the user Function key that
you wish to change.
F2 CHANGE? Y/hi
GROUP KEY
C Press the {
F2 Y/N/hi
CODE 03 GROUP KEY
{Yes }}}} key.
{{
F2 Y/N/hi
CODE 03 GROUP KEY
D Press the {
E Press the {
key.
{No}}}} key.
{{
{Yes}}}} and {{{{Function}}}}
{{
4
D Press the {
E Press the {
{No}}}} and {{{{Yes}}}} key.
{{
{Function}}}} key.
{{
Deleting a Function Program
A Press the {
the {{{{Yes}}}} key.
Fk F1-F2/hi
PRINT LISTh/SEARCHi
{Function}}}} {{{{3}}}} {{{{5}}}} and
{{
B Press the user Function key that
you wish to erase.
Note
❒ Example: {F2}
F2 CHANGE? Y/hi
GROUP KEY
C Press the {
{Yes }}}} key.
{{
77
Page 91

Other Features
Dual Access
4
Dual Access means that even if the
machine is already carrying out a
task, you may be able to operate the
machine.
For instance, if your m achine is currently receiving a long fax message,
but you want to send a message and
go back to your desk without having
to wait by the machine, you c an plac e
your message in the feeder, select the
required transmission features , dial
the number, and press Start. Your
Job tha t you wish to carry out at the sa me time
123456789 101112Job Currently in
Progress
1. Storing to Memory
2. Printing from
Memory
--
✓
✓
--
✓
×
ЧЧЧЧЧЧЧ Ч Ч Ч
message will be scanned and stored
to memory while the machine is still
receiving. This means that you can
take your f ax back to your desk bef ore
it is actually sent. However, to be sure
whether your transmission was successful or not, keep an eye open for
Error Reports (or check the Journal).
The following table shows which features can operate simultaneously on
your machine.
✓✓✓✓ ✓
×
×
✓
3. Copying
4. Printing an Automatic Re port
5. Immediate
Transmission
6. Memory Transmission
7. Receiving and
Printing a Fa x
8. Receiving a Fax
to Memo ry
9. Transmitting a
Service Re po rt
10.PC Print*
11.PC Scan*
12.PC Fax*
××
✓
××
××××--××××
✓
×
✓
ЧЧЧЧЧ
✓
×
✓
×
✓
×××
ЧЧЧЧЧЧЧЧЧ Ч
✓
×
• * : PC Interface Kit required
××
--
--
✓
××
✓
××× ×
✓
××× × ×
✓
ЧЧЧЧЧЧ Ч Ч
✓
ЧЧЧЧЧ Ч Ч Ч
--
✓✓
✓✓
×
×××
×× × × ×
--
×
--
--
✓✓
×
××
✓
✓
✓
✓
--
××
××
××
××
××
--
✓
×
--
• ✓: Possible
• ×: Impossible
78
Page 92
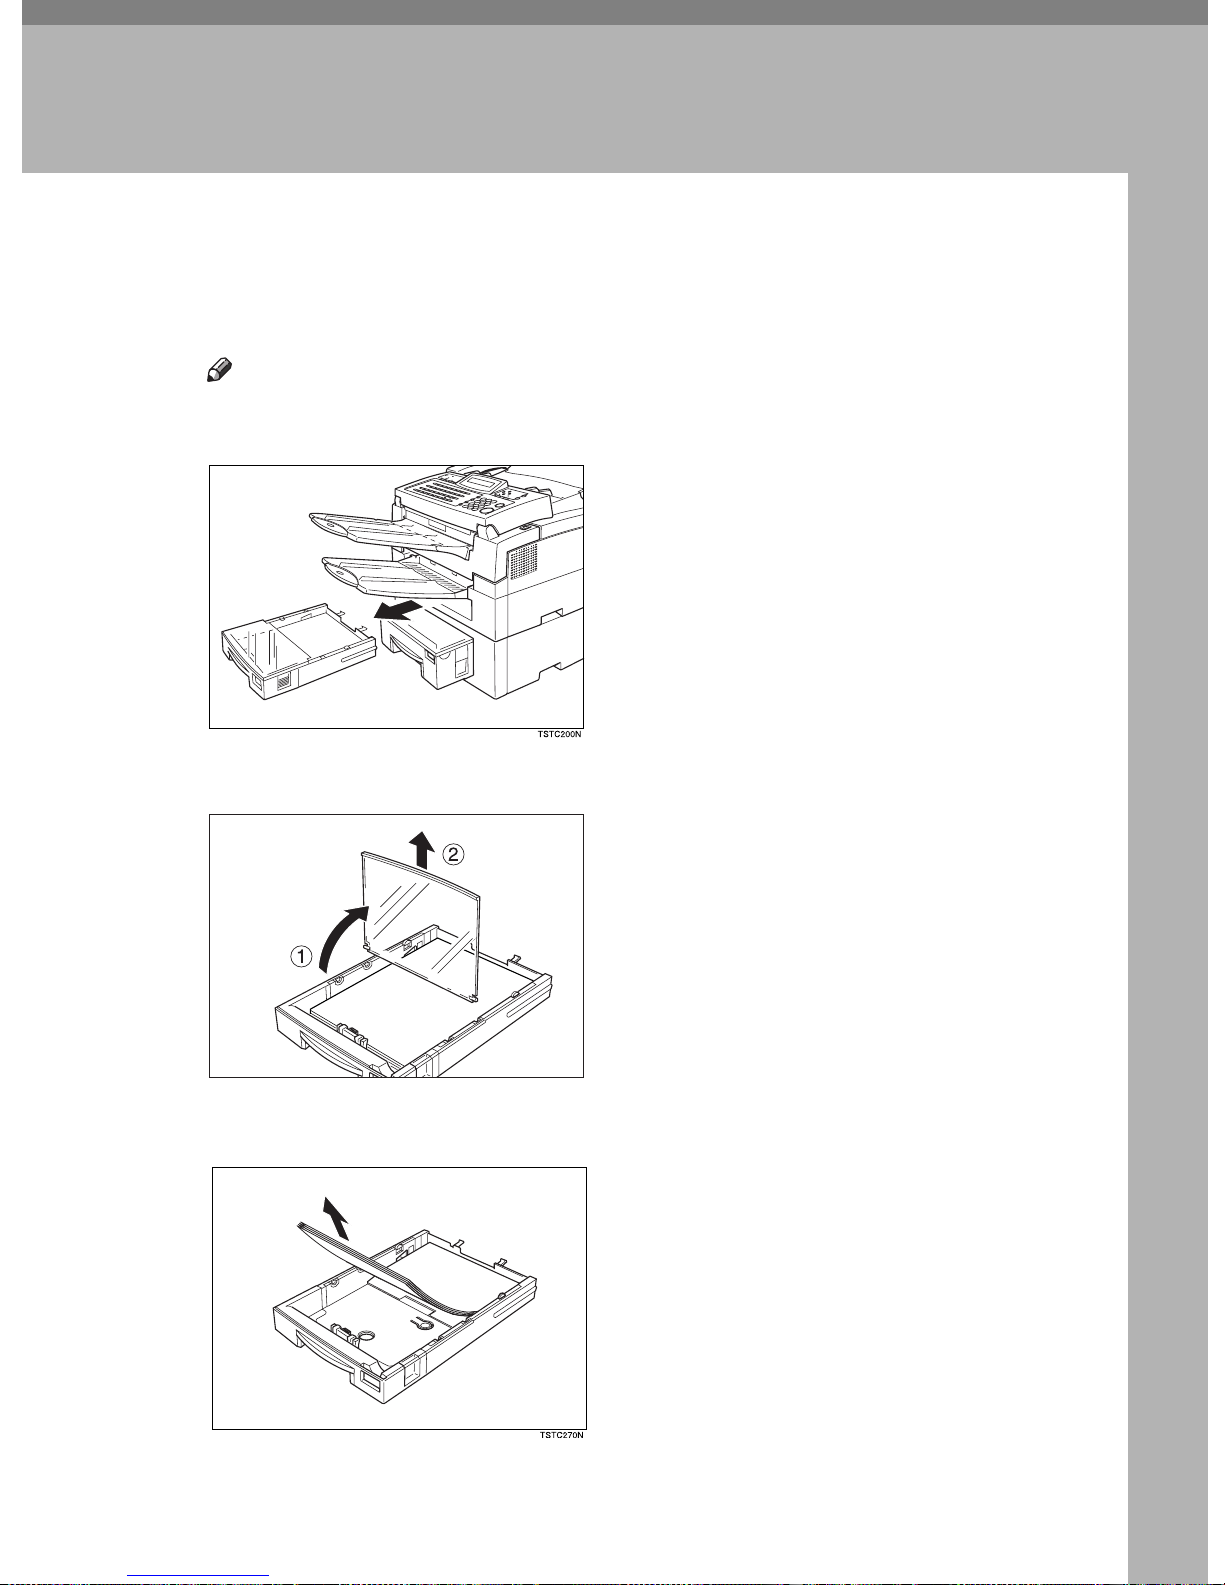
5. Maintaining Yo ur Mac hine
Loading Paper In The Main Cassette
A Pull out the paper cassette and place it on a flat surface.
Note
❒ Remove any paper that may have dropped inside the machine in the area
vacated by the paper cassette.
B Lift up the cassette co ver and remove it.
TSTC100N
C Remove any remaining paper.
79
Page 93
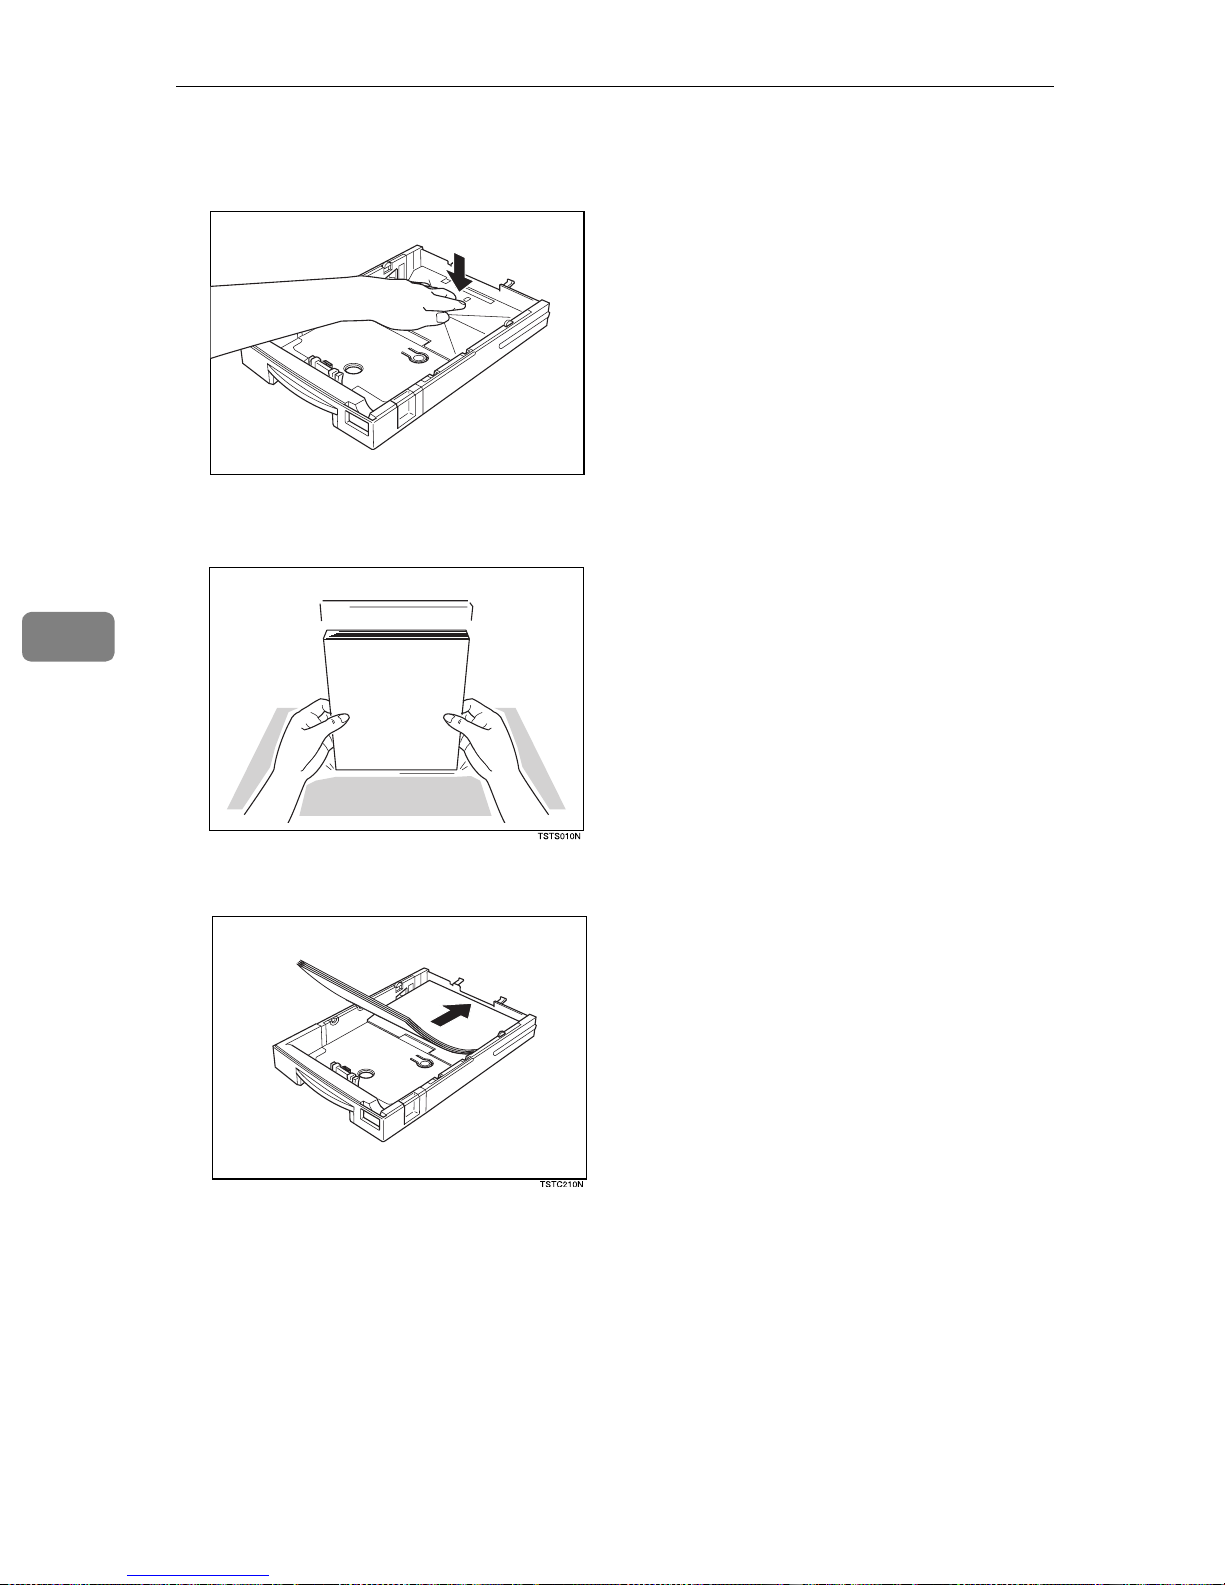
5
Maintainin g Yo u r Machine
D If the metal base plate is raised, push it firmly down until it locks into
place.
TSTC050N
E Prepare a stack of blank paper. For smoother operation, square the edges.
F Load the paper into the cassette.
80
Page 94
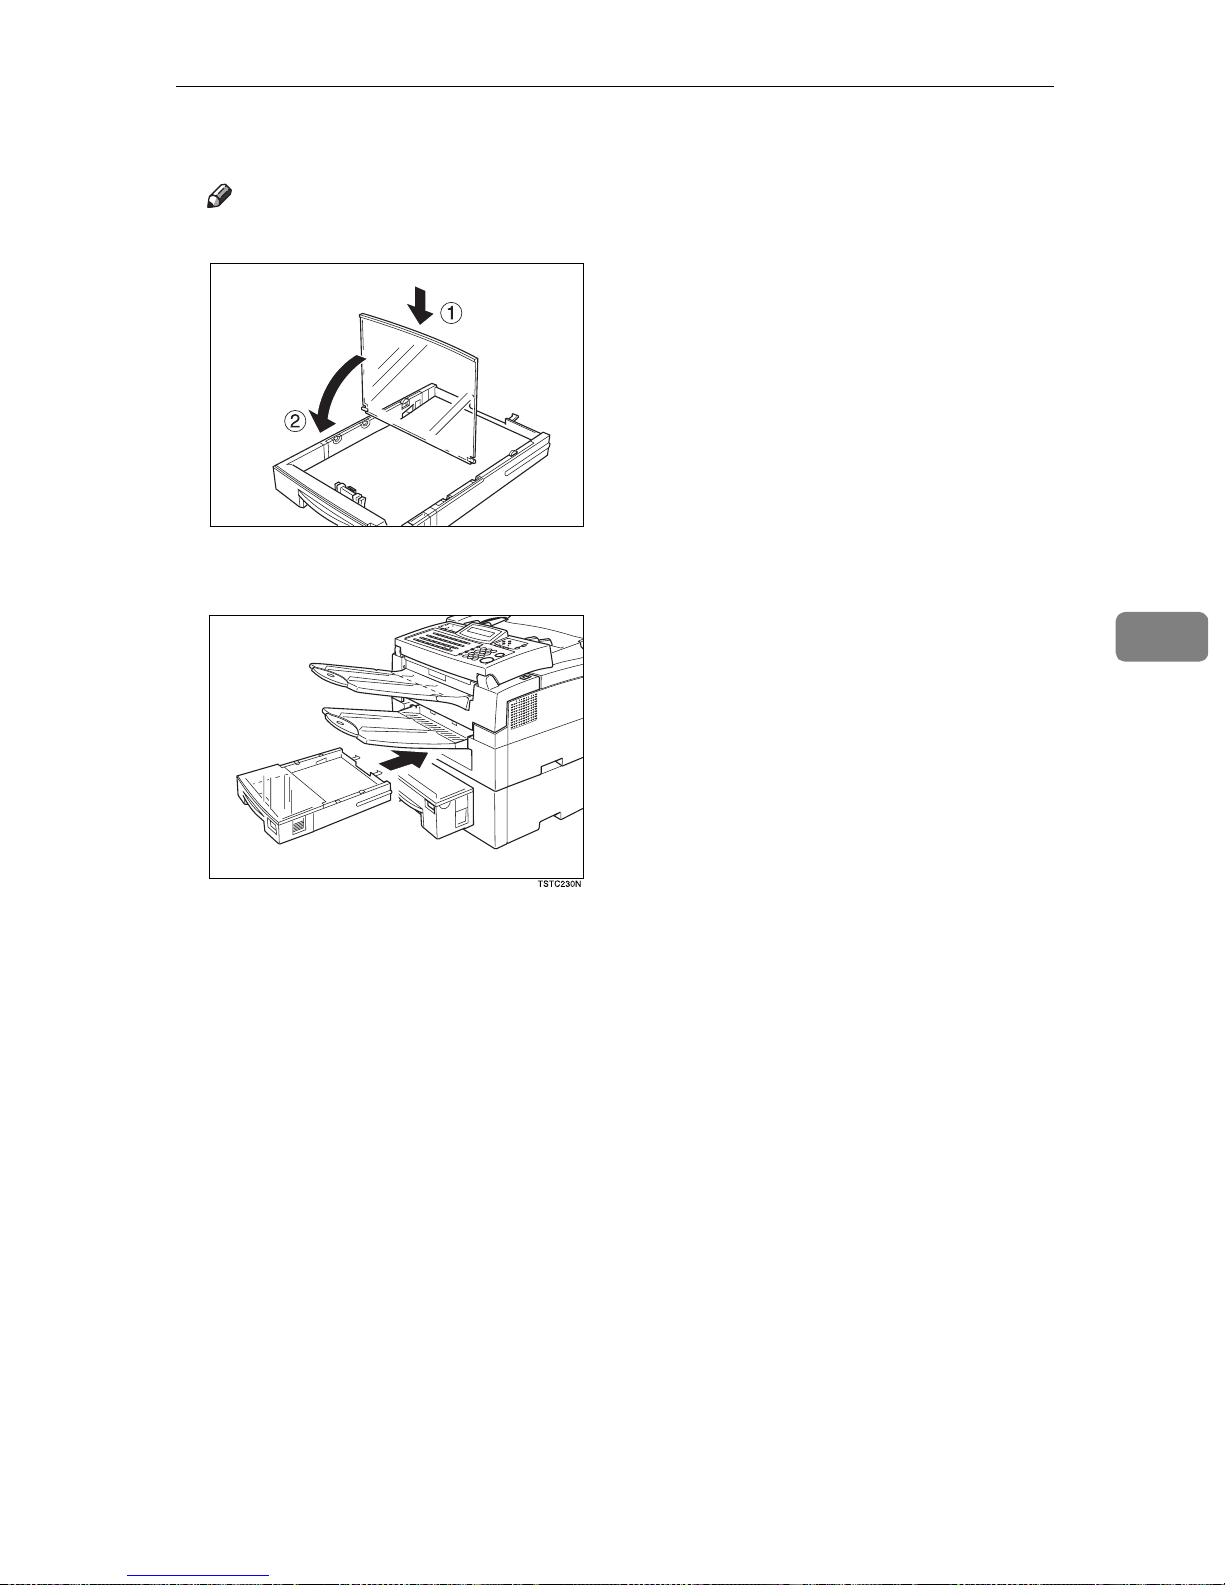
Loading Paper In The Main Cassette
G Replace the cassette cover.
Note
❒ The frosted s ide of the cover must be face up when closed.
TSTC220N
H Replace the cassette. P ush it in f irmly until it locks into place.
5
81
Page 95
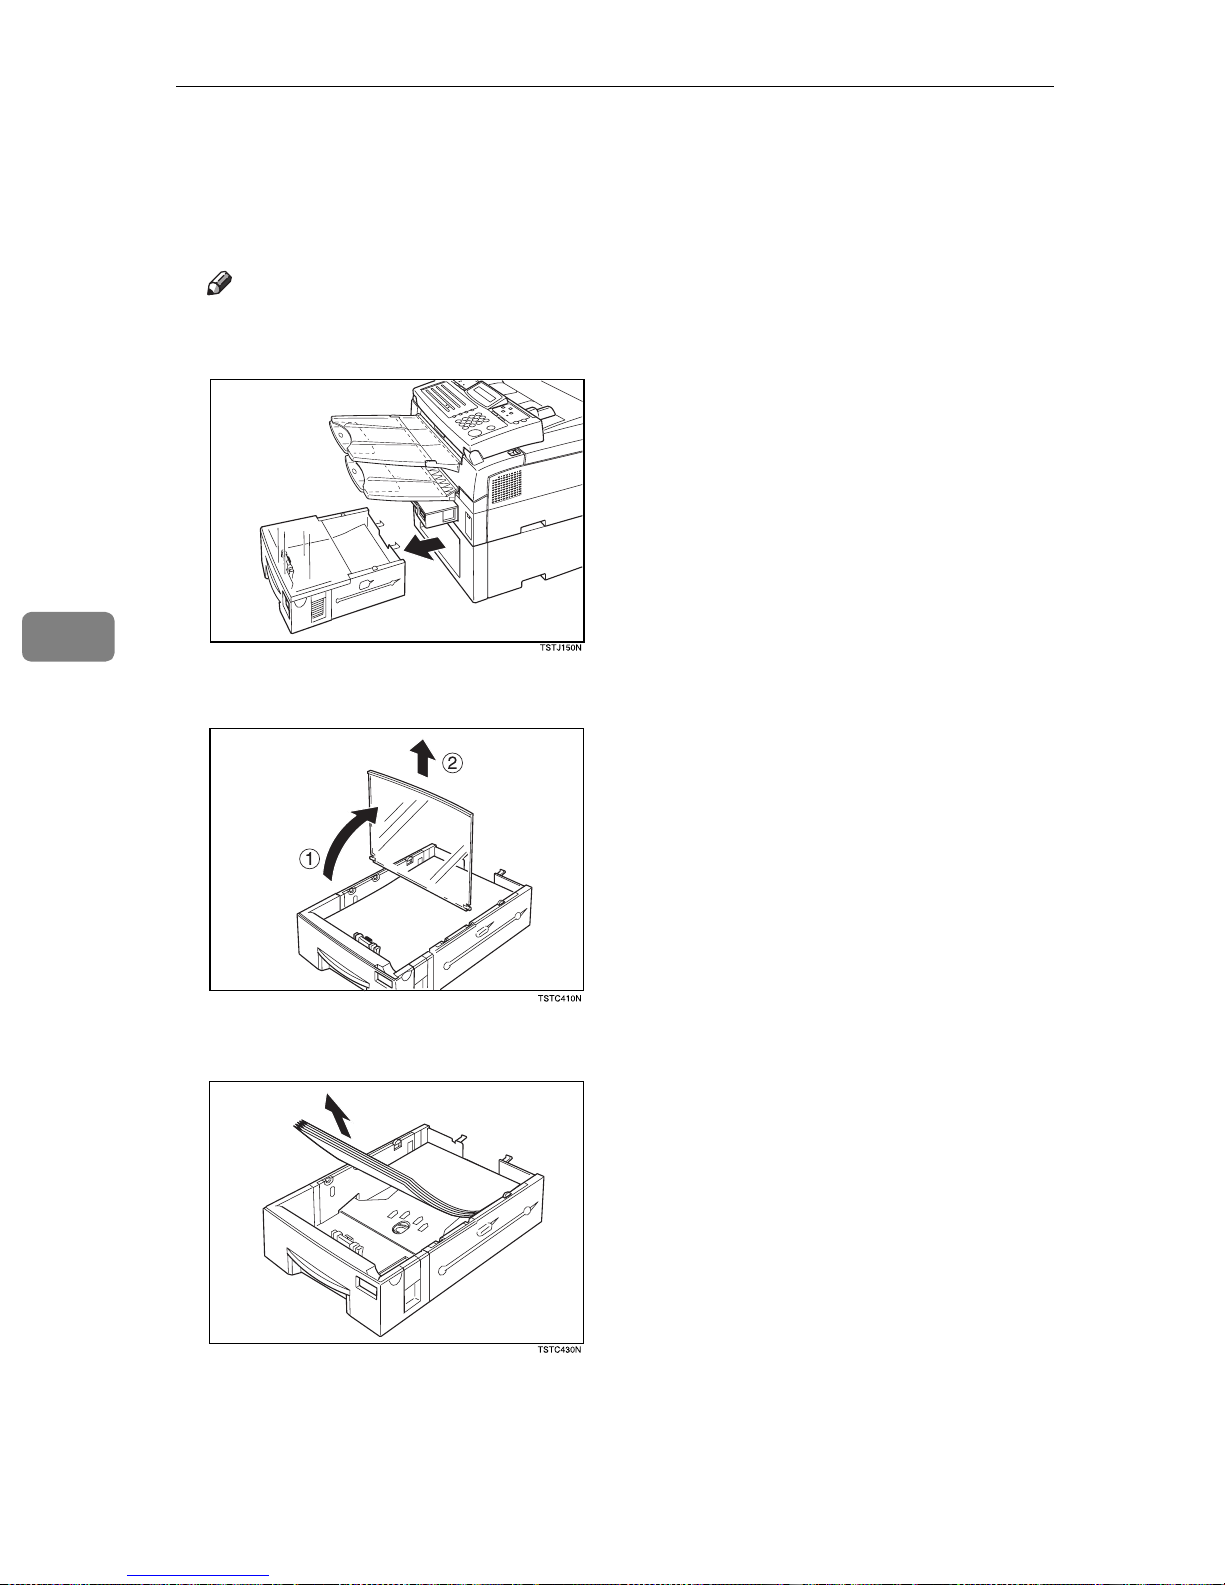
5
Maintainin g Yo u r Machine
Loading Paper In The Lower Cassette
A Pull out the paper cassette and place it on a flat surface.
Note
❒ Remove any paper that may have dropped inside the machine in the area
vacated by the paper cassette.
B Lift up the cassette co ver and remove it.
C Remove any remaining paper.
82
Page 96
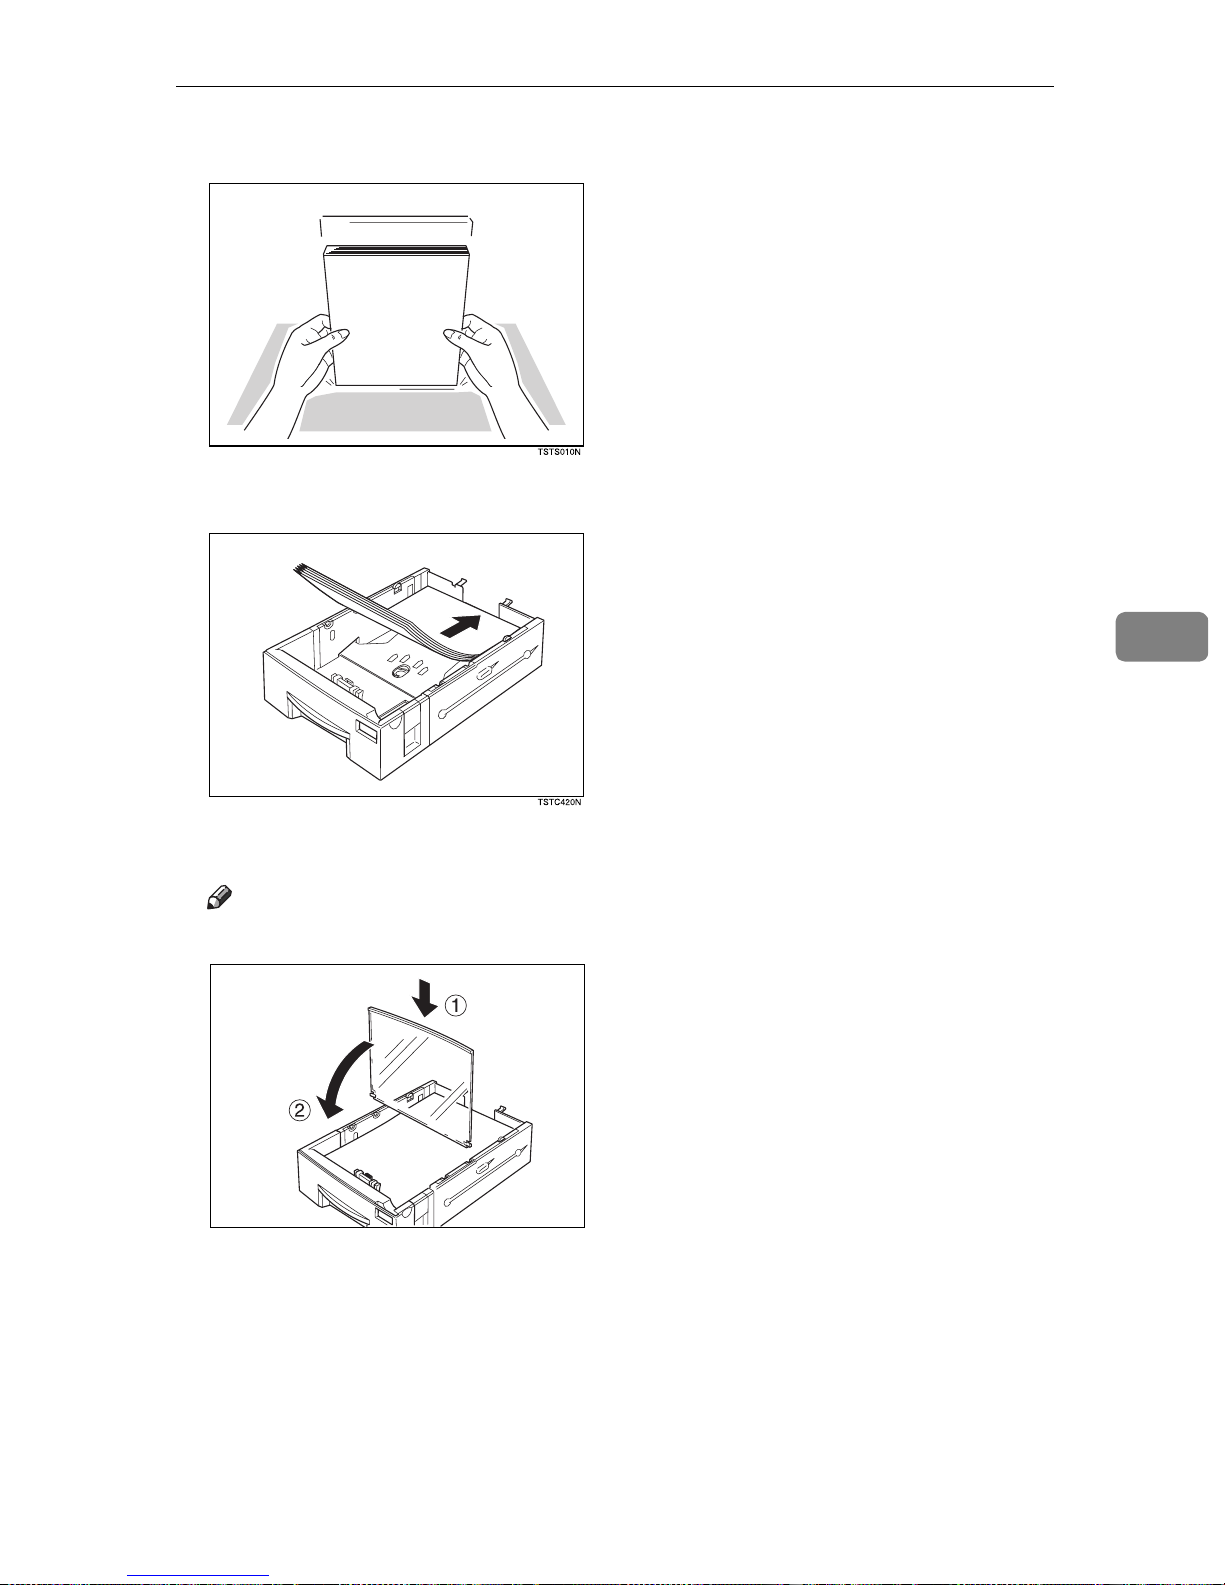
Loading Paper In The Lower Cassette
D Prepare a stack of blank paper. For smoother operation, square the edges.
E Load the paper into the cassette.
5
F Replace the cassette cover.
Note
❒ The frosted s ide of the cover must be face up when closed.
TSTC190N
83
Page 97
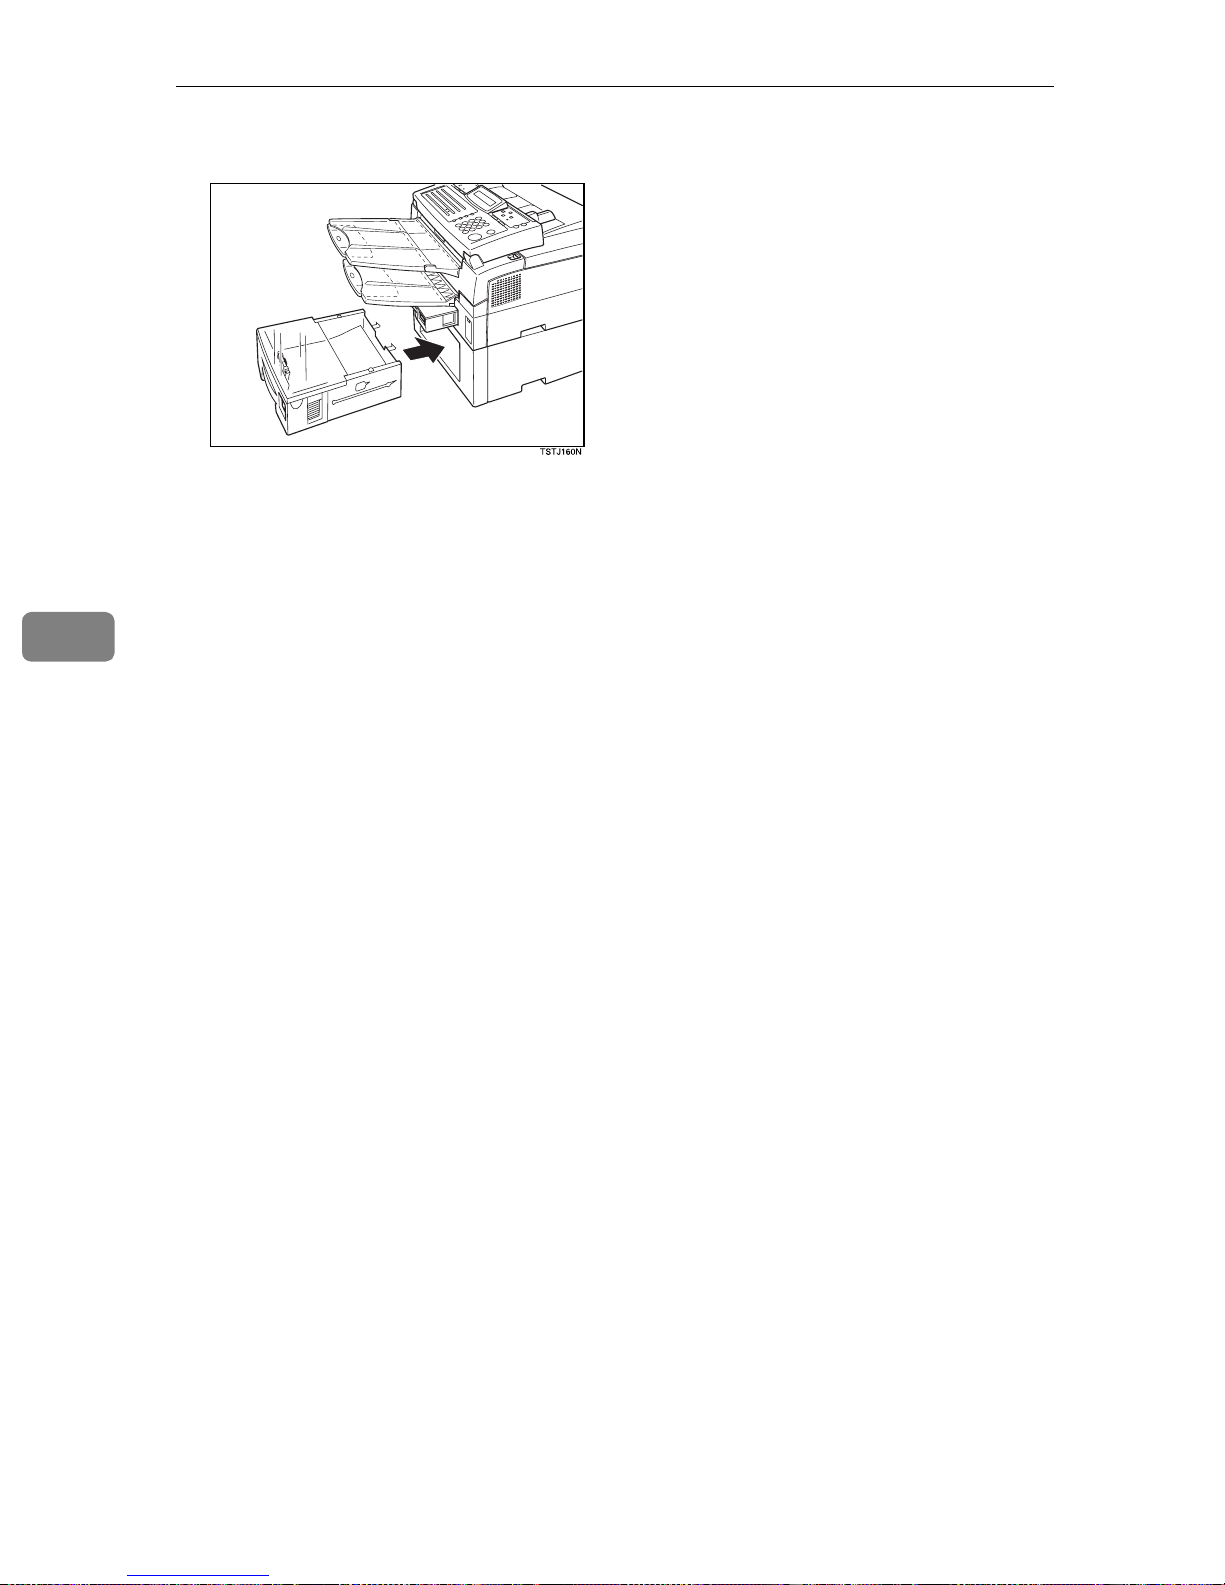
5
Maintainin g Yo u r Machine
G Replace the cassette. P ush it in f irmly until it locks into place.
84
Page 98
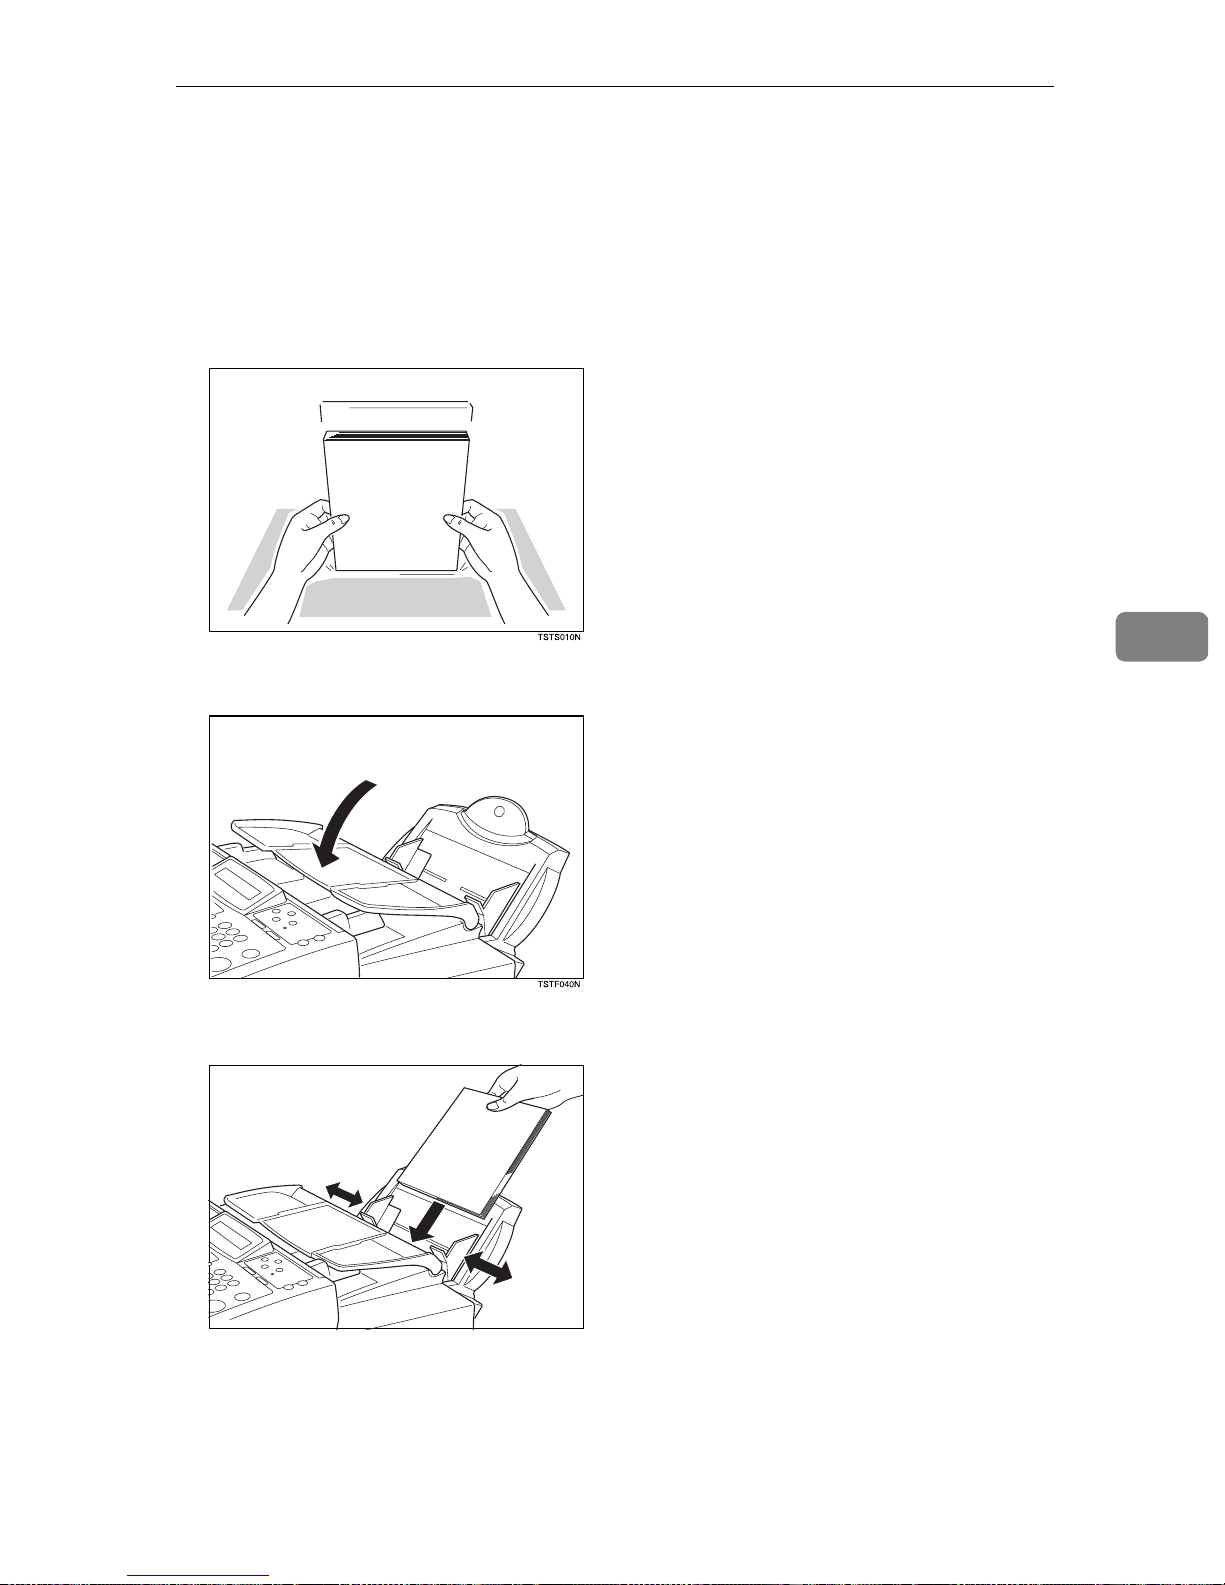
Loading Paper In The Optional Multi-purpose Feeder
Loading Paper In The Optional Multipurpose Feeder
A Remove any paper remaining in the feeder.
B Prepare a stack of blank paper. For smoother operation, square the edges.
5
C Lift back the document table.
D Rest the paper stack in the feeder.
TSTF010N
85
Page 99
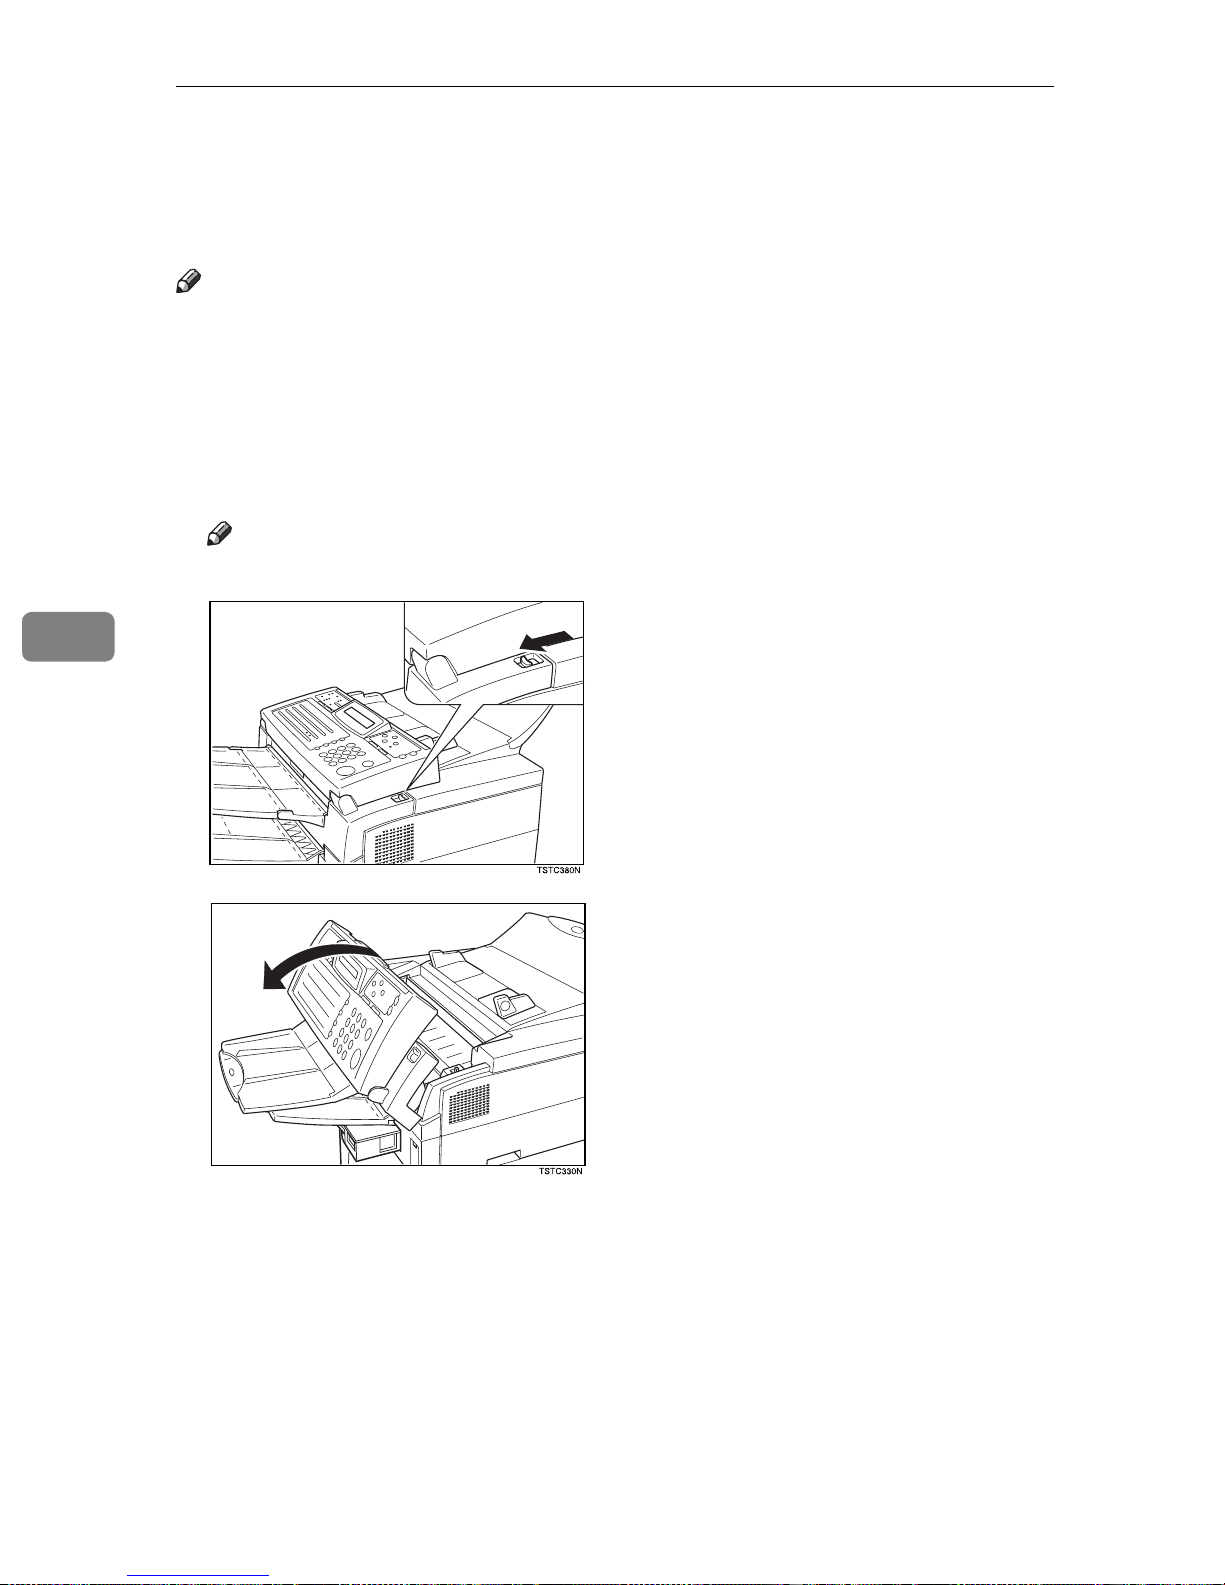
5
Maintainin g Yo u r Machine
Replacing The Toner Cassette And
Cleaning Pad
Note
❒ When the Add Toner indicator (D) starts to blink, the toner cassette is almost
empty. You will make 100 more copies before you have to change the toner
cassette.
❒ When the Add Toner indicator (D) remains lit, it is time to install a new toner
cassette.
A Pull the lower unit release lever towards you and open the top cover.
Note
❒ If you do not pull the lever, only the upper unit will open.
86
Page 100
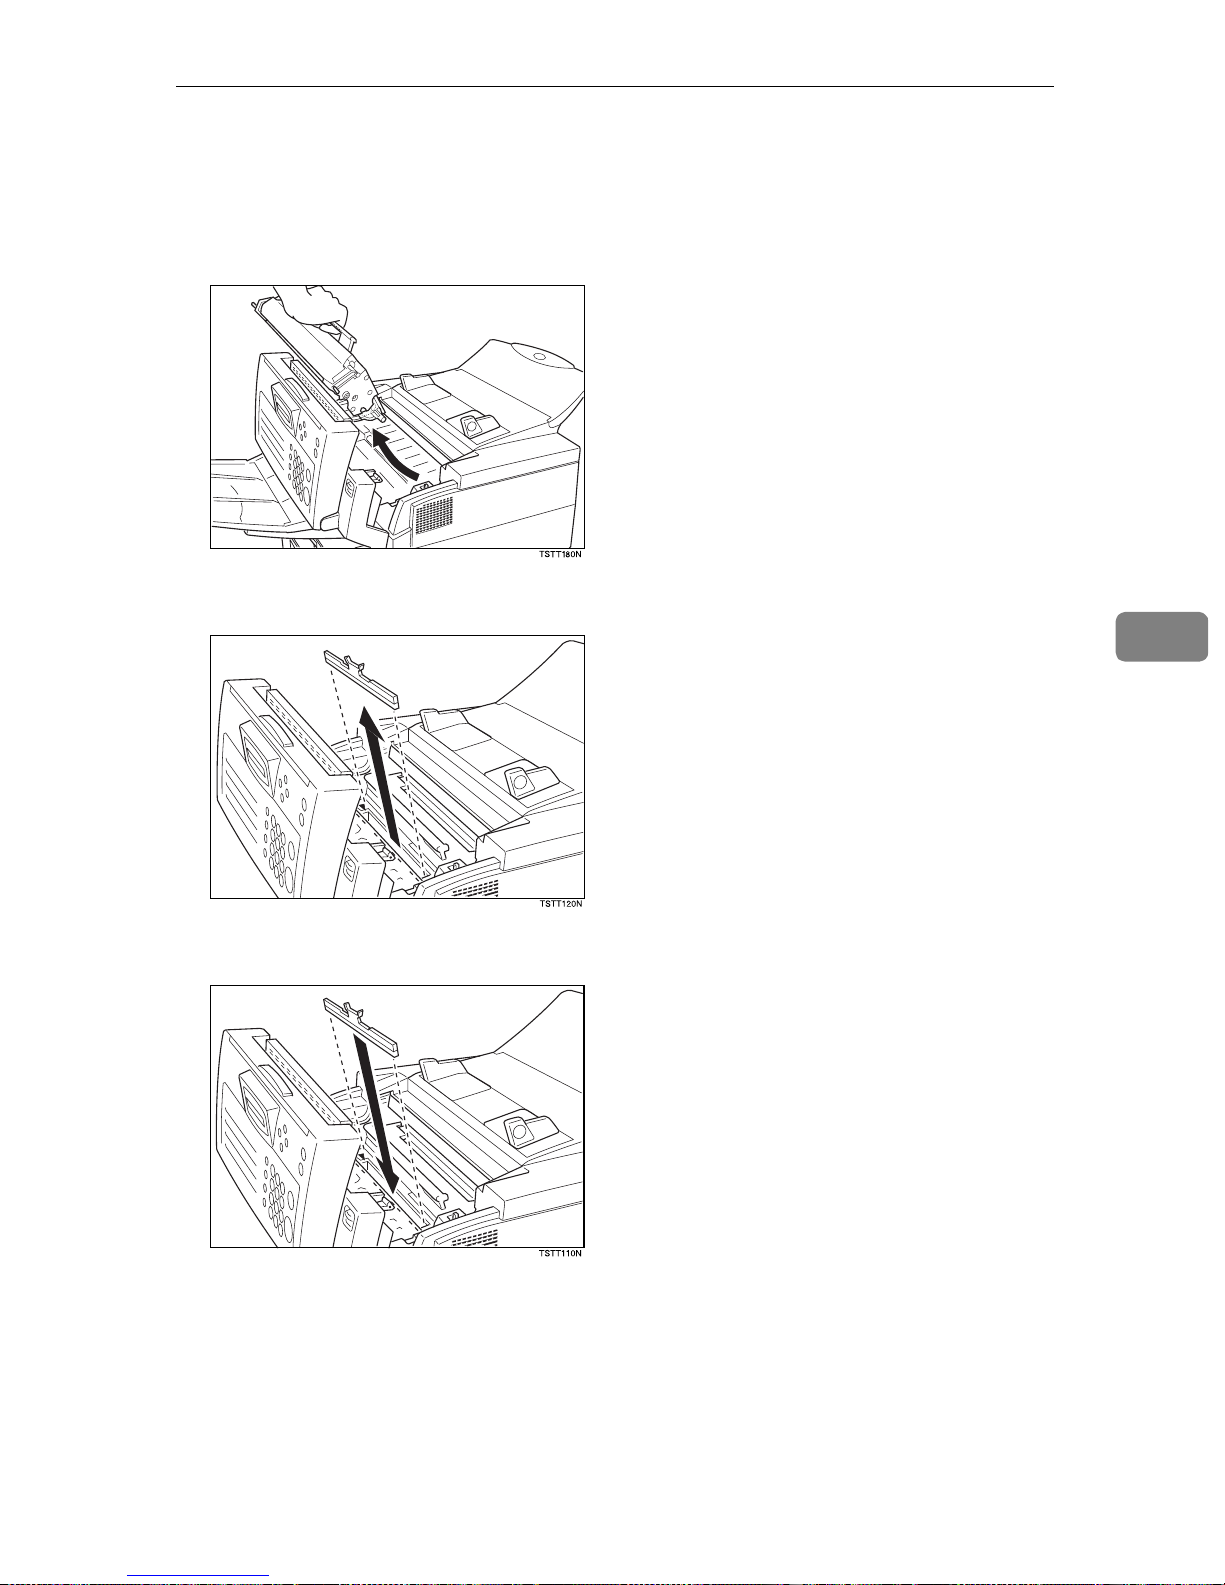
Replacing The Toner Cassette And Cleaning Pad
B Grasp the old tone r cas sette as sho wn, and lift it out carefully.
R
WARNING:
Do not inc inera te wa st e ton er. T oner d ust may i gni te su ddenly wh en exp osed
to an open flame.
C Remove the old cleaning pad.
5
D Install the cleaning pad a shown in the illustration.
87
 Loading...