

Page 1
GE
Security
MVC-15HS, MVC-17HS
user manual
imagination at work
Page 2

Copyright Copyright © 2004, GE Security, Inc. All rights reserved.
This document may not be copied in whole or in part, or otherwise reproduced
except as specifically permitted under US copyright law, without the prior
written consent from GE.
Disclaimer The information in this document is subject to change without notice. GE, in
Trademark
notices
keeping pace with technological advances, i s a company of product innovation.
Therefore, it is difficult to ensure that all information provided is entirely accurate and up-to-date. GE accepts no responsibility for inaccuracies or omissions
and specifically disclaims any liabilities, losses, or risks, personal or otherwise,
incurred as a consequence, directly or indirectly, of the use or application of any
of the contents of this document.
This publication may contain examples of screen captures and reports used in
daily operations. Examples may include fictitious names of individuals and
companies. Any similarity to names and addresses of actual businesses or
persons is entirely coincidental.
MVC-15HS, MVC-17HS product and logo are registered trademarks of
GE Security.
GE and the GE logo are registered trademarks of General Electric.
Other trade names used in this document may be trademarks or registered
trademarks of the manufacturers or vendors of the respective products.
Software
license
agreement
Intended use Use this product only for the purpose for which it was designed; refer to the data
compliance
Contact Direct all inquiries about GE’s legal policies with regard to this product to:
GE software supplied with GE products is proprietary and furnished under
license and can be used or copied only in accordance with the license terms.
THE ENCLOSED PROGRAM IS FURNISHED SUBJECT TO THE TERMS AND CONDITIONS OF THIS AGREEMENT. RETENTION OF THE PROGRAM FOR MORE THAN 30
DAYS, OPENING OF THE SEALED WRAPPER, IF ANY, SURROUNDING THE
PROGRAM, OR USE OF THE PROGRAM IN ANY MANNER WILL BE CONSIDERED
ACCEPTANCE OF THE AGREEMENT TERMS. IF THESE TERMS ARE NOT ACCEPTABLE, RETURN THE UNUSED PROGRAM AND ANY ACCOMPANYING DOCUMENTATION TO GE FOR A FULL REFUND OF THE LICENSE FEE PAID. (FOR INFORMATION
REGARDING THE RETURN OF PROGRAMS ENCODED OR INCORPORATED WITHIN
EQUIPMENT, CONTACT THE NEAREST GE SALES OFFICE.)
sheet and user documentation. For the latest product information, contact your
GE sales representative or visit us online at www.gesecurity.com.
FCC
This equipment has been tested and found to comply with the limits for a Class
A digital device, pursuant to part 15 of the FCC Rules. These limits are designed
to provide reasonable protection against harmful interference when the equipment is operated in a commercial environment . This equipment generates,
uses, and can radiate radio frequency energy and, if not installed and used in
accordance with the instruction manual, may cause harmful interference to
radio communications.
You are cautioned that any changes or modifications not expressly approved
by the party responsible for compliance could void the user's authority to
operate the equipment .
Director of Legal Services
GE Security
4575 SW Research Way, Suite 250
Corvallis, OR 97333 USA
Page 3

Introduction
This is the GE MVC-15HS, MVC-17HS User Manual. This
document includes detailed instructions explaining:
• how to install the units; and
• how to make connections.
There is also information describing how to contact technical
support if you have questions. To use this document effectively,
you should meet the following minimum qualifications:
• a basic knowledge of electrical wiring and low-voltage
electrical connections; and
• a basic knowledge of CCTV systems and components.
Read these instructions and all ancillary documentation entirely
before
installing or operating this product. The most current
versions of this and related documentation may be found on our
website. Refer to Online publication library on page 8 for
instructions on accessing our online publication library.
1
Note: A qualified service person, complying with all applicable codes,
should perform whatever hardware installation is required.
Page 4

MVC-15HS, MVC-17HS
2
User Manual
Conventions used in this manual
The following conventions are used in this document:
Bold Menu items and buttons.
Italic Titles of books and various documents.
Emphasis of an instruction or point; special terms
Windows, panes, tabs, fields, variables, and other
GUI elements.
Monospace Text that displays on the computer screen.
File names, path names, or coding sequences.
Blue italic Hyperlinks to cross-references, related topics, and
URL addresses.
Safety terms and symbols
These terms may appear in this manual:
Improper use may cause equipment damage.
Caution statements identify conditions or practices that may
result in damage to the equipment or other property.
Improper use could cause equipment damage or
serious personal injury.
Warning statements identify conditions or practices that could
result in equipment damage or serious personal injury.
Page 5

1. Installation
Before you install, make sure you have the provided power cable
and have selected an appropriate location for installation.
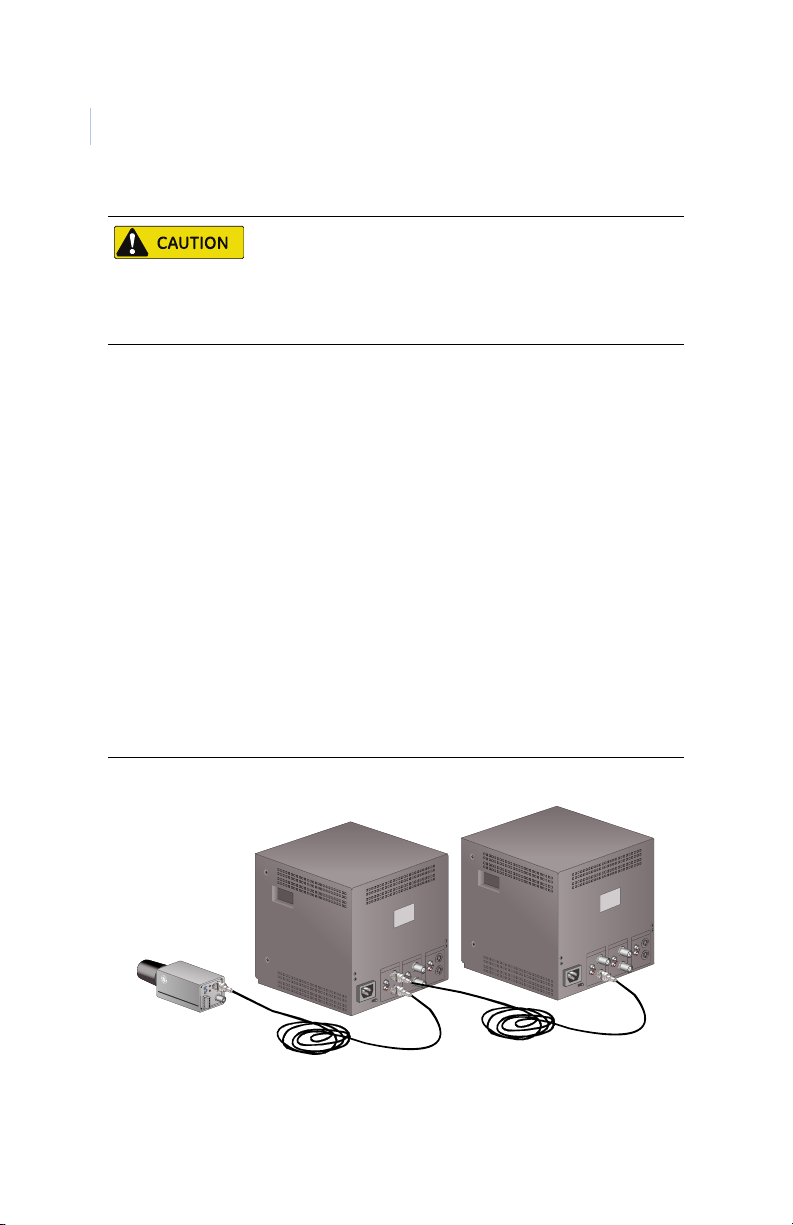
Figure 1. MVC-15HS, MVC-17HS back connections
3
AC input connector Audio out connector
Signal input switch Audio in connector
Video out connector Y/C out connector
Video in connector Y/C in connector
Page 6
MVC-15HS, MVC-17HS
4
User Manual
1. MVC-15HS only: Set the signal input switch. For
2. Attach the VIDEO IN connector of the monitor to the
3. If applicable, attach an additional monitor’s video input
To prevent electric shock, do not remove the monitor cover.
Qualified service personnel should make repairs.
Complete all installation steps before supplying power to
the unit.
standard coaxial cable connection, set the switch to
VIDEO. For Y/C connection, set the switch to Y/C (B in
Figure 1).
Note: For the following steps, use either the Y/C or the VIDEO
connections, whichever corresponds with the selection
made in step 1.
VIDEO OUT connector of the camera (or other
equipment providing video).
connector to the video output connector of the unit, as
shown in Figure 2.
Figure 2. Camera and two monitors
Page 7

4. If applicable, connect the AUDIO IN connector to the
audio output connector of a VCR (or other equipment)
and connect the AUDIO OUT connector to the AUDIO
IN connector of a VCR (or other equipment).
5. Attach the monitor’s power cord to the AC input
connector.
6. Insert the power plug into an approved power source.
5
Page 8

MVC-15HS, MVC-17HS
6
User Manual
Front panel controls
To adjust the monitor settings, see Tabl e 1 and do the following:
Table 1. Front panel controls
OSD (Onscreen
display) selection.
Down/brightness
button.
Up/contrast
button.
Enter select
button.
Power indicator
light.
Over/under scan
(MVC-17HS only)
A channel (MVC17HS only)
B channel (MVC17HS only)
Y/C channel (MVC17 only)
Power button.
(MVC-17HS only)
1. Press the power button and confirm that the green power
indicator light is on.
2. Press the down/brightness arrow button to adjust the
monitor’s brightness.
Page 9

3. Press the up/contrast arrow button to adjust the monitor’s
contrast.
4. Press the up and down arrow buttons to navigate among
other functions. The active function is highlighted with a
red bar. See Tab le 2 for the function menu and defaults..
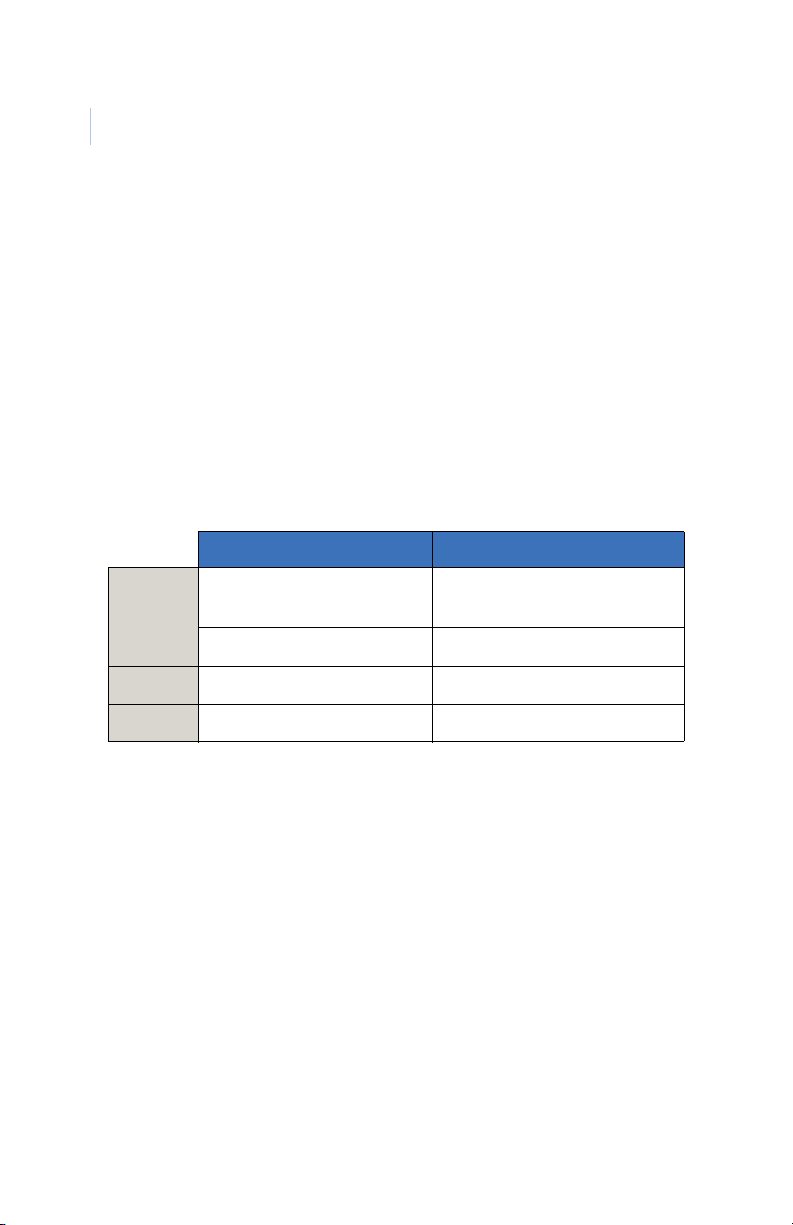
Table 2. Function menu
Function Default Function Default
1. Color 50% 6. Volume 50%
2. Tint 53% 7. Dwell time Not functional
7
3. Brightness 75%
4. Contrast 75% 9. Title N/A
5. Sharpness 75% Exit OSD
1. Japanese, Chinese, French, German, Italian, Russian, and Spanish are other
available options.
8. Language
1
English
Rack-mount (optional)
The unit is rack-mountable in a standard 19-inch rack. To mount
the unit, do the following:
1. Place the unit in a standard 19-inch rack and line up the
mounting holes.
2. Use the appropriate fasteners to secure the unit to the
rack.
Page 10
MVC-15HS, MVC-17HS
8
User Manual
Contacting technical support
For assistance installing, operating, maintaining, and
troubleshooting this product, refer to this document and any other
documentation provided. If you still have questions, you may
contact technical support and sales 24 hours a day, 7 days a week.
For sales and technical support assistance, we provide customers
with several options (see Ta bl e 3). Our support phone number is
available Monday through Friday (excluding holidays) between
the hours of 6 a.m. and 5 p.m. Pacific Time.
Table 3. Sales and support contact information
Sales Technical support
Phone:
E-mail
Fax
Note: Be ready at the equipment before calling for technical support.
800-469-1676 800-469-1676 (Mon. – Fri.
6 a.m. to 5 p.m. Pacific Time)
541-754-9133 541-740-3589 (all other times)
cvovideosales@ge.com generaltech@ge.com
541-754-7162 541-752-9096 (24 hours/day)
Online publication library
Another great resource for assistance with your GE product is our
online publication library, available to all of our customers. To
access the library, go to our website at the following location:
http://www.gesecurity.com
In the To o l s area at the top, click the Publication Library link
then select Video Surveillance. After you register and log on,
search through our online library for the documentation you need.
 Loading...