

Page 1

AudioTroll 9400/9600
Operation + Installation Manual
Granite Embedded Systems 11 Autumn Pond Park, Bldg. 2 Greenland, NH 03840 T 603-397-3548 F 603-334-3475
Page 2

Granite Embedded Systems
Table of Contents
A Message From GES...! 1
Installation - 9-3! 2
Background and required tools! 2
Required Tools ! 2
Installation! 2
Installation - 9-5 ! 4
Background and required tools! 4
Required Tools ! 4
Installation! 4
Operation! 6
Plugging in your iPod! 6
It’s just like the CD Changer!! 6
Audio System Button Functions with AudioTroll:! 6
Preparing your iPod for use with AudioTroll! 6
The long and winding road...! 7
Auxiliary Input! 7
...and because you know someone’s gonna do it...! 7
AudioTroll 9400/9600 Operation + Installation Manual! i
Page 3

Granite Embedded Systems
Nominal electrical interference, it could have been worse.! 7
Troubleshooting! 8
Warranty! 9
Limited Warranty! 9
Filing a warranty claim! 9
Specifications! 10
Control Unit! 10
AudioTroll 9400/9600 Operation + Installation Manual! ii
Page 4

Granite Embedded Systems
A Message From GES...
Thank you for purchasing an AudioTroll iPod and auxiliary input adapter for your Saab 9-3 or 9-5 automobile! This system
is the culmination of over two years of intensive research and development, ensuring the safety of the occupants of the
vehicle, as well as attending to their auditory pleasure. This manual is designed to help you understand the installation as
well as the operation of the system in your Saab. Should this manual fail to answer a question you may have, feel free to
visit the GES Support Forum on the website (http://support.granite-embedded.com/) to see if someone else in the Saab
community or at GES has the solution. Again, thank you for your purchase and enjoy the ride!
AudioTroll 9400/9600 Operation + Installation Manual
Page 5
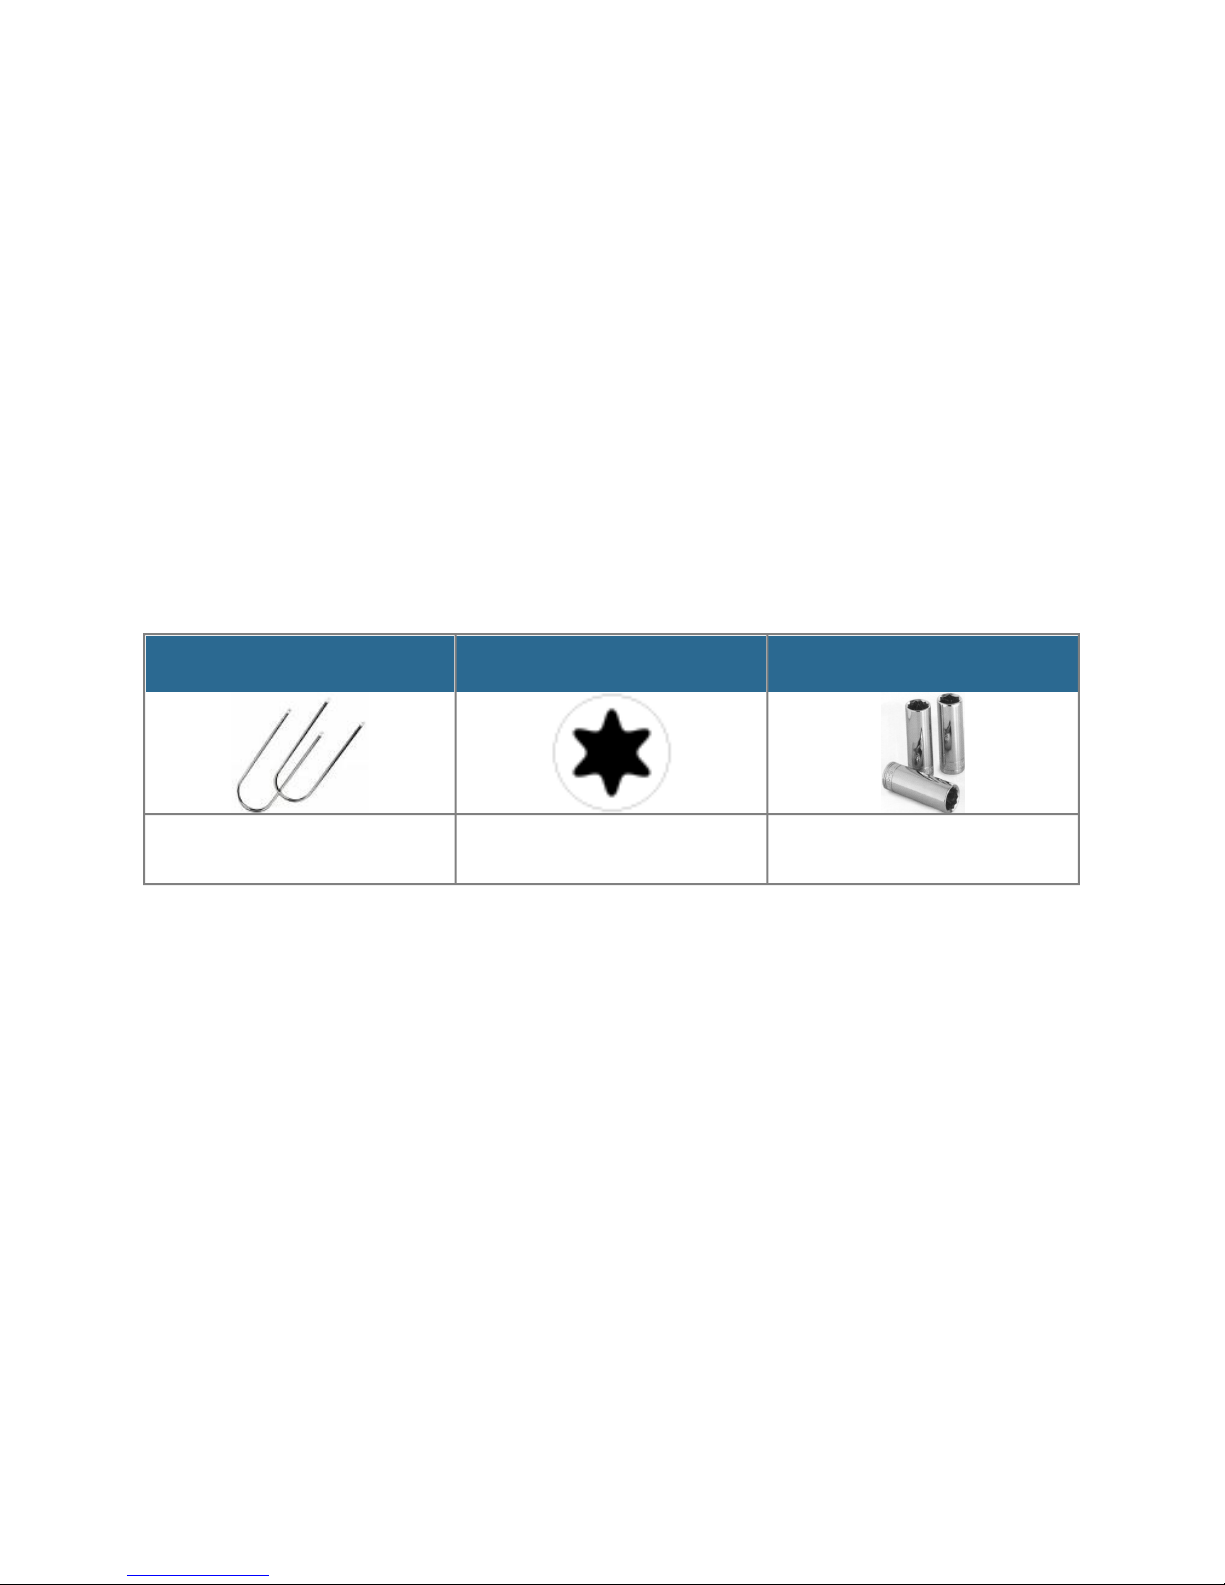
DIN Radio Removal Tools
Torx T-25 Screwdriver
Ratchet with 10mm Socket
*Commonly available at auto parts
stores.
*Your Saab toolkit contains one of
these screwdrivers.
Granite Embedded Systems
Installation - 9-3
Background and required tools
The Saab 9-3 (M98-M02, including M03 Convertible) utilize a purpose-built Clarion CD or Cassette head unit in all
markets. The AudioTroll system uses a specially designed Y-Harness to bridge the connection between the car’s
instrumentation wiring harness and the radio chassis. Installation requires the removal of the radio and glove box
assembly.
Required Tools
Installation
Step 1: Removing the radio
Locate a set of DIN keys, these will be essential to removing the radio. Insert one DIN key into the vertical holes on the
face of the radio, repeat for the opposing side. Once the keys have clicked in, and are not able to move further, gently pry
outward on the tools as you extract the radio from the fascia panel. Unclip the 26-pin male connector, antenna lead and
amplifier DIN lead (If equipped) from the rear of the radio. Place the unit aside. Reach inside the dashboard and press the
climate control unit out from the rear to allow access to the lower console.
Step 2: Removing the glove box
Open the glove box and pop the small hinged covers off the fasteners. Unscrew the T-25 screws revealed by prying off
the covers, then proceed to remove the clips on the side of the dashboard. Finally, unbolt the 10mm bolt in the bottom
right hand corner of the glove box (left hand for a RHD car). Slide the glovebox assembly out and downward.
Step 3: Installing the AudioTroll
The Chassis Harness Adapter is designed to be a bridge between the Saab’s dashboard wiring harness and the radio,
providing the adequate connections to the AudioTroll. Press the female connector of the harness adapter over the 26-pin
male connector from the dashboard harness, Carefully remove the AudioTroll from its static protection bag and connect
the DB-9 connector from the harness adapter to the AudioTroll unit. Now is probably a good time to figure out where you
want your iPod to sit when it is in the vehicle.
AudioTroll 9400/9600 Operation + Installation Manual
Page 6

Granite Embedded Systems
Step 4a: Wiring into the glovebox
Carefully cut a 1” (2.54cm) hole into the glovebox in a logical location. Run the audio and dock cable down through the
radio opening and out the side of the console. Pull these wires through and put them through the hole you’ve cut in the
glove box. Leave approximately 1’ (30.5cm) of cable in the console to allow connections to reach.
Step 4b: Wiring to an external dock
If you’ve procured an iPod mount for your dashboard, you can opt to run the cables out of the console in whatever manner you feel is aesthetically correct to make the connections. Ensure that you leave 1’ (30.5cm) of cable length in the
console to complete the connections to the control unit.
Step 5: Putting it all back together
Once the cables have been run to the respective location, connect the DIN connector (the round one that says Belkin on
it) and audio cable to the AudioTroll. Gently press the new assembly downward and out of the way of the radio’s and
climate control unit’s space. Before refitting the radio into the fascia, refit the antenna lead and position the unit near the
opening in the fascia. Insert the male connector from the harness adapter into the back of the radio unit. Slide radio unit
back into the dashboard until it clicks.
AudioTroll 9400/9600 Operation + Installation Manual
Page 7

DIN Radio Removal Tools
Torx T-25 Screwdriver
*Commonly available at auto parts
stores.
*Your Saab toolkit contains one of
these screwdrivers.
Granite Embedded Systems
Installation - 9-5
Background and required tools
The Saab 9-5 (M98-M05) utilize a purpose-built Clarion CD head unit (AS1) or Pioneer CD/Cassette head unit (AS2/AS3).
The AudioTroll system uses a specially designed Y-Harness to bridge the connection between the car’s instrumentation
wiring harness and the radio chassis. Installation requires the removal of the radio and climate control panel.
Required Tools
Installation
Step 1: Removing the radio
Locate a set of DIN keys, these will be essential to removing the radio. Insert one DIN key into the vertical holes on the
face of the radio, repeat for the opposing side. Once the keys have clicked in, and are not able to move further, gently pry
outward on the tools as you extract the radio from the fascia panel. Set the radio aside. With a flat-head screwdriver,
gently pry inwards on the sides of the radio cage to release the clips from the fascia panel. Carefully pull the cage out of
the fascia panel. Unclip the 26-pin male connector and antenna lead from the rear of the cage. Place the cage aside.
Press the climate control unit out from the rear and disconnect the harness. Place the climate control unit aside.
Step 2: Installing the AudioTroll
The Chassis Harness Adapter is designed to be a bridge between the Saab’s dashboard wiring harness and the radio,
providing the adequate connections to the AudioTroll. Press the female connector of the harness adapter over the 26-pin
male connector from the dashboard harness, Carefully remove the AudioTroll from its static protection bag and connect
the DB-9 connector from the harness adapter to the AudioTroll unit. Now is probably a good time to figure out where you
want your iPod to sit when it is in the vehicle. The recommended installation location in a Saab 9-5 is in the center console beneath the armrest. You may choose any location that you wish, but instructions for installation in the center console are as follows.
Step 3: Running the interface and audio cables through the console
Remove the ashtray (or cubby depending on the year) by gently prying upwards on the bottom with a screwdriver and
then release the boot or gently pull off the indicator plate surround from the respective transmission control lever.
AudioTroll 9400/9600 Operation + Installation Manual
Page 8

Granite Embedded Systems
There will be screws behind where the ashtray/cubby came out, pop the seat heater/fan switches out, disconnect the
electrical connections on that panel and gently pull up on the end closest to the rear of the car. The panel will pop out.
Exercising great caution, disengage the wiring to the power lock switch, remove the panel and set it aside. Remove any
screws in the top of the console to gain clearance, and pry out the window switch pack and coin box. Twist the collar
around the ignition lock clockwise and pull upward to disengage it from the console cover. Disconnect the wiring to the
collar and set it aside. Move to the back seat. Pry upward and backward on the rear of the console to gain access to the
two remaining console cover screws. You may choose to disconnect the wiring for the rear lighter socket and rear heated
seat (if applicable), but it is not necessary for this procedure. Removing the rear cover exposes the last two screws that
hold the console cover onto its framework. Remove these two screws and remember which way that metal bracket orients itself to the hinge assembly. The device end of the cables can be fished through under the top of the console next to
the shifter and up through to the radio area. The iPod end of the cables can be fished through in the same manner in the
vicinity of the window switchpack. Once the iPod ends are through, pull them down towards the bottom of the center
armrest bin and with the rubber mat removed in said bin, pull the iPod ends of the cables through. Pull a reasonable
amount of cable into the storage bin, but make sure you have enough to reach the control box in the dash. Gently tuck
the remainder of the cables up and under the plastic top of the console and it will neatly fall into the center console. Replace the screws, window switches, coin box, shifter surround panel and ashtray.
Step 4: Putting it all together
Once the cables have been run to the respective location, connect the DIN connector (the round one that says Belkin on
it) and audio cable to the AudioTroll. Gently press the new assembly downward and out of the way of the radio’s and
climate control unit’s space.
--CAUTION-The locking tabs on the harness adapter’s male connector MUST be removed!
Damage will result if tabs are not removed.
Before refitting the cage into the fascia, refit the antenna lead, slide the radio into the cage and position the assembly
near the opening in the fascia. Insert the male connector from the harness adapter into the back of the radio unit. Slide
radio unit back into the dashboard.
AudioTroll 9400/9600 Operation + Installation Manual
Page 9

AudioTroll Function
Button
Steering Wheel Button (if
applicable)
Access Playlists 1-5 defined in iTunes
Preset 1-5
n/a
Access Entire Library
Preset 6
n/a
Select Tracks
Seek >> / Seek <<
Seek >> and Seek <<
Reset iPod connection (9-5 Only!)
Center SEEK (hold down)
n/a
Shuffle Mode
Preset 6 then hold CD
n/a
Recall Title
n/a
NXT
Granite Embedded Systems
Operation
Plugging in your iPod
AudioTroll has TWO wires for the iPod. The one with the green connector carries audio signals, the other carries serial
data and 12-volts DC power to charge the iPod. Make sure you have both connected before attempting to use
AudioTroll. You may ask why there are two wires and the answer is simply that a Saab is a very noisy place from an
electrical interference standpoint and carrying audio, power and data over the same wire made a lot of strange sounds in
early testing during development. It’s all about the music.
It’s just like the CD Changer!
When you activate AudioTroll for the first time by pressing your CD button twice, you will find a very transparent user
interface that is intuitive and slick.
Audio System Button Functions with AudioTroll:
Preparing your iPod for use with AudioTroll
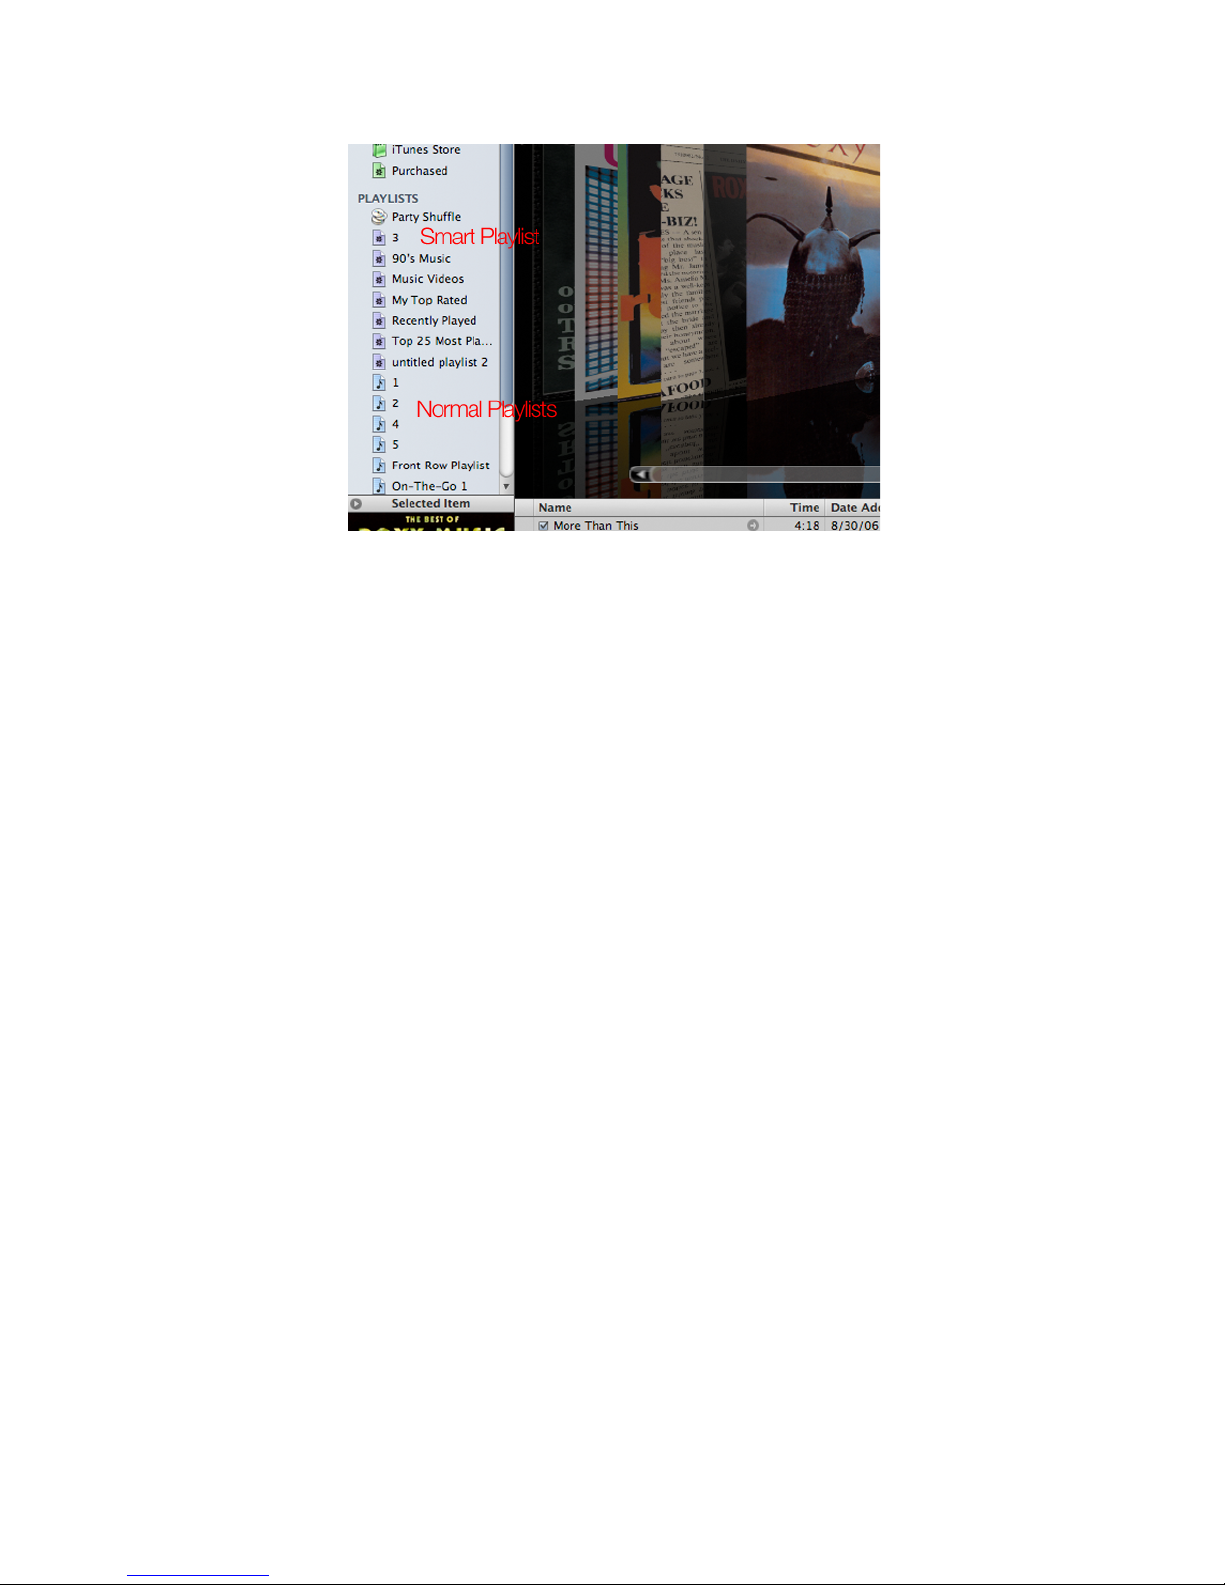
AudioTroll is a playlist-centric device given the hardware limitations of the Saab Audio System. For the greatest ease of
use, GES recommends defining playlists in iTunes numbered 1-5 and putting songs that you’d want to hear in them.
These playlists can be “Smart Playlists” as well, which can be programmed to automatically select music based on various criteria.
AudioTroll 9400/9600 Operation + Installation Manual
Page 10
Granite Embedded Systems
The long and winding road...
Long road trips can really be a pain... especially with commercial radio stations blaring out the same junk from city to city.
Your passengers can swap their iPod into the system very easily to switch up the musical variety. Simply unplug the iPod
that is plugged into AudioTroll, plug the new one in and initiate the reset function. On a 9-5, you hold down the middle of
the SEEK button until the SID chirps, then you select a playlist from the preset buttons. On a 9-3, you simply switch to a
different source then come back.
Auxiliary Input
AudioTroll functions as an auxiliary input for any device that utilizes a 3.5mm (1/8”) stereo jack. For best results, unplug
the iPod from the system before attaching another device. The SID will read as whatever playlist you left off in, track zero.
...and because you know someone’s gonna do it...
Please do not try and connect anything to the iPod dock connector on the AudioTroll that is not an iPod. Yeah, the
Zune’s connector looks the same but you’ll either fry the Zune or your car... same goes for Creative Zen, dockable
Satellite Radio systems, etc. GES will not cover any damages caused by improper use of the AudioTroll device, and the
warranty will be voided by such activities within the warranty period.
Nominal electrical interference, it could have been worse.
You are going to hear the hard drive of your iPod spool up from time to time, or the occasional digital burst of data
flooding across the ground plane of the board. The noise should never be so bad that it inhibits your ability to enjoy the
music coming from the speakers.
AudioTroll 9400/9600 Operation + Installation Manual
Page 11

Symptom
Cause
Remedy
AudioTroll will not turn on when I hit
CD twice.
Software timer has stopped for some
reason.
Pull and re-insert the respective audio
system fuse (9 in a 9-5, 13 in a 9-3).
iPod battery is not charging, and I
hear ticking over the speakers.
iPod has been subject to a sustained
thermal departure from normal.
Tip the dock plug out at a 15-degree
angle and plug it back in.
AudioTroll randomly kicked back into
FM1
Software timer has stopped for some
reason.
Pull and re-insert the respective audio
system fuse (9 in a 9-5, 13 in a 9-3).
None of my normal SID information is
showing up after installation
Connectors are loose, they take a bit
of strength to set effectively
Crank down on the connector
between the car harness and the Y-
harness.
The song title is stuck on the SID
Software got stuck in a loop
Pull and re-insert the respective audio
system fuse (9 in a 9-5, 13 in a 9-3).
The AIRBAG light illuminated briefly
on my instrument cluster and cased a
“ding-dong” sound from the SID
Saab’s i-bus has been overloaded
temporarily, and unfortunately, it
sends its most grim message to alert
you of that fact.
Don’t press the steering wheel
buttons so fast.
The track number never leaves 0 and
the song titles went away
Software got stuck in a loop
Pull and re-insert the respective audio
system fuse (9 in a 9-5, 13 in a 9-3).
Granite Embedded Systems
Troubleshooting
AudioTroll 9400/9600 Operation + Installation Manual
Page 12

Granite Embedded Systems
Warranty
Limited Warranty
Granite Embedded Systems ("GES") warrants that when shipped from GES each GES product ("GES Product") will conform to GES's current published specifications in existence at
the time of shipment and will be free, for the warranty period ("Warranty Period") described below, from defects in materials and workmanship. The limited warranty described herein
("Limited Warranty") is not transferable, shall extend only to the first end-user ("User") purchasing the GES Product from either GES or a dealer expressly authorized by GES to sell
GES Products ("Authorized GES Dealer"), and is subject to the following terms, conditions and limitations:
1. A Warranty Period of ninety (90) days shall apply to all new GES Products. Unless otherwise stated by GES, a Warranty Period of ninety (90) days shall apply to: (a) a used GES
Product sold either by GES or by an Authorized GES Dealer who has been expressly authorized by GES to sell such used GES Product; and (b) services provided by GES, including
testing, servicing, and repairing an out-of-warranty GES Product. The Warranty Period shall begin from the later of: (i) the date of shipment of the GES Product from GES, or (ii) the
date of shipment (or other delivery) of the GES Product from an Authorized GES Dealer to User.
2. GES's sole obligation under this Limited Warranty shall be limited to either repairing, replacing, or adjusting, at GES's option, a covered GES Product that has been determined by
GES, after reasonable inspection, to be defective during the foregoing Warranty Period. All warranty inspections, repairs and adjustments must be performed by GES. All warranty
claims must include proof of purchase, including proof of purchase date, identifying the GES Product by serial number.
WHAT IS NOT COVERED
This Limited Warranty excludes all damage, including damage to any GES Product, due to: failure to follow GES's user's manual and other GES instructions; abuse; misuse; neglect;
accident; fire; flood; Acts of God; improper applications; connection to incorrect line voltages and improper power sources; use of incorrect fuses; overheating; contact with high
voltages or injurious substances; or other events beyond the control of GES. This Limited Warranty does not apply to any equipment not manufactured or supplied by GES nor, if
applicable, to any damage or loss resulting from use of any GES Product outside the designated country of use. By accepting a GES Product, User agrees to carefully evaluate the
suitability of the GES Product for User's intended use and to thoroughly read and strictly follow all instructions supplied by GES (including any updated GES Product information
which may be obtained at the GES website). In no event shall this Limited Warranty cover any damage arising during shipment of the GES Product to or from GES.
User agrees that the following will render the above Limited Warranty void: (i) alteration, removal or tampering with any serial number, identification, instructional, or sealing labels on
the GES Product, or (ii) any unauthorized disassembly, repair or modification of the GES Product. In no event shall GES be responsible for the cost of or any damage resulting from
any changes, modifications, or repairs to the GES Product not expressly authorized in writing by GES, and GES shall not be responsible for the loss of or damage to the GES Product
or any other equipment while in the possession of any service agency not authorized by GES.
GES reserves the right to make changes in design and improvements upon GES Products from time to time, and User understands that GES shall have no obligation to upgrade any
previously manufactured GES Product to include any such changes.
The foregoing Limited Warranty is GES's sole warranty and is made in place of all other warranties, express or implied, including but not limited to the implied warranties of
merchantability and fitness for a particular purpose and any implied warranty arising from course of performance, course of dealing, or usage of trade. If GES has substantially
complied with the warranty claim procedures described below, such procedures shall constitute User's sole and exclusive remedy for breach of the Limited Warranty.
In no event shall GES be liable for any indirect, special, incidental, or consequential damages or for any cover, loss of information, profit, revenue or use based upon any claim by User
for breach of warranty, breach of contract, negligence, strict liability, or any other legal theory. In no event shall GES's liability exceed the amount User has paid for the GES Product.
To the extent that any applicable law does not allow the exclusion or limitation of incidental, consequential or similar damages, the foregoing limitations regarding such damages shall
not apply.
This Limited Warranty gives you specific legal rights, and you may also have other rights which vary from state to state. This Limited Warranty shall be governed by the laws of the
State of New Hampshire, USA.
Filing a warranty claim
In the event you should have to file a claim with GES for repair/replacement of your AudioTroll under the 90-day limited
warranty, please call the owner of GES, Carl Levine, directly at 603-397-3548 during normal business hours (Eastern
Time)
AudioTroll 9400/9600 Operation + Installation Manual
Page 13

Granite Embedded Systems
Specifications
Control Unit
Dimensions: Approx. 4”x2”x0.5”
RoHS Compliance: Available upon request
Processor: Microchip PIC2585 @ 8mhz
Audio Processor (2): Analog Devices SSM2142 or Equivalent
Interface Harness
26-pin ISO-DIN Male and Female with DB-9 to control unit
Interface Cable
Belkin 6’ made exclusively for GES
Audio Cable
6’ M/M Stereo
AudioTroll 9400/9600 Operation + Installation Manual
 Loading...