

German Physiks Loreley Mk3 Owners manual
Loreley Mk III User Manual
This product complies with European Union EMC Directive
(89/336/EEC) and the Low Voltage Directive (73/23/EC)
© German Physiks 2007
Revision g
Released 22nd October 2007
We reserve the right to change the information contained in this manual without notice. For the
latest version please see our web site at www.german-physiks.com

TABLE OF CONTENTS
1. INTRODUCTION ............................................................................................................................3
2. UNPACKING YOUR LOUDSPEAKERS .......................................................................................3
3. ASSEMBLING YOUR LOUD SPEAKERS ....................................................................................5
Introduction ............................................................................................................................... 5
Assembly Procedure .................................................................................................................6
4. CONNECTING YOUR LOUDSPEAKERS ....................................................................................10
High Frequency Level Control ..................................................................................................10
Low Frequency Level Control ................................................................................................... 10
Input Terminal Connections ...................................................................................................... 11
Single Wire Connection ....................................................................................................... 11
Bi- Wire Connection .............................................................................................................11
Bi- Amp Connection .............................................................................................................11
5. LOUDSPEAKER BREAK IN..........................................................................................................11
6. LOUDSPEAKER PLACEMENT AND SET-UP ............................................................................. 12
Listening Room Layout ............................................................................................................. 12
Loudspeaker Placement ........................................................................................................... 12
Distance from rear wall: ....................................................................................................... 12
Distance from side wall: .......................................................................................................12
7. CARE OF YOUR LOUDSPEAKERS............................................................................................. 14
8. WARRANTY ..................................................................................................................................14
9. SERVICE AND SUPPORT............................................................................................................ 14
10. HOW TO CONTACT US ..............................................................................................................15
11. LORELEY MkII SPECIFICATIONS..............................................................................................16
12. WARRANTY REGISTRATION.....................................................................................................17
2
1. INTRODUCTION
Thank you for selecting the German Physiks Loreley for your audio system. It uses an array of four
DDD drivers to cover all frequencies above 180Hz. The low frequencies are handled by a system using
two 12 inch drivers combined with four 8 inch passive radiators. The Loreley is entirely handmade and is
built and tested by highly skilled technicians at our factory in Germany.
Every step in the design and manufacture of this product has been dedicated to producing a loudspeaker
that will provide a lifetime of musical enjoyment.
We strongly recommend that you read this manual before you attempt to use the loudspeakers. The
supplying audio dealer is responsible for assembling and setting up the loudspeakers. This should not
be attempted by the customer. Information on these topics contained in this manual is intended for
general use only.
2. UNPACKING YOUR LOUDSPEAKERS
NOTE: The customer should not attempt to assemble the loudspeaker.
This will be done by the supplying audio dealer.
The crates and their contents are heavy. To avoid injury, please
ensure that 2 people are available to unpack and position the
loudspeakers.
The Loreley is supplied in 3 crates. Before opening them, please inspect them for damage. If you see
any damage to the crates, please contact the supplying audio dealer immediately and provide them with
a full description of the damage. Do not attempt to unpack the loudspeakers until you have spoken with
the dealer and have been advised how to proceed.
The woofer module assemblies for the left and right channels are packed in separate crates which are
marked “left” and “right” on the outside. Take care not to mix components from these two crates up. The
two DDD towers are packed together in the third crate.
Please retain all of the packing as you will need this should it be necessary in the future to ship the
loudspeakers. Should you need to return the loudspeakers to the factory, you must use the original
packing. The use of any other packing may result in the loudspeakers sustaining damage in transit.
Such damage is not covered by the warranty. Should you require replacement packing, please contact
your German Physiks dealer, the national distributor or the factory directly.
The crates and their contents are heavy. To avoid injury, please ensure that 2 people are available to
unpack and position the loudspeakers. Use Figure 1 to identify the major components and confirm that
the crates contain the following items:
Item Quantity Description
1 2 Bottom Plates
2 2 Lower Modules
3 2 Distance Frames
4 2 Upper Modules
5 2 Top Plates
6 2 DDD towers
7 24 Inter-Cabinet Connecting Cables
8 1 User manual
9 4 Cleaning cloths
If any items are missing, or if any item shows signs of damage, please contact the supplying audio
dealer immediately.
3
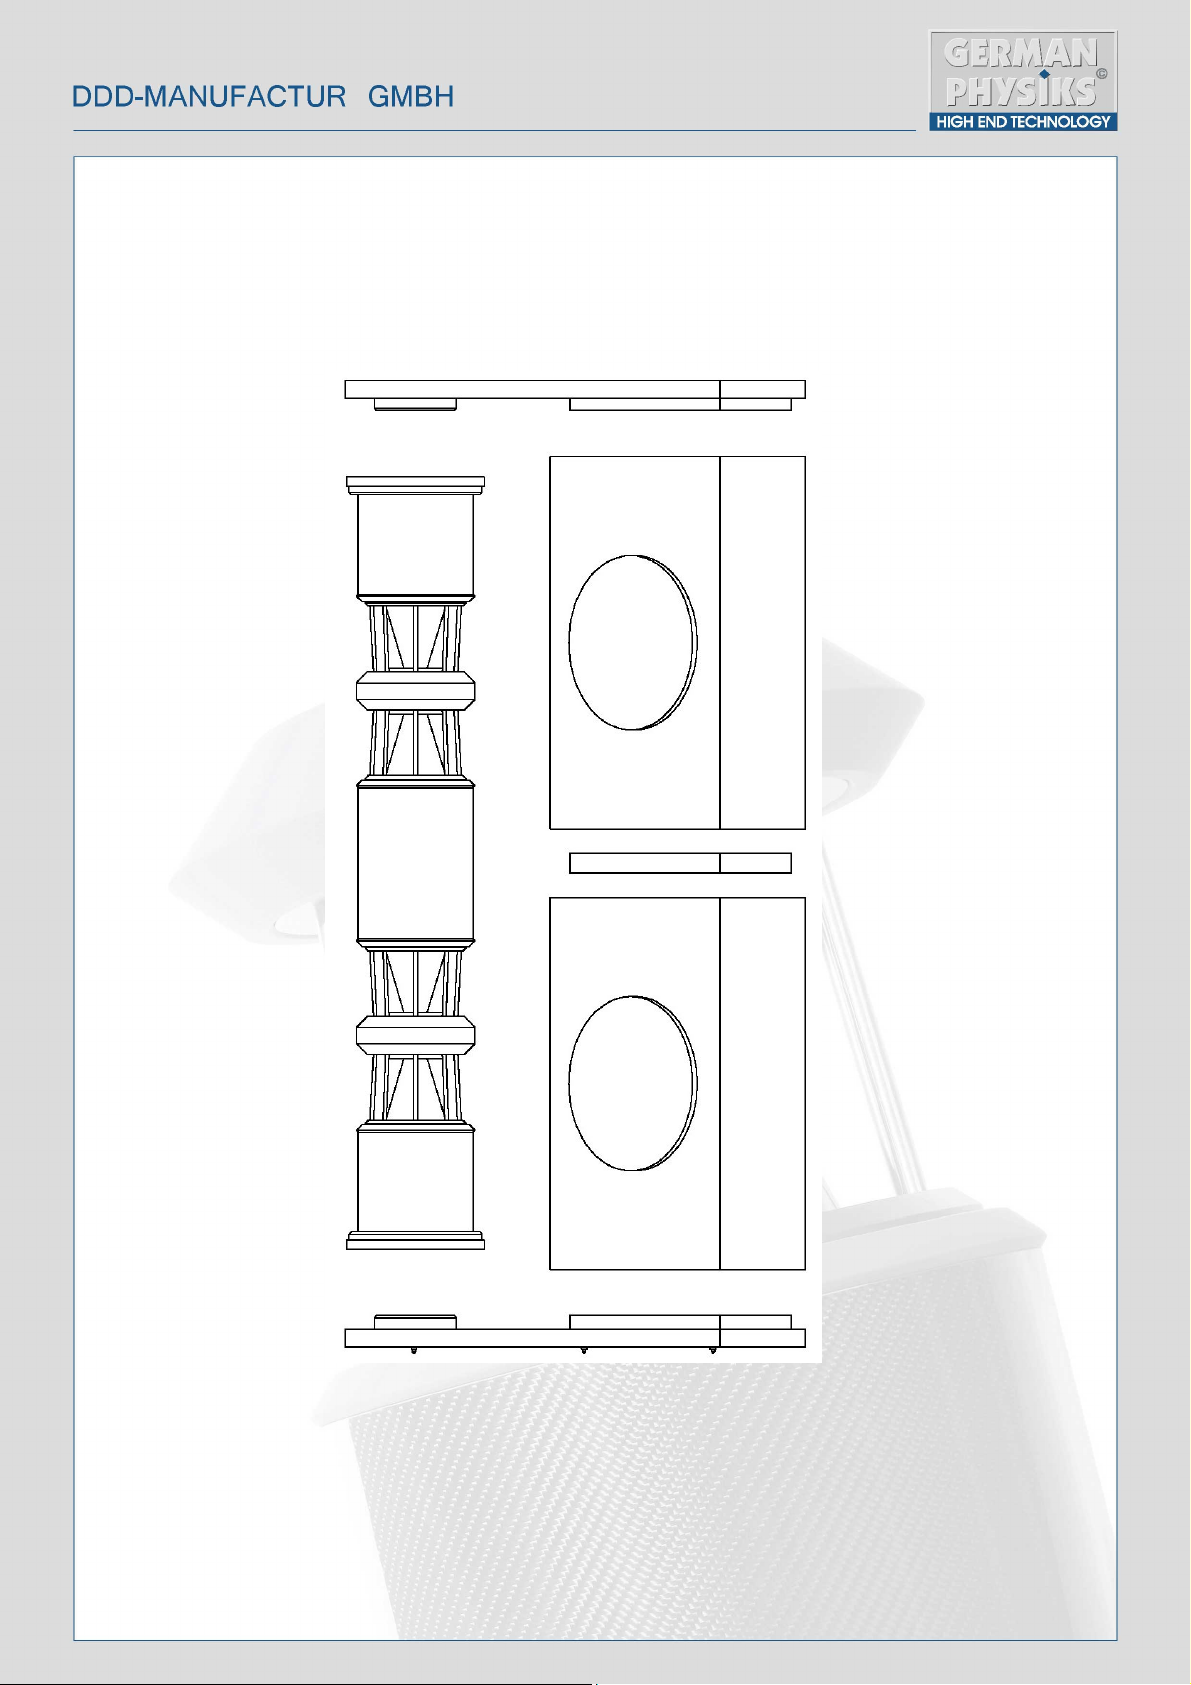
5. Top Plate
4. Upper Module
6. DDD Tower
3. Distance Frame
2. Lower Module
1. Bottom Plate
Figure 1. Loreley Major Components
4
Left Loudspeaker
3. ASSEMBLING YOUR LOUDSPEAKERS
Introduction
Because of the complexity of the Loreley, customers are strongly requested not to attempt to assemble
or set up the loudspeakers on their own. These tasks will be carried out by the supplying dealer who has
received detailed training from German Physiks engineers. Many of the component parts are very heavy
and personal injury could result if they are inappropriately lifted. Component parts could also be
damaged by inexpert handling and any resulting damage would not be covered by the warranty.
The following description of the assembly process is for general information only. It is not intended to be
used as a guide for assembling the loudspeakers, as it has been simplified for the sake for clarity.
Please refer to figure 1 to familiarise yourself with the major components.
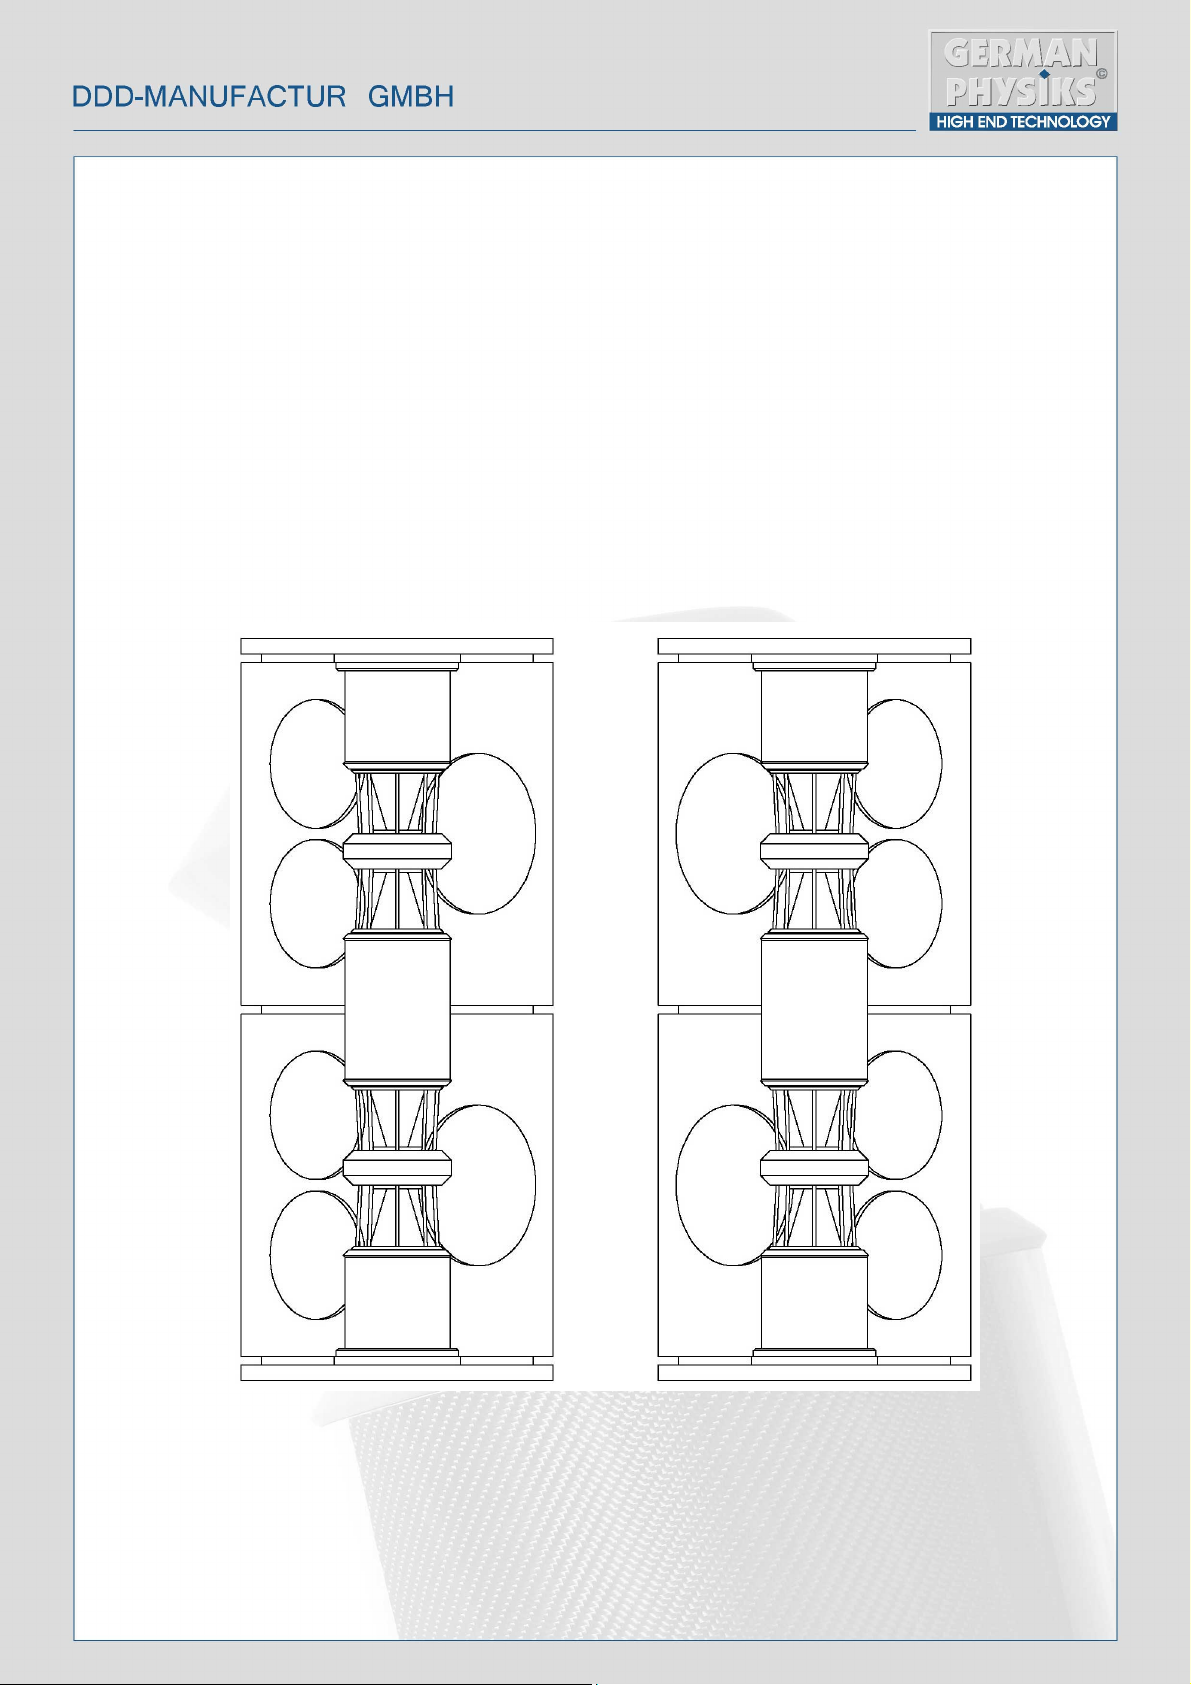
We will describe the assembly process for the left loudspeaker. This has its two 12 inch drivers located
on the right side of the woofer modules, as can be seen in figure 2 below.
Figure 2. Loreley Front View
5
Right Loudspeaker
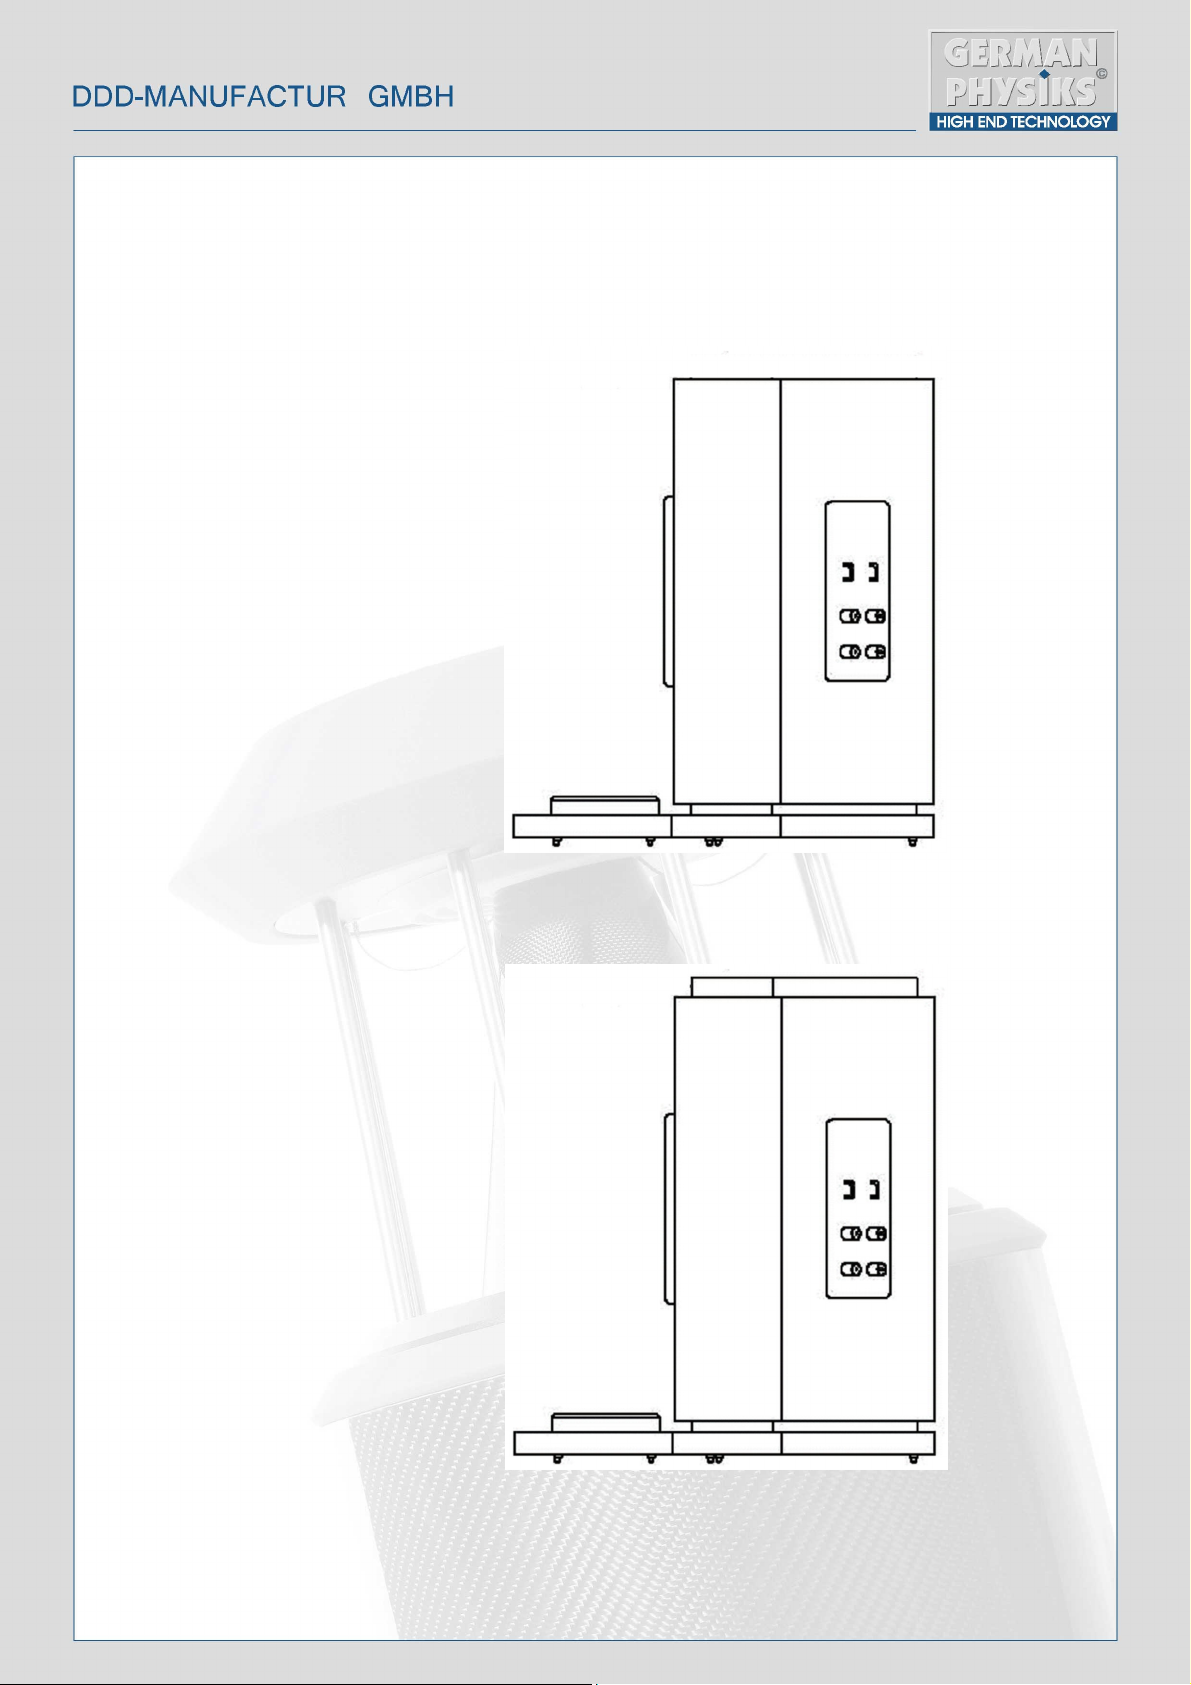
Figure 4. Lower Module with Distance Frame
2. Identify the left lower module. This has
the input terminals and level selectors on
its rear face. This module is very heavy
and you may find it easier to grip if the
woofer grills are removed first. Place it
carefully on top of the bottom plate as
shown in figure 3. Ensure that it is properly
3. Replace any grills that have been
removed and then place the distance frame
on top of the lower module as shown in
Assembly Procedure
1. Place the left loudspeaker bottom plate on the floor in the position where the speaker is to be sited.
Ensure that it is sitting squarely on all 5 support points and that it is level. Please refer to figure 9 for
guidance.
seated.
figure 4. Ensure that it is properly seated.
Figure 3. Lower Module on Bottom Plate
6
 Loading...