

Gerber D460065, D460065BN Installation Manual

4 ½" Five Function S
howerhead
Pomme de douche de 4 ½ po (11,4 cm) à
cinq fonctions
Cabeza de ducha con cinco funciones de 4 ½ pulg
Adjustable
Llave ajustable
Clé à molette
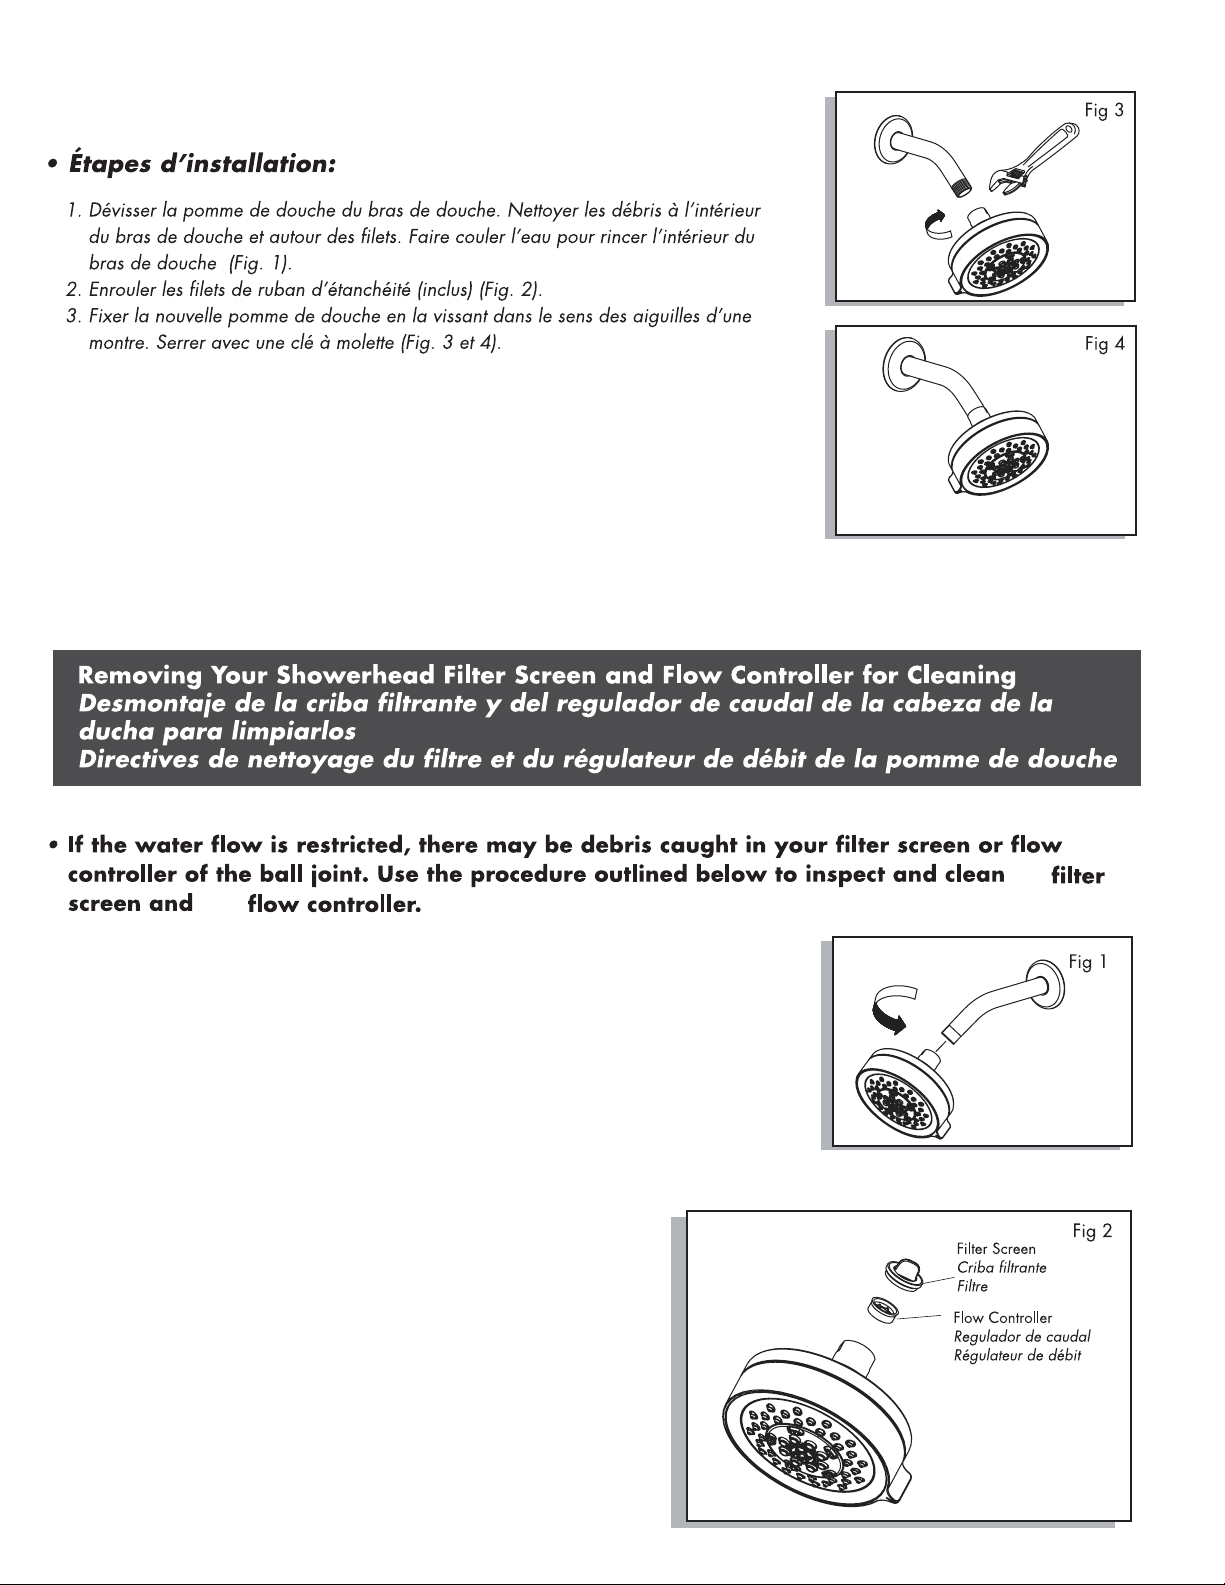
1.
2. Wrap the threads of the showerarm with plumber's tape (included) (Fig 2).
3.
Wrench
Remove the existing showerhead from the showerarm. Clean any debris from inside
the showerarm and showerarm threads. Run the water to flush residual debris from
inside the arm (Fig 1).
Attach the new showerhead to the showerarm by turning clockwise. Tighten with a
wrench (Fig 3 & 4).
Needle-nose Pliers
Alicates de extremos finos
Pince à bec effilé
D460064/D460065
Shown/Mostrado/Illustré
the
1.
Remove the showerhead from the showerarm by unscrewing the ball
joint counter-clockwise (Fig 1).
2. The filter screen and flow controller are located at the opening of the
showerhead ball joint (Fig 2). Unscrew the filter screen from the ball
If necessary, use your needle-nose pliers (Fig 3).
joint.
3. Use needle-nose pliers to grasp the flow controller and pull the flow
controller out.
flow controller so as to avoid damage (Fig 4).
4. Remove any debris from the filter screen and from the flow controller.
Reinstall the flow controller by pressing into the opening of the
showerhead. Reinstall the filter screen by screwing clockwise into
the ball joint threads. Reattach the showerhead by screwing the ball
joint clockwise into the showerarm threads. Make sure to follow the
original installation instructions shown above.
Take care not to use excessive force when grasping the
the
 Loading...