

Page 1

Page 2
Page 3
8
S
P
L
I
T
/
R
E
S
E
T
S
T
A
R
T
/
S
T
O
P
MODE
S
UN MON TUE WED THU FRI SA
T
10 28
38
PM
MODE
Day week
12h mode
Principle
information
Time / Stopwatch
SPLIT/RESET START/STOP
MODE
MODE
SUN
AM
PM
MON TUE WED THU FRI SAT
00:0000
Alarm sound
Page 4

9
Congratulations on your purchase of the Trt’L 300! This device
offers very good measuring precision as well as great ease of
use. The Trt’l300 will accompany you for a long time during all
your athletic activities.
Limited guarantee
DECATHLON guarantees the initial purchaser of this stopwatch that it is free from any faults linked to the materials or manufacture for a period of two years from the date of purchase.
Please retain your receipt as proof of purchase.
•
This guarantee does not cover damage resulting from improper use, failure to respect
the terms of use or accidents, neither does it cover damage resulting from improper
maintenance or use of the item for business purposes.
•
This guarantee does not cover damage resulting from repairs carried out by parties not
authorized by DECATHLON.
•
The guarantees contained here replace all other guarantees including the implicit
guarantee of fair and trade quality and/or adaptation to use. DECATHLON cannot under
any circumstances be held responsible for any damage, be it direct or indirect, general or
specific, caused by or linked to these directions for use or the products they relate to.
•
During the guarantee period, the item will either be repaired free of charge by an
authorized repair service or replaced for free (depending on distributor).
•
The guarantee does not cover batteries or cracked or broken watch faces where signs
of a blow are evident.
Characteristics and functions
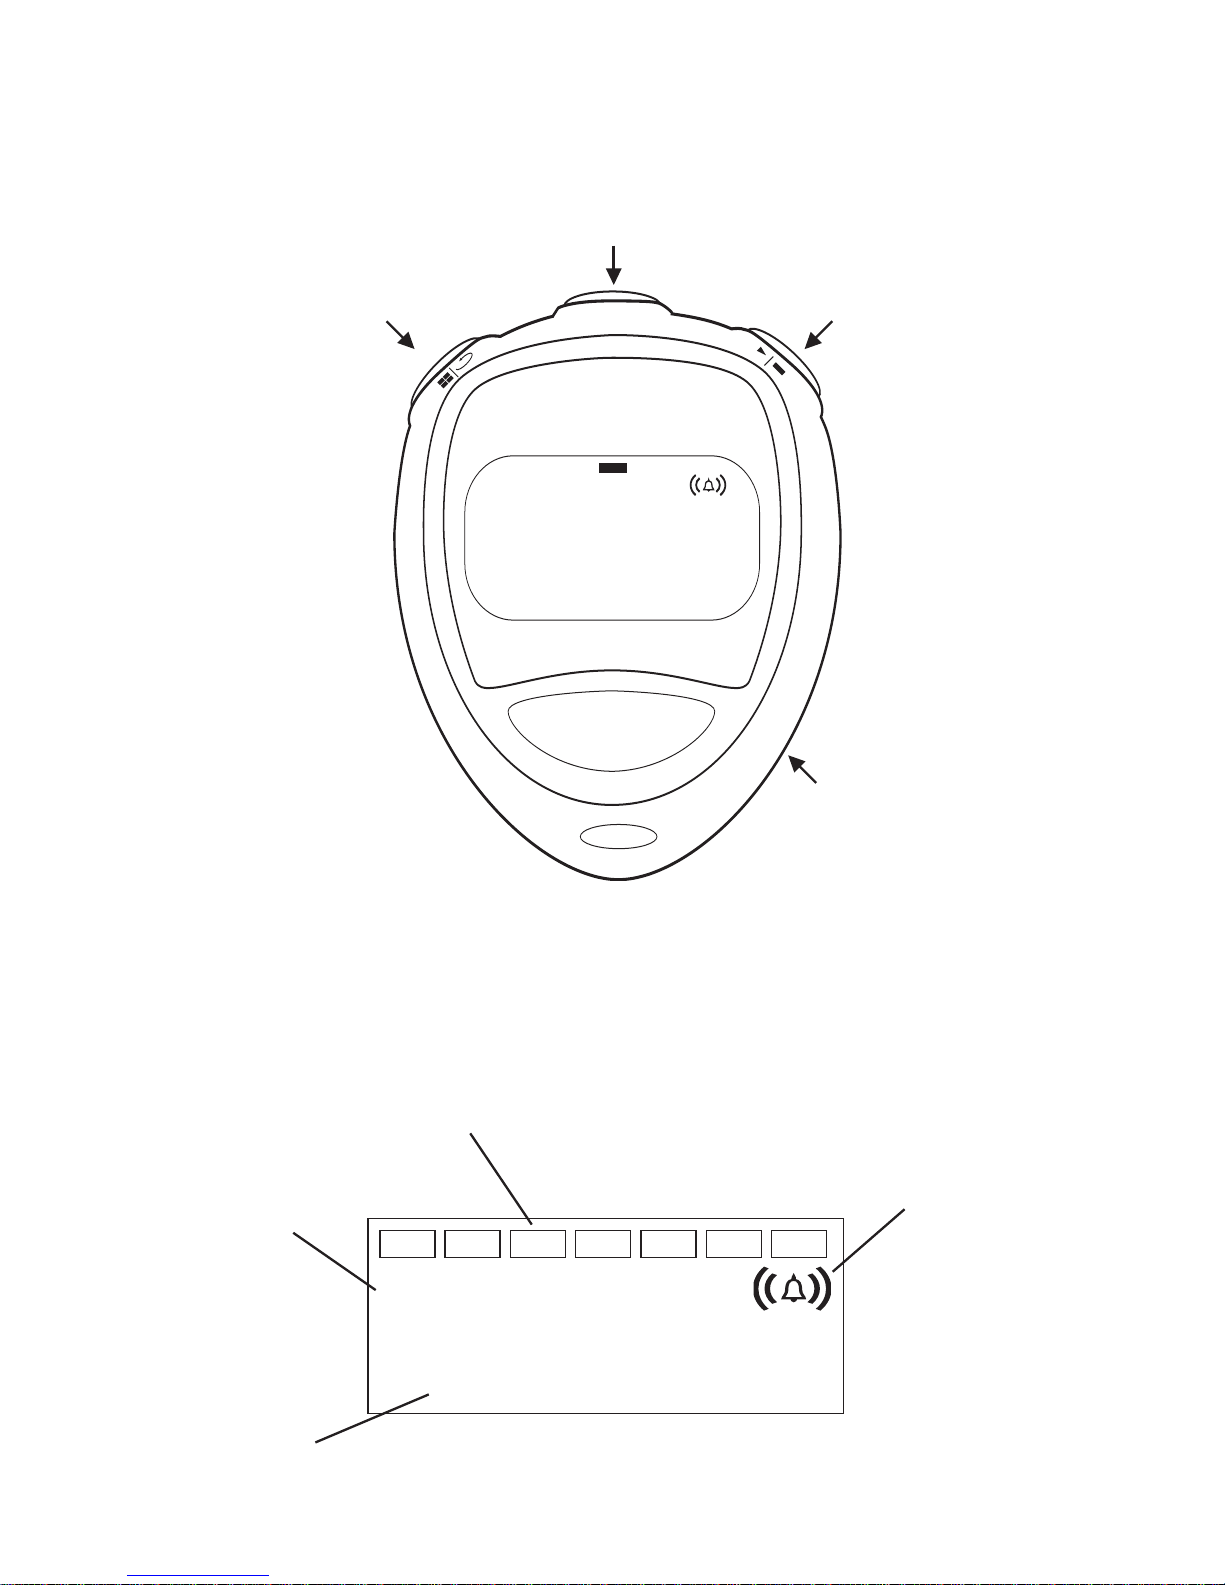
•
4 buttons:
SPLIT/RESET, RECALL, START/STOP, MODE
•
1 line of display, large characters
•
precise measuring from 1/100 of a second to 1 hour
•
replaceable batteries
(CR2032).
•
case is waterproof to water spray. May be used for water sports or in the rain.
Fonctions
•
Stopwatch for up to 23 hours and 59 minutes
•
Time (h, min, s in 12 hour and 24 hour display)
•
Date (day, month, year), automatic calculation of the day of the week (from 2000
to 2049)
•
1 Intermediate time
Normal conditions of use
T
his stopwatch has been designed to measure intervals of time in order to optimize
a
thletic tr
aining or f
or measuring perf
ormance. It is not intended for calibrating technical
or safety devices (especially braking systems).
It is no long
er designed f
or arbitr
ating competition or to be used for any commercial
pur
pose
.
Restrictions on use / guidelines governing use:
•
If you do not respect the following precautions, you risk losing the DECATHLON.
•
Waterproof design: The stop watch is classified as "water resistant". It can therefore be
used in humid conditions and is water-resistant in rain or water spray. But it is not
waterproof in cases of immersion, nor is it designed to be used under water.
EN
Page 5

10
•
Care and maintenance: To preserve the Decathlon guarantee, any operation or repair
must be exclusively entrusted to a Decathlon electronics shop. If one is not available, no
dysfunction can be claimed in the context of the Decathlon guarantee, with the exception
of hidden defects.
•
When changing the battery, replace the seal and check for water tightness
•
If condensation appears or water infiltrates, check the device immediately. Water may
attack the electronic elements inside the casing.
•
Avoid submitting the device to hard shocks like those received when falling onto a hard
surface.
•
Do not expose the stopwatch to extreme temperatures.
•
Clean only with a slightly damp, soft cloth, and do not use detergents or soap, which may
cause the materials to deteriorate.
•
Keep the device away from any strong electrical field or area of static electricity.
Operating problems:
If you encounter a problem with the read-out please check the batteries first.
Recycling:
The ‘crossed out dustbin’ sign means that this product and its batteries cannot
be thrown out with domestic waste. They should be treated apart. When you
have finished with them, drop them at an authorised collection point so they
can be recycled. This gesture will go towards protecting the environment and
your health.
Initial settings
Settings for the time and date are explained in the sections dedicated to the different
modes.
Initialization: In case of display problems or significant dysfunctions, press the
4 buttons simultaneously
(START/STOP, MODE, MODE, SPLIT/RESET)
to reset the stop-
watch
(RESET)
batteries : The stopwatch uses a CR2032 type battery
Replacing the battery is done by unscrewing the back cover a quarter turn, using a coin,
for example.
Inserting the battery is done according to the following diagram. Make sure the polarities
are correctly placed.
Page 6

11
SUNAMMON TUE WED THU FRI SAT
5:1604
AM
7:2244
1
Time/Date Mode (Time)
2
Stopwatch mode
3
Setting mode for the alarm
4
Time setting mode
Scrolling through the different modes
By pressing repeatedly on the MODE button, you can access the different functioning
modes as shown in the following diagram. You must make the screen corresponding to
the desired function appear in order to use or set it.
1 Time/Date Mode (Time)
2 Stopwatch mode
3 Setting mode for the alarm
4 Time setting mode
Modes
1 Time/Date Mode (Time)
START/STOP:
display of the date
SPLIT/RESET :
Display of the alarm
MODE :
go to the following mode
•
The indication for the day alarm will appear to right of the screen if the function
is selected.
•
The time is displayed in Anglo-Saxon mode
(0-12 hours AM/PM)
or in European mode
(0-24 hours)
. on the main line. Going from one to the other is done in the time setting
mode.
A dash indicates the day of the week at the top of the screen.
•
Activation of the day alarm
To activate or deactivate the day alarm (thus making the symbol appear or disappear),
hold down SPLIT/RESET and press START/STOP at the same time.
2 Stopwatch mode
START/STOP :
start/stop the stopwatch
SPLIT/RESET :
record an intermediate
time/reset to 0
MODE :
go to the following mode
•
The time measured with the stopwatch occupies the main line of the stopwatch
The dashes at the top of the screen indicate the general functioning of the stopwatch.
The dashes for Saturday (SA) and Sunday (SU) will flash.
Page 7

PM
9:59 P
AM
4:2750
12
•
The stopwatch enables you to measure an intermediate time (SPLIT: the time passed
since the start up to arrival at the given point). It does not allow you to save information in
memory.
•
Using the stopwatch
When the stopwatch has stopped, press the SPLIT/RESET button to reset to 0.
•
The stopwatch is started/stopped by pressing the START/STOP button (Time format:
minutes: seconds: 1/100 second). The maximum value is 23 h 59min 59s 99.
At the top of the screen, the dash for Friday (FR) will flash and indicate that the stopwatch
is functioning.
•
Several time measurements can be accumulated by pressing START/STOP again
between each measurement.
•
The intermediate time measurements can be displayed when the stopwatch is running
by pressing repeatedly on the SPLIT/RESET button. At the top of the screen, the dash for
Thursday (TH) will begin to flash, indicating that the stopwatch is in the "intermediate time"
position
Press SPLIT/RESET again to return to the normal stopwatch display.
3 Setting mode for the alarm
START/STOP:
to set the parameter that is flashing
SPLIT/RESET:
go to the settings mode for the
following parameter
MODE :
go to the following mode
•
When entering this mode, the alarm time is displayed and the number of hours flashes
to indicate that you have entered the setting mode.
Press
START/STOP to set the hours
Press SPLIT/RESET to make the minutes flash
Press START/STOP to set the minutes
ATTENTION :
Depending on the time display mode (to be set in the next mode, following paragraph),
you will see an "H" to the right of the time (24h display) or an "A" or a "P" (12h display).
To change the alarm display, you must change the time display.
•
When entering the setting mode, the alarm is automatically activated. You must
invalidate it by using the procedure described in the time mode.
•
The modifications made to the alarm are automatically validated when you leave the
mode b
y the MODE b
utton.
4 Time setting mode
START/STOP:
to set the parameter that is flashing
SPLIT/RESET:
go to the settings mode for the
following parameter
MODE :
go to the following mode
Page 8

13
Upon entering this mode, the time is displayed and the number for the seconds will flash
to indicate that you have entered the setting mode.
Press
START/STOP to set the seconds to 0
Press SPLIT/RESET to make the minutes flash
Press START/STOP to set the minutes
Press
SPLIT/RESET to make the hours flash
Press START/STOP to set the hours
ATTENTION : Going from the European display to an Anglo-Saxon display is done
when setting the time.
Press START/STOP to make the numerals scroll by
The possible values are:
You must therefore set the number for the hours in the appropriate system. The alarm time
will be adapted to the same format.
If the 12h mode is selected, the AM and PM symbols will appear, depending on the case,
on the left of the screen.
The modifications made to the alarm are automatically validated when you leave the mode
by the MODE button.
Contact
As we strive to continually improve the products we develop, we are interested in your
feedback regarding the quality, the functionality and the usage of our products.
•
In France, please call the customer service center at:
0810 08 08 08 (local call rate)
•
For any other country, please leave a message under the relevant heading on
our website: www.decathlon.com
We promise to answer you promptly.
60
22:01
ACC
70
M
ALTI
0-23 H (24h system) - - -> 12-11 A (12h system-morning AM) - - -> 12-11 P (12h system afternoon PM)
 Loading...