

Page 1

Page 2

Content
A word from the product manager ������������������������������������������������������������������������������������������������������������������������������������������������������������������������������������������4
1� Product composition ������������������������������������������������������������������������������������������������������������������������������������������������������������������������������������������������������������4
2� Charging the battery ������������������������������������������������������������������������������������������������������������������������������������������������������������������������������������������������������������4
3� Switch on and set the product ��������������������������������������������������������������������������������������������������������������������������������������������������������������������������������������������4
4� Installing the heart rate monitor belt ����������������������������������������������������������������������������������������������������������������������������������������������������������������������������������5
5� Key functions ������������������������������������������������������������������������������������������������������������������������������������������������������������������������������������������������������������������������5
6� The watch’s main menus �����������������������������������������������������������������������������������������������������������������������������������������������������������������������������������������������������5
7� Activities offered by your GPS ��������������������������������������������������������������������������������������������������������������������������������������������������������������������������������������������6
8� Starting a session�����������������������������������������������������������������������������������������������������������������������������������������������������������������������������������������������������������������6
8.1. Searching for the satellite signal ......................................................................................................................................................................................6
8.2. Searching for heart rate (ONmove 710 only) ...................................................................................................................................................................7
9� How to use in free mode ������������������������������������������������������������������������������������������������������������������������������������������������������������������������������������������������������7
9.1. Specifying activity options................................................................................................................................................................................................7
9.1.1. Target zone ...................................................................................................................................................................................................................7
9.1.2. Lap information .............................................................................................................................................................................................................7
9.2. Select a route...................................................................................................................................................................................................................8
9.3 Session progress ..............................................................................................................................................................................................................8
9.3.1 Starting the session .......................................................................................................................................................................................................8
9.3.2. “My indicators” display ..................................................................................................................................................................................................8
9.3.3. Taking lap times manually .............................................................................................................................................................................................8
9.3.4. Pausing and stopping a session ...................................................................................................................................................................................8
9.4. Other displays available during session ..........................................................................................................................................................................8
9.4.1. The “My rhythm” display ...............................................................................................................................................................................................8
9.4.2. “My route” display .........................................................................................................................................................................................................9
9.5. Summary of session ........................................................................................................................................................................................................9
10� How to use the training mode �������������������������������������������������������������������������������������������������������������������������������������������������������������������������������������������9
10.1. Modifying a training programme ...................................................................................................................................................................................9
10.1.1. Structure and modication of a interval training programme .....................................................................................................................................9
10.1.1.1. Structure of a interval training programme .............................................................................................................................................................9
10.1.1.2. Modifying a interval training programme ................................................................................................................................................................9
10.1.2. Structure and modication of a pyramid training programme .................................................................................................................................. 11
10.1.2.1. Structure of a pyramid training programme ..........................................................................................................................................................11
10.1.2.2. Modifying a pyramid training programme .............................................................................................................................................................11
10.2. Creating my training programme .................................................................................................................................................................................13
10.3. Consulting a training programme ................................................................................................................................................................................14
10.4. Using a training programme ........................................................................................................................................................................................14
10.4.1. Specify activity options .............................................................................................................................................................................................15
10.4.2. Progression of training ..............................................................................................................................................................................................15
10.4.2.1. Warm-up ................................................................................................................................................................................................................15
10.4.2.2. Series.....................................................................................................................................................................................................................15
10.4.2.3. Series-break ..........................................................................................................................................................................................................16
10.4.2.4. The Cool down .......................................................................................................................................................................................................16
10.4.2.5. End of training .......................................................................................................................................................................................................16
10.4.2.6. Other available training displays ............................................................................................................................................................................17
11� Using the challenge mode �����������������������������������������������������������������������������������������������������������������������������������������������������������������������������������������������17
11.1. Free race ......................................................................................................................................................................................................................17
11.1.1. Free race with route ..................................................................................................................................................................................................17
11.1.1.1. Set your run ...........................................................................................................................................................................................................17
11.1.1.2. Start the race .........................................................................................................................................................................................................18
11.1.1.3. End of the race .......................................................................................................................................................................................................18
11.1.1.4. Other displays available during your race ..............................................................................................................................................................18
11.1.2. Free race with distance .............................................................................................................................................................................................18
11.1.3. Unlimited free race ....................................................................................................................................................................................................19
11.2. Self-challenge ..............................................................................................................................................................................................................19
11.3. Maximum aerobic speed (MAS) ...................................................................................................................................................................................19
11.3.1. Denition and purpose of MAS .................................................................................................................................................................................19
11.3.2. Doing the eld test ....................................................................................................................................................................................................19
12� How to use guiding ����������������������������������������������������������������������������������������������������������������������������������������������������������������������������������������������������������20
12.1. Create and select a route ............................................................................................................................................................................................20
12.1.1. Create a route ...........................................................................................................................................................................................................20
12.1.1.1. Using MyGeonaute ................................................................................................................................................................................................20
Page 3

12.1.1.2. Using a previously saved session .........................................................................................................................................................................20
12.1.1.2.1. Select a route .....................................................................................................................................................................................................20
12.1.1.2.2. Route direction and guiding pop-up ....................................................................................................................................................................21
12.2. Access to start of route ................................................................................................................................................................................................21
12.3. Guiding along the route ...............................................................................................................................................................................................21
12.3.1. Using the “my route” display .....................................................................................................................................................................................21
12.3.2. Using guiding pop-ups ..............................................................................................................................................................................................21
12.3.2.1. Directional pop-ups ................................................................................................................................................................................................22
12.3.2.2. Pop-up alert out of track ........................................................................................................................................................................................22
12.3.2.3. Wrong way pop-up alert .........................................................................................................................................................................................22
13� Using the stretching mode ����������������������������������������������������������������������������������������������������������������������������������������������������������������������������������������������22
14� Using the indoor mode ����������������������������������������������������������������������������������������������������������������������������������������������������������������������������������������������������23
15� The library �������������������������������������������������������������������������������������������������������������������������������������������������������������������������������������������������������������������������23
15.1. Consult a session ........................................................................................................................................................................................................23
15.2. View a route .................................................................................................................................................................................................................23
15.3. Consulting and managing the memory ........................................................................................................................................................................23
16� Settings �����������������������������������������������������������������������������������������������������������������������������������������������������������������������������������������������������������������������������24
16.1. Activity options .............................................................................................................................................................................................................24
16.2. Personalising the interface ..........................................................................................................................................................................................24
16.2.1. Display ......................................................................................................................................................................................................................24
16.2.2. Fast Touch (ONmove 710 only) ................................................................................................................................................................................25
16.2.2.1. Fast Touch functions ..............................................................................................................................................................................................25
16.2.2.2. Fast Touch sensitivity .............................................................................................................................................................................................25
16.2.3. Beeps........................................................................................................................................................................................................................25
16.2.4. Vibrator (ONmove 710 only) .....................................................................................................................................................................................26
16.2.5. Lighting .....................................................................................................................................................................................................................26
16.3. General .......................................................................................................................................................................................................................26
16.3.1. Language ..................................................................................................................................................................................................................26
16.3.2. Time ..........................................................................................................................................................................................................................26
16.3.3. Units..........................................................................................................................................................................................................................26
16.4. User .............................................................................................................................................................................................................................26
16.5. HR belt (ONmove 710 only).........................................................................................................................................................................................26
16.5.1. Pairing with cardio belt monitor ................................................................................................................................................................................26
16.5.2. Deactivate HR monitor function ................................................................................................................................................................................27
16.5.3. Activate the HR monitor ............................................................................................................................................................................................27
16.6. Upgrade/maintenance .................................................................................................................................................................................................27
16.6.1. Upgrading product ....................................................................................................................................................................................................27
16.6.2. Default settings ........................................................................................................................................................................................................28
17� Safety functions����������������������������������������������������������������������������������������������������������������������������������������������������������������������������������������������������������������29
17.1. Return to start line of previous session .......................................................................................................................................................................29
17.2. Display GPS position ...................................................................................................................................................................................................29
18� Transfer data to your PC ��������������������������������������������������������������������������������������������������������������������������������������������������������������������������������������������������29
18.1. Install MyGeonaute .....................................................................................................................................................................................................29
18.2. Connect your watch to your PC ...................................................................................................................................................................................29
18.3. Importing your sessions ...............................................................................................................................................................................................29
18.4. View your sessions ......................................................................................................................................................................................................30
19� Troubleshooting ���������������������������������������������������������������������������������������������������������������������������������������������������������������������������������������������������������������30
19.1. Abnormal speed and distance .....................................................................................................................................................................................30
19.2. Detecting HR monitor belt (ONmove 710 only) ...........................................................................................................................................................30
19.3. Abnormal heart rate (ONmove 710 only) .....................................................................................................................................................................30
19.4. Heart rate information display not present or has no values (ONmove 710 only) .......................................................................................................30
19.5. Low watch battery ........................................................................................................................................................................................................30
19.6. Restore default settings ...............................................................................................................................................................................................30
19.7. The watch has frozen and is not responding ...............................................................................................................................................................31
19.8. The watch’s memory is low ..........................................................................................................................................................................................31
20� Summary of available functions �������������������������������������������������������������������������������������������������������������������������������������������������������������������������������������31
21� Technical features ������������������������������������������������������������������������������������������������������������������������������������������������������������������������������������������������������������31
22� Compatible accessories ��������������������������������������������������������������������������������������������������������������������������������������������������������������������������������������������������32
23� Change HR belt battery (ONmove 710 only) ������������������������������������������������������������������������������������������������������������������������������������������������������������������32
24� Recommendations for use ����������������������������������������������������������������������������������������������������������������������������������������������������������������������������������������������33
25� Guarantee ��������������������������������������������������������������������������������������������������������������������������������������������������������������������������������������������������������������������������33
26� Contact us �������������������������������������������������������������������������������������������������������������������������������������������������������������������������������������������������������������������������33
27� Index ����������������������������������������������������������������������������������������������������������������������������������������������������������������������������������������������������������������������������������34
Page 4

A word from the product manager
Thank you for choosing this product for your running sessions. The ONmove 510 watch or ONmove 710 heart rate monitor have been specially designed to
meet the needs of runners. They provide support during exercise, whatever your approach to running.
If you want to improve, use the training mode. If you want to run freely but monitor your effort, use the free mode and target zones. If you like to discover new routes
when running, take advantage of our guiding options. If you are very competitive, the challenge mode is perfect for you.
After your session, you’ll be able to view the routes you’ve completed, analyse your sessions and monitor your progress using MyGeonaute.
The navigation menu, which is available in 7 languages, will ensure that you quickly become familiar with the product. You can also personalize the screen
which means you can access any information you want and only the information you want.
We hope you enjoy your running sessions using your new product.
1� Product composition
ONmove 510 ONmove 710
GPS Watch
USB cable to charge the battery and transfer information to your PC
Heart rate monitor belt
2� Charging the battery
Plug in the USB power adapter to a USB plug and the pincers to your watch.
Connect to a USB port
Connect to your watch
S/N: 000000
W KALENJI 300 GPS
INPUT:
XXXXX XXX XXX X
MADE IN XXX XXX
S/N: 000000
W KALENJI 300 GPS
INPUT:
XXXXX XXX XXX X
MADE IN XXX XXX
The 4 metal connectors of the pincers must be completely inserted into the 4 corresponding slots on the back of the watch.
80%
When the watch is switched off and the USB cable plugged in, the battery indicator shows the battery charge level.
You are advised to switch off the product after use to extend battery life.
3� Switch on and set the product
Switch on the watch by pressing the ON key. The rst setting screen, “language”, will appear.
Set your product by entering: language, time, units, gender, date of birth, weight, height, max HR (maximum heart rate), max resting HR (resting heart rate).
Maximum heart rate is automatically calculated from your age but can be adjusted manually.
Keys used for setting:
Return to the previous screen
Increase the previous
value or choose in the list
Reduce the value or choose
the next in the list
On/off (long press).
Validating the setting
language
English
4
Page 5
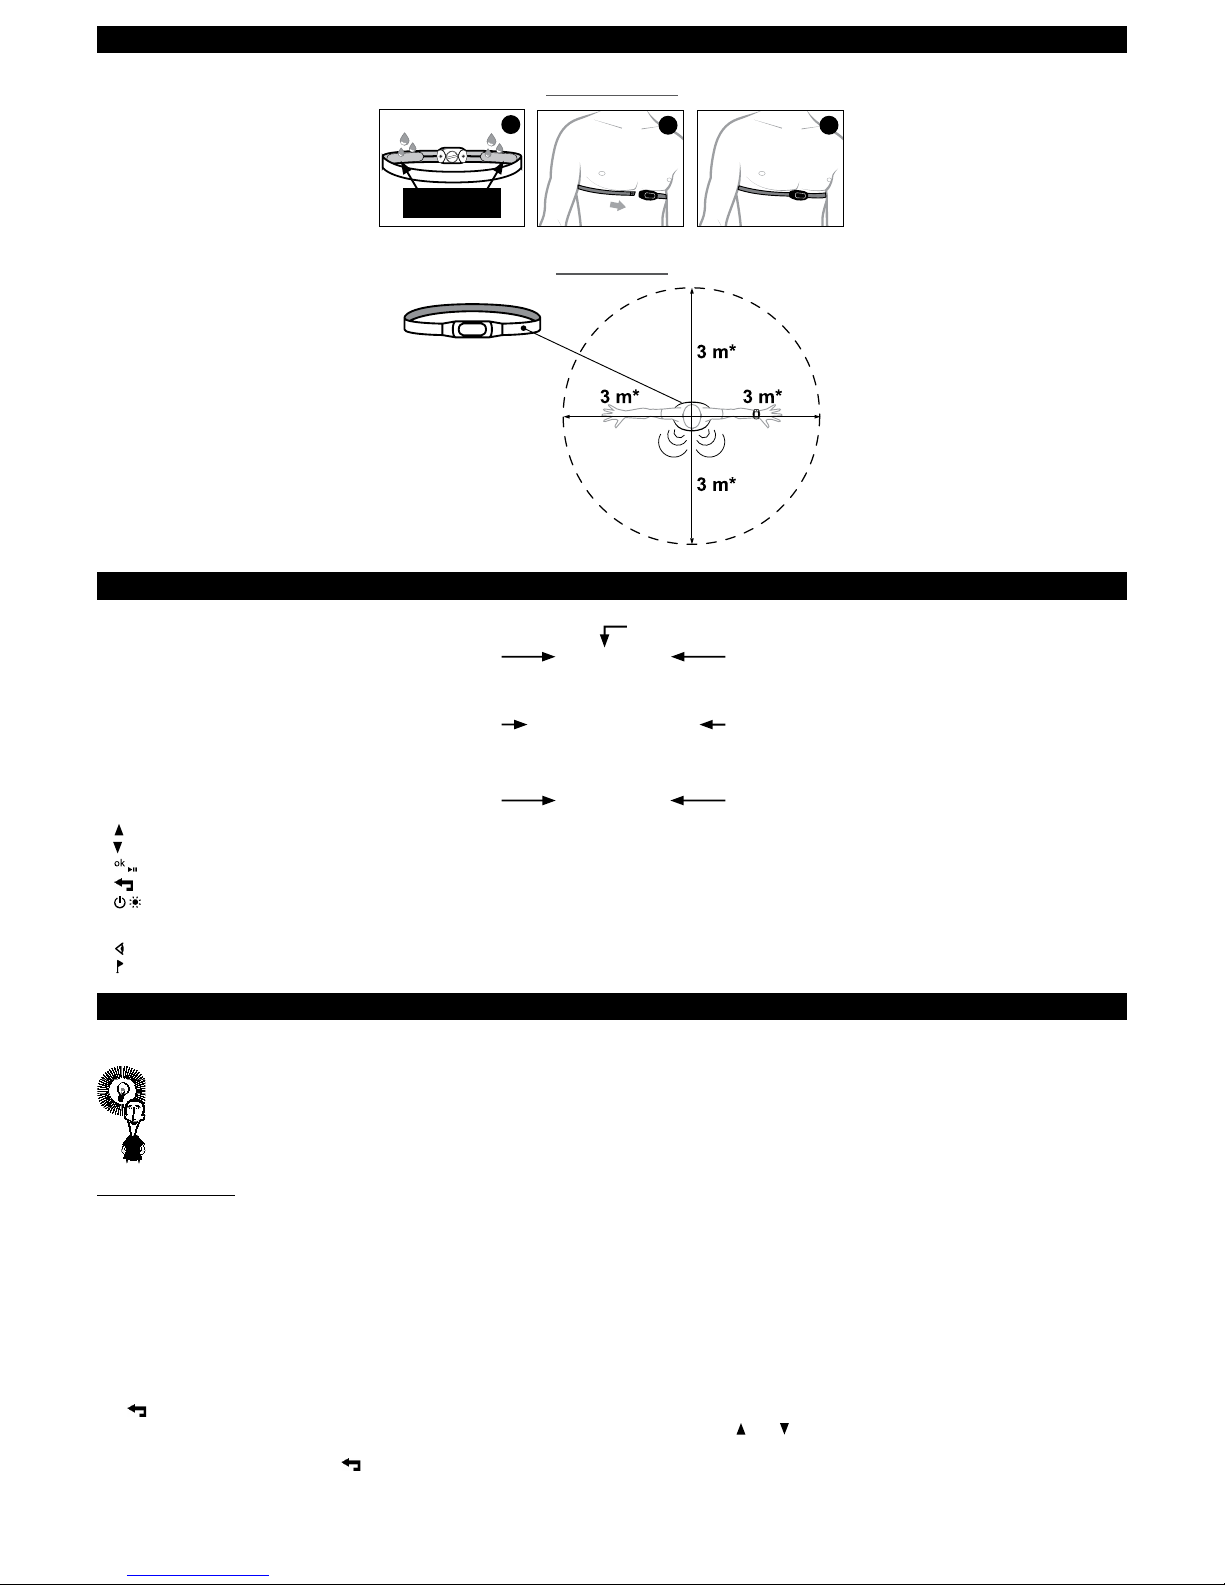
4� Installing the heart rate monitor belt
This chapter only relates to the ONmove 710 model.
Setting up the belt
1
Sensors
2 3
Reception cone
*118.08 inches
5� Key functions
4
1
6
2
5
3
7
activities
1. top: previous choice from list, increase a value, previous page of indicators from “my indicators” display, zoom in on “my route” display.
2. bottom: next choice from list, decrease a value, next page of indicators from “my indicators” display, zoom out on “my route” display.”
3. start/pause: enter main menu of GPS, conrm a choice, start/stop the stopwatch during a session. Unlock product (hold down) when in energy saving mode.
4. back: return to the previous menu or screen.
5.
: turn the product on or off (hold down), illuminate screen.
The side keys only work once a session is underway.
6.
screen: to change display during the session.
7. lap: to take lap times manually.
6� The watch’s main menus
After setting, and then each time you switch the watch on, your GPS will display the time, date and battery level.
To access product functions more quickly, you can press OK to eliminate the "Kalenji" and "Geonaute technology" screen animations that appear
when you switch your watch on.
Energy saving mode
After 5 minutes of inactivity, the watch will automatically switch to energy saving mode, indicated by a closed padlock sign at
top right hand corner of screen.
To exit energy saving mode and access main menu, hold down the OK key.
Press OK to access the GPS menu.
The
key lets you return to the time.
4 menus are listed and can be accessed by pressing OK. To navigate between menus use the and keys. To enter the menu of your choice, press the
OK key.
To display the time again, press the key.
5
Page 6
activities
The activities menu lets you access the watch’s different modes, most notably, free session, training, challenge, stretching and indoor
activities, on which you will nd a detailed presentation in the following chapter.
my library
The library menu gathers the detailed reports of your sessions, your route and updates you on memory storage capacity.
settings
The menu settings let you adjust the product interface (display, sound etc.), the general parameters (language, time etc.) or user
information (age, weight etc.). They also let you manage the heart rate monitor belt (for the ONmove 710) and access the product
maintenance menu (default settings, upgrade).
safety
functions
The safety menu functions lets you locate your GPS position or be guided to to the start or nish line of a previous session.
7� Activities offered by your GPS
Free session: run at your own rhythm and regulate your pace using target zones or activate auto lap information based on time and distance. You can be
guided if a route has already been created or downloaded to the product.
Training: here you will nd the most popular running sessions ( training) or you can create your own training session (new training) then let your watch
guide you during the session.
Challenges: challenge yourself using a mode that lets you race against a virtual competitor (free race), yourself (challenge myself) or assess your MAS
(maximum aerobic speed). You can be guided if a route has already been created or downloaded to the product.
Stretches: stretches are suggested for the various muscle groups in order to improve recovery following exercise. You can launch a list of predened
stretches. You can adapt this list to your own needs.
Indoors: this mode deactivates the GPS for indoor activities (treadmill, indoor athletics) while enabling you to save your session and check your heart
rate (ONmove 710 only).
8� Starting a session
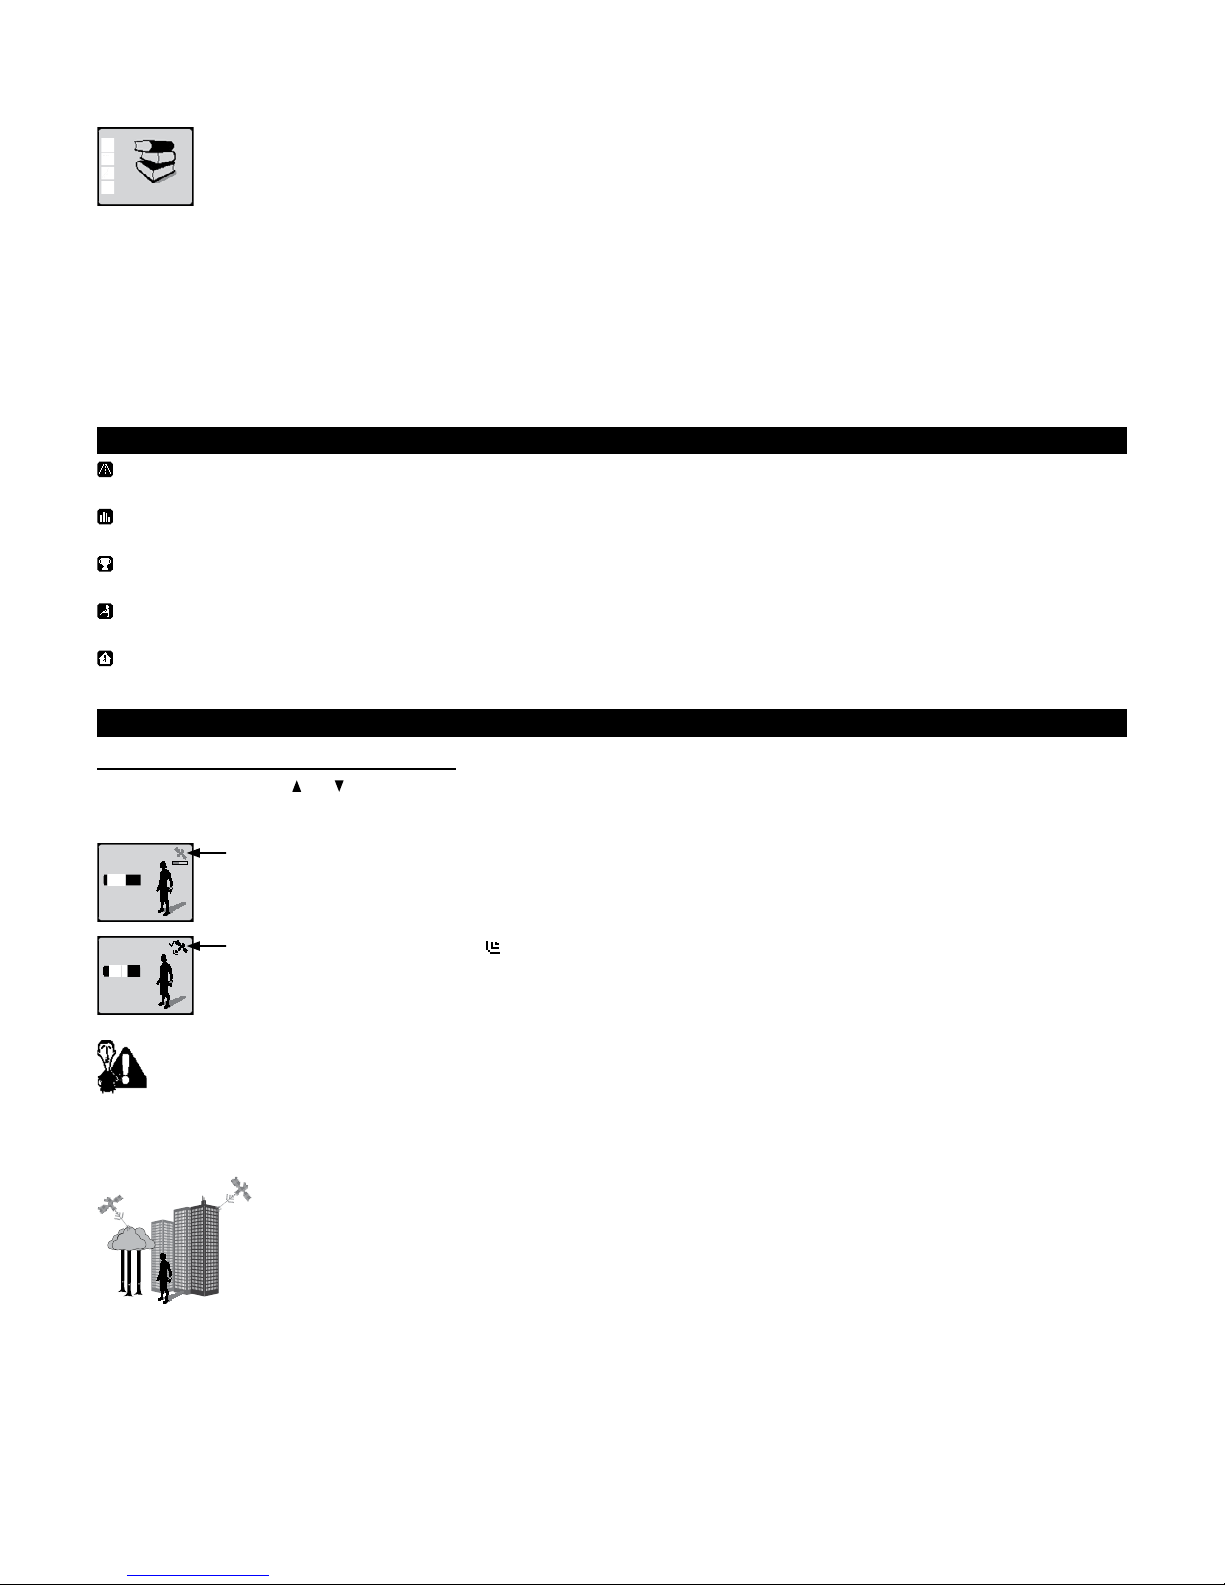
8�1� Searching for the satellite signal
Select your activity using the and keys and conrm by pressing OK�
The GPS measures speed and distance. When entering free session, training and challenge modes, the watch will search for the signals of the nearest
satellites.
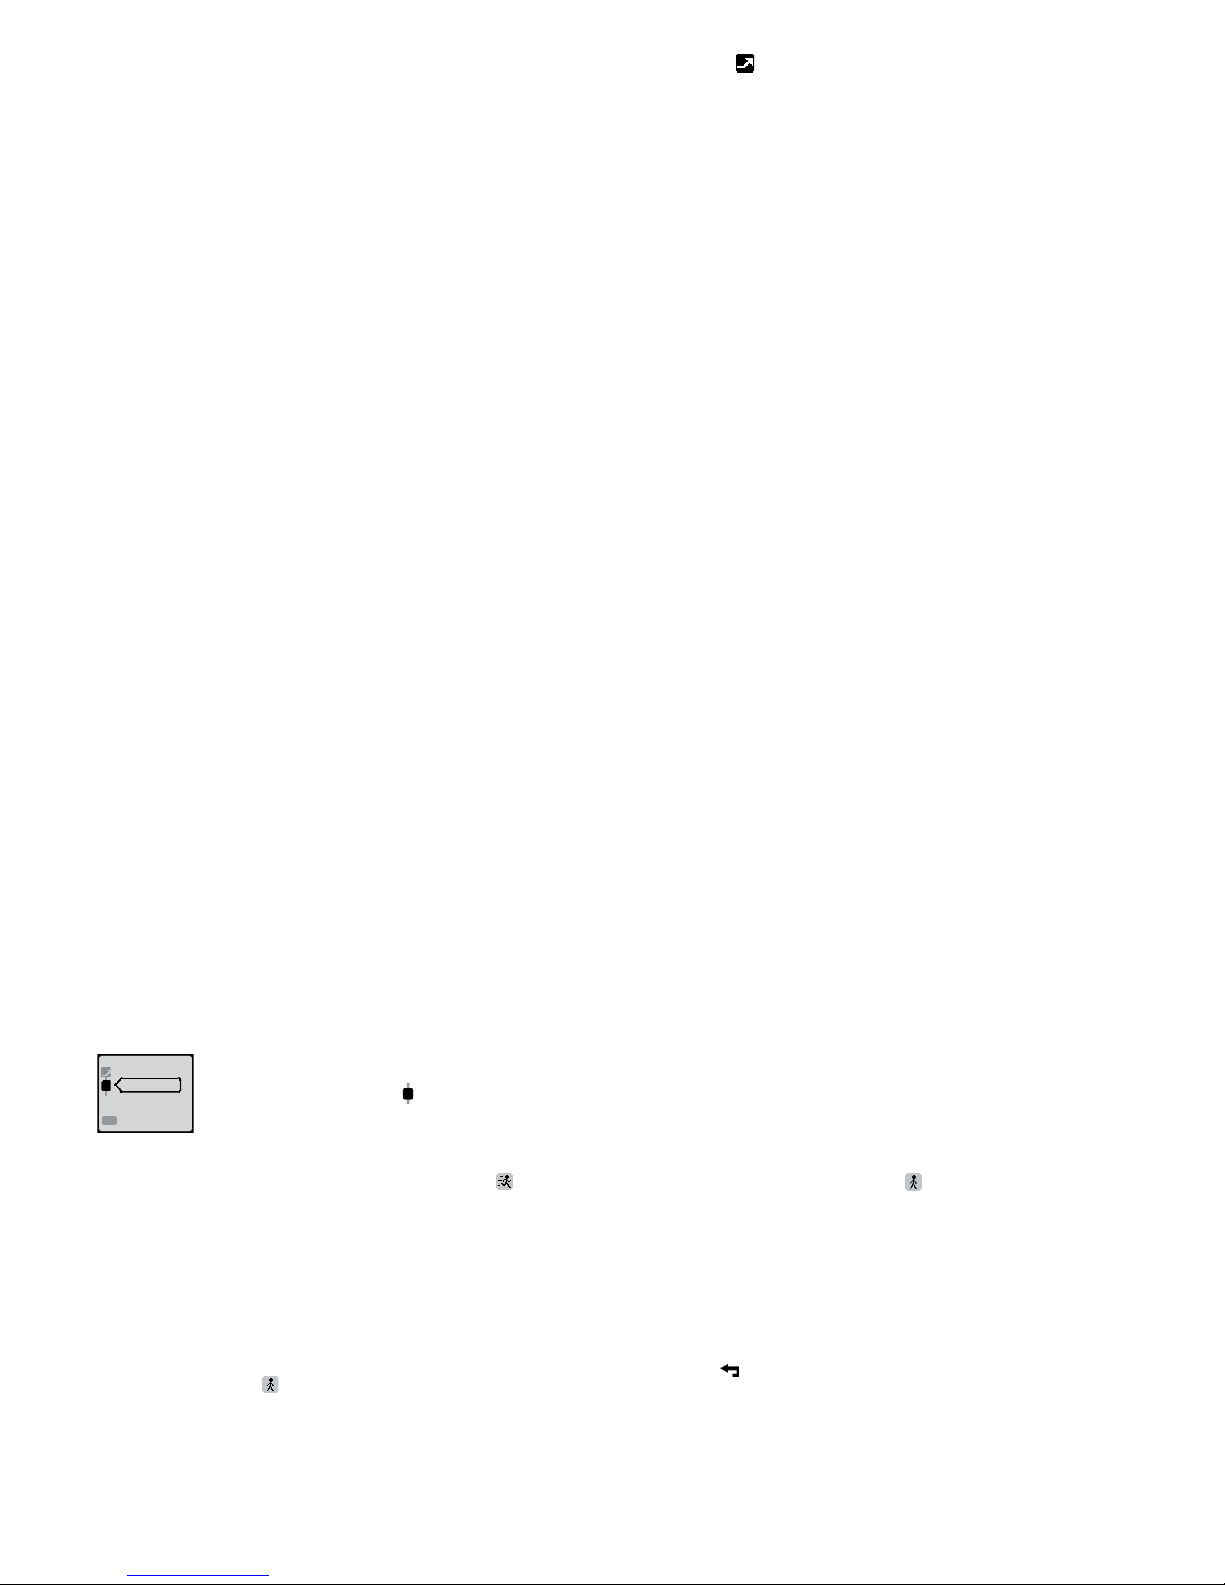
options
route
ok
The ashing satellite sign and the partially complete progress bar show that the watch has not found sufcient satellites to provide
information on speed, distance and guiding.
ok
The lled-in, non-ashing satellite icon shows that the watch has located sufcient satellites to provide information on speed, distance
and guiding.
It is strongly recommended that you wait for a satellite reception before exercising, otherwise:
- the distance and speed values given will be incorrect.
- the watch will struggle to receive the signal if you have already started running.
When the product is not used regularly or if it is used outside the usual area, it may take longer to search for a satellite signal (1-2 minutes), the time it takes
to receive a signal from the satellites covering your position.
Bad satellite reception
conditions.
The quality of satellite reception is affected by the environment and movement. In order to facilitate reception, it is recommended
wherever possible to:
-
Stand in an open area away from buildings and not to stand under trees.
- Stay still while the signal is detected.
Wait for GPS
signal
Start without
speed and
distance
If you press OK before the satellite signal is found, you will be asked if you wish to continue your search. But you can also start your activity
without measuring speed and distance.
retry
indoor help
If the search for the satellite signal is not completed, you will be asked to start the search again. But you can also use the indoor mode.
route
options
6
Page 7
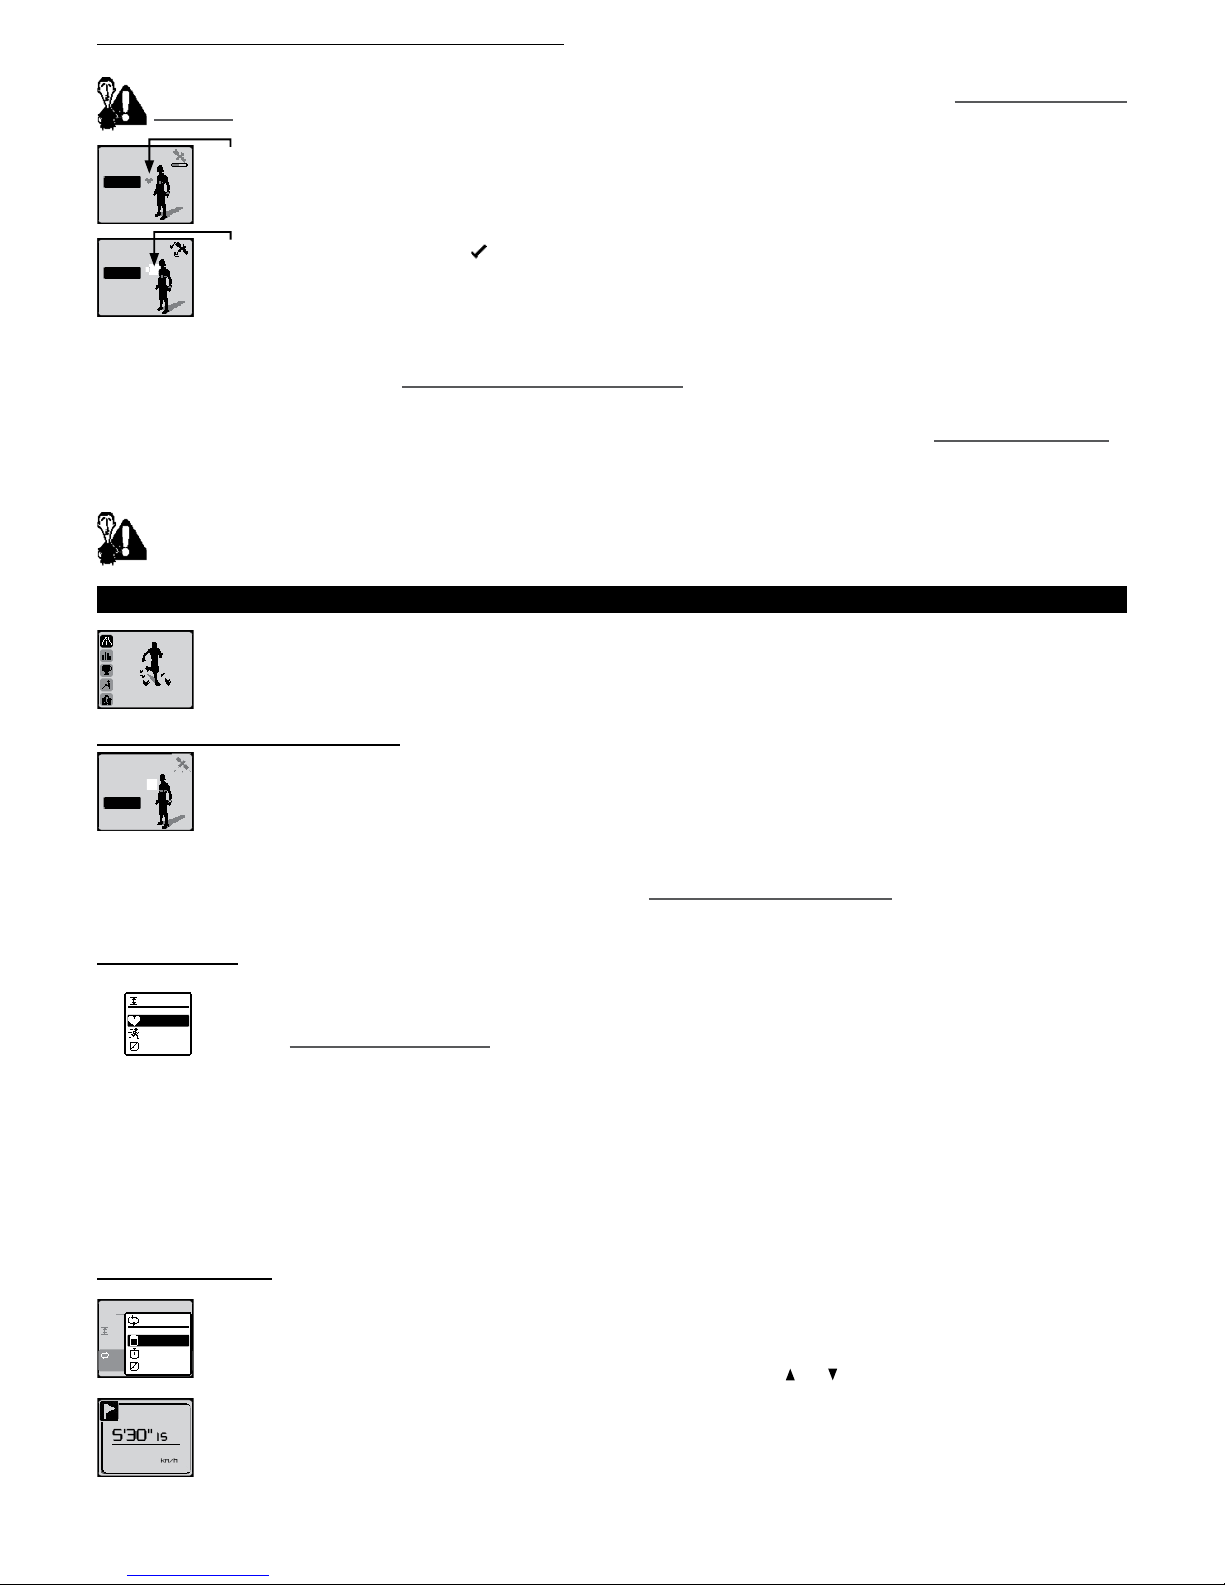
8�2� Searching for heart rate (ONmove 710 only)
When you enter one of the free session, training or challenge modes, the watch will also check that it detects a heart rate.
For your watch to detect your heart rate correctly, the belt must be well positioned and dampened as shown in chapter 4. Installing the heart rate
monitor belt.
options
route
ok
The ashing heart indicates that the watch is searching for the heart rate monitor belt.
options
route
ok
The lled-in, non-ashing heart icon indicates that the watch has detected the belt.
If the watch has not detected the belt after 15 seconds of searching, you will be asked either:
restart
pair belt
without belt
- to begin another search attempt to locate belt.
-
to pair your belt (chapter 16.5.1. Pairing the heart rate monitor belt). In order to prevent the watch connecting with another belt, you
must stand at least 20 metres away from other ant+ heart rate monitor belts. This is only necessary during the pairing procedure which
memorises your unique belt identier. You do not need to follow this procedure when searching for your belt at the start of the free,
training and challenge modes. If the watch does not successfully pair with the belt, please refer to chapter 19.2. Detecting cardio belt.
-
to continue without the belt, if you have forgotten it or don't wish to use it. To prevent the screen from becoming cluttered with useless
information, your product will no longer display any heart rate-related information during this session.
If, when you begin your session, the watch has not detected the belt and you have not been offered the options outlined above, then your watch
will not relay the relevant heart rate information (these gures will be replaced by “--”).
9� How to use in free mode
free
You are advised to use free mode when using for rst time. This will help you become more familiar with the product and make it easier to
use before moving onto other suggested activities, especially training and challenge.
9�1� Specifying activity options
options
route
ok
When entering this mode, the watch will search for satellites and heart rate (ONmove 710 only).
While it is doing this you can check and adjust your activity options.
options
auto lap
every 1.00 km
zone
150 -160 bpm
The activity options let you set a target zone and automatic lap information.
You can also change activity options during the session (chapter 9.3.4. Pausing or stopping a session).
9�1�1� Target zone
options
auto lap
zone
150-160 bpm
heart rate
speed
zone
off
The target zone can be based on:
- Heart rate in beats per minute (BPM) or as a percentage of maximum heart rate (% max HR). (CW 700 GPS only).
- Speed expressed in km/h, minutes/km (’/km) or as a percentage of your Maximum Aerobic Speed (% max) if this has been entered
(chapter 11.3. Maximum aerobic speed).
If you have activated a target zone (example speed between 10 and 12 km/h), the watch will alert you, for a period of 5 seconds, that you have left your
target zone.
A beep will alert you every time you leave your target zone provided that you have activated the pop-up alerts in the settings/personalised interface, beeps menu.
Alert showing you have exceeded your target zone Alert showing you have not reached target zone
slow down
speed up
9�1�2� Lap information
options
auto lap
every 1.00km
zone
150-160 bpm
distance
1
time
auto lap
off
Lap information can be based on:
- Distance (eg. every km).
- Time (eg. every 5 minutes).
In both cases you can choose a value from the list.
If none of the values suit, select “user” from the list and enter another value using the and keys.
km/h
5' 15
30'
'
3
If you have activated automatic lap information, when the setting time or distance has elapsed, the watch will display the lap number, time
or distance covered during the lap and the average speed per lap, for a 5 second period.
A beep will alert you at the start of each lap provided that you have activated the alerts pop up in the settings/personalised interface, beeps
menu.
13.0
10.0-12.0
9.6
10.0-12.0
10
.
9
7
Page 8
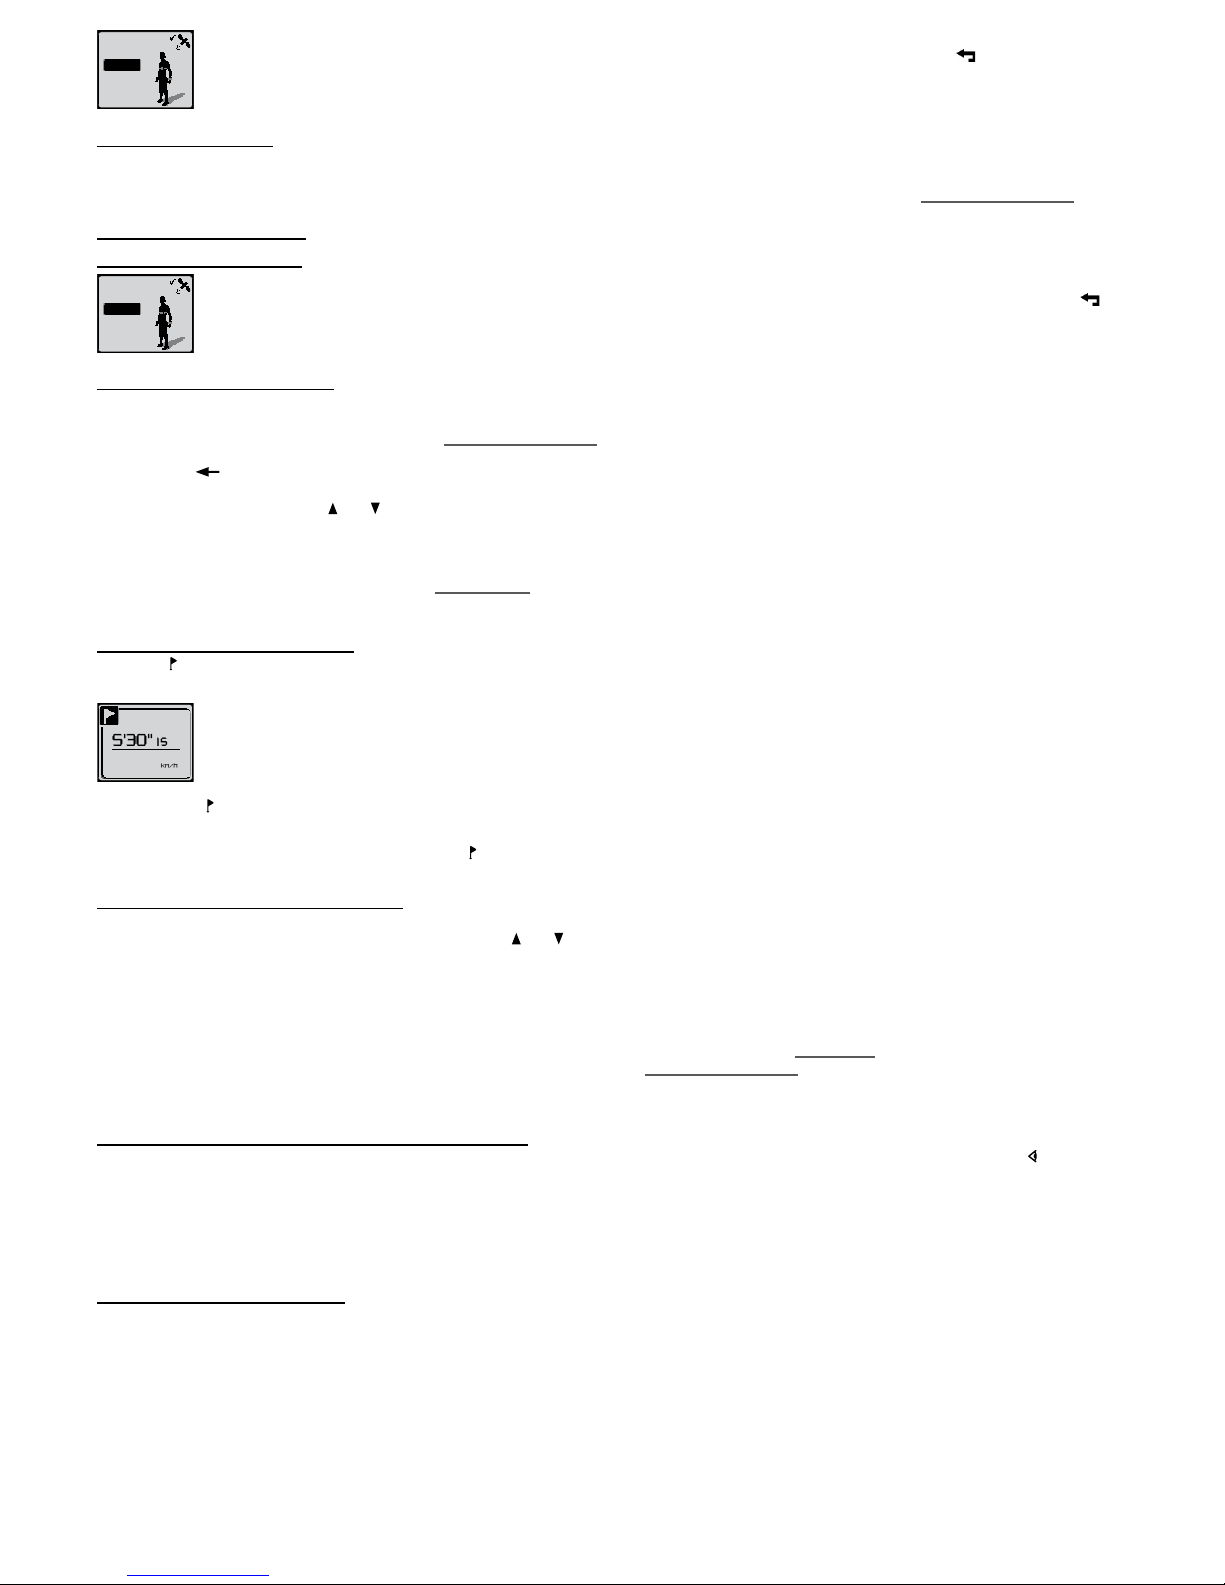
options
route
ok
To start the session, once you have selected your options, return to the satellite signal screen by pressing the key several times and
select OK to go to the next screen.
9�2� Select a route
The free mode also lets you choose a route and guides you along this route.
Choose the route menu and select the route that you wish to take.
All information relating to the creation of a route and guiding options (direction and guiding pop up) are explained in chapter 12. How to use guiding.
9�3 Session progress
9�3�1 Starting the session
ok
options
route
Once you have selected your setting options, to start the session, return to the searching for satellite signal screen by pressing the key
several times and then select OK to move on to the next screen.
9�3�2� “My indicators” display
When in free mode, the watch will automatically show the “my indicators” display with useful information for your session provided in list form. 4 pages of
indicators are available.
If you have chosen a route (in this case see section 12. How to use guiding), the my route display will automatically be shown.
00:00’00
0km
0km
1/4
The watch displays the rst 4 pages of available indicators with the stopwatch, distance and instant speed. On this rst page CW 700 GPS
users can also access instant heart rate in beats per minute.
By pressing the and keys, you can access the 3 other pages.
The settings/personalize interface/display menu allows you to congure these pages of indicators as you wish: number of pages (1 to 4), number of indicators
per page (1 to 4) and choice of indicators (chapter 16.2.1 Display).
- Press OK again to start the stopwatch and begin recording the session.
9�3�3� Taking lap times manually
Press the key to time a lap manually. The watch will then display the lap number, the lap time and the average speed during that lap, for a period of
5 seconds.
km/h
5' 15
30'
'
3
If you press the key, although you have set auto lap info (section 9.1.2 lap info) the next auto lap info will change accordingly.
For example: Auto lap info set for every km.
At the 1.5km mark, you start the manual lap info (press
key).
The next auto lap info will start at 1.5km + 1km = 2.5km + 1km = 2.5km, then 3.5km, then 4.5km…
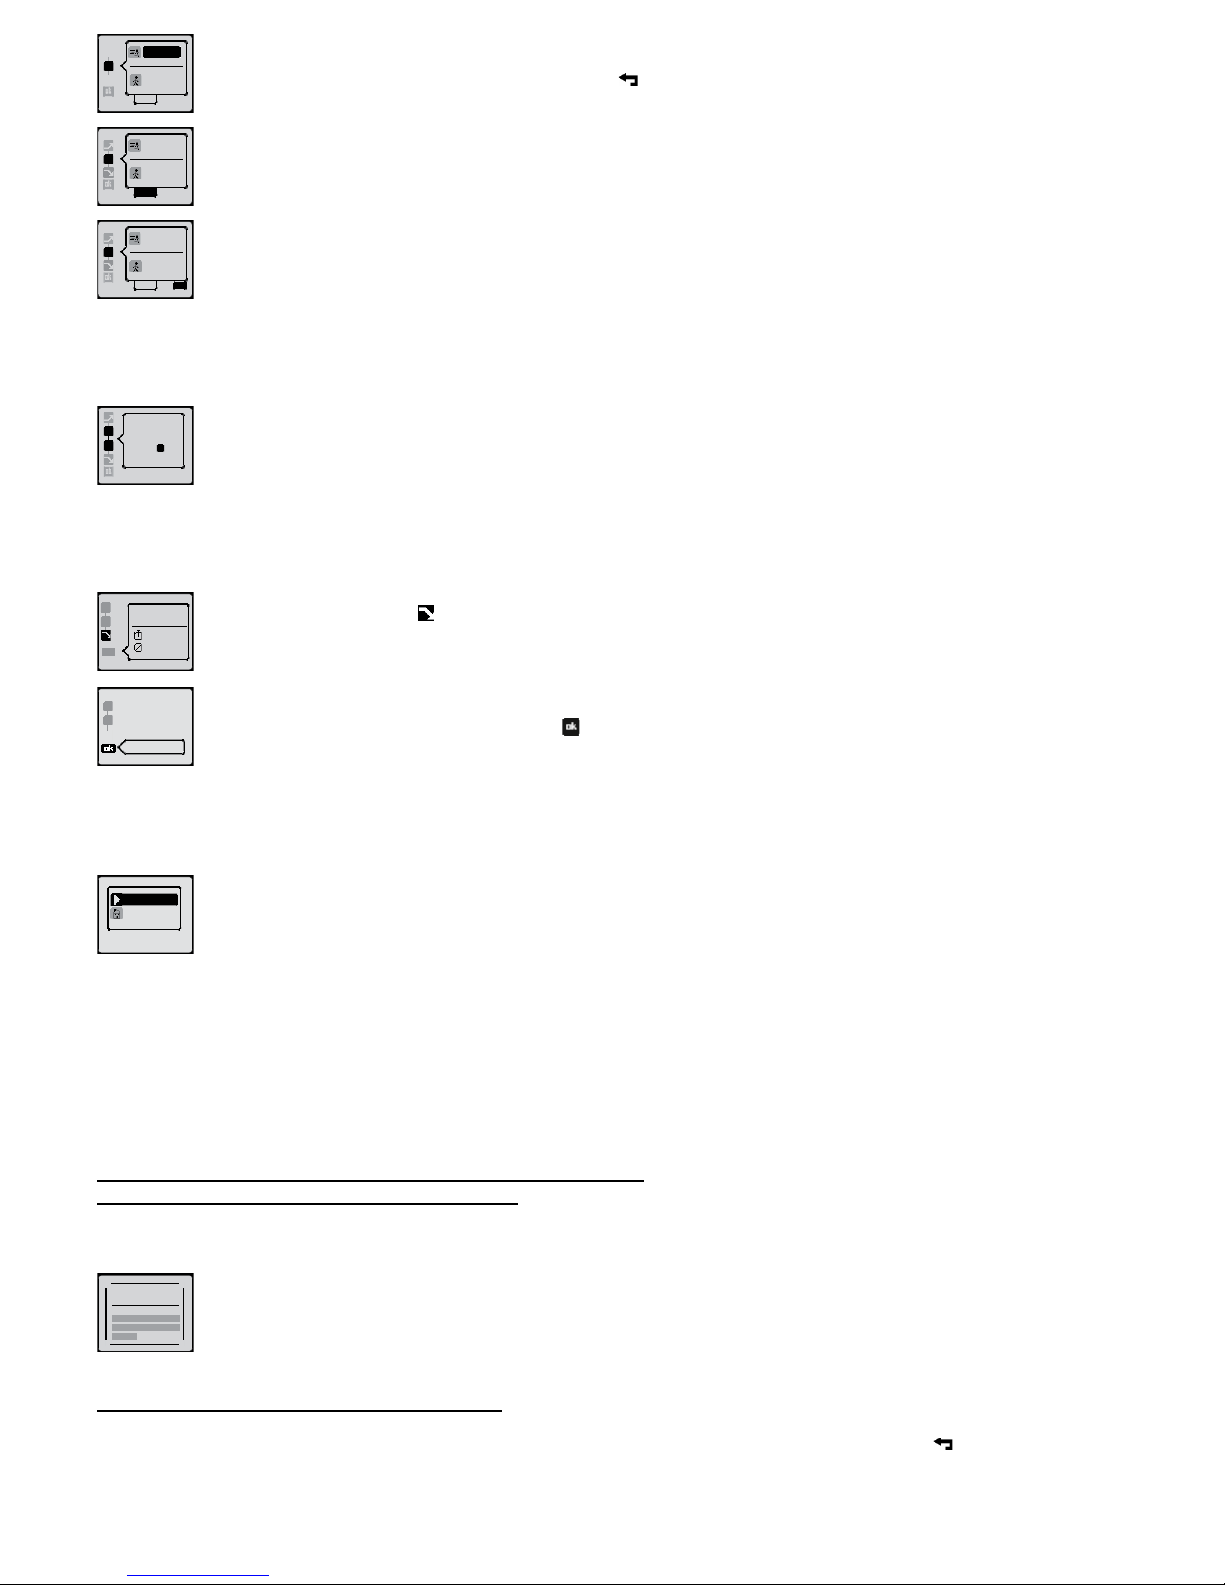
9�3�4� Pausing and stopping a session
During your session, you can pause the session and stop the stopwatch by pressing OK.
You can select one of the options, in the next menu, using the and keys and then OK.
stop
restart
continue
settings
go back
coordinates
Continue: re-start session where you left off.
Stop: stop and save session (select yes on next screen to conrm that you wish to stop session or no to return to the pause menu).
Re-start: return to the start of the session without saving (on next screen, select yes to conrm that you wish to stop session and no to
return to pause menu).
Settings: accessing product settings, activity options and product parameters (chapter 16. Settings).
Go back: the watch will guide you back to the start line (chapter 12. How to use guiding).
Coordinates: viewing current GPS coordinates.
9�4� Other displays available during session
In addition to the classic display on the indicators page, your watch also offers an alternative view of your session. To access this, press the key.
my indicators
my rhythm my route
9�4�1� The “My rhythm” display
The “my rhythm” display provides very visual information about your pace. This page is particularly useful if you have a dened target zone.
The indicators shown are dened automatically depending on the various parameters (example: use or otherwise of the heart rate monitor belt with the
ONmove 710) and speed or heart rate target zone etc...
The following example illustrates the my rhythm display during a session without a heart rate monitor belt and with a speed target zone.
10
.
9
8
Page 9

Running time
Target zone indicator with moveable cursor indicating position in target zone.
With the ONmove 710 model, if you have not chosen a target zone and you use the HR monitor belt, the watch will indicate your effort range depending on
your heart rate:
- Recovery: below 70% of maximum HR,
- Endurance: between 70% and 80% of maximum HR,
- Soft resistance: between 80% and 88% of maximum HR,
- Hard resistance: above 88% of maximum HR.
9�4�2� “My route” display
The “my route” display is only available when a route has been selected at the beginning of the session (chapter 12. How to use guiding).
9�5� Summary of session
Once the session is completed and saved, you will automatically have access to a summary. Scroll down the session information by pressing the OK key.
stretching
playlist
exit to main
menu
detailed report
At the end of this consultation, you can:
- start a stretching session.
- see a detailed session report, including lap information.
- return to main menu.
10� How to use the training mode
training
In the training mode, you will nd different menus to meet all your different training needs.
training
In the training menu, you will nd 4 different types of running training that you can select by using the ▲ and ▼ keys:
- Interval training consisting of 30 seconds of running followed by 30 seconds recovery, repeated 10 times. This is the famous 30/30.
- A training session involving 3 soft resistance repetitions, each lasting 5 minutes, with an equivalent recovery time.
- A full pyramid training with effort phases over 200m, 400m, 600m, 800m, 400m and 200m, alternating with adapted recovery times
between each distance.
- Gradual acceleration training.
For the ONmove 710, the soft resistance and gradual acceleration training sessions are set with HR target zones.
interval
1 series of
The name of the training session and the brief description beneath will help you quickly identify the type of training chosen.
start
modify
Once you have selected the training, you can start or change the training at will. These training programmes are, therefore, also a good
way of quickly creating a training programme using an existing base.
10�1� Modifying a training programme
training sessions are constructed in two different ways to cover the different possible types of training and to help you quickly devise your own training
programme:
- Interval training.
- Pyramid training.
10.1.1. Structure and modication of a interval training programme
10�1�1�1� Structure of a interval training programme
interval
1 series of
In interval training, you simply specify a time or distance for the effort phase (action) and a time or distance for the recovery phase
(recovery). Then you specify the number of repetitions (between 1 and 99 inclusive) and a number of series (between 1 and 6 inclusive).
This format allows you to quickly create training programmes with a repeated action/recovery sequence.
The 30/30 interval and soft resistance training plans are structured in this way.
The rst line of the description indicates the number of series, the second shows the number of repetitions and duration or distance of the action/recovery
phases. In this instance, 1 series of 10 repetitions of 30’’/30’.
You can use the 30/30 interval training, for example, to create an interval training programme with 3 repetitions of 500m/1 min.
10�1�1�2� Modifying a interval training programme
Use the ▲ and ▼ keys to choose the elds or amend the values, use the OK key to conrm and move to the next eld and the key to return to the menu
or a higher level.
Example of how to modify the 30/30 interval training programme to create a programme consisting of 2 series of 5 repetitions of 1km with 2’00’’ recovery
time.
Choose 30/30 interval training, then choose “modify”.
9
Page 10
warm up
on
target
off
The warm-up phase is automatically selected. The cursor is positioned on the icon representing the warm-up phase.
Press OK to modify or press ▼ to select the number of series.
target
off
ok
warm up
on
The cursor is positioned on the On key. If you want to cancel the warm-up, press the OK key and select off.
target
off
warm up
ok
on
The warm-up is automatically set for 20’00. To change the warm-up time, select the value 20’00 and press OK.
distance
no limit
time
limit
warm up
You can then adjust the warm-up time by modifying either distance or time. In both instances, an alert will notify you at the end of the
anticipated warm-up time. But you can also increase or decrease this time. If you choose an unlimited warm-up, there will be no alert at
the end of the warm-up period.
warm up
limit
In this example, we chose to base our warm-up on distance by selecting distance on the previous screen. Choose one of the values from
the proposed list or specify the value yourself by choosing user and by changing the value using the ▲ and ▼ keys.
warm up
Target
off
ok
on
Once you have chosen warm-up time or distance using the ▲ and ▼ keys and then conrmed with OK, a summary of your warm-up
programme will appear on your screen. You can adjust the intensity of the programme by selecting the target zone which is automatically
switched to off.
zones
heart rate
warm up
speed
off
You can base your target zone on speed (in km/h or minutes/km) or, in the case of the ONmove 710 watch, on heart rate (beats per minute
or as a percentage of maximum heart rate). Select off if you do not wish to use the target zone.
warm up
zones
In this example, the target zone is based on speed in km/h. Select km/h to amend values of target zone.
warm up
zones
zone
Select the lower limit and change the value using the ▲ and ▼ keys and then press OK to amend the upper limit in the same way. Press
OK to conrm the target zone.
warm up
ok
on
Select OK using the ▼ key to conrm your warm-up programme.
warm up
on
The cursor will again move to the icon representing the warm-up phase.
ok
series
Using the ▼ key, select the icon, representing series and press OK to amend the content.
The cursor will move to the action phase . Press OK to amend or ▼ to change the recovery phase .
target
off
action
As with the warm-up phase, you can also amend the distance or time of the action phase and set a target zone.
target
off
action
In our example, a distance of 1km has been chosen for the action phase and the target phase has not been activated.
Once you have specied the settings for the action sequence, press the key then the ▼ key to move the cursor to the recovery
phase .
Press OK to amend the recovery phase in the same way as the action or warm-up phase.
10
Page 11
1.0km
2'00''
x 10
x1
In our example, the time duration, 2’00’’ has been chosen for the recovery phase and the target zone has not been activated.
Once you have specied the settings for recovery, press the
key then the ▼ key to move the cursor to the number of repetitions which
is automatically set to 10 for each training programme.
1.0km
2'00''
x 5
x1
You can amend the number of repetitions by pressing OK, then the ▲ and ▼ keys to change the value. In our example, this has been
set to 5.
1.0km
2'00''
x 5
x1
Once you have amended the number of repetitions, press OK to conrm then the ▼ key to move the cursor to the number of series (X1)
and press OK.
number of
series
Change the number of series by pressing the ▲ and ▼ keys.
x 2
number of
series
The number of series has been set at 2. The icon indicates that the number of series has been doubled.
Press OK to move the cursor to the icon representing the number of series.
'5'00'
ok
target
off
cool down
on
Press the ▼ key to select the icon representing the cool-down phase. In this training programme, the cool-down phase is set at 5’00’’
without a target zone. Press OK to amend this phase. To do this, please refer to the instructions on modifying the warm-up phase as the
method is exactly the same.
save as
Once you have set the cool-down phase, select the symbol and press the OK key to save the training programme.
new
training
save as
It is not possible to amend a training programme; you are therefore advised to save it as a new training programme.
new training
saved
main menu
start
Once the training programme is saved, you can:
- Start your training.
- Return to main menu.
my
trainings
To recover this training programme, start at the main menu, choose activities, training and my training.
interval 1
2 series of
The name of your training programme will automatically appear. It replicates the type of structure used (interval or pyramid) and the number
created.
The description indicates the number of series (2) then the number of repetitions (5) and the duration or distance of the action and recovery
phases (1.00 km/02’00’’).
10.1.2. Structure and modication of a pyramid training programme
10�1�2�1� Structure of a pyramid training programme
In a pyramid training programme, each phase of training is individually dened and constitutes a block. This means that the duration or distance of each
phase can differ from the preceding phase. Furthermore, each block created can be described as an action phase or recovery phase.
You can increase the sequence created by changing the number of series which can range from 1 to 6.
200m/400m/600m...
...800m/600m/400m...
...200m
complete
pyramid
1 serie of:
The complete pyramid and gradual acceleration training programmes are based on this structure.
The rst line describes the number of series and then, the second the duration or distance of action sequences only.
You can use this structure to create any type of training which involves different distances or time intervals during the session.
10�1�2�2� Modifying a pyramid training programme
The principles for modifying a pyramid training programme are the same as for an interval training programme.
Use the ▲ and ▼ keys to select the elds or modify the values, the OK key to conrm and move to the next eld and the key to return to the menu
or a higher level.
11
Page 12

Example of modication of a complete pyramid training to create a training programme that includes:
- A warm-up phase.
- 4 series of 300m action phase/100m recovery.
200m action phase/100m recovery.
- A cool down phase.
Select complete pyramid training then select modify.
warm up
on
target
off
The warm-up phase is automatically selected. The cursor is positioned on the icon representing the warm-up phase.
- Press OK to amend (see chapter 10.1.1.2, modifying a interval training programme).
- Press ▼ to select the series.
ok
series
The cursor moves to the icon, representing the series. Press the OK key to change the content.
The screen displays the rst blocks of the series (identied by the number of the block, the time or distance, action or recovery) and the
number of series.
Icon representing an action phase.
Icon representing a recovery phase.
The cursor is positioned on the rst block.
Press OK to amend the content of the rst block.
type
action
rest
You can modify the type of block by selecting action and recovery and conrm by pressing OK�
action
target
off
You can now amend the block parameters: distance or time, target zone.
Position the cursor on 200m and press the OK key.
limit
distance
time
Select distance and press OK.
limit
Use the ▲ and ▼ keys to select 300 m from the list of proposed distances and press the OK key to conrm. If the desired distance is not
available, select “personalise” from the list to add the desired value, using the ▲ and ▼ keys.
action
target
off
Once you have conrmed the distance, you can select target off to adjust target zone (see chapter 10.1.1.2, Modifying a interval training
session).
In this example, the target zone remains off.
Press the
key to amend the next block.
Block n° 1 displays the distance 300m set during the previous stage. Press the ▼ key to select block 2.
rest
type
action
Press the ▼ key to select “recovery” and adjust the distance over 100m in the same way as for block 1 as seen in the previous stage.
Press the key to return to the previous screen.
target
off
rest
Press the key to select the next blocks.
Amend the next two blocks to set the distance of the second action phase (200m) and the second recovery phase (100m).
The original training programme used to create our target training programme includes other blocks which are of no use for this programme.
100m
6
200m
8
x1
ok
add
remove
Press the ▼ key several times to move to the end of the blocks list and place the cursor above “delete”.
Pressing the OK key allows you to delete the last block on the list. Repeat the process until there are only 4 useful training blocks remaining.
12
Page 13

remove
add
To restore a block that you have accidentally deleted or which is missing from your training programme, place the cursor over + add and
press OK.
add
remove
Position the cursor over the x1 and press the OK key to access the series settings.
number of
series
The cursor is positioned over the number of series. Amend the value using the ▲ and ▼ keys. The number of series has been set to 4.
The
icon representing the number of series is increased as the number of series created is increased. Press the OK key to check the
number of series.
series
The cursor is positioned over the icon, representing the number of series.
cool down
target
off
on
Press the ▼ key to select the icon, representing the relaxation phase. In this training programme, this is set at 5’00’’ with no target
zone. Press the OK key to amend this phase. To do this, please refer to the information on modifying the warm-up phase which follows an
identical procedure (chapter 10.1.1.2. Modifying a interval training programme).
save as
Press the ▼ key to position the cursor over OK save as and press the OK key to save the training programme.
new
training
save as
As it is not possible to amend a training programme, you are advised to save it as a new training programme.
main menu
start
Once the training has been saved, you can:
- Start your training.
- Return to the main menu.
my
trainings
To recover this training programme, starting from the main menu, select activities, training, my training programmes.
300m/200m
pyramid 1
4 series of
The name of your training programme is created automatically. It gives the type of structure used (interval or pyramid) and the number of
the programme created.
The description indicates the number of series (4) and the duration or distance of the action phase (300m/200m).
10�2� Creating my training programme
We have just looked at the chapter 10.1.1.2. Modifying a interval training programme on how to create a training programme using a training programme.
The second method consists of creating a training programme using the 2 menus suggested for this purpose: new interval or new pyramid training.
new interval
training
new pyramid
training
To choose the right training structure, refer to chapters 10.1.1.1. Structure of a interval training programme and 10.1.2.1. Structure of a pyramid training
programme.
The “new interval” and “new pyramid” training menus are pre-set automatically to make them easier to understand and make it quicker to create a training
programme.
The process of modifying these pre-set training programmes is exactly the same as modifying a training programme.
To learn how to modify a training programme, please refer to chapters 10.1.1.2. Modifying a interval training programme or
10.1.2.2. Modifying a pyramid training programme.
my
trainings
To locate a training programme that you have already created, select activities, training, my training from the main menu.
interval 1
2 series of
The name of your training programme is automatically created. It gives the type of structure used (interval or pyramid) and the number of
the programme created.
In the case of interval training, the description indicates the number of series (2) then the number of repetitions (5) and the duration or
distance of action and recovery phases (1km/02’00’’).
13
Page 14

200m/400m/600m...
...800m/600m/400m...
...200m
complete
pyramid
1 serie of
In the case of pyramid training, the description indicates the number of series and the time or distance of the action phases only.
10�3� Consulting a training programme
You consult a training programme in the same way that you amend it (see chapters 10.1.1.2. Modifying a interval training programme ou 10.1.2.2. Modifying
a pyramid training programme).
training
In the training menu, choose training or my training. You can only consult your training programmes if you have already created one
(chapter 10.2. Creating my own training programme or chapter 10.1. Modifying a training programme).
Interval
1 serie of
Choose consulting training programme and press OK.
start
modify
To consult or modify a training programme, select “modify”.
warm up
on
target
off
Select the training phases (warm-up , series , cool down by positioning cursor over the appropriate symbols, using ▲ and ▼ keys.
Press OK to view details.
x 10
0'30''
x 1
0'30''
In the series phase, the number of icons indicates the number of series. After series 3, the screen is no longer able to display all the
icons, but you can view the number of series at the bottom right hand of the screen.
To view details of the action
(effort phase) or the recovery and view, in particular, the settings of the target zones, you must place the cursor over the
time or distance of action or repetition and press OK.
save
modifications?
yes
no
Once you have consulted the programme, press the key as many times as necessary to reach the “save modications?” screen.
Select no and press OK if you have not made any changes or don’t wish to save them.
start
modify
You will then return to the next screen.
interval
1 serie of
Press the key to exit viewing training programmes.
start
modify
delete
training programmes can be amended, in which case a new training programme will be created and become available in the “my training”
menu.
My training can be amended, in which case you will then have the choice of erasing the original training programme or creating a new
training programme. My training can also be deleted.
10�4� Using a training programme
training
In the training menu, choose your training program from the training programmes or my training.
interval
1 number of serie
Once you have selected the training programme, press OK.
start
modify
Select “start” and press OK.
14
Page 15

10�4�1� Specify activity options
options
ok
After youʼve chosen your training programme and selected start, your watch will display the searching satellite signal screen and the heart
rate monitor belt (CW 700 GPS only).
Please consult chapter 8.1. Searching for satellite signal and 8.2. Searching for heart rate for all information relating to this stage.
30'
zones pop-ups
on
options
While the watch is searching for a satellite signal you can activate or deactivate the target zone pop up in the menu option then press
the key to return to the previous screen.
10�4�2� Progression of training
options
ok
Once the satellite signal is detected, select ok and press the OK key.
10�4�2�1� Warm-up
The watch will display the rst programmed phase for this training session which, in the case of a training programme, is “warm up ”.
warm up
The target time or distance for warm up will ash at the top left hand side of screen. If no time or distance has been entered, the countdown
will be replaced by a stopwatch displaying value 0.
A reminder of the session objective is displayed in the black box in the centre.
If the target zone has been set, it will appear at the bottom of the screen.
Press the OK key to start the session. The countdown will start. If you have specied a distance, you will see this decrease as soon as you start running.
This countdown helps you visualise the remaining time or distance.
A few moments after the start of the sequence, the black box will disappear leaving a full view of my rhythm with the following information:
m
212
18 52
km/h
,
- on the rst line, the distance or time remaining (see previous screen),
- on the second line, the time elapsed or distance covered since the start of the sequence,
- at the bottom left, a reminder of the sequence objective,
- in the lower right of the screen is the information relating to your target zone (current value and reminder of zone).
The watch will alert you when you have completed the specied time or distance for your warm-up. You can also decrease the envisaged warm-up period
by pressing OK.
In either case, you can select from the following menu, one of the suggestions using the ▲ and ▼ keys and the OK key.
warm up
completed
continue
next series
settings
stop
restart
coordinates
go back
Continue: to continue the warm-up.
next series: to go to the next series�
Stop: to stop and save the session (on the next screen, select yes to conrm that you wish to stop the session and no to return to the
pause menu).
Re-start: return to start of session without saving (on next screen, select yes to conrm that you wish to stop session and no to return
to the pause menu).
Settings: accessing product settings, activity options and product parameters (chapter 16. Settings).
Go back: let the watch guide you to the start line (chapter 12. User guide).
Coordinates: viewing the current GPS coordinates.
To continue training, select “next series”.
10�4�2�2� Series
If you haven’t programmed a warm-up phase, the rst phase of your training will undoubtedly be an action phase .
In this case, the black box will show the number of the current repetition and the total number of repetitions in the series for interval training.
next action
As soon as you have started a series, the watch will continue, without stopping, to the action and recovery phases.
m
km/h
52
00 20
14 2
,
As happened at the beginning of the warm up, the black box which signals the next phase will disappear after a few seconds and will
instead be replaced by “my rhythm” with the following information:
- On the rst line, the remaining distance or time.
- On the second line, the time elapsed or distance covered since the start of the sequence.
- At the bottom left an icon recalling the sequence objective.
- At the bottom right, information relating to the target zone (the instant value and reminder of zone).
At the end of the action phase, the next phase is announced in the black box. It starts immediately (in our case, the rst recovery).
01/10
00 30
next rest
And it continues in the same way until the end of the rst series.
You can pause your session at any time during the series by pressing OK.
You can select one of the suggestions from the next menu using the and keys then OK�
10.0-12.0
10.0-12.0
15
Page 16

continue
next rest
series break
stop
restart
settings
go back
coordinates
Continue: to restart the series where you stopped it.
Next rest ou next action: to go the next phase (recovery if you were in an action phase or action if you were in a recovery phase).
Series-break: go to the next series-break phase which separates the 2 series.
Stop: to stop and record the session (on the next screen, select yes to conrm that you wish to stop the session and no to return to the
pause menu).
Re-start: return to start of session without saving (on next screen, select yes to conrm that you wish to stop session and no to return to
the pause menu).
Settings: accessing product settings, activity options and product parameters (chapter 16. Settings).
Go back: let the watch guide you to the start line (chapter 12. How to use guiding).
Coordinates: viewing the current GPS coordinates.
10�4�2�3� Series-break
series break
The series-break is the recovery phase which separates the 2 series.
As in previous sequences, after a few seconds, the black box indicating the series-break phase will disappear and be replaced by “my rhythm” with the
following information:
m
km/h
102
00 45
9 8
,
- On the rst line, the time elapsed since the start of the series-break.
- On the second line, the distance covered since the start of the series-break.
- At the bottom left, a reminder of the sequence objective.
As the target zone cannot be set for series breaks, there is no reminder in the “my rhythm” display.
As the duration or distance of this phase cannot be set, it’s up to you to end session by pressing OK when you want to move onto the following series.
You can chose one of the options from the following menu using the
and keys and then OK�
continue
next series
stop
restart
settings
go back
coordinates
Continue: continue your series where you stopped.
Next series: to go to the next series.
or
Relax: go to the cool down phase when the last series is in progress.
Stop: to stop and save the session (on the next screen, select yes to conrm that you wish to stop the session and no to return to the
pause menu).
Restart: return to start of session without saving (on next screen, select yes to conrm that you wish to stop session and no to return to
the pause menu).
Settings: accessing product settings, activity options and product parameters (chapter 16. Settings).
Go back: let the watch guide you to the start line (chapter 12. How to use guiding).
Coordinates: viewing the current GPS coordinates.
10�4�2�4� The Cool down
If it has been set, this phase will end your training session.
After the last repetition of the last series, the next pop up will announce the cool down phase.
01/10
05'00'
'
cool down
The target time or distance for warm up will be counted down at the top left hand side of the screen. If no time or target distance has been
entered, this countdown will be replaced by a stopwatch which will display the value 0.
A reminder of the session objective is displayed in the black box in the centre.
If the target zone has been set it will appear at the bottom of the screen.
A few seconds after the start of the cool-down phase, the black box will disappear and be replaced by “my rhythm” with the following information:
m
km/h
105
0412
11,2
150-160
- On the rst line, the distance or time remaining (see previous screen).
- On the second line, the time elapsed or distance covered since the start of the sequence.
- At the bottom left, a reminder of the sequence objective.
- At the bottom right, information relating to the target zone (the instant value and reminder of zone).
If you don’t wish to continue with your cool down until the end of the planned time or distance, or you wish to stop it, if you haven’t xed a time or target
distance for this phase, press OK.
You can select one of the proposed options from the next menu using
and keys then OK�
continue
restart
stop
settings
go back
coordinates
Continue: restart series where you stopped it.
Stop: to stop and save the session (on the next screen, select yes to conrm that you wish to stop the session and no to return to the
pause menu).
Restart: return to start of session without saving (on next screen, select yes to conrm that you wish to stop session and no to return to
the pause menu).
Settings: accessing product settings, activity options and product parameters (chapter 16. Settings).
Go back: the watch will guide you back to the start line (chapter 12. How to use guiding).
Coordinates: viewing the current GPS coordinates.
10�4�2�5� End of training
There are two ways of nishing training:
- Wait for the end of the training programme.
The next pop up will signal the end of your training session. You will then be given the choice to continue or stop.
finish
stop
yes
no
Select yes to nish and save your training.
If you choose to continue, the watch will interpret this additional training time as a cool down session.
16
Page 17

- Stopping voluntarily
stop and save?
no
yes
To do this, press the OK key at any stage during your training session then select stop (see different phases above) and conrm by
selecting yes on the next screen.
However you choose to nish your training session, once saved, you will receive an overall report of your session. Press the OK key to scroll through the
information.
stretching
playlist
detailed
report
exit to
main menu
At the end of this consultation, you can:
- start a stretching session
- see detailed report of session, including information broken down by sequence.
- return to main menu
10�4�2�6� Other available training displays
During your training, you can access other displays relating to your session by pressing the key.
In addition to the “my rhythm” display automatically available in this mode, you can also view the “my indicators” display and the “my session” display.
“My indicators” display
00:00’00
0km
0km
1/4
“My indicators” display lets you display the precise information you require on the screen.
The watch displays the rst 4 pages of indicators available with the stopwatch, distance and instant speed. If you have a CW 700 GPS, on
the rst page, you also have instant heart rate in beats per minute.
By pressing the
and keys you can access 3 other pages.
The settings/personalize interface display menu lets you congure these pages of indicators as you wish: number of pages (1 to 4), number of indicators per
page (1 to 4) and choice of indicators (chapter 16.2.1. Display).
“My session” display
3/10
series 2/2
The my session display lets you see what stage you are at in your training session at any moment: warm-up, series or cool down.
In this example, the phase in progress is the 3rd recovery of the second series.
11� Using the challenge mode
The challenge mode combines a fun mode based on simulating a competition with a virtual competitor and a tness test, the maximum aerobic speed test.
11�1� Free race
free race
The free run can be done in three different ways:
- By following a memorised route stored in the watch.
- By following a free route where you can specify the distance.
- Unlimited mode: no distance dened. You can stop when you want.
11�1�1� Free race with route
11�1�1�1� Set your run
no limit
distance
route
race type
To do this, choose the “route” menu and select route to follow.
All information relating to the creation of a route and guiding options (direction and guiding pop up) are explained in chapter 12. How to
use guiding.
competitor
moderate
Once you have specied the route and options, adjust the speed of your virtual competitor by pressing the ▲ and ▼ keys then press OK.
11,0km/h
competitor
me
vs.
During the race, the black gure shows your position and the white gure that of your competitor.
Press the OK key again.
options
ok
Your watch displays the searching for satellite signal screen and heart rate monitor belt screen (CW 700 GPS only)
Please consult chapters 8.1. Searching for satellite signal and 8.2 Searching for heart rate signal (ONmove 710 only)) for all information
relating to this phase.
auto lap
every 1,00 km
guiding pop-up
off
options
While the watch is searching for the satellite signal, you can activate and set a lap time. Consult the chapter 9.1.2. Lap info.
At this level, you can also activate or deactivate the guiding pop-ups.
Press the key to return to the previous screen.
17
Page 18

11�1�1�2� Start the race
ok
options
Once the satellite signal is detected, select ok and press the OK key.
The watch will automatically display the “my routes” display to take you to the start line. The dotted line indicates the direction you need
to take from your current position to reach the start line.
See chapter 12. How to use guiding for all information related to how to use my route display.
you reached
the start line
press ok
Once you’ve reached the start line, press the OK key.
ready
You are ready to start the race. Press the OK key again; a 3 second countdown will begin; start running when this has nished.
next:
The watch will automatically show the “my route” display which allows you to follow your race itinerary. Your position is shown by a black
gure.
Race leader pop-ups:
you have just
lost the lead
!
At the start of the race, and then at each change of position, the watch will indicate whether you or your competitor is in the lead.
The auto lap pop-up:
If you have activated auto lap info, when the time or distance set has elapsed, the watch will display for a period of 5 seconds the number
of the lap, the time taken or distance during the lap and the average distance for the lap. See chapter 9.1.2. Auto lap for further information.
11�1�1�3� End of the race
When you have reached the nish line, the watch will indicate whether you or your competitor has won the race.
You have won
Finish!
Your competitor has won
Finish!
Press the OK key; your race is automatically saved and you can then access a summary of your session. Scroll down the session information by pressing
the OK key.
stretching
playlist
exit to main
menu
detailed report
At the end of this consultation, you can:
- start a stretching session.
- see a detailed session summary including information per sequence.
- return to main menu.
11�1�1�4� Other displays available during your race
During your training, you can access other displays about your race by pressing the key.
The “my rhythm” display lets you see who (black gure or your competitor, white gure) is in the lead, your respective speeds and the
distance between you.
The “my session” display lets you see the remaining distance to the nish line and the time elapsed since the start of the race.
11�1�2� Free race with distance
no limit
distance
route
race type
The free race with distance works in exactly the same way as the free race with route except that:
- You select a distance to cover instead of choosing a route.
- The default display here is “my rhythm”.
- The “my route” display is therefore not available in this mode.
You can use this function if you want to run without following a specied route.
10
,
9
start:
18
Page 19

distance
Increase or decrease target distance using ▲ and ▼ keys and press OK key.
Apart from a few specic details outlined above, the race with distance works in a similar way to the race with route. Please consult chapter 11.1.1. Free race
with route for all information relating to race modes.
11�1�3� Unlimited free race
no limit
distance
route
race type
The unlimited free race works in the same way as the free race with distance but without specifying a target distance. You can stop the
race yourself whenever you wish. This means you can use this mode as a fun pace setter.
Please consult chapter 11.1.1. Free race with route for all information relating to race modes.
11�2� Self-challenge
challenge
myself
The self-challenge mode lets you compete in a race against yourself running in a previous session.
When you choose this mode, you are asked to choose a session which has been previously stored in your product’s memory.
Your race will take the same route followed during this session.
Your competitor’s speed will be your average speed during the previous session.
This method is a fun and motivating way of nding out if you have made progress compared to your previous session.
The remainder of the mode is identical to the race with route mode. Please consult chapter 11.1.1. Free race with route for all information relating to race
modes.
11�3� Maximum aerobic speed (MAS)
11.3.1. Denition and purpose of MAS
max aerobic
Speed
The Maximum aerobic speed mode is a test mode that lets you assess your maximum aerobic speed which is the lowest speed at which
an individual consumes the most oxygen (VO2Max).
The MAS, assessed in tests of 5-10 minutes duration, is a good indicator of a sportsman’s potential performance and corresponds to
middle distance races. For longer efforts such as long distance races, the MAS provides you with a rough estimate of potential performance
although this is not entirely accurate and depends on the runner’s stamina. All endurance athletes (long-distance and middle-distance)
aim to improve their MAS. They mostly do this through “interval” training including a series of successively intensive efforts, working in the region of 95-110%
MAS, followed by short rest periods (of shorter duration than effort phase), calculated to allow for only partial recovery.
There are several ways of assessing one’s MAS.
The method used is very easy. It consists of covering a distance of 2,000m in the shortest possible time.
It requires an intense effort. You are strongly advised to consult your doctor before undertaking this test.
MAS estimation:
adjust
do the test
After selecting Maximum Aerobic Speed from the “challenge”, menu and pressing the OK key, you can start the test or adjust your MAS
manually if you know it.
Providing information about your MAS or doing the test, means that you can activate a product option which allows you to set your target
zones (free session or training) as a percentage of your MAS.
11.3.2. Doing the eld test
Select “do the test”.
ok
Your watch displays the searching for satellite signal and heart rate monitor belt screen (CW 700 GPS only).
Please consult chapters 8.1. Searching for satellite signal and 8.2. Searching for heart rate signal (ONmove 710 only) for all information
relating to this stage.
ok
Once the satellite signal is detected, select ok and press the OK key
You are ready to start the race. Press the OK key again; a 3 second countdown will begin; start running at the end of this countdown.
The watch will display the my indicators display with the following information:
Remaining distance, time elapsed, current speed and heart rate (ONmove 710 only).
This information cannot be amended in the MAS test mode.
FINISH 1
A pop up will tell you when you have covered 2,000 metres. You will then be able to access a summary of your test. You can scroll through
the information by pressing OK�
new MAS
estimation:
save
delete
At the end of the report, you can choose to save or discard your MAS value.
19
Page 20

restart
The test has
no value
if paused
stop
If the test is interrupted before you have covered the 2,000m, the MAS calculation cannot be completed.
12� How to use guiding
Your watch can guide you along a pre-specied route. The “my race” display lets you see your position in terms of the route and the
distance from the next way-point.
The my route display is available each time the guiding function is activated:
- In free mode when you choose a route.
- In the challenge mode with route.
- In the self-challenge mode.
- When you choose “go back” after pausing your session, irrespective of the mode being used.
- When you use the safety option to return to the beginning of a route.
When the guiding function is not activated, the my route display is not available.
12�1� Create and select a route
12�1�1� Create a route
There are two ways of creating a route:
A route consists of a series of guiding points also called way-points linked to each other by straight lines.
Guiding simply consists of taking the user from one point to another.
There are two ways of creating a route:
- using MyGeonaute.
- using a previous session.
12�1�1�1� Using MyGeonaute
Go to your myGeonaute.com section and make sure you have ONconnect.
You can nd ONconnect on www.start.geonaute.com
Go to the Itineraries tab. From this tab you can:
- Find the itineraries from your previous sessions
- Creat a point-by-point or automatic itinerary
- Import a .kml or .gpx le
To send your itinerary to your product, select the itineraries you want and click on "Send to my product"
Then connect your product to your computer then start ONconnect.
Your itinerary will be transferred to your product automatically. It will be stored in the ONconnect "Itinerary" category.
If it doesn't appear, click on the "Synchronise with myGeonaute.com" button.
You can delete the itineraries in your product using Onconnect whenever you want. Simply select them and click on the wastepaper bin.
next:
20
Page 21

12�1�1�2� Using a previously saved session
In the main menu, choose library, my workouts. Choose the session with the route that you want to use. Press the key until you select
“create route” and press OK key�
The route from this session has been created. It is stored in the library, my routes.
12�1�1�2�1� Select a route
options
route
ok
One the route is created, select “route” either at the start of the free session mode or the race mode with route.
Choose your route from the available list using the and keys then press the OK key�
12�1�1�2�2� Route direction and guiding pop-up
Once you have chosen the route to follow, choose the direction of route (normal or reverse) and press the OK key.
Select yes or no to activate the guiding pop-ups and, then press the OK key.
There are two types of guiding pop-ups:
- Directional pop-ups
These are temporary displays that appear in the my route display (12.3.1. Using my route display) when approaching a way-point. This pop-up appears
when you consult a display other than “my route” so that you don’t miss a change of direction. It disappears once the guiding point has been reached.
- The route error pop-up (out of track, wrong direction).
This is a temporary message alert when you deviate signicantly from the route or when you don’t follow the route in the right direction. These pop-ups
may be shown for all viewed displays, including route.
The activation of guiding pop-ups automatically deactivates the target zone and lap info to avoid the clashing of route-related information and
information related to the actual race. However, even if the lap pop-ups are not displayed, the lap information that you have set in your options is
saved and you can nd it in your session report.
Consult chapter 12.3.2. How to use pop-up guiding for more information on use of guiding pop-ups.
laps
map
delete
new route
my routes
Grand tour
guiding
direction?
normal
reverse
no
Yes
guiding
pop-up?
21
Page 22

12�2� Access to start of route
Once you have chosen the route and the guiding options (direction of route and guiding pop-up) as well as other possible mode options,
return to the searching for satellite signal screen.
Wait until the watch has detected the satellite signal (chapter 8.1. Searching for satellite signal).
The my route window is automatically displayed.
The watch will indicate the direction (directional arrow) and distance to start line for selected route. The dotted line indicates the direct route
from your current position to the start of the route.
As the watch does not have a compass, you have to constantly keep moving so that the directional arrow can indicate the direction to follow.
The
and keys let you zoom in and out respectively to display more or less information about the route.
The watch alerts you when you reach the start line. Then press the OK key.
12�3� Guiding along the route
Once you have reached the start of the route, you can then be guided along the entire route.
12�3�1� Using the “my route” display
The route to be taken is marked by a light grey line with white circles marking the way-points. The next point to be reached is circled in black.
Its distance and direction are shown at the top of the screen.
The path that you have covered is marked by a black line. When the two lines are superimposed, this means that you are on the route.
As the watch does not have a compass, you have to constantly keep moving so that the directional arrow can indicate the direction of the next
point.
The
and keys let you zoom in and out respectively to display more or less information about the route.
12�3�2� Using guiding pop-ups
If, in particular, you want to follow your race settings using the “my indicators” or “my rhythm”, display but, nonetheless, want to be guided, activate the
pop-ups (chapter 12.1.1.2.2. route direction and guiding pop-ups).
12�3�2�1� Directional pop-ups
As you approach each way-point, the watch will show the “my route” display and will indicate the direction to follow and the distance to
the next point.
Once you have reached a way-point, the “my route” display will disappear and be replaced by the previous display, “my indicators”
(section 9.3.1. My indicators) or “my rhythm” (section 9.4.2. My rhythm). If the points are close together, the “my route” display will appear.
12�3�2�2� Pop-up alert out of track
If you deviate from the track, you will receive an out of track pop-up alert.
The dotted line and directional arrow will direct you towards the track.
12�3�2�3� Wrong way pop-up alert
If you are on track but you are heading in the opposite direction, you will receive a wrong way pop-up alert.
Until you turn in the right direction, the directional arrow will be pointing downwards and the message “wrong way” will ash.
13� Using the stretching mode
The stretching mode gives a list of 16 positions covering the 5 muscle groups. The suggested stretches, which appear in diagram form,
can be organized as a play list that you can just open and follow to help your recovery.
ok
options
start:
you reached
the start line
press ok
next::
next:
out of track
next:
wrong way
wrong way
stretching
22
Page 23

To consult available stretches for a particular muscle group, choose the group and press OK.
The rst position is shown. Press the key to view the others.
Once the position is ticked, it will appear in the play list. Press the OK key twice to delete from list.
If the position is not ticked, it will not appear in the play list. Press OK key twice to add.
playlist
To launch playlist, select playlist and press OK key.
The upper part of the screen shows the muscle groups to be stretched and the number of the position in each group.
Choose “option” to set time limit for the stretches and the number of repetitions.
Select “read” and press OK to start the play list.
The watch will move through the positions that you have chosen during the allotted time and as many times as you have specied in the
options list.
For each position, the watch will indicate, if necessary, the side you need to stretch, the pose to adopt as well as the amount of time
remaining to hold each position.
As with the other modes, free session, training, challenge, you can press the OK key at any time to pause the session. You can then choose one of the
suggested actions using the
and key and conrm by pressing OK:
- Continue the session.
- Stop the session.
- Go to the following stretch.
- Return to previous stretch.
- Restart sequence.
14� Using the indoor mode
When the indoor mode is activated, it deactivates the GPS function.
In this mode, you have access to: the “my indicators” display. This includes the time since the start of the activity and the lap time.
133
00'50''
If you have a ONmove 710, provided that the belt has been detected, you can also see the heart rate in beats per minute in the “my
indicators” display as well as the my rhythm display. You can choose a target heart rate zone from your options (see chapter 9.1.1. Target
zone). If a target zone is not chosen, the watch will indicate your effort range using your heart rate.
- Recovery: below 70% of maximum HR
- Endurance: between 70% and 80% of maximum HR.
- Soft resistance: between 80% and 88% of maximum HR.
- Hard resistance above 88% of maximum HR.
Please consult chapter 8.2. Searching for heart rate signal for all information about detecting HR belt.
15� The library
The “Library” menu which you can access from the main menu, lets you view and manage:
- Detailed reports of previous sessions.
- The routes that you have created (Chapter 12.1.1 Creating a route).
- Product memory.
15�1� Consult a session
After you have chosen “my workouts”, choose which session you wish to consult using the and .
calves
calves
1
.calves 1
.hamstrings 1
.quadriceps 2
.abductors 2
.gluteal muscles 2
play
options
.calves 1
.hamstrings 1
.quadriceps 2
.abductors 2
.gluteal muscles 2
play
options
right side
calves 1
indoor
01'14 ''00
00'46 ''09
recovering
library
23
Page 24

7 km
8.1
1
The most recent session will appear at the top of the list. You can identify a session by following 3 features:
- Session date.
- Mode of session (free session, training, challenge).
- Session distance.
Press the OK key to consult the session selected. You will then be able to access the following menu:
Session: view overall session report.
Laps: view details of each lap (automatic or manual).
Map: view the route (use the
key to zoom in and key to zoom out)
Delete: delete the session.
Create route: Create a route using this session.
If you choose “session”, you will be able to consult distance, time, average and maximum speed, calories and fat burned, difference in
height and speed of ascent and descent.
Press the
and keys to scroll through information and the key to exit session consultation.
If you choose “lap”, you will be able to access the list of laps with the number of the lap, distance and time of lap. If you choose one of the
laps using the and keys, you can view the same information available during the session.
15�2� View a route
Once you have chosen your route, choose the route you wish to consult using the and keys.
The most recently created route will appear at the top of the list. A route can be identied from the following 3 features:
- The name of the route that you have chosen, if created using MyGeonaute or with session name, if from session.
- The type of route.
- The length of the route.
Once you have chosen the route, you can consult the differences in elevation by selecting “details” or delete it.
15�3� Consulting and managing the memory
The memory menu lets you see how many hours of storage remain, lets you manage the memory by altering the sample rate and nally
allows you to completely empty the memory.
change sampling
clear all
remaining
The watch automatically records data from your session every 2 seconds. With this sample rate (rate of storage/saving), it has 33 hours
of storage capacity.
The indicator shows how many hours of storage are available.
The menu “change capacity” lets you alter the capacity of available storage. You can increase this capacity by selecting a 5 second-sample rate.
Conversely, if you want maximum accuracy, you can choose a sample rate for each second. In this case the storage capacity will be halved
relative to the default value (2 seconds).
To change the storage capacity, choose “change capacity” and press OK. Use the and keys to increase or decrease the sample range. You
will notice an immediate effect on the number of recording hours available.
Chapter 19.8. The watch’s memory is low.
16� Settings
settings
The setting menu contains all the parameters necessary to congure and update your watch.
16�1� Activity options
As the activity options are specic to each mode (free session, training, challenge), they can only be accessed via the settings menu when an activity has
been paused.
Activity options can always be accessed from the searching for satellite signal screen. For further information, consult the description of each mode.
16�2� Personalising the interface
In this menu, you can amend all the necessary parameters so that the watch can provide all relevant information.
16�2�1� Display
In this menu, you can congure the “my indicators” display described in chapter 9.3.2 My indicators display.
Adjust the number of information pages that you wish to use (1-4 pages).
Then select the pages to set the information on each page.
free
session
laps
map
delete
new route
Grand tour
memory
personallzed
interface
set page 1
set page 2
set page 3
set page 4
24
Page 25

number of lines
on page
Choose the number of the information item (1-4) required from selected page.
Select one piece of information to amend and press OK.
You will be able to access a list of available indicators, as illustrated here.
Select the category of indicators chosen using the and ▲ keys
then press OK.
Depending on the category of indicators chosen, you can choose to have instant, average, minimum or maximum values for the entire session or lap.
Use the ▲ and
key to make your choices and press OK to confirm or to go back.
List of available indicators
1 Time: the time
If you wish to consult the time during your session, leave this indicator on one of the pages.
2 Stopwatch: the stopwatch
- Beginning: from start of session.
- Lap: from the start of lap.
3 Speed: speed in km/h
- Instantaneous: instant speed.
- Average: Average speed during session or lap.
- Maximum: highest speed reached during session or lap.
4
% MAS: your speed expressed as a percentage of your maximum aerobic speed (the maximum aerobic speed should have been provided).
See chapter 11.3 Maximum aerobic speed)
- Instantaneous: instant % of MAS.
- Average: average % of MAS during session or lap.
- Maximum: highest % of MAS during session or lap.
5 Pace: pace in minutes/km
- Instantaneous: instant pace.
- Average: average pace during session or lap.
- lap: from the start of lap.
6 Distance: distance covered
- Total: from start of session.
- Lap: from the start of lap.
7 Altitude: distance above sea level.
8 Cumul +:cumulative altitude gain (to an accuracy of +/- 50 metres)
- Total: from start of session.
- Lap: from the start of lap.
9 Cumul -: cumulative altitude loss (to an accuracy of +/- 50 metres)
- Total: from start of session.
- Lap: from the start of lap.
10 Speed of ascent: speed of ascent (climb) in metres per hour
- Instantaneous: instant speed of ascent.
- Average: average speed of ascent during session or lap.
11 Speed of descent: speed of descent (downwards) in metres per hour
- Instantaneous: instant speed of ascent.
- Average: average speed of ascent during session or lap.
12 Heart rate: heart rate in beats per minute (CW 700 GPS only)
- Instantaneous: Instant heart rate.
- Average: average heart rate during session or lap.
- Maximum: highest heart rate during session or lap.
- Minimum: lowest heart rate during session or lap.
13 Percentage of max HR: heart rate as a percentage of maximum heart rate (max MR) (CW 700 GPS only)
- Instantaneous: percentage of instant max HR.
- Average: average heart rate during session or lap as percentage of max HR.
- Maximum: highest heart rate during session or lap as percentage of max HR.
- Minimum: lowest heart rate during session or lap as percentage of max HR.
14 Calories: energy expenditure in kilo calories burned
- Beginning: from start of session.
- Lap: from start of lap.
The watch is only able to accurately calculate the rate of calories expended when running.
values
time
stopwatch
speed
%
MAS
25
Page 26

List of available indicators
15 Calories/hour: rate of energy expended in kilo calories burnt per hour
- Instantaneous: instant rate of energy expended.
- Average: average rate of energy expended during session or lap.
- Maximum: highest rate of energy expended during session or lap.
The watch is only able to accurately calculate the rate of calories expended when running.
16�2�2� Fast Touch
This function means that a mere tap on the watch’s screen can launch a function.
This is quicker and more ergonomic than pressing the relevant function key.
You can set the function that you wish to link to Fast Touch and also the level of sensitivity. Select one of the 2 parameters and click OK
to change.
16�2�2�1� Fast Touch functions
Your Fast touch may be set to off (it is deactivated) or to one of 4 available functions:
- Take a manual lap.
- Changing display: my indicators => my rhythm => my session => my route. See sections relating to the different modes, namely free session, training,
challenge, and indoor to nd out about available displays for each mode.
- Page down in my indicators (section 9.3.2. My indicators display).
- Switching on backlight.
The activation of fast touch, with any of the 4 functions below, does not deactivate the keys specic to these functions.
16�2�2�2� Fast Touch sensitivity
Fast touch can be set to different levels of sensitivity from uid to hard.
Fluid touch: A light, clean tap is sufcient to start function.
Hard touch: A more forceful tap is required to start function.
Irrespective of the level of sensitivity selected, the tap should be clean. You are advised to tap the screen with the tip of your ngers rather than
the pad of your nger. Fast Touch is set to respond to a light, clean touch rather than a hard, slow touch.
16�2�3� Beeps
key press
pop-up alerts
on
on
In this menu you can activate or deactivate the beep (sound alert) for press key function as well as the pop up display beep.
The beep is activated with On and deactivated with Off.
16�2�4� Vibrator
You can combine vibration with a beep sound to ensure that you don’t miss any information when in noisy surroundings or when you are running with music.
16�2�5� Lighting
The product has 3 lighting modes:
- Light key: pressing the light key
lights up screen for 5 seconds. When in lighting phase, if you press any key, the watch lights up for 5 extra seconds
to make it easier to set at night.
- Night mode: The light is turned on by pressing any key.
- Auto: at night, the watch switches automatically to night mode and during day time reverts to push key light mode.
The use of backlight greatly increases the amount of energy consumed. How often the light is used greatly affects the watch’s charge.
16�3� General
In theory, you should not need to return to the general parameters if you adjust them, as directed, when you rst use the watch.
16�3�1� Language
There are 7 available languages: French, English, Portuguese, Dutch, German, Italian, Spanish.
16�3�2� Time
Adjust the time according to your time zone (the local time in your country).
Press the OK key to position the cursor over the time. Change the hour using the and keys then conrm by pressing on the OK key again. Repeat the
same process for minutes.
Your time is set. When the watch has detected the satellite signal, the time will automatically adjust to the nearest minute of GPS international time taking
into account your initial setting and therefore your time zone.
16�3�3� Units
You can choose to select the European unit system (cm - km - g- kg) or the imperial system (ft - mi - oz - lb)
16�4� User
function
OFF
“fast touch”
is disactivated
sensitivity
medium
“
touch
”
general
26
Page 27

Information about user parameters allows the watch to calculate different values as accurately as possible:
- Gender: needed to calculate calories and fat burned.
- Date of birth: needed to calculate theoretical maximum heart rate.
- Weight: needed to calculate calories and fat burned.
- Height: needed to calculate calories and fat burned.
- FC max (maximum HR) on ONmove 710 only.
It is automatically calculated using the formula 220 – age. If you know this already, you can calculate the optimal number of calories and fat burned and
calculate target zones expressed as a percentage of maximum HR more accurately.
This can be measured with the heart rate monitor during a sustained effort over a relatively short distance. After a proper warm-up, run one lap on a running
track at slow pace followed by a second lap at medium speed and then a faster third lap accelerating as much as you can over the last 100 metres. The heart
rate recorded is the one shown as you cross the nish line. Please consult your doctor before undertaking such exercise.
- HR min (resting HR) on ONmove 710 only
This provides a more accurate calculation of calories and fat burned. It can also be measured using the HR monitor. The ideal time to measure is in the
morning, when you are totally relaxed, lying on your bed.
16�5� HR belt (ONmove 710 only)
This menu will let you activate or deactivate your HR belt.
16�5�1� Pairing with cardio belt monitor
If the cardio belt monitor function is activated, you can continue with pairing process.
The watch is automatically programmed to pair with the HR belt monitor contained in the package. It is, therefore, unnecessary to use the “pairing”
function in order to use it.
The “pairing” function should only be used if the belt is replaced.
Each sensor (accelerometer or heart rate monitor belt) has a unique identication number that cannot be changed. When the belt is
activated, it automatically transmits its identication number to the watch. The HR monitor belt is activated as soon as it is moistened and
tted to the chest.
Once the belt is in place, press the OK key once to scroll through watch’s recommendations and launch the search.
During the pairing process, you must stand at least 10 metres away from other HR monitor belt users to prevent the watch from connecting
to other belts.
This precaution is only necessary for the pairing process and does not need to be repeated when searching for the belt at the beginning
of the free session, training or challenge modes.
The watch should locate the belt in a few seconds.
Press the OK key once the belt is found.
If the watch does not successfully pair with the belt, press the OK key; you will be asked to restart the process.
In the event of the pairing procedure repeatedly failing, please refer to chapter 19.2. Detecting HR belt.
16�5�2� Deactivate HR monitor function
If the HR monitor belt function is activated, you can deactivate it.
If you no longer wish to use your HR belt monitor, you are advised to deactivate the HR monitor function so as to prevent the watch from searching for the
belt at the start of every session. You will save time and battery charge (this searching phase consumes a lot of charge)
By deactivating the HR function, the watch will delete information and parameters linked to heart rate from the different watch menus.
Press the OK key once the function is deactivated.
16�5�3� Activate the HR monitor
If you deactivate the HR monitor function you can activate it again later.
If you do this, the watch will restart the pairing process (see chapter 16.5.1. Pairing the HR monitor belt)
16�6� Upgrade/maintenance
You can view the rmware version of your watch in the updates/maintenance menu. Firmware is your watch's internal programme. It
undergoes ongoing improvements to make your product ever easier and more fun to use.
When connecting your product to your computer, ONconnect checks the rmware version and lets you know if a new version is available. In this case, we
advise you to update.
16�6�1� Upgrading product
When an update is available, an information sticker is displayed on the "Adjustments" category.
Click on "Update" to update your product.
user
heart rate
belt
Install the belt
and humidify
the sensor
pair belt
Belt
found
!
belt missing
restart ?
no
yes
function
heart rate
disabled
default
settings
upgrade
the product
27
Page 28

Once the rmware has been synchronised, unplug your product then switch it on by pressing on the "ON" button.
The product updates automatically. Wait for it to nish then switch your watch back on.
Your product has been updated!
NB: we advise you to transfer your data before updating. It will be deleted during the update.
16�6�2� Default settings
Select this option to return to your product’s original settings.
Press OK to go to the information displayed by the watch and proceed to restoring default settings.
Restoring default settings will delete the library and training sessions created. It is recommended that you transfer all this data onto
MyGeonaute before proceeding to upgrade rmware.
17� Safety functions
2 types of functions are available:
- Return to beginning of previous session.
- Viewing the GPS coordinates.
17�1� Return to start line of previous session
This function lets you return to the start or nish line of a previous session. This may help you rend your path, if you are lost near a route
that you have previously taken, or if you have stopped and saved your current session and you can no longer access the “go back".
7 km
8.1
1
Choose a session from the sessions stored in the memory.
Choose whether you wish to be guided to the start or nish line of chosen session.
17�2� Display GPS position
N 50'38.7607'
E 003'08.6201'
'
'
This function allows you to communicate your position to the emergency services in case of danger.
18� Transferring your data to myGeonaute
18�1� Installing ONconnect and creating a myGeonaute account
Go to the www.start.geonaute.com platform and follow the instructions.
You will nd ONconnect and all the information you need to start out.
18�2� Import your sessions from your watch following the instructions below:
1 – Connect your product to one of the USB ports on your computer
2 – Start ONconnect up and log in with your ID and password
3 – Your product is detected automatically and your sessions are displayed in the "Session" section
safety
functions
go back
to the start
or finish line
of a previous
session
display GPS
coordinates
free
go straight to
the start line
go straight to
the finish line
current position
28
Page 29

4 – Select the sessions you want to transfer and click on "Send to myGeonaute.com"
5 – You can then view the details of your session on your myGeonaute.com account
19� Troubleshooting
19�1� Abnormal speed and distance
options
route
ok
The distance displayed by the watch does not match the known actual distance covered.
It is essential that you wait for the watch to detect the satellite signal before beginning your activity so that the speed and distance can be
calculated from outset of session (section 8.1. searching for a satellite signal).
Bad satellite reception (near a block of ats, or undergrowth) can alter the precision of measurement.
19�2� Detecting HR monitor belt (ONmove 710 only)
HR belt monitor not found:
- Move at least 10 metres away from others who may be using a HR monitor belt.
- Move belt closer to watch
- Correctly position the damp belt (chapter 4. Installing the HR monitor belt).
- Check activation of sensor in watch settings (chapter 16.5.3. Activate HR monitor).
- Restart pairing process: Setting/cardio belt (chapter 16.5.1. Pairing with cardio belt monitor).
- Change the belt battery (chapter 23 Change HR belt battery).
19�3� Abnormal heart rate (ONmove 710 only)
Check that the strap is in place and the sensors have been moistened (Chapter 4. Installing the HR monitor belt).
Environmental interference due to electromagnetic disturbance can temporarily destabilise or cause inaccurate heart rate readings. This is nearly always due
to being in close proximity to high voltage lines, overhead lines, trafc lights, televisions, car engines, some motorised sporting equipment, mobile phones,
computer screens, microwave ovens or when you are going through electrical security gates.
There are other causes for altered heart rate readings:
- Pairing with another user’s belt. Move at least 10 metres away from other runners and restart pairing process (section 16.5.1. Pairing with cardio belt
monitor).
- Clothes that ap against the belt or are strongly charged with static electricity.
- Excessively hair chest.
- Dirt on the belt.
If heart rate readings are unstable, rst check that none this is not due to any of the above causes.
19�4� Heart rate information display not present or has no values (ONmove 710 only)
- If the heart rate monitor function has been deactivated, the information or parameters linked to this function will no longer be displayed (Chapter 16.5.3. Activate
the heart rate monitor function).
- If the sensor cannot be detected, the watch displays a dotted line where the readings from the sensor should appear (chapter 19.2. Detecting HR
monitor belt).
- If transmission between the belt and the watch is interrupted, the watch will display “000000” for a few seconds.
29
Page 30

19�5� Low watch battery
17:03 11
18 10 2011
..
The battery icon ashes when in hour mode.
The battery is low and needs to be recharged (chapter 2. Charging the battery).
The low battery icon pop-up appears at the beginning of, or during the session, to indicate that there is only 20% and then 10% of battery
charge remaining. The watch needs to be recharged (chapter 2. Recharging the battery).
19�6� Restore default settings
Consult chapter 16.6.2 before proceeding to restore default settings which can be accessed via settings menu, upgrade and maintenance, default settings.
19�7� The watch has frozen and is not responding
The watch will switch off when you hold down , key for more than 10 seconds. Press key again to restart.
19�8� The watch’s memory is low
The storage limit for number of laps will be soon be reached. You are advised to delete some sessions.
The same pop-up with an indication of hours instead of laps shows that the storage limit, in terms of numbers of hours, will soon be
reached. It also advises you to delete some sessions. Consult chapters 15.1. View a session and 15.3. View and manage storage.
20� Summary of available functions
ONmove 510 ONmove 710
Free session mode
Auto lap information
Target zone speed
Target zone pace
Target zone MAS percentage
Yes
Yes
Yes
Yes
Yes
Yes
Yes
Yes
Yes
Yes
Interval training mode with target zone
Pyramid training mode with target zone
Yes
Yes
Yes
Yes
Challenge mode (virtual competitor)
- Free race
- Race with route
- Race against yourself
Yes
Yes
Yes
Yes
Yes
Yes
Indoor mode Yes Yes
Stretching mode Yes Yes
Guiding functions
Back to start line
- Go directly
- Follow route
Guiding for imported route
Guiding on a route created using a previous session
Yes
Yes
Yes
Yes
Yes
Yes
Yes
Yes
HR monitor function No (product not compatible
with cardio belt)
Yes
Accelerometer function No (product not compatible) No (product not compatible)
Interface
Menu available in 7 languages
Vibrator mode
Fast touch (function activated by touching screen)
Yes
No
No
Yes
Yes
Yes
21� Technical features
ONmove 510 ONmove 710 Heart rate monitor belt
GPS chip Sirf Star 3 Sirf Star 3
Waterproof IPX 7. Designed to withstand
heavy rain, accidental immersion
and splashes but not suitable for
swimming or water sports
IPX 7. Designed to withstand
heavy rain, accidental immersion
and splashes but not suitable for
swimming or water sports
1 ATM. splash/rain resistant
Charge
Recharging time from 0-100%
16 hours in use (not counting the light
and Vibrate mode)
5 days in energy saving mode
3½hrs
16 hours of use
(without light and vibrator mode)
5 days in energy saving mode
3½hrs
2 years (4 hours use per week)
low battery
10
remaining
continue
delete session
45 laps till arrival
30
Page 31

ONmove 510 ONmove 710 Heart rate monitor belt
Memory
Recording/1 sec
Recording/2 sec
Recording/5 sec
Number of laps
Number of sessions
16 hours
33 hours
84 hours
2,000
100
16 hours
33 hours
84 hours
2,000
100
Range of authorised values:
Heart rate target zone
Speed target zone:
Pace target zone
Lap information in distance
Lap information in distance
Distance challenge
Speed challenge
Maximum number of sections
in pyramid training
Maximum number of training
repetitions
Maximum number of training series
29 - 250 beats per minute
0,0 - 99,9 km/m
59’00’’ – 1’00’’/km
0,1 – 99,9 km
15’’ to 99:59’59’
0,1 – 99,9 km
0.0 - 99.5 km/m
16 sections
99
6
29 - 250 beats per minute
0.0 - 99.9 km/m
59’00’’ – 1’00’’/km
0.1 - 99.9 km
15’’ to 99:59’59’’
0.1 - 99.9 km
0.0 - 99.5 km/m
16 sections
99
6
Communication protocols
Transmission range: 3 m in use
10 m when paired
3 m in use
10 m when paired
3 m in use
10 m when paired
Working temperature range: -10°C to 50°C -10°C to 50°C -10°C to 50°C
Battery Lithium ion battery Lithium ion battery CR 2032 battery
Weight 75 g. 75 g. 52 g.
PC transfer
- Route
- Speed graph
- Altitude graph
- HR graph
Google Earth compatible
Yes
Yes
Yes
No
Yes
Yes
Yes
Yes
Yes
Yes
22� Compatible accessories
ONmove 510 ONmove 710
Ant + HR belt No Yes
Accelerometer No No
23� Change HR belt battery (ONmove 710 only)
The “crossed-out bin” icon indicates that this product and the batteries it contains cannot be disposed of with household waste. They
must be separated and specially recycled. Dispose of the batteries and unusable electronic products in an authorised collection area
for recycling. Recycling your electronic waste in this way will protect the environment and your health.
This device complies with Section 15 of the FCC regulations. Functioning of the device is subject to the following two conditions:
- 1 That it does not produce harmful interference.
- 2 That it may itself be subject to interference, including interference that may adversely affect its functioning.
This equipment has been tested and found to comply with the agreed limits for a Class B digital device, pursuant to Part 15 of the FCC Rules.
31
Page 32

These limits are intended to provide reasonable protection against harmful interference within residential buildings.
This equipment generates, uses and emits radio energy frequencies and, if not installed in accordance with instructions, may adversely affect radio reception.
However, we cannot guarantee that it will not affect radio communication in certain built environments.
If this equipment adversely affects radio or television reception, which can be ascertained by switching the device off and on again, the user should attempt
one of the following measures to mitigate such interference:
- Change the direction in which the reception antenna is pointing or move it.
- Move the equipment and the receiver further apart.
- Plug in the equipment, using a different circuit from the one used for the receiver.
- Contact your retailer or a radio/television technician.
Warning:
Any change or modication which has not been expressly authorised by Decathlon may render invalid any authorisation granted to the user for equipment use.
24� Recommendations for use
25� Guarantee
OXYLANE guarantees the initial purchaser of this product that it is free from any material or manufacturing faults. This product is guaranteed for two years
from the purchase date. Please keep your receipt as proof of purchase.
The warranty does not cover:
- failure or damage resulting from misuse, accident, improper maintenance, neglecting to follow the user instructions or from the commercial use of the
product.
- damage resulting from repairs carried out by persons not authorised by OXYLANE.
- batteries or casings that are cracked or broken or that have visibly been knocked.
During the warranty period, the item will either be repaired free of charge by an authorised repair service or replaced free of charge (at the distributor’s
discretion).
Find your rhythm, enjoy your run�
26� Contact us
We would like to hear your views on the quality, practicality or use of our products: www.geonaute.com.
We will reply as soon as possible.
32
Page 33

27� Index
A
Accessoires ����������������������������������������������������������������������������������������������������������������������������������������������������������������������������������������������������������������������������32
Acquiring satellite signals �������������������������������������������������������������������������������������������������������������������������������������������������������������������������������������������������������6
Action (training) ����������������������������������������������������������������������������������������������������������������������������������������������������������������������������������������������������������������������15
Activate (heart rate monitor belt) �����������������������������������������������������������������������������������������������������������������������������������������������������������������������������������������27
Activities������������������������������������������������������������������������������������������������������������������������������������������������������������������������������������������������������������������������������������6
Alarms
Beep and vibration ................................................................................................................................................................................................................25
Training target zone ................................................................................................................................................................................................................7
Altitude
Display ..................................................................................................................................................................................................................................24
View a session ....................................................................................................................................................................................................................23
B
Battery �������������������������������������������������������������������������������������������������������������������������������������������������������������������������������������������������������������������������������������32
C
Calories
Display ..................................................................................................................................................................................................................................24
View a session ......................................................................................................................................................................................................................23
User (settings)………………………………………………………………….. .........................................................................................................................26
Challenge (activity)�����������������������������������������������������������������������������������������������������������������������������������������������������������������������������������������������������������������17
Charging
Battery ...................................................................................................................................................................................................................................4
Route ....................................................................................................................................................................................................................................20
Cleaning (belt) �������������������������������������������������������������������������������������������������������������������������������������������������������������������������������������������������������������������������33
Conguration
Settings .................................................................................................................................................................................................................................24
Activity options free session ...................................................................................................................................................................................................7
Activity options training .........................................................................................................................................................................................................15
Activity options challenge .....................................................................................................................................................................................................17
Cool down (training) ��������������������������������������������������������������������������������������������������������������������������������������������������������������������������������������������������������������16
D
Deleting information
Session .................................................................................................................................................................................................................................23
Route ....................................................................................................................................................................................................................................23
Display �������������������������������������������������������������������������������������������������������������������������������������������������������������������������������������������������������������������������������������24
Distance
Display ..................................................................................................................................................................................................................................24
View a session .....................................................................................................................................................................................................................23
Lap info ...................................................................................................................................................................................................................................7
E
Energy saving ���������������������������������������������������������������������������������������������������������������������������������������������������������������������������������������������������������������������������5
F
Fast Touch �������������������������������������������������������������������������������������������������������������������������������������������������������������������������������������������������������������������������������25
Fat ��������������������������������������������������������������������������������������������������������������������������������������������������������������������������������������������������������������������������������������������23
Free session (activity) ��������������������������������������������������������������������������������������������������������������������������������������������������������������������������������������������������������������7
G
MyGeonaute ����������������������������������������������������������������������������������������������������������������������������������������������������������������������������������������������������������������������������29
Go back (return to start line) ���������������������������������������������������������������������������������������������������������������������������������������������������������������������������������������������������8
GPS
GPS chip...............................................................................................................................................................................................................................31
Acquiring satellite signal .........................................................................................................................................................................................................6
GPS coordinates���������������������������������������������������������������������������������������������������������������������������������������������������������������������������������������������������������������������29
Guiding ������������������������������������������������������������������������������������������������������������������������������������������������������������������������������������������������������������������������������������20
H
Heart rate
Display .................................................................................................................................................................................................................................24
View data .............................................................................................................................................................................................................................23
Maximum heart rate ................................................................................................................................................................................................................
Minimum heart rate (at rest) .................................................................................................................................................................................................26
Target zone ............................................................................................................................................................................................................................7
Heart rate monitor belt
Activate ................................................................................................................................................................................................................................27
Pair .......................................................................................................................................................................................................................................26
Change the battery ...............................................................................................................................................................................................................32
Install .....................................................................................................................................................................................................................................5
Search again .........................................................................................................................................................................................................................7
History (see “library”) ������������������������������������������������������������������������������������������������������������������������������������������������������������������������������������������������������������23
33
Page 34

I
Indicators (see display) ���������������������������������������������������������������������������������������������������������������������������������������������������������������������������������������������������������24
Indoor (activity) ����������������������������������������������������������������������������������������������������������������������������������������������������������������������������������������������������������������������23
L
Language �������������������������������������������������������������������������������������������������������������������������������������������������������������������������������������������������������������������������������26
Lap
Auto lap info ............................................................................................................................................................................................................................7
Activity options free session ...................................................................................................................................................................................................7
Activity options challenge .....................................................................................................................................................................................................17
Display ..................................................................................................................................................................................................................................24
Manual lap info ......................................................................................................................................................................................................................8
Lap info ��������������������������������������������������������������������������������������������������������������������������������������������������������������������������������������������������������������������������������������7
Library �������������������������������������������������������������������������������������������������������������������������������������������������������������������������������������������������������������������������������������23
Lighting
Buttons ...................................................................................................................................................................................................................................5
Settings ................................................................................................................................................................................................................................26
M
Maximum Aerobic Speed �������������������������������������������������������������������������������������������������������������������������������������������������������������������������������������������������������19
Memory ������������������������������������������������������������������������������������������������������������������������������������������������������������������������������������������������������������������������������������31
My indicators (display)�������������������������������������������������������������������������������������������������������������������������������������������������������������������������������������������������������������8
My rhythm (display) ������������������������������������������������������������������������������������������������������������������������������������������������������������������������������������������������������������������8
My route (display) �������������������������������������������������������������������������������������������������������������������������������������������������������������������������������������������������������������������21
My session (display) �������������������������������������������������������������������������������������������������������������������������������������������������������������������������������������������������������������17
P
Pace
Display ..................................................................................................................................................................................................................................24
View a session ......................................................................................................................................................................................................................23
Target zone ............................................................................................................................................................................................................................7
PC Transfer ����������������������������������������������������������������������������������������������������������������������������������������������������������������������������������������������������������������������������29
R
Recording ����������������������������������������������������������������������������������������������������������������������������������������������������������������������������������������������������������������������������������8
Recovery (training) ����������������������������������������������������������������������������������������������������������������������������������������������������������������������������������������������������������������15
Route
Create a route .......................................................................................................................................................................................................................20
Follow a route .......................................................................................................................................................................................................................21
S
Safety functions
GPS coordinates...................................................................................................................................................................................................................29
Go back to start or nish line of a previous session ............................................................................................................................................................29
Satellite signal ��������������������������������������������������������������������������������������������������������������������������������������������������������������������������������������������������������������������������5
Screen
My session ..............................................................................................................................................................................................................................9
My indicators...........................................................................................................................................................................................................................7
My route ................................................................................................................................................................................................................................20
My rhythm ...............................................................................................................................................................................................................................7
Session
View ......................................................................................................................................................................................................................................23
Delete............................................................................................................. ......................................................................................................................23
Sent to PC ............................................................................................................................................................................................................................29
Software (MyGeonaute) ���������������������������������������������������������������������������������������������������������������������������������������������������������������������������������������������������������29
Speed
Display ..................................................................................................................................................................................................................................24
View a session ......................................................................................................................................................................................................................23
Lap info ...................................................................................................................................................................................................................................7
Target zone ............................................................................................................................................................................................................................7
T
Target zones ������������������������������������������������������������������������������������������������������������������������������������������������������������������������������������������������������������������������������7
Technical features ������������������������������������������������������������������������������������������������������������������������������������������������������������������������������������������������������������������31
Time
Home page .............................................................................................................................................................................................................................4
Settings .................................................................................................................................................................................................................................26
Time
Display ..................................................................................................................................................................................................................................24
View a session .....................................................................................................................................................................................................................23
Lap info ..................................................................................................................................................................................................................................7
Activity options free session ...................................................................................................................................................................................................7
Activity options challenge .....................................................................................................................................................................................................17
Display ..................................................................................................................................................................................................................................24
Manual lap info ......................................................................................................................................................................................................................8
34
Page 35

Training (activity)
Interval ....................................................................................................................................................................................................................................9
training programmes ..............................................................................................................................................................................................................9
Pyramid.................................................................................................................................................................................................................................11
My training ...........................................................................................................................................................................................................................13
Troubleshooting ���������������������������������������������������������������������������������������������������������������������������������������������������������������������������������������������������������������������30
U
Units �����������������������������������������������������������������������������������������������������������������������������������������������������������������������������������������������������������������������������������������26
Upgrade internal programme (rmware) ������������������������������������������������������������������������������������������������������������������������������������������������������������������������������27
User������������������������������������������������������������������������������������������������������������������������������������������������������������������������������������������������������������������������������������������26
V
Vibrator ������������������������������������������������������������������������������������������������������������������������������������������������������������������������������������������������������������������������������������26
W
Warm-up ����������������������������������������������������������������������������������������������������������������������������������������������������������������������������������������������������������������������������������15
Watch buttons ���������������������������������������������������������������������������������������������������������������������������������������������������������������������������������������������������������������������������5
Waterproof ������������������������������������������������������������������������������������������������������������������������������������������������������������������������������������������������������������������������������31
35
Page 36

OXYLANE
4 Boulevard de Mons – BP 299
59665 Villeneuve d’Ascq cedex – France
 Loading...