

Page 1
Präzisions-Laser PL-70
5 - 9
6 - 9
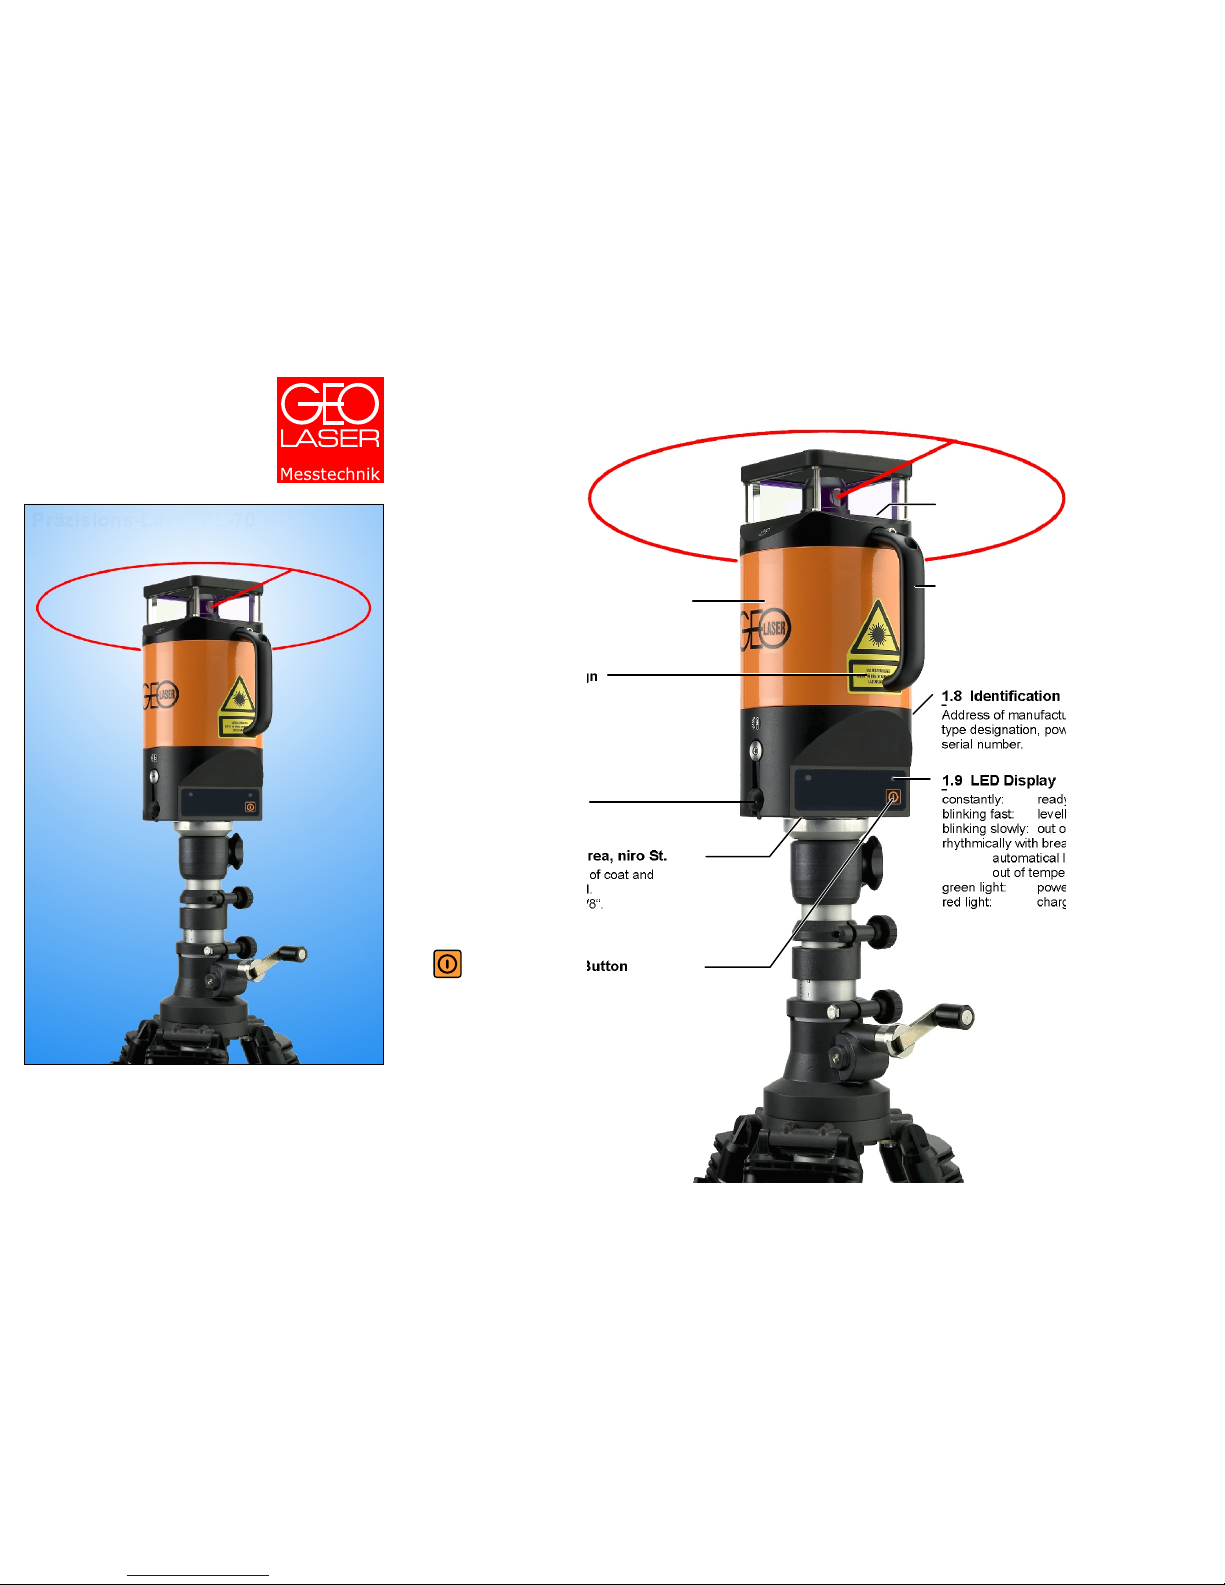
1.4 Bulging Ground Area, niro St.
Protects against damages of coat and
guarantees a secure stand.
Central fastening thread 5/8“.
1.8 Identification
Address of manufacturer, laser power,
type designation, power supply,
serial number.
1.2 Laser Warning Sign
Laser class 2, < 1 mW
= 1.5 ON/OFF Button
1. Description
1.9 LED Display
constantly: ready for work
blinking fast: levelling not yet finished
blinking slowly: out of self-levelling range
rhythmically with breaks:
automatical laser cut-off (see 3.)
out of temperature range (> 49°)
green light: power supply correct
red light: charge battery
1.7 Handle
For easy handling, safe transport and
simple set-up.
4 - 9
The rotary laser RL-70 and the precision laser PL-74 are
all around lasers for horizontal use capable of
electronic self-levelling over two axes.
They emit a laser beam which
turns into a light plane as
it rotates.
1.6 Box Level
Aid for set-up.
Rotary Laser RL-70
Precision Laser PL-74
2. Start Up 1 - 2 - 3
Set up laser, switch on, measure.
Operating Instructions
Congratulations on your new GEO laser
This operating instructions contain enclosed in addition to
information on how to use the laser important safety
information.
First read the safety instructions on the
supplement page and then the operating
instructions carefully before using the laser.
Please note:
1 - 3
1.1 Robust Light Metal Housing
Plastic-coated, swept with nitrogen,
100 % watertight.
1.3 Charging Socket
Behind the dust guard cap.
By pressing theON/OFF button, the laser is switched
on. After the levelling phase the laser beam and the
right LED stop blinking. If this does not happen, the
device must be moved into the levelling range by tilting
it forwards. The rotor rotates with max. 800 rpm.
To switch off the device, press the ON/OFF button until
the right LED switches over to orange.
Date 07/2012 Subject to change
Page 2
7 - 9 8 - 9 9 - 9
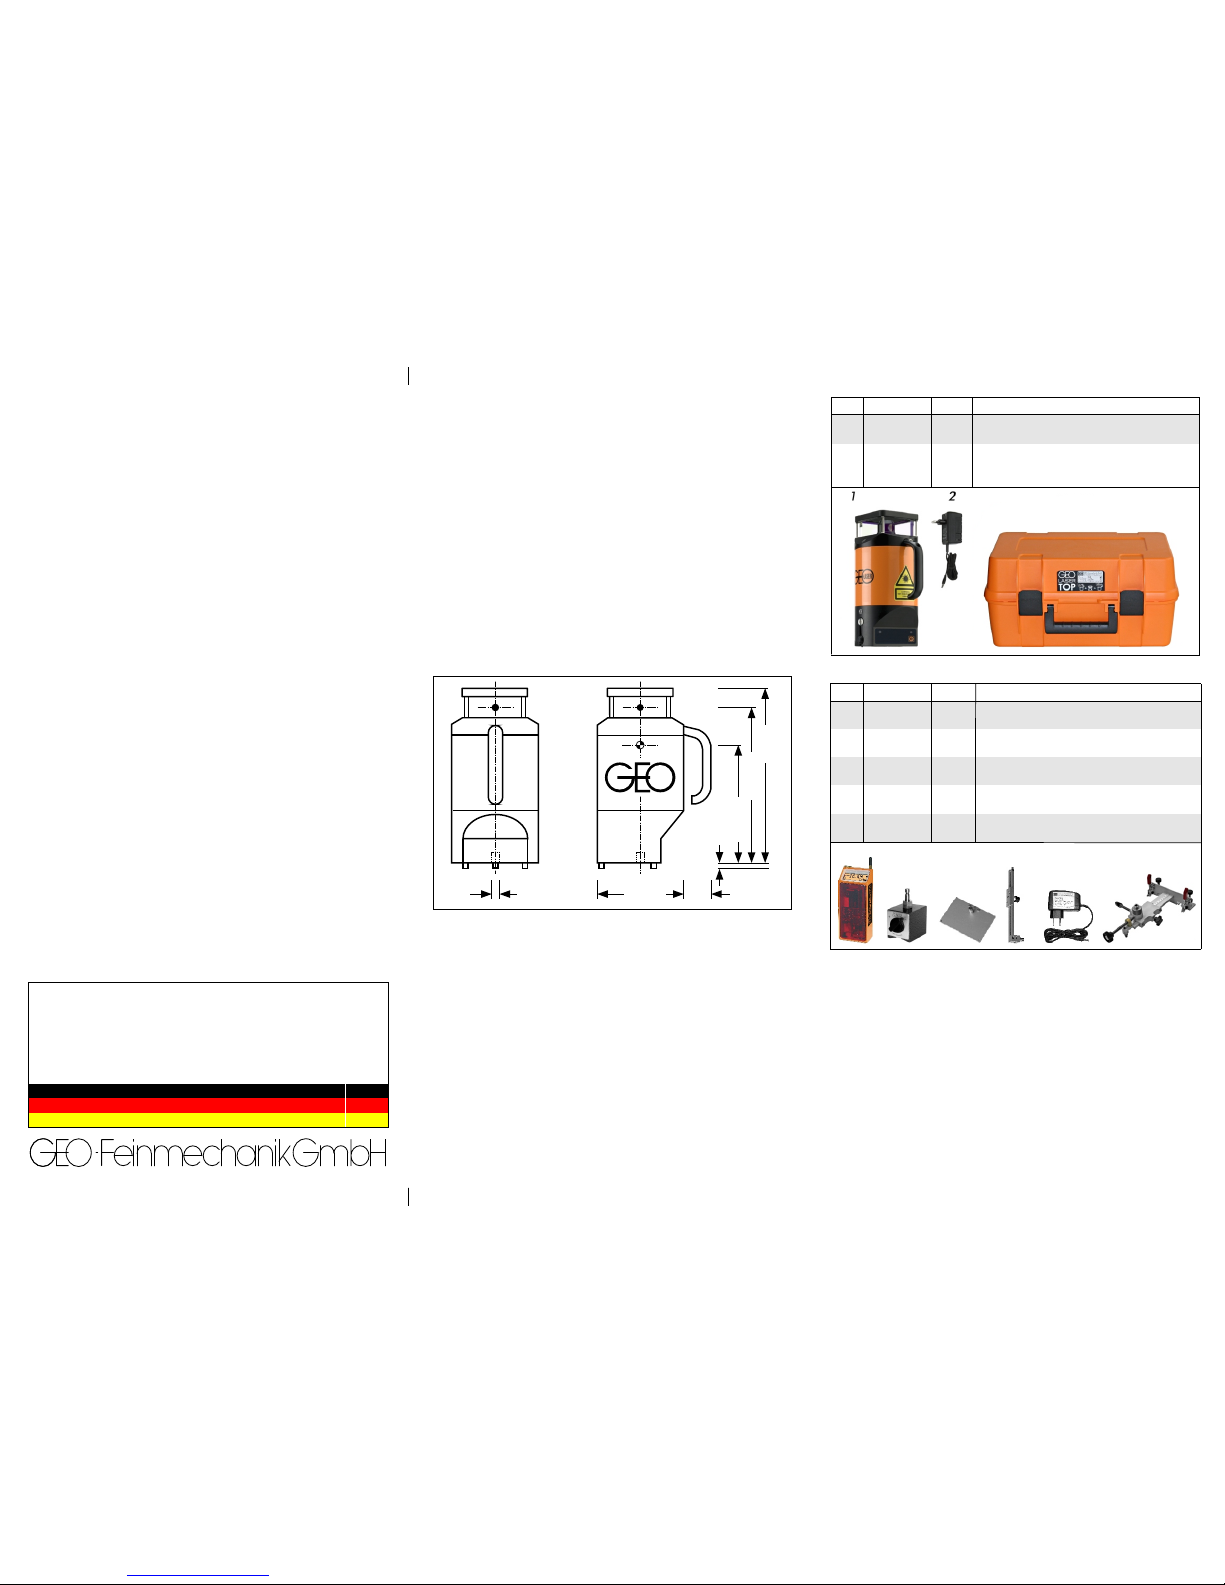
10. Dimensional sketch
3
No. Order No. Type Description
1 0001.700.1 RL-70 Rotary laser
or 0001.773.1 PL-74
with
2 0037.16 LG-80 Battery charger
3 0077.36 Transport case
Precision laser
130
42
Ww5/8"
Ø
182,5
239,5
270
9,5
7. Adjustment
7.1. Checking the Adjustment
Set-up the laser upright and mark laser beam in the height of the required
measuring distance. Turn laser device on the tripod by 180°, mark once again. If
the adjustment is perfect, the first mark does not deviate from the second one.
Turn device by 90°, repeat this process.
The laser can be adjusted in the field without having to open the device. For safety
reasons, however, adjustment should only be carried out by authorized personal.
See the special adjustment instructions in this regard.
8. Troubleshooting
1. No laser beam - check battery charge.
2. Low range - clean laser beam exit window.
3. Laser beam blinks slowly - move device into the levelling range by tilting it
forwards. If the errors are not corrected within 2.5 minutes, the device is
switched off automatically.
4. Laser switched off automatically (kick guard) - see 3.
7.2. Adjustment
9.Maintenance
The laser requires no special maintenance. Keep the electrical connections
clean. Do not clean with water spray. Clean glass parts with a soft, clean cloth.
Store dry. Always transport the laser in its original case.
3. Automatic Laser Cut-Out
The laser is switched off automatically as a precautionary measure in the event of
a jerky movement (bump). The right LED begins to blink inrhythmically. The laser
must be switched on again by pressing the ON button shortly. The positioning
must then be checked and corrected if necessary.
4. Monitoring of Self-Levelling
The self-levelling function corrects even the smallest deviation. At a deviation of
approx. 0.01 % the laser beam and the green LED begin to blink.
To deactivate this function keep the ON button pressed when you switch on the
laser, until the left LED blinks green.
6. Charging the Battery
• The battery is charged with the battery charger type LG-80.
• Protect the battery charger against moisture and only use indoors.
• Take the laser out of the transport case for charging.
• Do not charge in sub-zero temperatures.
• The charging time is finished after approx. 4 hours, the charge LED begins
to blink.
• The battery only reaches its full capacity after several charging and
discharging cycles.
• Defective NiMh batteries must be disposed of in accordance with local
regulations.
5. Power Supply
4.8 V DC internal rechargeable battery or 12 V DC external rechargeable
battery in combination with converter cable 0117.00 or directly with the power
unit NE-06.
Solinger Straße 8 • D-45481 Mülheim • Tel.: +49 (0) 208 99357-0 • Email: [email protected]
from:
GEO - partner of the construction industry for 45 years
European Quality Product
CE
Certified
Page
5. Power Supply . . . . . . . . . 7
7
8
8
Maintenance
12. . . 9
13. ..... 9
6. Charging the battery . . . . .
7. Adjustment . . . . . . . . . .
8. Troubleshooting . . . . . . . .
9. ..........8
10. Dimensional sketch . . . . . . 8
11. Technical specifications ...8
Standard delivery package
Optional accessories
Table of Contents Page
Safety Information . . . . . 1 - 2
Laser safety . . . . . . . . 2 - 3
Repair.............3
EMC .............3
Guarantee ..........3
Disposal............3
1. Description . . . . . . . . 5 - 6
2. Start up 6
3. Automatic Laser Cut-Out . . 7
4. Monitoring of Self-Levelling . 7
S1
S2
S3
S4
S4
S5
............
11. Technical specifications
Laser class: .............................2, < 1 mW
Laser: . . . . . . . . . . . . . . . . . . . . . diode laser, visible red, 658 nm
Beam diameter RL-70/PL-74:. . . . . . . . . . . . . . . 13 mm/5 mm at laser
Range RL-70/PL-74: . . . . . . . . . . . to 200 m/100m, 00 m/ 00 m
. . . . . . . . . . . . . . . . depending on circumstances and laser receiver
Self-levelling range: ............................± 5 %
Accuracy
Accuracy mm + ± 0.024mm/m
Rotor speed: .............................800 RPM
Operating time: . . . . . . . . . . . . . . . . . . . NiMh battery to 22 hours
External power supply: . . . . . . . . . . . 11 to 14 V DC with cable 0117.00
Low battery cut-out:.............................yes
Watertight: ...............................to 3.5 m
Temperature range RL-70/PL-74: . . . . . . -10° C to + 50° C/0° C to + 40° C
Weight: ..................................3.4 kg
Adjustment: . . . . . . possible in the field without having to open the device
Guarantee: ..............................24 months
CE:...................................certified
Ø 4 Ø 2
RL-70: .........................± 5 mm/100 m
PL-74: .................± 0.025
No. Order No. Type Description
Laser receiver
Laser receiver
Laser receiver magnetic foot
Mini tripod for laser receiver
Fastening adapter
5 0037.12 NE-06 Power supply, buffer mode for PL-74
6 0061.01.2 BW-80 Base plate/Wall mount
0059.06.1 ST-10 Alu. crank tripod,
0059.01.1 ST-20 Alu. crank tripod,
1 0009.38.1 LE-71 with digital data display
1 0009.39.1 LE-72 with digital data display
2 0081.00
3 0099.14
4 0033.19 with ball locking, 260 mm
- min. 0.55 m, max. 0.94 m
- min. 0.93 m, max. 1.99 m
Further optional accessories on request
1
2
3
4
5
6
12. Standard Delivery Package
13. Optional Acessories
 Loading...