

Page 1
Minim
+
monitor LED
Quick start guide
BBES-A-QSG-0 04_5
Page 2
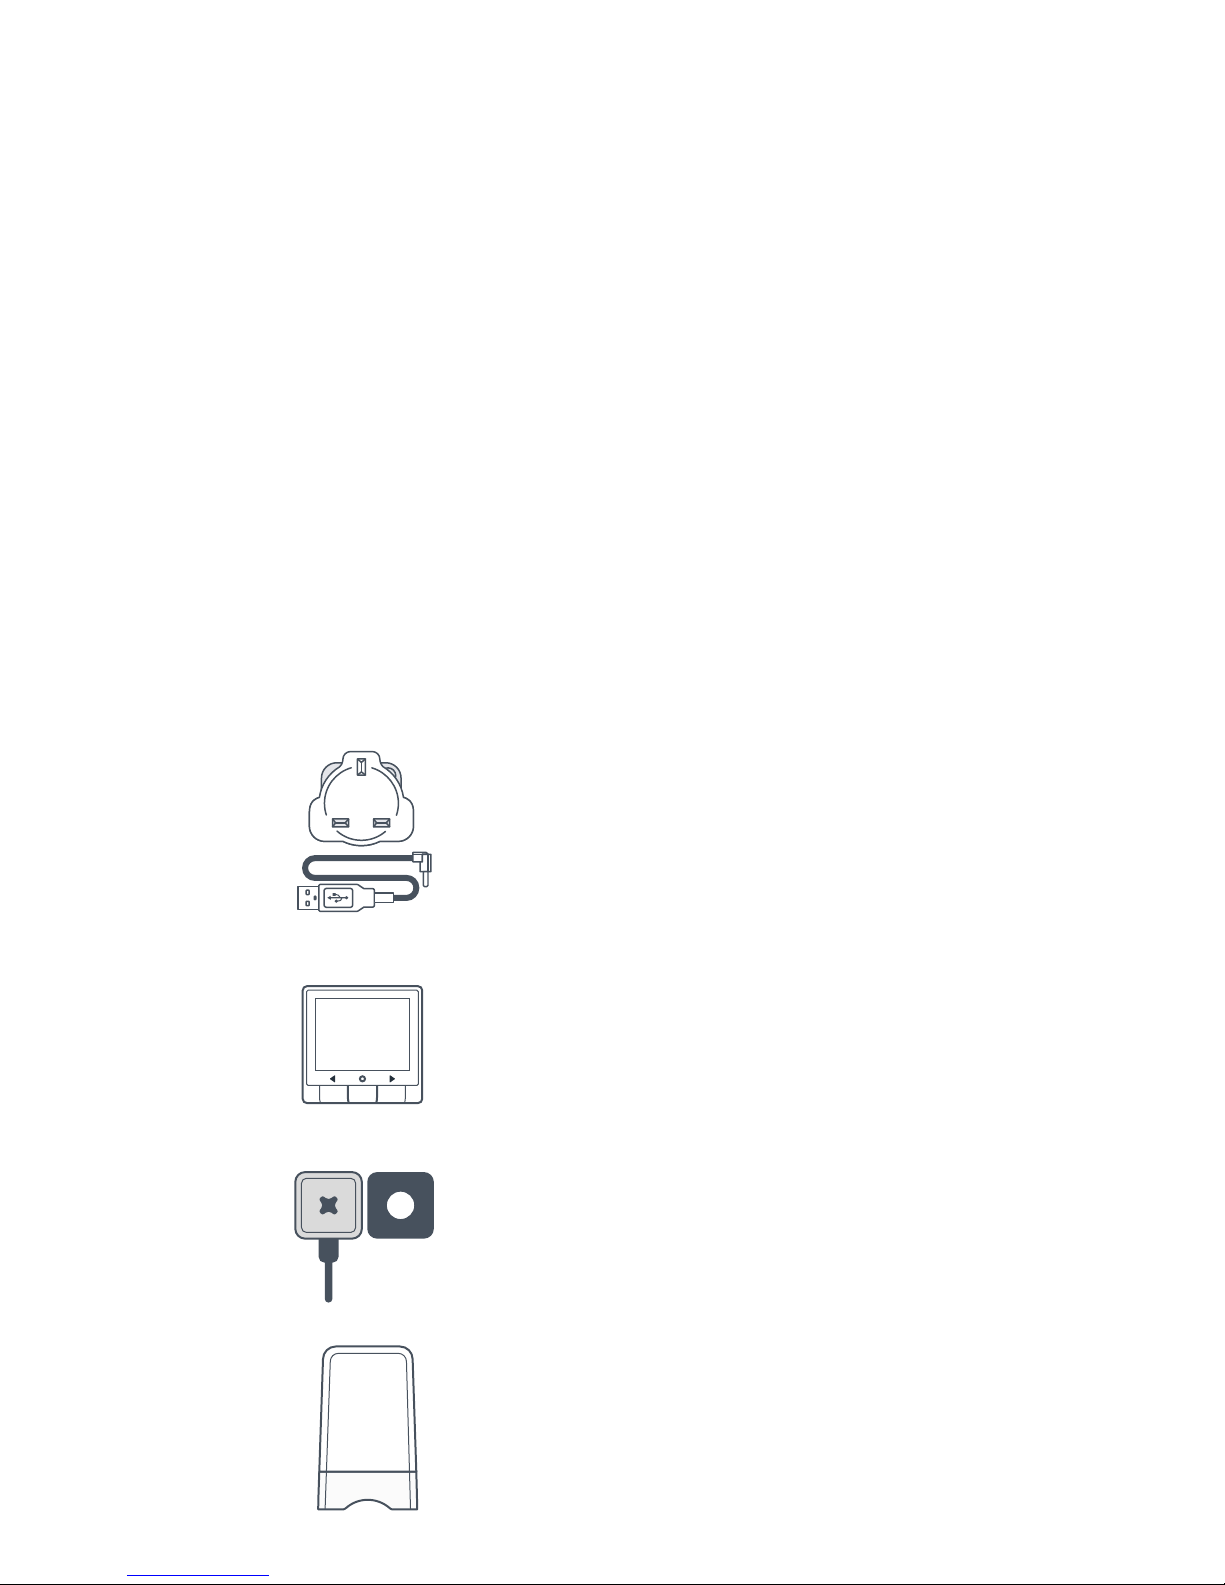
What’s in the box...
Power supply
The power supplies comes in two
easy-to-assemble pieces, which will
click rmly together once correctly
assembled. It powers the monitor and
the transmitter directly from the mains.
Monitor
The monitor shows your energy use in
real time. The monitor is mains powered.
Sensor
Using the adhesive Velcro pad
provided, attach the sensor to the
imp/kWh output on the meter to
measure the energy you are using.
Transmit ter
The transmitter is battery powered
and sends the energy measured by the
sensor wirelessly to the monitor.
Welcome to your
new Minim+ monitor
It’s a great way to learn how to use less electricity and
save money on your energy bills. Put your Minim+
monitor somewhere easy to see to keep track of your
electricity usage, and you’ll soon start to see how
simple changes like turning off the lights, or boiling less
water in the kettle mean less electricity is being used.
For more help on your Minim+ monitor, visit
www.geotogether.com/support/products/minim
Remember, using less electricity means more
money saved, and helps to reduce your home’s carbon
footprint too.
Page 3
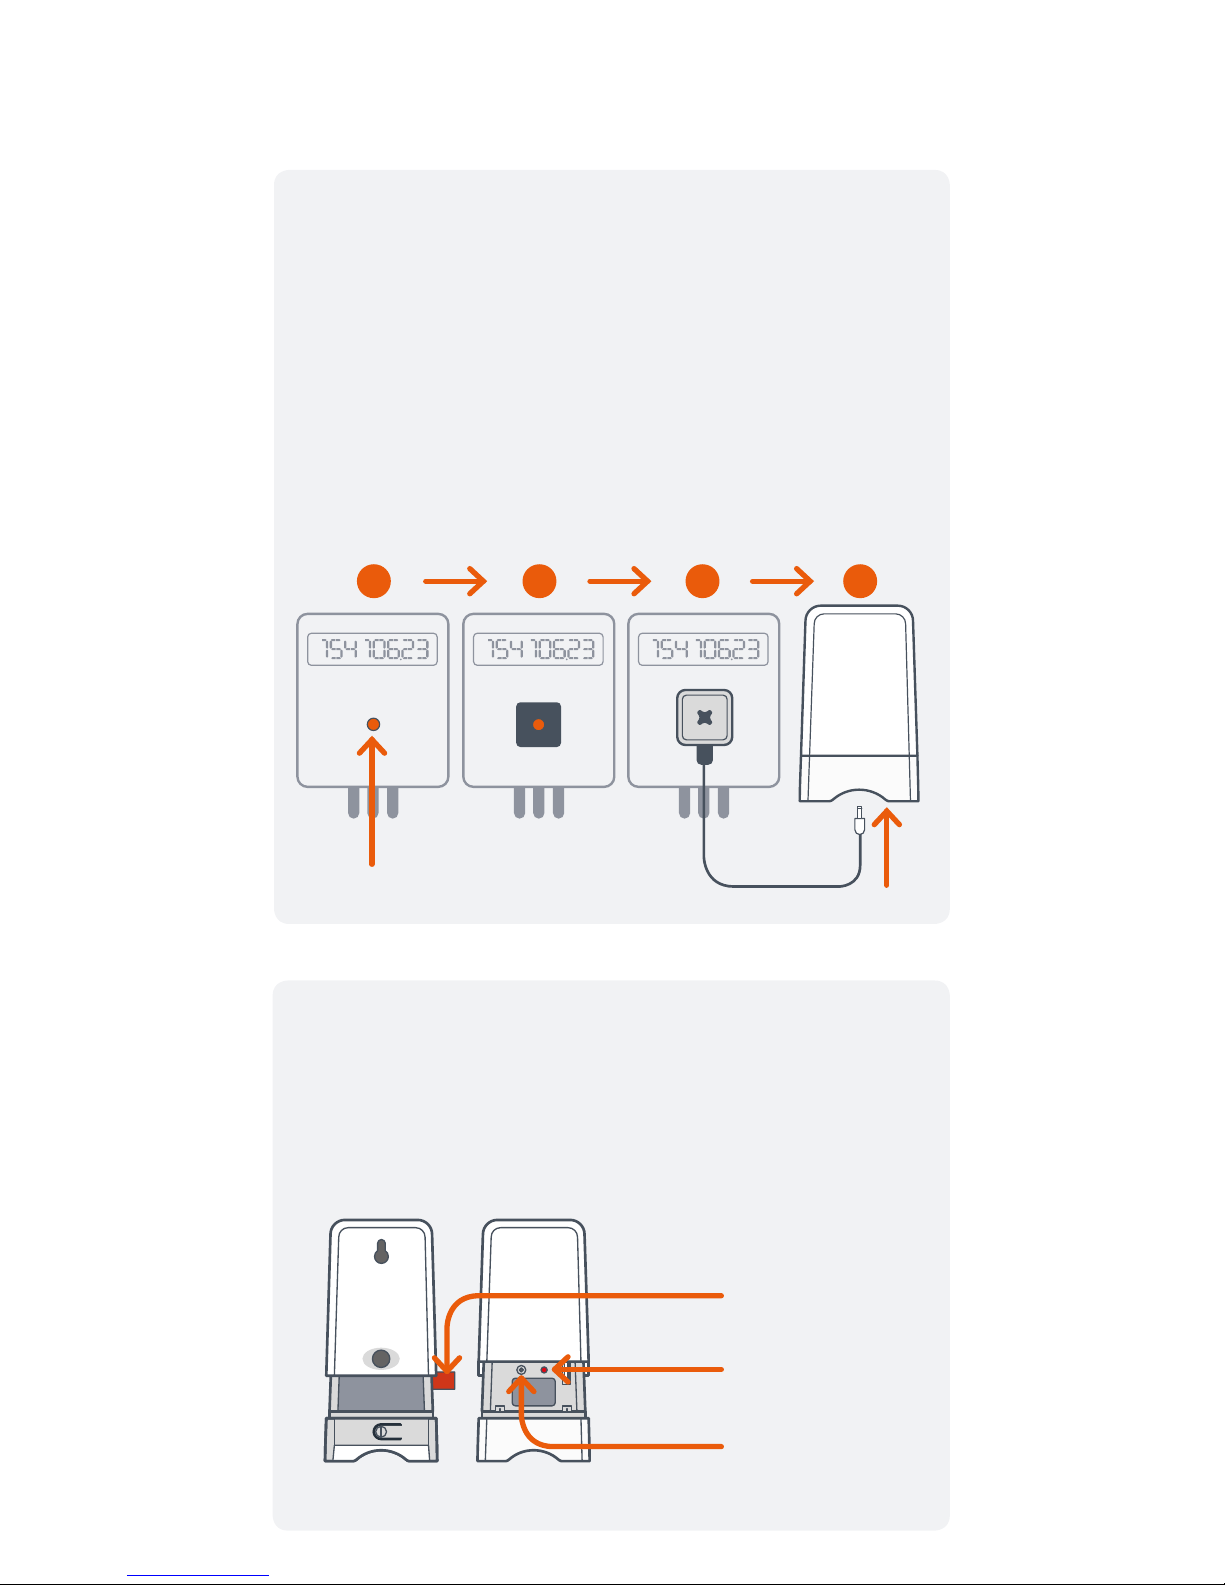
4 easy steps to install
1. Attach the sensor
1. Find the pulse output on your meter.
2. Stick the square Velcro around the pulse output
on the meter.
3. Place the LED sensor over the square Velcro on the
meter ensuring that the geo logo is facing you.
4. Insert the other end of the LED cable to the bottom
of the transmitter.
2. Activate the transmitter
Open the transmitter by pressing the button on
the back and pulling the outer cover away. Remove
the battery tab. The red light will ash to show the
unit is working.
Battery tab
Flashing red LED
Button A
1 2 3 4
Pulse output
(imp/kWh)
Page 4
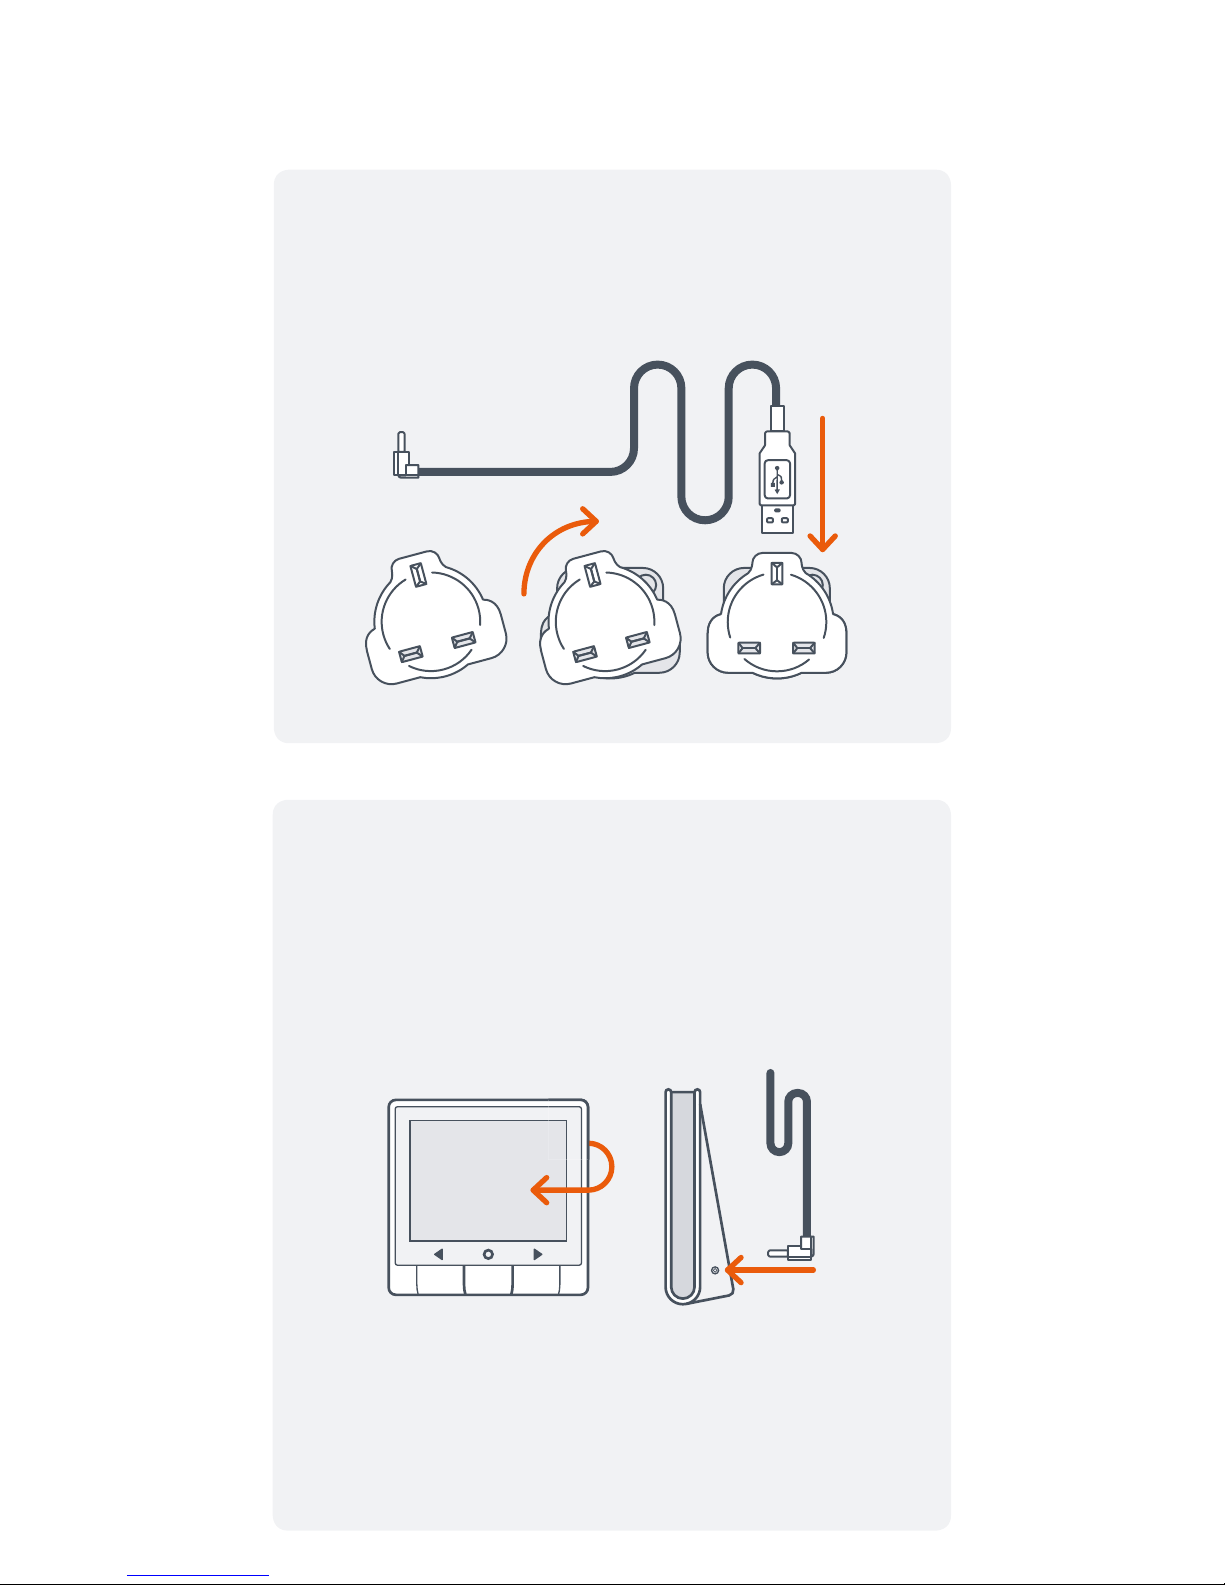
3. Assemble the power supply
Insert and twist clockwise to clip the pins to the
power supply. You will hear a small ‘click’ when
the two lock correctly.
4. Plug it in
Put the plug into a mains socket and insert the black
power cable into your monitor. The monitor will light
up and ask you to enter the correct year, month, day
and time. Use the a and c buttons to change values
and the ¡ button to save.
Now you are ready to start using your monitor. You
may want to set the monitor for your particular tariff
and budget, please see the frequently asked
questions for help with this.
Page 5
Navigation and settings
Left and right buttons
Use the A and C buttons to view different periods of
use. You can see consumption for today, yesterday, this
week, last week, this month and last month.
Middle ¡ button
To change units, press the ¡ button to view the power
and energy in cost, carbon or kW. Another press of the
¡
button presents your budget for the selected time
period on the lower digits.
Settings
Enter the settings menu by pressing and holding the
¡
button. Use the A and c buttons to navigate to the
required setting and press the ¡ button to conrm.
When a setting ashes, it can be changed using the
A
and c buttons and saved by pressing the ¡ button.
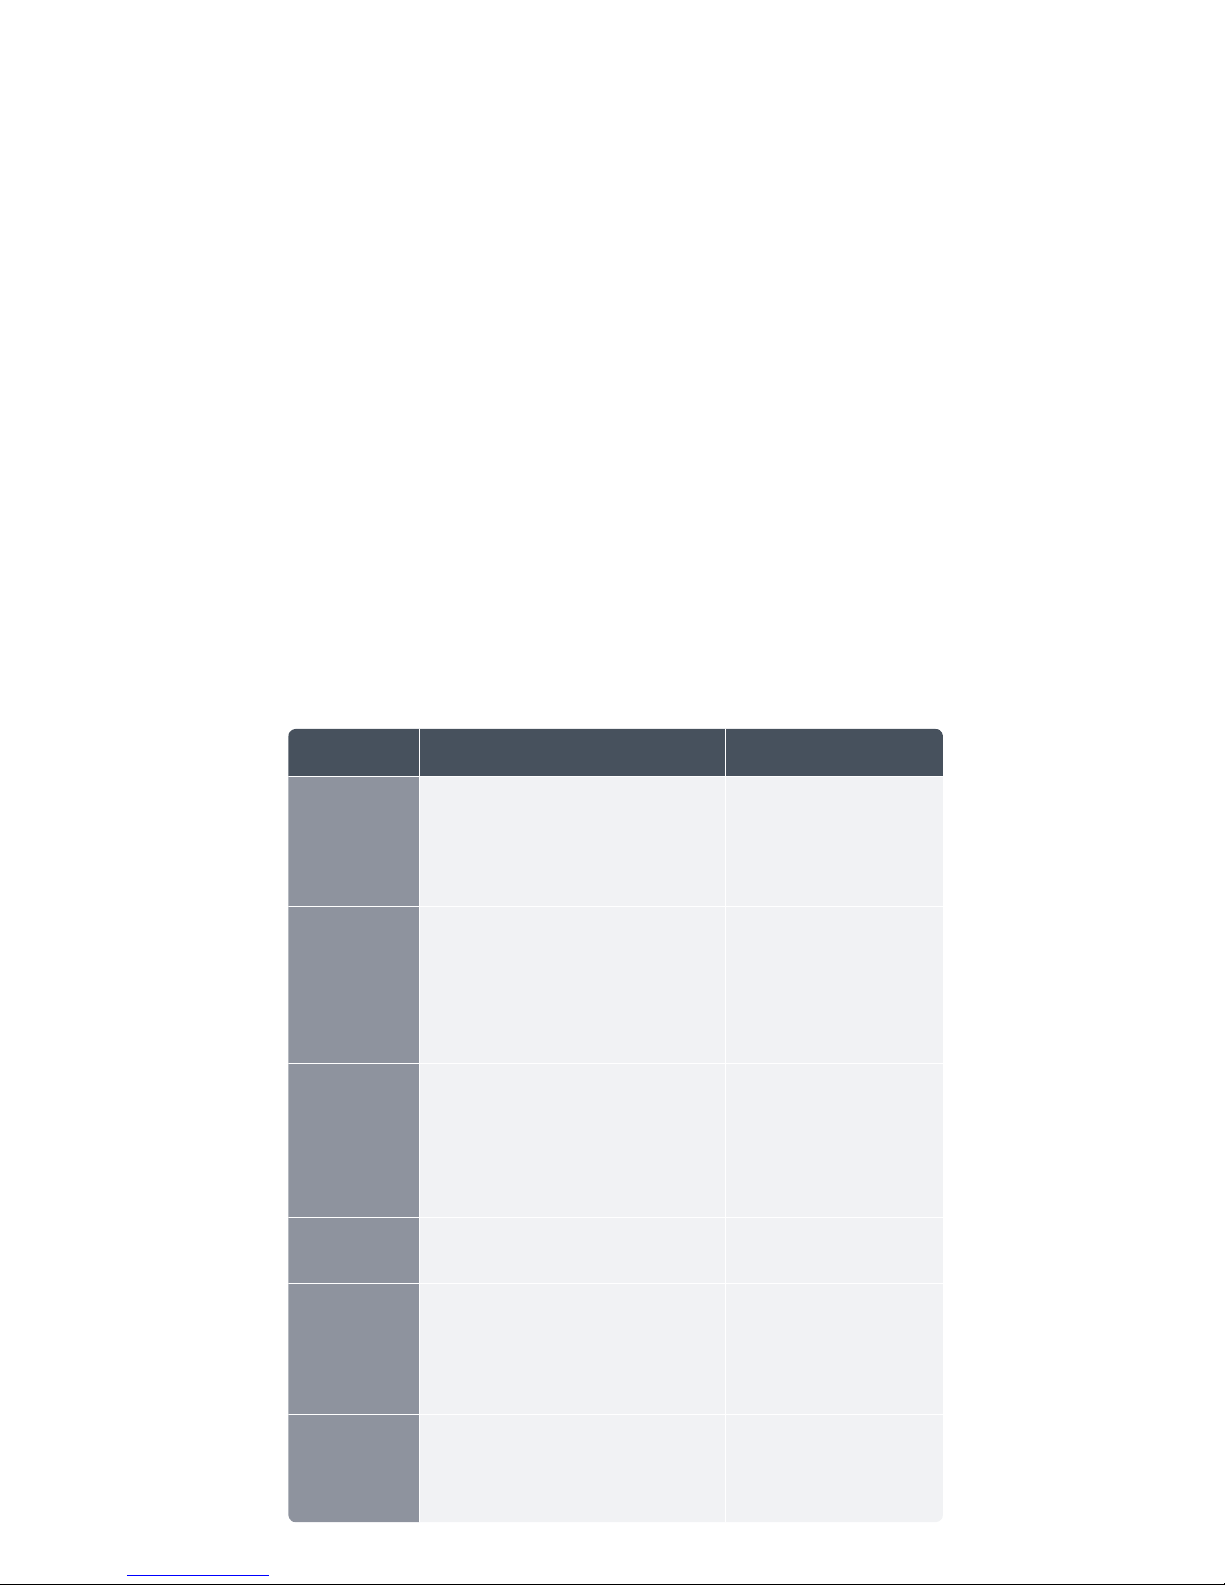
Setting What does it mean? What are the options?
BUDGET Your budget is your monthly
electricity expenditure (e.g.
your direct debit amount) and
is used by the budget bar.
Please set this to your
own expenditure. The
default will change
depending on what
currency is set.
CURRENCY You can choose the currency
for the budget and tariff.
The default is £
(Pounds), and €
(Euros), kr (Kroner)
or a general currency
symbol can be
chosen.
TARIFF You have one or more
electricity tariffs that tell the
monitor how to calculate costs.
You can set up to
three tariffs and a
standing charge. The
default will change
depending on what
currency is set.
DATE+TIME You can set your date and time. You can change year,
month, day and time.
BACKLIGHT Your monitor is always on,
but you can change when
the monitor is lit up by its
backlight.
By default, your
backlight is always
on but you can set
the backlight to be
timed.
LED
SENSOR
Choose the value that matches
the pulses per kilowatt hour
setting for your meter.
By default this is 1000
imp/kWh.
Page 6

Frequently asked questions
How do I set the tariff on my monitor?
In the settings menu select the TARIFF option. You can set
up to three tariffs and a standing charge. Use the a and c
buttons to change the tariff value and ¡ button to save. You
can set up to two different tariffs for different times of day:
these can be found on your energy bill or by speaking to
your energy provider.
How do I set my budget?
In the settings menu, select the BUDGET option. Enter your
monthly expenditure using the a and c buttons and ¡
button to save.
How do I turn the backlight off?
In the settings menu, select the BACKLIGHT option. You can
select either ALWAYS ON or TIMED (by pressing the a and c
buttons). If you select TIMED, you can set the time when you
would like the backlight to be on (DISP ON) and off (DISP OFF).
The signal strength indicator is not showing and
the speedometer does not show?
In some cases it may be necessary to move the display closer
to the transmitter. If this does not work, the transmitter and
display may need to be paired again. Please see below for
more information.
How do I change currency?
In the settings menu select the CURRENCY option. Use the
a
and c buttons to change the currency value and ¡ button
to save. This will change the tariff and budget settings so
remember to check these afterwards.
How long is the transmitter battery life?
The battery life is up to two years. When the battery indicator
starts to ash replace the 3 X 1.5V AA Alkaline / LR6 batteries
in the transmitter.
My monitor is under or over reading?
Check the LED SENSOR setting in the menu to ensure it
matches the setting for your meter. Most meters provide
1000 pulses per kilowatt hour, but this is not always the case.
Use the a and c buttons to change the sensor value and ¡
button to save.
How do I re-pair the transmitter to the display?
To enter pairing mode on the display, hold down the a and c
buttons together for 3 seconds. Once at the next screen, hold
down the middle button for 3 seconds until the Display shows
“Pair?”. The display is now ready to pair to the transmitter.
Remove the cover from your transmitter, then press and
hold the pair button (next to the red light) until you see a
red LED light. When you release the pair button the LED
ashes as the transmitter pairs with the display unit. Your
display should now read “Paired LED”. Press any button to
return to the main screen.
Page 7
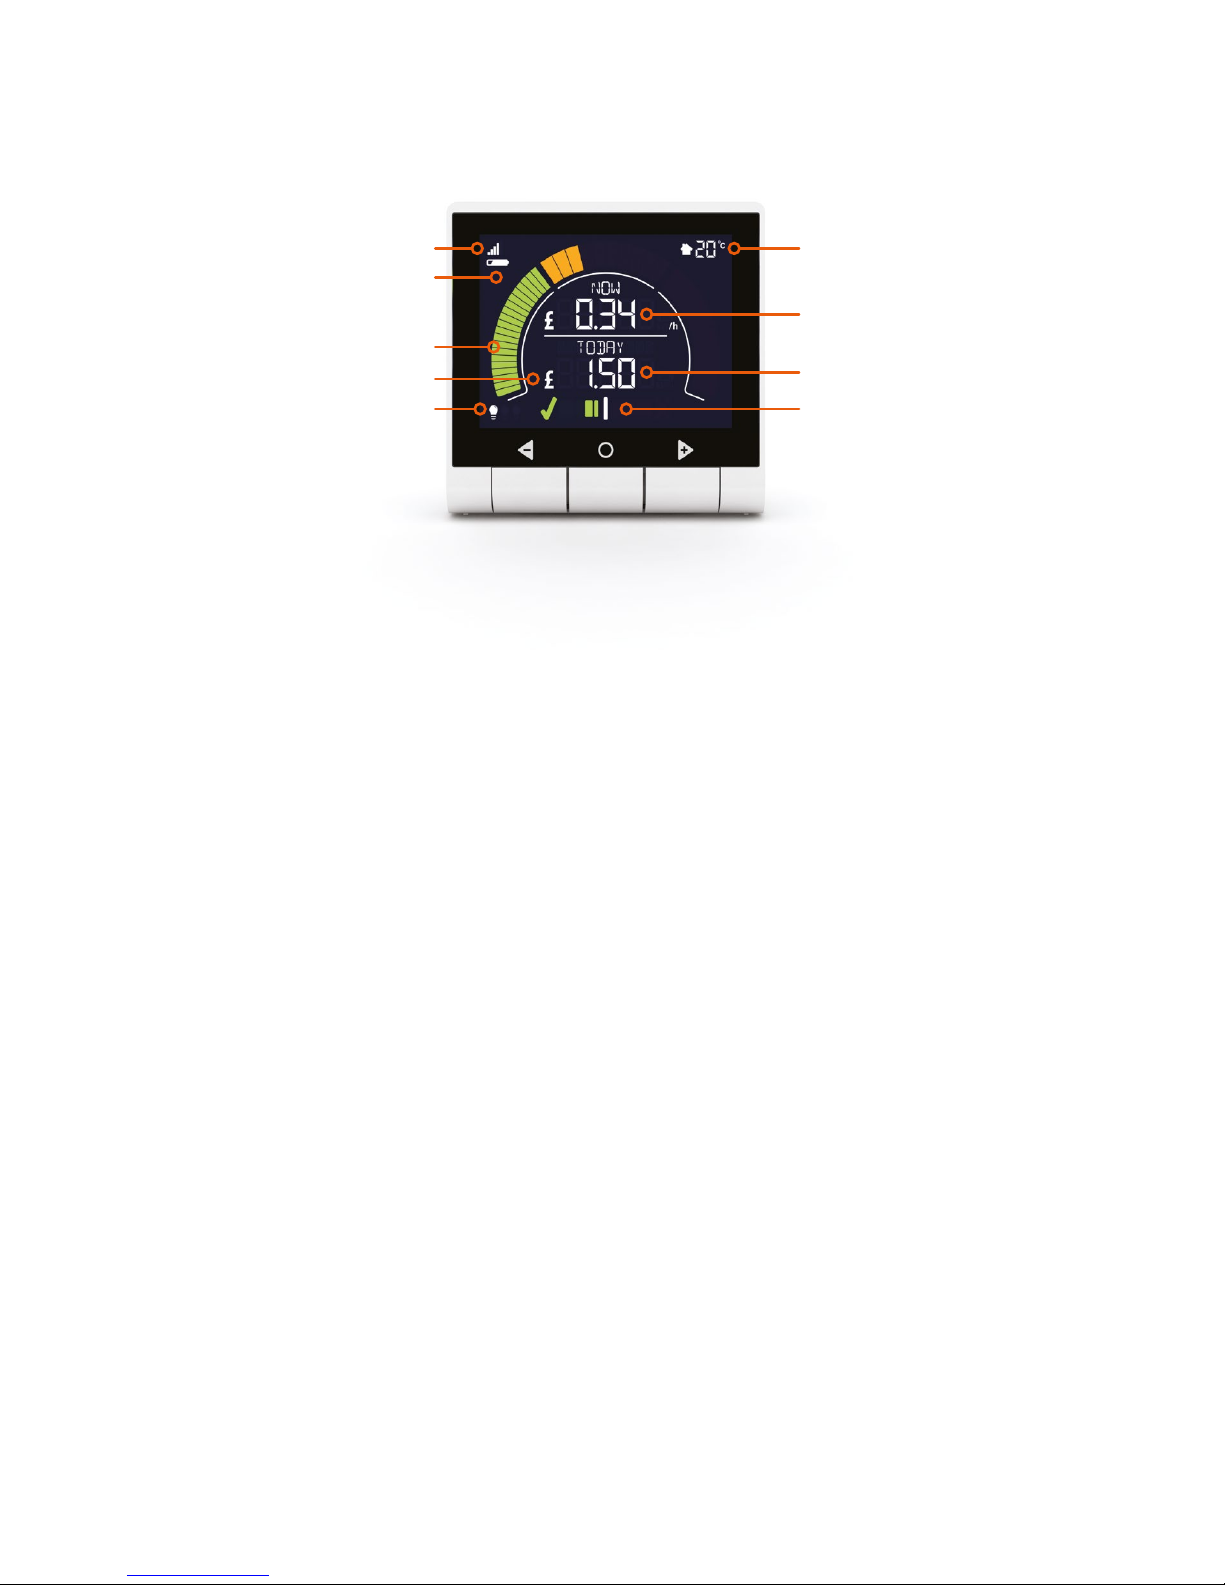
Temperature
Upper digits
Lower digits
Budget bar
Signal strength
Battery
indicator
Speedometer
Currency
Tariff
Start using your Minim+ monitor
Signal strength
Shows the signal strength of the transmitter.
Battery indicator
Flashes when the batteries in the transmitter are low.
Speedometer
Shows your current rate of consumption in kW.
Currency
Shows the cost of the energy consumed in the
selected currency (£, €, Kr or a general symbol).
Tariff
Shows if you are on the lowest, middle or highest
of your tariff rates.
Temperature
Shows you the room temperature where your
monitor is placed.
Upper digits
Shows your current rate of consumption in cost,
carbon or kW.
Lower digits
Shows the total energy consumed or the budget for
the chosen time period.
Budget bar
Shows if you are predicted to be over or under your
budget for the time period.
Page 8
Technical specifications
Minim+ monitor
This product is intended to be
used indoors in a domestic
environment. It is not suitable
for outdoor use.
Supply voltage:
240Vac, 50Hz
Operating voltage:
5Vdc (display) and 3 x AA
alkaline batteries (transmitter)
Operating power:
< 0.6W
Operating temperature:
0 to 40ºC
Operating humidity:
0 to 85% non-condensing
Manufacturer:
Green Energy Options Ltd.
3 St. Mary’s Court, Main Street,
Hardwick, Cambridge
CB23 7QS, UK
This product CE
Declaration of Conformance
can be retrieved from:
https://www.geotogether.com
/cedoc
Safety notice
Please be aware of these simple safety precautions
when using these products. Safe operation may
be hindered if used in a way that is not specied by
the manufacturer.
Keep products away from water and other
liquids. Disconnect from the mains power
supply before cleaning (with a soft, dry cloth
only). Please contact your supplier if any
components appear damaged or faulty.
Your products are designed to be used in an
indoor, domestic environment only.
To protect the environment, these products
and their batteries must be disposed of safely
at the end of their life.
These products are CE approved.
These products comply with RoHS regulations.
The meter transmitter is double insulated.
 Loading...