

Genuis N5000, N5000 User Manual
ENGLISH
Hardware Installation
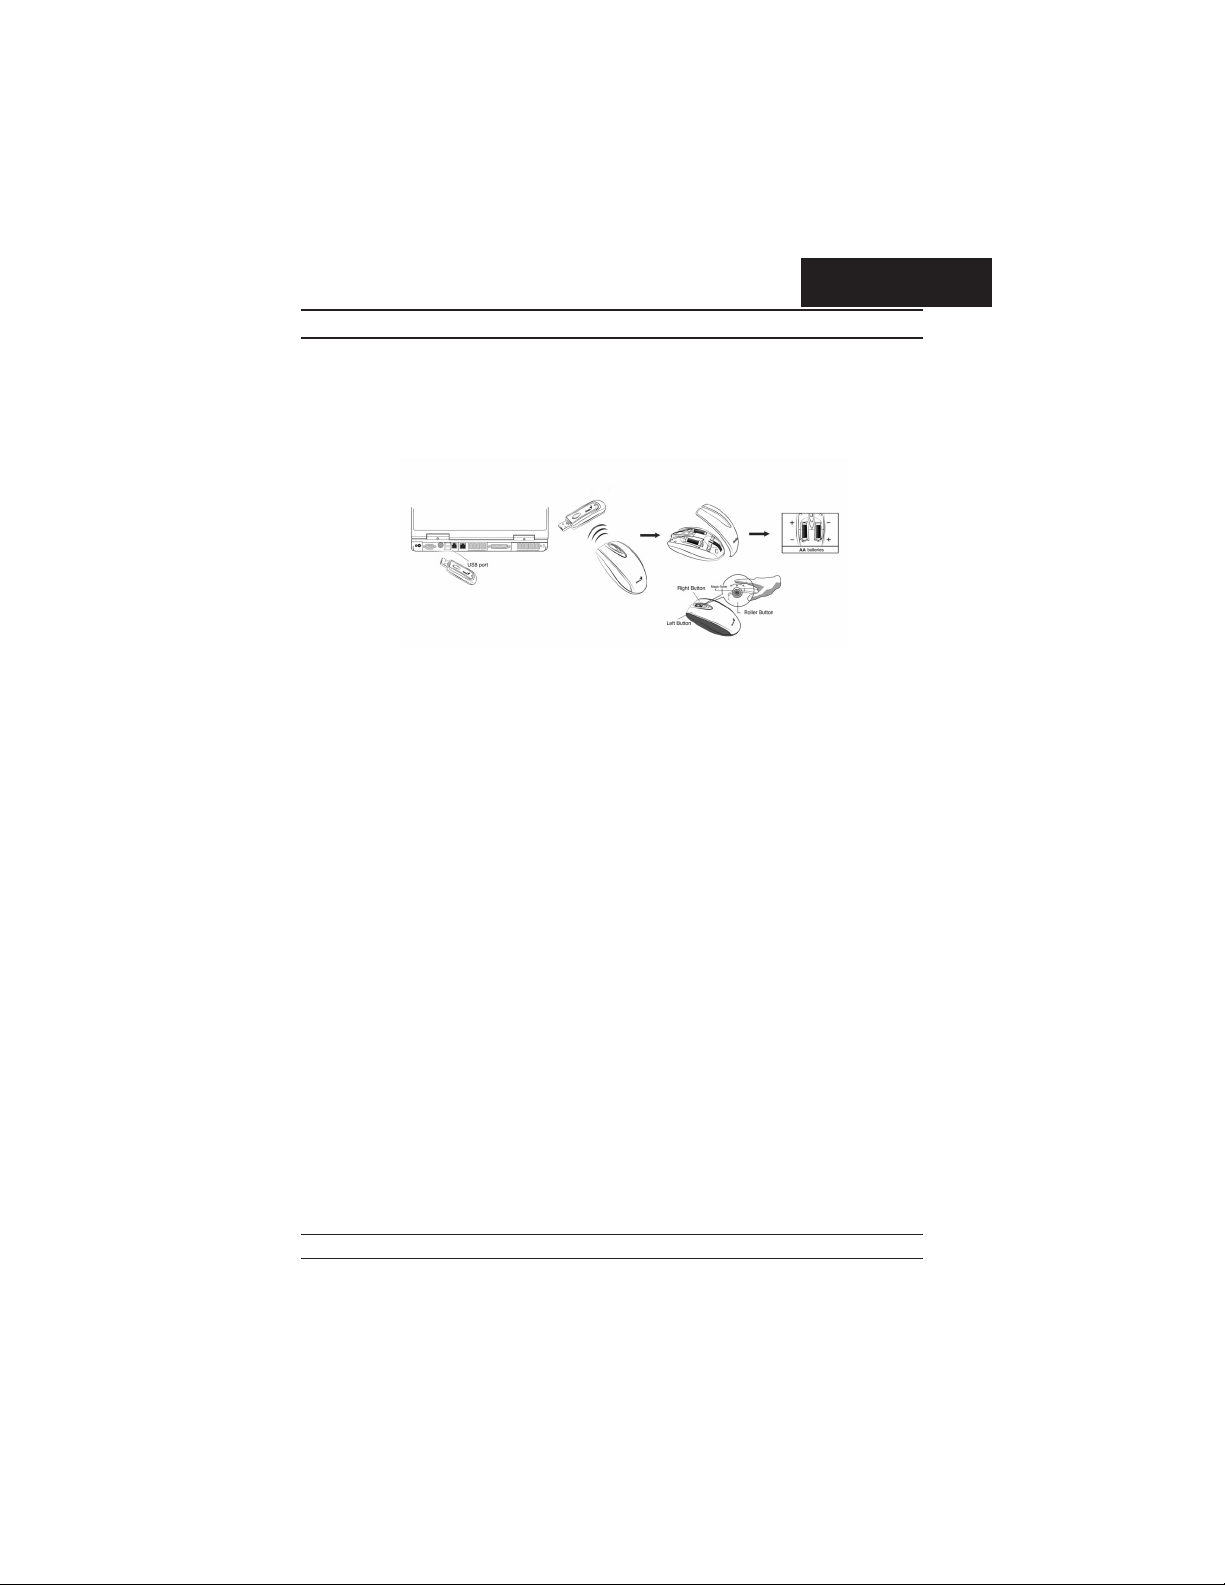
1. You can connect the receiver to a USB port of a PC
2. Install two AA batteries in the mouse.
3. Turn on your computer.
4. After you open Windows, please press the button on the receiver first and then
press the button under the mouse for channel setting.
Important: Remember do not put the batteries in the wrong direction, use the same
types of batteries. Also, keep all drinks away! If any spill occurs on the receiver,
unplug the USB connector first and clean the receiver immediately. Please switch the
button to "off" under the mouse once you don't use it for a long time, and remove the
batteries if you do not use this device for at least two weeks.
Warning: (Troubleshooting)
1. Please do not use wireless optical mouse on a desk which is made of glass, mirror, iron, or black velvet. Also, a flat surface is necessary or the optical sensor
will error easily. When you use wireless optical mouse on a desk that is made of
metal, try using a pad and reduce the receiving distance.
2. Before the first installation is completed (channel setting ready), the mouse will
not work in DOS.
3. The wireless optical mouse channel provides 256 ID-codes, and it automatically
selects the ID # for your mouse. You can only set up one wireless optical mouse
at a time. But if you have additional wireless optical mouse sets in an area of 10
square meters, more interference will occur between the receiver and your
mouse.
4. If you feel the mouse does not move smooth as usual, then the batteries have lost
their charge, so please replace them.
5. The wireless optical mouse with radio frequency gives you free movement and
an enjoyable experience. For optimal performance, place the receiver at least 8
inches (about 20 cm) away from the mouse and other electrical devices, such as
the computer, monitor, and etc.
1
Button Assignments
Software Installation
1. Make sure the mouse is connected to the computer.
2. Put the Setup disk (or CD) into the disk drive.
3. Follow the instructions on the screen to finish the software installation.
Factory Setting
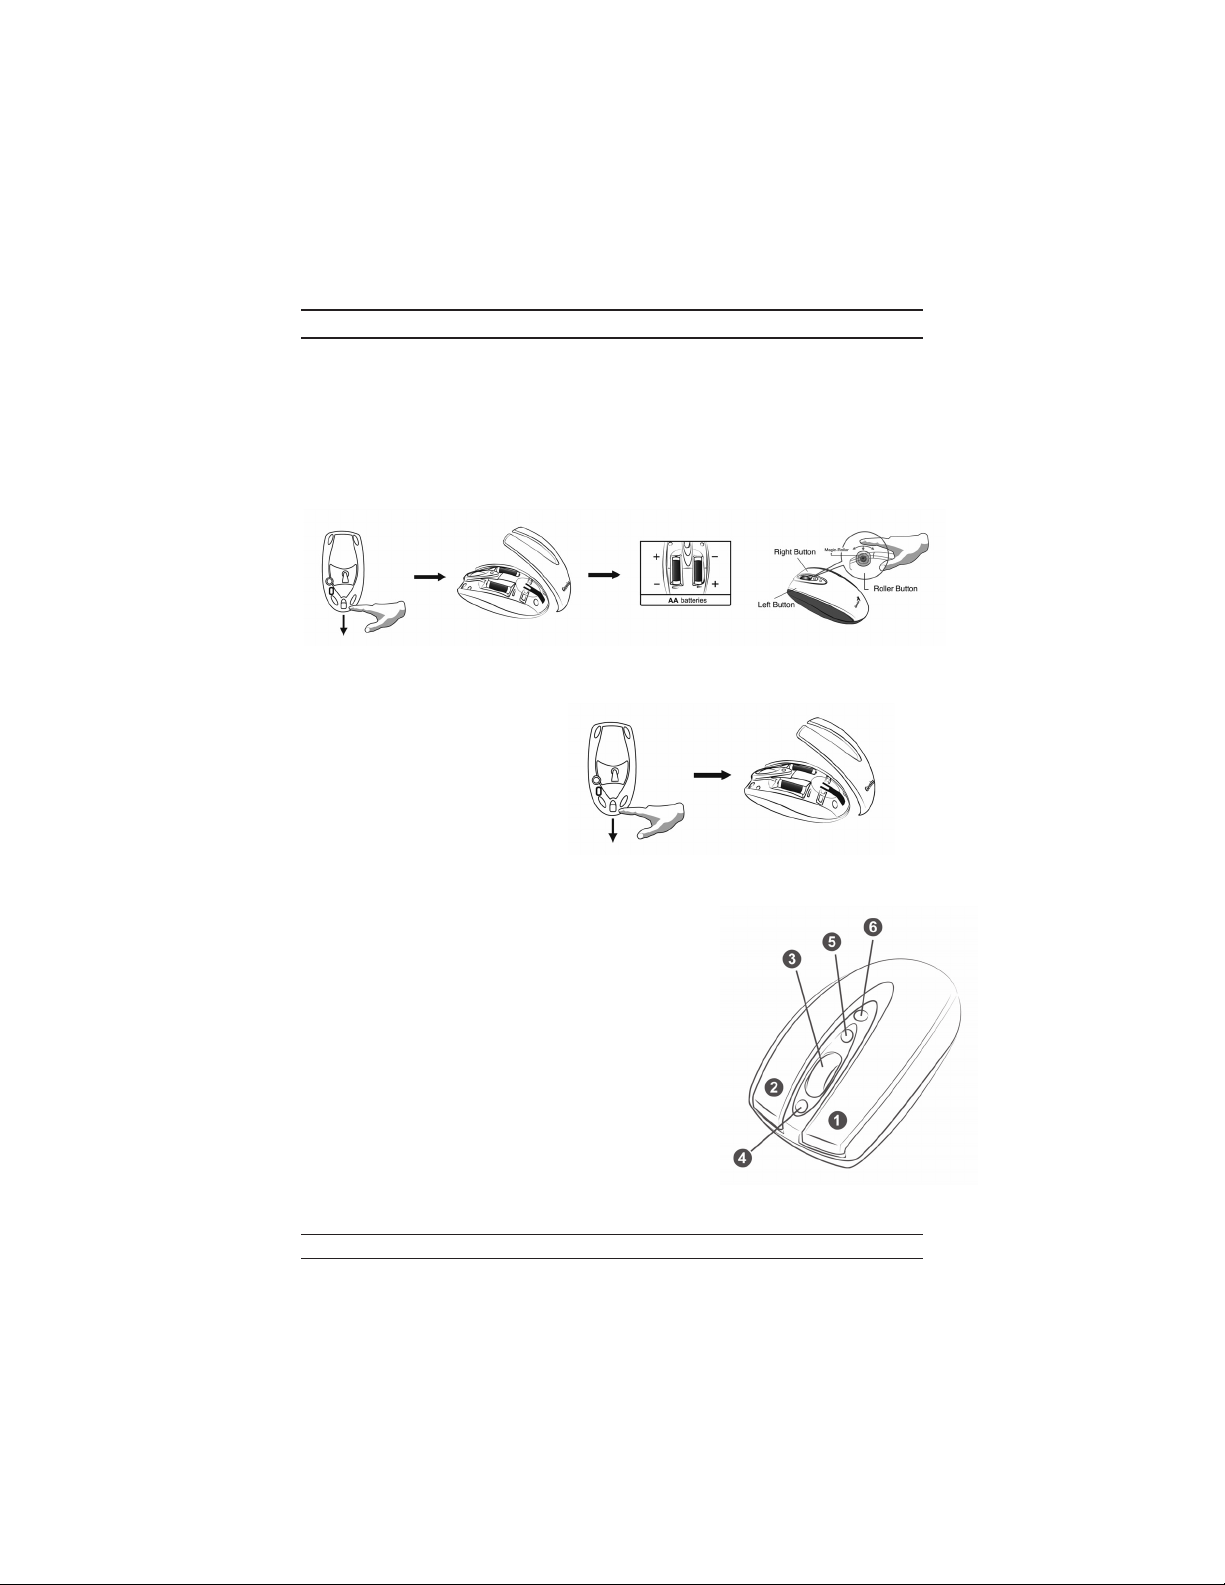
Changing the Faceplate
Push the button underneath
the mouse towards the front,
and the faceplate will pop off
Button Assignments
1. Left Button: Provides traditional mouse functions
like click, double click and drag.
2. Right Button: You can assign this button to fre
quently used keyboard and mouse functions in ad
dition to features like Easy Jump, Auto-Panning,
Zoom, etc.
3. Magic-Roller: Press the “Magic-Roller” to surf
the Internet and Windows documents.
4. Back: See previous page when viewing the Inter
net.
5. Forward: Go to next page when viewing the
Internet.
6. Application Switch: You can switch between ac
tive programs and documents.
-
-
-
-
2
 Loading...