

Page 1
Optical
USB
version
Manual
Page 2
Hardware Installation
Hardware Installation
Connect the Mouse to Your Computer
Note: Always turn off your computer before you connect or disconnect
your mouse unless you’re using a USB device in Win98.
1.
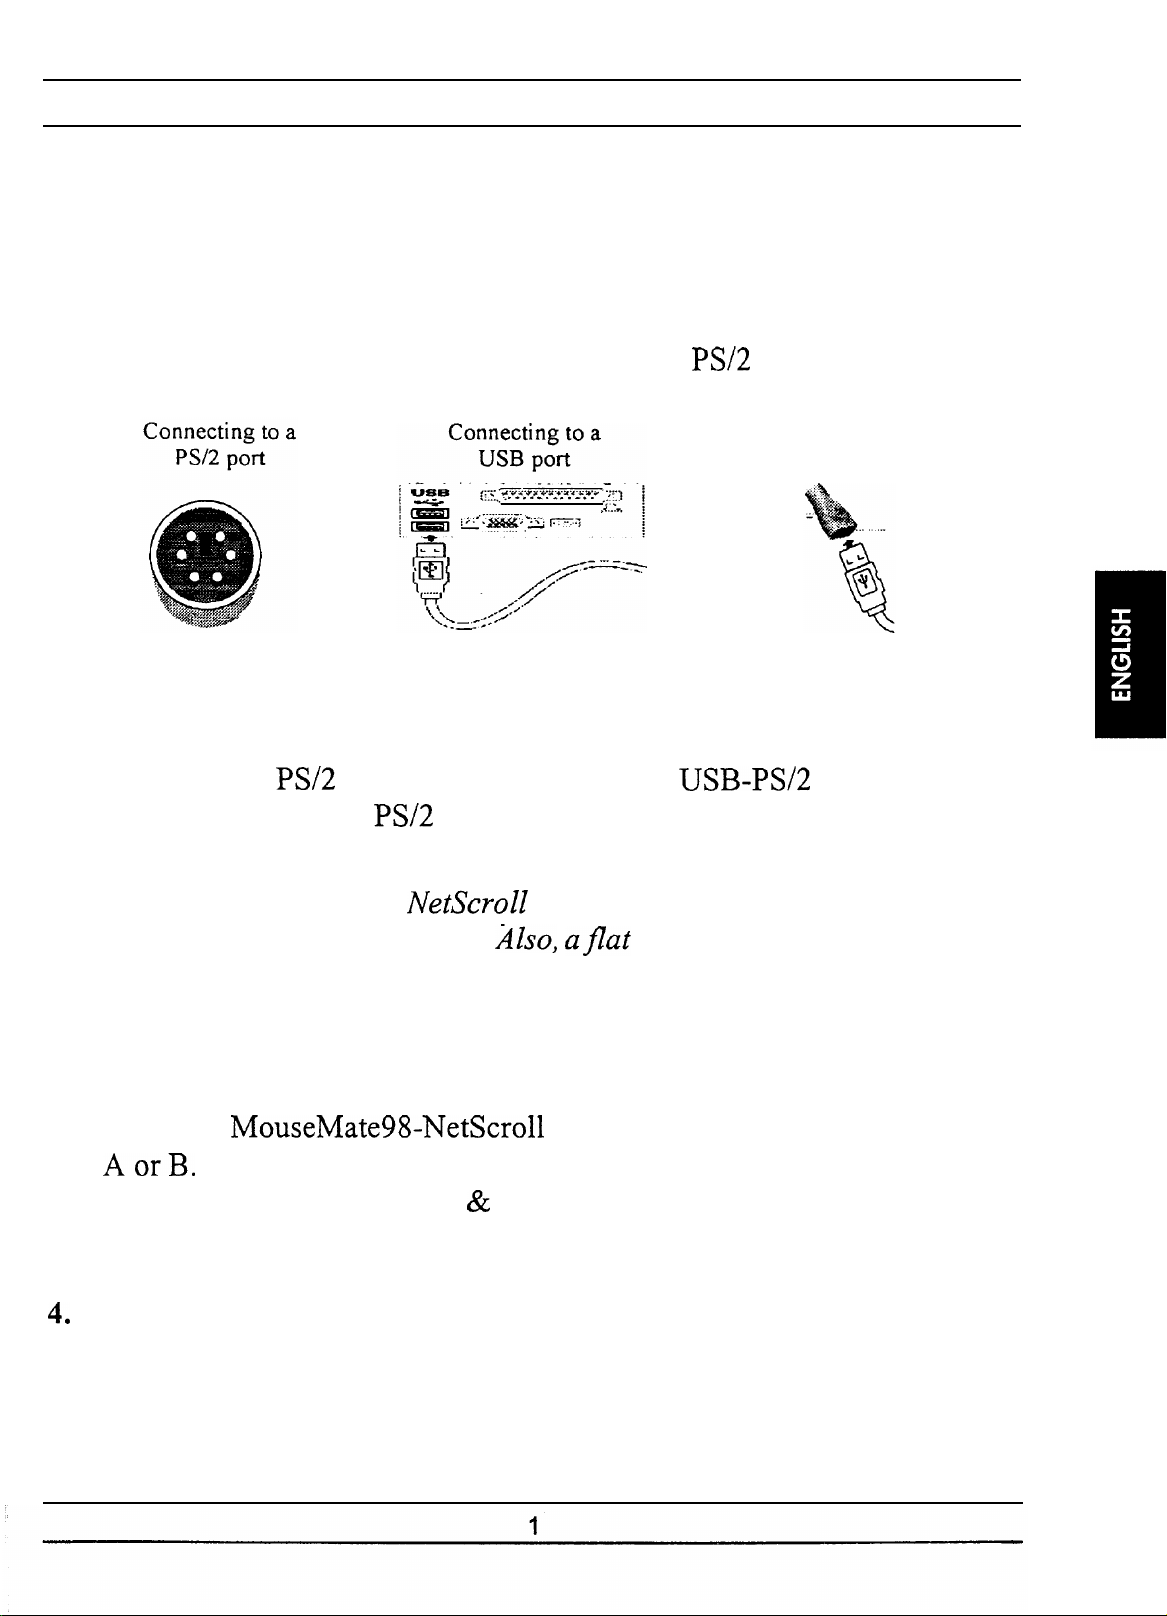
You can connect the mouse to either a USB or
port.
Connecting USB
to 6-pin port
2.
For the USB mouse port, connect your mouse to the USB port on your
computer.
3.
If you have a
need to use the 6-pin
4.
Turn on your computer.
Warning: Please do not use
glass, mirror, iron, or black velvet.
port and you are using the
adapter.
Optical on a desk which is made of
surface is necessary or the
model, then you
Optical Sensor will error easily.
Software Installation
Installing the MouseMate software
1.
Insert the
2.
Open the “Start” menu (Ctrl
3.
Type A:SETUP (or B:SETUP) in the command line box and select
“OK”.
Optical software diskette into drive
Esc), and select “Run”.
Follow the instructions on the screen, and when the installation is complete, restart your computer.
Page 3
Factory Settings
Factory Settings
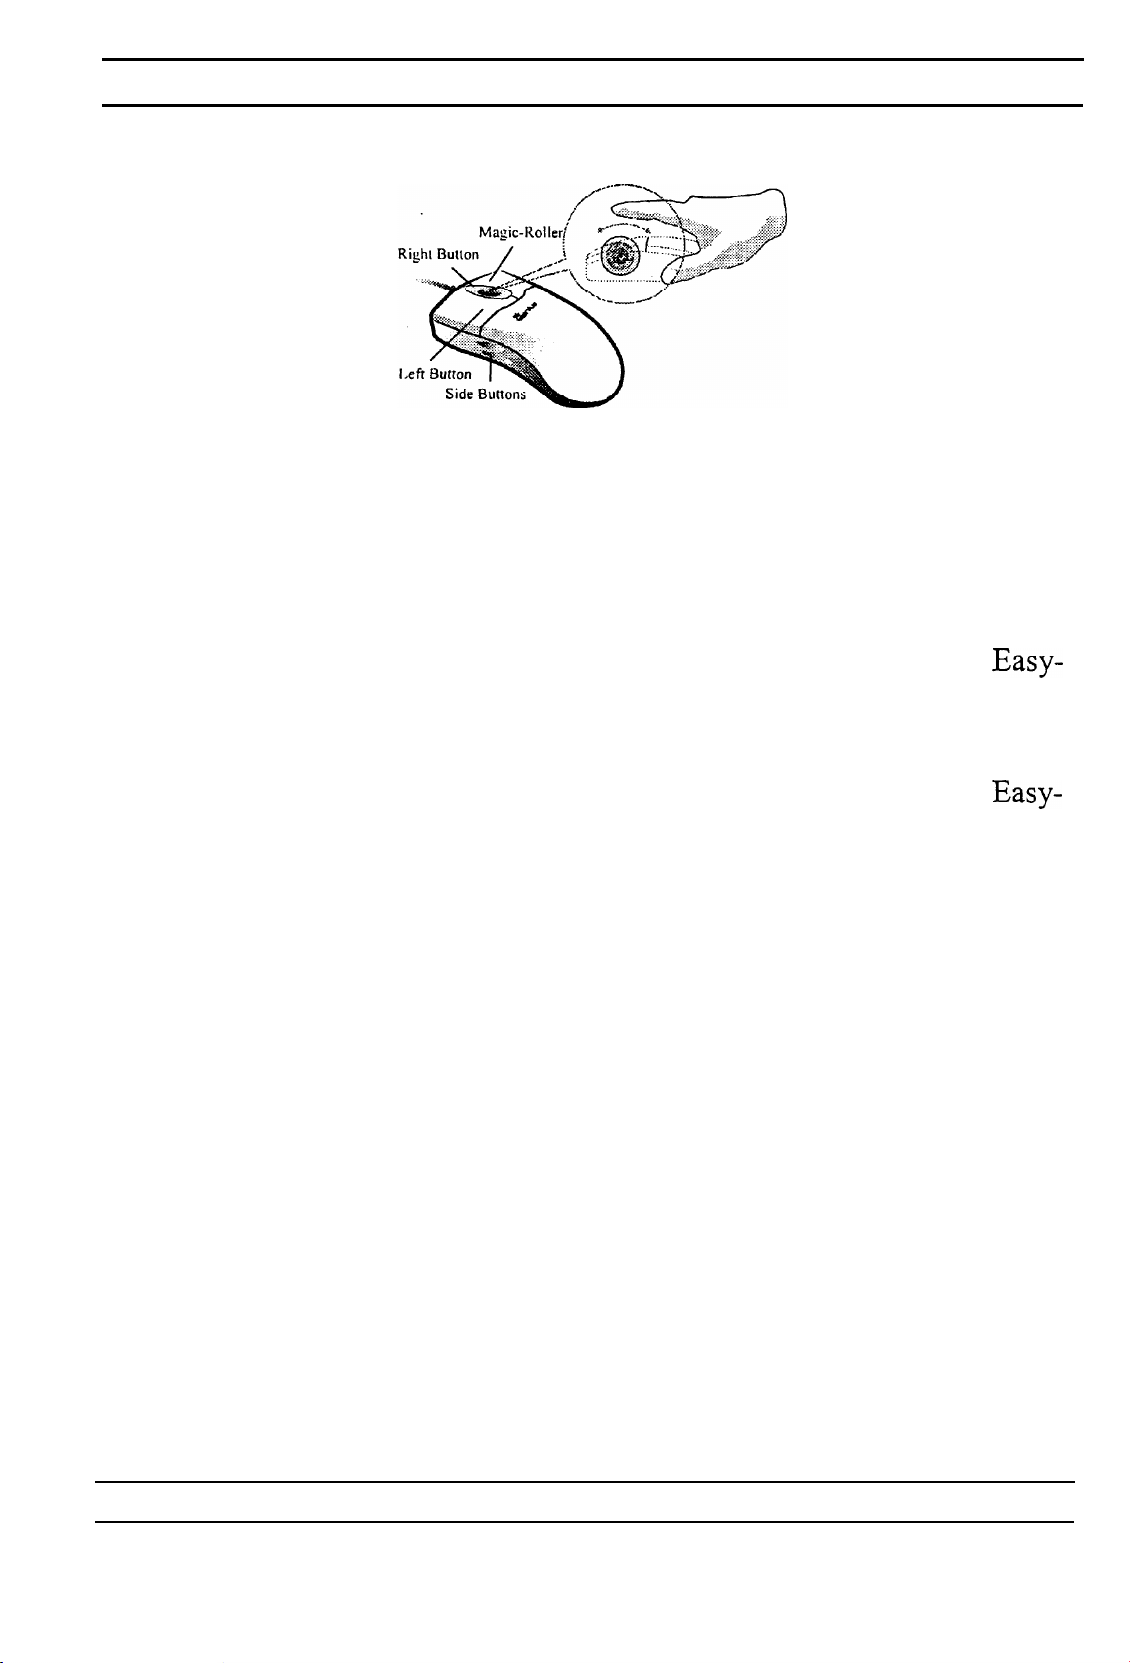
Magic-Roller
Left Button
Right Button
Roller Button
Side Buttons
Horizontal Scrolling
Press the “Magic-Roller” to surf the Internet and Windows documents
Provides traditional mouse functions such as click,
double click and drag.
You can assign this button frequently used keyboard
and mouse functions in addition to features like
Jump, Auto-Panning, Zoom, etc.
You can assign this button frequently used keyboard
and mouse functions in addition to features like
Jump, Auto-Panning, Zoom, etc.
You can assign certain functions to the upper or lower
side button with the roller.
Hold the Shift key while pressing the Magic-Roller in the direction you
want to go or move the cursor over the horizontal scroll bar and press
the Magic-Roller.
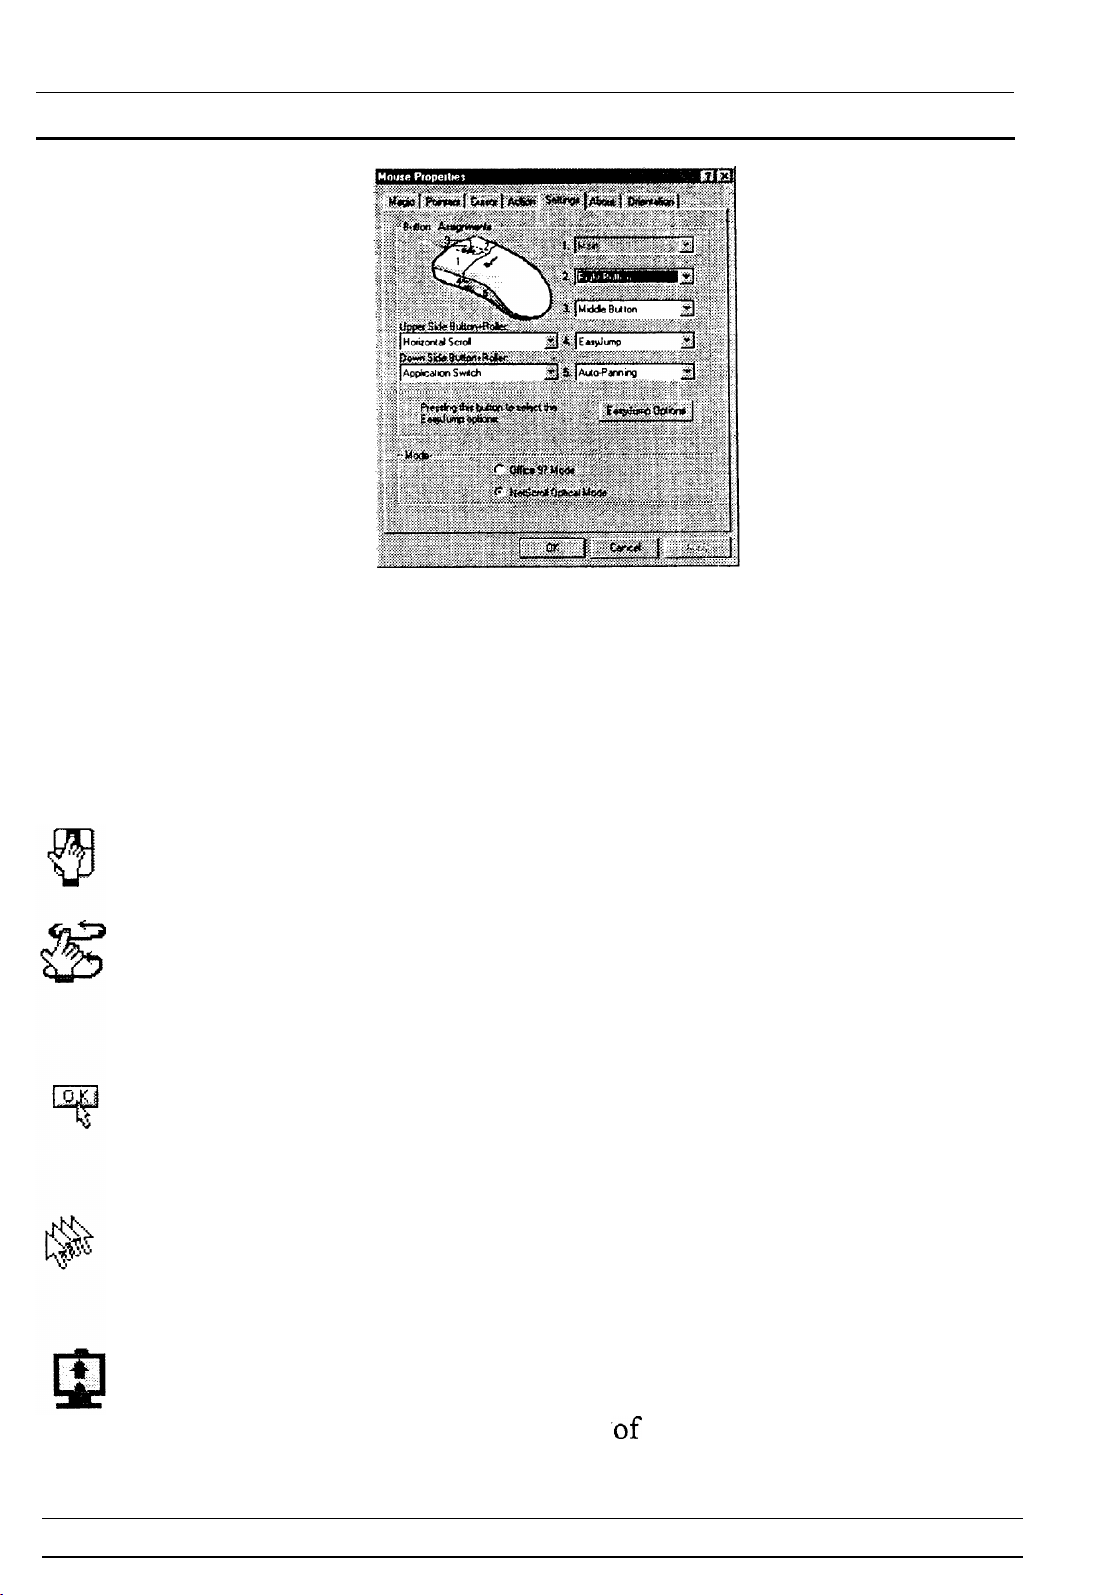
Button Assignments
The Button Assignment feature lets you work in a more efficient way
because you can assign the most frequently used commands in Windows
to the mouse buttons.
2
Page 4
MouseMate Software Features
l
Side Buttons: You can assign the following functions (Application/Document, Horizontal Scroll, Last/Next Page, and Zoom In/Out) to
the upper or lower side button with the roller.
MouseMate Software Features
Browsing Speed
Browsing
Direction
Button Find
Trails
You can adjust the browsing speed when you surf
the Internet or Windows documents.
Move the “Magic-Roller” forward and the screen
will browse to the top of the document. Move it in
reverse and the document will go in the opposite di-
rection
Automatically positions the cursor on the default
button, usually the OK button, when the dialog box
appears on your screen.
This option makes it easier to find the cursor when
Loop
using an LCD monitor. This option cannot be used
if your monitor does not support it.
When you move the cursor to the top (or bottom) of
the screen, it will automatically move the cursor to
the bottom (or top)
,
3
the screen.
Page 5
MouseMate Software Features
Mouse Speed
Double Click
Speed
This function lets you adjust the speed at which the
pointer moves across the screen.
Use this function to set the double click speed of the
mouse.
Select this option if you want to have
operate with the right mouse button as the pri-
mary button.
Pointers Folders This lets you change the shape of the cursor.
Office 97 Mode
Genius Mode
Only supports Microsoft Office 97 along with some
new applications. Features include zoom, scrolling
and Auto-scrolling features. It’s similar to Micro-
soft’s
Supports all applications that use scrollbars, includ-
ing
with zoom, Auto-panning, and scroll-
Abdut
orientation
ing functions.
Click here to open the Genius
This function lets you set the angle when you move
the mouse upward. It gives you a more comfortable
angle when holding the mouse. This function works
best with a portable trackball.
4
Page 6
MouseMate Software Features
for Windows
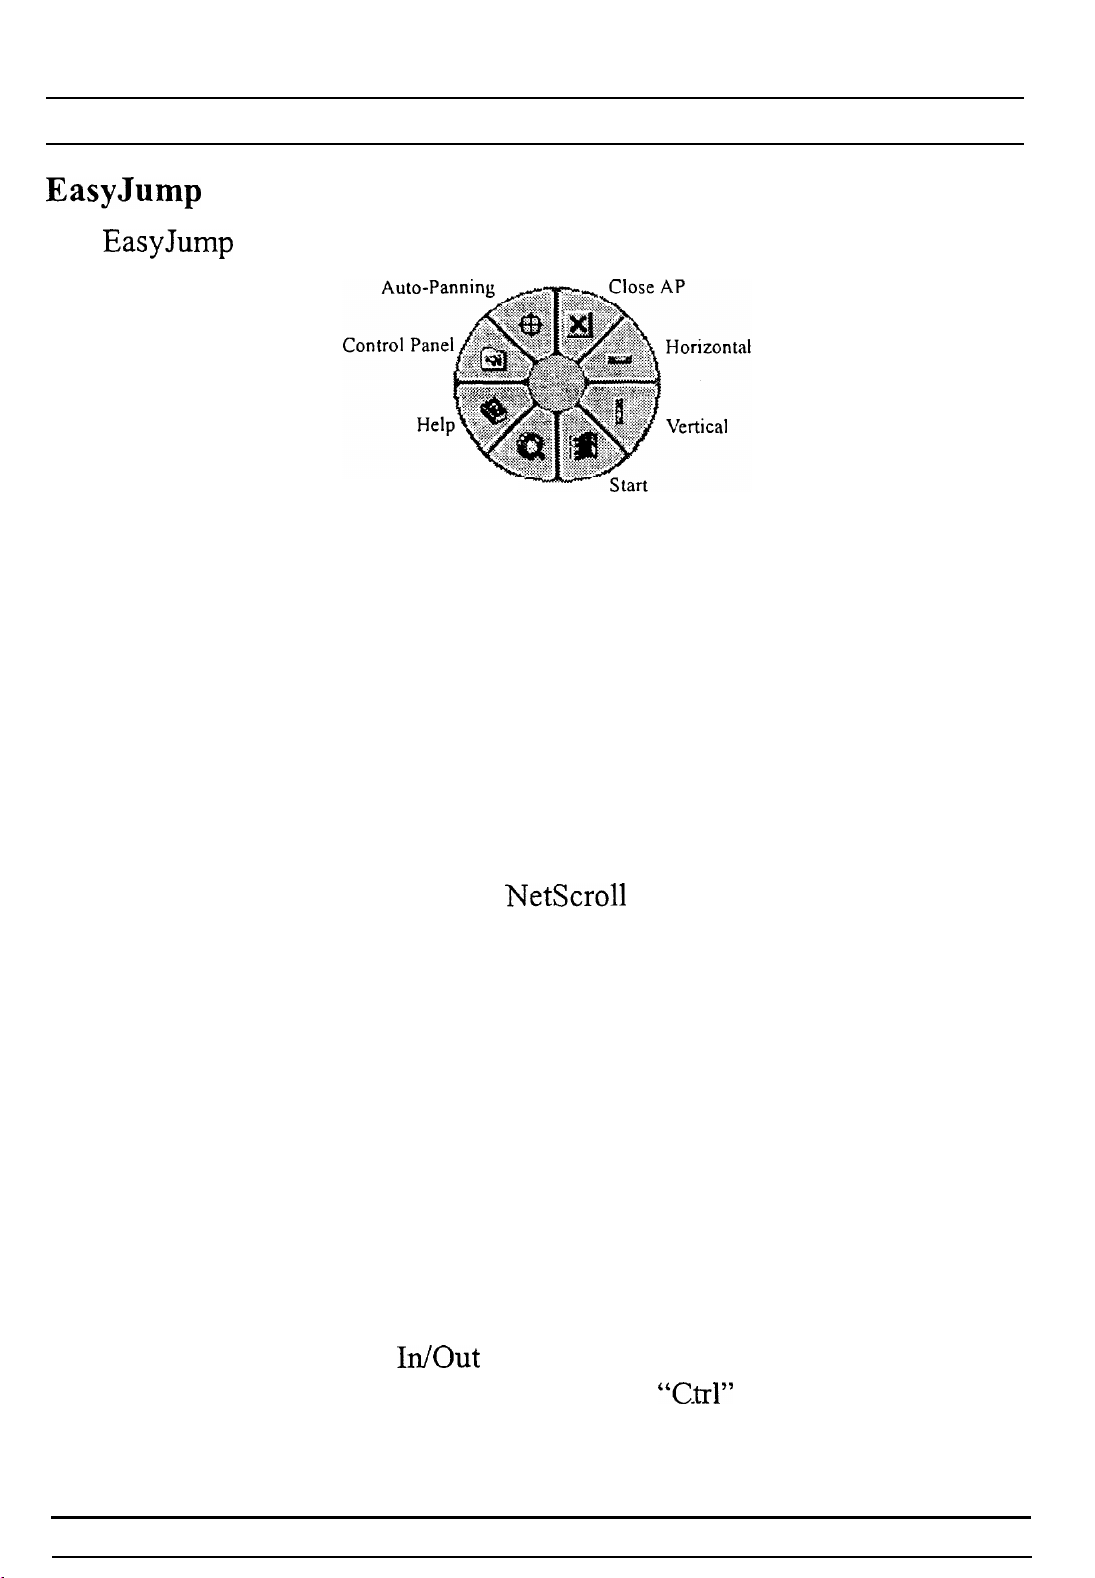
lets you open eight special functions quickly.
Internet Access
Close AP
Horizontal
Vertical
Start
Close the application you are using.
Moves the cursor to the
Moves the cursor to the
Activates the Windows
horizontal scroll bar.
vertical scroll bar.
Start menu.
Internet Access This function opens Browser to access the Internet.
Help
Control Panel
Auto-Panning
This opens the Help menu.
Opens the
Move the mouse, and the document will move in
the direction you move the mouse.
Optical control panel.
Switch Applications
When the right-button or Magic-Roller is set to “Switch AP”, you can
quickly switch from one open application to another without moving the
mouse. To switch to a specific application, press the the right button or
the Magic-Roller to select the application.
Zoom function for Office 97 and IE4.01 Applications
Press the “Ctrl” key and move the “Magic-Roller” forward (or backward) to set the Zoom
Zoom In/Out: set the right button to be the
right button and move the “Magic-Roller” forward (or backward) to enlarge (or decrease) the document window.
function. You can also use just one hand to
function, press the
5
Page 7
Troubleshooting
Auto-Panning
You can set this function in the Button Assignment menu. Move the
mouse, and the document moves in the direction you just moved.
Uninstall
Optical
Follow these instructions to remove the
your hard disk. In Windows
Programs and move to
Scroll Optical.
Customize
Optical
This section shows you how to
control panel, you can double-click on the icon in the
task bar or select the “Genius
Optical program group.
the
Optical Software
Click the right button on the
cal” to close the software.
Troubleshooting
Optical software from
on the Start button, select
Optical. Then click on Uninstall
Optical. To open the
Optical” icon from the
and select “Close
Opti-
Why can’t my
stalled the driver under Windows
A. 1.
2.
A.
B.
c.
D.
Make sure
Make sure there are no other driver conflicts in Windows
To do
Open the “Control Panel” from “My Computer”.
Run “System” icon, and select the “Device Manager” folder.
Point to item list under the “Mouse” icon.
Press the “Remove” button to remove the other Mouse Driver.
E.
Re-install the
this:
Optical use the Magic-Roller function after I in-
is properly connected.
Optical driver.
6
 Loading...