

Page 1
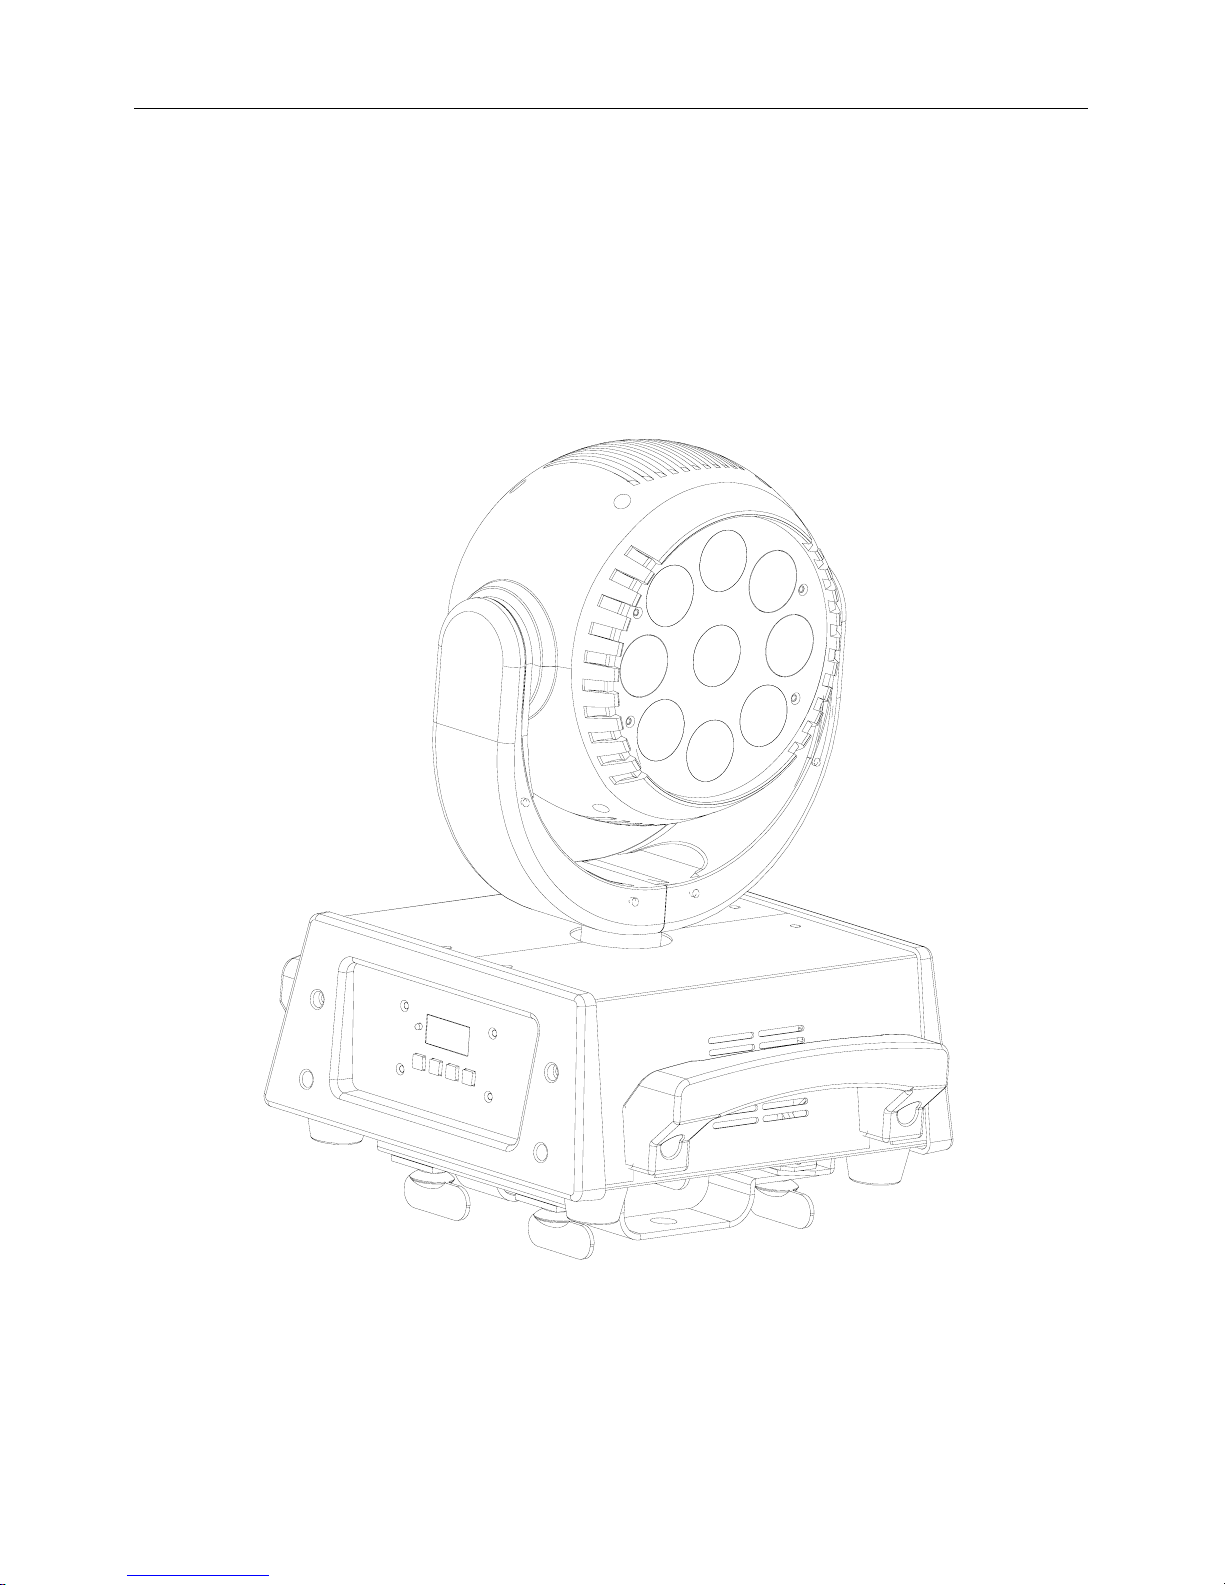
USER MANUAL
(SRM-6113)
Page 12 of 18
Page 2

INTRODUCTION
Thanks for your purchase of our product, SRM-6113 High Power LED Moving Head. It can works under
auto mode、sound and Master Slave mode with 16 built-in programs. The product has a long lifespan and
10W 4IN1 cree LED. It is exquisite and applicable for all kinds of entertaining occasions. Before you begin,
please read instructions carefully. If you meet with any problem, please contact with your distributor nearby.
MAIN FEATURES
■DMX-512 control, 12 channels
■DMX, AUTO, SOUND,Master Slave mode
■RGBW control with 255 grades
■RGBW total dimmer is 0~100%
■Shutter speed is 10/sec ~1/10secs
■9X10W 4IN1 RGBW LED
■PAN scan angle 0~540 degrees
■Tilt scan angle 0~230 degrees
UNPACKING
SRM -6113 High Power LED Moving Head
USER MANUAL
TENICAL SPECIFICATION
Type--------------------------------------------------------------------------SRM-6113 High Power LED MOVING HEAD
Light Source--------------------------------------------------------------------------------9X10W 4IN1 RGBW CREE LED
Voltage----------------------------------------------------------------------------------------------------96~240VAC 50/60Hz
Power----------------------------------------------------------------------------------------------------------------------------110W
Dimension------------------------------------------------------------------------------------------------------250X300X390MM
Weight-------------------------------------------------------------------------------------------------------------------------6.45KG
SAFETY WARNING
For your convenient and accurate operation, please read following information carefully.
Suitable for indoor use only.
Put it in a dry, well -ventilated place in case of short cut caused by erosion of moisture and rain.
Do not install it nearby hot sources in case that rising temperature of lamp damages itself.
Do not barrier vent in order to ventilate well and dissipate in time.
Connect the fixture with power source, which has a ground line and voltage of power source, should accord
with rating voltage.
Page 13 of 18
Page 3
If fuse was damaged, change the same type.
You can only choose accessories the manufacturer provides when need repairing.
Ambient temperature of the lamp should not exceed 40
If any p roblem, contact with professional technicians working in our after-sales service department.
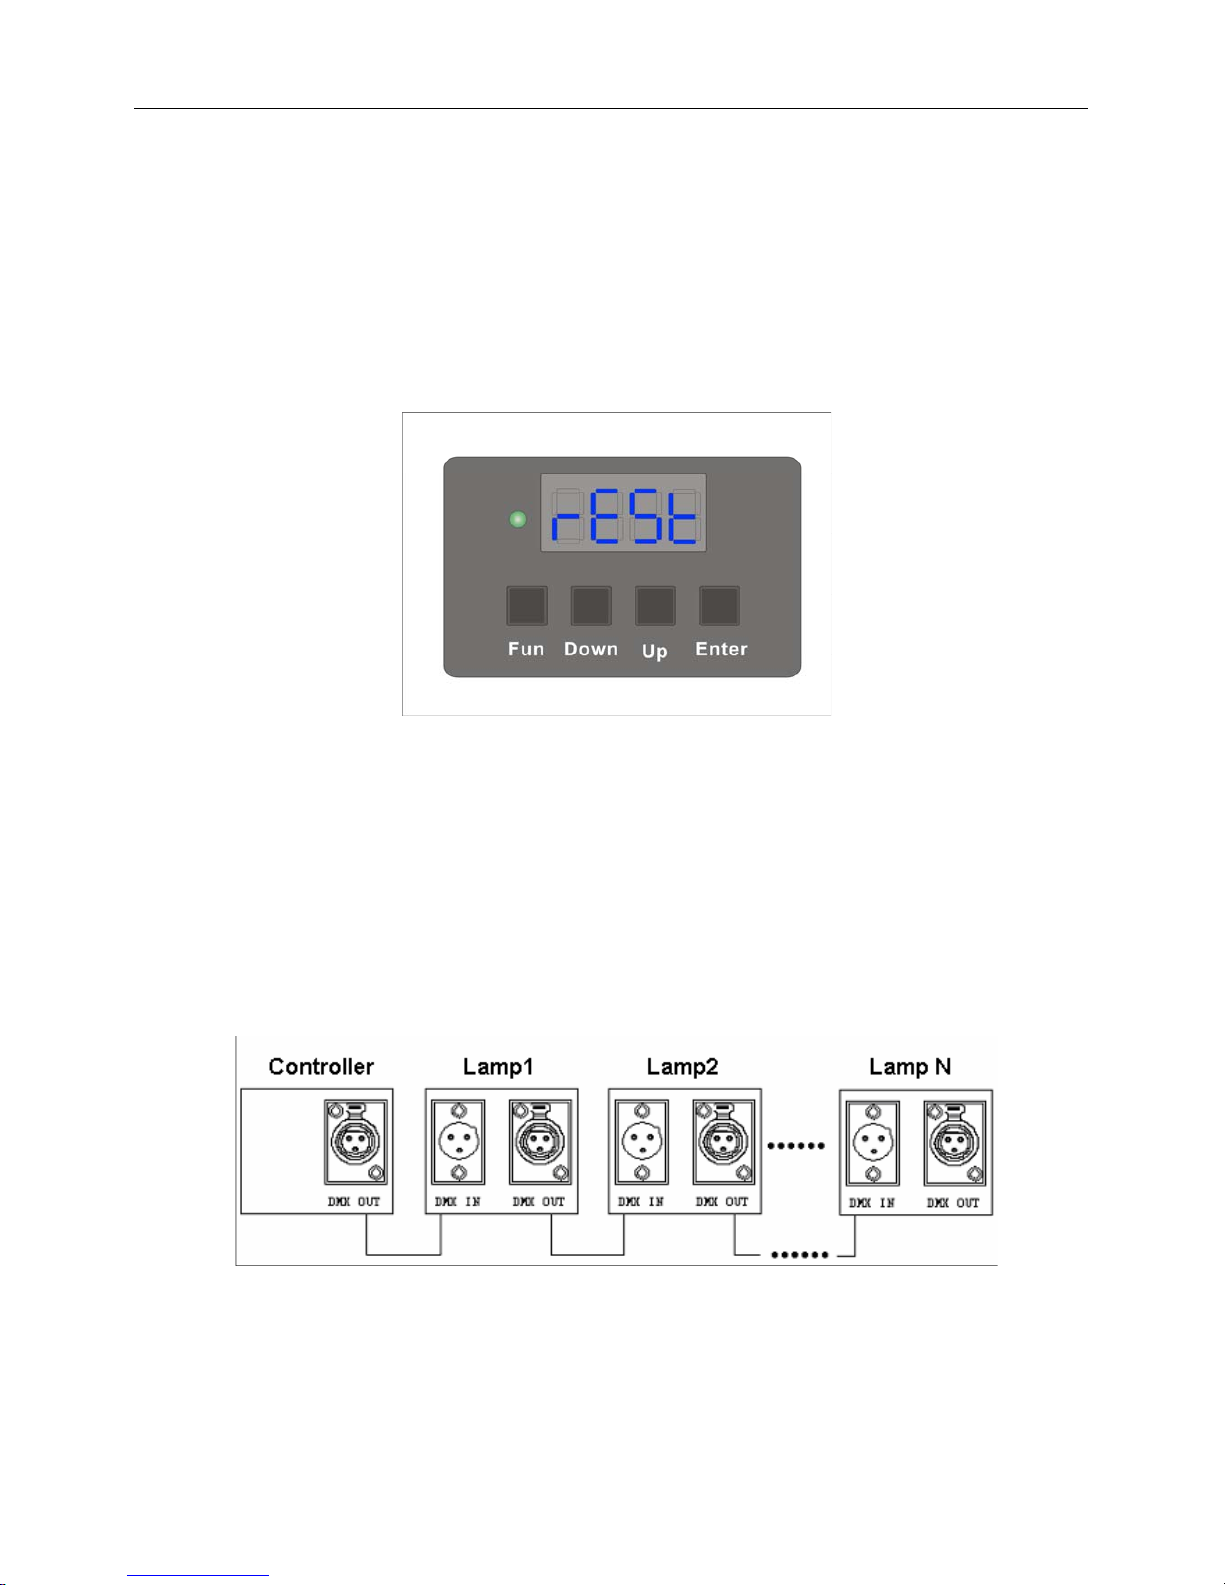
PANEL REVIEW
FUN: function menu or withdraw the last menu
ENTER: enter the next menu or definite present value.
UP: increase one step each time
DOWN: decrease one step each time.
INSTALLATION AND SETTING
1. MULTI-FIXTURES CONNECTION
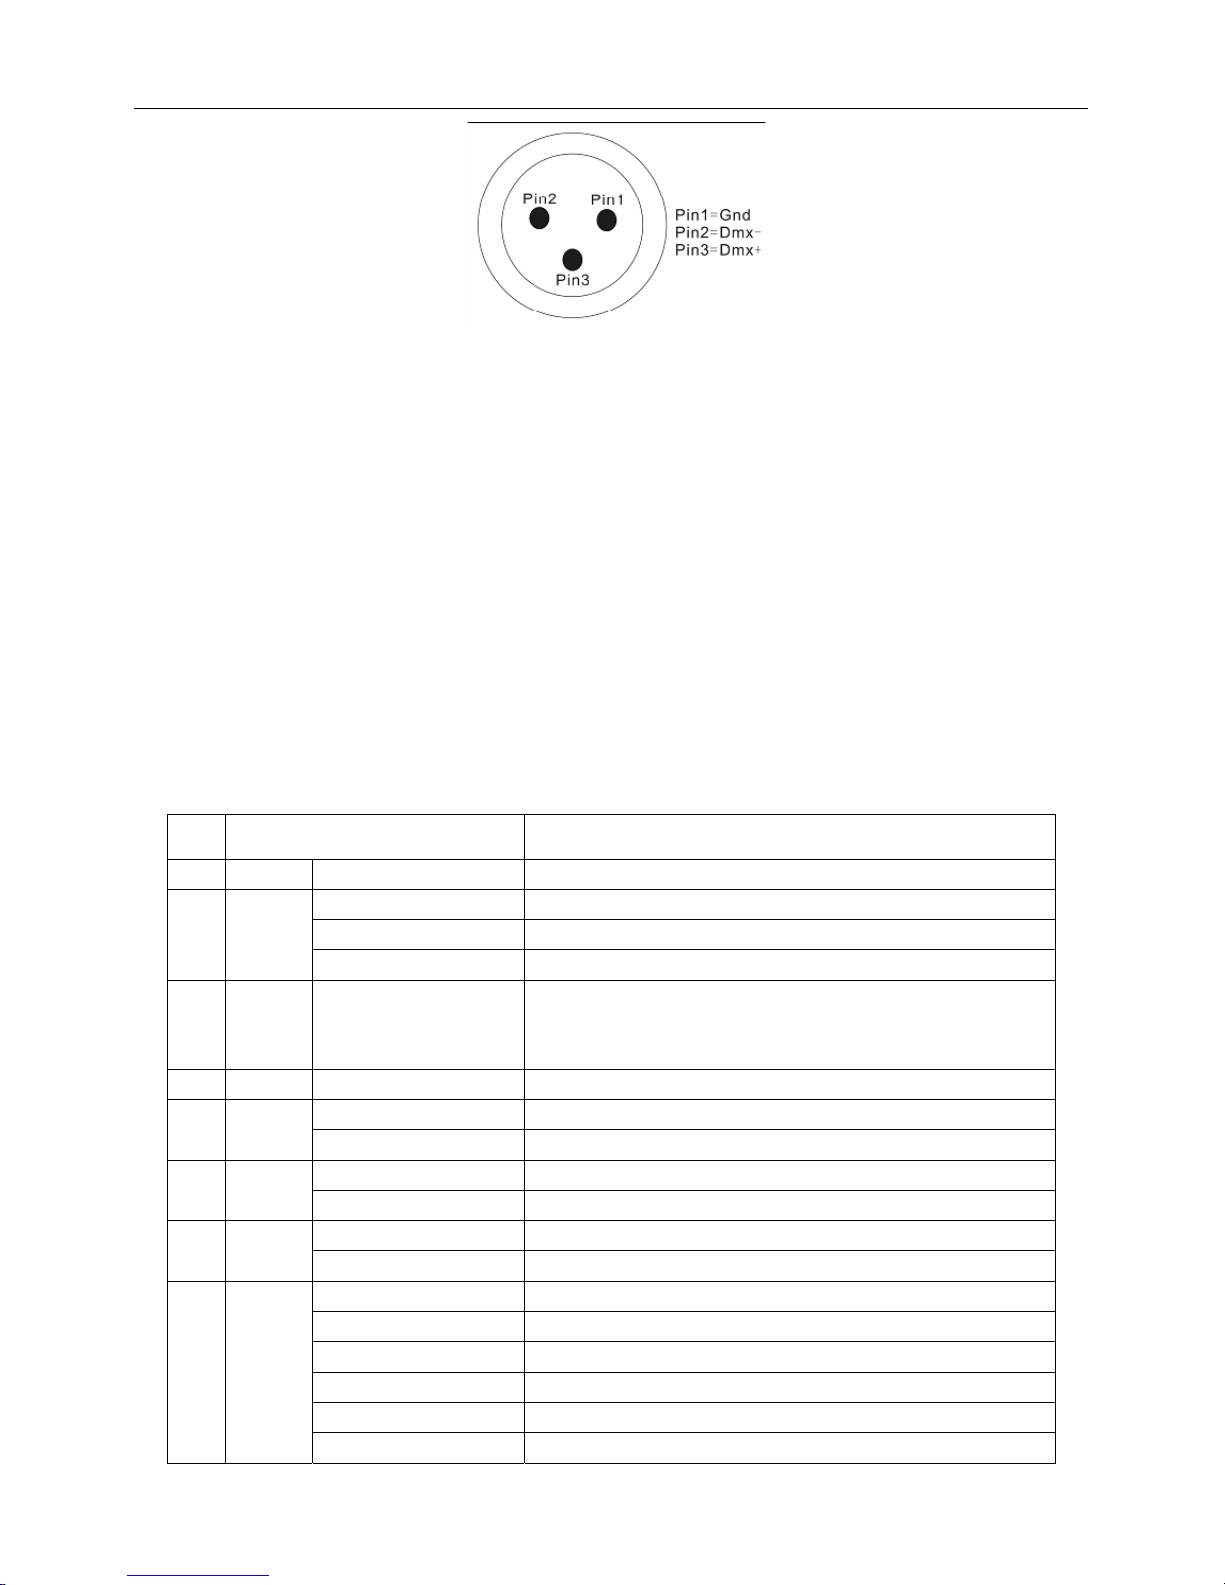
The shield connection is pin 1, while pin 2 is Data Negative (S-) and pin 3 is Data positive (S+).
Page 14 of 18
Page 4
2. LAMP BODY INSTALLATION
Notes: Do not install it nearby the curtain or flammable materials. Only for indoor use.
OPERATION
1. SET DIPSWITCHES
■Each fixture occupies 12 DMX channels.
■DMX 512 signals can control multi-fixtures together; however you must set DMX address of each lamp first.
Different DMX address will lead to different movements.
■You can set DMX address from 1~500 on the multi-function display panel.
■Switch on power supply and after finishing resetting, the panel will show 001,that is to say DMX address is
001 and the first lamp has been controlled by 1~12 channels.In turn the second fixture has been controlled by
13~24 channels. (When panel shows 001, press UP/DOWN button until it shows 013.Then just press ENTER
button). In the same way, the third fixture has been controlled by 25~36 channels and the panel shows 025.
■Through this method, you can control multi-fixtures to perform different movements.
2
. CHANNEL FUNTIONS
No.
DISPLAY FUNCTION
1 Addr 001-501(503) DMX address (16BT is on, the max value is 501).
M-DM DMX mode.
M-AU AUTO mode.
2 MODE
M-SO SOUND mode.
3 PRCO PR-1~PR-8
8 built-in programs.
Pr1-4 means skip.
Pr5-8 means fade.
4 SPCO SP01~SP15 Auto speed is 0.1~20 seconds each step.
STND Run clockwise as DMX value increases.
5 rPAN
REV Run anticlockwise as DMX value decreases
.
STND Run clockwise as DMX data increase.
6 rTILT
REV Run anticlockwise as DMX data decreases
.
STND CH7:PAN, CH8:TILE, CH10:PAN FINE, CH11:TILT FINE.
7 r-PT
REV CH7:TILE, CH8:PAN, CH10:TILT FINE, CH11:PAN FINE.
ALL Check all LEDs with motors.
PAN
Check pan channels, Display“Pan”.
TILT
Check TILT channels, Display“TITL”.
RED
Check red channels, Display“rEd”.
GREN
Check green channels, Display“GrEn”.
8 TEST
BLUE
Check blue channels, Display“bLuE”.
Page 15 of 18
Page 5
WHITE
Check white channels, Display“AnbE”.
STND Display bites normally.
9 DSPL
REV Display bytes upside down
.
10 REST REST/on System Reset
ON PAN, TILT is 16 bit, CH10: PAN FINE, CH11:TILT FINE.
11 16BT
OFF PAN, TILT is 8 bit. CH10, CH11 does not exist.
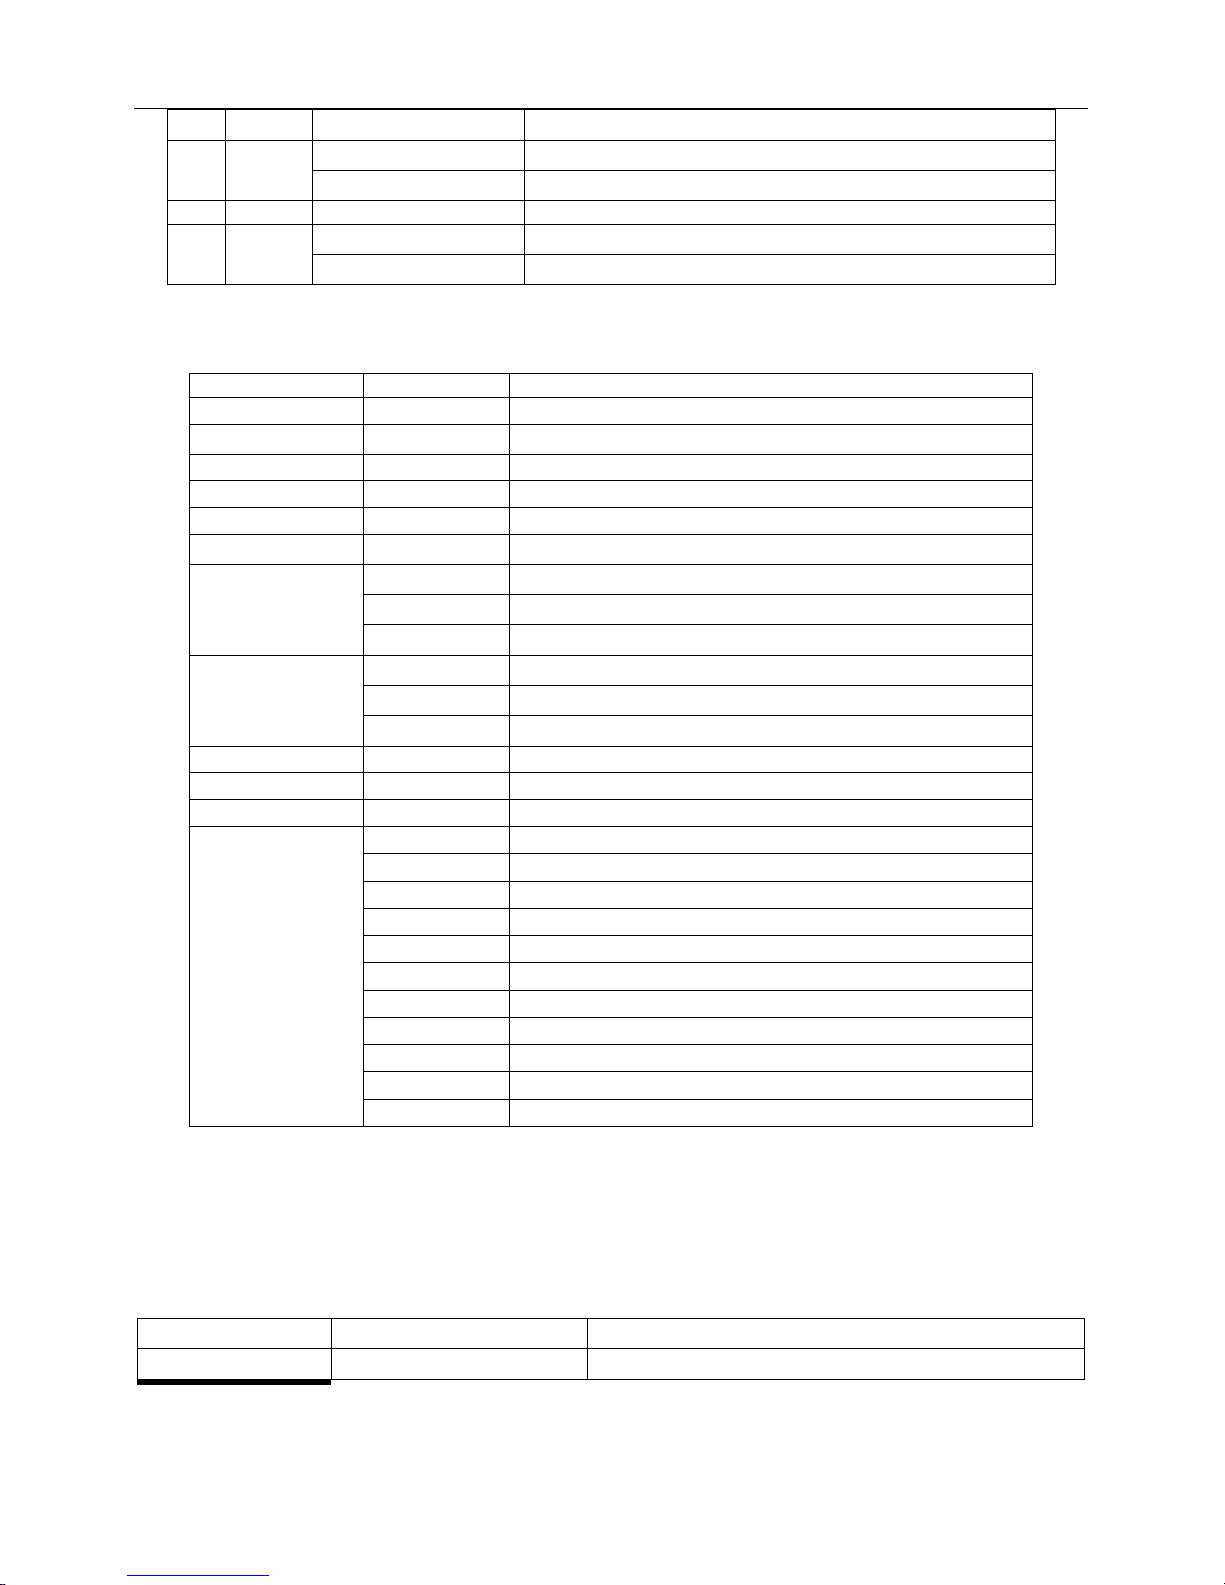
3. ABOUT EACH CHANNEL
NO. DMX Value Function
CH1
000~255 Dimmer:0%~100%
CH2
000~255
Shutter or Auto speed
CH3
000~255 Red:0%~100%
CH4
000~255 Green:0%~100%
CH5
000~255 Blue: 0%~100%
CH6
000~255
White:0%~100%
000
Leftmost.
127
Medium.
CH7
PAN(540°)
255
Rightmost.
001
Bottommost.
000/127
Topmost.
CH8
TILT(230°)
255
Bottommost.
CH9
000~255
Motor Speed
CH10
000~255 PAN FINE(2.4°)
CH11
000~255 TILT FINE(2.4°)
000~024
RGBW Manual mode(the relevant channels: CH1 ~ CH6)
025~049
Built-in program 1, (the relevant channels: CH2).
050~074
Built-in program 2, (the relevant channels: CH2).
075~099
Built-in program 3, (the relevant channels: CH2).
100~124
Built-in program 4, (the relevant channels: CH2).
125~149
Built-in program 5, (the relevant channels: CH2).
150~174
Built-in program 6, (the relevant channels: CH2).
175~199
Built-in program 7, (the relevant channels: CH2).
200~224
Built-in program 8, (the relevant channels: CH2).
225~244
Sound-active program.
CH12
245~255
20 seconds later, system Reset
Notes: When 16 BT is on, CH10, CH11 exists; otherwise they do not exist.
MAINTENANCE
1. TROUBLESHOOTING
Problem Probable cause(s) Suggested remedy
Fixtures do not
No power source
Check if power source is on or cord works well.
Page 16 of 18
Page 6
work.
Fuse burnt
Cut off power source and change the same type
fuse. If fuse was burnt on end, it may be the problem
of connection; Find qualified professors to repair.
False or incomplete data
connection
Check, repair or change the data line. Ensure
connection is well and the first lamp’s single input is
connected with the controller output.
False address setting Check DMX address.
Problem of signal
connector of some fixtures
Pull out the signal output and input of one fixture.
Then connect both directly. If it works well, this
fixture is proved to be the failed one. Handle the rest
fixtures alike to check which fixture has problems. If
any problem, please connect the technician.
Reset normally, but
console
Abnormally or no
response
.
Signal output does not
match with the pin(pins2
and pins3 has a wrong
sequence)
Toggle the PHASE button on the controller to
reverse the polarity.
2. CLEANING
Though increasing reliability by designing well and we never stop to improve quality to lengthen lamp’s
lifespan. It is still indispensable to maintain it well by certain time in order to ensure best performance
First, clean fan and vent.
Favorable heat-dissipation and ventilation is vital to lamp’s normal work. So clean the fan and vent during a
certain time to guarantee smooth of wind path. Otherwise dust will barrier vent, which will affect the
performance because of over heat after working for some time.
Second, lens cleaning and maintenance
To ensure the best effect of lamp, please clean every lean or reflective setting. Use the soft cotton with some
lotion to clean it, but do not damage lens.
Third, check line during a certain time.
Check connecting line, wiring and ground line to ensure safety of using lamp during a certain time.
Forth, mechanical transmission part maintenance.
Check mechanical transmission part if it has any loose part during a certain time, such as a strap. Abrasion of
mechanical transmission part will affect stability of lamp work. If strap is loose, you should change it if
needed.
Page 17 of 18
 Loading...