

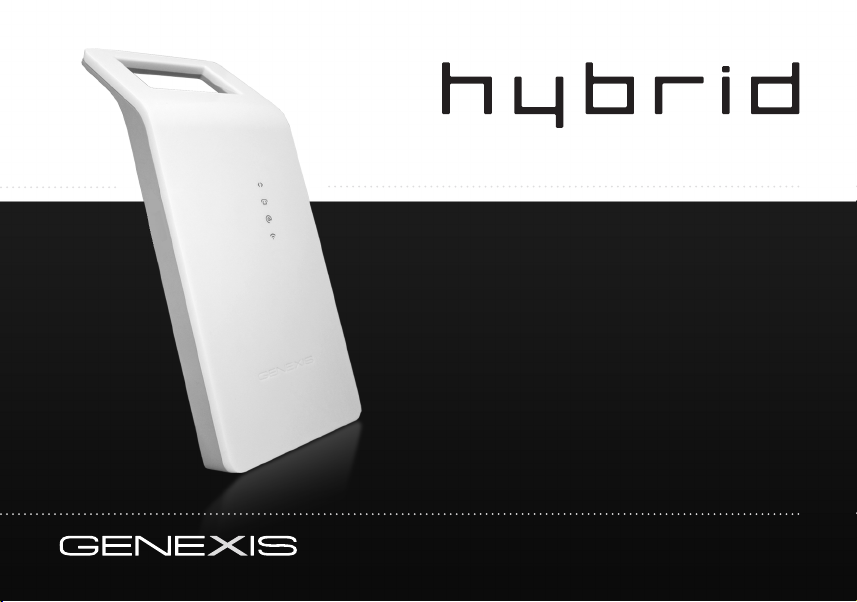
Quick Installation Guide
Live!
Titanium-20 series


Contents
1. Live! overview.............................
2. Installation......................................
3. Network setup.................................
4. Wireless setup.................................
5. Configuring your Live!......................
6. Troubleshooting..............................
2
4
7
8
9
10
1
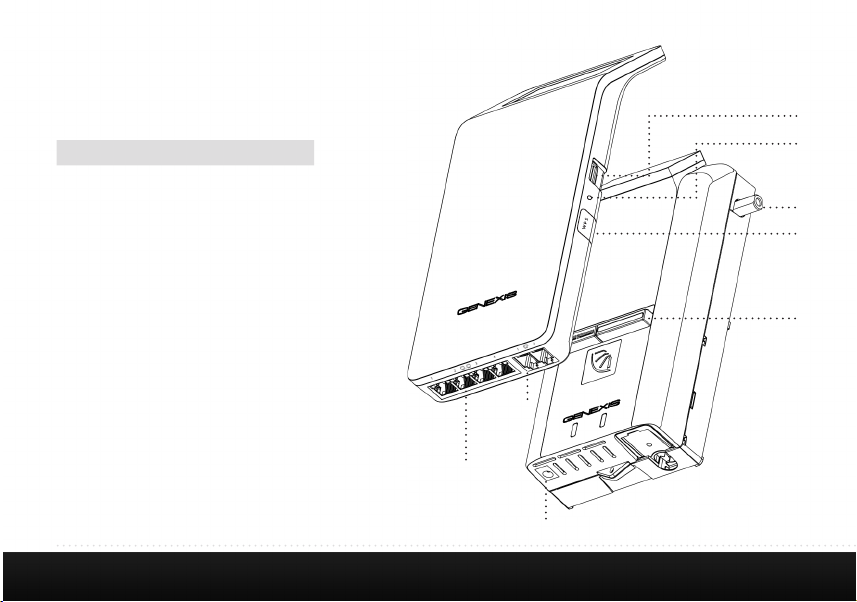
1. Live! overview
User interfaces
Description
1 Live! Ethernet LAN ports
2 Live! Telephony ports
3 Live! USB 2.0 port
4 Reset button (recessed hole)
5 WPS button
6 Element power port
7 Universe CATV connector
8 Hybrid Interface connector
Depending on your specific product type, port
configuration may differ.
2
3
4
7
5
8
2
1
6
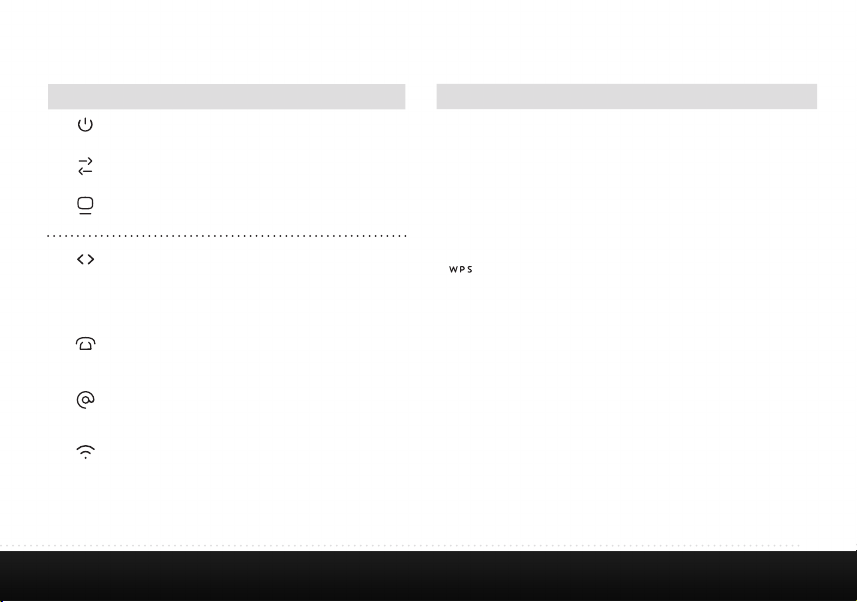
Status feedback LEDS:
Buttons:
Activity Description
On
Off
On
Off
On
Off
On
On (red)
Blink (green)
Off
On
Blink
Off
On
Blink
Off
On
Blink
Off
LAN ports Green
Yellow
Powered successfully
Power not connected
Optical link activated
No optical link
CATV enabled
CATV disabled
Successful data uplink
Hardware error
Firmware upgrade /
provisioning initializing
No data uplink
Phone line enabled
Phone line initializing
Phone line disabled
Internet connection enabled
Internet connection initializing
Internet connection disabled
WLAN enabled
WPS active
WLAN disabled
1000M link - blink on activity
100/10M link - blink on activity
Function Action
Reset Reboot • Press reset button for less than 5 sec-
Factory
Default
WPS
Toggle
on/off
onds and release to initiate reset.
• Press and hold reset button for more
than 5 secons (when LEDs will blink)
and release to initiate a factory reset.
All configuration data will be lost!
• Press WPS button for less than 5
seconds and release to initiate WPS on
WLAN.
• Press WPS button for more than 5 seconds (when LEDs will blink) and release
to toggle WLAN state on/off.
3

2. Installation
Step 1: Installing the Hybrid Live!
Click the Hybrid Live! module on the Hybrid Element, as
shown in the picture.
Note: Proper installation does not require excessive force.
1
2
4
Click!
Step 2: Powering the device
Connect the 12V plug of the supplied adapter to the Hybrid
Element and connect the adapter to a power socket. The unit
will now start up. During the start-up sequence the
LEDs are on, other LEDs may blink.
When the start-up sequence has finished the following LEDs
should be on: .
The complete start-up sequence may take several minutes.

Step 3: Connecting your computer
Connect your computer to one of the Ethernet LAN ports
on the Hybrid Live!, using an Ethernet cable with a RJ-45
connector. Your provider can tell you which ports to use.
Note: refer to section “fixed network setup” if your connection
is not working directly from the start.
Step 4: Connecting your telephone
This step is only relevant if the Hybrid Live! has voice ports.
A standard analog telephone handset can be connected to the
active voice ports, using a RJ-11 cable. The LED indicates
if voice is enabled and operating correctly. Your provider can
tell you which ports to use.
5

Step 5: Connecting your analog television or radio
This step is only relevant if your Hybrid configuration has a
CATV receiver.
Connect your analog television or radio using a coaxial cable
with a male F-connector. The LED indicates if CATV
service is enabled.
6
Cleaning instructions:
Your Hybrid product may be cleaned using a soft, dry cloth.
For areas of persistent dirt, a damp cloth may be used with
mild detergent. Product and LED logos may be damaged
by using aggressive cleaning products or ethanol-based
cleaners - if in doubt do not clean near these logos. Under
no circumstances allow water or cleaning fluid to ingress the
product, as this may cause permanent damage and prevent
correct operation.

3. network setup
Step 1:
Open the web browser on your computer and check if your
connection is working. If your connection is working, you can
skip step 2 and 3.
Step 2:
(Instructions for Windows Vista / Windows 7; for other
operating systems please contact your service provider)
• On your computer, go to “Start” at the bottom left
corner and click on “Control Panel”.
• The Control Panel window will appear. Click on “View
Network Status and Tasks” at the “Network and Internet”
category.
• The Network and Sharing Centre will appear:
• For Windows Vista: Click on “Manage network
connections” at the top left hand corner.
• For Windows 7: Click on “Change adapter
• Right click on the correct “Local Area Connection”
• Select “Internet Protocol Version 4 (TCP/IPv4)”. Click on
• Select “Obtain an IP address automatically”, and “Obtain
settings” at the top left hand corner.
by identifying the correct network card and click
“Properties”.
“Properties”
DNS server address automatically”. Save the settings by
clicking “OK”, and close the window by clicking “OK” or
“Close”.
Step 3:
Open your web browser and check if your connection is
working. If your connection is not working, please refer to the
troubleshooting section.
7

4. Wireless setup
This section is only relevant if wireless functionality is
available on your Hybrid Live!. The LED indicates if
wireless functionality is enabled.
Step 1:
To set up the wireless connection between your computer and
the Hybrid Live! you may need the SSID and WPA key of the
Hybrid Live!. The SSID is the name of the wireless network.
The WPA key is the password needed for your secured wireless network. The default SSID and the WPA key are printed on
the label on the rear of your Hybrid Live!.
You may write down these values here:
SSID: _____________________________________________________
WPA key: _________________________________________________
8
Step 2:
(Instructions for Windows Vista / Windows 7; for other
operating systems please contact your service provider)
• Go to “Start” at the bottom left corner and click on
“Control Panel”.
• The Control Panel window will appear. Click on “View
Network Status and Tasks” at the “Network and
Internet” category.
• The Network Connections window will appear. Click
on the “Connect to a network”.
• Show “Wireless” and select the network (SSID) that is
printed on the label.
• If requested press the WPS button on your Hybrid
Live!. Alternatively you can connect using the WPA key
that is printed on the label.
• Your connection is now operational. Open your web
browser and verify that your connection is working.
If your connection is not working, please refer to the
troubleshooting section.
• After installation you can manually change the SSID
and WPA key, by using the web-interface of the Hybrid
Live!.

5. Conguring your Live!
Note: By default the router is configured properly for most
home networks. Changing the configuration is only advised
for advanced users and might interrupt your connection.
Please refer to page 3 on how to reset the router settings back
to the factory default settings.
Step 1:
• Launch the web browser on your computer and enter
the router’s name ‘http://router’ or default address
‘http://192.168.1.254’. This address is also printed on
the label on the back of your Hybrid Live!.
Step 2:
• Log in as ‘admin’, using the default password ‘admin’.
It is strongly advised to change the password after you
logged in for the first time.
Step 3:
• Configure the router to the desired configuration. Read
the help text for additional information about this
setting.
9

6. Troubleshooting
Issue Action
LED is off Make sure you have connected the Hybrid Element to a working power outlet, using
LED is off There is no valid link on the fiber port. Please contact your service provider.
the adapter shipped along with it. If the LED remains off, please contact your service
provider.
LED is off There is no valid CATV signal on the Universe CATV connector. Please contact your
Red LED is on Hardware error. Power down the device, wait for 1 minute, then power the device back
LED is off Voice functionality is not enabled. Please contact your service provider if voice func-
LED keeps blinking Voice service initialization not completed. Please make sure the phone is not off-hook
10
service provider if a CATV signal is expected.
on. If the problem persists, contact your service provider.
tionality is expected.
and the phone line is connected to the correct port. If this issue persists, contact your
service provider.

Issue Action
LED is off
LED keeps blinking
LED is off Please check in the web interface if wireless functionality is enabled. Please contact
Internet connectivity is not enabled. Please contact your service provider if routing
functionality is expected.
Internet service initialization not completed. If this persists, contact your service
provider.
your service provider if wireless functionality is expected.
Web interface is not reachable Check if Internet functionality is enabled , and if you have the correct router IP ad-
How to reset the router settings? See page 3
dress. If you changed the router IP address, you can perform a “Factory Default reset”
to restore the default IP address.
11

Europe-EU Declaration of Conformity
Hereby, Genexis BV declares that this product is in compliance
with the essential requirements and other relevant provisions
of Directive 1999/5/EC.
Industry Canada statement:
This device complies with RSS-210 of the Industry Canada Rules. Operation is subject to the following two conditions: (1) This
device may not cause harmful interference, and (2) this device must accept any interference received, including interference
that may cause undesired operation.
Ce dispositif est conforme à la norme CNR-210 d'Industrie Canada applicable aux appareils radio exempts de licence. Son
fonctionnement est sujet aux deux conditions suivantes: (1) le dispositif ne doit pas produire de brouillage préjudiciable,
et (2) ce dispositif doit accepter tout brouillage reçu, y compris un brouillage susceptible de provoquer un fonctionnement
indésirable.

Federal Communication Commission Interference Statement
This device complies with Part 15 of the FCC Rules. Operation is subject to the following two conditions: (1) This device may
not cause harmful interference, and (2) this device must accept any interference received, including interference that may
cause undesired operation.
This equipment has been tested and found to comply with the limits for a Class B digital device, pursuant to Part 15 of the FCC
Rules. These limits are designed to provide reasonable protection against harmful interference in a residential installation.
This equipment generates, uses and can radiate radio frequency energy and, if not installed and used in accordance with the
instructions, may cause harmful interference to radio communications. However, there is no guarantee that interference will
not occur in a particular installation. If this equipment does cause harmful interference to radio or television reception, which
can be determined by turning the equipment off and on, the user is encouraged to try to correct the interference by one of the
following measures:
- Reorient or relocate the receiving antenna.
- Increase the separation between the equipment and receiver.
- Connect the equipment into an outlet on a circuit different from that
to which the receiver is connected.
- Consult the dealer or an experienced radio/TV technician for help.
FCC Caution: Any changes or modifications not expressly approved by the party responsible for compliance could void the
user’s authority to operate this equipment.
This transmitter must not be co-located or operating in conjunction with any other antenna or transmitter.

Radiation Exposure Statement:
This equipment complies with FCC radiation exposure limits set forth for an
uncontrolled environment. This equipment should be installed and operated
with minimum distance 20cm between the radiator & your body.
Industry Canada statement:
This device complies with RSS-210 of the Industry Canada Rules. Operation is
subject to the following two conditions: (1) This device may not cause
harmful interference, and (2) this device must accept any interference
received, including interference that may cause undesired operation.
Ce dispositif est conforme à la norme CNR-210 d'Industrie Canada applicable
aux appareils radio exempts de licence. Son fonctionnement est sujet aux
deux conditions suivantes: (1) le dispositif ne doit pas produire de brouillage
préjudiciable, et (2) ce dispositif doit accepter tout brouillage reçu, y
compris un brouillage susceptible de provoquer un fonctionnement
indésirable.
Radiation Exposure Statement:
This equipment complies with IC radiation exposure limits set forth for an
uncontrolled environment. This equipment should be installed and operated
with minimum distance 20cm between the radiator & your body.
Déclaration d'exposition aux radiations:
Cet équipement est conforme aux limites d'exposition aux rayonnements IC
établies pour un environnement non contrôlé. Cet équipement doit être
installé et utilisé avec un minimum de 20 cm de distance entre la source de
rayonnement et votre corps.

Copyright © Genexis 2014 rev.2
 Loading...