

Page 1

2.4GHz DIGITAL CORDLESS TELEPHONE with CID
1
MODEL: CT-D201 USA VERSION
CT-D201 User’s Manual
G E N E X
Page 2

2.4GHz DIGITAL CORDLESS TELEPHONE with CID
2
MODEL: CT-D201 USA VERSION
I MPORTANT SAFETY INSTRUCTIONS
When using your telephone equipment, basic safety precautions should always be followed to reduce the risk of
fire, electric shock, and injury to persons, including the following:
1. Read and understand all instructions.
2. Follow all warnings and instructions marked on the product.
3. Unplug this product from the wall outlet before cleaning. Do not use liquid cleaners or aerosol cleaners. Use
a damp cloth for cleaning.
4. Do not use this product near water, for example, near a bathtub, washbowl, kitchen sink, or laundry tub, in a
wet basement or near a swimming pool.
5. Do not place this product on an unstable cart, stand, or table. The product may fall, causing serious damage
to the product.
6. Slots and openings in the cabinet at the back or bottom are provided for ventilation, to protect it from
overheating. These openings should never be blocked or covered. The openings should never be blocked
by placing the product on the bed, sofa, rug, or other similar surface. This product should never be placed
near or over a radiator or heat register. This product should not be placed in a built -in installation unless
proper ventilation is provided.
7. This product should be operated only from the type of power source indicated on the marking label. If you
are not sure of the type of power supply to your home, consult your dealer or local power company.
8. Do not allow anything to rest on the power cord. Do not locate this product where the cord will be abused by
persons walking on it.
9. Do not overload wall outlets and extension cords as this can result in the risk of fire or electric shock.
10. Never push objects of any kind into this product through cabinet slots as they may touch dangerous voltage
points or short out parts that could result in a risk of fire or electric shock. Never spill liquid of any kind on
the product.
11. To reduce the risk of electric shock, do not disassemble this product, but take it to a qual ified service
contr336actor when some service or repair work is required. Opening or removing covers may expose you
to dangerous voltages or other risks. Incorrect reassembly can cause electric shock when the appliance is
subsequently used.
12. Unplug this product from the wall outlet and refer servicing to qualified service personnel under the following
conditions:
A. When the power supply cord or plug is damaged or frayed.
B. If liquid has been spilled into the product.
C. If the product has been exposed to rain or water.
If the product does not operate normally by following the operating instructions, Adjust only those controls that
are covered by the operating instructions. Improper
D. Adjustments of other controls may result in damage and will often require extensive work by a qualified
technician to restore the product to normal operation.
E. If the product has been dropped or the cabinet has been damaged.
F. If the product exhibits a distinctive change in performance.
13. Avoid using a telephone (other than a cordless type) during an electrical storm. There may be a remote risk
of electric shock from lightning.
14. Do not use the telephone to report a gas leak in the vicinity of the leak.
G E N E X
Page 3

2.4GHz DIGITAL CORDLESS TELEPHONE with CID
3
MODEL: CT-D201 USA VERSION
BATTERY SAFETY INSTRUCTION
CAUTION: To reduce the risk of fire or injury to persons, read and follow these instructions:
1. Use only the following type and size of handset batteries: cordless Telephone Batteries DC3.6V, 550mAh,
Ni-MH AAA size Batte ry pack.
2. Do not dispose of the battery in a fire. The cell may explode. Check with local codes for possible special
disposal instructions.
3. Do not open or mutilate the battery. Released electrolyte is corrosive and may cause damage to the eyes or
skin. It may be toxic if swallowed.
4. Exercise care in handling the battery in order not to short the battery with conducting material such as rings,
bracelets and keys. The battery or conductor may overheat and cause burns.
5. Recharge only the battery provided with or identified for use with this product. The battery may leak
corrosive electrolyte or explode if it is not the correct type.
6. Do not attempt to rejuvenate the battery provided with or identified for use with this product by heating them.
Sudden release of the battery electrolyte m ay occur causing burns or irritation to eyes or skin.
7. When inserting the batteries into this product, the proper polarity or direction must be observed. Reverse
insertion of batteries can cause charging that may result in leakage or explosion.
8. Remove the batteries from this product if the product will not be used for a long period of time (several
months or more) since during this time the battery could leak in the product.
9. Discard “dead” batteries as soon as possible since “dead” batteries are more likely to leak in a product.
10. Do not store this product, or the battery provided with or identified for use with this product, in high-
temperature areas. Batteries that are stored in a freezer or refrigerator for the purpose of extending shelf life
should be stabi lized at room temperature prior to use after cold storage.
11. Disconnect telephone lines before installing batteries.
G E N E X
Page 4

2.4GHz DIGITAL CORDLESS TELEPHONE with CID
4
MODEL: CT-D201 USA VERSION
INSTALLATION PRECAUTIONS
1. Never install telephone wiring during a lightning storm.
2. Never install telephone jacks in wet locations unless the jack is specifically designed for wet locations.
3. Never touch uninsulated telephone wires or terminals unless the telephone line has been disconnected at
the network interface.
4. Use caution when installing or modifying telephone lines.
FCC NOTICE
The FCC requires that you be advised of certain requirements involving the use of this telephone.
1. This telephone is Hearing Ai d Compatible.
2. This equipment complies with Part 68 of the FCC rules. On the bottom of this equipment is a label that
contains, among other information, the FCC registration number and Ringer Equivalence Number (REN) for
this equipment. If requested, provide this information to your telephone company.
3. The REN is useful to determine the quantity of devices you may connect to your telephone line and still
have those entire devices ring when your number is called. In most, but not all areas, the sum of the RENs
of all devices should not exceed five (5.0). To be certain of the number of devices that you may connect to
your line, as determined by the REN, you should call your local telephone company to determine the
maximum REN for your calling area.
4. If your telep hone causes harm to the telephone network, the telephone company may discontinue your
service temporarily. If possible, they will notify you in advance. But if advance notice is not practical, you
will be notified as soon as possible. You will be advised of your right to file a complaint with the FCC.
5. Your telephone company may make changes to its facilities, equipment, operations or procedures that
could affect the proper operation of your equipment. If they do, you will be given advance notice so as to
give you an opportunity to maintain uninterrupted service.
6. If you experience trouble with the telephone, please contact service center at the below address. The
telephone company may ask you to disconnect this equipment from the network until the problem has been
corrected or you are sure that the equipment is not malfunctioning.
Services can be obtained at: Columbia Telecommunications Inc.
174 Milbar Blvd. Farmingdale, NY 11735
Tel: 1 -800-889-7434
7. This equipment may not be used on coin service provided by the telephone company. Connection to party
line service is subject to state tariffs. (Contact your state public utility commission or corporation commission
for information).
8. WARNING: Changes or modifications to this unit not expressly approved by the party responsible for
compliance could void the user’s authority to operate the equipment.
• NOTE: This equipment has been tested and found, comply with the limits for a class B digital device,
pursuant to Part 15 of the FCC Rules. These limits are designed to provide reasonable protection
against harmful interference in residential installation. This equipment generates, uses and can radiate
radio frequency energy. If not install and used in accordance with the instruction, may cause harmful
interference to radio communications. However, there is no guarantee that interference will no occur in
a particular installation. If this equipment does cause harmful interference to radio or television
reception, which can be determined by turning the equipment off and on, the user is encouraged to try
to correct the interference by one or more of the following measure:
G E N E X
Page 5

2.4GHz DIGITAL CORDLESS TELEPHONE with CID
5
MODEL: CT-D201 USA VERSION
• Increase the separation between the equipment and receiver.
• Connect the equipment into an outlet on a circuit different from that to which the receiver needed.
• Consult the dealer of an experienced radio / TV technician for help.
Some cordless phones operate at frequencies that may cause interference to nearby TVs and VCRS ; to
minimize or prevent such interference, the base of the cordless phone should not be placed near or on top of a
TVs or VCR. If interference is experienced, moving the cordless telephone farther away from the TV or VCR will
often reduce or eliminate the interference.
G E N E X
Page 6

2.4GHz DIGITAL CORDLESS TELEPHONE with CID
6
MODEL: CT-D201 USA VERSION
CONTENTS
Checking the Packing Contents
Base Unit Physical Description
Setting Up the Base Unit
Preparing the Battery Pack
Initialize the handset to the base unit (ID setting)
Telephone Operations
Basic Features
Receiving a call
Making a call
Last number redial
Last five numbers redial
Paging call
Flash Function
Pause function
Receiving volume Control
No service warning
Range limit warning tone during a call
Extension in use
Intercom from the handset to handset
Multi handset Fe atures
Transferring a call
Memory Features
Review a phone name and number from memory
Storing a phone name and number in memory
Editing a phone name and number in memory
Deleting a phone name and number from memory
Dialing a number from memory
Caller ID Features
General Features (information)
Reviewing the caller ID list
To make a call by using caller ID list
Deleting a call from caller ID list
Deleting all calls from caller ID list
Storing a caller ID number in a memory
G E N E X
Page 7

2.4GHz DIGITAL CORDLESS TELEPHONE with CID
7
MODEL: CT-D201 USA VERSION
Call Waiting Deluxe Features
General Features (information)
Answer
Conference
Hold
Drop
Announcement
Forward
Voice Mail features
Dialing your Voice Mail Service
Programming a one-touch voice mail access number
User Setting Features
Selecting ringer volume
Selecting ringer type
Setting call waiting CID
Setting CID deluxe
Entering Area code
Entering voice mail number
Setting time and date
Setting extension phone detection
Setting pause time
Selecting language mode
First ring On/Off
Setting handset number
VMWI Off
Default setting
Trouble Shooting
G E N E X
Page 8

2.4GHz DIGITAL CORDLESS TELEPHONE with CID
8
MODEL: CT-D201 USA VERSION
Checking the Packing Contents
Make sure you have received the following items in the package.
l Base Unit
l Handset & Belt Clip
l Ni-MH Rechargeable Batter y
l AC/DC Adaptor
l Telephone Lind Cord
l User’s Manual
G E N E X
Page 9
2.4GHz DIGITAL CORDLESS TELEPHONE with CID
9
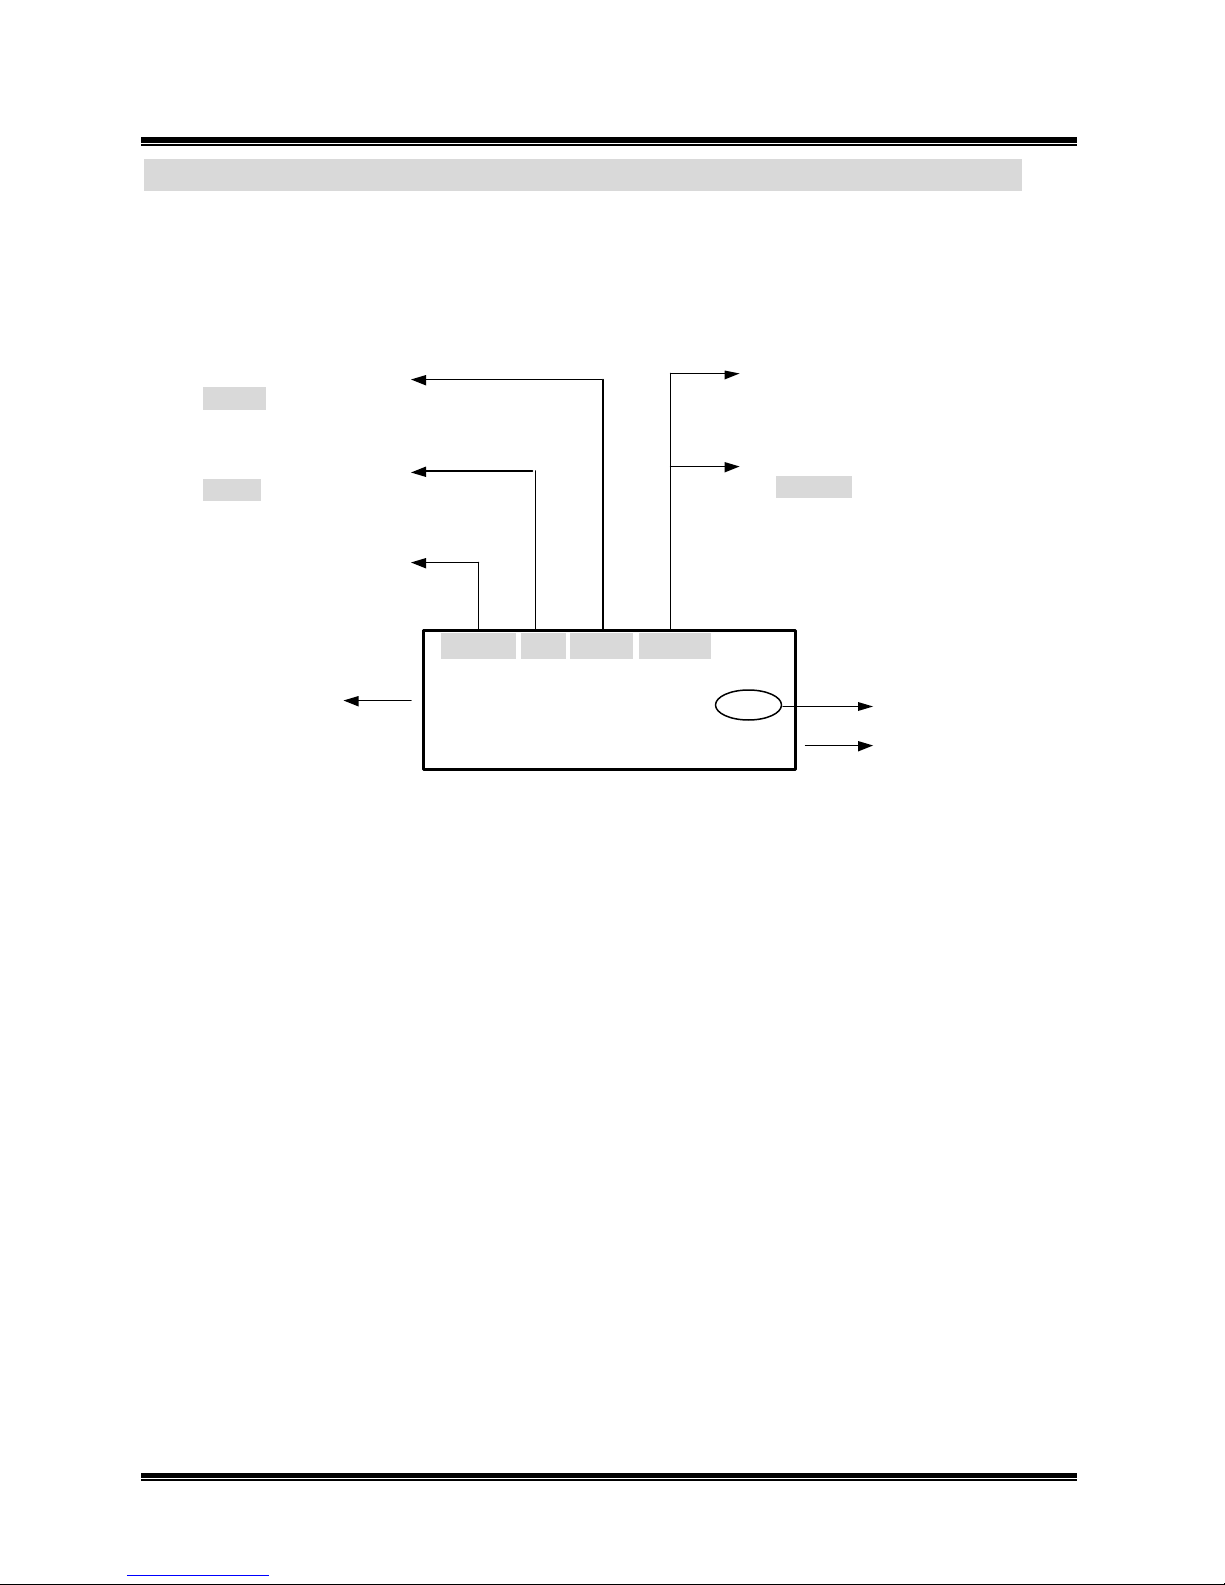
Total calls number
10:10 AM 11/05
02
39
MODEL: CT-D201 USA VERSION
Hand LCD Description
New calls number
Or call timer (second)
10 SEC
Month, day
Or call timer (minute)
01 MIN
Time ( AM & PM )
Name field
Or Repeat calls number
RPT 02
NEW
TOTAL
S m i t h J o h n H 3
Handset number
5 5 5 4 5 6 0 9 8 1 Number field
G E N E X
Page 10

2.4GHz DIGITAL CORDLESS TELEPHONE with CID
10
MODEL: CT-D201 USA VERSION
Setting Up the Base Unit
Choose the Base Unit Location
Before choosing a location for your phone, read the important safety instruction and Installation precautions .
l Avoid Heat sources, such as radiators, and ducts, and sunlight
l Avoid Television sets and other electronic
l Avoid noise sources such as a windows by a street with heavy traffic
l Avoid Microwave ovens
l Avoid excessive moisture, extremely low temperatures, dust, mechanical vibrations, or shock
l Avoid personal computers
l Avoid ot her cordless telephone
l The best location is in an upstairs room and central to the area to be covered
Connect the Base Unit
Desktop Installation:
l Connect the telephone line cord to the TEL LINE jack and to a telephone outlet.
l Connect the AC adaptor to the DC9V jack and to a standard 120VAX wall outlet.
l Arrange the cable through the cable channel.
Note: Use only the supplied AC adaptor. Do not use any other adaptor.
Choose the Dialing Mode
Depending on your dialing system, set the TONE/PULSE switch as you dialing system.
Enter your Area Code number
You may wish to enter your local area code before you use this phone for the first time, or move to new area
code, you should enter your area code. You can enter by using the User Setting Feature. (Refer to page 30)
Note: If your calling area require 10-digits dialing, please skip this step.
G E N E X
Page 11

2.4GHz DIGITAL CORDLESS TELEPHONE with CID
11
MODEL: CT-D201 USA VERSION
Preparing the Battery Pack
How to install the Ni -MH Battery
l Remove the battery compartment cover of the Handset by sliding it down.
l Connect the battery plug along slot into the Handset's battery connector
l Insert the Ni-MH battery pack into the battery compartment.
l Replace the battery compartment cover by sliding it up towards the Handset.
Note : The Ni-MH battery must be fully charged at least 1 4~16 hours before initial use.
Battery Use Time
From fully charged.
Talk Time: If the battery is full charged, the length of time you may talk on your telephone before it is Necessary
to recharge it is approxi mately 3 hours.
Standby Time: The length of time your telephone may be idle and out of its base before it Is necessary to
recharge it is approximately 8days.
When The Battery Charge Becomes Low
The LCD on the handset indicates a low battery condition when the battery pack is very low and needs to be
charged. And then the handset will generate warring tone. If the handset is in use the handset beeps. Complete
your conversation as quickly as possible and return the handset to the base unit for charging. If you don’t
change the battery pack or return to base unit, your call terminates after two minutes.
Note : The LCD on the handset indicates a low battery condition only standby mode. If the handset flashes
“Low Battery”, you can ’t use the TALK key. The handset should be charged for at least 8 hours.
G E N E X
Page 12

2.4GHz DIGITAL CORDLESS TELEPHONE with CID
12
MODEL: CT-D201 USA VERSION
Initialize the Handset to the Base unit (ID setting)
To initialize the handset to the base unit, perform the following: simultaneously push and hold the PA GE key on
the base unit and the FLASH key on the handset until “Register” appears on the display. The unit will beep
once to indicate registration is complete (ID data is transmitted to Handset by RF part of base unit. The Handset
is received ID data by RF part of Handset and transmitted ACK signal to RF part). And then “Successful” will
appear on the display. If the operation has failed, repeat the above procedure.
G E N E X
Page 13
2.4GHz DIGITAL CORDLESS TELEPHONE with CID
13
MODEL: CT-D201 USA VERSION
Telephone Operations
Basic Features
Receiving a call
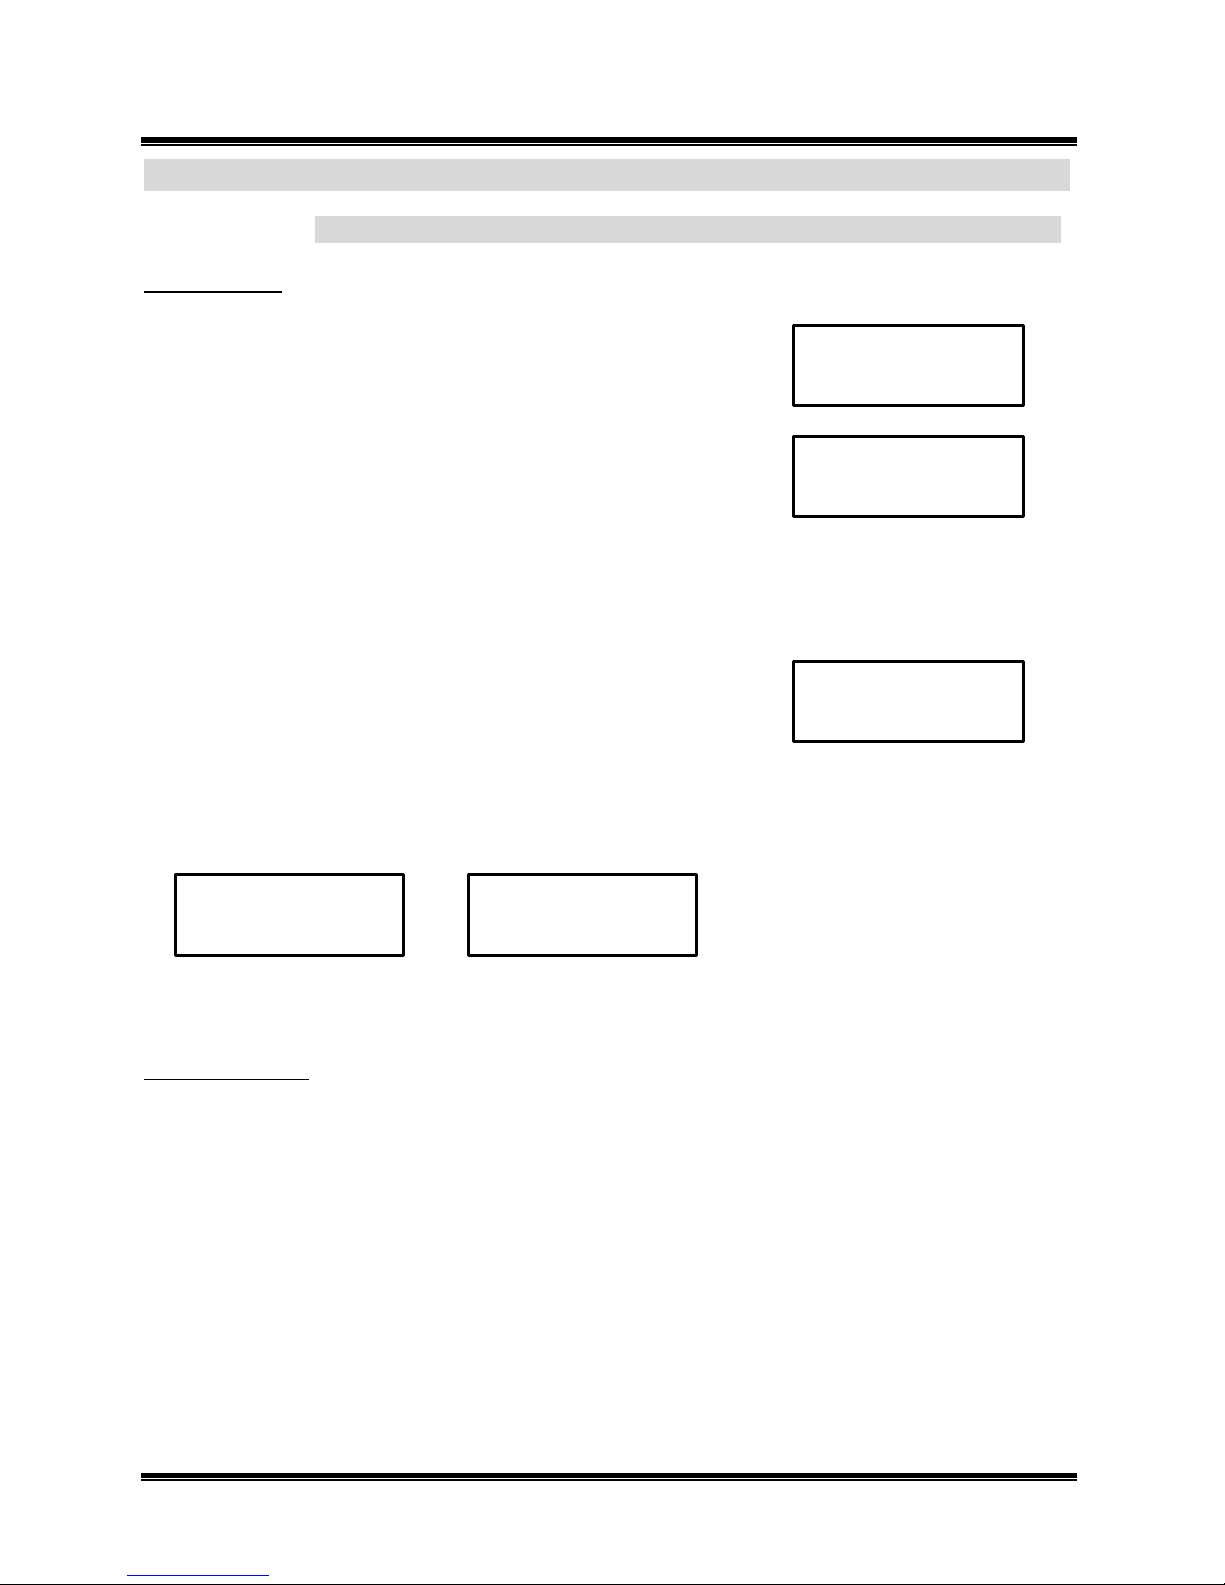
1. The handset rings and the following screen appears:
(The in-use LED on the base unit flashes)
2. Press TALK on the handset.
3. When you finish the call, press TALK.
Note: When return the handset to the base unit, handset will automatically return to standby mode.
Making a call
1. Press TALK.
2. Dial the phone number.
3. When you finish the call, return to the base unit or press TALK.
Or
1. Dial the phone number.
2. Press TALK. The LCD call timer start to count.
3. When you finish the call, return to the base unit or Press TALK.
11:15 AM 12/06 NEW 00 TOTAL 25
Note: When return the handset to the base unit, handset will automatically return to standby mode.
Last number redial
The last number dialed (up to 32 digits) are stored in redial memory until another number is dialed.
1. Press TALK, and then press R/P.
Or
2. Press R/P, and then press TALK.
Last five numbers redial
The last five numbers dialed (up to 32dights) are stored in redial memory until another number is dialed.
1. Press R/P to find the one you want to call numbers.
2. Press R/P repeated to find one you want to call.
3. Press TALK.
2 3 4 0 7 0 3
T a l k
05 MIN 02 SEC
2 3 4 0 7 0 3
11:15 AM 12/06 NEW 01 TOTAL00
C a l l
05 MIN 02 SEC
T a l k
V o l : M e d i u m
05 MIN 02 SEC
T a l k
2 3 4 0 7 0 3
G E N E X
Page 14
2.4GHz DIGITAL CORDLESS TELEPHONE with CID
14
MODEL: CT-D201 USA VERSION
Paging call
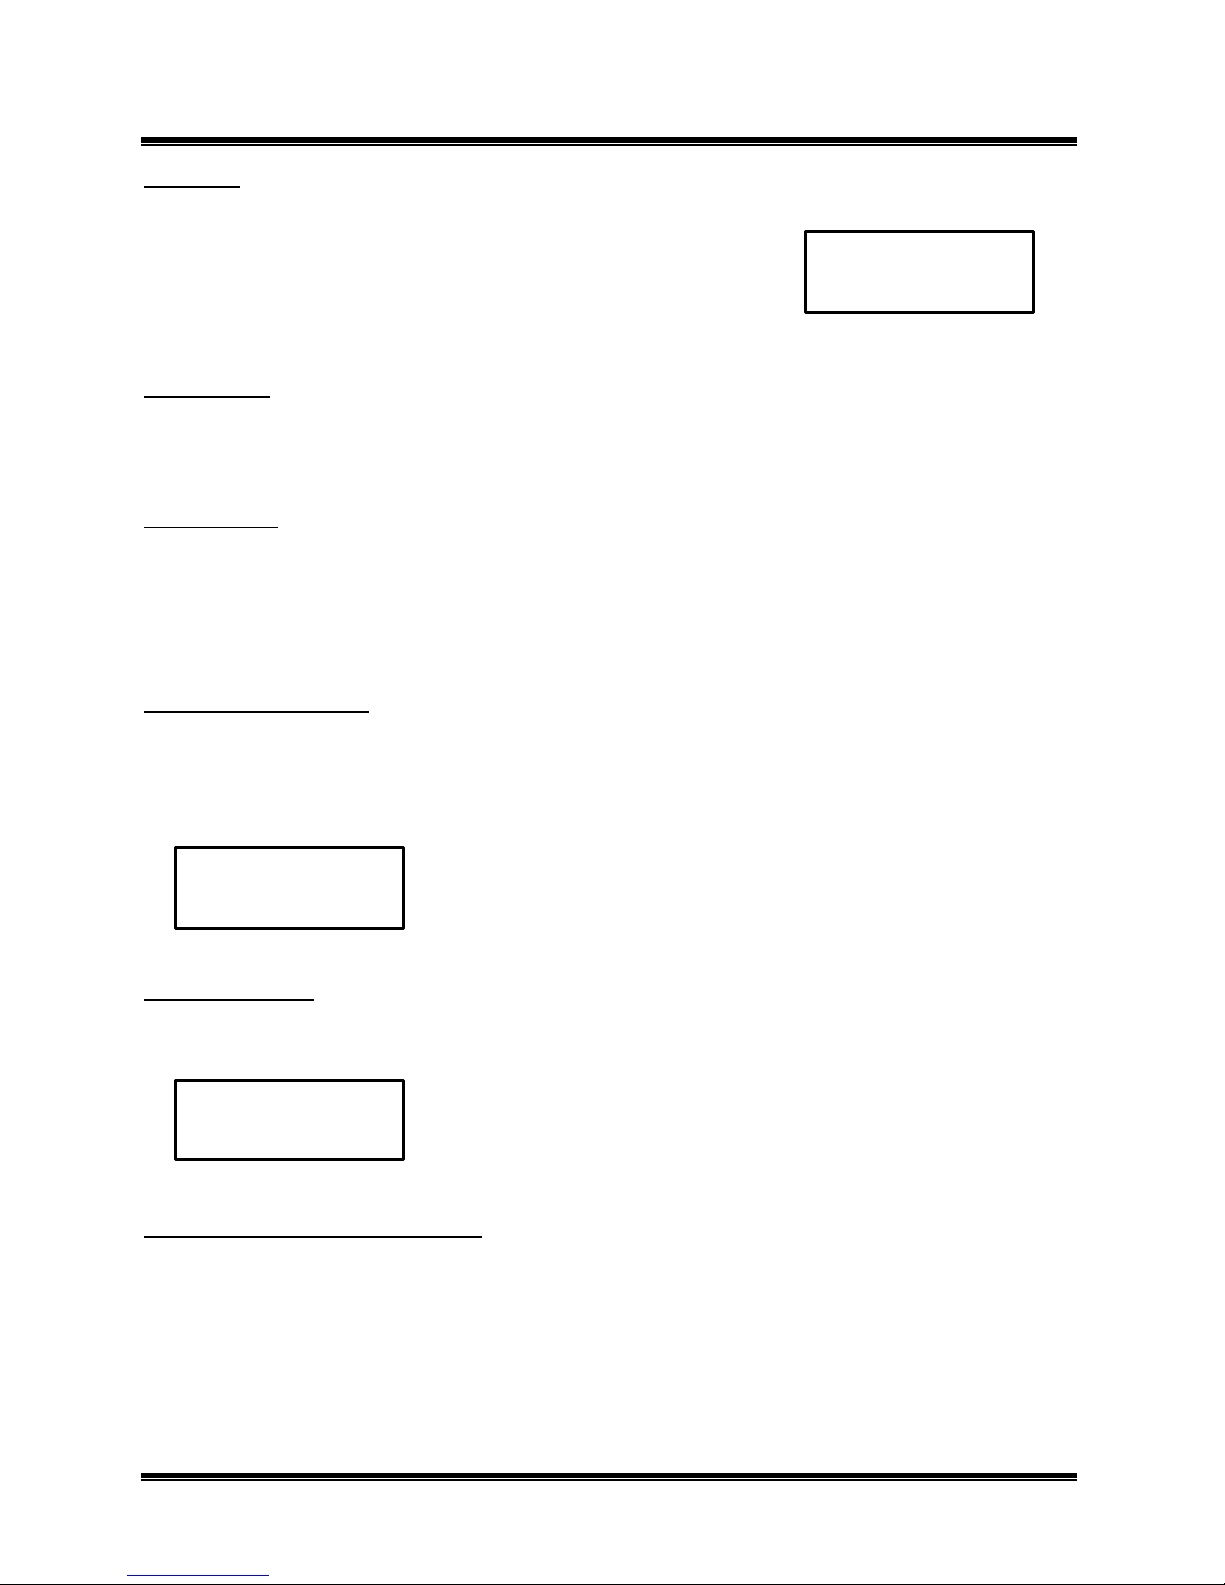
To locate the handset, press PAGE on the base unit. The handset beeps for 60seconds. The following LCD
appears :
Note : To turn off paging beep, press TALK on the handset.
Flash function
Use the button to activate custom calling services such as call waiting or three-way Calling (*Special subscription
from your local telephone company required).
Pause function
The R/P key when in the MEMORY/CID/SELECT mode can be pressed to insert a pause into a number to be
dialed. Each pause will be equal to one second of delay before generating the next DTMF tones in number to be
dialed.
Note: you can select pause time at user setting mode. (Refer to page 31)
Receiving volume control
1. Handset earpiece volume control: to adjust the handset earpiece volume while on call.
Press to increase volume.
Press to decrease volume.
T a l k
V o l : L o w
No service warning
When you are too far from the base unit (out of range), cannot link, another handset in-use or if the selected
service is not available, the display will show “No service”.
11:15 AM 12/06 NEW 00 TOTAL 25
N o s e r v i c e
Range limit warning tone during a call
During a call, in range limit conditions, the handset will generate warning tone in the handset earpiece. If the
handset goes out of range, your call terminates.
05 MIN 02 SEC
Volume step: Low - Medium – High – Maximum
11:15 AM 12/06 NEW 00 TOTAL 25
P a g i n g
G E N E X
Page 15
2.4GHz DIGITAL CORDLESS TELEPHONE with CID
15
11:15 AM 12/06 NEW 00 TOTAL 25
MODEL: CT-D201 USA VERSION
Extension in use
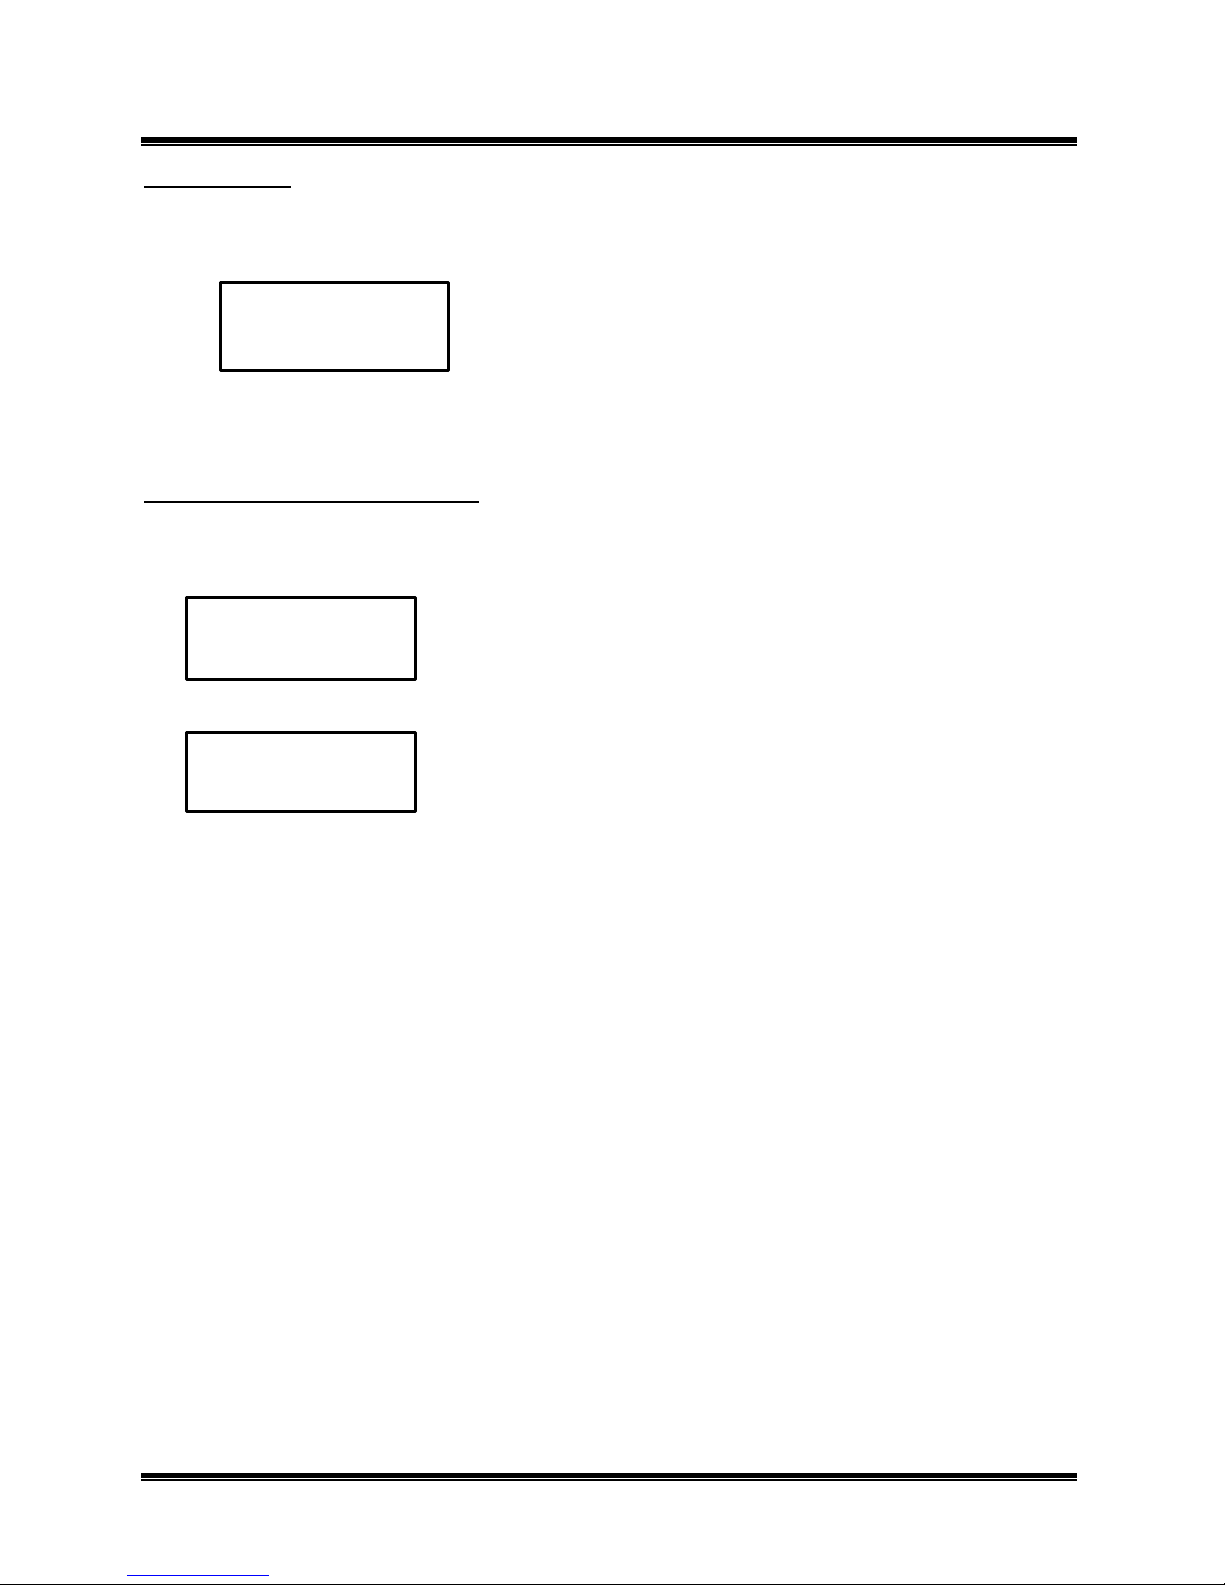
The extension In Use feature prevents accidental interruption of ongoing telephone conversations. If you attempt
to make a call and another phone is in use on line, the handset LCD will display “Ext In Use ”. If you press
TALK, you hear extension error tone.
E x t I n U s e
Note: if you want to join a conversation on an extension currently in use, Press TALK twice. The flash feature
does not function. When the phone is in the conference mode.
Intercom from the handset to handset
1. Press INT on the handset,
2. Press 1, 2 or 3 to select hand set number you want to intercom call. (1, 2, 3)
11:15 AM 12/06 NEW 00 TOTAL 25
I n t e r c o m T o ?
[ 1 . 2 . 3 . ]
3. The handset paging beeps and the handset LCD will display handset number.
11:15 AM 12/06 NEW 00 TOTAL 25
I n t e r c o m
F r o m H 2
4. Press TALK to receive intercom call.
5. To turn off the intercom, press TALK on the handset.
Note: if no answer, press INT on the handset again to disconnect.
G E N E X
Page 16
2.4GHz DIGITAL CORDLESS TELEPHONE with CID
16
MODEL: CT-D201 USA VERSION
Multi Handset Features
The phone supports up to 3 handsets. You can purchase additional for use many of this phone’s feature. To
initialize the handset to the base unit, repeat the abovementioned procedure.
Transferring a call
1. When speaking with an out side call, to transfer a call from the handset, Press INT.
2. Enter the handset number you want to transfer the call (Use 1~3 to call all available) Then out side call is put
on hold and the handset starts ringing.
T r a n s f e r T o ?
[ 1 . 2 . 3 . ]
3. The Handset transfer rings and the handset LCD will display handset number.
11:15 AM 12/06 NEW 00 TOTAL 25
T r a n s f e r
F r o m H 1
4. When the handset picks up or Press TALK, the outside call is connected to the handset.
Note: if the handset does not pick up within 25 seconds, the outside call is return to the original handset and will
rings 5 seconds and then all the handset will rings 10 seconds and dropped the call. The handset must be
assigned an extension number to be able to transfer a call .(Refer to page 32)
05 MIN 02 SEC
G E N E X
Page 17
2.4GHz DIGITAL CORDLESS TELEPHONE with CID
17
01
01
08
02
02
08
08
MODEL: CT-D201 USA VERSION
Memory features
Your phone stores up to 40 name/numbers in the handset memory(phone number-20digits, name–16 characters)
Note:
n Press or to move the desired location.
n Press CLR/ ** or key to delete one character. If no name and no number is typed, press CLR/** , then go
back to the previous screen. Press MEMO to cancel the function and go back to the standby mode.
n Your phone stores up to 40 name/numbers before the memory becomes full. If your phone memory is full.
To store new name and number, you must delete old and unnecessary call.
Review a phone name and number from memory
1. Press MEMO in standby mode, it always shows memory “01 ” first.
2. Press or to find the one you want to review.
M a r k T a y l o r
2 3 4 0 7 0 3
Note: If more than 12digits or 12 characters the remaining part is showed on pressing and button key
once more.
A B C D E F G H I J K
1 2 3 4 5 6 7 8 9
L M N O P
Storing a phone name and number in memory
Preferred Calls: You can assign a Preferred Call which will generate a special ringer sound at the start of the
second ring to any welcome caller in the memory. When you are saving the Name and number into the memory
add “*” mark at the beginning of the name by pressing the 0 button.
Blocked Calls: You can assign a Blocked Call which will disable the ringer sound from the second ring To any
caller in the memory. When you are saving the name and number into the memory, add “#” mark at the
beginning of the name by pressing the 0 button twice.
1. Press MEMO in standby mode.
2. Press or to find a location you want to save a new entry.
3. Enter the new name using dial keypad 0 – 9.(refer to keypad characters)
(If you want to make a space, Press key.)
4. Press key to enter the number
5. Enter new number using dial keypad 0 – 9.
6. Press SELECT to save. Then the phone will generate confirmation tone.
0 1 2 3 4 5
M a r k T a y l o r
2 3 4 0 7 0 3
J i m C a s s i d y
S a v e d
G E N E X
Page 18
2.4GHz DIGITAL CORDLESS TELEPHONE with CID
18
01
08
08
08
MODEL: CT-D201 USA VERSION
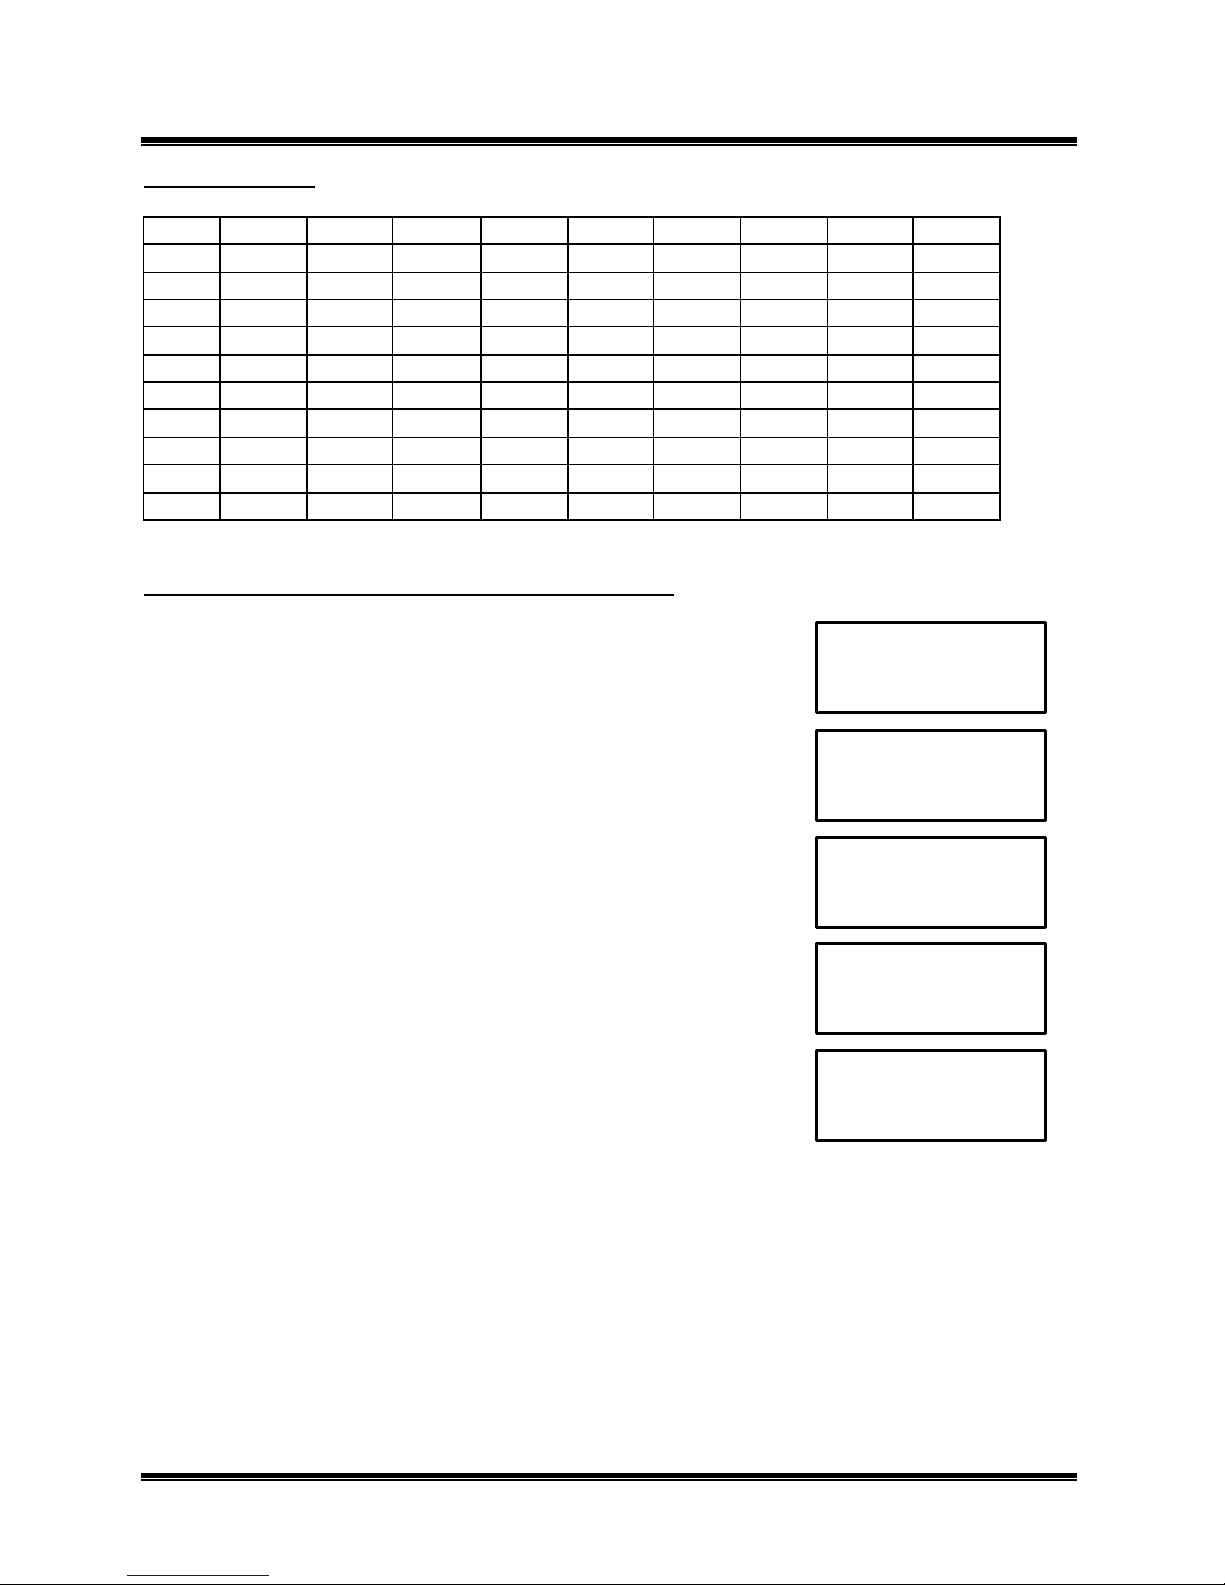
Key pad characters
Key 1st 2nd 3rd 4th 5th 6th 7th 8th 9th
1 1
2 A B C a b c 2
3 D E F d e f 3
4 G H I g h i 4
5 J K L j k l 5
6 M N O m n o 6
7 P Q R S p q r s 7
8 T U V t u V 8
9 W X Y Z w x y z 9
0 * # - $ ( ) (blank) 0
Editing a phone name and number in memory(only English)
1. Press MEMO in standby mode.
2. Press or to find a location you want to edit name and number.
3. Enter the name using dial keypad 0 – 9.(refer to keypad characters)
(If you want to make a space, Press key.)
4. Press key to edit the number.
5. Enter the number using dial keypad 0 – 9.
6. Press SELECT to save. Then the phone will generate confirmation tone.
M a r k T a y l o r
2 3 4 0 7 0 3
J o h n S m i t h
5 2 3 0 9 8 4
J o h n S m i t
J i m C a s s i d y
5 2 3 0 9 8
S a v e d
G E N E X
Page 19
2.4GHz DIGITAL CORDLESS TELEPHONE with CID
19
01
08
01
08
05 MIN 02 SEC
MODEL: CT-D201 USA VERSION
Deleting a phone name and number from memory
1. Press MEMO in standby mode.
2. Press or to find a location you want to delete name and number.
3. Press CLR/** .
4. Press SELECT to delete. Then the phone will generate confirmation tone.
Note: if an empty location is selected, then the phone will generate error tone.
Dialing a number from memory
1. Press MEMO in standby mode.
2. Press or to find a location you want to dial name and number.
3. Press TALK to dial a phone number.
M a r k T a y l o r
2 3 4 0 7 0 3
J o h n S m i t h
5 2 3 0 9 8 4
D e l e t e ?
D e l e t e d
M a r k T a y l o r
2 3 4 0 7 0 3
J o h n S m i t h
5 2 3 0 9 8 4
T a l k
5 2 3 0 9 8 4
G E N E X
Page 20
2.4GHz DIGITAL CORDLESS TELEPHONE with CID
20
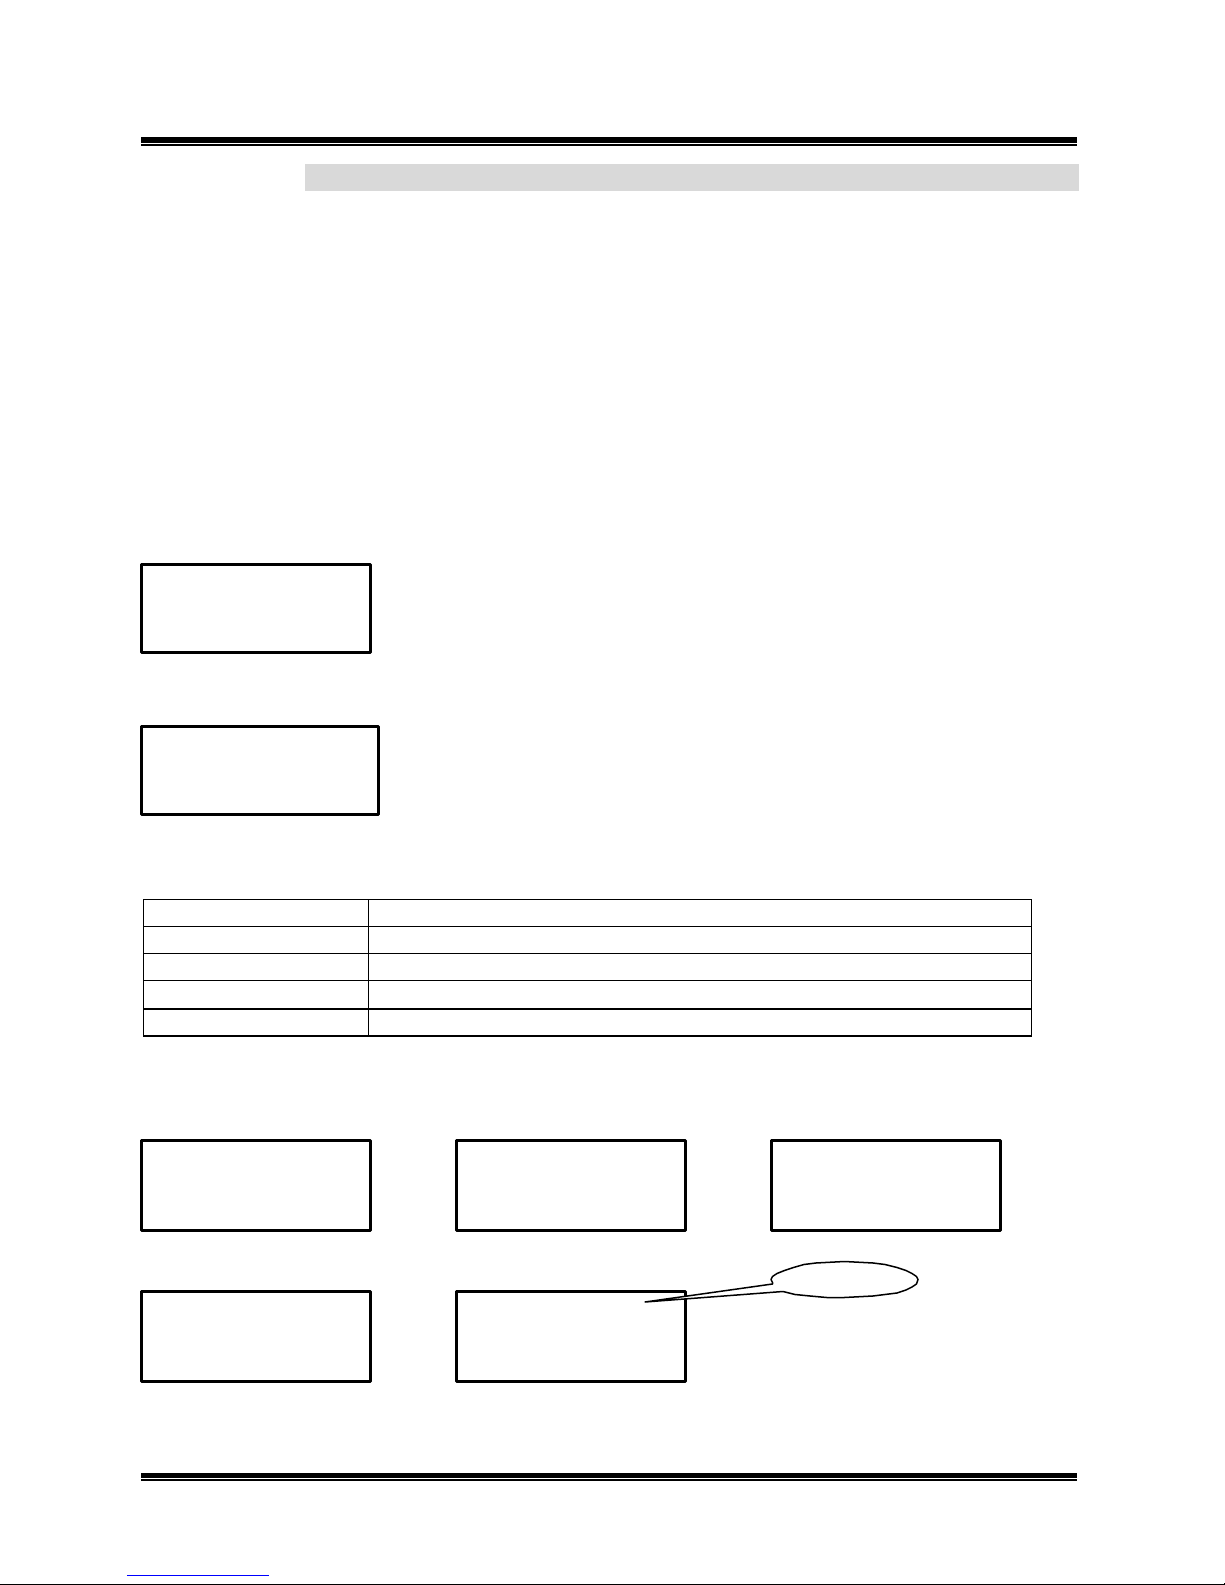
Time, Date, New call, Repeat call, Line
11:15 AM 12/06 NEW 01 RPT 03
11:15 AM 12/06 NEW 00 TOTAL 25
10:10 AM 11/05 NEW 01 RPT 03
10:10 AM 11/05 NEW 01 RPT 03
10:10 AM 11/05 NEW 01 RPT 03
10:10 AM 11/05 NEW 01 RPT 03
10:10 AM 11/05 NEW 02 RPT 02
Repeat Call
MODEL: CT-D201 USA VERSION
Call ID feature
This phone support. CLID FSK. When the phone rings, the caller ID feature allows you view the caller ’s name,
number, time and total call count on the handset LCD before you answering your phone. Once the caller ID
information is automatically stored. You can dial the displayed number and store the information for memory
dialing.
Note: you must subscribe to caller ID from your phone company to use this feature.
When there is an incoming call, the name, the telephone number and total call count of the caller will
automatically display. If you enter your 3-digits area code number in the area code setting mode, when you
received caller ID message from inside your local area, your local area code does not appears in caller ID
message. When reviewing caller ID message, you will see only the local seven digits number. For calls received
from outside your local area code, you will see a full 10-digit number.
Standby mode:
H 1
When received incoming a call:
M a r t i n K i m
3 2 7 - 1 2 1 2
The following special network messages are managed and displayed at the place of calling number.
Message Meanings
Private Name If a call is received from a caller that has blocked his/her information
Private No. If a call is received from a caller that has blocked his/her information
Unknown Name If a call is received from an area which does not provide caller ID service
Unknown No. If a call is received from an area which does not provide caller ID service
Note: If the incoming caller’s number is repeated, “RPT 02” will appear on the LCD.
P r i v a t e N a m e
U n k n o w n N o .
ç
Time, Date, New call, total calls
ç
ç Name
ç
Number (or with area code)
P r i v a t e N o .
M a r t i n K i m
5 6 7 - 8 9 0 1
U n k n o w n N a m e
G E N E X
Page 21
2.4GHz DIGITAL CORDLESS TELEPHONE with CID
21
10:10 AM 11/05 01 RPT 00
Location number of call
or new call
10:10 AM 11/05 NEW 05 RPT 02
10:10 AM 11/05 02 RPT 00
10:10 AM 11/05 02 RPT 00
05
MIN
02
SEC
5 5 5 3 2 7 1 2 1 2
05 MIN 02 SEC
1 5 5 5 3 2 7 1 2 1 2
10:10 AM 11/05 NEW 05 RPT 02
05 MIN 02 SEC
1 2 1 2
10:10 AM 11/05
05
02
MODEL: CT-D201 USA VERSION
Reviewing the caller ID list
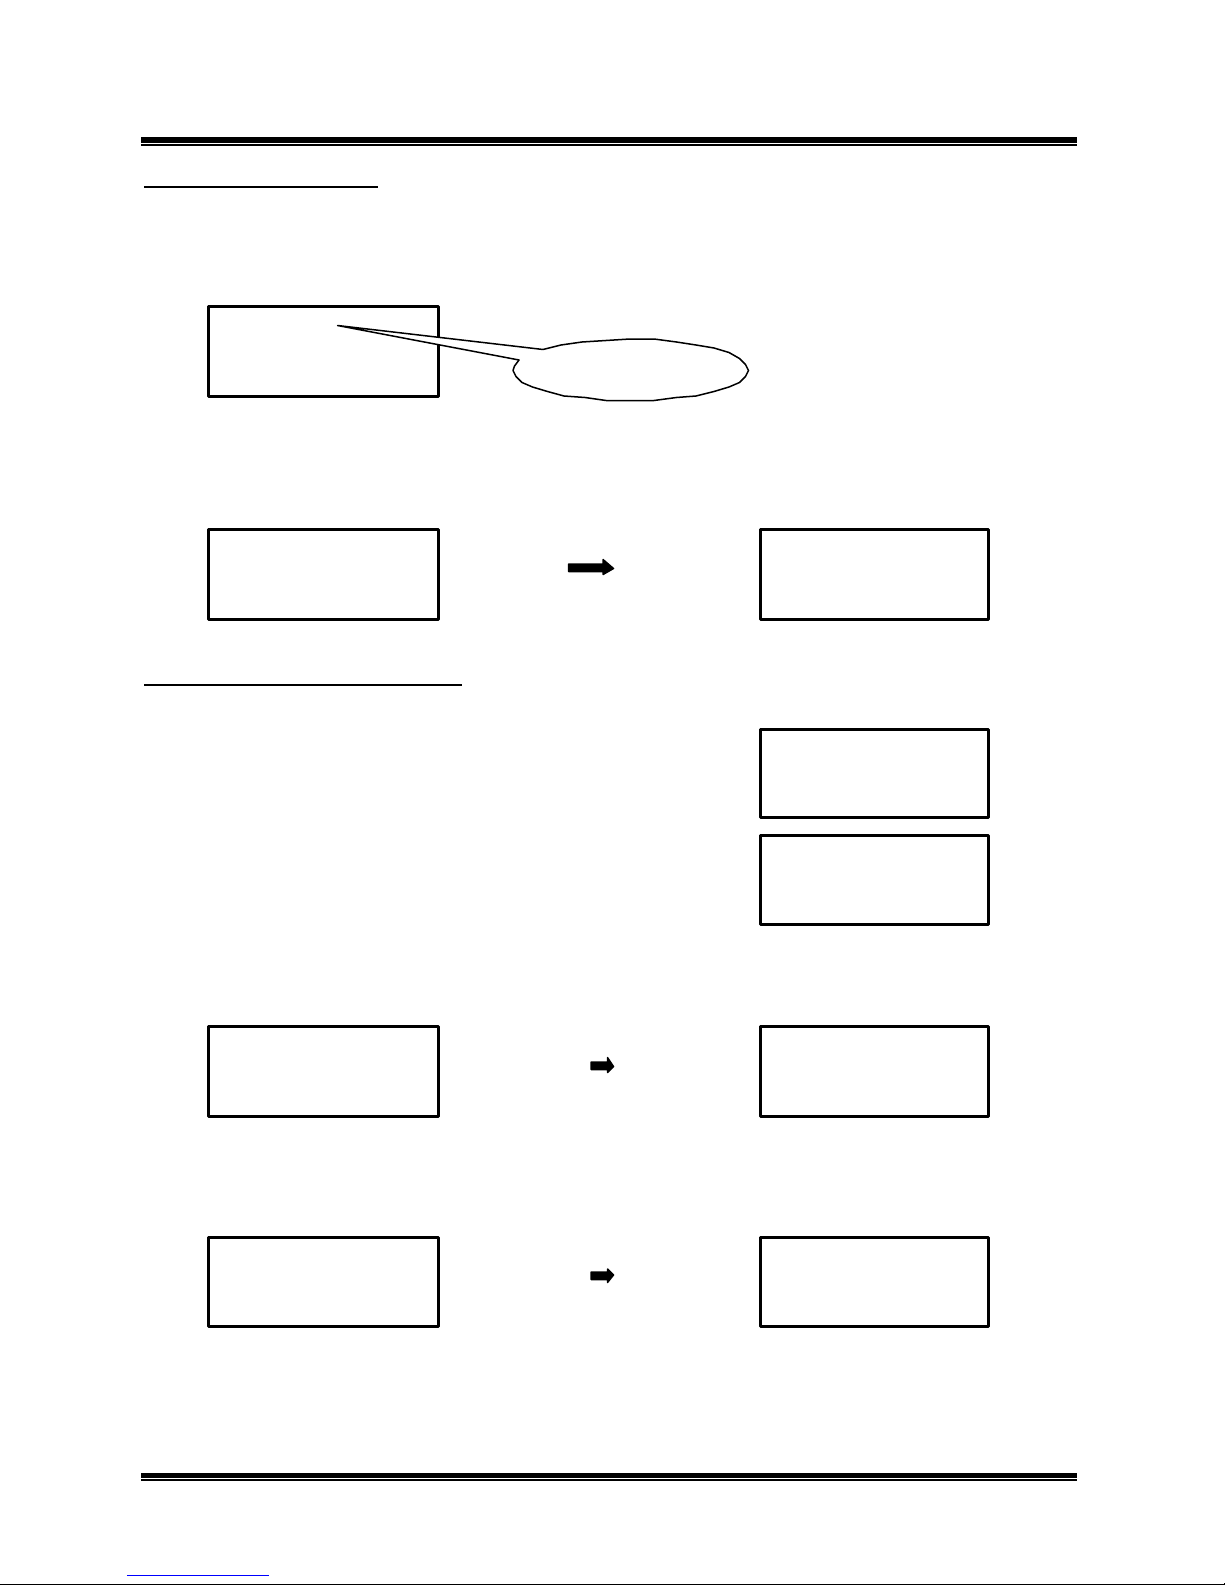
The caller ID information stores up to 40 incoming calls in the handset CID directory. (Number - 20 digits,
Name –16 digits, date and time). To review your caller ID name and number in the standby mode of handset,
follow the steps below:
1. Press to review the newest call or press to review the oldest call.
M a r t i n K i m
3 2 7 - 1 2 1 2
Note: If more than 12digits or 12characters the remaining part is showed on pressing and button key once
more. If the key is not pressed for about 15 seconds in the review mode, it automatically return to standby mode,
it is also possible to leave menu by pressing FLASH.
A B C D E F G H I J K
1 2 3 4 5 6 7 8 9
To make a call by using caller ID list
1. Press or to find the name and number you want to call back.
2. Press TALK. the number automatically dials.
Note 1 : For long distance calling, add “ 1 ” at the beginning of the 10 digit numbers by pressing the 1 button on
the keypad before pressing TALK. The number automatically dials.
Note 2 : Select the seven digits from 10 digits numbers by pressing 2 but ton.
M a r k T a i l e r
5 5 5 - 3 2 7 - 1 2 1 2
Note 3 : For area code dialing, add your area code at the beginning of the 7 digit numbers by pressing the 2
button twice on the keypad before pressing TALK. The number automatically dials.
M a r k T a i l e r
2 2 2 - 3 2 7 - 1 2 1 2
NEW
RPT
L M N O P
0 1 2 3 4 5
M a r k T a i l e r
5 5 5 - 3 2 7 - 1 2 1 2
T a l k
T a l k
T a l k
3 2 7 -
G E N E X
Page 22
2.4GHz DIGITAL CORDLESS TELEPHONE with CID
22
10:10 AM 11/05 NEW 09 RPT 00
10:10 AM 11/05 NEW 09 RPT 00
10:10 AM 11/05
NEW
09
RPT
00
10:10 AM 11/05 NEW 01 RPT 00
10:10 AM 11/05 NEW 09 RPT 00
10:10 AM 11/05 NEW 09 RPT 00
MODEL: CT-D201 USA VERSION
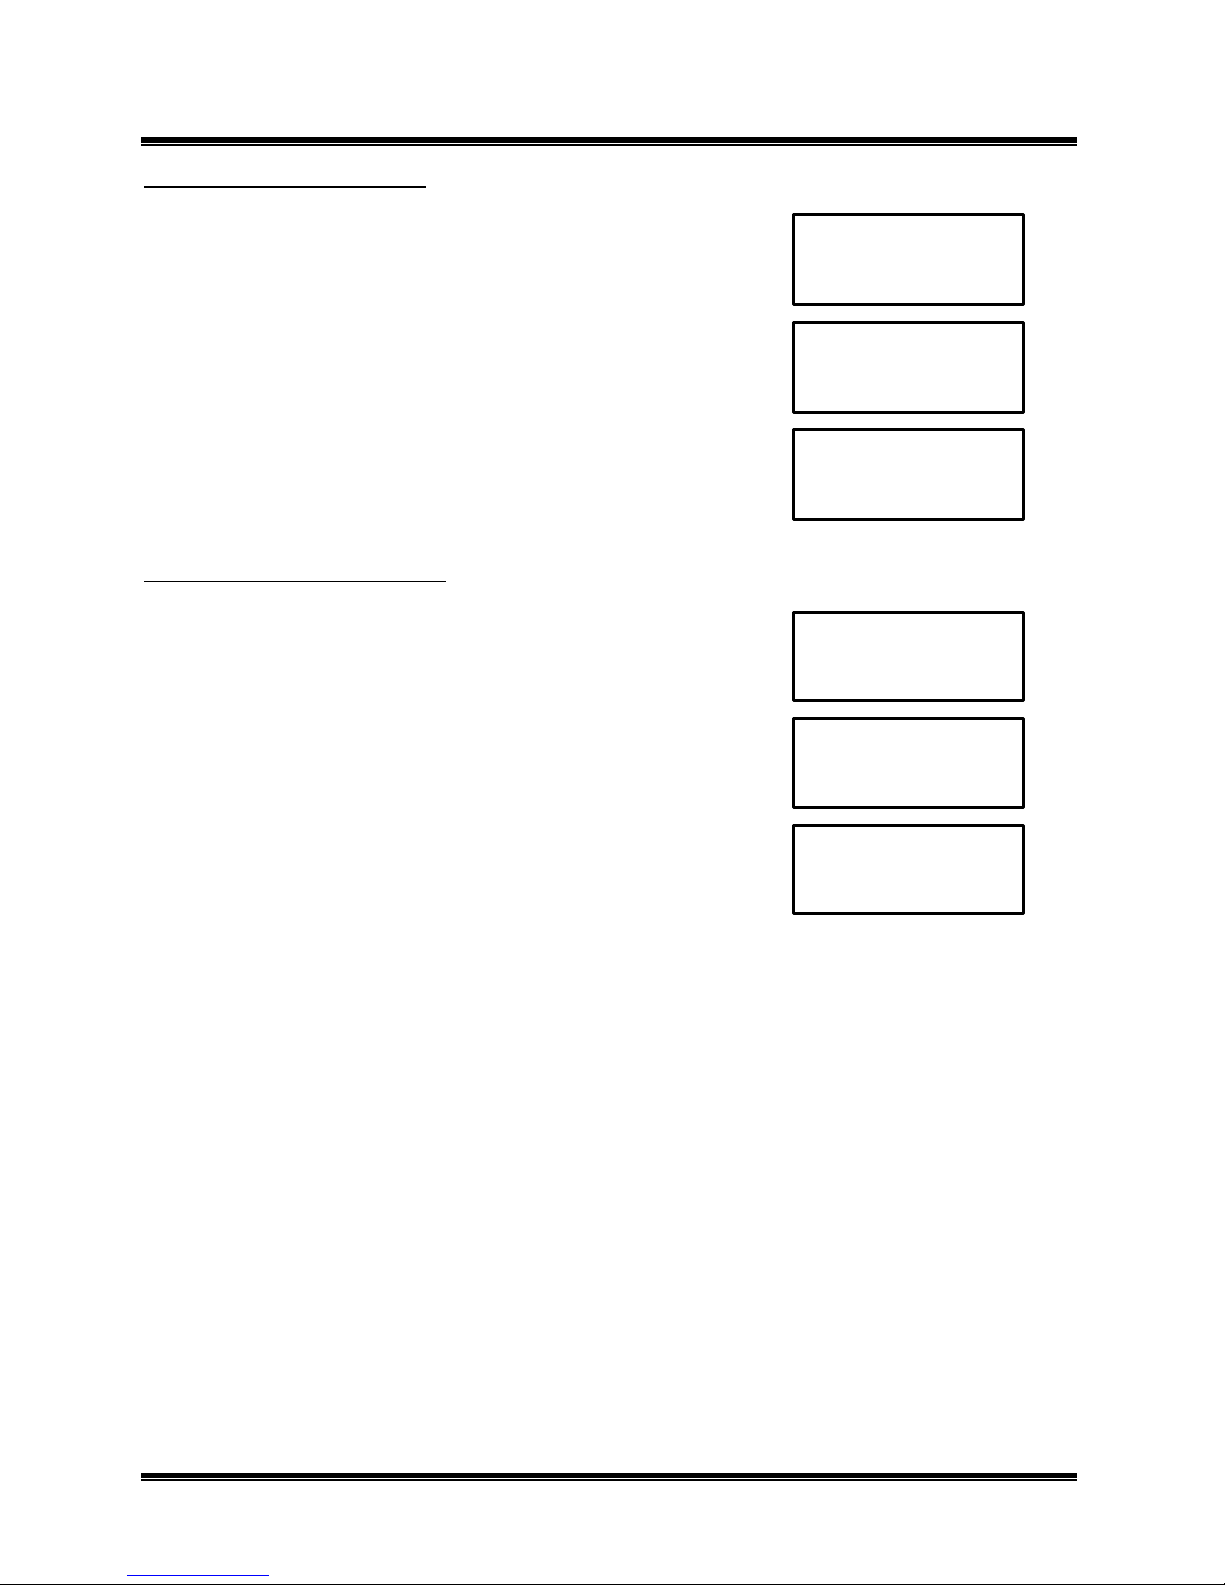
Deleting a call from caller ID list
1. Press or to find the name and number you want to delete.
2. Press CLR/** .
3. Press SELECT to delete. Then the phone will generate confirmation tone.
Deleting all calls from caller ID list
1. Press or to go to caller ID review mode.
2. Press CLR/** and hold for 2 seconds.
3. Press SELECT to delete. Then the phone will generate confirmation tone.
J e s s e K i m
3 4 7 - 2 7 1 2
D e l e t e ?
D e l e t e d
M s r t i n K i m
3 2 7 - 1 2 1 2
D e l e t e A l l ?
D e l e t e d
G E N E X
Page 23
2.4GHz DIGITAL CORDLESS TELEPHONE with CID
23
10:10 AM 11/05 NEW 22 RPT 02
10:10 AM 11/05 NEW 09 RPT 00
10:10 AM 11/05
NEW
09
RPT
00
MODEL: CT-D201 USA VERSION
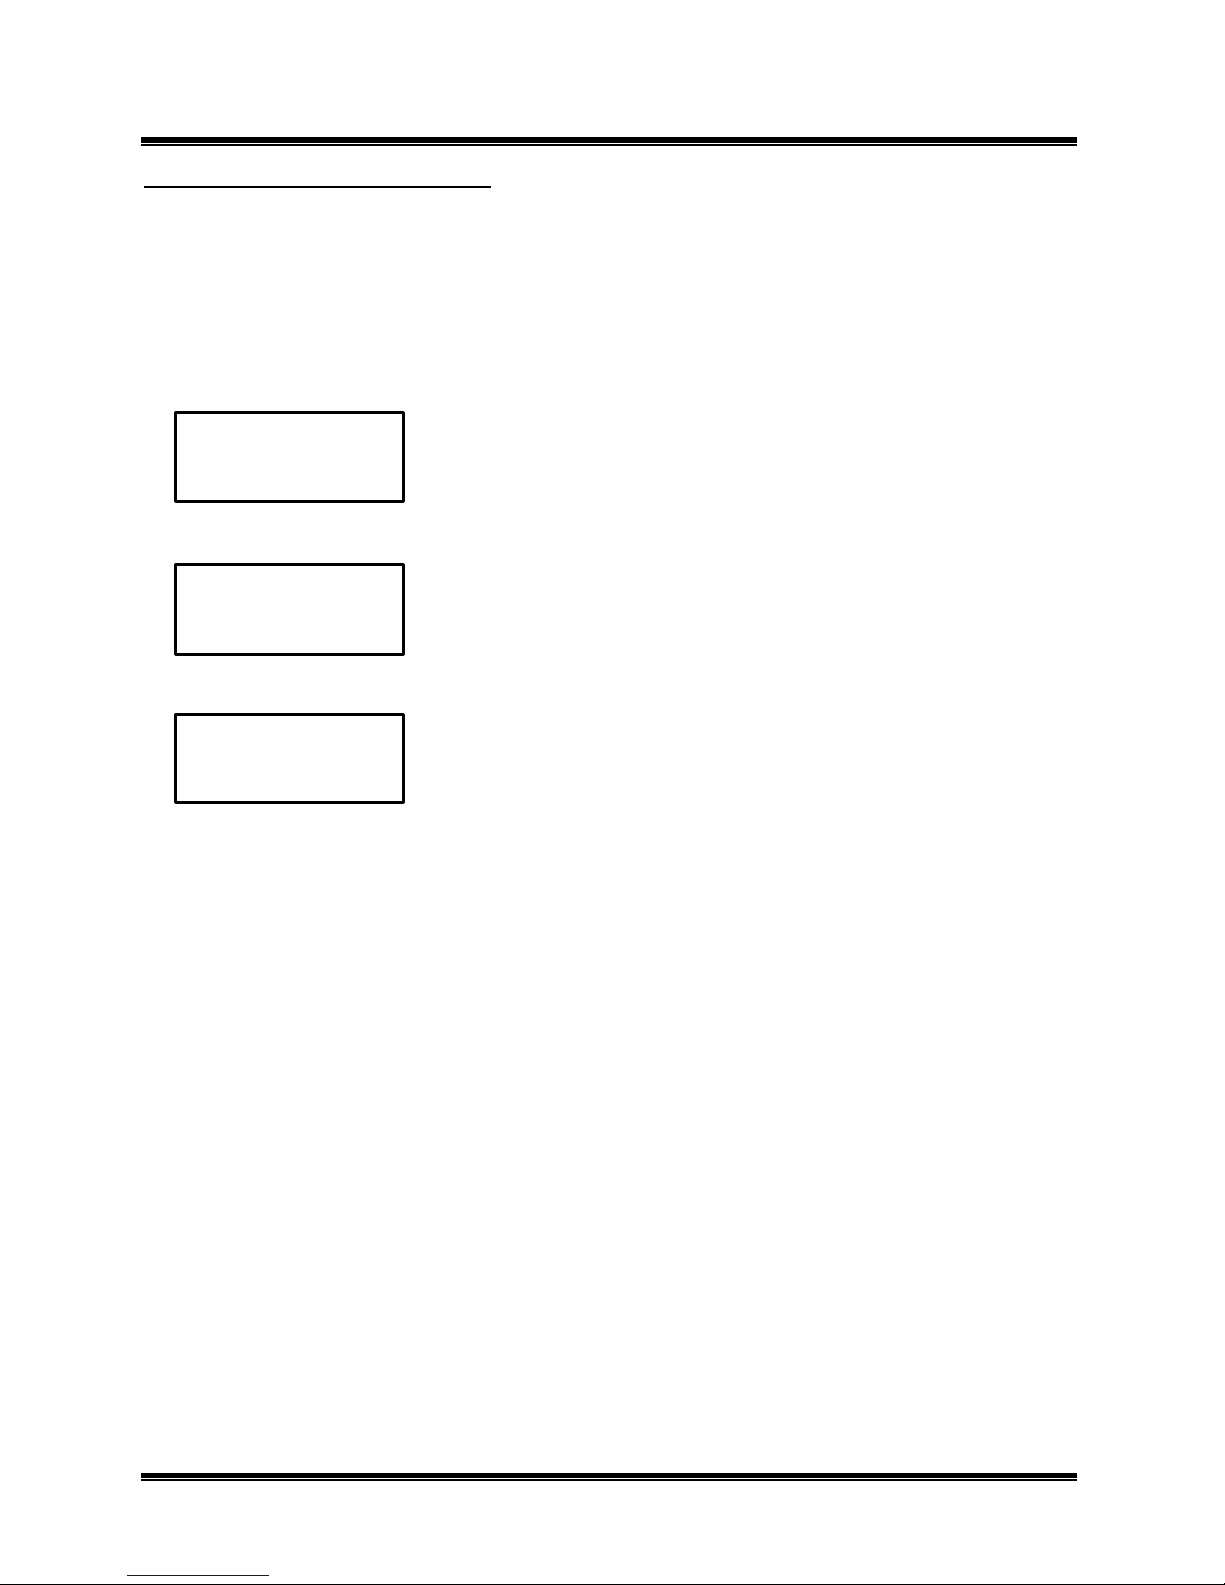
Storing a caller ID number in a memory
Preferred Calls: You can assign a Preferred Call which will generate a special ringer sound at the start of the
second ring to any welcome caller in the memory. When you are saving the Name and number into the memory
add “ * ” mark at the beginning of the name by pressing the 0 button.
Blocked Calls: You can assign a Blocked Call which will disable the ringer sound from the second ring To any
caller in the memory. When you are saving the name and number into the memory, add “#” mark at the
beginning of the name by pressing the 0 button.
1. Press or to find the name and number you want to store in memory.
J e s s e K i m
3 4 7 - 2 7 1 2
2. Press MEMO. If you want to select preferred calls or blocked calls, add “*” or “#” mark at the beginning of
the name by pressing the 0 button.
J e s s e K i m
3 4 7 - 2 7 1 2
3. Press SELECT. Then the phone will generate confirmation tone
S a v e d
Note: Your phone stores up to 40 name/numbers before the memory becomes full. If your phone memory is full,
to store new name and number, you must delete old and unnecessary call.
Note : If you dose not subscribe to Call Waiting Deluxe service from yo ur phone company, use Call Waiting
Deluxe feature by using just FLASH key.
G E N E X
Page 24
2.4GHz DIGITAL CORDLESS TELEPHONE with CID
24
MODEL: CT-D201 USA VERSION
Call waiting deluxe feature
Call waiting Deluxe is a network feature which provides the customer with various options for the disposition of a
new call waiting call. When you receiving call waiting call, you can select the following call waiting deluxe
features on the handset. Upon selection the desired option, the desired choice will send the corresponding
Flash/DTMF key sequence to the network to enact the chosen function. In the case of Answer, Hold and
Conference, there are subsets of options as to what the user can due with the call.
Note : You must subscribe specially to Call Waiting Deluxe in order to receive these options.
Stable Two-party call state
Generic option name Comment
Answer Your phone is connected to new call, current call is held.
Conference 3 - party call
Hold New call is held (and given “hold” announcement)
Drop Your phone is connected to new call, current call is dropped
Announcement New call given announcement (then disconnected)
Forward New call is forwarded (usually to voice mail)
Held call state
Generic option name Comment
Return Alternates between callers
Drop Current call is dropped
Conference 3 -party call
Conference state
Generic option name Comment
Drop first Original call drop
Drop last Current call is dropped
1. Call waiting timeout is 25 seconds after end of FSK
2. If new call waiting received on 2-way call mode, then the old call waiting mode is clear and start call waiting
mode newly.
Call waiting deluxe menu directory
Return
Answer (press or )
Conference (press or )
Talk mode (press or )
Hold (press or )
Drop
Announcement
Forward
Drop
Conference
Drop first
Drop last
Return
Drop
Conference
G E N E X
Page 25
2.4GHz DIGITAL CORDLESS TELEPHONE with CID
25
10:10 AM 11/05 NEW 01 RPT 01
05
MIN
02
SEC
05 MIN 02 SEC
10:10 AM 11/05 NEW 01 RPT 01
05
MIN
02
SEC
05 MIN 02 SEC
05 MIN 02 SEC
05 MIN 02 SEC
MODEL: CT-D201 USA VERSION
Answer
When you received call waiting call at talk mode, if you want to make the current call hold, select Answer. In
held call state, you can choice following subset mode.
When you receive a call waiting call at talk mode,
M a r t i n K i m
3 2 7 - 1 2 1 2
1. Press or to find Answer.
A n s w e r
2. Press SELECT to select Answer. Press or to select the option.
R e t u r n
3. If you select the option,
Press SELECT. Then go to normal talk mode
T a l k
Conference
When you received call waiting call at talk mode, If you select Conference, call is changed to conference mode.
If you want to drop the original call, select the Drop First . Then original call is dropped and connected the call
waiting call. Or, if you want to drop the call waiting call, select Drop Last. Then call waiting call is dropped and
connected the original call. If you want to drop the all call, press TALK.
When you receive a call waiting call at talk mode,
M a r t i n K i m
3 2 7 - 1 2 1 2
1. Press or to find Conference.
C o n f e r e n c e ♦
2. Press SELECT to select Conference.
3. Press or to select the option.
D r o p F i r s t
4. If you select the option,
Press SELECT. Then go to normal talk mode
T a l k
D r o p
D r o p L a s t
G E N E X
Page 26
2.4GHz DIGITAL CORDLESS TELEPHONE with CID
26
05 MIN 02 SEC
10:10 AM 11/05 NEW 01 RPT 01
05 MIN 02 SEC
10:10 AM 11/05 NEW 01 RPT 01
05
MIN
02
SEC
05 MIN 02 SEC
05 MIN 02 SEC
MODEL: CT-D201 USA VERSION
Hold
When you received call waiting call at talk mode, if you want to make the call waiting call hold, select the Hold.
In held call state, you can choice the following subset mode.
When you receive a call waiting call at talk mode,
M a r t i n K i m
3 2 7 - 1 2 1 2
1. Press or to find Hold.
H o l d ♦
2. Press SELECT to select Hold. Press or to select the opti on
R e t u r n
3. If you select the option,
Press SELECT. Then go to normal talk mode
T a l k
Drop
When you received call waiting call at talk mode, if you select Drop, your phone is connected to new call.
Current call is dropped.
When you receive a call waiting call at talk mode,
M a r t i n K i m
3 2 7 - 1 2 1 2
1. Press or to find Drop.
D r o p ♦
2. Press SELECT to select Drop. Then go to normal talk mode.
T a l k
D r o p
G E N E X
Page 27
2.4GHz DIGITAL CORDLESS TELEPHONE with CID
27
05 MIN 02 SEC
10:10 AM 11/05 NEW 01 RPT 01
05
MIN
02
SEC
05 MIN 02 SEC
10:10 AM 11/05 NEW 01 RPT 01
05 MIN 02 SEC
MODEL: CT-D201 USA VERSION
Announcement
When you received the call waiting call at talk mode, if you select Announcement, new call given announcement
(then disconnected)
When you receive a call waiting call at talk mode,
M a r t i n K i m
3 2 7 - 1 2 1 2
1. Press or to find Announcement..
A n n o u n c e ♦
2. Press SELECT to select Announcement. Then go to normal talk mode.
T a l k
Forward
When you received call waiting call at talk mode, if you select forward, new call is forwarded (usually to voice
mail)
When you receive a call waiting call at talk mode,
M a r t i n K i m
3 2 7 - 1 2 1 2
1. Press or to find Forward.
F o r w a r d
2. Press SELECT to select Forward. Then go to normal talk mode.
T a l k
G E N E X
Page 28

2.4GHz DIGITAL CORDLESS TELEPHONE with CID
28
10:10 AM 11/05 NEW 09 RPT 00
MODEL: CT-D201 USA VERSION
Voice mail feature
If you subscribe to voice mail service. The voice mail LED is flashing on the handset whenever you have
messages waiting in your voice mail box, and then you can access by using the one-touch voice mail key
(CLR/** ). This key can be programmed via the User Setting Mode . Your phone stores up to 12 numeric digits
plus up to 6 pauses and then the another 8 numeric digits. If you presses one-touch voice mail key without
having a number stored for voice mail, the handset LCD screen will display the following screen with error tone:
Note: the message shown above will time out after 3 seconds and the phone will return to standby mode with
nothing displayed on the LCD screen. If you not subscribe to the telephone company voice mail service, this key
can be programmed as a one-touch speed dial.
Programming a one -touch voice mail access number
If you want to programming a one-touch voice mail access number of your phone company, (Refer to page 30).
E n t e r V o I c e
M a i l N u m b e r
G E N E X
Page 29
2.4GHz DIGITAL CORDLESS TELEPHONE with CID
29
10:10 AM 11/05 NEW 09 RPT 00
10:10 AM 11/05 NEW 09 RPT 00
10:10 AM 11/05 NEW 09 RPT 00
10:10 AM 11/05 NEW 09 RPT 00
MODEL: CT-D201 USA VERSION
Us er setting features
This unit contains the following User setting features. To access, press the SELECT button at standby mode on
the handset, use the or button to find each setting mode.
Note: If the key is not pressed for about 30 seconds in the setting mode, it automatically return to standby mode,
it is also possible to leave menu by pressing CLR/** .
n Selecting Ringer Volume
n Selecting Ringer Type
n Setting call waiting CID
n
Setting CID Deluxe
n Entering Area Code
n Entering voice mail number
n Setting Time and Date
n Setting extension phone detection
n Setting pause time
n
Selecting language mode
n First Ring On/Off
n Setting handset number
n VMWI Off
n Default setting
Selecting ringer volume
1. Press SELECT in standby mode.
2. Press or to select Ringer Volume setting mode.
3. Press SELECT.
4. Press or to select Ringer Volume. (Off – Low – High)
3. Press SELECT to confirm and go back to next user setting feature mode.
Then the phone will generate confirmation tone.
Selecting Ringer Type
1. Press SELECT in standby mode.
2. Press or to select Ringer Type setting mode.
3. Press SELECT.
4. Press or to select Ringer Type. (Type 1 – Type 2 – Type 3)
5. Press SELECT to confirm and go back to next user setting featu re mode.
Then the phone will generate confirmation tone.
R i n g e r V o l
L o w
R I n g e r T y p e ♦♦
T y p e 2
O f f
T y p e 1
G E N E X
Page 30
2.4GHz DIGITAL CORDLESS TELEPHONE with CID
30
10:10 AM 11/05
09
00
10:10 AM 11/05 NEW 09 RPT 00
10:10 AM 11/05
NEW
09
RPT
00
10:10 AM 11/05 NEW 09 RPT 00
10:10 AM 11/05
09
00
10:10 AM 11/05 NEW 09 RPT 00
10:10 AM 11/05 NEW 09 RPT 00
10:10 AM 11/05 NEW 09 RPT 00
MODEL: CT-D201 USA VERSION
Setting Call Waiting CID(CWCID)
1. Press SELECT in standby mode.
2. Press or to select Call Waiting CID On/Off setting mode.
C W C I D ♦♦
3. Press SELECT.
4. Press or to select On or Off.
5. Press SELECT to co nfirm and go back to next user setting feature mode.
Then the phone will generate confirmation tone.
O n
O f f
Setting CID Deluxe
1. Press SELECT in standby mode.
2. Press or to select CID Deluxe setting mode.
C I D D e l u x e ♦♦
3. Press SELECT.
4. Press or to select Active or Deactive.
5. Press SELECT to confirm and go back to next user setting feature mode.
Then the phone will generate confirmation tone.
A c t I v e
D e a c t i v e
Entering Area Code
1. Press SELECT in standby mode.
2. Press or to select Area Code setting mode.
A r e a C o d e ♦♦
3. Press SELECT.
4. Enter Area Code Number.
5. Press SELECT to confirm and go back to next user setting feature mode.
Then the phone will generate confirmation tone.
E n t e r N u m b e r
Note: it shows current Area code number. If want to delete one digit, then press CLR/** .
Entering voice mail number
1. Press SELECT in standby mode.
2. Press or to select Voice Mail Number setting mode.
V o I c e M a i l ♦♦
3. Press SELECT.
4. Enter Voice Mail Number.
5. Press SELECT to confirm and go back to next user setting feature mode.
E n t e r N u m b e r
Then the phone will generate confirmation tone.
Note: it shows current voice mail number. If want to delete one digit, then press CLR/** .
NEW
RPT
NEW
RPT
G E N E X
Page 31
2.4GHz DIGITAL CORDLESS TELEPHONE with CID
31
10:10 A M 11/05 NEW 09 RPT 00
10:10 AM 11/05
09
00
10:10 AM 11/05 NEW 09 RPT 00
10:10 AM 11/05 NEW 09 RPT 00
10:10 AM 11/05 NEW 09 RPT 00
10:10 AM 11/05
09
00
MODEL: CT-D201 USA VERSION
Setting Time and Date
It is necessary to set the internal clock time of the phone to display the time in the caller ID display when
incoming calls received, if you subscribe to caller ID from your local land line telephone company, the time and
date are automatically set when the first call from land line is received.
1. Press SELECT in standby mode.
2. Press or to select Time and Date setting mode.
3. Press SELECT to setting Time and Date. Then your phone will flash
time icon of the LCD.
4. Press the telephone keypad dial button to enter hour, minute.
5. Press the key to move the cursor to the desired location.
6. Press the 1 button to select AM or 2 button to select PM.
7. Press the telephone keypad dial button to enter month, date.
8. Press SELECT to confirm and go back to next user setting feature mode.
Then the phone will generate confirmation tone.
Setting extension phone detection
When you attempt to make a call and another phone is in use on line.
On mode: if you press TALK twice, join two phones.
Off mode: if you press TALK, join two phones.
1. Press SELECT in standby mode.
2. Press or to select EIU detection setting mode.
3. Press SELECT.
4. Press or to select On or Off.
5. Press SELECT to confirm and go back to next user setting feature mode.
Then the phone will generate confirmation tone.
Note: when On mode the handset LCD will display “Ext In Use ”.
Setting pause time
1. Press SELECT in standby mode.
2. Press or to select pause time setting mode.
3. Press SELECT.
4. Press or to adjust the pausing time (1~ 10 ).
3 seconds is the preset pause time.
5. Press SELECT to confirm and go back to next user setting feature mode.
6. Then the phone will generate confirmation tone.
T i m e / D a t e ♦♦
0 : 0 0 A M 0 0 / 0 0
E I U D e t e c t ♦♦
O n
P a u s e T i m e ♦♦
P a u s e T i m e ?
[ 1. ~ 1 0. ]
O f f
NEW
RPT
NEW
RPT
G E N E X
Page 32
2.4GHz DIGITAL CORDLESS TELEPHONE with CID
32
10:10 AM 11/05 NEW 09 RPT 00
10:10 AM 11/05
NEW
09
RPT
00
10:10 AM 11/05 NEW 09 RPT 00
10:10 AM 11/05 NEW 09 RPT 00
10:10 AM 11/05 NEW 09 RPT 00
10:10 AM 11/05 NEW 09 RPT 00
MODEL: CT-D201 USA VERSION
Selecting Language mode
This phone offers English or Spanish languages for your convenience.
1. Press SELECT in standby mode.
2. Press or to select Language setting mode.
L a n g u a g e ♦♦
3. Press SELECT.
4. Press or to select English or Spanish.
5. Press SELECT to confirm and go back to next user setting feature mode.
E n g l i s h
6. Then the phone will generate confirmation tone.
First Ring On/ Off
This telephone will generate the first ring sound even in the Blocked Call mode to indicate that you have an
incoming call. To keep silent in Blocked Call mode you can turn off the first ring sound.
1. Press SELECT in standby mode.
2. Press or to select First Ring setting mode.
F i r s t R i n g ♦♦
3. Press SELECT.
4. Press or to select On or Off.
5. Press SELECT to confirm and go back to next user setting feature mode.
O n
Then the phone will generate confirmation tone.
Setting Handset number
1. Press SELECT in standby mode.
2. Press or to select handset number setting mode.
H a n d N u m b e r ♦♦
3. Press SELECT.
4. Press handset number using by dial keypad ( 1,2,3).
5. Press SELECT to confirm and go back to next user setting feature mode.
Then the phone will generate confirmation tone.
H a n d N u m b e r ?
[ 1 2 3 ]
Note: if you enter the same handset number on each or all handset, when the phone receiving call form out side,
paging call or transfer call. Each or all handset rings simultaneously. You must change the handset number.
S p a n I s h
O f f
G E N E X
Page 33
2.4GHz DIGITAL CORDLESS TELEPHONE with CID
33
10:10 AM 11/05 NEW 09 RPT 00
10:10 AM 11/05 NEW 09 RPT 00
10:10 AM 11/05 NEW 09 RPT 00
10:10 AM 11/05 NEW 09 RPT 00
MODEL: CT-D201 USA VERSION
VMWI Off
When the VMWI LED is flashing on the handset, you can turn off the VMWI LED by using this feature.
1. Press SELECT in standby mode.
2. Press or to select VMWI Off mode.
3. Press SELECT.
V M W I O f f ♦♦
4. Press or to select Yes or No.
Y e s
5. Press SELECT to confirm and go back to next user setting feature mode. Then the phone will generate
confirmation tone and the VMWI LED is turn off.
Default setting
If you want to return to default setting mode for your phone, follow the steps below:
n Ring volume – high
n Ringer type – No. 1
n Call waiting CID – enable
n CID deluxe – enable
n
Area code – 000
n Voice mail number – 000
n Time and date – 12:00 am 1/01 new 00 total 00
n Extension phone detection – enable
n Pause time – 3 seconds
n Language mode – English
n
First ring – On
n Handset number – No. 1
n VMWI Off – Yes
1. Press SELECT in standby mode.
2. Press or to select Default setting mode.
D e f a u l t
S e t t i n g ?
3. If you want to handset default setting, press SELECT.
4. Press or to select No or Yes.
N o
Y e s
5. Press SELECT to confirm. Then the handset will generate confirmation tone and go back to standby mode.
N o
G E N E X
Page 34
2.4GHz DIGITAL CORDLESS TELEPHONE with CID
34
s service department if the problem continues
Contact your telephone service provider to verify that your caller ID service is
data was displayed, which usually occurs
MODEL: CT-D201 USA VERSION
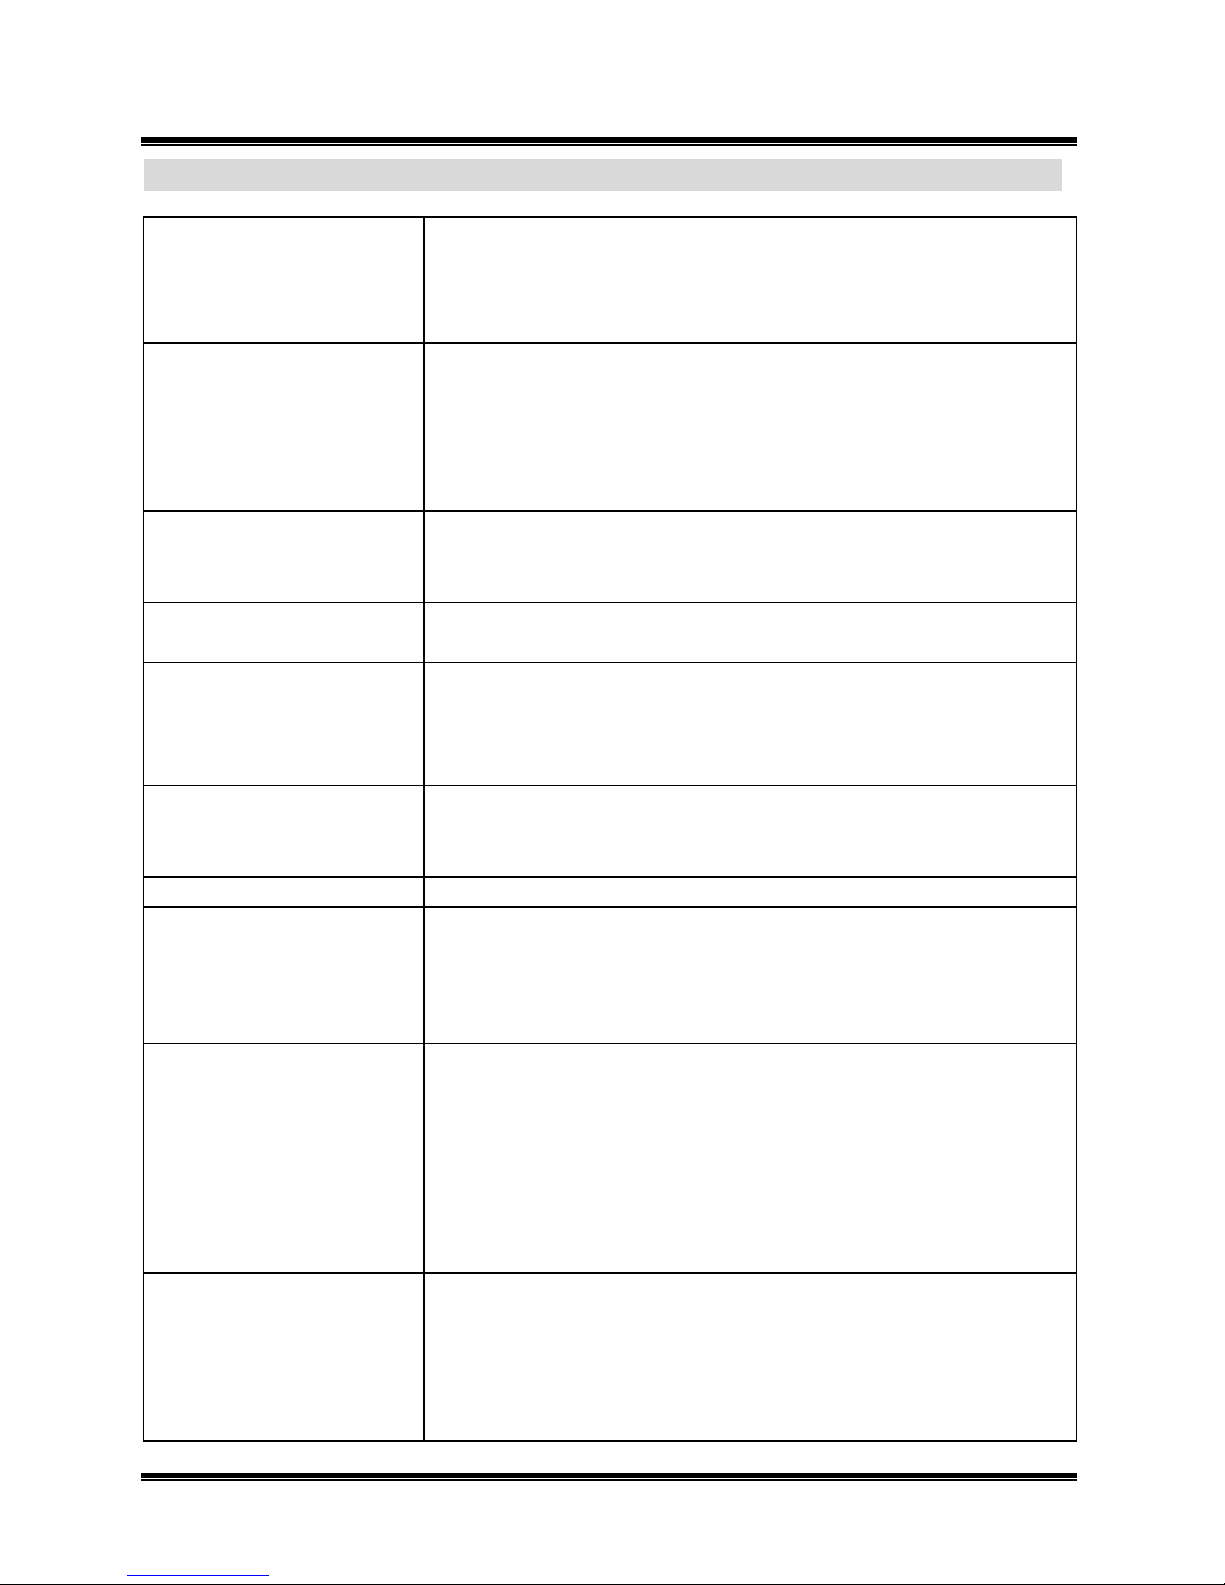
TROUBLESHOOTING
Symptoms Possible Solution / Cause
No dial tone or phone will not
dial out
Cannot hear the telephone
ringing
The handset does not work
Volume drops or you hear
Unusual Sounds
Static interference
(Crackling sound during call)
The handset’s range decreases
Check that you have plugged the AC power adapter into a working outlet.
Check all telephone cord connections or try another jack. Check to be sure that the
phone is set to the correct type of service (tone/pulse)
Check the ringer volume select mode (at the off mode the ring not be heard).
Refer to user setting feature.
You may have exceeded the Ringer Equivalence Number (REN) limit of how many
phones can be connected to the same line. The REN total of all devices (printed on
the bottom label of each unit) should not exceed five (5). Disconnect the appropriate
units to lower the REN total.
Move the handset closer to the base unit
Be sure the phone line cord and AC adaptor are correctly and securely connected.
Be sure the battery pack is connected and charged.
Someone has pickup another phone on the same line.
Hang up the other phone.
Do not place near appliances or large metal objects.
Keep the handset away from interference sources such as computers, remote
control toys, wireless alarm systems, wireless intercoms, room monitors, fluorescent
lights, and electrical appliances.
Return the handset to the base unit to recharge the battery pack.
Move the base unit so that it is centrally located in your residence or office and make
sure that the base unit is not located near appliances.
Receiver sound flutters or fades Be sure the battery pack is charged. Move the handset closer to the base unit.
Check your service. Call your local telephone company to ensure that you have
caller ID or call waiting service.
No data sent
Does not charge or Charge light
does not work
Caller ID /call waiting ID Does
not work properly
Contact your local telephone company’
for more than 24 hours. Your local telephone company central office may be
temporarily experiencing an overload.
Check the Ni- MH battery pack for proper connection inside the battery compartment
on the handset.
Make sure the charging contacts on both the base unit and the handset are in
contact during charging.
The charging contacts and terminals may need cleaning with an alcohol- dampened
swab.
Check the AC adapter. Be sure that the adapter is not damaged and that it is
securely plugged into a working outlet.
activated and working properly.
Caller ID service may not work if you have your phone connected to a private branch
exchange [PBX].
You answered the call before the caller ID
after the second ring.
G E N E X
 Loading...