

Page 1
OPERATION MANUAL
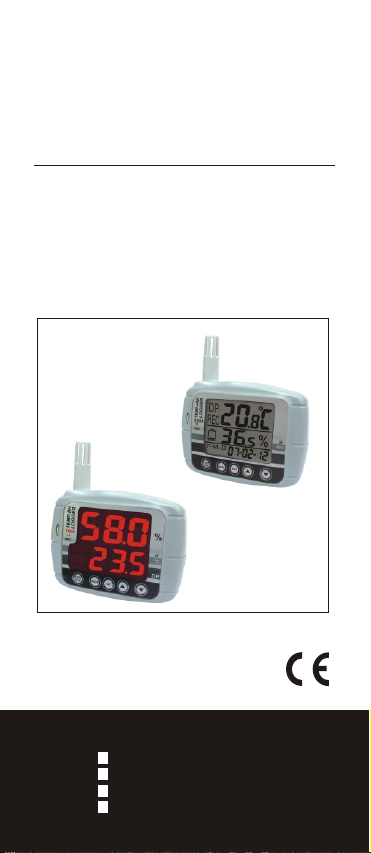
WALL-MOUNTED
INDOOR AIR QUALITY
MONITOR& LOGGER
8808
8809
Models:
8808, LCD type temp.& RH%
8809, LED type temp.& RH%
8806, LCD type temperature
8807, LED type temperature
Page 2
INTRODUCTION
Thank you for purchasing this wall-mounted
indoor air quality monitor ( 8806/07/08/09).
This meter is designed with big monitor,
audible/visible alarm and quick response
sensor to help you monitor the air temp &
humidity easily. The 16K Memory capacity
also help you to record the air quality any
time.
The monitor is divided into three distinct
sections for 8808 or two distinct sections
for 8809. There is no RH% display for 8806
8807 so one section of the monitor will
always shows - - - . The manual is written
based on 8808/09. For 8806/8807, please
neglect the description of humidity.
Please read this manual thoroughly before
operation. You will find it is a easy to operate
and a valuable instrument to measure &
record the air temperature & humidity.
MATERIAL SUPPLIES
The standard package of this product
contains:
The meter x 1pc
Operation manual x1pc
USB cable + CD x 1pc
Plain paper box x1pc
AA battery x 4pcs
The optional accessories are:
9V adaptor (>= 500mA. Depth:9mm
Inner: 1.35mm. Outer: 3.5mm)
33% & 75% calibration salt bottles
(VZ0033AZ1, VZ0075AZ1)for RH
calibration purposes.
Please contact the store where you bought
the meter to inquire above accessories.
1
Page 3
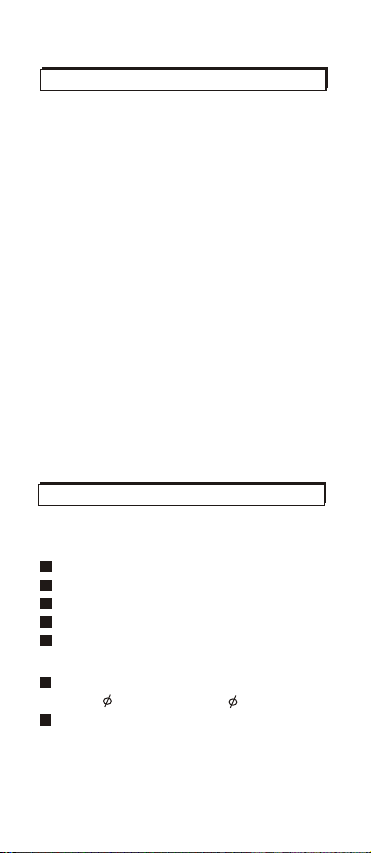
FEATURES
The meter offers below functions:
Big 8808/8806) or
LED display (8809/8807)
Up to point
It is always needed to use adaptor
when using logging function
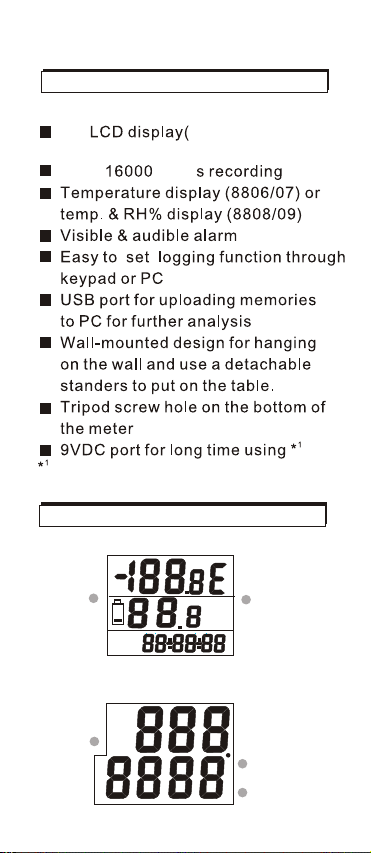
DISPLAY
LCD type 8808/8806
DP
REC
ALM
Y-M-D
H:M:S
%
REC
LED type 8809/8807
ALM
2
F
DP
Page 4

8808/8806
- The primary display shows the measured
air temperature in C or F for both models.
- The secondary display shows the air
humidity for #8808.
In 8806, the section will be - - -
- Year/Month/Date and Hour/Minute/Sec ond are displayed interchangeably at
the bottom of the screen for both models.
- DP icon is at the left side of the primary
display for #8808 and the value is showed
on after DP icon.
- REC is at the left side of the primary
display for both models and will appear
when the meter is in logging status.
8809/8807
- The primary display shows the measured
air humidity in % for #8809. In 8807, the
section will be - - -
- The secondary display shows the air
temperature in C for both models. When
switching the unit to F, the F LED will lit.
- When switch the mode to DP, the DP
LED will lit and the value will show on the
secondary display
- REC LED is at the left side of the monitor
for both models and will lit when the meter
is in logging status.
Dot LED flash ( 8809 )
While in logging mode:
-DP LED flashing stands for temp.
exceeds the threshold setting.
-F LED flashing stands for the RH%
exceeds the threshold setting.
- REC LED flashing stands for the
meter is in logging status.
Beeper will sound if any of above is
happened(When adaptor is plugged)
NOTE:Beeper will not alarm when
adaptor is unplugged .
3
Page 5
Dot LED flash ( 8808 ):
-REC LED flashes when the meter is in
the logging status.
-ALM LED flashes when temp. or RH
is exceeding threshold setting.
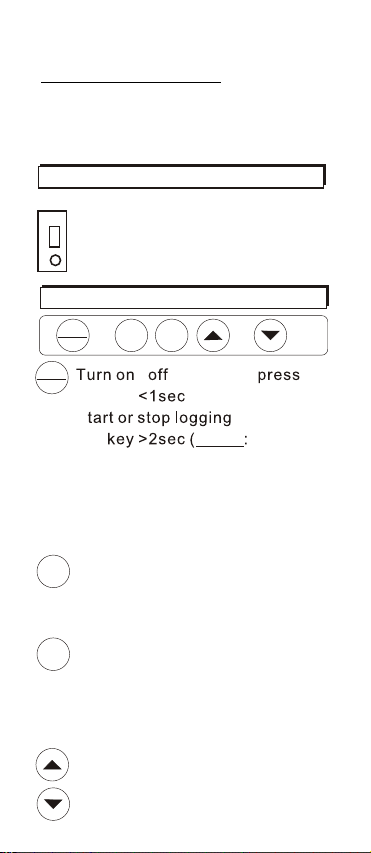
PORTS
Right side view
USB PORT
DC 9V
KEY PAD OPERATION
START
STOP
START
- / monitor by ing
STOP
the key
-S by pressing
the NOTE need to set
the start mode as KEY start)
-Change 33%RH calibration to 75%
caibration in RH calibration mode.
-Press START & SET keys at the
same time >2 sec to start 33%
RH calibration.
MODE
-Press key >2 sec to switch Dew
Point (8808/09) & air temperature.
-Press key <1 sec to switch temp.
unit.
SET
-In normal measurement mode,
press this key to enter set mode
in order to change and set up.
-Saving the setting: sample rate/
sample point/ start mode/ start
time/ real time/ alarm.
-Change the setting upwards.
MODE
SET
-Change the setting downwards.
4
Page 6

LOGGER SETTING
There are two methods to set logger
parameters: Through PC or via meter's
keypad.
Press "SET" key to enter set mode.
There are 6 parameters in set mode:
-Sample Point:
'PtS' & 'P1' show on the screen .
-Start Mode:
' ' & 'P2' show on the screen.
-Start Time:
'Stt' & 'P3' show on the screen.
-Sample Rate:
'Sr' & 'P4' show on the screen.
-Alarm Set:
'AL' & 'P5' show on the screen.
-Real time:
'rtC' & 'P6' show on the screen
Press "Up" /"Down" to choose the mode.
Press "SET" to enter each mode.
Press "MODE" to escape to previous
status.
NOTE: If the start mode is not
Scheduled, you won't see the Start
Time in the setting menu.
Sample Point:
- After pressing "SET " key to enter, the
selectable sample point values will
appear. They are 1, 2, 4, 8, 12, 16.
1 means 1000 sample points. ....16
stands for 16000 points. For the models
measure relative humidity, 1 means
500 Temp +500 RH points , 16 means
8,000 Temp +8000 RH points.
By Keypad Setting
5
Page 7

- In Pts (P1) mode, press "SET" to enter
this mode and to change the value.
-Press "Up" or "Down" to choose the
sample point value.
-Press "SET" to save and return to P1.
or press "MODE" to escape without
saving the value.
8808
NOTE: " " in above diagram means
K. Please refer to page 18 for
reference.
Start Mode
-After pressing "SET" key to enter start
mode setting, there are 4 start modes
for you to choose." ","P2" show on
the screen.
Repeat :
'rEp' displays on the bottom of the
monitor. Repeat means the logger
will automatically record again once
the memories are uploaded to PC.
Key start:
'hEy' displays on the bottom of the
monitor. Key start means the logger
will start to record when you press
the start/stop key > 2 seconds.
Immediately:
' ' displays on the bottom of the
monitor. Immediately means the
logger will start to record right away
after you saving the setting.
Schedule
'SCh' displays on the bottom of the
monitor. Schedule means the logger
will start to record from the date & time
you preset in P3.( Page 7)
6
Page 8

-Press "Up " or "Down" to choose the
start mode you need.
-Press "SET" to save the start mode,
or press "MODE" to return to main
menu without saving setting.
8808
Start Time Setting ( start mode is SCH)
- After pressing "SET" to enter start time
setting, "Stt" "P3" show on the screen.
Year set
'yEr' displays on the top( 8809/07) or
middle (8808/06) of the monitor.
Month set
' ' displays on the top( 8809/07) or
middle (8808/06) of the monitor.
Date set
'dAt' displays on the top( 8809/07) or
middle (8808/06) of the monitor.
Hour set
'Hor' displays on the top( 8809/07) or
middle (8808/06) of the monitor.
Minute set
' ' displays on the top( 8809/07) or
middle (8808/06) of the monitor.
7
Page 9

Second set
'SEc' displays on the top( 8809/07) or
middle (8808/06) of the monitor.
-The values for above 6 parameters
will display on the bottom of the monitor.
-Press "Up" or "Down" to adjust the
setting values.
-Press "SET" to save the setting and
enter next parameter.
-Repeat above steps to finish the whole
setting.
-Press "MODE" to return to main menu
if you don't want to save the setting.
NOTE: While in logging mode, press
START/STOP key >2 seconds to stop
logging. The parameters only could
be set while the meter is not in logging
mode.
NOTE: While in logging mode, press
SET key could enter setting
mode to "VIEW" the setting.
Y-M-D
Y-M-D
H:M:S
H:M:S
Y-M-D
H:M:S
8808
8
Page 10

Sample Rate
-Press "SET" key to enter sample rate
setting. The parameters are Hour /
Minute/Second.
Hour set:
'Hor' displays on the top ( 8809/07) or
middle (8808/06) of the monitor. The
selectable range is 00~12.
Minute set:
' ' displays on the top( 8809/07) or
middle (8808/06) of the monitor. The
selectable range is 00~59.
Second set:
'SEc' displays on the top( 8809/07) or
middle (8808/06) of the monitor. The
selectable range is 00~59.
To be summarized, the selectable
sample rate is 00:00:01 to 12:00:00.
-Press "Up" or "Down" to adjust the
setting values.
-Press "SET" to save the sampling rate
value.
-Repeat above steps to finish the whole
setting.
-Press " MODE" to return to main menu
if you don't want to save the setting of
sampling rate .
8809
9
Page 11

Alarm Setting
-Pressing "SET" key to enter alarm
setting. The set items of 8808/09 are
TempHi, TempLo, RHHi, RHLo. The
set items of 8806/07 are TempHi,
TempLo. NOTE:Above are valid both
in "monitoring" or "logging" mode.
TempHi set ( Threshold of Hi Temp)
'tHi' displays on the top ( 8809/07) or
middle (8808/06) of the monitor. The
selectable range is -20.0~70.0
TempLo set (Threshold of Lo Temp.)
'tLo' displays on the top ( 8809/07) or
middle (8808/06) of the monitor. The
selectable range is -20.0~70.0
RHHi set (Threshold of Hi RH)
'Hhi' displays on the top ( 8809/07) or
middle (8808/06) of the monitor. The
selectable range is 0.0~100.0
RHLo set
'HLo' displays on the top ( 8809/07) or
middle (8808/06) of the monitor. The
selectable range is 0.0~100.0
NOTE: The value of Lo Temp/RH
exceeds the setting of Hi. Temp/RH
is not allowed and invalid.
-Press "Up" or "Down" to adjust the
values. Press "SET" to save the alarm
setting. Repeat above steps to finish
the whole setting.
-Press " MODE" to
return to main menu
if you don't want to
save the alarm
values..
10
8809
Page 12

Real Time Setting
-Press "SET" to enter real time setting,
"rtC" "P6" show on the screen . It is
important to input your local time
before you running the logger function.
Wrong time setting will cause you fail
to get correct logging data.
Year set:
'yEr' displays on the top( 8809/07) or
middle (8808/06) of the monitor.
Month set:
' ' displays on the top( 8809/07) or
middle (8808/06) of the monitor.
Date set:
'dAt' displays on the top( 8809/07) or
middle (8808/06) of the monitor.
Hour set:
'Hor' displays on the top( 8809/07) or
middle (8808/06) of the monitor.
Minute set:
' ' displays on the top( 8809/07) or
middle (8808/06) of the monitor.
Second set:
'SEc' displays on the top( 8809/07) or
middle (8808/06) of the monitor.
- Press "Up" or " Down" to adjust the
setting value. Press "SET" to save
the real time setting. Repeat above
steps to finish the whole setting.
-Press " MODE" to return to main menu
if you don't want to save the real time
setting.
H:M:S
11
8808
Page 13

By Computer Setting
USB1.0
USB
PC
The meter can link with computer to
set the logging parameters which
are introduced in Page5~Page11.
1.Plug the standard accessory USB
cable into the USB port at the right
side of the meter.
2.Instert the USB connector to the
computer's Com.1 or 2 or ....8 etc.
3.Start to set up logger software by
inserting the CD-ROM.
4.When installing the logger software
,please review the manual enclosed
in the CD to understand the function
of the software.
5.It is needed to install the USB driver
which is enclosed in the software CD.
6.Running the software on computer.
7.Select the correct COM port and
make sure the meter is now linked
well to software.
contacts well, the ID information of
the datalogger will appear on main
screen. If not,
Logger is not plug in interface
module!>>
screen.
While the logger
<< WARNING: Data
message will appear on
12
Page 14

Select the icon of "Com. Port Setting"
from the main screen.
Choose correct COM
port, Baud rate, Data
bits, Parity and Stop
bits. Select up to
COM 8 for special
systems. Select OK to
accept setting changes,
Cancel to abort the com. port setting.
NOTE: Except the Port No., Others
should be set as above photo.
8.Follow below steps to set logging
parameters:
Select "Logger Set" button from main
screen. The parameters needed to be
set are sample points, sample rate,
start mode. If "Schedule" is selected as
start mode, then start date and time
need to be set as well. High/Low alarm
setting are optional.
To make sure the time of datalogger is
correct, always remember to press "OK "
at Clock Setting to make the time frame
of logger is the same as your local time.
NOTE: The time of your PC must be
correct.
The selectable time frame for sampling
rate is from 1 second to 12 hours.
9. After setting above, the meter is now
ready to record.
13
Page 15

12345678
Air Temp.
DOWNLOADING
When the logging process is finished,
you could upload the memories to
computer for data analysis, records
statistic, reviewing the curve change,
saving the memories as *.txt
file or printing out ......etc.
Please follow below steps to upload
the memories from the meter to PC.
1.Please connect the logger to PC and
execute
the software.
2.Please press download key on the
software main screen to transmit the
data from meter to PC.
3.It takes few seconds to minute to finish
the uploading.
4.You now can save the data for data
analysis, records statistic ,....etc.
(Please see more about the software
from the manual enclosed in CD.)
14
Page 16

HUMIDITY CALIBRATION (8808/09)
Please follow below steps to calibrate
the humidity accuracy of the meter.
1.Turn off the meter, plug the meter probe
into 33% salt bottle and press
"START/STOP" +"SET" at the same
time over 2sec to enter to calibration
mode.
2."32.8%" will flash on the monitor.
30 minutes after, the flashing stops to
indicate the calibration of 33% is
finished.
3. Move the meter probe to the 75% salt
bottle and press "START/STOP" over
2 seconds to enter 75% calibration.
4. "75.3%" will flash on the monitor.
30 minutes after, the f
5. lashing stops
means the whole calibration has
been completed and the calibration
data have been saved in memory.
6. After step5, the meter will return to
measurement mode automatically.
Note:
a)You can exit calibration without
saving by pressing "START/STOP"
>2sec before step 5.
b)To get high accuracy, strongly
suggest you to do the calibration at
23+2 C Temperature environment.
%
%
8808
15
Page 17

TROUBLESHOOTING
1.Power on but no display or meter
doesn't work .
a)For 8808/06, please check whether
the DC power is connected or not.
b)Make sure the time of pressing
"START/STOP" key is more than
100 mS.
c)Check the batteries are in place and
in good contact and correct
polarity.
d)Replace new batteries and try again.
e)Move the batteries for one minute
and put them back again
2.Calibration failure.
a)For 8808, please check whether
the DC power is connected or not.
b)Make sure the calibration bottle is
under good sealing status when the
meter's probe is plugged into the
salt bottle.
c)Make sure the free air temperature is
within 23+2 C when calibration is
processed.
3. Error Codes.
a)E02: The value is underflow.
b)E03: The value is overflow.
c)E04: The wrong value is caused by
E02 or E03.
d)E11: RH calibration error. Need to
re-calibrate.
e)E32: IC read/write error. Need to
return the meter to dealer for
repair.
f)E33: Circuit error in measurement
portion. Need to return the meter
to dealer for repair.
16
Page 18

SPECIFICATIONS
MODEL NO
RH %
RES.
ACCURACY
TEMP.
RES.
ACCURACY
MEMORY
REAL TIME
USB PORT
8808/06 8809/07
3% at 10~90%, 5 % at others
ooo
0.6 .2
C at 0~50 C, 1 C at others
Up to 16K(For 8808/09 are Temp:8K, RH:8K)
YES
YES
0.0~100.0%
0.1%
-20~70oC
o
0.1
C
NO
YES
WARRANTY
The meter is warranted to be free from
defects in material and workmanship for
a period of one year from the date of
purchase. This warranty covers normal
operation but does not cover battery,
misuse, abuse, alteration, tampering,
neglect, improper maintenance, or damage
resulting from leaking batteries. Proof of
purchase is required for warranty repairs.
Warranty is void if the meter used to be
taken apart .
RETURN AUTHORIZATION
Authorization must be obtained from the
supplier before returning items for any
reason. When requiring a RA (Return
Authorization), please include data
regarding the defective reason, the meters
are to be returned along with good packing
to prevent any damage in shipment and
insured against possible damage or loss.
17
Page 19

DISPLAY ALPHABET LIST
Display DisplayMeaning Meaning
A
d
H
k
m
o
r
t
C
E
i
L
n
P
S
y
18
 Loading...