

Page 1
Page 2

INTRODUCTION
Features
• Backlight
CO LEVELS & THEIR EFFECT
• Adjustable CO warning level
• Dual digital display
• Low battery
• Auto power off function
• Wrist strap.
PPM Symbols and applicable standard.
0-1 Maximum
9 Maximum
Maximum allowable concentration per ASHRAE Residential standards 62-1989 for living area.
25 Maximum
fornia OSHA workplace standards.
35 Maximum
workplace standards.
50 Maximum
any 8 hrs average level per OSHA standards.
100 Remove
centration exceeds 100ppm per OSHA exposure limit.
200 Mild
hrs.
400 Frontal
concentrations in ue gas the US EPA and AGA
standards.
800 Dizziness,
1600
Nausea w/i 20 min., death w/i 2-3 hrs.
background levels
indoor air quality level:
limit 8 hrs of continuous exposure per Cali-
8 hrs average exposure level per US OSHA
concentration for continuous exposure in
employees from enclosed space if the CO con-
headache, fatigue, nausea and dizziness w/i 2-3
headache, life threatening after 3 hrs. Maximum
nausea, convulsions, death w/I 2-3 hrs.
1
SPECIFICATIONS
1. CO range: 0~999PPM
2. Resolution: 1 ppm.
3. Accuracy: +/- 20% at 0~100 ppm
+/- 15% at 100~500 ppm
(at 20 +/- 5°C, 50 +/- 20%RH)
4. Battery: 3AAA alkaline. Battery life is 250
hours when the backlight is off and 35 hrs
when the backlight is on.
ACCESSORIES INCLUDED
(3) AAA alkaline batteries, Operation manual,
Wrist Strap & Carrying pouch
WARRANTY
The meter is warranted to be free from defects in material
and workmanship for a period of one year from the date
of purchase. This warranty covers normal operation and
does not cover battery, misuse, abuse, alteration, neglect,
improper maintenance, or damage resulting from leaking batteries. Proof of purchase is required for warranty
repairs. Warranty is void if the meter has been opened.
RETURN AUTHORIZATION
Authorization must be obtained from the supplier before re-
turning items for any reason. When requiring a RGA, RMA
(return authorization), please include data regarding the
defective reason, the meters are to be returned along with
good packing and insured against possible damage or loss.
6
Page 3

OPERATING NOTICE
1. Keep the meter off from electromagnetic interference
(EMI) which may cause erratic readings.
2. Recovering time is required when meter exposed
to high level CO. The longer the exposure, the longer
recovering time is needed.
3. Self-
Test after power is on to the test sensor and
circuit condition.
TROUBLESHOOTING
• Power on but no display
a) The power must be on for at least 300ms.
b) Make sure the batteries are in good contact and
correct polarity.
c) Replace a new battery and try again.
• Displays disappears
Check whether the low battery indicator shows before
display disappears. If so, replace with new battery.
• Calibration failure
a) Check if the low battery indicator shows before
calibration. If so, replace with new battery and try again.
b) Make sure the standard gas is correct.
E 2. : The value is underow.
E 3. : The value is overow.
E 4. : The value is erroneous.
E 31.:
repair.
E 33.: Measurement circuit failure, return the meter to
your distributor for repair.
E 35.: Self-T
other area free of CO. Sensor failure. Return
the meter to your distributor for repair.
A/D failure, return the meter to your distributor for
est failure. Turn on the meter again in the
5
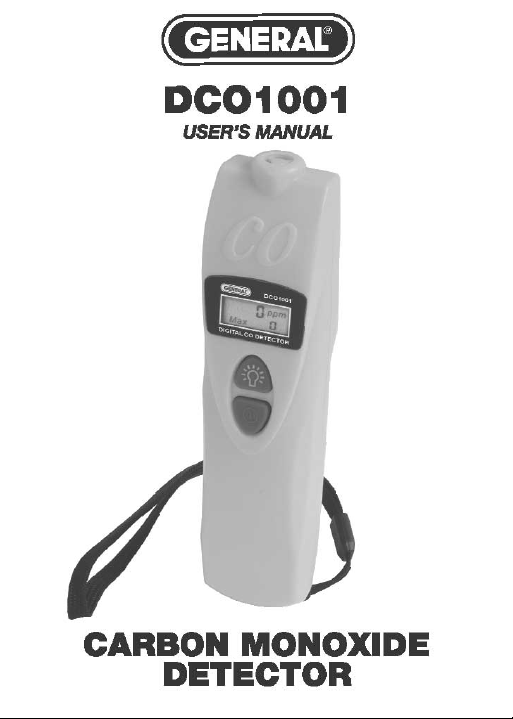
CONTROLS AND INDICATORS
LCD Display 8888 ppm
Max 1888
1. Primary display: Current CO value.
2. Secondary display: Max CO value
3. Low battery indicator.
Function Keys
1. Ф Turns the meter on and off. Selects the alarm value.
2. Turns the backlight on and off.
Switch temperature unit C and F.
Reset the maximum CO value.
Select the calibration value.
3. Ф + : Enter calibration mode.
OPERATING INSTRUCTIONS
1. Power on/off
Press Ф to turn the meter on and off. When meter is on,
the preset alarm value and current air temperature will blink
on the LCD. The meter is now running its Self- Test and will
nish in about 15 seconds with a short beep. The meter will
then be in the measuring mode.
A 25 ppm
72 F
IMPORTANT:
Turn on the meter in an area free of CO since high
CO level may cause failure in passing Self-Test.
2
Page 4

2. F/C Switching
User can select °C or °F as the temperature mode by press
ing
for temperature more than 1 sec. during Self-Test.
3. Alarm Setting
The meter is preset at the alarm value of 25 ppm to give
warnings of possible danger. Users can adjust the value for
different needs or standard by:
1. Turn off the meter.
2. Press and hold Ф until the value options show
will be 25, 30, 35, 45, 50, 70, 100, and 200ppm display
ing in cycles.
3. Release the button to select the preferred value.
4. The meter will return to Self- Test mode.
. There
4. Measurements
The meter detects the existence of CO in the environment
and displays the reading in PPM. It also indicates the maxi
mum value (on the bottom LCD display) of all readings
since the meter has been on. Users may reset the maximum
value by pressing
mode.
for two seconds in the measuring
5. Backlight
The meter features backlight function for using in dark
areas. Press
6. Low Battery indicator
Shows on the LCD when battery voltage gets low.
to turn the backlight on and off.
Auto Power off
The meter turns itself off automatically after 15 minutes of
non-operation is disabled during calibration.
3
CALIBRATION
To enter the calibration mode, turn off meter and press Ф +
simultaneously for 2 seconds. It will show blinking ppm on
the upper display and calibration value “0” at lower side.
Now the meter is running 0 ppm calibration as default.
0 ppm calibration.
The meter has a preset calibration value at 0 ppm. Put the
meter in the area free of CO and enter calibration mode. The
meter will calibrate automatically. The LCD is now displaying a blinking ppm value at upper side which will slowly runs
down to 0 or a minus value, completed. This takes about 10
minutes.
Note:
Don’t be alarmed if high PPM or minus value shows up when
entering calibration mode. It will go down and approach to 0
seconds. The erratic readings are caused by electromagnetic
interfere (EMI) in the environment, such as computers or cell
phones. It is suggested to remove the meter from the interference otherwise the calibration may take much longer time or
never complete.
100ppm/500ppm calibration
For other standard calibrations press and hold
calibration value. (0, 100, 500 ppm).
1. Place the meter into the sealed box lled with standard
gas
2. (e.g. 100ppm/500ppm) for 15 minutes.
tion will be done automatically.
3. Check if the reading meets calibration value. If it does,
the calibration is well completed. If not repeat the
procedure.
4
to select the
Then the calibra
Page 5

 Loading...