

Page 1
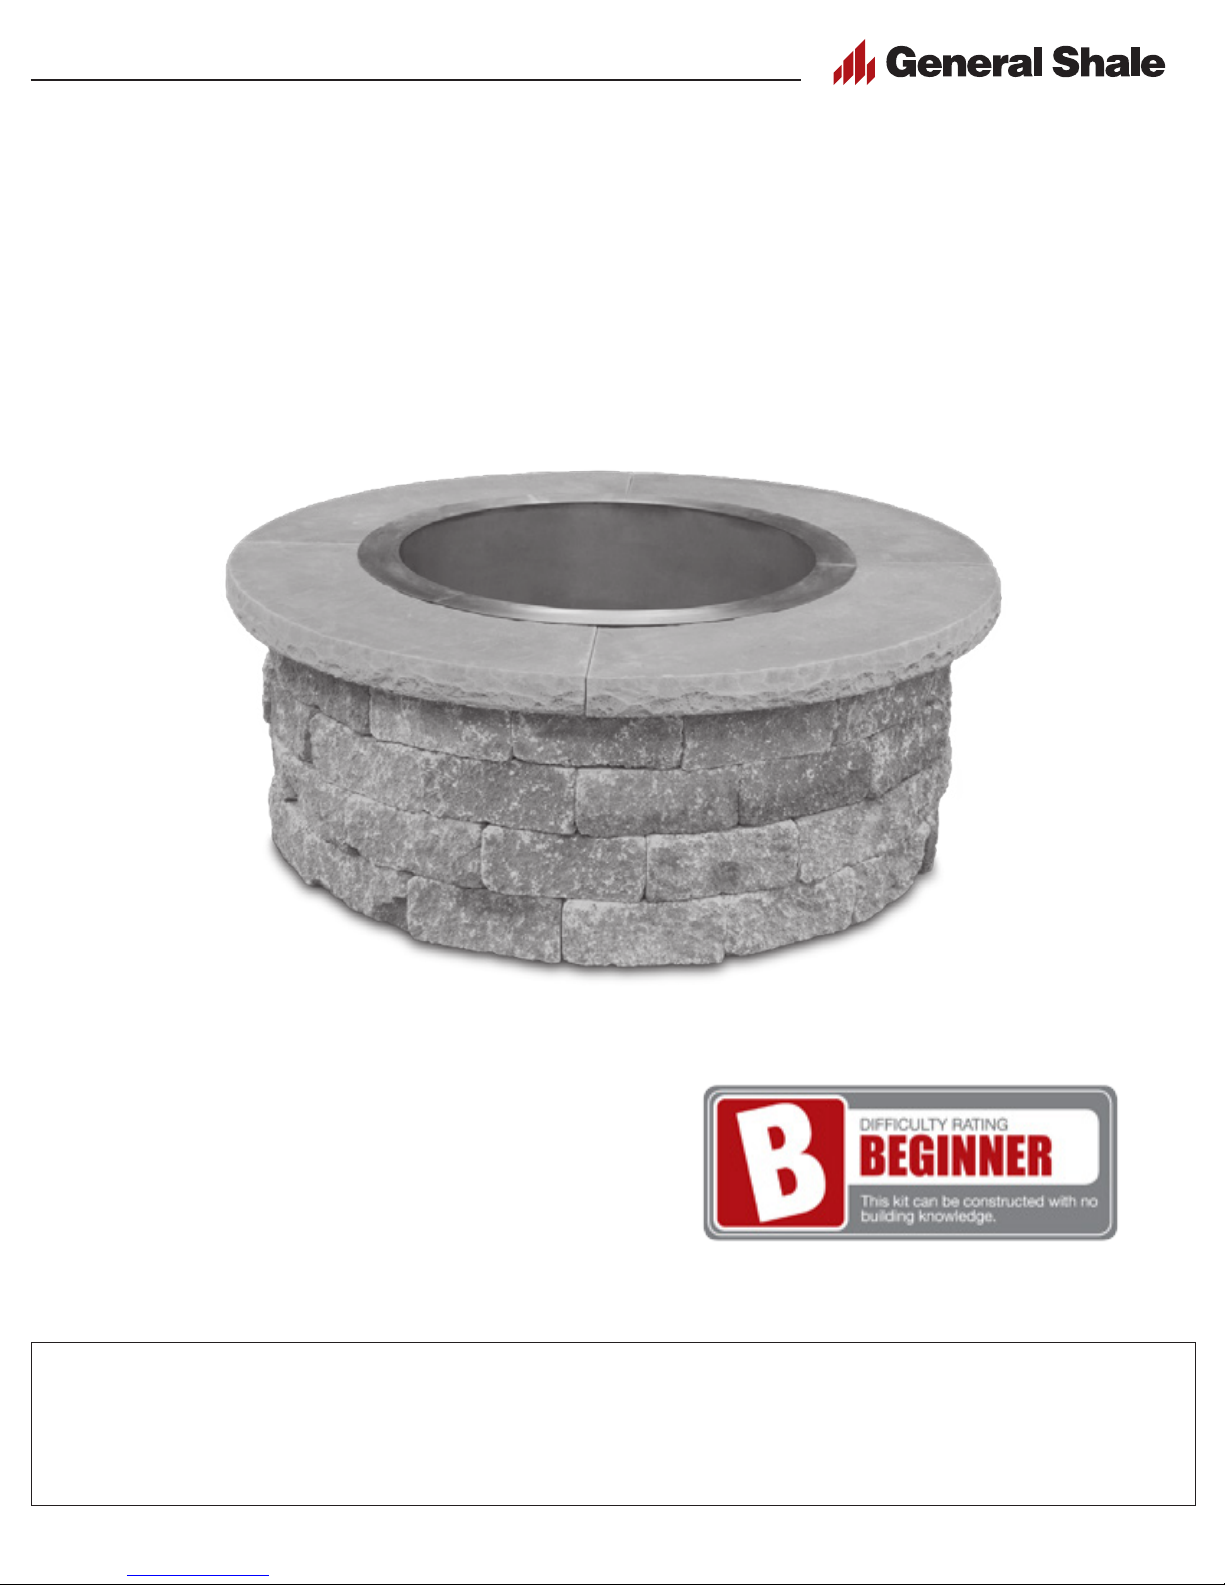
“Entertainer” Fire Pit (FPR-100) Assembly Instructions
How-To Assemble Your
ENTERTAINER
Outdoor Living Products
Round Fire Pit
PART NO. FPR-100
DIFFICULTY BEGINNER
APPROX. DIM. 3'5"W x 3'5" x 1'6"H
APPROX. WEIGHT 850 lbs.
GENERAL SHALE OUTDOOR LIVING PRODUCT WARRANTY
All General Shale Outdoor Living products are warranted to be made from high quality materials that meet or exceed ASTM material standards.
Outdoor Living products are intended for recreational or residential use and are not warranted for any other purpose. The life of the product
depends on correctness of installation and extent of usage. All metal components are subject to normal rust and corrosion.
ANY IMPLIED WARRANTIES ARE HEREBY DISCLAIMED AND ARE EXPRESSLY EXCLUDED.
P.O. Box 3547 / Johnson City, TN 37602 / 1-800-414-4661 / www.GeneralShale.com
Page 2
“Entertainer” Fire Pit (FPR-100) Assembly Instructions
Materials included with your outdoor kit.
(60)
Block “A” Circle Landscaping Stones
(4)
Cast Concrete Pieces
(1)
Metal Insert Ring
(1)
in Set Mix Bag
Additional materials required to install your kit.
Concrete or Gravel (for setting base)
Level
Tape Measure
Rubber Mallet
Small Trowel
Outdoor Living Products
5 Gal. Mixing Bucket
NOTE: is unit is designed for outdoor use only. is unit is not designed to be used on
wood decks or under roof enclosures. Locate unit reasonable distance from any combustible
materials. Comply with local building code(s) and burning permits as applicable. Retain these
instructions with unit.
P.O. Box 3547 / Johnson City, TN 37602 / 1-800-414-4661 / www.GeneralShale.com
2
Page 3
“Entertainer” Fire Pit (FPR-100) Assembly Instructions
Outdoor Living Products
Step
1
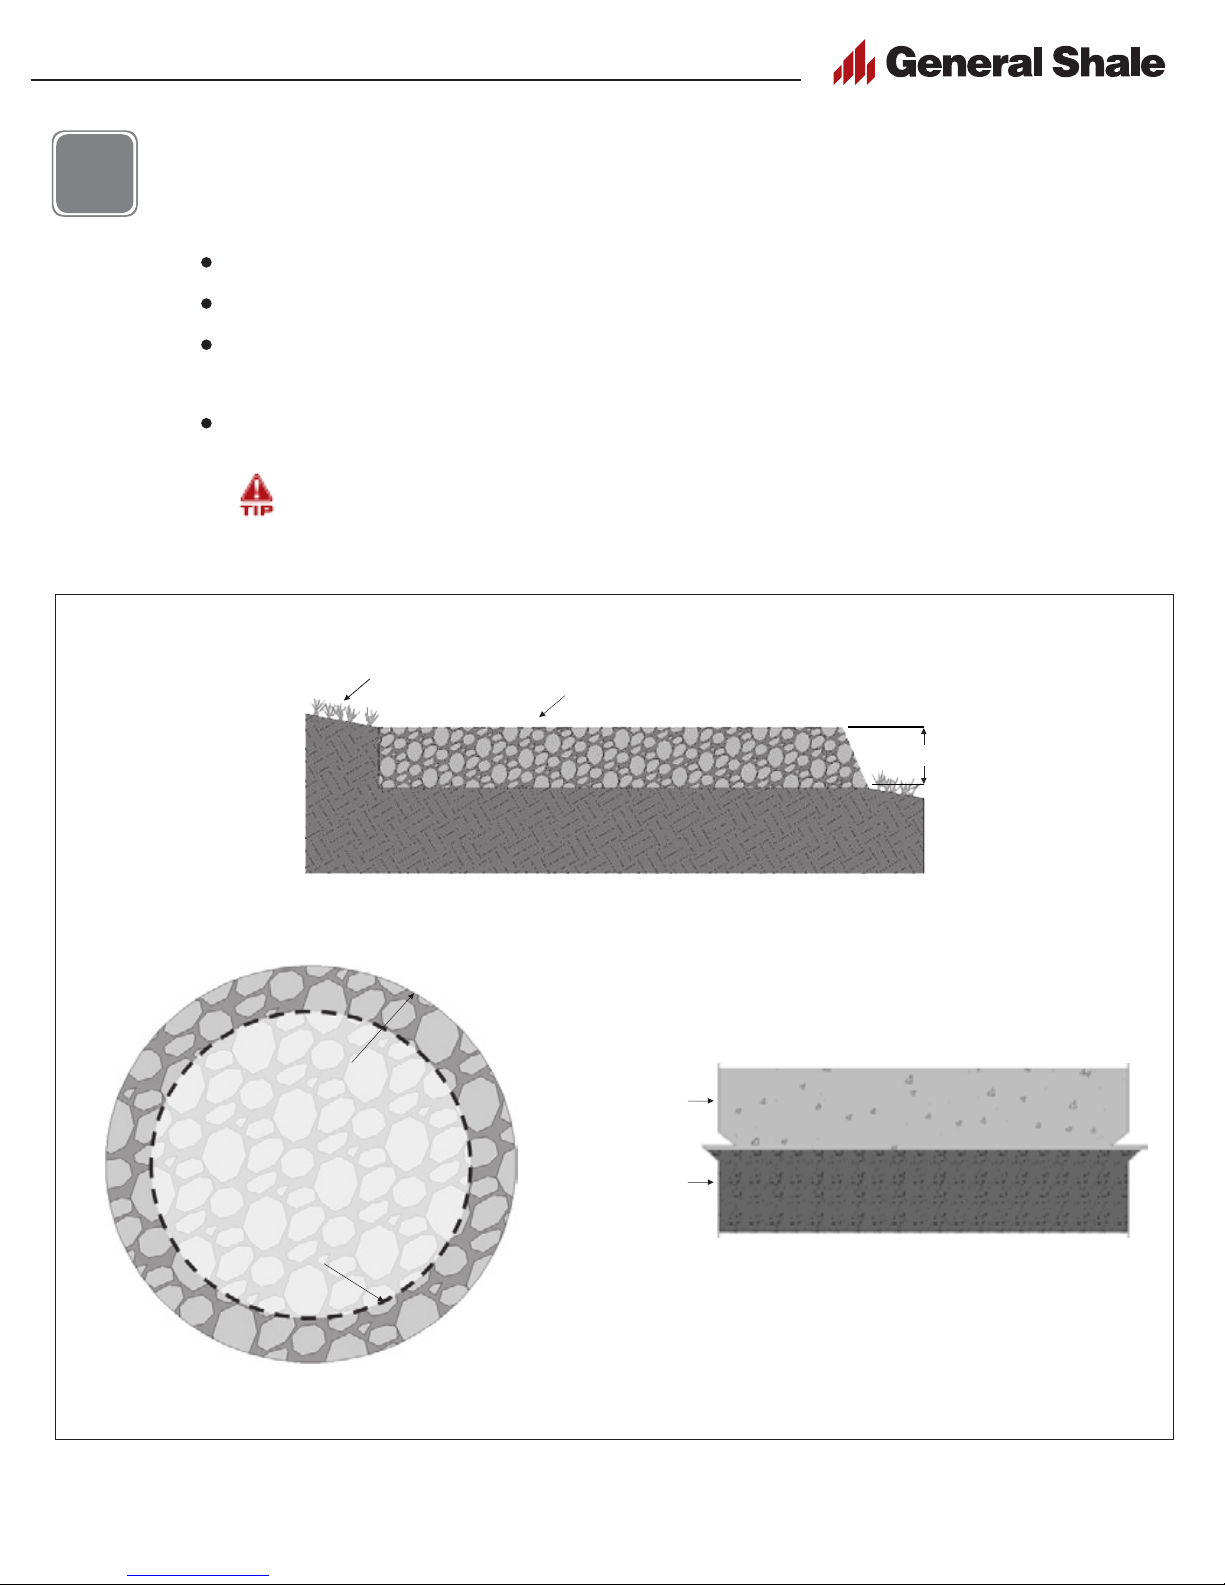
Create a level base using Crusher Run Stone to accommodate the overall footprint
of the re pit.
Prepare an area 3'11" wide x 3'11" deep or 3'11" in diameter.
Remove sod and vegetation.
Excavate/remove so soil as required to provide level stone surface at a
minimum of 4" deep.
If required, use landscape blocks to retain stone base.
If soil under sod is hard, soil can be leveled out and used as a base material.
Reference diagrams for creating a level base.
Existing Ground
Screed Stone Base Level
3' x 11"
Diameter
Crusher Run Base
(4" min. thickness)
3' x 5"
Diameter
Fire Pit Outline
4"min. Crusher Run Stone
Undisturbed Ground
(Base Section View)
NOTE: Base thicknesses shown are minimum.
Soer soils will require thicker bases.
4" Minimum
Concrete
4" Minimum
Compacted
Crusher Run
Sub-Base
4"
(Concrete Slab Section)
(Base Plan View)
NOTE: All outdoor living kits can be installed directly on a properly prepared stone base. However, for best performance and appearance,
a concrete pad is recommended.
P.O. Box 3547 / Johnson City, TN 37602 / 1-800-414-4661 / www.GeneralShale.com
3
Page 4
“Entertainer” Fire Pit (FPR-100) Assembly Instructions
Outdoor Living Products
Step
2
Build the re pit.
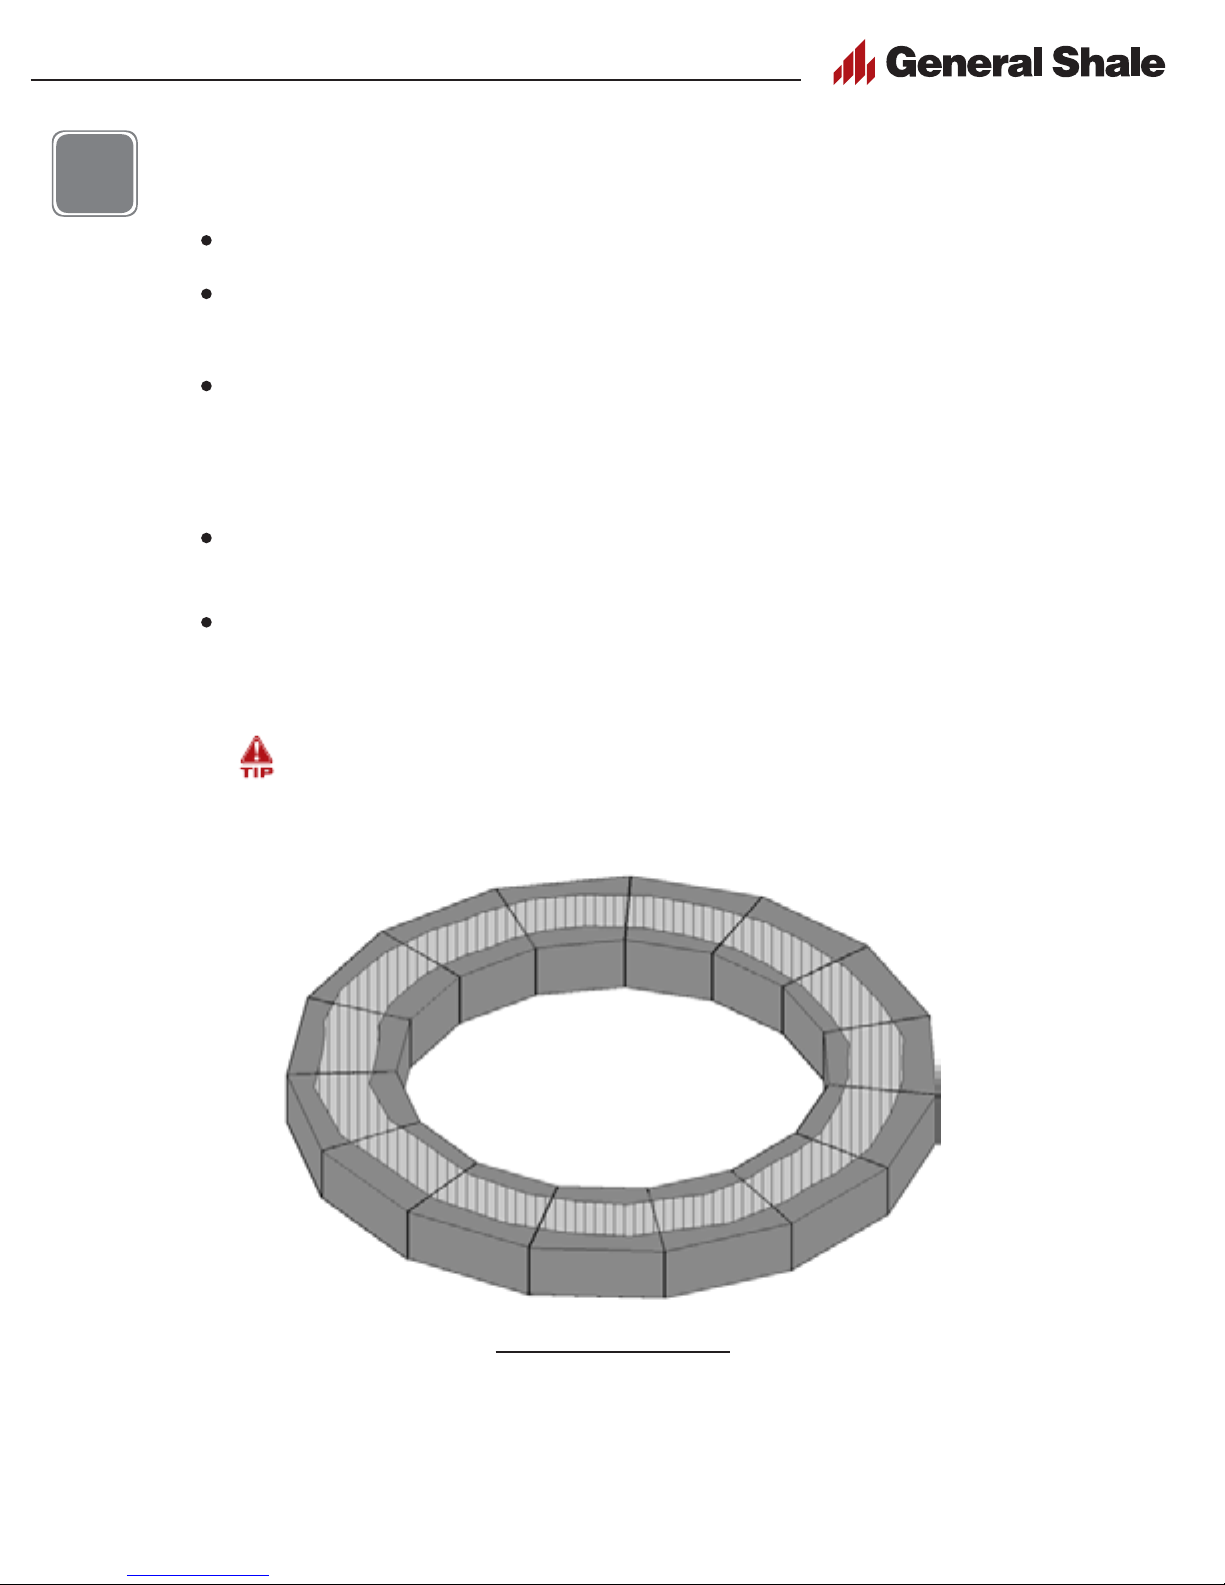
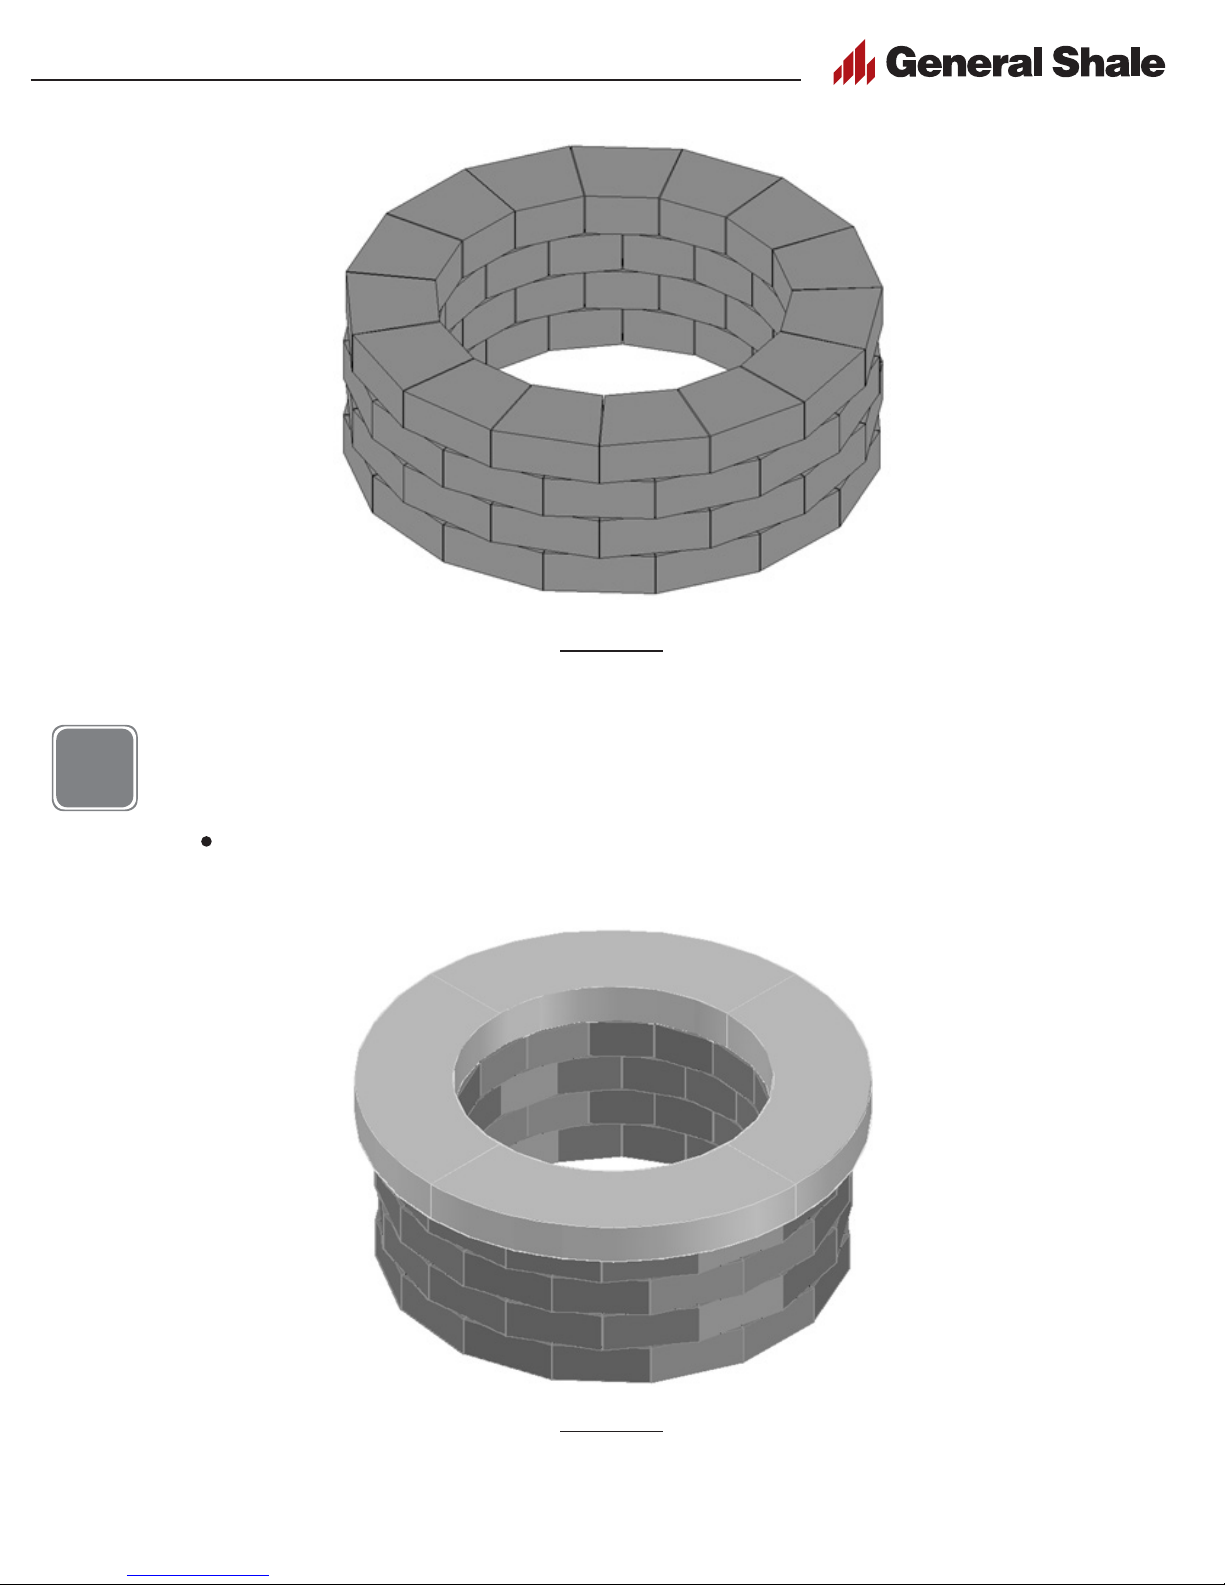
Each course will use (15) block "A" circle block landscaping stones.
Dry stack courses 1 through 4 and check t before applying thin set.
Adjust gap and position block as needed.
Mix supplied thin set according to package directions. Apply a thin
layer uniformly using a small trowel between all pieces and courses.
Apply thin set toward the inside of the re pit to prevent it from
potentially squeezing out onto the outside face of the stones.
Level stones by tapping with rubber mallet as needed. Use caution to
avoid squeezing thin set out from between stones.
Adjust the position of units as required to maintain uniform level and
square courses. (Pre-packaged shims, pieces of roof shingles or metal
washers can be used as shims)
For best appearance, the vertical joints of each following course should
align with the center of the stones from the course below. (See Course 4
image on page 5)
P.O. Box 3547 / Johnson City, TN 37602 / 1-800-414-4661 / www.GeneralShale.com
Courses 1 through 4
(15) Block “A” Circle Landscaping Stones
4
Page 5
“Entertainer” Fire Pit (FPR-100) Assembly Instructions
Outdoor Living Products
Step
3
Course 4
(*NOTE: Aer completing the fourth course, the re pit
should look like the picture above.)
Continue building the re pit.
Adhere the four (4) cast concrete top pieces using thin set mortar.
Ensure the assembled top aligns evenly with the course below.
P.O. Box 3547 / Johnson City, TN 37602 / 1-800-414-4661 / www.GeneralShale.com
Course 5
(4) Cast Concrete Top Pieces
5
Page 6
“Entertainer” Fire Pit (FPR-100) Assembly Instructions
Step
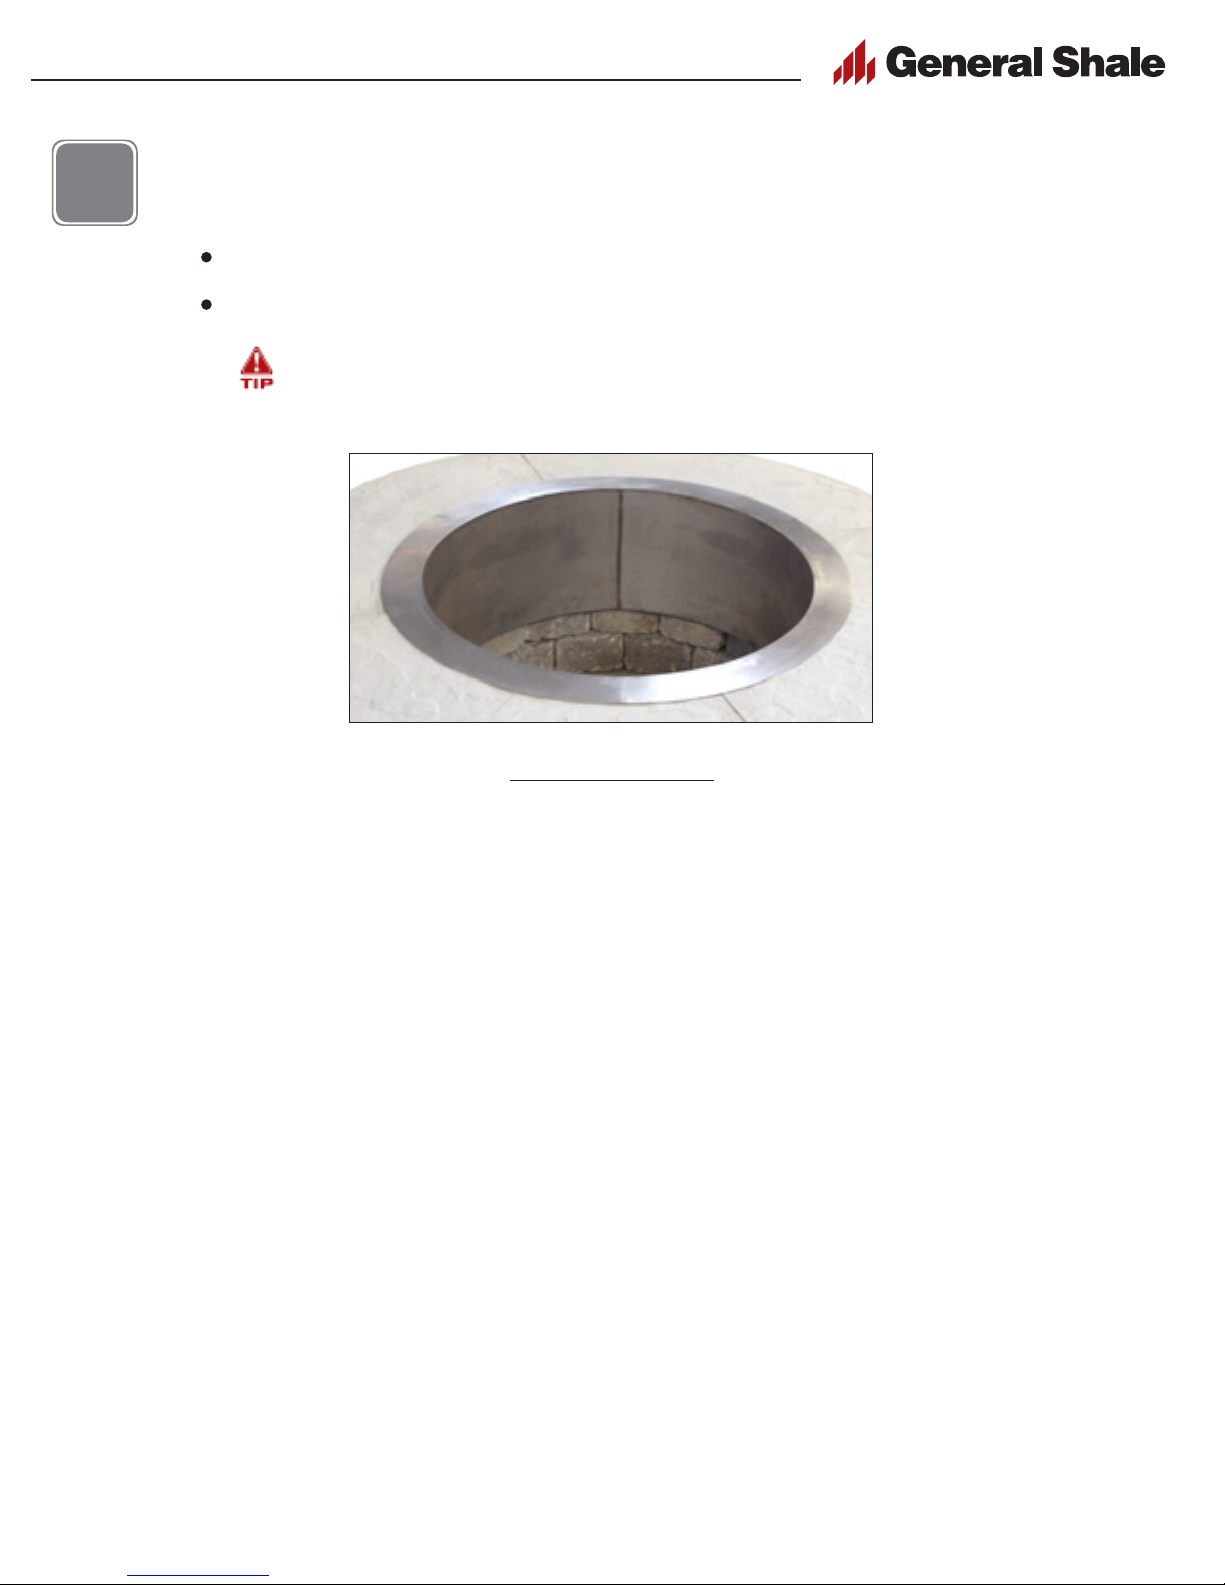
Install metal ring insert.
4
Slide the metal ring insert into the opening as shown to complete the kit.
Wait 24 hours before building a re in your re pit to allow for curing.
To allow for drainage, ll the inside of re pit with crushed stone, pea gravel
or similar to desired height (8" recommended).
Outdoor Living Products
Metal Ring Insert
OL-BRO 0010-0516
P.O. Box 3547 / Johnson City, TN 37602 / 1-800-414-4661 / www.GeneralShale.com
6
 Loading...