

GENERAL PUMPA member of the Interpump Group
8
SERVICING INSTRUCTIONS
SERVICING PUMP PROCEDURES
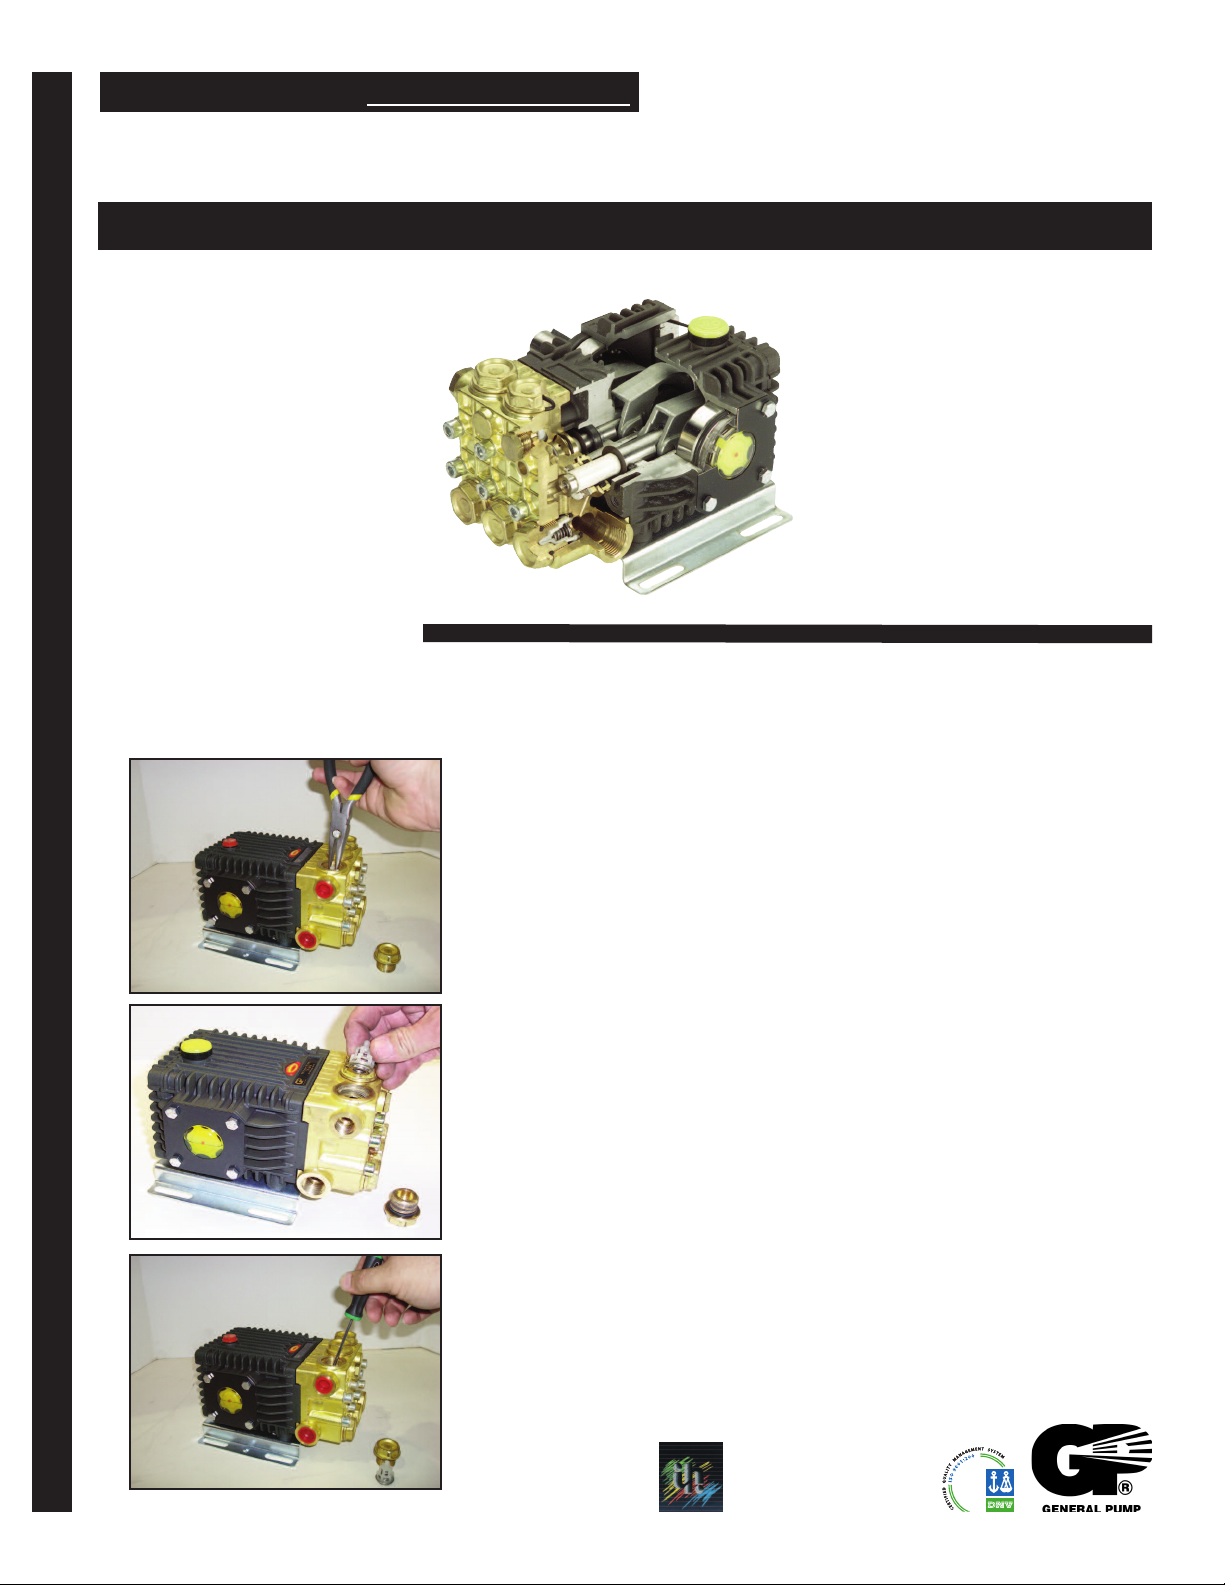
TC Series “60”
Triplex Plunger Pump
Valve Replacement: All inlet and discharge valves can be serviced without disrupting the inlet or discharge
plumbing. The inlet and discharge valves are identical in all 63 series models.
To service any valve:
1) Remove valve cap and examine o-ring. Replace o-ring if there is any
evidence of cuts, abrasions, distortion or wear.
2) Remove valve assembly (retainer, spring, valve, valve seat) from
valve cavity.
3) Remove valve seat o-ring from valve cavity.
4) Inspect manifold for wear or damage.
5) Install new o-ring in valve cavity.
TRIPLEX TRIPLEX
6) Insert valve assembly into valve cavity.
7) Replace valve cap and torque to specification.
NOTE: Only one valve kit is necessary to repair all the valves
in the pump. The kit includes new o-rings, valve seat, poppet, spring and
retainer. All are pre-assembled.
Ref 300875 Rev. A
General Pump
is a member of
the Interpump Group
02-12
TC Series “60”
Servicing Instructions
GENERAL PUMPA member of the Interpump Group
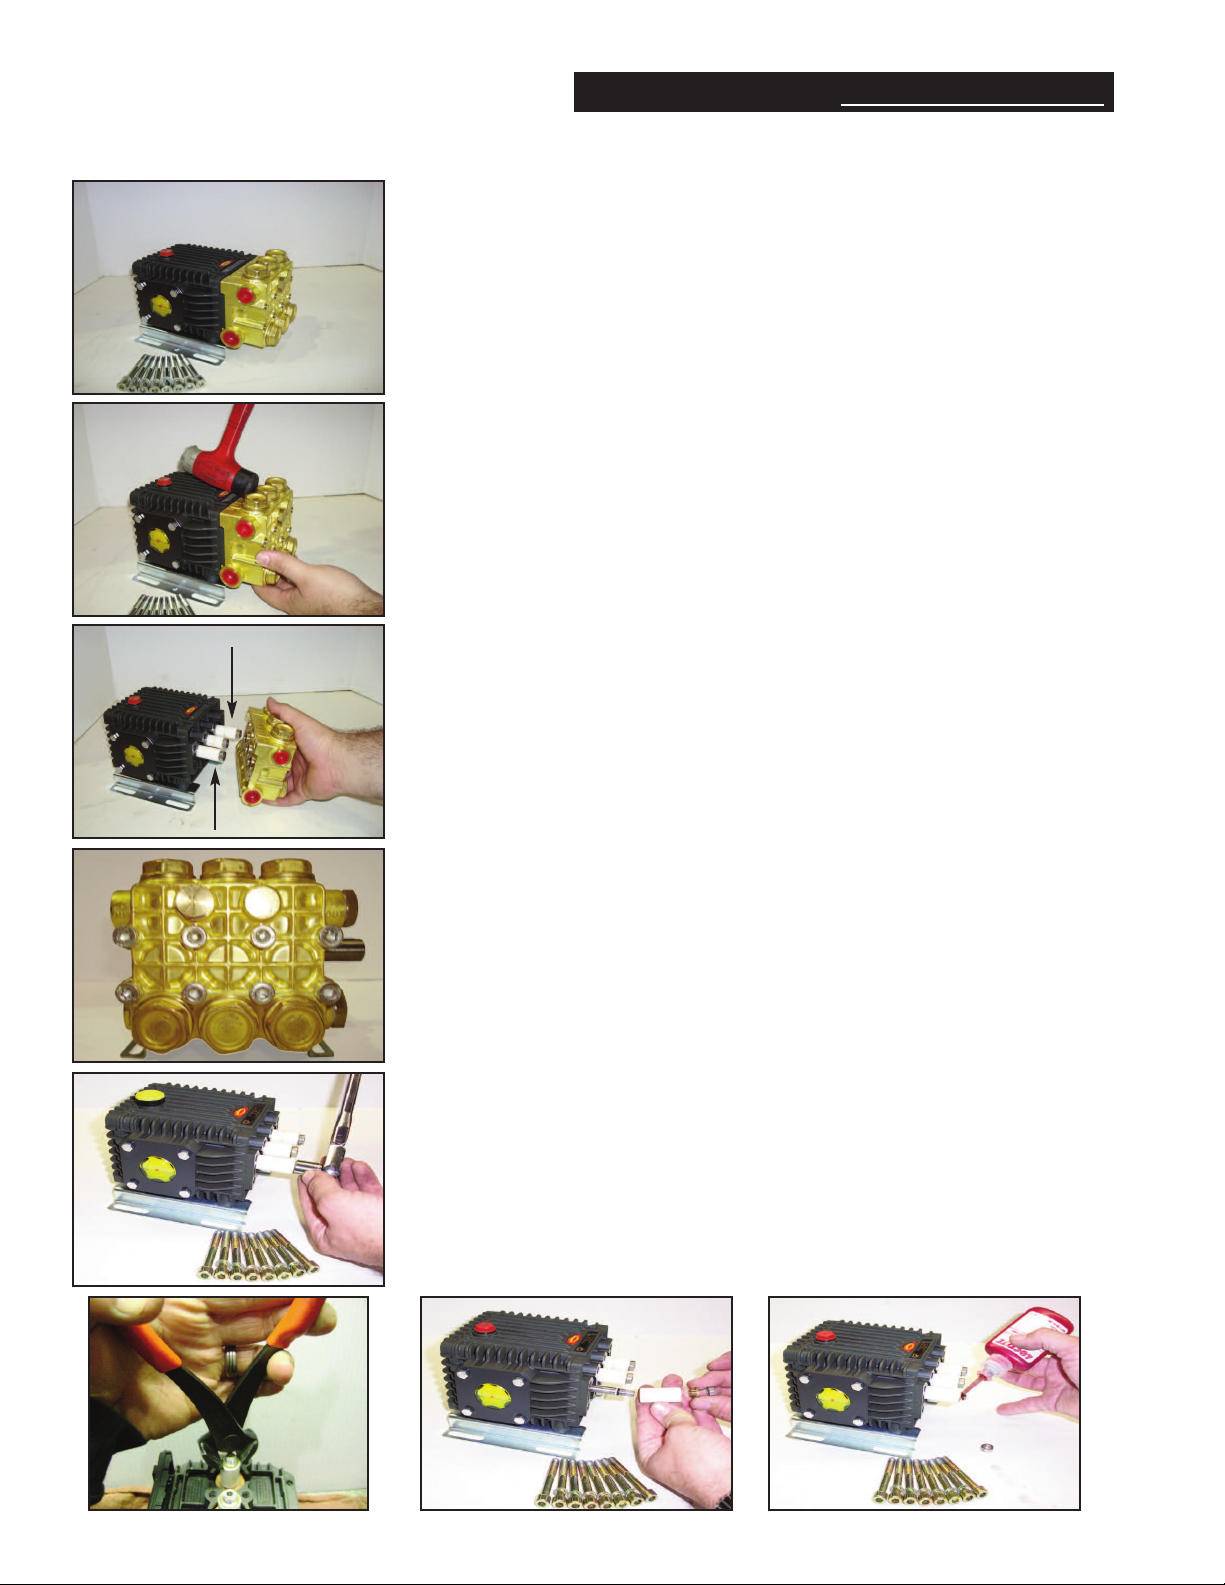
Removing/Installing Manifold:
1) Remove fasteners retaining manifold.
2) Separate manifold from crankcase.
Note: it may be necessary to rotate the crankshaft, or tap the manifold
lightly with rawhide mallet to loosen the manifold from crankcase.
Caution: When sliding head from crankcase use caution not to damage
plungers.
3) The seal assemblies may come off with the manifold. At this point
examine the ceramic plungers. Plunger’s surface should be smooth
and free from scoring, pitting, or cracks; if not, replace.
4) Coat each plunger with grease.
5) Align outside pistons in the forward position.
6) Reinstall manifold and torque to specifications per sequence
described below.
TORQUE SEQUENCE FOR TIGHTENING MANIFOLD:
14 67
5328
• Install all manifold bolts finger tight.
• Torque to 10 foot pounds in sequence as shown.
• Next torque to specification; again, in sequence.
Replacing ceramic plungers:
1) Remove the stainless steel fasteners retaining the plungers.
2) Remove the brass bushing and ceramic plunger from piston rod.
3) If copper slinger washer comes off with plunger, be certain this is
replaced before new plunger is installed.
4) Install new o-ring and Teflon back-up ring on piston rod.
NOTE: a film of grease on the outside of the o-ring insures a better
installation.
5) Slide new plunger over the piston rod, insert new brass
bushing.
6) Apply a drop of removable anaerobic thread sealant to
threads of piston rod.
7) Install the stainless steel fasteners retaining the plungers
and torque to specifications.
Ref 300875 Rev. A
02-12

TC Series “60”
Servicing Instructions
GENERAL PUMPA member of the Interpump Group
Replacing packings:
1) Remove manifold from crankcase.
2) Insert proper extractor collet through main seal retainer.
Tighten collet and extract retainers, packings and
head rings.
3) Apply grease to the packing assembly before installing in
cylinders.
4) Install packing assembly into manifold
5) Repeat this sequence for each cylinder.
6) Align outside pistons in forward position.
7) Coat each plunger with grease.
8) Install manifold and torque retainers to specifications.
Recommended Tools/Supplies:
1) 100783 Complete Extraction Kit
Includes the following tools:
2530016 handle 2530020 15mm sleeve
2530017 bolt 2530021 18mm sleeve
2530018 pin
2) 190446 Oil Drain Kit
3) 100295 General Pump Series 100 Oil (1-16 oz. bottle)
100214 General Pump Series 100 Oil (6-16oz. bottles)
100216 General Pump Series 100 Oil (24-16 oz. bottles)
GGEENNEERRAALL PPUUMMPP
Phone: (651)686-2199 • Fax: (800)535-1745 • e-mail: sales@gpcompanies.com • www.generalpump.com
1174 Northland Drive • Mendota Heights, MN 55120
Ref 300875 Rev. A
02-12

TROUBLESHOOTING
PROBLEM CAUSE REMEDY
Pulsation
Low pressure
Pump runs extremely rough,
pressure very low.
Water leakage from under
manifold. Slight leakage.
Oil leak between crankcase
and pumping section.
Valve stuck open. Check all valves, remove foreign matter.
Faulty pulsation damper.
Worn nozzle. Replace nozzle, of proper size.
Belt slippage. Tighten or replace; use correct belt.
Air leak in inlet plumbing. Disassemble, reseal and reassemble.
Relief valve stuck; partially plugged or
improperly adjusted valve seat worn.
Inlet suction strainer clogged or improperly sized.
Worn packing. Abrasives in pumped fluid
or severe cavitation. Inadequate water.
Fouled or dirty inlet or discharge valves. Clean inlet and discharge valve assemblies.
Worn inlet, discharge valve blocked or dirty.
Leaky discharge hose.
Restricted inlet or air entering the inlet plumbing.
Inlet restrictions and/or air leaks. Stuck
inlet or discharge valve.
Worn packing. Install new packing.
Cracked plunger. Replace plunger(s).
Worn crankcase piston rod seals. O-rings
on plunger retainer worn.
Check precharge; if low, rechargeit or install a new one.
Clean, adjust relief valve; check for worn and dirty
valve seats. Kit available.
Clean. Use adequate size. Check more frequently.
I
nstall proper filter. Suction at inlet manifold must be limited
to lifting less than 20 feet of water or -8.5 PSI vacuum.
Replace worn valve seats and/or discharge hose
Proper size inlet plumbing; check for air tight seal
Replace worn cup or cups, clean out foreign material,
replace worn valves.
Replace crankcase piston rod seals. Replace
o-rings.
Oil leaking in the area of
crankshaft.
Excessive play in the end of
the crankshaft pulley.
Water in crankcase.
Oil leaking from underside
of crankcase.
Oil leaking at the rear portion
of the crankcase.
Loud knocking noise in pump.
Frequent or premature failure
of the packing.
Worn crankshaft seal or inproperly
installed oil seal o-ring.
Bad bearing.
Worn main bearing from excessive
tension on drive belt.
May be caused by humid air condensing i
nto water inside the crankcase
Worn packing and/or piston rod sleeve,
o-rings on plunger retainer worn.
Cracked plunger Replace plunger(s).
Worn crankcase piston rod seals. Replace seals.
Scored piston rod. Replace piston rod.
Damaged crankcase, rear cover o-ring,
drain plug o-ring, or sight glass o-ring.
Pulley loose on crankshaft. Check key and tighten screw.
Broken or worn bearing on rod(s). Replace bearing or rod(s).
Valve stuck open or shut, or not opening enough.
Scored, damaged or worn plunger. Replace plungers.
Overpressure to inlet manifold. Reduce inlet pressure.
Abrasive material in the fluid being pumped. Install proper filtration on pump inlet plumbing.
Excessive pressure and/or temperature
of fluid being pumped.
Overpressure of pump. Reduce pressure.
Running pump dry. Do not run pump without water.
Upstream chemical injection.
Remove oil seal retainer and replace damaged
o-ring and/or seals.
Replace bearing and any spacer or cover damaged
by heat.
Replace crankcase bearing and/ or
tension drive belt.
Change oil intervals. Use General Pump SAE 30
non-detergent oil.
Replace packing. Replace o-rings.
Replace cover or-ring, drain plug o-ring, or sight
glass o-ring.
Replace bad valve.
Check pressures and fluid inlet temperature; be
sure they are within specified range.
Use downstream chemical injection.
GGEENNEERRAALL PPUUMMPP
Phone: 651.686.2199 • Fax: 800.535-1745 • e-mail: sales@gpcompanies.com • www.generalpump.com
1174 Northland Drive • Mendota Heights, MN 55120
Ref 300875 Rev. A
02-12
 Loading...