


HT500 SET
USER MANUAL
generallife.com.tr

generallife.com.tr

Table of Contents
ABOUT GENERAL Life
WHAT IS SMART ROOM THERMOSTAT?
RULES TO BE CONSIDERED FOR SAFETY
HT500 SET and EQUIPMENTS
TECHNICAL DATA
HT500 SET RECEIVER
HT500 SET RECEIVER PLACEMENT
HT500 SET RECEIVER SETUP
HT500 SET SMART ROOM THERMOSTAT
HT500 SET SMART ROOM THERMOSTAT PLACEMENT
HT500 SET SMART ROOM THERMOSTAT SETUP
MOBILE APP - MODES
LED LIGHT COLOR EXPLANATIONS- RECEIVER
DECLARATION OF CONFORMITY
WARRANTY CONDITIONS
WARRANTY CERTIFICATE
RECEIVER WALL HANGER SCHEME
1
2
3
4
5
6
7
8
9
10
11
13
14
15
16
18
20

1
ABOUT GENERAL Life
ISIPARK İÇ VE DIŞ TİCARET A.Ş. created GENERAL LIFE brand, which is one of the
leading brand in its sector.
Established and growing with 100% domestic capital, GENERAL Life presents its
products to users in many countries of the world with its exports and represents
Turkey in the World.
GENERAL Life; aims to contribute Turkey' s economy maximum level by doing R&D,
P&D and production in Turkey.
Increases product portfolio by analyze customers' needs of stylish, user-friendly and
technological products with resources allocated.
The product you purchased is produced with all this consciousness and presented to
the liking of our valuable users.
Thank you for choosing us.

WHAT IS SMART ROOM THERMOSTAT?
Smart Room Thermostat is a device which allows you to control your heating
equipment via App with Internet even you are not at home.
HOW DOES HT500 SET WORKS?
HT500 SET Works as being smart room thermostat when connects with power adapter.
It Works as being wireless room thermostat when batteries are installed instead of
adapter. In this case, the device doesn't allow to control by mobile app. Adapter should
be taken for turning back to smart room thermostat usage.
WHAT ARE ADVANTAGES OF HT500 SET?
Control your home temperature, wherever you are in the World by Smart Room
Thermostat App with your mobile phone.
Create daily or weekly programs easily by your Mobile Application.
Using Location Mode reduces the temperature of your home when you move away
from home, or increases the temperature of your home when you approach your
home.
Depending on the date range selected from the smart room thermostat's mobile
application, you can get a historical report of your heating unit's working hours, the
temperature of your home and the outside air temperature graphically.
HT500 SET can placed to anywhere else in your home owing to working option with
batteries.
LCD display provides you have knowledge about your device instantly and you can
control your heating unit with the buttons on device.
HT500 SET keeps your living space desired temperature. By this means needlessly
working of your heating unit is avoided. It provides %30 savings of your invoices.
2

3
RULES TO BE CONSIDERED FOR SAFETY
1- Be sure to read the manual before using the device and its equipments.
2- Opening, disassembly or use of the plastic parts of the product and equipments
other than the intended purpose are out of warranty.
3- Only original adapter and USB cable which are located inside the box should be used
for power. Other accessories are a potential safety hazard and can be cause loss of
your device.
4- Usage of original adapter and USB cable which are located inside the box for other
devices, is a potential safety hazard. Your other devices or adapters can be damaged.
5- Please note that the voltage of the outlet where you set up your device and
equipments is the recommended value in the user manual.
6- Keep away your product and all equipments from all kinds of foreign matter such as
liquid, dust, heat etc.
7- Do not expose the device cables to any jamming or pressure. Pay attention to
plugging in jacks and sockets as you can always reach the power connections of the
devices.
8- Disconnect the power supply to prevent damage to your device and equipments
during thunderstorms and lightning.
9- Disconnect the power supply if your device has not been used for a long period of
time.
10- Your equipment and apparatus should be used with caution as instructed in the
user manual. In case of damages and malfunctions because of external use (contact
with liquid, fall into place, etc.) , ask for help from services.
11- Contact our service for maintenance and repair of the HT500 SET and its
appliances. Maintenance and repair of the product and equipments should be
performed by ISIPARK İÇ VE DIŞ TİC. A.Ş. service and authorized services only and
accessories and equipments specified by company must be used.

1- HT500 SET AND EQUIPMENTS
THERMOSTAT EQUIPMENTS
4
HT500 SET
Room Thermostat
RECEIVER EQUIPMENTS
HT500 SET Receiver Power Cable Pegs And Screws
Holder Battery
Adapter USB Cable
(Alkaline)
AAA
AAA
5
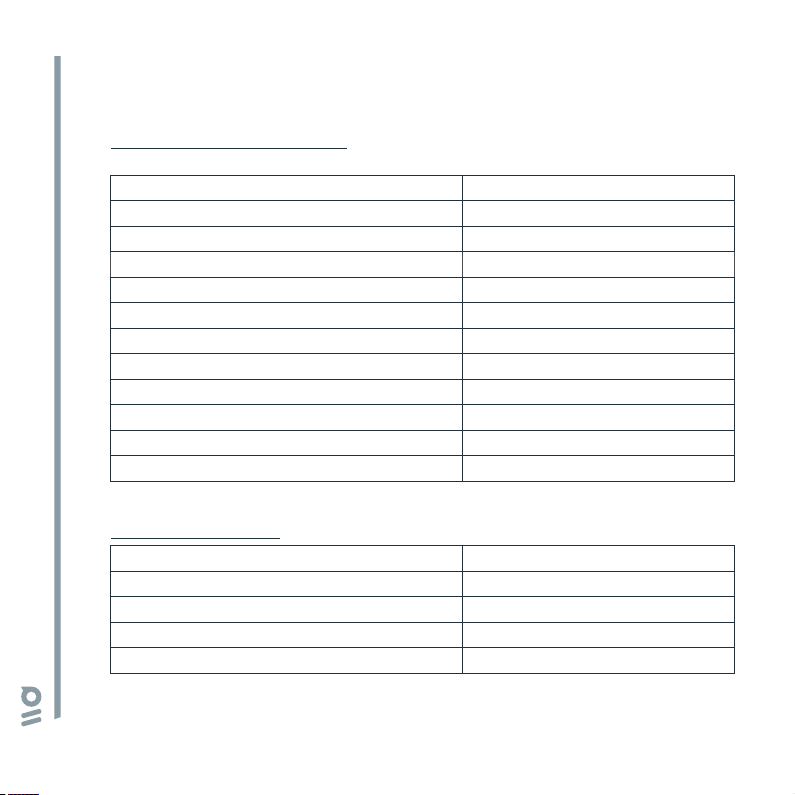
2-TECHNICAL DATA
Room Thermostat Technical Data
Feeding Voltage (Usage with Adapter)
Feeding Voltage (Usage with Battery)
Maksimum Load Current (Usage with Adapter)
Maksimum Load Current (Usage with Battery)
Dimensions
Temperature Measurement Sensitivity
Temperature Setting Range
Operating Sensitivity
Wi-Fi Connection Frequency
Communication Distance
Operating Temperature
Storage Temperature
Receiver Technical Data
Feeding Voltage
Dimensions
Relay NO Switching Current
Operating Temperature
Storage Temperature
5V (DC)
3V DC (2 x AAA alkaline battery)
500 mA
80 mA
131mm / 74mm / 25.5mm
o
0.1 C
o o
0.1 C – 1.0 C
o
0.5 C
Wi-Fi 802.11 b/g/n @ 2.4GHz
100m (açık alanda)
o o
(-10 C) – (+50 C)
o o
(-20 C) – (+60 C)
220V (AC)
85mm / 90mm / 28.5mm
7A (220V AC)
o o
(-10 C) – (+50 C)
o o
(-20 C) – (+60 C)

3- HT500 SET RECEIVER
COM NO NC
1-Receiver LED Light
2-Sync Button:
Syncs receiver and room thermostat.
3-Manual Button:
1
Deactivates receiver and allows you to use
2
boiler manually.
3
4-Receiver Power Cable Input
5-Boiler Connection Cable Input
6
4
5

7
4- HT500 SET RECEIVER PLACEMENT
The important thing to note in the HT500 SET receiver placement is that avoiding
physical contact with boiler and protecting against materials such as liquid, dust etc.
You can place your receiver in boiler's cabinet without physical contact with boiler or
mount receiver to wall by using Receiver Wall Mount Schematic which in page 20.
CONNECTION SCHEME
COM NO

5- HT500 SET RECEIVER SETUP
Primarily, shut down electrical current which your boiler is connected (fuse, power
outlet etc.)
Connect one of the boiler connection cable to HT500 SET receiver as shown in the
Connection Scheme.
Connect other boiler connection cable end to boiler's room thermostat input as
shown in the boiler's user manual.
Connect Receiver Power Cable first to receiver then plug into. If there is no plug near
your boiler, you can connect cable to your boiler's connection fuse.
After finishing connections, turn on electrical current first, then turn on your boiler.
You may see orange light blinks on the receiver by pressing for 2 seconds to manual
usage button of receiver. After being sure that your boiler is working, press same
button for 2 seconds again and see orange light disappeared.
Setup your Room Thermostat to sync receiver with room thermostat.
Attention: Only persons who have got Professional Competence should make
operations electric wiring or boiler setup.
8

9
6- HT500 SET SMART ROOM THERMOSTAT
Battery Indicator
Internet Connection
Temperature Set Button
Indicator
Key Lock
Boiler is Working
Outside Mode
Home Mode
Manual Mode
Mode Button
(Reduce)
ON/OFF
O
C
Outdoor Temperature
Setted Temperature
Room Temperature
Sleep Mode
Program Mode
Location Mode
Temperature Set Button
(Increase)
“ ”, “ ” Temperature Set Buttons: Increasing or reducing the temperature while
manual mode is active.
“ ” Mode button: Unlock keylock by pressing 2 seconds. Change the modes.
“ ” ON/OFF: Turn off the boiler and thermostat by pressing 4 seconds.

HT500 SET Reset And Sync:
Sync while setup: Sync signal is sent to receiver if “ ” button is pressed for 4 seconds.
Sync while using the device: First the device is setted to off-mode by pressing “ ” button.
Then sync signal is sent to receiver if “ ” button is pressed for 4 seconds..
Wi-Fi Reset while setup: Device is reset by pressing “ ” button for 4 seconds. Thus new
setup can start.
Wi-Fi Reset while using the device: First the device is setted to off-mode by pressing “ ”
button. Device is reset by pressing “ ” button for 4 seconds. Thus new setup can start.
7- HT500 SET SMART ROOM THERMOSTAT PLACEMENT
Place your HT500 Smart Room Termostat in a room where you most use it as your living
area. For example: living room. Be attentive to placement in the area of wireless internet
modem zone at home by reason of the signal is sent via internet connection to room
thermostat. Avoid installing the HT500 SET where there is a lot of air circulation such as
door entry or window edges. Also, do not place in places near heat units (central heating
system, fireplace, etc.) and places that receive direct sunlight. We recommend that the room
thermostat be placed at an altitude of 50 cm to 150 cm from the floor. You can try a few
places to find the most suitable place.
50 cm
M
M
M
10
50 cm-150 cm

11
Thermostat Battery Housing
Thermostat Power Cable Input
BATTERY PLACEMENT
Remove the battery housing from the back side of thermostat. Install 2 alkaline
batteries to battery housing. Please be sure the directions of batteries. Assemble
battery housing back. Change the both batteries together.
Warning: Please throw away dead batteries to trashes special only for batteries.
8- HT500 SET SMART ROOM THERMOSTAT SETUP
1- Power on the device by using adapter which you received with HT500 SET. “1”
number will be seen on display. It means, HT500 SET is ready for smart setup.
Note: Setup can't start without adapter connection.

2- Scan QR Code below via your smartphone. You can install HT500 SET mobile
application from Apple Store or Google Play to your smartphone with that code. (You
may need QR Code Reader App regarding to your phone's model and brand)
3- Complete your membership by enter into the mobile application which you
downloaded.
4- You will receive confirmation mail after you completed signing up.
5- If you confirm the incoming mail, the application will automatically have directed to
setup page.
6- Perform the instructions on the Setup page in order and complete setup.
Note: To get further information about mounting and setup please visit
generallife.com.tr/kurulum/ht500set or go to the webpage by scanning QR Code
below.
12

13
9- MOBILE APP – MODES
With HT500 SET' s Home-Sleep-Outside-Program-Location and Manual mods, you can
warm up as you want and you can save money.
Home Mode will fix temperature on set value. Recommended to use when you
are at home. Suggested temperature value is 23 C.
o
Sleep Mode provides you comfy sleep with set temperature you desire. You
can use this mode between 11 pm to 7 am which is common sleeping hours.
Suggested temperature value is 18 C.
o
Outside Mode is suggested to use when you are outside of your house for
short or long time.
Program Mode allows you to program weekly as 30 minute time periods
which will automatically change temperature in your home with your program.
Location Mode reduces the temperature of your home when you move away
from home, or increases the temperature of your home when you approach
your home.
Manual Mode allows you to set the degree to which you can determine the
warmth of your home.

10- RECEIVER LED LIGHT COLOR EXPLANATIONS
14
Green
Green Flashing
Red
Red Flashing
Orange
Modem synced with thermostat and Works properly.
Pressed to receiver sync button and waiting for
thermostat sync signal.
Receiver has energy but no thermostat synced.
Boiler shut down because no signal from thermostat
more than 22 minute.
On Manual Mode.

15
DECLARATION OF CONFORMITY
ISIPARK İÇ VE DIŞ TİC. İNŞ. ISITMA SİSTEMLERİ OTO. SAN.A.Ş.which Head Office and
production site is located on Fatih Mah. 1188 Sk.No:13/A Sarnıç - Gaziemir - İZMİR –
TÜRKİYE confirms and declares that the product marked with CE and its specifications
below is covered by the provisions of the mentioned directive.
Brand
Product Name
Product Type
The product manufactured by ISIPARK and mentioned above is connected wirelessly
at 2.4 Ghz internet and periodically shares the temperature and status information
with the server on the internet.
Compatible Directives:
Radio and Telecommunication Terminal Equipment Regulation 2014/53/EU
(R&TTE/RED EN 301 489-1 V2.1.1:2017, EN 300 220-1 V3.1.1:2017, EN 301 489-3
V2.1.1:2017, EN 300 220-2 V3.1.1:2017, EN 62479: 2010, EN 60730-2-9:2010, EN
60730-1:2011)
Electromagnetic Compatibility Regulation 2014/30/EU (EMC EN 61000-6-3: 2007 + A1:
2011, EN 61000-6-1: 2007
Low Voltage Directive 2014/35/EU (LVD EN 60730-2-9:2010, EN 60730-1:2011)
Supplementary Information: Mentioned product can be used with combi boilers with
on / off output and compatibility with the directive only covers the product. ISIPARK is
not responsible for the compliance of the entire system with the directive. This
declaration does not apply when changes are made to the product without obtaining
our consent.
: GENERAL Life
: HT500 SET
: Smart Room Thermostat

WARRANTY CONDITIONS
1- Warranty starts at the delivery date of devices and equpments and warranted against
manufacturing defect for 2 years.
2- Devices and equipments are delivered to customers in operation. Mounting and other
connections will be additional fee for service.
3- Devices will maintenance and repair in our factory and should send by contracted
transportation company. For out services, transportation and accommodation of service
personnel are covered by customers. Overtime is added on service charge and is received
as cash proceeds.
4- Maintenance of devices and equipments will be in our factory. For device maintenance,
the round travel fares are covered by customers.
5- If devices are malfunction in warranty duration, devices will be inspected in our factory to
find out whose responsibility (manufacturer or customer) and will announce to user by
report.
6- Devices, which malfunctioned in warranty duration and found out it is responsibility of
manufacturer, customer can demand new product or repair which all costs will fulfilled by
manufacturer regarding to cost is not higher than device.
7- After inspection of malfunction and detected that, it is customer's fault, repair cost of the
device which still in warranty duration will be customer's responsibility.
8- Customers should be aware of damages (if there is any) of product and warn
manufacturer since the day warranty duration starts. If customer do not warn
manufacturer with knowledge of damage, customer lose the rights of article 6.
9- Devices and equipments should be used as specified in User's Manual if not used as
specified, products are out of warranty.
10- If products damaged, scratched or cracked by customer. The products will be out of
warranty conditions.
11- Damages/Malfunctions because of using other brand' s and model' s devices and
equipments without knowledge of manufacturer are out of warranty.
12- The arising depredation owing to working in humid and acidic places and result of
16

17
rusting, oxidation is out of warranty.
13- The transport damage is out of warranty. Customers can take a transportation
insurance.
14- Damages by virtue of grid voltage are out of warranty.
15- Damages because of force majeure like flood, earthquake, fire etc. are out of warranty.
16- All parts of the product are under warranty of our company.
17- If product breaks down and gets fixed in warranty duration, duration of maintenance
adds to the warranty duration. Products repairment can't exceed 20 work days. This
duration starts when the product's problems are reported to the seller, agency, producer or
the importer if there is no service station. Consumer can report the problem by; fax, e-mail,
registered and reply paid letter or a similar way. If a conflict happens, the consumer has the
responsibility of proofing it. If the problem can't be solved more than 10 days the producer
or importer has to supply a similar device until end of the reparation. If the product breaks
down because of material, label or mounting faults in the warranty duration, firm won't
demand label costs, changing parts or any other kind of charge for repairment.
18- Despite consumers rights of maintenance;
- If the product breaks down for 4 times in a year or 6 times in warranty duration and these
problems effects main purpose of the product. (starting from delivery time during
warranty.),
- Exceeding the maximum repairing term,
- In the case of not existing service station, determining that repairment is not possible with
the report compiled by respectively service station's seller, dealer, agency, legation, importer
or manufacturer.
19- You may apply for Ministry of Custom and Trade and General Directorate of Protection
of Costumers and Market Surveillance in case of the problems about certificate of
warranty.
20- Warranty document should be kept by customer until warranty duration is finished. If
warranty is lost there will be no replacement. All maintance and repair cost is responsibility
of customer in case of warranty document lost.

MODEM WALL HANGER SCHEME
64 mm
20

ISIPARK reserves the right to change and develop product specications and user manual.
*For all the changes, you can visit generallife.com.tr
 Loading...