

Page 1
AeroFlo
36
Assembly Guide
®
2
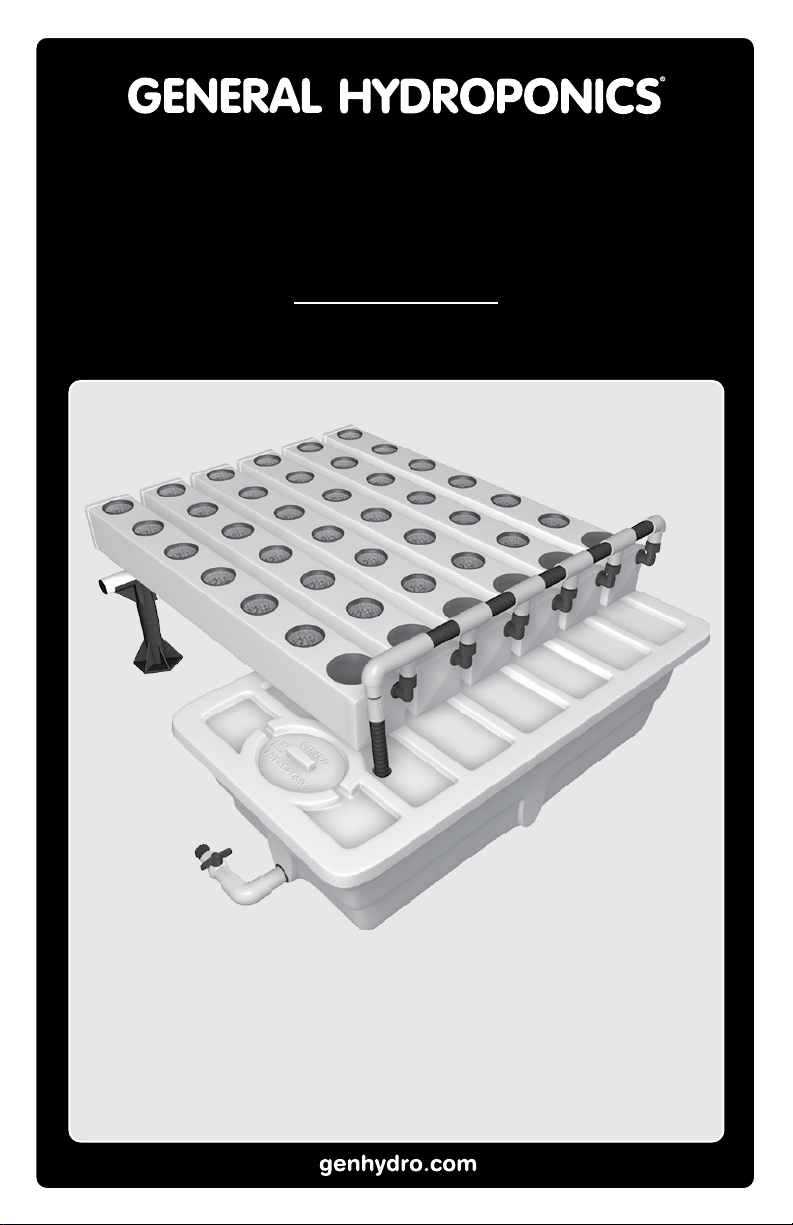
For quite a while now, satisfied AeroFlo2 users have
requested a compact AeroFlo2 model designed expressly
for indoor lighting. General Hydroponics is pleased to offer
the trim line Model 36 with a large 40 Gallon reservoir. The
Model 36 is designed to fit an indoor grow light.
Page 2
11
AeroFlo2 36 PARTS
3415 18 16
2
1
12
13
14
17
591019 7
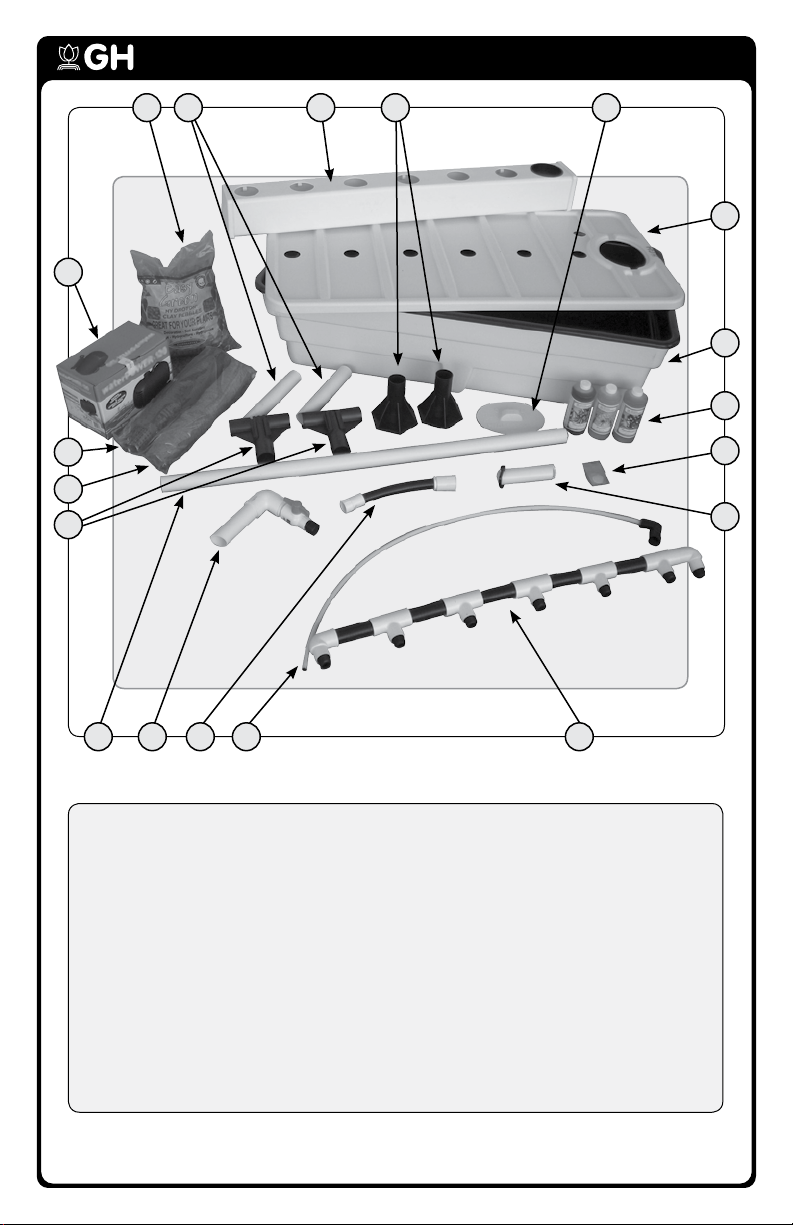
AeroFlo2 36 PARTS:
assembled dimensions: 4’2”L X 4’7”W X 2’H
1: Panda Reservoir (40 gal)
2: Reservoir Lid
3: Hatch Cover
4: Growing Chambers (6)
5: Laser Spraylines (6)
6: Drain Level tubes (6)
7: Manifold
8: Silicon Grease
9: Pump Line
8
6
10: Drain Valve
11: WaterPower 85 Pump
12: Flora Series Nutrient
13: Net Pots (36)
14: CocoTek Liners (36)
15: Clay Pebbles (9 Liter)
16: SnapStand Base (2)
17: SnapStand Cross Fittings (2)
18: SnapStand Support Legs (2)
19: SnapStand Cross Support
Page 3
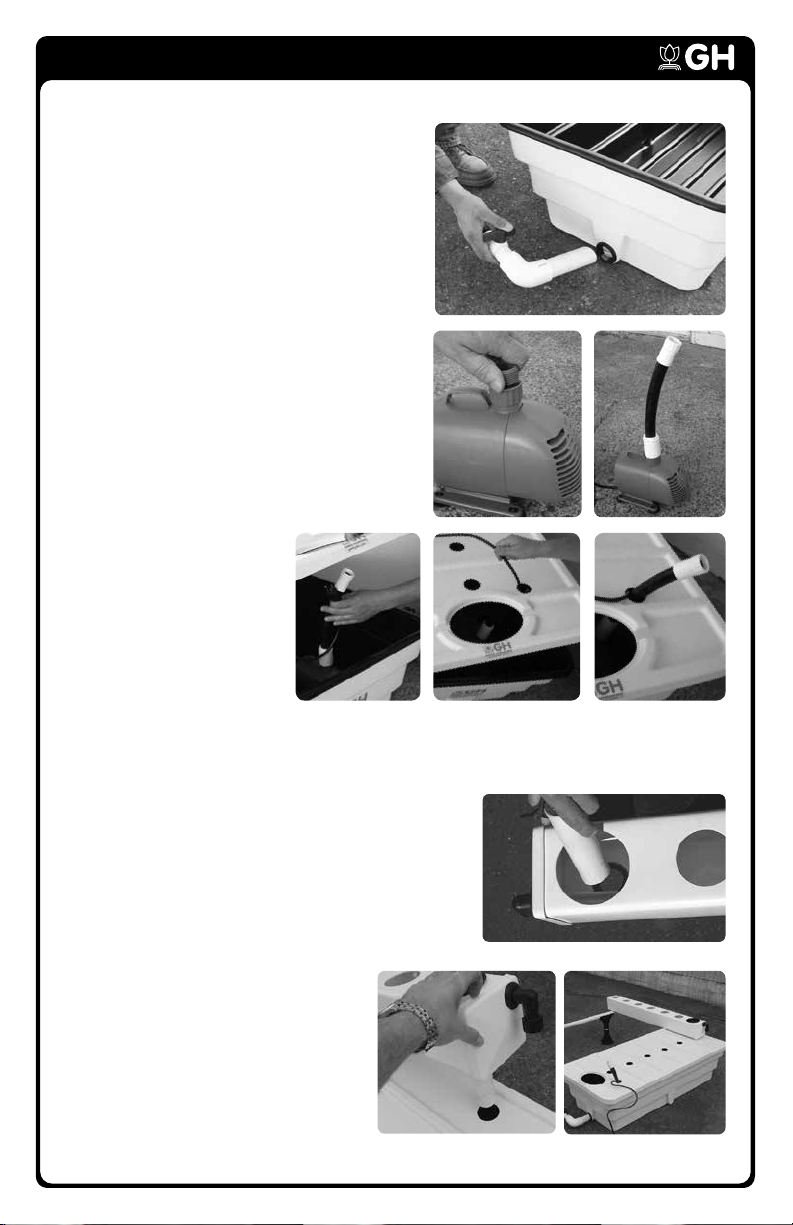
STEP 1
Place the Reservoir where it will be used on a
level surface. Line the inside of the Reservoir
grommet with a thin coat of the Silicon Grease.
Insert Drain Valve into grommet using a
twisting motion.
STEP 2
Attach the pipe thread adaptor provided with
the WaterPower 85 Pump to the outlet. Then
attach the Pump Line to the outlet adaptor;
making sure the Pump Line is fully seated
against the “O” Ring.
STEP 3
Place the WaterPower 85
Pump on the bottom of
the Reservoir and feed the
power cord through the hole
in the Reservoir Lid. Lower
the Reservoir lid guiding the
Pump Line through the same
hole as the power cord.
ASSEMBLY
STEP 4
Remove the Laser Sprayline, Drain Level Tube, Net Pots and CocoTek Liners from each of
the Growing Chambers. Follow the included directions on inserting the Laser Spraylines
into each Growing Chamber.
Line the inside of the Growing Chamber grommet
with a thin coat of the Silicon Grease and insert the
Drain Level Tube half way into the grommet. Repeat
for the rest of the chambers. The water level of the
Growing Chambers is adjusted by raising or lowering
the Drain Level Tubes.
STEP 5
Assemble the SnapStand by sliding the
two Support Legs into the SnapStand
Bases and the SnapStand Cross Fittings.
Snap the Cross Support into the
SnapStand Cross Fitting and place the
StanpStand approximately 5’ from the
reservoir. Center the Growing Chambers
with the Drain Level Tube inserted into
the Drain Overflow Hole and the other
end on the SnapStand.
Page 4
ASSEMBLY & HELPFUL GUIDELINES
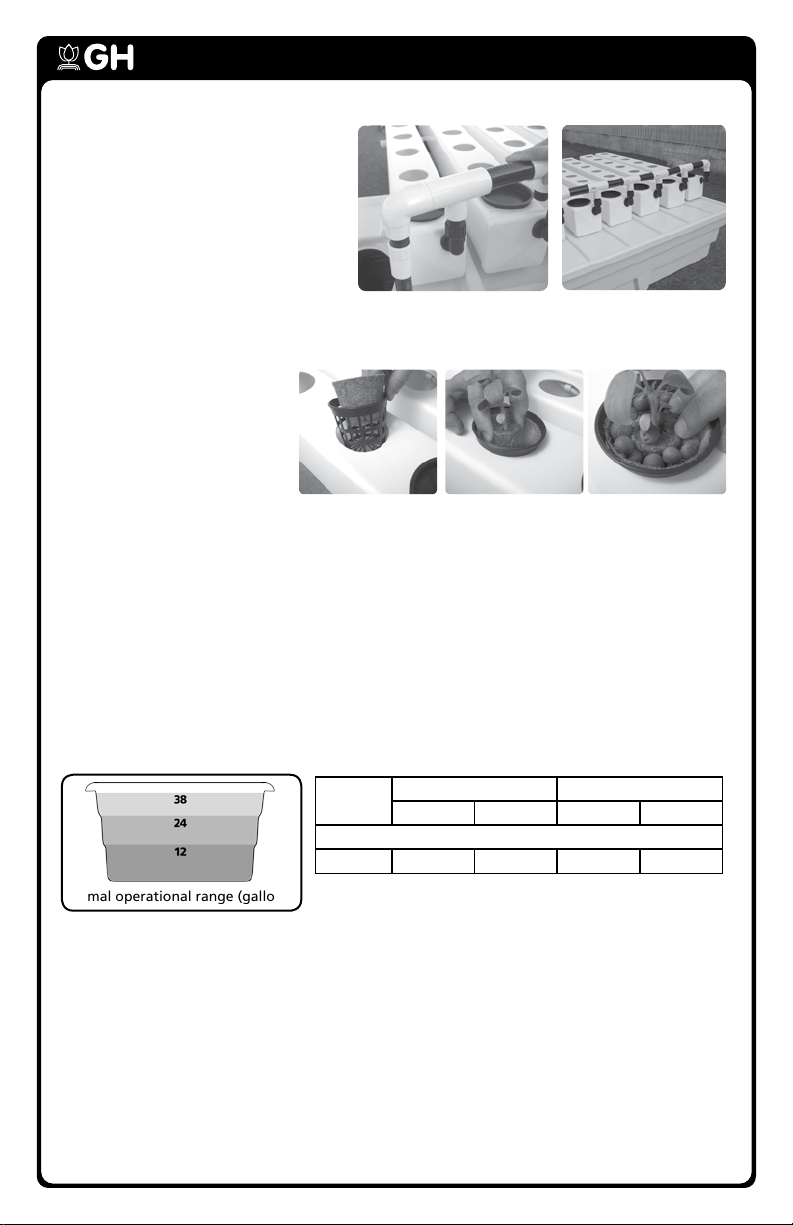
STEP 6
Attach the Manifold to the Pump Line
and attach each of the Laser Spraylines
to the Manifold. Make sure there is a
rubber gasket in the Laser Sprayline
fitting and DO NOT OVER TIGHTEN.
The level of the water in the Growing
Chambers is controlled by the height
of the Drain Level Tube. Keep the
Drain Level Tube access covered after
adjusting the water level.
STEP 7
Place the Net Pots with the
CocoTek Liners into the
growing sites and use the Clay
Pebbles to support seedling
plants. Always rinse the Clay
Pebbles before use.
FILLING
Before filling your system with water it is essential that you understand the system
capacity. The reservoir should be drained first before draining the growing chambers.
This will prevent overfilling of the reservoir and possible flooding. See illustration for
reservoir capacities at each of the steps. Fill the reservoir with a known volume of water
and then start the pump. Adjust the Drain Level Tubes (DLT) to the desired level and
start adding water in 1 gallon increments until the Growing Chambers and reservoir are
at the desired levels. Record the total gallons to be used for calculating the amount of
nutrient to add to the system. See chart for approximate amount of water each system
holds at the two operating levels.
CAUTION: Never run the water pump without water covering the pump inlet.
Reservoir
capacity
38 0.6 2.4 42 58
normal operational range (gallons)
Growing Chamber Total Water*
low level high level low level high level
gallons
* Total amount of water in all chambers and reservoir
PLANTING
To prepare a seedling or a plant for transplanting, remove all soil and/or organic material
from around the roots. Plants must be sturdy with established roots before transplanting
into the AeroFlo. Choose seedlings because it’s more difficult to successfully transplant
older plants. If your plant has been growing in soil or peat moss, gently remove the
plant from its pot and carefully rinse as much soil as possible from the roots before
transplanting. Although this method of transplanting from soil to hydroponics is
somewhat risky, as soil may contain disease organisms that proliferate in the rich
hydroponic solution, we have had success using this transplant method and encourage
you to try it. Or, you can avoid these problems by starting plants from cuttings in one of
our RainForest Systems.
Page 5

HELPFUL GUIDELINES
PLACEMENT
Abundant light, proper temperature and adequate ventilation are crucial for fast
growth, healthy plants and higher yields. Place the AeroFlo2 system in a warm, well-lit,
well-ventilated location, such as an outdoor garden, sunlit window, patio or greenhouse.
Keep your AeroFlo2 away from areas where the inevitable dripping that occurs during
filling, draining and pH adjustment could cause water damage.
NUTRIENTS
Start by choosing either the most widely recognized, reliable nutrient in the industry, Flora
Series® or step into the technological breakthrough of FloraNova® for the accelerated
performance of mineral nutrients enriched with the healthy, flavorful characteristics
of organics. Please refer to our Feeding Schedule that is provided with the system for
nutrient recommendations.
• Keep the nutrient solution temperature
below 75° F (24° C).
• Change nutrient solution every 7-10 days.
• Top off with fresh water between
nutrient changes.
• Keep nutrient solution aerated for best results.
• If your water is above 200 ppm total or 70 ppm
calcium, use Hardwater FloraMicro instead
of FloraMicro.
The pH (acidity or alkalinity) of a nutrient solution affects the availability of the elements
contained within. Use GH pH adjusters to maintain nutrient pH between 5.5 - 6.5.
OPERATION
When plants are small and their roots are not well developed, the Drain Level Tubes (DLT)
should be at the maximum height to allow nutrient rich water to reach the bottoms of
the net cups. Once the roots have grown and are immersed within the flowing stream
of nutrient, the DLT’s can be pushed down to increase oxygen within the nutrient and
growing chamber. The water level in the Growing Chambers should be maintained at
a 1” to 2” depth in case the power or the pump fails. Generally it’s best for the system
to always run. However, many people do put their AeroFlo2 systems on a timer to save
electricity. The AeroFlo2 stays on during the light cycle and only runs for 10 to 15 minutes
every 1 to 2 hours for the night cycle. Cycling the pump keeps the water from stagnating
and the roots from drying out and dying.
PREPARATION FOR REPLANTING
Drain the whole system, brush out the growing chambers and, if necessary, unclog the
spray holes in the beige spray lines mounted inside the growing chambers. Sponge
off all parts to disinfect. You can use General Hydroponic’s FloraShield™ to clean the
system and clay pebbles or a disinfectant. Rinse everything thoroughly. Refill it with
water and run it for a few hours, then drain again before introducing a new crop.
Clean filters frequently. Simply unplug pump and remove reusable filter. Rinse pump
filter under hot water to clean. CAUTION: Do not rinse filter with a strong Bleach
(chlorine) solution, it may react with the filter and form an oily residue.
Page 6
TROUBLE SHOOTING
If white salt deposits form on the clay pebbles:
1. Try using a milder nutrient solution and topping off with plain water only.
2. Occasionally drain your system, refill with plain water and run the pump
overnight. After the overnight rinse, empty reservoir and refill with
fresh nutrient.
If plants are not growing well and you suspect “hard” water:
1. Use FloraMicro Hardwater in place of FloraMicro.
2. Try distilled or purified water. You should see a significant improvement
in plant health and growth within one week.
3. Collect rainwater for use in your AeroFlo2.
If nutrient solution stops flowing from the beige spray lines:
1. Check to ensure that pump is plugged in and the reservoir is filled
with nutrient solution.
2. Check whether emitter holes in the beige spraylines are clogged. Keep pump
filter clean and use General Hydroponic’s FloraKleen™ to minimize nutrient
buildup and crusting.
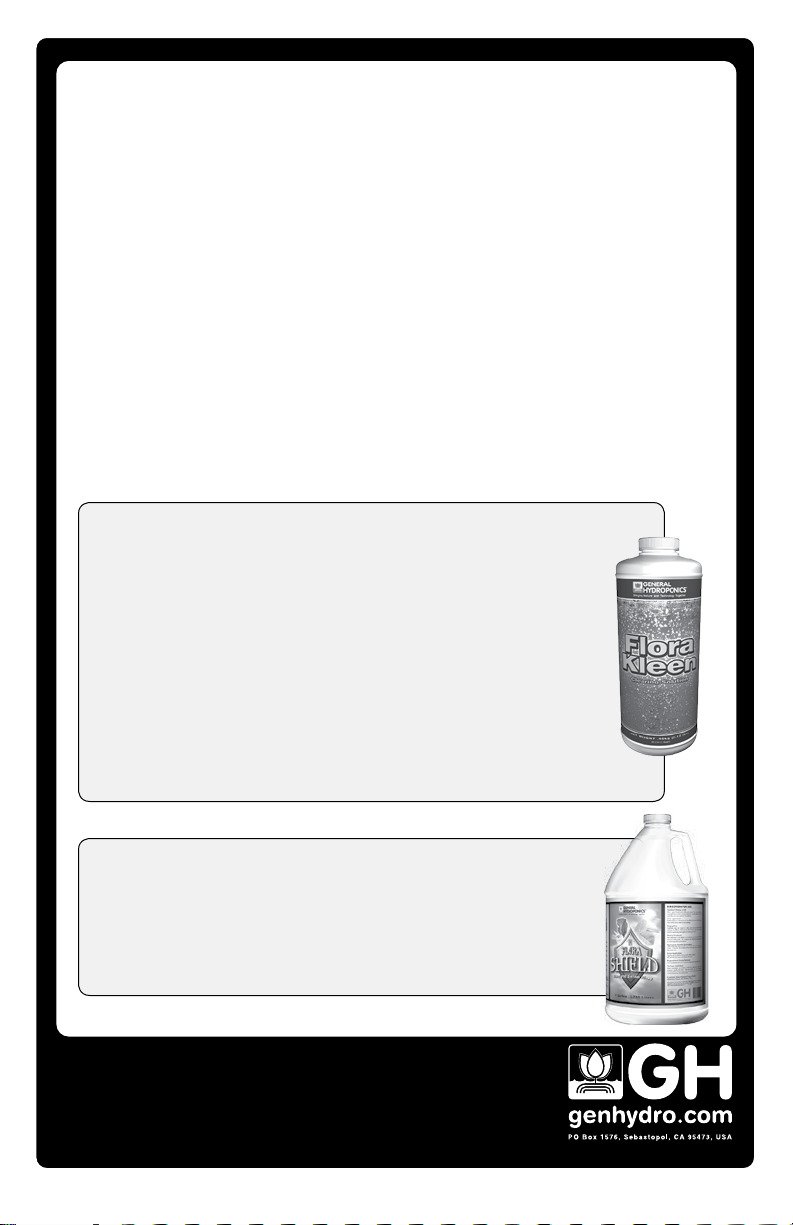
FLORAKLEEN
• Dissolves accumulated fertilizer salts.
• Reduces plant stress from excess and imbalanced nutrients.
• Releases nutrient bonds between plants and systems, also
correcting nutrient lock-out.
• Use FloraKleen as a final flush a few days before harvest to
promote maturation and sugaring.
• Safe for all systems and media while plants are growing.
FloraKleen removes fertilizer residue that can accumulate over time in
hydroponic systems, growing media, and potting soils. Use FloraKleen
monthly to purge your hydroponic system or potted plants of excess salts
that can accumulate as a result of regular fertilizer application. FloraKleen
can be used at anytime throughout the plant’s life and is an excellent final
flush to help improve flavor. Its high concentration and low price make
FloraKleen the economical choice for maintaining your plants in both
hydroponic and soil based environments.
FLORASHIELD
Maintain healthy roots without resorting to harsh toxic chemicals.
FloraShield’s unique combination of compounds can thoroughly rinse
systems and plants during all phases of growth. Growers across the
globe have attested to FloraShield’s ability to solve root problems.
Not to be used with SubCulture
®
®
707-824-9376 Monday through Friday 9am to 4pm PST
©2012 GH Inc.
p050912am
 Loading...