

Page 1
Installation
Gas Slide-in Range
Instructions
“If you have questions, call 800.GE.CARES or visit our website at: GEAppliances.com”
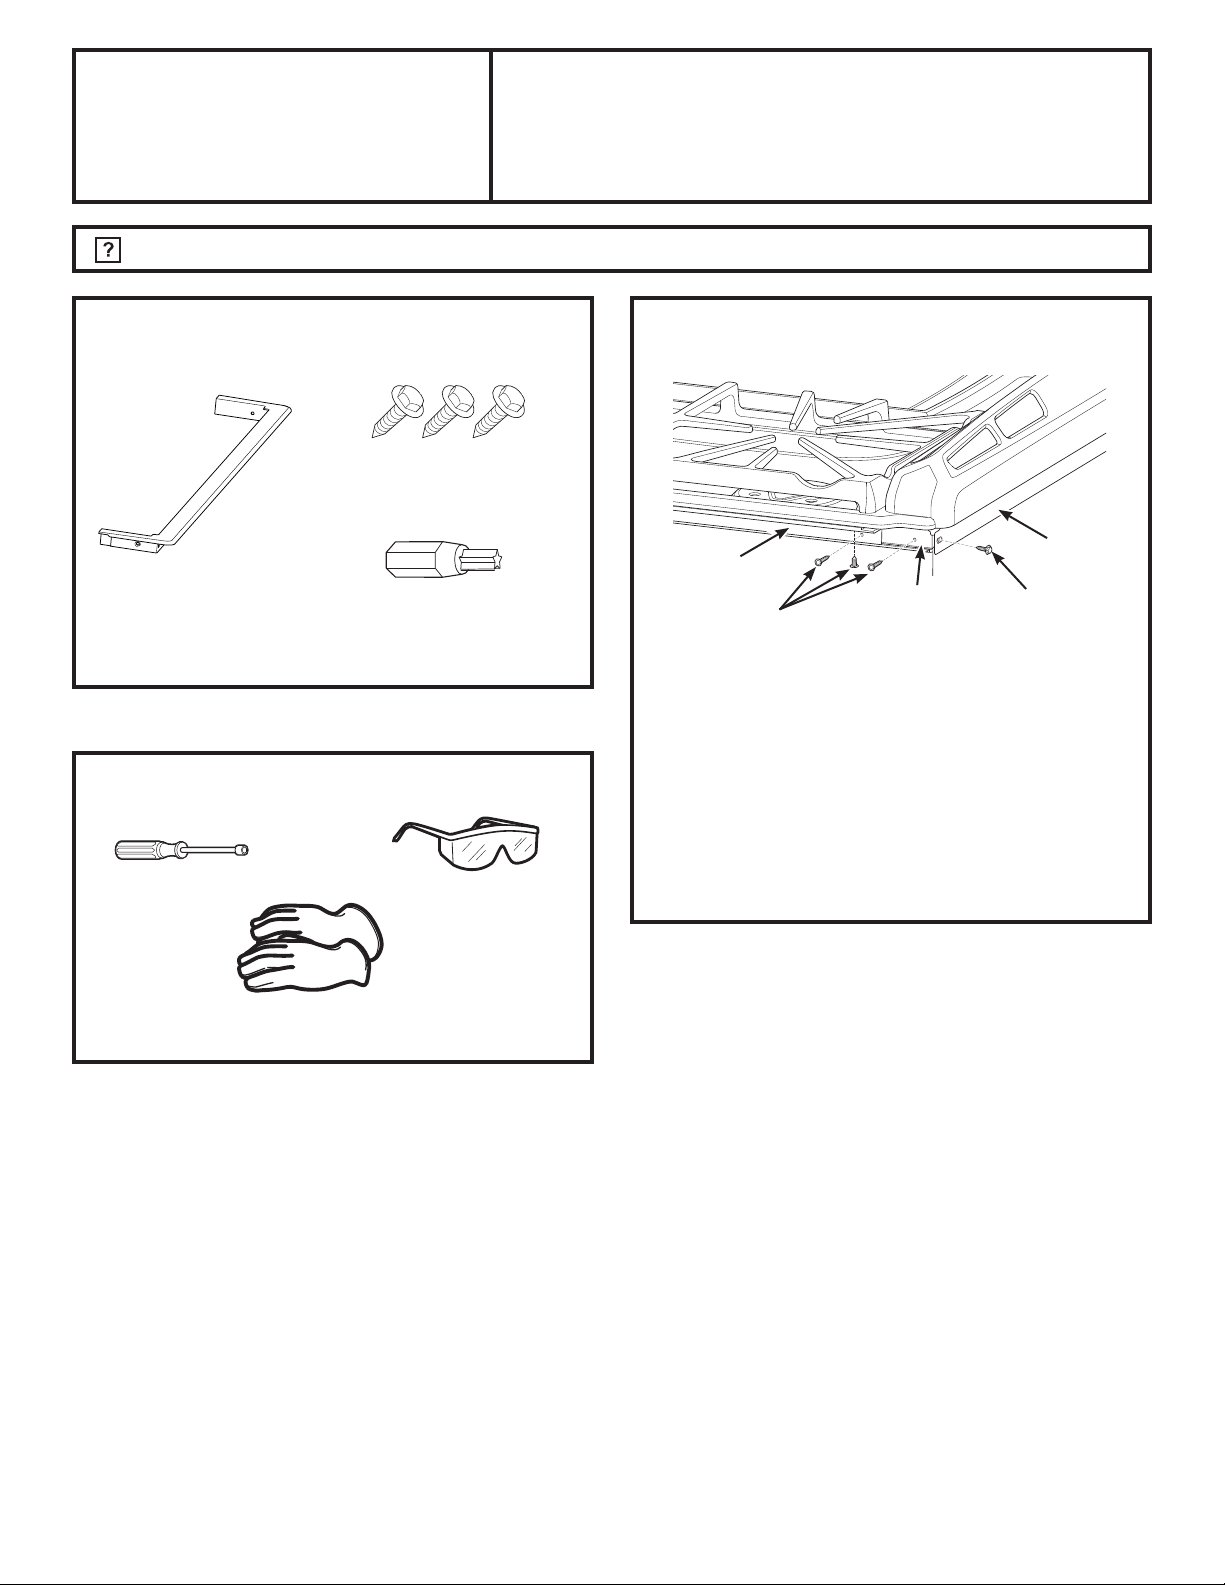
PARTS INCLUDED
(3) ¼” drive #8 x 3/4”
Sheet Metal Screws
Island Trim
T10 TORX® Bit
TOOLS YOU WILL NEED
Island Installation Kit
In order to install the island trim kit, you must first
remove the two (2) short trim pieces on both sides.
Side Trim
Short Trim
T10 TORX® Screws
1. Remove (3) three T10 TORX
2. Remove (1) one ¼” sheet metal screw retaining
the rear trim and discard.
NOTE: When the screws are removed from the
rear trim it may flex away from the back of the
range – this is normal.
®
screws.
Rear Trim
Sheet Metal
Screw
Nutdriver
Cut Resistant Gloves
Safety Glasses
3. Remove short trim.
4. Repeat steps 1 thru 3 on the opposite corner.
31-10953 02-14 GE
1
Page 2
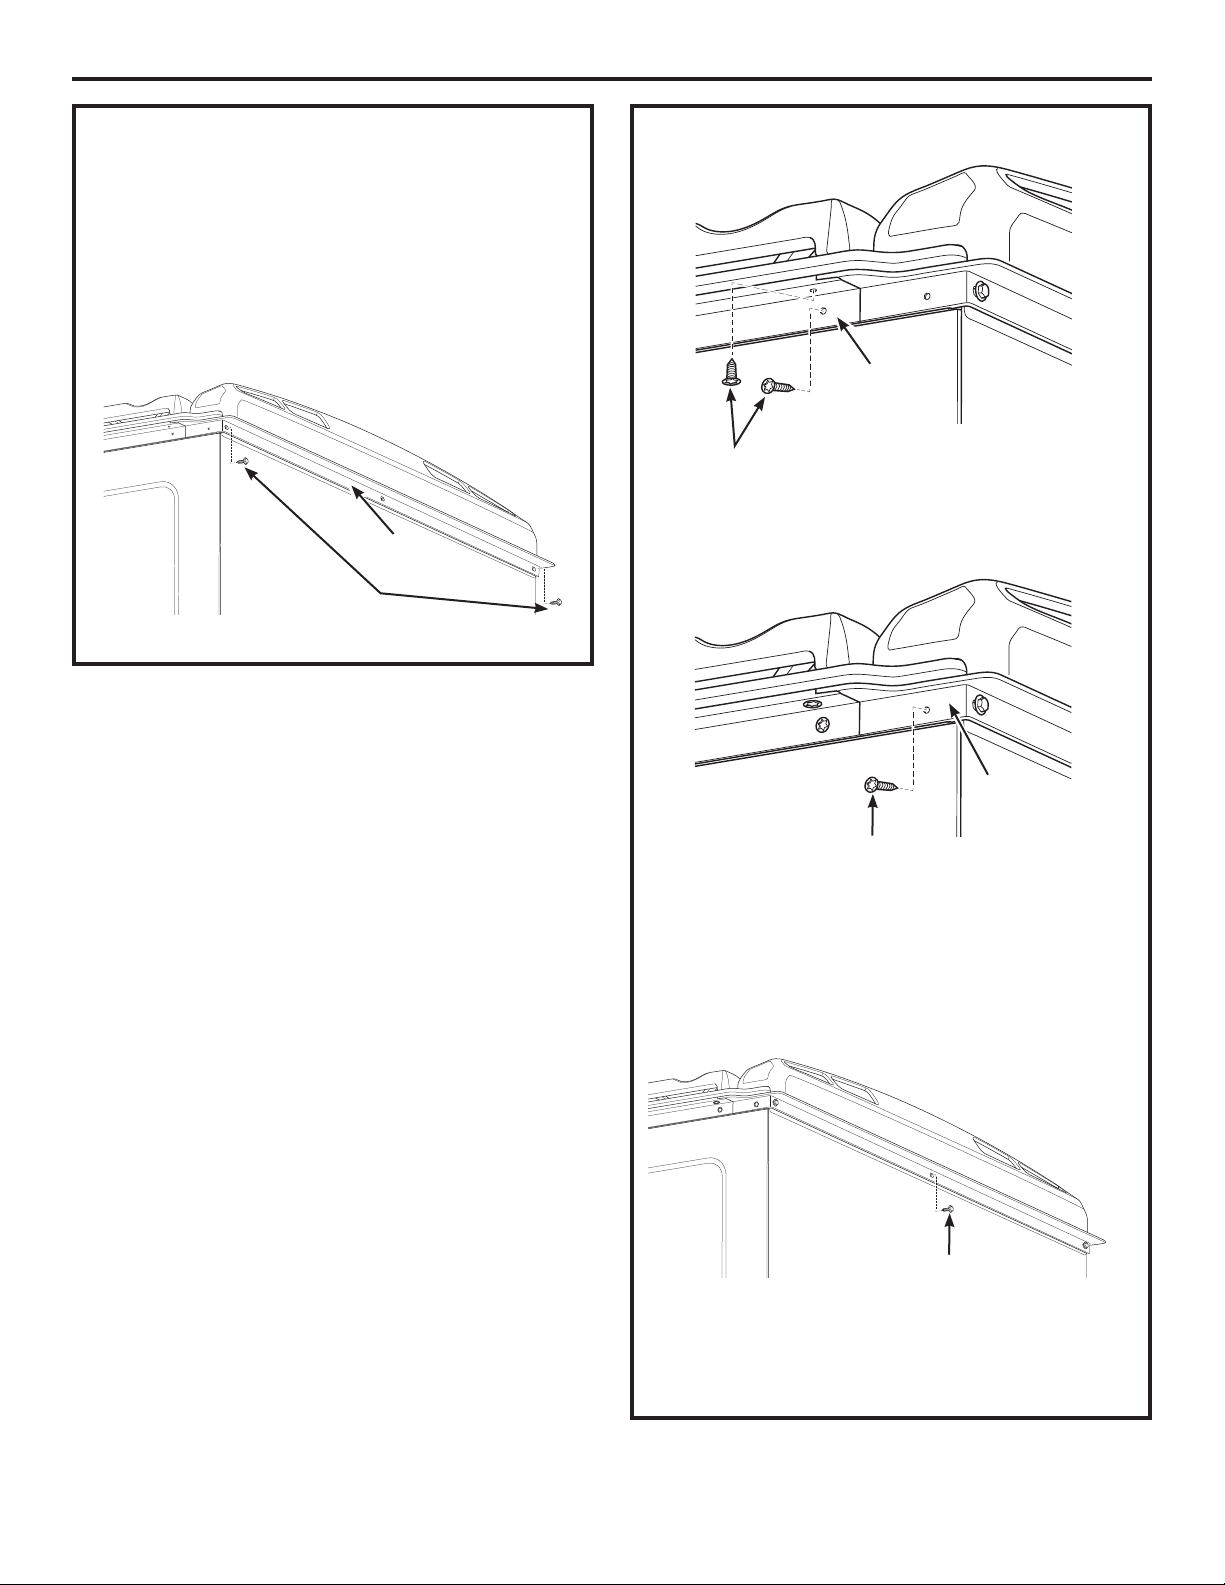
Installation Instructions
5. Install island trim piece making sure that the
side lap joint engages with the side trim on
both sides.
NOTE: Make sure that the notch on island trim
fits into the slot of the rear trim.
6. Install the (2) two ¼” sheet metal screw provided
in the kit thru the corner trim and rear trim.
NOTE: This will draw the corner trim and rear
trim together.
Island Trim
¼” Sheet
Metal Screws
7.
Install (2) two T10 TORX® screws into the side trim.
Side Trim
T10 TORX® screws
8.
Install (1) one T10 TORX® screws into the island
trim.
Island Trim
T10 TORX® screws
9.
Repeat steps 7 & 8 on the opposite corner.
NOTE: Island trim will protrude approximately
1/2” beyond the rear of the rear trim.
10. Install (1) one ¼” sheet metal screw provided in
the kit thru the center hole of the island trim.
¼” Sheet
Metal Screw
11. Install the range per the range installation
instructions.
2
 Loading...