

Page 1
Installation
Range Trim Kit
Instructions
JXFILLR1BB, JXFILLR1SS, JXFILLR1DD
If you have questions, call GE Appliances at 800.GE.CARES (800.432.2737)
or visit our website at: GEAppliances.com.
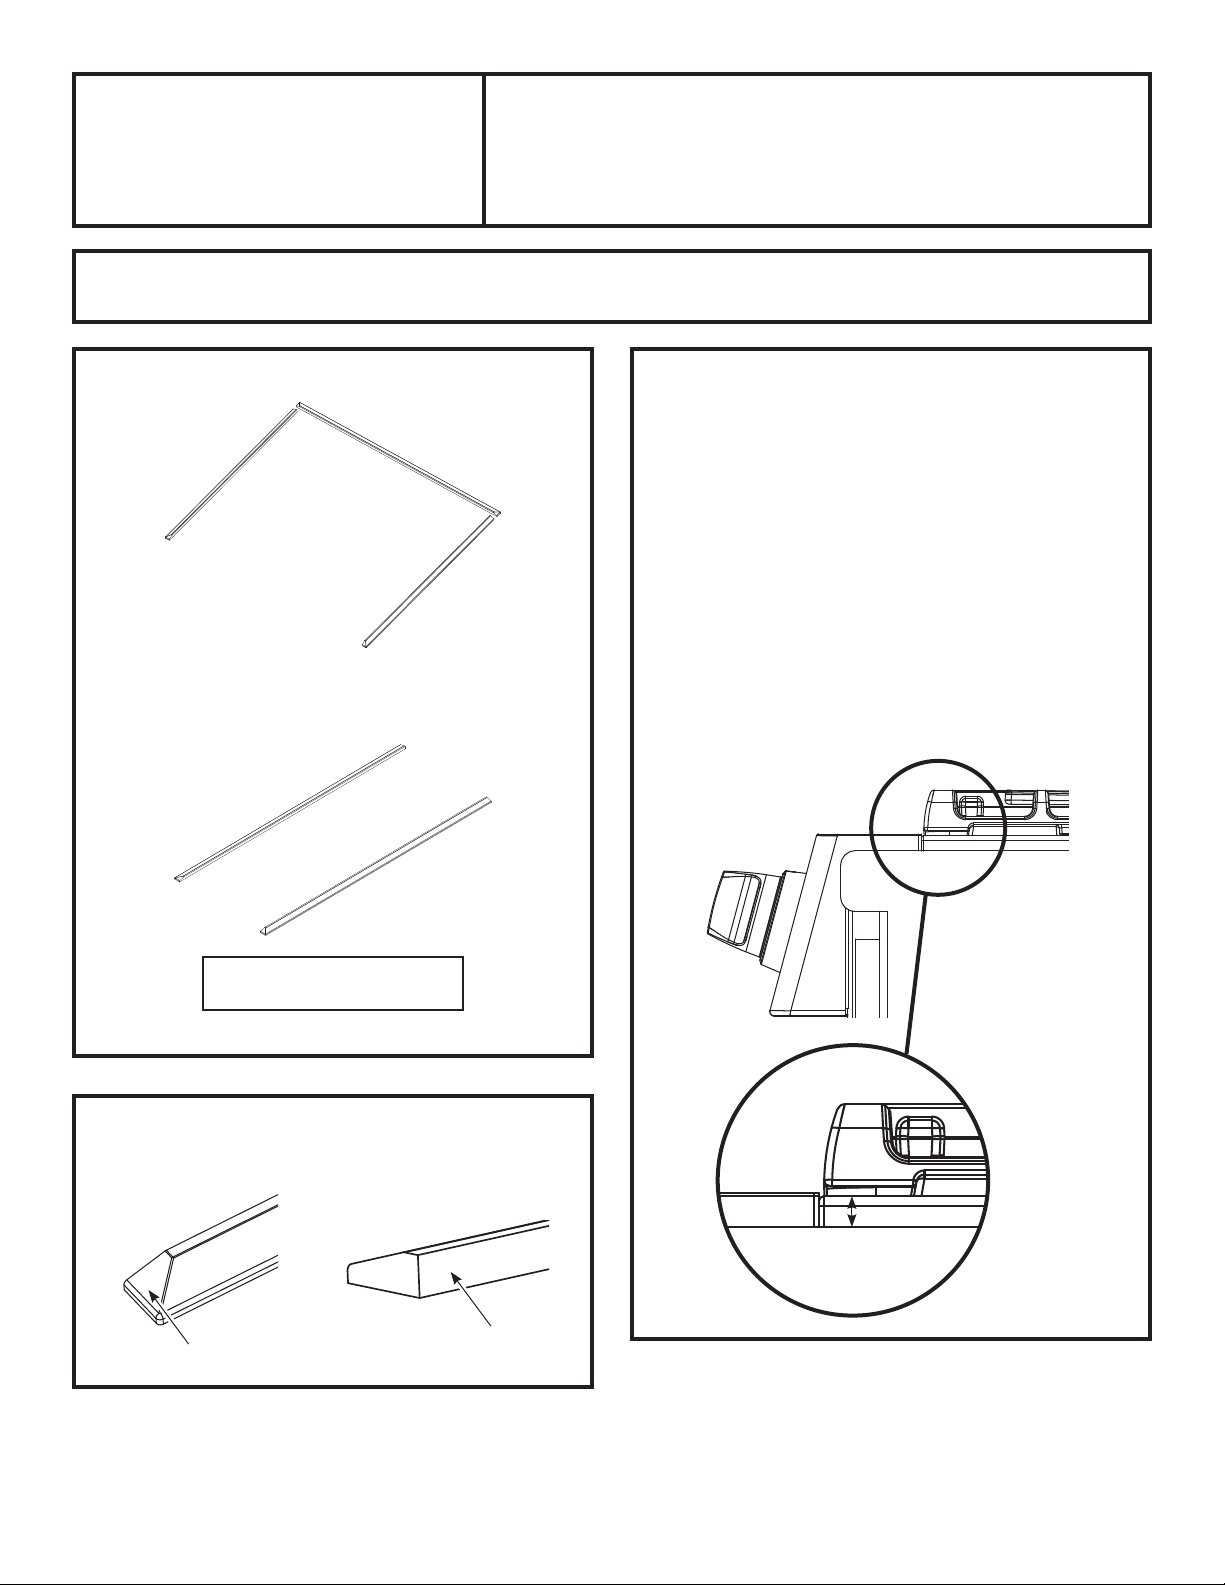
PARTS INCLUDED
Left Side Trim (1)
Optional Trim Parts
Rear Trim (3)
Right Side Trim (2)
INSTALLATION INSTRUCTIONS
If your range is to be installed against a wall, only
parts 1 and 2 are recommended.
If your range is to be installed in an island
configuration, parts 1,2, and 3 are recommended.
Parts 4 and 5 can be used in place of parts 1 and 2,
but modifications may need to be completed by the
customer for an ideal fit.
1. In order to securely install the trim kit, countertop
surfaces around the range must be clean and dry.
2. Adjust the range height so that the top of the
cooktop is 3/8” higher than the countertop and
level. See range installation instructions on how to
adjust unit height.
Longer Left Side Trim (4)
Longer Right Side Trim (5)
No tools required*
*Unless part 4 & 5 are needed, which may have to be cut to size
SIDE TRIM REFERENCE GEOMETRY
Front of Side Trims Back of Side Trim Piece
Angled Front Surface
Flat Surface Against Range
Cooktop
3/8”
Countertop
31-11118 07-17 GEA
Page 2
Installation Instructions
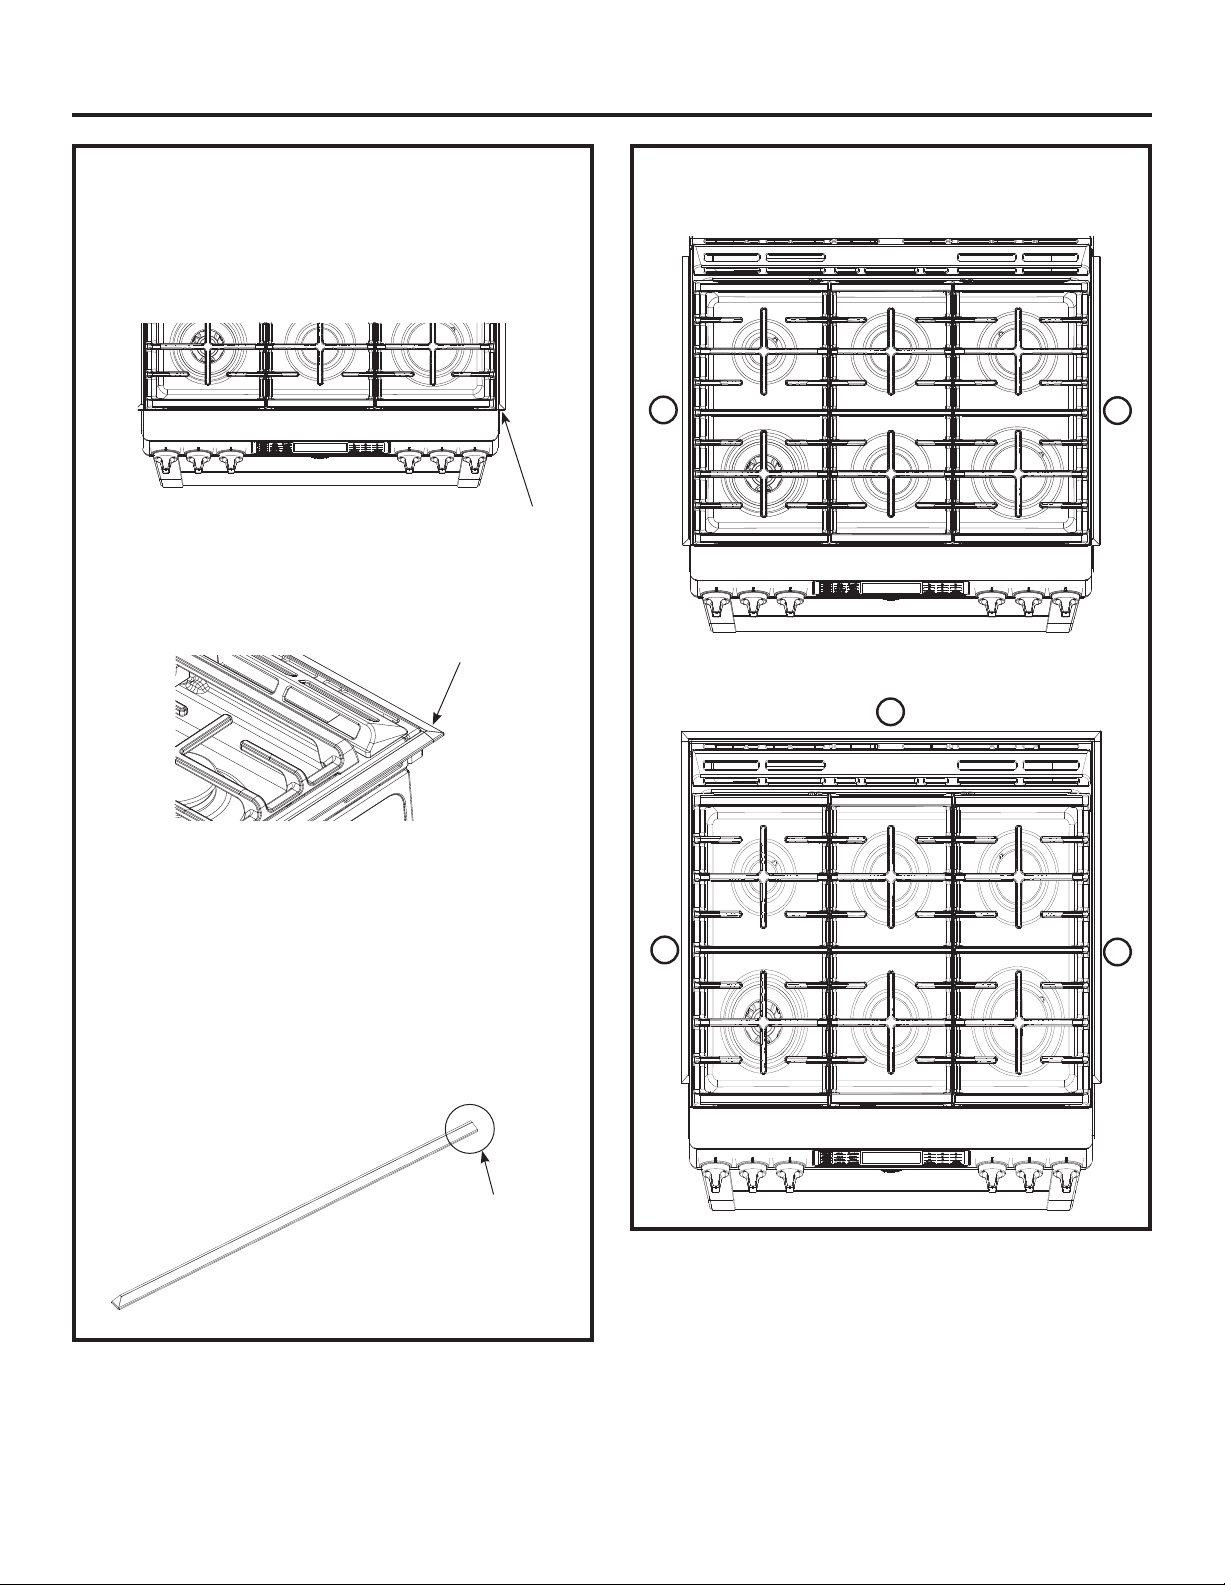
3. Before removing the adhesive backing, dry fit the
trim pieces against the range. The angled front
surface should be in the front for parts 1 and 2.
■ For wall installed ranges, the front edge of the
side trims should line up with the front edge of
the cooktop.
Edge of cooktop
■ For an island installation, center part 3 (has two
angled ends) along the back edge of the range
so that parts 1 and 2 are flush with part 3 for a
continuous appearance.
Flush appearance
FINAL ASSEMBLY REFERENCE
Installation against a wall:
1
Installation in an island:
3
2
4. If trim pieces 4 and 5 are used for either wall
installation or island installation, ensure trim starts
at the front edge of the countertop. Trim length
modifications can be made by removing material
from the back end of the trim piece.
5. After determining the location of the trim pieces,
remove the adhesive backing and carefully place
the trim pieces in their previous location. Press
the trim pieces firmly down onto the countertop to
adhere the double sided tape.
Modify back end of part
4 and 5 in this area
1
2
2 31-11118
 Loading...