

GeneralAire GFI 4545 Installation & Owner's Manual
Perfect Platform
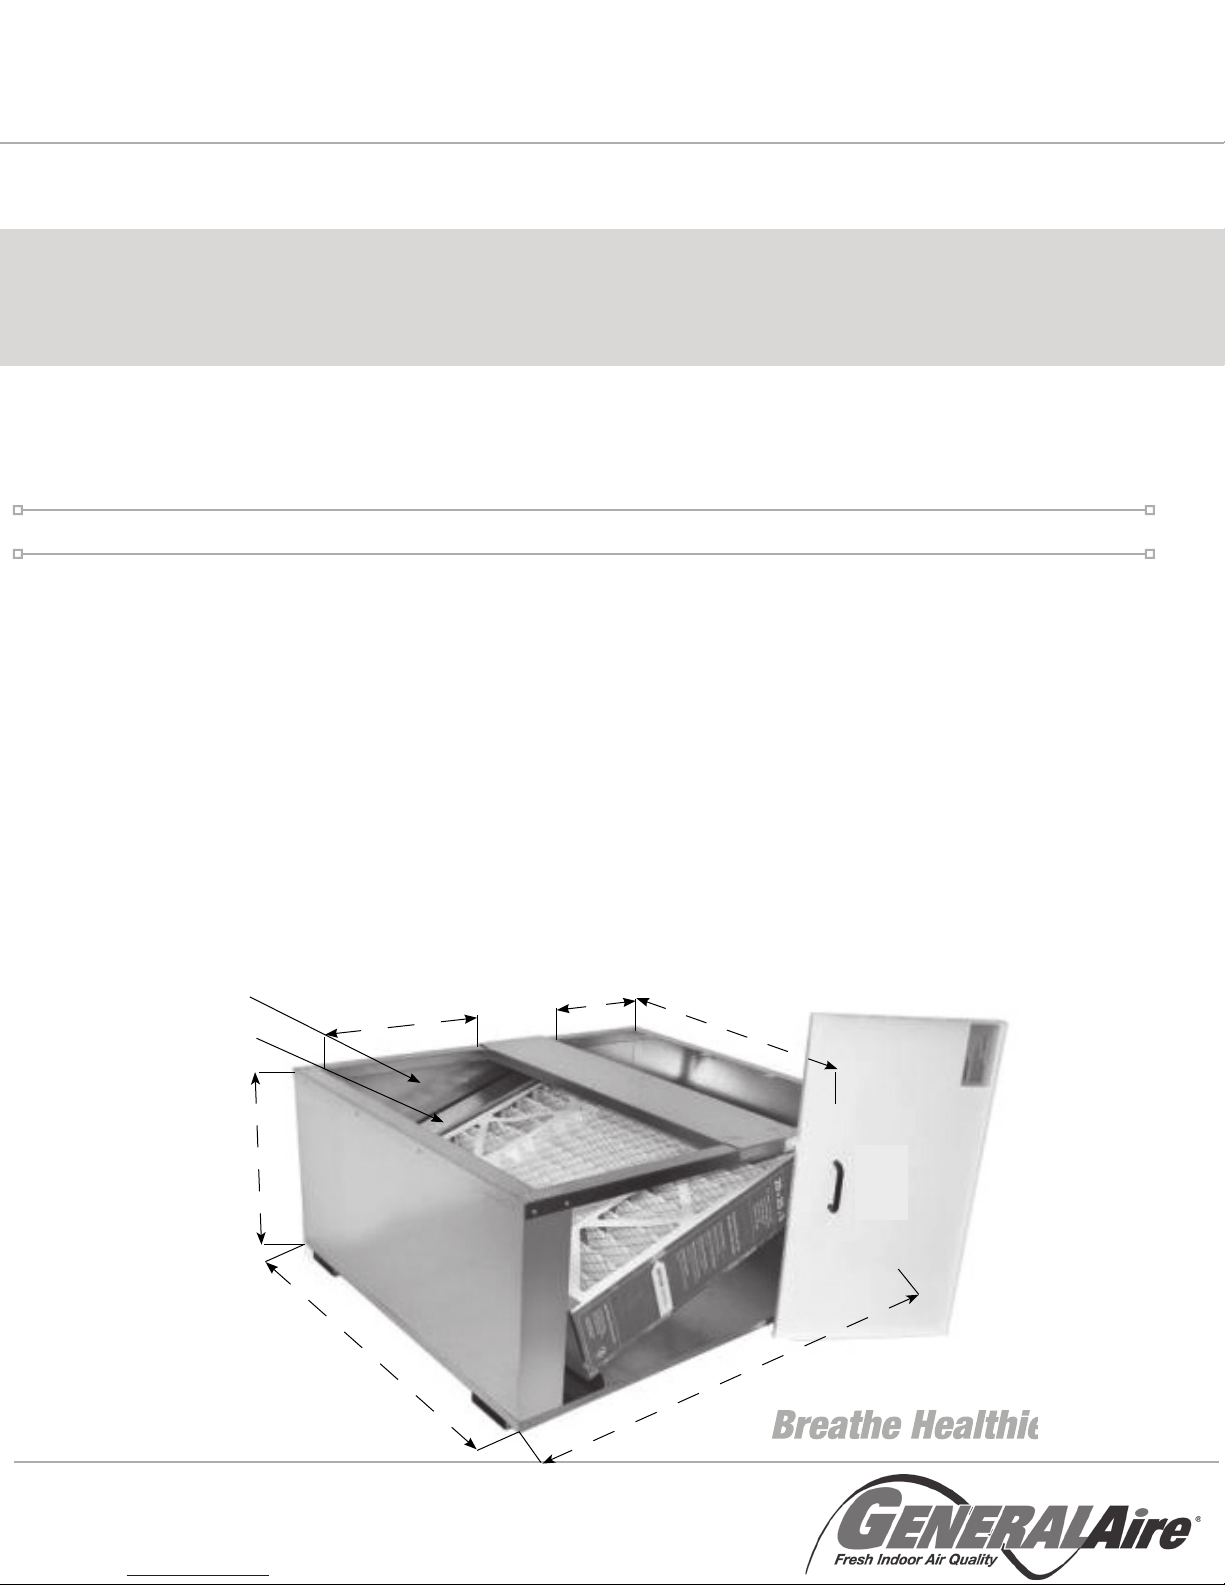
Air Cleaner
GFI #4545
Installation & Owners Manual
Read and Save These Instructions
• Installation by anyone other than a qualifi ed contractor voids the warranty.
• Product designed for residential installation only. Commercial installation voids warranty.
• Modifi cation or alteration of product, parts, installation instructions or local safety codes voids warranty.
• Read our full warranty policy at the end of this document.
CAUTION: Sharp edges may cause injury from cuts. Use care when handling.
!
!
WARNING: Disconnect power to furnace before installation.
Specifi cations
• MERV: MERV 11 (MERV 10 Option Available)
• Type: Cartridge
• Weight: 58 lbs.
• Rated Air Flow: 2000 CFM
• Static Pressure Drop: .26 in w.c.
• Min. Ave. % Eff. 1.0-3.0: 61.8% (MERV 10) or 75% (MERV 11)
• Operation: Air ow from furnace through air cleaner
• Replacement Filter: 6FM2025 (MERV 11 - GFI #4551); Replace every 6-12 months
• Application: Inline
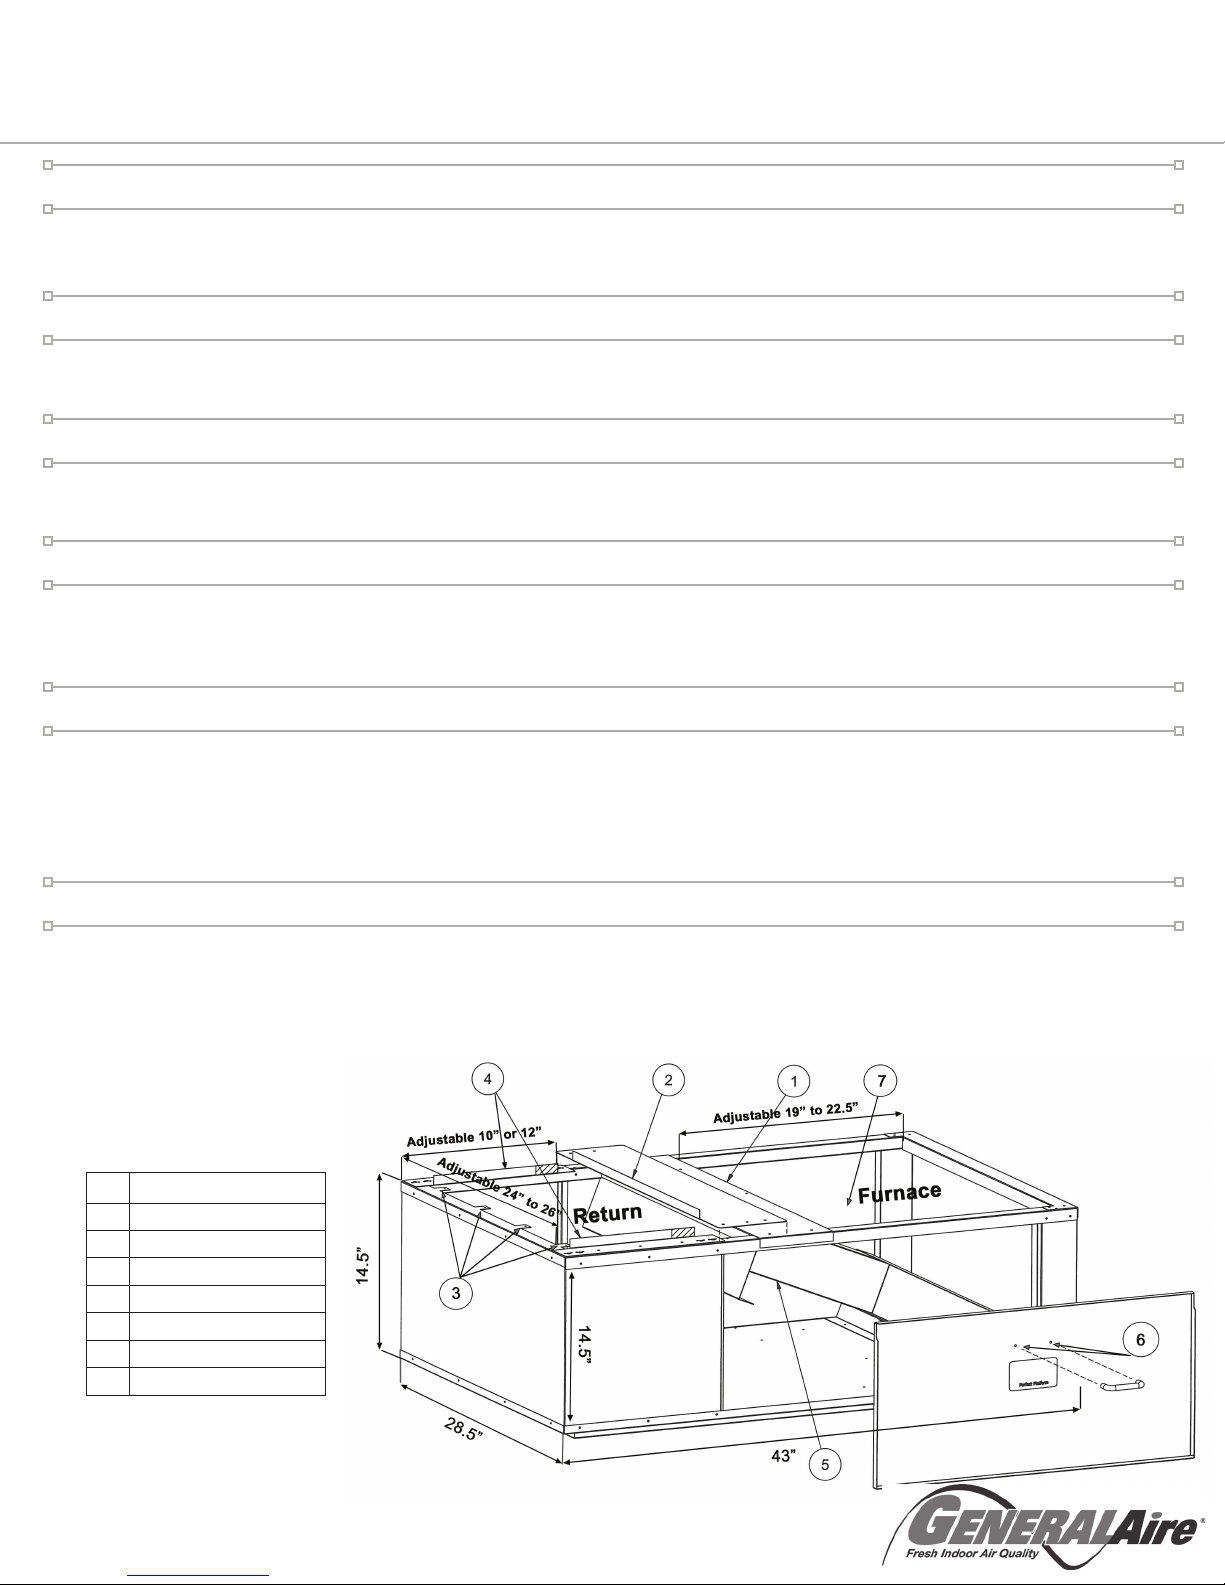
• Installation: Return Air Duct; can be adjusted for 10” or 12” duct. (See diagram below)
• Pallet Quantity: 8
• Warranty: 10 Years
• Material: Heavy 22 gauge galvanized sheet metal; riveted for sturdiness and long life
• Accommodates 1.3 or 3.5 ton electric air handler or gas furnace
• Door: Two door openings allow access from either side for installation purposes and lter replacement
Removable Panel
Filter Rail
14.5”
Manufacturers of Whole House Residential Indoor Air Quality Products.
Humidifi ers - Dehumidifi ers - Air Cleaners - UV Air Purifi ers - Heat/Energy Recovery Ventilators
1
www.generalaire.com
Adjustable
19” to 22.5”
28.5”
Adjustable
10” or 12”
Adjustable
24” to 26”
43”
Breathe Healthier
Perfect Platform
Air Cleaner
Installation & Owners Manual
Replacement Filter Size
• The Perfect Platform lter part number is GFI #4501 (5FM2025) MERV 10 or GFI #4551 (6FM2025) MERV 11.
• Replace your lter at least once every 6 months, or more often if needed.
Door
• Afx the handle (6) to the door (only one of the two doors has holes for handles), using the two included #6 x 1/2”
screws. This door is to be located on the side for which the homeowner has access for replacing the lter.
Filter Rail Spacer
• The lter rail spacer (5) is placed to the back, next to the lter track and closest to the door opening that will not be
accessible. The open side of the spacer will be against the removable panel (7) at the back (inaccessible) opening.
Adjustable Center Assembly
• The center crossbar (1) is secured to the platform with the two formed anges down. Set the crossbar in place, but do
not secure it to the Perfect Platform until the intake duct adjuster (2) is also in place.
• The Perfect Platform crossbar can be adjusted to close the gap for a narrow air handler or furnace.
GFI #4545
Duct Flanges
• The at duct anges (3) need to be bent up 90° and are used to secure the intake duct to the platform.
• The Perfect Platform intake duct adjuster (2) can be placed allowing for either 10” or 12” duct. The formed ange should
be facing up and is used to secure the intake duct to the platform. Once the adjuster is positioned correctly four #8 x
3/8” screws are used to secure both the adjuster and crossbar to the platform at the sides. One screw is used to secure
the adjuster to the crossbar in the center.
Duct Adaptors
• Two duct adaptors (4) are used if you need to reduce the intake duct to 24”. The adaptors are placed where indicated,
on each side of the return, and holes are drilled in the platform. Use the clearance holes on the adaptors as the locators
to drill the platform holes. Do not drill holes elsewhere as this may interfere with the door. On the 2832 model the
shaded area of the duct adaptor will need to be cut off to allow the intake duct to t over the adaptor.
• IMPORTANT: Once the air handler or furnace and the duct are in place and secured, the joints must be properly sealed
to prevent air leakage.
# Description
1 Center Crossbar
2 Intake Duct Adjuster
3 Duct Flanges
4 Duct Adaptors
5 Filter Rail Spacer
6 Door Handle
7 Removable Back Panel
2
 Loading...