

Page 1
www.gen-16.com
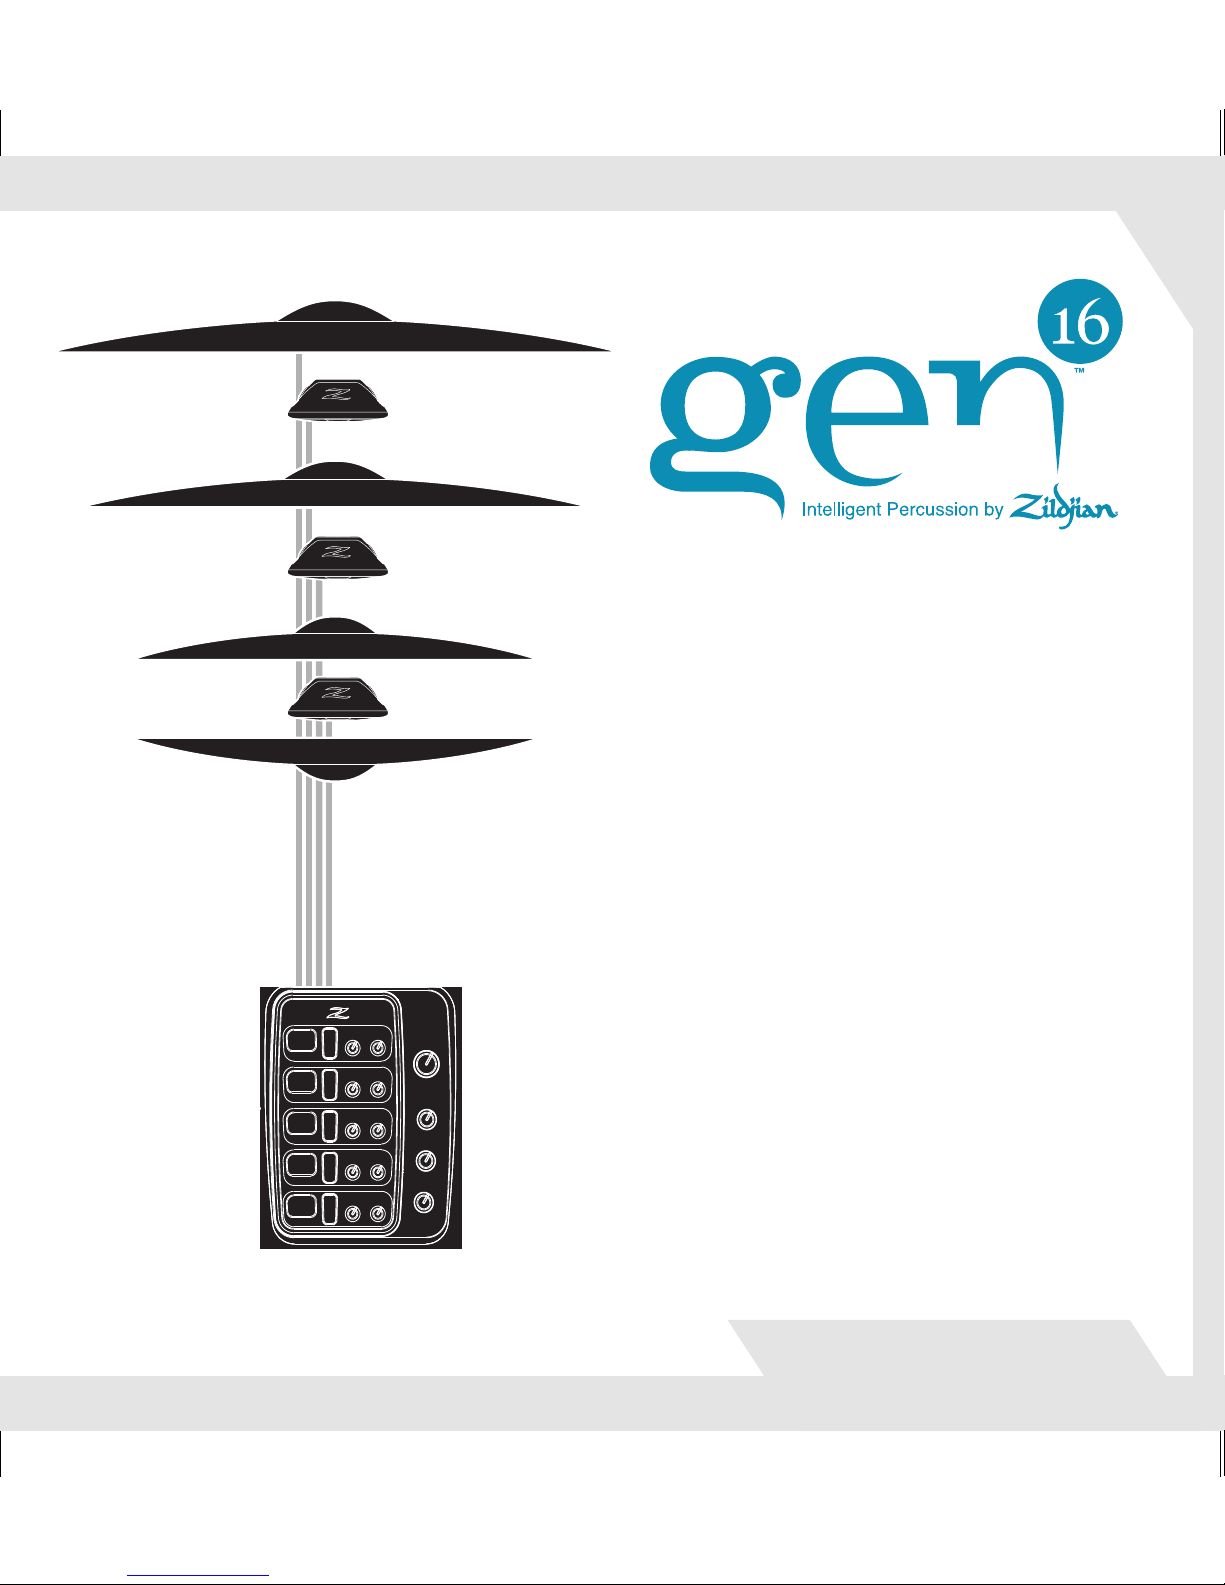
AE Cymbal Systems
//Box Set 480
14” HiHats, 18” Crash, 20” Ride
//Box Set 368
13” HiHats, 16” Crash, 18” Crash Ride
//Box Set 38
13” HiHats, 18” Crash Ride
Visit Gen-16.com to download a PDF of the full
Owners Manual and to view videos showing
how to get the most from your AE System.
56359 CD Holder Txt r1.indd 3 6/16/11 1:09 PM
Page 2

●
●
●
●
●
●
●
●
●
●
Table of Contents
What’s in the Box
Important Safety Instructions
Safety Notices
Recycling Notice
Mounting & Connecting HiHat Pickup
Mounting & Connecting Cymbal Pickup
Connecting Pickups to DCP
DCP Control Panel Functions
Mounting DCP to Bracket
Important / Caution Notifications
56359 CD Holder Txt r1.indd 4 6/16/11 1:09 PM
Page 3
www.gen-16.com
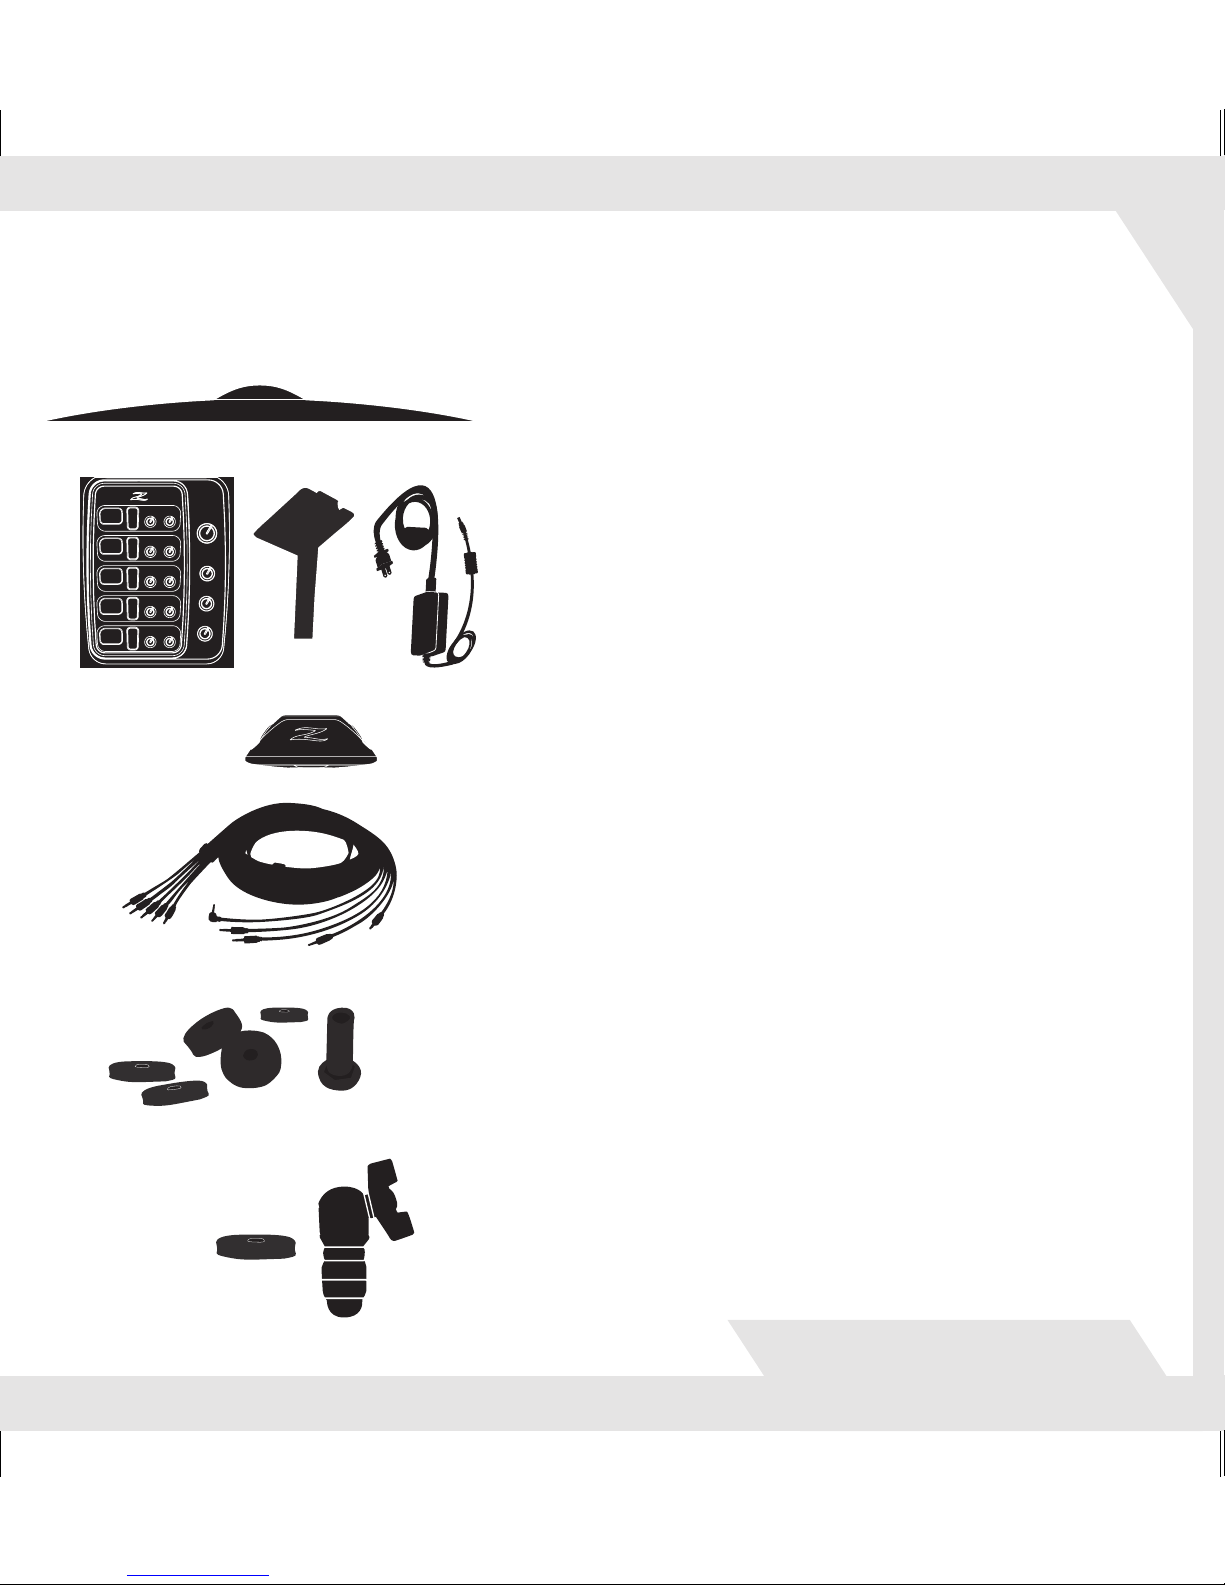
//Acoustic Electric Cymbals
//Contents will vary depending on AE Box purchased
//Digital Cymbal Processor
AC Power Supply
Mounting Bracket
//AE Pickup
1 Per Cymbal
1 Per HiHat Pair
//5 Channel AE Cable Snake
//Cymbal Mounting Kit
1 Kit Per Cymbal, 1 Kit Per HiHat Pair
Each Kit Contains:
2 Sizes of Isolation Pads (4 total)
1 Cymbal Sleeve
1 Cymbal Disk
//HiHat Mounting Kit
1 HiHat Clutch
1 HiHat Isolation Pad
What’s in the Box?
56359 CD Holder Txt r1.indd 5 6/16/11 1:09 PM
Page 4

Important Safety Instructions
Read these instructions.
Keep these instructions.
Heed all warnings.
Follow all instructions.
Do not use this apparatus near water.
Clean only with dry cloth.
Do not block any ventilation openings. Install in accordance with the
manufacturer’s instructions.
Do not install near any heat sources such as radiators, heat registers,
stoves, or other apparatus (including amplifiers) that produce heat.
Do not defeat the safety purpose of the polarized or grounding-type plug.
A polarized plug has two blades with one wider than the other.
A grounding type plug has two blades and a third grounding prong. The
wide blade or the third prong are provided for your safety. If the provided
plug does not fit into your outlet, consult an electrician for replacement
of the obsolete outlet.
Protect the power cord from being walked on or pinched particularly
at plugs, convenience receptacles, and the point where they exit from
the apparatus.
56359 CD Holder Txt r1.indd 6 6/16/11 1:09 PM
Page 5

www.gen-16.com
Important Safety Instructions (cont.)
Only use attachments/accessories specified by the manufacturer.
Unplug this apparatus during lightning storms or when unused for long
periods of time.
Refer all servicing to qualified service personnel. Servicing is required
when the apparatus has been damaged in any way, such as powersupply cord or plug is damaged, liquid has been spilled or objects have
fallen into the apparatus, the apparatus has been exposed to rain or
moisture, does not operate normally, or has been dropped.
Safety Notices
WARNING:
To reduce the risk of fire or electric shock, do not expose this apparatus
to rain or moisture.
For use only with the supplied Power Supply Model PA-1015-2T2 or
equivalent power supply acceptable to the manufacturer.
The plug on the power supply cord is utilized as the mains disconnect
of the product. This mains plug shall always be readily accessible to the
user to disconnect power from the product.
56359 CD Holder Txt r1.indd 7 6/16/11 1:09 PM
Page 6

●
●
●
●
●
NOTE:
This equipment has been tested and found to comply with the limits for
a Class B digital device, pursuant to part 15 of the FCC Rules. These
limits are designed to provide reasonable protection against harmful
interference in a residential installation. This equipment generates uses
and can radiate radio frequency energy and, if not installed and used
in accordance with the instructions, may cause harmful interference to
radio communications. However, there is no guarantee that interference
will not occur in a particular installation. If this equipment does cause
harmful interference to radio or television reception, which can be determined by turning the equipment off and on, the user is encouraged to try
to correct the interference by one or more of the following measures:
Reorient or relocate the receiving antenna.
Increase the separation between the equipment and receiver.
Connect the equipment into an outlet on a circuit different from that
to which the receiver is connected.
Consult the dealer or an experienced radio/TV technician for help.
Opening or tampering with DCP, Pickups or Cables will void warranty.
CANADA:
This Class B digital apparatus complies with Canadian ICES-003.
(French): Cet appareil numerique de la Classe B est conforme a la
norme NMB-003 du Canada.
56359 CD Holder Txt r1.indd 8 6/16/11 1:09 PM
Page 7
www.gen-16.com
RECYCLING NOTICE FOR EU COUNTRIES:
Information on Disposal for Users of
Waste Electrical & Electronic Equipment.
This symbol on the product and / or accompanying documents means
that used electrical and electronic products should not be mixed with
general household waste. For proper treatment, recovery and recycling,
please take this product to a designated collection point where it will be
accepted free of charge.
Alternatively, in some countries you may be able to return your products
to your local retailer upon purchase of an equivalent new product.
Disposing of this product correctly will help save valuable resources
and prevent any potential negative effects on human health and the
environment, which could otherwise arise from inappropriate
waste handling.
Please contact your local authority for further details of your nearest
designated collection point.
Penalties may be applicable for incorrect disposal of this waste, in
accordance with your national legislation.
56359 CD Holder Txt r1.indd 9 6/16/11 1:09 PM
Page 8
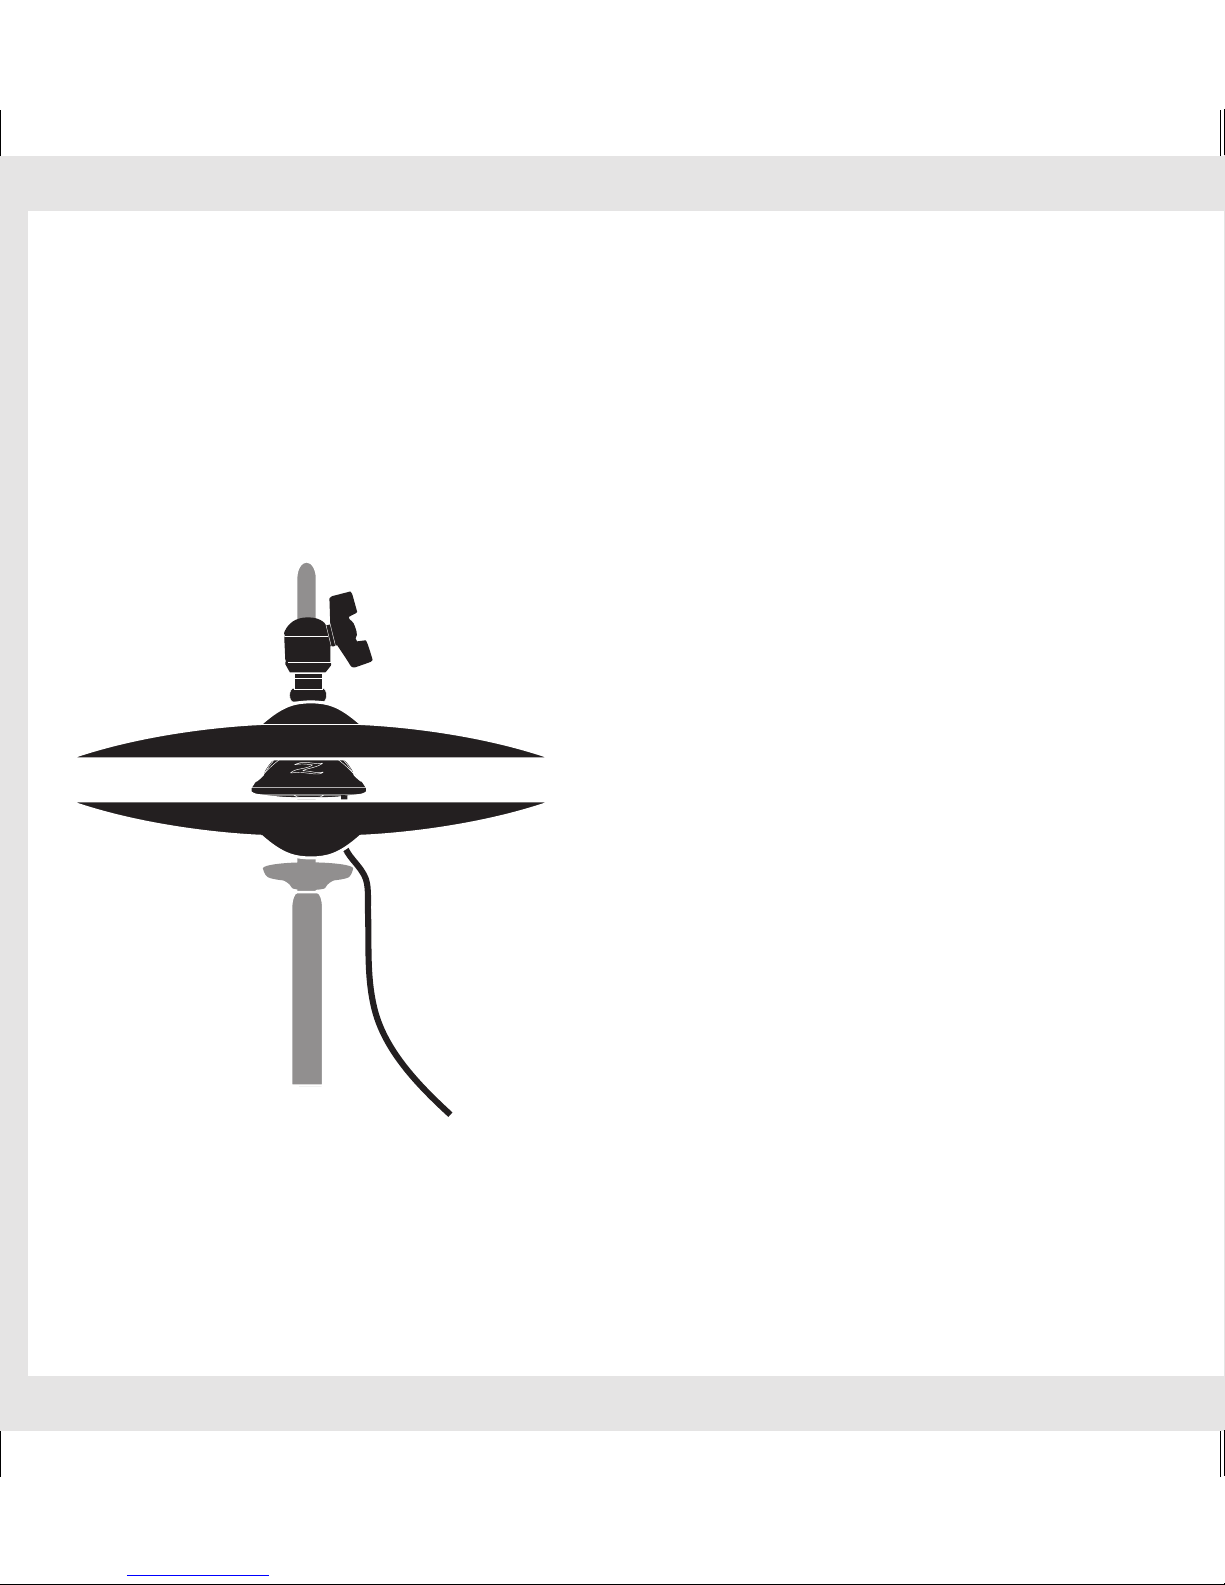
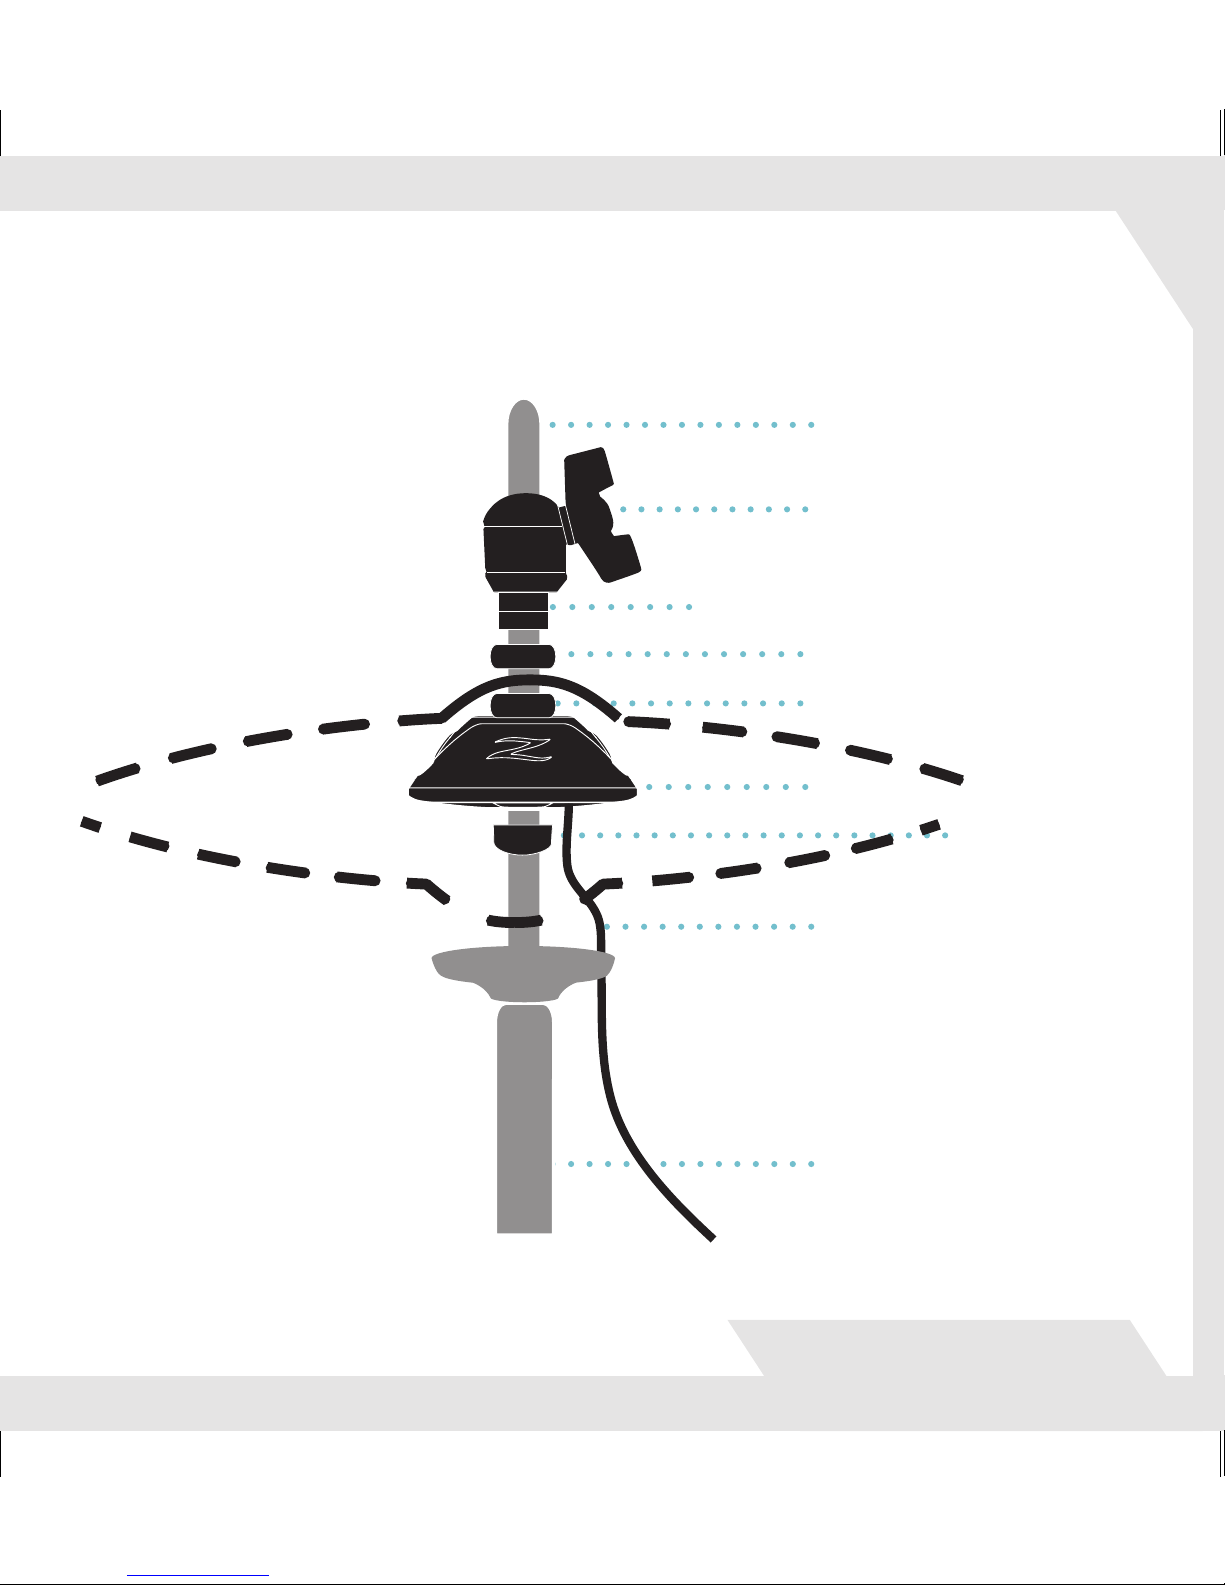
HIHAT PICKUP:
Remove bottom clutch nut and lower foam washer.
Leave upper foam washer on the clutch!
Place top HiHat cymbal on clutch shaft (bell up)
below the upper foam washer (the top HiHat cymbal
should rest over black area on HiHat clutch shaft).
Slide lower foam washer on HiHat clutch shaft over
black area. Place pickup on HiHat shaft (light ring
towards bottom).
Insert clutch nut (hex nut up) into bottom of pickup.
Screw until tight (do not overtighten).
Pass HiHat cable (right angle end) through bottom
HiHat cymbal.
Place bottom HiHat cymbal on stand. Insert cable
(plug) into HiHat pickup jack.
Slide clutch with top HiHat cymbal on to the HiHat
stand pull rod (HiHat stand sold separately).
Mounting & Connecting
HiHat Pickup
56359 CD Holder Txt r1.indd 10 6/16/11 1:09 PM
Page 9
www.gen-16.com
Clutch
●
Cymbal Tension Adjustment
●
Pickup
●
Clutch Nut
●
Cable
●
HiHat Pull Rod
●
HiHat Stand
(sold separately)
●
Lower Foam Washer
●
Upper Foam Washer
●
56359 CD Holder Txt r1.indd 11 6/16/11 1:09 PM
Page 10
Mounting & Connecting
Cymbal Pickups
●
●
●
●
●
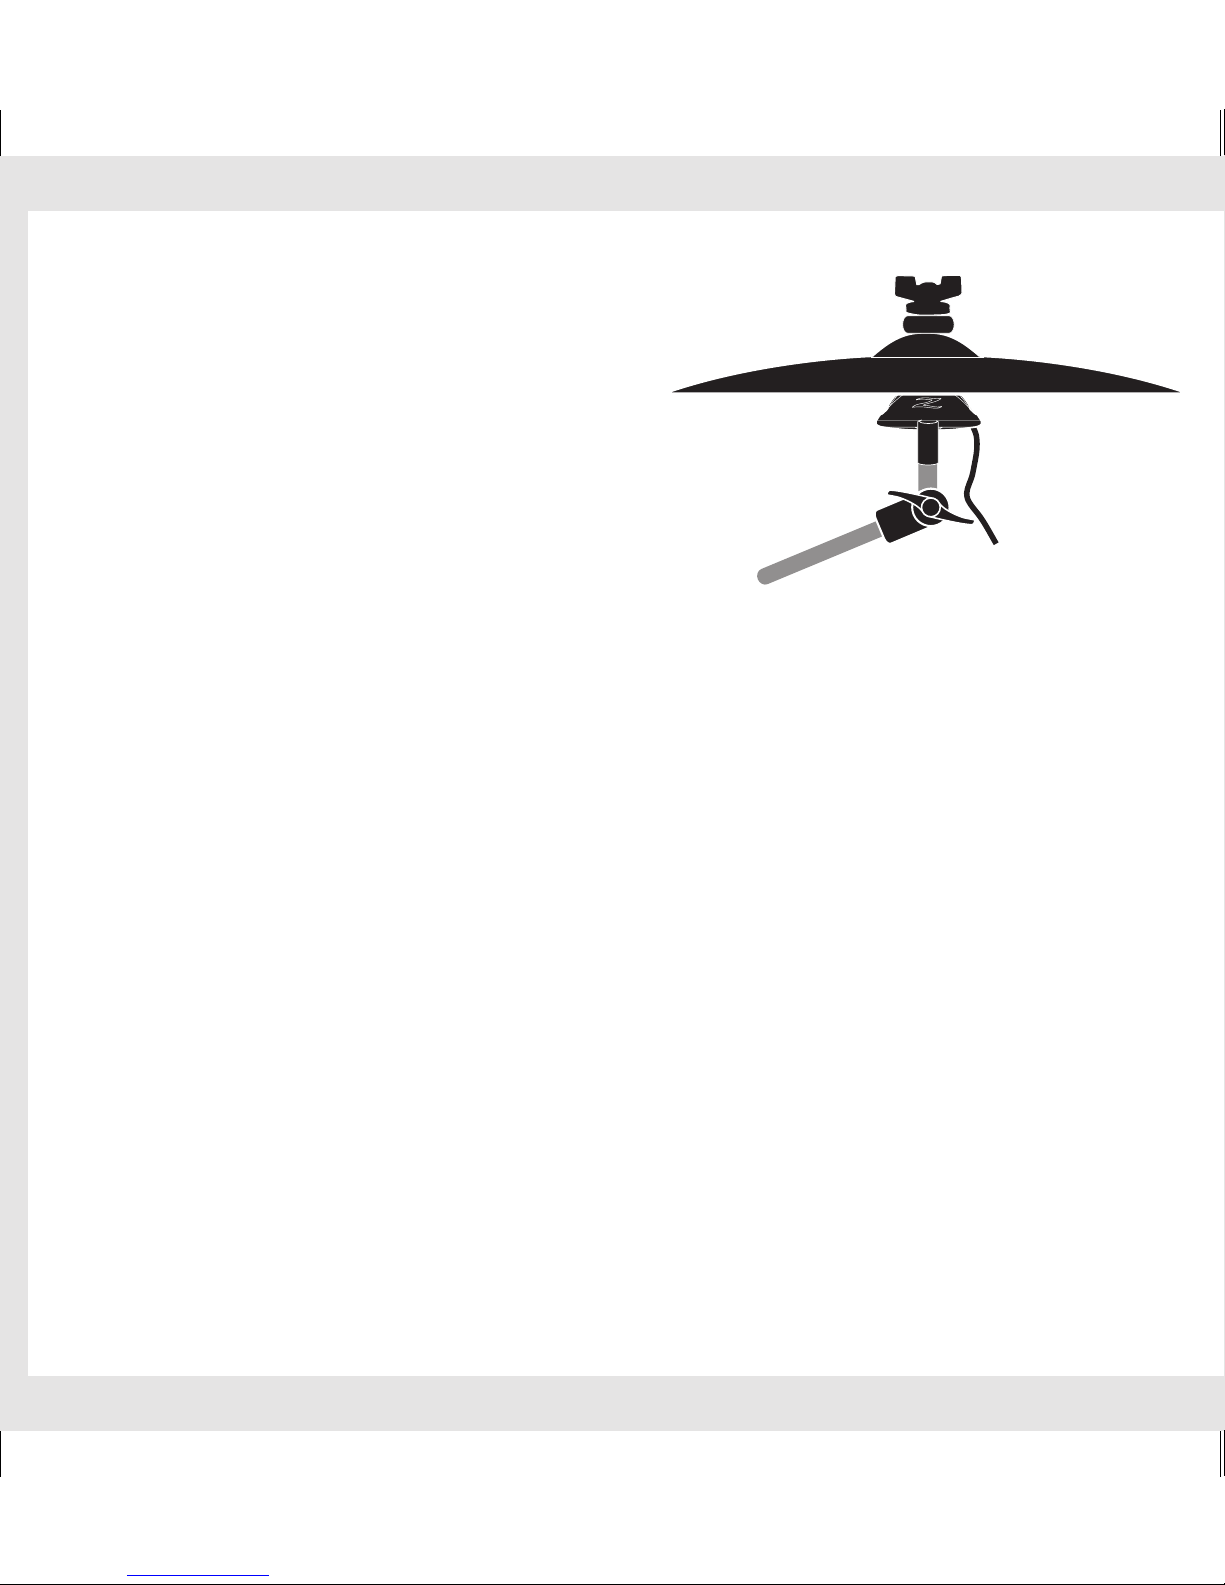
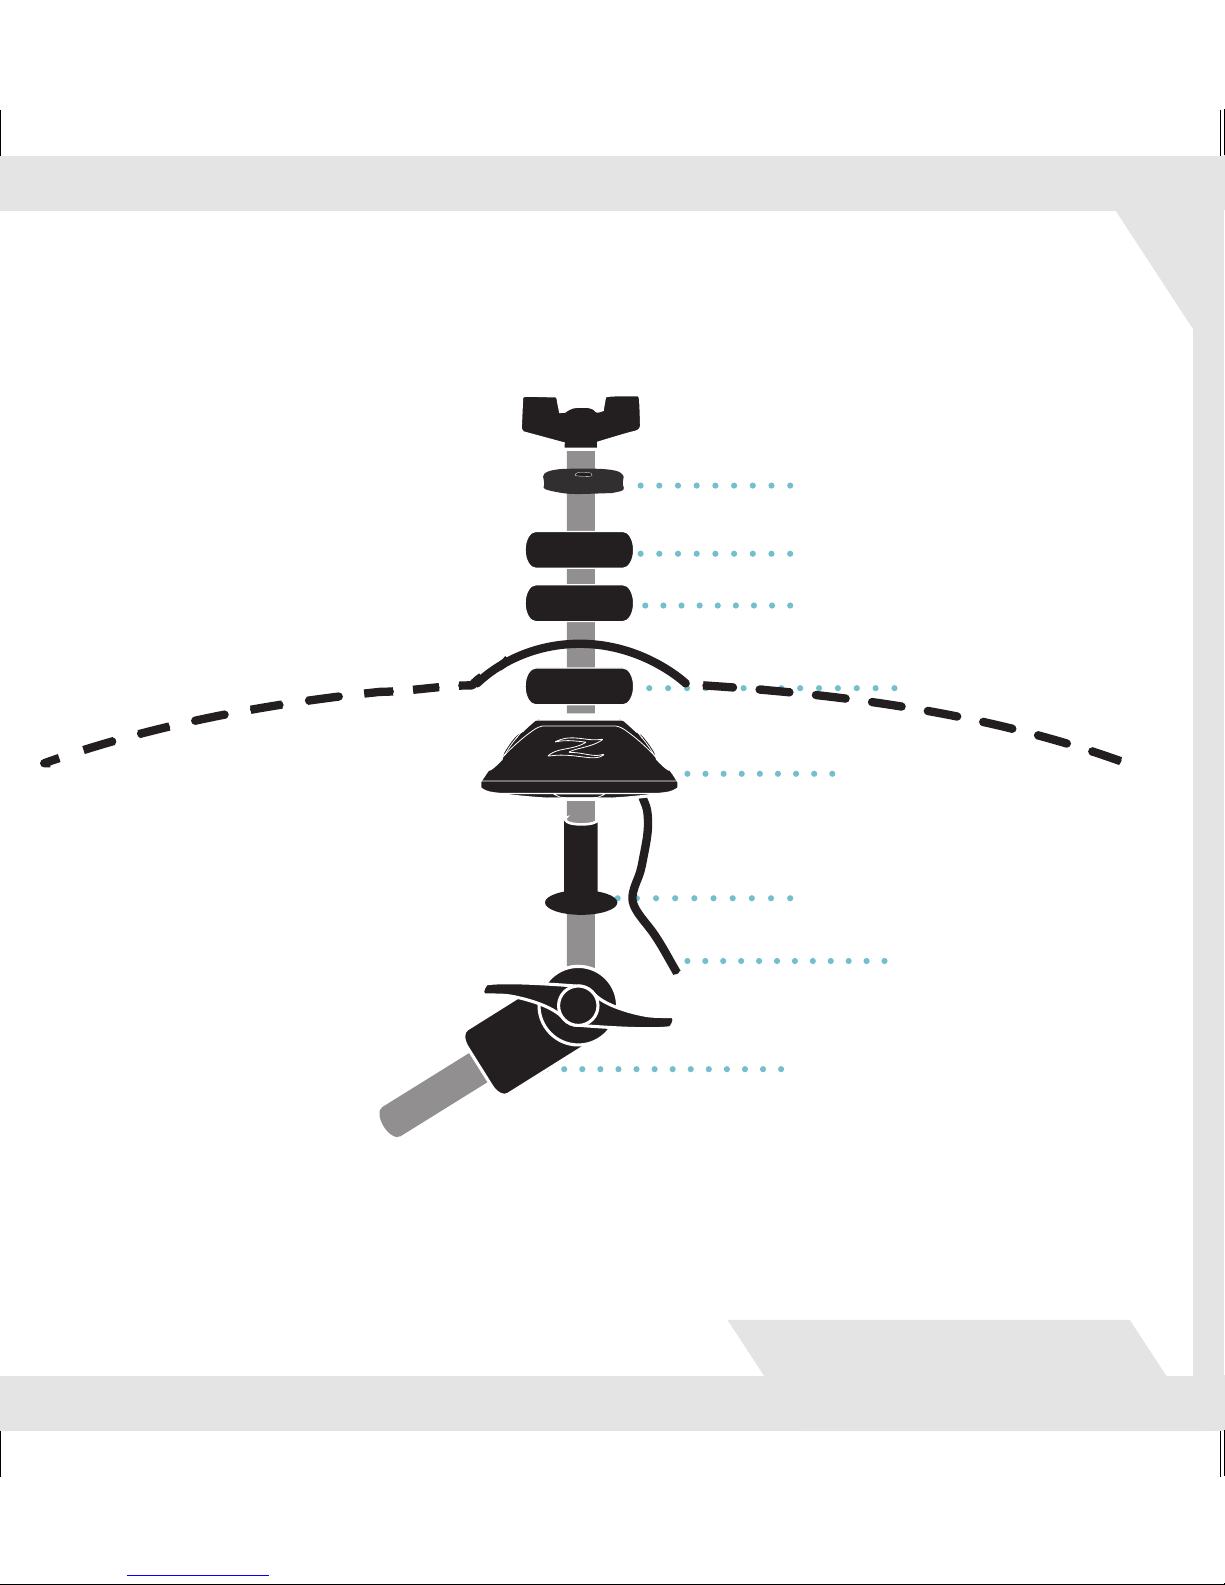
CYMBAL PICKUP:
Remove the existing cymbal felts and cymbal stand sleeve.
Place the supplied AE cymbal sleeve on the stand by simply sliding a sleeve over the
cymbal stand’s threaded shaft.
Place pickup over cymbal sleeve and align hex nut pattern. Place foam washer #1 over
top of pickup.
Place cymbal on foam washer. Place foam washer on top of cymbal #2 (If needed, place
optional second foam washer on top of cymbal). Note: Use size and amount of foam washers based on length of cymbal shaft.
Place cymbal disk on top of foam washer. Place cymbal stand wing nut on shaft above
cymbal disk and tighten.
Positioning Pickups (Chrome Mesh Microphones Holes):
Cymbals: Place at 9:00 and 3:00
Ride Cymbal: Place at 12:00 and 6:00
Note:
The Gen16 foam washers have been specially designed to provide optimum results
with your AE Cymbals.
To avoid audio wash, limit cymbal movement, by keeping cymbal secure (tighten
wing screw).
Avoid playing directly over the Chrome Mesh Microphone Holes.
56359 CD Holder Txt r1.indd 12 6/16/11 1:09 PM
Page 11
www.gen-16.com
Pickup
●
Foam Washer (#2)
●
Cymbal Sleeve
●
Cable
●
Cymbal Tilter Assembly
(sold separately)
●
Cymbal Disk
●
Foam Washer (*optional)
●
(*Use amount of foam washers best suited for your hardware)
Foam Washer (#1)
●
56359 CD Holder Txt r1.indd 13 6/16/11 1:09 PM
Page 12
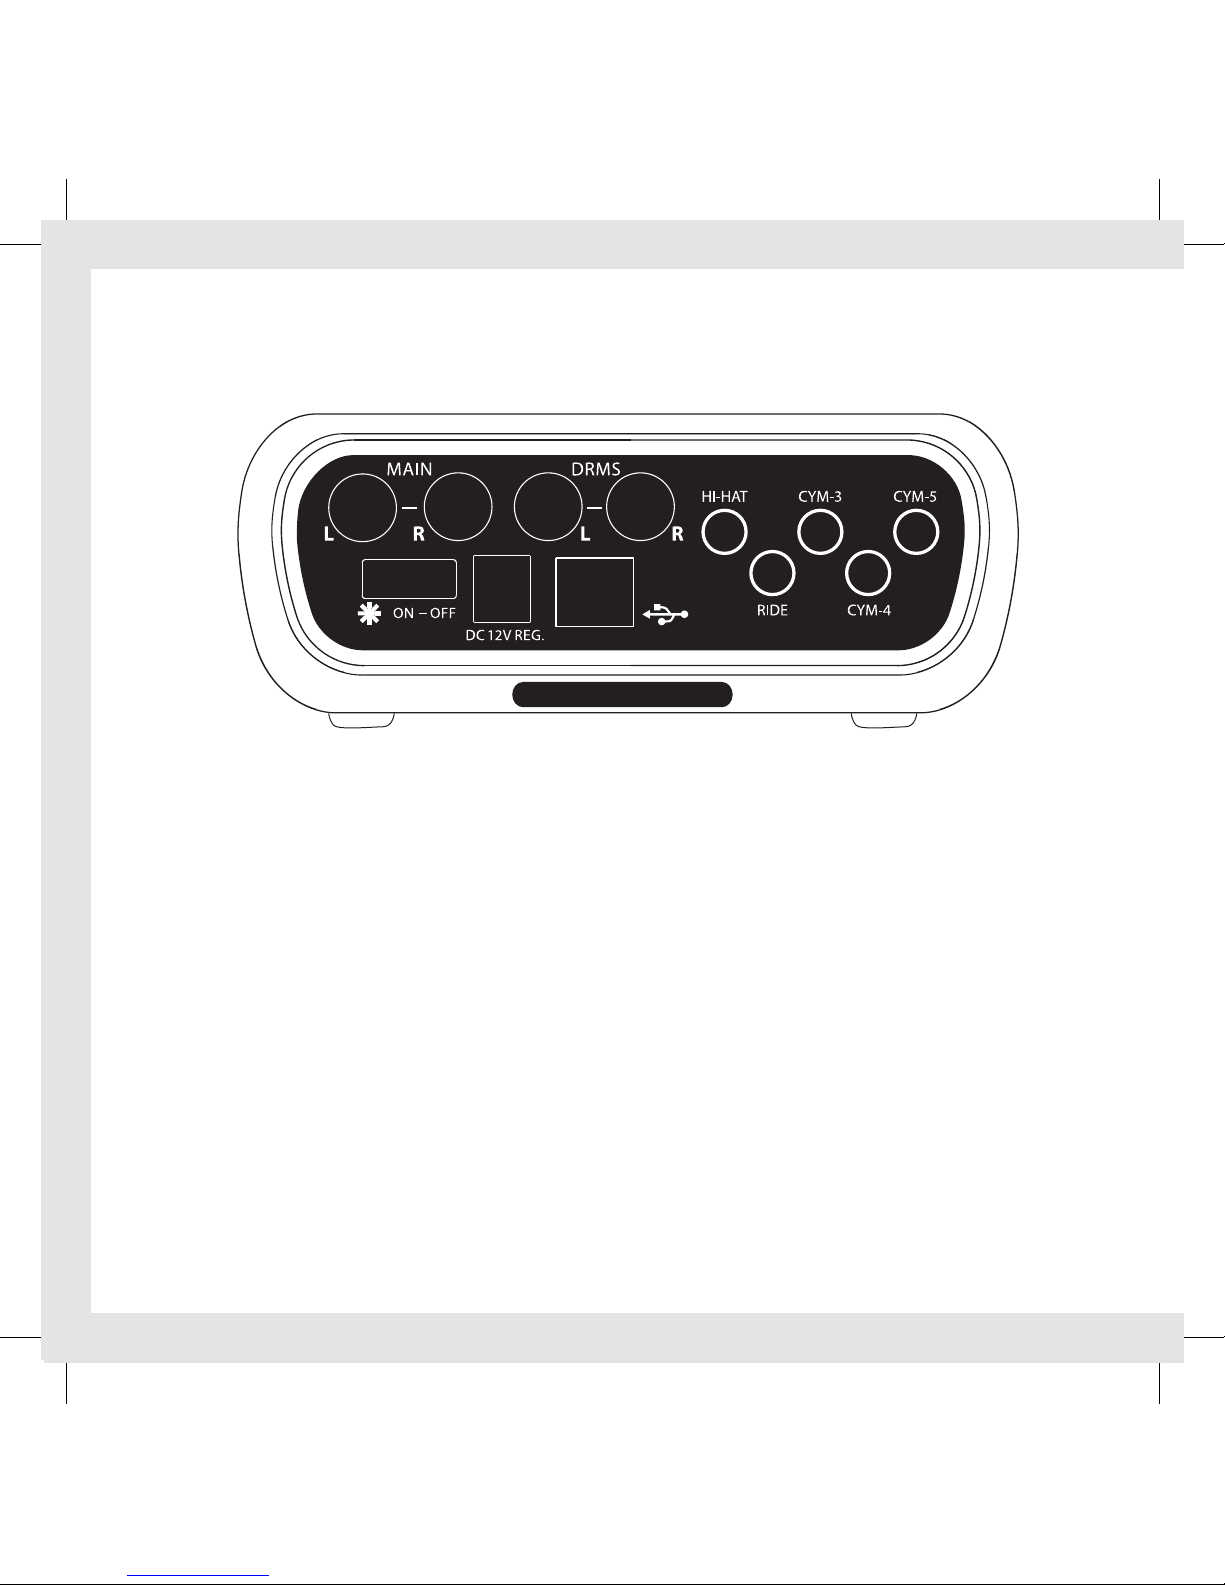
Connect color coded cable snake to DCP and matching cymbal pickups (note
connection is tight, fully engage).
Connect audio output to mixer / PA system (R & L stereo, L-mono) and / or connect
headphones (cables & headphones sold seperately).
Connect Edrum controller audio input for blend option (Edrums sold seperately).
With volume off, connect power supply / plug into wall outlet. Turn on the DCP. Use
the 3 position switch on the rear panel to turn power on. This switch has 2 settings
(positions) for the ON position:
Position (1) powers up the DCP with the pickup “light ring” off.
Position (2) powers up the DCP with the pickup “light ring” on.
Set master volume at 1:00.
Gradually increase each channel volume to preference .
If connecting Edrum controller, blend Edrum controller and AE Cymbal audio levels (mix).
Connecting Pickups to DCP
DCP - REAR VIEW
MP3 Player
●
●
DIGITAL CYMBAL PROCESSOR
56359 CD Holder Txt r1.indd 14 6/16/11 2:10 PM
Page 13
www.gen-16.com
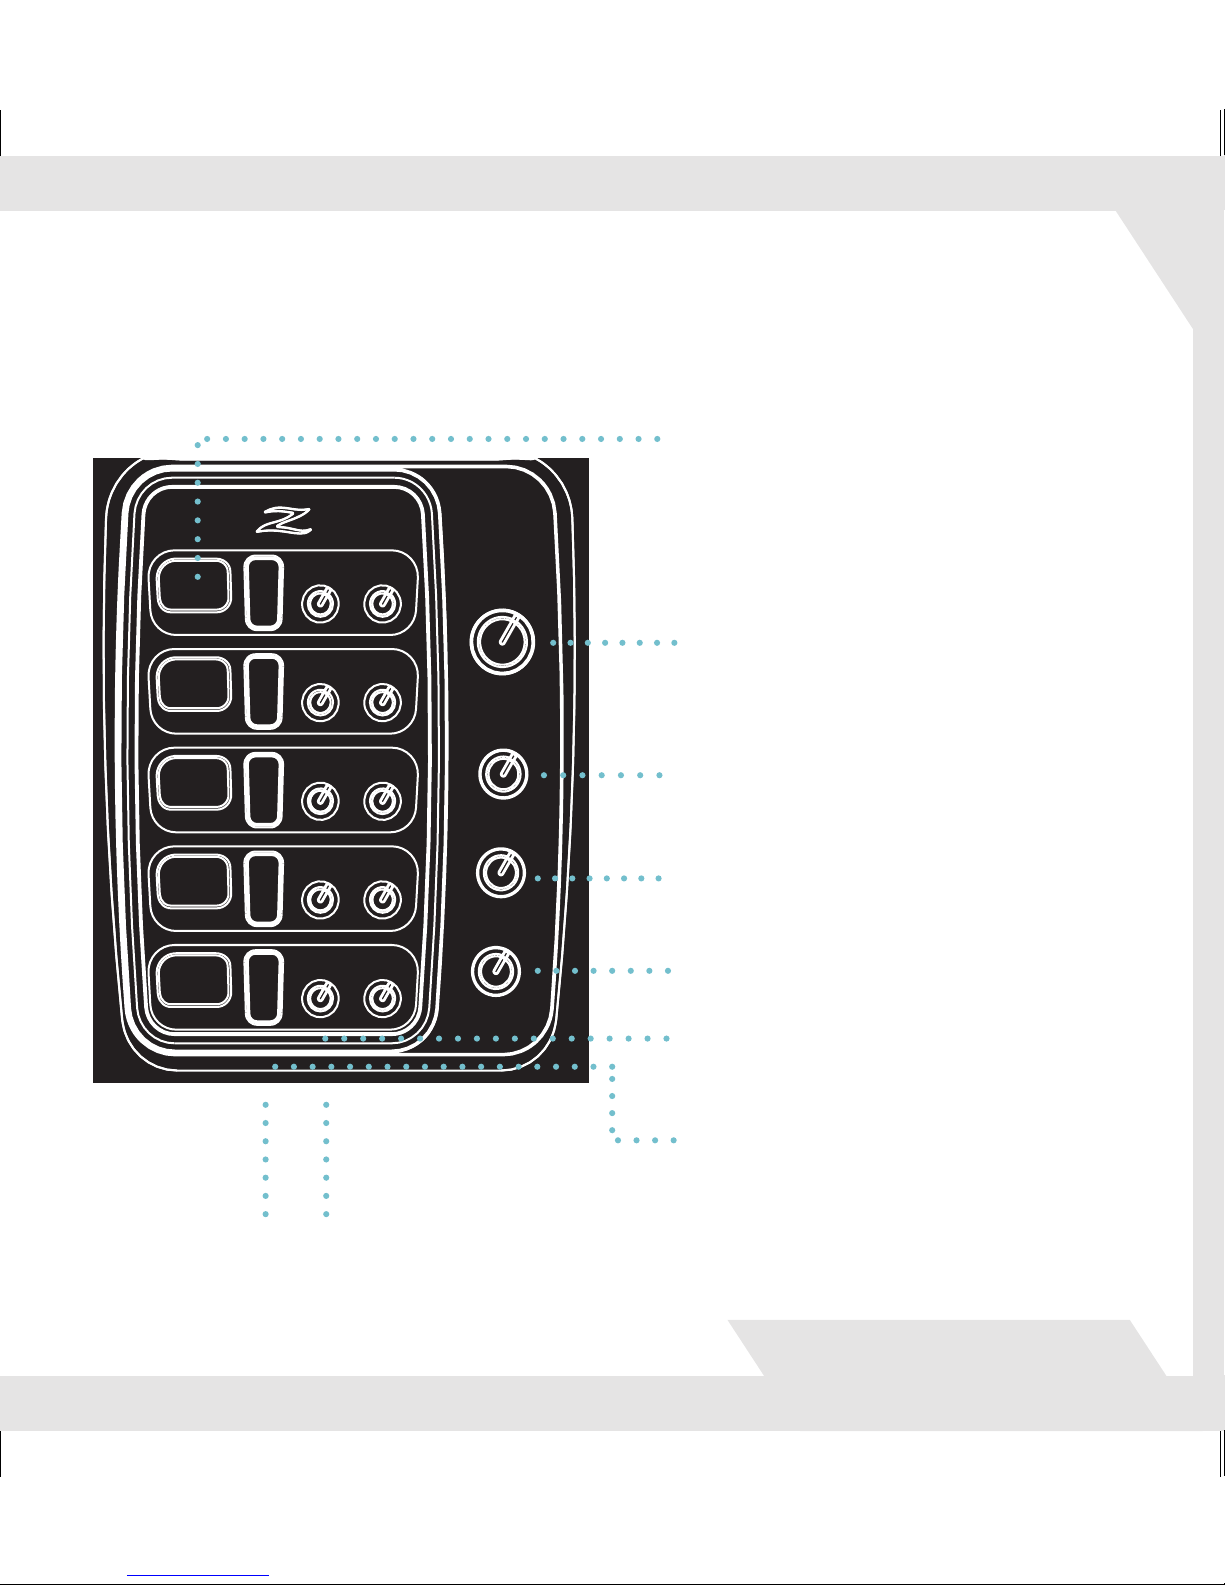
Master Volume Level
Identifies Per-Channel
Tone Shape PreSet
Controls Per-Channel Volume
and Panning
Controls Volume
Controls Reverb
Blends Edrum/Cymbal Mix
(optional)
Controls Per-Channel Tone
Shape PreSet
Headphone
Output
MP3 Player
/ Aux Input
DCP Control Panel Functions
●
●
●
●
●
●●
●
●
●
●
●
●
●●●
●
●
●
56359 CD Holder Txt r1.indd 15 6/16/11 1:09 PM
Page 14
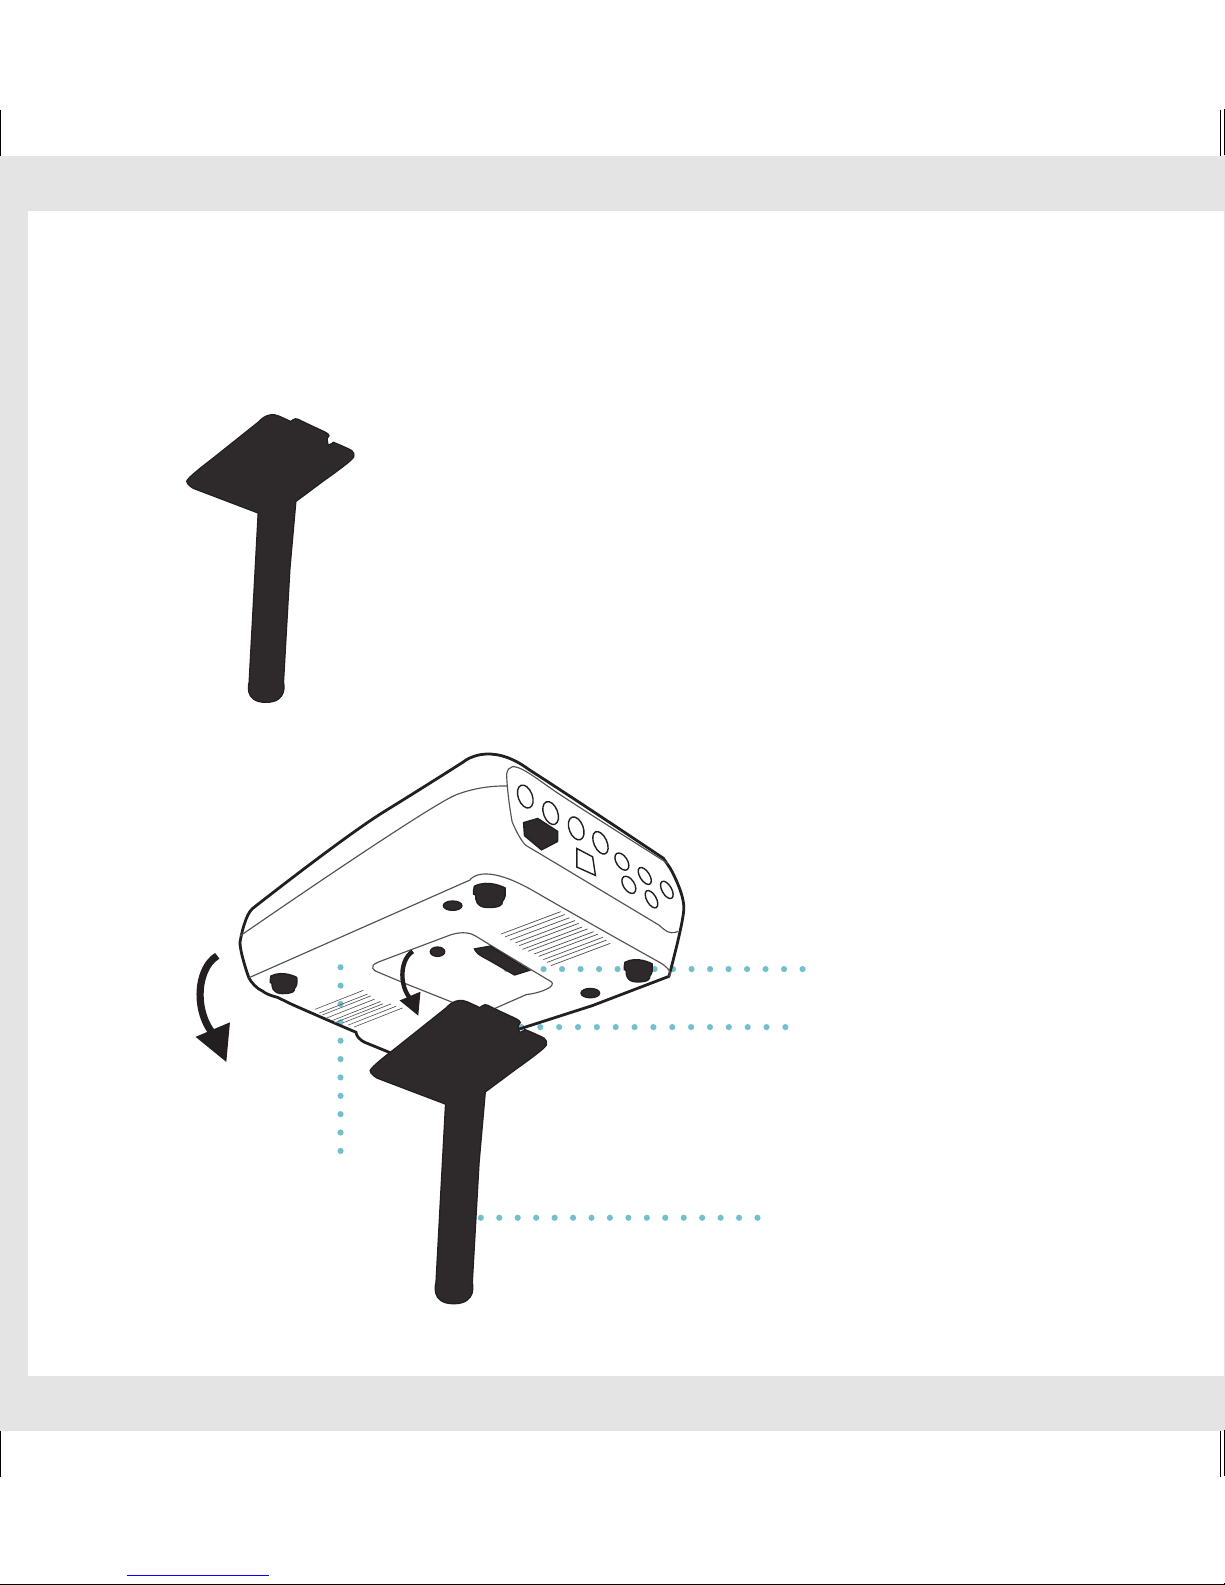
Secure the DCP Mounting Bracket to your existing
drum hardware. (The bracket has an embedded magnet
that makes mounting the DCP quick and easy.)
Place the Alignment Tab into the Alignment Channel on
the underside of the DCP (top first). The DCP fits into place
using an internal magnet.
Angle DCP to allow bracket alignment tab to slip into
alignment channel
Mounting DCP to Bracket
Alignment Channel
●
Bottom of DCP
●
Alignment Tab
●
DCP Mounting Bracket
●
56359 CD Holder Txt r1.indd 16 6/16/11 1:09 PM
Page 15
www.gen-16.com
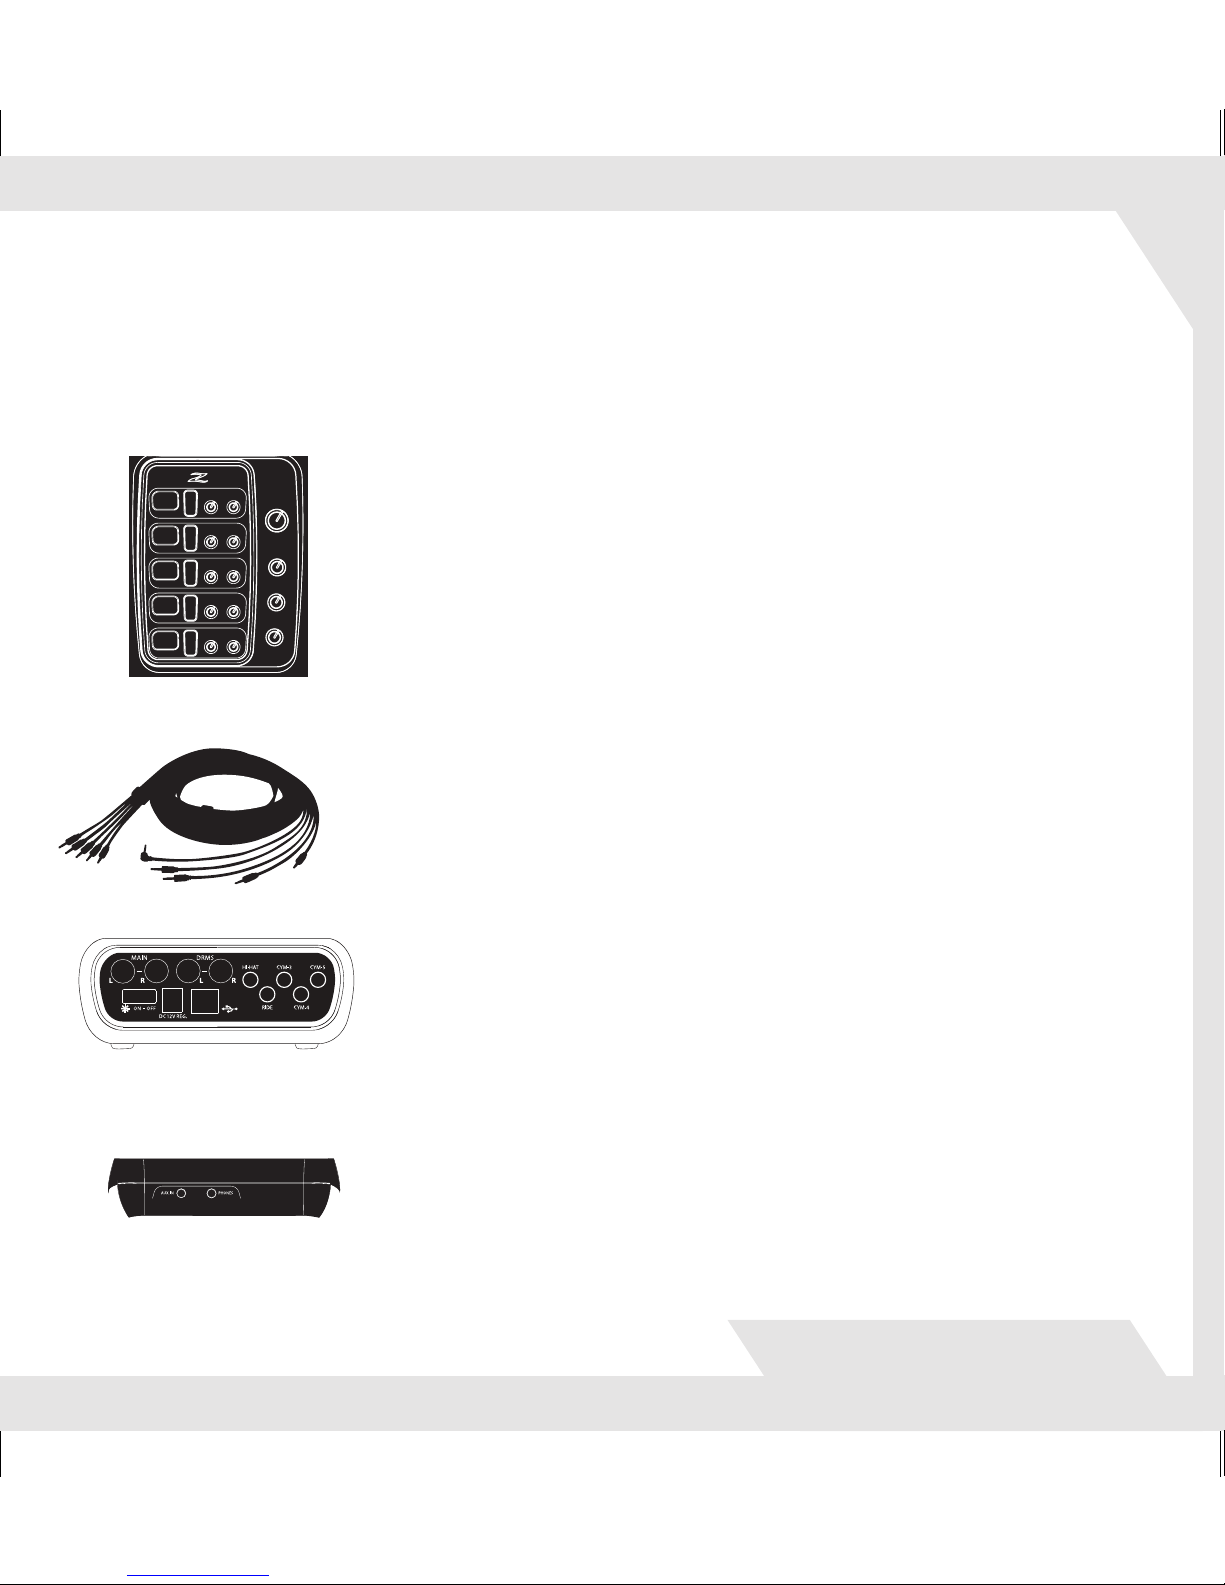
The connectors are designed to create an exceptionally tight fit to
prevent their coming loose during playing. Make sure they are fully
inserted into the pickups and DCP rear panel inputs.
Use only Gen16 4 conductor pickup cables to connect the pickups to
the controller. Other cables may not work and / or provide inferior
results. The pickup connections feature balanced-impedance audio
and also supply power to the integrated electronics and LED lighting.
Always power down the DCP before connecting or disconnecting
cymbal pickup cables. Connecting or disconnecting cymbal pickups
with the unit powered on may result in a DCP crash, loss of user
settings, data, or speaker damage.
The Digital Cymbal Processor’s headphone amplifier is capable of
driving many headphones to very high sound levels. Use care in
setting the headphone volume level control to avoid potential hearing
damage.
Important / Caution
DIGITAL CYMBAL PROCESSOR
56359 CD Holder Txt r1.indd 17 6/16/11 1:09 PM
Page 16

56359 CD Holder Txt r1.indd 2 6/16/11 1:09 PM
 Loading...