

Page 1
WX-5803
User’s Guide
54Mbps/11Mbp s Wireless ADSL Router
Page 2

Regulatory Information
telephone company may discontinue your service temporarily. If
possible, they will notify you in advance. But if advance notice is
FCC Statement
FCC Part 68
This equipment complies with Part 68 of FCC Rules. On the
bass unit of this equipment is a label that contains, among other
information, the FCC Registration Number and Ringer
Equivalence Number (REN) for this equipment. IF
REQUESTED, THIS INFORMATION MUST BE GIVEN TO THE
TELEPHONE COMPANY.
The REN is useful to determine the quantity of devices you may
connect to your telephone line and still have those entire
devices ring when your telephone number is called. In most, but
not all areas, the sum of the REN of all devices connected to
one line should not exceed five (5.0). To be certain of the
number of devices you may connect to you line, as determined
not practical, you will be notified as soon as possible. You will be
informed of your right to file a complaint with the FCC. Your
telephone company may make changes in its facilities,
equipment, operations or procedures that could affect the
proper functioning of your equipment. If they do, you will be
notified in advance to give you an opportunity to maintain
uninterrupted telephone service.
If you experience trouble with this telephone equipment, Please
contact the following address and phone number for information
on obtaining service or repairs.
The telephone company may ask that you disconnect this
equipment from the network until the problem has been
corrected or until you are sure that the equipment is not
malfunctioning.
by the REN, you should contact your local telephone company
to determine the maximum REN for your calling area.
If your equipment causes harm to the telephone network, the
This equipment may not be used on coin service provided by
the telephone company. Connection to party lines is subject to
state tariffs.
Page 3

COMPANY: Gemtech Wireless Inc.
turning the equipment off and on, the user is encouraged to try
ADDRESS: 44790 S. GRIMMER BLVD., SUITE 100, FREMONT, CA 94538
TEL NO: 949-357-3207
Registration Number: US: GEMDL02BWX5803
Equipment Code: DL
Ringer Equivalence: 0.2B
THIS PRODUCT COMPLIES WITH 47CFR PART 68.
THIS PRODUCT HAS BEEN CERTIFIED BY A TCB.
Use Standard Jack: RJ11C
FCC Part 15
This equipment has been tested and found to comply with the
limits for a Class B digital device, pursuant to Part 15 of the FCC
Rules. These limits are designed to provide reasonable
protection against harmful interference in a residential
installation. This equipment generates, uses and can radiate
radio frequency energy and, if not installed and used in
to correct the interference by one of the following measures:
Reorient or relocate the receiving antenna.
Increase the separation between the equipment and
receiver.
Connect the equipment into an outlet on a circuit different
from that to which the receiver is connected.
Consult the dealer or an experienced radio/TV technician
for help.
FCC Caution: To assure continued compliance, any changes or
modifications not expressly approved by the party responsible
for compliance could void the user's authority to operate this
equipment.
This device complies with Part 15 of the FCC Rules. Operation
is subject to the following two conditions:
accordance with the instructions, may cause harmful
interference to radio communications. However, there is no
guarantee that interference will not occur in a particular
installation. If this equipment does cause harmful interference to
radio or television reception, which can be determined by
(1) This device may not cause harmful interference, and
(2) this device must accept any interference received, including
interference that may cause undesired operation.
IMPORTANT NOTE:
Page 4

FCC Radiation Exposure Statement
Table of Contents
This equipment complies with FCC radiation exposure limits set
forth for an uncontrolled environment. This equipment should be
installed and operated with minimum distance 20cm between
the radiator & your body.
This transmitter must not be co-located or operating in
conjunction with any other antenna or transmitter.
Introduction
Features
A Look at the Hardware
Front Panel
Back Panel
Hardware Installation
Configure the Router for the first time
Configuring IP Settings on Your Computer
Configuring with Web Browser
Appendix A: Specifications
Page 5

Introduction
EAP-TLS framework
IP sharing feature allows multiple stations to access the
WX-5803 Wireless ADSL Router allows you to share the single
account of Internet Access. With build-in NAT, this Router allows
up to 253 users on the Ethernet LAN simultaneously and up to
16 users on the 802.11g/b Wireless LAN simultaneously.
WX-5803 has the throughput speeds of up to 54Mbps and
advanced Orthogonal Frequency Division Multiplexing (OFDM).
In case of home usage, WX-5803 acts as a gateway for Internet
connection sharing. You can connect the Wireless ADSL Router
to your Internet connection directly, and use the wireless LAN to
connect your computers to the Internet.
Features
Fully compliant with ANSI T1.413 Issue 2, ITU G.992.1, ITU
G.992.2, and ITU G.994.1
internet using a single broadband
System configuration and firmware upgrades
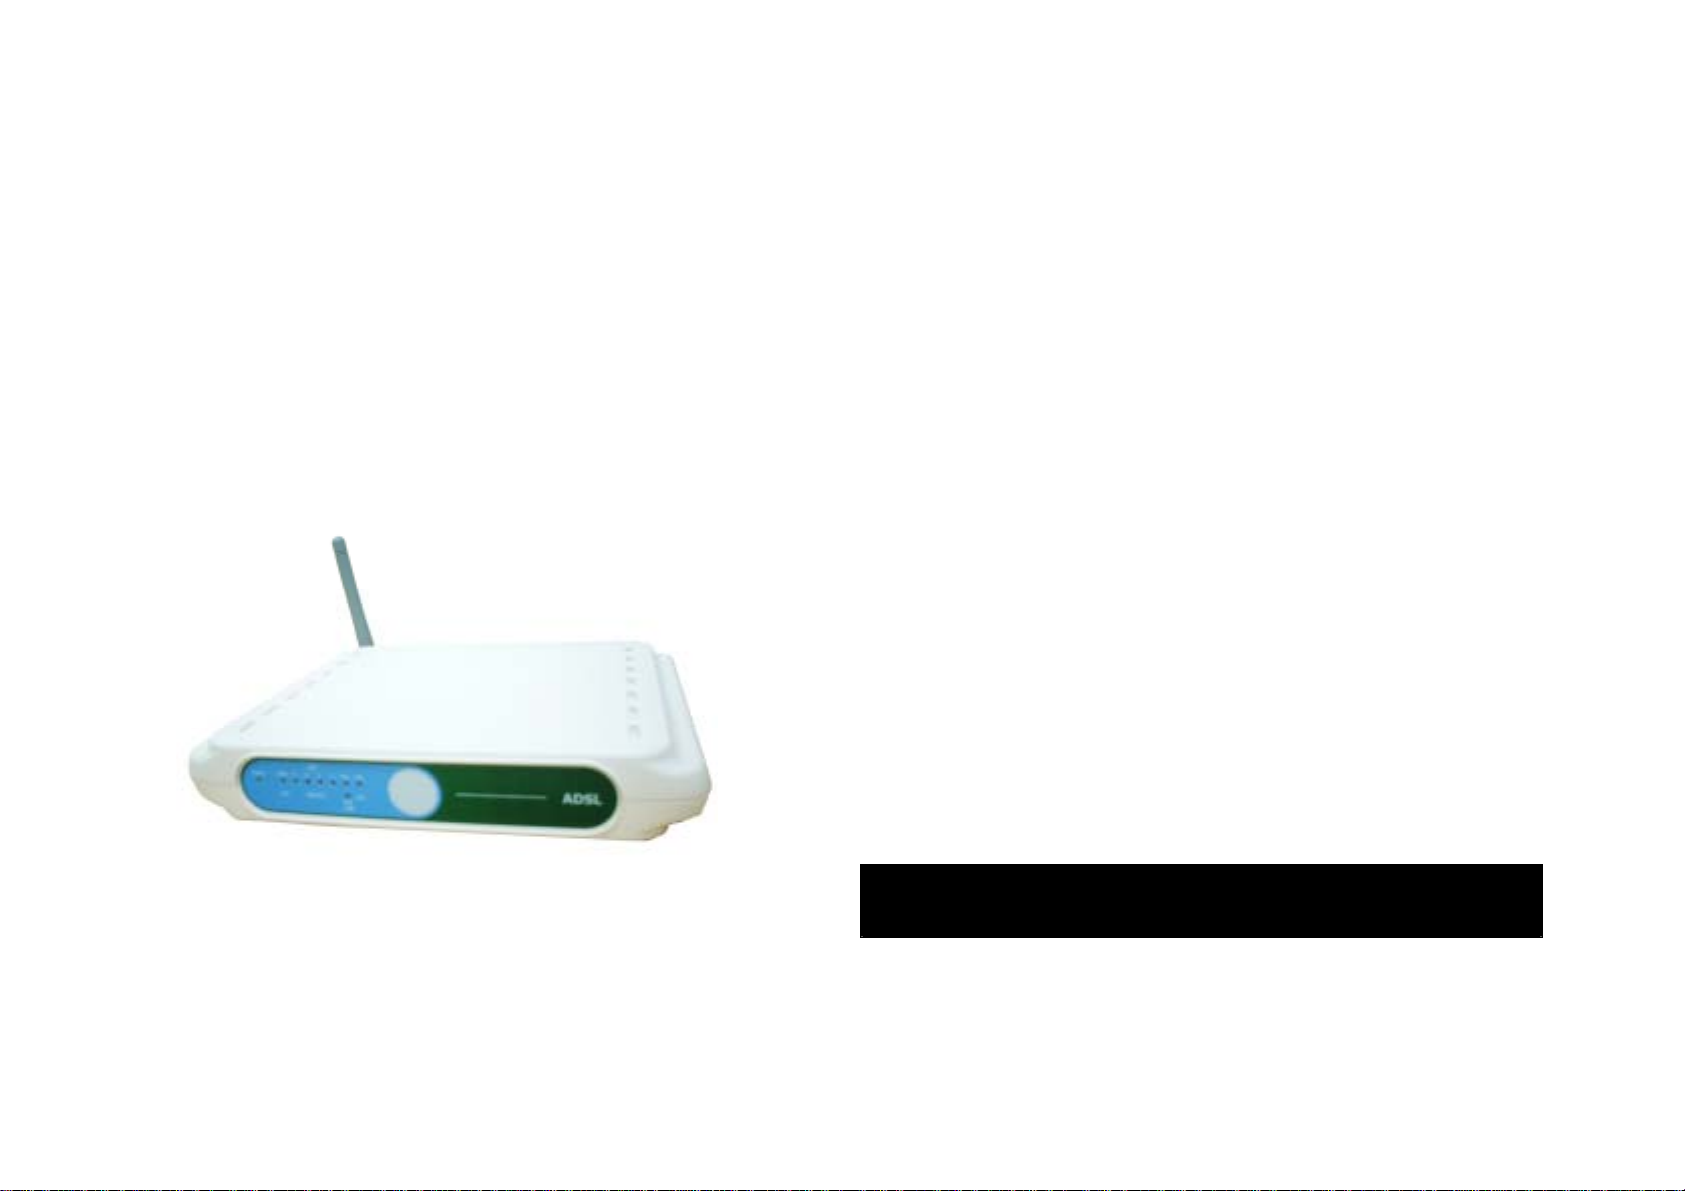
A Look at the Hardware
Front Panel
The WX-5803 Wireless ADSL Router has nine Light Emitting
Diodes (LEDs), or link lights, on its front panel. The following
table defines the behavior for each LED:
LED Represents Activity / Status
Fully compliant with Wi-Fi / 802.11b Client Devices
Delivering the fastest possible data rate defined by IEEE
802.11g standard
Support 802.1x enhanced security with EAP-MD5 and
Power Power The Power LED will light up when the
device is powered on.
USB USB - Sold On – USB is connected to a host
Page 6
Connection PC.
A
1, 2, 3, 4 LAN
- Blinking – Data is being transferred over
the USB connection.
Steady on when there is a link connecting
Connection
Link DSL
Connection
PPP PPP
Connection
11G Wireless
LAN
to the unit.
Blinking – Data is being transferred.
- Off - ADSL link is not connected.
- Blinking - ADSL is handshaking and
receiving signaling.
- Solid On - ADSL link is connected.
Solid On – PPP is connected.
- Sold On – When connected a client
- Blinking – Data is being transferred over
the Wireless LAN connection.
- Off – When there is no connected client
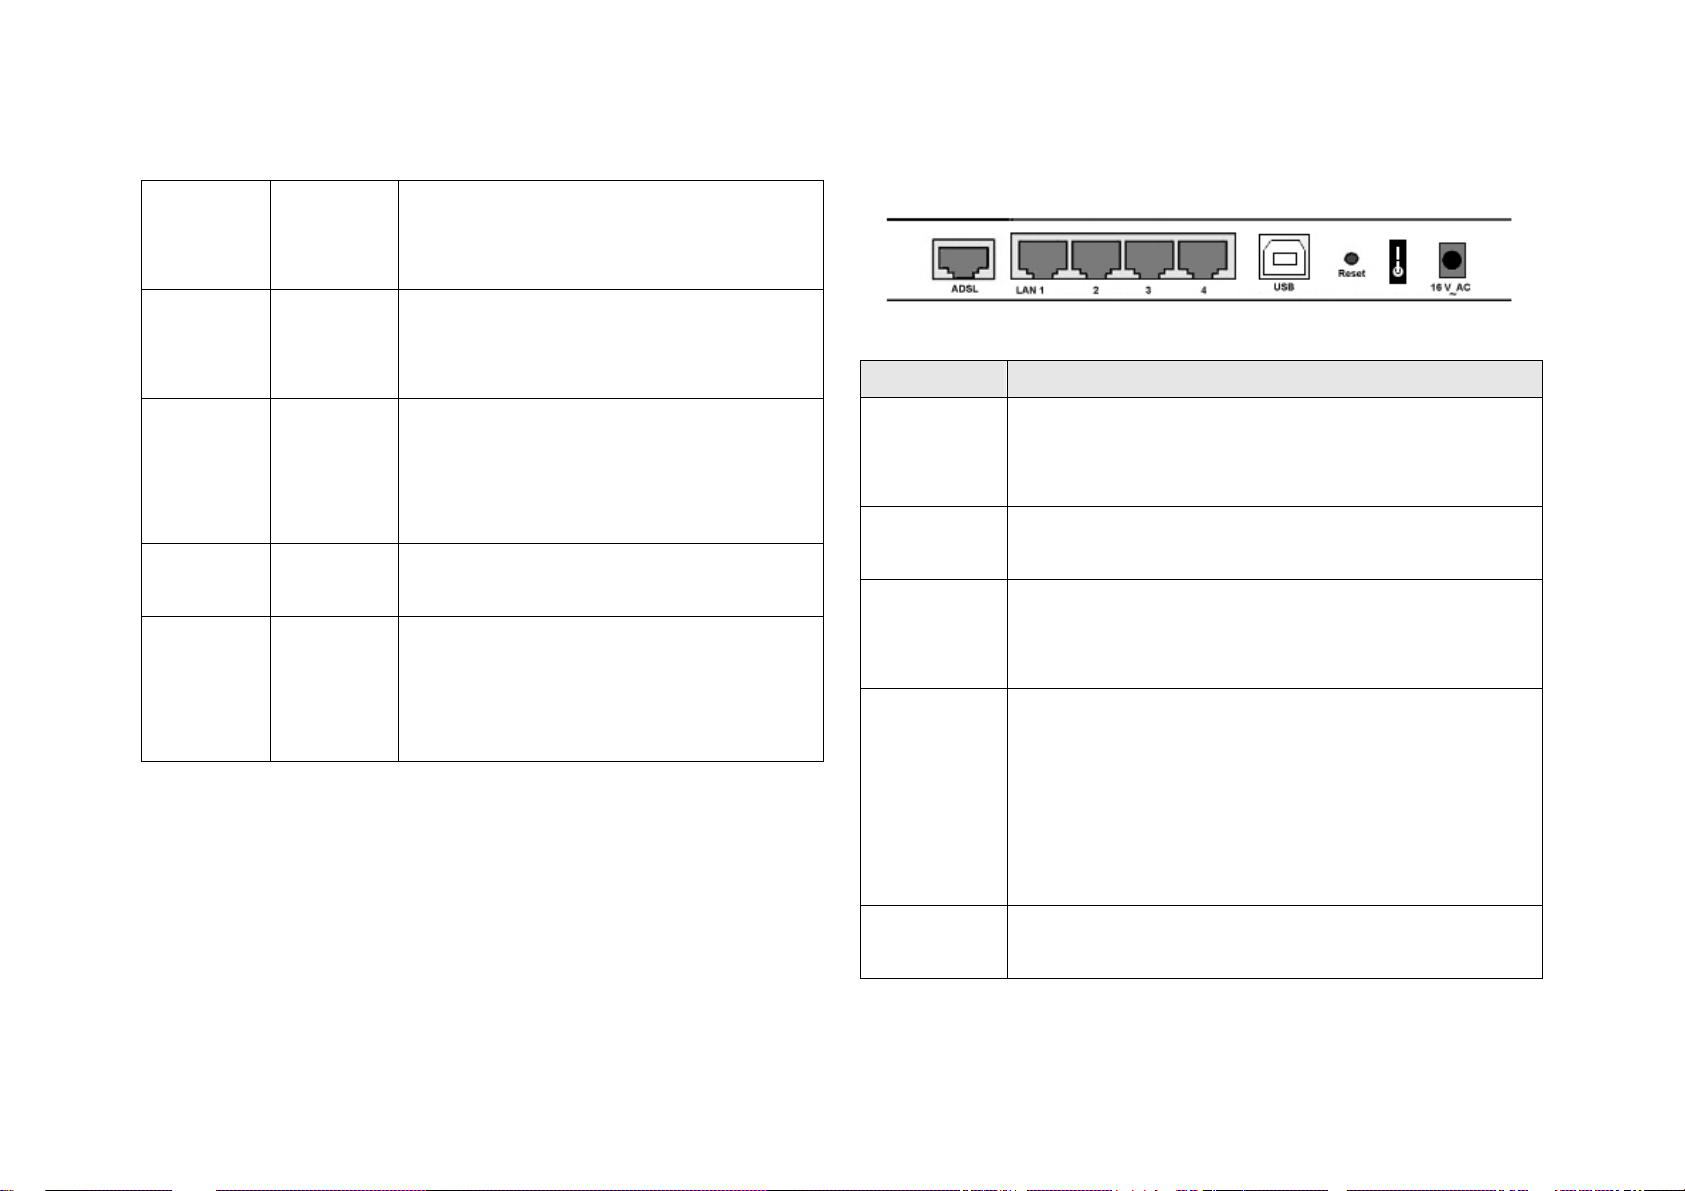
Back Panel
Connector Description
ADSL Connect one end of the RJ-11 telephone cord to
DSL port and connect the other end to the ADSL
line outlet that your ISP has installed.
LAN 1-4 Accept a RJ-45 Ethernet cable for connecting up
to 4 PCs. Or external Ethernet switch/hub.
USB For USB connection (optional), connect the USB
cable to the USB port and connect the other end
to the computer.
Reset Use an object, such as a stretched paper clip, to
press the button for less than 5 seconds. LAN1, 2,
3, 4 LED will light up for a short time and then be
off. You can release the button now to reset the
device. Or press the button for at least 8 seconds
to reset the device to its factory-default settings.
On/Off Turn on the router by pressing up the power
switch to the “|” position.
Page 7
Power Connect the power adapter to this Power port,
and then plug the other end of the power cable
into a power outlet.
Hardware Installation
Configure the Router for the first
time
Configuring IP Settings on Your Computer
Thank you for purchasing the 54Mbps/11Mbps Wireless ADSL
Router WX-5803. The following instructions will walk you
through installation of the router.
Step 1. Connect the DSL port of the router into your ADSL
jackpoint (telephone wall socket) with the provided line cord.
Step 2. Connect the LAN port of the router to the Ethernet port
of your computer with the Ethernet cable provided.
Step 3. Connect the 16V AC power adapter to the Power jack of
router, and plug the adapter into a mains power outlet. Switch
on the router. If the power is turned on, the PWR LED on the
front panel will illuminate.
To configure WX-5803 Wireless ADSL Router for the first time,
the configuration PC must have a static IP address. Use
192.168.1.x (x is any number between 2 and 254) and subnet
mask 255.255.255.0. Specify gateway as 192.168.1.1 and enter
DNS server IP.
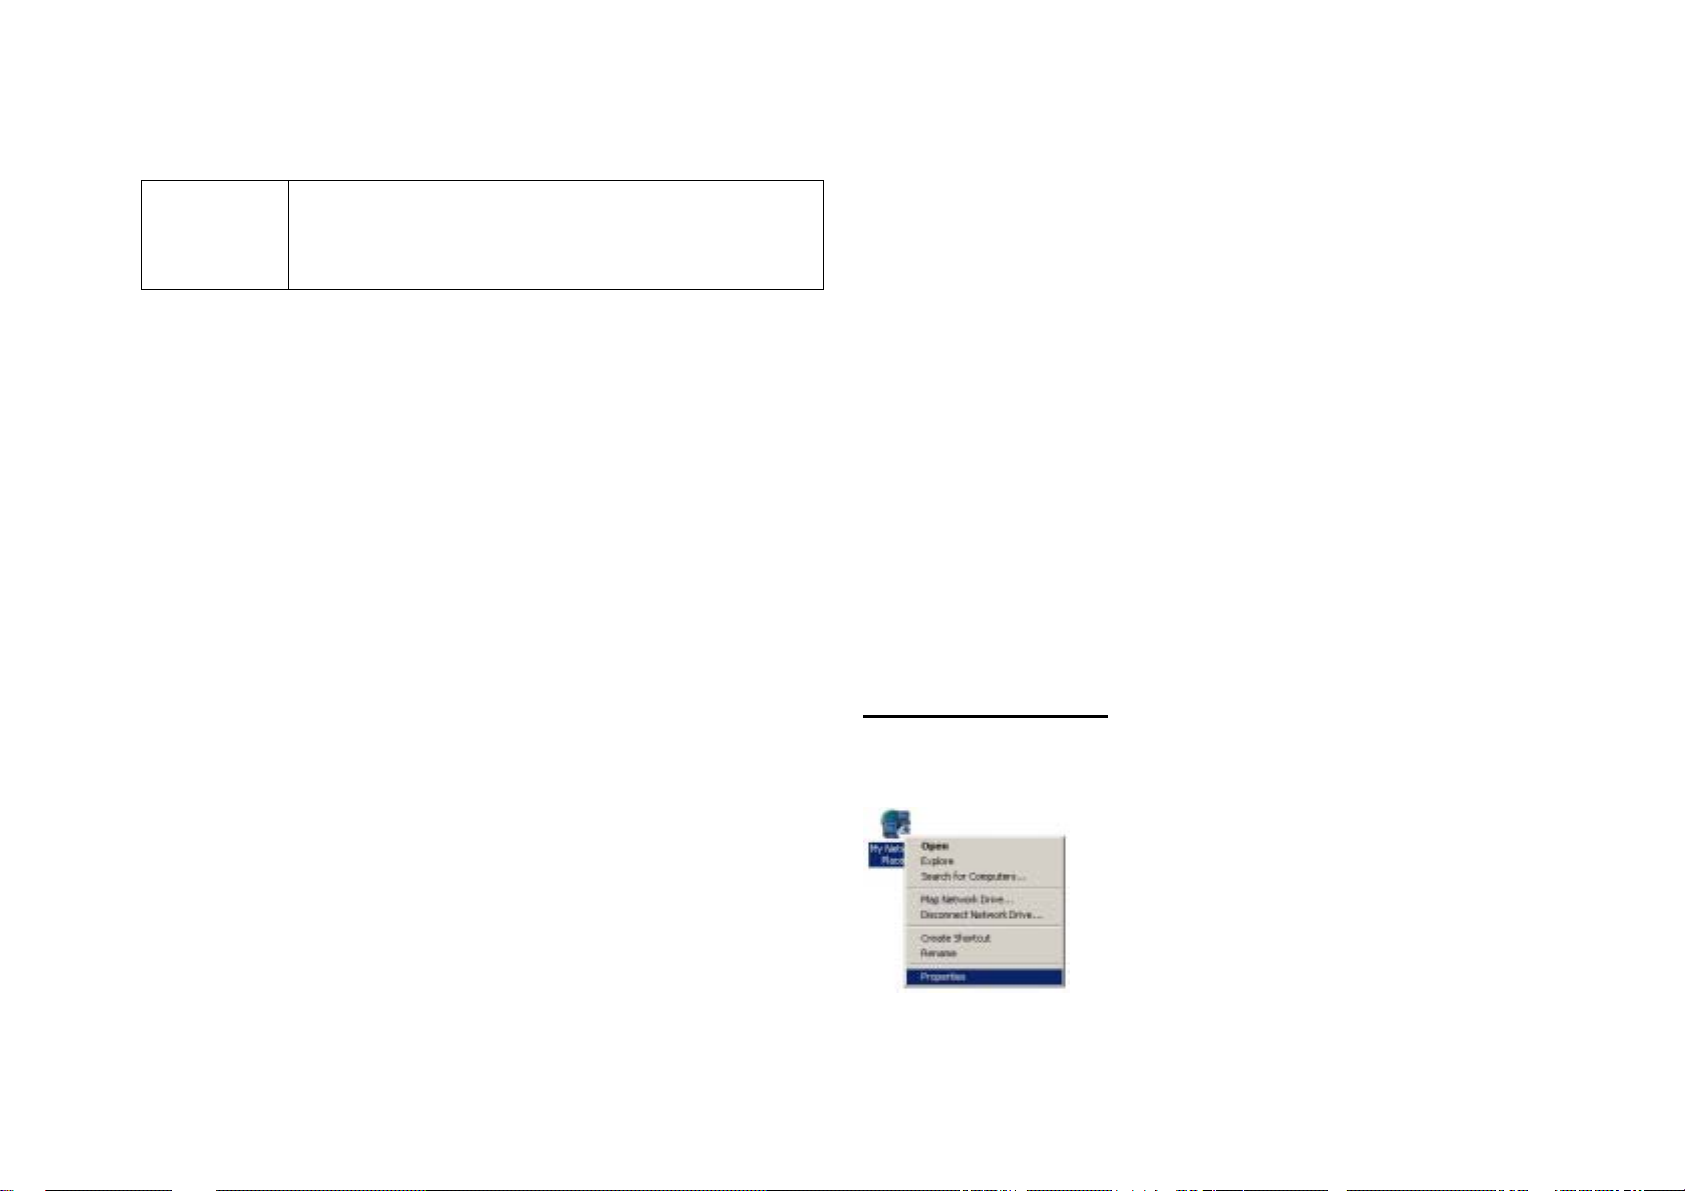
For Windows 2000
1. Right-click on My Network Places icon on the desktop and
then click Properties in menu.
Page 8

6. In the default gateway box, type the default gateway IP
2. Double-click Local Area Connection icon and then
click Properties button.
3. Scroll down to highlight TCP/IP (your network card) and
then click Properties button.
4. Check the radio button for Specify an IP address. In the
IP address box, type the assigned IP address 192.168.1.x
address. For example, 192.168.1.1.
7. Click OK button in the TCP/IP Properties window to
complete the PC configuration, and click Close or the OK
button to close the Network window.
Configuring with Web Browser
Before you begin
Make sure that you get setup information you need (for example,
VPI, VCI, and type of encapsulation) from your Internet Service
Provider (ISP).
The ADSL Router can be configured with your Web browser.
The product provides a very easy and user-friendly interface for
(x is any number between 2 and 254).
5. In the Subnet mask box, type the subnet mask
255.255.255.0.
configuration.
1. Open your web browser. Enter http://192.168.1.1 in the
web browser’s Address field, and press the Enter key.
Page 9
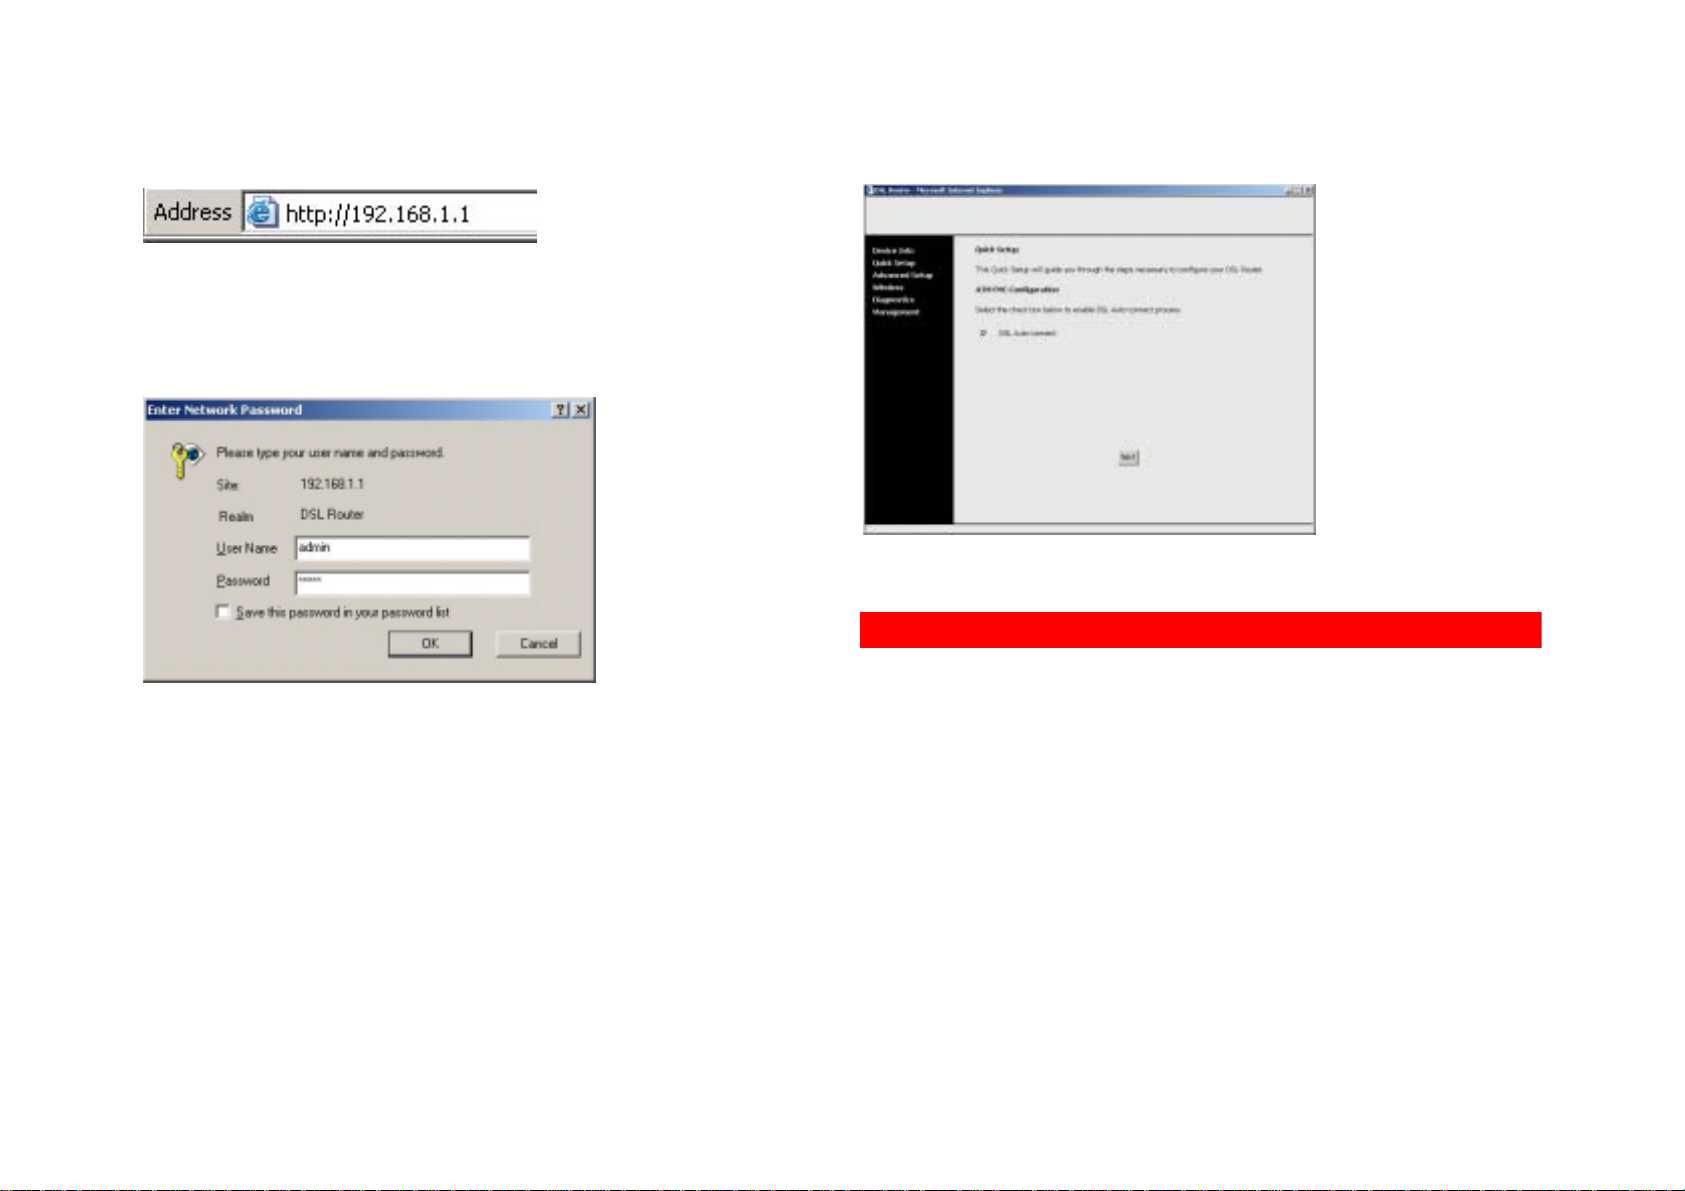
2. A Login window will appear. Enter admin in the User
Name field and enter admin in the Password field.
I. Device Info
3. After login, WX-5803 Web UI screen will appear.
The Device Info page contains information of the software
version of your device and some settings, such as IP Address
and gateway.
Page 10

II. Quick Setup
The Quick Setup will guide you through the steps necessary to
configure your DSL Router.
DSL Auto-connect
If you want your router automatically detect PVC and connect to
the network, check the box Auto-connect.
The WX-5803 has OAM (Operation, Administration and
Management) for network administration and support. It scans
PVC (Permanent Virtual Circuits) using OAM F5 cell starting
from 0/32 to 0/60, then 1/32 to 1/60, until the last PVC 8/60 or
until it receives OAM response. It skips over established PVCs.
When an OAM response is received, WX-5803 will try to
establish a connection. The following sequence is typical of a
network protocol and encapsulation your router will try to use:
PPPoE with LLC encapsulation
Page 11

PPPoA with VC-MUX encapsulation
Setup DSL Connection Manually
PPPoA with LLC encapsulation
If one fails, the router will try the next. If all these connections
fail, it will try next PVC. If the responding PVC is not PPPoE or
PPPoA, it will choose the first responding PVC and run in
Bridging connection type with LLC encapsulation.
If no PVC responds to OAM, the router will use the default
settings 0/35 and run in Bridging connection type with LLC
encapsulation.
If the ISP doesn't support the Auto-connect, you have to setup
the DSL connection manually.
Specify the values for VPI (Virtual Path Identifier) and VCI
(Virtual Channel Identifier). For the following steps to create a
DSL connection, please refer to the next section Advanced
Setup.
After you complete the DSL connection settings, a Wireless –
Setup page will appear . Enter a desired name in SSID field. This
Page 12

SSID is a network name that identifies the wireless devices in
the network. The default value is WX5803. All workstations and
access points must use the same SSID to be able to
communicate with one another. The SSID is a 32-character field,
and the value is case sensitive.
Close your Web UI window and wait for about 2 minutes before
reopening your web browser.
Click Next button.
The WAN Setup – Summary page will appear. It displays a
summary of all WAN setting profiles. Click Save/Reboot button
to save all the settings and reboot the router.
Page 13

III. Advanced Setup
(Virtual Channel Identifier). Consult your ISP to get the numbers.
1. Click the Advanced Setup tab on the left frame.
2. Click the WAN tab on the left frame. A WAN Setup page will
appear on the right frame. Click Add button.
The valid range for the VPI number is from 0 to 255 (The default
value is 0.). The valid range for the VCI number is from 32 to
65535 (The default value is 35).
There are five service categories provided: UBR Without PCR,
UBR With PCR, CBR, Non Realtime VBR, and Realtime VBR.
3. The ATM PVC Configuration page will appear. Enter the
appropriate VPI and VCI values. Select appropriate Service
Category. Click Next.
PVC is identified by the VPI (Virtual Path Identifier) and VCI
4. The Connection Type page will appear. There are several
ways for the device to have a public IP address and then to
access Internet. You have to check with your ISP about
Page 14

which way is adopted. Check the radio button of your
connection type.
5. Scroll down to select the appropriate Encapsulation Type.
WX-5803 ADSL router supports the following five network
operating modes over an ATM PVC WAN interface:
PPP over ATM (PPPoA)
PPP over Ethernet (PPPoE)
MAC Encapsulated Routing (MER)
IP over ATM (IPoA)
button.
Bridging
The steps to configure PPP over ATM (PPPoA) are similar to
PPPoE.
PPP over Ethernet (PPPoE)
1. Select the PPP over Ethernet (PPPoE) radio button and
scroll down to select the appropriate Encapsulation Mode.
There are two encapsulation types available:
LLC/SNAP-BRIDGING and VC/MUX. Then click Next
2. In the PPP Username and Password page, enter the user
name and password supplied by your ISP in PPP
Username and PPP Password fields.
Page 15

Allows only one PC on the LAN
The public IP address assigned by the remote using the
PPP/IPCP protocol is actually not used on the WAN PPP
interface. Instead, it is forwarded to the PC’s LAN interface
through DHCP. Only one PC on the LAN can be connected
to the remote since the DHCP server within the ADSL
router has only a single IP address to assign to a LAN
device.
NAPT and firewall are disabled when this option is selected.
The ADSL router becomes the default gateway and DNS
3. Check the box Disconnect if no activity if you want to
enable the function of automatic disconnection. It will
auto-disconnect the ADSL Router when there is no activity
on the line for a period of time.
PPP IP Extension is a special feature deployed by some service
providers. Unless your ISP specifically requires this setup, do
NOT select it.
The PPP IP Extension supports the following conditions:
server to the PC through DHCP using the LAN interface IP
address.
The ADSL router extends the IP subnet at the remote
service provider to the LAN PC. That is, the PC becomes a
host belonging to the same IP subnet.
The ADSL router bridges the IP packets between WAN and
LAN ports, unless the packet is addressed to the router’s
LAN IP address.
4. Click Next button.
5. Check the box Enable IGMP Multicast if you want to enable
IGMP multicast. Check the box Enable WAN Service if you
Page 16

want to enable WAN Service. Click Next.
6. The WAN Setup – Summary page displays a summary of
all WAN setting profiles. Click Save button to save all the
settings.
7. The WAN Setup page will appear. Click Save/Reboot
button. The router will reboot automatically with the new
settings in effect.
Page 17

8. Close your Web UI window and wait for about 2 minutes
before reopening your web browser.
IP over ATM (IPoA)
1. Select the IP over ATM (IPoA) radio button and scroll down
to select the appropriate Encapsulation Mode. There are
two encapsulation types available: LLC/Snap-Routing and
VC/MUX. Then click Next button.
Page 18

2. DHCP is not supported over IpoA. Enter your WAN IP
address, WAN Subnet Mask, gateway IP address and DNS
server IP address provided by your ISP to configure the
WAN IP settings. Then click Next button.
3. The Network Address Translation Settings page will appear.
If you want to enable NAT function, check the box Enable
NAT. If NAT is enabled, it will display a NAT submenu on
the left panel after reboot.
NAT occurs when multiple IP addresses on a private LAN are
converted to one public address. This public address is sent out
to the Internet. NAT increases security because the IP address
for a PC connected to the private LAN is never transmitted to the
Internet. NAT also allows xDSL/cable routers to be used with
low-cost Internet accounts, where only one TCP/IP address is
Page 19

provided by the ISP. The user may have many private addresses
masked by the single address provided by the ISP.
4. If you want to enable Firewall function, check the box
Enable Firewall. If Firewall is enabled, it will display a
Firewall submenu on the left panel after reboot.
Firewall will rejects any unsolicited data from the Internet to
access the computer on your LAN. Basically, if you do not
request data, the data will not be allowed by the firewall to pass.
5. If you want to enable IGMP Multicast, check the box Enable
IGMP Multicast. If you want to disable it, uncheck the box.
6. The default of WAN service is Enable. If you want to disable
WAN service, uncheck the box Enable WAN Service.
7. Enter a desired name in Service Name field. It is used to
identify the service.
8. Click Next button.
8. The WAN Setup – Summary page displays a summary of
all WAN setting profiles. Click Save button to save all the
settings.
9. The WAN Setup page will appear. Click Save/Reboot
button. The router will reboot automatically with the new
settings in effect.
Page 20

Bridging
1. Select the Bridging radio button and scroll down to select
the appropriate Encapsulation Mode. There are two
encapsulation types available: LLC/Snap-Bridging and
VC/MUX. Then click Next button.
2. Check the box Enable Bridge Service. Enter a desired
name in Service Name field. It is used to identify the service.
Then click Next button.
Page 21

The LAN IP in bridge operating mode is needed for local users to
manage the ADSL router. And no IP address is needed for the
WAN in bridge mode.
3. The WAN Setup – Summary page displays a summary of
all WAN setting profiles. Click Save button to save all the
settings.
4. The WAN Setup page will appear. Click Save/Reboot
button. The router will reboot automatically with the new
settings in effect.
Page 22

5. Close your Web UI window and wait for about 2 minutes
before reopening your web browser.
IV. Configure Wireless Connectivity
Basic
1. Click the Wireless tab on the left frame. Click the Basic tab.
A Wireless - Basic page will appear on the right frame.
Check the box Enable Wireless.
2. Check the box Hide Access Point and then your router will
not be "ping"ed by any user on the Internet. This feature is
helpful if you do not want to let other Internet users to check
the status of your router. However, the station will not be
able to find your router.
Page 23

wired networks and wireless 802.11 networks. It provides a
3. Enter a desired name in SSID field.
4. Click Apply button.
Security
The WX-5803 provides advanced mechanism for wireless
security. If you want to enable the security mechanism, click the
Security tab.
Network Authentication
Without implementing security, it is possible for an unauthorized
person to intercept your data. It will ensure only authorized
users can access the network.
Use Network Authentication drop-down list to select the method
framework for centralized user identification and authentication,
and a key distribution management method. Clients authorized
by RADIUS servers can access this WX-5803. To use 802.1X,
enter the required values on RADIUS Server IP Address,
RADIUS Port and RADIUS Key fields.
of wireless security. There are three methods provided: 802.1X,
WPA and WPA-PSK.
(1) 802.1X
802.1X is an IEEE standard for authenticated network access to
(2) WPA
WPA also adopts an authentication scheme -- via 802.1X. It
consists of three main elements: an Authentication Server
(typically a RADIUS server), WPA-enabled router or AP (called
"Authenticator"), and a WPA-enabled client (called "Supplicant").
Page 24

To use WPA authentication, enter the required values on WPA
Group Rekey Interval, RADIUS Server IP Address, RADIUS
Port and RADIUS Key fields.
WPA Group Rekey Interval is used to specify the frequency of
encryption key rotations. The lower the number, the faster your
encryption key will rotate, however, setting this number too low
may cause your wireless network to slow down.
In WPA, you can select TKIP, or AES or TKIP+AES as data
encryption method.
TKIP (Temporal Key Integrity Protocol) includes four algorithms:
MIC (message integrity check), to protect packets from
tampering; PPK (Per-Packet Key) hashing, to prevent weak key
attacks; extended IV (initialization vector), to reduce IV reuse
and the possibility that a hacker will collect sufficient packets to
crack the encryption; and a re-keying mechanism, to change the
temporal key dynamically. TKIP is the most commonly used
encryption method; however, if your wireless clients do not
support TKIP, the WX-5803 also supports AES (Advanced
Encryption Security) encryption. AES will replace 802.11's
RC4-based encryption under 802.11i specification.
(3) WPA-PSK
In enterprises, WPA will be used in conjunction with both
wireless router and authentication server. In Small Office/ Home
Office (SOHO) environment, where there are no authentication
servers, user can use pre-shared key (PSK) mode in place of
the authentication server. WX-5803 provides WPA running in
PSK mode.
Enter the following field with the required values.
WPA Pre-shared Key
WPA Pre-Shared Key (PSK) is a field where the password is
entered. All wireless clients must also use this password to
Page 25

gain access to the network. Note that the Key format must also
protect wireless communications. WEP provides a way of
match the setting for the wireless clients.
WPA Group Rekey Interval
WPA Group Rekey Interval is used to specify the frequency of
encryption key rotations.
Data Encryption
WPA Encryption has 3 choices: TKIP, or AES or TKIP+AES.
creating an encrypted key that is shared between a wireless
client and the router. This key encrypts data before it is
transmitted. WEP can be implemented with 64-bit or 128-bit key.
128-bit key is relatively securer than 64-bit key.
1. In Data Encryption, select WEP if you want to enable
WEP.
2. Click on the Encryption Strength drop-down list to
select appropriate encryption strength.
3. Click on Set Encryption Keys button, and the Wireless
Settings – Encryption Keys page will appear.
Data Encryption - WEP
You can use WEP (Wired Equivalent Privacy) encryption to
Page 26

4. It is possible to enter up to 4 different WEP Keys. The
WEP key must match between two parties for secure
communications. Enter four different keys in the
Network Key fields provided. If you choose 64-bit
encryption, enter 5 ASCII characters (or 10
hexadecimal digits). If you choose 128-bit encryption,
enter a 13-character (or 26 hexadecimal digits) WEP
key.
5. Select only one key out of the four provided in the
Current Network Key drop-down list.
6. Click Apply button. Then, the page will return to
Wireless – Security page.
7. Click Apply button to apply the settings.
MAC Filter
This feature prevents specific computers within the LAN from
accessing the Internet. To use MAC filter, perform the following
steps:
1. Click the MAC Filter tab on the left frame.
2. If you want to grant the computer specified to access the
network, check the radio button Allow. If you want to restrict
the access, check the radio button Deny.
3. Click Add button. The Wireless – MAC Filter page will appear.
4. Enter the hexadecimal MAC address (for example,
00:11:22:33:44:55) that you allow or deny access in the MAC
Address box.
Page 27

The steps below show how to find the MAC address of the
computer in Windows 2000 and XP.
1. Click the Start button, and then click Run.
2. In the Open field, type the following text: cmd
3. Click the OK button.
4. At the command prompt, type the following text to obtain the
Physical Address (MAC address): ipconfig/all
5. Click Apply button. The page will return to the Wireless –
MAC Filter page.
Appendix A: S pecifications
Product Name Gateway
54 Mbps/ 11Mbps Wireless ADSL Router NAT, DHCP server, Port forwarding, Firewall
Model Number 802.1d Spanning Tree Protocol (STP)
WX-5803 Security
Spreading 64/128-bit WEP
802.11b : DSSS, 802.11g : OFDM 802.1x (port-based security with RADIUS)
Frequency Range MAC address filtering
2.4GHz Number of Channels
Data Rate USA – 11
802.11b: 11, 5.5, 2, 1 Mbps Antenna
802.11g: 54, 48, 36, 24, 18, 12, 9, 6 Mbps 2dBi gain
Transmit Power Dimension
+17dBm (Maximum) for WLAN 176 mm x 137 mm x 27 mm
+14dBm (Maximum) for ADSL Weight
Standards 525 g (Router only)
IEEE 802.11b for Wireless LAN Ports
IEEE 802.3 for Wired LAN RJ-11 /45 ADSL WAN Port
ANSI T1.413 Issue II for ADSL 10/100 Mbps wired LAN * 4 ( Auto-Cross over)
ITU G.992.1 ( G.DMT ) for ADSL USB Port
ITU G.992.2 ( G.lite ) for ADSL Temperature Range
ITU G.994.1 ( G.HS ) for ADSL 0~40°C(operating), -20~65°C (storing)
Network Protocol Humidity
TCP/IP, IPX/SPX, NetBEUI, DHCP Client 15%~95%
RFC1483 Bridged IP over ATM Power Adapter
RFC1483 Routed IP over ATM Input: AC 120/240V, 0.35A, 50/60Hz
RFC1577 Classical IP over ATM Output AC 16V, 1A
RFC2364 PPP over ATM AAL5
RFC2516 PPP over Ethernet
AAL5 UBR & CBR
 Loading...