

Page 1
file:///G|/CSO/Documentation/Documentation%20-%20Draft/Networking/5454%20Mach-1%20AP/User%20Guide/English/index.html
Wireless Nd1 Access Point: User Guide
● Home
● Installation
● Configuration
● Tutorials
● Help
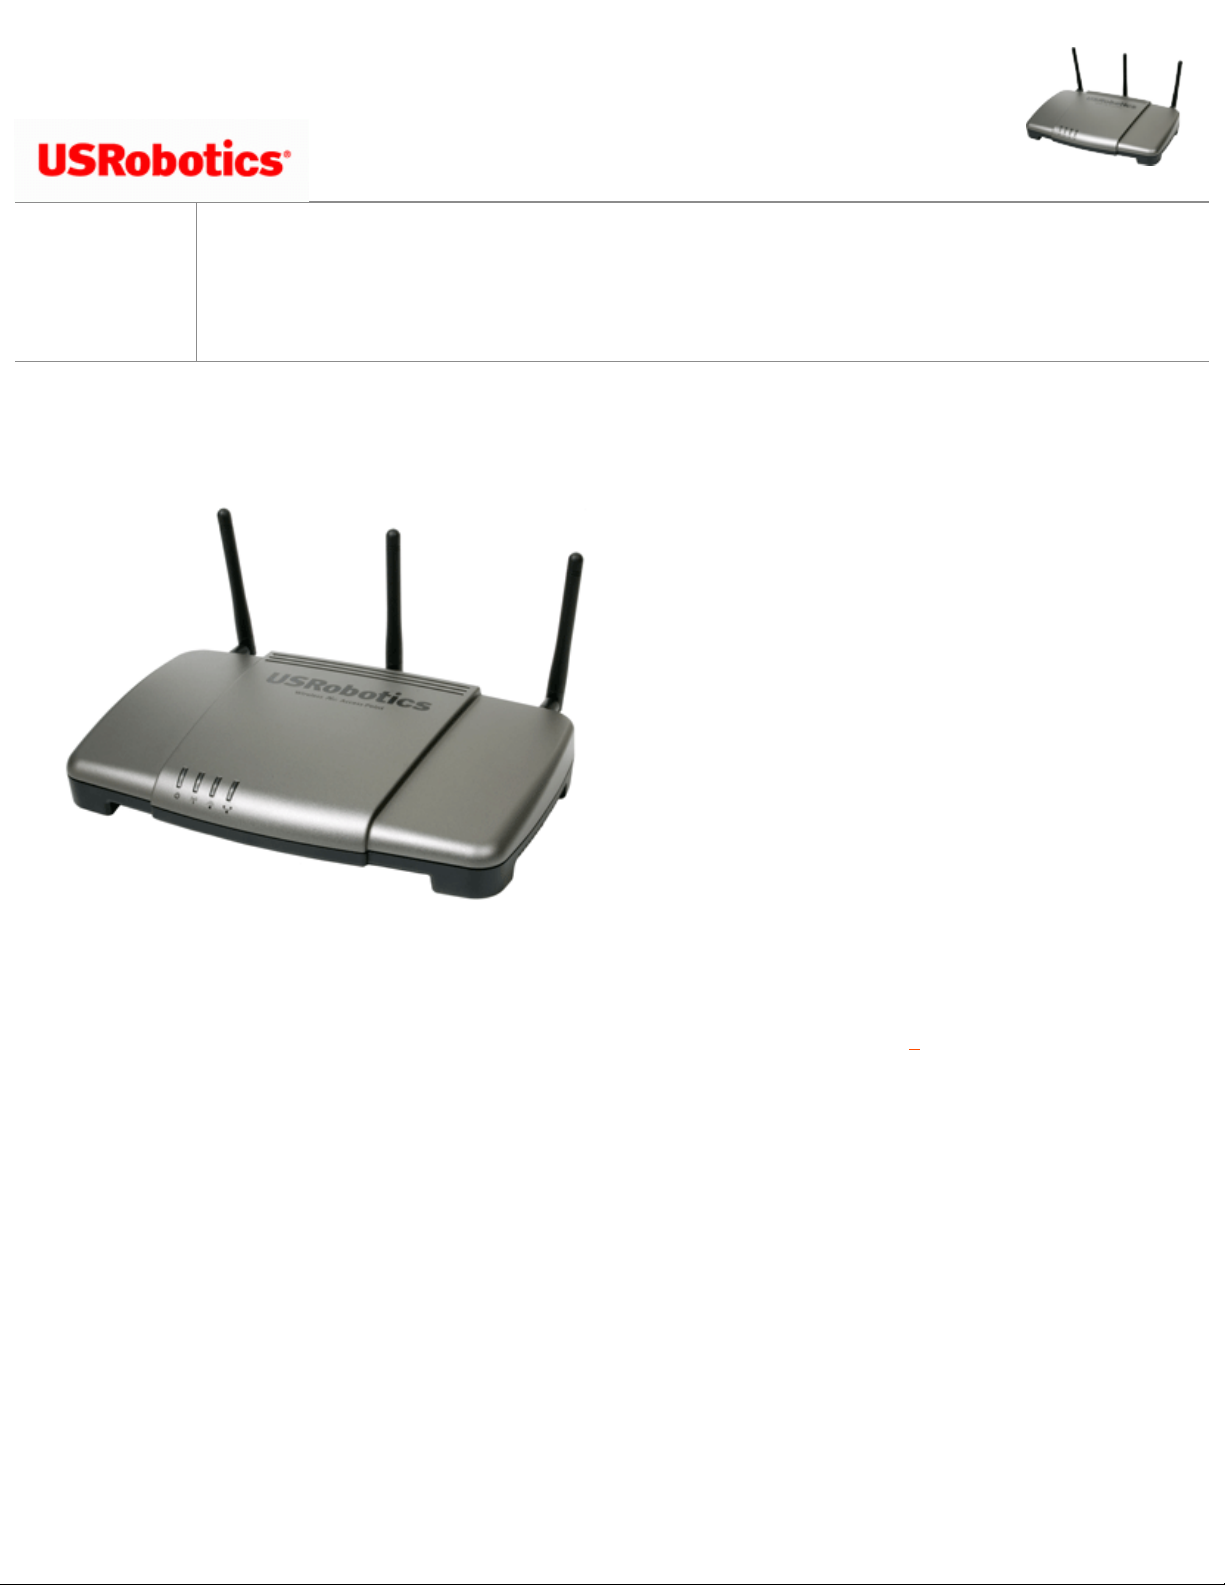
The USRobotics Wireless Nd1™ Access Point turns your wired network into a powerful and secure wireless network.
Featuring USRobotics’ exclusive Nd
1
wireless technology, delivering speeds up to 270 Mbps* and a range up to 5 times
greater than standard 802.11g, the access point is designed to provide total home/small business coverage and optimal
performance. New SecureEZSetup™ provides simple and fast installation and security configuration. A full complement of
security capabilities deliver confident, high-performance wireless networking.
System Requirements
● A computer with an Ethernet adapter installed
● A router or other networking device with a DHCP server
● An HTML 4.01-compliant Web Browser with JavaScript enabled
file:///G|/CSO/Documentation/Documentation%20-%20Dr.../5454%20Mach-1%20AP/User%20Guide/English/index.html (1 of 3)10/26/2006 9:47:01 AM
Page 2
file:///G|/CSO/Documentation/Documentation%20-%20Draft/Networking/5454%20Mach-1%20AP/User%20Guide/English/index.html
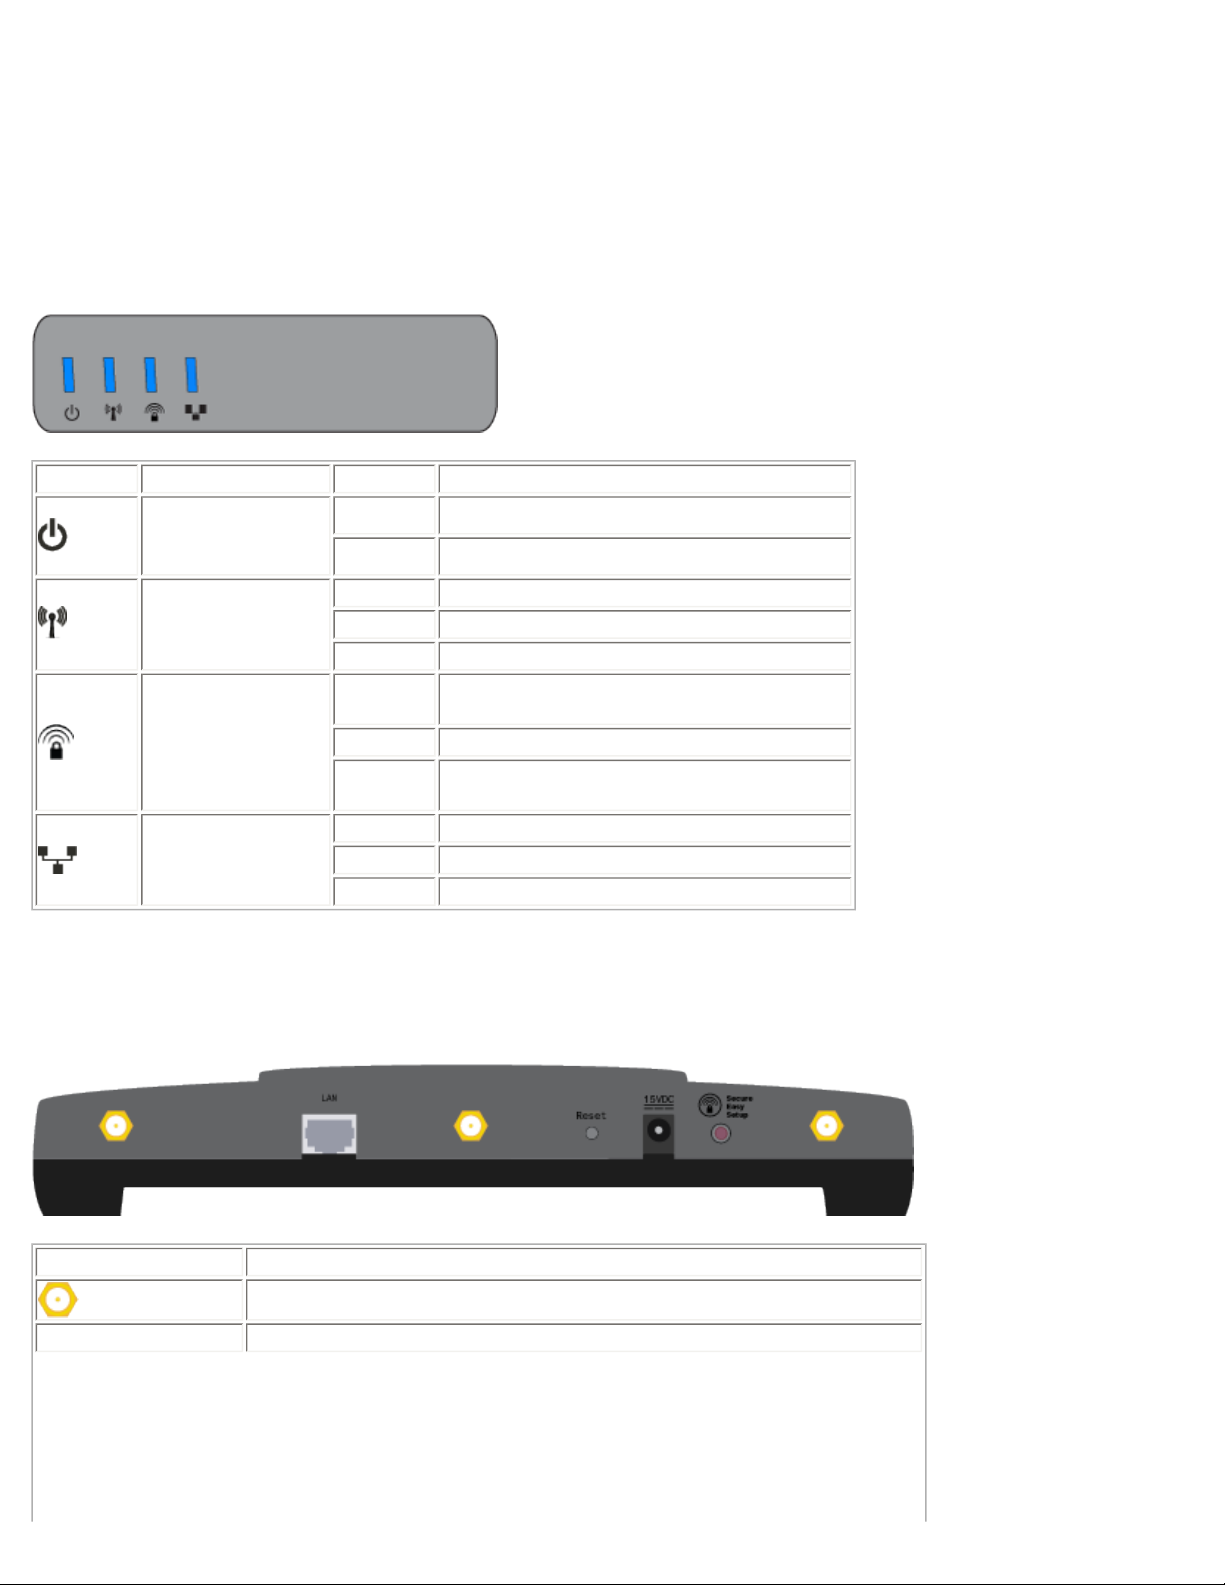
Product Views
Front
Symbol Name State Condition
Power
Off Not receiving power.
Solid Receiving power.
WLAN
(Wireless Network)
Off Wireless connection is disabled.
Solid Wireless connection is enabled.
Flashing Sending and receiving data.
SecureEasySetup
Off
SecureEasySetup mode is not ready on
the access point.
Solid SecureEasySetup mode is ready.
Blinking
Communicating with SecureEasySetup
devices.
LAN
Off No LAN connection.
Solid LAN link is achieved.
Flashing Sending and receiving data.
Back
Item Function
Connects an antenna to the access point.
LAN
Connects the access point to a networking device.
file:///G|/CSO/Documentation/Documentation%20-%20Dr.../5454%20Mach-1%20AP/User%20Guide/English/index.html (2 of 3)10/26/2006 9:47:01 AM
Page 3

file:///G|/CSO/Documentation/Documentation%20-%20Draft/Networking/5454%20Mach-1%20AP/User%20Guide/English/index.html
Reset
Reboots your access point or restores your access point to its factory
default settings.
● To reboot your access point without changing your current
settings, press and hold the Reset button for 1 second.
● To restore your access point to the factory default settings,
press and hold the Reset button for 7 seconds.
15VDC
Connects the power adapter to your access point.
SecureEasySetup
button
Enables SecureEasySetup on your access point.
● To enable SecureEasySetup on your access point, press and
hold the SecureEasySetup button for 1 second.
● To reset your wireless security settings to the factory default
(no security enabled), press and hold the SecureEasySetup
button for 7 seconds.
* Actual performance may vary depending on operating environment and distance between networked devices.
© 2005-2006 U.S. Robotics Corporation
R46.1320.00
rev 0.1 10/06
file:///G|/CSO/Documentation/Documentation%20-%20Dr.../5454%20Mach-1%20AP/User%20Guide/English/index.html (3 of 3)10/26/2006 9:47:01 AM
Page 4

file:///G|/CSO/Documentation/Documentation%20-%20Draft/Networking/5454%20Mach-1%20AP/User%20Guide/English/features.html
Wireless Nd1 Access Point:
User Guide
● Home
● Installation
● Configuration
● Tutorials
● Help
Product Specifications
● Integrated 270 Mbps 802.11n Draft 1.0 Wireless Access Point, Bridge, and Range
extender
● One RJ-45, 10/100 Mbps auto-sensing and auto-switching Ethernet LAN port
● HTML-based configuration
● Roaming capability
● Wi-Fi Multi Media (WMM): Prioritization of marked voice and video traffic
● AP firmware upgrades available through the Web User Interface
● Complies with IEEE 802.11g 54 Mbps wireless radio standard and 802.11n Draft
1.0 270 Mbps wireless radio
● Dynamic IP Address assignment via DHCP or Static IP address assignment
through the Web User Interface (Access Point mode only)
● Wireless Multi-Bridging support using Wireless Distribution System (WDS) (Bridge
mode only)
Security Features
● WPA and WPA2 (Wi-Fi Protected Access)
● 64/128-bit WEP (Wired Equivalent Privacy) data encryption with Open/Shared
Key
file:///G|/CSO/Documentation/Documentation%20-%20Dr...54%20Mach-1%20AP/User%20Guide/English/features.html (1 of 2)10/26/2006 9:47:01 AM
Page 5

file:///G|/CSO/Documentation/Documentation%20-%20Draft/Networking/5454%20Mach-1%20AP/User%20Guide/English/features.html
● WPA/WPA2-Enterprise (WPA-WPA2 with 802.1X)
● Ability to disable SSID Broadcast
● MAC address authentication and wireless association control (Access Point and
Range Extender modes only)
● 802.1x pass-through support (not supported in WDS Mode)
● WDS restrictions (Bridge mode only)
© 2005-2006 U.S. Robotics Corporation
file:///G|/CSO/Documentation/Documentation%20-%20Dr...54%20Mach-1%20AP/User%20Guide/English/features.html (2 of 2)10/26/2006 9:47:01 AM
Page 6
file:///G|/CSO/Documentation/Documentation%20-%20Draft/Networking/5454%20Mach-1%20AP/User%20Guide/English/install.html
Wireless Nd1 Access Point: User Guide
● Home
● Installation
● Configuration
● Tutorials
● Help
Installing the Access Point
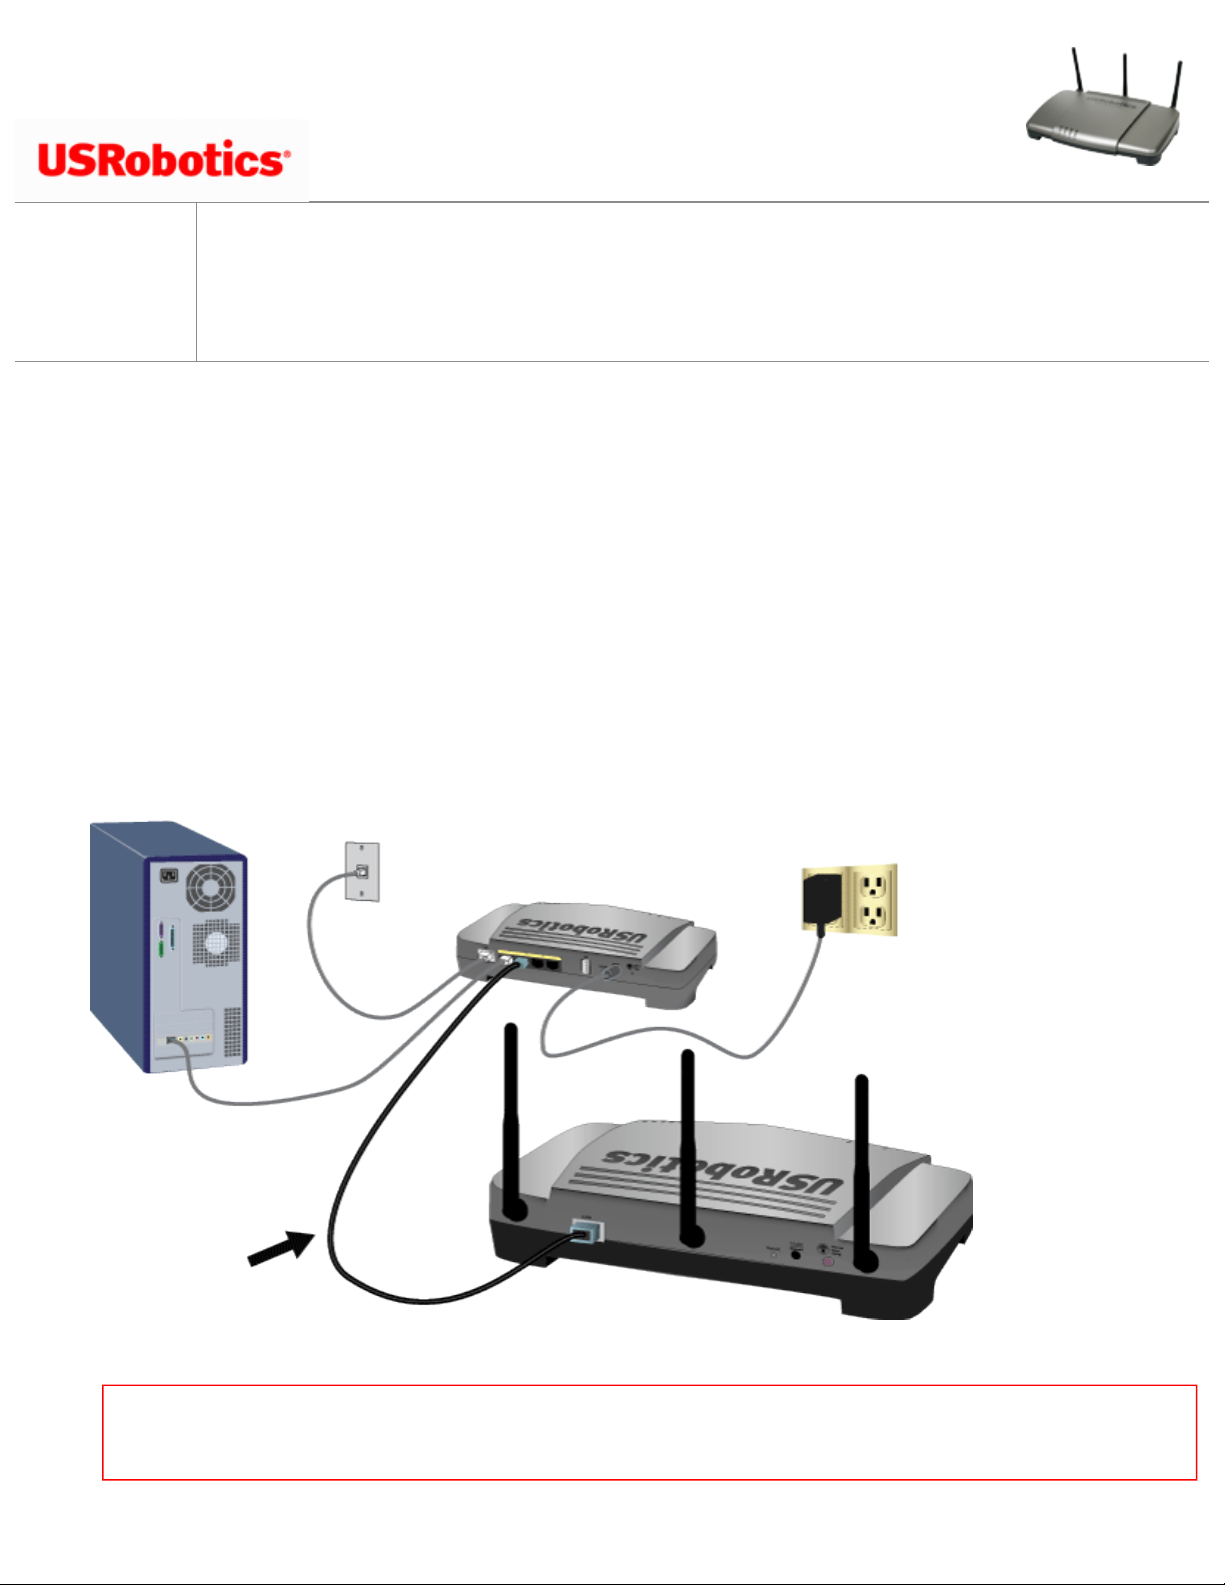
Step One: Connect the Access Point
1. Look at the label on the bottom of the access point and note its LAN MAC address. You may need it to distinguish
the access point from other devices on your network.
2. Connect the provided antennas to the back of the access point.
3. Use the supplied Ethernet cable to connect the LAN port on the access point to a LAN port on your networking
device.
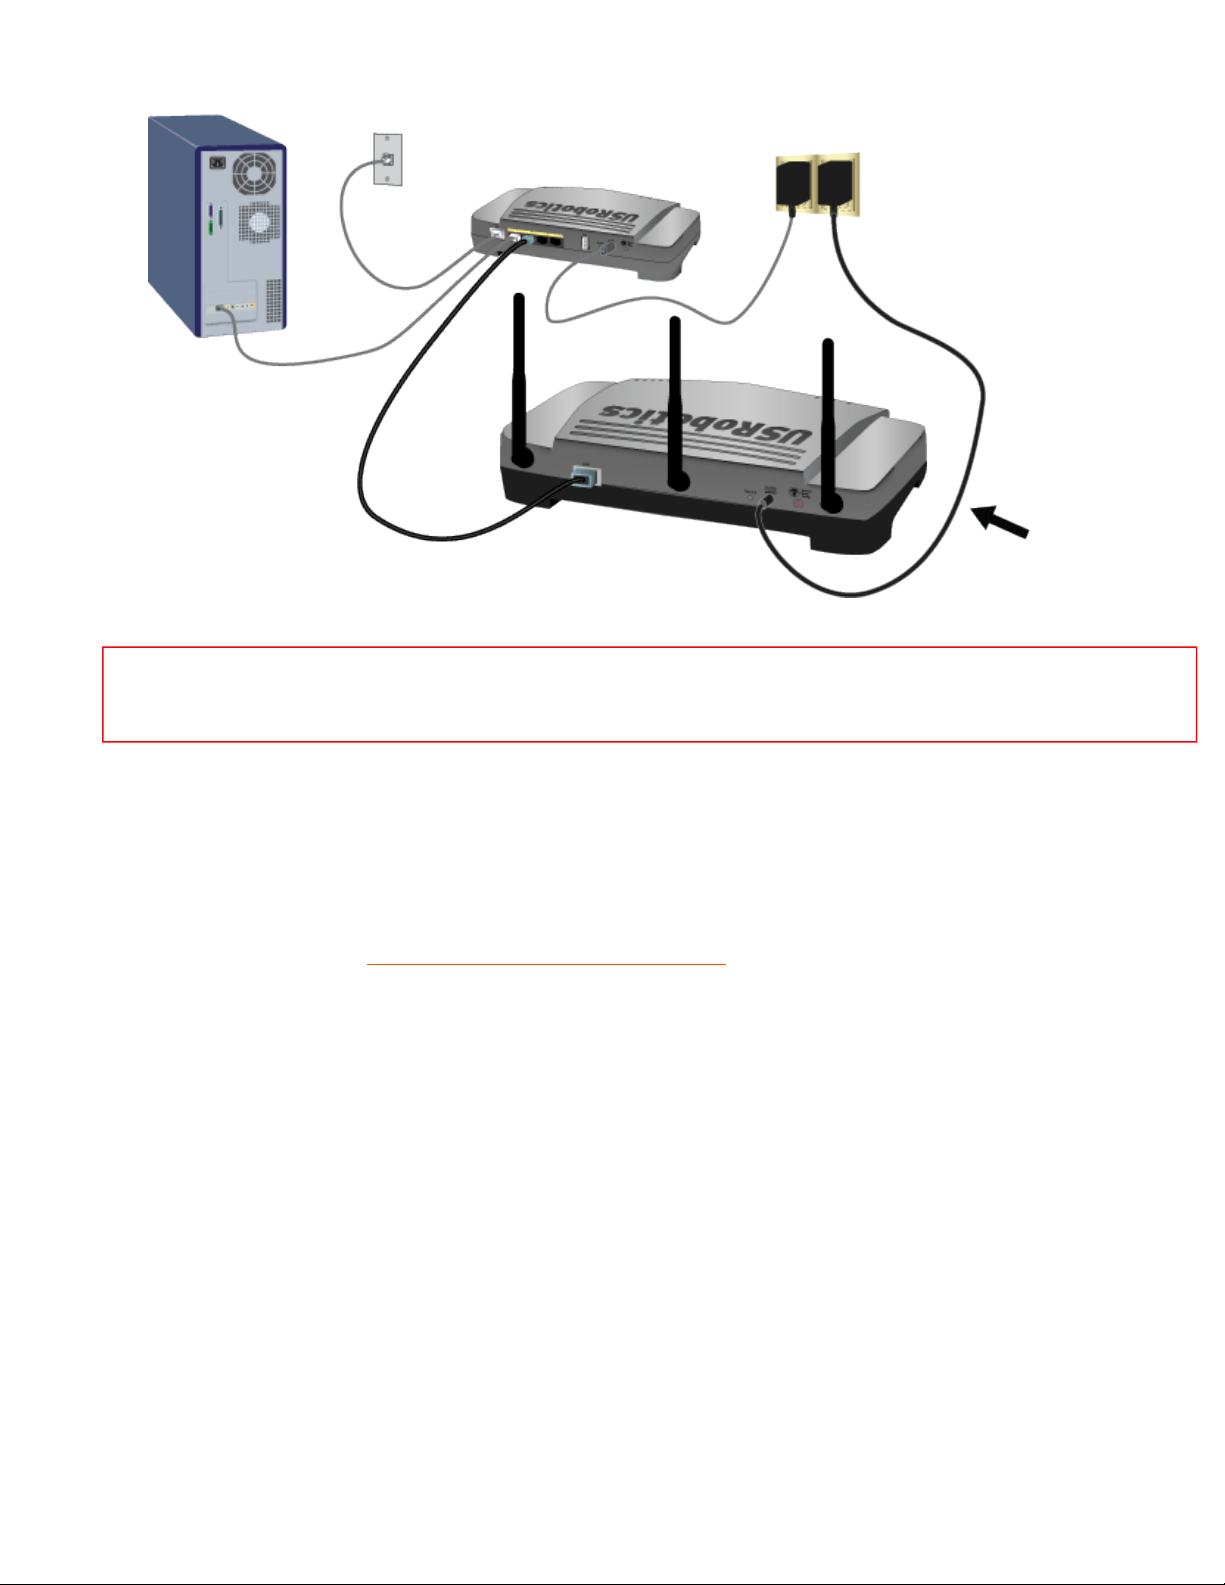
4. Supply power to the access point as follows:
Note to UK Users: With the power adapter unplugged, connect the appropriate power plug for your
country on to the power adapter. Apply enough pressure to cause a click and firmly seat the plug.
file:///G|/CSO/Documentation/Documentation%20-%20Dra...5454%20Mach-1%20AP/User%20Guide/English/install.html (1 of 9)10/26/2006 9:47:05 AM
Page 7
file:///G|/CSO/Documentation/Documentation%20-%20Draft/Networking/5454%20Mach-1%20AP/User%20Guide/English/install.html
A. Connect the supplied power adapter to the 15VDC port on the access point.
B. Plug the power adapter into a standard power outlet.
Note: This product is intended to be supplied by a Listed Direct Plug-in Power Unit marked Class 2 and
rated 15VDC, 1200 mA.
Step Two: Start the Setup Wizard
The setup wizard makes it easy for you perform basic setup of the access point. To start the wizard using an operating
system other than Windows, go to
Setup Wizard for Non-Windows Users.
Setup Wizard for Windows Users
If you are using a Windows operating system, you can use the setup program on the USRobotics Installation CD-ROM to
install and run the Network Device Locator and configure basic settings in one easy, continuous process:
1. Insert the USRobotics Installation CD-ROM into the CD-ROM or DVD drive.
If the CD doesn't start automatically, start it manually as follows:
A. Windows XP: Click Windows Start > My Computer.
Windows 2000: On the desktop, double-click My Computer.
B. Double-click the CD drive.
file:///G|/CSO/Documentation/Documentation%20-%20Dra...5454%20Mach-1%20AP/User%20Guide/English/install.html (2 of 9)10/26/2006 9:47:05 AM
Page 8
file:///G|/CSO/Documentation/Documentation%20-%20Draft/Networking/5454%20Mach-1%20AP/User%20Guide/English/install.html
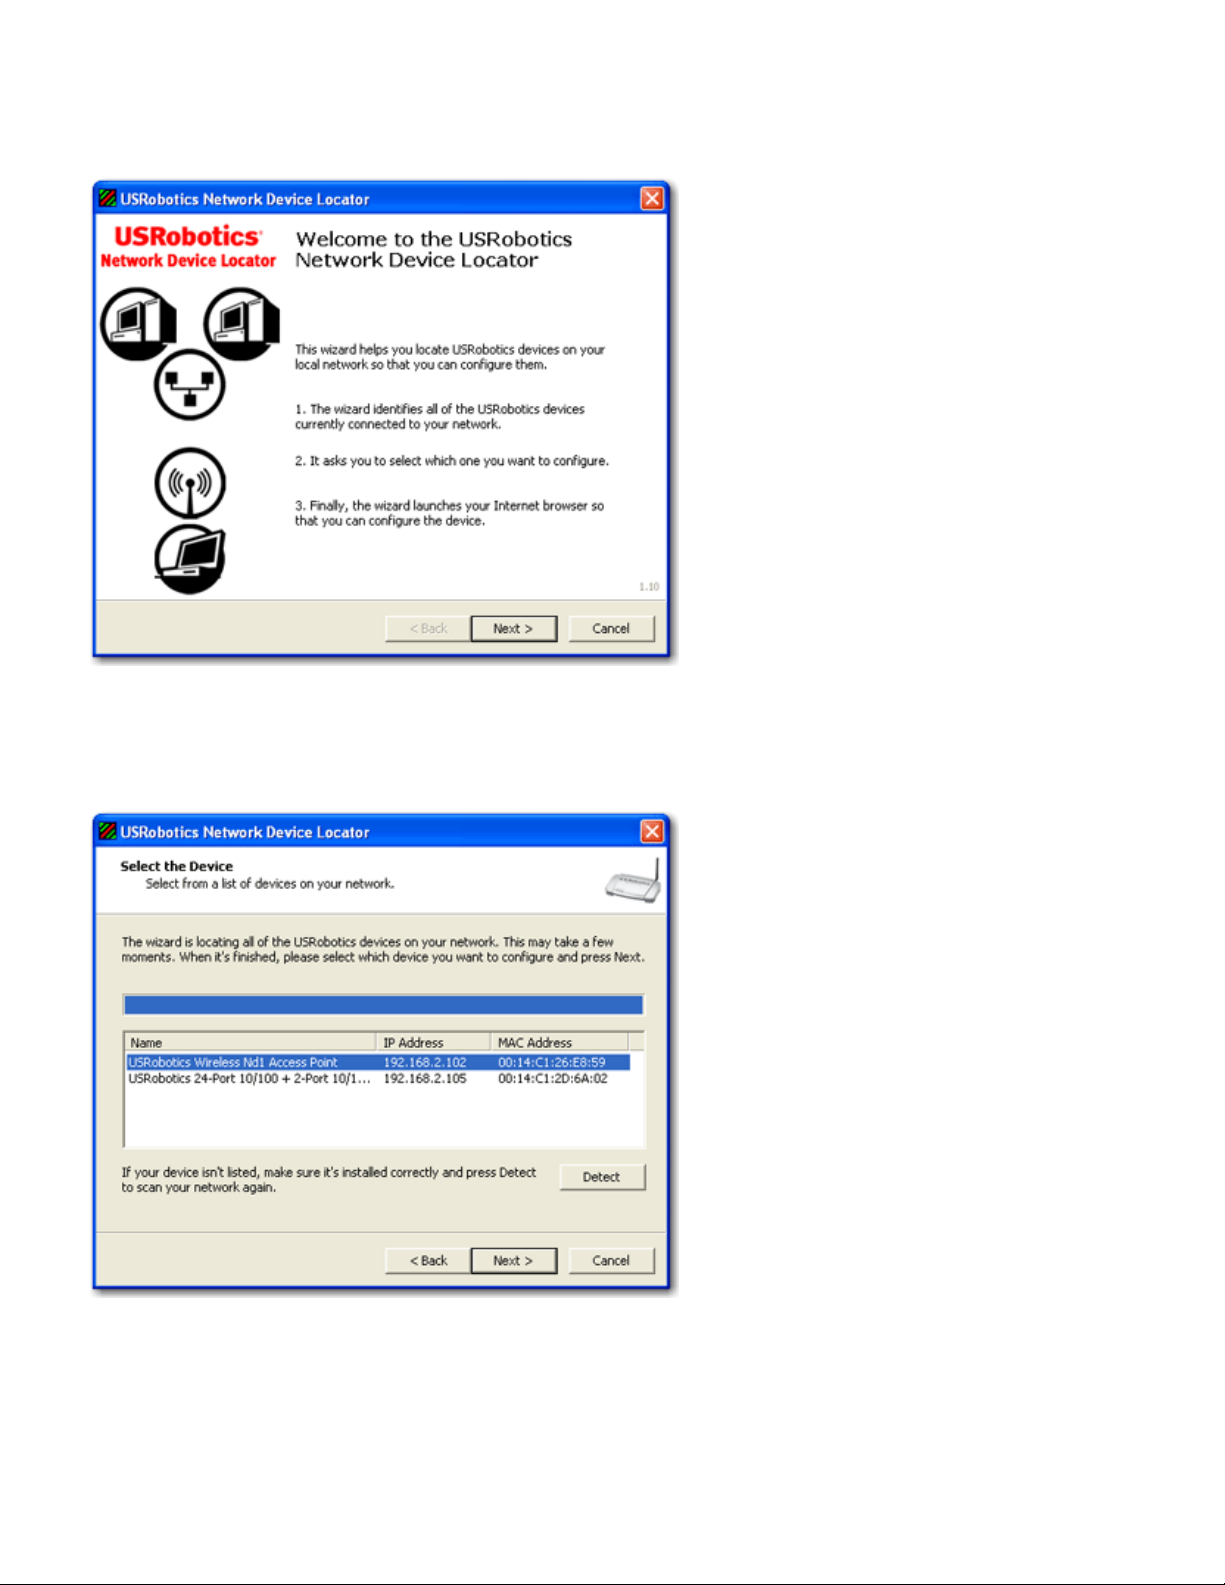
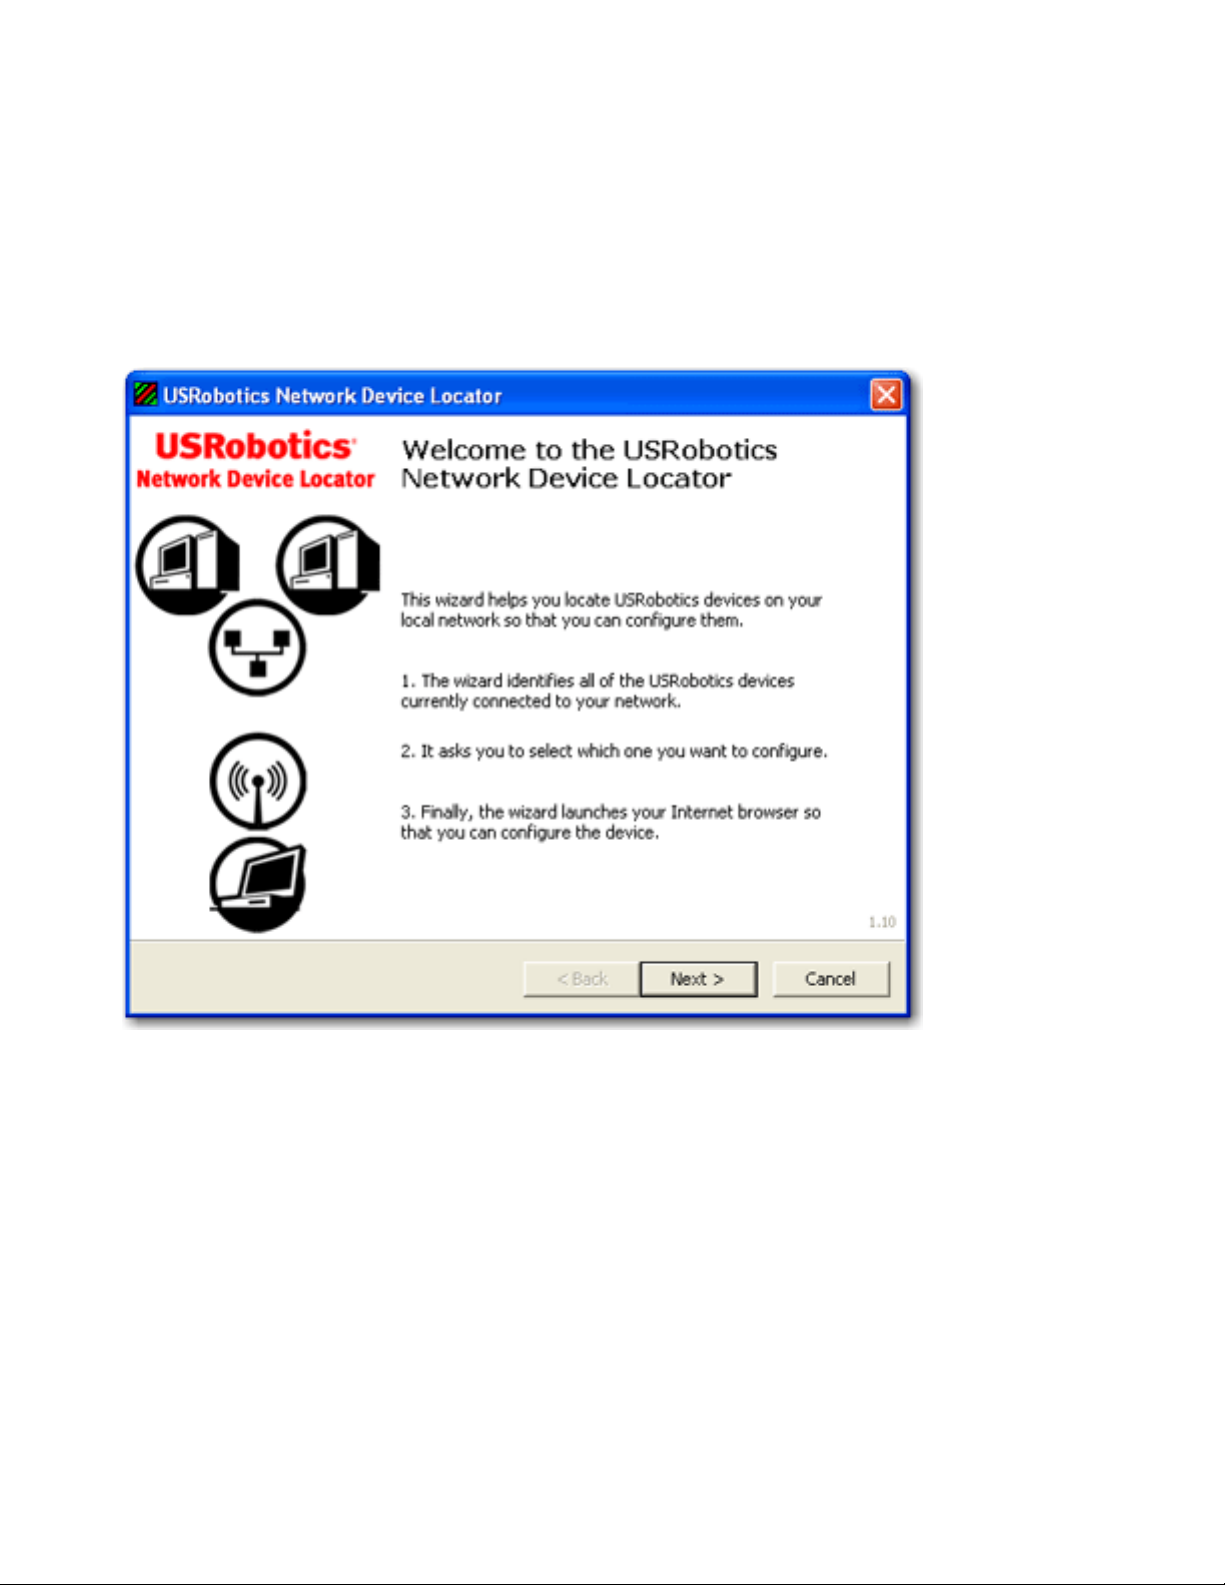
2. Follow the on-screen instructions to install the locator.
When the locator is installed, it starts automatically:
3. Click Next.
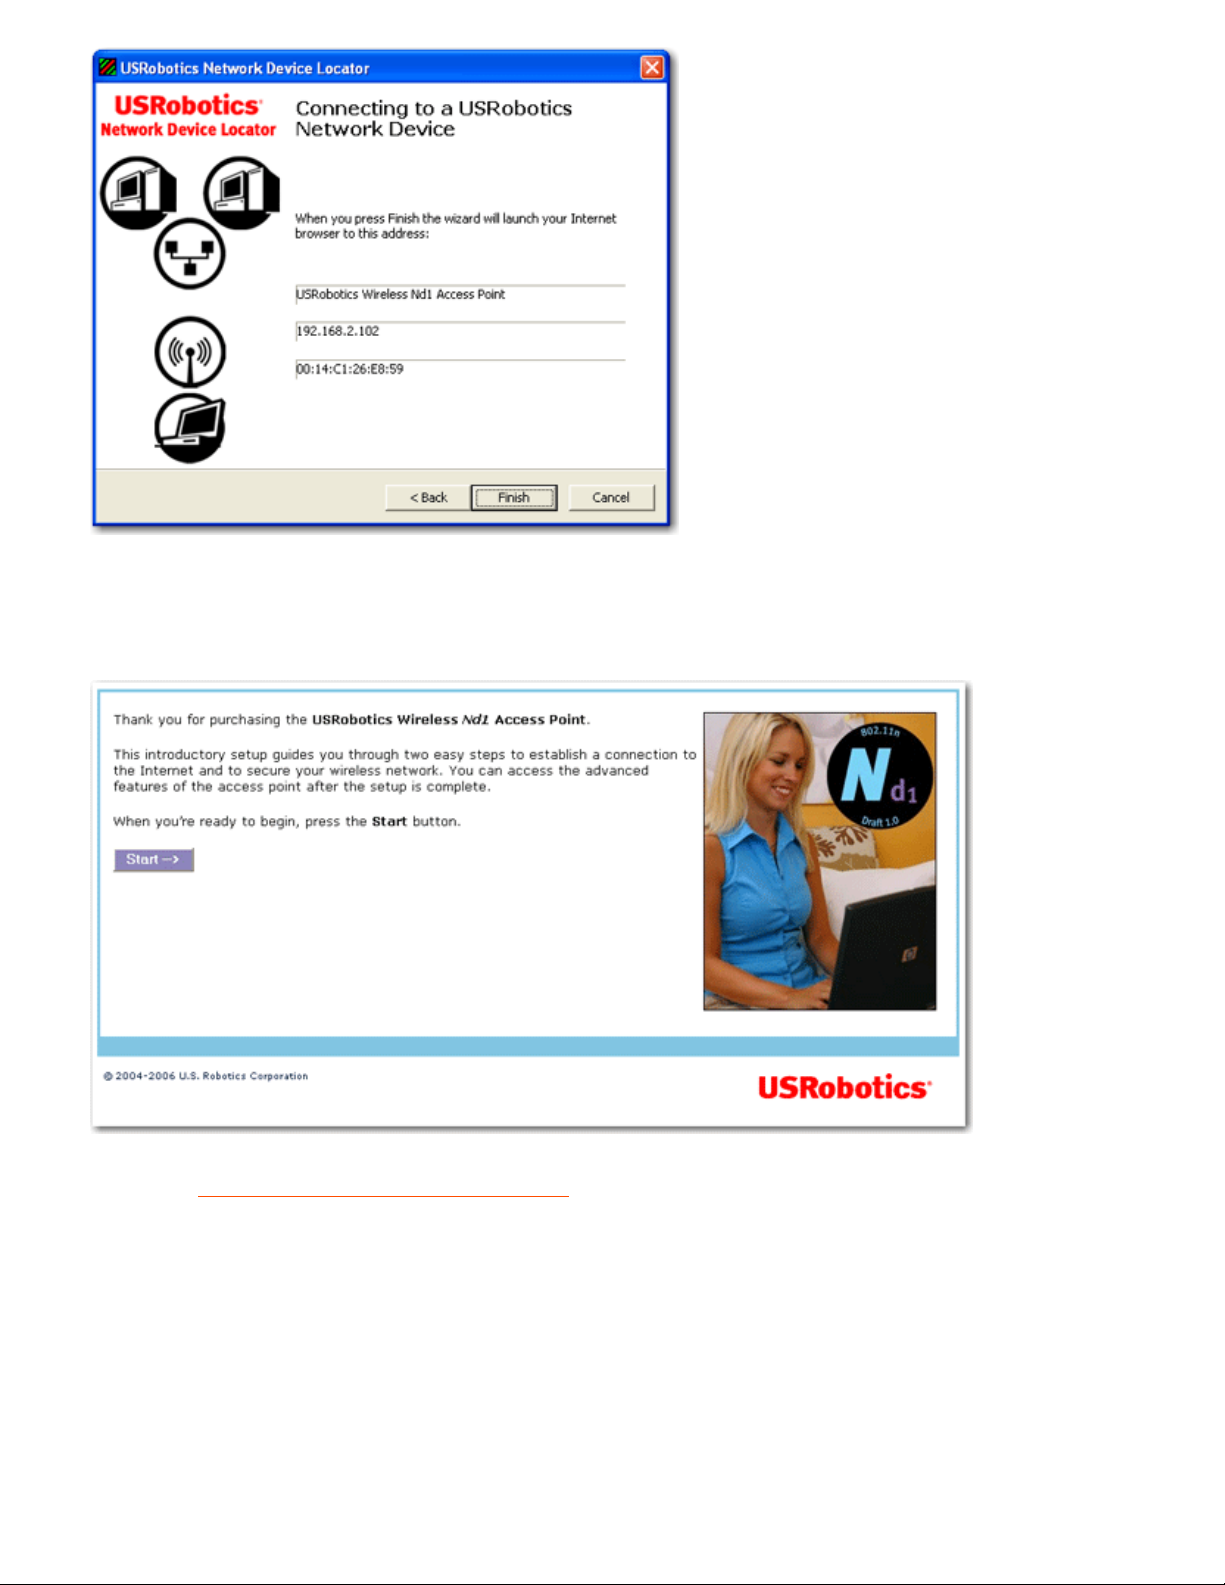
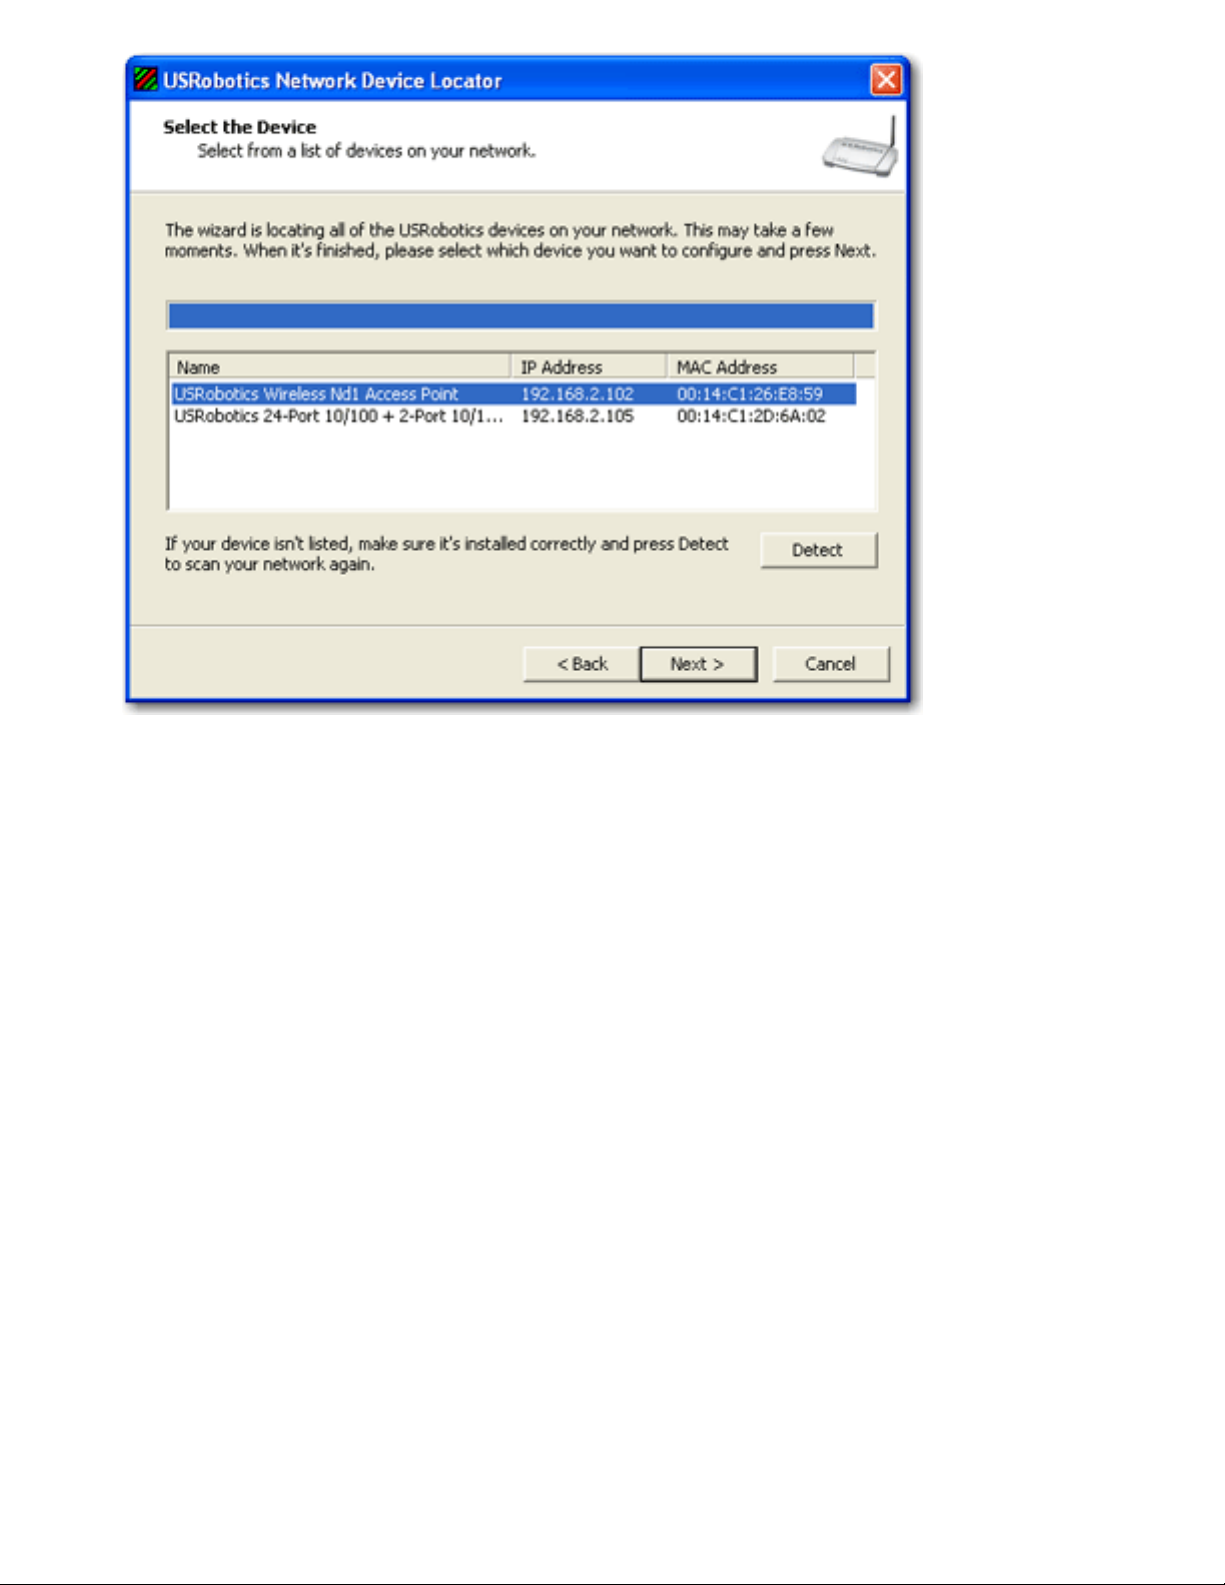
The locator lists the access point as well as any other USRobotics devices that were found:
4. Select the device whose MAC address matches the LAN MAC address on the bottom of the access point, and click
Next.
The locator displays the name, IP address, and LAN MAC address of the access point:
file:///G|/CSO/Documentation/Documentation%20-%20Dra...5454%20Mach-1%20AP/User%20Guide/English/install.html (3 of 9)10/26/2006 9:47:05 AM
Page 9
file:///G|/CSO/Documentation/Documentation%20-%20Draft/Networking/5454%20Mach-1%20AP/User%20Guide/English/install.html
5. Click Finish.
The locator launches the setup wizard for the access point:
Proceed to "Step Three: Configure Basic Settings".
Setup Wizard for Non-Windows Users
If you are using an operating system other than Windows, you first need to find the IP address of the access point. Then
you can start the setup wizard to configure the basic settings of the access point.
file:///G|/CSO/Documentation/Documentation%20-%20Dra...5454%20Mach-1%20AP/User%20Guide/English/install.html (4 of 9)10/26/2006 9:47:05 AM
Page 10
file:///G|/CSO/Documentation/Documentation%20-%20Draft/Networking/5454%20Mach-1%20AP/User%20Guide/English/install.html
Find the IP Address of the Access Point
The networking device to which you connected the access point assigns IP addresses on your local network. To find the
IP address of the access point:
1. Access the configuration program or configuration pages of the networking device. For detailed instructions, consult
the documentation for the networking device.
2. Find the list of clients associated with the networking device.
3. On the client list, find the LAN MAC address of the access point.
4. Note the IP address associated with the LAN MAC address of the access point.
Run the Setup Wizard
1. Start your Web browser.
2. In the location or address line, type the IP address of the access point and press ENTER.
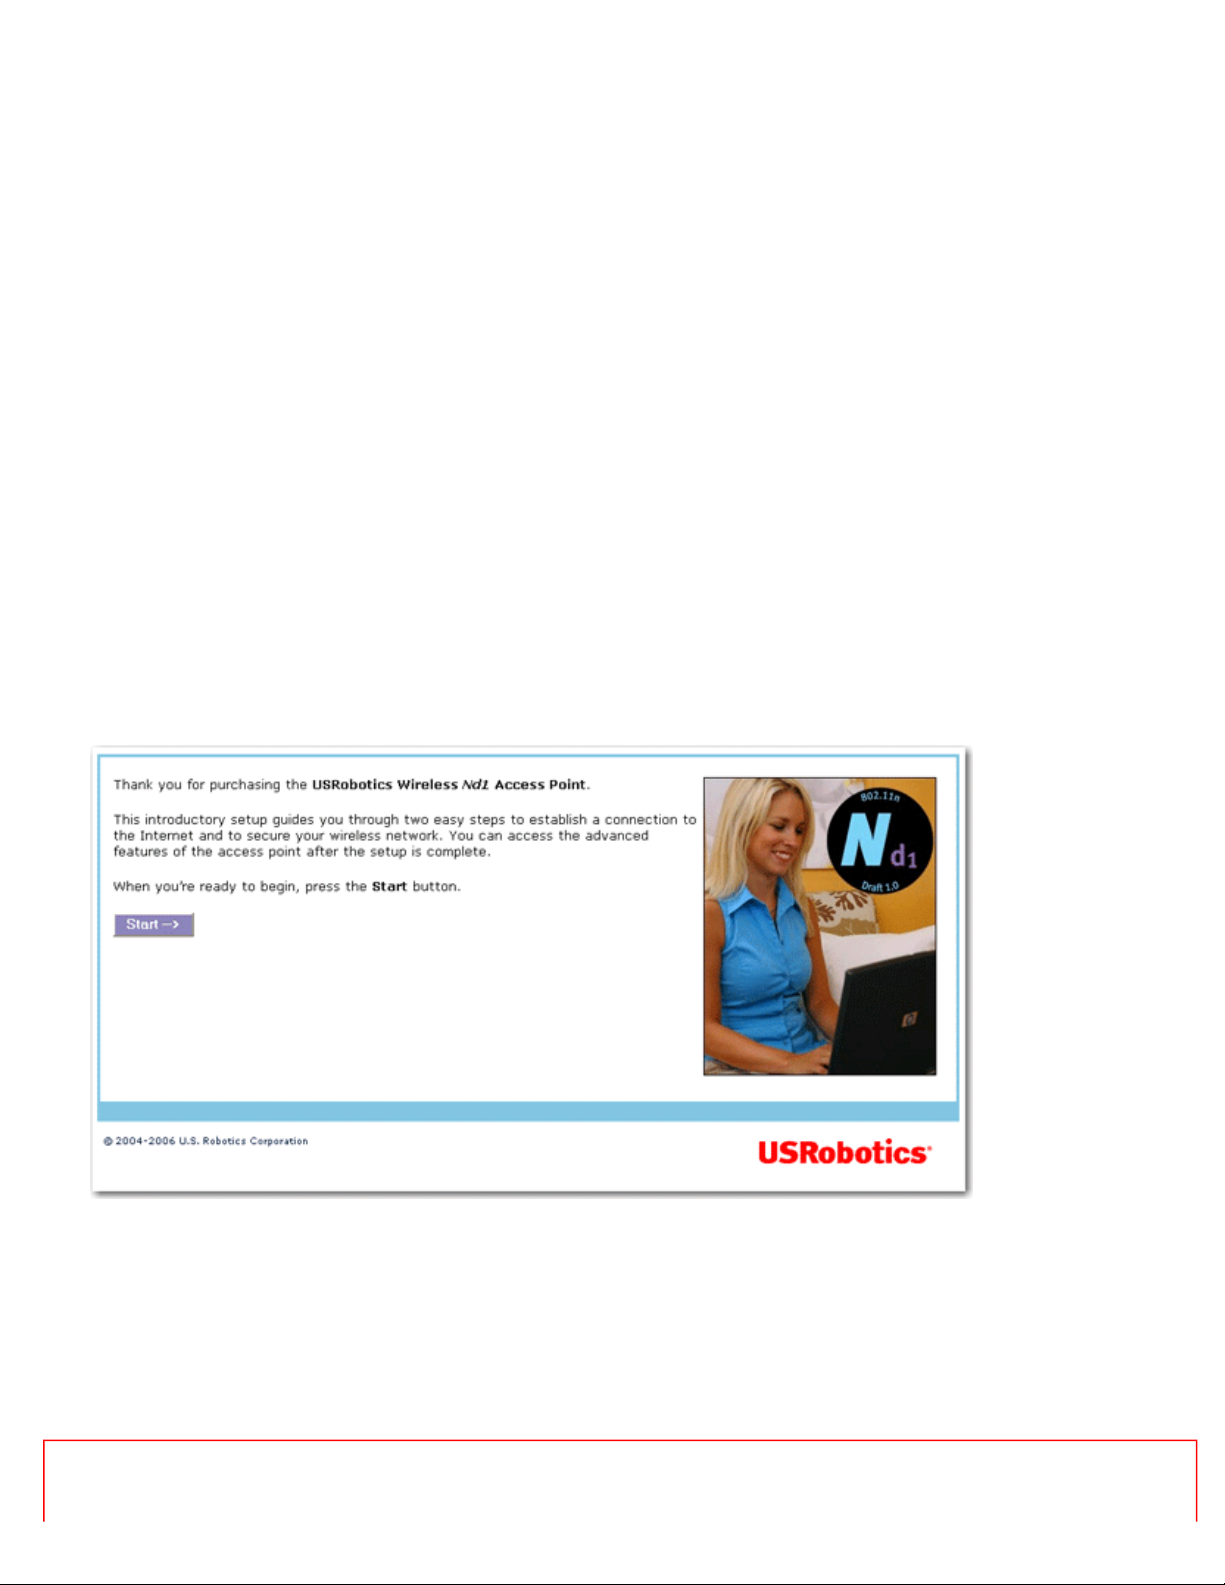
The wizard displays its welcome page:
Step Three: Configure Basic Settings
In the setup wizard, follow the on-screen instructions to complete the initial setup of the access point as follows:
Note: If you see a “Page Not Found” error at any time while using the setup wizard, press the Back button in
your Web browser or refresh the page.
file:///G|/CSO/Documentation/Documentation%20-%20Dra...5454%20Mach-1%20AP/User%20Guide/English/install.html (5 of 9)10/26/2006 9:47:05 AM
Page 11
file:///G|/CSO/Documentation/Documentation%20-%20Draft/Networking/5454%20Mach-1%20AP/User%20Guide/English/install.html
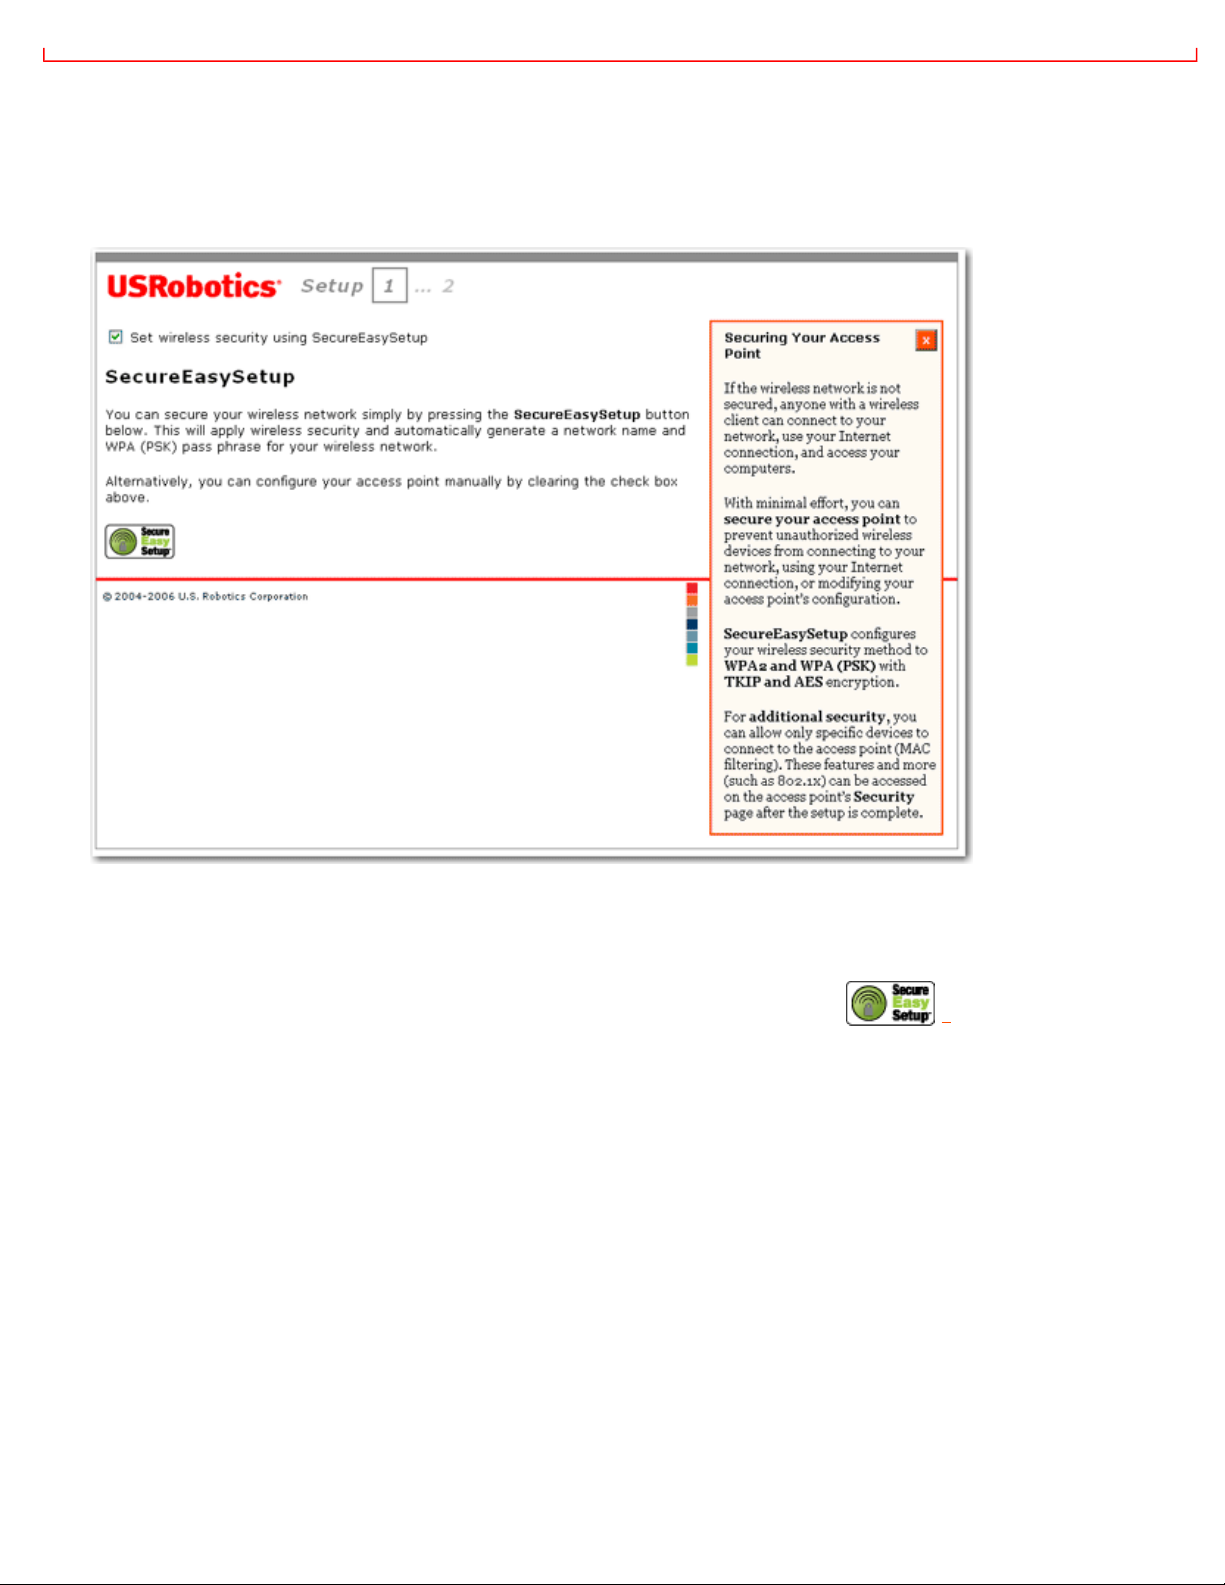
1. Click Start.
The setup wizard displays the SecureEasySetup page:
2. Do one of the following:
❍ To use SecureEasySetup to set your wireless security:
A. Select Set wireless security using SecureEasySetup and click
*
B. Wait for setup to complete, then click Continue.
OR
❍ To set your wireless security information manually:
A. Clear the Set wireless security using SecureEasySetup checkbox.
The setup page displays wireless security settings.
file:///G|/CSO/Documentation/Documentation%20-%20Dra...5454%20Mach-1%20AP/User%20Guide/English/install.html (6 of 9)10/26/2006 9:47:05 AM
Page 12
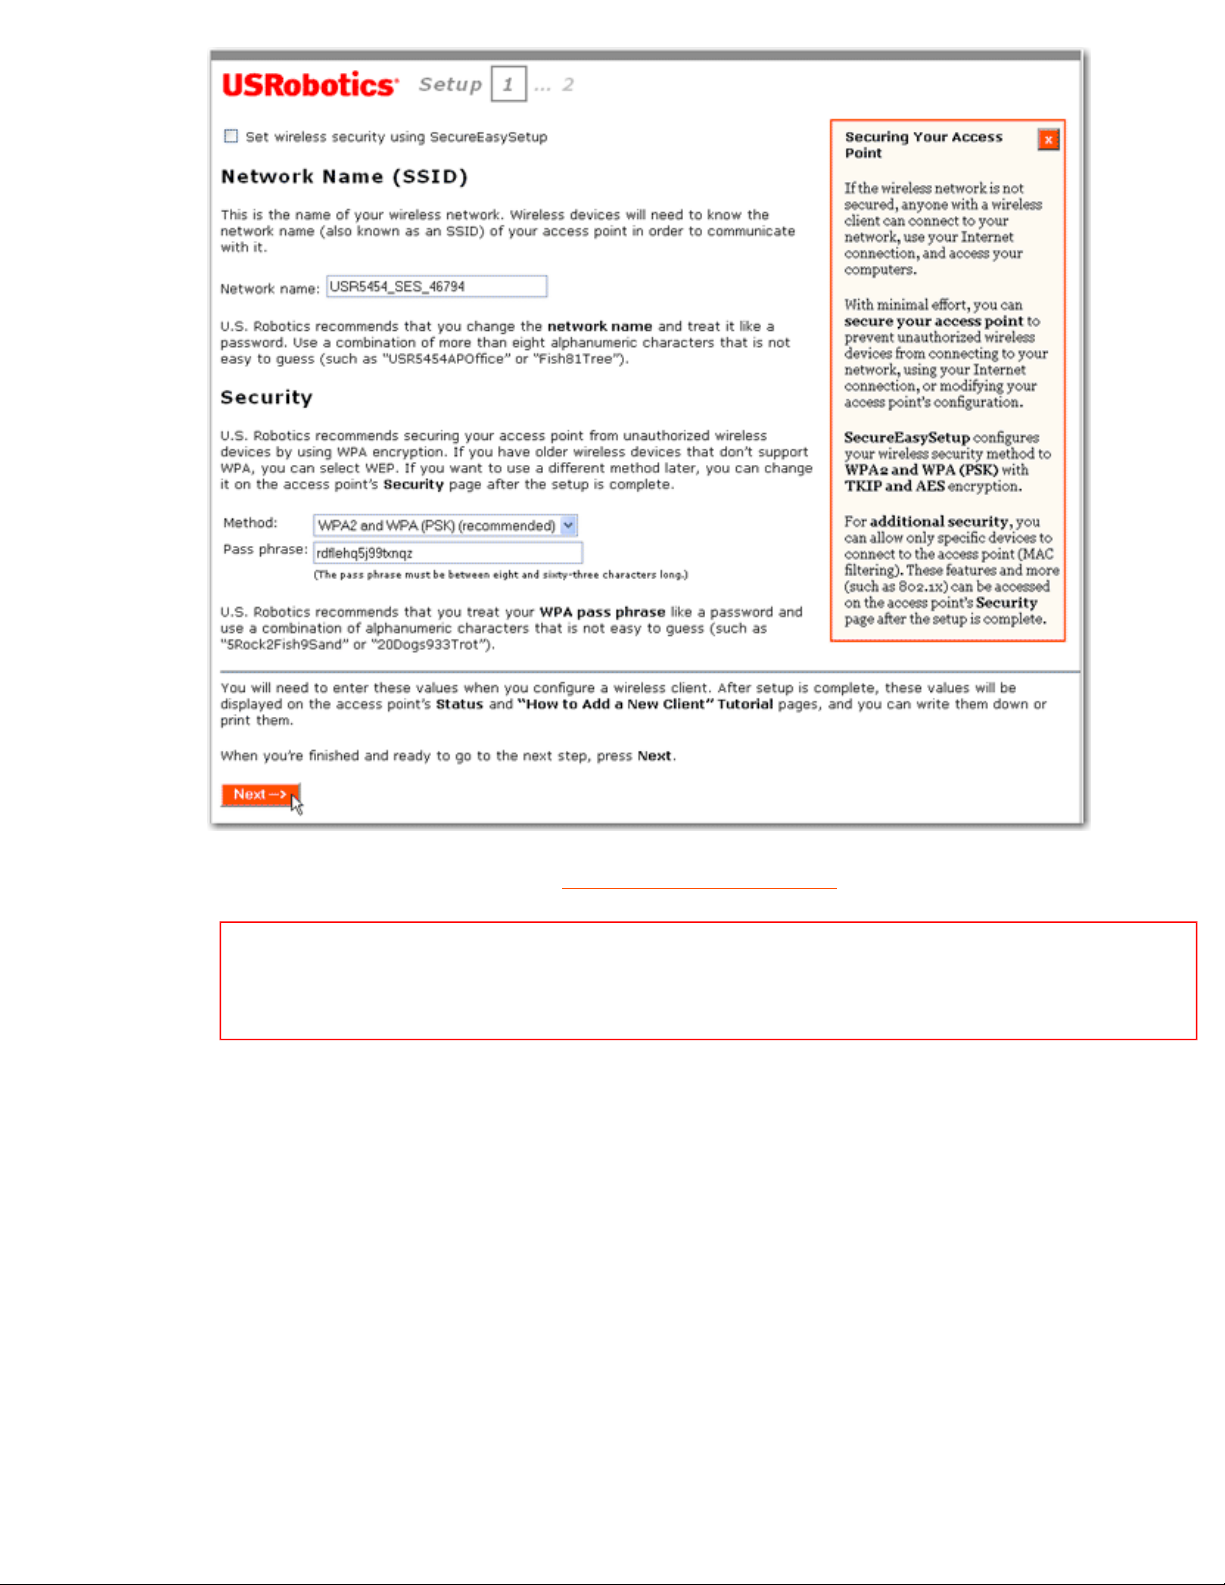
file:///G|/CSO/Documentation/Documentation%20-%20Draft/Networking/5454%20Mach-1%20AP/User%20Guide/English/install.html
B. Enter a Network Name (SSID), select a security Method, and enter your pass phrase. For more
information about pass phrases, see
wireless security information.
Note: For your wireless security settings, it is recommended that you select the WPA2 and
WPA (PSK) wireless security method using TKIP and AES encryption for the most secure
wireless network.
C. Click Next.
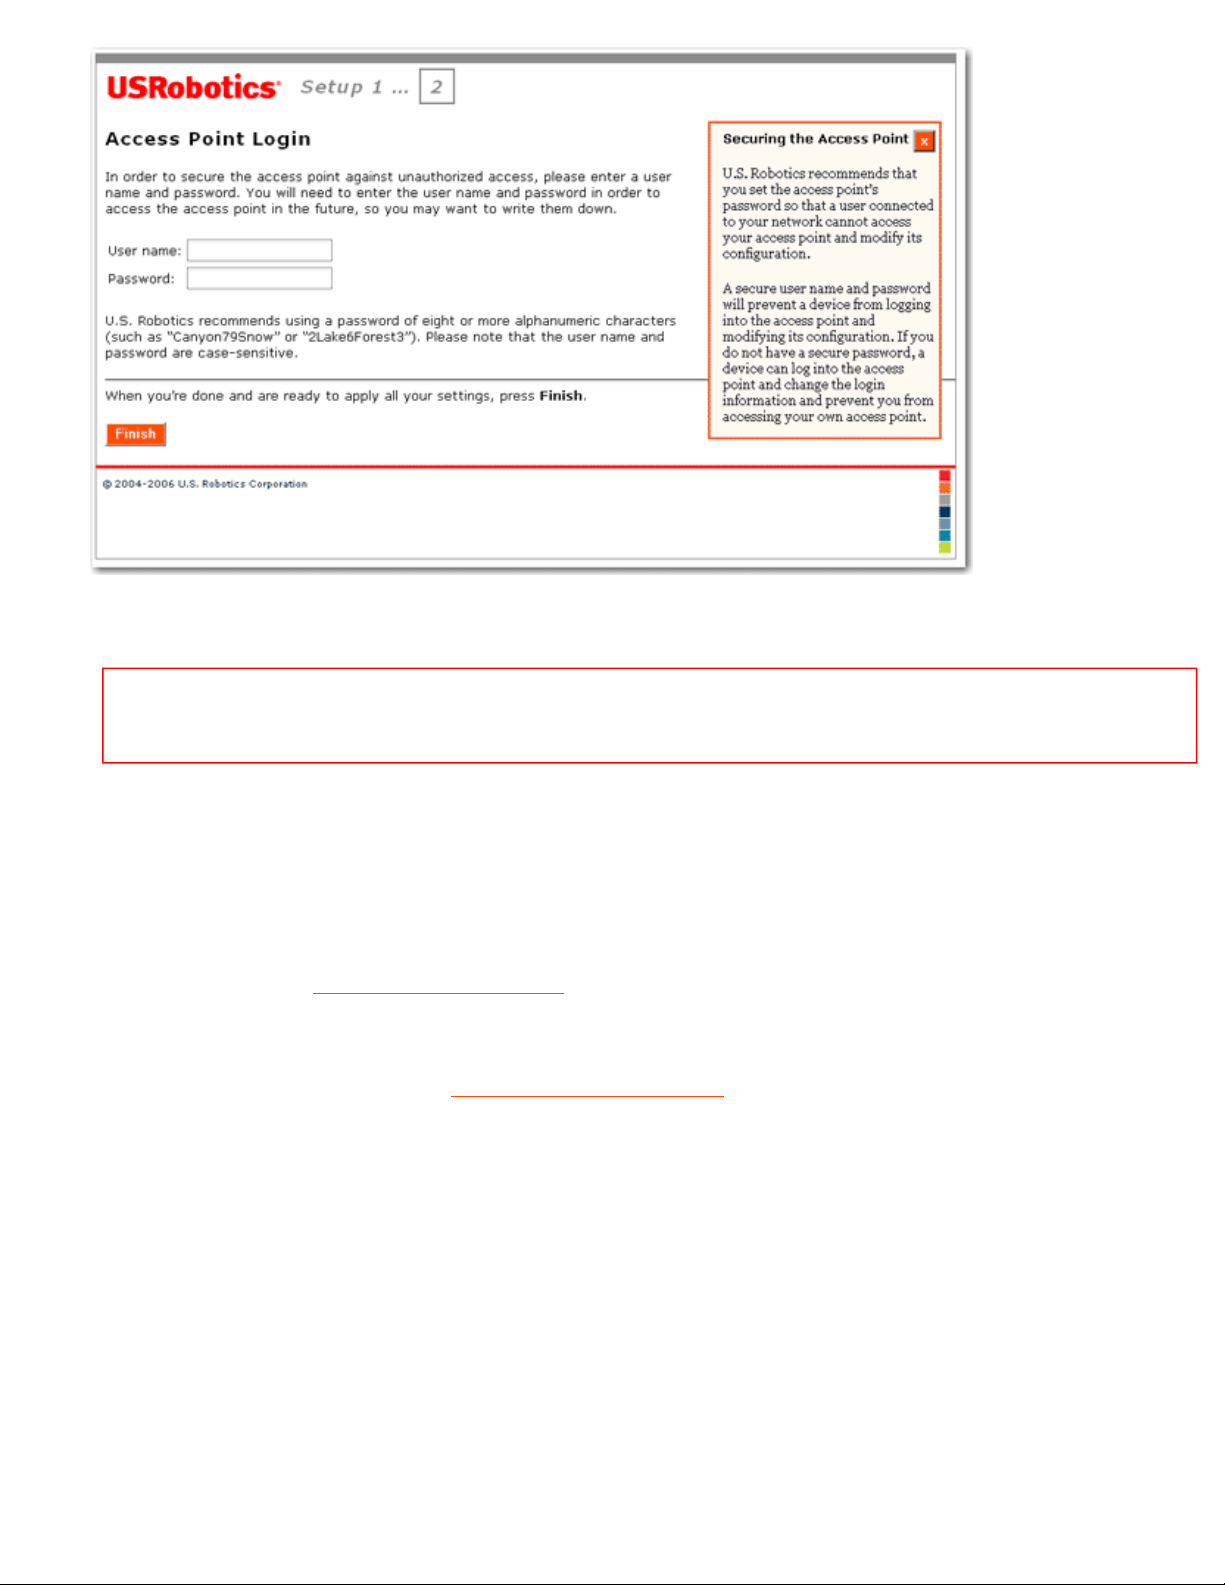
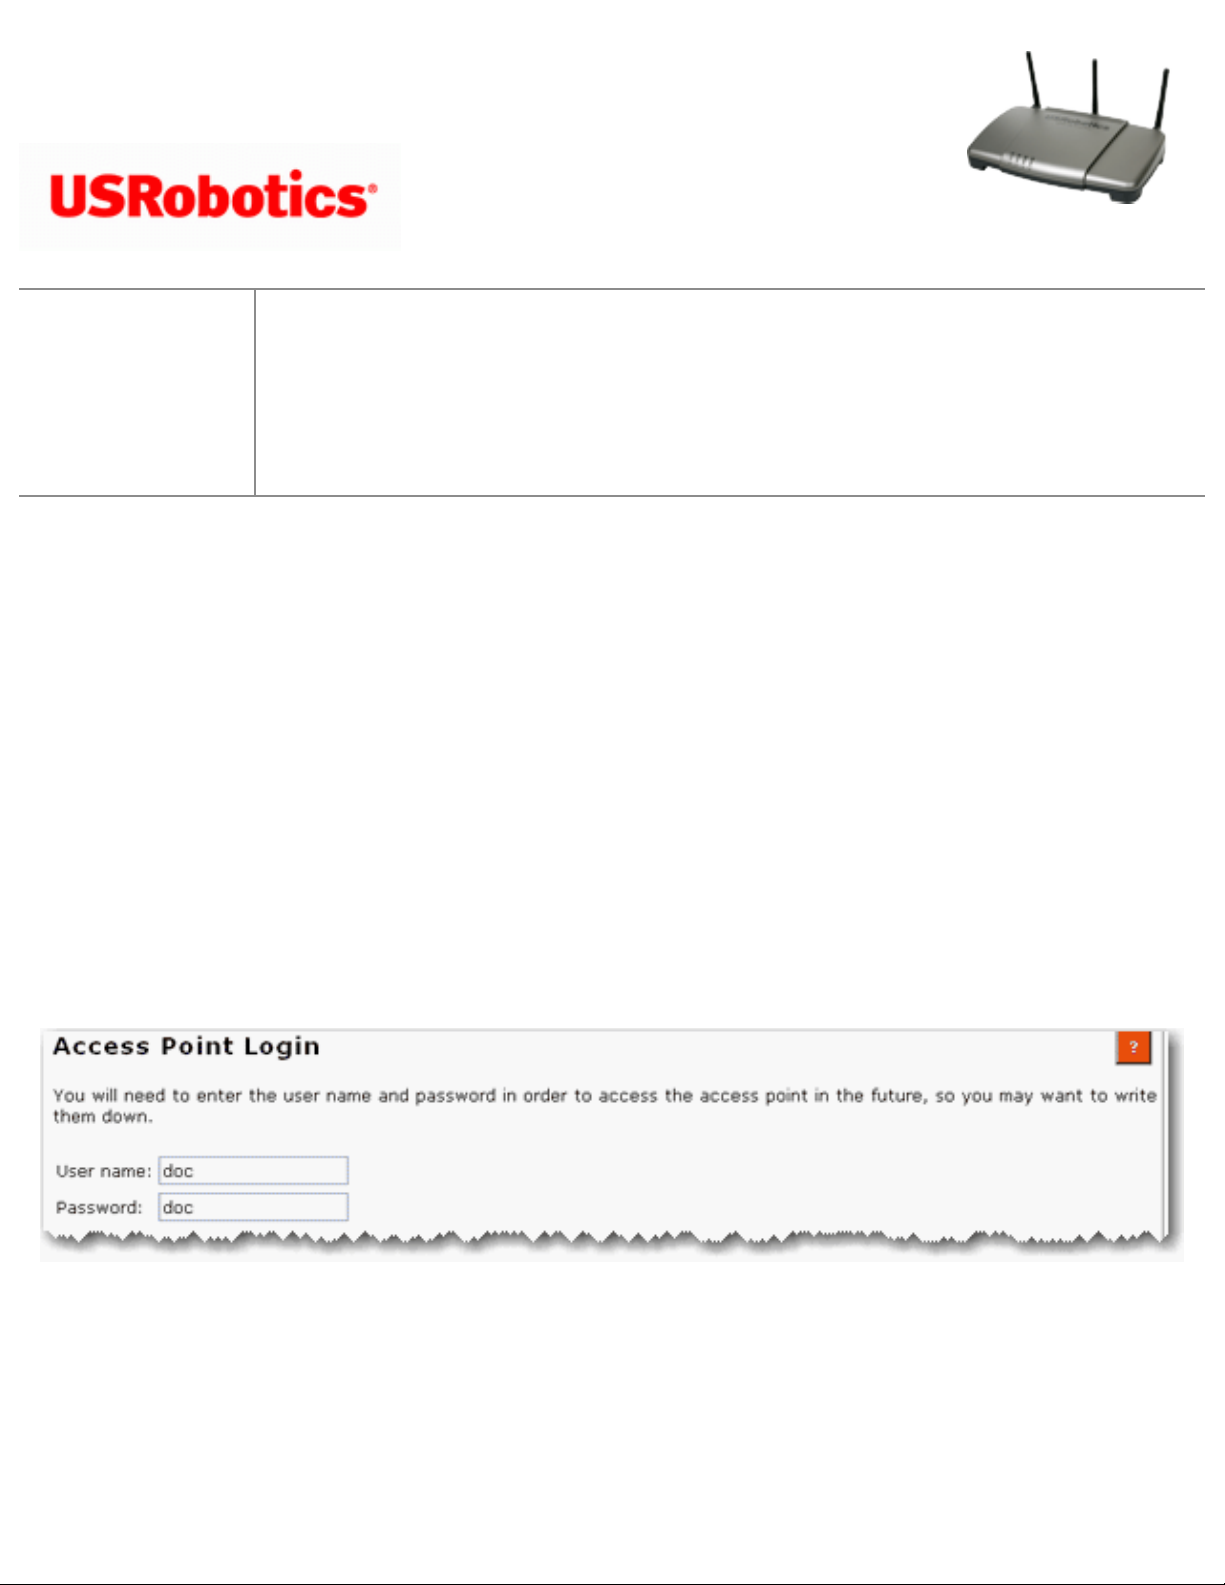
When your security settings are complete, the setup wizard displays the login setup page:
file:///G|/CSO/Documentation/Documentation%20-%20Dra...5454%20Mach-1%20AP/User%20Guide/English/install.html (7 of 9)10/26/2006 9:47:05 AM
Page 13
file:///G|/CSO/Documentation/Documentation%20-%20Draft/Networking/5454%20Mach-1%20AP/User%20Guide/English/install.html
3. Enter a User name and Password and click Finish.
Note: Remember the user name and password that you enter. You will need it whenever you access the
configuration pages of the access point.
The access point displays its status page. If you intend to connect wireless devices to the access point manually, you will
need the informaton on the status page. Consider bookmarking the page for easy access to the required information.
You have successfully completed the installation procedure. You can verify your network connection by registering your
Wireless Nd
1
Access Point at www.usr.com/productreg/.
To connect a client to the access point, see
Connecting a Wireless Client in this user guide.
Backing Up Your Configuration Settings
Having a backup reduces the effort required in reapplying your configuration settings should you ever restore your access
point to its factory default settings. USRobotics recommends that you back up your settings now.
1. In the configuration pages, click the Device tab, and scroll down to Back Up Settings.
2. Click Back Up.
file:///G|/CSO/Documentation/Documentation%20-%20Dra...5454%20Mach-1%20AP/User%20Guide/English/install.html (8 of 9)10/26/2006 9:47:05 AM
Page 14

file:///G|/CSO/Documentation/Documentation%20-%20Draft/Networking/5454%20Mach-1%20AP/User%20Guide/English/install.html
Your system prompts you to save or open the file.
3. Click Save.
* By default, SecureEasySetup is ready to be used on your access point. If you change the wireless settings, be aware
that for SecureEasySetup to be ready on your access point, it must be set with WPA2 and WPA (PSK) wireless security,
with TKIP and AES encryption, and a pass phrase (which is also commonly called a Network key, WPA key, or WPA Preshared key). You can configure the settings manually on the Wireless configuration page of the access point or
automatically by pressing the SecureEasySetup button on the back of the access point.
© 2005-2006 U.S. Robotics Corporation
file:///G|/CSO/Documentation/Documentation%20-%20Dra...5454%20Mach-1%20AP/User%20Guide/English/install.html (9 of 9)10/26/2006 9:47:05 AM
Page 15

file:///G|/CSO/Documentation/Documentation%20-%20Draft/Networking/5454%20Mach-1%20AP/User%20Guide/English/config.html
Wireless Nd1 Access Point:
User Guide
● Home
● Installation
● Configuration
● Tutorials
● Help
Configuration Pages
The Wireless Nd1 Access Point provides configuration pages so that you can manage
and monitor the access point from any computer on the network. Under normal
operating conditions, you do not need to change the basic configuration that you
established when you installed your access point. However, if your network
environment changes, you may decide to reconfigure your access point to reflect the
new environment.
The topics below address the following aspects of using the configuration pages:
● Configuring Your Web Browser
● Logging in to the Configuration Pages
● Using the Configuration Pages
Configuring Your Web Browser
file:///G|/CSO/Documentation/Documentation%20-%20Dr...5454%20Mach-1%20AP/User%20Guide/English/config.html (1 of 5)10/26/2006 9:47:05 AM
Page 16

file:///G|/CSO/Documentation/Documentation%20-%20Draft/Networking/5454%20Mach-1%20AP/User%20Guide/English/config.html
You may need to disable the HTTP Proxy feature of your Web browser so the
configuration pages will display the most current information.
Internet Explorer users:
1. Click Tools > Internet Options, and select the Connections tab.
2. Select Never dial a connection, then click Apply.
3. Click OK.
4. Click Tools > Internet Options, and select the Connections tab again.
5. Click the LAN Settings button.
6. Clear all the check boxes and click OK.
7. Click OK again.
Netscape Navigator 8.x users:
1. Click Tools > Options > General.
2. Click the Connection Settings button.
3. Select Direct connection to the Internet, then click OK.
Logging in to the Configuration Pages
If you know the IP address of the access point, simply type it in your Web browser's
location or address line and press ENTER. If you do not know the IP address of the
access point, follow one of the procedures below to find it:
file:///G|/CSO/Documentation/Documentation%20-%20Dr...5454%20Mach-1%20AP/User%20Guide/English/config.html (2 of 5)10/26/2006 9:47:05 AM
Page 17
file:///G|/CSO/Documentation/Documentation%20-%20Draft/Networking/5454%20Mach-1%20AP/User%20Guide/English/config.html
Using the Device Locator (Windows Users Only)
1. Click Windows Start > Programs > USRobotics Network Device Locator.
The locator displays its welcome screen:
2. Click Next.
The locator lists the access point as well as any other USRobotics devices that
were found:
file:///G|/CSO/Documentation/Documentation%20-%20Dr...5454%20Mach-1%20AP/User%20Guide/English/config.html (3 of 5)10/26/2006 9:47:05 AM
Page 18
file:///G|/CSO/Documentation/Documentation%20-%20Draft/Networking/5454%20Mach-1%20AP/User%20Guide/English/config.html
3. Find the Wireless Nd1 Access Point in the list. (If you have more than one
Wireless Nd
1
Access Point, find the device whose MAC address matches the LAN
MAC address on the bottom of the access point that you are trying to access).
Note the IP address associated with the LAN MAC address of the access point.
Manually Finding the IP Address of the Access Point
The networking device to which you connected the access point assigns IP addresses on
your local network. To find the IP address of the access point:
1. Access the configuration program or configuration pages of the networking
device. For detailed instructions, consult the documentation for the networking
device.
2. Find the list of clients associated with the networking device.
3. On the client list, find the LAN MAC address of the access point.
file:///G|/CSO/Documentation/Documentation%20-%20Dr...5454%20Mach-1%20AP/User%20Guide/English/config.html (4 of 5)10/26/2006 9:47:05 AM
Page 19

file:///G|/CSO/Documentation/Documentation%20-%20Draft/Networking/5454%20Mach-1%20AP/User%20Guide/English/config.html
4. Note the IP address associated with the LAN MAC address of the access point.
Using the Configuration Pages
The configuration pages are divided into the functional areas shown on its tabs and
listed below:
● Status
● Security
● Wireless
● LAN
● Device
© 2005-2006 U.S. Robotics Corporation
file:///G|/CSO/Documentation/Documentation%20-%20Dr...5454%20Mach-1%20AP/User%20Guide/English/config.html (5 of 5)10/26/2006 9:47:05 AM
Page 20

file:///G|/CSO/Documentation/Documentation%20-%20Draft/Networking/5454%20Mach-1%20AP/User%20Guide/English/client_connect.html
Wireless Nd1 Access Point: User Guide
● Home
● Installation
● Configuration
● Tutorials
● Help
Connecting a Wireless Client
You can use the SecureEasySetup™ button to connect installed Wireless Nd1 or other certified SecureEasySetup wireless
devices to your access point.
*
If your wireless client has SecureEasySetup, you should see one of the following logos on the device or within the client
utility:
If your wireless client does not support SecureEasySetup, you can manually enter the wireless security settings.
Connecting a Device Using SecureEasySetup
1. Press the SecureEasySetup button on the back of the access point for 1 second. The SecureEasySetup LED on the
front of the access point starts blinking after you release the button.
2. Initiate SecureEasySetup in the client utility for your wireless adapter.
3. The access point and the wireless device synchronise their wireless security settings, and the device is securely
connected to the access point.
Connecting a Device Manually
file:///G|/CSO/Documentation/Documentation%20-%20Dra...Mach-1%20AP/User%20Guide/English/client_connect.html (1 of 2)10/26/2006 9:47:07 AM
Page 21

file:///G|/CSO/Documentation/Documentation%20-%20Draft/Networking/5454%20Mach-1%20AP/User%20Guide/English/client_connect.html
1. Ensure that the wireless adapter to be connected to the network is set to infrastructure mode. For instruction in
changing your adapter's wireless mode, see your wireless adapter's documentation.
2. Set the network name or SSID in the wireless adapter's settings to the Network name that is used on the access
point. You can find the network name for the access point on the
Status page.
3. Ensure that the wireless security settings for the wireless adapter match those that you set on the access point.
You can find the wireless security settings for the access point on the
Status page. For instruction in changing your
adapter's wireless security settings, see your wireless adapter's documentation.
* BROADCOM, SecureEasySetup, and the SecureEasySetup logo are trademarks or registered trademarks of Broadcom
Corporation in the United States and/or other countries.
© 2005-2006 U.S. Robotics Corporation
file:///G|/CSO/Documentation/Documentation%20-%20Dra...Mach-1%20AP/User%20Guide/English/client_connect.html (2 of 2)10/26/2006 9:47:07 AM
Page 22

Wireless Nd1 Router User Guide
Wireless Nd1 Access Point: User Guide
● Home
● Installation
● Configuration
● Tutorials
● Help
Using SecureEasySetup
SecureEasySetup™ makes it easy to connect wireless clients to the access point. SecureEasySetup automatically
configures wireless security settings between the access point and your wireless clients.
*
Access Point or Repeater Mode
If your Wireless Nd1 Access Point Wireless Network Type is set to Access Point or Range Extender mode,
SecureEasySetup transmits SecureEasySetup information, so your wireless clients can execute SecureEasySetup and get
the new Network Name (SSID), method type, encryption type, and pass phrase for your wireless network.
Note: While the access point is in SecureEasySetup configuration mode, you can only configure one
SecureEasySetup device at a time. Attempting to connect multiple devices may result in errors.
When the SecureEasySetup button on the access point is pressed for 1 second:
1. One of the following occurs:
❍ If you do not have any wireless security settings applied to your access point, SecureEasySetup generates a
Network Name (SSID), sets WPA2 and WPA (PSK) wireless security with TKIP and AES encryption, and
generates a pass phrase.
❍ If you already have a Network Name (SSID), WPA2 and WPA (PSK) wireless security with TKIP and
AES encryption, and a pass phrase set on the access point, SecureEasySetup does not change any of these
settings.
❍ If you have another wireless security method or encryption type set on the access point, SecureEasySetup
detects the Network Name (SSID) being used on the access point, then resets your method and encryption
to WPA2 and WPA (PSK) wireless security with TKIP and AES encryption, and generates a pass phrase.
file:///G|/CSO/Documentation/Documentation%20-%20Dr...ng/5454%20Mach-1%20AP/User%20Guide/English/ses.html (1 of 3)10/26/2006 9:47:07 AM
Page 23

Wireless Nd1 Router User Guide
2. SecureEasySetup negotiates with an installed Nd1 or other certified SecureEasySetup wireless device in range that
is in SecureEasySetup mode to pass the wireless security settings to the device.
Pressing the SecureEasySetup button on your access point for 7 seconds resets your wireless security settings to the
factory default, None (no security enabled).
Connect a New Wireless Client Using SecureEasySetup
1. Press the SecureEasySetup button on the access point for 1 second. The SecureEasySetup LED will blink,
indicating that it is ready to connect a SecureEasySetup device.
2. Press the SecureEasySetup button in the utility for your networking device or physically press the
SecureEasySetup button on the networking device.
For wireless adapters, the wireless adapter utility will display a message when the connection has been successfully
completed.
For networking devices with LEDs, the SecureEasySetup LED on the access point will stop blinking when the
SecureEasySetup process has completed on the access point.
Bridge or Infrastructure Mode
If your Wireless Nd1 Access Point Wireless Network Type is set to Bridge or Infrastructure mode, SecureEasySetup
establishes communication and negotiates security between the router or access point.
When the SecureEasySetup button on the access point is pressed for 1 second:
1. SecureEasySetup negotiates with an installed Nd
1
or other certified SecureEasySetup networking device in range
that is also in SecureEasySetup mode.
2. SecureEasySetup automatically configure the access point's wireless security settings and pass phrase for a
connection to the wireless network.
Pressing the SecureEasySetup button on your access point for 7 seconds resets your wireless security settings to the
factory default, None (no security enabled).
Disable SecureEasySteup
file:///G|/CSO/Documentation/Documentation%20-%20Dr...ng/5454%20Mach-1%20AP/User%20Guide/English/ses.html (2 of 3)10/26/2006 9:47:07 AM
Page 24

Wireless Nd1 Router User Guide
Press the SecureEasySetup button on the access point for 7 seconds.
Note: This is not the same as a
restore to factory defaults or a reboot of the access point. The SecureEasySetup
button only affects your wireless security settings.
The SecureEasySetup LED will turn off. The security method and encryption type for your wireless network will be reset
to None. No other settings on your access point will be changed.
* BROADCOM, SecureEasySetup, and the SecureEasySetup logo are trademarks or registered trademarks of Broadcom
Corporation in the United States and/or other countries.
© 2005-2006 U.S. Robotics Corporation
file:///G|/CSO/Documentation/Documentation%20-%20Dr...ng/5454%20Mach-1%20AP/User%20Guide/English/ses.html (3 of 3)10/26/2006 9:47:07 AM
Page 25
file:///G|/CSO/Documentation/Documentation%20-%20Draft/Networking/5454%20Mach-1%20AP/User%20Guide/English/status.html
Wireless Nd1 Access Point:
User Guide
● Home
● Installation
● Configuration
● Tutorials
● Help
Access Point Status Information
From Status page, you can view the current status of your access point and its
features.
Refresh: Click Refresh at the bottom of the page to update the page with the most
current information.
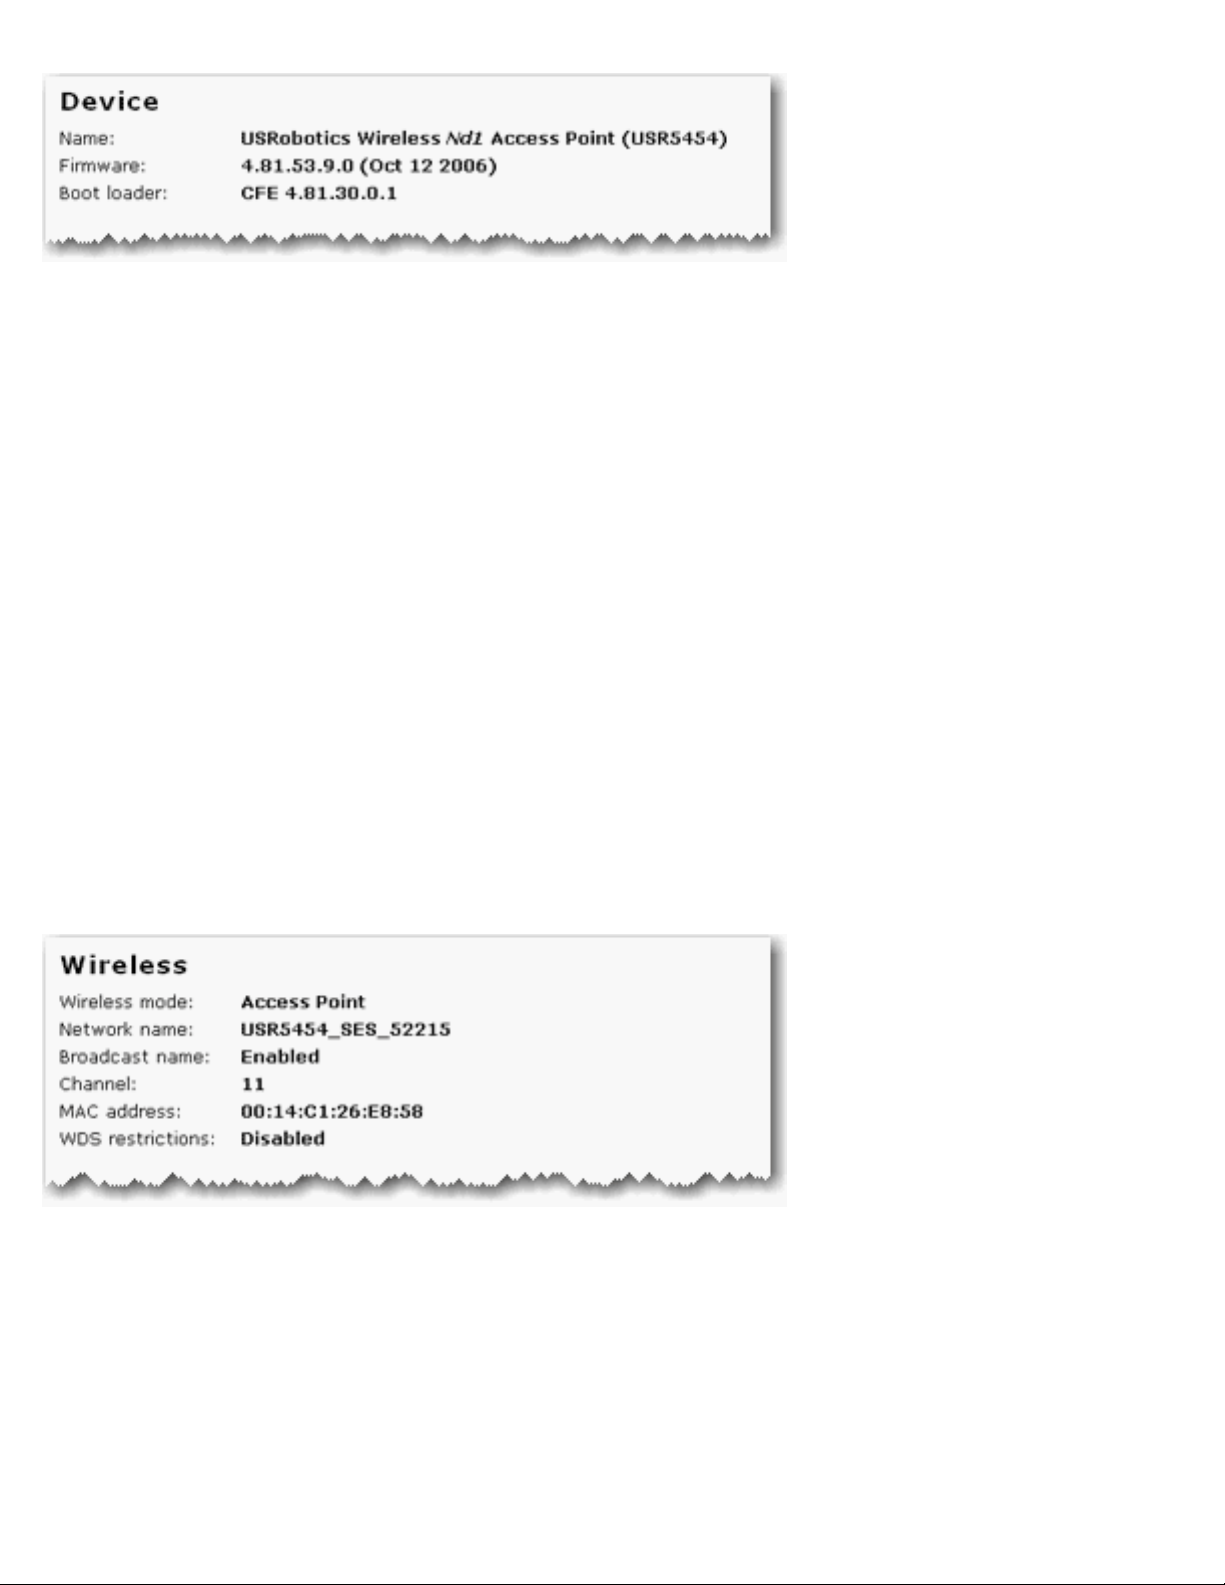
Device
file:///G|/CSO/Documentation/Documentation%20-%20Dr...5454%20Mach-1%20AP/User%20Guide/English/status.html (1 of 5)10/26/2006 9:47:08 AM
Page 26
file:///G|/CSO/Documentation/Documentation%20-%20Draft/Networking/5454%20Mach-1%20AP/User%20Guide/English/status.html
● Name: Displays the name of the access point.
● Firmware: Shows the current firmware version on your access point.
● Boot loader: Displays the boot loader version that is running on your access
point.
Wireless
This displays information on your wireless network settings, including the following:
● Wireless mode: Displays the mode the access point is currently functioning in,
either Access Point, Bridge Mode, Range Extender or Infrastructure. This
file:///G|/CSO/Documentation/Documentation%20-%20Dr...5454%20Mach-1%20AP/User%20Guide/English/status.html (2 of 5)10/26/2006 9:47:08 AM
Page 27

file:///G|/CSO/Documentation/Documentation%20-%20Draft/Networking/5454%20Mach-1%20AP/User%20Guide/English/status.html
can be configured from the Wireless page.
● Network name: Displays the Network name of the access point that is broadcast
for wireless connections. This can be configured from the
Wireless page.
● Broadcast name: Displays the whether the broadcasting of the network name is
Enabled or Disabled. This can be configured from the
Wireless page.
● Channel: Displays the current channel your access point is using, and any side
channel information in parentheses.
Note: If the WDS channel of the networking device that the access
point is connected to changes, the
Status page will continue to
show the old channel information for the access point. Although the
Network list on the
Wireless page will display the selected
network and the correct channel, the change has not yet been
applied to the access point. To update the channel information on
the access point, click Save at the bottom of the
Wireless page.
● MAC address: Displays the wireless (WLAN) MAC address of the access point.
● WDS restrictions: Displays the status of WDS restrictions on the access point,
either Enabled or Disabled.
● Access Points(s) (Bridge and Range Extender modes only): Displays the MAC
address of the networking device to which the Wireless Nd
1
Access Point is
connected.
● Associated network (Infrastructure mode only): Displays the network name for
the network to which the Wireless Nd
1
Access Point is connected.
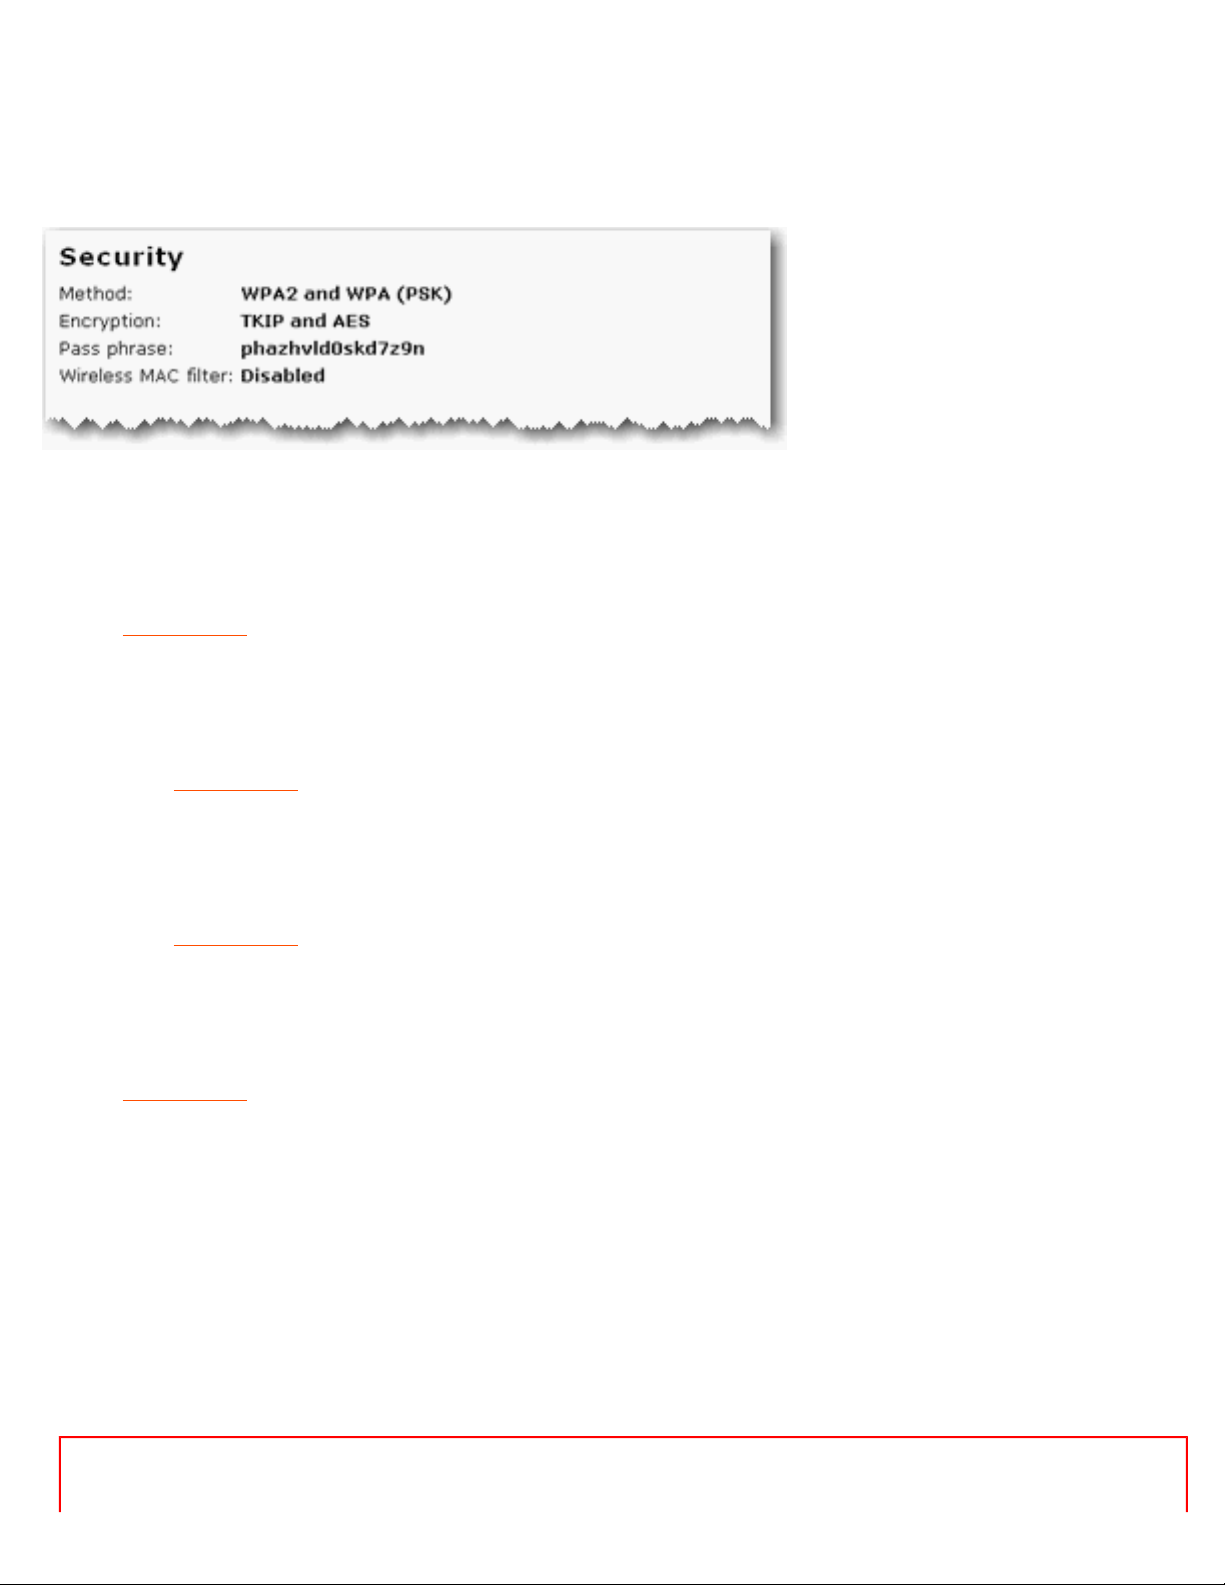
Security
file:///G|/CSO/Documentation/Documentation%20-%20Dr...5454%20Mach-1%20AP/User%20Guide/English/status.html (3 of 5)10/26/2006 9:47:08 AM
Page 28
file:///G|/CSO/Documentation/Documentation%20-%20Draft/Networking/5454%20Mach-1%20AP/User%20Guide/English/status.html
This section displays the current wireless security settings for your access point.
● Method: The security method and security settings (Encryption, Pass phrase,
Key, etc.) for your access point. This information can be configured from the
Wireless page.
● Encryption: The security method and security settings (Encryption, Pass
phrase, Key, etc.) for your access point. This information can be configured from
the
Wireless page.
● Pass Phrase: The security method and security settings (Encryption, Pass
phrase, Key, etc.) for your access point. This information can be configured from
the
Wireless page.
● Wireless MAC filter: Displays whether the wireless MAC Filter is Enabled or
Disabled on your network. This information can be configured from the
Wireless page.
Clients
Note: Any devices connected to the access point that have static IP addresses
file:///G|/CSO/Documentation/Documentation%20-%20Dr...5454%20Mach-1%20AP/User%20Guide/English/status.html (4 of 5)10/26/2006 9:47:08 AM
Page 29

file:///G|/CSO/Documentation/Documentation%20-%20Draft/Networking/5454%20Mach-1%20AP/User%20Guide/English/status.html
will not show up in the Clients list. Also, devices that are connected through a
WDS connection will be displayed as wired clients.
● MAC Address: The MAC address of the connected device.
● Association Time: The timeframe before the lease will expire for the connected
device.
● Authorized: If the client is authorized to connect to this gateway, the status will
display as Yes. If the client is not authorised to connect to the gateway, the
status will display as No.
● WMM Link: If the client supports WMM, the status will display as Yes. If the
client does not support WMM, the status will display as No.
● Power Save: If the client is running in Power Save mode, the status will display
as Yes. If the client is not in Power Save mode, the status will display as No.
© 2005-2006 U.S. Robotics Corporation
file:///G|/CSO/Documentation/Documentation%20-%20Dr...5454%20Mach-1%20AP/User%20Guide/English/status.html (5 of 5)10/26/2006 9:47:08 AM
Page 30
file:///G|/CSO/Documentation/Documentation%20-%20Draft/Networking/5454%20Mach-1%20AP/User%20Guide/English/security.html
Wireless Nd1 Access Point:
User Guide
● Home
● Installation
● Configuration
● Tutorials
● Help
Security Settings
The Security page lets you configure and change the security settings for the access point,
including your wireless security settings, MAC address filtering options, and login
information.
Access Point Login
This displays the current user name and password assigned to the access point. To change
your user name and/or password, enter the new user name and password and click Save at
the bottom of the page. You will need to log in to your access point with the new user name
and password.
file:///G|/CSO/Documentation/Documentation%20-%20Dr...54%20Mach-1%20AP/User%20Guide/English/security.html (1 of 4)10/26/2006 9:47:09 AM
Page 31

file:///G|/CSO/Documentation/Documentation%20-%20Draft/Networking/5454%20Mach-1%20AP/User%20Guide/English/security.html
Password Rules:
1. The Wireless Nd1 access point lets you set a password up to 15 characters long. The
most secure passwords are usually between 8 and 15 characters long.
2. The access point will allow you to enter a space or other punctuation in your
password.
3. Use a mixture of upper (A through Z) and lower (a through z) case letters.
4. Adding numbers 0 through 9 to a password increases security.
5. Use ASCII symbols, such as ~ ! @ # $ % & ^ *, etc, to further increase the security
of your password.
MAC Filter
In this area you can control which wireless devices are allowed or denied access to the
access point based upon their MAC addresses. The MAC address can usually be found either
on a label on the external wireless product or in the configuration utility of the wireless
client, depending on the wireless device you are using.
file:///G|/CSO/Documentation/Documentation%20-%20Dr...54%20Mach-1%20AP/User%20Guide/English/security.html (2 of 4)10/26/2006 9:47:09 AM
Page 32

file:///G|/CSO/Documentation/Documentation%20-%20Draft/Networking/5454%20Mach-1%20AP/User%20Guide/English/security.html
The access point configuration pages let you configure access to the access point based on
MAC addresses by using the Allow Current Clients button or specify a level of filter to
apply:
● Click Allow Current Clients to allow all of the wireless clients currently connected to
the access point to be allowed access to the access point in the future. By default, the
filter setting of Allow only these devices will then be applied.
● Allow all devices: Any wireless client that has the correct security information will
be allowed to connect to the access point. This is the default setting.
● Allow only these devices: Allows only devices with specific MAC addresses to
establish a wireless connection with the access point.
1. Enter the MAC address of the device that should be allowed connection to the
access point.
2. Click Add.
● Deny only these devices: Denies a wireless connection to the access point for
devices with the specified MAC addresses. This can be used if you notice unauthorised
wireless devices that are connected to your network.
1. Enter the MAC address of the device that should be denied connection to the
access point.
file:///G|/CSO/Documentation/Documentation%20-%20Dr...54%20Mach-1%20AP/User%20Guide/English/security.html (3 of 4)10/26/2006 9:47:09 AM
Page 33

file:///G|/CSO/Documentation/Documentation%20-%20Draft/Networking/5454%20Mach-1%20AP/User%20Guide/English/security.html
2. Click Add.
Note: You need to click Save to save all your new settings and reboot the access
point after you have completed all your changes.
© 2005-2006 U.S. Robotics Corporation
file:///G|/CSO/Documentation/Documentation%20-%20Dr...54%20Mach-1%20AP/User%20Guide/English/security.html (4 of 4)10/26/2006 9:47:09 AM
Page 34

file:///G|/CSO/Documentation/Documentation%20-%20Draft/Networking/5454%20Mach-1%20AP/User%20Guide/English/lan.html
Wireless Nd1 Access Point:
User Guide
● Home
● Installation
● Configuration
● Tutorials
● Help
Local Area Network (LAN) Settings
From the LAN page, you can view and modify the Local Area Network (LAN) settings of the
access point. These settings apply only to your local network.
IP Address
You can set the IP address as Dynamic or Static.
file:///G|/CSO/Documentation/Documentation%20-%20Dr...ng/5454%20Mach-1%20AP/User%20Guide/English/lan.html (1 of 3)10/26/2006 9:47:09 AM
Page 35

file:///G|/CSO/Documentation/Documentation%20-%20Draft/Networking/5454%20Mach-1%20AP/User%20Guide/English/lan.html
● Dynamic: Select this option if your access point will obtain an IP address from a
DHCP server on the network.
● Static: Select this option if the access point to have a specific IP address or your
network cannot assign an IP address using DHCP. Enter your new IP Address,
Gateway, DNS Server, and Subnet mask and click Save at the bottom of the page.
When you change the IP address of your access point, you may need to reboot your wireless
clients after the access point reboots with its new IP address.
file:///G|/CSO/Documentation/Documentation%20-%20Dr...ng/5454%20Mach-1%20AP/User%20Guide/English/lan.html (2 of 3)10/26/2006 9:47:09 AM
Page 36

file:///G|/CSO/Documentation/Documentation%20-%20Draft/Networking/5454%20Mach-1%20AP/User%20Guide/English/lan.html
© 2005-2006 U.S. Robotics Corporation
file:///G|/CSO/Documentation/Documentation%20-%20Dr...ng/5454%20Mach-1%20AP/User%20Guide/English/lan.html (3 of 3)10/26/2006 9:47:09 AM
Page 37

Wireless Nd1 Router User Guide
Wireless Nd1 Access Point:
User Guide
● Home
● Installation
● Configuration
● Tutorials
● Help
Wireless Settings
In this section you can enable the wireless security features. USRobotics strongly
recommends that you enable some form of wireless security so that unauthorised clients are
not able to access your network.
Note: Depending on your settings, some items may not appear on your access point
configuration pages for options that you connection does not support.
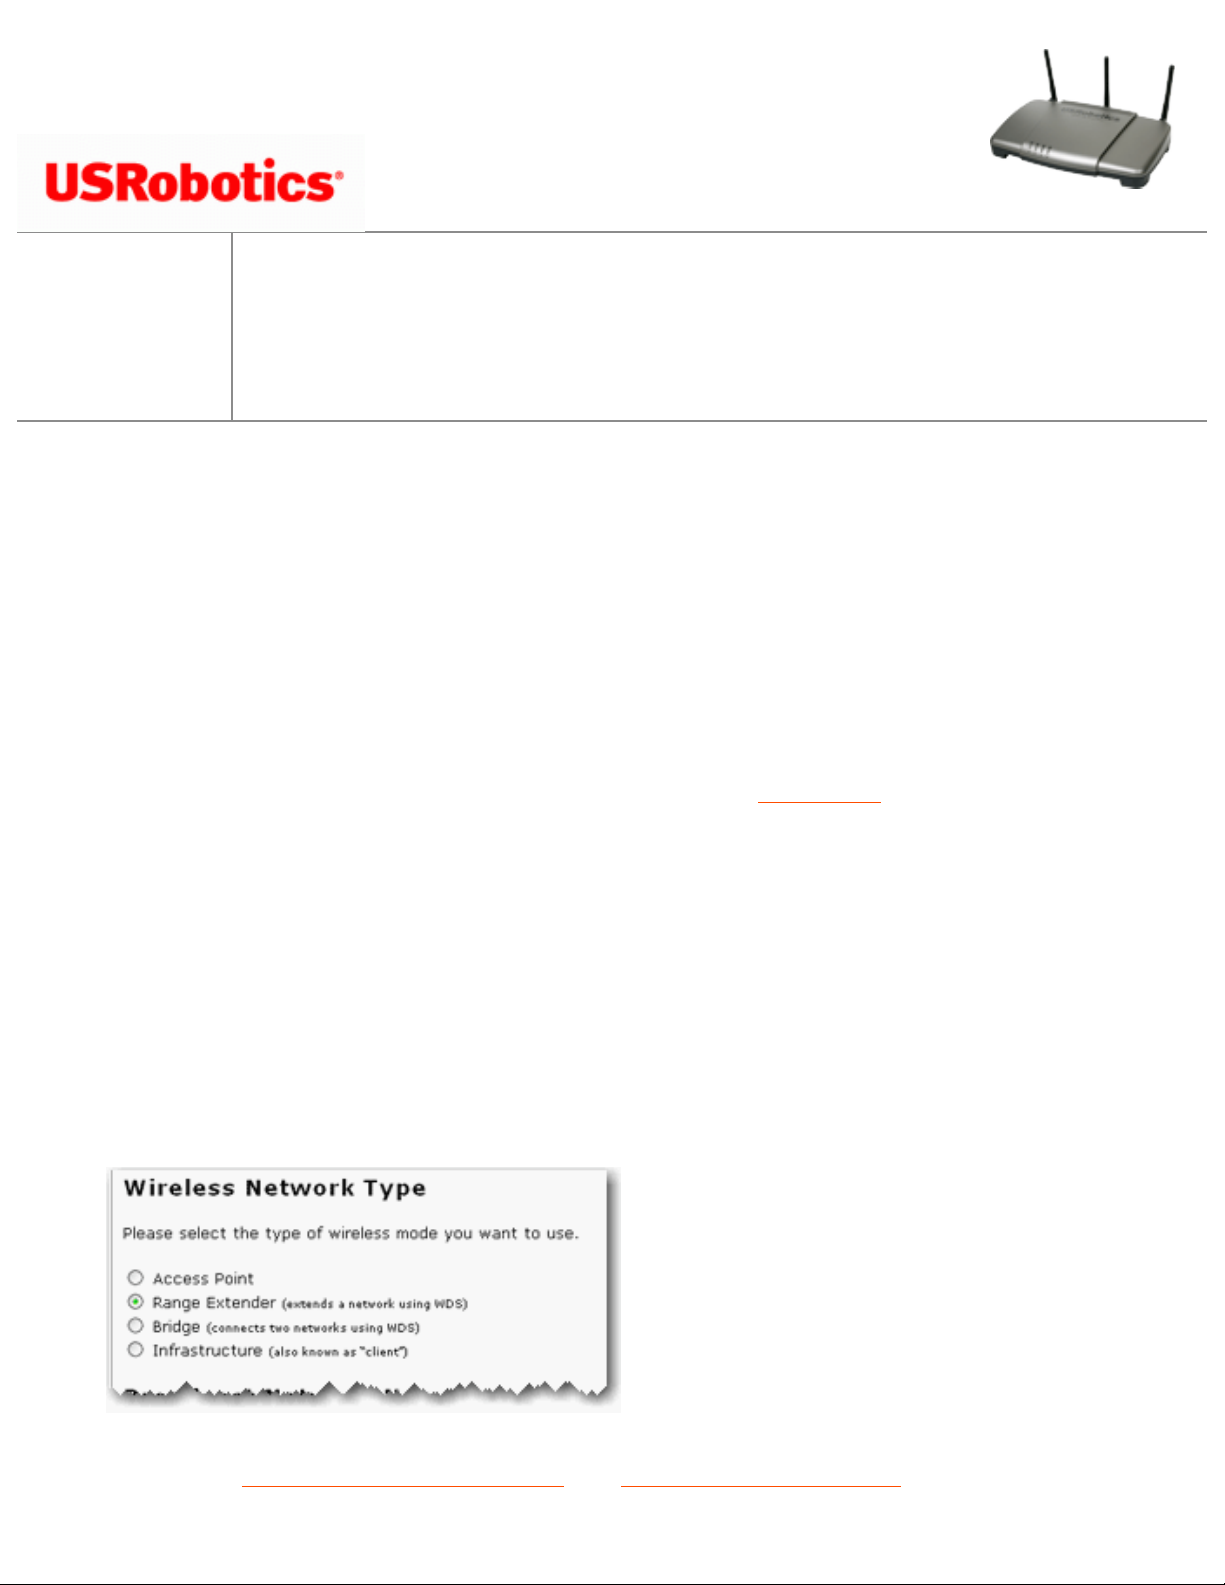
Wireless Network Type
Select the wireless network type for the the access point to run.
file:///G|/CSO/Documentation/Documentation%20-%20Dr...54%20Mach-1%20AP/User%20Guide/English/wireless.html (1 of 17)10/26/2006 9:47:10 AM
Page 38

Wireless Nd1 Router User Guide
● Access Point: Select this option if you will be using the access point as a traditional
access point.
● Range Extender: Select this option if you will be using the access point to extend the
range of an existing network.
● Bridge: Select this option if you will be using the access point to connect two WDS
networks together.
● Infrastructure: Select this option if you will be using the access point to connect a
computer or other networking device to an existing wireless network.
Broadcast Network Name
Select Broadcast network name if you want wireless devices to be able to detect your
access point when they perform a site scan.
If you deselect Broadcast network name, wireless devices will not be able to detect your
wireless network during a site scan. Devices will have to manually enter the Network Name
(SSID) of your access point to connect.
file:///G|/CSO/Documentation/Documentation%20-%20Dr...54%20Mach-1%20AP/User%20Guide/English/wireless.html (2 of 17)10/26/2006 9:47:10 AM
Page 39

Wireless Nd1 Router User Guide
Access Point Isolation
If the access point will be used in a public place where you do not want any wireless clients
to be able to share files or printers between themselves, select Access point isolation.
With this selected, all of the wireless clients will only be able to access the Internet. An
example of a situation where you would want to enable this feature is in a public hotspot,
such as a coffee shop or hotel. This feature is disabled by default.
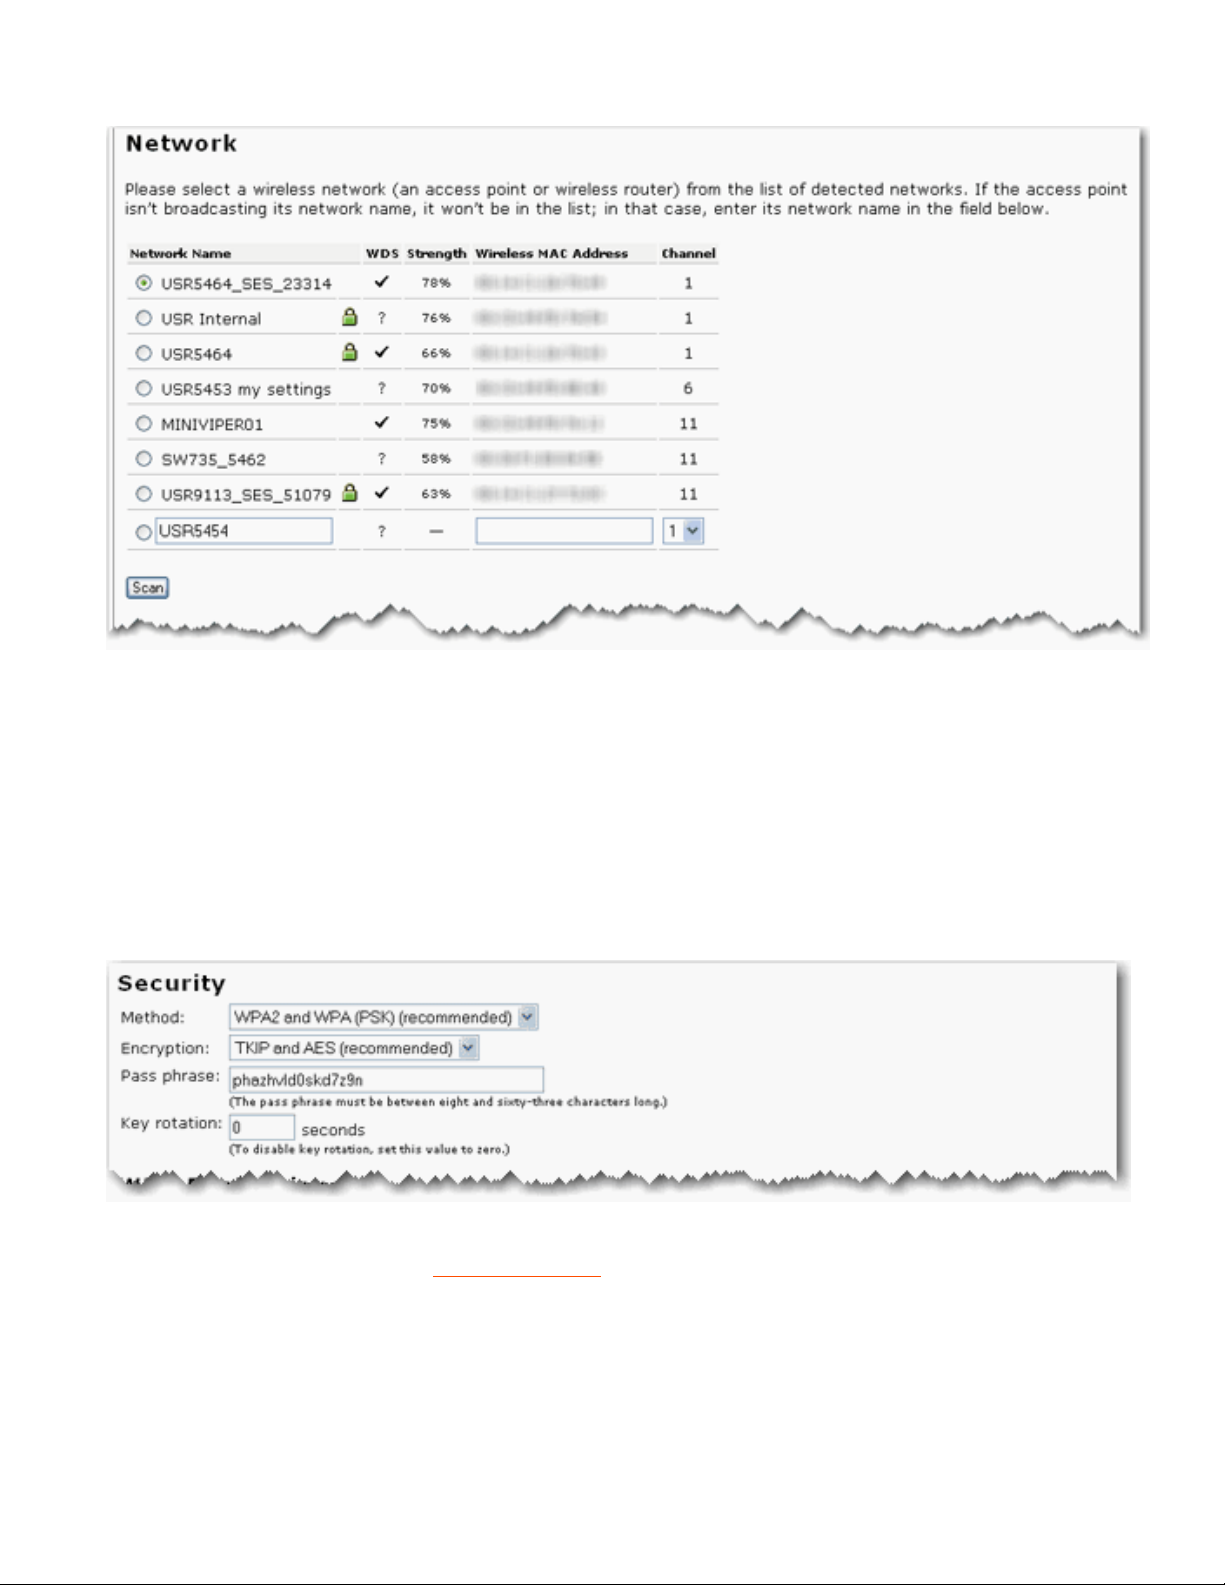
Network
Select the network that the access point should connect to.
file:///G|/CSO/Documentation/Documentation%20-%20Dr...54%20Mach-1%20AP/User%20Guide/English/wireless.html (3 of 17)10/26/2006 9:47:10 AM
Page 40

Wireless Nd1 Router User Guide
If the network is not in the list, click Scan to perform a site scan and refresh your network
list, or manually enter the Network Name, Wireless MAC address and select the
Channel for the network you want to connect to, then select that network.
Network Name (SSID)
Note: If you used SecureEasySetup to configure your wireless security settings,
changing the Network Name or other security settings for your access point will
cause your connected wireless clients to loose connectivity with the access point.
Wireless clients use the Network name (SSID) to connect to your access point.
file:///G|/CSO/Documentation/Documentation%20-%20Dr...54%20Mach-1%20AP/User%20Guide/English/wireless.html (4 of 17)10/26/2006 9:47:10 AM
Page 41

Wireless Nd1 Router User Guide
The default Network name of the access point is USR5464. If you want to use multiple
Wireless Nd
1
access points independently, you must configure a unique Network name for
each access point.
Note: If you are using multiple Wireless Nd
1
access points and you want them to
use independently, each access point will need a unique Network name.
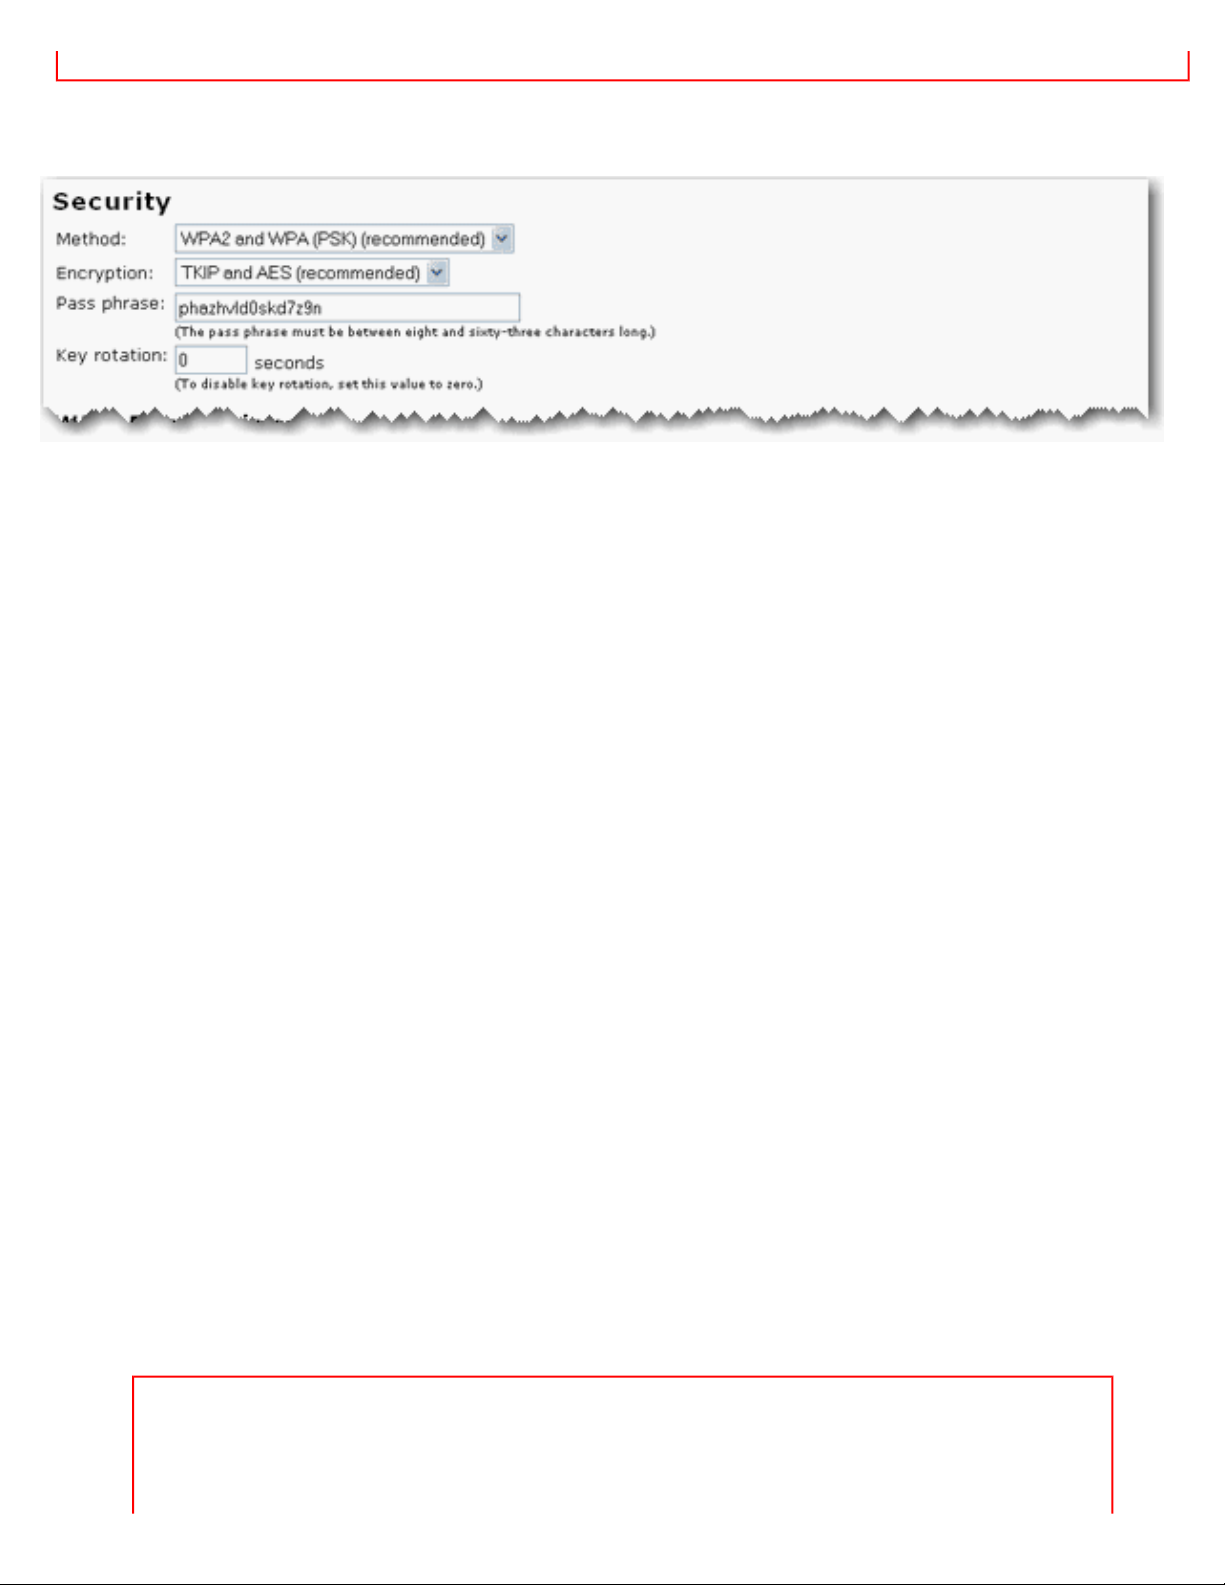
Security
Note: All the wireless devices you want to connect to the network must have the
same
wireless security settings including the pass phrase or key that you use to
secure your wireless network.
In this section you can enable the wireless security features. USRobotics strongly
recommends that you enable some form of wireless security so that unauthorised clients are
not able to access your network. All the wireless devices you want to connect to the network
must have the same security settings including the pass phrase or key that you use to
secure your wireless network.
Note: For your wireless security settings, it is recommended that you select the
WPA2 and WPA (PSK) or WPA2 and WPA with 802.1x (RADIUS) wireless
security method using TKIP and AES encryption for the most secure wireless
network.
file:///G|/CSO/Documentation/Documentation%20-%20Dr...54%20Mach-1%20AP/User%20Guide/English/wireless.html (5 of 17)10/26/2006 9:47:10 AM
Page 42
Wireless Nd1 Router User Guide
Select the encryption Method that you want the wireless network to use. You can select
from the following methods and enter the pass phrase or key:
● WPA2 and WPA (PSK): You need to set your Encryption type to TKIP and AES,
AES, or TKIP. You will then need to enter a Pass phrase (which is also commonly
called a Network key, WPA key, or WPA Pre-shared key). The pass phrase must be
between eight and sixty-three characters in length. This pass phrase must be the
same on each computer that is connected to the wireless network. You can also
specify a Key rotation, in seconds, or enter 0 in the field to disable the option.
● WPA2 (PSK): You need to set your Encryption type to AES or TKIP. You will then
need to enter a Pass phrase (which is also commonly called a Network key, WPA
key, or WPA Pre-shared key). The pass phrase must be between eight and sixty-three
characters in length. This pass phrase must be the same on each computer that is
connected to the wireless network.
● WPA (PSK): You need to set your Encryption type to TKIP and AES, AES, or
TKIP. You will then need to enter a Pass phrase (which is also commonly called a
Network key, WPA key, or WPA Pre-shared key). The pass phrase must be between
eight and sixty-three characters in length. This pass phrase must be the same on each
computer that is connected to the wireless network.
Note: Not all wireless clients support AES encryption when using WPA
(PSK) security. TKIP encryption with WPA (PSK) is supported by most
wireless clients. You can assign the access point WPA (PSK) security
file:///G|/CSO/Documentation/Documentation%20-%20Dr...54%20Mach-1%20AP/User%20Guide/English/wireless.html (6 of 17)10/26/2006 9:47:10 AM
Page 43

Wireless Nd1 Router User Guide
with the TKIP and AES encryption to cover both AES and TKIP clients.
● WEP open: You need to set your Key type to 128-bit ASCII, 128-bit hex, 64-bit
ASCII or 64-bit hex. Then, enter the Key (which is also commonly called a Network
key). The Key must be 13 characters long for a 128-bit ASCII key type, 26 characters
long for a 128-bit hex key type, and 5 characters long for a 64-bit ASCII key type or
10 characters long for a 64-bit hex key type.
● WEP shared: You need to set your Key type to 128-bit ASCII, 128-bit hex, 64-
bit ASCII or 64-bit hex. Then, enter the Key (which is also commonly called a
Network key). The Key must be 13 characters long for a 128-bit ASCII key type, 26
characters long for a 128-bit hex key type, and 5 characters long for a 64-bit ASCII
key type or 10 characters long for a 64-bit hex key type.
● WPA2 and WPA with 802.1x (RADIUS): You need to set your Encryption type to
TKIP and AES, AES or TKIP. Then you need to enter the RADIUS server IP
address and RADIUS Port. You will then need to enter the RADIUS key.
● WPA2 with 802.1x (RADIUS): You need to set your Encryption type to TKIP and
AES, AES or TKIP. Then you need to enter the RADIUS server IP address and
RADIUS Port. You will then need to enter the RADIUS key.
● WPA with 802.1x (RADIUS): You need to set your Encryption type to AES or
TKIP. Then you need to enter the RADIUS server IP address and RADIUS Port.
You will then need to enter the RADIUS key.
Note: Not all wireless clients support AES encryption when using WPA
(PSK) security. TKIP encryption with WPA is supported by most wireless
clients.
● None: This disables all wireless security on your access point.
Note: The setting of None is not recommended since without any
encryption enabled, your network will be vulnerable to outside malicious
attacks.
file:///G|/CSO/Documentation/Documentation%20-%20Dr...54%20Mach-1%20AP/User%20Guide/English/wireless.html (7 of 17)10/26/2006 9:47:10 AM
Page 44

Wireless Nd1 Router User Guide
WDS Restrictions
USRobotics routers and access points are capable of using a feature known as WDS
(Wireless Distribution System) which allows the wireless router or access point to connect
directly to another wireless router or access point, while still allowing wireless clients to
connect to the network.
If you select I want to specify the devices that can connect to this one, you will need
to enter the MAC addresses of the wireless routers or access points that will connect to this
access point and click the Add button.
file:///G|/CSO/Documentation/Documentation%20-%20Dr...54%20Mach-1%20AP/User%20Guide/English/wireless.html (8 of 17)10/26/2006 9:47:10 AM
Page 45

Wireless Nd1 Router User Guide
To delete an existing WDS mapping, click the Delete button next to the MAC Address.
WDS allows you to use multiple access points or wireless routers to connect several
separate networks together. By connecting an access point or wireless router to each
network and enabling the WDS feature, the wireless clients in the immediate area will be
able to connect to the wireless network while a bridge would also be created to another
access point or wireless router that is further away. The wireless access point and the
wireless product that you will be creating a bridge with will need to have the same channel
selected, the same Network Name (SSID), same wireless security settings, as well as the
MAC address of the other device entered in the WDS Restrictions table. Enabling the WDS
Restrictions option allows you to enter the MAC addresses of the access points or wireless
routers that will be capable of connecting to each point of the wireless network that you
have created. This will then limit exactly who has access to the wireless network.
One thing to note about this type of wireless network is that the throughput may be reduced
for the bridging portion. Therefore, bridged routers or access points that also allow wireless
clients to connect to the network should not be used for high-volume traffic. Some examples
of the type of situations where you might want this type of network would be for security
cameras, to provide network access to certain parts of a building that might not be able to
be connected using wires, or to provide short-term network access to a conference area.
file:///G|/CSO/Documentation/Documentation%20-%20Dr...54%20Mach-1%20AP/User%20Guide/English/wireless.html (9 of 17)10/26/2006 9:47:10 AM
Page 46

Wireless Nd1 Router User Guide
If you enable Bridge mode and WDS Restrictions in the wireless access point, a bridge
will be created to another wireless router or access point and no wireless clients will be able
to connect to the wireless network. This is generally used when you want to connect two
networks that are in different buildings. Each wireless router or access point will have to
have the MAC address of the other device entered in the WDS Restrictions table.
The access point’s WDS connections do not support: WPA2 (PSK) or any of the RADIUS
security methods, nor TKIP and AES encryption.
If your access point is set with one of the following security methods and encryption types,
all WDS connections to the access point should use WPA-PSK (TKIP):
● WPA2 (PSK) with TKIP and AES
● WPA2 (PSK) with TKIP
● WPA (PSK) with TKIP and AES
● WPA (PSK) with TKIP
If your access point is set with one of the following security methods and encryption types,
all WDS connections to the access point should use WPA (PSK) with AES:
● WPA2 (PSK) with AES
● WPA (PSK) with AES
In both of these cases, the Pass phrase (which is also commonly called a Network key,
key, or Personal shared key) you entered for the wireless security on your access point will
be also used as the Personal Shared Key (PSK) for WDS connections. However, all wireless
clients connecting to the access point should continue to use the same security method and
file:///G|/CSO/Documentation/Documentation%20-%20D...4%20Mach-1%20AP/User%20Guide/English/wireless.html (10 of 17)10/26/2006 9:47:10 AM
Page 47
Wireless Nd1 Router User Guide
encryption type that you configured on your access point.
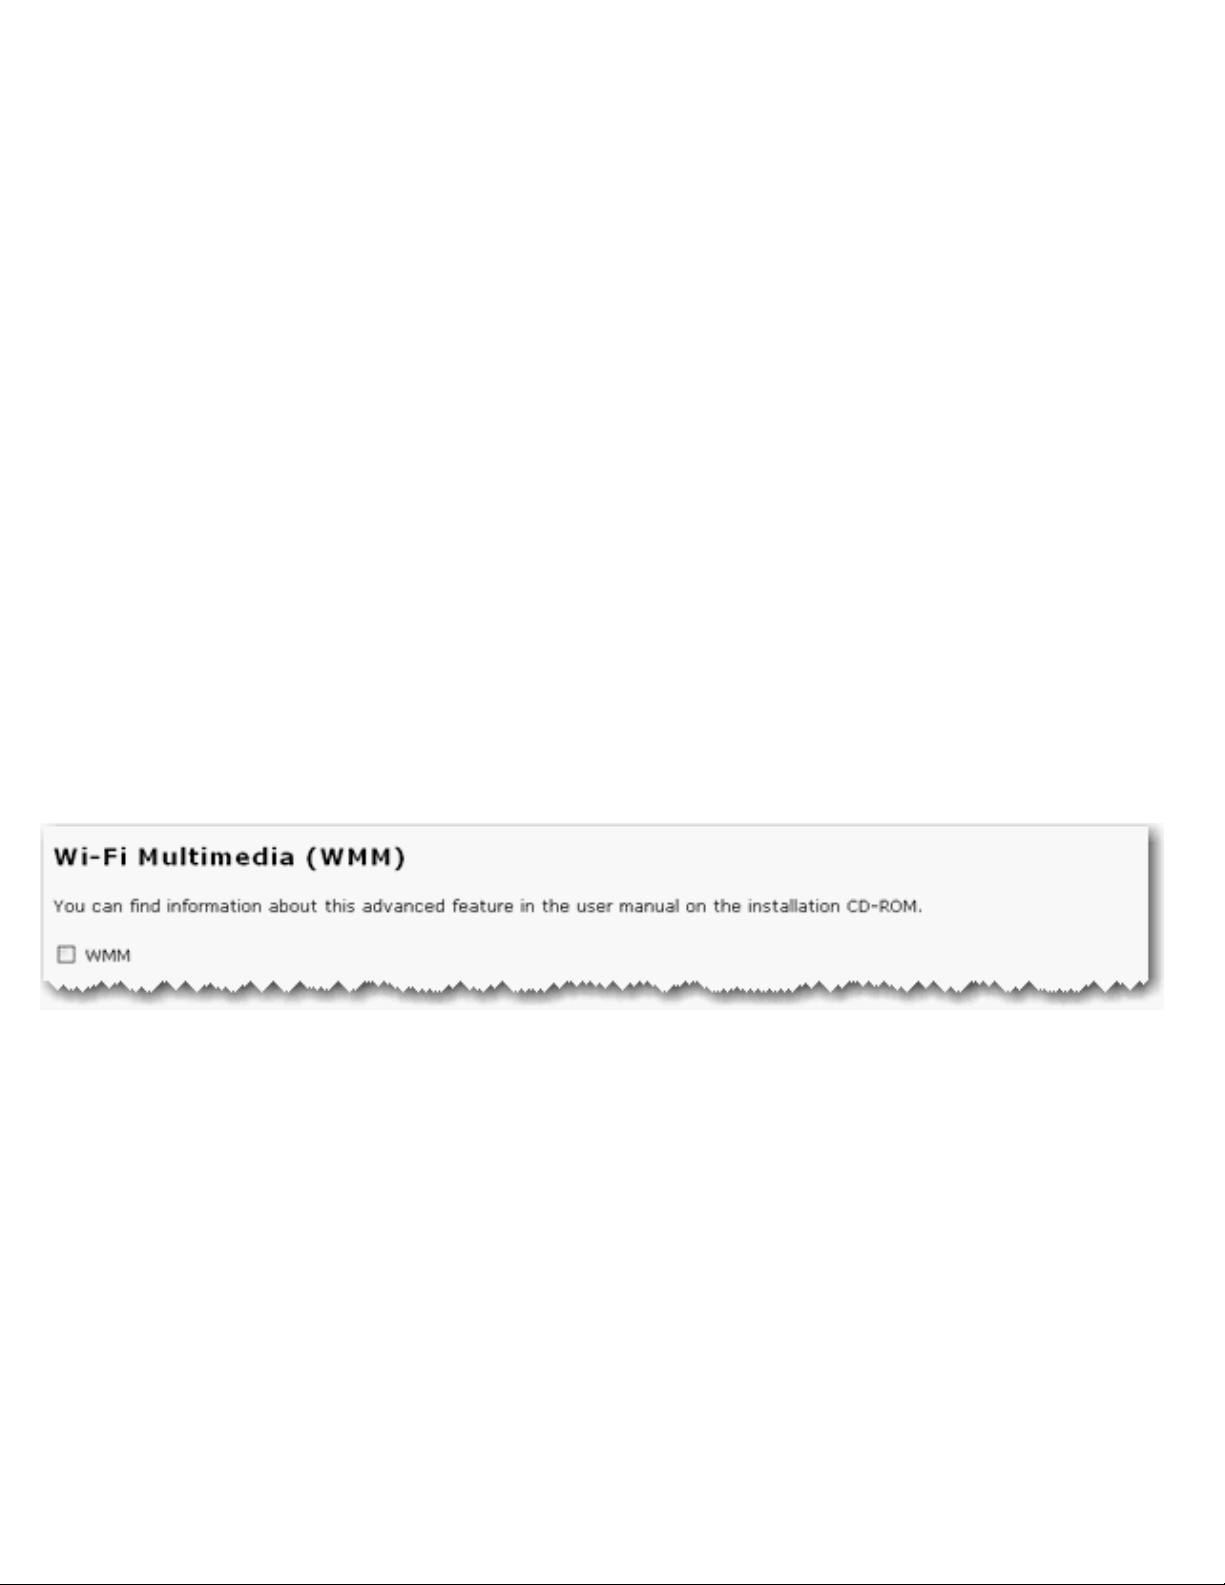
Wi-Fi Multimedia (WMM)
This feature is disabled by default. If you want to enable this feature, select the checkbox
next to Enable WMM (Wi-Fi Multimedia). The other devices that you are connecting to in
order to use this feature must also support WMM and have it enabled.
This feature enables the Quality of Service (QoS) function that is used for multimedia
applications, such as Voice-over-IP (VoIP) and video. This allows the network packets of the
multimedia application to have priority over regular data network packets, allowing
multimedia applications to run smoother and with fewer errors.
If you enable WMM, you can then select Enable no-acknowledgement. NoAcknowledgement refers to the acknowledge policy used at the MAC level. Enabling noacknowledgement can result in more efficient throughput but higher error rates in a noisy
Radio Frequency (RF) environment.
file:///G|/CSO/Documentation/Documentation%20-%20D...4%20Mach-1%20AP/User%20Guide/English/wireless.html (11 of 17)10/26/2006 9:47:10 AM
Page 48

Wireless Nd1 Router User Guide
With WMM enabled, you can also select Enable APSD (Automatic Power Save Delivery).
APSD manages radio usage for battery-powered devices to allow longer battery life in
certain conditions. APSD allows a longer beacon interval until an application requiring a
short packet exchange interval starts. Voice Over Internet Protocol (VoIP) is an example of
application requiring a short packet exchange interval. APSD affects radio usage and battery
life only if the wireless client also supports APSD.
Note: 802.11n mode does not support WMM, and the Acceleration option MAXg
(125 Mbps) is incompatible with WMM. You must change the 802.11n mode to
Off and set the Acceleration option to 54g+ (Xpress™) to enable WMM.
Transmission
The fields in this area are for more advanced wireless features that most people do not need
to change. If you do want to change any of these settings, write down the default settings
before you make any changes in case you experience any problems and need to change
these settings back.
file:///G|/CSO/Documentation/Documentation%20-%20D...4%20Mach-1%20AP/User%20Guide/English/wireless.html (12 of 17)10/26/2006 9:47:10 AM
Page 49

Wireless Nd1 Router User Guide
Control and Extension Channels
Control and the secondary extension channels are only applicable if your access point is
operating at 40 MHz bandwidth and the 802.11n mode is configured as Automatic.
For US channels:
Control Channel Sideband Extension Channel
1 - 7 Lower Channel number + 4
5 - 11 Upper Channel number - 4
For European channels:
Control Channel Sideband Extension Channel
1 - 9 Lower Channel number + 4
5 - 13 Upper Channel number - 4
Example: If your control channel is set to 1, the extension channel will be
transmitted on channel 5. The total bandwidth of the signals on channel 1 and 5
equals 40 MHz.
Example: If your control channel is set to 11, the extension channel will be
transmitted on channel 6. The total bandwidth of the signals on channel 11 and
7 equals 40 MHz.
file:///G|/CSO/Documentation/Documentation%20-%20D...4%20Mach-1%20AP/User%20Guide/English/wireless.html (13 of 17)10/26/2006 9:47:10 AM
Page 50

Wireless Nd1 Router User Guide
● Multicast rate: Specify the rate at which multicast packets are transmitted and
received on your wireless network. Multicast packets are used to send a single
message to a set of recipients in a defined group. Teleconferencing, videoconferencing
and group email are some examples of multicast applications. Specifying a high
multicast rate may improve performance of multicast features. The rates are in Mbps.
You can select Automatic, 1, 2, 5.5, 6, 9, 11, 12, 18, 24, 36, 48, 54.
● Power level: Select either 100%, 50%, or 25% from the drop-down menu. The
Power level sets the strength of the wireless signal that the access point transmits.
You would want a lower setting if you live in an area where your wireless signal could
be overlapping with other wireless networks and want to reduce the interference you
encounter.
● Control channel: Sets the channel on which the access point operates. If you are
experiencing interference or wireless network problems, changing the channel may
solve the issue. It is recommended that you keep the control channel set at
"Automatic" to avoid interference with adjacent networks.
file:///G|/CSO/Documentation/Documentation%20-%20D...4%20Mach-1%20AP/User%20Guide/English/wireless.html (14 of 17)10/26/2006 9:47:10 AM
Page 51

Wireless Nd1 Router User Guide
● 802.11n mode: You can select Automatic, or Off. Automatic enables 802.11n
support, and Off will disable 802.11n support.
● Bandwidth: Specify radio frequency bandwidth, either 20MHz or 40MHz (dual
channel), that the access point will use if 802.11n mode is configured as Automatic.
If the access point detects other adjacent wireless networks, it will use 20 MHz
operation so as to not interfere with the networks. If there no other adjacent networks
are detected, the access point will use 40MHz operation.
In both 20 MHz and 40 MHz operation, when the 802.11n mode is configured to
Automatic, the router will use dynamic channel selection to determine the best
channels to transmit in order for optimal operation.
● Sideband for control channel mode: Displays which sideband the access point is
using for the control channel, either Upper or Lower. Sideband channels are only
applicable if your access point is operating at 40 MHz bandwidth and the 802.11n
mode is configured as Automatic.
● NPHY rate: Set the Physical Layer (NPHY) rate. These rates are only applicable when
the 802.11n mode is configured as Automatic.
● Automatic 802.11n protection: If you select this option, the access point will use
Request to Send/Clear to Send (RTS/CTS) to improve the performance in 802.11
mixed environments. If this is not selected, the 802.11 performance will be
maximized under most conditions while the other 802.11 modes (802.11b, etc.) will
be secondary.
● Legacy rate: Set the Physical Layer rate. This option is only visible when 802.11n
mode is turned Off.
● Basic rate set: Select the basic rate that wireless clients must support, either
Default, All, or 1 & 2 Mbps.
● Acceleration: Select None, 54g+ (Xpress™), or MAXg (125 Mbps). These
features determine either normal speed rates or accelerated rates. Set the mode to
54g+ (Xpress™) for the widest compatibility. Set the mode to None if you are
experiencing difficulty with legacy 802.11b/g equipment. MAXg (125 Mbps) will only
work with MAXg wireless clients.
● Enable VLAN priority mode: When selected, the access point will advertise packet
priority using the VLAN tag.
file:///G|/CSO/Documentation/Documentation%20-%20D...4%20Mach-1%20AP/User%20Guide/English/wireless.html (15 of 17)10/26/2006 9:47:10 AM
Page 52

Wireless Nd1 Router User Guide
● Beacon Interval: The amount of time between beacon transmissions. A beacon is
basically a heartbeat for a wireless client or access point, sending out a signal
informing the network that it is still active. This should be set between 1 and 1000
milliseconds. The default beacon interval is 100 ms.
● RTS threshold: The RTS Threshold is the minimum size in bytes for which the
Request to Send/Clear to Send (RTS/CTS) channel contention mechanism is used. In
a network with significant radio interference or large number of wireless devices on
the same channel, reducing the RTS Threshold might help in reducing frame loss. The
RTS threshold is 2347 bytes by default, which is the maximum value.
● Fragmentation threshold: The maximum level the access point will reach when
sending information in packets before the packets are broken up in fragments.
Typically, if you are experiencing problems sending information, it is because there is
other traffic on the network and the data being transmitted is colliding. This might be
corrected by the information being broken into fragments. The lower the level that the
Fragmentation threshold is set to, the smaller a packet has to be before it is broken
into fragments. If the maximum is set (2346), fragmentation is essentially disabled.
You should only change this level if you are an advanced user.
● DTIM Interval: This parameter configures the amount of time after which buffered
broadcast and multicast frames will be delivered to the wireless clients. This allows
mobile stations to conserve power. If you are using applications which use broadcast
or multicast frames for delivering data, you should use a Delivery Traffic Indication
Message (DTIM) Interval of 1 to minimize delay for real-time traffic, such as multicast
audio and video streams.
● Preamble: Defines the length of the Cyclic Redundancy Check (CRC) block for
communication between the access point and wireless clients. The preamble consists
of the Synchronization and Start Frame Delimiter (SFD) fields. The sync field is used
to indicate the delivery of a frame to wireless stations, to measure frequency of the
radio signal, to perform corrections if needed. The SFD at the end of the Preamble is
used to mark the start of the frame.
If you are not using any 802.11b devices in your network, you can configure the
Preamble type to Short for optimum performance. The Long Preamble type should be
used when both 802.11g and 802.11b devices exist on your network.
Note: Click Save to apply all your new settings and reboot the access point after
you have completed all your changes.
file:///G|/CSO/Documentation/Documentation%20-%20D...4%20Mach-1%20AP/User%20Guide/English/wireless.html (16 of 17)10/26/2006 9:47:10 AM
Page 53

Wireless Nd1 Router User Guide
© 2005-2006 U.S. Robotics Corporation
file:///G|/CSO/Documentation/Documentation%20-%20D...4%20Mach-1%20AP/User%20Guide/English/wireless.html (17 of 17)10/26/2006 9:47:10 AM
Page 54

file:///G|/CSO/Documentation/Documentation%20-%20Draft/Networking/5454%20Mach-1%20AP/User%20Guide/English/device.html
Wireless Nd1 Access Point: User
Guide
● Home
● Installation
● Configuration
● Tutorials
● Help
Device Settings
In the access point configuration pages, the Device page lets you access some of the basic
settings of the access point and perform administrative functions.
Reboot Access Point
If the access point is not functioning properly, you can click Reboot to restart the access
point.
file:///G|/CSO/Documentation/Documentation%20-%20Dr...5454%20Mach-1%20AP/User%20Guide/English/device.html (1 of 5)10/26/2006 9:47:10 AM
Page 55

file:///G|/CSO/Documentation/Documentation%20-%20Draft/Networking/5454%20Mach-1%20AP/User%20Guide/English/device.html
Upgrade Access Point
Firmware updates may be available on the USRobotics website to upgrade your device with
new or improved features. If you are experiencing problems with your device, you may want
to check for firmware updates.
1. Click Check for Update to search for the latest firmware from www.usr.com and save
the firmware file to your computer.
2. Click Browse to locate and select the new firmware file.
3. Click Upgrade to begin the update process.
The access point may disconnect and reconnect to the Internet during the update.
When complete, you will be prompted to log back in to the access point.
You should then see the new version of firmware listed on the Status page. If
you do not, repeat the upgrade procedure.
file:///G|/CSO/Documentation/Documentation%20-%20Dr...5454%20Mach-1%20AP/User%20Guide/English/device.html (2 of 5)10/26/2006 9:47:10 AM
Page 56

file:///G|/CSO/Documentation/Documentation%20-%20Draft/Networking/5454%20Mach-1%20AP/User%20Guide/English/device.html
Back up Settings
At any time, you can use Back Up Settings to save a backup file of your current access point
configuration, such as before you make significant changes to your access point
configuration, or after you have successfully applied changes.
To save your settings:
1. Select Back Up.
2. A window appears. Click Save.
3. Browse to the location at which you want the backup file saved and click Save.
Restore Settings
If you ever lose your settings or if your settings have changed and the access point is not
functioning properly, you can restore your saved settings from a backup file. If you did not
create a backup file, you may need to
restore the default settings.
file:///G|/CSO/Documentation/Documentation%20-%20Dr...5454%20Mach-1%20AP/User%20Guide/English/device.html (3 of 5)10/26/2006 9:47:10 AM
Page 57

file:///G|/CSO/Documentation/Documentation%20-%20Draft/Networking/5454%20Mach-1%20AP/User%20Guide/English/device.html
1. Browse to the location where your backup file is saved and click Open.
2. In the access point configuration page, click Restore.
Factory Settings
Click Reload to restore the factory default settings of your access point. When you restore
the factory default, all your current settings will be lost. If you have forgotten the password
to your access point, you will need to restore to the factory default using the Reset button
on the access point, and then
reinstall your access point.
You can also restore the factory default settings using the Reset button on the access point.
Press in and hold the Reset button on the access point for 7 seconds.
file:///G|/CSO/Documentation/Documentation%20-%20Dr...5454%20Mach-1%20AP/User%20Guide/English/device.html (4 of 5)10/26/2006 9:47:10 AM
Page 58

file:///G|/CSO/Documentation/Documentation%20-%20Draft/Networking/5454%20Mach-1%20AP/User%20Guide/English/device.html
© 2005-2006 U.S. Robotics Corporation
file:///G|/CSO/Documentation/Documentation%20-%20Dr...5454%20Mach-1%20AP/User%20Guide/English/device.html (5 of 5)10/26/2006 9:47:10 AM
Page 59

file:///G|/CSO/Documentation/Documentation%20-%20Draft/Networking/5454%20Mach-1%20AP/User%20Guide/English/tut_ap.html
Wireless Nd1 Access Point:
User Guide
● Home
● Installation
● Configuration
● Tutorials
● Help
Configuring the Access Point as an Access Point
By default, the Wireless Nd1 Access Point is configured as an access point. If you are
using a Windows operating system and have followed the installation instructions in this
guide, your basic configuration is complete.
© 2005-2006 U.S. Robotics Corporation
file:///G|/CSO/Documentation/Documentation%20-%20Draft/...ing/5454%20Mach-1%20AP/User%20Guide/English/tut_ap.html10/26/2006 9:47:11 AM
Page 60

file:///G|/CSO/Documentation/Documentation%20-%20Draft/Networking/5454%20Mach-1%20AP/User%20Guide/English/tut_client.html
Wireless Nd1 Access Point: User Guide
● Home
● Installation
● Configuration
● Tutorials
● Help
Configuring the Access Point as a Client
For Bridge mode, you must be using a wireless router or access point that supports WDS (Wireless
Distribution System). If you select Infrastructure mode, you will be able to select either WPA2 PSK
(AES), WPA2 PSK (TKIP), WPA PSK (AES), WPA PSK (TKIP), WEP Open, or WEP Shared for the
encryption method.
1. If you have not installed your access point, complete the
installation procedure.
2. Type the IP address of your access point in your Web browser's location or address line and
press ENTER.
3. When prompted, enter your login and password for the access point and press ENTER.
4. Click the Wireless tab.
5. For the Wireless Network Type, select Infrastructure.
6. Next you will need to select the Network Name (SSID) of the wireless network device to
file:///G|/CSO/Documentation/Documentation%20-%20Dra...4%20Mach-1%20AP/User%20Guide/English/tut_client.html (1 of 3)10/26/2006 9:47:11 AM
Page 61
file:///G|/CSO/Documentation/Documentation%20-%20Draft/Networking/5454%20Mach-1%20AP/User%20Guide/English/tut_client.html
which you will be connecting the Bridge. If you do not see the Network Name (SSID) of the
appropriate wireless network device, click Scan to search the area again.
If the appropriate network device does not appear or if that device is not broadcasting its
Network Name (SSID), manually enter the information for the network device. You will need
to enter the Network Name, the Wireless MAC Address, and select the Channel of the
existing wireless network.
7. Next, you will need to select the security Method and enter the Pass phrase or the Key
(depending on if you selected WPA PSK or WEP). These settings must match the security
information of the wireless network device to which you are connecting the access point. Bridge
mode only supports WPA2 in Infrastructure mode.
8. Select or enter any required
Transmission settings that you will need to connect to the
wireless network device.
9. Click Save at the bottom of the page.
file:///G|/CSO/Documentation/Documentation%20-%20Dra...4%20Mach-1%20AP/User%20Guide/English/tut_client.html (2 of 3)10/26/2006 9:47:11 AM
Page 62

file:///G|/CSO/Documentation/Documentation%20-%20Draft/Networking/5454%20Mach-1%20AP/User%20Guide/English/tut_client.html
© 2005-2006 U.S. Robotics Corporation
file:///G|/CSO/Documentation/Documentation%20-%20Dra...4%20Mach-1%20AP/User%20Guide/English/tut_client.html (3 of 3)10/26/2006 9:47:11 AM
Page 63
file:///G|/CSO/Documentation/Documentation%20-%20Draft/Networking/5454%20Mach-1%20AP/User%20Guide/English/tut_repeater.html
Wireless Nd1 Access Point: User Guide
● Home
● Installation
● Configuration
● Tutorials
● Help
Configuring the Access Point as a Range Extender
You must be using a wireless router or access point that supports WDS (Wireless Distribution
System). If you are using WPA as an encryption method in your wireless network, you must be using
either TKIP or AES, not a combination, since the Range Extender only supports one or the other.
1. If you have not installed your access point, complete the
installation procedure.
2. Type the IP address of your access point in your Web browser's location or address line and
press ENTER.
3. When prompted, enter your login and password for the access point and press ENTER.
4. Click the Wireless tab.
5. For the Wireless Network Type, select Range Extender.
6. Select your
Broadcast Network Name and Access Point Isolation options and enter any
required settings.
file:///G|/CSO/Documentation/Documentation%20-%20Dra...20Mach-1%20AP/User%20Guide/English/tut_repeater.html (1 of 3)10/26/2006 9:47:11 AM
Page 64

file:///G|/CSO/Documentation/Documentation%20-%20Draft/Networking/5454%20Mach-1%20AP/User%20Guide/English/tut_repeater.html
7. Next you will need to select the Network Name (SSID) of the wireless network device to
which you will be connecting the Bridge. If you do not see the Network Name (SSID) of the
appropriate wireless network device, click Scan to search the area again.
For Range Extender mode, the list of networks is based on this access point's wireless radio
scan. The channel information may be different on the peer WDS device.
If the appropriate network device does not appear or if that device is not broadcasting its
Network Name (SSID), manually enter the information for the network device. You will need
to enter the Network Name, the Wireless MAC Address, and select the Channel of the
existing wireless network.
8. Next, you will need to select the security Method and enter the Pass phrase or the Key
(depending on if you selected WPA PSK or WEP). These settings must match the security
information of the wireless network device to which you are connecting the access point. Bridge
mode only supports WPA2 in Infrastructure mode.
9. If other bridges will be connecting to this access point, select the checkbox next to I want to
specify the devices that can connect to this one under WDS Restrictions. You will then
need to enter the wireless MAC address of each new Bridge you will be connecting to this one
and then click Add. By default, this feature is disabled. USRobotics recommends that you only
file:///G|/CSO/Documentation/Documentation%20-%20Dra...20Mach-1%20AP/User%20Guide/English/tut_repeater.html (2 of 3)10/26/2006 9:47:11 AM
Page 65

file:///G|/CSO/Documentation/Documentation%20-%20Draft/Networking/5454%20Mach-1%20AP/User%20Guide/English/tut_repeater.html
add one more Bridge in this fashion. If you add more than one Bridge in a chain, you will begin
to lose network quality and speed.
Note: If the WDS channel of the networking device that the access point is
connected to changes, the
Status page will continue to show the old channel
information for the access point. Although the Network list on the
Wireless
page will display the selected network and the correct channel, the change has
not yet been applied to the access point. To update the channel information on
the access point, click Save at the bottom of the
Wireless page.
10. Select or enter any required
Transmission settings that you will need to connect to the
wireless network device.
11. Click Save at the bottom of the page.
© 2005-2006 U.S. Robotics Corporation
file:///G|/CSO/Documentation/Documentation%20-%20Dra...20Mach-1%20AP/User%20Guide/English/tut_repeater.html (3 of 3)10/26/2006 9:47:11 AM
Page 66

file:///G|/CSO/Documentation/Documentation%20-%20Draft/Networking/5454%20Mach-1%20AP/User%20Guide/English/tut_bridge.html
Wireless Nd1 Access Point: User Guide
● Home
● Installation
● Configuration
● Tutorials
● Help
Configuring the Access Point as a Bridge
For access point in Bridge mode, you must be using a wireless router or access point that supports
WDS (Wireless Distribution System). If you select Bridge mode, you will be able to select either WPA
PSK (AES), WPA PSK (TKIP), WEP Open, or WEP Shared for the encryption method.
Note: When you select a wireless router or access point to which you want to connect, make
sure you choose one that supports WDS.
1. If you have not installed your access point, complete the
installation procedure.
2. Type the IP address of your access point in your Web browser's location or address line and
press ENTER.
3. When prompted, enter your login and password for the access point and press ENTER.
4. Click the Wireless tab.
5. For the Wireless Network Type, select Bridge.
file:///G|/CSO/Documentation/Documentation%20-%20Dr...%20Mach-1%20AP/User%20Guide/English/tut_bridge.html (1 of 4)10/26/2006 9:47:12 AM
Page 67

file:///G|/CSO/Documentation/Documentation%20-%20Draft/Networking/5454%20Mach-1%20AP/User%20Guide/English/tut_bridge.html
6. Next you will need to select the Network Name (SSID) of the wireless network device to
which you will be connecting the Bridge. If you do not see the Network Name (SSID) of the
appropriate wireless network device, click Scan to search the area again.
For Bridge mode, the list of networks is based on this access point's wireless radio scan. The
channel information may be different on the peer WDS device.
If the appropriate network device does not appear or if that device is not broadcasting its
Network Name (SSID), manually enter the information for the network device. You will need
to enter the Network Name, the Wireless MAC Address, and select the Channel of the
existing wireless network.
7. Next, you will need to select the security Method and enter the Pass phrase or the Key
(depending on if you selected WPA PSK or WEP). These settings must match the security
information of the wireless network device to which you are connecting the access point. Bridge
mode only supports WPA2 in Infrastructure mode.
file:///G|/CSO/Documentation/Documentation%20-%20Dr...%20Mach-1%20AP/User%20Guide/English/tut_bridge.html (2 of 4)10/26/2006 9:47:12 AM
Page 68

file:///G|/CSO/Documentation/Documentation%20-%20Draft/Networking/5454%20Mach-1%20AP/User%20Guide/English/tut_bridge.html
8. If other Bridges will be connecting to this access point, select the checkbox next to I want to
specify the devices that can connect to this one under WDS Restrictions. You will then
need to enter the wireless MAC address of each new Bridge you will be connecting to this one
and then click Add. By default, this feature is disabled. USRobotics recommends that you only
add one more Bridge in this fashion. If you add more than one Bridge in a chain, you will begin
to lose network quality and speed.
Note: If the WDS channel of the networking device that the access point is
connected to changes, the
Status page will continue to show the old channel
information for the access point. Although the Network list on the
Wireless
page will display the selected network and the correct channel, the change has
not yet been applied to the access point. To update the channel information on
the access point, click Save at the bottom of the
Wireless page.
9. Select or enter any required
Transmission settings that you will need to connect to the
wireless network device.
10. Click Save at the bottom of the page.
file:///G|/CSO/Documentation/Documentation%20-%20Dr...%20Mach-1%20AP/User%20Guide/English/tut_bridge.html (3 of 4)10/26/2006 9:47:12 AM
Page 69

file:///G|/CSO/Documentation/Documentation%20-%20Draft/Networking/5454%20Mach-1%20AP/User%20Guide/English/tut_bridge.html
© 2005-2006 U.S. Robotics Corporation
file:///G|/CSO/Documentation/Documentation%20-%20Dr...%20Mach-1%20AP/User%20Guide/English/tut_bridge.html (4 of 4)10/26/2006 9:47:12 AM
Page 70

file:///G|/CSO/Documentation/Documentation%20-%20Draft/Networking/5454%20Mach-1%20AP/User%20Guide/English/troubleshooting.html
Wireless Nd1 Access Point:
User Guide
● Home
● Installation
● Configuration
● Tutorials
● Help
Basic Troubleshooting Procedure
This basic procedure addresses a number of symptoms that you might experience with
your access point:
1. Verify that the power cord and the Ethernet cable are connected securely at both
ends.
2. Ensure that the power outlet to which the access point is connected is a live
outlet.
3. Make sure that you are receiving power and that all 4 LEDs are lit.
4. For connectivity issues, try rebooting the access point by disconnecting and then
reconnecting its power supply.
5. For wireless connections:
❍ Low link quality or range can be caused by environmental interference,
such as lead-based paint and concrete walls, or some electronic items, such
as 2.4GHz phones. Try moving the antennas of the access point or
repositioning the wireless client to improve the link quality.
❍ Verify that the following settings on the connected device match those of
the access point.
■ Mode (must be Infrastructure mode)
file:///G|/CSO/Documentation/Documentation%20-%20Dra...ach-1%20AP/User%20Guide/English/troubleshooting.html (1 of 4)10/26/2006 9:47:12 AM
Page 71

file:///G|/CSO/Documentation/Documentation%20-%20Draft/Networking/5454%20Mach-1%20AP/User%20Guide/English/troubleshooting.html
■ Network name or SSID
■ Security type and key, psk, or passphrase.
Refer to your wireless adapter's documentation to determine how to
change these settings.
If you still have trouble using the access point, follow the procedure below that best
describes your symptom.
Installation and Configuration
The access point is connected to a live power source, but the power LED is off.
The installation procedure did not start when I inserted the USRobotics Installation CDROM.
The Network Device Locator does not find the Wireless Nd1 Access Point.
SecureEasySetup did not configure my wireless client.
I cannot access the configuration pages.
After I performed a firmware upgrade, the access point did not display its status page.
file:///G|/CSO/Documentation/Documentation%20-%20Dra...ach-1%20AP/User%20Guide/English/troubleshooting.html (2 of 4)10/26/2006 9:47:12 AM
Page 72

file:///G|/CSO/Documentation/Documentation%20-%20Draft/Networking/5454%20Mach-1%20AP/User%20Guide/English/troubleshooting.html
Wireless Connections
The Wireless Nd1 Access Point does not appear when I scan for it with a wireless client.
My client is not communicating with the Wireless Nd1 Access Point.
I am no longer able to access the Internet.
My client does not establish a wireless connection to the Wireless Nd1 Access Point after
I changed the settings.
My wireless unicast connection is very slow while another client is using the access
point for a multicast stream, such as videoconferencing or Internet radio.
Troubleshooting ping procedure
In bridge mode, the access point will not connect to another networking device.
In range extender mode, the access point will not connect to another networking device.
file:///G|/CSO/Documentation/Documentation%20-%20Dra...ach-1%20AP/User%20Guide/English/troubleshooting.html (3 of 4)10/26/2006 9:47:12 AM
Page 73

file:///G|/CSO/Documentation/Documentation%20-%20Draft/Networking/5454%20Mach-1%20AP/User%20Guide/English/troubleshooting.html
© 2005-2006 U.S. Robotics Corporation
file:///G|/CSO/Documentation/Documentation%20-%20Dra...ach-1%20AP/User%20Guide/English/troubleshooting.html (4 of 4)10/26/2006 9:47:12 AM
Page 74

file:///G|/CSO/Documentation/Documentation%20-%20Draft/Networking/5454%20Mach-1%20AP/User%20Guide/English/trouble_cd.html
Wireless Nd1 Access Point:
User Guide
● Home
● Installation
● Configuration
● Tutorials
● Help
The installation procedure did not start when I inserted the
USRobotics Installation CD-ROM.
Solution
Some programs may keep the autoplay feature of the installation CD-ROM from
starting. Close any open applications and reinsert the CD-ROM.
Solution
Start the CD-ROM manually as follows:
1. Windows XP: Click Windows Start > My Computer.
Windows 2000: On the desktop, double-click My Computer.
file:///G|/CSO/Documentation/Documentation%20-%20Dr...%20Mach-1%20AP/User%20Guide/English/trouble_cd.html (1 of 2)10/26/2006 9:47:12 AM
Page 75

file:///G|/CSO/Documentation/Documentation%20-%20Draft/Networking/5454%20Mach-1%20AP/User%20Guide/English/trouble_cd.html
2. Double-click the CD drive.
Return to Troubleshooting page
© 2005-2006 U.S. Robotics Corporation
file:///G|/CSO/Documentation/Documentation%20-%20Dr...%20Mach-1%20AP/User%20Guide/English/trouble_cd.html (2 of 2)10/26/2006 9:47:12 AM
Page 76

file:///G|/CSO/Documentation/Documentation%20-%20Draft/Networking/5454%20Mach-1%20AP/User%20Guide/English/trouble_client_comm.html
Wireless Nd1 Access Point:
User Guide
● Home
● Installation
● Configuration
● Tutorials
● Help
My client is not communicating with the Wireless Nd1 Access
Point.
Solution:
See "For wireless connections" in the basic troubleshooting procedure.
Solution:
In the configuration utility for your wireless card or adapter, ensure that you are
connecting to the correct Wireless Nd
1
Access Point by verifying the WLAN MAC
address. You can find the WLAN MAC address on the label on the bottom of the access
point.
file:///G|/CSO/Documentation/Documentation%20-%20Dra...1%20AP/User%20Guide/English/trouble_client_comm.html (1 of 3)10/26/2006 9:47:13 AM
Page 77

file:///G|/CSO/Documentation/Documentation%20-%20Draft/Networking/5454%20Mach-1%20AP/User%20Guide/English/trouble_client_comm.html
Solution:
The access point may not have received a valid IP address for your network. Check the
LAN configuration page of the access point.
● If the IP address is set to Dynamic, make sure that the access point is connected
to a DHCP server.
● If you use a static IP address verify that it is in the same subnet as your client's
IP address.
Solution:
The access point may not be responding. Try the following:
1. Reconnect by following the steps in
Connecting a Wireless Client.
2. If you still are not communicating with the access point, restore the factory
default settings of the access point to reactivate it.
Note: When you restore the factory default settings, the access point will
lose all custom settings.
To restore the factory default settings, use a small object such as a paper clip to
press in and hold the reset button on the back of the access point for 5 to 10
seconds.
3. After you restore the access point,
reconfigure the basic settings of the access
point, or, if you made a backup of your settings,
restore the settings by using the
backup.
file:///G|/CSO/Documentation/Documentation%20-%20Dra...1%20AP/User%20Guide/English/trouble_client_comm.html (2 of 3)10/26/2006 9:47:13 AM
Page 78

file:///G|/CSO/Documentation/Documentation%20-%20Draft/Networking/5454%20Mach-1%20AP/User%20Guide/English/trouble_client_comm.html
Return to Troubleshooting page
© 2005-2006 U.S. Robotics Corporation
file:///G|/CSO/Documentation/Documentation%20-%20Dra...1%20AP/User%20Guide/English/trouble_client_comm.html (3 of 3)10/26/2006 9:47:13 AM
Page 79

file:///G|/CSO/Documentation/Documentation%20-%20Draft/Networking/5454%20Mach-1%20AP/User%20Guide/English/trouble_client_comm_02.html
Wireless Nd1 Access Point:
User Guide
● Home
● Installation
● Configuration
● Tutorials
● Help
My client does not establish a wireless connection to the
Wireless Nd
1
Access Point after I changed the settings.
In the configuration utility for your wireless adapter:
1. Ensure that you are connecting to the Wireless Nd1 Access Point by verifyingthe
WLAN MAC address.
2. Ensure that the same encryption options, and their passphrase or key, are used
on both the wireless adapter and the access point. If you change the setting on
the access point, you must also change the settings of every wireless adapter
that is intended to connect to the access point.
Return to Troubleshooting page
file:///G|/CSO/Documentation/Documentation%20-%20Dra...0AP/User%20Guide/English/trouble_client_comm_02.html (1 of 2)10/26/2006 9:47:13 AM
Page 80

file:///G|/CSO/Documentation/Documentation%20-%20Draft/Networking/5454%20Mach-1%20AP/User%20Guide/English/trouble_client_comm_02.html
© 2005-2006 U.S. Robotics Corporation
file:///G|/CSO/Documentation/Documentation%20-%20Dra...0AP/User%20Guide/English/trouble_client_comm_02.html (2 of 2)10/26/2006 9:47:13 AM
Page 81

file:///G|/CSO/Documentation/Documentation%20-%20Draft/Networking/5454%20Mach-1%20AP/User%20Guide/English/trouble_client_scan.html
Wireless Nd1 Access Point:
User Guide
● Home
● Installation
● Configuration
● Tutorials
● Help
The Wireless Nd1 Access Point does not appear when I scan
for it with a wireless client.
Solution:
The access point may not be broadcasting its network name.
1. Using a computer connected to the same networking device as the access point,
start a Web browser.
2. Type the IP address of the access point, and press ENTER to display the
configuration pages of the access point. You can get the IP address from the
Network Device Locator.
3. Click the Wireless tab and verify that Broadcast network name is selected. If it is
not selected, select it, scroll to the bottom of the Wireless page, and click Save.
Solution:
file:///G|/CSO/Documentation/Documentation%20-%20Draf...-1%20AP/User%20Guide/English/trouble_client_scan.html (1 of 2)10/26/2006 9:47:13 AM
Page 82

file:///G|/CSO/Documentation/Documentation%20-%20Draft/Networking/5454%20Mach-1%20AP/User%20Guide/English/trouble_client_scan.html
Disconnect the network cable from the client device before scanning for the access
point.
Return to Troubleshooting page
© 2005-2006 U.S. Robotics Corporation
file:///G|/CSO/Documentation/Documentation%20-%20Draf...-1%20AP/User%20Guide/English/trouble_client_scan.html (2 of 2)10/26/2006 9:47:13 AM
Page 83

file:///G|/CSO/Documentation/Documentation%20-%20Draft/Networking/5454%20Mach-1%20AP/User%20Guide/English/trouble_locator.html
Wireless Nd1 Access Point:
User Guide
● Home
● Installation
● Configuration
● Tutorials
● Help
The Network Device Locator does not find the Wireless Nd1
Access Point.
1. Click Detect to rescan the network.
2. If the locator still does not find the access point, look at the client list for the
networking device that is connected to the access point. Refer to the device's
documentation to find out how to view the client list.
3. In the client list, find the MAC address shown on the bottom of the access point
and note the IP address associated with that MAC address. This is the IP address
of the access point.
4. Start a web browser, type the IP address of the access point, and press ENTER.
5. Verify that the connection information is correct for the network to which the
access point is connected.
Return to Troubleshooting page
file:///G|/CSO/Documentation/Documentation%20-%20Dra...ach-1%20AP/User%20Guide/English/trouble_locator.html (1 of 2)10/26/2006 9:47:13 AM
Page 84

file:///G|/CSO/Documentation/Documentation%20-%20Draft/Networking/5454%20Mach-1%20AP/User%20Guide/English/trouble_locator.html
© 2005-2006 U.S. Robotics Corporation
file:///G|/CSO/Documentation/Documentation%20-%20Dra...ach-1%20AP/User%20Guide/English/trouble_locator.html (2 of 2)10/26/2006 9:47:13 AM
Page 85

file:///G|/CSO/Documentation/Documentation%20-%20Draft/Networking/5454%20Mach-1%20AP/User%20Guide/English/trouble_ses_client.html
Wireless Nd1 Access Point:
User Guide
● Home
● Installation
● Configuration
● Tutorials
● Help
SecureEasySetup did not configure my wireless client.
Press the SecureEasySetup button on the back of the access point for one full second
and then release it. Verify that the SecureEasySetup LED on the front of the access
point starts blinking before initiating SecureEasySetup in the client utility for your
wireless adapter.
Return to Troubleshooting page
© 2005-2006 U.S. Robotics Corporation
file:///G|/CSO/Documentation/Documentation%20-%20Draft/N...Mach-1%20AP/User%20Guide/English/trouble_ses_client.html10/26/2006 9:47:14 AM
Page 86

file:///G|/CSO/Documentation/Documentation%20-%20Draft/Networking/5454%20Mach-1%20AP/User%20Guide/English/trouble_unicast.html
Wireless Nd1 Access Point:
User Guide
● Home
● Installation
● Configuration
● Tutorials
● Help
My wireless unicast connection is very slow while another
client is using the access point for a multicast stream, such
as videoconferencing or Internet radio.
Set the multicast rate to 2 and try your unicast connection. If your connection
improves, continue increasing the multicast rate until you find the speed that provides
the best combination of connections for unicast and multicast clients. In a wireless
network with both 802.11b and 802.11g clients connected to the access point, you can
increase the multicast rate up to 9. In a wireless network with only 802.11g clients
connected to the access point, you can increase the multicast rate up to 54.
Return to Troubleshooting page
© 2005-2006 U.S. Robotics Corporation
file:///G|/CSO/Documentation/Documentation%20-%20Draft/N...%20Mach-1%20AP/User%20Guide/English/trouble_unicast.html10/26/2006 9:47:14 AM
Page 87

file:///G|/CSO/Documentation/Documentation%20-%20Draft/Networking/5454%20Mach-1%20AP/User%20Guide/English/trouble_wui_access.html
Wireless Nd1 Access Point:
User Guide
● Home
● Installation
● Configuration
● Tutorials
● Help
I cannot access the configuration pages.
1. In your Web browser, make sure that you are entering the correct IP address for
the access point. To find the IP address, see
Logging in to the Configuration
Pages.
2.
Configure your Web browser so that the HTTP Proxy feature of your Web browser.
3. If you are trying to access the configuration pages wirelessly, try to access them
with a wired connection as follows:
A. Using a computer connected by Ethernet cable to the same networking
device as the access point, start a Web browser.
B. Enter the IP address of the access point and press ENTER.
If you can access the configuration pages with a wired connection, you are
exeriencing a connectivity issue. See
"For wireless connections" in the basic
troubleshooting procedure.
If you cannot access the configuration pages with a wired connection,
restore the factory default settings of the access point to reactivate it.
file:///G|/CSO/Documentation/Documentation%20-%20Dra...-1%20AP/User%20Guide/English/trouble_wui_access.html (1 of 2)10/26/2006 9:47:14 AM
Page 88

file:///G|/CSO/Documentation/Documentation%20-%20Draft/Networking/5454%20Mach-1%20AP/User%20Guide/English/trouble_wui_access.html
Note: When you restore the factory default settings, the access
point will lose all custom settings.
To restore the factory default settings, use a small object such as a paper
clip to press in and hold the reset button on the back of the access point for
5 to 10 seconds.
After you restore the access point to its factory default settings,
reconfigure
the basic settings of the access point, or, if you made a backup of your
settings,
restore the settings by using the backup.
Return to Troubleshooting page
© 2005-2006 U.S. Robotics Corporation
file:///G|/CSO/Documentation/Documentation%20-%20Dra...-1%20AP/User%20Guide/English/trouble_wui_access.html (2 of 2)10/26/2006 9:47:14 AM
Page 89

file:///G|/CSO/Documentation/Documentation%20-%20Draft/Networking/5454%20Mach-1%20AP/User%20Guide/English/trouble_connect_speed.html
Wireless Nd1 Access Point:
User Guide
● Home
● Installation
● Configuration
● Tutorials
● Help
My client cannot achieve 270 Mbps connections.
Make sure the wireless products you are using to connect to the Wireless Nd1 Access
Point support 270 Mbps speeds and that the Wireless Nd
1
Access Point is connected to
a networking device that supports 270 Mbps speeds.
Return to Troubleshooting page
© 2005-2006 U.S. Robotics Corporation
file:///G|/CSO/Documentation/Documentation%20-%20Draft/N...h-1%20AP/User%20Guide/English/trouble_connect_speed.html10/26/2006 9:47:14 AM
Page 90

file:///G|/CSO/Documentation/Documentation%20-%20Draft/Networking/5454%20Mach-1%20AP/User%20Guide/English/trouble_wds.html
Wireless Nd1 Access Point:
User Guide
● Home
● Installation
● Configuration
● Tutorials
● Help
In bridge mode or range extender mode, the access point will
not connect to another networking device.
Solution:
If the WDS channel of the networking device that the access point is connected to
changes, the
Status page will continue to show the old channel information for the
access point. Although the Network list on the
Wireless page will display the selected
network and the correct channel, the change has not yet been applied to the access
point. To update the channel information on the access point, click Save at the bottom
of the
Wireless page.
Make sure the access point is using the same required
Wireless settings as the WDS
peer, including the Control channel and Bandwidth settings (under Transmission),
and the same wireless Security settings as the WDS peer.
Return to Troubleshooting page
file:///G|/CSO/Documentation/Documentation%20-%20Dr...20Mach-1%20AP/User%20Guide/English/trouble_wds.html (1 of 2)10/26/2006 9:47:15 AM
Page 91

file:///G|/CSO/Documentation/Documentation%20-%20Draft/Networking/5454%20Mach-1%20AP/User%20Guide/English/trouble_wds.html
© 2005-2006 U.S. Robotics Corporation
file:///G|/CSO/Documentation/Documentation%20-%20Dr...20Mach-1%20AP/User%20Guide/English/trouble_wds.html (2 of 2)10/26/2006 9:47:15 AM
Page 92

file:///G|/CSO/Documentation/Documentation%20-%20Draft/Networking/5454%20Mach-1%20AP/User%20Guide/English/trouble_power.html
Wireless Nd1 Access Point:
User Guide
● Home
● Installation
● Configuration
● Tutorials
● Help
The access point is not getting an IP address from the DHCP
server.
Connect the access point is connected to a networking device before you connect the
access point to power.
Return to Troubleshooting page
© 2005-2006 U.S. Robotics Corporation
file:///G|/CSO/Documentation/Documentation%20-%20Draft/...4%20Mach-1%20AP/User%20Guide/English/trouble_power.html10/26/2006 9:47:15 AM
Page 93

file:///G|/CSO/Documentation/Documentation%20-%20Draft/Networking/5454%20Mach-1%20AP/User%20Guide/English/trouble_upgrade.html
Wireless Nd1 Access Point:
User Guide
● Home
● Installation
● Configuration
● Tutorials
● Help
After I performed a firmware upgrade, the access point did not
display its status page.
Solution
The upgrade may still be in progress. Wait for at least two minutes.
Solution
If you received the upgrade completion message, reboot the access point by
disconnecting and then reconnecting its power supply.
Solution
file:///G|/CSO/Documentation/Documentation%20-%20Dra...ach-1%20AP/User%20Guide/English/trouble_upgrade.html (1 of 8)10/26/2006 9:47:15 AM
Page 94

file:///G|/CSO/Documentation/Documentation%20-%20Draft/Networking/5454%20Mach-1%20AP/User%20Guide/English/trouble_upgrade.html
1. Restore the factory default settings of the access point to reactivate it.
Note: When you restore the factory default settings, the access point will
lose all custom settings.
To restore the factory default settings, use a small object such as a paper clip to
press in and hold the reset button on the back of the access point for 5 to 10
seconds.
After you restore the access point to its factory default settings,
reconfigure the
basic settings of the access point, or, if you made a backup of your settings,
restore the settings by using the backup.
2. Reapply the firmware upgrade.
Solution
The firmware image may have been corrupted during the upgrade procedure. Try one
of the following procedures to force the upgrade:
● Windows XP, 2000, or NT users: perform this procedure.
● Windows Me, 98, and 95 users: perform this procedure.
For Windows XP, 2000, and NT
Windows XP, 2000, and NT users can perform the following semi-automated upgrade
procedure to install the firmware.
file:///G|/CSO/Documentation/Documentation%20-%20Dra...ach-1%20AP/User%20Guide/English/trouble_upgrade.html (2 of 8)10/26/2006 9:47:15 AM
Page 95
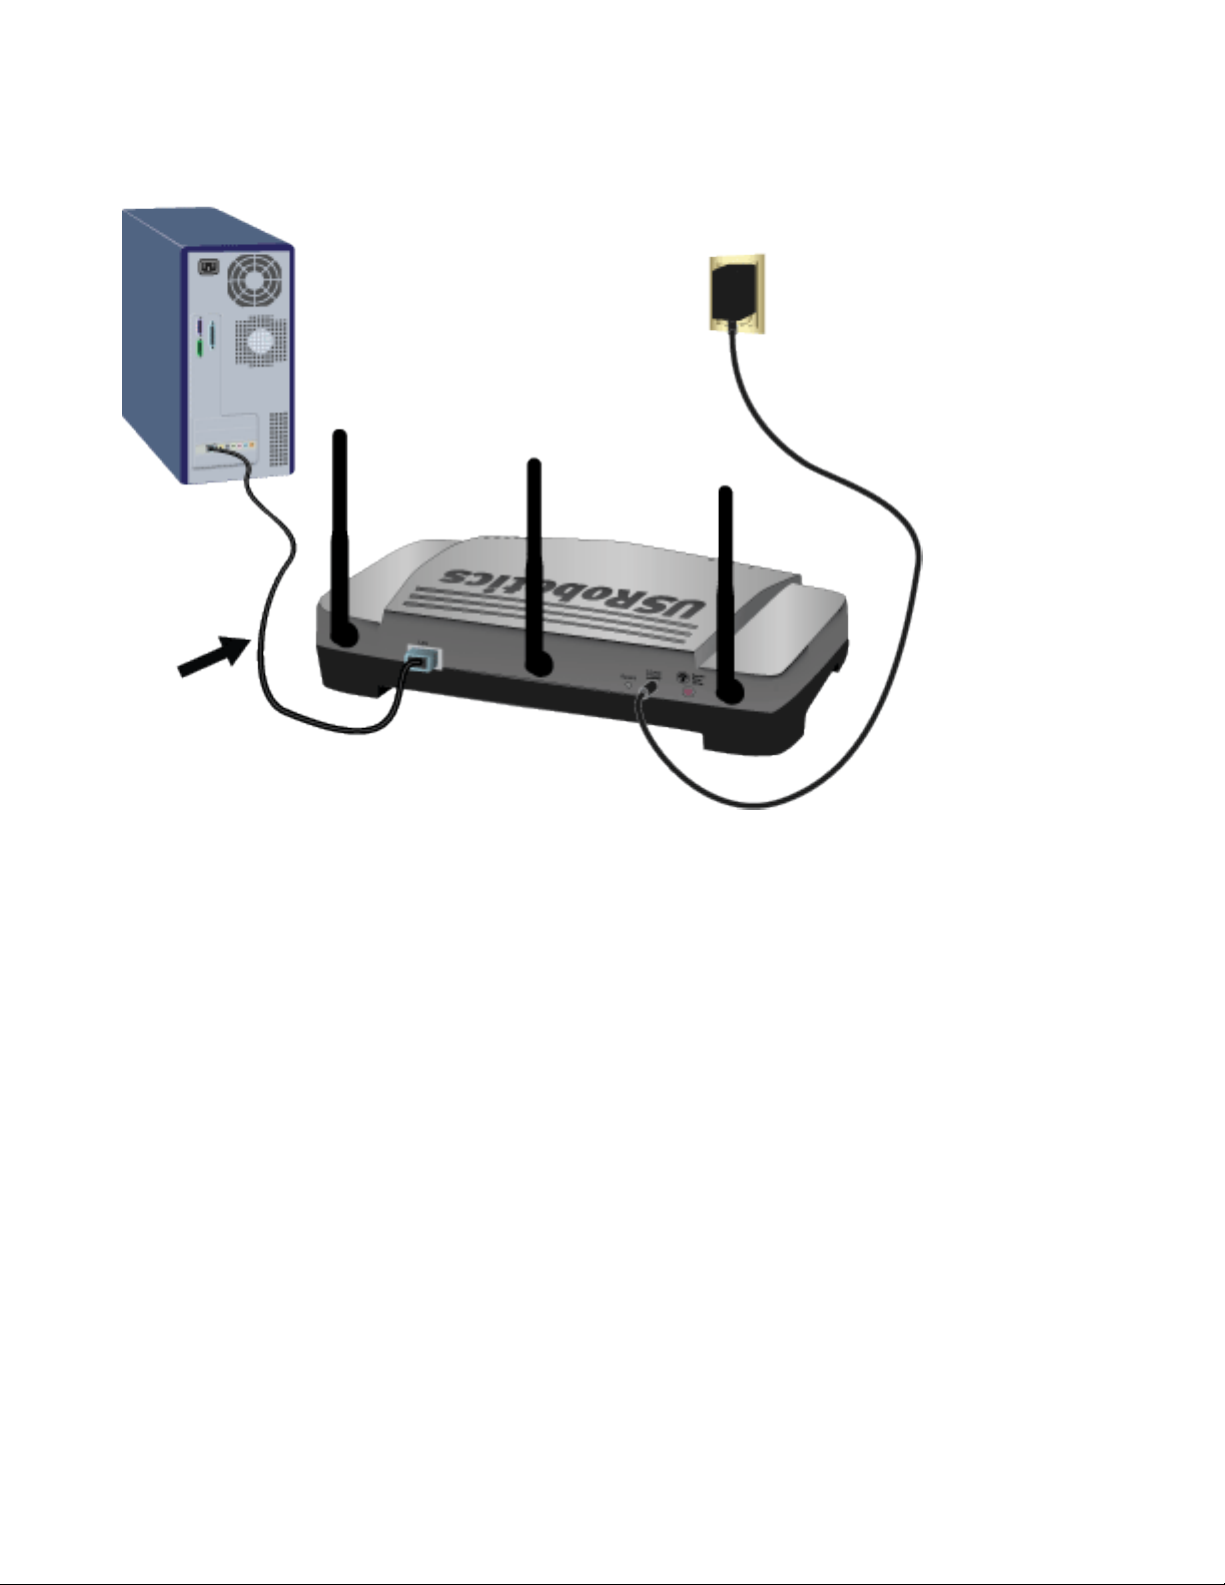
file:///G|/CSO/Documentation/Documentation%20-%20Draft/Networking/5454%20Mach-1%20AP/User%20Guide/English/trouble_upgrade.html
1. Use a networking cables to connect the access point directly to the computer. Do
not try to use a wireless connection for this procedure.
2. Locate the folder that contains the firmware file that you downloaded.
3. On the USRobotics Installation CD-ROM, locate the Manual_Upgrade.cmd utility.
4. Drag the firmware file onto the Manual_Upgrade.cmd utility icon and follow the
on-screen instructions.
5. Set IP addressing for the network adapter on the computer back to "Obtain an IP
address automatically" as follows:
A. Open the Control Panel and double-click Network Connections.
B. Right-click the Local Area Connection of the network adapter that
connects the computer to the networking device and select Properties.
C. On the General tab, select Internet Protocol (TCP/IP) and click
Properties.
D. Select Obtain an IP Address Automatically and click OK.
E. Click OK again.
file:///G|/CSO/Documentation/Documentation%20-%20Dra...ach-1%20AP/User%20Guide/English/trouble_upgrade.html (3 of 8)10/26/2006 9:47:15 AM
Page 96

file:///G|/CSO/Documentation/Documentation%20-%20Draft/Networking/5454%20Mach-1%20AP/User%20Guide/English/trouble_upgrade.html
Windows XP, 2000, and NT users can also perform the following manual upgrade
procedure:
1. Use a networking cables to connect the access point directly to the computer. Do
not try to use a wireless connection for this procedure.
2. Determine the IP address to use for the access point:
A. If the most recent IP address of the access point was acquired dynamically,
use 192.168.1.64
B. If you assigned a static IP address to the access point, use the address that
you assigned. If you cannot remember the IP address that you assigned,
run the
Network Device Locator. As long as the access point is in the same
subnet as the computer, the locator will find the access point.
3. On the Windows Start menu, select Run.
4. In the Run dialog box, type cmd and click OK.
5. Locate the folder that contains that firmware file that you downloaded.
6. Type cd followed by the path to the firmware file. Use quotation marks around
the pathname as shown in the following example:
file:///G|/CSO/Documentation/Documentation%20-%20Dra...ach-1%20AP/User%20Guide/English/trouble_upgrade.html (4 of 8)10/26/2006 9:47:15 AM
Page 97

file:///G|/CSO/Documentation/Documentation%20-%20Draft/Networking/5454%20Mach-1%20AP/User%20Guide/English/trouble_upgrade.html
cd "C:\networking\usr5454"
and then press ENTER.
7. Type the following command (but do not press ENTER)
tftp -i xxx.xxx.x.x put 5454.usr where xxx.xxx.x.x is the IP
address of the access point.
8. Disconnect and then reconnect the power supply of the access point.
9. Press ENTER.
You should see a message in the command window stating the image was
transferred.
10. Wait for the upgrade to finish. When the wireless LED
turns on, the upgrade is
done.
11. Set IP addressing for the wired network adapter to "Obtain an IP address
automatically" as follows:
A. Open the Control Panel and double-click Network Connections.
B. Right-click the Local Area Connection of the network adapter that
connects the computer to the router and select Properties.
C. On the General tab, select Internet Protocol (TCP/IP) and click
Properties.
D. Select Obtain an IP Address Automatically and click OK.
E. Click OK again.
Return to Troubleshooting page
For Windows Me, 98, and 95
file:///G|/CSO/Documentation/Documentation%20-%20Dra...ach-1%20AP/User%20Guide/English/trouble_upgrade.html (5 of 8)10/26/2006 9:47:15 AM
Page 98

file:///G|/CSO/Documentation/Documentation%20-%20Draft/Networking/5454%20Mach-1%20AP/User%20Guide/English/trouble_upgrade.html
Perform the following steps to manually install the access point's firmware:
1. Use a networking cables to connect the access point directly to the computer. Do
not try to use a wireless connection for this procedure.
2. Determine the IP address to use for the access point:
A. If the most recent IP address of the access point was acquired dynamically,
use 192.168.1.64
B. If you assigned a static IP address to the access point, use the address that
you assigned. If you cannot remember the IP address that you assigned,
run the
Network Device Locator. As long as the access point is in the same
subnet as the computer, the locator will find the access point.
3. On the desktop, right-click Network Places or Network Neighborhood and
select Properties.
4. On the Configuration tab, select the network adapter that connects the
computer to the router and click Properties.
5. Select Use the following IP address:
file:///G|/CSO/Documentation/Documentation%20-%20Dra...ach-1%20AP/User%20Guide/English/trouble_upgrade.html (6 of 8)10/26/2006 9:47:15 AM
Page 99

file:///G|/CSO/Documentation/Documentation%20-%20Draft/Networking/5454%20Mach-1%20AP/User%20Guide/English/trouble_upgrade.html
6. Specify a temporary static IP address for the computer's network adapter.
The IP address must be in the same subnet as the access point:
❍ If the access point was acquiring its address dynamically, set the IP
address of your computer to 192.168.1.100.
❍ If you assigned a static IP address to the access point, match the first three
parts of the IP address to the static address of the access point. For
example, if the static address of the access point is 192.168.3.1, set the IP
address of the computer to 192.168.3.100.
7. Click OK.
8. Click OK again.
9. Run the Device Locator to obtain the IP addresses of devices on your local
network. Match the MAC address printed on the bottom of the access point to the
addresses shown by the utility to find the access point's IP address.
10. On the Windows Start menu, click Run.
11. In the Run dialog box, type command and click OK.
12. Locate the folder that contains that firmware file that you downloaded.
13. Type cd followed by the path to the firmware file. Use quotation marks around
the pathname as shown in the following example:
cd "C:\networking\usr5454"
and then press ENTER.
14. Type the following command (but do not press ENTER)
tftp -i xxx.xxx.x.x put 5454.usr where xxx.xxx.x.x is the IP
address of the access point.
15. Disconnect and then reconnect the power supply of the access point.
file:///G|/CSO/Documentation/Documentation%20-%20Dra...ach-1%20AP/User%20Guide/English/trouble_upgrade.html (7 of 8)10/26/2006 9:47:15 AM
Page 100

file:///G|/CSO/Documentation/Documentation%20-%20Draft/Networking/5454%20Mach-1%20AP/User%20Guide/English/trouble_upgrade.html
16. Press ENTER.
You should see a message in the command window stating the image was
transferred.
17. Wait for the upgrade to finish. When the wireless LED
turns on, the upgrade is
done.
Return to Troubleshooting page
© 2005-2006 U.S. Robotics Corporation
file:///G|/CSO/Documentation/Documentation%20-%20Dra...ach-1%20AP/User%20Guide/English/trouble_upgrade.html (8 of 8)10/26/2006 9:47:15 AM
 Loading...