

Page 1

- 1 -
DIGITAL CAMERA
GEMINI J44416
INSTRUCTION MANUAL
Page 2

- 2 -
Warning
For customer in the U.S.A.
FCC Statement
This device complies with 15 the FCC Rules. Operation is subject to the
following two condition: (i) This device may not cause harmful interference,
and (ii) this device must accept any interference received, including
interference that may cause undesired operation.
CAUTION
This equipment has been tested and found to comply with limits for a Class B
digital device, pursuant to Part 15 of the FCC Rules. These limits are designed
to provide reasonable protection against harmful interference in a residential
installation. The equipment generates, use, and can radiate radio frequency
energy and if not installed and used in accordance with the instruction, may
cause harmful interference to radio communications. However, there is no
guarantee that interference to radio communications. However, there is no
guarantee that interference to radio or television reception, which can be
determined by turning the equipment off and on, the user is encouraged to try
to correct the interference by one or more of the following measures:
− Reorient or relocate the receiving antenna
− Increase the separation between the equipment and receiver
− Connect the equipment into an outlet on a circuit different from that to
which the receiver is connected
− Consult the dealer or an experienced radio/TV technician for help
You are cautioned that any changes or modifications not expressly approved in
this manual could void your warranty.
For customer in Canada
CAUTION
This class B digital apparatus complies with Canadian ICES-003.
Page 3

- 3 -
Content
1.
Warning
P.2
2.
Contents
P.3
3.
Preface
P.4
4.
Nomenclature
P.5
5.
Specification
P.6
6.
Camera features
P.7
7.
Selecting the power supply
P.7
8.
Getting Started
P.8
9.
Taking pictures
P.8
10.
Delete all / Delete last still image or video clip
P.9
11.
Recording video clips (AI)
P.9
12.
Continuous mode (Ct)
P.9
13.
Self-timer (St)
P.10
14.
Changing the resolution- Hr / Lr
P.10
15.
Changing the Lighting Hz
P.11
16.
High density mode (CP)
P.11
17.
Pre-installation Checklist in Windows
P.12
18.
Installation on Windows PC
P.12
19.
Installing the Camera driver – J44416
P.12
20.
Installing the Software – Ulead PhotoExpress 4.0 SE
P.13
21.
Installing the Software – Acrobat Reader 5.05
P.15
22.
Connecting the J44416 to your PC
P.16
23.
Uploading your pictures & video clips to your PC
P.16
24.
Live Video mode
P.17
25.
Uninstalling the software on a Windows PC
P.18
26.
Uninstalling the driver on a Windows PC
P.18
27.
Cleaning and maintenance
P.18
28.
Troubleshooting
P.19
29.
Safety Note & warning
P.21
Page 4

- 4 -
Preface
Test Shots Prior to Photography
Always take a test photograph to check that the camera is functioning normally.
The liability for any incidental losses (such as the cost of photography or the
loss of income from photography) incurred as a result of fault with this product
cannot be accepted.
Notes on Copyright
Images recorded using your digital camera system cannot be used in ways
that infringe copyright laws without the consent of the owner unless intended
only for personal use. Note that some restrictions apply to photographing stage
performances, entertainment and exhibits, even when intended purely for
personal use. Users are also asked to note that the transfer of memory cards
containing images or data protected under copyright laws is only permissible
within the restrictions imposed by those copyright laws.
Liquid Crystal
If the LCD monitor or LCD panel is damaged, take particular care with the
liquid crystal in the monitor or panel. If any of the following situations arise,
take the action indicated.
• If the liquid crystal comes in contact with your skin wipe the area with a
cloth and then thoroughly wash with water and soap.
• If the liquid crystal gets into your eyes flush the eye with clean water for at
least 15 minutes and then seek medical assistance.
• If liquid crystal is swallowed flush your mouth thoroughly with water. Drink
large quantities of water and induce vomiting. Seek medical assistance.
Notes on Electrical Interference
If the camera is used in hospital or aircrafts, please note that it may cause
interference with other equipment in the hospital or aircraft.
For details, please check with the applicable regulation in that area.
Trademark Information
MS-DOS and Windows are registered trademarks of the Microsoft Corporation
registered in the USA and other countries.
Windows is an abbreviated term referring to the Microsoft Windows Operation
System.
Other company or product names are trademarks or registered trademarks of
their respective companies.
Page 5

- 5 -
Nomenclature
Front
1. Shutter
2. Viewfinder
3. Lens
4. USB plug-in
5. Hand wrist hole
Back
6. Feature button
7. LCD display
8. Battery compartment
door
Page 6

- 6 -
Specification
1. Image senso
r
640 x 480 CMOS senso
r
2. Image resolution Still picture: High: 640 x 480 pixels
3. Low: 320 x 240 pixels
Movie: 320 x 240 pixels
4. Internal memory 8 MB SDRAM
5. Storable frame High (normal mode): 26 Images
Low (normal mode): 105 Images
High (compress mode): 91 Images
Low (compress mode): 367 Images
Movie: 1 min – 2 min (depend on Normal /
Compress mode)
6. Exposure Auto exposure
7. Optical viewfinder Built-in with reverse Galilean filter
8. Lens 3 elements aspheric hybrid lens with IR filter glass
9. Focus range 1.5 m – infinity
10. File format Still picture: BMP file
Video: AVI file
11. Self-timer Electronic self-timer with 10 second delay
12. Delete pictures method PC: Not Available
Camera: Delete last / Delete all
13. Button control Shutter button / Select & Power On button
14. Output connector USB
15. Zoom rate Not Available
16. LCD display Show image counter / Off mode (OF)
Self timer mode (St) / Continuous mode (Ct)
Video mode (AI) / Delete all mode (CA)
Delete last mode (CL) / Select frequency (F5 / F6)
Change resolution (Hr/Lr) / High density mode (CP/nP)
17. Beeper Yes
18. Auto power-off ` Stand by mode (After 30 seconds inactivity)
19. Low battery warning /
indicator
With low battery warning indicator (Low battery icon “Lr” will flash)
20. Power supply 2 x AAA alkaline battery (included)
21. Dimension 85.6mm (L) x 53.2mm (H) x 16mm (D)
22. Weight 44 g (without battery)
23. Bundled accessories USB cable / CD ROM software
2 x AAA alkaline battery
24. Viewfinder range 98 % of actual target
Page 7

- 7 -
Camera features
Features
− Capable of recording images at VGA or CIF resolutions
− AVI clip in CIF format
− Auto exposure and auto white balance functions
− 8 MB internal memory
− USB connection
Selecting the power supply
Important battery information
It is strongly recommended that you use fresh batteries to optimize the
performance of your camera. You may use alkaline AAA batteries.
Note:
• Do not use different types of batteries together.
• Do not use Ni-MH or Ni-Cd or any rechargeable batteries.
• Soiling, such as fingerprints on the battery terminals, can significantly
reduce the battery life.
• Do not use new and used batteries together.
• Different brands of batteries will yield different results.
• The battery life of alkaline batteries may be shortened when exposed to
temperatures of 10°C or below.
• Always turn the camera off when replacing the batteries. If the camera is
left on, the camera’s settings may revert to the default settings.
• After 30 seconds of inactivity the camera will switch to standby mode
automatically. The LCD will not be illuminated and all images will be
stored in the camera’s memory.
• You may lose images stored in the camera if the battery power is
insufficient.
Insert batteries
1. Open the Battery Compartment Door and insert 2 x AAA batteries. When
inserting the batteries, make sure that you follow the polarity direction (+)
(-), which is indicated in the battery compartment.
2. Press down on the battery cover to lock the battery door.
3. Please make sure you have downloaded all pictures before replacing your
batteries.
Page 8

- 8 -
Getting Started
Turn the camera on by pressing the Feature Button once. Press the Feature
Button to cycle through the Feature Modes. To exit the Feature Mode
continue to press the Feature button until the LCD displays a number or wait 5
seconds without pressing any buttons.
oF
(Off mode)
Æ
St
(Self-timer mode)
Æ
Ct
(Continuous mode)
Æ
AI
(Video mode)
Æ
CA
(Delete all mode)
Æ
CL
(Delete last mode)
Æ
Lr/Hr
(Change resolution)
Æ
F5/F6
(Select Frequency)
Æ
CP/nP
(High density mode)
Notes:
After 30 seconds of inactivity, the camera will switch to standby mode. The
LCD will go blank. All images taken will be stored in the camera’s memory and
the camera’s setting will revert to the default settings.
Taking pictures
Press the shutter button once to take a picture. The counter displayed on the
LCD will decrease showing the number of images left. Note: If the counter
remain unchanged that indicate the image has not been taken. This is
probably due to low light intensity. Please adjust the lighting and retake the
image. When the counter displays 00, the camera’s memory is fully utilized
and no space to take additional images remains. In order to take additional
pictures, you must transfer or upload your images to the PC.
Notes: Ensure that neither your fingers nor the strap come between the lens
and the subject. If it is dirty, clean the lens as described in the
Cleaning and maintenance section.
Page 9
- 9 -
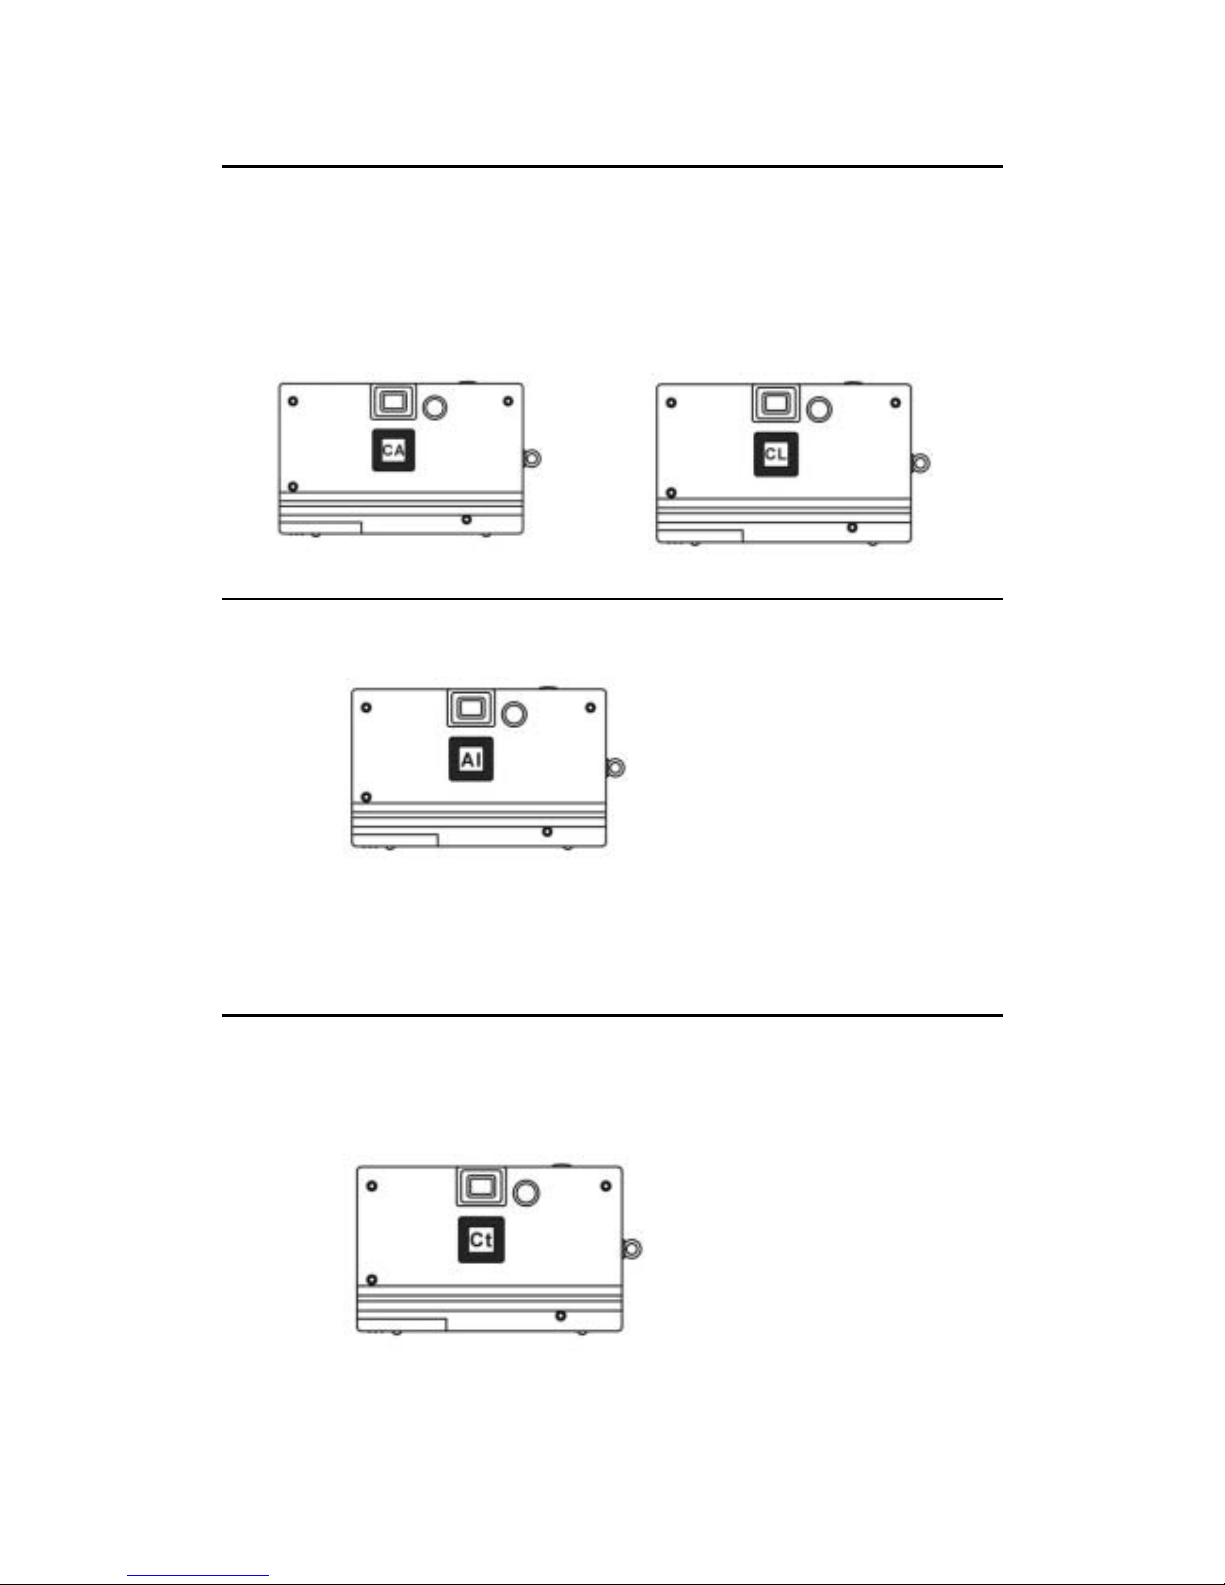
Delete all / Delete last still image or video clip
Press the Feature Button until either CA or CL appears in the LCD.
• CA stands for clear all and is used to delete all images
CL stands for clear last and is used to delete the last image..To delete the last
image taken, press the shutter button once after CL appears in the LCD.
To delete All Images, press the Feature Button until CA appears in the LCD.
Press the shutter button to confirm your selection and again when CA flashes
in the LCD.
Recording Video Clips (AI)
Press the Feature Button until ‘AI’ appears in the LCD. Press and hold the
shutter button to record video clips. The camera will record video clips as
long as the shutter button ispressed or until the memory is full.
Note: The camera is designed to record video clips regardless of the lighting
conditions. Pay special attention to the light conditions while in this mode to
optimize image quality.
Continuous mode (Ct)
Press the Feature Button until ‘Ct’ appears in the LCD. Press and hold the
shutter button to capture pictures continuously. When the counter indicated
00, it means the camera’s memory is exhausted. In order to take additional
pictures, you must transfer or upload your images to the PC.
Page 10

- 10 -
Self-timer (St)
Press the Feature Button until ‘St’ appears in the LCD. Press the shutter to
start a 10-second self-timer count down. The camera will issue a series of
short beeps followed by a long beep. When the image has been captured, the
camera will beep again.
Changing the resolution- Hr/Lr
To change the resolution, press the Feature Button until the resolution option is
displayed in the LCD. The resolution is noted by Hr for high resolution and Lr
for Low resolution. When the resolution you are currently in appears in the
LCD, press the shutter button to change to the other resolution option. The
picture resolution can be changed at any time and then the camera can store
both high and low resolution images at the same time.
Select high resolution mode
Preset to high resolution counter
Select low resolution mode
Preset to low resolution counter
Page 11

- 11 -
Resolution chart
Resolution Picture stored
Hr
640 × 480
26
Lr
320 × 240
105
Changing the Lighting Hz
Different countries use different lighting frequencies. The US uses a 60Hz
frequency while Europe uses a 50 Hz frequency. The J44416 camera gives
you the option to switch the Hz frequency as you travel. To change the
frequency, press the Feature Button until the frequency option denoted by
either F5 or F6 is displayed in the LCD. Press the shutter button to change
the frequency from the number displayed in the LCD to the other frequency
option.
High Density mode (CP)
Press the Feature Button until ‘CP’ appears in the LCD. Press the shutter
button one more time to change to high density mode. In high density mode,
the number of pictures that you can take will be doubled in both Hr/Lr
resolution.
To switch back to the normal (low density) mode, press the Feature Button until
‘nP’ appears in the LCD. Press the shutter button again to change back to
normal mode.
High/low density chart chart
Resolution Picture stored
Hr/nP 640 x 480 26
Hr/CP 640 x 480 91
Lr/nP 320 x 240 105
Lr/CP 320 x 240 367
Page 12

- 12 -
Pre-installation Checklist in Windows
Hardware and software requirements:
To run this software, your must have the hardware and software described
below. Check your system before you begin the installation.
Operating System Windows 98(including second edition), 2000 Professional,
Me and Xp
CPU Pentium 233MHz or higher
RAM 32MB RAM or higher
Accessory USB port
Hard Disk Space 200MB free hard disk space
Note:
- Connect the PC and the digital camera directly using the USB
cable. Connecting via USB hub is not guaranteed.
- USB interface board is not guaranteed.
- Self-made PC is not guaranteed.
Installation on Windows PC
The J44416 includes the following software and applications: Camera driver -
to provide image transfer from the camera to your computer, Ulead Photo
Express 4.0 SE – for photo editing and Adobe Acrobat Reader - to access the
Owner’s Manual (PDF).
Installing the Camera driver – J44416
Insert the J44416 CD into your CD-ROM drive. The CD should auto run.
Otherwise, go to Start Æ Run and type “D:\autorun.exe” (where D:\ is your
CD-ROM drive). The following screen will appear on your monitor.
1. Press the “Digital Camera driver”
2. Press “Yes” to agree the license agreement and
then start the J44416 driver installation.
3. The usable file transfer to the computer.
4. The installation complete. The windows ask for
restart the computer to activate the driver. Press
“Yes” to restart now or Press “No” to restart later.
Page 13

- 13 -
Note: If you had installed the driver already, then you
can remove the driver when you start the driver
installation again. If you connect the J44416 in first time,
your operating system will ask for driver location, please
insert the driver CD and select the CD-ROM for driver
searching.
Installing the software – Ulead Photo Express 4.0 SE
Insert the J44416 CD into your CD-ROM drive. The CD should auto run.
Otherwise, go to Start Æ Run and type “D:\autorun.exe” (where D:\ is your
CD-ROM drive). The following screen will appear on your monitor.
1. Press ”Image editing software”
2. Select the language you to install from the table
3. On the welcome screen, click “Next” to continue setup.
4. On the license agreement screen, click “Yes” to accept license agreement
to continue setup.
5. Enter your registration information and serial number and then click
“Next”. The serial number will be labeled on the CD cover.
Page 14

- 14 -
6. Chose the destination location of where you’d like to install the software
and click “Next”.
7. Click “Next” on the select program folder screen.
8. Confirm the setting before copying files. Click “Next” to transfer files if it is
correct.
9. The setup progress bar will appear, please wait until the bar disappears to
proceed.
10. Installation completed. Click “Finish” to quit. You can also choose to
register to Ulead though Internet.
Page 15

- 15 -
Installing the software – Acrobat Reader 5.05
Insert the J44416 CD into your CD-ROM drive. The CD should auto run.
Otherwise, go to Start Æ Run and type “D:\autorun.exe” (where D:\ is your
CD-ROM drive). The following screen will appear on your monitor.
1. Press the “Acrobat Reader”
2. Click “Next” on the welcome screen to continue setup.
3. Click “Next” on the destination folder.
4. Click “OK” to complete setup.
Page 16
- 16 -
Connecting the J44416 to your PC
When you finish taking pictures, you can connect your camera to your PC and
upload your images through the USB cable supplied. Plug one end of the
USB cable into your camera and the other end into the USB port of you PC
(located either at the back your PC or in the front panel).
When the camera is connected, you will hear a beeping sound from the
camera indicating that the PC is supplying power to the camera, The image
counter will appear on the LCD. If you connect the J44416 in first time, your
operating system will ask for driver location, please insert the driver CD and
select the CD-ROM for driver searching.
Uploading your pictures & video clips to your PC
1. Make sure that your camera is securely connected to your PC and the
“PC” is shown on the LCD.
2. Double click the shortcut “MarsCam VGA” on your desktop.
3. The twain driver will detect the storage of the camera
automatically and then a window will pop up and ask for
uploading.
4. All pictures and videos clip will show on the twain driver.
5. Highlight the picture or video clips you want.
6. Press “save” icon
7. Select a directory to keep the picture and then you can find images later.
For example (C:\MyDocuments\MyPictures)
8. The pull down arrow allows you to select the file format in which the image
will be saved. The JPG file format is smaller without any reduction in
image quality.
9. Press “save” button to save your picture.
Note: If the short cut file “MarsCam VGA” does not appear on the desktop that
indicates the driver has not been installed properly.
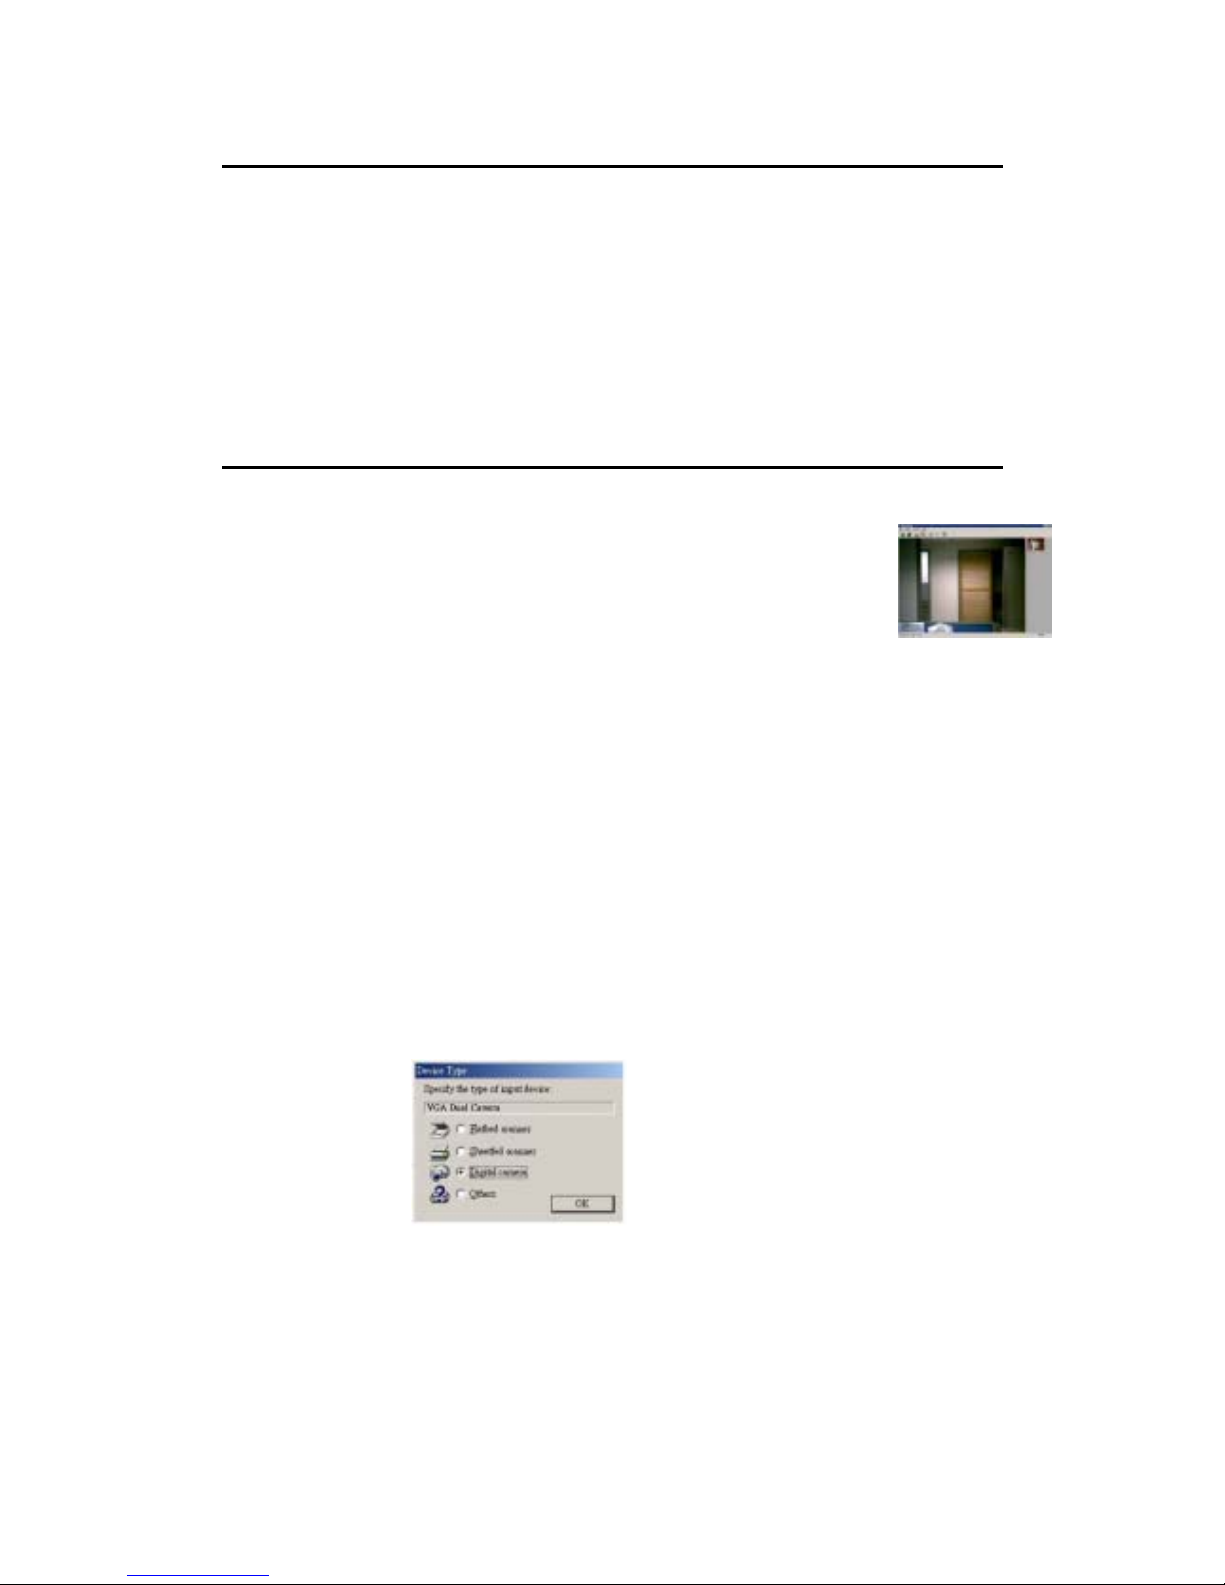
You can also download the picture when you using Ulead software.
- Click Get Photos and select “Digital Camera”.
- Preset “VGA Dual Camera” to digital camera.
- Select “VGA Dual Camera” on the left and then press “Acquire” to
download photos.
Page 17
- 17 -
- The twain driver will detect the storage of the camera automatically and
then a window will pop up and ask for uploading.
- All pictures and videos clip will show on the twain driver.
- Highlight the picture or video clips you want.
- Press “Option” → “Transfer” can transfer the picture to Photo
Express directly.
Now you can rotate, crop and modify your picture as you like though the Ulead
photo Express 4.0.
Live Video mode
The J44416 can be used as a web cam with different videoconference and
video capturing software available in the market.
Make sure that your camera is securely connected to your PC and the “PC” is
shown on the LCD.
Double click the shortcut “MarsCam VGA” on your desktop.
Press “ “ to enable the live video mode.
Press “ “ to start the live video.
Note: After you press “ “, you should setup the live video frequency first.
(Select “option” → select “ Video Source” → Choose the frequency “50Hz /
60Hz”)
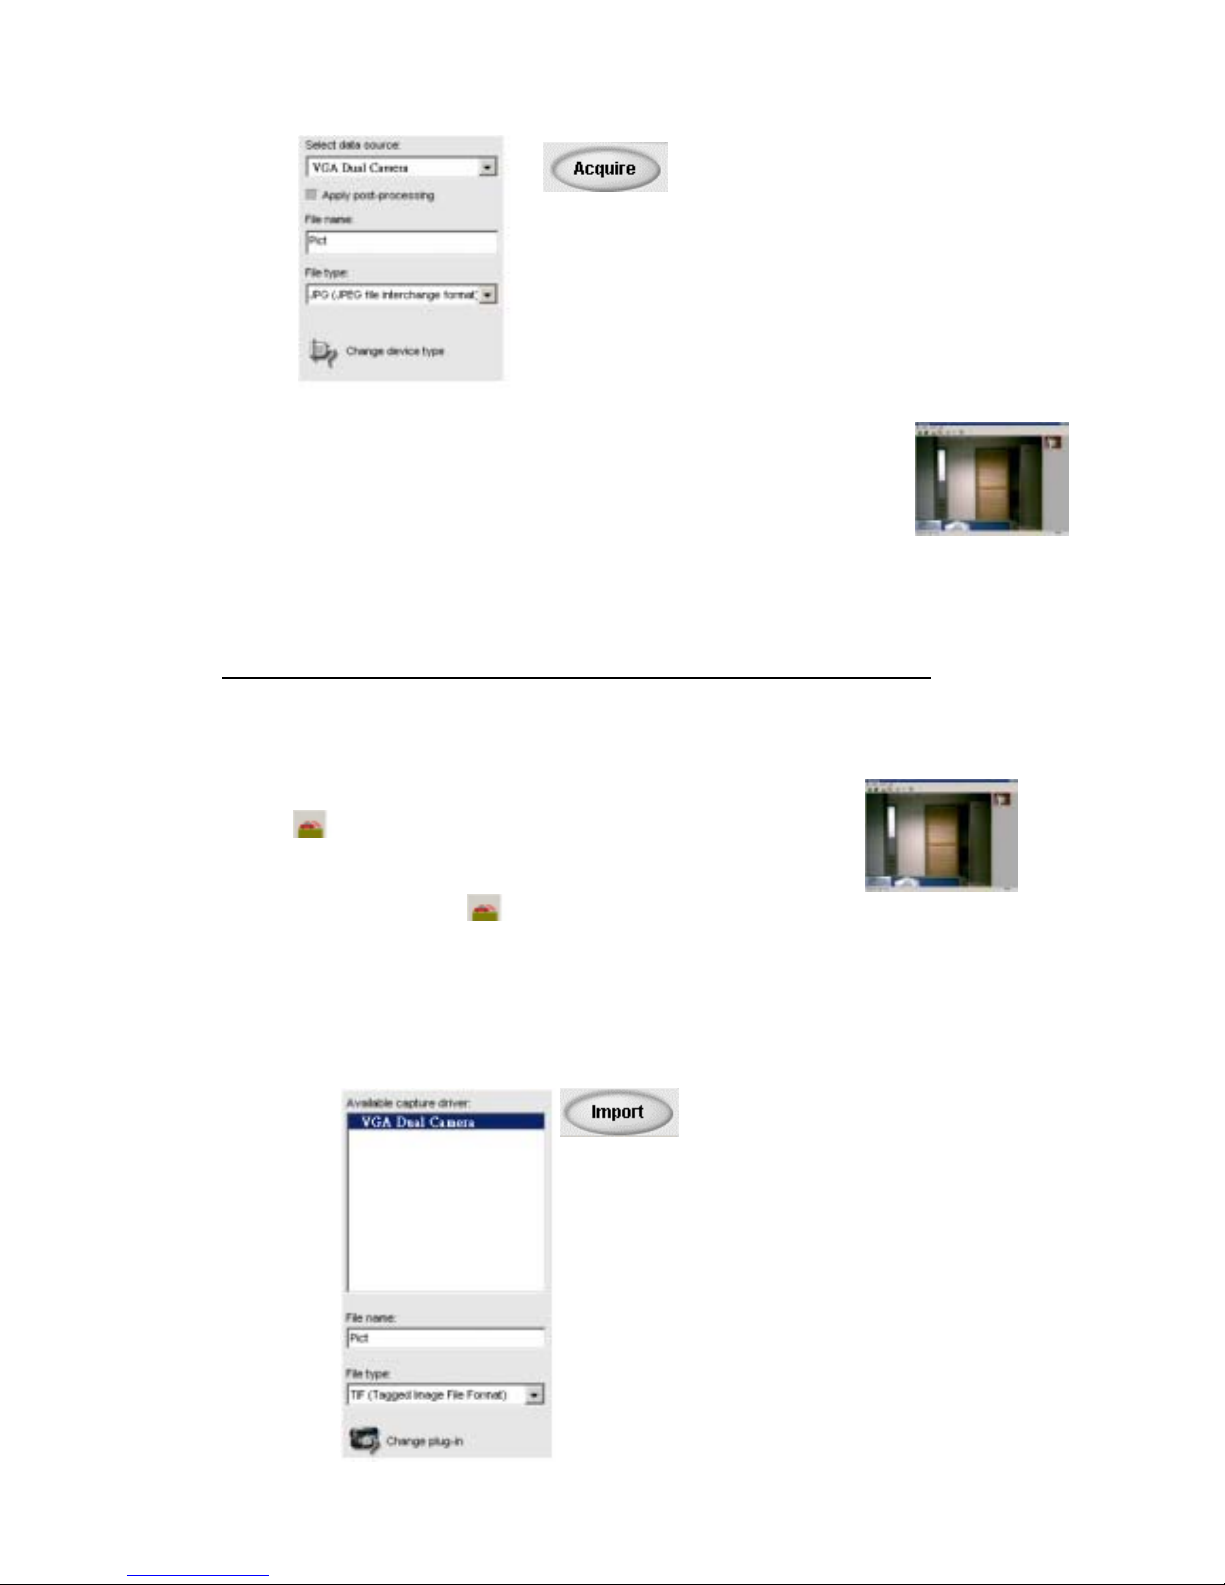
You can also view the live video by using Ulead Photo Express 4.0 SE
- Select “VGA Dual Camera” on the left and then press “Import”
to show the live video
Page 18

- 18 -
Uninstalling the software on a Windows PC
The User can automatically uninstall the software using the “Add/Remove
Program” in the Control Panel.
Note:
Use this procedure only when the installed software is no longer required or
when the software installation fails.
Procedure:
1. Switch on your PC and start up Windows.
2. Open the “My Computer” windows and double-click on “Add/Remove
Programs” in the Control Panel.
3. Select the application to be uninstalled.
The “Add/Remove Programs Properties” windows appear. Select the
program to be deleted. (Photo Express) and click the “Add/Remove”
button.
4. Select the uninstall method.
5. The user can choose “Automatic “ to uninstall the whole software or
choose “Custom” to uninstall part of the software.Press “Next” to begin. If
you choose “Custom”, you need to select the files, directory and registry
key to be uninstalled, and then press “Finish” to begin the uninstallation.
Uninstalling the driver on a Windows PC
User can automatically uninstall the driver by run the driver installation again.
In the installation beginning, the driver will search the computer. if the driver
had been detected in the computer then the window will pop up and ask for
uninstallation. Press “Yes” to start the uninstallation.
Cleaning and maintenance
Be sure to read this information to ensure that you use your camera correctly.
Places to Avoid
Do not store or use the camera in the following places or locations:
• Very humid, dirty or dusty places.
• In direct sunlight or in places subject to extreme increases in
temperature such as in a closed car during summer.
• Extremely cold places.
• Places subject to strong vibrations.
• Places affected by smoke or steam.
• Places subject to strong magnetic fields (such as near motors,
transformers or magnets.)
• Keep away from contact with chemicals such as pesticides or next to
rubber or vinyl products.
• Do not expose the camera to sand. In sandy locations such as beaches
or deserts, or in locations where there is wind borne sand, ensure that
the camera is not exposed to sand. This can cause irreparable damage.
Page 19

- 19 -
Storing the camera
If you do not intend to use the camera for a long period of time, remove the
batteries before storing the camera.
Cleaning your Camera
Use a blower brush to remove dust from the lens and LCD surface and
then wipe lightly with a soft, dry cloth. If any soiling remains, apply a small
amount of lens cleaning liquid to a piece of lens cleaning paper and wipe
gently. Do not scratch hard objects against the lens, LCD screen or
viewfinder as these surfaces are easily damaged. Clean the body of the
camera with a soft dry cloth. Do not use volatile substances such as
thinners, benzene or insecticide, as these may react with camera’s body
and cause deformities or remove the coating.
When traveling overseas
Do not place your camera in the check-in baggage. Baggage handling at
airports may subject the camera to violent shocks and the camera may be
damaged internally even when no external damage is visible.
Troubleshooting
The troubleshooting guide is designed to help you.
For Windows® User:
Symptom Problem Solution
You have lost power to your J44416 by either:
Insufficient battery power. Upload all images to your PC as
soon as possible. Refer to
Battery Guidance section in the
User’s Manual.
All the images I have taken do
not appear.
The battery was removed
before the camera was
connected to the PC.
To retain the images in the
camera’s memory while
changing the batteries, you must
first connect the camera to a PC
via the USB cable. The USB will
supply power to the camera
making it safe to change the
batteries.
I cannot upload images to the
PC.
Connection failure. Check to make sure all cable
connections are secure.
The battery indicator is less
than half.
There is insufficient power. To retain the images in the
camera’s memory while
changing the batteries, you must
first connect the camera to a PC
via the USB cable. The USB
will supply power to the camera
making it safe to change the
batteries.
Page 20

- 20 -
My CD installation wizard does
not work.
The auto installation file is
switched to off or the CD ROM
is not in the drive.
Go to the computer desktop.
Right click on “My Computer.”
Click on “Properties.” Select
“Device Manager” and double
click on “CD-Rom.” Double
click on “CD-R.”Click on
“ Setting .” Ensure “Auto insert
notification” is checked and
the “ disconnect” is selected.
If you change the settings the
computer will ask you to restart
your PC. Click “ Yes .”
The image counter on the LCD
flashed after I took my last
image.
The camera is processing the
image.
Wait for the LCD to stop
flashing and then take your
next image. You may need to
wait a further 20 seconds
before taking the next image.
I get a blurred image when
uploading my images to my
computer.
There may be a momentary
delay between pressing the
Shutter button and the actual
exposure.
Hold the camera steady until
you hear a “beep” which
indicates the exposure is
completed.
I press the shutter button and
get no response.
The camera allows 3
continuous images to be
taken.
Wait for this process to
complete.
Page 21

- 21 -
Safety Notes & Warning
SAFETY NOTES
Place to Avoid
Do not store or use the camera in the following types of environment: -
- Very humid, dirty or dusty places
- In direct sunlight or in places subject to extreme temperature rises, such
as in a closed car in summer/winter
- Extremely cold places
- Places subject to strong vibrations
- Places affected by smoke or steam
- Places subject to strong magnetic fields (such as places near motors,
transformers or magnets)
- For long periods in contact with chemicals such as pesticides or next to
rubber or vinyl products
- Any wet areas, e.g. bath room, swimming pool, and etc
Do Not Expose the camera to sand
The camera is particularly and adversely affected by sand. In sandy
locations such as beaches or deserts, or in locations where there is wind
borne sand, ensure that the camera is perfectly covered from sand.
(Exposing the camera to sand may cause faults that are irreparable.)
Notes on Condensation
If the camera is carried suddenly from a cold location into warm place,
water droplets (condensation) may form on the inside of the camera or on
the lens.
When the camera is Unused for Long Periods
If you do not intend to use the camera for a long period, remove the
batteries before storing the camera.
Page 22

- 22 -
W A R N I NG
♦ Use only the batteries specified with this camera.
Load the batteries with the poles positioned as indicated by the ⊕ and
Θ marks. The use of other power sources can damage the camera and
cause a fire accident.
♦ When a fault arises, switch the camera off and remove the
batteries/remove the camera from USB connection.
Turn off the camera and remove batteries/remove the camera from
USB connection immediately when the camera becomes very warm,
emitting smoke, emitting unusual odor or in any other abnormal states.
Continue use of the camera in these situations may cause a fire or electric
shock.
♦ Do not cover or wrap the camera
This can cause heat to build up and distort the casing or cause a fire.
♦ If the battery leaks and fluid gets into our eyes or comes into
contact with your skin or clothing, this can cause injury or loss of
eyesight. Immediately flush the affected area thoroughly with clean
water and seek medical treatment.
♦ When discarding or storing batteries, cover the battery terminals
with insulation tape.
Contact with other metallic objects or batteries could cause the
batteries to ignite or burst.
♦ Do not heat, modify or attempt to disassemble the batteries.
♦ Do not drop or subject the batteries to impacts.
♦ Do not attempt to recharge lithium or alkaline batteries.
♦ Do not store the batteries with metallic products
Any of these actions can cause the batteries to burst or leak and
cause fire or injury as a result.
♦ Do not allow water or foreign objects to enter
the camera
If water or a foreign object has entered the camera, switch the
camera off and then remove the batteries/remove the camera from USB
connection. Continued use of the camera can cause a fire or electric
shock.
♦ Never attempt to modify or disassemble the camera. (Never
open the casing)
♦ Do not use the camera when it has been dropped or the casing is
damaged.
This may cause a fire or electric shock
Page 23

- 23 -
♦ Never attempt to take pictures whilst in motion
♦ Do not use the camera while you are walking or operating a
moving car or other vehicle.
This can result in you falling down or being involved in a traffic
accident.
♦ Do not touch any metal parts of the camera
during a thunderstorm
This can cause an electric shock due to induced current from the
lighting discharge.
♦ Do not use this camera in locations severely affected by oil
fumes, steam, humidity or dust.
♦ Remove the batteries and disconnect the camera from USB
connection when you are cleaning the camera or if you intend to leave
the camera unused for a long period.
♦ Do not use the camera in the bathroom or
shower
Failure to do so can cause a fire or electric shock.
♦ Do not leave this camera in places subject to extremely high
temperatures.
♦ Do not leave the camera in locations such as a sealed vehicle or
in direct sunlight.
This can cause a fire.
♦ Do not place the camera on an unstable surface
♦ Do not place heavy objects on the camera.
This can cause the heavy object to tip over or fall and cause injury.
♦ Do not use the flash close to anyone’s eyes
This can cause temporary damage to the person’s eyesight.
♦ Request regular internal testing and cleaning for
your camera
Build-ups of dust in your camera can cause a fire or electric shock
♦ Under a strong electro-static discharge environment, e.g.
directly under lightening, transformer and etc , the camera will go into
a idle / fault mode. Simply press the reset button to reset the camera
Be sure the camera is under your supervision in all time when it is
connected to your computer via the USB cable. Your camera might
become very warm when connecting to computer for a longer period of
time. Disconnect the camera from the USB port and turn the camera off
for a while to cool it down. Continued usage while the camera is very
warm might cause a fire.
 Loading...