

Page 1
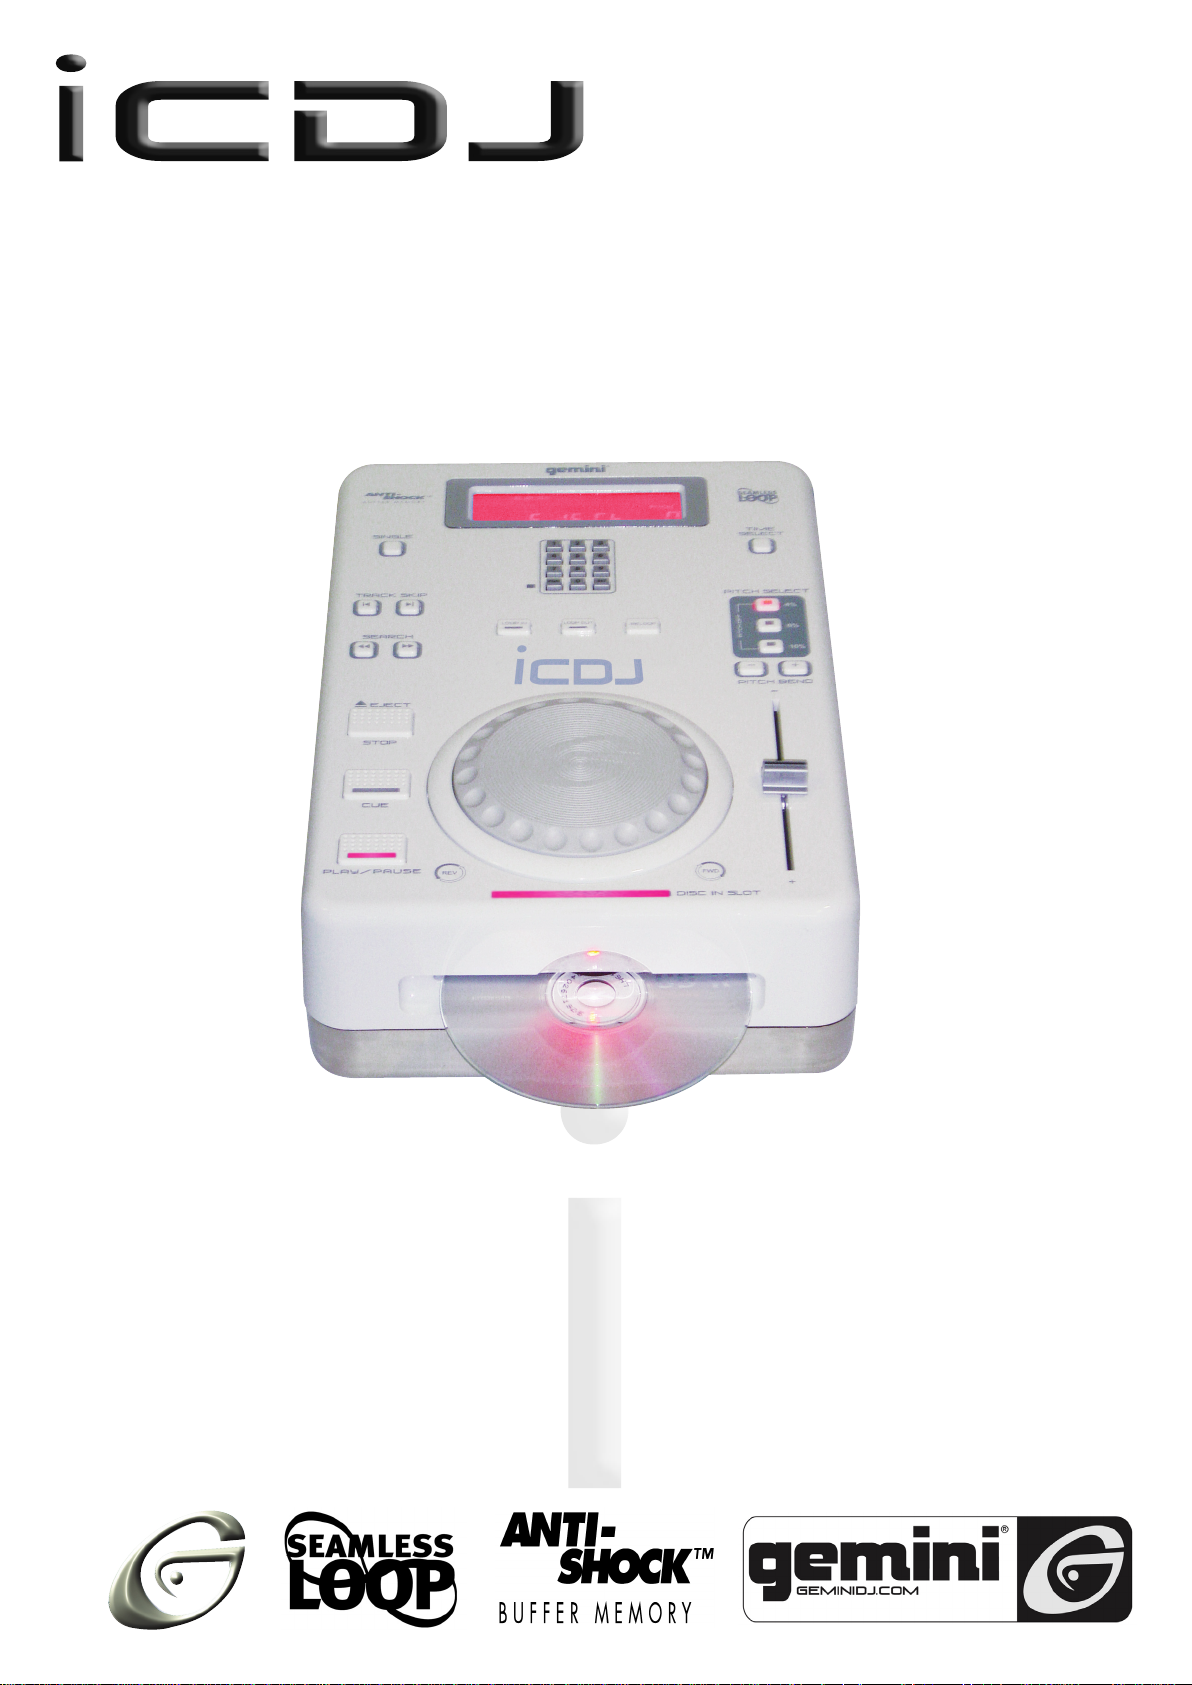
Professional CD-PLayer
PROFESSIONELLER CD-SPIELER
LECTOR DE CD PROFESIONAL
LECTEUR DE CD PROFESSIONNEL
OPERATIONS MANUAL
BEDIENUNGSHANDBUCH
MANUAL DEL OPERADOR
MANUEL D’INSTRUCTIONS
Page 2
MULTI LANGUAGE INSTRUCTIONS
ENGLISH..............................................................................................................................................................................................................................................................................PAGE 4
DEUTSCH............................................................................................................................................................................................................................................................................PAGE 6
ESPAÑOL..........................................................................................................................................................................................................................................................................................................................................................................PAGE 9
FRANCAIS....................................................................................................................................................................................................................................................................................................................................................................PAGE 1 2
PLEASE READ BEFORE USING APPLIANCE, IMPORTANT WARNING & SAFETY INSTRUCTIONS!
CAUTION
RISK OF ELECTRICAL SHOCK DO NOT OPEN!
CAUTION: This product satisfies FCC regulations when shielded cables and con
nectors are used to connect the unit to other equipment. To prevent electromag
netic interference with electric appliances such as radios and televisions, use
shielded cables and connectors for connections.
The exclamation point within an equilateral triangle is intended to alert the user to
the presence of important operating and maintenance (servicing) instructions in
the literature accompanying the appliance.
The lightning flash with arrowhead symbol, within an equilateral triangle, is
intended to alert the user to the presence of uninsulated “dangerous voltage”
within the product’s enclosure that may be of sufficient magnitude to constitute a
risk of electric shock to persons.
READ INSTRUCTIONS: All the safety and operating instructions should be read
before the product is operated.
RETAIN INSTRUCTIONS: The safety and operating instructions should be retained
for future reference.
HEED WARNINGS: All warnings on the product and in the operating instructions
should be adhered to.
FOLLOW INSTRUCTIONS: All operating and use instructions should be followed.
CLEANING: The product should be cleaned only with a polishing cloth or a soft dry
cloth. Never clean with furniture wax, benzine, insecticides or other volatile liquids
since they may corrode the cabinet.
ATTACHMENTS: Do not use attachments not recommended by the product manu
facturer as they may cause hazards.
WATER AND MOISTURE: Do not use this product near water, for example, near a
bathtub, wash bowl, kitchen sink, or laundry tub; in a wet basement; or near a
swimming pool; and the like.
ACCESSORIES: Do not place this product on an unstable cart, stand, tripod, brack
et, or table. The product may fall, causing serious injury to a child or adult, and seri
ous damage to the product. Use only with a cart, stand, tripod, bracket, or table
recommended by the manufacturer, or sold with the product. Any mounting of the
product should follow the manufacturer’s instructions, and should use a mounting
accessory recommended by the manufacturer.
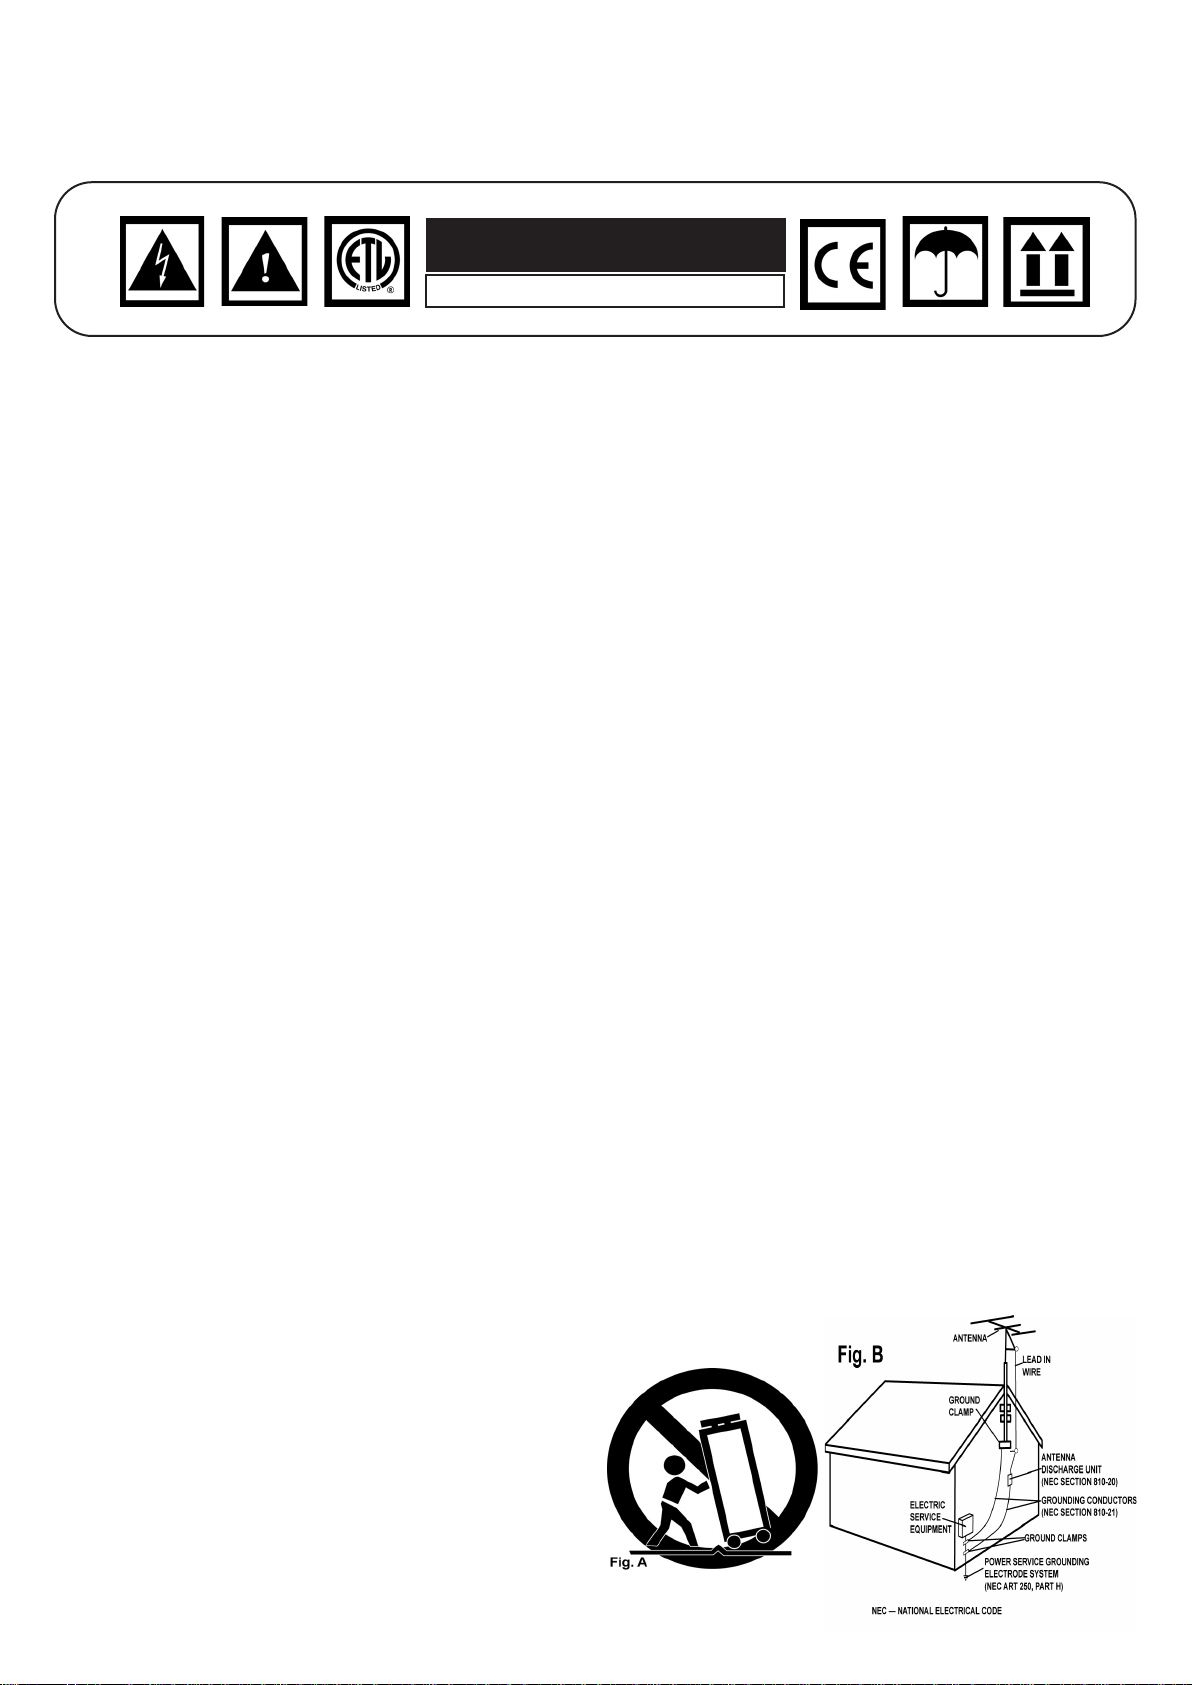
CART: A product and cart combination should be moved with care. Quick stops,
excessive force, and uneven surfaces may cause the product and cart combina
tion to overturn. See Figure A.
VENTILATION: Slots and openings in the cabinet are provided for ventilation and to
ensure reliable operation of the product and to protect it from overheating, and
these openings must not be blocked or covered. The openings should never be
blocked by placing the product on a bed, sofa, rug, or other similar surface. This
product should not be placed in a built-in installation such as a bookcase or rack
unless proper ventilation is provided or the manufacturer’s instructions have been
adhered to.
POWER SOURCES: This product should be operated only from the type of power
source indicated on the marking label. If you are not sure of the type of power sup
ply to your home, consult your product dealer or local power company.
LOCATION: The appliance should be installed in a stable location.
NON-USE PERIODS: The power cord of the appliance should be unplugged from the
outlet when left unused for a long period of time.
GROUNDING OR POLARIZATION:
• If this product is equipped with a polarized alternating current line plug (a plug
having one blade wider than the other), it will fit into the outlet only one way. This
is a safety feature. If you are unable to insert the plug fully into the outlet, try
reversing the plug. If the plug should still fail to fit, contact your electrician to
replace your obsolete outlet. Do not defeat the safety purpose of the polarized
plug.
• If this product is equipped with a three-wire grounding type plug, a plug having a
third (grounding) pin, it will only fit into a grounding type power outlet. This is a
safety feature. If you are unable to insert the plug into the outlet, contact your
electrician to replace your obsolete outlet. Do not defeat the safety purpose of the
grounding type plug.
POWER-CORD PROTECTION: Power-supply cords should be routed so that they
are not likely to be walked on or pinched by items placed upon or against them,
paying particular attention to cords at plugs, convenience receptacles, and the
point where they exit from the product.
OUTDOOR ANTENNA GROUNDING: If an outside antenna or cable system is
connected to the product, be sure the antenna or cable system is grounded so as
to provide some protection against voltage surges and built-up static charges.
Article 810 of the National Electrical Code, ANSI/NFPA 70, provides information
with regard to proper grounding of the mast and supporting structure, grounding of
the lead-in wire to an antenna discharge unit, size of grounding conductors, loca
tion of antenna-discharge unit, connection to grounding electrodes, and require
ments for the grounding electrode. See Figure B.
LIGHTNING: For added protection for this product during a lightning storm, or when
it is left unattended and unused for long periods of time, unplug it from the wall out
let and disconnect the antenna or cable system. This will prevent damage to the
product due to lightning and power-line surges.
POWER LINES: An outside antenna system should not be located in the vicinity of
overhead power lines or other electric light or power circuits, or where it can fall
into such power lines or circuits. When installing an outside antenna system,
extreme care should be taken to keep from touching such power lines or circuits
as contact with them might be fatal.
OVERLOADING: Do not overload wall outlets, extension cords, or integral conven
ience receptacles as this can result in a risk of fire or electric shock.
OBJECT AND LIQUID ENTRY: Never push objects of any kind into this product
through openings as they may touch dangerous voltage points or short-out parts
that could result in a fire or electric shock. Never spill liquid of any kind on the
product.
SERVICING: Do not attempt to service this product yourself as opening or removing
covers may expose you to dangerous voltage or other hazards. Refer all servicing
to qualified service personnel.
DAMAGE REQUIRING SERVICE: Unplug this product from the wall outlet and refer
servicing to qualified service personnel under the following conditions:
• When the power-supply cord or plug is damaged.
• If liquid has been spilled, or objects have fallen into the product.
• If the product has been exposed to rain or water.
• If the product does not operate normally by following the operating instructions.
Adjust only those controls that are covered by the operating instructions as an
improper adjustment of other controls may result in damage and will often require
extensive work by a qualified technician to restore the product to its normal oper
ation.
• If the product has been dropped or damaged in any way.
• When the product exhibits a distinct change in performance, this indicates a need
for service.
REPLACEMENT PARTS: When replacement parts are required, be sure the service
technician has used replacement parts specified by the manufacturer or have the
same characteristics as the original part. Unauthorized substitutions may result in
fire, electric shock, or other hazards.
SAFETY CHECK: Upon completion of any service or repairs to this product, ask the
service technician to perform safety checks to determine that the product is in
proper operating condition.
WALL OR CEILING MOUNTING: The product should not be mounted to a wall or ceil
ing.
HEAT: The product should be situated away from heat sources such as radiators,
heat registers, stoves, or other products (including amplifiers) that produce heat.
(2)
Page 3
iCDJ
(3)
Page 4

INTRODUCTION:
Congratulations on purchasing a Gemini ICDJ CD play-
er. This state of the art professional CD player is backed
by a three year warranty, excluding lasers. One year warranty on CD lasers. Prior to use, we suggest that you
carefully read all the instructions.
FEATURES:
-Anti-shock using buffer memory (10-40 seconds)
-Digital output
-Slot-in mechanism with red LED "Slot-in" display
-Direct access rubber keypad, fully programmable
-Single auto cue / continuous play
-Seamless looping with reloop
-Pitch bend
-Frame accurate search
-Large red LCD display
-Large soft touch rubber jog wheel
-4%, 8% & 16% variable pitch with OFF feature
-Time select
CAUTIONS:
1. Do not use this CD player at temperatures below
41°F/5°C or higher than 95°F/35°C.
2.The apparatus should not be exposed to dripping or
splashing, and no objects filled with liquids such as vases
should be placed on the apparatus.
3. Place the unit in a clean and dry location.
4. Do not place the unit in an unstable location.
5. When disconnecting the power cord from an AC outlet,
always grasp it by the plug. Never pull the power cord.
6. To prevent electric shock, do not remove the cover or the
bottom screws. THERE ARE NO USER SERVICEABLE
PARTS INSIDE. Please refer servicing to a qualified technician.
7. Do not use chemical solvents to clean the unit.
8. Keep the laser pickup clean by keeping the tray closed.
9. Keep this manual in a safe place for future reference.
SAFETY CERTIFICATIONS:
Laser Diode Properties
Material: Ga - Al - As
Wavelength: 755 - 815 nm (25° C)
Laser Output: Continuous Wave, max. 0.5mW
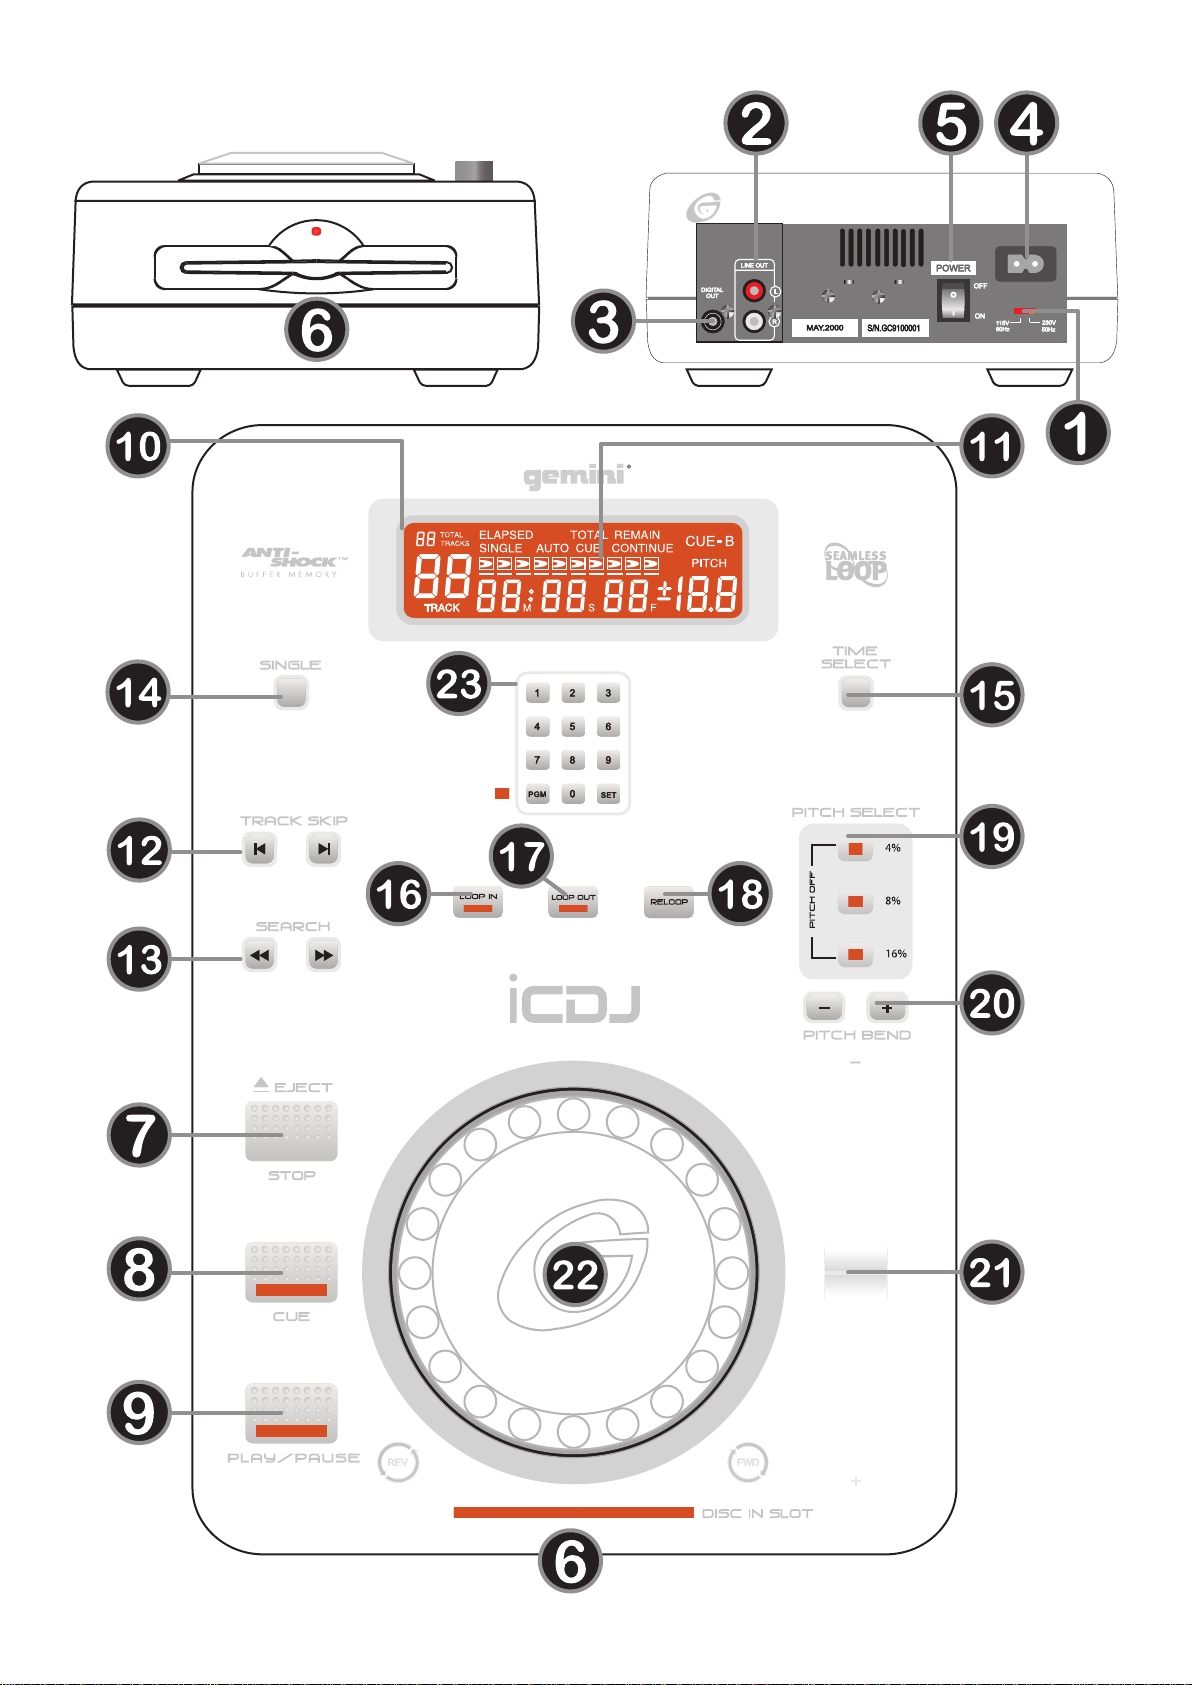
LINE VOLTAGE SELECTION:
Model ICDJ is a dual voltage unit. It will operate at 115
or 230 volts. To set the proper voltage follow these steps:
1. Place the head of a screw driver in the center of the
VOLTAGE SELECTOR SLIDE (1) found on the rear
panel.
2. Slide the switch left for 115 V or push the switch right for
230 V.
3. Do not force or twist the switch. Excessive force may
cause damage. If the switch does not move smoothly,
contact a qualified technician.
CONNECTIONS:
1. Plug one end of a set of RCA connectors into each of the
LINE OUTPUT (2) jacks.
2. Plug the other end of the RCA connectors into any available line level input jacks on your mixer. If you are playing the ICDJ through a receiver, you can plug the RCA
connectors into the CD or AUX input jacks on your receiver. If there are no CD or AUX inputs, use any line level
(not phono) inputs.
3. Connect any type of device that will accept a digital sig-
nal, such as DAT, MD, HARD DRIVE, etc. to the COAX-
IAL (3) inputs on the rear panel to record a digital signal.
4.Connect the power plug into the POWER JACK (4) for
power.
FUNCTION DESCRIPTIONS:
POWER SWITCH: After making sure that the VOLTAGE
SELECTOR SLIDE (1), found on the rear panel, is prop-
erly set, plug the unit in and press the POWER (5) switch.
The unit will turn on. Pressing the POWER (5) switch a
second time will turn the unit off.
DISC IN SLOT: The DISC IN SLOT (6) is where the CD is
held. When a disc is in the slot the red LED bar will be
illuminated.
STOP/EJECT: Press STOP/EJECT (7) once to stop,
twice to eject, and hold down to eject the CD.
CUE: With the unit in the play mode, and after memorizing
the cue point, pressing the CUE (8) button will cause the
CD player to enter the pause mode at the memorized cue
point. Holding down the cue button changes the cue function to preview (allowing you to hear the music play from
the cue point) and releasing the cue button returns you to
the preset cue point.
PLAY/PAUSE: Each press of the PLAY/PAUSE (9) but-
ton causes the operation to change from play to pause or
from pause back to play. See the CUE INSTRUCTIONS
section for more information.
DISPLAY: The DISPLAY (10) shows the track numbers,
play mode, pause mode, and 3 different time displays.
These time displays are time elapsed on the track, time
remaining on the disc and time remaining on the track.
PLAYBACK DISPLAY: The PLAYBACK DISPLAY (11)
displays the time remaining to play and flashes slowly
when the track has 30 seconds left. The PLAYBACK DISPLAY (11) flashes quickly when the track has 15 seconds
left.
TRACK SKIP: The TRACK SKIP (12) buttons let you
select the track to play.
SEARCH: The SEARCH (13) buttons are used to
move foward or reverse while in play mode. The
SEARCH (13) buttons are also used to accurately position the disc at the point where you wish the track to start
playing. This position on the track is memorized as the
cue point. See the CUE INSTRUCTIONS section for
more information.
SINGLE: Pressing the SINGLE (14) button activates the
AUTO-CUE function. The AUTO-CUE function causes
the unit to pause at the beginning of music of the following track and allows you to start play immediately from the
start of music without any blank space (which exists at the
beginning of every track). Pressing the SINGLE (14) button a second time activates the CONTINUOUS function
causing the unit to play continuously (after the last track,
the unit will return to the first track of the disc and continue to play). Pressing the SINGLE (14) button a third time
deactivates the CONTINUOUS function.
TIME: The TIME (15) button switches the time display
between the three available choices listed under display.
LOOP IN: Pressing the LOOP IN (16) button while a track
is playing will set a loop point.
(44)
Page 5

LOOP OUT: After a loop point is memorized, pressing
LOOP OUT (17) in play mode will repeat the section
between the first loop point and a second loop point when
the LOOP OUT (17) button was pressed. Press LOOP
OUT (17) again or pause play to exit the repeating play.
RELOOP: Press for repeated loop play (stutter) from the
first loop point or to reloop a previously set loop. The
RELOOP (18) function automatically returns the music to
the loop point and will play the loop until it is released with
the LOOP OUT (17) button. CD starts instant play from
the previously set cue points.
PITCH SELECT: Pressing the PITCH SELECT (19) but-
tons enable you to select pitch levels ranging from 4%,
8%, & 16%. Press the two buttons labeled PITCH OFF
together to turn off the pitch control.
PITCH BEND: Pushing the PITCH BEND (20) buttons
will automatically raise the pitch up to +4% or lower the
pitch down to -4% from the existing pitch setting.
Releasing the buttons will return the pitch to the original
pitch setting. You can use this function to match the pitch
bend when mixing from one song to another.
PITCH CONTROL SLIDE: Moving the PITCH CONTROL
SLIDE (21) up or down will lower or raise the pitch per-
centage.
JOG WHEEL: Use the JOG WHEEL (22) to make fine
adjustments in pause mode for cueing or bending the
pitch for precise synchronization in play mode.
PGM (Program): Use the PGM (23) section for DIRECT
SELECT or to create a TRACK PROGRAM. Please refer
to the PGM section for detailed instructions.
OPERATING INSTRUCTIONS:
1. Place a CD in the DISC IN SLOT (6).
2. Push the TRACK SKIP (12) buttons to select the track
you want to play.
3. Press the PLAY/PAUSE (9) button and the unit will
instantly play.
CUE INSTRUCTIONS:
1. To start the play at a point other than the beginning of a
track, follow these instructions:
First select the track you wish to play, and then press
PLAY/PAUSE (9) so the unit goes into the play mode.
Press PLAY/PAUSE (9) to pause play at the spot where
you want the play to start the CUE POINT. Use the
SEARCH (13) buttons or JOG WHEEL (22) to pick the
precise spot you want play to begin, then press
PLAY/PAUSE (9) again to save the cue point. Press the
CUE (8) button to pause play at the cue point (the unit will
go into the pause mode and the location indicated on the
display will be the memorized cue point). You can preview
the cue point by pressing and holding down CUE (8).
Press PLAY/PAUSE (9) to begin play from the cue point.
2. Once you have saved a cue point you can fine tune or
change the memorized cue point:
To change a cue point, push PLAY/PAUSE (9) so the
unit plays from the cue point, then press PLAY/PAUSE
(9) at the spot you wish your new cue point to be. Press
PLAY/PAUSE (9) again to save the cue point. The unit
will go into the pause mode and the location indicated on
the display will be the new memorized cue point.
To fine tune a cue point, pause play at the memorized
cue point, then use the SEARCH (13) buttons or JOG
WHEEL (22) to scan frame by frame (1/75th of a second)
to where you want play to begin. Press PLAY/PAUSE (9)
to save the new cue point.
NOTE: DURING FINE TUNING THERE WILL BE A STUTTER EFFECT
(TO HELP YOU FIND THE BEAT). THE STUTTERING EFFECT WILL
END WHEN YOU PRESS PLAY/PAUSE (9) TO SAVE THE CUE
POINT. ALSO, DURING FINE TUNING IF YOU HOLD DOWN THE
SEARCH (13) BUTTON, THE UNIT WILL SCAN QUICKLY.
PGM:
First press STOP/EJECT (7) once followed by PGM to
enter program mode. Select a TRACK NUMBER with the
NUMBER PAD and press SET afterwards to set a track
for that slot. Continue to select tracks and press the SET
button, until satisfied with a program of tracks. Then press
PLAY/PAUSE (9) to start the program. To exit a PRO-
GRAM press the STOP/EJECT (7) button twice or hold
the button down to EJECT the CD. SINGLE-AUTO CUE
modes will function normally with PROGRAM mode.
DIRECT SELECT:
To DIRECTLY SELECT a track, simply enter the TRACK
NUMBER you want to hear. If you select track numbers
1-9 you may use 0 before the number for, example 01 for
track number 1. For tracks 11 and higher use the first digit
then followed by second digit to jump to that track. SIN-
GLE-AUTO CUE modes will function normally with direct
select mode.
NOTE: PROGRAM AND DIRECT SELECT MODES WORK INDE-
PENDTLY, TO USE EITHER MODE THE DISC MUST BE EJECTED
AND REINSERTED.
TROUBLESHOOTING:
- If the disk will not play, check to see if the disc was loaded correctly (label side up). Also check the disc for excessive dirt,
scratches, etc.
- If the disc turns but there is no sound, check the cable connections. If they are okay, check your amplifier or receiver.
- If the CD skips, check the CD for dirt or scratches. Do not
assume that the CD player is defective. Many CDs are recorded out of spec and will skip on most or all CD players. Before
sending the unit in for repair, try playing a CD that you are sure
plays properly.
SPECIFICATIONS:
GENERAL:
Disc Type..........................Standard Compact discs (12 cm & 8 cm)
Time Display............Track Elapsed, Track Remain, or Total remain
Variable Pitch..............................± 16% Slider with Resume Switch
Start..................................................................Within 0.03 seconds
Track Selection...........................................................1 to 99 Tracks
AUDIO SECTION:
Quantization.................1 Bit Linear/Channel, 3 Beam Laser
Oversampling Rate....................................................8 Times
Sampling Frequency................................................44.1 kHz
Frequency Response....................................20 Hz to 20 kHz
Total Harmonic Distortion.........................Less Than 0.005%
Signal to Noise Ratio.............................................................>96 dB
Dynamic Range.....................................................................>94 dB
Output Level (nominal)............................................1.9 Volts R.M.S.
Power Supply..............................................AC 120/230V, 60/50 Hz
Dimensions.........................................................12.5" x 8.3" x 3.75"
..........................................................................(31.5 x 21 x 9.5mm)
Weight..................................................................5.65 lbs. (2.56 kg)
SPECIFICATIONS AND DESIGN ARE SUBJECT TO CHANGE
WITHOUT NOTICE FOR PURPOSE OF IMPROVEMENT.
(5)
Page 6

EINLEITUNG:
Wir gratulieren Ihnen zum Kauf eines Gemini ICDJ CD
Players. Dieser moderne CD-Spieler enthält dreijährige
Garantie, ausschließlich Laser. Einjährige Garantie für
CD Laser. Vor Anwendung der Einheit lesen Sie bitte alle
Anleitungen sorgfältig durch.
EIGENSCHAFTEN:
-Antischock (10-40 Sec. Antischockspeicher)
-Slot-in Laufwerk mit Slot-in Anzeige
-Pitch mit 4, 8, 16% regel- und abschaltbarer
-Single-Auto-Cue / Endlosspielfunktion
-Seamless Loop
-Pitchbend -/+
-Elapsed/Remain Zeitanzeige
-Framegenaues Cueing
-Großes soft-touch Gummi-Jog-Wheel
-10er-Tastatur für direkte Titelanwahl und Programmierfunktion
-Großes rot LCD-Display
-Digital Ausgang
VORSICHTSMASSNAHMEN:
1. Dieser CD-Spieler darf nicht in einer Umgebung
gebraucht werden, in der die Temperatur 5°C unterschre-
itet oder 35°C überschreitet.
2. Das Gerät vor Tropfen und Spritzern schützen, und es
dürfen keine mit Flüssigkeit gefüllte Behälter wie Vasen
darauf gestellt werden.
3. Das Gerät an einer sauberen, trockenen Stelle aufstellen.
4. Das Gerät nicht so aufstellen, daß es nicht ausreichend
abgestützt ist.
5.Wenn das Netzkabel aus einer Steckdose gezogen wird,
immer am Stecker ziehen, nicht am Kabel selbst.
6. Um das Risiko elektrischen Schocks zu vermeiden,
weder das Gehäuse noch die unteren Schrauben entfernen. ES BEFINDEN SICH KEINE VOM ANWENDER ZU
WARTENDEN TEILE IM GEHÄUSE. Die Wartung ist von
einem qualifizierten Techniker vorzunehmen.
7. Das Gerät nicht mit chemischen Lösungsmitteln reinigen.
8. Den Laser-Tonabnehmer sauber halten, indem der CDDeckel immer geschlossen bleibt.
9. Dieses Handbuch als Nachschlagewerk gut aufbewahren.
SICHERHEITSBESCHEINIGUNG:
Eigenschaften der Laserdiode
Material: Ga - Al - As
Wellenlänge: 755-815 nm (25° C)
Laserabgabe: kontinuierliche Welle, max. 0,5 mW
WAHL DER NETZSPANNUNG:
Das Modell ICDJ ist eine Doppelspannungseinheit, die
bei oder 230 V in Gebrauch genommen werden kann. Um
die richtige Spannung einzustellen, sind folgende Schritte
zu befolgen:
1. Einen Schraubenzieherkopf in die Mitte des
Spannungswahl-Schiebereglers VOLTAGE SELECTOR
SLIDE (1) auf der hinteren Schalttafel einstecken.
2. Den Schalter nach rechts schieben, um auf 115 V zu
schalten, oder nach rechts schieben, um auf 230 V zu
schalten.
3. Den Schalter nicht mit übermäßiger Kraft schieben
oder drehen. Falls der Schalter sich nicht bewegen läßt,
wenden Sie sich an einen qualifizierten Techniker.
ANSCHLÜSSE:
1. Ein Ende von einem Satz RCA-Stecker in jeden der
Anschlüsse LINE OUTPUT (2) (Leitungsausgang) ein-
stecken.
2. Das andere Ende der RCA-Stecker in einen beliebigen
Anschluß Leitungseingang des Mischpults einstecken.
Wenn der ICDJ durch einen Empfangsgerät gespielt wird,
können die RCA-Stecker in die Eingangsanschlüsse CD
oder AUX des Empfangsgeräts eingesteckt werden.
Wenn kein CD oder AUX Eingang vorhanden ist, kann
jeder Leitungseingang (nicht Phono) verwendet werden.
3. Verbinden Sie jenes Gerattyp das ein digitales Signal
akzeptieren wird, wie z.B. DAT, MD, FESTPLATTE,
USW. zu der COAXIAL (3) eingabe auf der Ruckseite
um ein digitales Signal aufzunehmen.
4. Für die Stromverbindung schließen Sie den Netzstecker
am POWER JACK (4) an.
FUNKTIONSBESCHREIBUNG:
NETZSCHALTER: Nachdem sichergestellt wurde, daßder
Schieberegler VOLTAGE SELECTOR SLIDE (1) auf der
hinteren Schalttafel richtig eingestellt ist, die Einheit einstöpseln und den Netzschalter POWER (5) einschalten.
Damit wird die Einheit eingeschaltet. Wenn der Schalter
POWER (5) ein zweites Mal gedrückt wird, wird es ausgeschaltet.
DISC IN SLOT: Der DISC IN SLOT (6) ist der Einschub für
die CD. Wenn sich eine CD im Slot befindet, leuchtet die
rote LED-Leiste.
STOP/EJECT (STOP/AUSWURF): Einmal auf die
STOP/EJECT (7) Taste drücken, um die Platte zu stop-
pen, zweimal die Taste für Auswurf drücken und die Taste
gedrückt halten, um die CD auszuwerfen.
CUE: Wenn die Einheit in den Abspiel-Modus geschaltet
und nachdem die Merkstelle gespeichert worden ist, wird
ein Drücken der Taste CUE (8) dafür sorgen, daßder CDSpieler den Pause-Modus an der gespeicherten Stelle
eingibt. Wenn Sie die Cue-Taste gedrückt halten, ändert
sich die Cue-Funktion und gibt eine Vorschau (wobei Sie
die Musik von der Merkstelle an hören können), und eine
Freigabe der Taste führt Sie zur voreingestellten
Merkstelle zurück.
PLAY/PAUSE (Spielen/Pause): Jedesmal, wenn die
Taste PLAY/PAUSE (9) gedrückt wird, schaltet die Einheit
von Spielen auf Pause bzw. von Pause wieder auf
Spielen. Im Abschnitt MERKANLEITUNG befinden sich
zusätzliche Informationen.
DISPLAY: Das DISPLAY (10) zeigt die Spurnummer, den
Abspielmodus, den Pausenmodus sowie drei verschiedene Zeitanzeigen. Die Zeitanzeigen sind abgelaufene Zeit der Spur, auf der CD verbleibende Zeit und
auf der Spur verbleibende Zeit.
PLAYBACK DISPLAY (Playback-Anzeige): Durch
Drücken der Taste PLAYBACK DISPLAY (11) wird die
restliche Spielzeit angezeigt und blinkt langsam, wenn 30
Sekunden bis zum Ende der Spur verbleiben. Die Taste
PLAYBACK DISPLAY (11) blinkt schnell, wenn 15
Sekundenbis zum Ende der Spur verbleiben.
(6)
Page 7

SPUR ÜBERSPRINGEN: Die Tasten TRACK SKIP
(12) (Spur überspringen) erlauben eine Auswahl der Spur,
die gespielt werden soll.
SEARCH (Abtasten): Die Tasten SEARCH (13)
dienen dazu, während dem Spiel-Modus auf der CD vorwärts und rückwärts zu laufen. Die Tasten SEARCH (13)
dienen ebenfalls dazu, die CD genau an der Stelle zu
positionieren, an der die Spur mit dem Spielen anfangen
soll. Diese Stelle der Spur wird als Merkstelle gespeichert. Im Abschnitt MERKANLEITUNG finden Sie weitere Informationen.
SINGLE: Drücken der SINGLE (14) Taste aktiviert die
AUTO-CUE Funktion. Die AUTO-CUE Funktion stoppt
das Gerät beim Start der Musik des darauffolgenden
Titels und ermöglicht das Abspielen sofort beim Start der
Musik ohne jeglichen leeren Zwischenraum (der zu
Beginn eines jeden Titels besteht). Durch Drücken der
SINGLE (14) Taste ein zweites Mal aktiviert die CONTIN-
UOUS Funktion. Diese Funktion lässt das Gerät
fortwährend spielen (nach dem letzten Titel kehrt das
Gerät zum ersten Titel der Platte zurück und setzt das
Spielen fort). Drücken der SINGLE (14) Taste eindrittes
Mal deaktiviert die CONTINUOUS Funktion.
TIME (Zeit): Die Taste TIME (15) schaltet die Zeitanzeige
auf eine der verschiedenen Zeitanzeigen, die unter DIS-
PLAY (10) aufgeführt sind.
LOOP IN: Das Drücken der LOOP IN (16) Taste während
ein Track abgespielt wird, setzt einen Loop Punkt.
LOOP OUT: Nachdem ein Loop Punkt gesetzt wurde und
während des fortwährenden Abspielens die LOOP OUT
(17) taste gedrückt wird, spielt der CD-Player das Stück
zwischen diesen beiden Loop Punkten endlos ab
(Schleife). Wird die LOOP OUT (17) taste nochmals
gedrückt oder die Play Taste betätigt, verlässt der Player
die Schleife und spielt weiter ab.
RELOOP: Drücken Sie die RELOOP (18) Taste um die
Schleife (Loop) erneut abzuspielen. Der CD-Player
springt automatisch auf den Loop Punkt und spielt sofort
wieder die Schleife ab, bis wie zuvor beschrieben wieder
verlassen wird.
PITCH SELECT: Durch das Drücken einer der PITCH
SELECT (19) tasten wird die Pitchfunktion eingeschaltet
und die Bereiche 4%, 8% oder 16% sind wählbar.
Innerhalb dieser Bereiche regelt der Pitchfader die
Wiedergabegeschwindigkeit stufenlos. Betätigen Sie die
zwei Tasten, die WEG TAKTABSTAND zusammen, um
die Luftschraubenverstellung abzustellen beschriftet werden.
PITCH BEND (Tonhöhen-Nuance): Das Drücken der
PITCH BEND (20) tasten wird die Tonhöhe von der
ursprünglichen Einstellung automatische bis +4%
anheben oder bis auf -4% senken. Diese Funktion können Sie benutzen, um die Tonhöhen-Nuance anzupassen, wenn Sie beim Mischen vom einen zum anderen
Song übergehen.
PITCH CONTROL SLIDE (Tonhöheregelung): Die
Tonhöhe der CD wird je nach der Stellung der PITCH
CONTROL SLIDE (21) geändert.
JOG-WHEEL: Mit dem JOG-WHEEL (22) können Sie im
Pause Modus einen Feinabgleich des Cuepunktes duchführen. Im Play Modus dient es zum Pitch Bending um
synchrones Abspielen zu ermöglichen.
PGM (PROGRAMM): Benutzen Sie den PGM (23)
Abschnitt für DIREKTES VORWÄHLEN oder ein
SCHIENE PROGRAMM zu verursachen. Beziehen Sie
bitte sich den auf PGM Abschnitt für ausführliche
Anweisungen.
BEDIENUNGSANLEITUNG:
1. Legen Sie ein CD in DISC IN SLOT (6).
2. Die Tasten TRACK SKIP (12) drücken, um die gewünschte Spur zu wählen.
3. Die Taste PLAY/PAUSE (9) drücken und die Einheit
fängt sofort an zu spielen.
MERKANLEITUNG:
1. Um das Abspielen an einer anderen Stelle als am Anfang
einer Spur einsetzen zu lassen, sind folgende Anleitung
zu befolgen:
Zuerst die Spur auswählen, die abgespielt werden soll,
dann die Taste PLAY/PAUSE (89drücken, damit der CD-
Spieler in den Abspiel-Modus übergeht. Dann die Taste
PLAY/PAUSE (9) drücken, um das Abspielen an der
gewünschten Stelle, dem CUE POINT - zu starten.
Benutzen Sie die Abtastknöpfe SEARCH (13) oder JOG
WHEEL (22) tasten, um den exakten Punkt auszuwählen,
den Sie Spiel anfangen wünschen, dann die Taste
PLAY/PAUSE (9) nochmals drücken, um den Merkpunkt
zu speichern. Die Taste CUE (8) drücken, um das
Abspielen an der gewünschten Stelle zu unterbrechen
(die Einheit geht in den Pause-Modus, und die Stelle auf
der Anzeige wird die gespeicherte Merkstelle sein). Eine
Vorschau der Merkstelle erhalten Sie, indem Sie die Taste
CUE (8) drücken und gedrückt halten. Das Drücken der
Taste PLAY/PAUSE (9) wird das Abspielen von der
Merkstelle an starten.
2. Wenn Sie die eine Merkstelle gespeichert haben, können Sie diese feineinstellen oder ändern:
Um die Merkstelle zu ändern, drücken Sie die Taste
PLAY/PAUSE (9), damit die Einheit von der Merkstelle an
abspielt; dann die Taste PLAY/PAUSE (9) an derjenigen
Stelle
drücken, an der die neue Merkstelle sein soll. Die Taste
PLAY/PAUSE (9) nochmals drücken, um die neue
Merkstelle zu speichern. Die Einheit geht in den Pause-Modus,
und die auf der Angezeige angezeigte Stelle ist die neue gespeicherte Merkstelle. Das Feineinstellen einer Merkstelle geschieht,
indem man das Abspielen an der gespeicherten Merkstelle unterbricht und dann mit den Tasten SEARCH (13) oder JOG WHEEL
(22) Rahmen um Rahmen abtastet (1/75 einer Sekunde), wo das
Abspielen beginnen soll. Die Taste PLAY/PAUSE (9) drücken,
um die neue Merkstelle zu speichern.
HINWEIS: WÄHREND DES FEINSINSTELLENS WIRD EIN STOTTEREFFEKT
ERZEUGT (HILFT IHNEN, DEN BEAT ZU FINDEN). DER STOTTEREFFEKT
WIRD ENDEN, WENN SIE DIE TASTE PLAY/PAUSE (8) DRÜCKEN, UM DIE
MERKSTELLE ZU SICHERN. BEIM FEINEINSTELLEN KÖNNEN SIE EBENFALLS DIE TASTEN SEARCH (13) DRÜCKEN; DAS SYSTEM WIRD SCHNELL.
PGM:
Um in den Programmier Modus zu schalten, drücken Sie zuerst
die STOP/EJECT (7) Taste einmal und dann die PGM Taste.
Geben Sie danach mit der 10 er-Tastatur eine Tracknummer ein
und drücken dann auf die Set Taste. Fahren Sie so in der gewünschten Reihenfolge der Tracks fort. Wenn Ihre Programmierung
beendet ist, drücken Sie die Play /Pause (9) Taste um das
Programm abzuspielen. Um ein Programm abzubrechen drücken Sie die STOP/EJECT (7) Taste zweimal oder halten Sie Taste
gedrückt um den Ejectvorgang auszulösen. Die SINGLE-AUTO-
CUE (14) Funktion behält auch im Programm Modus ihre
Funktion bei.
(77)
Page 8

DIRECT SELECT:
Um einen gewünschten Track direkt abzuhören, geben
Sie einfach die Tracknummer ein. Bei Tracknummern
unter 10 stellen Sie die Null vorweg z.B. 01 für Track 1.
Die SINGLE-AUTO-CUE (14) Funktion behält auch im
DIREKT SELEKT Modus ihre Funktion bei.
BITTE BEACHTEN: PROGRAMM- UND DIRECT SELECT MODUS ARBEITEN
UNABHÄNGIG VONEINANDER, UM MIT DEM JEWEILS ANDEREN MODUS
ZU ARBEITEN MUß DIE CD AUS DEM PLAYER GENOMMEN UND DANN
WIEDER EINGESCHOBEN WERDEN.
FEHLERSUCHE:
- Wenn die CD nicht spielt, nachprüfen ob die CD richtig
eingelegt wurde (mit der beschrifteten Seite nach oben).
Auch auf Verunreinigung, Kratzer usw. überprüfen.
- Wenn die CD sich dreht, aber kein Ton zu hören ist, die
Kabelanschlüsse überprüfen. Wenn diese in Ordnung
sind, den Verstärker bzw. das Empfangsgerät überprüfen.
- Wenn die CD springt, ist sie auf Schmutz oder Kratzer zu
überprüfen. Man darf nicht sofort annehmen, daßder CDSpieler defekt ist. Viele CDs werden nicht spezifikationsgemäßaufgezeichnet und springen auf den meisten oder
allen CD-Spielern. Bevor Sie die Einheit zur Reparatur
einsenden, versuchen Sie, eine CD abzuspielen.
TECHNISCHE DATEN:
ALLGEMEINES:
CD-Typ................Standard-Compact-Discs (12cm und 8cm)
Zeitdisplay................abgelaufene Zeit der Spur, auf der Spur
..............verbleibende Zeit und auf der CD verbleibende Zeit
Tonlagenänderung......................+/- 16% Schieberegler mit
.......................................................Wiederaufnahmeschalter
Start.........................................innerhalb von 0,03 Sekunden
Spurauswahl..................................................1 bis 99 Spuren
AUDIOTEIL:
Quantisierung...............1 Bit Linear/Kanal, 3-Strahlen-Laser
Oversamplingrate....................................................8mal
Samplingfrequenz..................................................44,1 KHz
Frequenzantwort.........................................20 Hz bis 20 Khz
Digitale ausgangsubchse...................................IEC958
Harmonische Gesamtverzerrung............weniger als 0.005%
Verhältnis Signal/Rauschen........................................>96 dB
Dynamikbereich.........................................................>94 dB
Kanaltrennung.................................................90 dB (1 kHz)
Ausgangspegel.....................................................1,9 Volt
Stromversorgung.............Wechselstrom 120/230V, 60/50 Hz
Abmessungen..........................................213 x 225 x 95 mm
Gewicht.....................................................................2 kg
DIE TECHNISCHEN DATEN UND DIE KONSTRUKTION KÖNNEN ZU
VERBESSERUNGSZWECKEN OHNE VORHERIGE BEKANNTGABE GEÄNDERT WERDEN.
(8)
Page 9

INTRODUCCIÓN:
Felicitaciones por la compra del reproductor de discos
compactos ICDJ de Gemini. Este reproductor profe-
sional de la más avanzada tecnología está respaldado
por una garantía de tres años, salvo los lásers. Garantía
de un año para el lector CD. Antes de utilizarlo, le
recomendamos leer cuidadosamente todas las instrucciones.
CARACTERÍSTICAS:
-Anti-shock usando una memoria buffer (10-40 segundos)
-Mecanismo de inserción de disco con LED rojo de "Disco insertado"
-Teclado de goma de acceso directo, totalmente programable
-Single auto cue / continous play
-Loop sin fin con reloop
-Pitch bend
-Selector de tiempo
-Busqueda precisa de pista
-Display grande rojo
-Salida Digital
-Gran rueda de busqueda de goma
-Control variable de velocidad en 4%, 8% y 16% o apagado
PRECAUCIONES:
1. No use este reproductor de discos compactos en temperaturas inferiores a 5°C o superiores a 35°C.
2. Este aparato no debería estar expuesto al goteo o a las
salpicaduras y ningun objeto lleno de líquido, tal como floreros, debería estar colocado sobre el aparato.
3. Instale la unidad en una superficie limpia y seca.
4. No coloque la unidad en un sitio de poca estabilidad.
5. Para desconectar el cable de alimentación de la red, tire
del enchufe, nunca del cable.
6. Para evitar descargas eléctricas, no quite la tapa ni los
tornillos de la base. NUNCA INTENTE REPARAR UD.
MISMO ESTE APARATO, ante cualquier avería contacte
con un técnico especializado.
7. No use productos químicos para limpiar el aparato.
8. Conserve el lector láser limpio manteniendo la bandeja
cerrada.
9. Conserve este manual en un sitio apropiado para próximas consultas.
CERTIFICACIONES DE SEGURIDAD:
Características del diodo láser:
Material: Ga - Al - As
Longitud de onda: 755 - 815 nm (25°C)
Salida láser: onda continua; máx. 0,5 mVatios
ALIMENTACION DEL APARATO:
El modelo ICDJ es de doble voltaje. Puede funcionar
con 115 ó 230 voltios. Para cambiar el voltaje, siga los
pasos siguientes:
1. Coloque la punta de un destornillador en el centro de la
VOLTAGE SELECTOR SLIDE (CONMUTADOR DE
SELECCIÓN DE VOLTAJE) (1)que se encuentra en el
panel posterior.
2. Deslice el conmutador hacia la izquierda para 115 V o
hacia la derecha para 230 V.
3. No fuerce ni tuerza el conmutador. El hecho de aplicar
fuerza excesiva puede causar daños al equipo. Si el conmutador no se mueve con suavidad, contacte con un técnico cualificado.
CONEXIONES:
1. Conecte un extremo de un juego de clavijas tipo RCA en cada
uno de los LINE OUTPUT (2) (SALIDA DE LÍNEA).
2. Conecte las clavijas restantes del conector tipo RCA a la
entrada input del aparato a conectar. Si está reproduciendo la señal del ICDJ por intermedio de un receptor, puede
conectar las clavijas tipo RCA en la entrada CD (AC) o
AUX del receptor. Si el receptor no tiene entradas CD
(AC) o AUX, use cualquier entrada de nivel de línea (no
fonográfica).
3. Conecte cualquier tipo de instrumento que acepte una
señal digital, tal como DAT, MD, HARDDRIVE, etc. a la
entrada COAXIAL (3) input en el panel trasero enregistrar la señal digital.
4. Conecte la clavija al POWER JACK (4) para obtener
corriente.
DESCRIPCIÓN DE LAS FUNCIONES:
CONMUTADOR DE ALIMENTACIÓN: Después de ase-
gurarse de que la VOLTAGE SELECTOR SLIDE (1), que
se encuentra en el panel posterior, está en posición correcta, conecte la unidad a la red y pulse el CONMUTA-
DOR DE ALIMENTACIÓN - POWER (5). La unidad se
conectará. La unidad se desconectará cuando se vuelve
a pulsar el POWER (5).
DISCO EN CARGA: El DISCO EN CARGA (6) es donde el
CD se aloja. Cuando hay un disco en la bandeja, el LED
rojo se ilumina.
STOP/EJECT (PARAR/EYECTAR): Apriete
STOP/EJECT (7) una vez para parar, y dos veces para
eyectar, y mantenga el dedo en el pulsador para eyectar
el disco compacto.
CUE (PUNTO DE REFERENCIA): Con el aparato en la
modalidad de reproducción, y después de haber memorizado el punto de referencia, el hecho de apretar el CUE
(8) hace entrar el reproductor de discos compactos en la
modalidad de pausa al llegar al punto de referencia memorizado. Si Ud mantiene el dedo en el pulsador CUE, la
función CUE pasará a PREVIEW (lo que le permitirá
escuchar la música desde el punto de referencia). Si Ud
saca el dedo del pulsador CUE, le lleva de nuevo al punto
CUE pre-establecido.
PLAY/PAUSE (REPRODUCCIÓN/PAUSA): Cada vez
que se pulsa el botón de PLAY/PAUSE (9), el fun-
cionamiento cambia de Reproducción a Pausa o de
Pausa a Reproducción. Véase la sección INSTRUC-
CIONES DE PUNTO DE REFERENCIA.
DISPLAY: El DISPLAY (10) muestra los siguientes datos:
números de pista, modalidad de reproducción, modalidad
de pausa y 3 cifras horarias diferentes. Estas cifras corresponden al tiempo de pista transcurrido, el tiempo que
resta para acabar de disco y el tiempo que resta de pista.
PLAYBACK DISPLAY (DISPLAY PLAYBACK): El PLAY-
BACK DISPLAY (11) indica el tiempo que resta para la
reproducción y parpadea lentamente cuando quedan 30
segundos de música. El PLAYBACK DISPLAY (11)
parpadea rápidamente cuando quedan 15 segundos.
TRACK SKIP (SELECCIÓN DE PISTA): Los
botonnes de TRACK SKIP (12) le permite seleccionar la
pista a reproducir.
SEARCH (BOTONES DE BÚSQUEDA): Los
botonnes de SEARCH (13) se emplean para mover el
disco adelante o atrás durante la modalidad de reproducción. Los botones de SEARCH (13) se usan también para
posicionar con precisión el disco al punto preciso donde se
desea que comience la reproducción de la canción. Esta
posición de la pista se retiene como un punto de referen-
(9)
Page 10

cia. Véase la sección de las INSTRUCCIONES DE
PUNTO DE REFERENCIA para mayor información.
SINGLE: El hecho de apretar el botón SINGLE (14) acti-
va la función AUTO-CUE, Esta función produce la pausa
del aparato al principio de la música de la pista siguiente
y le permite empezar la reproducción inmediatamente
desde el principio de la música sin espacio en blanco (lo
que existe al principio de cada pista). El hecho de apretar
el botón SINGLE (14) por segunda vez activa la función
CONTINUOUS lo que permitirá una reproducción continua (después de la última pista, el aparato volverá a la
primera pista del disco y seguirá la reproducción). El
hecho de apretar el botón SINGLE (14) por tercera vez
desactiva la función CONTINUOUS.
TIME SELECT (TIEMPO): El botón de TIME (15) hace
desplegar sucesivamente los tres datos horarios enumerados en DISPLAY.
LOOP IN: Presionando LOOP IN (16) cuando un CD se
reproduce, marcaremos un punto de loop.
LOOP OUT: Después de memorizar un punto loop, presio-
nando LOOP OUT (17) la reproducción se repetirá entre
los dos puntos marcados. Presionando de nuevo LOOP
OUT (17) o control de pausa, la repetición de esta sección se terminará.
RELOOP: Púlselo para reproducción con repetición (tarta-
mudeo) desde el primer punto de loop, o para repetir un
bucle previamente marcado. El RELOOP (18) mantendrá
la repetición del bucle hasta que se anule a través de
LOOP OUT (17). El CD inicia instantáneamente los puntos cue marcados con anterioridad.
SELECCIÓN DE PITCH: Presionando los controles PITCH
SELECT (19) podremos cambiar el rango de velocidad
en 4%, 8%, y 16%. Presione los dos botones etiquetados
ECHADA APAGADO junto para dar vuelta apagado al
control de echada.
PITCH BEND (AJUSTE DE LA ALTURA TONAL): El
hecho de apretar los pulsadores PITCH BEND (20)
automáticamente alzará la altura por hasta 4% o atenuará la altura hasta -4%. El hecho de soltar los pulsadores regresará la altura tonal a su valor original. Se
puede utilizar esta función para hacer corresponder el
ajuste de la altura tonal de una canción a otra.
PITCH CONTROL SLIDE (CONTROL DE ALTURA
TONAL): La altura del disco compacto cambiará según
la posición del PITCH CONTROL SLIDE (21).
JOG WHEEL: Use la rueda JOG WHEEL (22) para hacer
ajustes finos en modalidad de pausa sobre los puntos
cue o ajuste fino de velocidad en play para cuadrar los
temas.
PGM (PROGRAMA): Utilice la sección de PGM (23) para
DIRECTO SELECCIONAN o crear un PROGRAMA de la
PISTA. Refiera por favor a la sección de PGM para las
instrucciones detalladas.
INSTRUCCIONES DE MANEJO:
1. Coloque un CD en DISC IN SLOT (6).
2. Para seleccionar la pista que quiera escuchar, pulse los
botones TRACK SKIP (12).
3. Pulse el botón de PLAY/PAUSE (8) y la unidad comen-
zará a reproducir instantáneamente.
INSTRUCCIONES DE PUNTO DE REFERENCIA:
1. Para comenzar la reproducción en un punto distinto al
comienzo de la pista, siga estas instrucciones:
Primero, seleccione la pista que quiere reproducir,
después pulse el botón de PLAY/PAUSE (9) para que el
aparato pase a la modalidad de reproducción. Pulse el
botón de PLAY/PAUSE (9) para parar en el lugar donde
Ud. quiere que empiece la reproducción, el PUNTO DE
REPRODUCCIÓN. Utilice los botones de BUSQUEDA
(13) o JOG WHEEL (22) para escoger el punto exacto
que usted quisiera que el juego comenzara, entonces
pulse el botón de PLAY/PAUSE (9) otra vez para memo-
rizar el punto de referencia. Pulse el botón de CUE (8)
para parar en el punto de referencia (el aparato pasa a la
modalidad de pausa y el lugar indicado en el display será
el punto de referencia memorizado). Ud. puede ver el
punto de referencia en adelante al apretar y al mantener
el dedo en el CUE (8). Pulse el botón de PLAY/PAUSE
(9) para empezar la reproducción desde el punto de referencia.
2. Una vez el punto de referencia memorizado, se puede
sintonizar o cambiar:
Para cambiar el punto de referencia, Pulse el botón de
PLAY/ PAUSE (9) de manera que la unidad reproduzca
desde el punto de referencia, y después pulse el botón de
PLAY/PAUSE (9) en el lugar donde Ud. requiere el nuevo
punto de referencia. Pulse el botón de PLAY/PAUSE (8)
otra vez para memorizar el punto de referencia. El aparato pasará a la modalidad de pausa y el lugar indicado en
el display será el nuevo punto de referencia memorizado.
Para sintonizar (afinar) el punto de referencia, haga la
pausa en el punto de referencia memorizada y después
utilice los botones de SEARCH (13) o JOG WHEEL (22)
para buscar segmento por segmento (1/75 de un segundo) hasta donde a Ud. le gustaría empezar la reproducción. Pulse el botón de PLAY/PAUSE (9) para memorizar
el nuevo punto de referencia.
NOTA: DURANTE LA SINTONÍA HABRÁ UN EFECTO DE TARTAMUDEO (PARA
AYUDARLE A ENCONTRAR EL RITMO). ESTE EFECTO SE TERMINARÁ
CUANDO UD. PULSE EL BOTÓN DE PLAY/PAUSE (9) PARA MEMORIZAR EL
PUNTO DE REFERENCIA. TAMBIÉN DURANTE LASINTONÍA DE GRAN PRECISIÓN, SI UD. MANTIENE EL DEDO SOBRE LOS BOTONES DE SEARCH
(13), EL APARATO BUSCARÁ RÁPIDAMENTE.
PGM:
Primero presione STOP/EJECT (7) una vez seguido de
PGM para entrar en modo programA. Seleccione un
NUMERO DE PISTA con el TECLADO NUMERICO y
pulse SET para fijar la selección. Continúe seleccionando pistas y pulsando SET hasta finalizar todo su programa. Luego pulse PLAY/PAUSE (9) para iniciar la repro-
ducción del mismo. Para salir de un PROGRAMA pulse
STOP/EJECT (7) dos veces o manténgalo pulsado para
la EXTRACCION del CD. SINGLE-AUTO CUE (14) funcionarán normalmente con el modo PROGRAMA.
SELECCIÓN DIRECTA:
Para SELECCIONAR DIRECTAMENTE una PISTA,
simplemente pulse el NUMERO DE PISTA que desea
oír. Si usted seleccione PISTAS de 1-9 debe utilizar el 0
antes del numero, por ejemplo 01 para la pista 1. Para
pista 11 y superior utilice los dígitos normalmente. SIN-
GLE-AUTO CUE (14) funcionarán normalmente con el
modo SELECCIÓN DIRECTA.
NOTA: PROGRAMA Y SELECCIÓN DIRECTA TRABAJAN INDEPEN-
DIENTEMENTE, PARA UTILIZARLOS EL DISCO DEBE EXTRAER
EL DISCO Y VOLVER A CARGARLO.
(10)
Page 11

RESOLUCIÓN DE PROBLEMAS:
- Si el disco no reproduce, compruebe si el disco está colocado correctamente (cara impresa hacia arriba).
Compruebe además si el disco tiene suciedad excesiva,
o esta rayado, etc.
- Si el disco gira pero no se oye, compruebe las conexiones de los cables. Si éstas están bien, compruebe el
amplificador y el receptor.
- Si el disco omite sonidos, compruebe si el disco tiene
suciedad o esta rayado. No dé por supuesto que el defecto está en el reproductor. Muchos discos compactos se
graban fuera de especificaciones y no funcionan en
muchos o todos los reproductores. Antes de enviar la
unidad a ser reparada, pruebe un disco que funcione correctamente.
ESPECIFICACIONES:
GENERALES:
Tipo de disco....Discos compactos standard (12 cm. y 8 cm.)
Display horario.............Tiempo de pista transcurrido, tiempo
...................................restante de pista, tiempo restante total
Variación de tono...........Conmutador deslizable de +/-16%
.......................................................con llave de reanudación
Comienzo instantáneo..............Dentro de los 0.03 segundos
Selección de pistas del.......................................1 a 99 pistas
SECCIÓN AUDIO:
Cuantificación......Canal/linear de 1 bitio, láser de 3 destellos
Exceso de muestreo..................................................8 veces
Frecuencia de muestreo..........................................44.1 KHz
Respuesta en frecuencia...........................de 20 Hz a 20 Khz
Distorsión armónica total...........................menos de 0.005%
Proporción señal/ruido................................................>96 dB
Variación dinámica......................................................>94 dB
Nivel de salida..........................................1.9 voltios eficaces
Alimentación.....................................AC 120/230V, 60/50 Hz
Dimensiones............................................213 x 225 x 95 mm
Peso................................................................................2 kg
LAS ESPECIFICACIONES Y EL DISEÑO ESTÁN SUJETOS A CAMBIOS SIN
PREVIO AVISO CON FINES DE PERFECCIONAMIENTO.
(11)
Page 12

INTRODUCTION:
Nos félicitations à l'occasion de votre achat d'un lecteur
ICDJ de Gemini. Cet appareil est garanti durant 3 ans à
l'exception des blocs optiques (optiques de lecture),
garantis durant 1 an. Avant de l'utiliser, lisez attentivement toutes les instructions ci-après.
CARACTERÍSTICAS:
-Mémoire Anti-shock ( 10 - 40 secondes )
-Chargement motorisé Slot-In avec éclairage à LED rouge
-Clavier d'accès direct aux plages entièrement programmable
-Fonction Auto-cue / lecture continue
-Boucle numérique parfaite
-Touches de rattrapage de tempo
-Ecran LCD rouge rétro éclairé
-Sortie digitale
-Contrôle du tempo ( Pitch)
-Molette de recherche
-Variation de tempo : 4%,8%,16% & fonction Pitch OFF
PRÉCAUTIONS:
1. N'utilisez pas ce lecteur de CD là où la température
descend en-dessous de 41° F/5° C ou dépasse
95°F/35°C.
2. Cet appareil ne devrait pas être exposé aux égouttements ou aux éclaboussures et aucun objet rempli de liquide, p.e. vases, ne devrait être placé sur l'appareil.
3. Placez l'appareil dans un endroit propre et sec.
4. Ne placez pas l'appareil dans un endroit instable.
5. Lorsque vous débranchez le cordon d'alimentation d'une
prise, saisissez toujours la prise électrique. Ne tirez
jamais directement sur le cordon d'alimentation.
6. Afin réduire tout risque de chocs électriques, vous êtes
prié de ne pas ouvrir l'appareil. CE DERNIER NE CON-
TIENT PAS DE PIÈCES À REMPLACER PAR L'UTILISATEUR. En cas de problème, merci de contacter le
service technique de Gemini ou votre revendeur habituel.
7. Ne pas utiliser de solvants chimiques afin de nettoyer
l'appareil.
8. Veillez à refermer les tiroirs de lecture après chaque utilisation, ceci afin de préserver les optiques de lecture très
sensibles à la poussière.
9. Conservez le présent manuel dans un endroit sûr. Ce
dernier pourrait vous servir ultérieurement.
CERTIFICATIONS DE SÉCURITÉ:
Propriétés de la diode laser:
Matière: GA - Al - As
Longueur d'onde: 755 - 815 nm (25°C)
Sortie de laser: Onde continue, max. 0,5 mW
CHOIX DE LA TENSION DU SECTEUR:
Le modèle ICDJ est un appareil à double tension. Il fonc-
tionne en 115 ou 230 volts. Pour régler la tension appropriée, suivez les étapes ci-après:
1. Placez la tête d'un tournevis au centre du VOLTAGE
SELECTOR SLIDE (1) qui se trouve sur le panneau
arrière.
2. Glissez l'interrupteur à gauche sur 115 V ou poussez-le
à droite sur 230 V.
3. Ne forcez pas ou ne tordez pas le sélecteur de tension.
Une force excessive pourrait endommager l'appareil. Si
l'interrupteur ne se déplace pas facilement, prenez contact avec un technicien compétent.
CONNEXIONS:
1. Enfichez une extrémité d'un jeu de connecteurs RCA
dans chacun des LINE OUTPUT (2).
2. Enfichez l'autre extrémité des connecteurs RCA dans
tout jack d'entrée du niveau de ligne disponible sur votre
mélangeur. Si vous utilisez le ICDJ par l'intermédiaire
d'un récepteur, vous pouvez enficher les connecteurs
RCA dans les jacks d'entrée CD ou AUX sur votre récepteur. S'il n'y a pas d'entrées CD ou AUX, utilisez n'importe
quelles entrées de niveau de ligne (pas de phono).
3. Branchez n'importe quel dispositif qui acceptera un signal numérique tel que DAT, MD, HARDDRIVE, etc. à
l'entrée COAXIAL (3) Osur le panneau arrière enregistrer le signal numérique.
4. Branchez la fiche de tension au POWER JACK (4) pour
avoir du courant.
DESCRIPTIONS DES FONCTIONS:
INTERRUPTEUR GÉNÉRAL: Après s'être assuré que le
VOLTAGE SELECTOR SLIDE (1), qui se trouve sur le
panneau arrière, est convenablement réglé, branchez
l'appareil et appuyez sur le POWER (5) (Interrupteur
général). L'appareil sera sous tension. Le fait de pousser
le POWER (5) une deuxième fois, coupera le courant de
l'appareil.
DISC IN SLOT (CHARGEMENT SLOT IN): Introduisez le
CD dans la fente DISC IN SLOT (6) située en face avant.
Lorsqu'un disque est inséré la barre située sur le façade
s'allume en bleu.
STOP/EJECT (ARRÊTER/ÉJECTER): Appuyez
STOP/EJECT (7) une seule fois pour arrêter, deux fois
pour éjecter, et gardez le doigt sur la touche pour éjecter
le DC.
CUE: L'appareil se trouvant en mode lecture, et après avoir
mémorisé votre point d'insertion, le fait d'appuyer sur le
CUE (8) (bouton d'insertion) fait passer le ICDJ en mode
pause au point d'insertion mémorisé. Si vous gardez le
doigt sur la touche CUE, la fonction CUE deviendra la
fonction PREVIEW (ce qui vous permet d'écouter la
musique à partir du point de repère). La libération de la
touche CUE vous renvoie au point CUE préréglé.
PLAY/PAUSE (LECTURE/PAUSE): Chaque fois que l'on
appuie sur le PLAY/PAUSE (9) (bouton lecture/pause) il
fait en sorte que le fonctionnement passe de lecture à
pause ou revient de pause à lecture. Voir la section CUE
INSTRUCTIONS (consignes d'insertion) pour de plus
amples renseignements.
DISPLAY (AFFICHAGE): L'écran DISPLAY (10) indique
les numéros de la piste, le mode de lecture, le mode
pause, ainsi que 3 affichages de temps différents. Ces
affichages du temps sont les suivants: temps écoulé sur
la piste, temps restant sur disque, temps restant sur la
piste.
PLAYBACK DISPLAY (affichage playback): La function
PLAYBACK DISPLAY (11) affiche le temps restant à
jouer et clignote lentement lorqu'il reste 30 secondes à
jouer. La fonction PLAYBACK DISPLAY (11) clignote
rapidement lorsqu'il reste 15 secondes à jouer.
SAUT DE PISTE: Les TRACK SKIP (12) (boutons de
saut de piste) vous permettent de choisir la piste que
vous désirez écouter.
(12)
Page 13

BOUTONS DE RECHERCHE: Les SEARCH (13)
(boutons de recherche): Les SEARCH (13) s'utilisent
pour aller en avant ou en arrière dans le mode de lecture.
Les SEARCH (13) s'utilisent également pour positionner
le disque avec précision à l'endroit où vous désirez commencer la lecture. Cette position sur la piste est
mémorisée comme étant le point d'insertion. Reportezvous à la section CUE INSTRUCTIONS (consignes d'insertion) pour de plus amples renseignements.
SINGLE: Le fait d'appuyer sur la touche SINGLE (14)
activera la fonction AUTO-CUE. Cette fonction provoque
l'arrêt automatique de la lecture à l'issue de chaque plage
lue. L'appareil se met automatiquement en mode pause
et se cale au début de la plage suivante en évitant les
blancs car ce dernier se cale à la première note. Le fait
d'appuyer une seconde fois sur la touche SINGLE (14)
activera la fonction CONTINUOUS (EN CONTINU) ce qui
fera jouer l'appareil sans interruption entre chaque plage
(après lectur de la dernière plage, l'appareil retournera à
la première plage du disque et continuera la lecture). Le
fait d'appuyer une troisième fois sur la touche SINGLE
(14) désactive la fonction CONTINUOUS.
TIME SELECT (HEURE): Le TIME (15) (bouton de
réglage de temps) assure la commutation de l'affichage
du temps entre trois choix disponibles qui figurent sous
DISPLAY (11).
LOOP IN (POINT DE DEPART DE LA BOUCLE): En
appuyant sur la touche LOOP IN (16) en cours de lecture
vous mémorisez instantanément le point de départ de la
boucle.
LOOP OUT (POINT DE SORTIE DE LA BOUCLE): après
avoir mémorisé un point de départ, appuyez sur la touche
LOOP OUT (17) pour mémoriser le point de sortie. La
passage ainsi sélectionné sera répété jusqu'à ce vous
appuyez une nouvelle fois sur la touche LOOP OUT (17)
ou sur la touche pause/play.
RELOOP: Appuyer sur cette touche pour répéter la boucle
ou revenir au poInt de départ de cette dernière. La fonction RELOOP (18) permet de lire continuellement la
boucle jusqu'à ce que vous appuyez sur la touche LOOP
OUT (17) afin de reprendre la lecture de la plage normalement. La lecture reprendra au précédent point cue.
PITCH SELECT (REGLAGE DE VITESSE): En appuyant
sur la touche PITCH SELECT (19) vous pouvez sélectionner entre 4%, 8% & 16%. Appuyez sur les deux boutons marqués LANCEMENT AU LOIN ensemble pour
arrêter la commande de lancement.
PITCH BEND: Le fait de presser les touches PITCH
BEND (20) augmentera automatiquement la hauteur de
son de jusqu'à +4% ou la réduira de -4%.
PITCH CONTROL SLIDE (GLISSIÈRE DE COMMANDE
DE LANCEMENT): Le relèvement de DIAPOSITIVE de
PITCH CONTROL SLIDE (21) ou vers le bas abaissera
ou soulèvera le pourcentage de lancement.
JOG WHEEL (MOLETTE DE RECHERCHE): Utilisez la
molette (22) pour ajuster avec précision le calage de
votre disque pour enregistrer une boucle, ou pour ajuster
la vitesse de lecture lors d'un mix.
PGM (PROGRAMME): Employez la section de PGM (23)
pour DIRECT CHOISISSENT ou pour créer un PRO-
GRAMME de VOIE. Veuillez se référer à la section de
PGM pour des instructions détaillées.
CONSIGNES D'EXPLOITATION:
1. Placez un CD dans DISC IN SLOT (6).
2. Appuyez sur les TRACK SKIP (12) (boutons de saut de
piste) pour choisir la piste que vous désirez entendre.
3. Appuyez sur le PLAY/PAUSE (8) (bouton lecture/pause)
et l'appareil jouera instantanément.
CONSIGNES D'INSERTION:
1. Pour commencer à lire un disque en un endroit autre que
le début d'une piste, respectez les consignes suivantes:
Choisissez d'abord la piste que vous voulez entendre;
puis, appuyez sur le PLAY/PAUSE (9) (BOUTON DE
LECTURE/PAUSE) pour que l'appareil passe en mode
lecture. Appuyez sur le PLAY/PAUSE (9) pour inter-
rompre la lecture à l'endroit ou vous voulez faire commencer la lecture, le CUE POINT (POINT DE REPÈRE).
Utilisez les SEARCH (13) (boutons de recherche) où
JOG WHEEL (22) pour sélectionner la tache précise que
vous voulez que le jeu commence, puis appuyez de nouveau sur le PLAY/PAUSE (9) pour mémoriser cet endroit.
Appuyez sur le CUE (8) pour interrompre la lecture au
point de repère (l'appareil passera en mode pause et l'endroit indiqué sur l'affichage sera le point de repère
mémorisé). Vous pouvez passer en revue ce point de
repère en appuyant et en gardant le doigt sur le CUE (8).
Appuyez sur le PLAY/PAUSE (9) pour commencer la lec-
ture à partir du point de repère.
2. Une fois le point de repère mémorisé, vous pouvez faire
un réglage précis du point d'insertion mémorisé ou le
changer:
Pour changer un point de repère, appuyez sur le bouton
PLAY/PAUSE (9) de façon à ce que l'appareil passe en
mode lecture à partir du point de repère; puis, appuyez
sur le bouton PLAY/PAUSE (9) à l'endroit choisi comme
nouveau point de repère. Appuyez de nouveau sur le
bouton PLAY/PAUSE (9) pour mémoriser cet endroit.
L'appareil passera en mode pause et l'endroit indiqué sur
l'affichage deviendra le nouveau point d'insertion
mémorisé.
Pour le réglage précis d'un point de repère, mettez la
lecture en pause au point de repère mémorisé; puis,
utilisez les SEARCH (13) où JOG WHEEL (22) pour
avancer segment par segment (1/75ème d'une seconde)
jusqu'à l'endroit où vous voulez commencer la lecture.
Appuyez sur le bouton PLAY/PAUSE (9) pour mémoriser
ce nouveau point de repère.
REMARQUE: DURANT LE RÉGLAGE PRÉCIS, IL Y AURA UN EFFET DE
BÉGAIEMENT (POUR VOUS AIDER À TROUVER LA MESURE). CET EFFET
S'ARRÊTERA LORSQUE VOUS APPUIEREZ SUR LE BOUTON PLAY/PAUSE
(9) POUR MÉMORISER LE POINT DE REPÈRE. AINSI, DURANT LE RÉGLAGE
PRÉCIS, SI VOUS GARDEZ LE DOIGT SUR LES BOUTONS SEARCH (13),
L'APPAREIL FERA RAPIDEMENT.
PGM:
Appuyez sur la touche STOP/EJECT (7) puis sur la
touche PGM pour sélectionner le mode PROGRAMME.
Sélectionner les plages dans l'ordre désiré en appuyant
sur la touche SET après chaque sélection de plage. Puis
appuyez sur la touche PLAY/PAUSE (9) pour lancer la
lecture de la sélection. Pour sortir du mode PRO-
GRAMME appuyez sur la touche STOP/EJECT (7) deux
fois ou garder votre doigt dessus. Le mode SINGLE-
AUTO CUE (14) fonctionne aussi en mode PROGRAMME.
(13)
Page 14

DIRECT SELECT:
ACCES DIRECT aux plages: Pour sélectionner directe-
ment une plage de lecture appuyez sur le numéro de la
plage. Pour sélectionner les plages de 1 à 9, vous devez
auparavant appuyer sur la touche 0, exemple 0 puis 1
pour la plage. Pour les plages au delà de 10, appuyez
sur les deux chiffres, exemple puis 1 pour la plage 11. Le
mode SINGLE-AUTO CUE (14) fonctionne aussi en
mode ACCES DIRECT.
NOTE: LES FONCTIONS PROGRAMME ET ACCES DIRECT FONC-
TIONNENT INDEPENDAMMENT, POUR UTILISER L'UNE OU
L'AUTRE VOUS DEVEZ RE-INTRODUIRE LE DISQUE DANS L'APPAREIL.
DÉPANNAGE:
- Si l'appareil n'arrive pas à lire un disque, vérifiez si ce
dernier a été chargé correctement dans le tiroir de lecture
(côté écrit vers le haut). Contrôlez aussi le disque pour
s'assurer qu'il n'y a pas de saleté excessive, d'égratignures, etc.
- Si le disque tourne mais qu'il n'y a pas de son, contrôlez
les connexions du câble. Si celles-ci sont bien faites, contrôlez votre amplificateur ou votre récepteur.
- Si le CD patine, vérifiez si le CD est exempt de poussières
et/ou d'égratignures. Ne supposez pas que le lecteur de
CD est défectueux. De nombreux disques CD sont enregistrés selon des normes incompatibles et ils sauteront sur
la plupart ou sur tous lecteurs de CD. Avant d'envoyer
l'appareil pour réparation, faites un essai avec un CD
dont vous êtes certain de son fonctionnement correct.
SPÉCIFICATIONS TECHNIQUES:
GÉNÉRALITÉS:
Type de disque..Disques compacts standard (12 cm & 8 cm)
Affichage temps...............................................Piste écoulée,
.................................................piste restante ou total restant
Son variable..................Pitch avec interrupteur on/off ± 16 %
Démarrage instantané...............................En 0,03 secondes
Choix de piste...............................................de 1 à 99 pistes
SECTION AUDIO:
Quantification............Canal/linéaire 1 bit, laser à 3 faisceaux
Taux de sur- échantillonnage........................................8 fois
Fréquence d'échantillonnage...................................44,1 kHz
Réponse en fréquences.................................20 Hz à 20 kHz
Distorsion harmonique...............................Moins de 0,005 %
Rapport signal/bruit.....................................................>96 dB
Dynamique de mesure................................................>94 dB
Séparation des canaux......................................90 db (l KHz)
Niveau de sortie (nominal)...........................1,9 volts efficace
Alimentation électrique.....................c.a. 120/230V, 60/50 Hz
Dimensions..............................................213 x 225 x 95 mm
Poids...............................................................................2 kg
LES CARACTÉRISTIQUES ET LA CONCEPTION SONT SUJETTES À
DES CHANGEMENTS SANS PRÉAVIS.0
(144)
Page 15

NOTES
(15)
Page 16

IN THE USA: IF YOU EXPERIENCE PROBLEMS WITH
THIS UNIT, CALL 1-732-738-9003 FOR
GEMINI CUSTOMER SERVICE. DO NOT ATTEMPT TO
RETURN THIS EQUIPMENT TO YOUR DEALER.
Parts of the design of this product may be protected by worldwide patents.
Information in this manual is subject to change without notice and does n o t
represent a commitment on the part of the vendor. Gemini Sound Products
Corp. shall not be liable for any loss or damage whatsoever arising from the
use of information or any error contained in this manual. No part of this manual may be reproduced, stored in a retrieval system or transmitted, in any
form or by any means, electronic, electrical, mechanical, optical, chemical,
including photocopying and recording, for any purpose without the express
written permission of Gemini Sound Products Corp. It is recommended that
all maintenance and service on this product is performed by Gemini Sound
Products Corp. or its authorized agents. Gemini Sound Products Corp. will
not accept liability for loss or damage caused by maintenance or repair performed by unauthorized personnel.
Worldwide Headquarters • 120 Clover Place, Edison, NJ 08837 • USA
Tel: (732) 738-9003 • Fax: (732) 738-9006
France • Gemini France (GSL) • 1, Allee d’Effiat, Parc de l’evénement, 91160 Longjumeau, France
Tél: + 33 1 69 79 97 70 • Fax: + 33 1 69 79 97 80
Germany • Gemini Sound Products GmbH • Liebigstr. 16, Haus B - 3.0G, 85757 Karlsfeld, Germany
Tel: 08131 - 39171-0 • Fax: 08131 - 39171-9
UK • Gemini Sound Products • Unit C4 Hazleton Industrial Estate, P08 9JU Waterlooville , UK
Tel: 087 087 00880 • Fax: 087 087 00990
Spain • Gemini Sound Products S.A. • Rosello, 516, 08026 Barcelona, Spain,
Tel: 349-3435-0814 • Fax: 3493-347-6961
___________________________________________________
© Gemini Sound Products Corp. 2004 All Rights Reserved.
 Loading...