

Page 1
In the USA: IfIn the USA: If
In the USA: If
In the USA: IfIn the USA: If
call 1-732-738-9003 fcall 1-732-738-9003 f
call 1-732-738-9003 f
call 1-732-738-9003 fcall 1-732-738-9003 f
Do not aDo not a
Do not a
Do not aDo not a
y y
ou eou e
y
ou e
y y
ou eou e
ttempt to rttempt to r
ttempt to r
ttempt to rttempt to r
xperience prxperience pr
xperience pr
xperience prxperience pr
or Gemini Customer Seror Gemini Customer Ser
or Gemini Customer Ser
or Gemini Customer Seror Gemini Customer Ser
eturn this equipment to yeturn this equipment to y
eturn this equipment to y
eturn this equipment to yeturn this equipment to y
obob
lems with this unit,lems with this unit,
ob
lems with this unit,
obob
lems with this unit,lems with this unit,
vicevice
vice
vicevice
our dealerour dealer
our dealer
our dealerour dealer
..
.
..
..
.
..
Parts of the design of this product may be protected by worldwide patents.
Information in this manual is subject to change without notice and does not
represent a commitment on the part of the vendor. Gemini Sound Products
Corp. shall not be liable for any loss or damage whatsoever arising from
the use of information or any error contained in this manual.
No part of this manual may be reproduced, stored in a retrieval system or
transmitted, in any form or by any means, electronic, electrical, mechanical,
optical, chemical, including photocopying and recording, for any purpose
without the express written permission of Gemini Sound Products Corp.
It is recommended that all maintenance and service on this product is
performed by Gemini Sound Products Corp. or its authorized agents.
Gemini Sound Products Corp. will not accept liability for loss or damage
caused by maintenance or repair performed by unauthorized personnel.
OPERATIONS MANUAL
BEDIENUNGSHANDBUCH
MANUAL DEL OPERADOR
MANUEL D’INSTRUCTIONS
GX-I
POWERED MONITORS
ANGETRIEBENE MONITOREN
MONITORES ACCIONADOS
MONITEURS ACTIONNÉS
WW
oror
ldwide Headquarldwide Headquar
W
or
ldwide Headquar
WW
oror
ldwide Headquarldwide Headquar
Gemini France (GSL) • 1, Allee d’Effiat, Parc de l’Evénement, 91160 Longjumeau, France
Germany • Gemini Sound Products GmbH • Liebigstr. 16, Haus B - 3.0G 85757 Karlsfeld, Germany
UK • Gemini Sound Products • Unit C4 Hazleton Industrial Estate, Waterlooville, UK P08 9JU
Spain • Gemini Sound Products S.A. • Rosello, 516, Barcelona, Spain, 08026
© Gemini Sound Pr© Gemini Sound Pr
© Gemini Sound Pr
© Gemini Sound Pr© Gemini Sound Pr
terter
s • 120 Clos • 120 Clo
ter
s • 120 Clo
terter
s • 120 Clos • 120 Clo
Tel: (732) 738-9003 • Fax: (732) 738-9006
Tél: + 33 1 69 79 97 70 • Fax: + 33 1 69 79 97 80
Tel: 08131 - 39171-0 • Fax: 08131 - 39171-9
Tel: 087 087 00880 • Fax: 087 087 00990
Tel: 349-3435-0814 • Fax: 3493-347-6961
oducts Coroducts Cor
oducts Cor
oducts Coroducts Cor
vv
er Placeer Place
v
er Place
vv
er Placeer Place
pp
. 2004 All Rights R. 2004 All Rights R
p
. 2004 All Rights R
pp
. 2004 All Rights R. 2004 All Rights R
, Edison, NJ 08837 • USA, Edison, NJ 08837 • USA
, Edison, NJ 08837 • USA
, Edison, NJ 08837 • USA, Edison, NJ 08837 • USA
esereser
eser
esereser
vv
ed.ed.
v
ed.
vv
ed.ed.
Page 2
PLEASE READ BEFORE USING APPLIANCE,
IMPORTANT WARNING & SAFETY INSTRUCTIONS!
CAUTION
RISK OF ELECTRICAL SHOCK
DO NOT OPEN!
CAUTION: THIS PRODUCT SATISFIES FCC REGULATIONS WHEN SHIELDED CABLES AND CONNECTORS ARE USED TO
CONNECT THE UNIT TO OTHER EQUIPMENT. TO PREVENT ELECTROMAGNETIC INTERFERENCE WITH ELECTRIC
APPLIANCES SUCH AS RADIOS AND TELEVISIONS, USE SHIELDED CABLES AND CONNECTORS FOR CONNECTIONS.
THE EXCLAMATION POINT WITHIN AN EQUILATERAL TRIANGLE IS INTENDED TO ALERT THE USER TO THE PRESENCE OF
IMPORTANT OPERATING AND MAINTENANCE (SERVICING) INSTRUCTIONS IN THE LITERATURE ACCOMPANYING THE APPLIANCE.
THE LIGHTNING FLASH WITH ARROWHEAD SYMBOL, WITHIN AN EQUILATERAL TRIANGLE, IS INTENDED TO ALERT THE
USER TO THE PRESENCE OF UNINSULATED “DANGEROUS VOLTAGE” WITHIN THE PRODUCT’S ENCLOSURE THAT MAY
BE OF SUFFICIENT MAGNITUDE TO CONSTITUTE A RISK OF ELECTRIC SHOCK TO PERSONS.
READ INSTRUCTIONS: All the safety and operating instructions
should be read before the product is operated.
RETAIN INSTRUCTIONS: The safety and operating instructions
should be retained for future reference.
HEED WARNINGS: All warnings on the product and in the operating
instructions should be adhered to.
FOLLOW INSTRUCTIONS: All operating and use instructions
should be followed.
CLEANING: The product should be cleaned only with a polishing
cloth or a soft dry cloth. Never clean with furniture wax, benzine,
insecticides or other volatile liquids since they may corrode the cabinet.
ATTACHMENTS: Do not use attachments not recommended by the
product manufacturer as they may cause hazards.
WATER AND MOISTURE: Do not use this product near water, for
example, near a bathtub, wash bowl, kitchen sink, or laundry tub; in a wet
basement; or near a swimming pool; and the like.
ACCESSORIES: Do not place this product on an unstable cart, stand,
tripod, bracket, or table. The product may fall, causing serious injury to
a child or adult, and serious damage to the product. Use only with a
cart, stand, tripod, bracket, or table recommended by the manufacturer,
or sold with the product. Any mounting of the product should follow the
manufacturer’s instructions, and should use a mounting accessory
recommended by the manufacturer.
CART: A product and cart combination should be moved with care. Quick
stops, excessive force, and uneven surfaces may cause the product and
cart combination to overturn. See Figure A.
VENTILATION: Slots and openings in the cabinet are provided for
ventilation and to ensure reliable operation of the product and to protect
it from overheating, and these openings must not be blocked or covered.
The openings should never be blocked by placing the product on a bed,
sofa, rug, or other similar surface. This product should not be placed in
a built-in installation such as a bookcase or rack unless proper ventilation
is provided or the manufacturer’s instructions have been adhered to.
POWER SOURCES: This product should be operated only from the
type of power source indicated on the marking label. If you are not sure
of the type of power supply to your home, consult your product dealer or
local power company.
LOCATION: The appliance should be installed in a stable location.
NON-USE PERIODS: The power cord of the appliance should be
unplugged from the outlet when left unused for a long period of time.
GROUNDING OR POLARIZATION:
• If this product is equipped with a polarized alternating current line plug
(a plug having one blade wider than the other), it will fit into the outlet
only one way. This is a safety feature. If you are unable to insert the plug
fully into the outlet, try reversing the plug. If the plug should still fail to fit,
contact your electrician to replace your obsolete outlet. Do not defeat the
safety purpose of the polarized plug.
• If this product is equipped with a three-wire grounding type plug, a plug
having a third (grounding) pin, it will only fit into a grounding type power
outlet. This is a safety feature. If you are unable to insert the plug into
the outlet, contact your electrician to replace your obsolete outlet. Do not
defeat the safety purpose of the grounding type plug.
POWER-CORD PROTECTION: Power-supply cords should be
routed so that they are not likely to be walked on or pinched by items placed
upon or against them, paying particular attention to cords at plugs,
convenience receptacles, and the point where they exit from the product.
OUTDOOR ANTENNA GROUNDING: If an outside antenna or
cable system is connected to the product, be sure the antenna or cable
system is grounded so as to provide some protection against voltage
surges and built-up static charges. Article 810 of the National Electrical
Code, ANSI/NFPA 70, provides information with regard to proper
grounding of the mast and supporting structure, grounding of the leadin wire to an antenna discharge unit, size of grounding conductors,
location of antenna-discharge unit, connection to grounding electrodes,
and requirements for the grounding electrode. See Figure B.
LIGHTNING: For added protection for this product during a lightning
storm, or when it is left unattended and unused for long periods of time,
unplug it from the wall outlet and disconnect the antenna or cable system.
This will prevent damage to the product due to lightning and power-line surges.
POWER LINES: An outside antenna system should not be located in
the vicinity of overhead power lines or other electric light or power circuits,
or where it can fall into such power lines or circuits. When installing an
outside antenna system, extreme care should be taken to keep from
touching such power lines or circuits as contact with them might be fatal.
OVERLOADING: Do not overload wall outlets, extension cords, or integral
convenience receptacles as this can result in a risk of fire or electric shock.
OBJECT AND LIQUID ENTRY: Never push objects of any kind into
this product through openings as they may touch dangerous voltage
points or short-out parts that could result in a fire or electric shock.
Never spill liquid of any kind on the product.
SERVICING: Do not attempt to service this product yourself as
opening or removing covers may expose you to dangerous voltage or
other hazards. Refer all servicing to qualified service personnel.
DAMAGE REQUIRING SERVICE: Unplug this product from the wall outlet &
refer servicing to qualified service personnel under the following conditions:
• When the power-supply cord or plug is damaged.
• If liquid has been spilled, or objects have fallen into the product.
• If the product has been exposed to rain or water.
• If the product does not operate normally by following the operating
instructions. Adjust only those controls that are covered by the operating
instructions as an improper adjustment of other controls may result in
damage and will often require extensive work by a qualified technician to
restore the product to its normal operation.
• If the product has been dropped or damaged in any way.
• When the product exhibits a distinct change in performance, this indicates
a need for service.
REPLACEMENT PARTS: When replacement parts are required, be
sure the service technician has used replacement parts specified by the
manufacturer or have the same characteristics as the original part.
Unauthorized substitutions may result in fire, electric shock, or other hazards.
SAFETY CHECK: Upon completion of any service or repairs to this
product, ask the service technician to perform safety checks to determine
that the product is in proper operating condition.
WALL OR CEILING MOUNTING: The product should not be mounted
to a wall or ceiling.
HEAT: The product should be situated away from heat sources such as
radiators, heat registers, stoves, or other products (including amplifiers)
that produce heat.
GX-IGX-I
GX-I
GX-IGX-I
connections:connections:
connections:
connections:connections:
Page 3

INTRODUCTION:
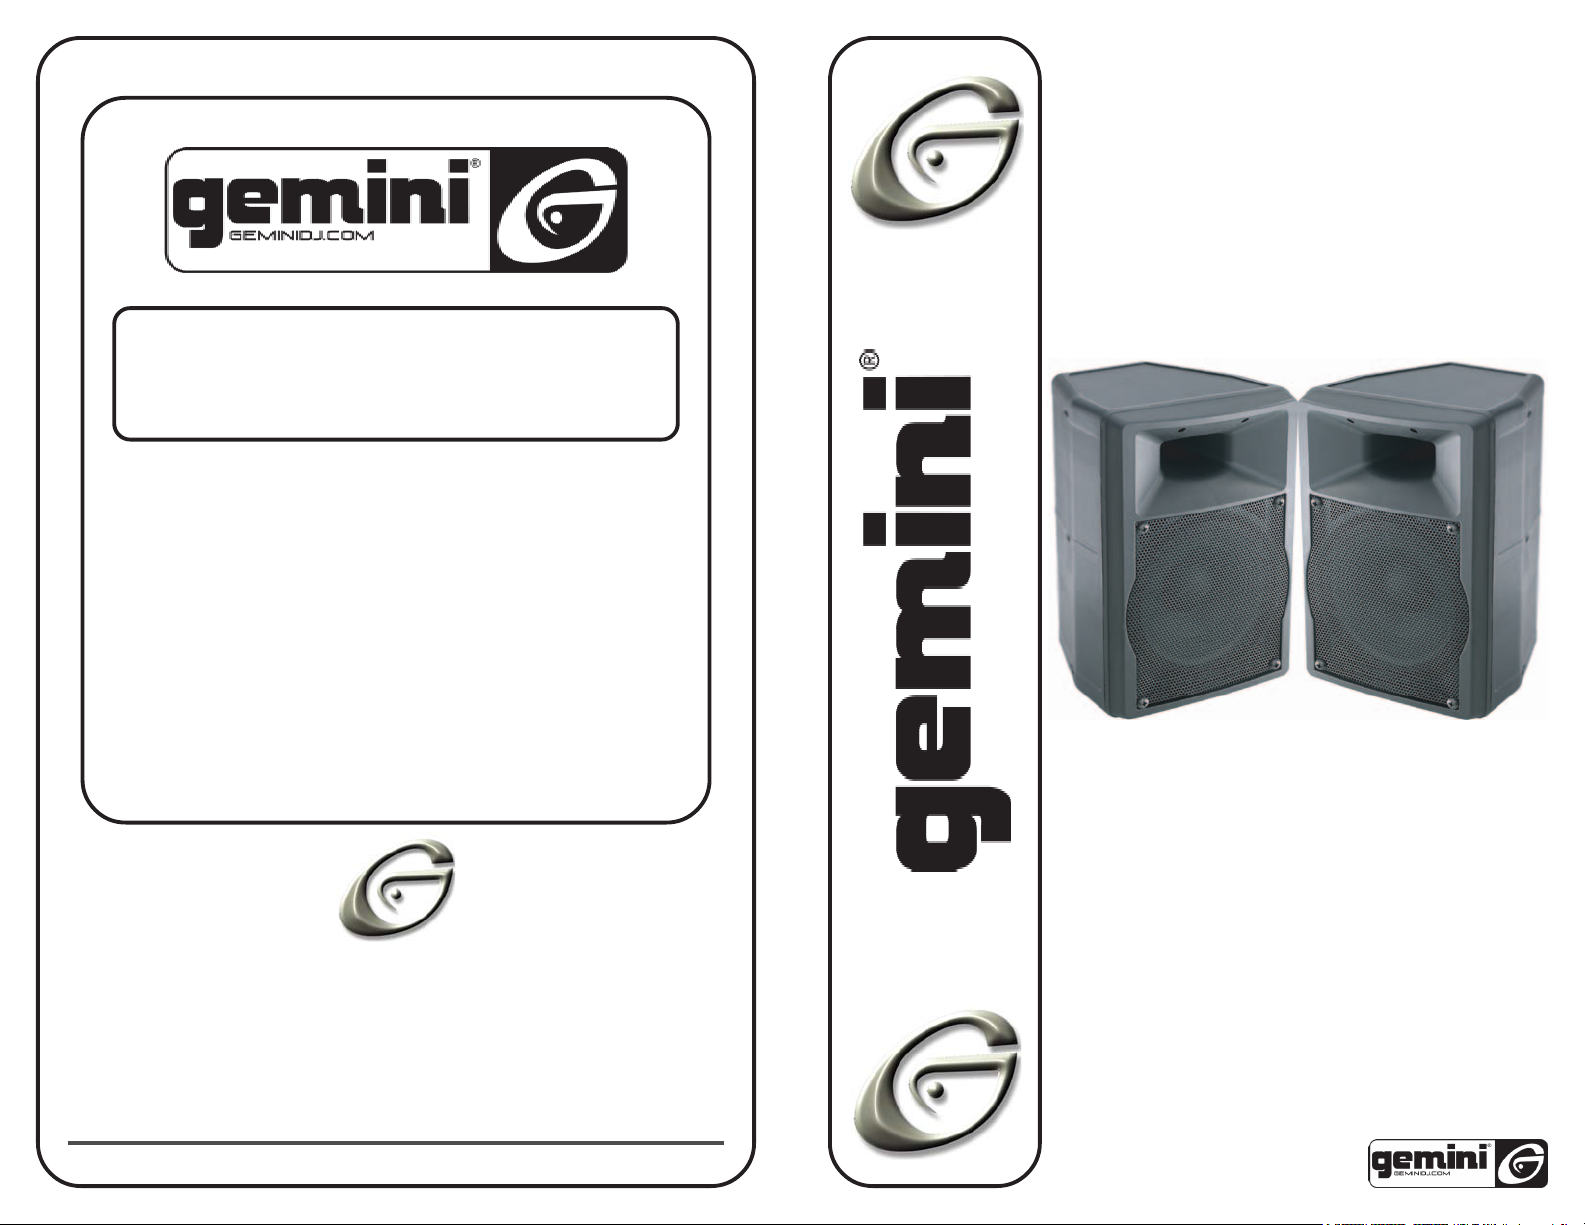
Congratulations on purchasing the Gemini GX-1 speaker system. This state of the art active 2-way
speaker system includes the latest features backed by a 3 year warranty. Prior to use, we suggest
that you carefully read all of the instructions.
FEATURES:
• Powered compact monitor speakers
• Hard ABS molded plastic design
• Mini woofer & tweeter
• Separate bass, treble & volume controls
• 3-D surround sound with on/off button
• Protective metal grill
• Stereo RCA outputs
• Includes AC adapter & RCA cables
CAUTIONS:
1. Read all operating instructions before using this equipment. Keep this manual in a safe place for
future reference.
2. The apparatus should not be exposed to dripping or splashing and no objects filled with liquids such as
vases should be placed on the apparatus.
3. To reduce the risk of electrical shock, do not open the unit. There are NO USER REPLACEABLE
PARTS INSIDE. Please contact the Gemini Service Department or your authorized dealer to speak to a
qualified service technician.
4. Be sure that all AC power is OFF while making connections.
5. Do not expose this unit to direct sunlight or to a heat source such as a radiator or stove.
6. This unit should be cleaned only with a damp cloth. Avoid solvents or other cleaning detergents.
7. When moving this equipment, it should be placed in its original carton and packaging. This will reduce
the risk of damage during transit.
8. DO NOT EXPOSE THIS UNIT TO RAIN OR MOISTURE. Operators of electronic equipment should in
no way be in contact with water.
9. DO NOT USE ANY SPRAY CLEANER OR LUBRICANT ON ANY CONTROLS OR SWITCHES.
10. If any objects or liquid fall into the unit, turn off the power and unplug the unit immediately and
have the system checked by a qualified service technician before using it again.
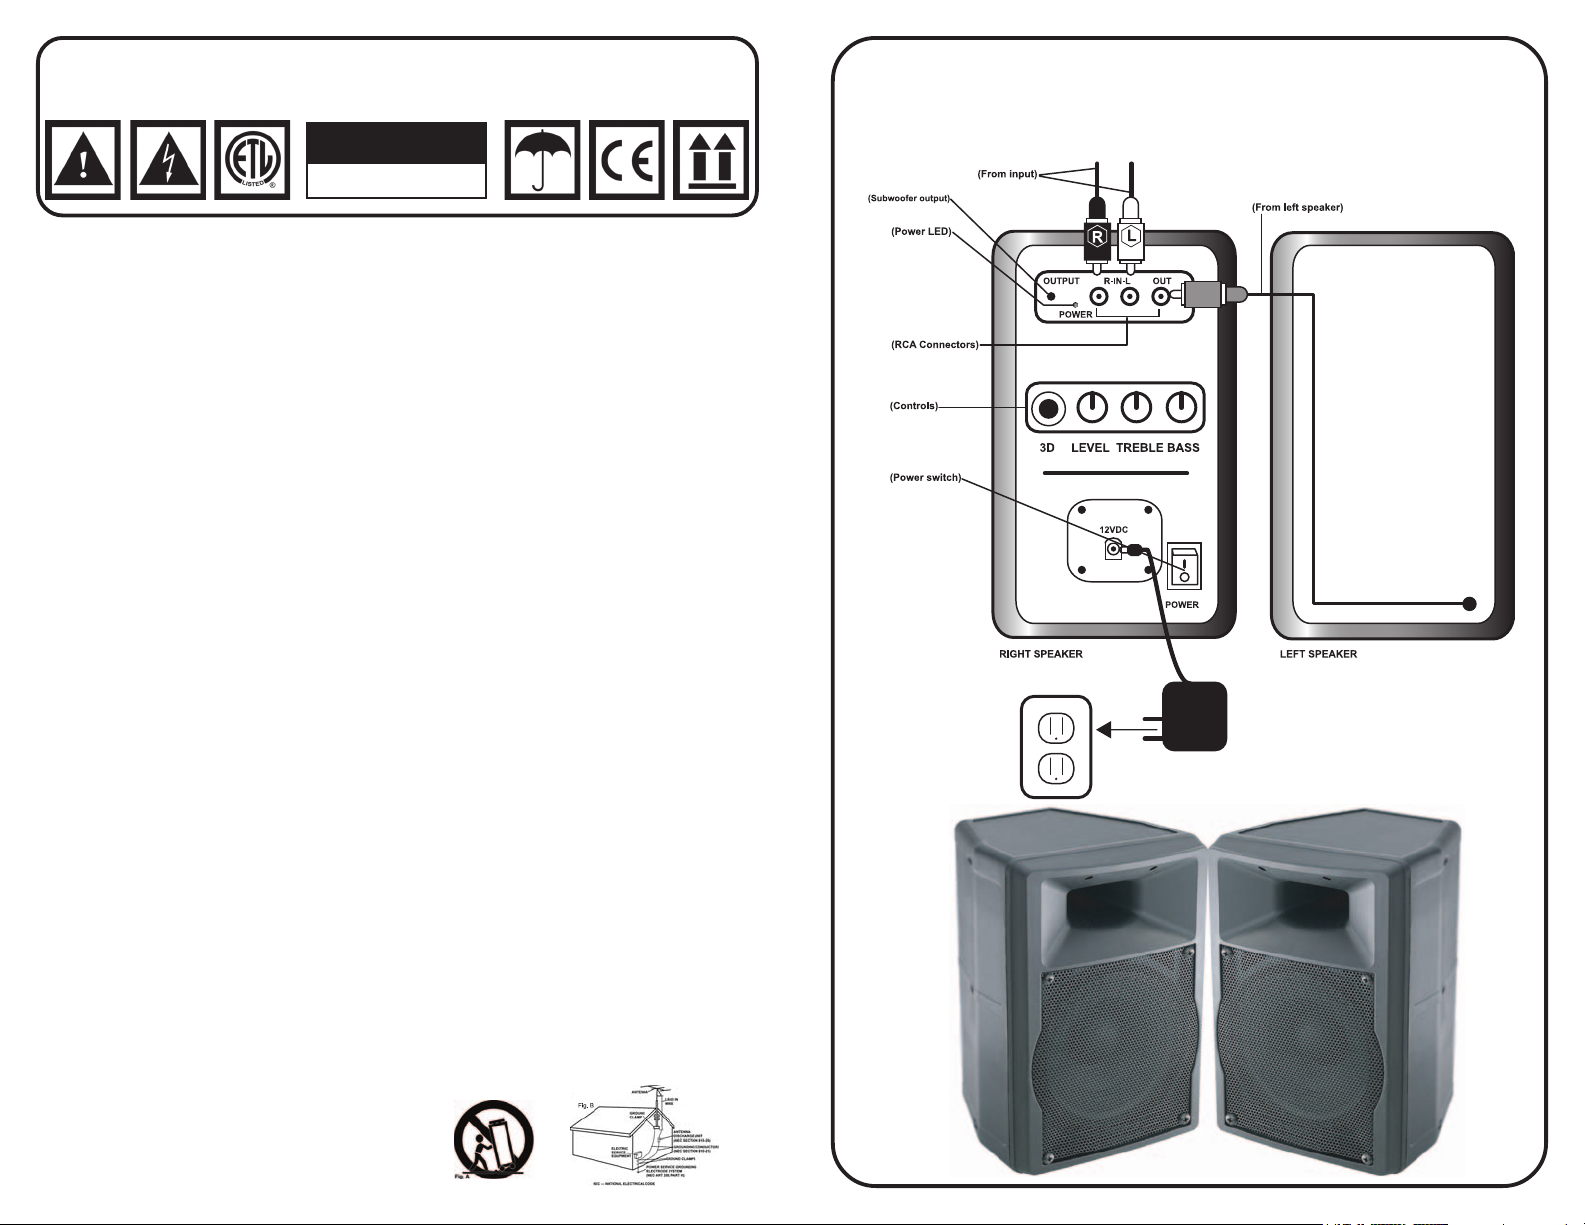
CONNECTIONS:
1. Make sure that the power switch located on the front of the right speaker is in the OFF position. This
unit comes supplied with a DC power adaptor. Plug the adaptor into the power jack (located on the
bottom rear of the left speaker). Then plug the adaptor into a proper power source.
2. Plug the cord coming from the left speaker into the connector marked OUT on the right speaker.
3. Plug one end of the RCA cables into the output jacks on your mixer. Plug the other end of the RCA
cables into the jacks on the back of the right speaker marked INPUT. When you are connecting the
RCA cables, make sure to match the color on the cable to the color on the speaker connector
(white = left channel, red = right channel).
4. Use the jack on the back of the right speaker marked OUTPUT to connect to a subwoofer (optional).
OPERATION:
1. Turn all of the controls (bass, treble and volume) located on the front of the right speaker all the way
to the left (the lowest level).
2. Press the power switch located on the front of the right speaker to the ON position (the LED will light).
3. Adjust the bass, treble and volume controls to the desired levels.
4. For an enhanced effect, press the 3D button (located on the front of the right speaker) to the ON
position to add a 3 dimensional spacial effect to your program.
SPECIFICATIONS:
Output Power............................................................................................................25W + 25W WMRS
PMPO...........................................................................................................................................300W
Speaker Unit........................................................................1.5” treble, 4” bass (magnetically shielded)
Impedance...................................................................................................................................4 Ohm
Frequency Response.........................................................................................................60 Hz-18 kHz
Input Connectors........................................................................................................Stereo RCA jacks
Output Connector.................................................................................................................1 RCA jack
Treble Up...........................................................................................................................10 dB ± 2 dB
Bass Up.............................................................................................................................10 dB ± 2 dB
Separation....................................................................................................................................48 dB
S/N Ratio......................................................................................................................................75 dB
Dimensions.............................................................................................8”x5.5”x5.5” (203x140x140mm)
Weight.....................................................................................................R 2.15/L 2.11lbs (R 1/L .95 kg)
SPECIFICATIONS AND DESIGN ARE SUBJECT TO CHANGE WITHOUT NOTICE FOR PURPOSE OF IMPROVEMENT.
EINLEITUNG:
Wir gratulieren Ihnen zum Kauf eines Gemini GX-1 Lautsprechersystems. Dieses moderne
Zweiweglautsprechersystem enthält die neueste Funktionen mit dreijähriger Garantie. Vor
Anwendung des Systems bitte alle Anweisungen sorgfältig durchlesen.
LEISTUNGSMERKMALE:
• Kompakte Aktiv Monitore
• Stabiles Gehäuse aus Hart-ABS
• Zweiwegsystem: Bass / Mittelhochton
• Getrennte Bass, Höhen Und Lautstärke Regler
• 3-D Surround Simulation schaltbar
• Metallschutzgitter
• Stereo-Cincheingangsbuchsen
• Netzadapter und Kabel inklusive
VORSICHTSMASSNAHMEN:
1. Vor Anwendung des Systems lesen Sie bitte alle Anweisungen sorgfältig durch.
2. Das System nicht an tropfenden oder spritzenden Stellen aufstellen, und
ebenso dürfen keine mit Flüssigkeit gefüllte Behälter darauf gestellt werden.
3. Um das Risiko elektrischen Schocks zu vermeiden, dürfen Sie das System nicht öffnen. DAS SYSTEM
ENTHÄLT KEINE VOM ANWENDER ERSETZBARE TEILE. Wenden Sie sich bitte an die Gemini Niederlassung
oder an Ihren Vertragshändler, um mit einem authorisierten Servicetechniker zu sprechen.
4. Achten Sie darauf, daß beim Anschliessen der Kabel der Netzschalter auf OFF geschaltet ist.
5. Das System nicht direktem Sonnenlicht oder einer Wärmequelle wie z.B.
Heizkörpern oder Öfen aussetzen.
6. Dieses System darf nur mit einem feuchten Tuch gesäubert werden. Keine Lösungs- oder
Reinigungsmittel benutzen.
7. Bei Umzügen sollte das System in seinem ursprünglichen Versandkarton und Verpackungsmaterial
verpackt werden. Dadurch verhindert man, daß es während des Transportes beschädigt wird.
8. DIESES SYSTEM NICHT REGEN ODER FEUCHTIGKEIT AUSSETZEN. Bei der Bedienung von
elektronischen Geräten darf die Bedienungsperson unter keinen Umständen mit Wasser in
Berührung kommen.
9. KEIN REINIGUNGSSPRAY ODER SCHMIERMITTEL AN DEN REGLERN ODER SCHALTERN VERWENDEN.
10. Falls Gegenstände oder Flüssigkeit in das Gerät fallen, den Strom abschalten und den Stecker des
Geräts sofort aus der Steckdose herausziehen; dann das System von einem befähigten Techniker
überprüfen lassen, bevor es wieder benutzt wird.
ANSCHLÜSSE:
1. Darauf achten, daß der Netzschalter an der Vorderseite des rechten Lautsprechers in OFF-Position
steht. Das System wird mit einem externen Netzadapter geliefert. Den Adapter in die
Stromversorgungsbuchse stecken (unten links am rechten Lautsprecher). Dann den Adapter an
einer vorschriftsmäßigen Stromquelle anschließen.
2. Das Kabel vom linken Lautsprecher in die mit OUT gekennzeichnete Anschlussbuchse des rechten
Lautsprechers stecken.
3. Ein Ende des RCA-Kabels in die Ausgangsbuchsen des Mixer stecken. Das andere Ende des RCAKabels an der Rückseite des rechten Lautsprechers in die mit INPUT gekennzeichnete Buchse
stecken. Wenn Sie die RCA-Kabel anschließen, darauf achten, dass die Farben der
Kabel denen der Lautsprecheranschlüsse entsprechen (weiss = linker Kanal, rot = rechter Kanal).
4. Die mit OUTPUT gekennzeichnete Buchse an der Rückseite des rechten Lautsprechers kann dazu
benutzt werden, um einen aktiven Tieftonlautsprecher (Subwoofer) anzuschließen. Dieser Anschluß
ist optional.
BETRIEB:
1. Den Lautstärkenregler, der sich an der Vorderseite des rechten Lautsprechers befindet, ganz nach
links drehen (der niedrigste Pegel).
2. Den Netzschalter, der sich an der Vorderseite des rechten Lautsprechers befindet, in die ONPosition drehen (die LED wird aufleuchten).
3. Die Bass-, Höhen- und Lautstärkenregler auf den gewünschten Pegel einstellen.
4. Um einen verbesserten Klangeffekt zu erzielen, drücken Sie die 3D-Taste (an der Vorderseite des
rechten Lautsprechers) in die ON-Position, um Ihrem Klang einen dreidimensionalen Effekt
hinzuzufügen.
TECHNISCHE DATEN:
Ausgangsleistung........................................................................................................25 W + 25 W RMS
Kurzzeitige Spitzenleistung...........................................................................................................300W
Lautprechersysteme...............................................................................38 mm Hochtöner, 100 mm Bass
(magnetisch abgeschirmt)
Impedanz ....................................................................................................................................4 Ohm
Frequenzgang....................................................................................................................60 Hz-18 kHz
Eingangsanschlüsse..........................................................................................................RCA-Buchsen
Ausgangsanschluss.....................................................................................................1 RCA Einfaßung
Höhenregelung...................................................................................................................10 dB ± 2 dB
Bassregelung.....................................................................................................................10 dB ± 2 dB
Kanaltrennung..............................................................................................................................48 dB
Geräuschabstand..........................................................................................................................75 dB
Abmessungen...........................................................................................8”x5.5”x5.5” (203x140x140mm)
Gesamtgewicht.........................................................................................R 2.15/L 2.11lbs (R 1/L .95 kg)
Page 4

INTRODUCCIÓN:
Felicitaciones por su compra del sistema de altavoces PM-100 de Gemini. Este sistema activo
bidireccional muy moderno incluye las más recientes características tecnológicas y está apoyado
por una garantía de 3 años. Antes de utilizarlo, le sugerimos que lea cuidadosamente todas las
instrucciones.
CARACTERÍSTICAS:
• Altavoces de monitor compactos autoamplificados
• Diseño en plástico duro ABS
• Woofer & tweeter
• Controles separados de graves, agudos y volumen
• Sistema de sonido 3D surround
• Rejilla de protección metálica
• Entradas estereo RCA
• Incluye adaptador de corriente y cables RCA
ADVERTENCIAS:
1. Lea todas las instrucciones de funcionamiento antes de usar este equipo. Guarde este manual en
un lugar seguro para su consulta futura.
2. El aparato no debe estar expuesto al goteo ni a salpicaduras y ningun
objeto lleno de líquido, tal como florero, debería estar colocado sobre el aparato.
3. Para reducir el riesgo de choques eléctricos, no abra el aparato. NO CONTIENE EN SU INTERIOR
NINGUNA PIEZA A REEMPLAZAR POR EL USUARIO. Por favor, póngase en contacto con el
departamento de servicio de Gemini o con su vendedor autorizado para hablar con un
técnico calificado.
4. Cerciórese de que desconectar la alimentación cuando se hagan las conexiones.
5. No exponga este aparato a los rayos directos del sol ni a una fuente de calor tal como radiadores o estufas.
6. Este aparato debería ser limpiado exclusivamente con un trapo húmedo. Evite el uso de
disolventes o de otros productos químicos de limpieza.
7. Cuando se transporte el equipo, use su embalaje y su caja original. Esto reducirá el riesgo de
daños durante el tránsito.
8. NO EXPONGA ESTE APARATO A LA LLUVIA O A LA HUMEDAD. Los componentes de equipos
electrónicos no deberían de ninguna manera estar en contacto con el agua.
9. NO USE NINGUN PRODUCTO O LUBRICANTE EN FORMA DE SPRAY EN LOS MANDOS O EN LOS
INTERRUPTORES.
10. Si algun objeto o un líquido se introduce dentro del aparato, corte la alimentación y desconecte
el aparato inmediatamente; haga verificar el aparato por un técnico calificado antes de utilizarlo
de nuevo.
CONEXIONES:
1. Cerciórese de que el interruptor de encendido colocado en la parte frontal del altavoz derecho esté
en la posición OFF (DESACTIVADO). Este aparato está suministrado con un adaptador de red de
corriente continua. Enchufe el adaptador en el jack de alimentación (colocado abajo en la parte
trasera del altavoz derecho). Después enchufe el adaptador en una fuente de alimentación apropiada.
2. Enchufe el cable del altavoz izquierdo en el conector identificado por L-SPK en el altavoz derecho.
3. Enchufe un extremo de los cables RCA en los jacks de salida de su mezclador. Enchufe el otro
extremo de los cables RCA en los jacks de la parte trasera del altavoz derecho identificado por
INPUT (ENTRADA). Cuando se conectan los cables RCA, cerciórese de que el color del cable
corresponda con el color del conector del altavoz (blanco = canal izquierdo; rojo = canal derecho).
4. Utilice el jack en la parte trasera del altavoz derecho identificado por OUTPUT (SALIDA) para
conectarlo a un subwoofer (opcional).
FUNCIONAMIENTO:
1. Gire el mando del volumen colocado en la parte frontal del altavoz derecho completamente hacia la
izquierda (volumen más bajo).
2. Oprima el interruptor de encendido colocado en la parte frontal del altavoz derecho en la posición
ON (activado) (el LED se encenderá).
3. Ajuste los mandos de los sonidos graves, de los altos y del volumen para los niveles deseados.
4. Para un efecto panorámico, oprima el botón 3D (colocado en la parte frontal del altavoz derecho) en
la posición ON (activado) para añadir un efecto espacial tridimensional a su programa.
ESPECIFICACIONES:
Potencia de salida.......................................................................................................25W + 25W WRMS
PMPO............................................................................................................................................300W
Altavoz.......................................................................sonidos altos de 4,8 cm, sonidos graves de 10 cm
(protección magnética)
Impedancia..............................................................................................................................4 ohmios
Respuesta en frecuencia.....................................................................................................60 Hz-18 kHz
Conectores de entrada....................................................................................................................RCA
Conector de salida.......................................................................................................................1 RCA
Sonidos altos arriba............................................................................................................10 dB + 2dB
Sonidos graves arriba........................................................................................................10 dB + 2 dB
Separación....................................................................................................................................48 dB
Relación señal/ruido.....................................................................................................................75 dB
Dimensiones............................................................................................
Peso.........................................................................................................R 2.15/L 2.11lbs (R 1/L .95 kg)
8”x5.5”x5.5” (203x140x140mm)
INTRODUCTION:
Nos félicitations à l’occasion de l’achat de votre système hauts-parleurs GX-1 de Gemini. Ce système
actif à deux voies ultramoderne comporte les dernières caractéristiques et il est garanti durant 3
ans. Avant son utilisation, nous vous recommandons de lire soigneusement toutes les instructions
de ce manuel.
CARACTÉRISTIQUES:
• Enceinte Monitor compacte amplifiée en ABS moulé
• Boomer & tweeter
• Fabrication ABS haute densité
• Réglage séparé grave, médium & aigu
• Entrée RCA stéréo
• Effet 3D
• Grille de protection
• Livré avec alimentation séparée et l'ensemble des cordons nécessaires
AVERTISSEMENTS:
1. Lisez toutes les instructions d’exploitation avant d’utiliser cet appareil. Conservez ce manuel dans
un lieu sûr pour sa consultation future.
2. L’appareil ne doit pas être exposé aux égouttements ni aux éclaboussures et aucun objet rempli de
liquide, comme des vases p.e., ne devrait être placé sur l’appareil.
3. Afin de réduire les risque de chocs électriques, n’ouvrez pas l’appareil. Il ne comporte AUCUNE
PIÈCE À REMPLACER À L’INTÉRIEUR. En cas de problème, veuillez contacter votre revendeur
habituel afin de parler à un technicien qualifié.
4. Avant d’effectuer les branchements, assurez-vous que l’appareil est bien hors tension.
5. N’exposez pas cet appareil directement au soleil, ni à tout autre source de chaleur (radiateur).
6. Ne pas utiliser de solvants chimiques afin de nettoyer l’appareil.
7. Lorsque vous déplacez cet appareil, il doit être placé dans son emballage et carton d’origine. Ceci
afin d’éviter tout risque d’endommagement durant le transport.
8. NE PAS EXPOSEZ L’APPAREIL À LA PLUIE NI À L’HUMIDITÉ. Tout utilisateur d’appareil électronique
ne doit jamais se retrouver en contact avec l’eau.
9. N’UTILISEZ PAS DE SOLVANTS OU TOUT AUTRE PRODUIT CHIMIQUE SUR LES COMMANDES ET
INTERRUPTEURS DE L’APPAREIL.
10.Si un objet ou un liquide venait à s’introduire à l’intérieur de l’appareil, coupez immédiatement
l’alimentation électrique en débranchant l’appareil; puis faites contrôler le système par un
technicien qualifié avant de l’utiliser à nouveau.
BRANCHEMENTS:
1. Assurez-vous que l’interrupteur d’alimentation situé sur le devant du hautparleur droit occupe la
position OFF (Désactivé). Cet appareil est fourni avec un adaptateur courant continu. Enfichez
l’adaptateur dans le jack électrique (situé en bas à l’arrière du haut-parleur). Puis, branchez
l’adaptateur à une prise électrique.
2. Reliez le cordon venant du haut-parleur gauche dans le connecteur appelé OUT situé sur le hautparleur droit.
3. Reliez votre cordon RCA à la sortie, équipée de conncecteurs RCA, de votre console de mixage.
Reliez l’autre extrémité du cordon RCA à l’entrée RCA du haut-parleur droit portant la référence
INPUT (entrée). Lorsque vous branchez les cordons RCA, veillez à respecter la couleur du
cordon à la couleur du connecteur du haut-parleur (blanc = voie gauche; rouge = voie droite).
4. Utilisez le RCA situé au dos du haut-parleur droit identifié par OUTPUT (sortie) pour le connecter à
un caisson de basse (facultatif).
FONCTIONNEMENT:
1. Tournez la commande de volume située sur le devant du haut-parleur droit à gauche (volume le plus faible).
2. Appuyez sur la touche d’alimentation située sur le devant du haut-parleur droit pour l’activer (ON)
(la DEL s’allumera).
3. Ajustez les commandes des graves, des aiguës et de volume selon les niveaux désirés.
4. Pour obtenir un meilleur effet, appuyez sur la touche 3D (située sur le devant du haut-parleur droit)
pour l’activer (ON) et pour ajouter un effet spatial tridimensionnel à votre programme.
SPÉCIFICATIONS:
Puissance de sortie.....................................................................................................25 W + 25 W RMS
PMPO...........................................................................................................................................300 W
Composants haut-parleur.......................................................................aigues (3,8 cm), basses (10 cm)
(blindage magnétique)
Impédance.................................................................................................................................4 ohms
Bande passante.................................................................................................................60 Hz-18 kHz
Connecteurs d’entrée.....................................................................................................................RCA
Connecteur de sortie...................................................................................................................1 RCA
Aiguës en haut...................................................................................................................10 dB + 2 dB
Graves en haut...................................................................................................................10 dB + 2 dB
Diaphonie....................................................................................................................................48 dB
Rapport signal/bruit.....................................................................................................................75 dB
Dimensions.............................................................................................8”x5.5”x5.5” (203x140x140mm)
Poids.......................................................................................................R 2.15/L 2.11lbs (R 1/L .95 kg)
 Loading...