

Page 1
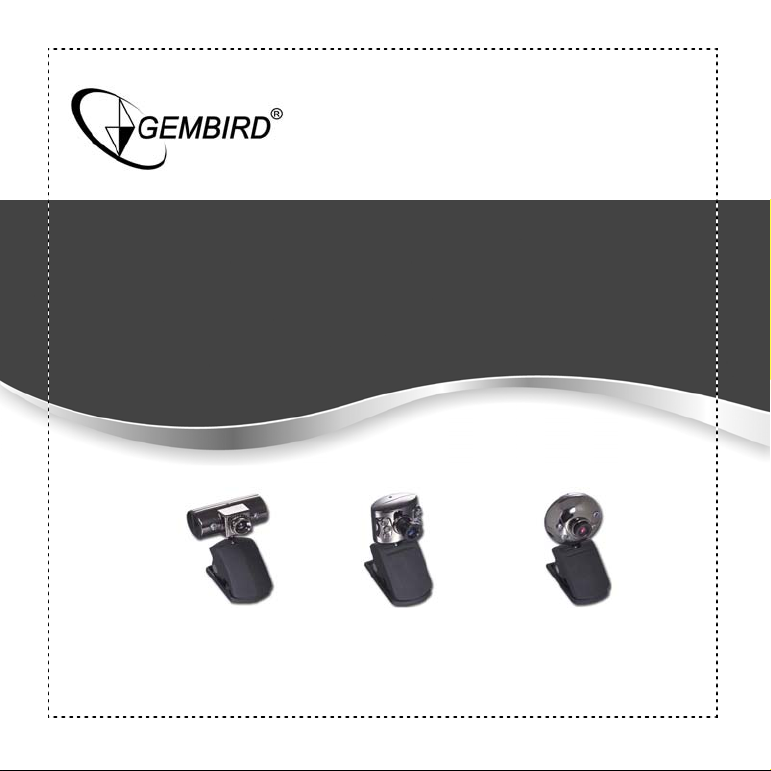
Web camera
CAM44U/CAM55U/CAM66U
PC Camera
Page 2
Web camera
Disclaimer
• We spared no efforts to make sure that the information in this manual is correct and
complete. However no liability is accepted for any errors or omissi ons. Gembird
Electronics reserves the right to change the sp ecifications of the hardware and
software described in this manual with out prior notice.
• No part of this manual may be reproduced, tr ansmitted o r translated i n any language
in any form, by any means, without the prior written permission of Gembird
Electronics Ltd.
• Gembird Electronics makes no warr anties for damages resulting from co rrupted or lost
data due to a mistaken operation or malfunction of the product, the sof tware,
personal computers or peripheral devices.
Gembird® is a registered trademark of GMB Tech (Holland) bv.
Other names or products not mentioned above may be registered trademarks or
trademarks of their respective owners.
Copyright © 2006 Gembird Electronics Ltd. All rights reserved.
Page 3

Web camera
CAM44U/CAM55U/CAM66U
User Manual
Thank you for choosing our new generation of Web camera! This device is a Plug and Play
product for real-time video transmission to PC via the USB Port.
Software/Hardware requirements
o IBM-compatible PC or laptop with USB port
o Pentium 200 or higher CPU
o Windows 98/2000/ME/XP operation system
o Over 200MB free hard disc space
o CD Rom drive
o 32MB memory or higher
o VGA card supporting DirectX
Introduction
Page 4

Features:
o High resolution
o Fast transmission rate
o Light and easy to carry
o Stylish design
o Night vision
For CAM44U:
o 350,000 pixels resolution VM 305 chipset
o High resolution CMOS color sensor
o Large window capture size: 640×480
o Video mode: 24 bit true color
o Interface: USB 1.1
o Includes microphone and software
For CAM55U:
o 350,000 pixels resolution VM 305 chipset
o High resolution CMOS color sensor
Web camera
Page 5

o Large window capture size: 640×480
o Video mode: 24 bit true color
o Interface: USB 1.1
For CAM66U
o 1,300,000 pixels resolution
o Interface: USB 2.0
o Transmission rate: 320×240 30fps or 1280*960 15fps
o Includes microphone and software
o Noise-signal ration: greater than 48db by 30fps 220LUX
o Dynamic range: greater than 72db
o Image focus: 5cm to infinity
o Built-in image compression
o Automatic brightness adjustment
o Automatic color compensation
o Manual focus
Web camera
Page 6

Web camera
Software installation
Insert CD with Driver/Applications into your CD Rom drive. The installation software should
be launched automatically. If by any reason it does not start, please, open the CD-drive in
your Windows Explorer and then execute Driver setup/Setup.exe manually. Y ou will see the
following window:
1. Choose “Next”.
Page 7

Web camera
2. The window below will be then shown during the installation.
3. Click “Finish” when you see the window below and restart your computer.
Page 8

Web camera
4. Plug the web camera into the USB port now and turn your computer on. The camera will
be automatically recognized by Windows:
5. Choose “Start/Programs/VIMICRO USB PC camera” group and launch the program
“AMCAP” to start the video capture.
Page 9

Web camera
6. This is how the video capture window looks like:
7. From the “Options” menu choose “Video Capture Filter” . Y ou will see the following dialog
box, which will help you to adjust the video picture if neces sary:
Page 10

Web camera
8. From the “Options” menu choose “Video Capture Pin”. You will see the following dial og
box, which will help you to adjust the video format & size:
Operation precautions
• Do not touch the lens with your hand or any sharp items. Use only clean and soft
tissues to clean it.
• Do not use the device in hot, cold, dusty or humid environments.
• Keep the camera on a steady surface. A fall may cause damages to the lens,
product itself or malfunction of electron ic circuit inside.
 Loading...