

Page 1
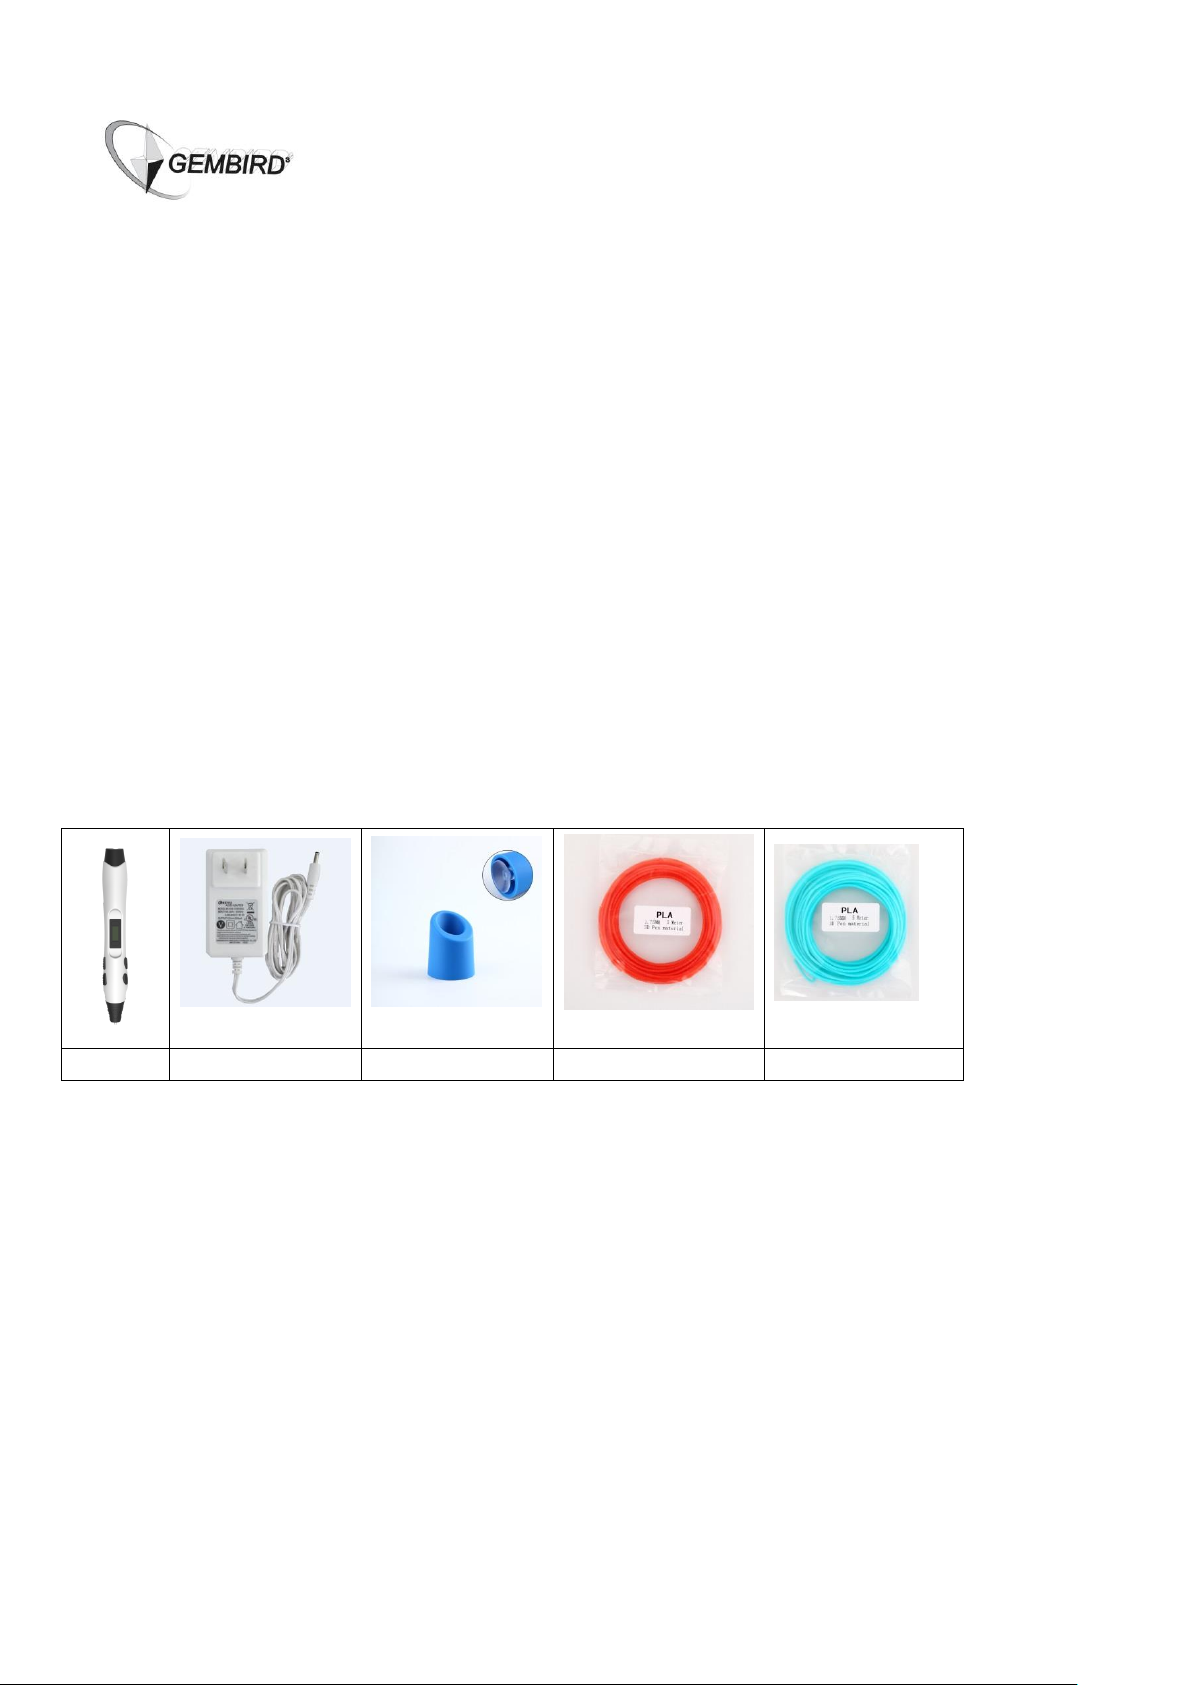
3d pen
Power adapter
Holder
Red filament (3m)
Blue filament (3m)
3DP-PEND-02 user manual
Read before the first use:
The tip of the pen can become quite hot! While the pen is used, please, do not touch the tip or
the surrounding area.
The hot tip of the pen might damage the painted surfaces, plastic, clothes etc.
The pen is not suitable for children under 8 years old unless they are supervised by adults.
Once the pen is no longer used, please, unload the filament, unplug and put the device into the
pen holder.
Do not use the pen in wet places where it can into contact with water due to a potential threat of
electric shock.
It is highly recommended to use this pen only with original Gembird3 filament.
Package content:
Product features:
Lightweight and comfortable – just 55g
Smart temperature sensing and heating
8 digital speed controls for more accurate and stable extruding
A single button push for continuous extrusion facilitates use
Embedded nozzle for easy maintenance
Patented lower temperature nozzle tip
Specifications:
Model NO.:3DP-PEND-02
Optimum temperature: ABS: 180-210 ℃,PLA: 160-180 ℃
Suitable filament: 1.75mm PLA/ABS
Power input: DC12V 2A 24W
Adapter power input: 100-250V 2A
Page 2
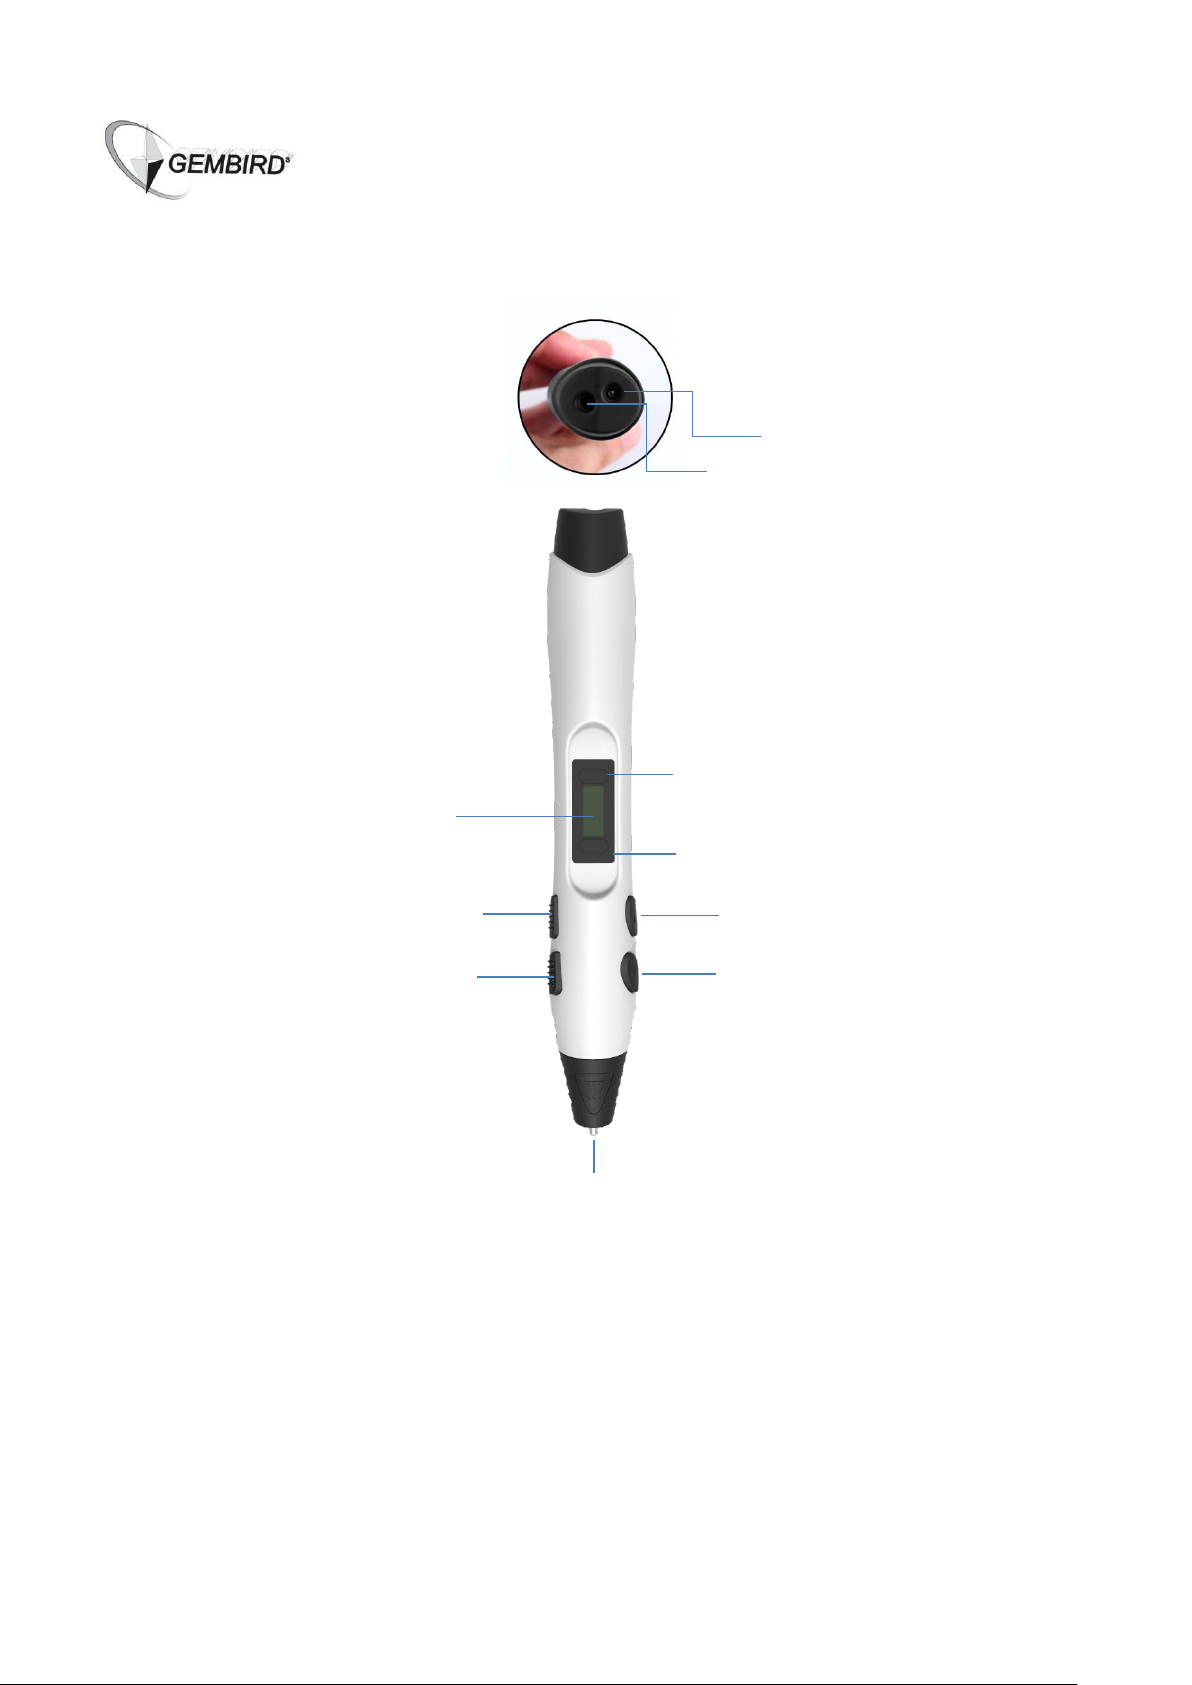
Power connector
Wire feeding hole
Nozzle
Material/Temperature +
Material/Temperature -
Wire unload
Wire feeding
Speed control +
Speed control -
LED screen
Product overview:
Page 3

Operation guidelines:
Step 1: power supply
Connect the adapter to the power outlet, then plug the adapter connector into the power source
hole of the pen. The LED next to the screen will then turn yellow to indicate that the device is on.
Step 2: selection of filament type
LED screen would display “PLA” or “ABS”, press the “material/temperature button” to choose the
correct filament type.
Step 3: preheating
Press “wire feeding” button, the LED next to the screen would turn red to indicate entering
pre-heating mode. LED screen would then display the actual nozzle temperature. Once the LED
turns green, this indicates that preheating is completed (it takes about 30 seconds to pre-heat).
Step 4: extrusion speed selection
Press “speed control buttons” to choose the extrusion speed (speed 5 is default speed, speed 8 is
fastest). These buttons only work when there is no extrusion (LED screen is green).
Step 5: load filament
Insert the filament into the “wire feeding hole” at the end of the pen and press “feeding button” to
load the filament. Once the melted filament appears at the tip of the pen, you can start drawing.
Step 6: drawing
Please, select a proper extrusion speed before you start drawing (see step 4 above). Note that
different color of the same type of filament might have different melting temperature. You may
consider to slightly adjust the temperature according to the filament.
Step 7: continuous and intermittent extrusion mode
To use the continuous extrusion mode: press the “feeding button” once. The pen will then extrude
and feed the filament automatically all the time. Press the “feeding button” again and the feeding
would stop for up to 8 minutes. To switch the intermittent extruding mode on double click the
“feeding button” and hold it on. Then the pen would start the extrusion. Release the button to pause
the extrusion.
Step 8: change/unload filament
Make sure LED screen is green, then press and hold the “unload button” for 3 seconds, then
release it. The pen would then start unloading the filament. Once filament no longer moves
backward, gently pull it out of the pen and then press the “unload button” again to stop the
unloading. Note: it is highly recommended to unload the filament when pen is not in use.
Page 4
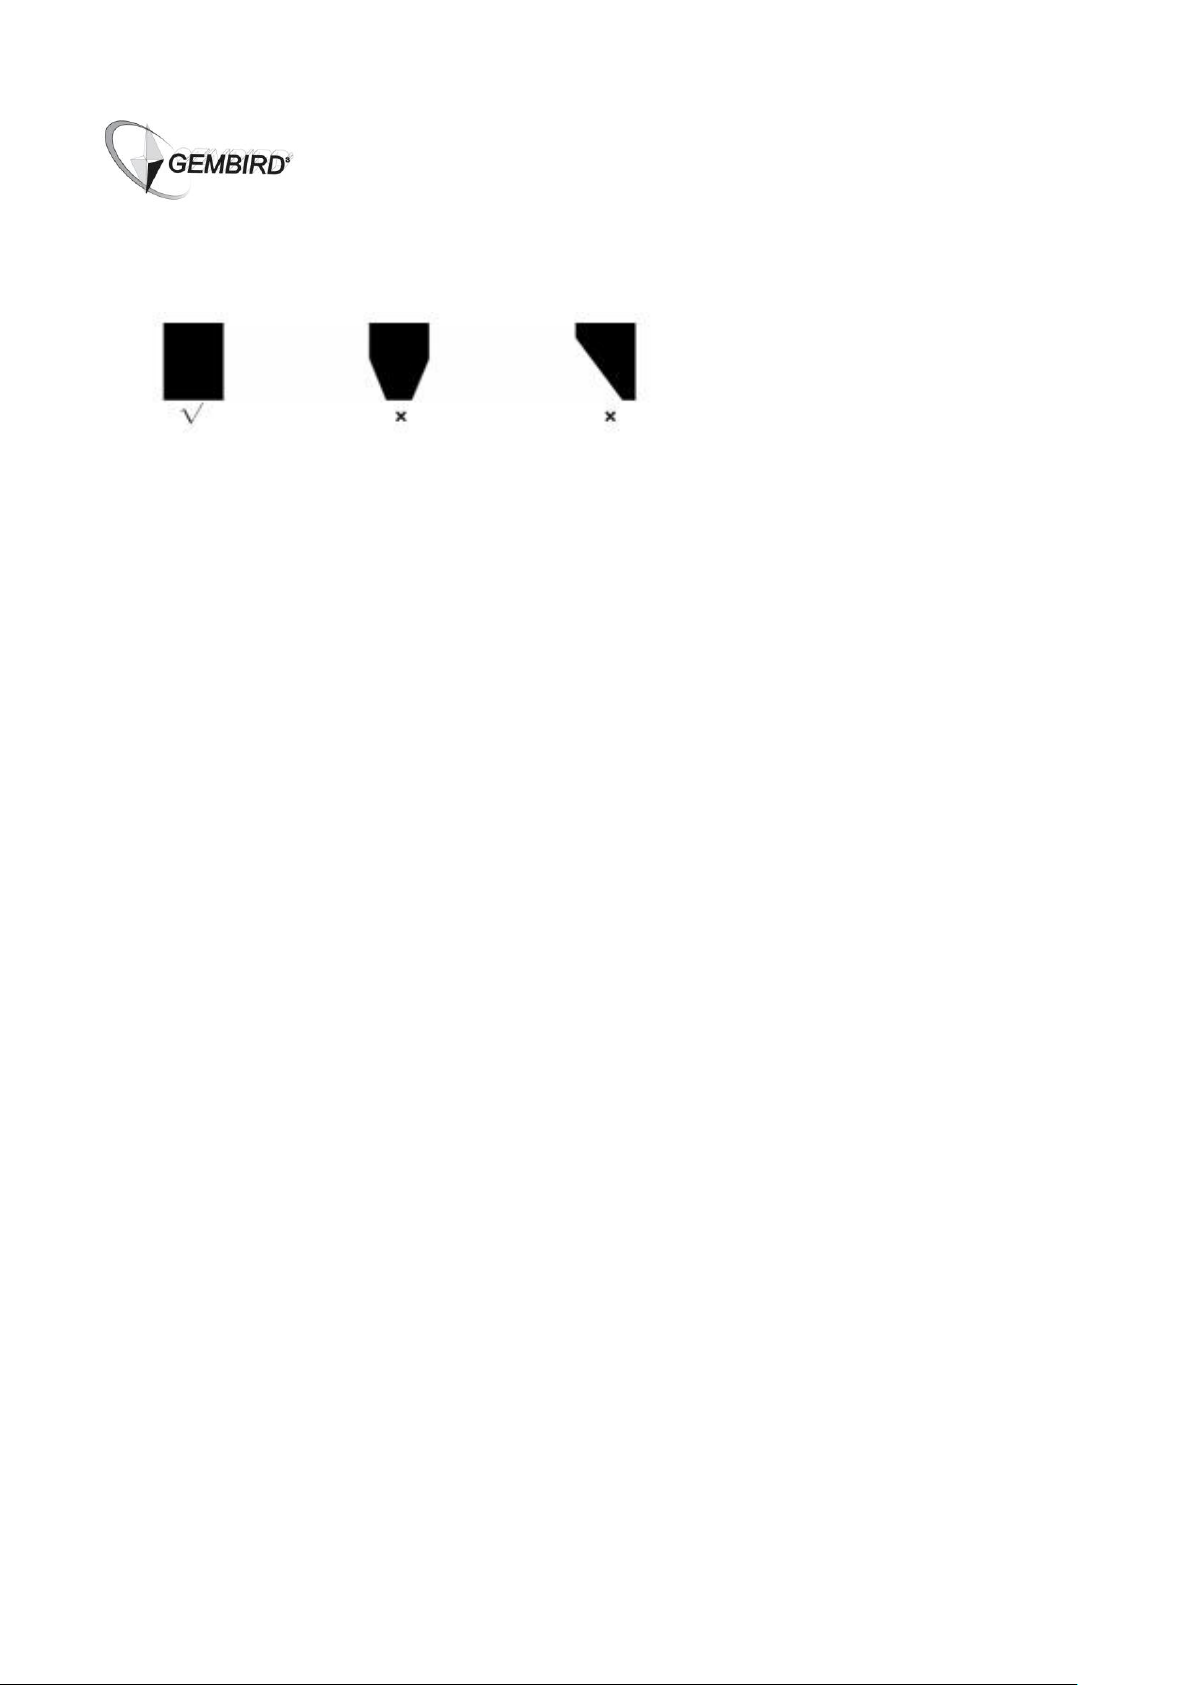
Changing filament:
The proper filament ending must be flat as shown on the picture above for optimal drawing
results.
If you wish to change the filament color (keeping the same filament type) you can then either
use “continuous feeding” or unload, then load again. In both cases, please, make sure the
ending of the filament remains flat as shown on the picture above.
If you wish to change the filament type (e.g. PLA to ABS), then first unload the filament, restart
the pen (unplug it from the power supply and then plug it in again), and then press the
“material/temperature button” to change the filament type.
Adjusting the temperature manually:
Different color filament might have slightly different melting point. In order to improve the drawing
quality, please, follow the rules below:
With the proper temperature the extruded filament should be smooth, proper bright color and
without bubbles (a bubble might happen occasionally).
If during use you hear some noise that indicates that the temperature is too high, try to decrease
the temperature by 8-15 ℃.
If during use you are getting lots of bubbles that also indicates that the temperature is too high,
try to decrease the temperature by 8-15 ℃.
If the color of the extruded filament looks pale and the motor makes coughing sounds that
indicates that the temperature is too low. Try to increase the temperature by 8-15 ℃.
If (using PLA material) the extruded filament becomes too thin and soft that also indicates that
the temperature is too low. Try to increase the temperature by 8-15 ℃.
Page 5

3d pen
Oplader
Houder
Rood filament
(3m)
Blauw filament
(3m)
3DP-PEND-02 handleiding
Belangrijk – lees eerst de handleiding voor gebruik:
De punt (printkop) van de pen kan heel heet worden! Raak tijdens het gebruikt, niet de punt of
de omgeving aan.
De hete printkop kan geverfde oppervlakken, plastic, kleding etc. beschadigen.
De pen is niet geschikt voor kinderen jonger dan 8 jaar, tenzij ze worden begeleid door
volwassenen.
Zodra de pen niet meer wordt gebruikt, moet het filament worden losgehaald, de stekker uit het
stopcontact gehaald worden en het apparaat in de penhouder worden geplaatst. Berg de pen
na gebruik op een veilige plek op, buiten bereik van kinderen.
Gebruik de pen niet op vochtige plaatsen waar het kan in contact met water kan komen. Dit
voorkomt het gevaar van een elektrische schok.
Aanbevolen wordt om uitsluitend origineel Gembird³ 3D-filament te gebruiken.
Inhoud van de verpakking:
Producteigenschappen:
Lichtgewicht en comfortabel – slechts 55 gram
Slimme temperatuurmeting en verwarming
8 snelheden om nauwkeurige 3D tekeningen te maken.
Ingesloten nozzle
Gepatenteerde nozzle punt.
Specificaties
Model nummer:3DP-PEND-02
Optimale temperatuur: ABS: 180-210 ℃,PLA: 160-180 ℃
Geschikt filament: 1.75mm PLA/ABS
Stroomaansluiting: DC12V 2A 24W
Adapter vermogen: 100-250V 2A
Page 6

Adapter ingang
Filament ingang
Nozzle
Materiaal/Temperatuur +
LED scherm
Materiaal/Temperatuur -
Filament ontladen
Filament laden
Snelheid +
Snelheid -
Product overzicht:
Page 7

Gebruikers richtlijnen:
Stap 1: Stroomvoorziening
Sluit de adapter aan op het stopcontact, sluit de 3D pen aan op de adapter. Het LED naast het
scherm wordt dan geel om aan te geven dat het apparaat is ingeschakeld.
Stap 2: Selectie van het type filament
LED-scherm geeft "PLA" of "ABS" aan, druk op de "materiaal / temperatuur" knop om het juiste
filament te kiezen.
Stap 3: Voorverwarmen
Druk op "Filament laden" knop, het LED naast het scherm kleurt rood om aan te geven dat het
apparaat aan het voorverwarmen is. Het LED-scherm geeft nozzle temperatuur aan. Zodra het
LED groen wordt, is het voorverwarmen voltooid (dit duurt ongeveer 30 seconden)
Stap 4: Snelheid selectie
Druk op de "snelheid" knoppen om de snelheid te kiezen (snelheid 5 is standaard snelheid,
snelheid 8 is het snelst). Deze knoppen werken alleen als het LED naast het scherm groen is.
Stap 5: Laden filament
Steek de draad in het "filament ingangt" aan het einde van de pen en druk op de "filament laden"
knop om het filament te laden. Zodra het gesmolten filament op het puntje van de pen verschijnt,
kunt u beginnen met tekenen.
Stap 6: Tekenen
Selecteer een goede snelheid voordat u begint met het tekenen (zie stap 4 hierboven). Let op dat
verschillende kleuren van hetzelfde type filament verschillende smelttemperatuur kunnen hebben.
U kunt overwegen om de temperatuur lichtjes aan te passen aan het filament.
Stap 7: Constant en handmatig filament doorvoeren
Als u wilt dat de pen constant filament doorvoert, dan drukt u éénmaal op de ‘filament laden’ knop.
De pen start dan met het doorvoeren van filament en stopt pas als u nogmaals op de knop drukt.
Het is ook mogelijk om doorvoer van filament handmatig te controleren. Om de handmatige
doorvoermodus te selecteren dubbelklikt u op de ‘filament laden’ knop. Daarna houdt u de knop
ingedrukt om filament door te voeren. Elke keer als u de knop loslaat stopt de filament doorvoer. Op
deze manier kunt u de hoeveelheid doorgevoerd filament nauwkeuriger controleren.
Stap 8: Wijzigen of loshalen filament
Zorg ervoor dat het LED naast het scherm groen is, druk dan op de "filament ontladen“ knop
gedurende 3 seconden. De pen zal dan beginnen met het loslaten van het filament. Zodra het
filament niet langer naar achteren beweegt, trekt u het voorzichtig uit de pen en druk nogmaals op
de "filament ontladen" knop om het proces te stoppen. Let op: Wij raden sterk aan om het
filament te ontladen wanneer de pen niet in gebruik is.
Page 8

Vervangen filament:
Filament einde moet vlak zijn zoals op de foto hierboven voor een optimaal resultaat voor het
tekenen.
Als u de kleur (met behoud van hetzelfde filament type) wilt veranderen kunt u gebruik maken
van "continuous feeding" of wanneer het filament nog niet op is, dit eerst ontladen, en het
nieuwe printmateriaal opnieuw laden. Zorg er In beide gevallen voor dat het einde van het
filament vlak is zoals op de foto hierboven.
Als u de filament type wilt veranderen (bijv PLA naar ABS), dan moet eerst het huidige filament
helemaal ontladen worden. Daarna trek de stekker uit adapter ingang van de pen en steek deze
korte tijd later hier weer in. Druk op de "materiaal/temperatuur” knop om de filament type te
wijzigen.
De temperatuur handmatig aanpassen:
Verschillende kleuren filament kunnen misschien een iets ander smeltpunt hebben.
Met het oog op de tekening kwaliteit , volg onderstaande regels.
• Met de juiste temperatuur moet het doorgevoerde filament, glad, een goede heldere kleur en
zonder bubbels (een zeepbel kan af en toe gebeuren) zijn.
• Als tijdens het gebruik er wat knisperend geluid ontstaat, dan geeft dit aan dat de temperatuur te
hoog is, pas de temperatuur aan met 8-15 ℃.
• Als u tijdens het gebruik vele blaasjes krijgt, geeft dat ook aan dat de temperatuur te hoog is. Pas
de temperatuur aan met 8-15 ℃.
• Als de kleur van het doorgevoerde filament er bleek uitziet en de motor maakt vreemde geluiden
dan betekent dat dat de temperatuur te laag is. Probeer de temperatuur te verhogen met 8-15 ℃.
• Als (met PLA) het filament te dun wordt en te zacht, dit geeft ook aan dat de temperatuur te laag is.
Verhoog de temperatuur met 8-15 ℃.
Page 9

(ENG) Declaration of conformity
This product is tested and complies with the
essential requirements of the laws of member
states concerning EMC(2004/108/EC). The
CE declaration can be found under
www.gembird.eu
(NL/BE) Verklaring van overeenstemming
Dit product is getest en voldoet aan alle geldende nationale
en Europese richtlijnen en regelgeving met betrekking tot
EMC(2004/108/EC). Dit product heeft een CE-markering en
de bijbehorende CE-verklaring van overeenstemming is
beschikbaar op onze website: www.gembird.eu
(FR/BE) Déclaration de conformité
Le produit est contrôlé et rempli les exigences
des directives nationales et de la directive
EMC(2004/108/EC). La conformité CE a été
démontrée et les déclarations
correspondantes sont déposées chez le
fabricant a: www.gembird.eu
(DE) Konformitätserklärung
Dieses Produkt wurde getestet und stimmt mit den
grundlegenden Anforderungen der Richtlinie
EMC(2004/108/EC) überein. Die Konformitätserklärung
kann auf unserer Webseite www.gembird.eu
heruntergeladen werden.
Deklaracja zgodności
Ten produkt został przetestowany i jest zgodny z zasadniczymi wymaganiami przepisów ustawowych państw
członkowskich dotyczących EMC(2004/108/EC). Deklaracja CE znajduje się pod adresem www.gembird.eu
Page 10

Waste disposal:
Do not deposit this equipment with the
household waste. Improper disposal can harm
both the environment and human health. For
Information about waste collection facilities for
used electrical and electronic devices, please
contact your city council or an authorized
company for the disposal of electrical and
electronic equipment.
Entsorgungshinweise:
Werfen Sie dieses Gerät nicht in den
Hausmüll. Unsachgemäße Entsorgung kann
sowohl der Umwelt als auch der menschlichen
Gesundheit schaden. Informationen zu
Sammelstellen für Altgeräte erhalten Sie bei
Ihrer Stadtverwaltung oder einer autorisierten
Stelle für die Entsorgung von Elektro-und
Elektronikgeräten.
Richtlijnen m.b.t. afvalverwerking
Batterijen en accu’s dienen als
klein-chemisch afval afgeleverd te worden bij
toegewezen afvalverzamelpunten (zie
www.afvalgids.nl). U dient ervoor te zorgen dat
de batterijen/accu’s leeg zijn en dus geen
stroom meer kunnen leveren. Let op, de
batterijen/accu’s dienen onbeschadigd
ingeleverd te worden.
Gooi dit product niet weg in uw vuilnisbak. Dit
kan zowel het milieu als de menselijke
gezondheid schade toebrengen. Informatie
over het inleveren van dit product kunt u
inwinnen bij uw gemeentelijke vuilnisdienst of
andere geautoriseerde instelling in uw buurt.
Traitement des déchets:
Ne jetez pas cet appareil dans les
déchets domestiques. Un traitement
inapproprié peut être dommageable à
l'environnement et à la santé humain.
Vous trouvez des informations sur les centres
de rassemblement des appareils vieux chez
l'administration municipale ou
chez un centre autorisé pour le traitement des
appareils électriques ou électroniques.
Page 11

WARRANTY CONDITIONS
GARANTIE BEDINGUNGEN
The receipt must clearly list the date of
purchase and the part number, in addition it
should be printed. Keep the receipt for the
entire warranty period since it is required for
all warranty claims. During the warranty
period the defective items will be credited,
repaired or replaced at the manufacturer's
expense. Work carried out under the
warranty neither extends the warranty period
nor starts a new warranty period. The
manufacturer reserves the right to void any
warranty claim for damages or defects due to
misuse, abuse or external impact (falling
down, impact, ingress of water, dust,
contamination or break). Wearing parts (e.g.
rechargeable batteries) are excluded from
the warranty. Upon receipt of the RMA
goods, Gembird Europe B.V. reserves the
right to choose between replacement of
defective goods or issuing a credit note. The
credit note amount will always be calculated
on the basis of the current market value of
the defective products
Die Garantie beträgt 24 Monate ab
Verkaufsdatum an den Endverbraucher. Das
Kaufdatum und der Gerätetyp sind durch
eine maschinell erstellte Kaufquittung zu
belegen. Bitte bewahren Sie Ihren Kaufbeleg
daher für die Dauer der Garantie auf, da er
Voraussetzung für eine eventuelle
Reklamation ist. Innerhalb der Garantiezeit
werden alle Mängel, wahlweise durch den
Hersteller entweder durch Instandsetzung,
Austausch mangelhafter Teile oder im
Austausch, behoben. Die Ausführung der
Garantieleistung bewirkt weder eine
Verlängerung noch einen Neubeginn der
Garantiezeit.
Eine Garantieleistung entfällt für Schäden
oder Mängel die durch unsachgemäße
Handhabung oder durch äußere Einwirkung
(Sturz, Schlag, Wasser, Staub,
Verschmutzung oder Bruch) herbeigeführt
wurden. Verschleißteile (z.B. Akkus) sind von
der Garantie ausgenommen.
Gembird Europe B.V.
Wittevrouwen 56, 1358CD Almere, The
Netherlands
www.gembird.nl/service
support@gmb.nl
GEMBIRD Deutschland GmbH
Coesterweg 45, 59494 Soest
Deutschland
www.gembird.de
Wenn Sie Hilfe im Umgang mit unseren Produkten
benötigen, können Sie uns kostenlos via E-Mail an
support@gembird.de oder über unser Hilfe-Forum
erreichen: http://gembird-support.de/
Page 12

GARANTIE VOORWAARDEN
CONDITIONS DE GARANTIE
Op de aankoopbon moeten de aankoopdatum
en productomschrijving duidelijk vermeld staan.
Gelieve de aankoopbon de gehele
garantieperiode te bewaren, deze is ten alle
tijden benodigd voor alle garantie aanspraken.
Tijdens de garantieperiode zullen alle gebreken
verholpen of vervangen worden door de
fabrikant d.m.v. reparatie, omruiling van het
defecte onderdeel of het gehele apparaat.
Aanspraken tijdens de garantieperiode leiden
niet tot verlenging hiervan. Garantieaanspraak
vervalt bij schade of gebreken die ontstaan zijn
door oneigenlijk gebruik, misbruik of invloeden
van buitenaf (vallen, stoten, water, stof, vuil of
breken). Slijtagegevoelige onderdelen (b.v.
batterijen, extruders, nozzles) en
verbruiksgoederen zijn uitgesloten van garantie.
Bij ontvangst van de defecte goederen behoudt
Gembird zich het recht om te kiezen tussen
vervanging van de defecte waren of het
uitgeven van een creditnota. Het bedrag van de
creditnota zal altijd gecalculeerd zijn op basis
van de huidige marktprijs voor het defecte
product.
Le talon de garantie doit énumérer clairement la date
d'achat et le type d'appareil.
Conservez le reçu d'achat pendant toute la durée de la
garantie car elle est nécessaire pour toute réclamation.
Au cours de la période de garantie tous les défauts
doivent être remplacé aux frais du fabricant, soit par la
réparation ou la remplacement de la pièce défectueuse
ou l'ensemble du produit. Les travaux effectués sous
garantie ne prolongent pas la période de garantie ni ne
commencent pas une nouvelle période de garantie.
Le fabricant se réserve le droit d'annuler toute
demande de garantie pour les dommages ou défauts
dus à une mauvaise utilisation, abus ou les effets
externes (chute, choc, pénétration de l'eau, la
poussière, etc..).
Les pièces d'usure (par exemple les piles
rechargeables) sont exclus de la garantie.
Dès réception de la marchandise sous garantie, le SAV
de Gembird Europe BV se réserve le droit de choisir
entre le remplacement des produits défectueux ou de
délivrer un avoir.
Le montant d’avoir sera toujours calculée sur la base
de la valeur actuelle du marché des produits
défectueux.
Gembird Europe B.V.
Wittevrouwen 56, 1358CD Almere, The
Netherlands
www.gembird.nl/service
helpdesk@gembird.nl
Tel: 0900-GEMBIRD
(€ 0,25 p/m binnen Nederland, exclusief mobiele
telefoonkosten)
Gembird Europe B.V.
Wittevrouwen 56
1358CD Almere, The Netherlands
www.gembird.nl/support
gembird@letmerepair.fr
+33(0) 251 404849
Prix d'appel depuis telephone fixe Pays-Bas : 0.15 euro /
min
Prix d'appel depuis telephone mobile / autre pays - selon
operateur
Page 13

ГАРАНТИЙНЫЙ ТАЛОН
УМОВИ ГАРАНТІЙНОГО ОБСЛУГОВУВАННЯ
1. Гарантийное обслуживание предоставляется в течение срока
гарантии, при наличии правильно и четко заполненного
гарантийного талона, и изделия в полной комплектации.
Серийный номер и модель изделия должны соответствовать
указанным в гарантийном талоне.
2. Гарантийное обслуживание представляет собой бесплатное
устранение всех неполадок (ремонт), или замену изделия на
новое (аналогичное).
3. Гарантия не распространяется на неисправности, вызванные
следующими причинами:
• использование изделия не по назначению.
• нарушение условий эксплуатации, хранения или перевозки
изделия, которые указаны в настоящей инструкции.
• подключение нестандартных или неисправных периферийных
устройств, аксессуаров.
• механические повреждения, попадание внутрь изделия
посторонних предметов, веществ, жидкостей, насекомых.
• ремонт изделия не уполномоченными на то лицами.
4. Комплектность и внешний вид изделия проверяются
Покупателем при получении товара в присутствии персонала
фирмы.
Послепродажные претензии по укомплектованности и
внешнему виду не принимаются.
Наименование изделия: ___________________________
Модель _________________________________________
Серийный номер _________________________________
Срок гарантии ___________________________________
Дата продажи «____» ___________________ 20____ года
Фирма-продавец: _________________________________
Адрес и телефон фирмы-продавца:
________________________________________________
М.П. С условиями гарантии ознакомлен и согласен:
Продавец: _____________ Покупатель: _____________
1. Гарантійне обслуговування надається протягом терміну
гарантії, при наявності Гарантійного талону, заповненого
належним чином, та виробу в повній комплектації.
2. Гарантійне обслуговування не підтримується в разі
порушення правил експлуатації, зберігання або перевезення
виробу, що зазначені в інструкції по експлуатації виробу.
3. Гарантійне обслуговування скасовується у випадках:
- наявності механічних пошкоджень або слідів стороннього
втручання;
- пошкодження викликані стихійним лихом або нещасним
випадком, включаючи й блискавку, потраплянням у виріб
сторонніх предметів, рідин, комах, тощо;
- пошкодження викликані застосуванням або підключенням
нестандартних або несправних периферійних пристроїв,
аксесуарів;
4. Гарантія не поширюється на витратні матеріали та додаткові
аксесуари;
З гарантійними умовами згоден.
Підпис покупця: ____________________
ГАРАНТІЙНИЙ ТАЛОН № __________________________
Товар/модель ____________________________________
Серійний номер __________________________________
Термін гаранії ____________________________________
Дата продажу ____________________________________
Продавець (назва, телефон)
_________________________________________
Печатка та підпис продавця
_________________________________________
З гарантійних питань звертайтесь до сервісних центрів Gembird.
Про адреси та контакти Ви можете дізнатись на сайті
www.gembird.ua або по телефону 044-4510213.
 Loading...