

Page 1
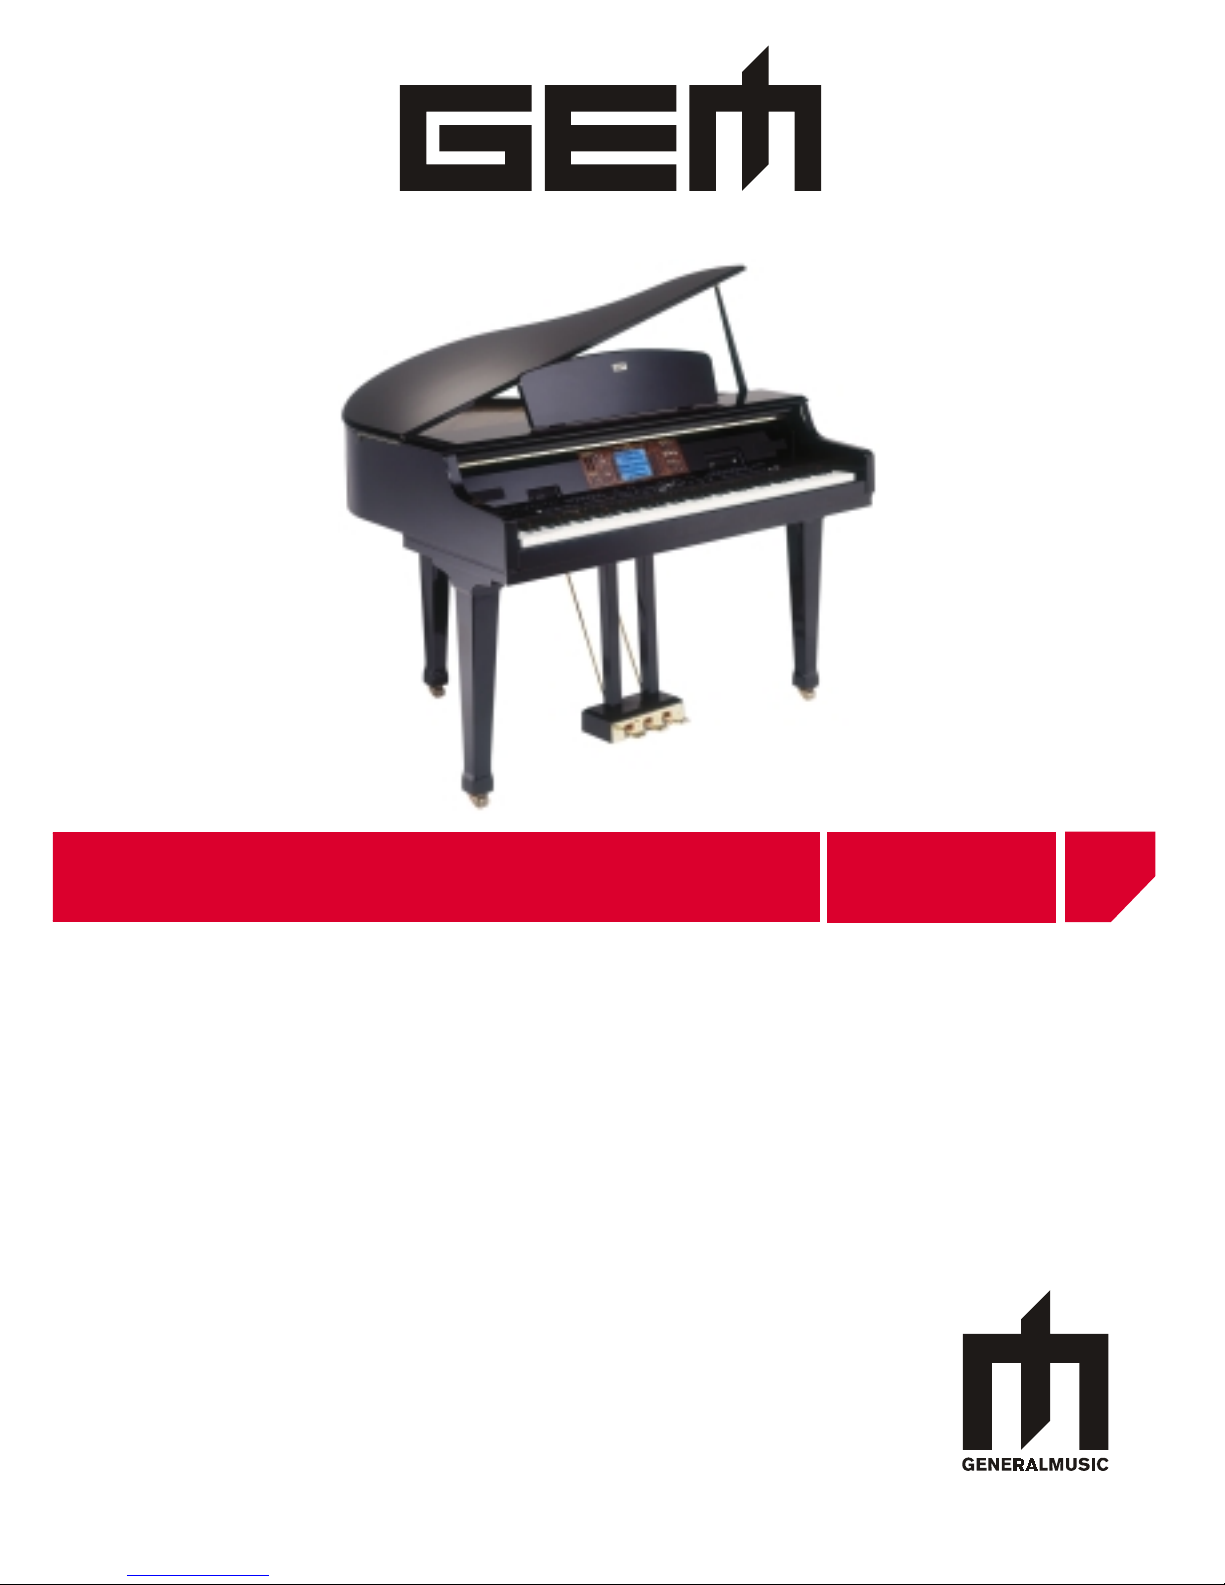
genesys ensemble
genesys grand ensemble
DIGITAL KEYBOARDS
Owner’s manual genesys
Page 2
SAVE THESE INSTRUCTIONS
SPECIAL MESSPECIAL MES
SPECIAL MESSPECIAL MES
SPECIAL MES
SAGESSAGES
SAGESSAGES
SAGES
ALARM SYMBALARM SYMB
ALARM SYMBALARM SYMB
ALARM SYMB
OLS:OLS:
OLS:OLS:
OLS:
Generalmusic electronics products could
present labels similar to that displayed in
this section. Please follow accurately the
precautions descripted in the safety instructions.
IMPORTIMPORT
IMPORTIMPORT
IMPORT
ANT NOTEANT NOTE
ANT NOTEANT NOTE
ANT NOTE
To reduce the risk related to the correct and normal use of the instrument,
all Generalmusic products are accuralety tested in a safety laboratory. DO
NOT modify the present unit, the safety standard and the correct instrument
operativity could be compromised, and as a further consequence the warranty will be invalidated.
The lightning flash with arrowhead symbol,
within an equilateral triangle, is intended to
alert the user to the presence of uninsulated
“dangerous voltage” within the product’s
enclosure that may be of sufficient
magnitude to constitute a risk of electric
shock to persons.
The exclamation mark within an equilateral
triangle is intended to alert.
Page 3

IMPORTIMPORT
IMPORTIMPORT
IMPORT
ANT SAFETY AND INSTANT SAFETY AND INST
ANT SAFETY AND INSTANT SAFETY AND INST
ANT SAFETY AND INST
ALLAALLA
ALLAALLA
ALLA
TION INSTRUCTIONSTION INSTRUCTIONS
TION INSTRUCTIONSTION INSTRUCTIONS
TION INSTRUCTIONS
INSTRUCTION PERTINSTRUCTION PERT
INSTRUCTION PERTINSTRUCTION PERT
INSTRUCTION PERT
AINING TO A RISK OF FIREAINING TO A RISK OF FIRE
AINING TO A RISK OF FIREAINING TO A RISK OF FIRE
AINING TO A RISK OF FIRE
, ELECTRIC SHOCK, ELECTRIC SHOCK
, ELECTRIC SHOCK, ELECTRIC SHOCK
, ELECTRIC SHOCK
, OR, OR
, OR, OR
, OR
INJURY TO PERSONS.INJURY TO PERSONS.
INJURY TO PERSONS.INJURY TO PERSONS.
INJURY TO PERSONS.
WW
WW
W
ARNING!ARNING!
ARNING!ARNING!
ARNING!
When using electric products, basic precautions should always be followed, including the following:
1. Read all the Safety and Installation instructions and explanations of Graphic Symbols before using the
product.
2. This product must be earthed. If it should malfunction or breakdown, grounding provides a path of least
resistance for electric current to reduce the risk of electric shock. This product is equipped with a cord
having an equipment-grounding conductor and a grounding plug. The plug must be plugged into an
appropriate outlet that is properly installed and earthed in accordance with all local codes and ordinances.
DD
DD
D
ANGERANGER
ANGERANGER
ANGER
::
::
: Improper connection of the equipment grounding conductor can result in a risk of electric shock.
Check with a qualified electrician or serviceman if you are in doubt as to whether the product is properly
grounded. Do not modify the plug provided with the product, if it will not fit the outlet, have a proper outlet
installed by a qualified electrician.
3. To reduce the risk of injury, close supervision is necessary when this product is used near children.
4. Do not use this product near water - for example, near a bathtub, washbowl, kitchen sink, in a wet
basement, or near a swimming pool or the like.
5. This product should only be used by a stand or cart that is recommended by the manufacturer .
6. This product, either alone or in combination with an amplifier and headphones or speakers, may be
capable of producing sound levels that could cause permanent hearing loss. Do not operate for a long
period of time at a high volume level or at a level that is uncomfortable. If you experience any hearing loss
or ringing in the ears, you should consult an audiologist.
7. This product should be located so that its location or position does not interfere with its proper ventilation.
8. This product should be located away from heat sources such as radiators, heat registers, or other
products that produce heat.
9. The product should be connected to a power supply only of the type described in the operating
instructions or as marked on the product.
10. This product may be equipped with a polarized line plug (one blade wider than the other). This is a safety
feature. If you are unable to insert the plug into the outlet, contact an electrician to replace your obsolete
outlet. Do not defeat the safety purpose of the plug.
11. The power-supply cord of the product should be unplugged from the outlet when left unused for a long
period of time. When unplugging the power supply cord, do not pull on the cord but grasp it by the plug.
12. Care should be taken so that objects do not fall and liquids are not spilled into the enclosure through openings.
13. The product should be serviced by qualified service personnel when:
A. The power-supply cord or the plug has been damaged
B. Objects have fallen, or liquid has been spilled into the product;or
C. The products has been exposed to rain or moisture
D. The product does not appear to be operating normally or exhibits a marked change in performance
E. The product has been dropped, or the enclosure damaged.
14. Do not attempt to service the product beyond that described in the user-maintenance instructions. All
other servicing should be referred to qualified service personnel.
15.
WW
WW
W
ARNINGARNING
ARNINGARNING
ARNING
- Do not place objects on product power cord or place it in a position where anyone could
trip over , walk on or roll anything over it. Do not allow the product, or its bench, or its pedal board to rest
on or to be installed over power cords of any type. Improper installations of this type create the possibility
of fire hazard and/or personal injury.
16. Electromagnetic interference (RFI). This electronic product utilizes digital sampled wave processing
technology (S.W .P.) that may adversely affect radio/tv reception. Read FCC information inside back cover
for additional information.
Page 4

TT
TT
T
echnical specifications are subject toechnical specifications are subject to
echnical specifications are subject toechnical specifications are subject to
echnical specifications are subject to
changechange
changechange
change
The information contained in this manual are considered
correct at the moment of printing. Generalmusic reserves
the right to change or modify any technical specification
without prior notice or obbligation to upgrade existing units.
Generalmusic Copyright 2004
Page 5

The illustrations and the screens of this
manual are for instructional purposes only and
may appear different from those on your instrument.
Page 6
genesys ensemble/genesys ensemble grand
Contents
I
Contents
1. POWER AND START-UP ........................................................... 1
Power and Standby ...................................................................... 1
First time Start-Up ....................................................................... 2
2. CONTROL PANEL ..................................................................... 3
The Arrow Keys ........................................................................... 3
The Dial and INC /DEC buttons ...................................................... 3
Transpose ................................................................................... 4
Octave ........................................................................................ 5
Volume Sliders ............................................................................. 6
Slider Mode Indicator .................................................................... 7
3. EXPLORING THE GENESYS ENSEMBLE .................................... 8
4. SELECTING SOUNDS ............................................................. 11
What is a Sound Preset ............................................................... 12
Single Sound ............................................................................. 13
5. KEYBOARD MODE.................................................................. 16
Piano Style ................................................................................ 17
Manual Bass .............................................................................. 18
Pro Split ................................................................................... 18
Changing the Split Point .............................................................. 19
6. USING THE STYLES AND STYLES CONTROLS ......................... 20
The Style Section ....................................................................... 20
Style Controls ............................................................................ 21
Variations ................................................................................. 21
Fills and Breaks ......................................................................... 22
Intros and Endings ..................................................................... 23
Ending ...................................................................................... 24
Syncro and Restart ..................................................................... 24
7. SINGLE TOUCH PLAY, STYLE PRESETS & MUSIC LIBRARY .............. 26
Single Touch Play, (S.T. Play) and Style Presets .............................. 26
Music Library ............................................................................. 27
8. STYLE TOOLS ........................................................................ 29
Arr. On/Off ................................................................................ 29
Arr.Mem. (Arranger Memory) ....................................................... 29
Fade I/O (Fade In/ Fade Out) ....................................................... 30
Bass inv. (Bass Inversion) ........................................................... 30
Tempo Lock ............................................................................... 30
Style Lock ................................................................................. 31
Edit .......................................................................................... 31
Main Screen .............................................................................. 31
One Finger ................................................................................ 32
Fingered 1 ................................................................................ 32
Page 7
genesys ensemble/genesys ensemble grand
Contents
II
Fingered 2. ............................................................................... 32
Normal ..................................................................................... 32
Extended .................................................................................. 32
Dynamic Arranger ...................................................................... 33
Autobacking .............................................................................. 34
Mixer Lock ................................................................................ 35
Key Memory .............................................................................. 36
9. MEMORIES ............................................................................ 37
Memory Banks ........................................................................... 38
Using Memories with Style Lock ................................................... 41
10. SOUND CONTROLS .............................................................. 42
Sustain ..................................................................................... 42
FX Off ....................................................................................... 42
Touch ....................................................................................... 42
Slow/Fast .................................................................................. 43
Solo ......................................................................................... 43
Harmony ................................................................................... 43
11. SONG PLAYER ..................................................................... 45
Midi Files and GEM songs ............................................................ 50
Enabling and Disabling Song Traks ............................................... 55
Playng a Midifle from a floppy disk ............................................... 56
Multitasking function in the file player ........................................... 58
Load while playing- function ........................................................ 60
Standard midifiles playing optimization. ........................................ 61
DB List ..................................................................................... 62
View filters ................................................................................ 63
Select and play songs from database list ....................................... 64
Search function .......................................................................... 65
F7 Edit Functions ....................................................................... 67
Add .......................................................................................... 67
Delete ...................................................................................... 67
Move up .................................................................................... 67
Move down ................................................................................ 67
Modify ...................................................................................... 67
DB Scan ................................................................................... 67
12. VOCAL GENIUS ................................................................... 68
Effects ...................................................................................... 70
Harmony ................................................................................... 73
Changing the Harmony Settings ................................................... 74
Vocal Genius Modes .................................................................... 76
Vocoder Mode ............................................................................ 76
Using a midifile with the Harmony Tracks ..................................... 79
Unison Mode ............................................................................. 80
Voice Set .................................................................................. 81
Page 8
genesys ensemble/genesys ensemble grand
Contents
III
13. RECORDING STUDIO........................................................... 82
How to Record a Song ................................................................ 83
Examining your Song .................................................................. 85
Adding another track to your song ................................................ 90
How to Record A Multi-Track SONG ............................................... 92
Other Features .......................................................................... 94
Naming your Songs .................................................................... 96
Saving your Songs ..................................................................... 97
How to record a Wave (Hard Disk Recording) ................................. 97
Other Ways To Use The WAVE Recorder ......................................... 99
Vocal Remover ..........................................................................100
How to convert a CD track to a WAVE file ..................................... 101
Removing The Vocal From a WAVE File ......................................... 102
Recording your own voice with a processed file ............................. 103
Understanding Vocal Remover ..................................................... 104
14. MAKE CD ........................................................................... 105
Creating an Audio CD ............................................................... 106
Creating a Data CD (CD-ROM) .................................................... 109
15. VIDEO & KARAOKE ........................................................... 111
Selecting the image to display .................................................... 112
Score Mode .............................................................................. 113
Lyrics Mode .............................................................................. 114
Chords on Lyrics ....................................................................... 114
16. DISK ................................................................................. 115
Loading from Disk ..................................................................... 115
Loading songs and sounds ..........................................................120
How Genesys Sounds Are Organized ............................................ 121
Save to Disk ............................................................................. 125
Other Disk Operation .................................................................129
Properties ................................................................................ 130
Disk Utilities ............................................................................. 130
HD Utilities ............................................................................... 131
Format H. Disk . ....................................................................... 131
H. Disk Check Recovery. ............................................................. 131
H.Disk Sleep Time ..................................................................... 131
H.Disk Protection ...................................................................... 131
FD Utilities ............................................................................... 132
Format Floppy - 1.62 Mb ............................................................132
Format Floppy 1.44 Mb .............................................................. 132
Format Floppy 0.720 Mb ............................................................ 132
Change Floppy Label ................................................................. 132
Refresh Floppy ..........................................................................132
CD Utilities ............................................................................... 133
Page 9

genesys ensemble/genesys ensemble grand
Contents
IV
CD Eject .................................................................................. 133
Fast Erase CD-RW .....................................................................133
Erase CD-RW ............................................................................133
17. SYSTEM ............................................................................. 134
System Controls ....................................................................... 135
Keyboard Sensitivity .................................................................. 136
Footswitch Polarity .................................................................... 136
Tuning & Scale ..........................................................................137
PC Keyboard/Computer .............................................................. 138
Display Controls ........................................................................ 139
Chord Language ........................................................................139
Display Mode ............................................................................ 139
Last Sel. Memory ...................................................................... 139
Battery & Release ..................................................................... 140
System Info ............................................................................. 140
Reset User Resources ................................................................ 141
18. MIDI .................................................................................142
Preset Midi channels ..................................................................142
Midi channels ........................................................................... 143
Configuration ............................................................................ 144
Internal Keyboard ..................................................................... 145
Midi In ..................................................................................... 145
Internal Sounds ........................................................................ 145
Midi Out ...................................................................................145
Midi Filters ............................................................................... 145
General Set .............................................................................. 146
Midi Clock ................................................................................ 146
Clock Send ............................................................................... 146
Midi Merge ............................................................................... 146
Midi In Transpose ...................................................................... 147
Midi In Fix Velocity .................................................................... 147
System Exclusive ...................................................................... 147
SysExc Device ID ......................................................................147
SMF save format ....................................................................... 147
General Midi .............................................................................147
Bank Select .............................................................................. 147
Common/ Arrg. .........................................................................148
Common Channel ...................................................................... 148
Chord Ch. 1 and 2 ..................................................................... 149
Local Off .................................................................................. 149
19. UPGRADING AND INITIALIZING ..................................... 150
How to replace or upgrade the system ......................................... 151
In case of problems ................................................................... 152
Page 10
Power and start-up
Page 1
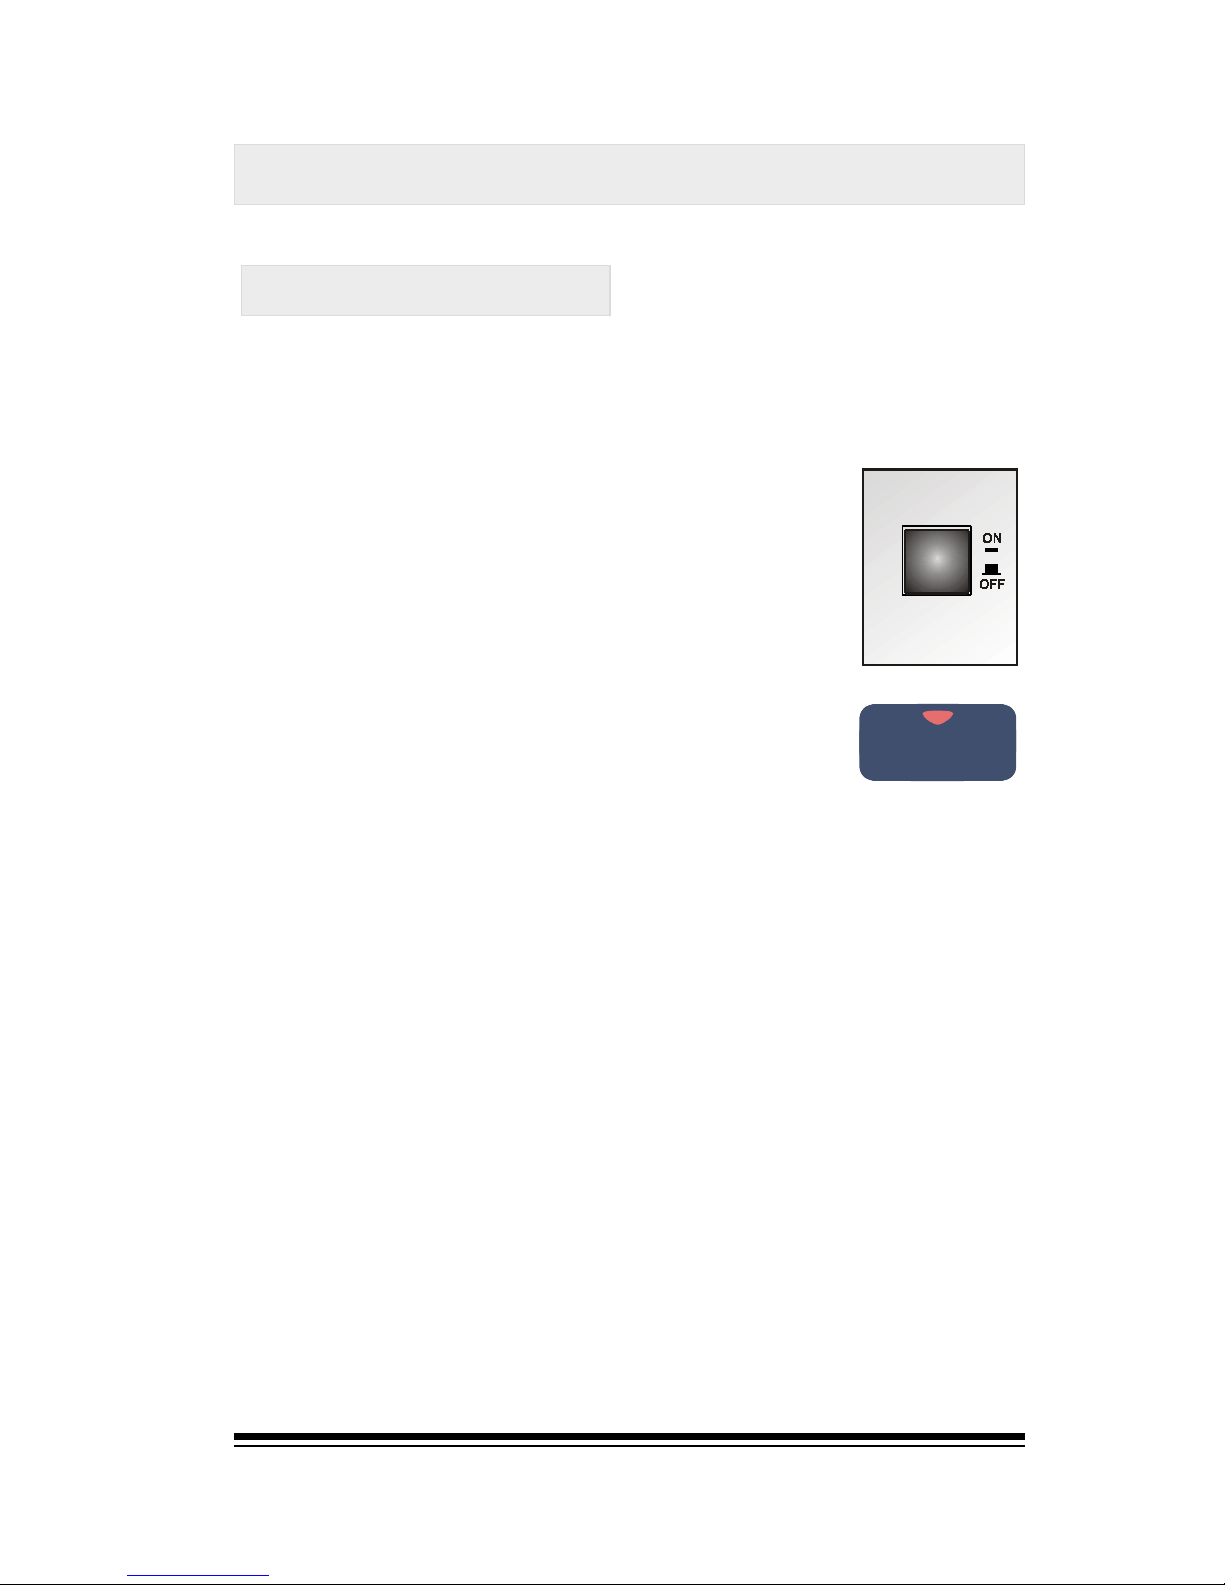
The first thing you might notice about the Genesys Ensemble is that it has two power switches.
Power and start-up
Power and Standby
The STANDBY button allows a small amount of power to be
retained which allows the instrument to be re-started more
quickly when needed.
If you use a computer you will be familiar with the difference between shut down and sleep or Standby. You
can think of the STANDBY switch as sleep and the main
power switch as shut down. For normal daily use, you
need only use the STANDBY button to turn the unit on or
off. If you are planning to leave the instrument unused for
a longer period, (say, two or three days), then it is better
to shut it down using the main power switch.
To turn the instrument off using the STANDBY button, you
need to keep it pressed for about two seconds. This is a
simple precaution to reduce the risk of turning the unit off
accidentally if the button is knocked.
The main power switch, is located in the left
side of the keyboard and this is used to completely shut-off all power to the instrument.
The second switch is on the lower left side of
the rail which runs beneath the keyboard. This
is called the STANDBY button. The main power
switch this is used to completely shut-off all
power to the instrument.
Page 11

genesys ensemble/genesys grand ensemble
Page 2
The first time you switch on the Genesys Ensemble, a num-
ber of different things may happen.
Exactly what happens will depend on how much time has
passed since the unit was last turned on.
The Genesys Ensemble contains an internal re-chargeable
battery which is used to retain the contents of its memory
while the unit is switched off. If the unit is left switched off
for more than about 2 days, the battery will discharge com-
pletely and the contents of the memory will be lost.Each
time you switch the instrument on, it checks to see if the
battery is charged and if the contents of the memory are
still available. If not, a message will be displayed and the
instrument will proceed to reset itself by loading a fresh
copy of the operating system from the internal hard disk.
This operating system will then remain in the instruments
memory as long as the internal battery is sufficiently
charged. To completely charge the internal battery, the unit
should be left on for around 16 hours. After this the battery
should remain charged for normal daily use.
First time start-up
Page 12
The Control Panel
Page 3
Before you start to use the Genesys Ensemble, you should
familiarize yourself with some of the main controls and features which will be used in each example.
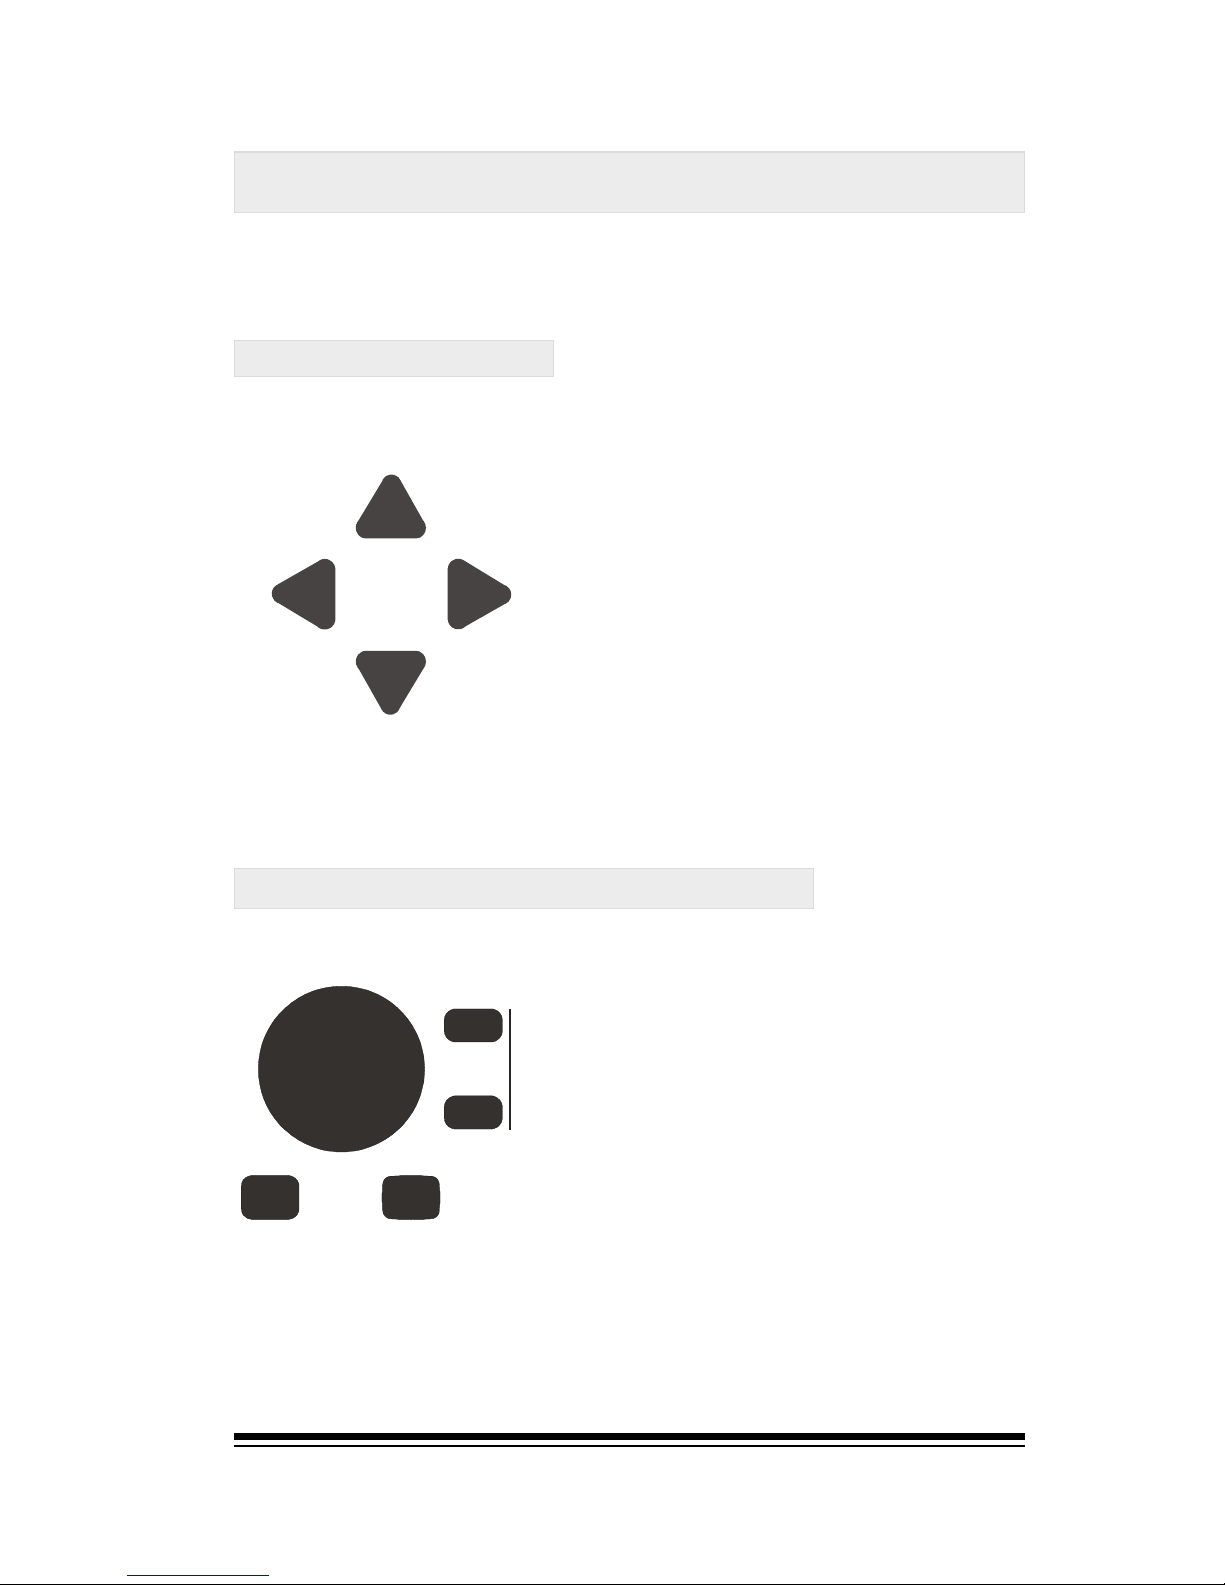
When you want to change the value
of any item displayed in the screen,
you simply select the item using the
arrow keys and then turn the dial
to the left or right to decrease or
increase the value displayed. Sometimes the dial will be too sensitive,
making it difficult to select the exact value you want. In this case,
the INC and DEC buttons can be
used to increase or decrease the
displayed number by a value of 1
each time.
These four buttons are used to
move around the display screen. In
most of the screens you will see an
item which is highlighted by a black
box. We refer to this box as the
CURSOR. When you want to move
the CURSOR to a different place in
the screen, you will use the arrow
keys to move it left, right, up or
down. In the examples that follow
we will use instructions such as
press the right arrow key to move
the cursor to the right In this case,
press the arrow key which points
to the right and you will see the
The Dial and INC / DEC buttons.
IN C
DEC
ENTER ESCAPE
PANIC
TEMPO / DATA
The Arrow Keys.
The Control Panel
Page 13
genesys ensemble/genesys grand ensemble
Page 4
2
Turning the dial clockwise will increase this value while turning the dial counter-clockwise will decrease it. For more
accurate tempo control, try pressing the INC or DEC buttons. You will see that the tempo changes by a value of 1
with each press of the button.
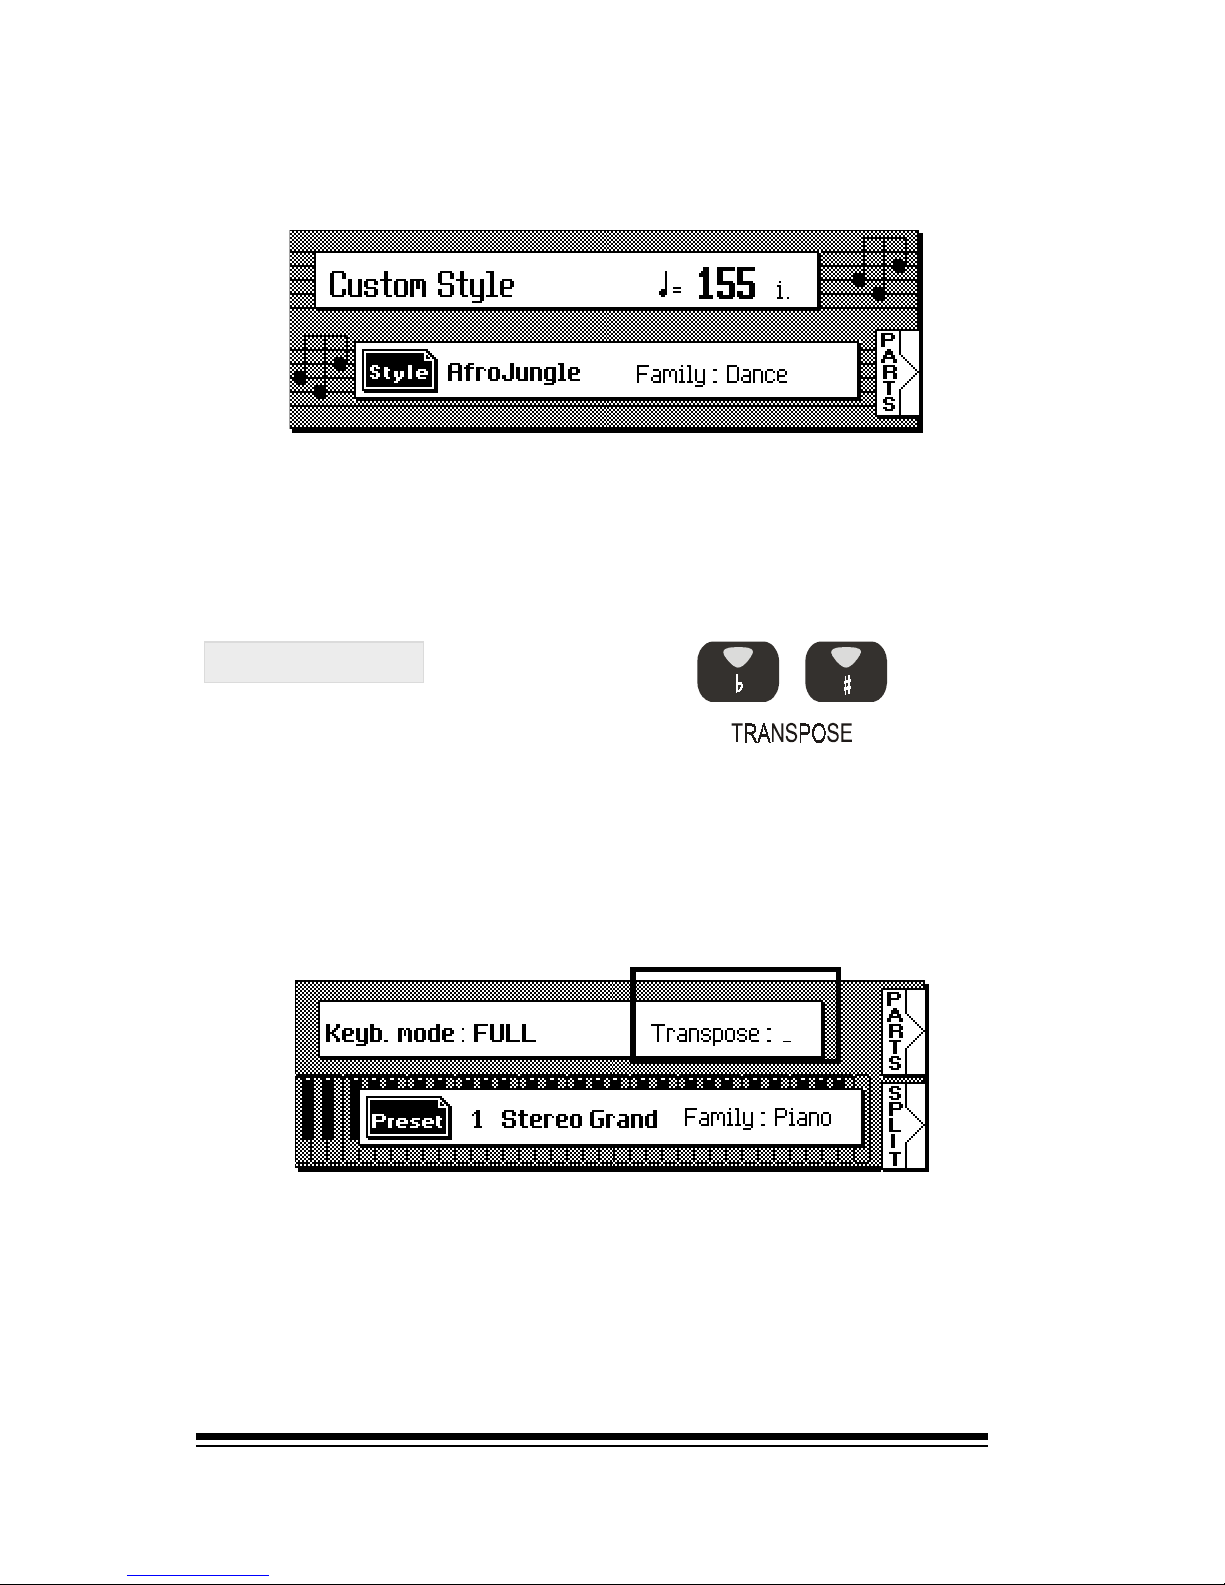
For example, in the home screen, the speed or tempo of
the style section is displayed at the very top.
For example, you can play a song in the key of C but, if you
press the right TRANSPOSE button twice the pitch of the
entire instrument will be raised by two half-steps (or
semitones). Youll see that the display tells you the Master
Transpose value is now 2.
TRANSPOSE
These buttons are used to shift the overall pitch of the
instrument. The left button is used to lower the pitch while
the right button is used to raise the pitch. The transpose
buttons have the effect of changing the key that you are
playing in.
Page 14
The Control Panel
Page 5
Although you are still playing in the key of C, a listener will
hear the song in the key of D, (C plus two half-steps = D).
If the song you were playing was in the key of F, the listener will now hear it in the key of G, (F plus two half-steps =
G).
The transpose buttons provide an effective way to change
the key of the piece without the need to re-learn it in another key. This can be particularly useful if youre playing
along with another musician or a singer who is more comfortable performing the piece in a different key.
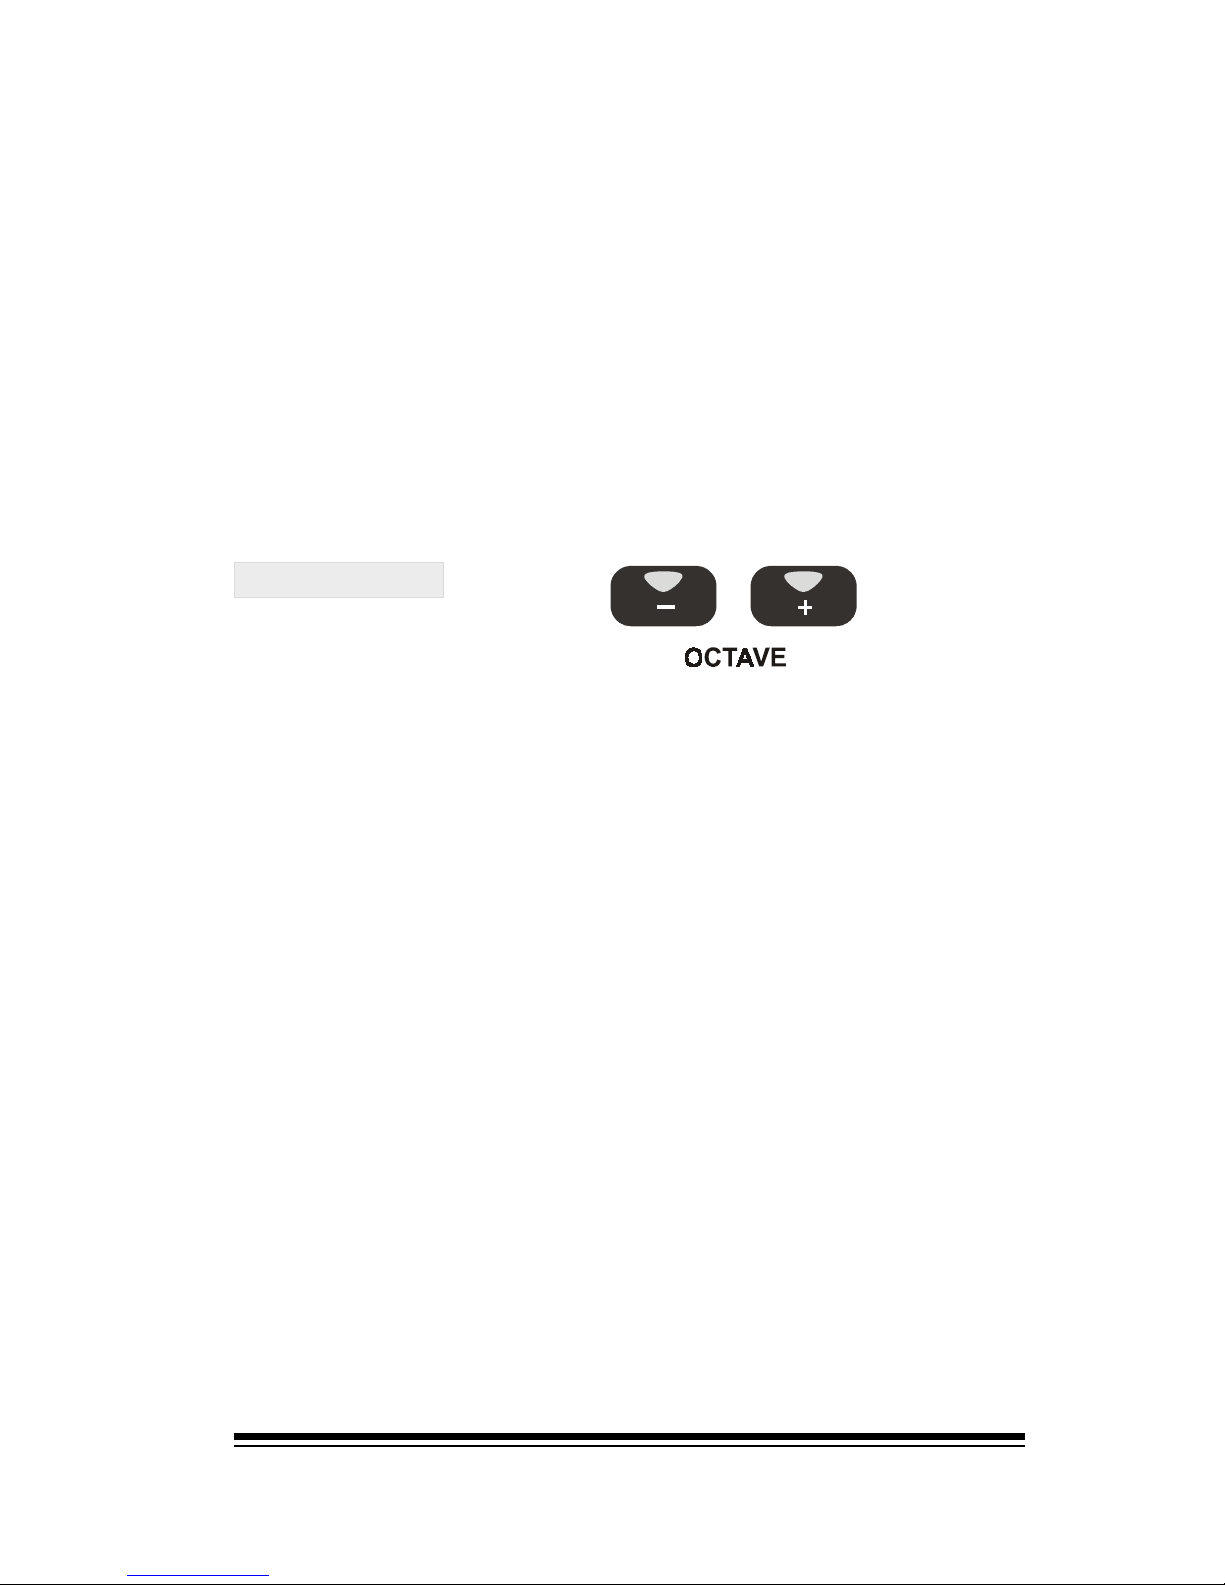
The OCTAVE buttons allow you to increase or decrease the
pitch of a sound by one octave. Normally, the OCTAVE buttons will only affect the main sound that youre playing on
the keyboard in FULL mode or the right-hand sound in
ACCOMP. SPLIT mode.
The OCTAVE buttons may also be used to shift the pitch of
any other part by selecting it from the appropriate PARTS
view. This will be covered in greater detail in the CREATING
& EDITING section of this manual.
OCTAVE
Page 15
genesys ensemble/genesys grand ensemble
Page 6
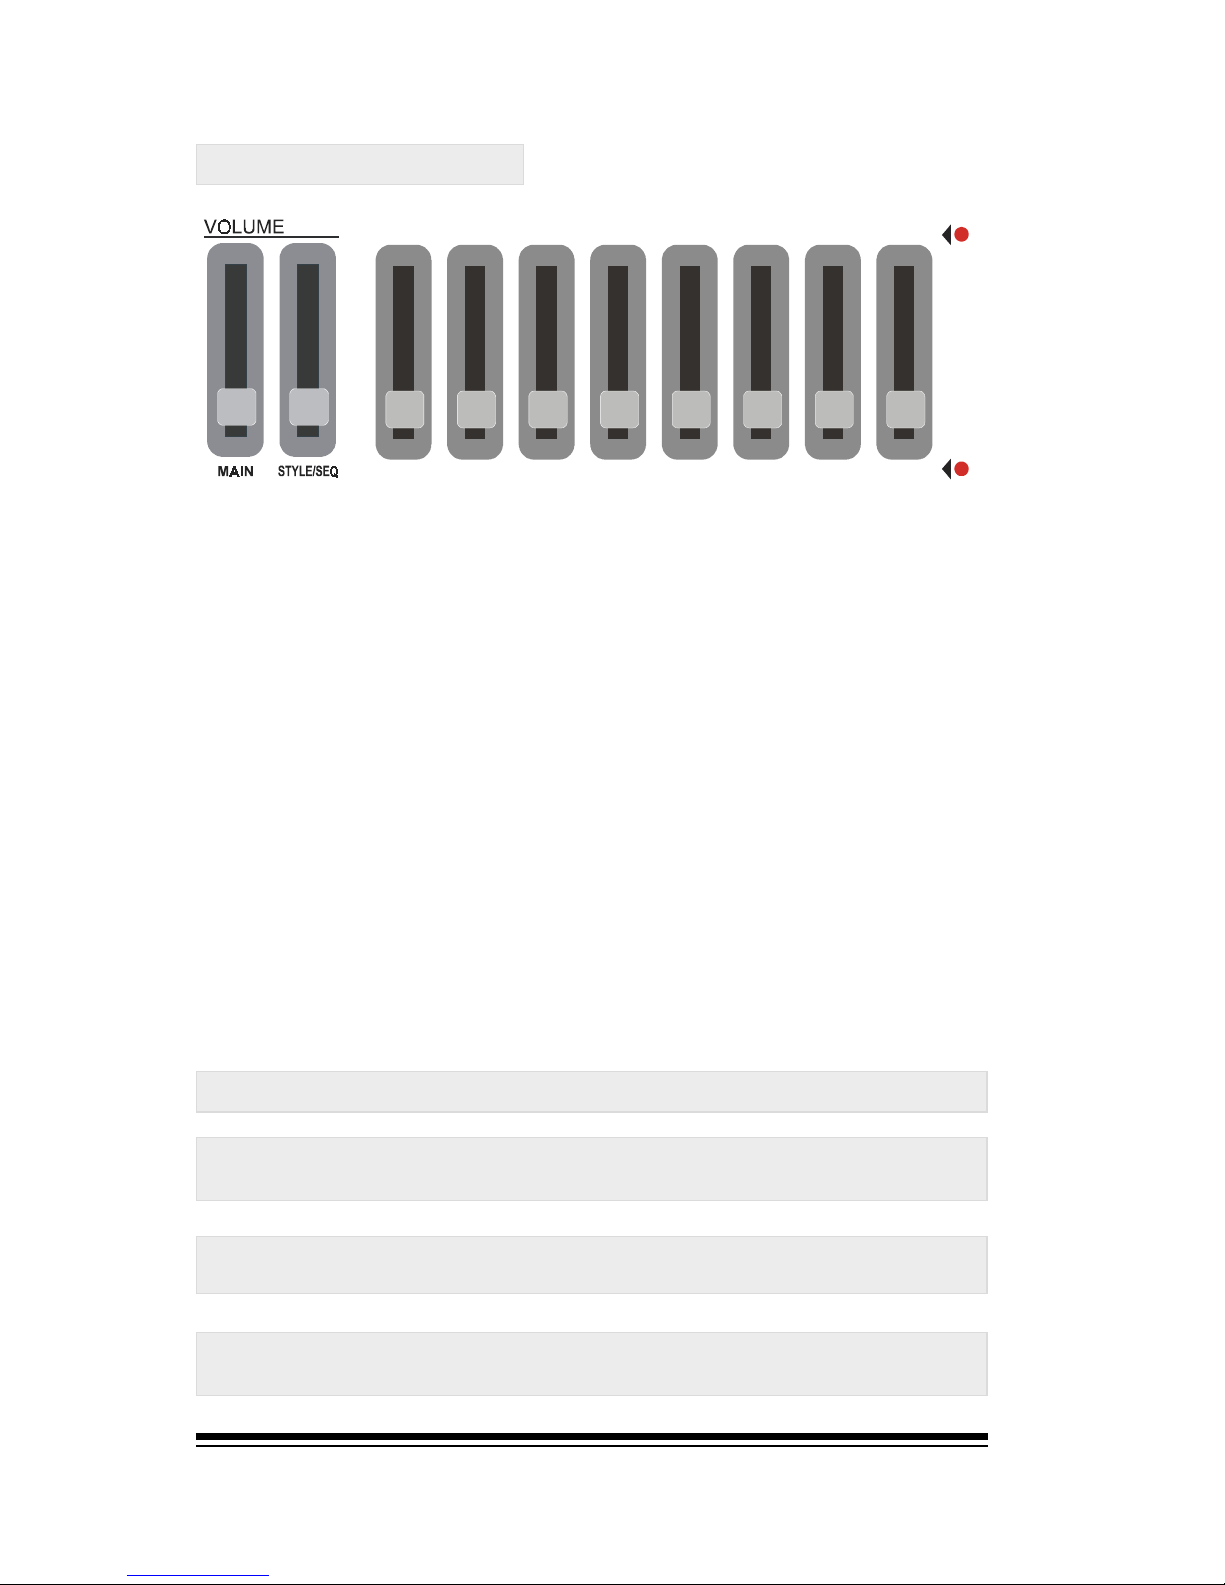
VOLUME SLIDERS
The ten sliders on the left side of the instrument allow you
to independently control the volume level for each part of
the instrument.
The first two sliders are MAIN and STYLES/SEQ.
MAIN is the overall volume of the entire instrument.
STYLES/SEQ controls the relative volume of the style and
song section. This allows you to easily balance the accompaniment volume with the volume of any other sounds being used to play along.
The other eight sliders allow you to adjust the volume for
all the other parts of the instrument. Each slider has a
name which is printed above.
The sliders provide volume control for the following parts
of the instrument:
CD: Controls the volume of CDs played with the SONG PLAYER
Mp3: Controls the volume of Mp3 files played with the
SONG PLAYER.
HD AUDIO: Controls the volume of WAVE files played with
the SONG PLAYER.
DRUMS: Controls the volume of the drum track in the style
accompaniment
C
D Mp3 HD AUDIODRUMSBA
SSACCO
MP LOWER UPPER
ABCDEFGHA
Page 16

The Control Panel
Page 7
While the sliders normally perform as indicated above, there
are certain situations in which their functions will be different. When this happens the Slider Mode Indicator will
change. To the right of the eight sliders are two small red
lights, one above and one below.
Normally, the upper light will be on. This indicates that the
sliders are functioning according to the names printed above
the sliders, (as described previously).
In certain special modes, (such as the various PARTS views
which will be covered further on in this manual), you will
see the lower light come on.
When this happens, you are referred to the names printed
below the sliders, A H. These labels correspond to the
eight screen positions which are printed beside the buttons
on the left side of the screen.
At this point, each of the 8 positions in the screen will display a sound whose volume can be adjusted with the corresponding slider.
BASS: Controls the volume of the bass track in the style
accompaniment
ACCOMP: Controls the volume of all other tracks in the
style accompaniment.
LOWER: Controls the volume of all sounds on the left or
lower side of the split.
UPPER: Controls the volume of the main sound, (in FULL
mode), or all sounds on the right or upper side of the split.
Slider Mode Indicator
Page 17
genesys ensemble/genesys grand ensemble
Page 8
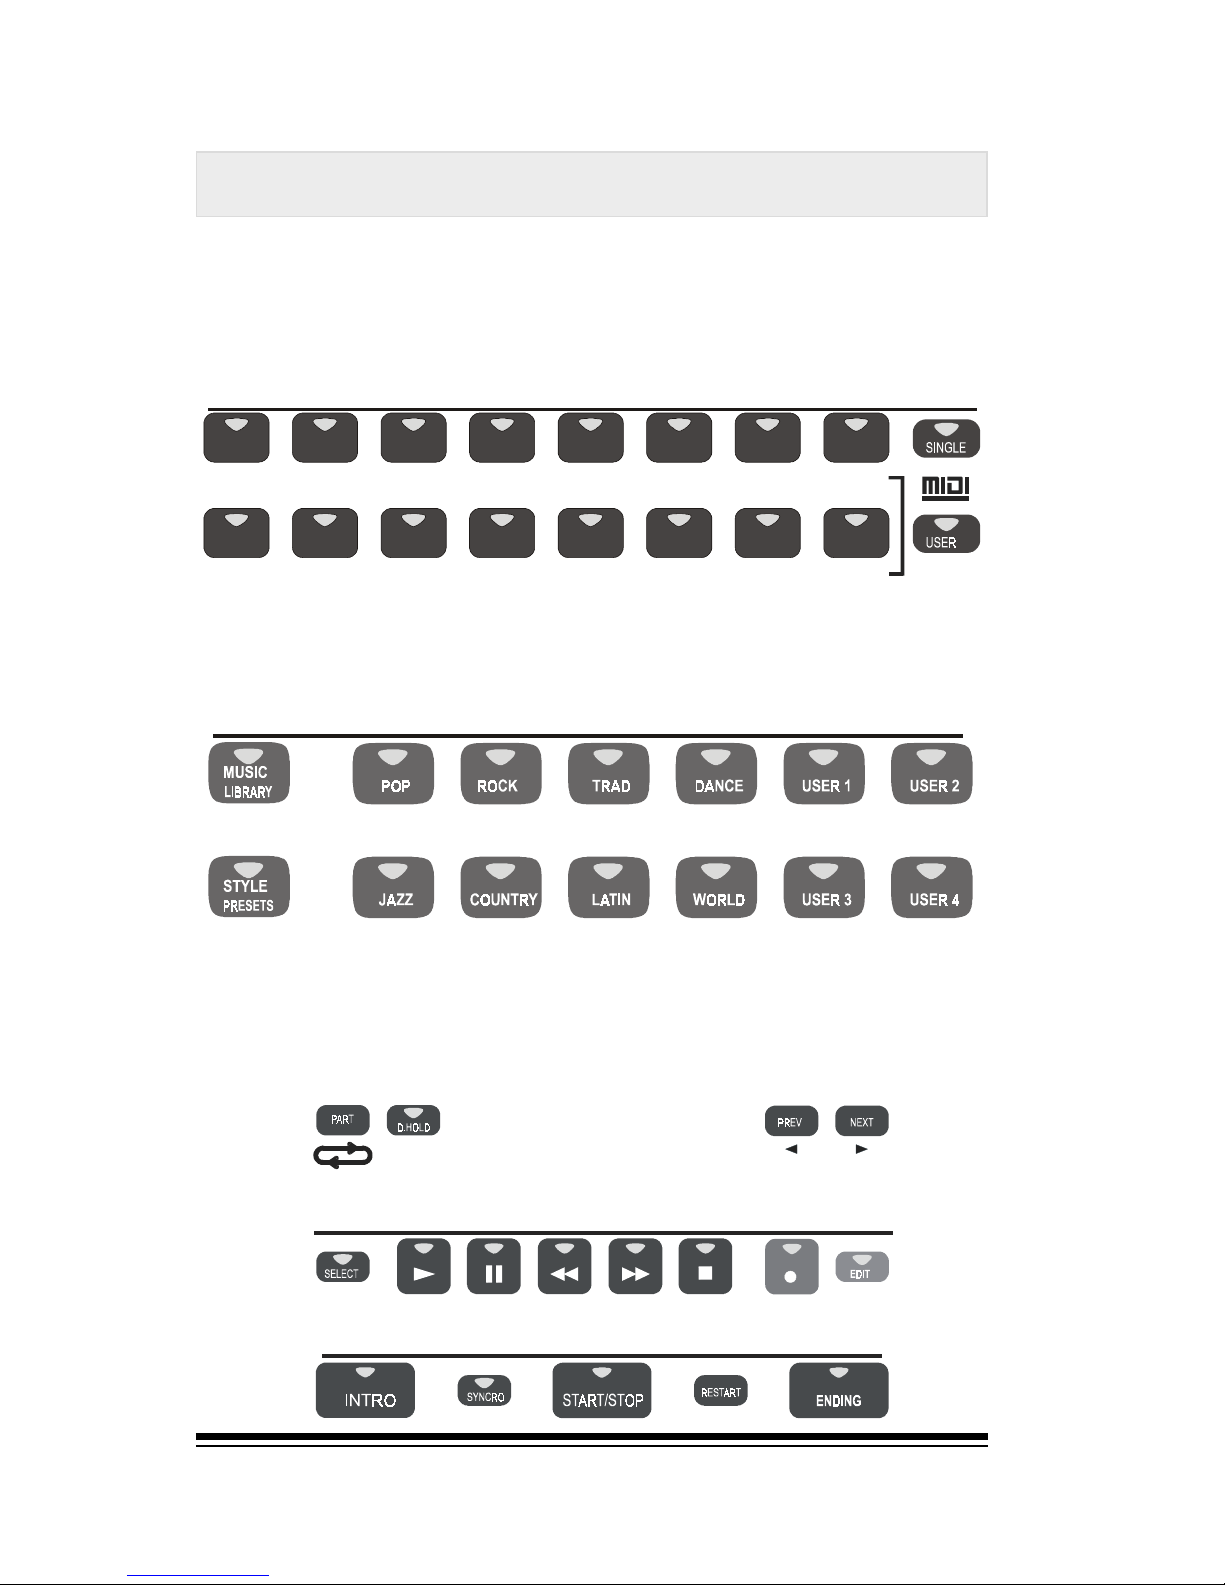
The Genesys Ensemble is divided into three main sections.
On the right side, in the section marked PRESET FAMILIES
you will find all of the factory preset sounds which are divided into families for easy access. You may also load your
own new sounds into this area.
S
TYLE FAMILIES
|
256 STYLES + 64 USER STYLES/4 VARATIONS/4 INTROS/4 ENDING/4 FILLS
SONG
PERF.
PAG E
SONG PL AYER/REC STUDIO
|
STYLE CO NTRO LS
PLAY:SMF/SONG/WAVE/Mp3/CD REC:SONG/STYLE/SAMPLE/WAVE
STRINGS
STRINGS
DRUMS
ETHNI
C
REAL
SOUNDS
ENSEMB
EFFECTS
PER
C
DRAWBAR
BRASS
SAMPLES
EFFE
CTS
ORCH.
REED
ACCORD
PIPE
BRASS
S
YN.LEAD
WIND
S
YN.PAD
SYNT
S
YNTH FX
PIANO
PIANO
MALLET
CHROM
ORGAN
ORGAN
GUITAR
GUITAR
BASS
BASS
PRESET FAMILIES |
256 PRESET S / OVE R 1000S INGLE SO UN D S / SAM PLE S / DRAW BAR O RGAN
GENERA L
Exploring the Genesys Ensemble
In the center of the main panel you will find the SONG
PLAYER/RECORDING STUDIO section. This section is used
for playing any type of song: Midifile, WAV, CD and Mp3.
This section is also used for creating your own songs and styles.
On the left side you will find the STYLE FAMILIES which
contain all of the factory preset styles. You may also load
your own new styles into this area.
Page 18
Exploring the Genesys Ensemble
Page 9
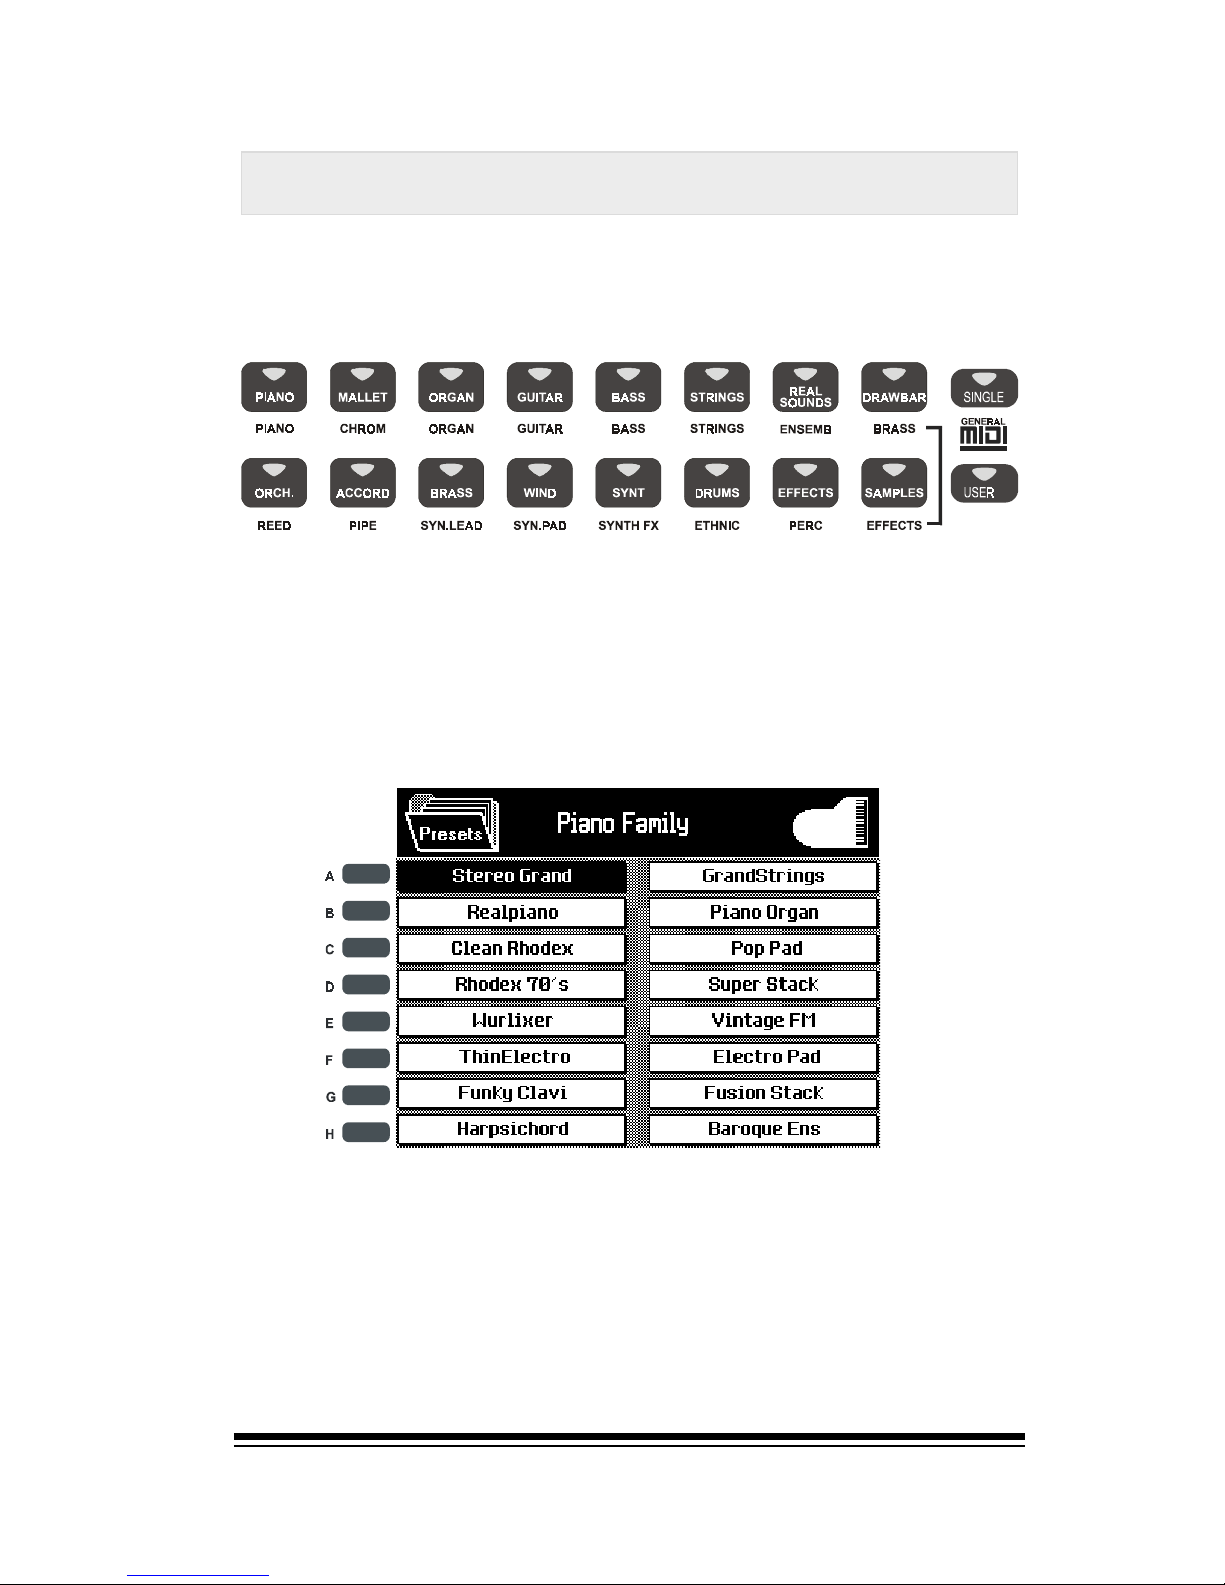
The LCD screen in the center of the main panel will keep
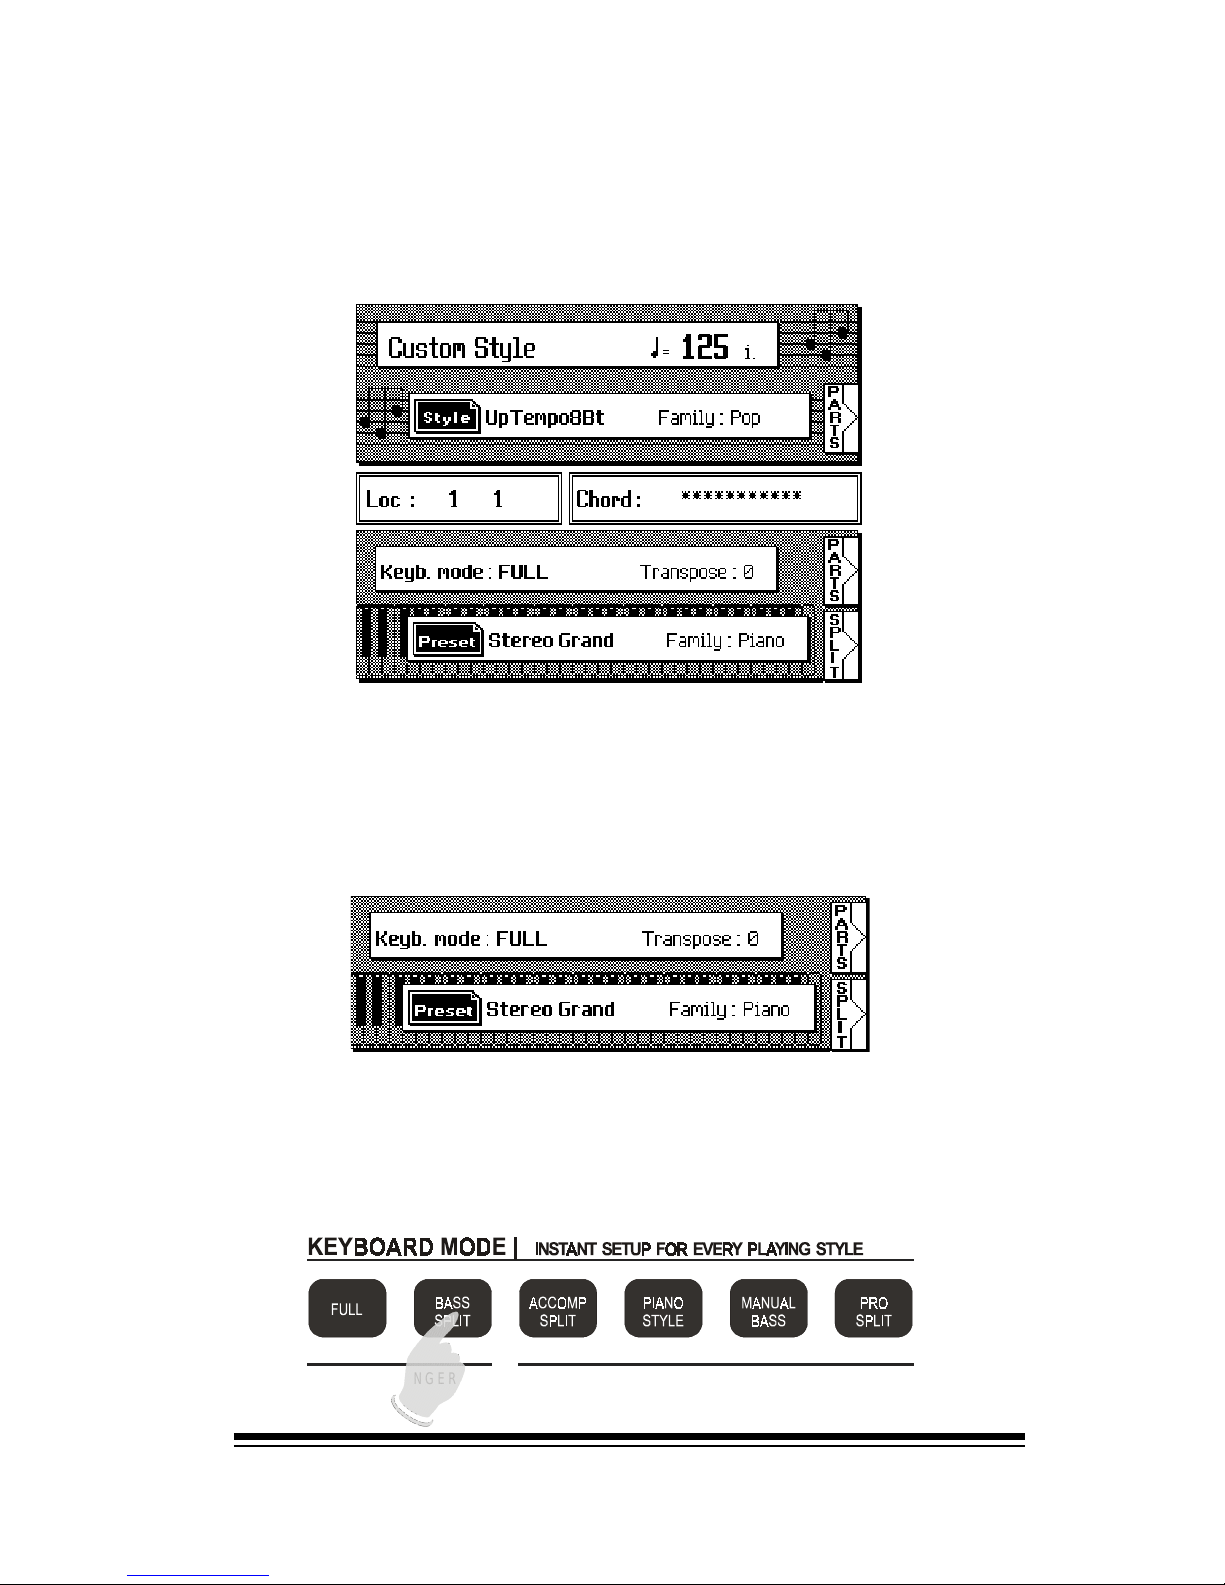
you informed about the current settings of these three sections. When you switch the instrument on you will see the
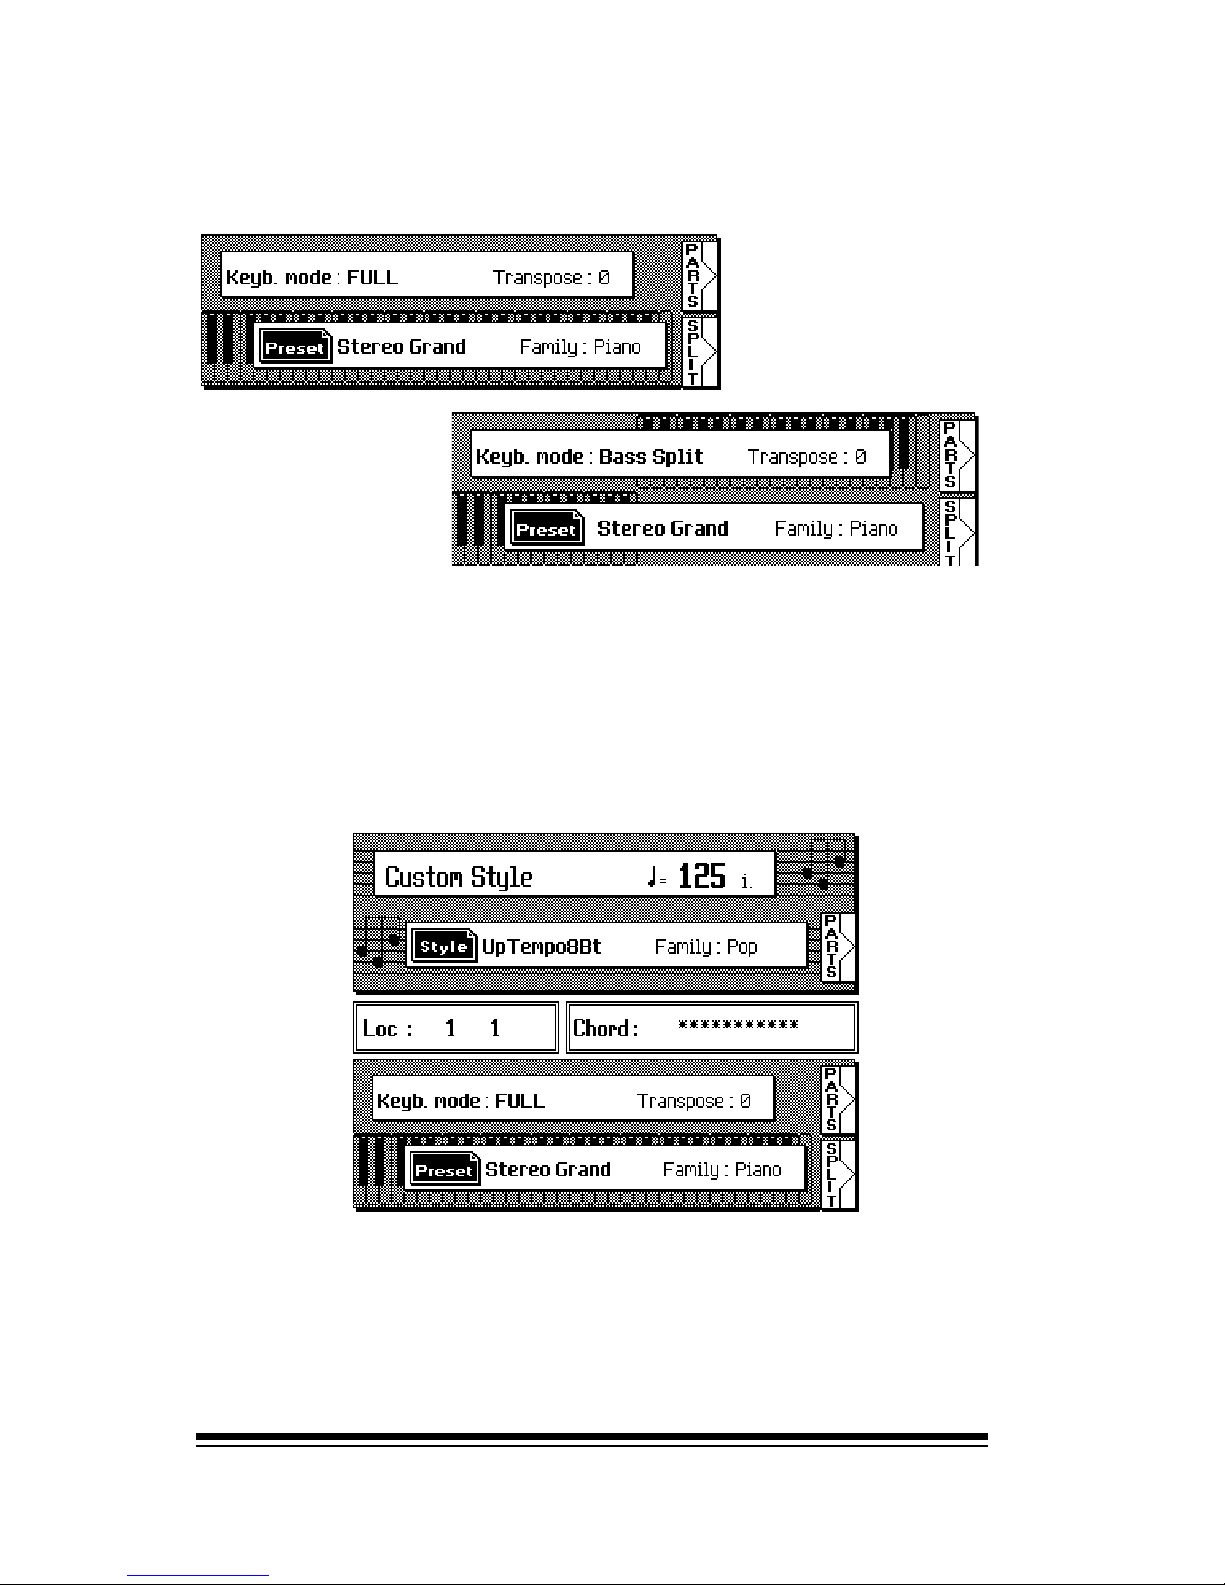
main display screen. This screen is divided into three parts.
NO ARRANGER ARRANGER
In the background you can see an image of a keyboard.This
image will change to let you know when the keyboard is
split. To see this in action, try switching between FULL, and
BASS SPLIT in the KEYBOARD MODE section.
The bottom part of the screen tells you which sound is
currently selected. You can see the name of the current
sound and also the name of the family in which it is located. There is also a PARTS button which will allow you to
inspect this sound setting in greater detail.
Page 19
genesys ensemble/genesys grand ensemble
Page 10
!
!
Notice how the image changes to reflect the difference between split and full keyboard.
This main screen should be considered as home. If you
ever find yourself looking at a different screen and wish to
get back to this home screen, keep pressing ESCAPE until you return to this screen.
The top part of the screen tells you the name of the currently selected style or song. The name shown here is exactly what you will hear when you press START/STOP. If a
style or Midifile is selected, you will also see a PARTS button which will allow you to inspect the settings of this style
or song in greater detail.
Page 20
Selecting Presets
Page 11
The sounds in the Genesys Ensemble are arranged into
what we call PRESET FAMILIES. There are 16 families in all
representing different categories of instrument. Each family contains 16 SOUND PRESETS.
Selecting Presets
Now press a different family button and choose one of the
16 presets from this family.
Each family button remembers the last preset that was
selected. If you now return to the PIANO family by pressing the PIANO button, you will instantly hear the sound
that was previously selected here. In this way, you can
choose your favorite sound in each family so that, in the
future, it can be recalled by pressing only one button.
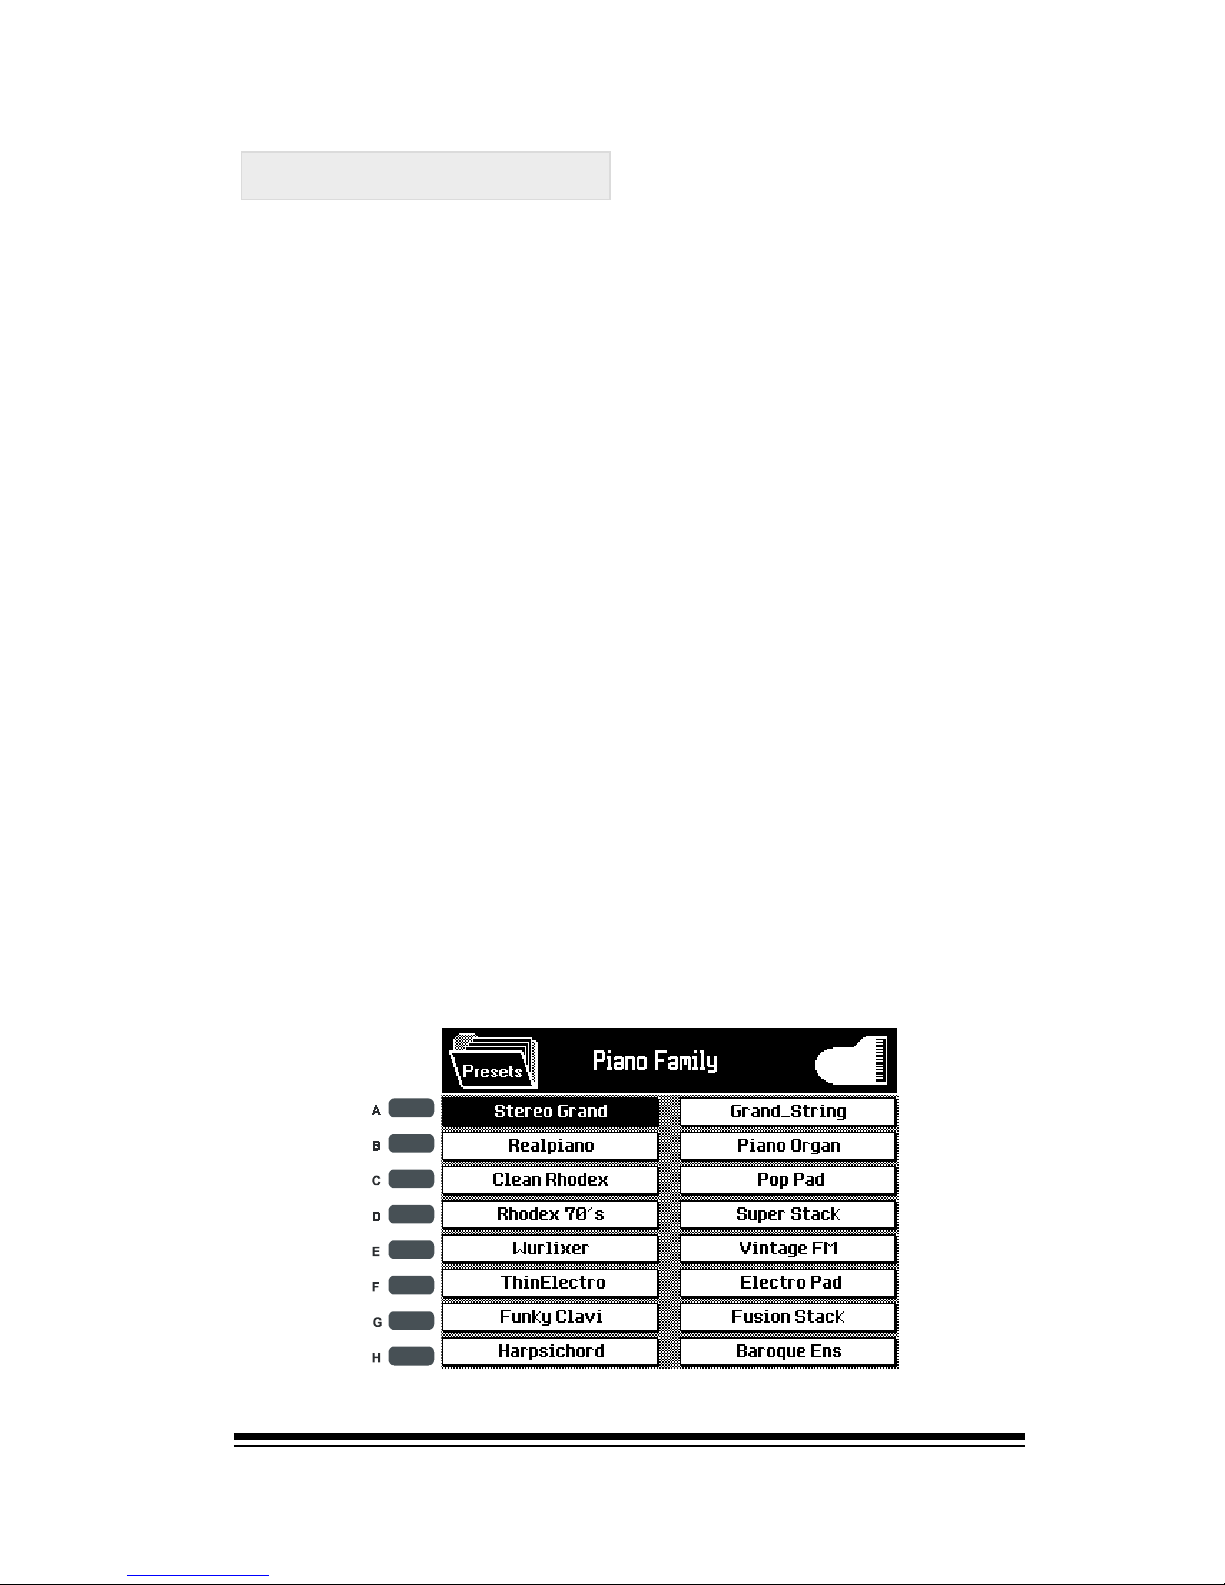
Selecting a SOUND PRESET is simple. First press one of the
PRESET FAMILIES buttons, (for example Piano). The screen
will now show you the 16 presets available in this family. To
select any of these presets, simply press the small button
beside its position in the screen. Lets select Stereo Grand.
You can now play this sound across the full range of the
keyboard.
J
Page 21

genesys ensemble/genesys grand ensemble
Page 12
A SOUND PRESET can be more than just a single sound. In
most cases, the 16 choices in each family are divided into
two parts; The first eight presets on the left side of the
screen and the second eight choices on the right.
The first eight choices on the left are nearly always single
sounds. The second set of eight choices on the right side
are combi settings which feature layered and split ef-
fects.
However, even when you choose one of the single sound
settings, the instrument does not simply select a single
sound. Each preset contains the correct effects, touch re-
sponse and mixer settings for the sound it contains. As you
move from one preset to the next, you will notice subtle
but effective differences which take place automatically.
On most other instruments you would need to adjust these
setting manually in order to optimize each sound.
If youre interested in knowing how a particular sound pre-
set was created, press the PARTS button, (F5 or F6 on the
right side of the screen) and you will see a list of the com-
ponent parts. Well explore this feature in greater detail in
the EDITING & CREATING section. To return to the home
screen, press ESCAPE.
What is a SOUND PRESET?
Page 22
Selecting Presets
Page 13
As we mentioned in the last section, each sound preset
has been professionally created to offer the correct effects
and other settings for the sound it contains. You can think
of the sound presets as a kind of showcase of the best
sounds that the Genesys Ensemble has to offer.
However, the Genesys Ensemble contains many more
sounds than just those which you will find in the sound
presets. To find all of these extra sounds we need to use
SINGLE mode. SINGLE mode is generally only used when
you are editing or creating a sound preset and we will use it
extensively in the EDITING & CREATING section. For normal playing purposes, you should never need to use single
mode for selecting sounds. If you decide that you want to
use one of these extra sounds for normal playing it is best
to create a new USER SOUND PRESET which contains the
single sound plus all of the necessary effects and other settings which best complement it. This will also be covered in
the EDITING & CREATING section. Selecting a sound in single
mode will change the sound that you hear but it will not
change any of the effects or other related settings. So before
we select a sound in single mode, its a good idea to begin by
selecting a SOUND PRESET which does not contain any complex layers, splits or extravagant effects. Lets choose the
first preset of the PIANO family, STEREO GRAND.
J
Single sounds
Now press the SINGLE button.
Page 23
genesys ensemble/genesys grand ensemble
Page 14
STRINGS
STRINGS
DRUMS
REAL
SOUNDS
ENSEMB
EFFECTS
DRAWBAR
BRASS
SAMPLES
ORCH.
ACCORD
BRASS
WIND
SYNT
PIANO
PIANO
MALLET
CHROM
ORGAN
ORGAN
GUITAR
GUITAR
BASS
BASS
PRESET FAMILIES |
256 PRESETS / OVER 1000SINGLE SOU ND S / SAMPLE S / DRAWBA R ORG A N
GENERAL
In single mode, the sounds are still organized into 16 families but they are categorized slightly differently from the
families we used in preset mode. We will now be using the
family names which are printed beneath each of the family
buttons instead of those names which are printed on the
surface of the buttons. These families conform to the General Midi standard and follow a slightly different system of
organization than the preset families. For example, Accordion sounds, which are normally found under the ACCORD
button in preset mode, are located in the ORGAN family in
single mode. Similarly, string section sounds which are
normally located in the STRING family in preset mode, can
be found in the ENSEMB. family in single mode. If you have
used any General Midi instrument in the past, this system
of organization will already be familiar to you.
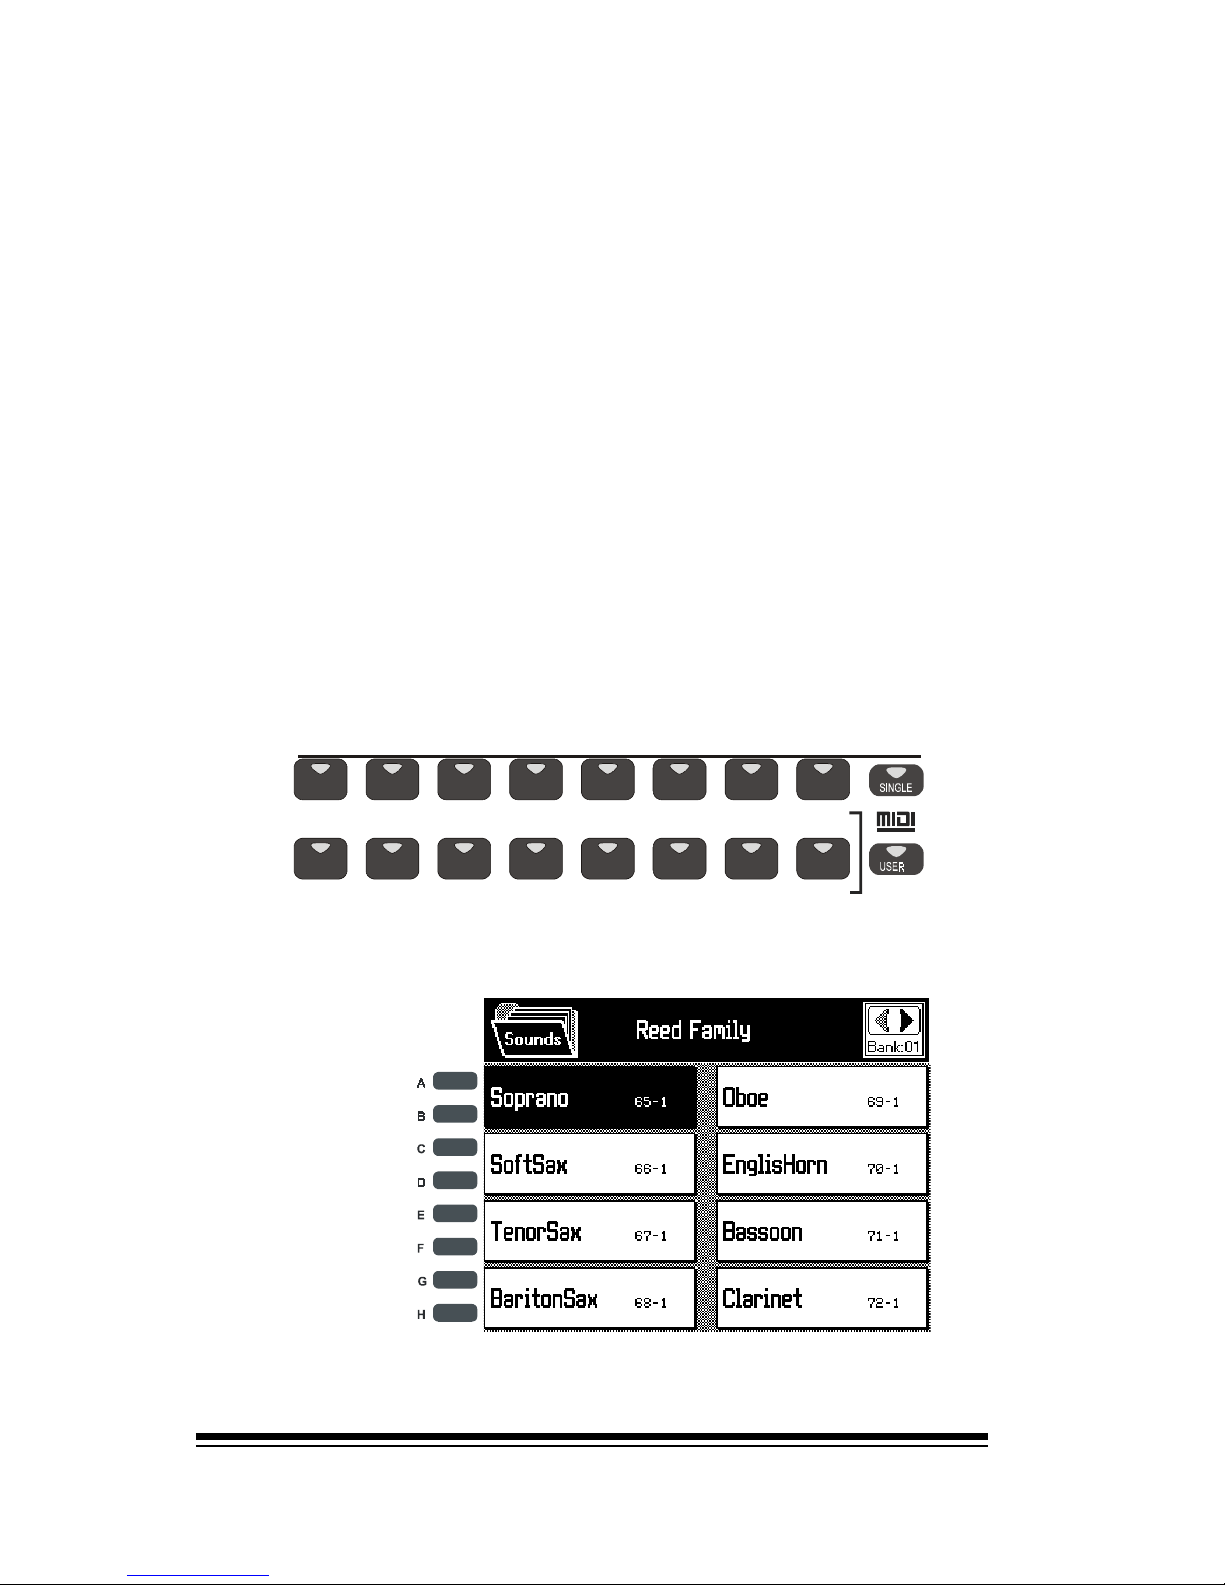
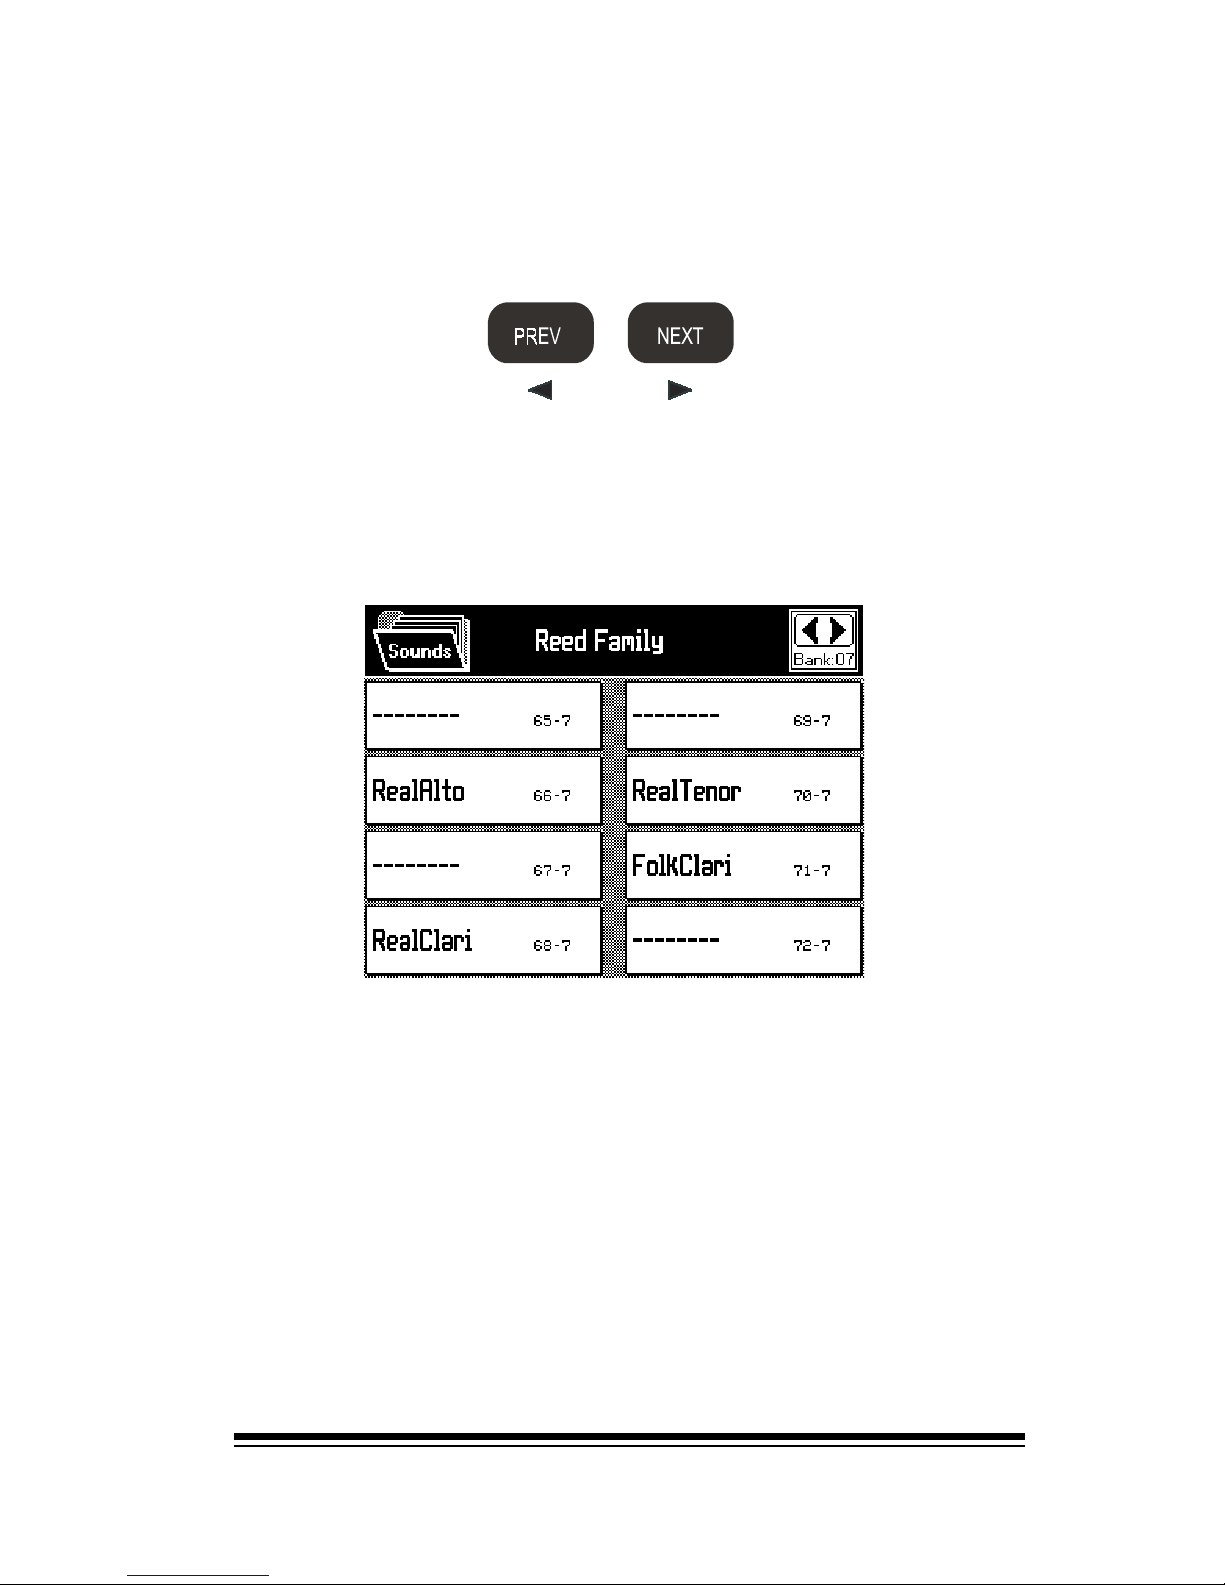
So, lets try some of the single sounds in the REED family.
Youll see that the REED family can be selected by pressing
the button which serves as the ORCH. family in preset mode.
In the top right corner of the screen you can see the bank
indicator. This tells you which bank of reed sounds you are
currently looking at.
Now we see eight sounds in the screen. You can select any of
these sounds by pressing the small button beside its location
in the screen.
J
J
Page 24
Selecting Presets
Page 15
Each family contains 16 banks of single sounds with 8
sounds in each bank. You move to the previous or next
bank by using the PAGE <> buttons below the screen. Press
PAGE > to see the next bank of reed sounds.
PA G E
J
J
These empty spaces are available for you to load new sounds
into. Having spaces available in each bank means that any
new sounds you load can be stored in the appropriate place.
For example, if you load a new guitar sound from a disk or
CD, you can place it in one of the empty slots in the GUITAR family. If you load a new trumpet sound it can be placed
in the BRASS family and so on. This system allows you
total flexibility when it comes to managing new sounds that
have been loaded into the instrument.
When youve finished exploring the range of single sounds available, set the instrument back to preset mode by turning off the
SINGLE button and press ESCAPE to return to the home screen.
Each time you press PAGE > the screen advances to the
next bank of sounds in this family. As you reach the higher
numbered banks, youll notice that not all of the spaces are
filled. Some banks contain more sounds than others.
Page 25
genesys ensemble/genesys grand ensemble
Page 16
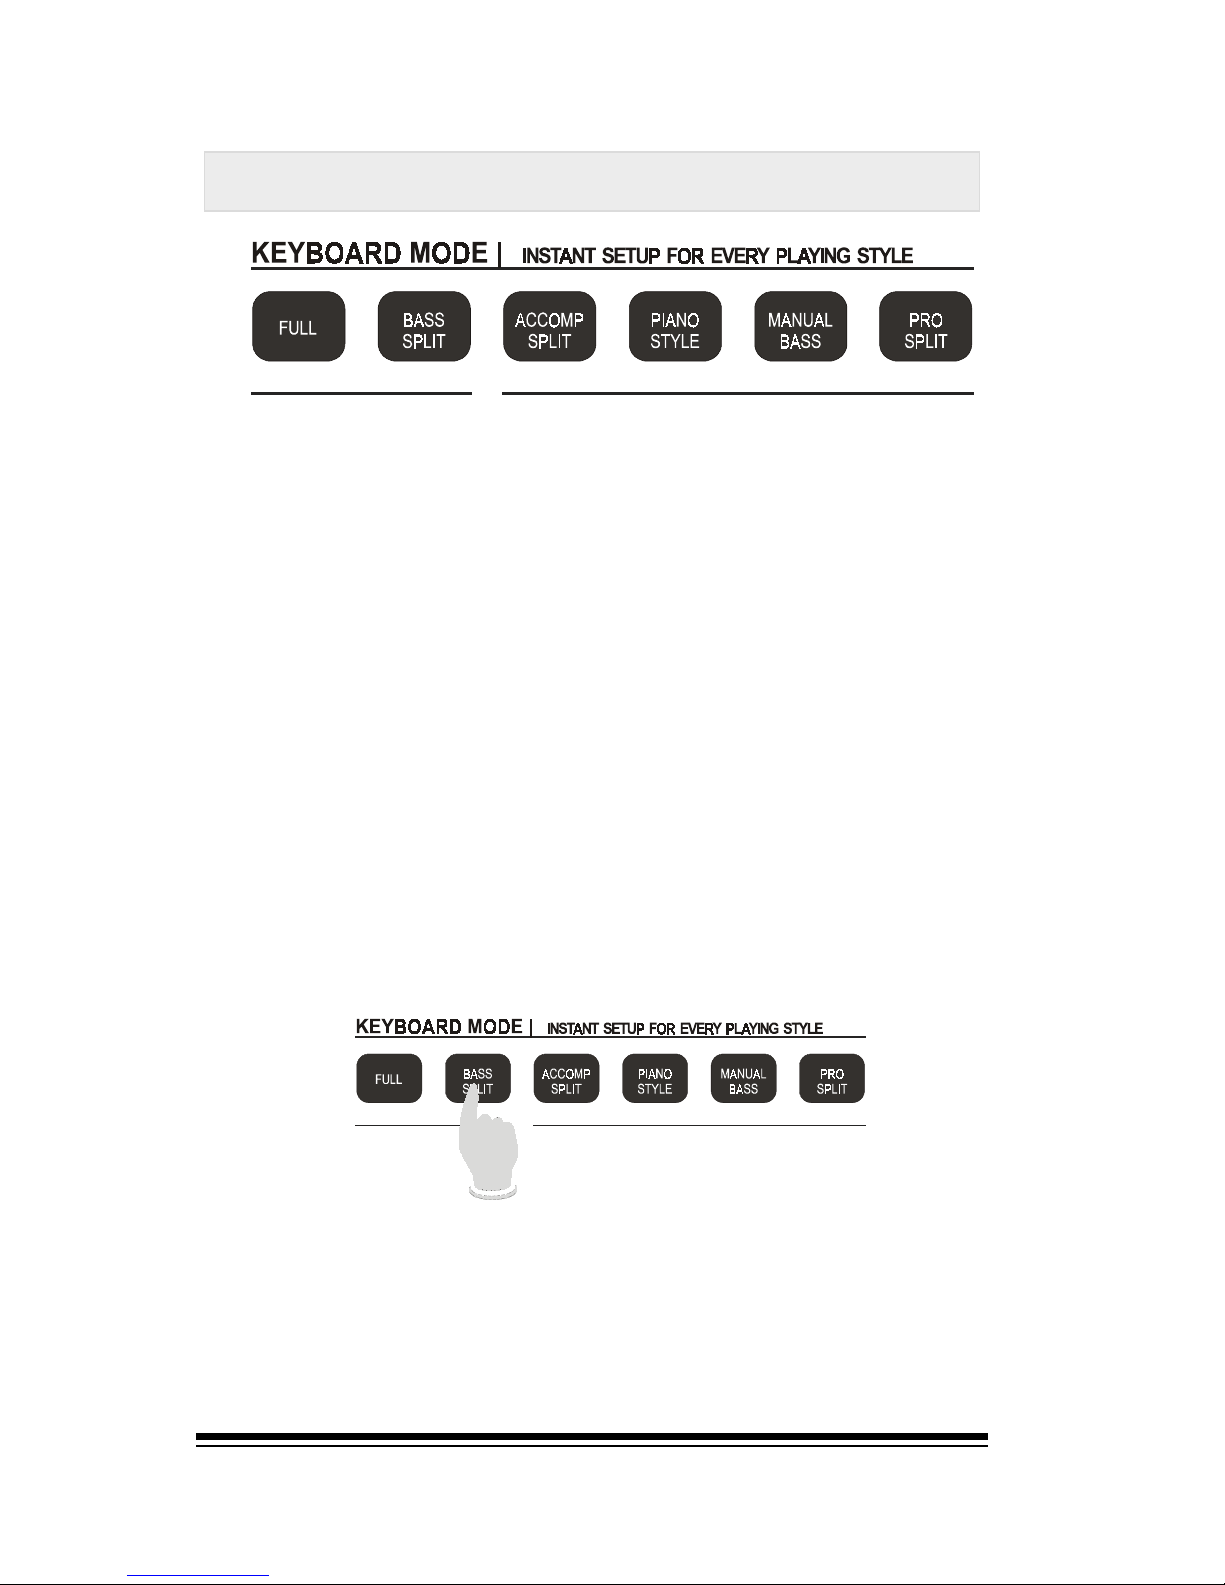
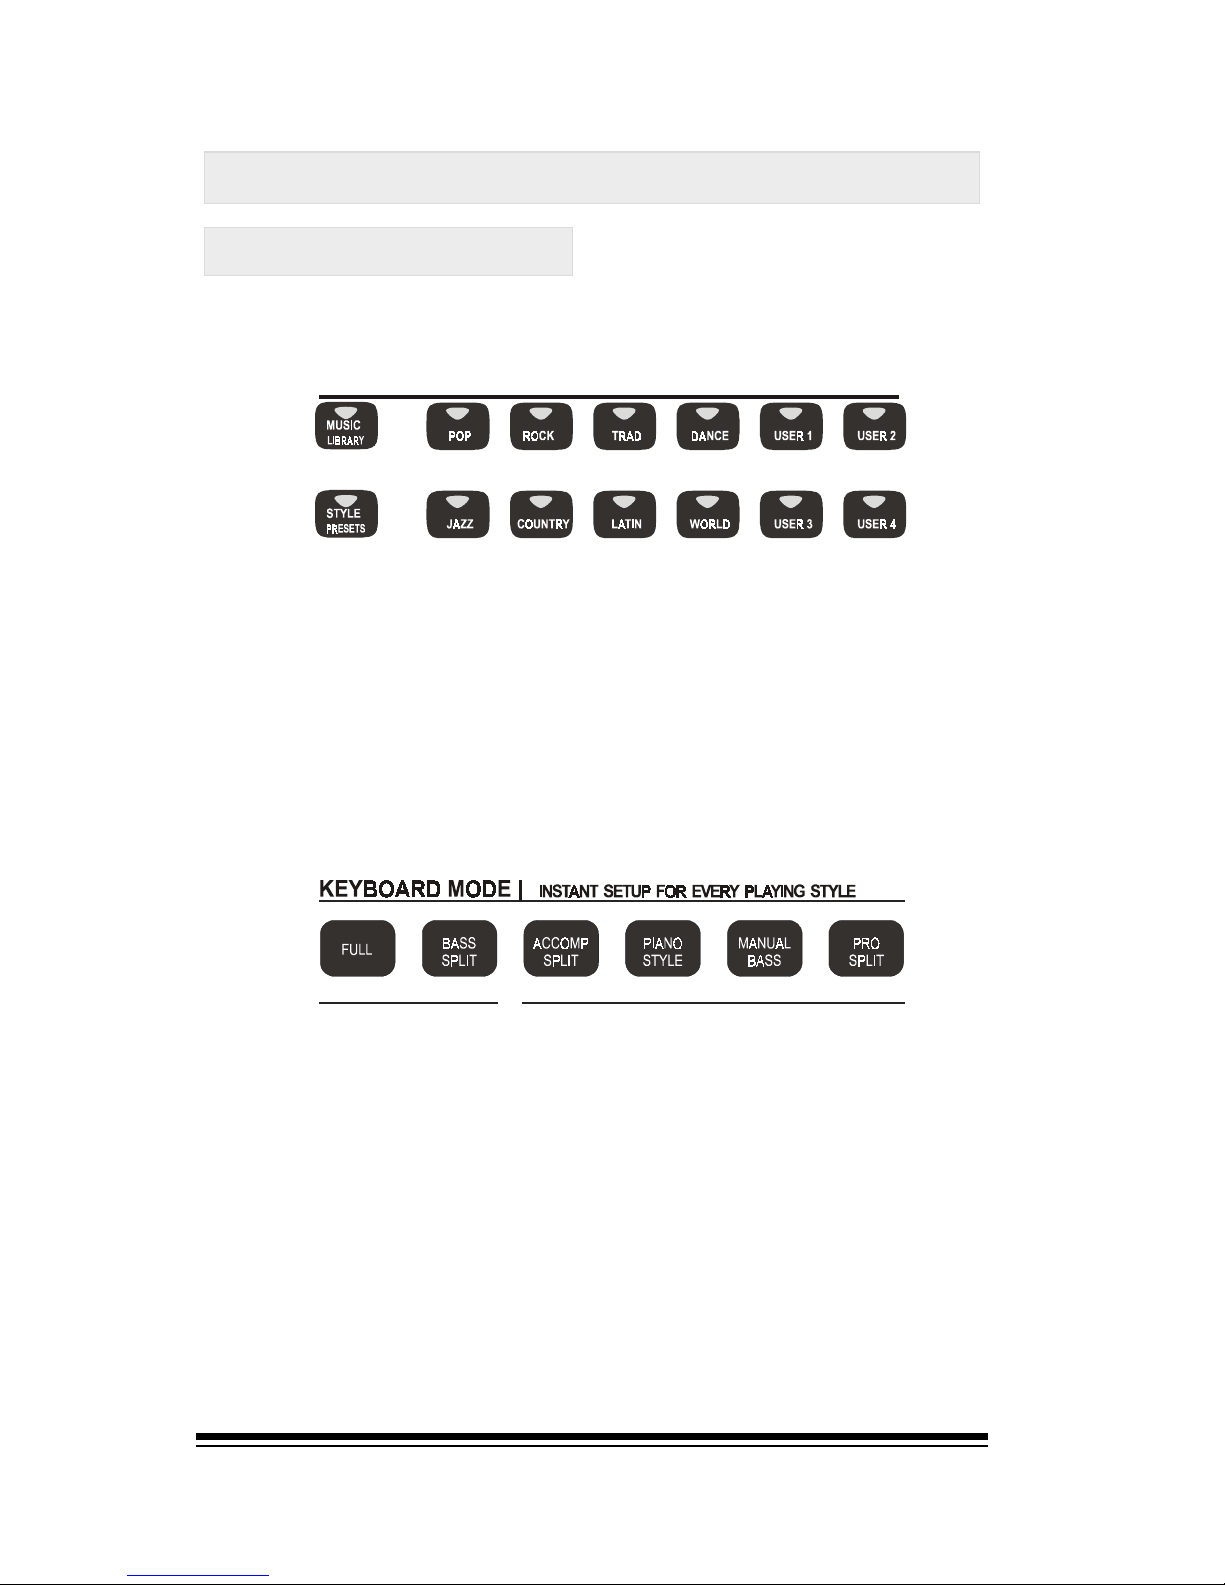
The six KEYBOARD MODE buttons on the left side of the
instrument provide a quick and easy way to change the
settings of the instrument according to how you want to
play.
NO ARRANGER ARRANGER
Keyboard Mode
Not only does the keyboard split but youll also find a bass
sound ready to play. This bass sound is matched to the
sound that youre currently using. If you choose a different
sound preset, the bass sound will change accordingly.
So far, weve been using the instrument in FULL mode which
is the normal setting when you first switch the instrument
on. KEYBOARD MODE allows to quickly switch to playing in
a different way with the touch of a single button.
Perhaps you want to split the keyboard to play left hand
bass or accompaniment chords using a style. The KEYBOARD MODE section contains buttons to do exactly these
things and many others.
To split the keyboard so that you can play bass with your
left hand press the BASS SPLIT button.
Page 26
Keyboard mode
Page 17
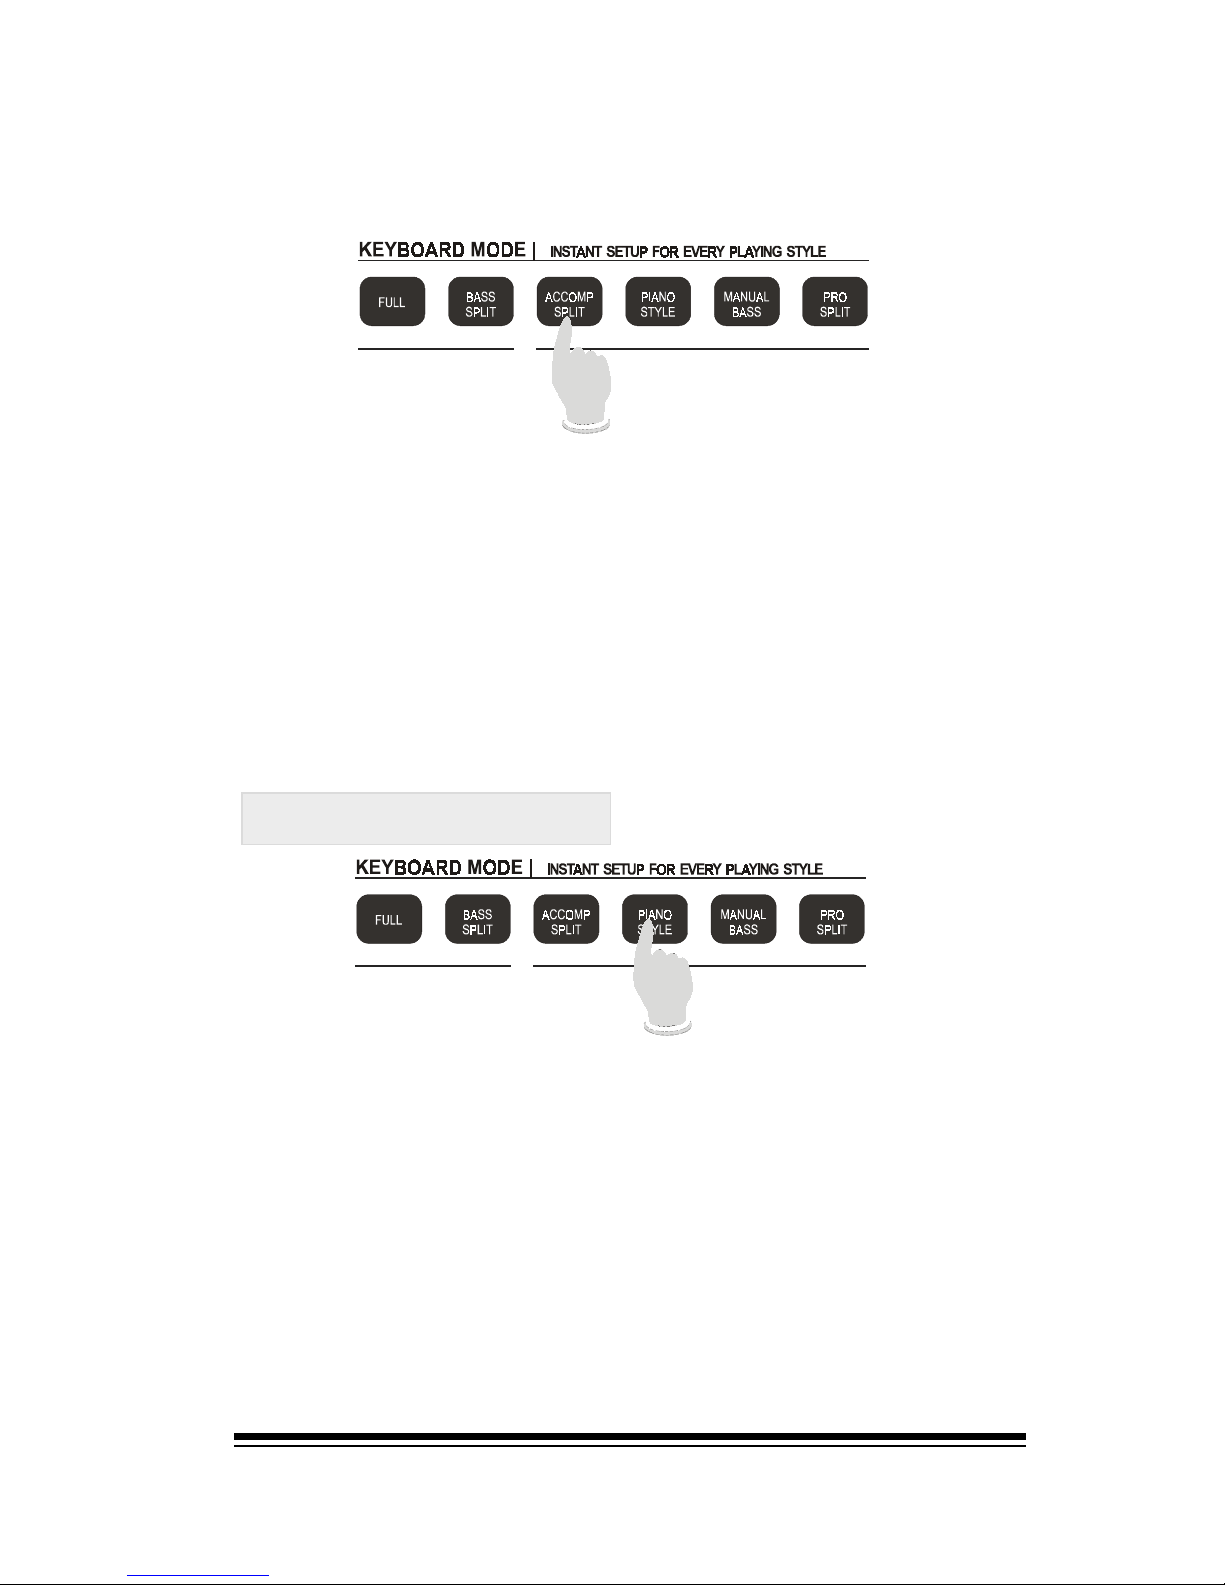
If you want to play with accompaniment using a style, press
ACCOMP. SPLIT.
This allows you to play the full keyboard using the accompaniment styles. Press START/STOP or syncro to start the
accompaniment styles. In PIANO STYLE mode, chords are
recognized wherever you play them on the keyboard. Playing melodies will not change the accompaniment but as
soon as you play more than two notes together in close
range the accompaniment will change accordingly. This allows piano players to use the accompaniment section while
retaining their normal piano technique.
A simple accompaniment sound will appear on the left side of
the keyboard, (also matched to the sound youre currently using).
Now pressing START/STOP you will hear the currently se
lected style and you can change chord voicing with your
left hand.
To turn off the sound played by the left hand along with
the style, reduce the LOWER volume slider to minimum.
The other choices available in the KEYBOARD MODE section
are:
Piano Style
Page 27
genesys ensemble/genesys grand ensemble
Page 18
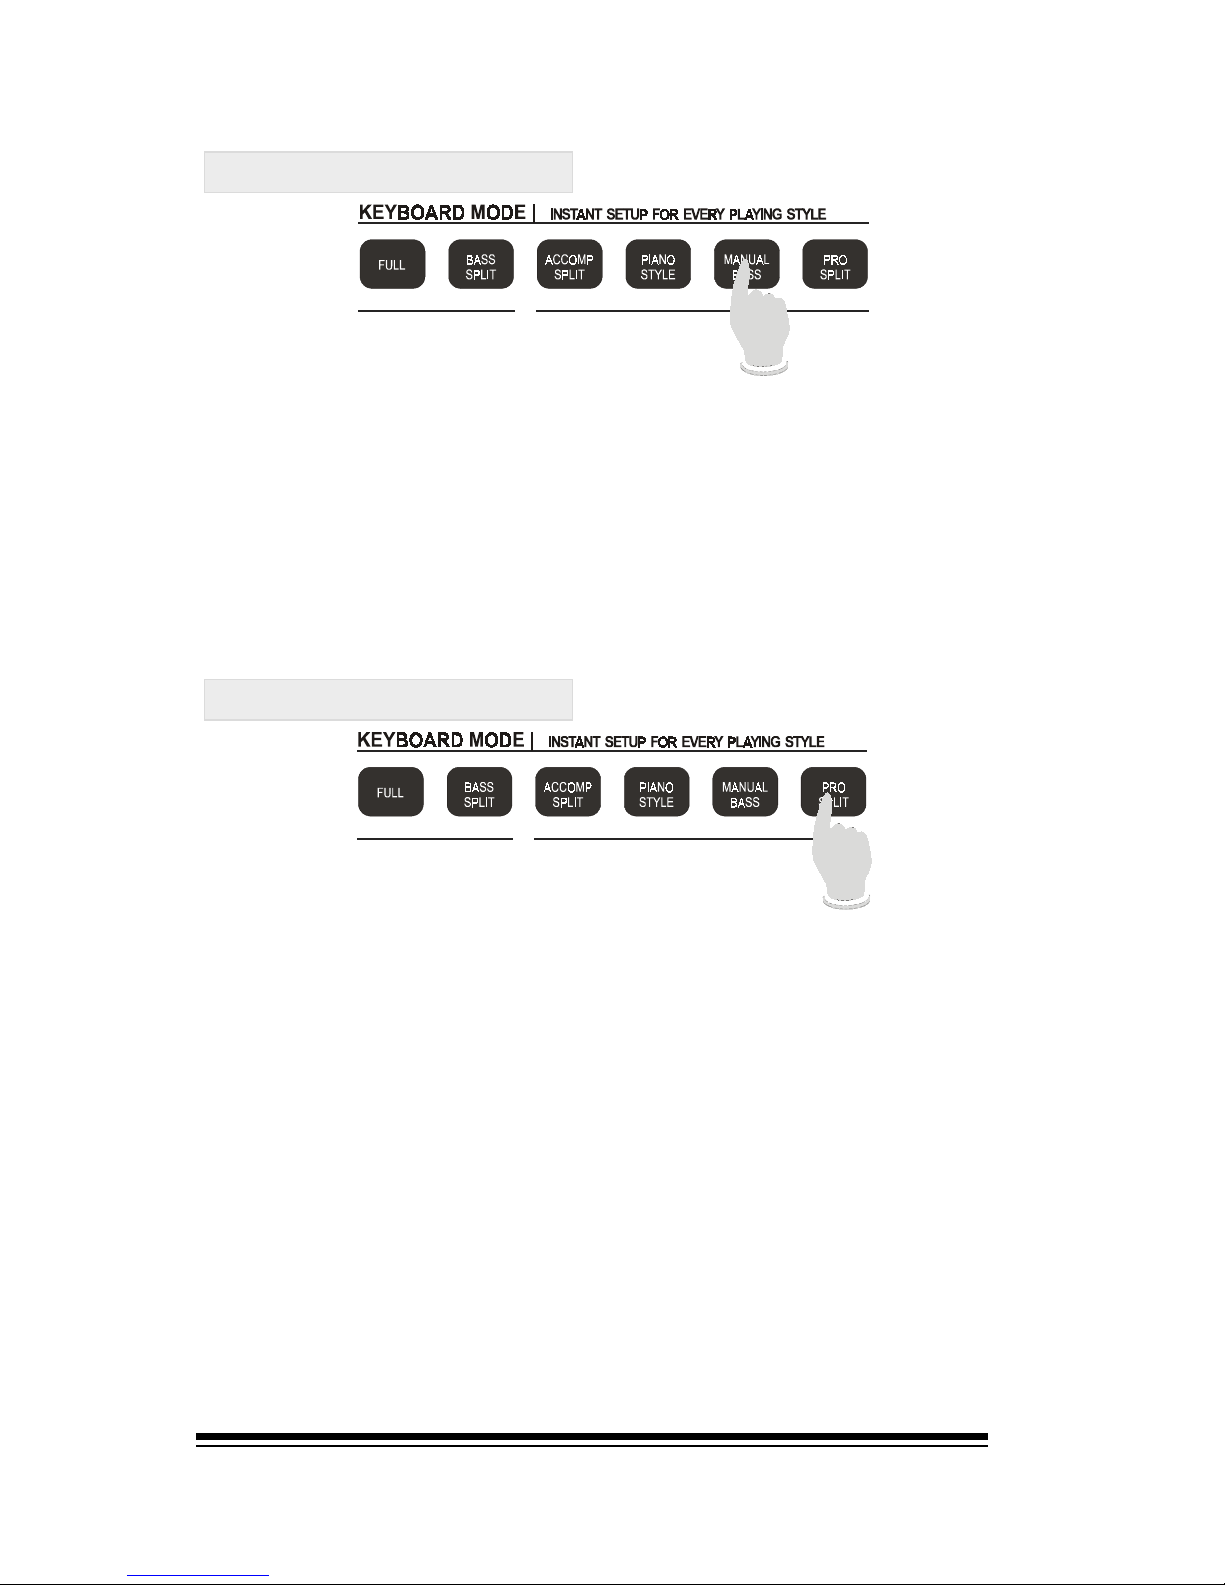
Professional users may occasionally need to play a bass
solo or a special bass figure in place of the automatic bass
generated by the style section. Pressing MANUAL BASS removes the automatic bass from the style and activates a
bass sound on the left side of the split. In this mode you
can change the accompaniment chord voicing by playing
chords on the right side of the split while your left hand
plays the bass part in real time.
Manual Bass
Pro Split
The PRO SPLIT function is a unique and innovative feature
which has been custom designed for the Genesys Ensemble
to suit a particular playing style which is impossible to manage on other arranger keyboards. A very popular way to
play accompaniment on both piano and synthesizer is to
play bass notes with the left hand while the right hand
plays chords. On a synthesizer this technique can be especially effective if you use a split keyboard with a separate
bass sound for the left hand and an appropriate chording
sound for the right hand. The problem comes when you try
to apply this technique to an arranger keyboard using the
accompaniment styles. When you split a typical arranger
keyboard, the chord recognition is assigned to the left side
of the split which would ignore the chords being played in
the right hand.
Page 28
Keyboard mode
Page 19
Changing the Split Point
In PRO SPLIT mode, the chord recognition is divided into
two parts: bass and accompaniment. The bass part is controlled by the notes played on the left side of the split while
all other accompaniment parts are controlled by the chords
you play on the right side of the split. This allows you to
easily play even the most complex voicings because the
bass will be generated independently of the chord accompaniment parts. As an example of how PRO SPLIT might be
used, try playing a number of different chords with the
right hand while keeping the same bass note with the left
hand. A good example might be to keep a C bass while the
right hand plays the chords C major, F major, G major, Bb
major and F major. This popular and relatively simple type
of progression, (typical of pianist/vocalists), could not be
played on an arranger keyboard without the unique PRO
SPLIT function.
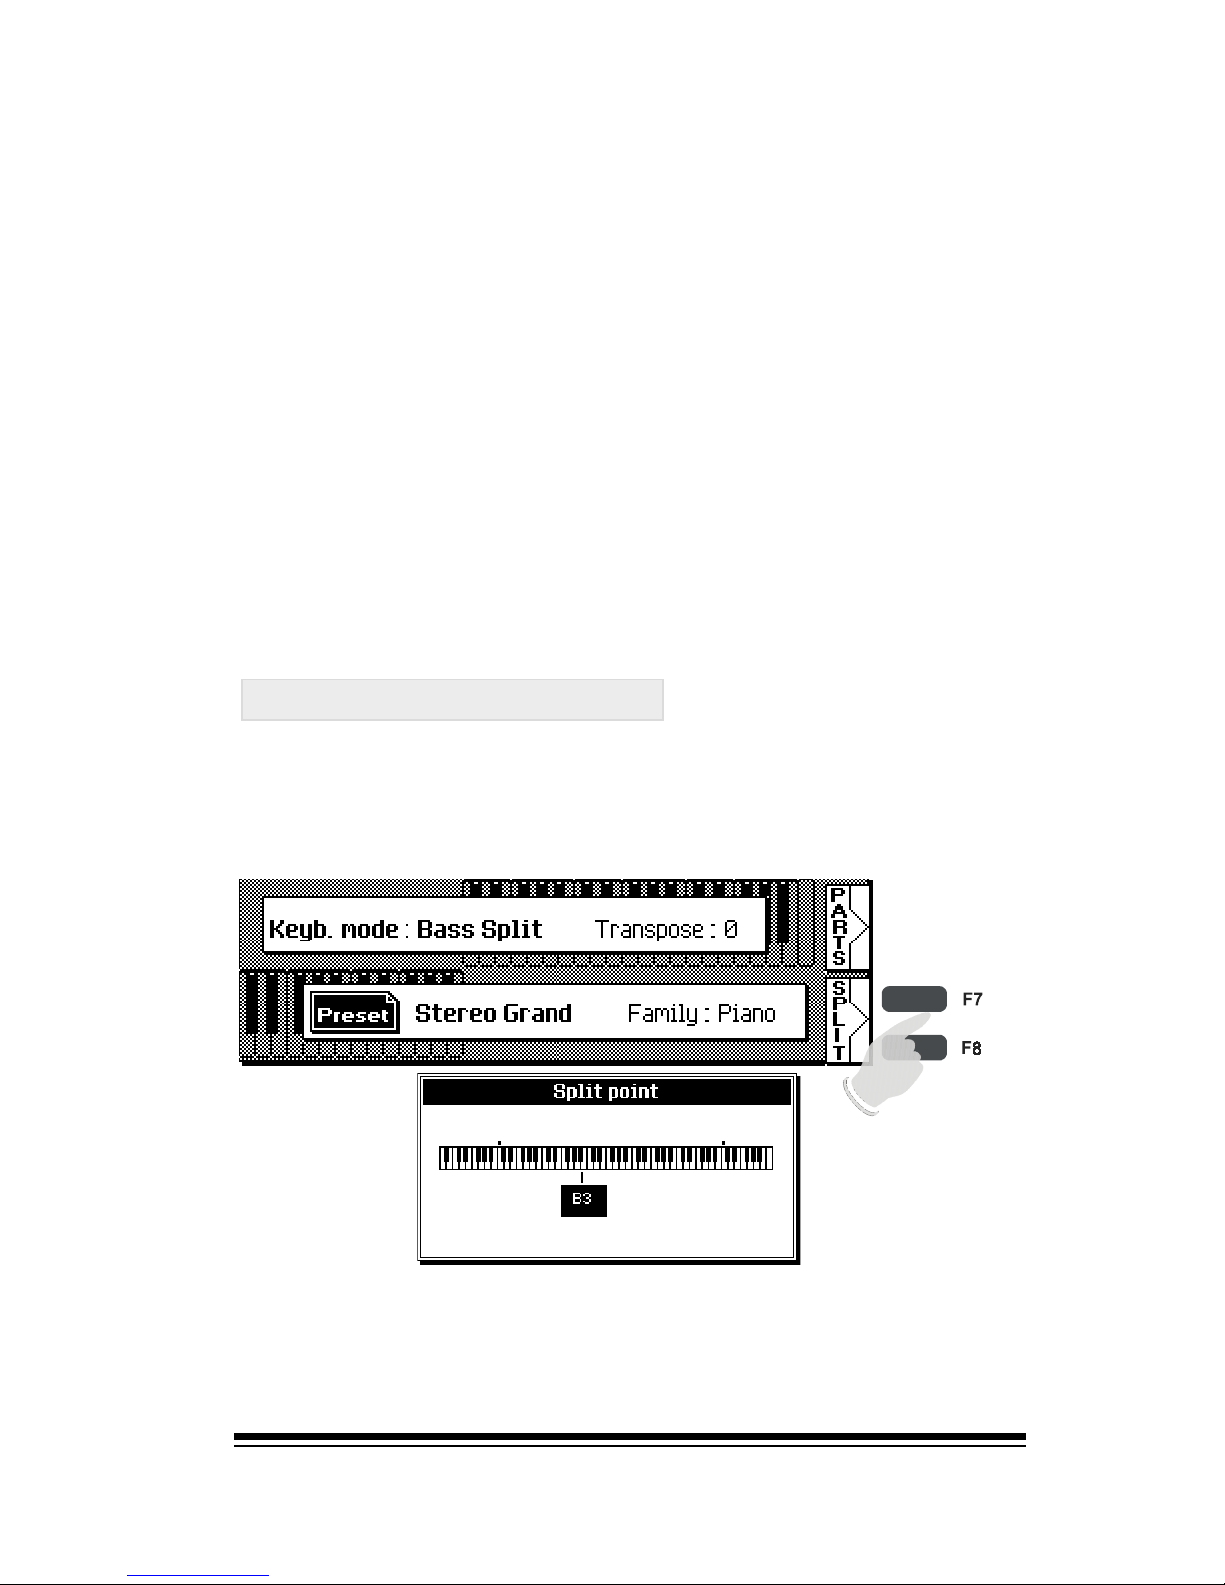
If you want to change the point where the keyboard splits,
select one of the split keyboard mode (BASS SPLIT, ACCOMP.
SPLIT, MANUAL BASS, PRO SPLIT), and press one of the
buttons (F7,F8) next to the word SPLIT in the screen.
Now you may either use the dial to change the split point
or simply press a key on the keyboard. The note you select
will become the lowest playable note of the right hand section. If youre happy with this choice, press ENTER to return to the home screen.
Page 29
genesys ensemble/genesys grand ensemble
Page 20
256 STYLES + 64 U SER STYLE S/4 VARATIONS/4 INTROS/4 ENDING/4 FILLS
S
TYLE FAMILIES
|
SONG
PERF.
NO ARRANGER ARRANGER
Using the Styles and Style Controls
KEYBOARD MODE offers six different ways to play the Genesys
Ensemble. When you choose one of the KEYBOARD MODE
settings, the system automatically makes changes to the style
section so that it operates most efficiently for the mode you
selected. Later on, well look at how you change the settings
of the style section yourself. For now, we can let the KEYBOARD MODE buttons do all the work for us. Lets begin by
using the most common set-up for playing with styles; a simple
split keyboard where we will play the accompaniment chords on
the left side of the split and the melody on the right side. To set
the instrument up for this style of playing, simply press ACCOMP.
SPLIT in the KEYBOARD MODE section.
Each style is a complete 8-part accompaniment pattern with
drums, bass and up to 6 additional instrumental parts complete with 4 variations, 4 fills, 4 intros and 4 endings. The
styles can be used in a variety of different ways depending
on your preferred playing style. However, setting up the styles
section to match the way that you want to play is pure simplicity thanks to the KEYBOARD MODE buttons described in
the previous section.
The Genesys Ensemble comes complete with 256 styles
which are divided into eight families.
The Styles Section
Page 30
Using the Styles and Style Controls
Page 21
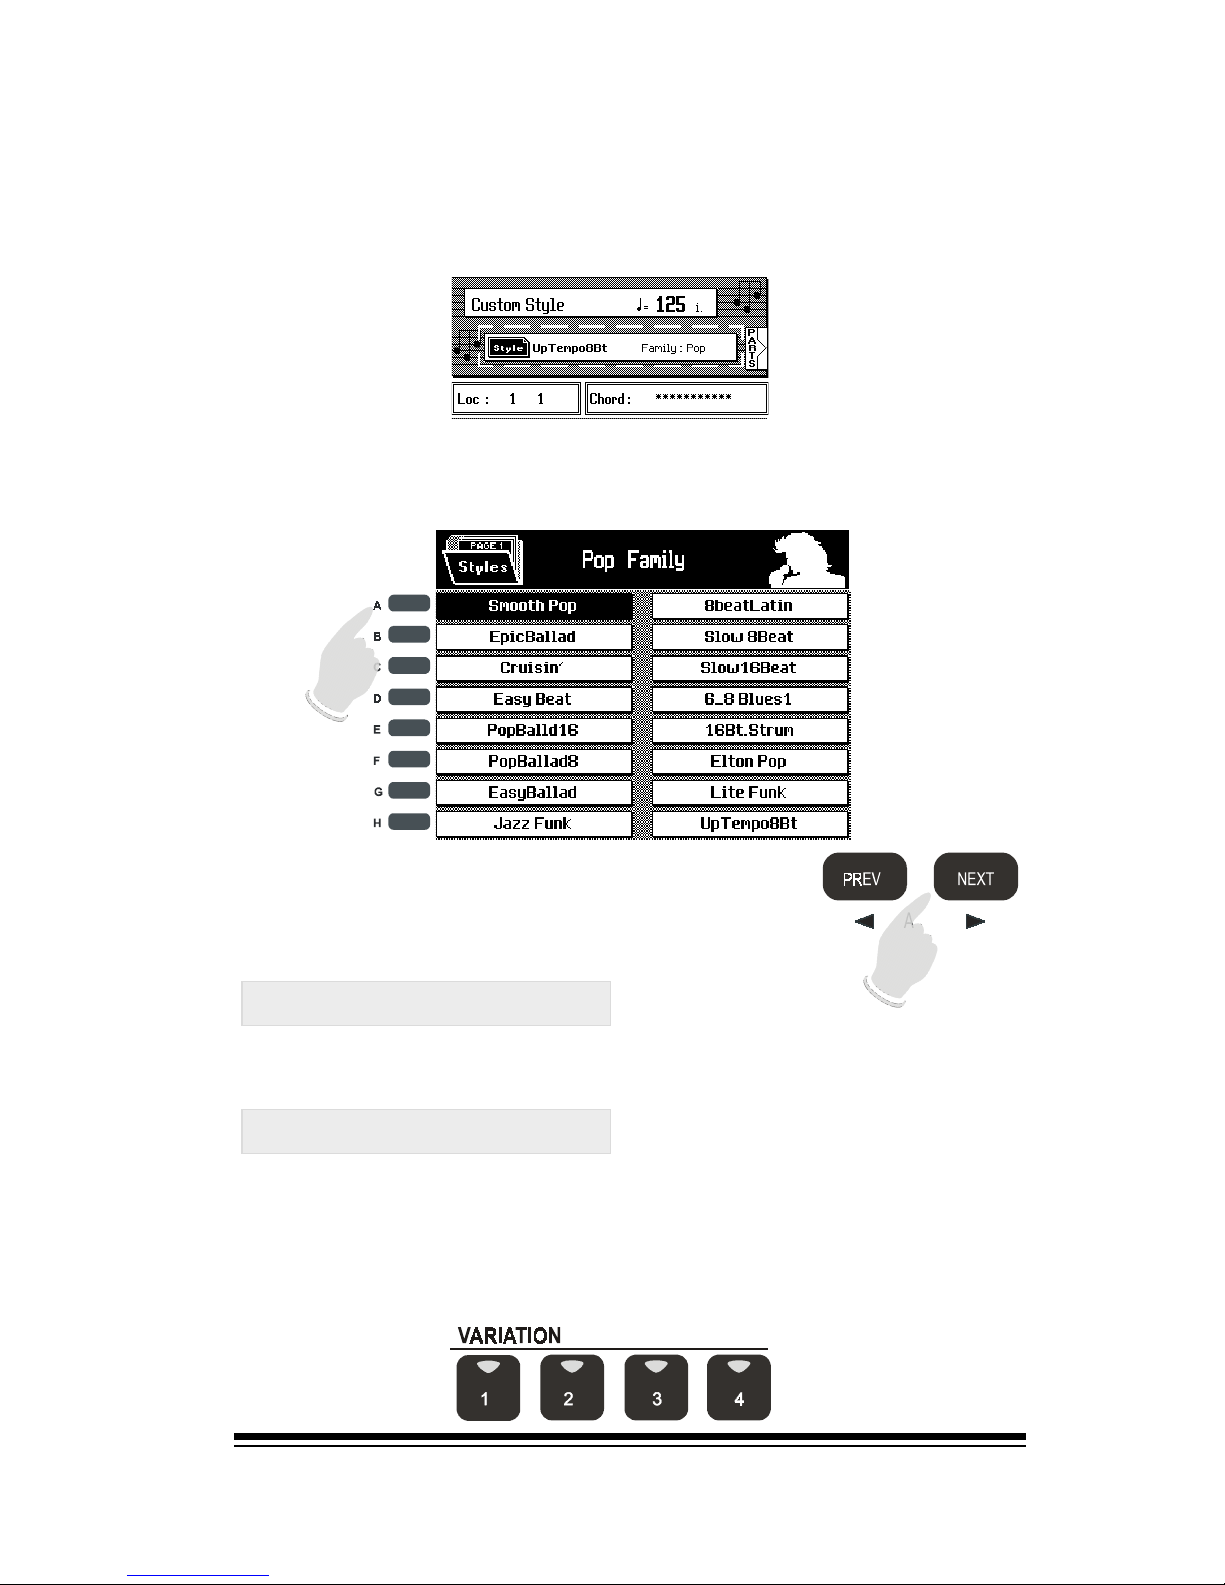
Thats it. If you now press START/STOP and play a chord in
the left hand section of the keyboard, you will hear the style
accompaniment playing along. You can see the name of the
style youre currently using in the upper part of the screen.
PAGE
Style Controls
Variations
You can select a different style by simply pressing one the
STYLE FAMILY buttons and choosing one of the titles in the
screen by pressing the function button beside it.
Each family has two pages of style
selection screens available. You can
switch between these by using the
PAGE <> buttons.
Now lets look at some of the different controls we have to
change the way each style behaves.
First, each style has 4 variations which allow you to start
your piece will a simple small group setting and build up
to a larger ensemble as the song progresses. To change
between the variations, simply press the Variation 1, 2, 3
and 4 buttons.
Page 31
genesys ensemble/genesys grand ensemble
Page 22
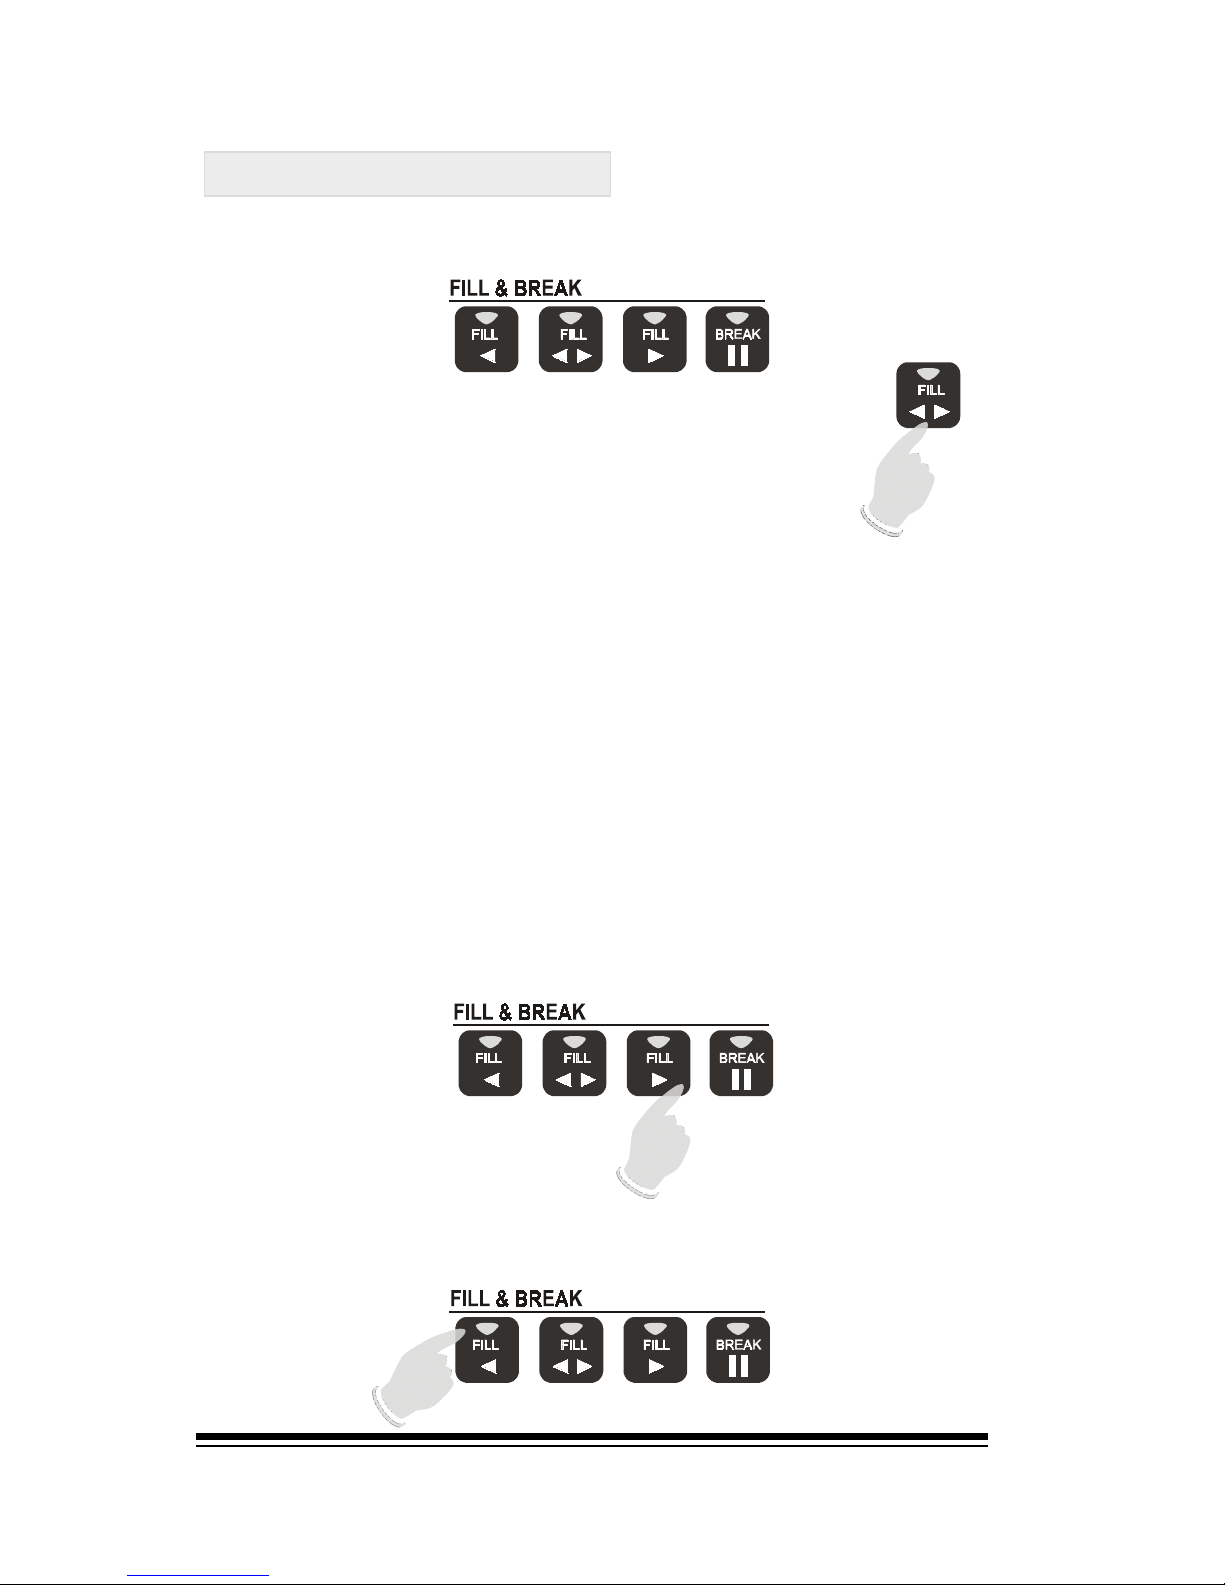
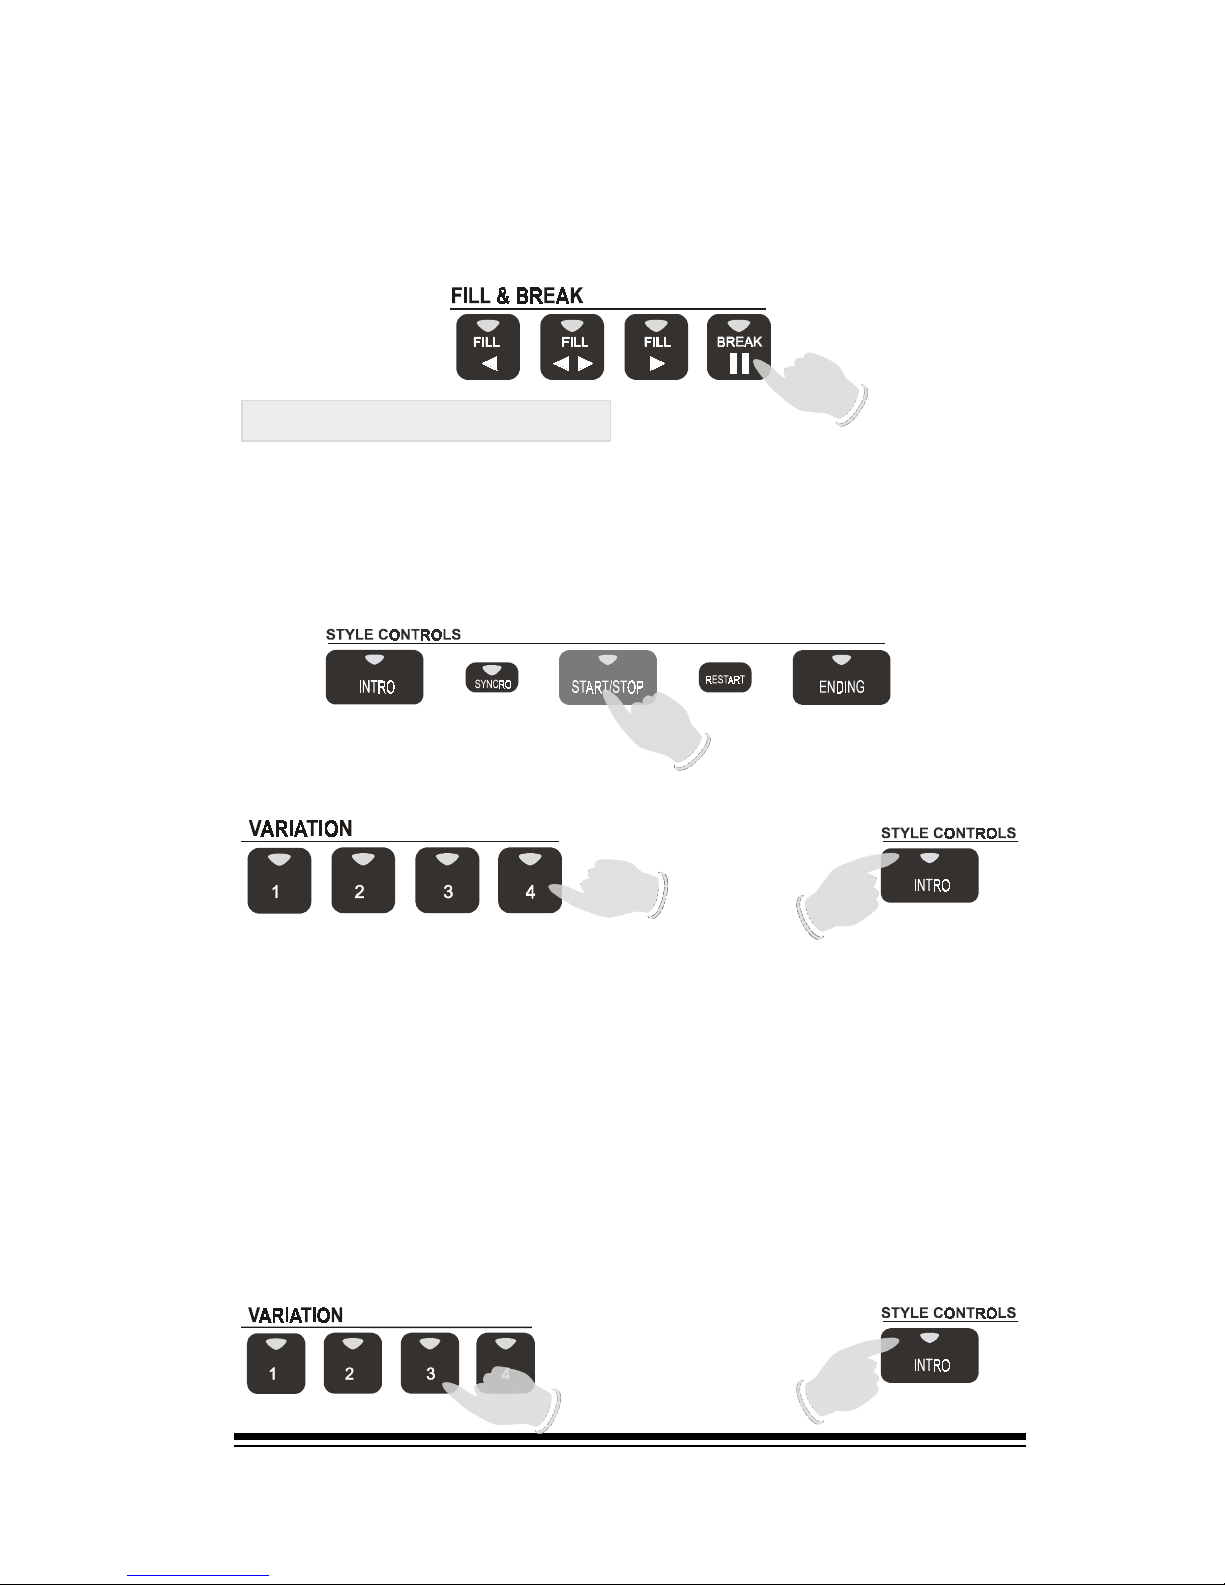
You can add professional sounding flourishes and accents to
the styles by using the fill buttons in the FILL & BREAK section.
Fills and Breaks
If you press FILL < you will hear a different fill after which
the style will move to the previous numbered variation.
You will hear a fill pattern which finishes at the beginning
of the next measure. Some styles contain longer fills which
can be heard if you hold the fill button down for more than
1 measure. The other two fill buttons in this section are designed to be used when you wish to change from one variation to the next. Instead of simply pressing the VARIATION 1,
2, 3 or 4 buttons as we did before, you may instead use either
of the fill to variation buttons which plays a fill and then,
when it finishes, automatically moves to a different variation
of the style. There are two of these fill to variation buttons: one which moves up to the next variation and another which moves down to the previous variation. If you
press FILL > you will hear a different fill after which the
style will move to the next numbered variation.
For a normal fill, press the button marked FILL
<>.
Page 32
Using the Styles and Style Controls
Page 23
Another option is to have a one-measure break in your
song. This is normally used when you want the band to
stop while you sing or play a brief solo passage. To accomplish this, just press the BREAK button.
Intros and Endings
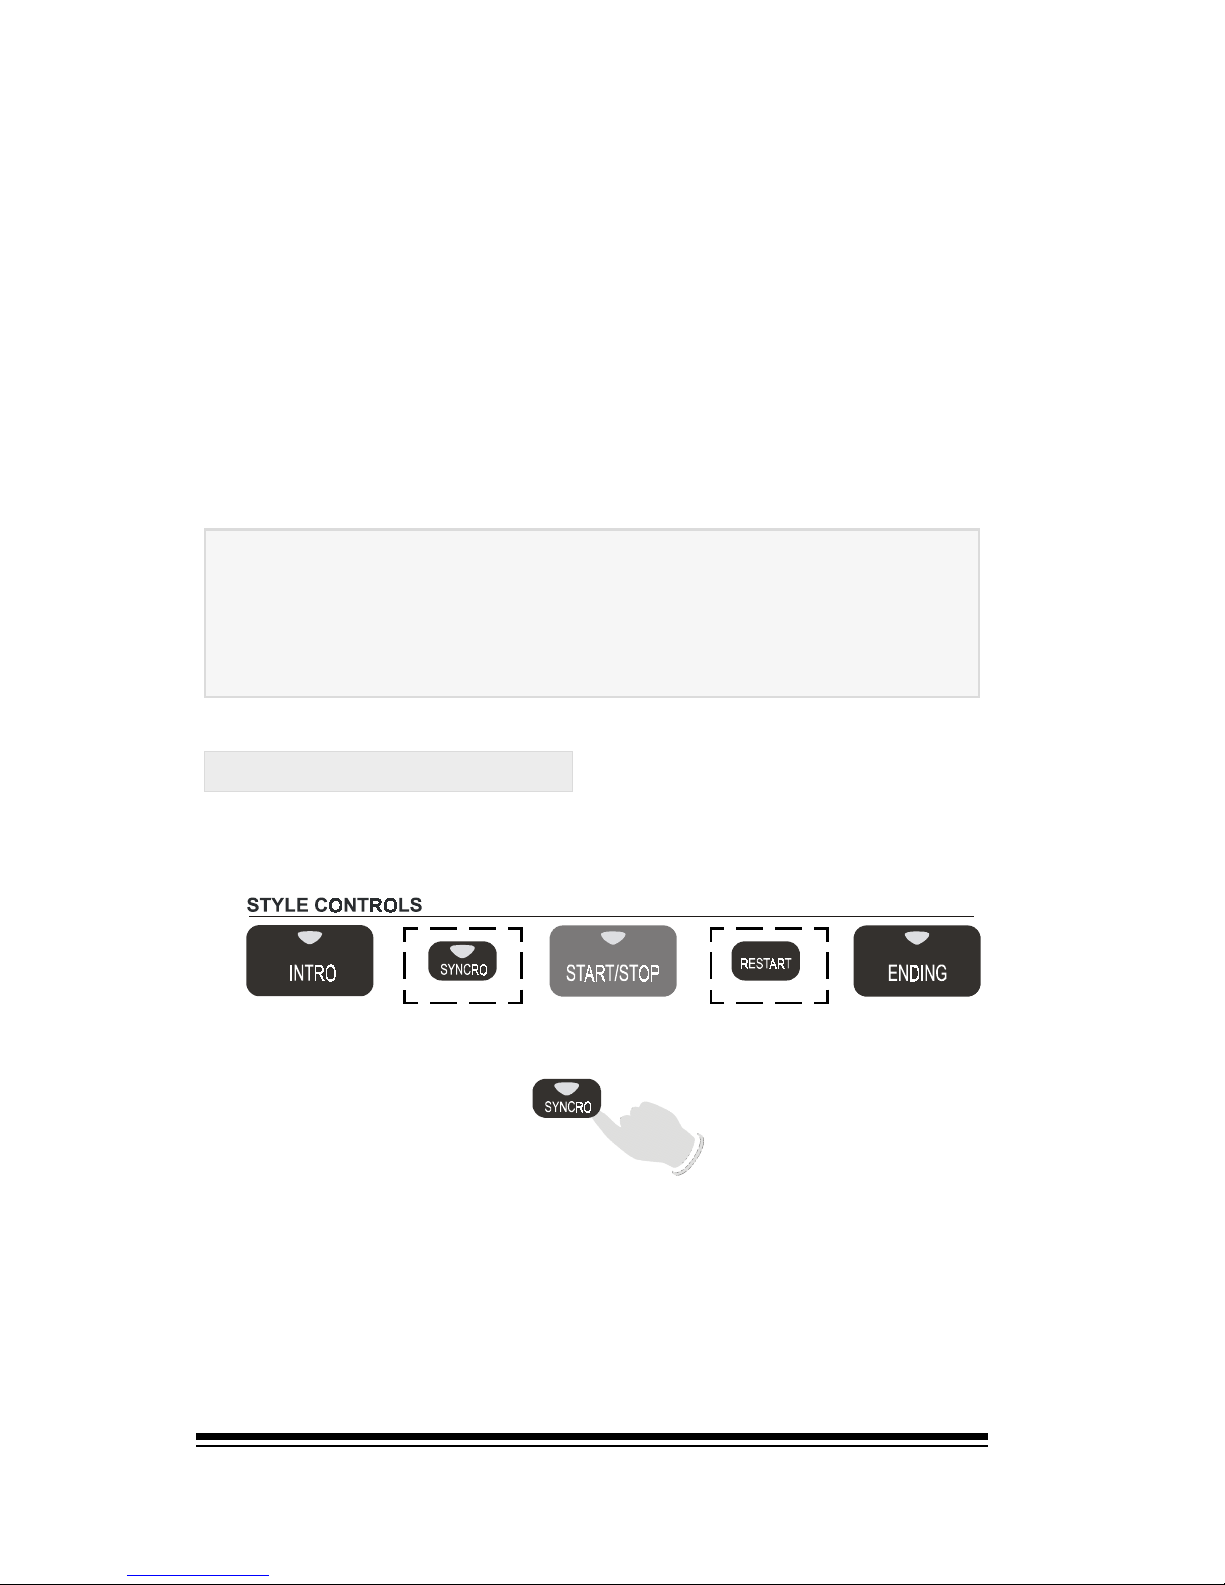
On the left side of the split, play a chord, (which would
normally be the first chord of the song youre going to play).
Now press START/STOP. You should now hear Intro 4 of the
current style. When this intro finishes, it will end on the
chord that you originally played, ready to begin your song.
Intro 4 is always the longest and most complex intro for each
style. If you want something a little simpler, try Intro 3 instead.
Stop the style and repeat the same procedure as before, this
time pressing the VARIATION 3 button before you press Intro.
Each style includes a choice of 4 intros and 4 endings. These
can be selected by combining the INTRO and ENDING buttons with the VARIATION 1, 2, 3 and 4 buttons. Lets start
the style with a professional intro. Stop the style if its currently playing by pressing START/STOP.
Now press the VARIATION 4 button and then the INTRO button.
Page 33
genesys ensemble/genesys grand ensemble
Page 24
As you can hear, Intro 3 is shorter and less complex. Using
the same system you can also listen to Intro 1 and 2 for
this style. Intro 1 is always a simple one, two, three, four
countdown, (ideal for practice or lessons), while Intro 2 is
a simple 1 measure intro which features only the drums.
While the style is playing, you can try the different endings
that are available. To use the endings, simply press one of
the VARIATION buttons and then quickly press ENDING.
The 4 different endings have been designed so that you
can choose the most appropriate one for the song you are
playing. The following rules apply:
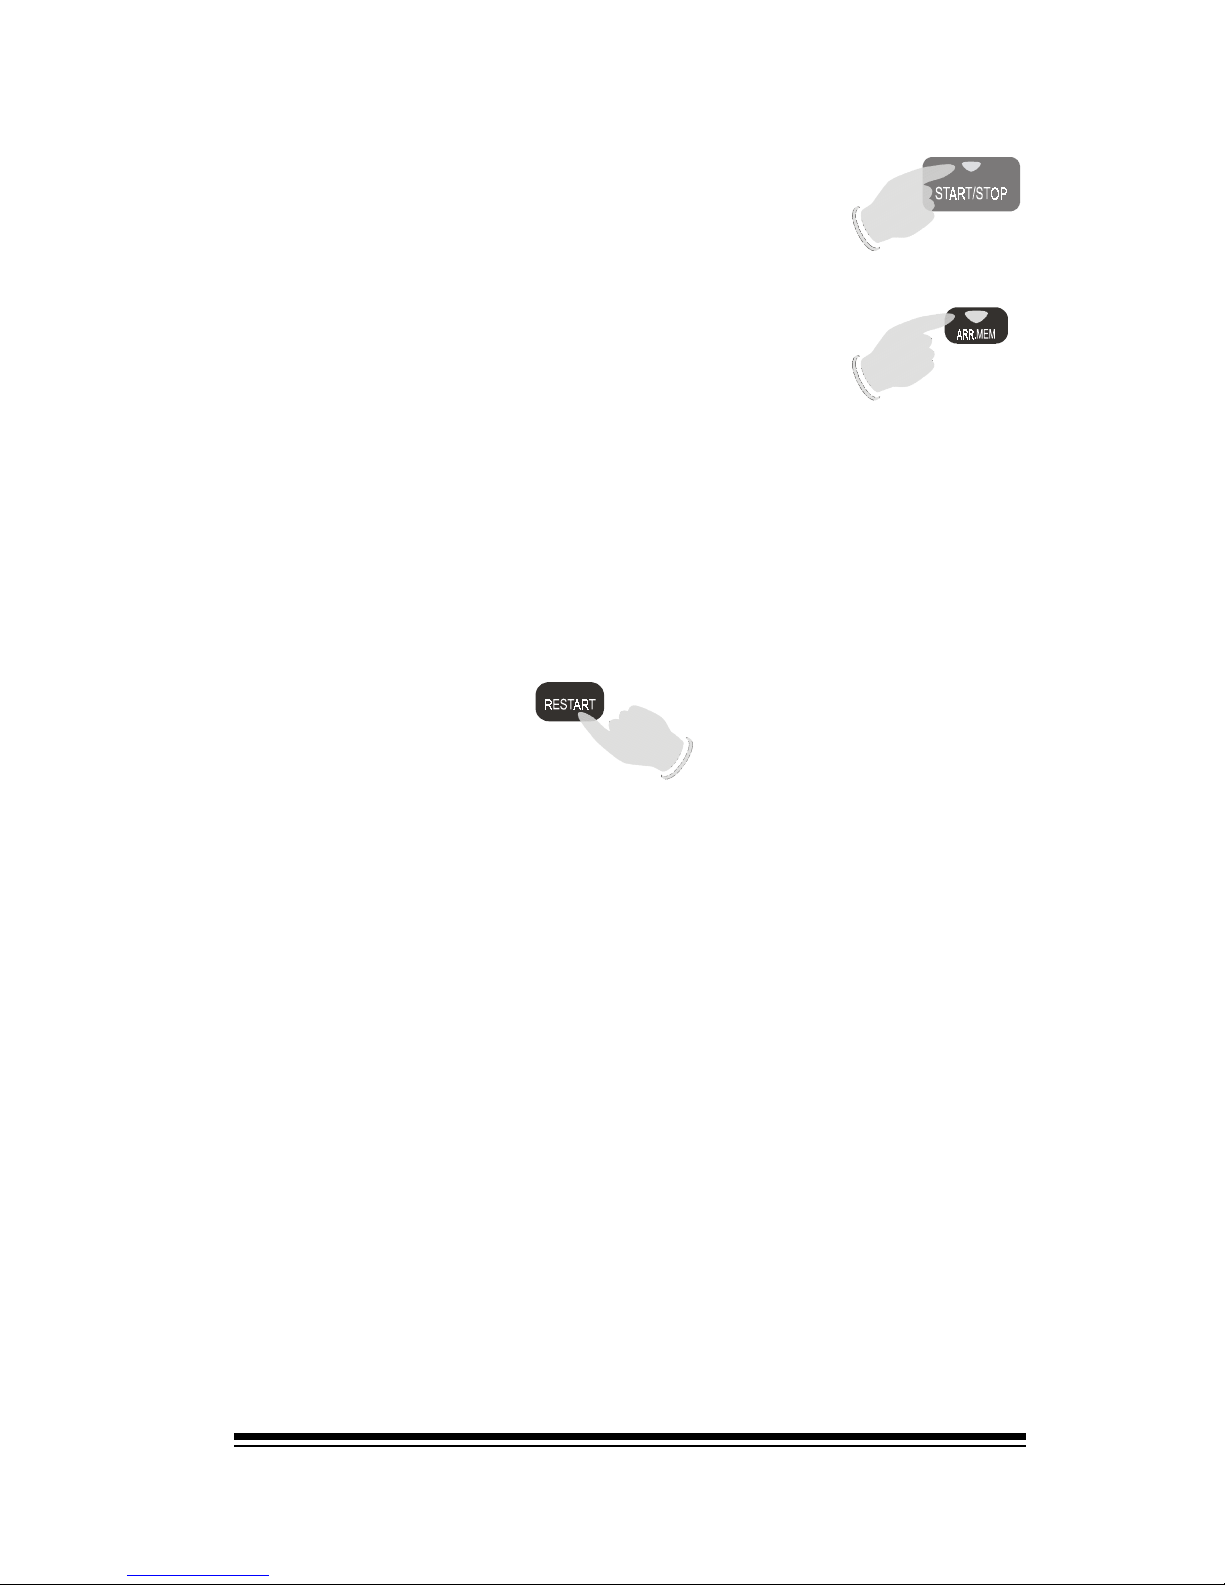
Synchro and Restart
Either side of the START/STOP button you will find the buttons for SYNCRO and RESTART.
ENDING 1: Finishes immediately on the first beat.
ENDING 2: Finishes within one measure.
ENDING 3: Short musical ending, (usually around 2-4 measures long)
ENDING 4: Long musical ending. (can be up to 16 measures long)
These controls are both related to the START/STOP function.
The SYNCRO button is essentially provided because you only
have two hands. Sometimes you want to play your first chord
at the same time as you begin playing the melody and start
the style. This would normally require three hands so the
SYNCRO button can be used to automatically start the style
when you play your first chord on the left side of the split.Once
the SYNCRO button is switched on it will remain lit and the
style will start when you play on the left side of the split.
Page 34
Using the Styles and Style Controls
Page 25
Many vocalists have a tendency to drift out of time with the
rhythm section. In a live band this can easily be rectified by
the drummer signaling the other members of the rhythm
section to re-start. This simply means to start counting a
new measure from one using the vocalist as a guide which
will place everybody back in time again. Pressing RESTART
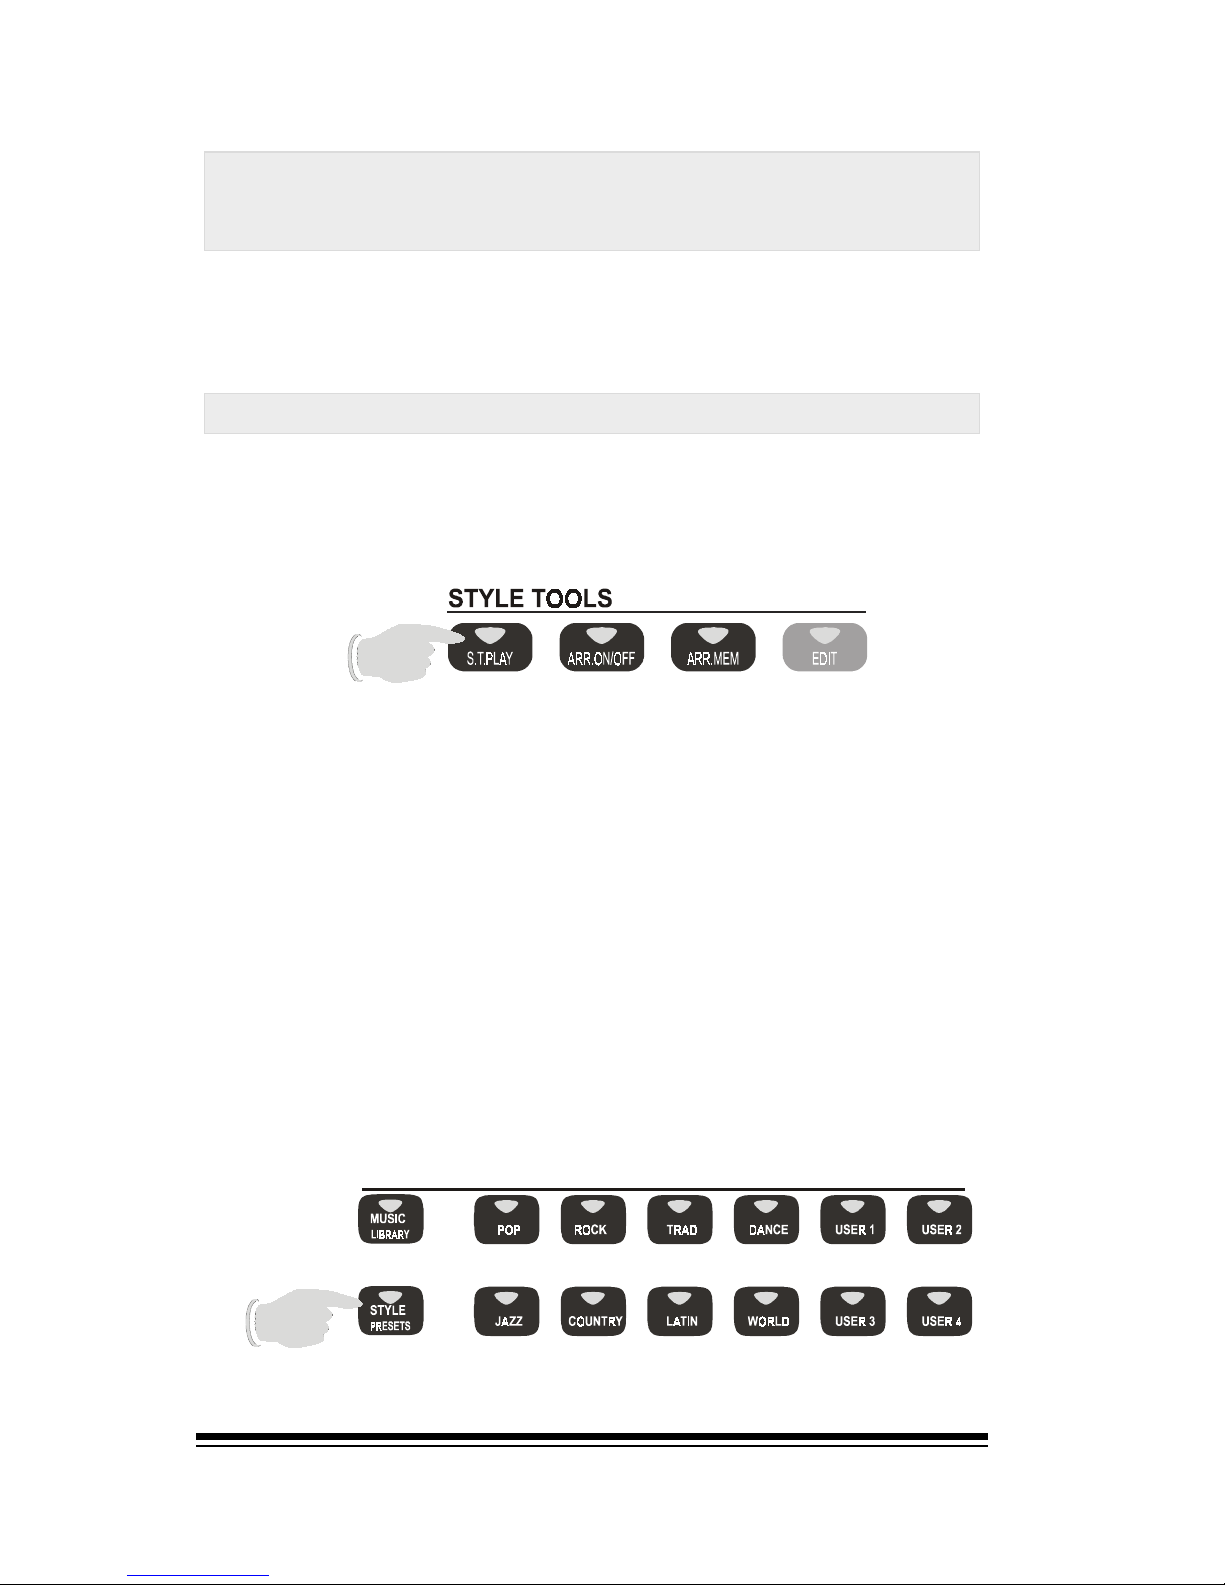
on the Genesys Ensemble accomplishes the same thing.
The current style pattern will jump back to beat 1 regardless of where it was when you pressed RESTART. Technically speaking, RESTART is a fairly non-musical function which
would normally only be used to rectify the type of problems
described here. However, it does have another interesting
use. RESTART can be used in songs where one measure has
a different time signature or meter to the rest of the song.
For example, a song written in 4/4 time might contain a
single measure of ¾ or 7/4. If you press RESTART after the
3rd beat of a 4/4 pattern it will give the effect of a single
measure of ¾ having been inserted into the song.
To stop the style, press START/STOP in the
normal way. To start the style again, just play
something on the left side of the split as before, (because SYNCRO is still on).
You can also use SYNCRO to automatically stop
the style when you release the chord played
on the left side of the split. To do this simply
turn off the ARR. MEM, (arrangement
memory), button in the STYLE TOOLS section
while SYNCRO is turned on. Now you can control both the starting and stopping of the style
with your left hand.
The RESTART button is a useful utility which is especially
effective when accompanying other instrumentalists or vocalists.
Page 35
genesys ensemble/genesys grand ensemble
Page 26
The STYLE TOOLS section contains a number of features
which allow you to control the behavior of the styles to suit
your playing style.
Single Touch Play, Style Presets &
Music Library
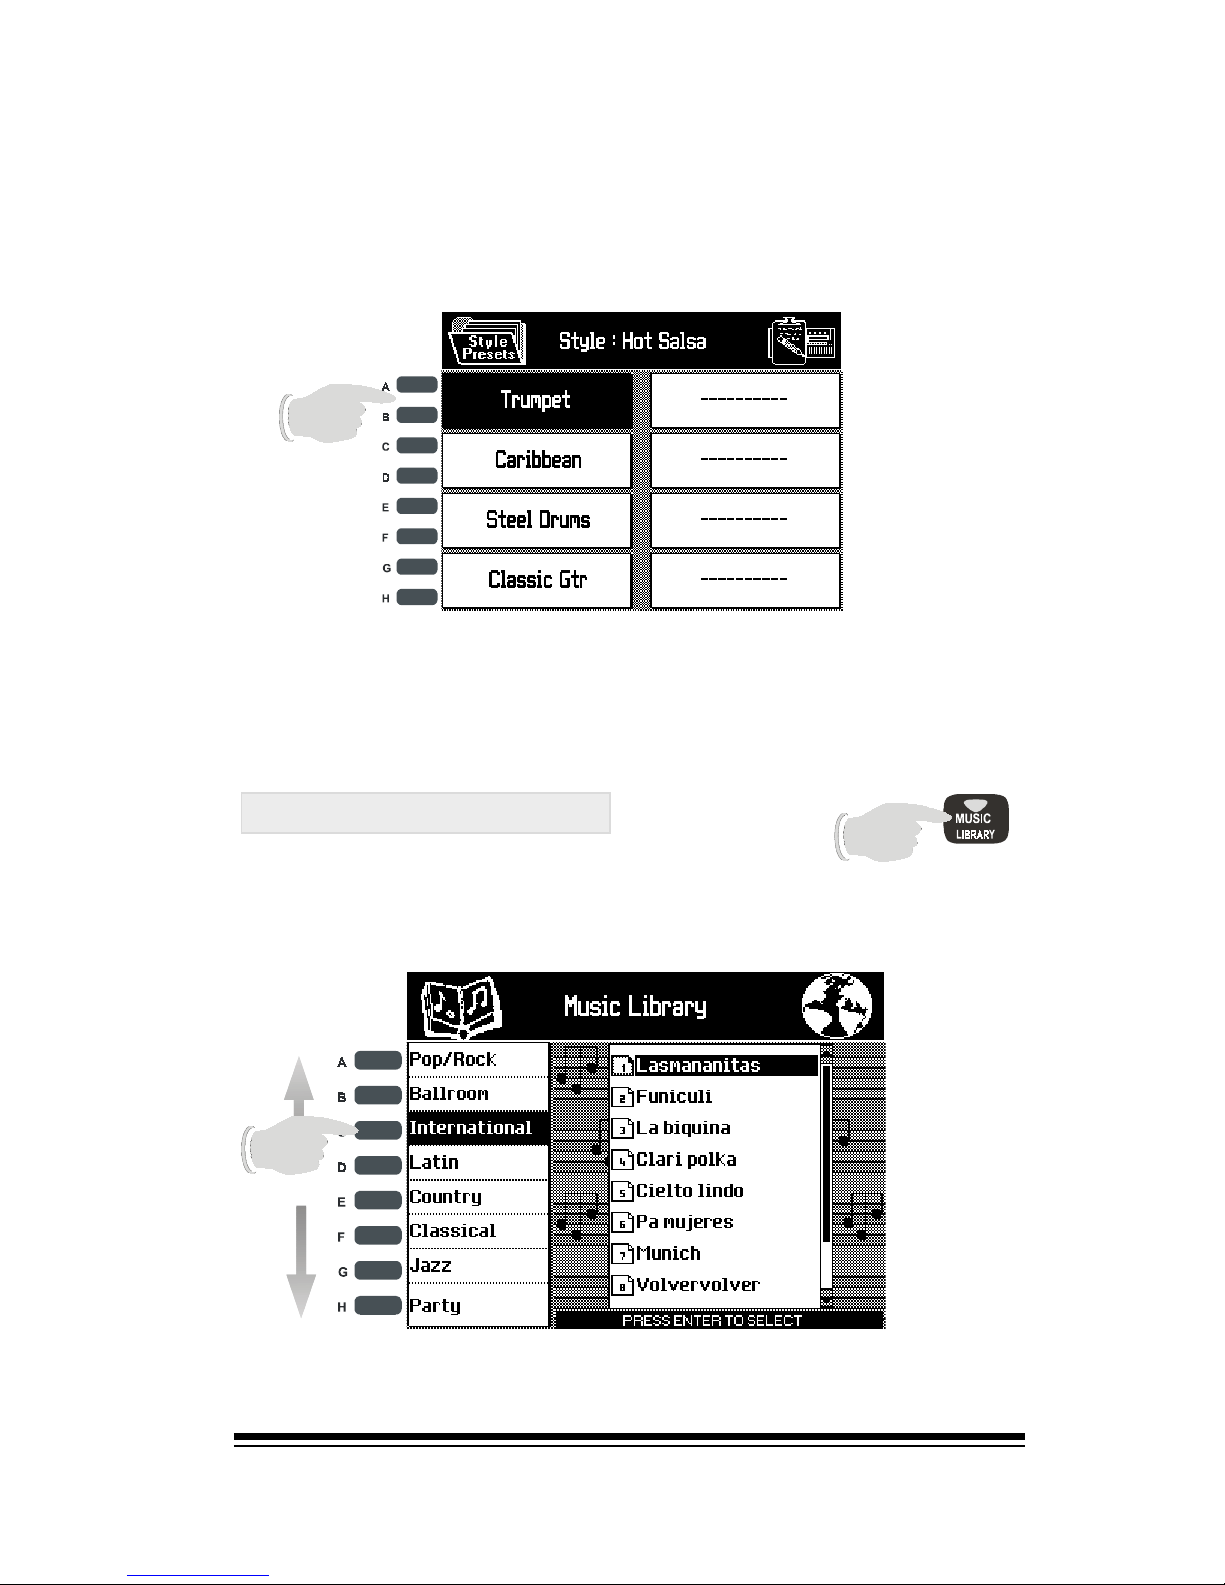
Every style actually contains not one, but four recommended
sound settings which are stored under the STYLE PRESETS
button.
If you leave S.T. Play turned on, each time you select a new
style, the recommended sound setting that goes with that
style will be automatically selected for you. It is important
to remember this because, sometimes, you might want to
change from one style to another but keep the sound you
are using in the right hand. In this case it is important to
check that S.T. Play is turned OFF before you select the
new style.
Single Touch Play, (S.T. Play) and Style Presets
Each style comes complete with a recommended right-hand
sound setting which is ideal for use with that particular
style. To hear this sound setting, simply turn on the S.T.
Play button.
256 STYLES + 64 USER STY LES/4 VARATIONS/4 IN TRO S/4 END ING/4 FILLS
S
TYLE FAMILIES
|
SONG PERF.
Page 36
Single Touch Play, Style Presets & Music Library
Page 27
Pressing the STYLE PRESETS button will display a list of
sound settings which have been made specifically for use
with the currently selected style. You can select any of
these by simply pressing one of the function buttons which
appears beside its name.
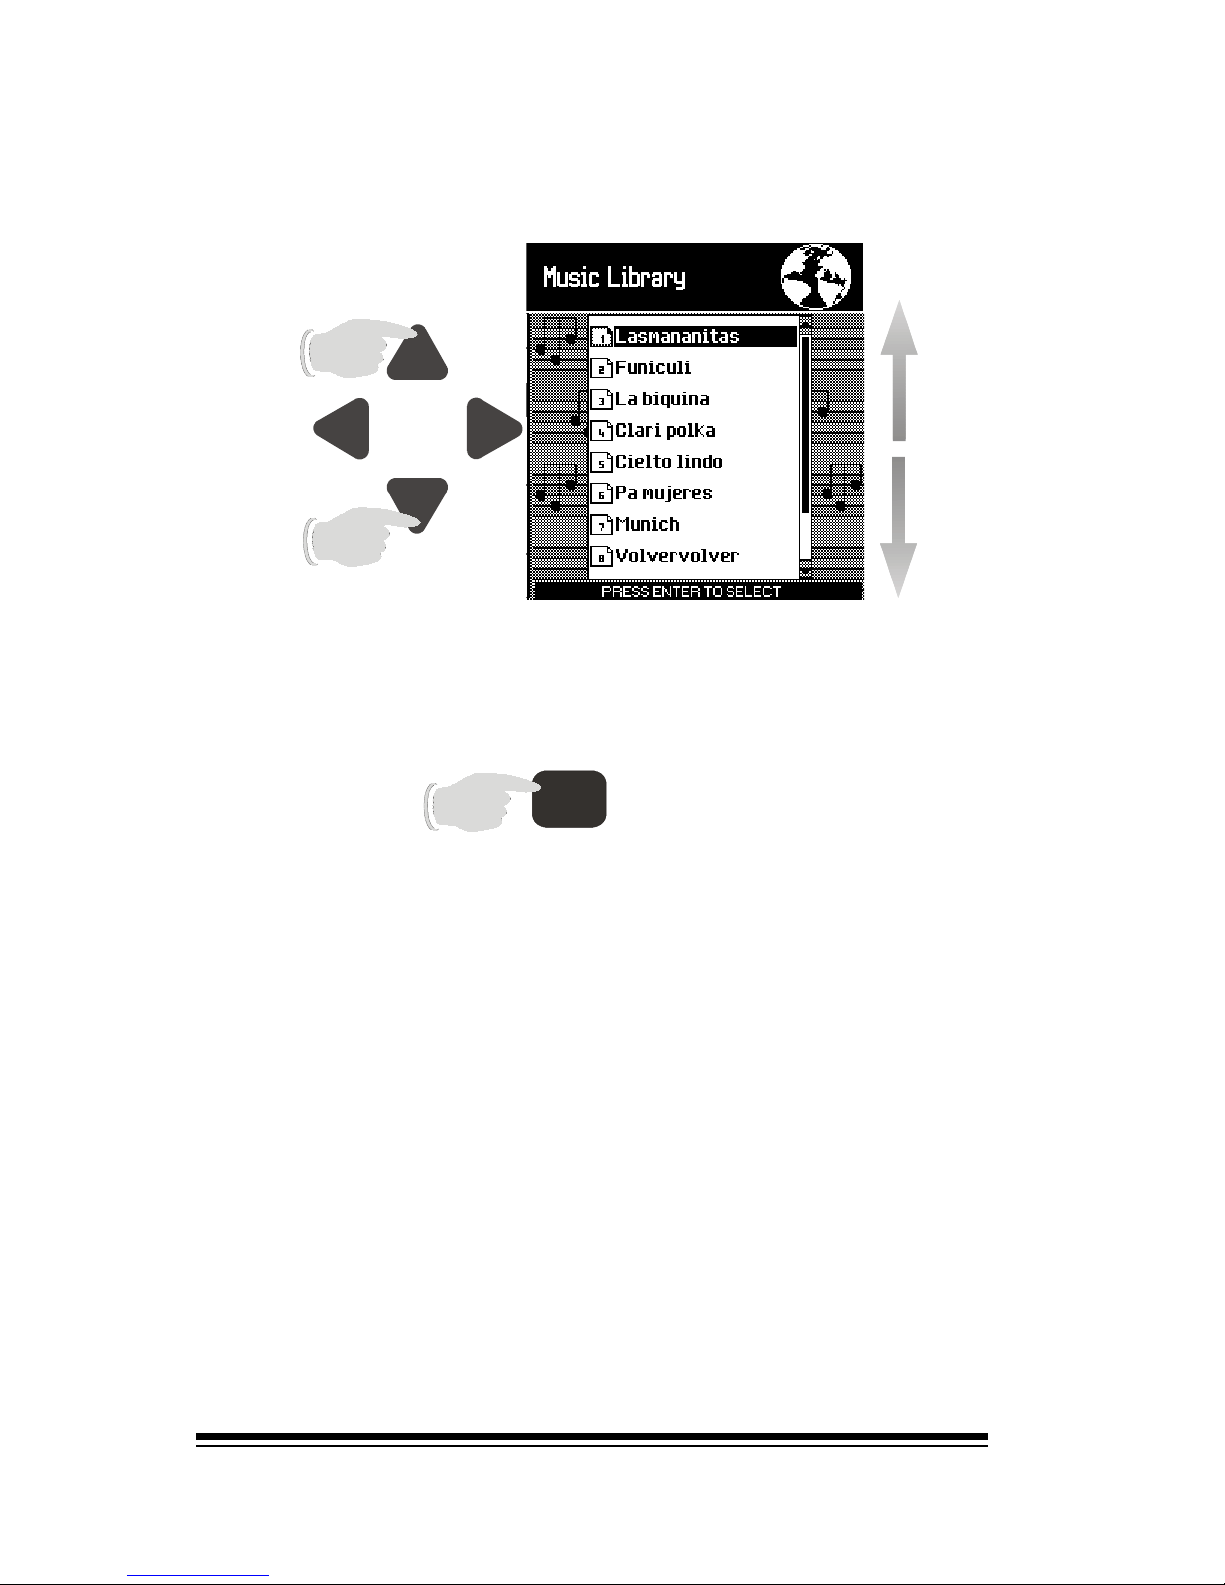
Music Library
Probably the easiest way to set up the Genesys Ensemble
automatically for playing a particular song is to use the
MUSIC LIBRARY.
On the right side you can see that there are also four empty
spaces. These have been left for you to store up to four of
your own presets for each style. The procedure for storing
these is covered in the CREATING & EDITING section.
Here you will find eight musical categories listed on the left
side of the screen. Selecting one of these categories will
produce a list of song titles on the right.
Page 37
genesys ensemble/genesys grand ensemble
Page 28
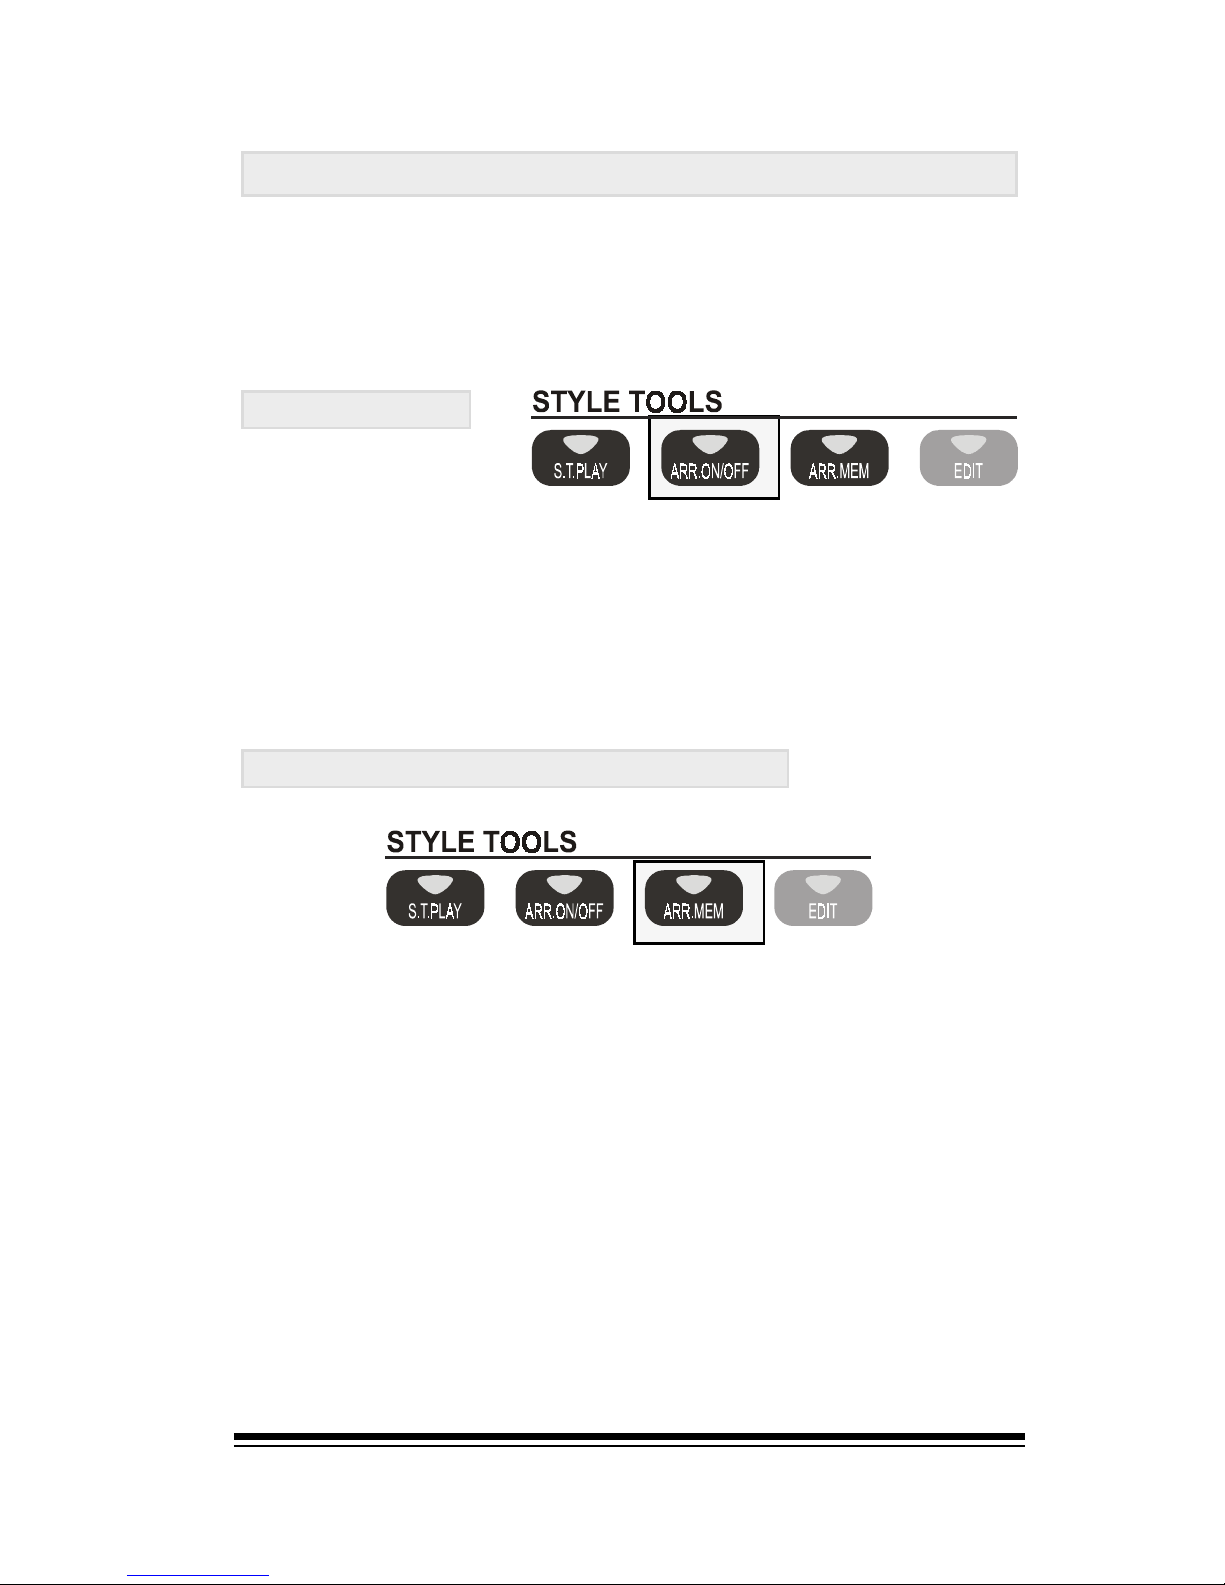
You can move up and down the list by using the up and
down arrows to the left of the dial.
ENTER
When the name of a song you wish to play is highlighted, simply press ENTER on the panel.
The MUSIC LIBRARY will set up the Genesys Ensemble with the
perfect settings for playing the selected song.
Page 38
Style Tools
Page 29
Style Tools
The STYLE TOOLS section contains a number of features
which allow you to control the behavior of the styles to suit
the way that you play. This section describes the function
of each control in this section.
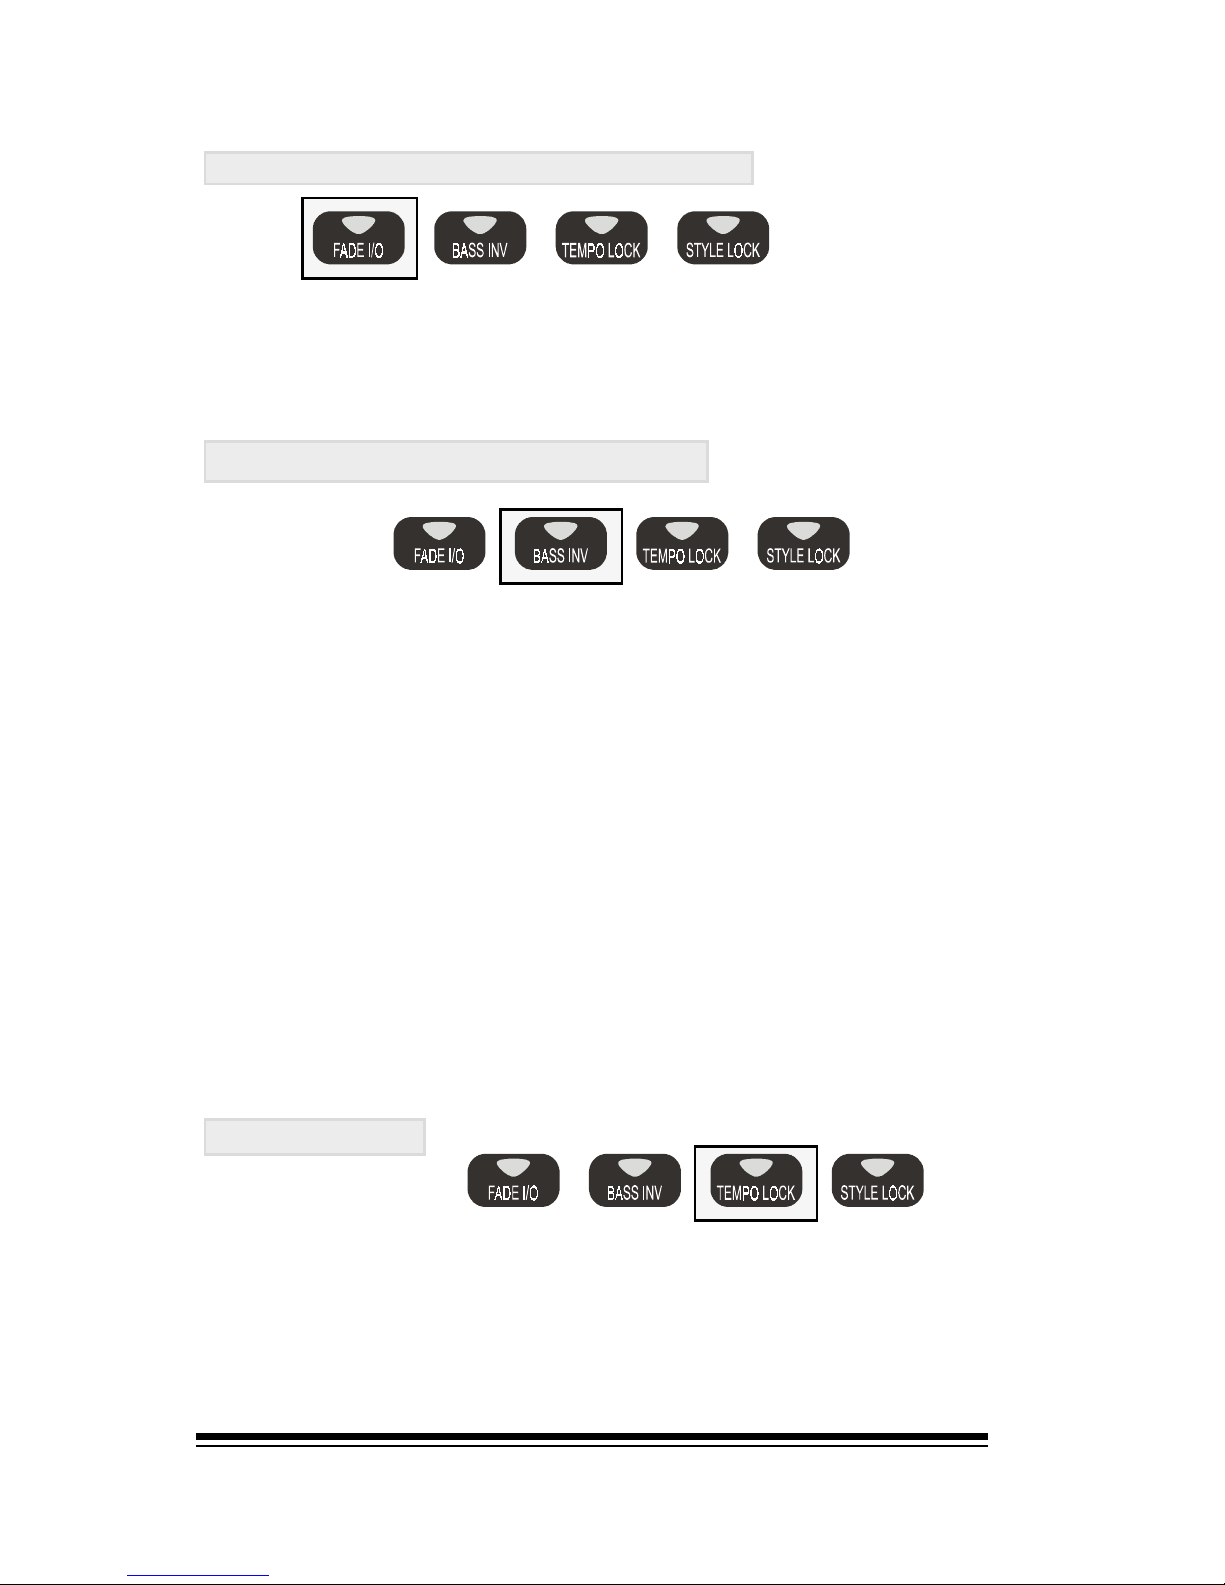
ARR. On/Off
This button simply turns the arrangement part of the style
on or off. When this button is turned off you will hear only
the drums from the style section. This button is remotely
controlled by the buttons of the KEYBOARD MODE section
so, normally, you wont need to worry about it.
ARR. MEM. (Arranger Memory)
The Arranger Memory function is what allows the style arrangement to continue playing after you have played a
chord. Normally this function is switched on and your lastplayed-chord will continue to be played by the style arranger until you play a different chord. Turning this button
off means that you will only hear the arranger while you
are actually playing a chord. As soon as the chord, is released the arrangement will stop, (leaving only the drums).
This button also works in conjunction with the SYNCRO
button as described in the STYLES section of this manual.
Page 39
genesys ensemble/genesys grand ensemble
Page 30
FADE I/O (Fade In/ Fade Out)
Turning this button on before you start a style, (either using START/STOP or INTRO), will activate a fade in. If you
press this button while the style is running it will activate a
fade out.
BASS INV. (Bass Inversion)
This function changes the behavior of the bass part within
the style accompaniment. Normally the chord you play with
your left hand is analyzed by the style system and the
correct bass tonality for the chord you played is calculated
regardless of the inversion played.
When Bass Inversion is turned on, the system breaks from
this normal operation and the bass tonality is taken from
the lowest note of the chord you are playing, regardless of
whether it is a correct match for the chord you are playing
or not.
The Bass Inversion function would normally be activated
temporarily while needed and then turned off again for
normal playing.
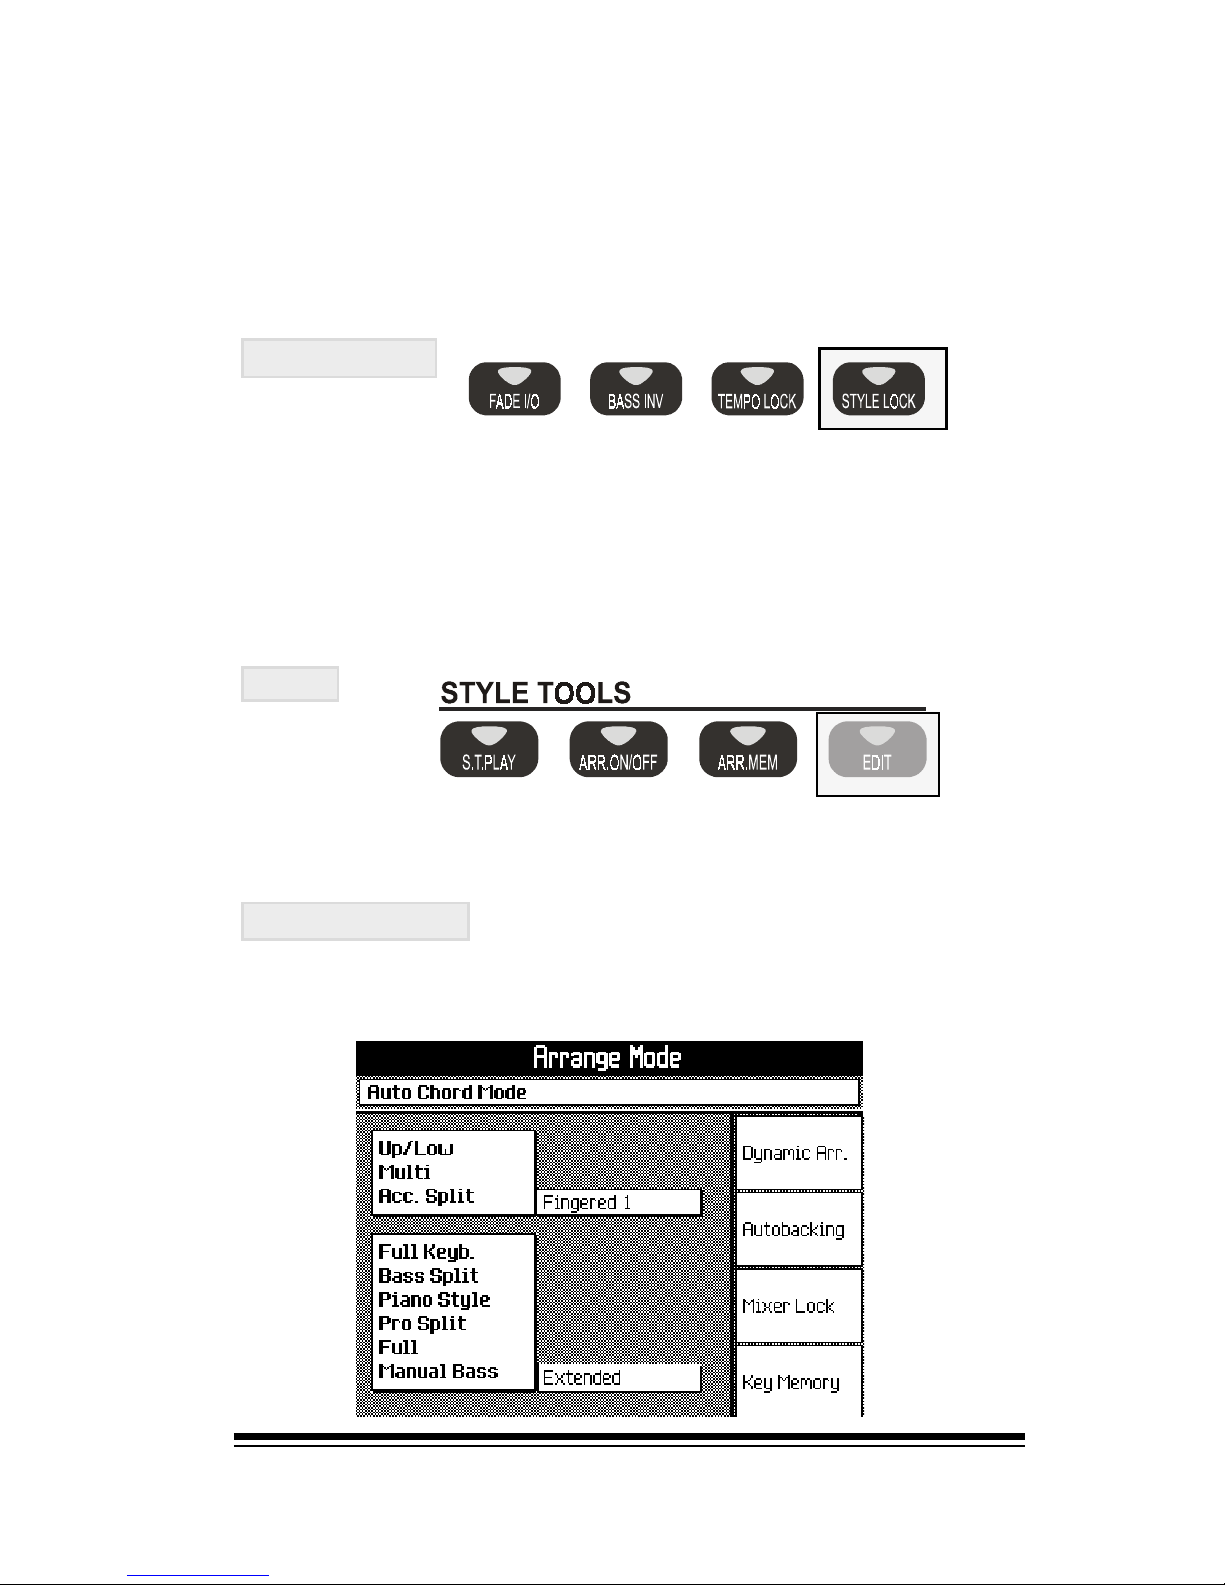
Tempo Lock
Each style has its own pre-programmed tempo which is
recalled whenever it is selected. This ensures that styles
will always play at an appropriate speed regardless of that
which was used for the previous style.
Page 40
Style Tools
Page 31
Sometimes, however, you might want to change from one
style to another and keep the same tempo as before. In
this case, turning TEMPO LOCK on will freeze the current
tempo allowing it to be changed only by rotating the dial
when you are in the home screen.
Style Lock
This function is only designed to be used in conjunction
with the MEMORIES. It locks the current style so that the
next memory you select will not change the style settings.
Please see the section on MEMORIES for more information.
EDIT
The EDIT button in the STYLE TOOLS section actually contains 6 separate functions.
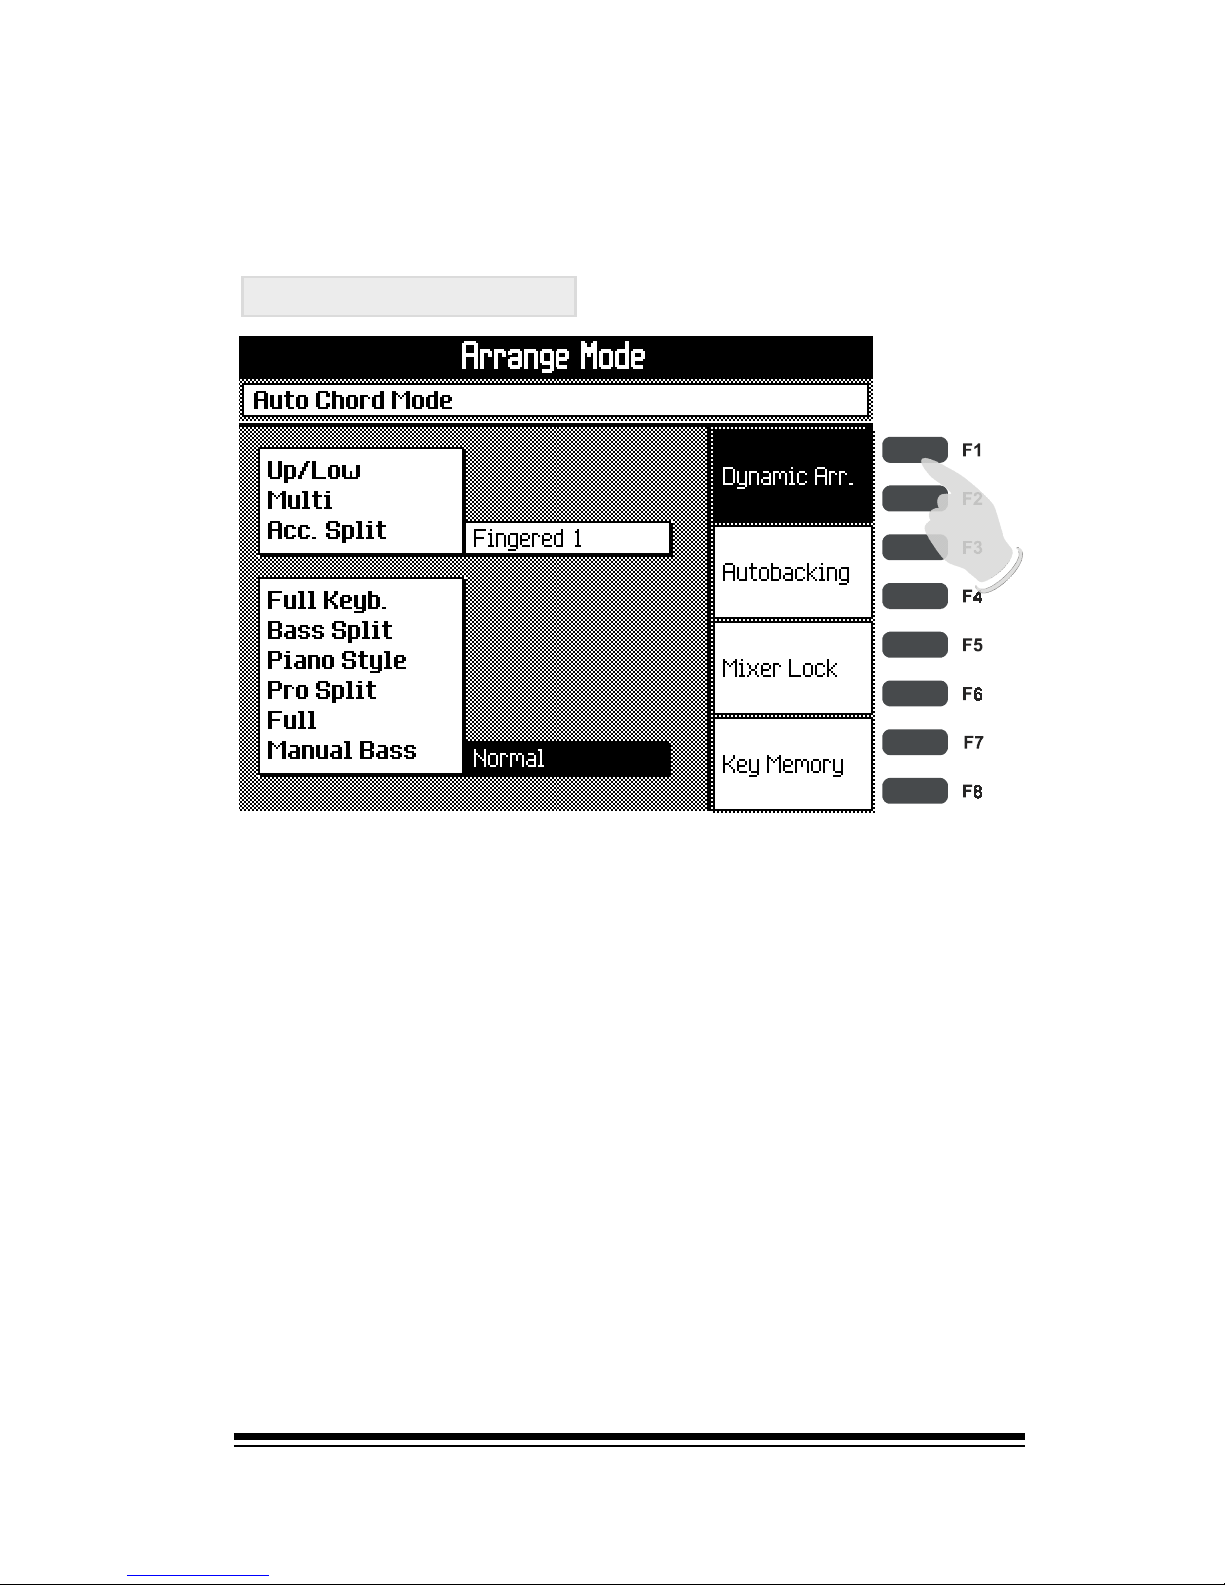
Main Screen
Here you can change the chord recognition method for each of
the available keyboard modes according to your playing style.
Page 41

genesys ensemble/genesys grand ensemble
Page 32
The first selection, at the top, allows you to set the type of
chord recognition mode that you want the instrument to
use when you are playing in Accomp. Split mode. There are
three choices.
One Finger: Recognizes one-finger chords allowing a
complete chord to be played by holding just a single note.
Minor and seventh chords can be played by adding the correct interval above or below the note played.
Fingered 1: Recognizes chords of three notes or more. If
you play less than three notes the accompaniment pattern
will not change at all.
Fingered 2: Recognizes chords of three notes or more. If
you play less than three notes the accompaniment will
change to reflect the actual notes you played, (even though
they do not constitute a complete chord).
The second selection, at the bottom, allows you to set the
type of chord recognition that you want the instrument to
use when you are playing in Full, Bass Split, Piano Style,
Manual Bass and Pro Split mode.
All of these modes are designed to recognize fairly complex
chord types but the two choices available here dictate just
how advanced the recognition should be.
NOTE:
In either of the above modes, any note played more than seven
half-steps, (a fifth) above the highest note of a recognized
chord will not be interpreted as part of that chord and will be
treated as a melody note. Similarly, any note played more than
a fifth below the lowest note of a recognized chord will be treated
as a bass note. In this case the bass part of the accompaniment
pattern will play in this key instead of the key dictated by the
recognized chord.
Normal: Will recognize chords of up to 4 notes.
Extended: Will recognize chords of up to 6 notes.
Page 42
Style Tools
Page 33
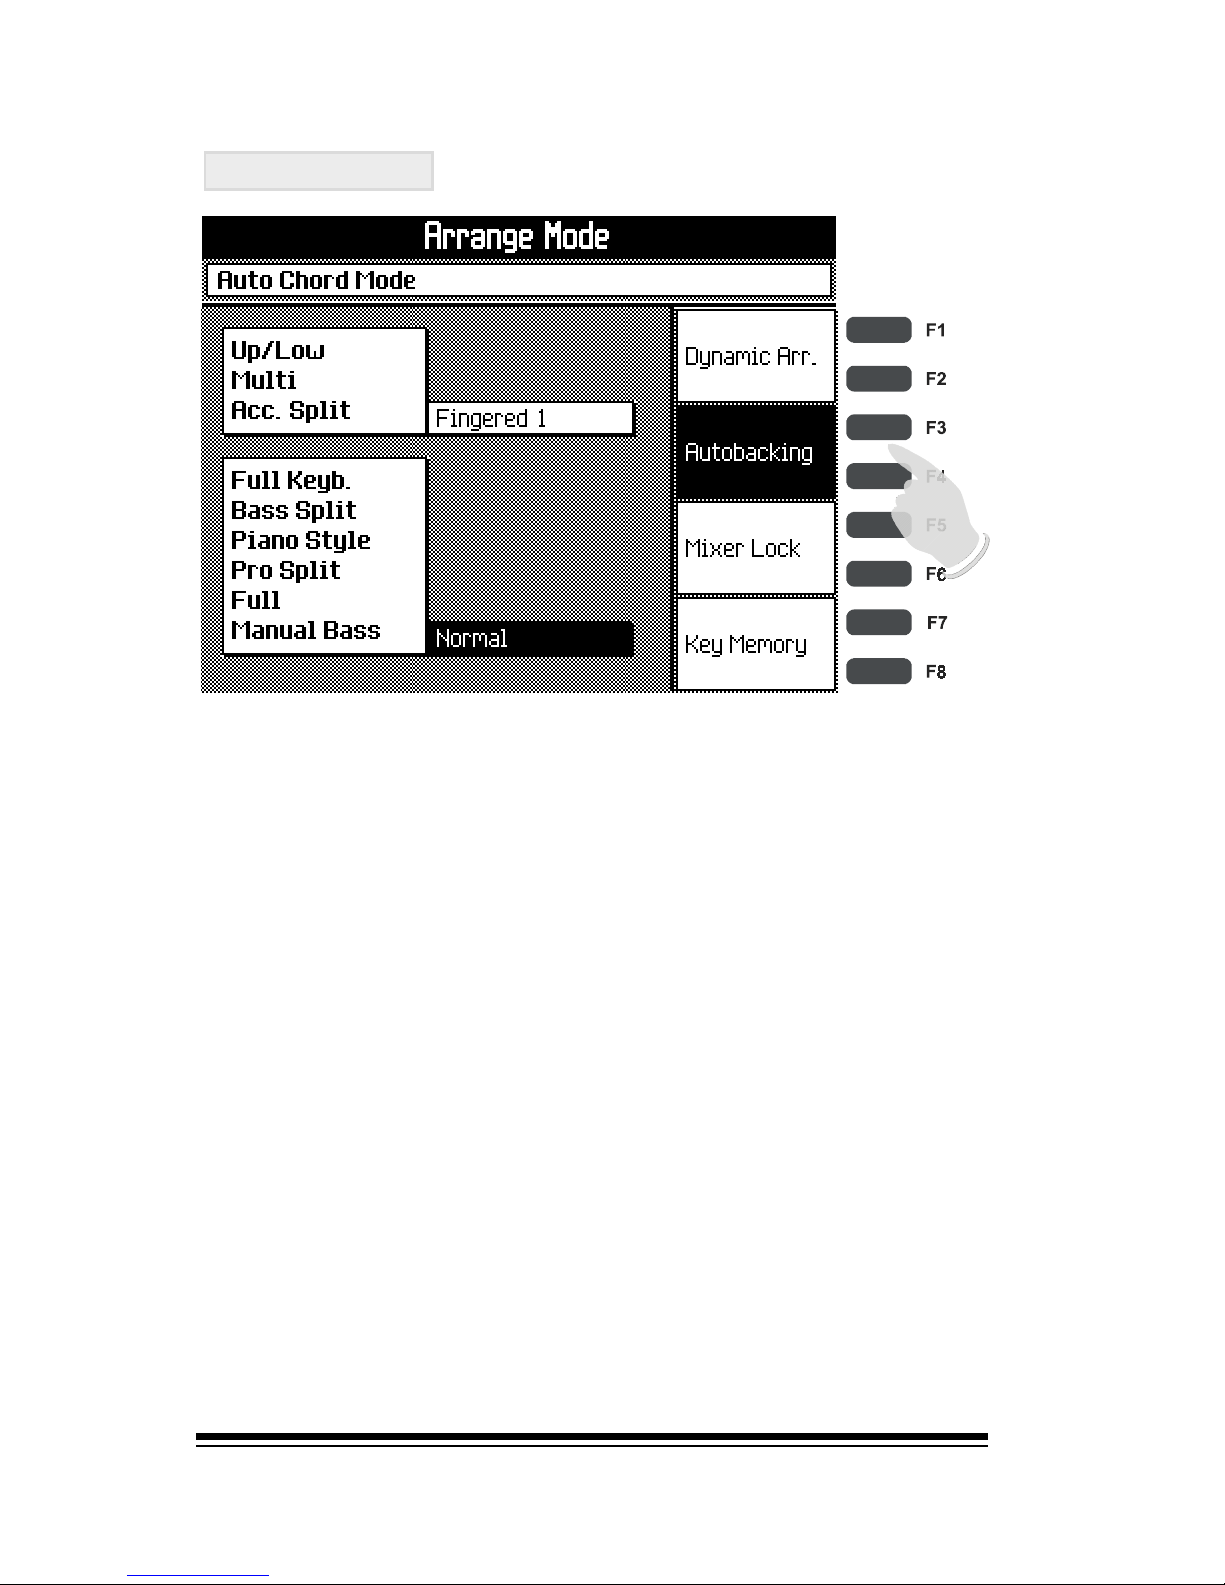
The other four functions are listed along the right edge of
the screen and should be used just like any of the other
buttons in the STYLE TOOLS section.
Dynamic Arranger
Normally the style accompaniment is not affected by keyboard velocity. That is, the volume level of the style tracks
will remain constant regardless of how hard or soft you
play the accompaniment chords.
If you prefer, you can turn on the DYNAMIC ARRANGER
function which allows the volume of the style to be varied
according to how hard you play the accompaniment chords.
To turn this function on, simply press one of the buttons
next to the title DYNAMIC ARR. in the screen.
Page 43
genesys ensemble/genesys grand ensemble
Page 34
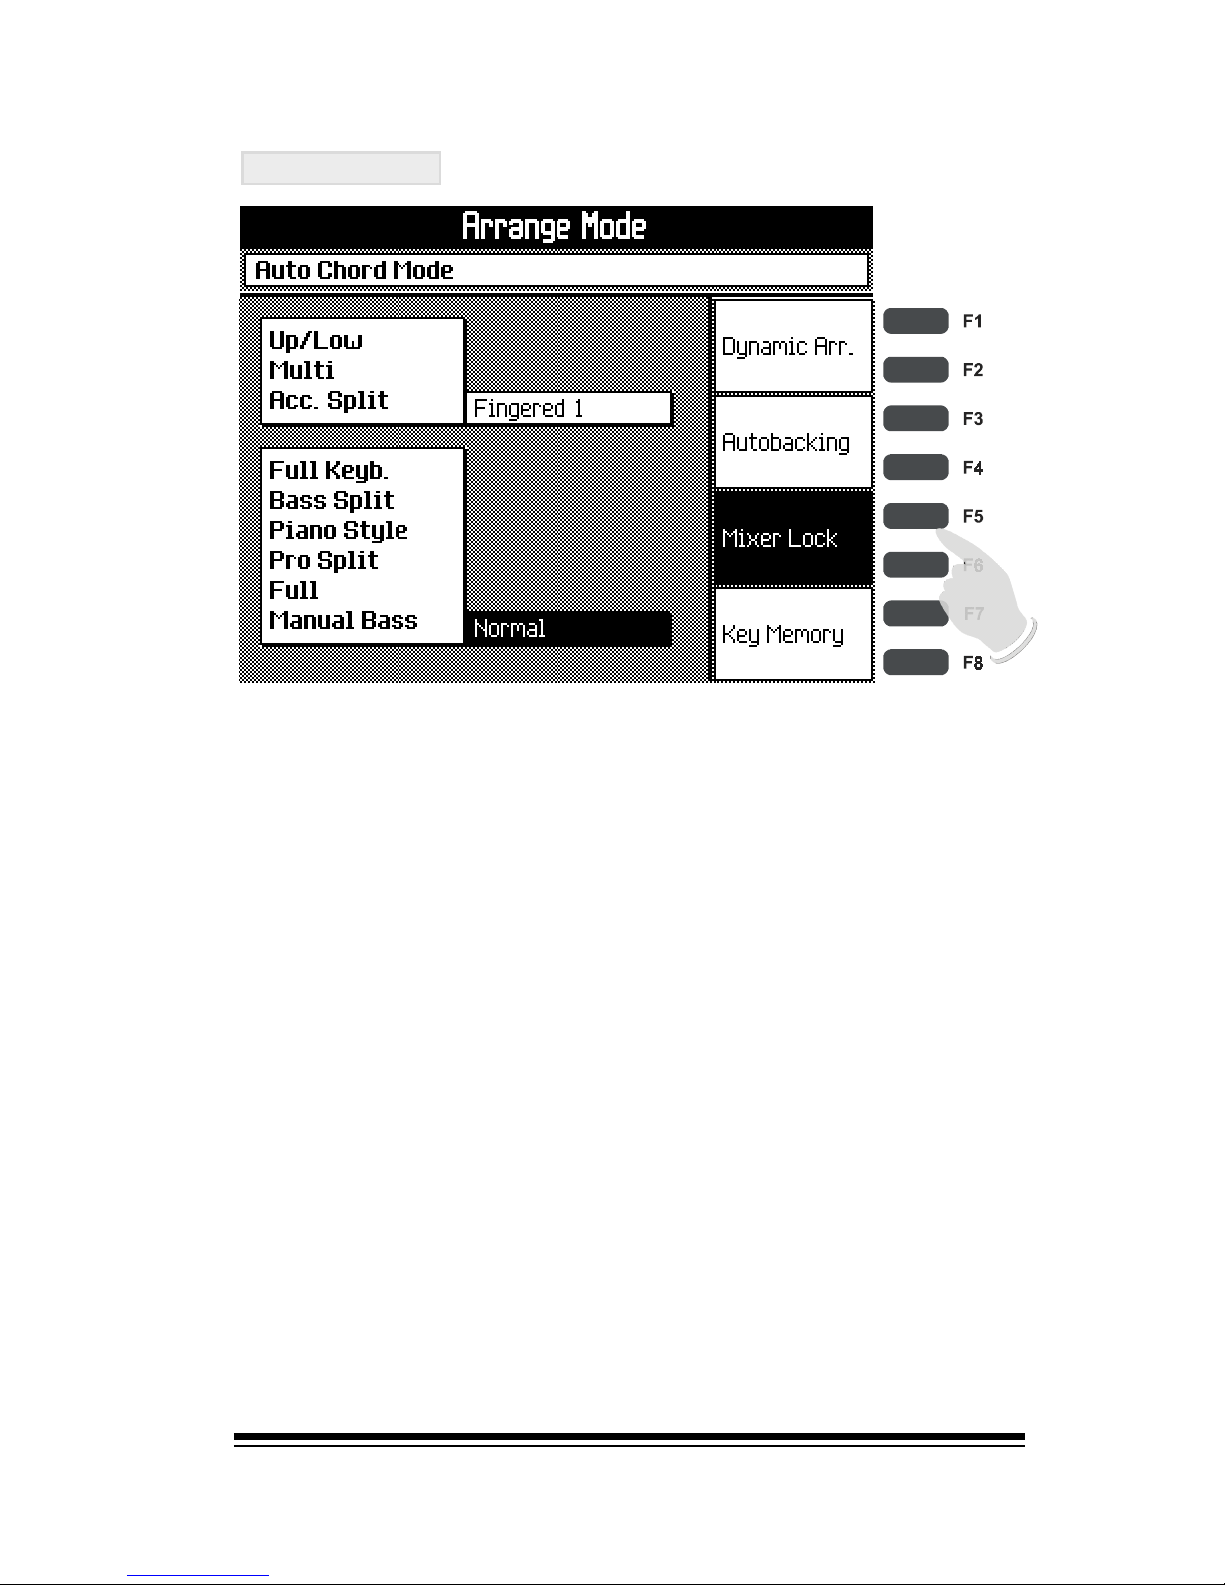
Autobacking
Autobacking is usually turned on for normal use. The
Autobacking function simply ensures that you will hear a
bass note and accompaniment chord sound immediately
whenever you play a new chord. If you turn Autobacking
off then the system will play the accompaniment part exactly as it was programmed. This means that, if you happen to change chord in a space where no bass or chord
instrument is currently sounding, you will hear nothing to
reflect the fact that you played a new chord until the style
accompaniment arrives at the next programmed bass or
chord note in the pattern.
While it is recommended to keep Autobacking turned on
for most purposes, you may occasionally find that the style
does not seem to keep good time or seems to jump while
youre changing chords. This will usually be because you
are not changing chords in perfect time and the Autobacking
function is accentuating your every little inaccuracy. In this
case, the problem can be solved by turning Autobacking
off.
Page 44
Style Tools
Page 35
Mixer Lock
Each style contains a factory pre-programmed mix which
sets the appropriate volume level for each instrument in
the style. Whenever you select a new style, this mix is
automatically recalled.
Sometimes you might wish to change the mix manually,
(using the sliders or the MIXER section), and have your
changes remain even when you switch to a different style.
For example, you might want to turn down all of the accompaniment tracks so that your style features only drums
and bass. However, when you switch to a new style, your
mix would normally be replaced by the pre-programmed
mix that has been stored in this style. To avoid this, turn on
the MIXER LOCK function. You are now in control of the
mixing and each new style you select will adopt the mix
that you created manually instead of using its own stored
mix.
Page 45
genesys ensemble/genesys grand ensemble
Page 36
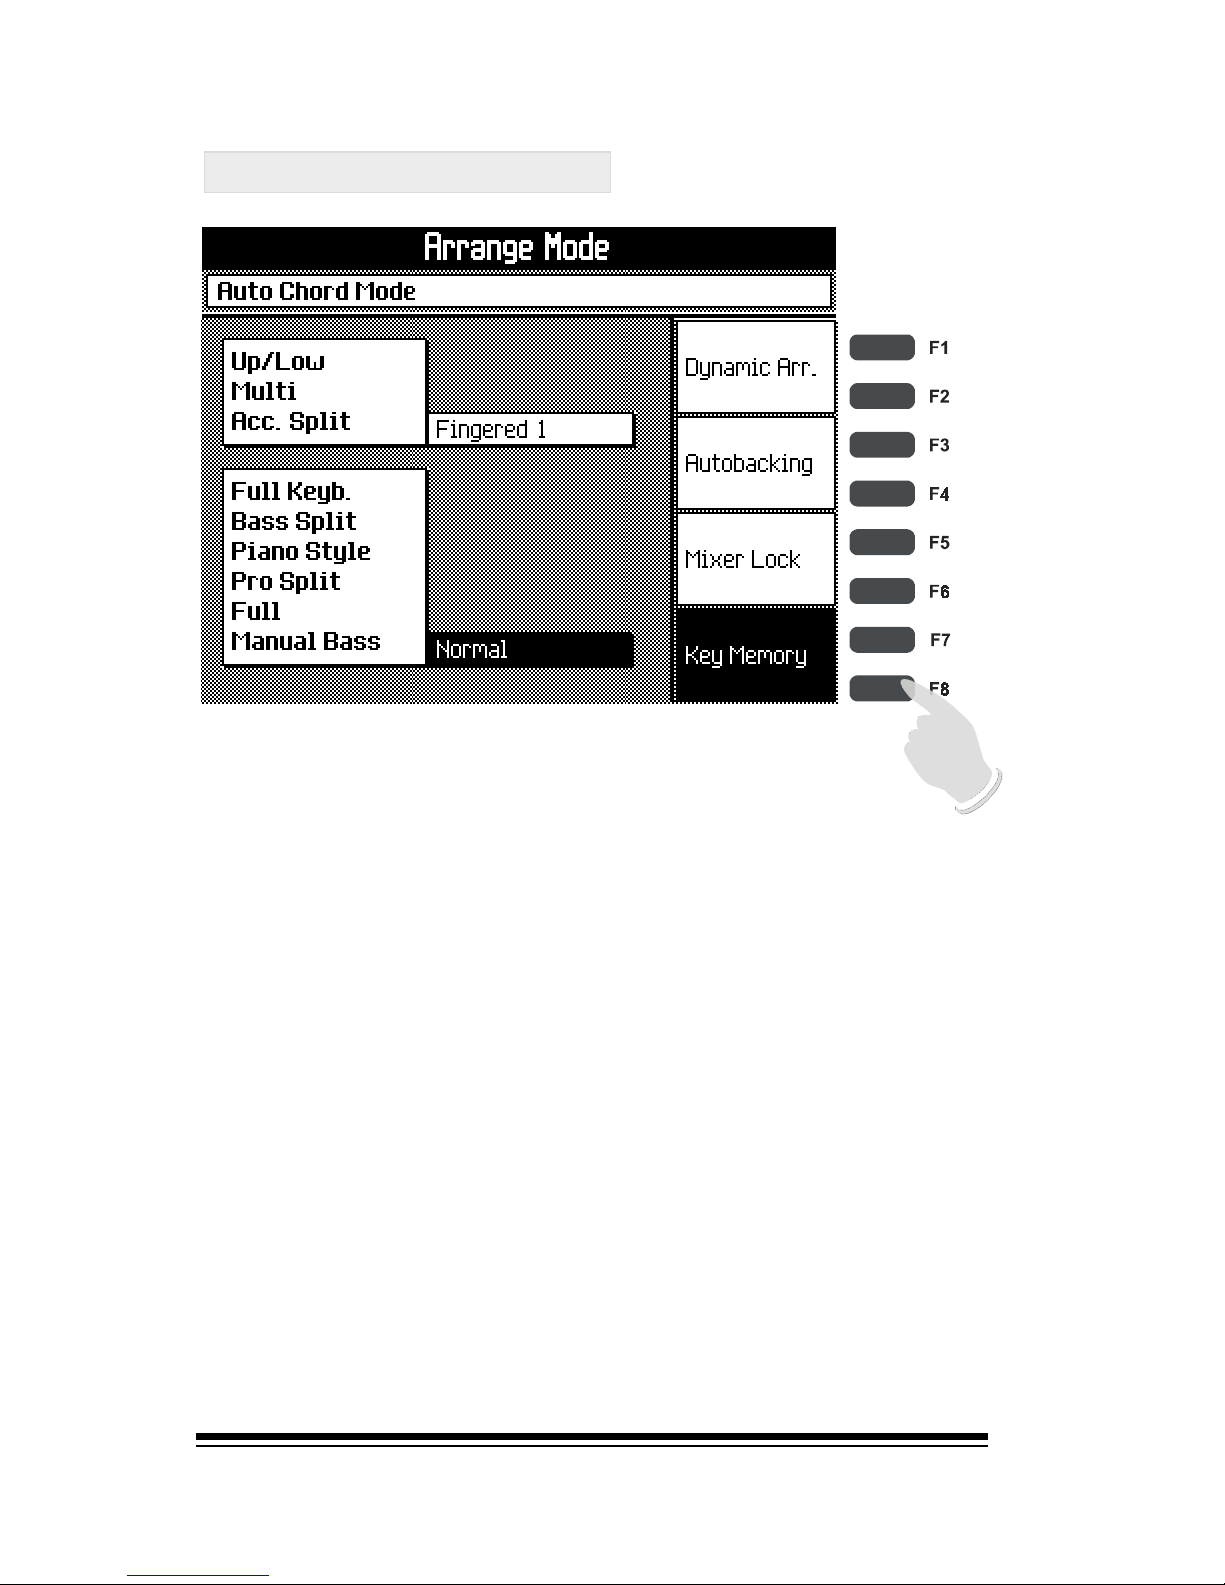
When you use Accomp. Split mode, a lower sound is available on the left side of the split. This sound is heard only
while you are playing the keys in this section. When you
release your hand, the style accompaniment continues to
play but this lower sound stops. Turning Key Memory on
enables this sound continue playing after you release the
keys.
Key Memory
Page 46
Memories
Page 37
Memories
Sooner or later, you will find a sound and style combination
which is perfect for a particular piece and youll want to
memorize it. The MEMORIES section is used for this purpose.
Using the memories is extremely simple. Lets try a simple
example.
1. Choose any style from the Style Families
2. Choose any sound from the Preset Families
3. Press START/STOP so that you can hear the style
playing.
4. Press ESCAPE and use the dial to adjust the tempo
of the style.
5. Make one other simple modification, (for example,
turn on the SUSTAIN or HARMONY button in the
SOUND CONTROLS section)
At this stage we have made a customized setting which
would normally require four of five button-presses and other
adjustments to re-create in the future. Now were going to
store this entire setting into memory number 2. Heres how
to do it:
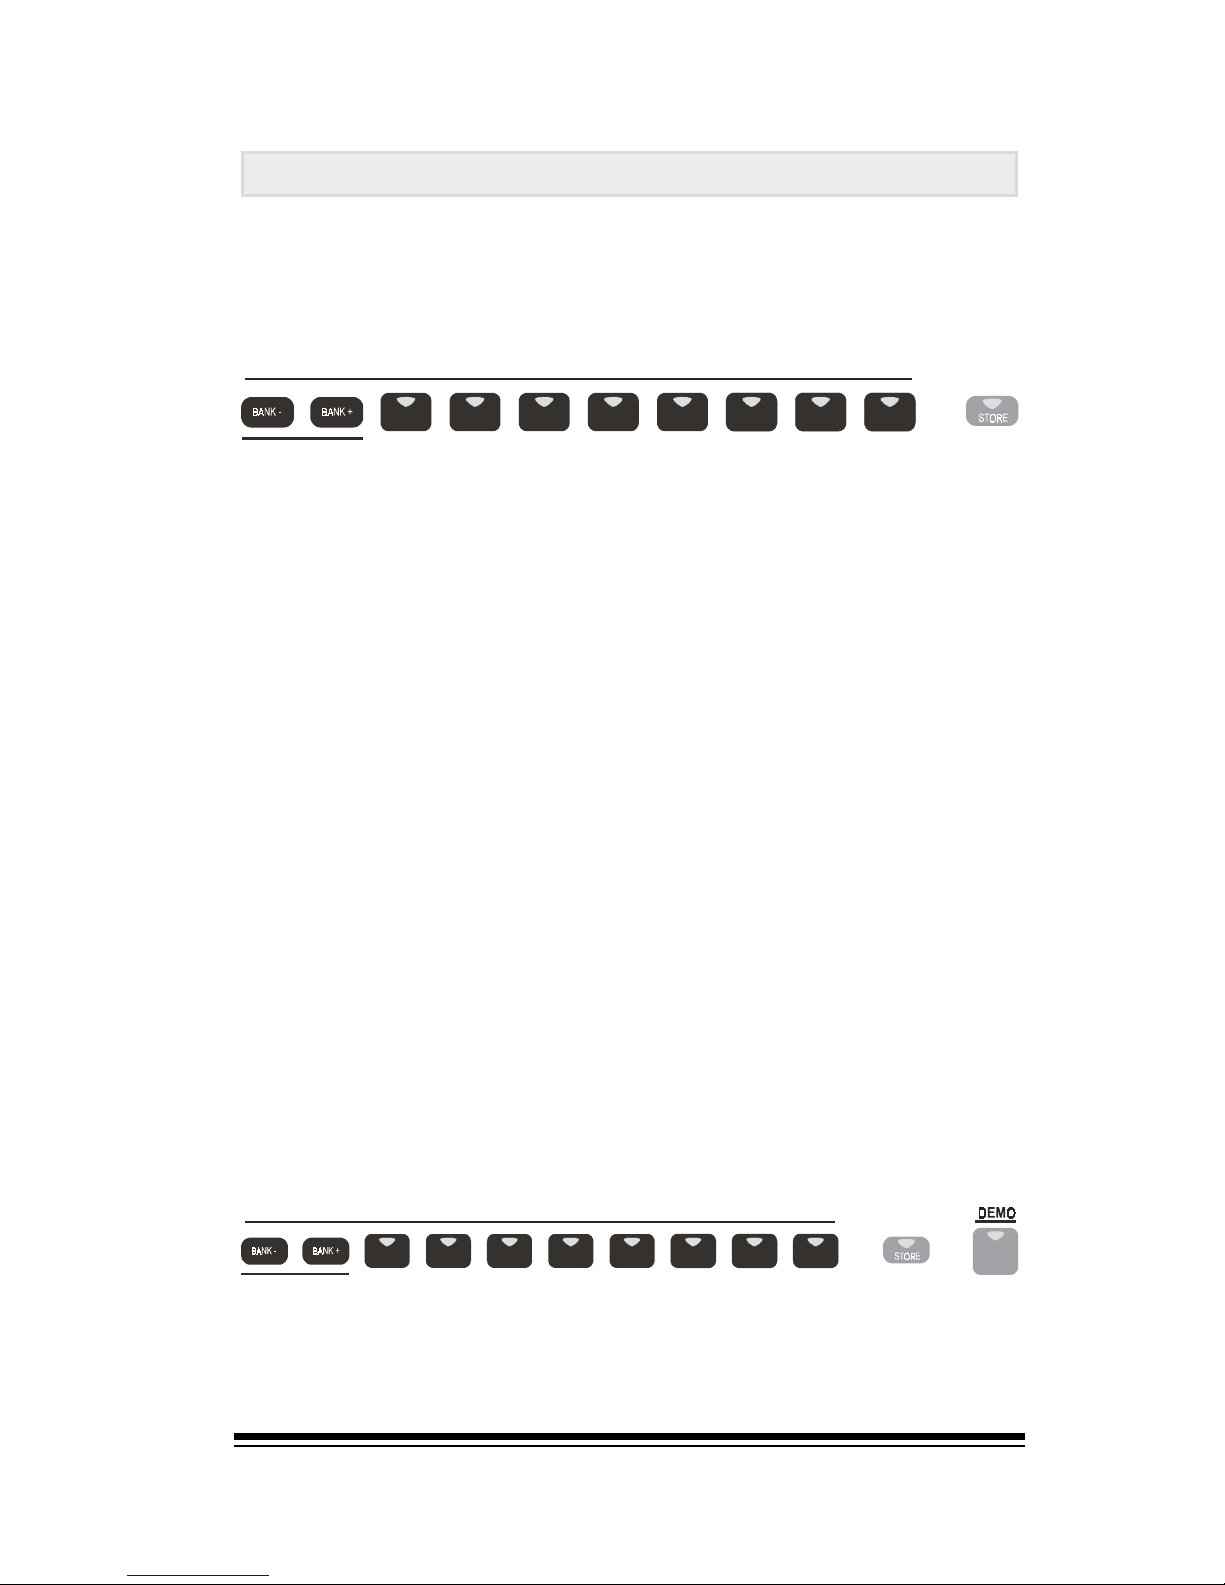
1. Press STORE, (at the right side of the MEMORIES
section)
2. Press the 2 button.
Thats it! All of your settings have been memorized.
12345678
LI
S
T
MEMOR IES |
1024 PROGRAMM A B LE LO CATIONS ( 8 X 128 BANKS )
12345678
MEMORIES |
1024 PRO GR A MM A BL E LO C ATIONS ( 8 X 128 BA NK S )
J
2
J
1
Page 47
genesys ensemble/genesys grand ensemble
Page 38
Now try changing all of the settings; choose a different
style and a different sound, make a few more adjustments
and then store the resulting settings into memory number
3 using the same procedure as before.
To recall the settings youve memorized, simply press the 2 or
3 button, (without pressing STORE first). Youll find the instrument set exactly as it was when you stored the memories.
Memory Banks
As you can see there are 8 memory buttons on the front panel
but the instrument has more than just 8 memories. There is
actually a total of 1024 memories. These memories are divided into 128 banks with each bank containing 8 memories.
When you recall a memory by pressing one of the numbered
buttons 1-8, the lower part of the display will tell you which
memory number you selected (on the left) and, most importantly, which bank it was in (on the right).
The memories you just stored probably went into bank 1. So
we can say that bank 1 is the current bank. So far, weve
just stored memories by pressing STORE and then pressing
a numbered button. When you do this, the memory is automatically stored into the current bank.
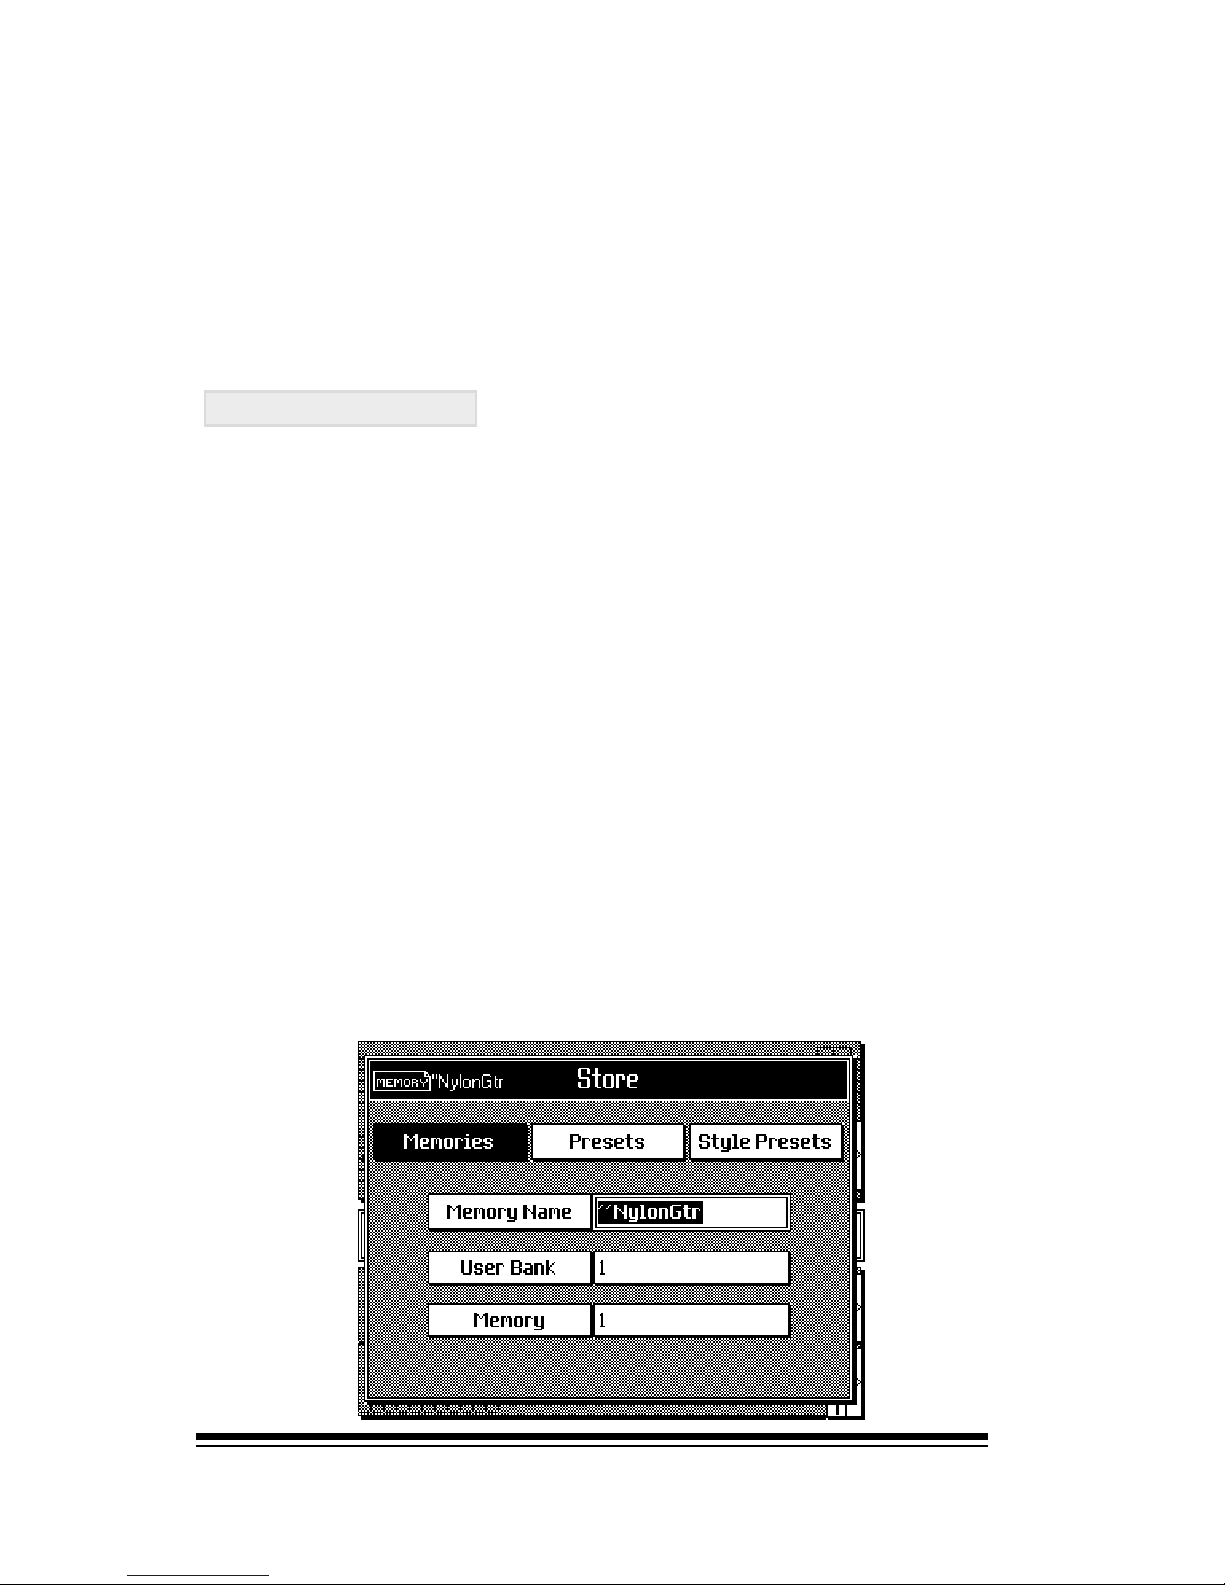
Press the STORE button again but, this time, dont press any
other buttons. You will see a window in the display which
offers you a number of options.
Page 48
Memories
Page 39
The first option lets you type in a name for your memory.
When you only have a few memories it might not seem
important to give each memory a name but, as you start to
store more and more settings, youll begin to wish that you
had. Typing in a name is simple. You can use the keys of
the keyboard which have the letters of the alphabet printed
below. Youll also find that the lowest keys offer functions
like CAPS, SPACE, DELETE and BACKSPACE.
Once youve entered a name, press the down arrow to move to
the next line in the display where you can choose one of the 128
banks. You can select a new bank number by turning the dial.
The last choice is to select which of the 8 memories in the
selected bank you want to store your settings in. You can
do this in one of two ways:
1. Press one of the 8 memory buttons
or
2. Select the last line of the display by pressing the down
arrow, use the dial to select a number between 1 and 8
and then press ENTER to confirm.
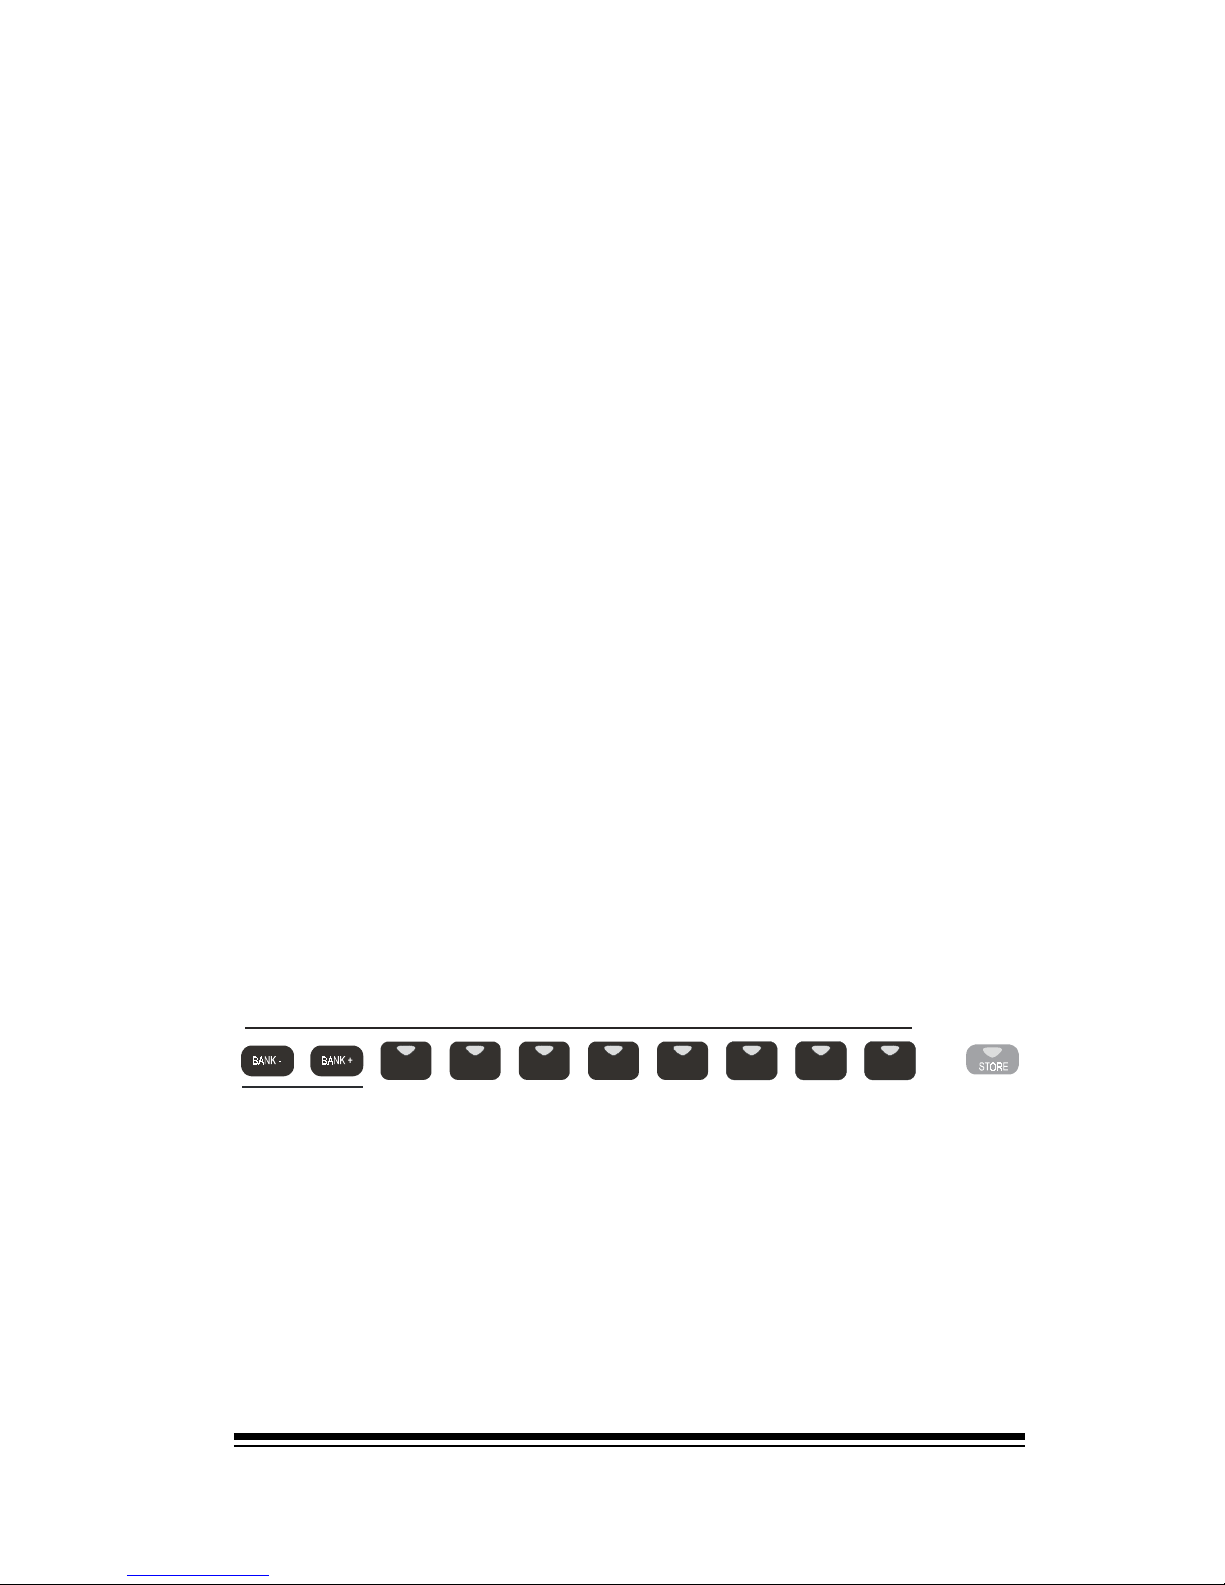
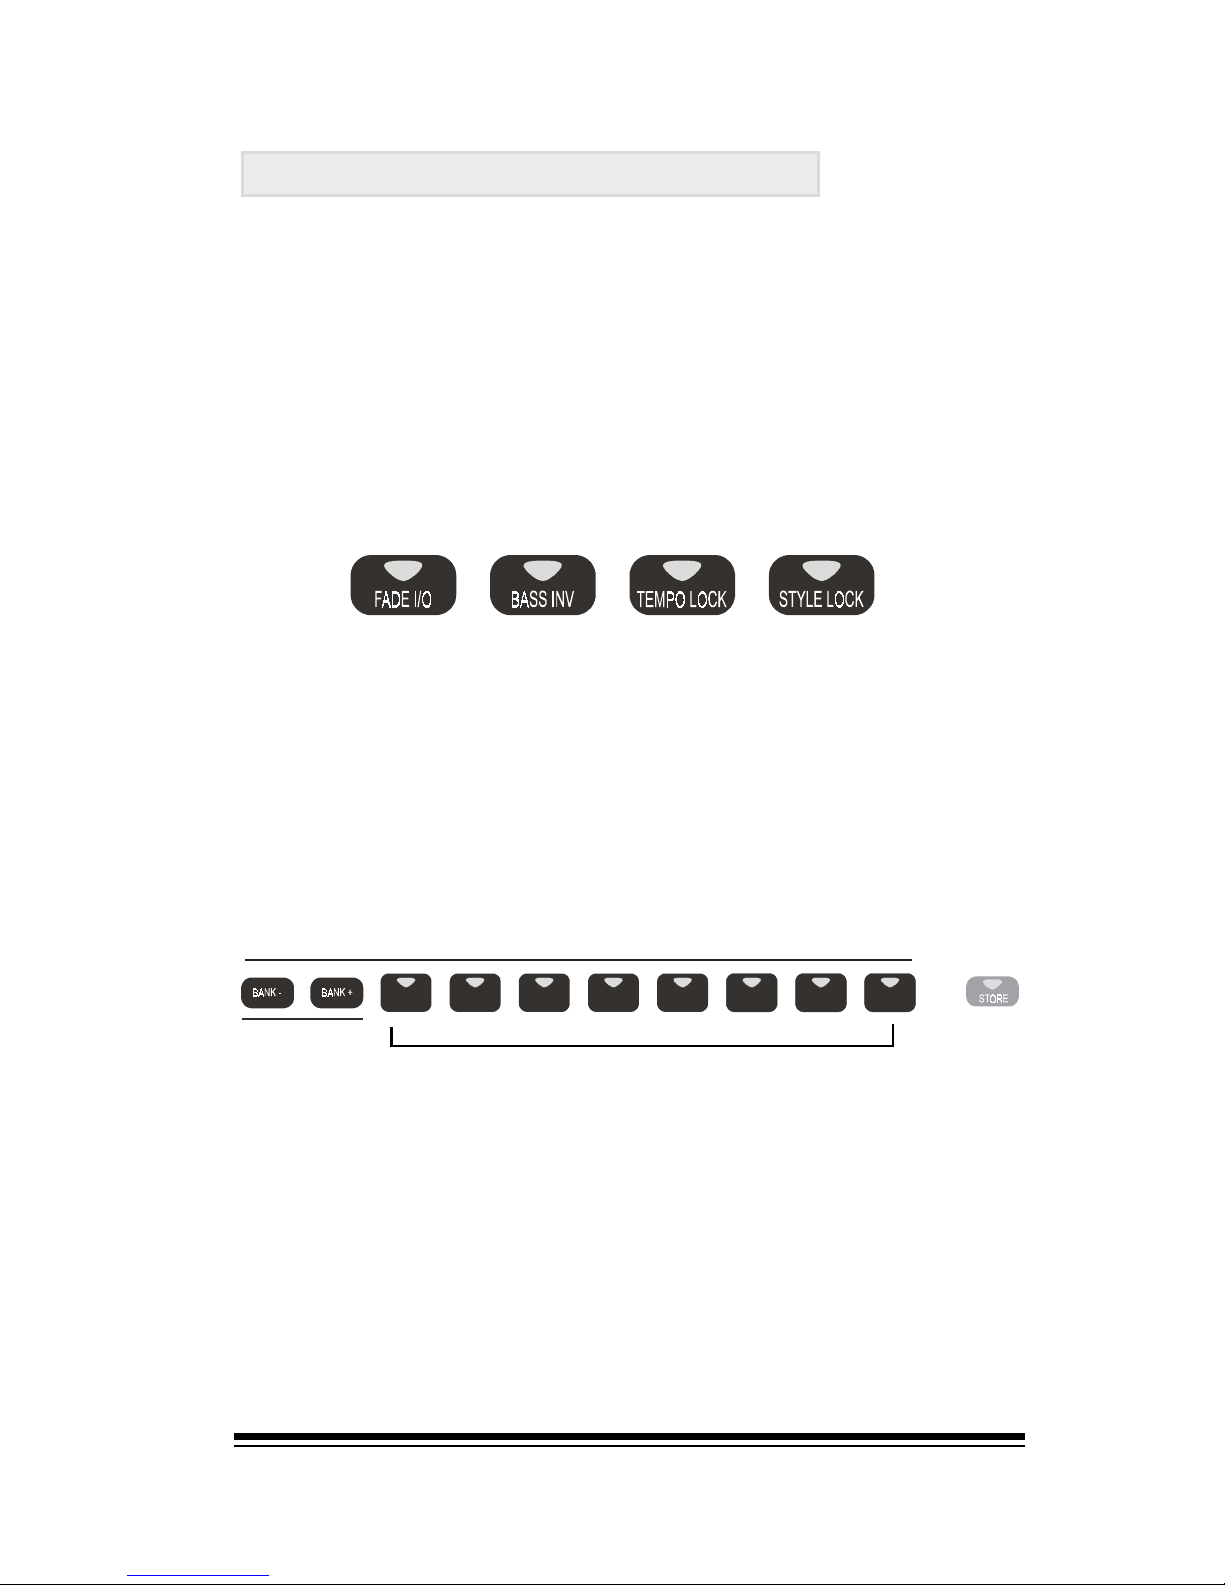
When you have more than one bank of memories stored,
youll need to use the BANK buttons to move between the
various banks.
12345678
LI
S
T
MEMORIES |
1024 PROGRAMM ABLE LOCATIONS ( 8 X 128 BAN KS )
J
Pressing BANK + will move to the next bank in numerical
order while pressing BANK will move to the previous bank.
Page 49
genesys ensemble/genesys grand ensemble
Page 40
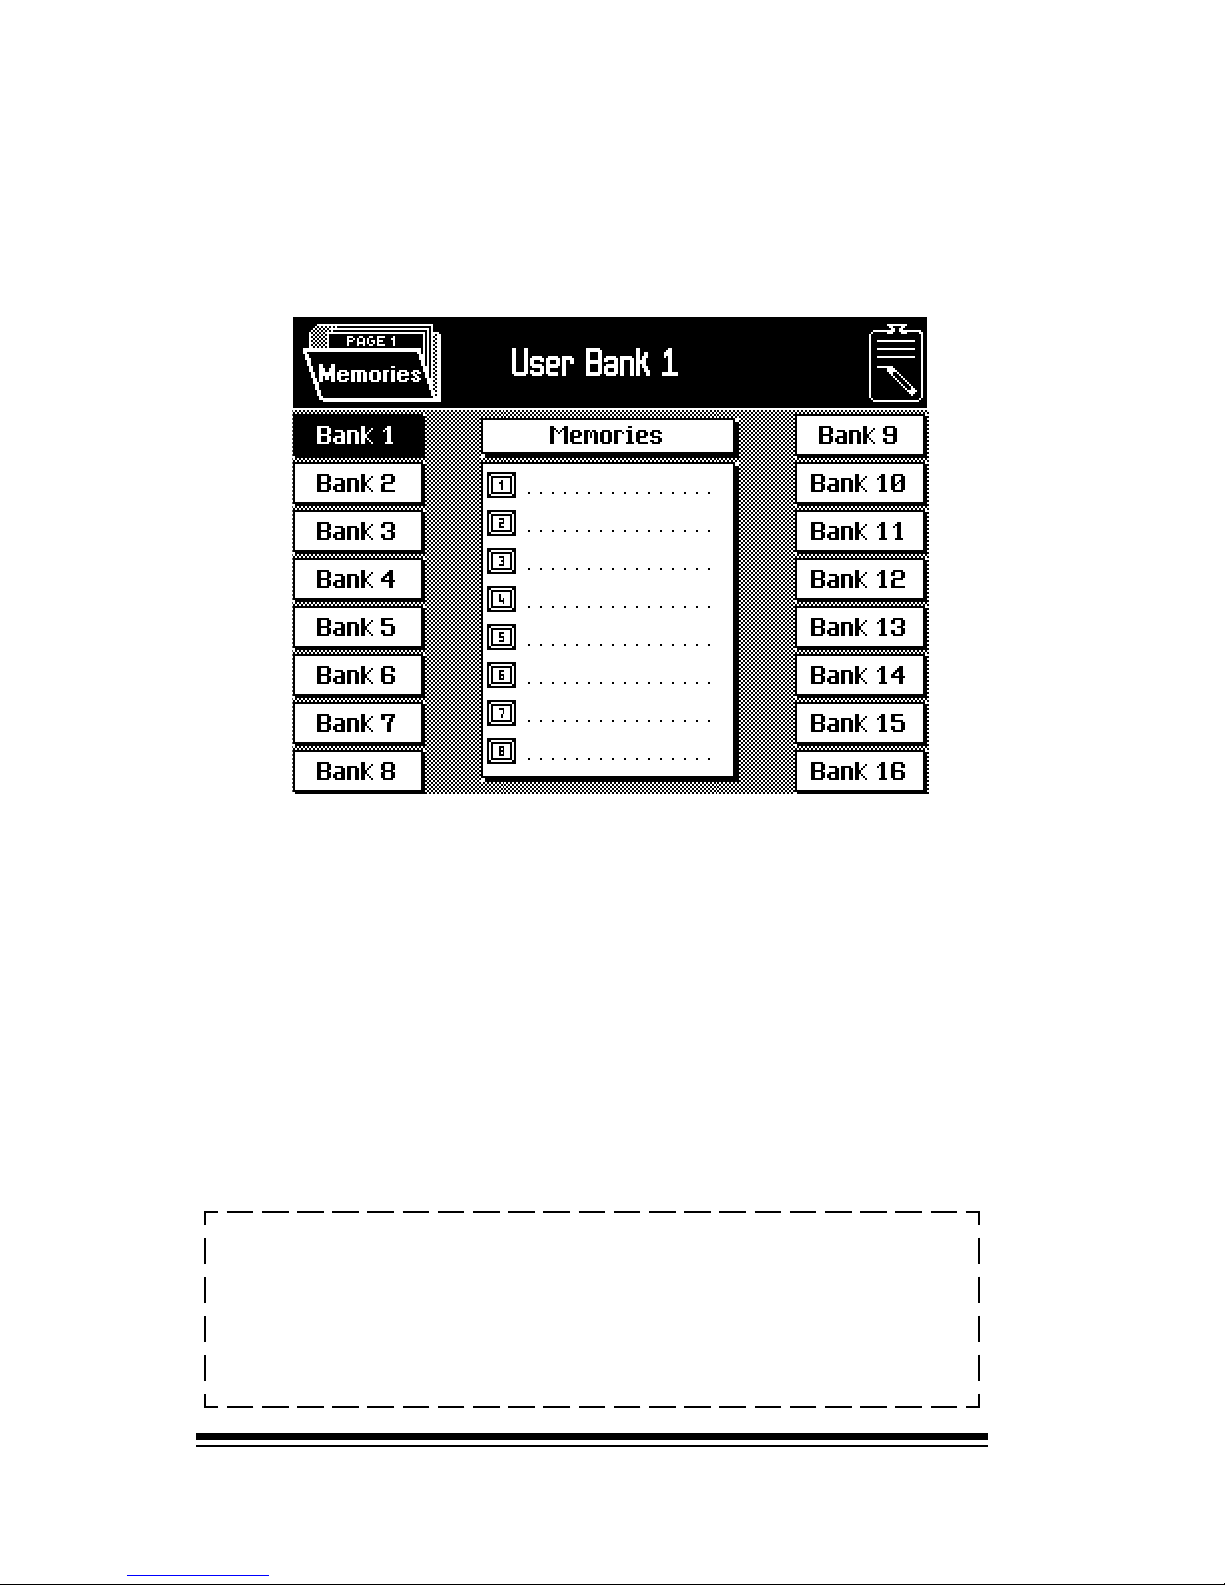
If you want to jump to a distant bank, for example, if youre
in bank 1 and you want to select a memory from bank 15,
press both of the BANK buttons together and youll see the
BANK LIST.
You can use the buttons around the edge of the screen to
select different banks. As soon as youve chosen your new
bank, the 8 memory buttons can now be used to recall the
8 memories stored in this bank.
This display will show you 16 banks at a time, If you want
to see the next 16 banks, press PAGE >
Now the screen will show you the next 16 available banks.
You can use PAGE > and PAGE < to view any group of 16
banks at a time.
NOTE: It is only possible to select a memory if some-
thing has been stored in it. If a memory is empty then
pressing one of the numbered buttons will have no effect. The button will not light and the previously selected memory will remain selected.
Page 50
Memories
Page 41
Using Memories with Style Lock
Each time you store a memory, the instrument remembers
all of the current settings including the style that was selected and the speed (tempo), that it was set at. Sometimes you might want to recall a different memory while
youre playing with a style, but you dont want the style
settings and tempo to change.
Pressing STYLE LOCK allows you to do this.
When STYLE LOCK is turned on, pressing one of the Memory
buttons will affect only the sounds that you are playing on
the keyboard without changing any of the related style settings.
J
12345678
LI
S
T
MEMORIES |
1024 PROGRAMM ABLE LOCATIONS ( 8 X 128 BAN KS )
J
Page 51
genesys ensemble/genesys grand ensemble
Page 42
SOUND CONTROLS
This section offers a number of controls which will affect
the overall sound of the instrument.
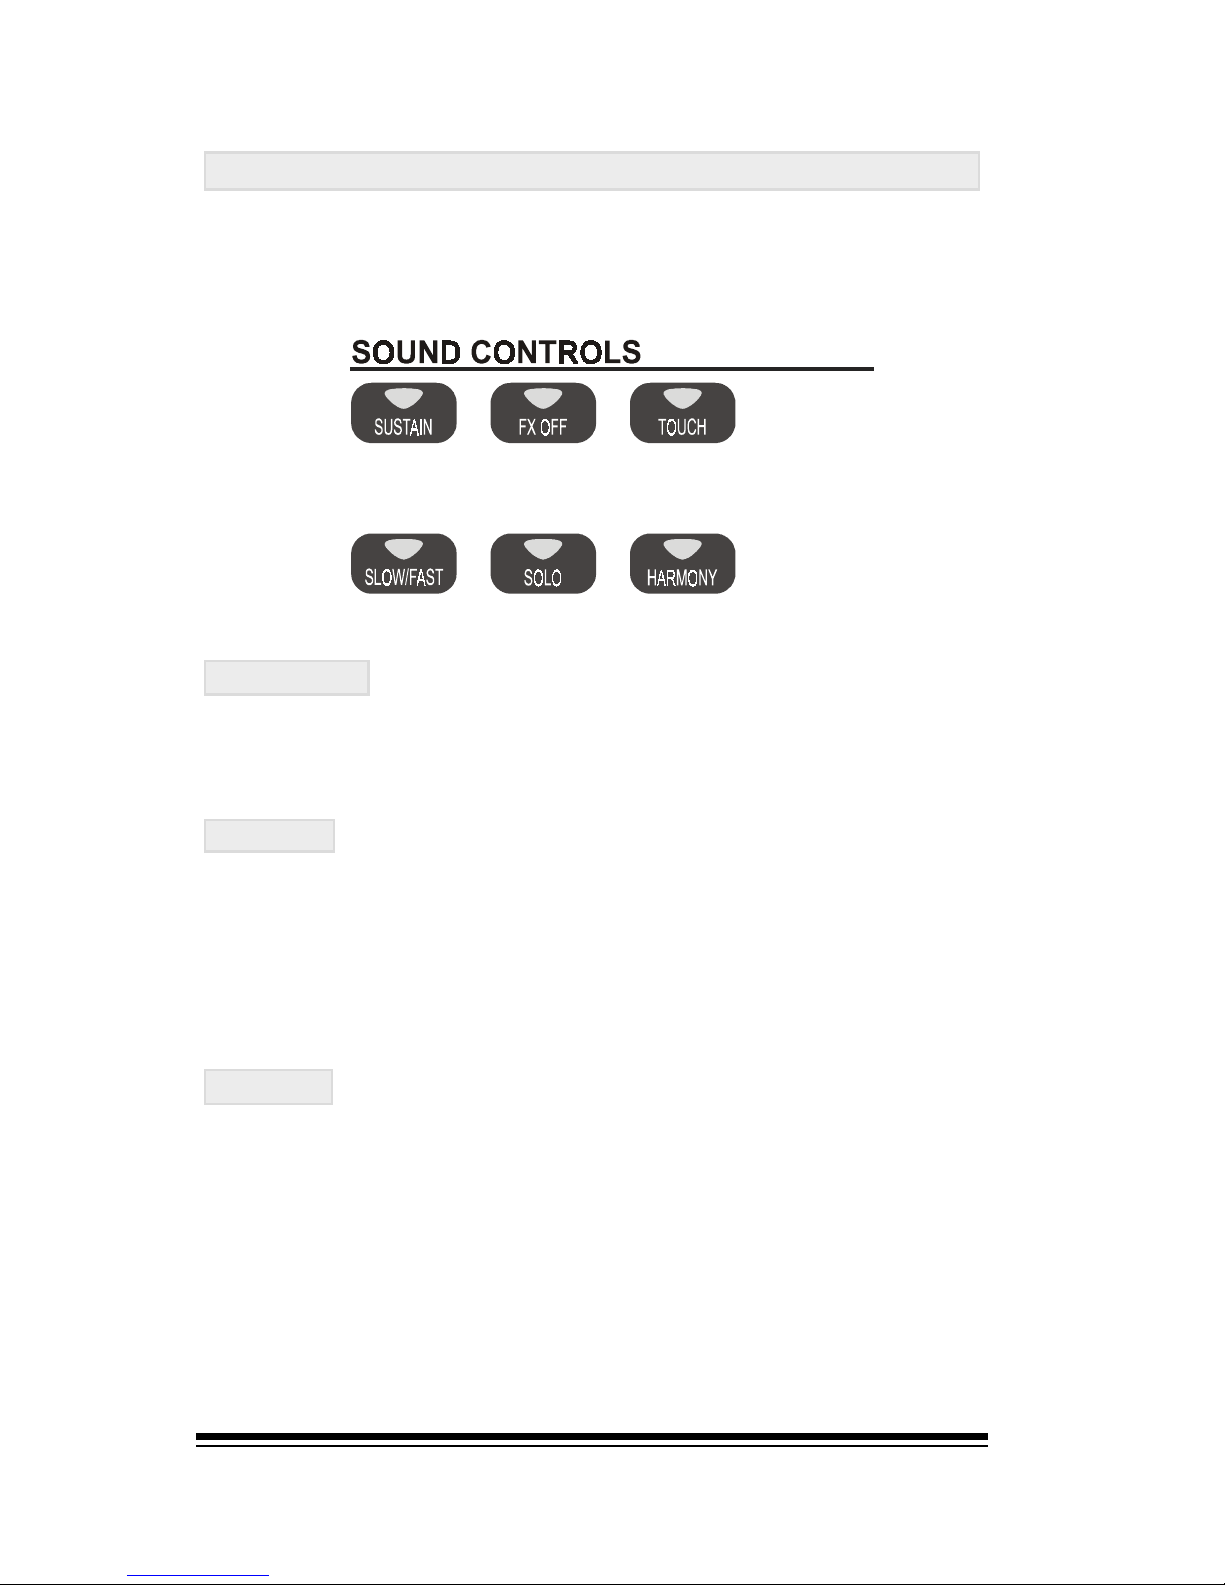
SUSTAIN
This button adds a lingering effect to the sound similar to
that of the damper pedal being pressed on a piano.
FX OFF
Pressing this button will temporarily cancel all of the
instruments internal effects. This button is primarily intended for use while editing where you wich to hear the
pure sound without additional effects. This function does
not cancel the effects section of VOCAL GENIUS.
TOUCH
This button cancels the touch sensitivity of the keyboard.
Normally the keyboard responds like a piano, the harder
you hit the key the louder and brighter the sound becomes.
If you turn on the TOUCH button this effect is cancelled
and all sounds will play a medium level no matter how hard
or soft you press the key.
Page 52
Sound Controls
Page 43
SLOW/FAST
This control changes the speed of the ROTARY effect which
is used on a number of organ sounds and particularly in
the DRAWBARS family.
SOLO
This button will cancel all other sounds except the one which
is currently highlighted in the PARTS display. For more examples on the use of this function, see the RECORDING
STUDIO chapter.
HARMONY
This function is designed primarily to be used in ACCOMP.
SPLIT mode. When turned on, it adds additional notes to
the melody note you are playing with your right hand.
HARMONY is designed for use when you are playing single notes
with your right hand. If you normally play more than one note
with your right hand you will not need to use this function.
To use the HARMONY function, select any style in ACCOMP.
SPLIT mode and play chords with your left hand. When you
turn HARMONY on, the melody notes that you play in your
right hand will be embellished by additional notes based on
your left-hand chord.
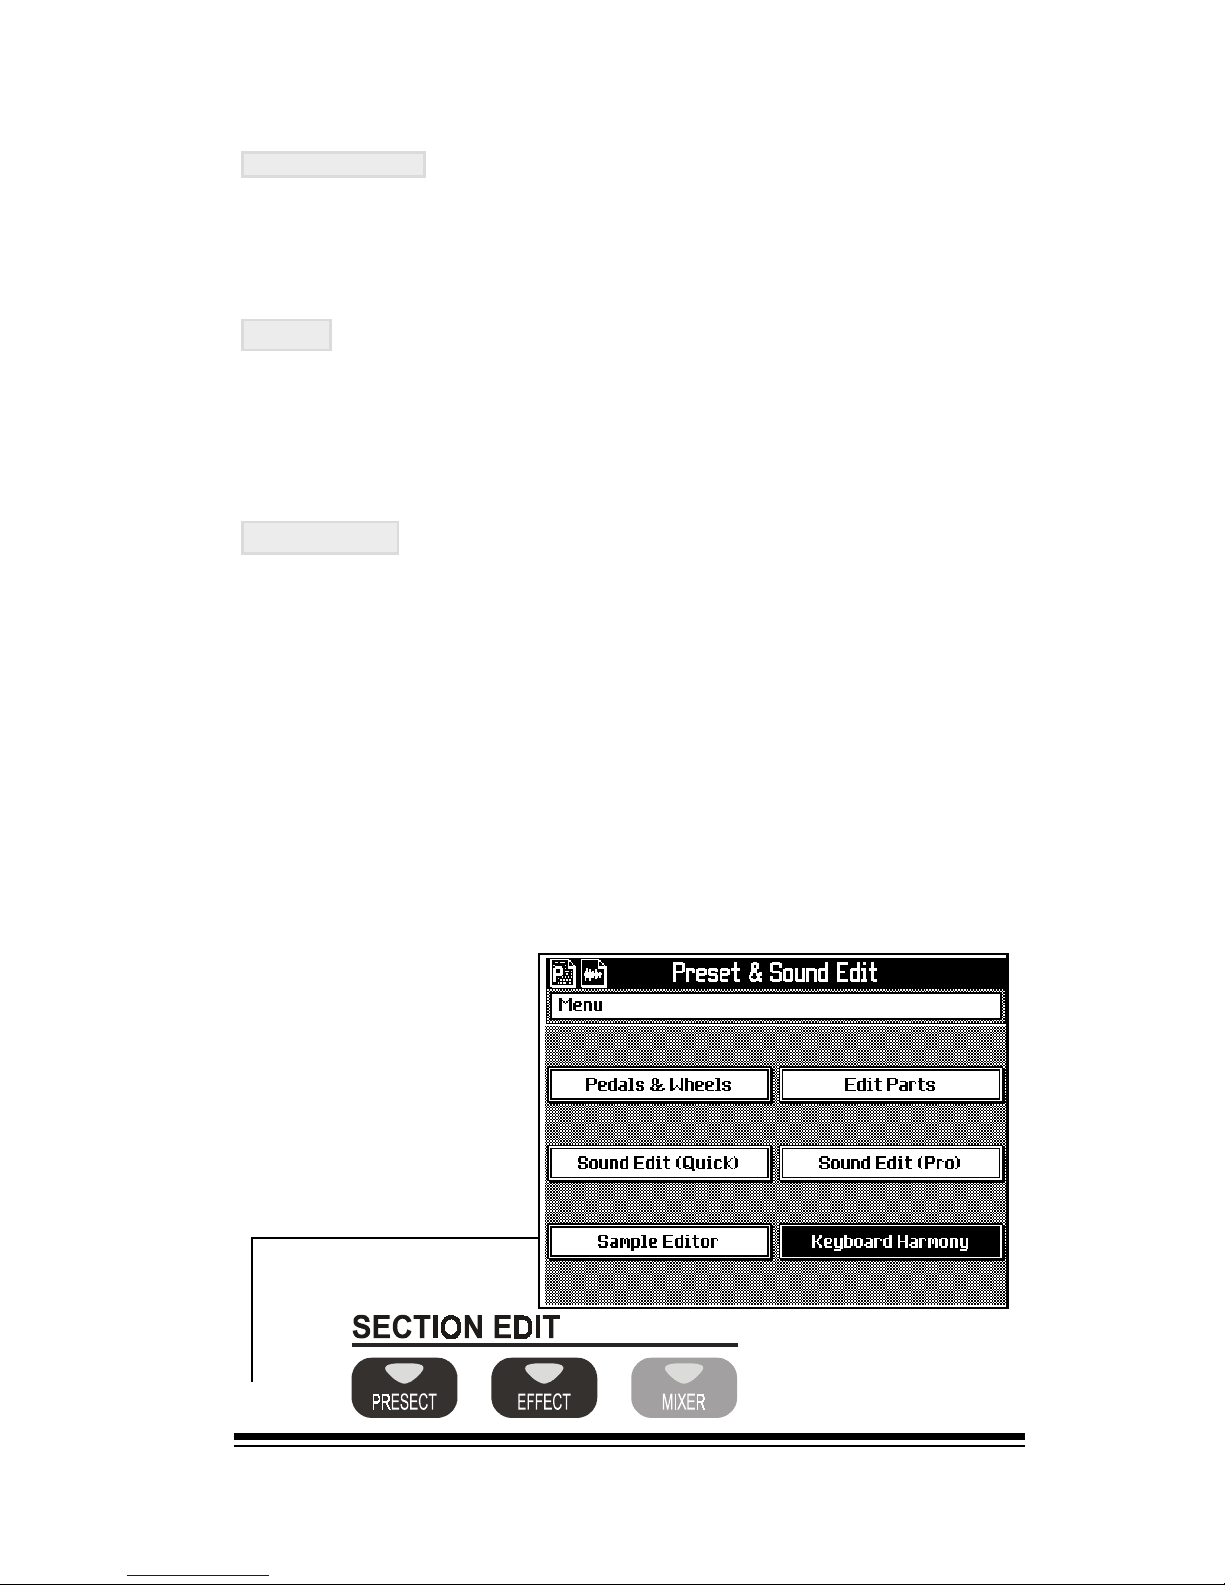
There are many different types of Harmony
available. To see the
currently selected Harmony type press the
PRESET button in SECTION EDIT.
J
Page 53
genesys ensemble/genesys grand ensemble
Page 44
DEC
ENTER
ESCAPE
PANIC
J
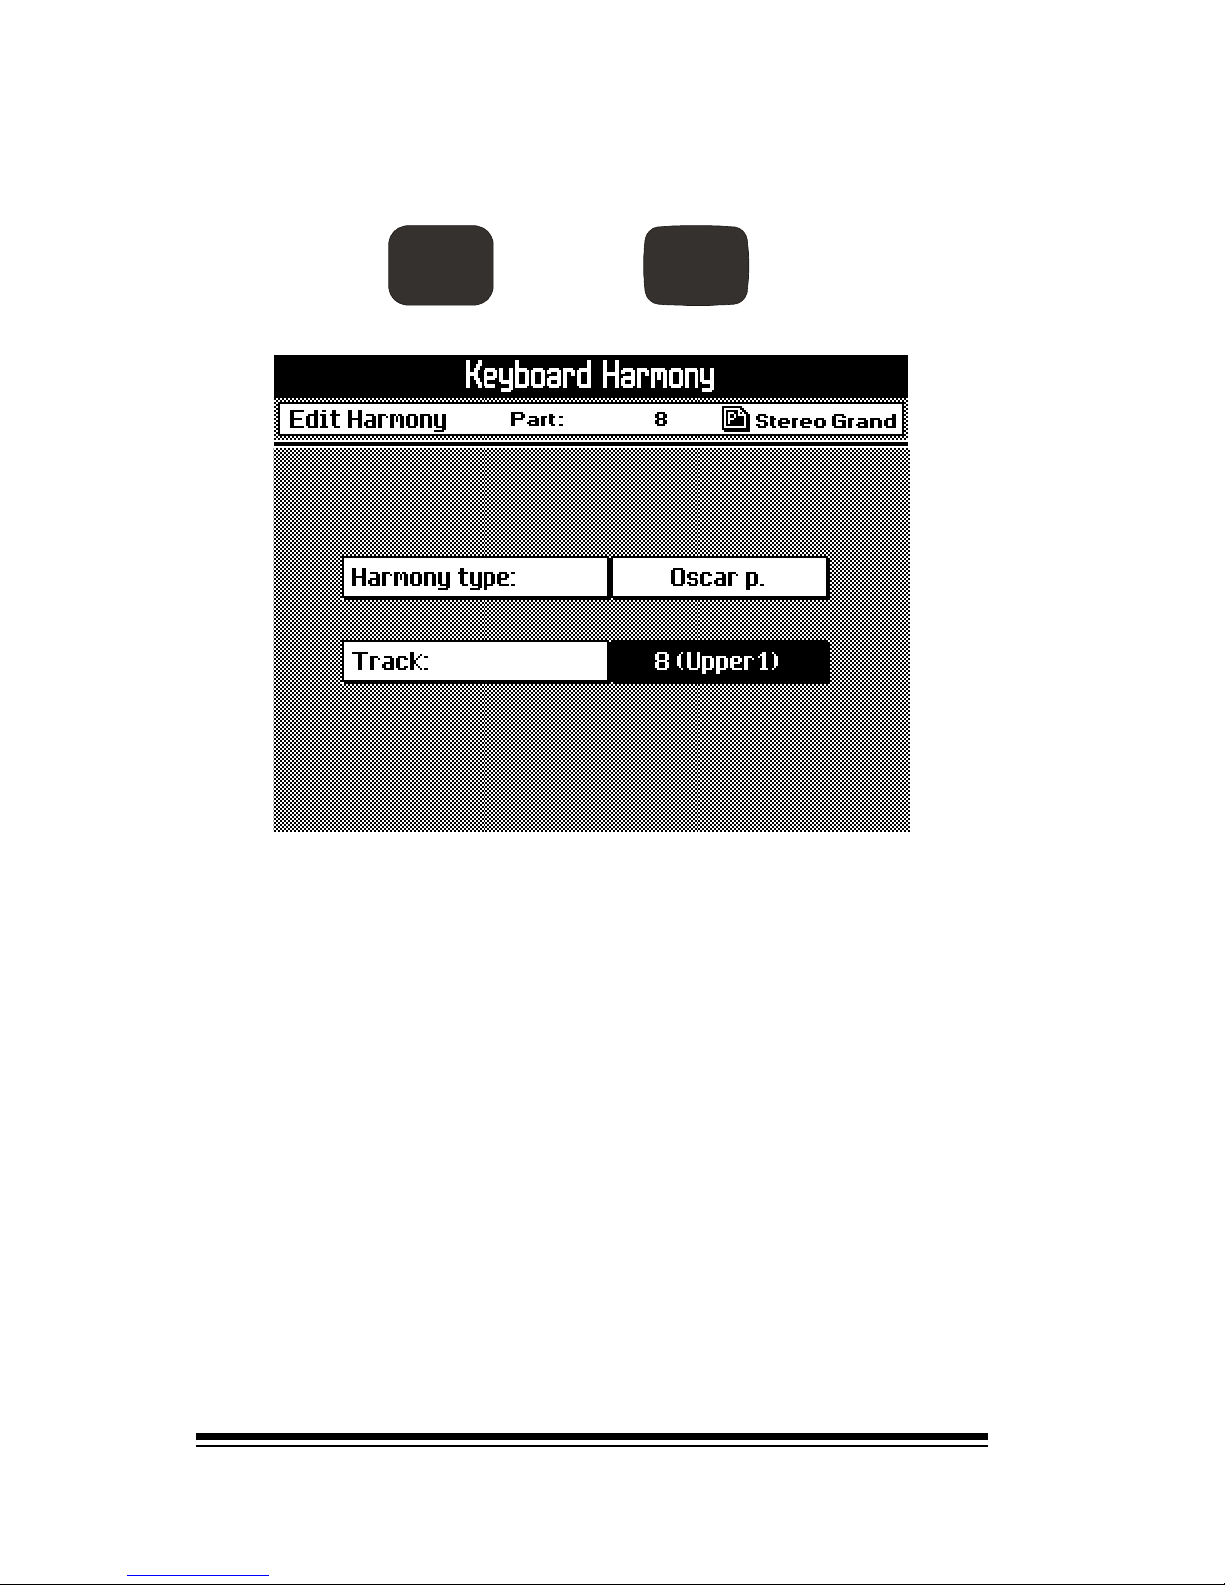
Select KEYBOARD HARMONY and press ENTER.
Now you can see the current HARMONY TYPE. While HARMONY is still switched on, you can listen to the different
types available by simply selecting them with the dial as
you play.
The TRACK setting in harmony should be set to 8 (Upper 1).
This indicates which sound will be used to play the harmony
notes. If you are using a setting with more than one sound,
(for example, Piano and Strings), you can set the harmony
track to play the Strings instead of the Piano by changing this
setting to 7 (Upper 2). For most purposes, however, it is
best to leave this set to 8 (Upper 1).
Press ESCAPE twice to return to the home screen from this
display.
Page 54
Song Player
Page 45
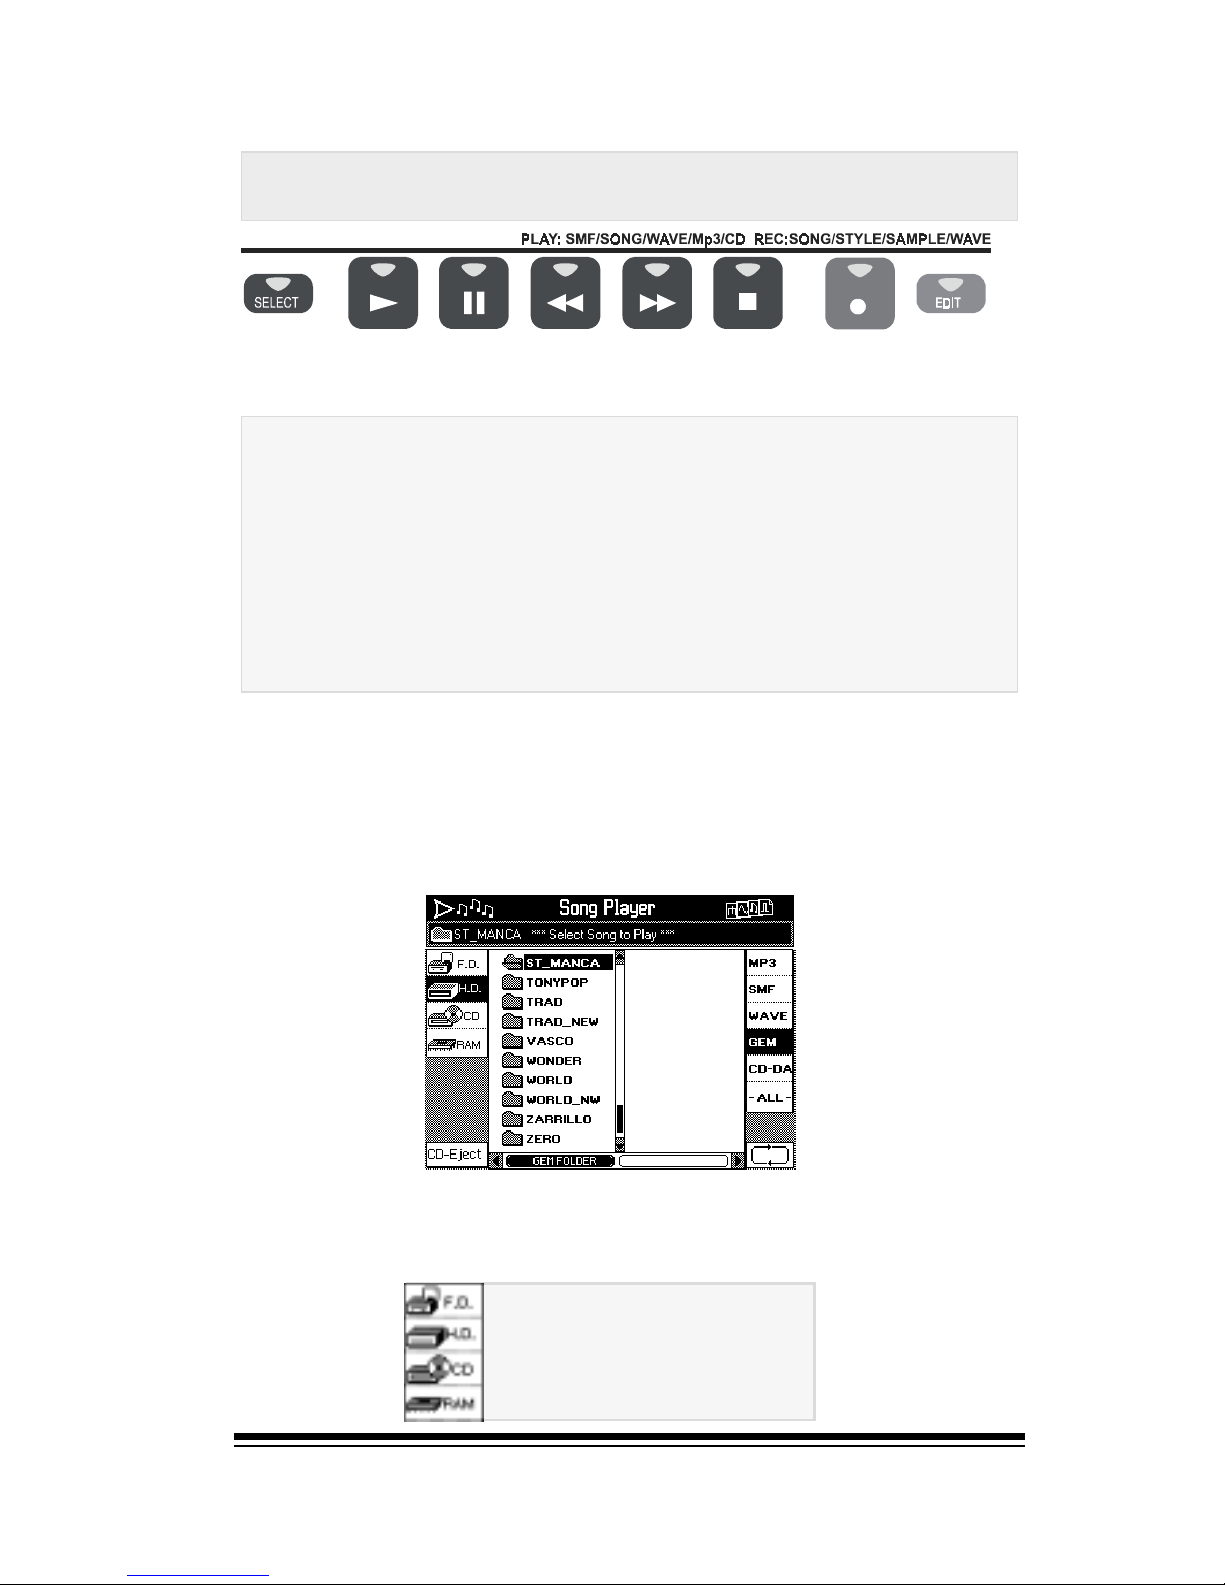
The SONG PLAYER section is a universal song file player
which can play all the following types of song files:
SONG PLAYER/REC STUDIO
|
FD Floppy Disk
HD Internal Hard Disk
CD CD-ROM
RAM Internal Memory
➤ Standard MIDI File 0,1 & 1 with Lyrics
➤ Gem WK/SK Series Songs
➤ Gem WX/SX Series Songs
➤ .KAR, WordBox©, PianoDisk©, Doc©, Diskclavier©
➤ MP3
➤ MP3 with Lyrics
➤ CD Audio
➤ WAV Audio (44.1K, 16 bit mono or stereo)
On the left side of the display you can see the device selector.
This allows you to choose where you want to select your song
from. In this list you will always see the following options;
The SONG PLAYER can play a song in any of these formats
from any available device, Floppy Disk, Hard Disk, CD, SCSI
device or from the instruments internal memory, (which is
called RAM in the SONG PLAYER and DISK menus). To select a song for the instrument to play, press SELECT
Song Player
Page 55
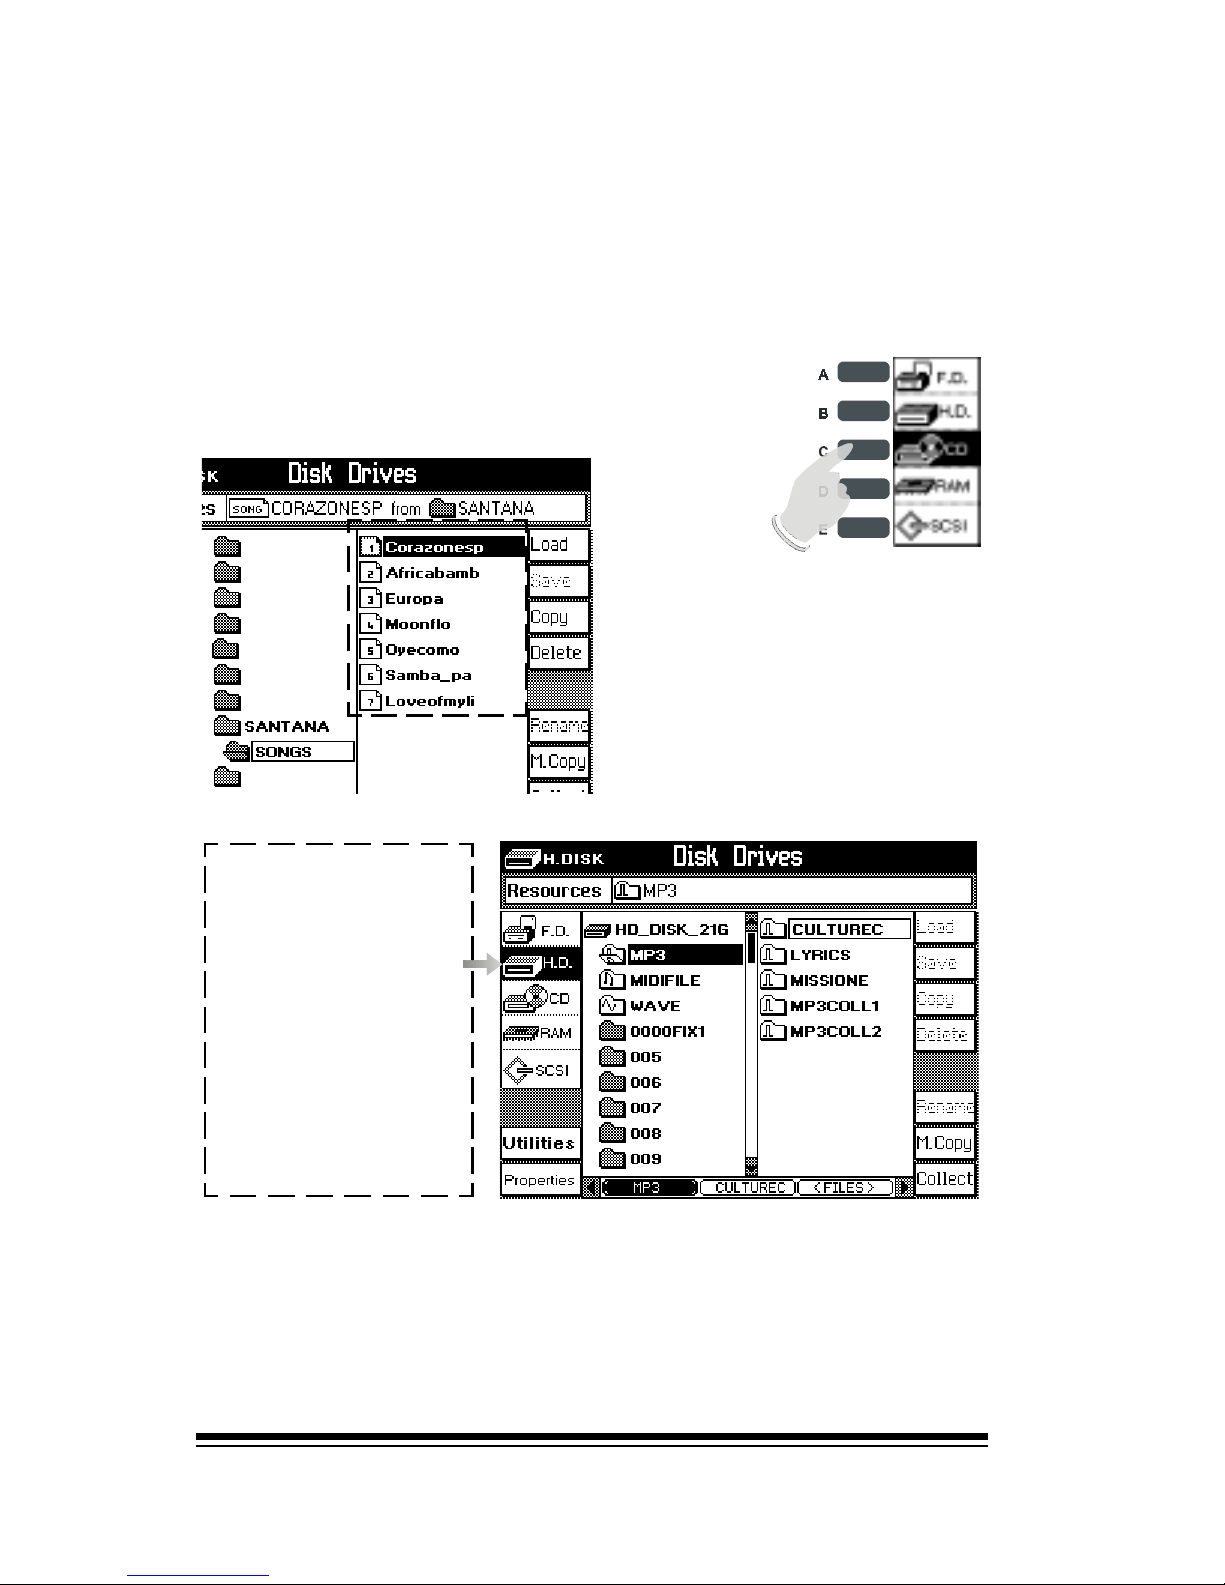
genesys ensemble/genesys grand ensemble
Page 46
If you have a SCSI interface and an external SCSI device
connected, you will see one additional option:
SCSI SCSI device, (usually a ZIP or JAZ drive)
The first step in playing a song is to select the device which
contains the song. For example, if you want to play a song
from the Internal Hard Disk, press the HD button.
On the right side of the display, you can see a number of
options which refer to the different types of song that the
Genesys Ensemble can play. Well start by listening to an
Mp3 song. Press the Mp3 button.
Once youve chosen the device, you will see its contents in the display.
Lets begin by
playing one of the
pre-loaded songs
that are included
on the
instruments Hard
Disk. In the left
side of the display,
select HD.
Press the CD button to play a song from a CDROM:
Page 56
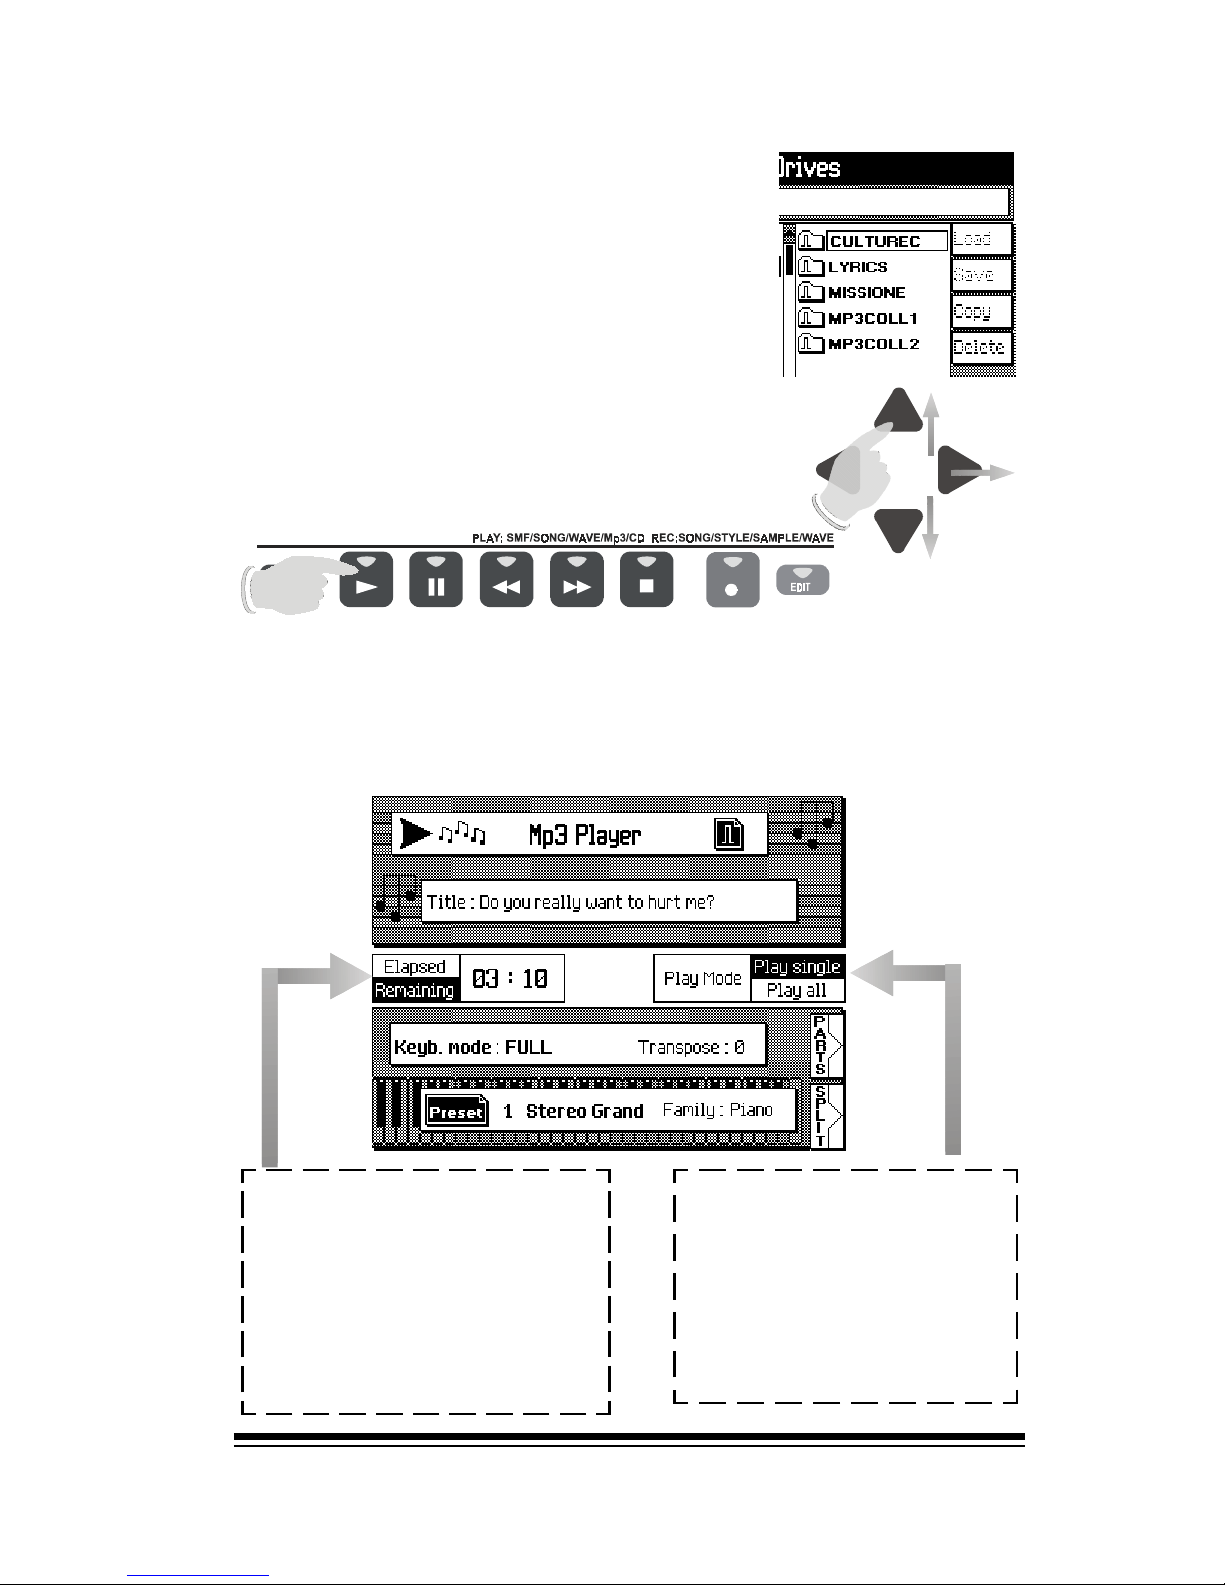
Song Player
Page 47
Now you can see the Mp3 folder and all
of its sub-folders. To look inside one of
these folders and find the songs it contains, first select the folder you want by
using the up or down arrows and then
press the right arrow to look inside it.
Now you can see a list of songs in the
right column. To listen to any song, simply select it using the up or down arrows
and then press the PLAY button in the
SONG PLAYER section.
The option on the right lets
you choose whether to
play just a single song or
to play all of the songs in
the current sub-folder, one
after the other.
In the center of the display
you can see the song timer
which tells you either how
much time has elapsed or
how much time is remaining
depending on which option
you select by pressing the
buttons at the side.
SONG PLAYER/REC STUDIO
|
Now your song is playing you can return to the home screen
by pressing ESCAPE.
Notice how the top portion of the display shows you that
the SONG PLAYER is running and also the name of the
current song.
Page 57
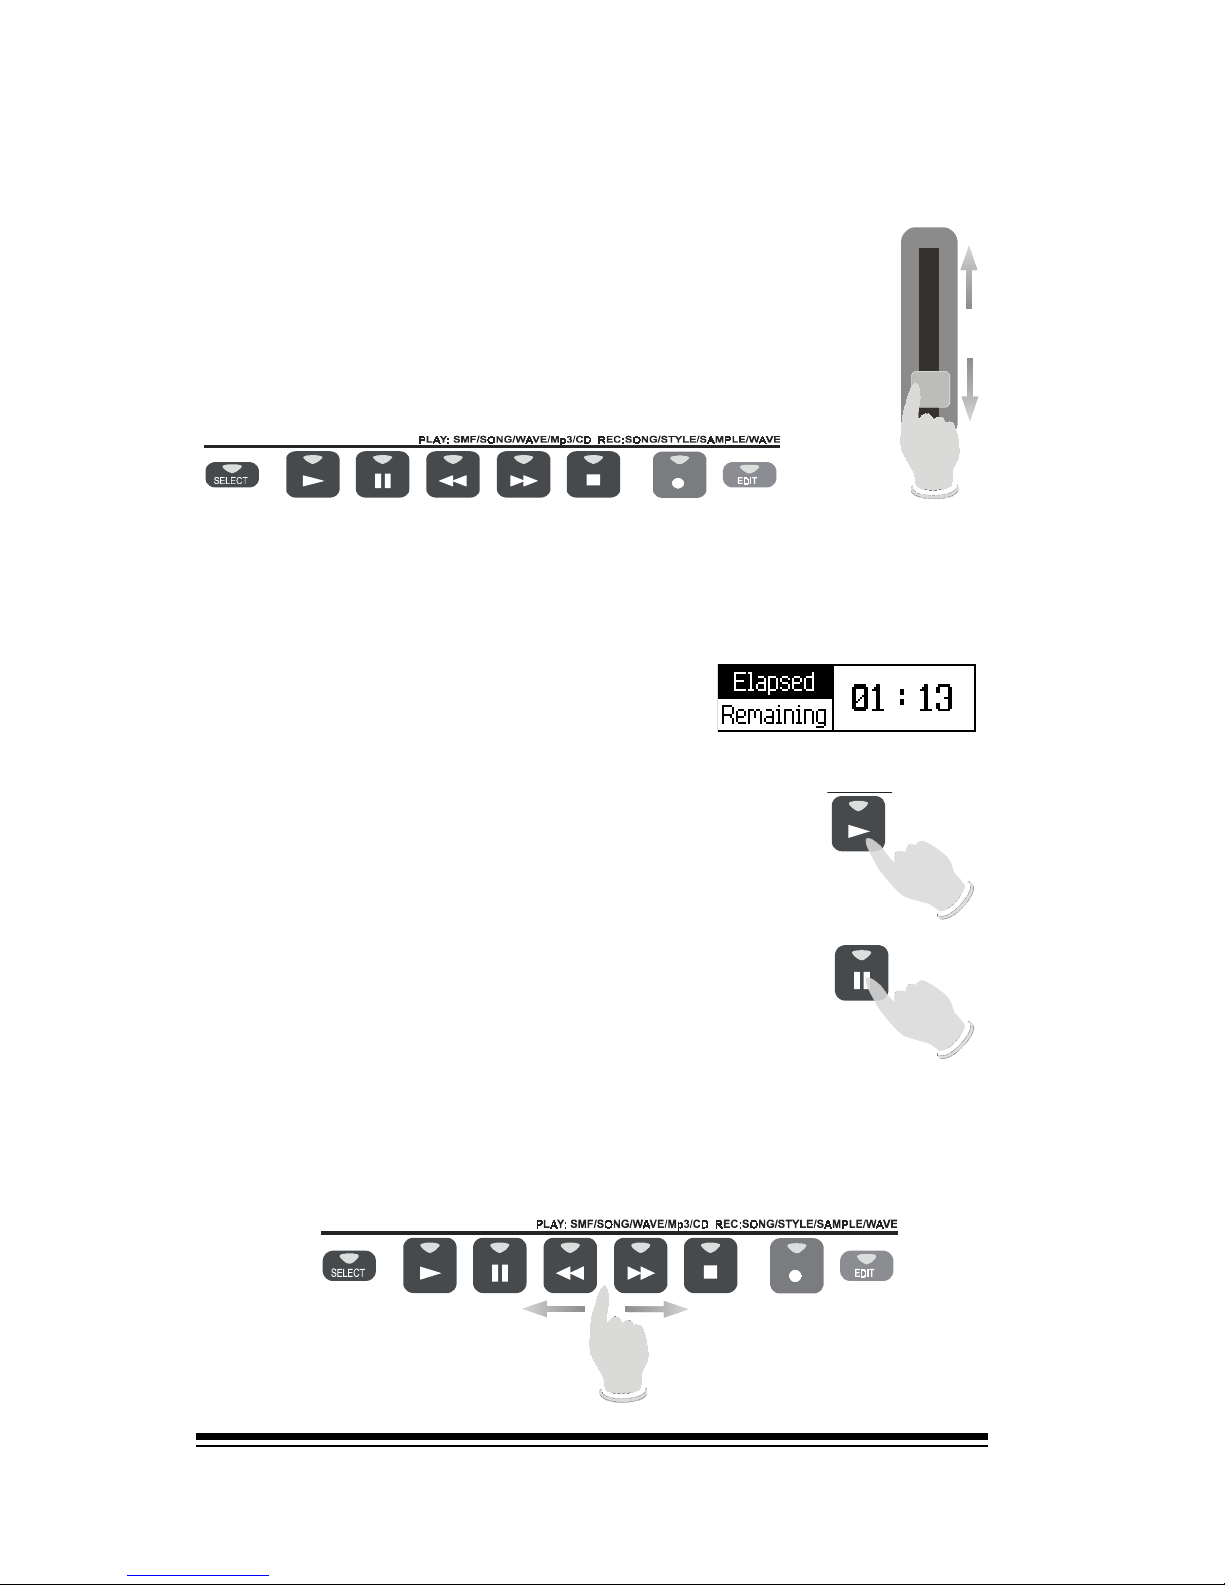
genesys ensemble/genesys grand ensemble
Page 48
In the slider section you will find the volume control
for Mp3. This allows you to adjust the volume level
of the song, to balance the realtime parts played by
the keyboard and the MP3 Try also some other SONG
PLAYER controls. Press STOP and then re-start the
song by pressing PLAY again.
SONG P LAYER/REC STUDIO
|
The FORWARD and BACK buttons can be used to locate a
specific point in the song.
All the keyboard functions can be used as usual, with the
exception of the styles.
SONG PLAYER/REC STUDIO
|
2
JJ
1
J
3
Mp3
B
Let the song play for a few seconds and then press PAUSE.
The display shows the point where you
have paused the song (seconds).
Pressing the PLAY button again, the song will
start playing from this point.
Now press PAUSE once again
Page 58
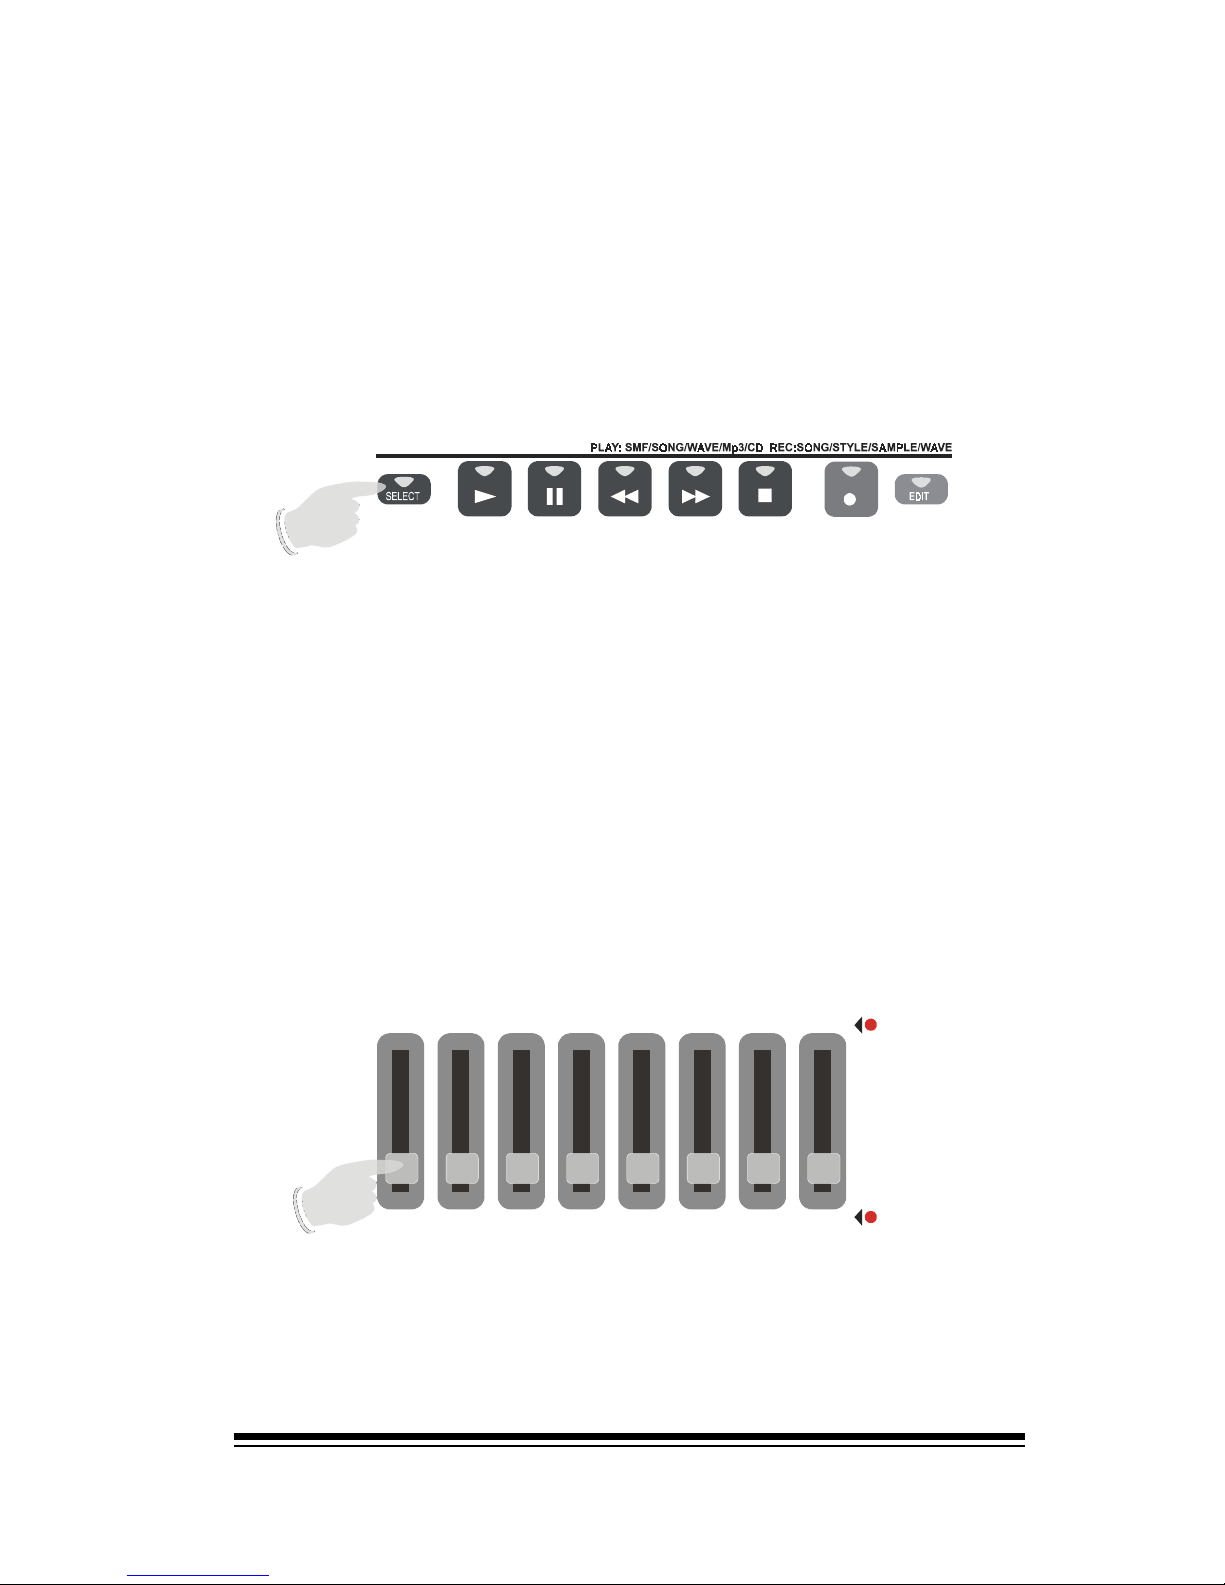
Song Player
Page 49
Tapping either button will move the song 1 second in either
direction. If you hold either button down then the position
will move much faster until you release the button. Just as
before, once youve found the desired location in the song,
just press PLAY to start playback from this point. You can
also use the FORWARD and BACK buttons while the song is
playing, without pressing PAUSE. Try it. Now press STOP.
Lets try playing something else. Press the SELECT button
again.
C
D Mp3 HD AUDIODRUMSBASSA
CCO
MP LOWER UPPER
ABCDEFGHA
The songs weve heard so far are all types of digital audio.
You can also try listening to some high quality .WAV songs
from the hard disk if you press the WAV button on the right
side and proceed exactly as you did when selecting Mp3 songs.
To play a track from a CD, insert a standard audio CD into
the CD Drive. After a couple of seconds the CD is ready to
play. To see the tracks on the CD, just select the CD-DA,
(Compact Disc Digital Audio), button on the right. In this
case, you dont need to select the CD device on the left
side. This is simply because CD-DA tracks can only be on a
CD. The Genesys Ensemble knows automatically where to
find this type of song. To play any track, just select it with
the up or down arrows and press PLAY. Youll find that the
SONG PLAYER controls work exactly as they did before with
the Mp3. This time though, youll need to use the CD
slider to adjust the playback volume.
SONG PLAYER/REC STUDIO
|
Page 59
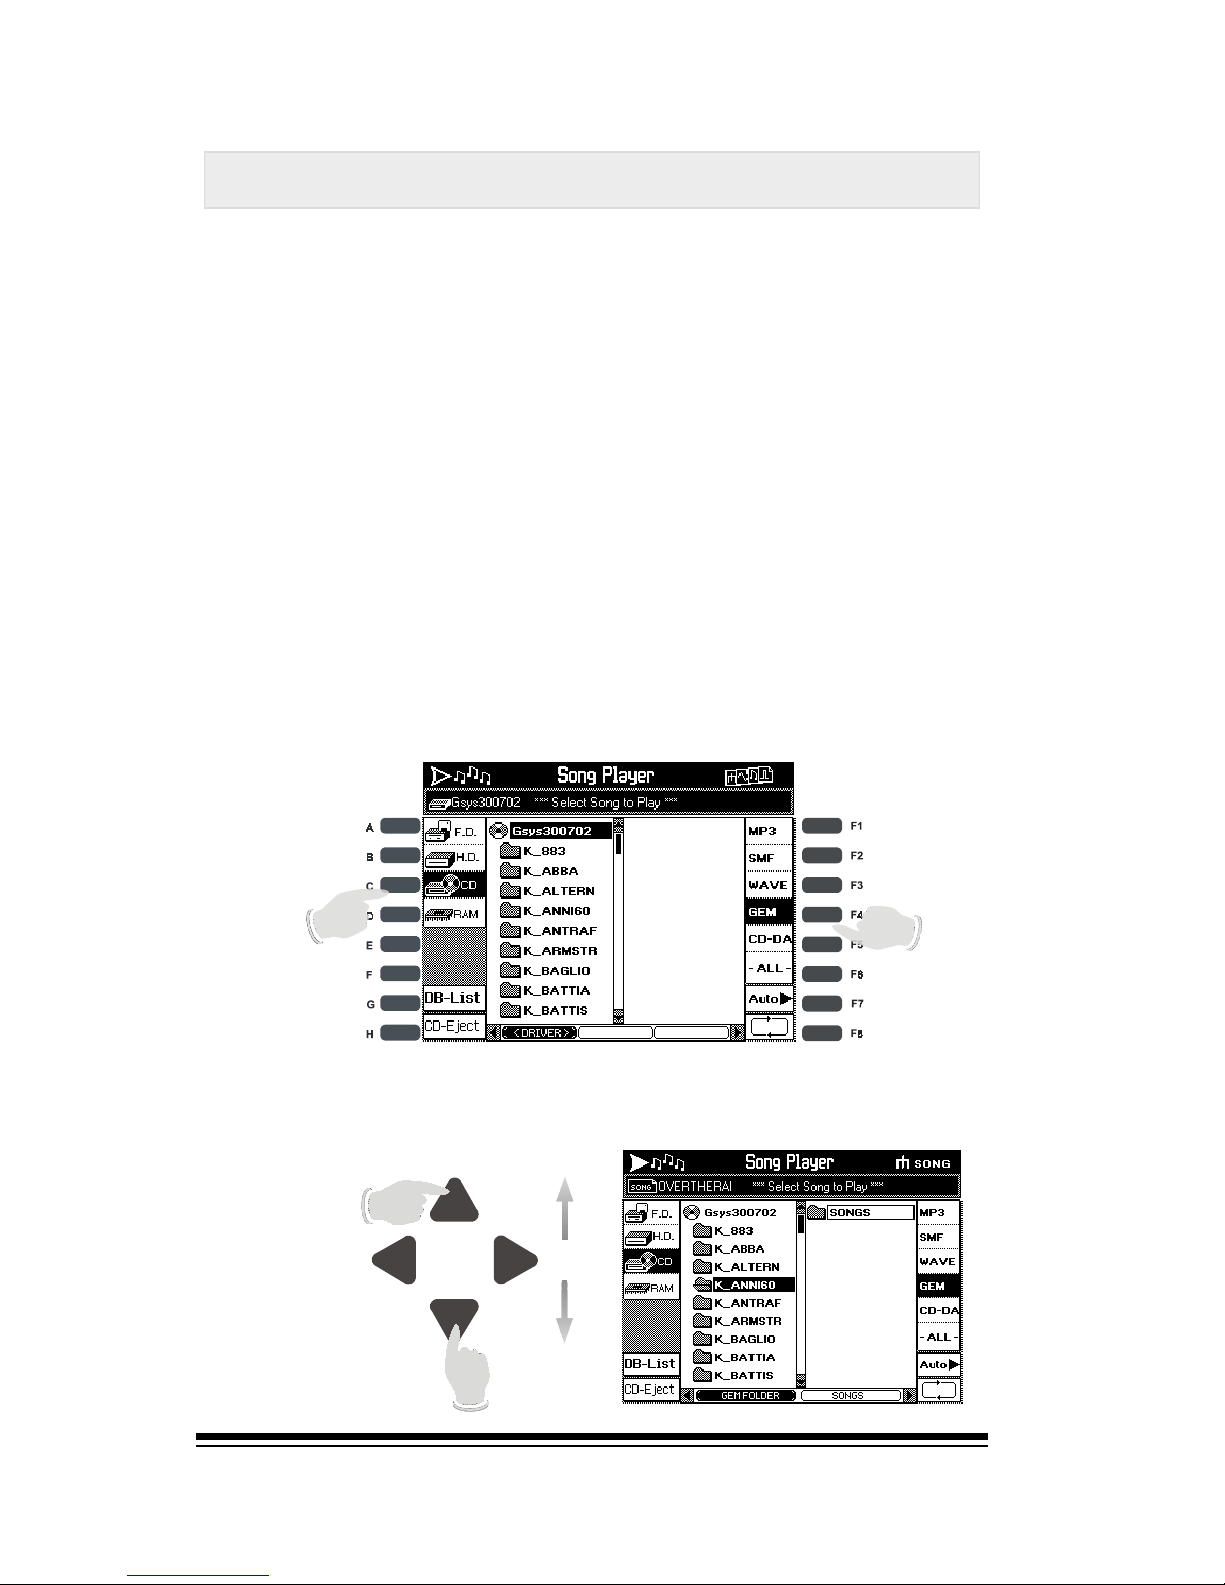
genesys ensemble/genesys grand ensemble
Page 50
After few seconds the CD is ready and you can use the UP/
DOWN arrows to select one folder in the directory
The Genesys Ensemble can play both digital audio and MIDI
song files, (it can also be used to record both types but
that comes later!). MIDI songs, also known as Midifiles or
SMFs, (Standard Midi Files), have long been the most popular format for use with electronic keyboards. If you have
some SMF disks you can use the song player to play these
in the same way that you did for digital audio songs. GEM
for creating songs use an exclusive format which offers
much greater power that ordinary Midifiles; offering 32
tracks instead of 16, a much wider range of sounds effects
and some very special additional features.
Midi files and GEM songs
Now to play one of these song, we will use the song CD
Rom included in the Genesys Ensemble packaging. Insert
first the song CD Rom in the drive, Then select this device
pressing the button C, and enable the display visualization
only for GEM song format only pressing the button F4
Page 60
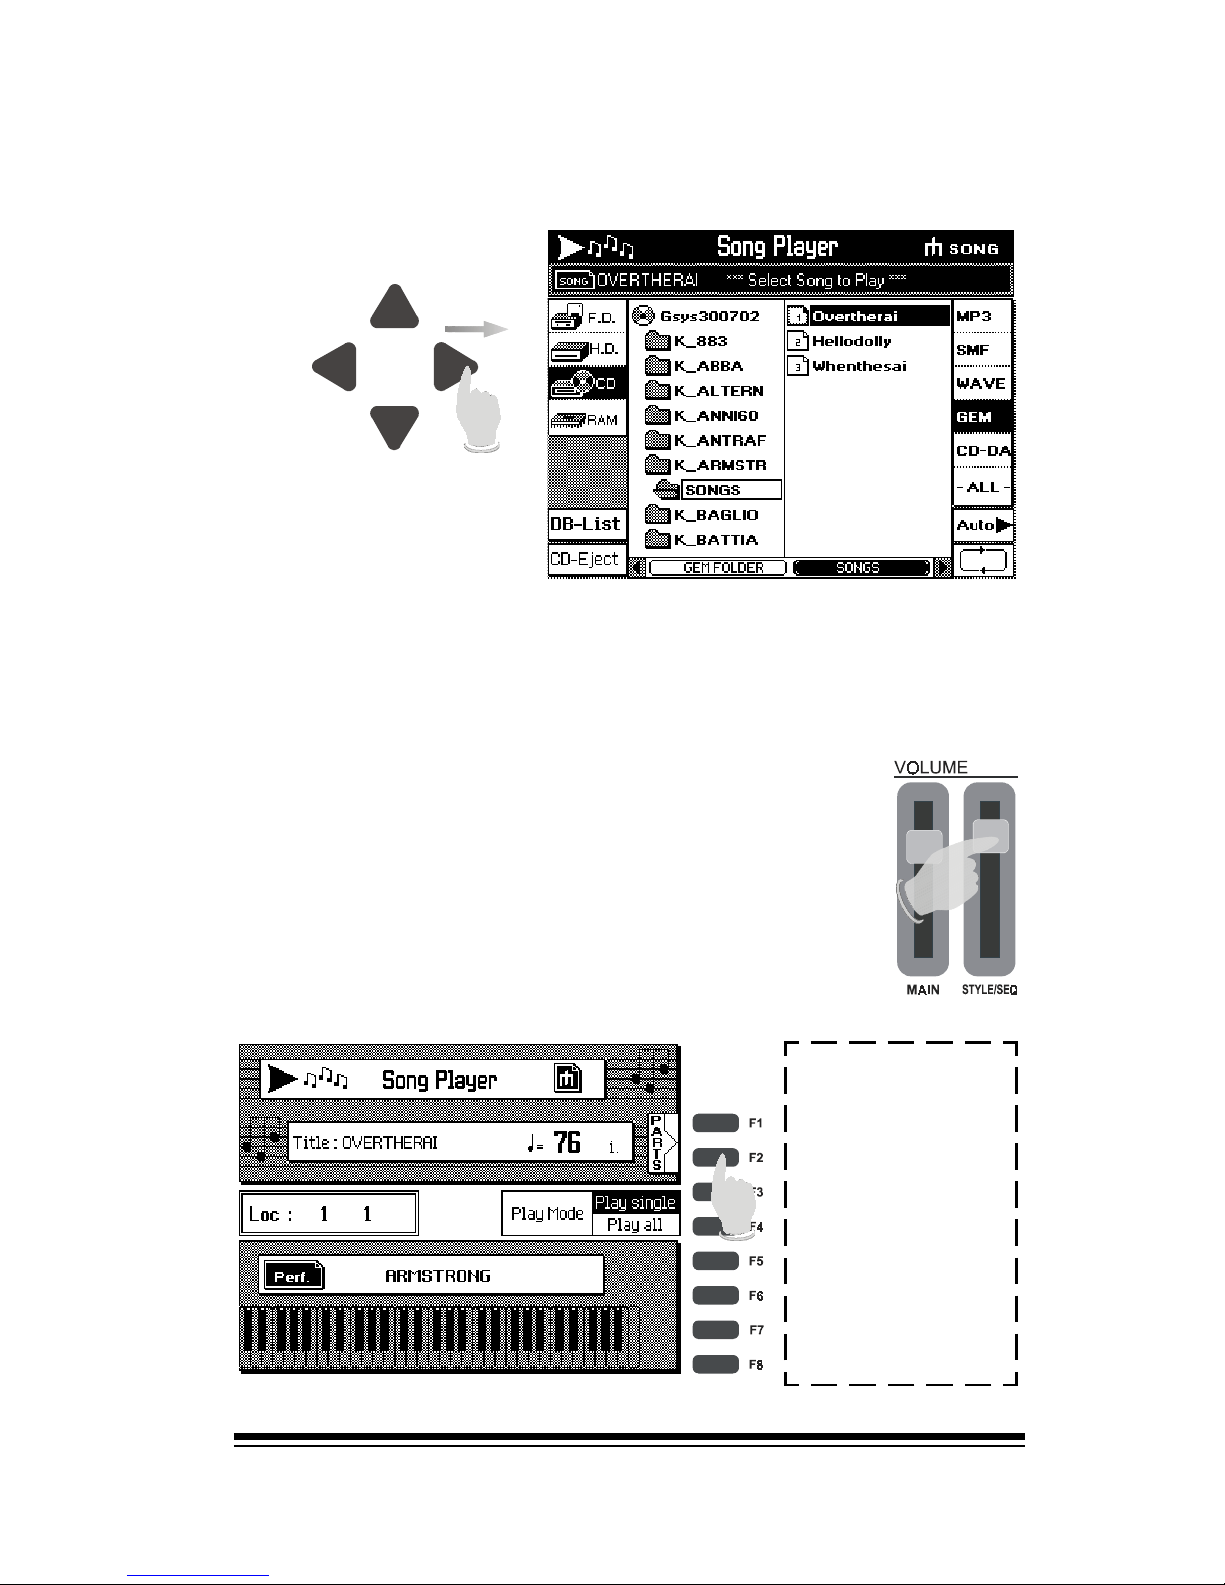
Song Player
Page 51
To adjust the volume of the song, use the STYLE/
SEQ volume slider on the left side of the instrument.
Whether the song your playing is a GEM song or
a standard Midifile, you can easily see and manipulate the individual tracks which make up the
song.
Once the song is selected press PLAY. the song start immediately
Than the RIGHT Arrows allows to enter the folder, and using the arrows UP/DOWN again you can select a song in
the folder
All GEM songs come complete with SCORE and LYRICS. To
see either of these while the song is playing, press the
SCORE or LYRICS button in the VIDEO & KARAOKE section.
Press ESCAPE
and then PARTS
(F2) at the upper
right side of the
screen. Now
youre looking at
the Genesys Ensemble sequencer screen.
Page 61
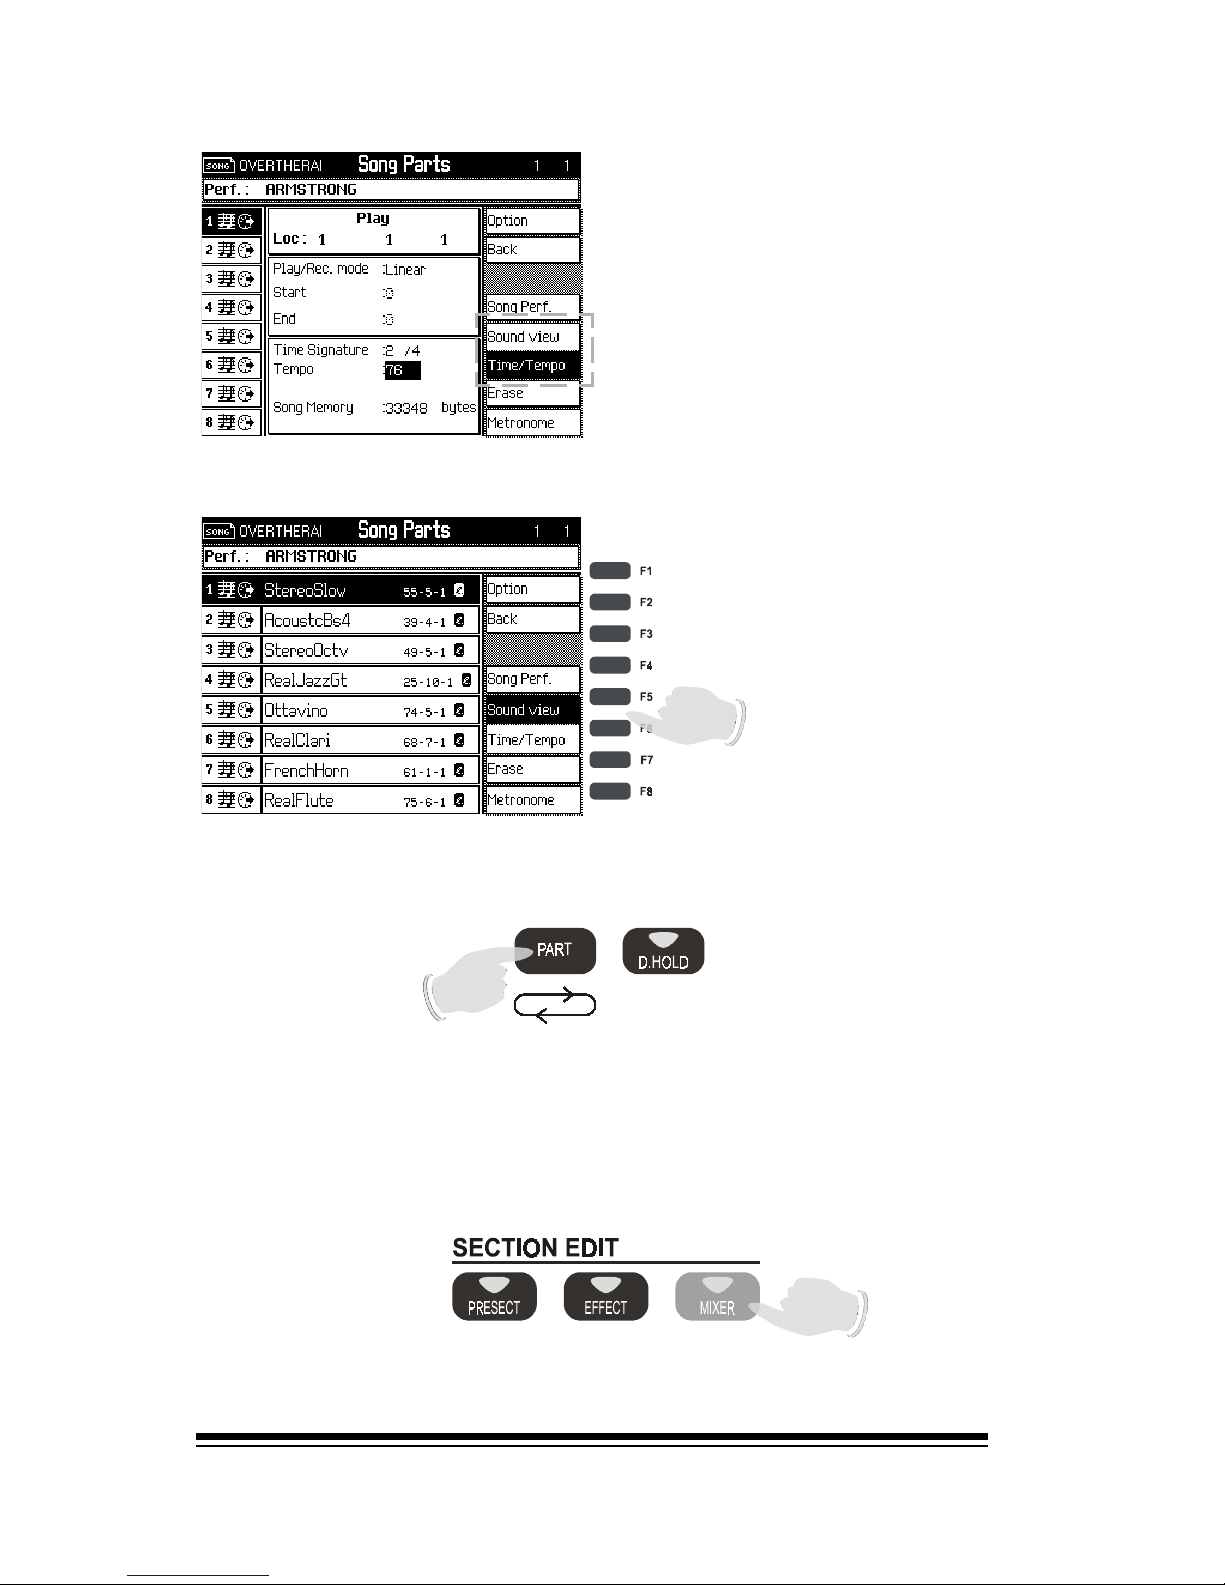
genesys ensemble/genesys grand ensemble
Page 52
The sequencer screen
shows TIME/TEMPO song
parameters: beat location,
time signature, tempo
speed, etc., whereas the
SOUND VIEW mode shows
the sounds, volume, panpot
etc. used in the selected
song.
Select the F5 function button to enter the SOUND VIEW mode.
Now you can see the first eight tracks of this song. If you
press the PART button, you will see the next eight tracks.
If there are more than eight tracks then keep pressing PART
to see additional tracks. Lets go back to the first eight
tracks and have a little fun, (keep pressing PART until the
screen returns to tracks 1-8). Make sure the song is still
playing. If it has stopped, just press PLAY to start it again.
Now press the MIXER button in SECTION EDIT.
Page 62
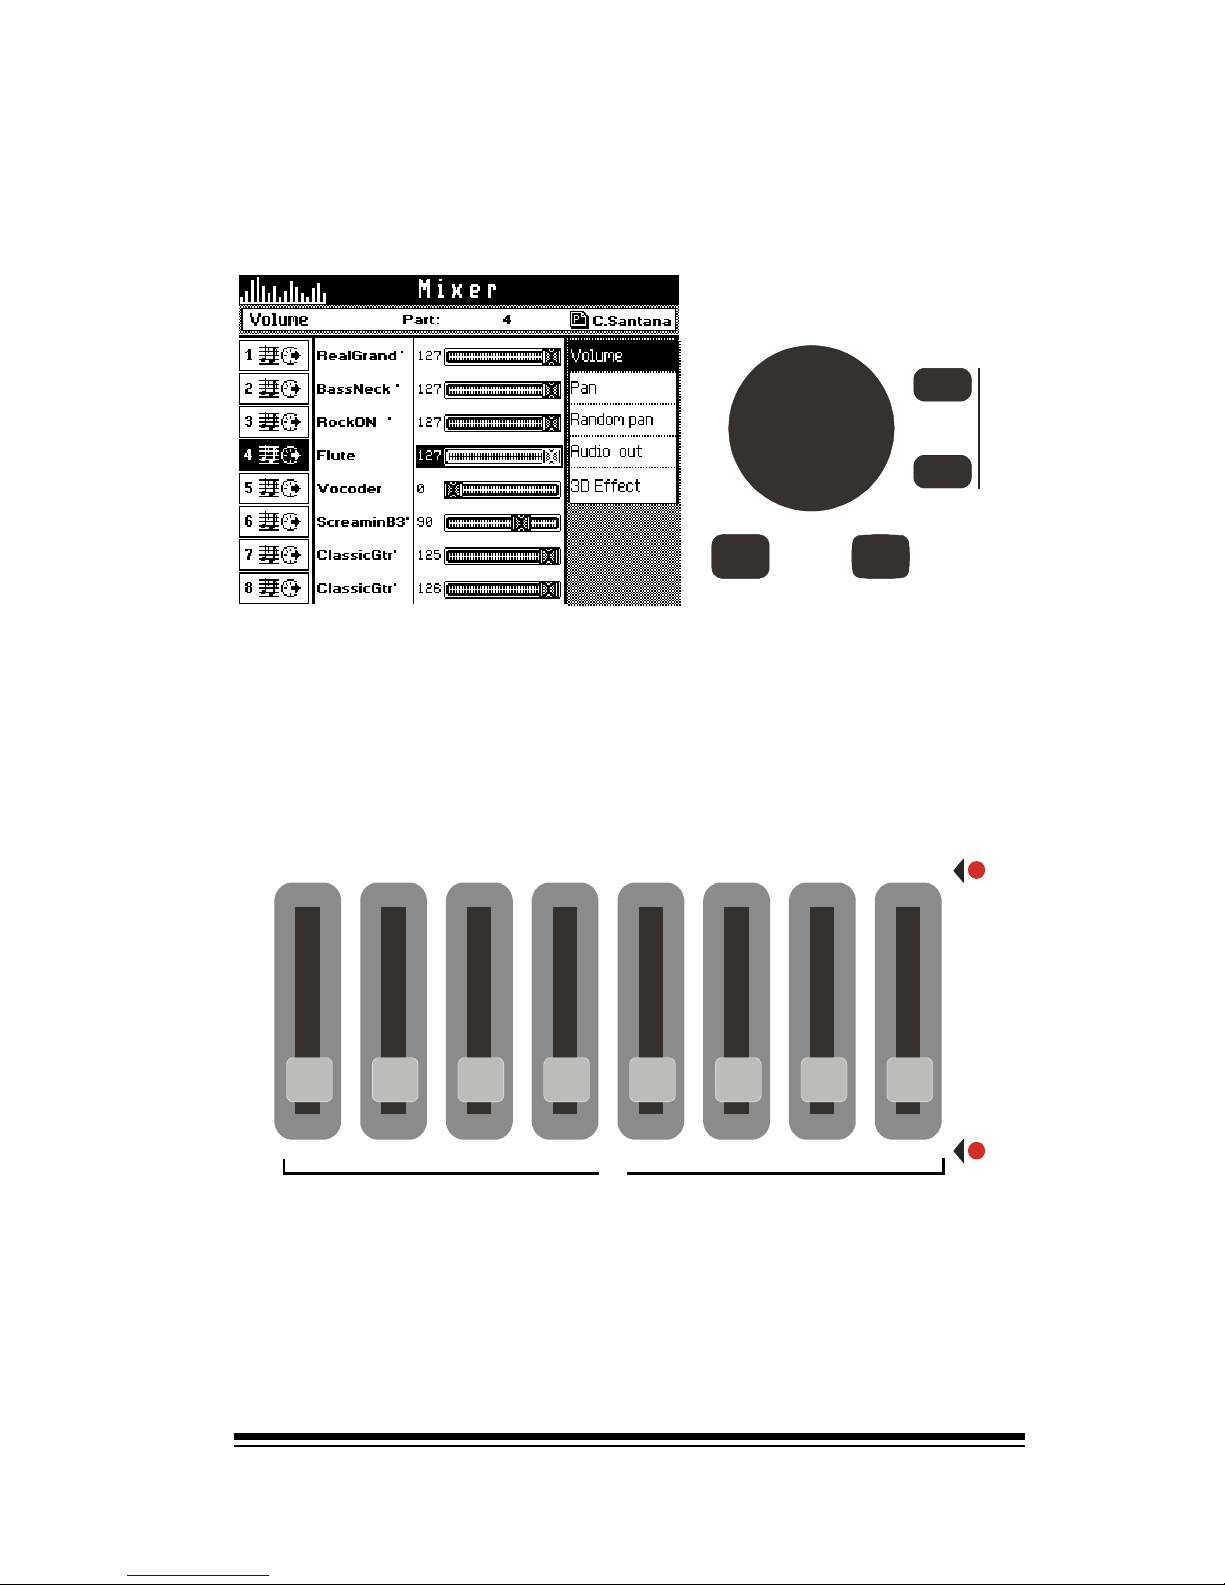
Song Player
Page 53
Here you can see the volume level of each track. You can
select different tracks by using the up and down arrow buttons. Use the dial to change the volume of each track.
For a faster mix, notice that each track in the screen corresponds with a letter of the alphabet printed beside the buttons along the left side of the screen.
If you look beneath the group of eight sliders on the left side
of the keyboard, youll notice that these too have corresponding letters.
Grab a handful of these sliders and pull them down. Youll
see the track volumes change in the screen and youll hear
these changes in the song too. Dont worry if you make a
mess of everything. These changes are only temporary. Youll
learn more about how to store these changes in the CREATING & EDITING section. Now lets try to change a few sounds.
INC
DEC
ENTER ESCAP E
PAN IC
TEMPO / DATA
J
CD
Mp3HD AUDIO
DRUMS
BASS
ACCOMP
LOW ER
UPPER
ABCDEFGHA
J
Page 63
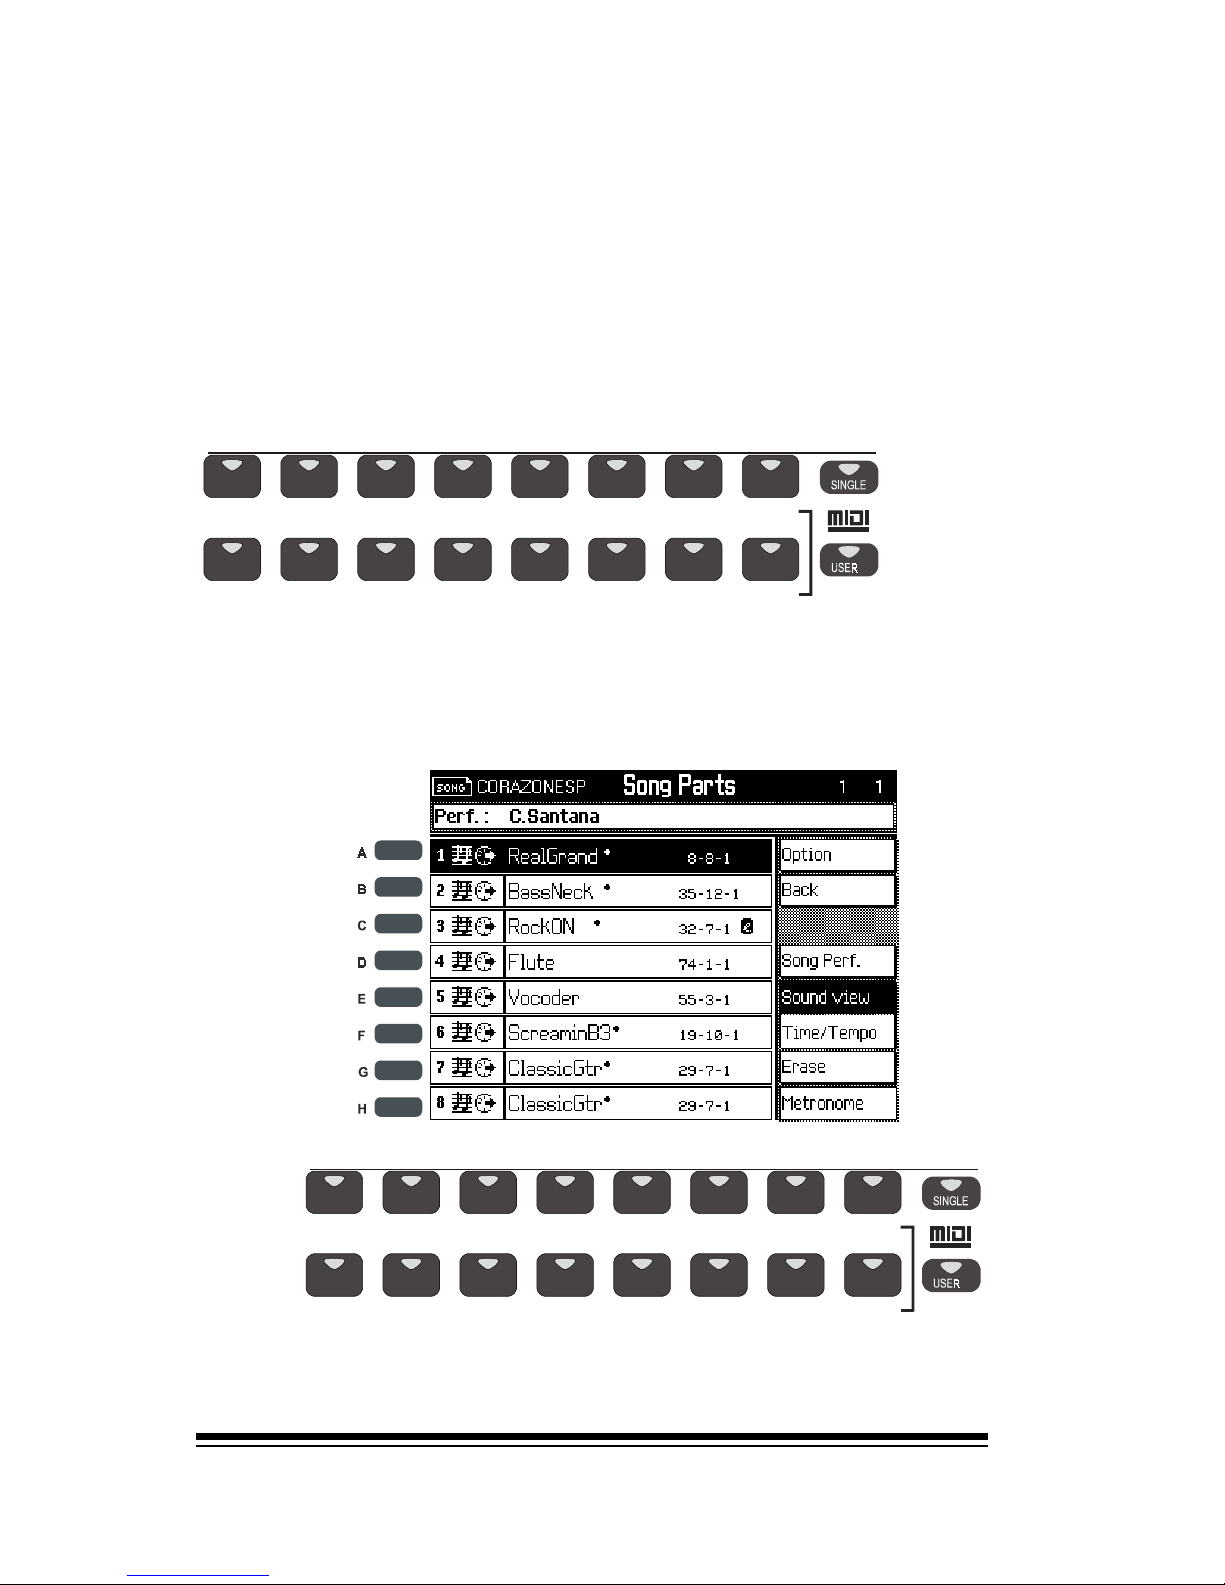
genesys ensemble/genesys grand ensemble
Page 54
Press ESCAPE to return to the home screen
Now press PARTS (F2) once again to get back to our sequencer screen.
Changing the sound in any track is simple. First, make sure
the song is playing and then select SINGLE mode in the
PRESET FAMILIES section.
Now select any track and simply choose a new sound from
one of the sound families. As soon as you select a sound
you will hear that new sound playing in the track you selected
Once again, these changes are only temporary so dont
worry about messing anything up.
STRINGS
STRINGS
DRUMS
ETHNI
C
REAL
SOUNDS
ENSEMB
EFFECTS
PER
C
DRAWBAR
BRASS
SAMPLES
EFFE
CTS
ORCH.
REED
ACCORD
PIPE
BRASS
S
YN.LEAD
WIND
S
YN.PAD
SYNT
S
YNTH FX
PIANO
PIANO
MALLET
CHROM
ORGAN
ORGAN
GUITAR
GUITAR
BASS
BASS
GENERAL
J
J
STRINGS
STRINGS
DRUMS
ETHNI
C
REAL
SOUNDS
ENSEMB
EFFECTS
PER
C
DRAWBAR
BRASS
SAMPLES
EFFE
CTS
ORCH.
REED
ACCORD
PIPE
BRASS
S
YN.LEAD
WIND
S
YN.PAD
SYNT
S
YNTH FX
PIANO
PIANO
MALLET
CHROM
ORGAN
ORGAN
GUITAR
GUITAR
BASS
BASS
GENERAL
J
Page 64
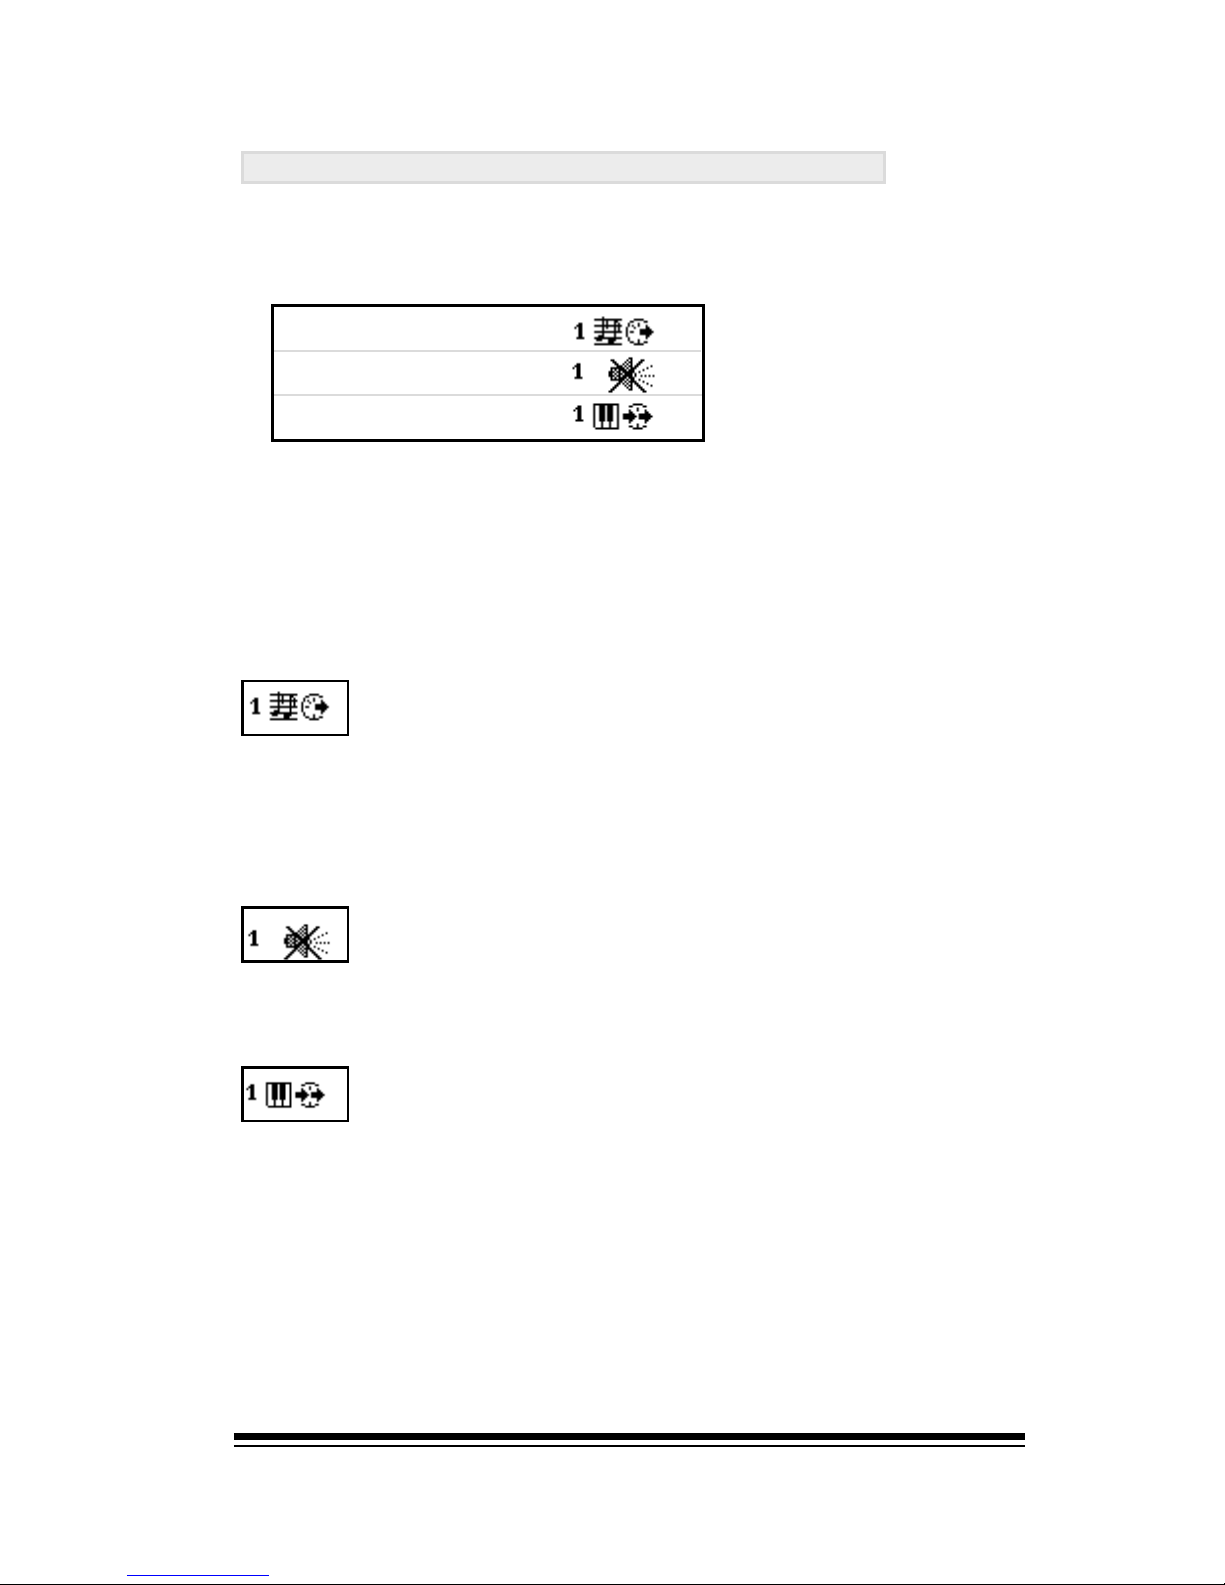
Song Player
Page 55
Enabling and Disabling Song Tracks
For each track in a song, you can choose one of three different playback modes.
1. Song play
2. Mute
3. Keyboard play
You choose the mode by simply clicking the small button
to the left of the track.
Each subsequent click switches to the next mode and
the icon changes accordingly.
This is the Song Play icon. When a track is in this
mode it will play the musical part that has been
recorded into it, (if this is an empty track, you will
not be able to select this mode). This is the normal mode for a track that contains some recorded
music.
This is the Keyboard Play icon. When a track is in
this mode you can play it from the keyboard. Putting a track into this mode will stop it from playing
back any recorded music so that you can play it
manually.
This is the Mute icon. When this mode is selected
the track is silenced and will not be played. This is
the normal mode for an empty track.
Page 65
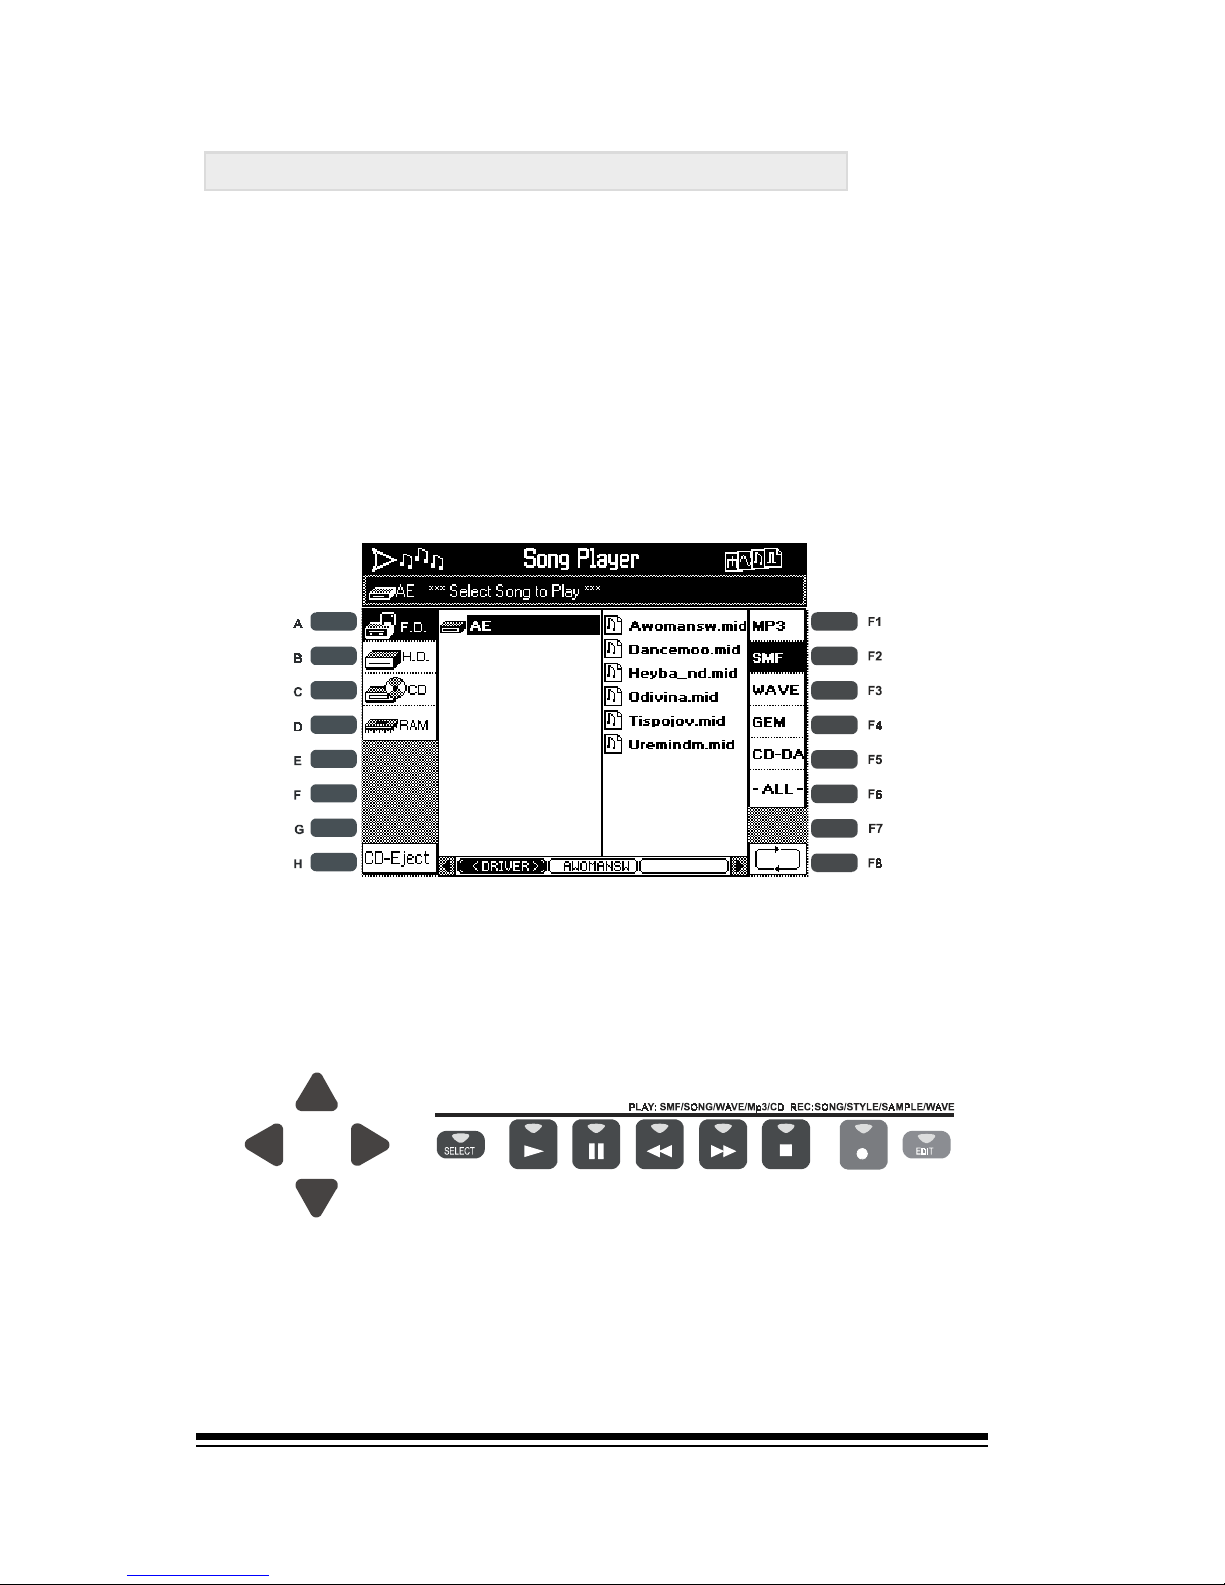
genesys ensemble/genesys grand ensemble
Page 56
Playing a Midifile from a floppy disk
You may already have a floppy disk with some Midifiles on
it. Heres how to listen to your songs.
Insert the floppy disk into the drive and then go to the
SONG PLAYER/SELECT screen. Since we want to listen to a
Standard Midi File, (SMF) from a floppy disk, (FD), we need
to press FD on the left and SMF on the right.
In fact, you didnt really need to press SMF. Read the footnote entitled FILTERS to decide whether this is necessary
in your case.
Now you can see all of the SMFs on this disk.
You can listen to these songs exactly as before. Select the song
you want using the up and down arrows and then press PLAY.
When youre using a Midifile you can use the SOUND PRESETS in the normal way to play along, (you can switch off
SINGLE mode).
You can also manipulate the tracks and change the mix in
exactly the same way we did for the GEM song example.
J
J
SONG PLAYER/REC STUDIO
|
J
J
Page 66

Song Player
Page 57
NOTE: Filters
Sometimes you may want to look at everything the device
contains. However, some devices like the Internal Hard Disk
or a CD-ROM can contain so much data that it can be useful
to only look at certain items and hide those which are not of
interest to you. For this purpose a number of FILTERS are
provided on the right side of the screen. You can use a filter
to tell the system that you only wish to see songs of a certain
type. Anything else will not be shown to you.
For example, if you have a CD which contains hundreds of
Midifiles plus .WAV files, Mp3s and more, you can use the
buttons on the right side to show you only the type of files
you are interested in. Pressing MP3 will show you only the
Mp3 files on that CD. Pressing SMF will show you only the
Midifiles and so on.
Remember that when you dont wish to use a filter, you
should select ALL. This effectively turns off all the other
filters and allows you to view every file.
Page 67
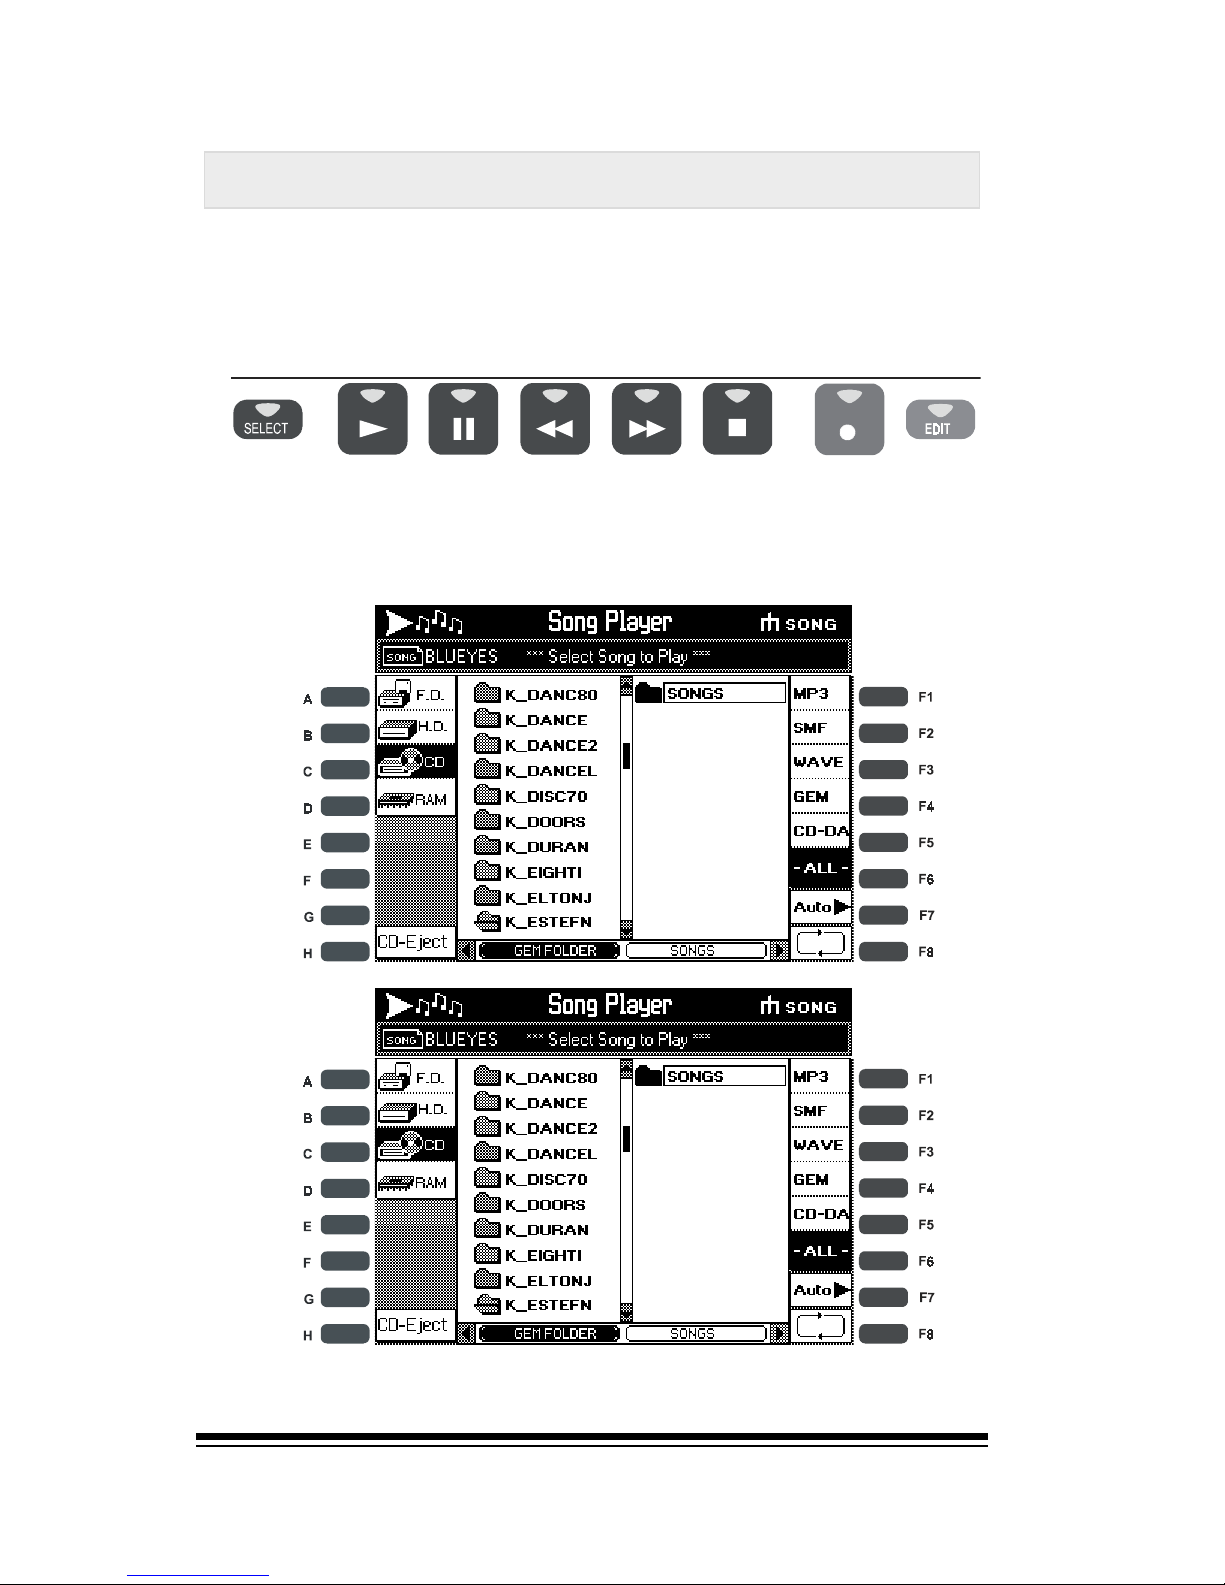
genesys ensemble/genesys grand ensemble
Page 58
J
It is possible to change folder (same file type), without any
interruptions in your playing.
a) Press the button [SELECT] in Song/Player section.
J
c) Select a Play driver (FD, CD-ROM, HD).
MULTITASKING FUNCTION IN THE FILE PLAYER
b) Disable the [AUTO] Function, pressing [F7] button.
J
Page 68
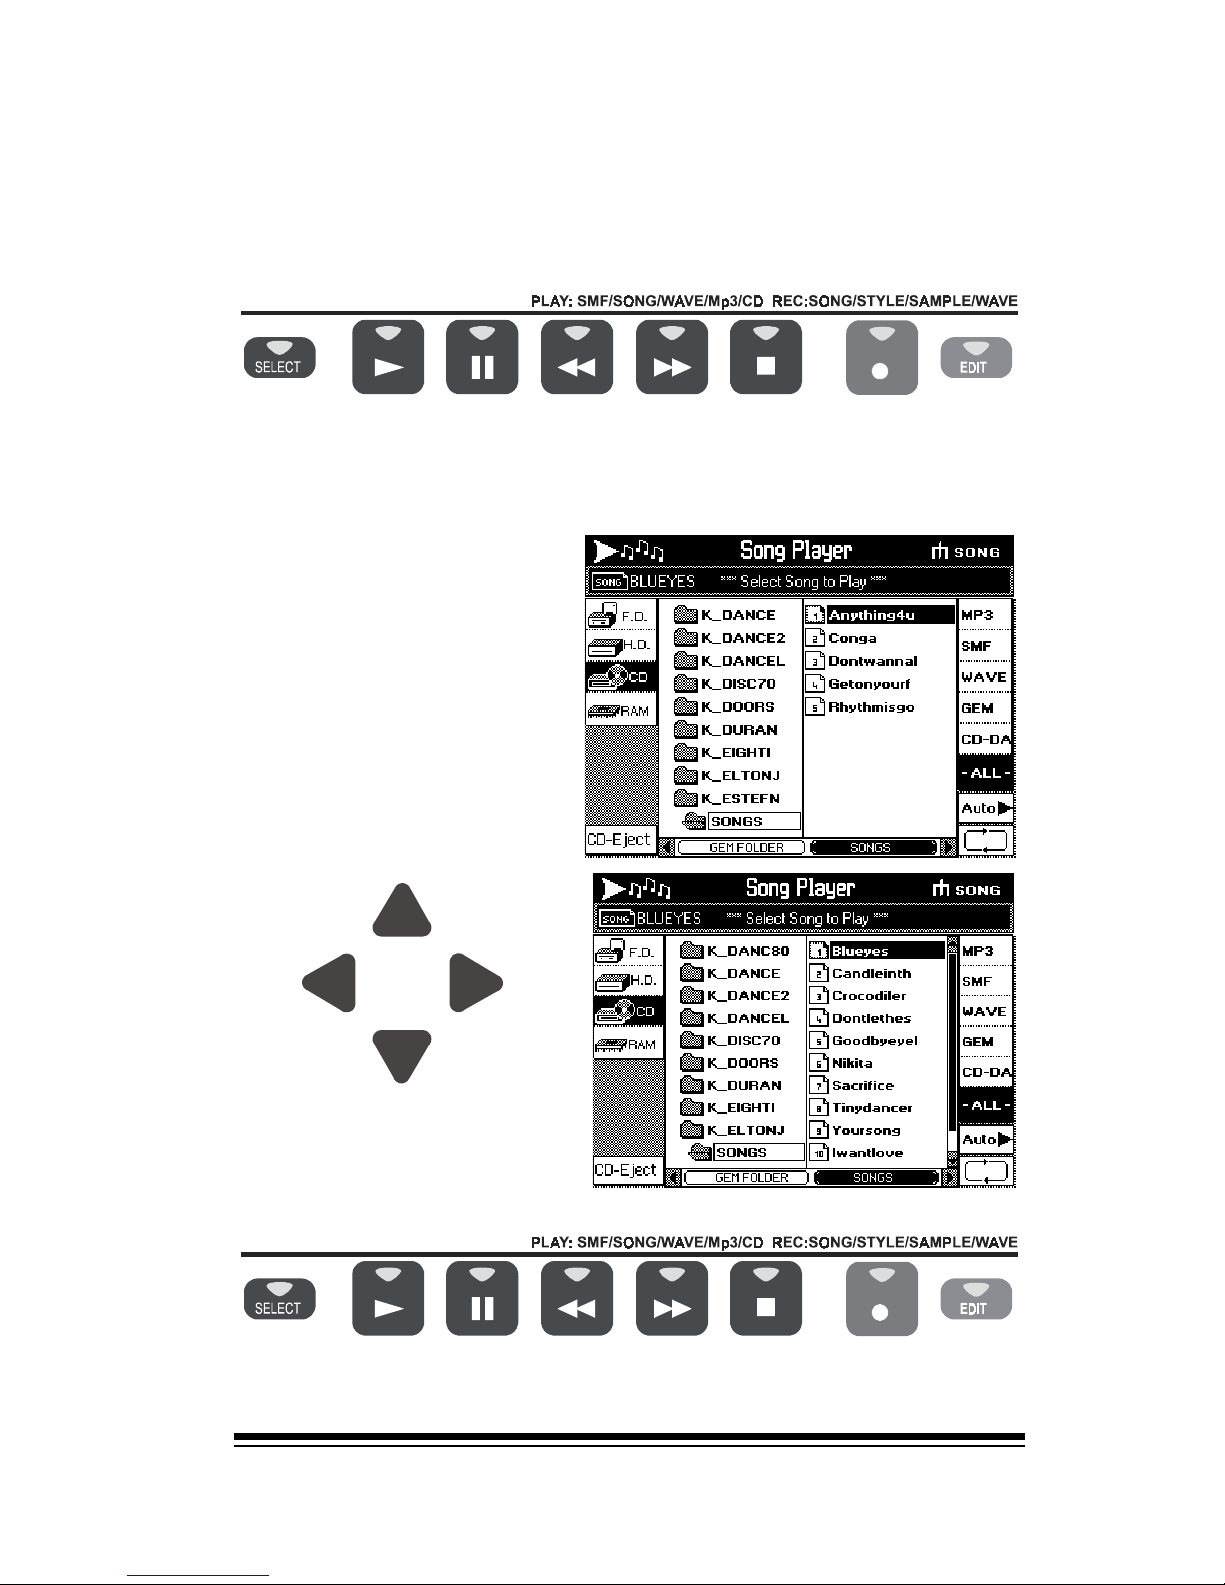
Song Player
Page 59
d) Using the cursor keys select a song in GEM format from
any folder. Make it play pressing the [PLAY] button in
the panel.
e) During the song
execution, you can
change folder, using
the cursor keys,
without the instrument
stop playing the
current song. Press
[STOP] and [PLAY] to
play the new song.
J
SONG PLAYER/R EC STUDIO
|
SONG PLAYER/R EC STUDIO
|
J
J
1
2
J
J
J
1
3
2
Page 69
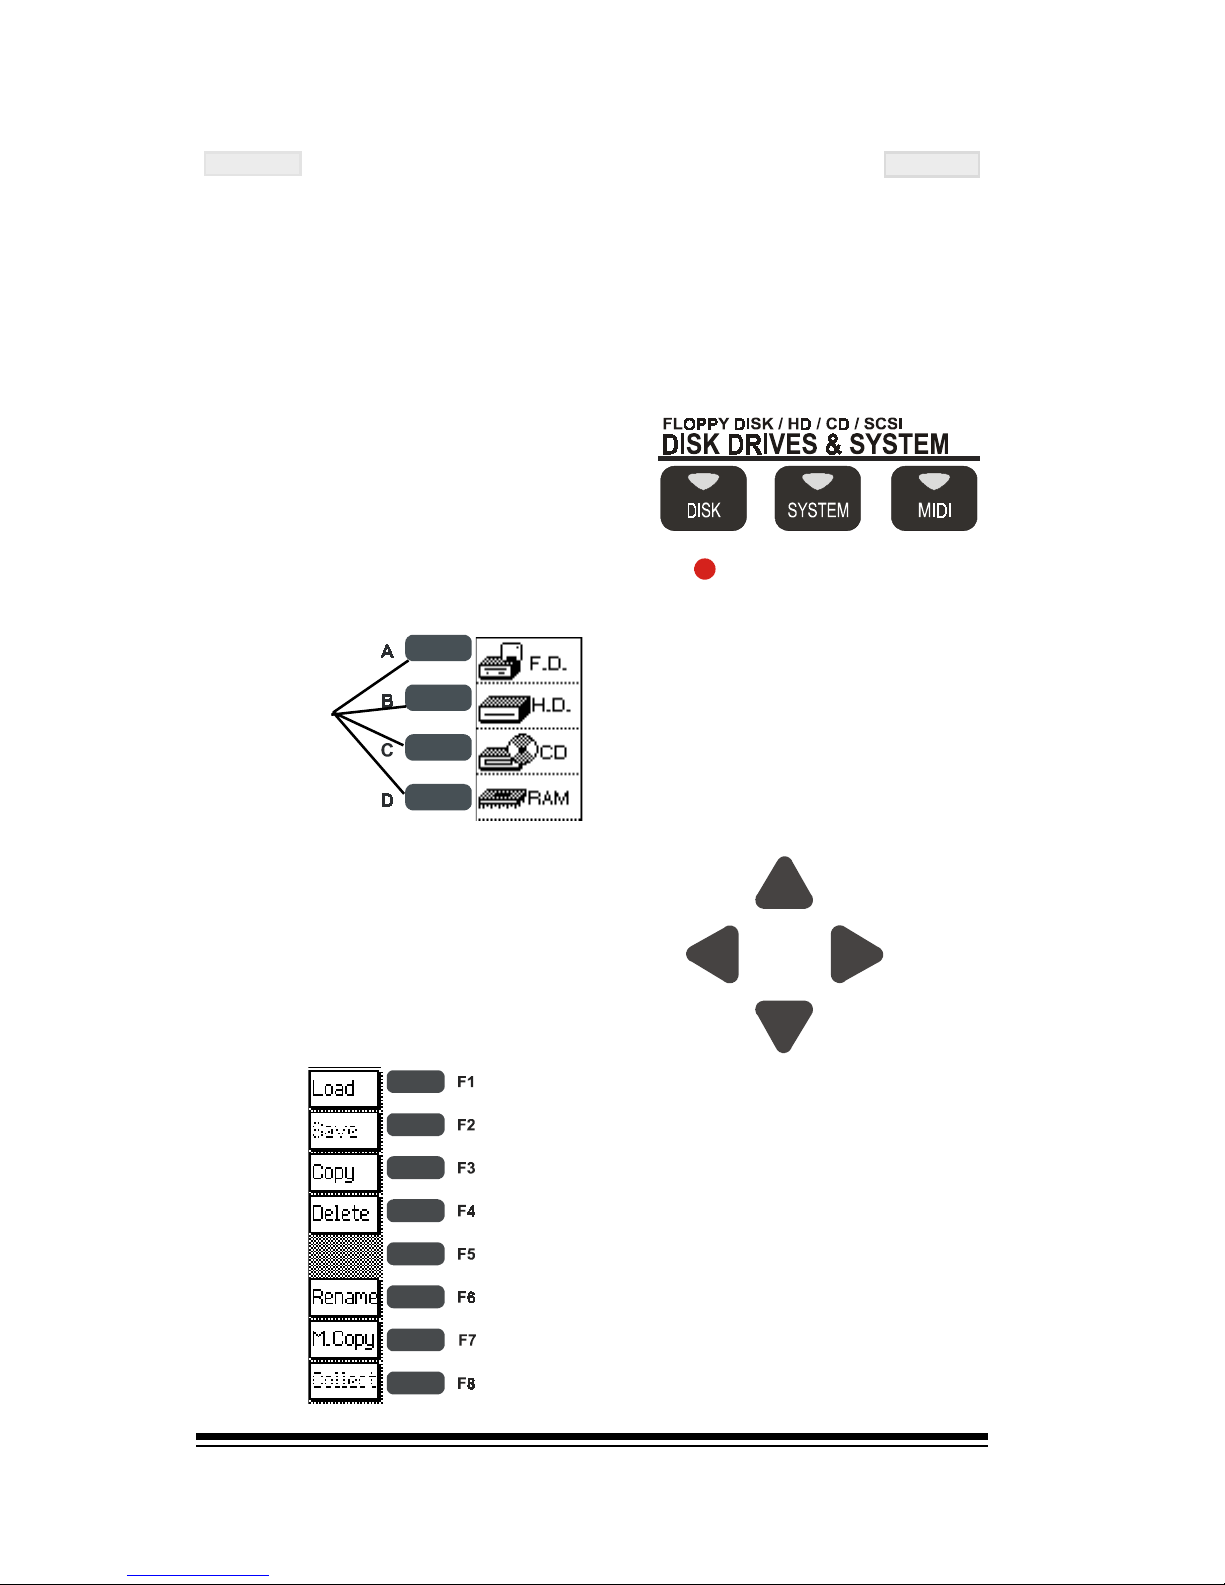
genesys ensemble/genesys grand ensemble
Page 60
J
J
J
J
J
LOAD WHILE PLAYING- FUNCTION
During internal RAM file song execution, it is possible to
accede to all media supports (Hard disk, floppy, CD ROM,
SCSI), to load a file song in RAM memory, without any
interruptions in your playing.
a) Press the [DISK] button in the
panel.
b) Select a media support.
c) Select using the cursor
keys, a folder containing
songs in GEM format.
d) Load the folder in RAM
memory, using the [F1]
(LOAD), key.
Page 70
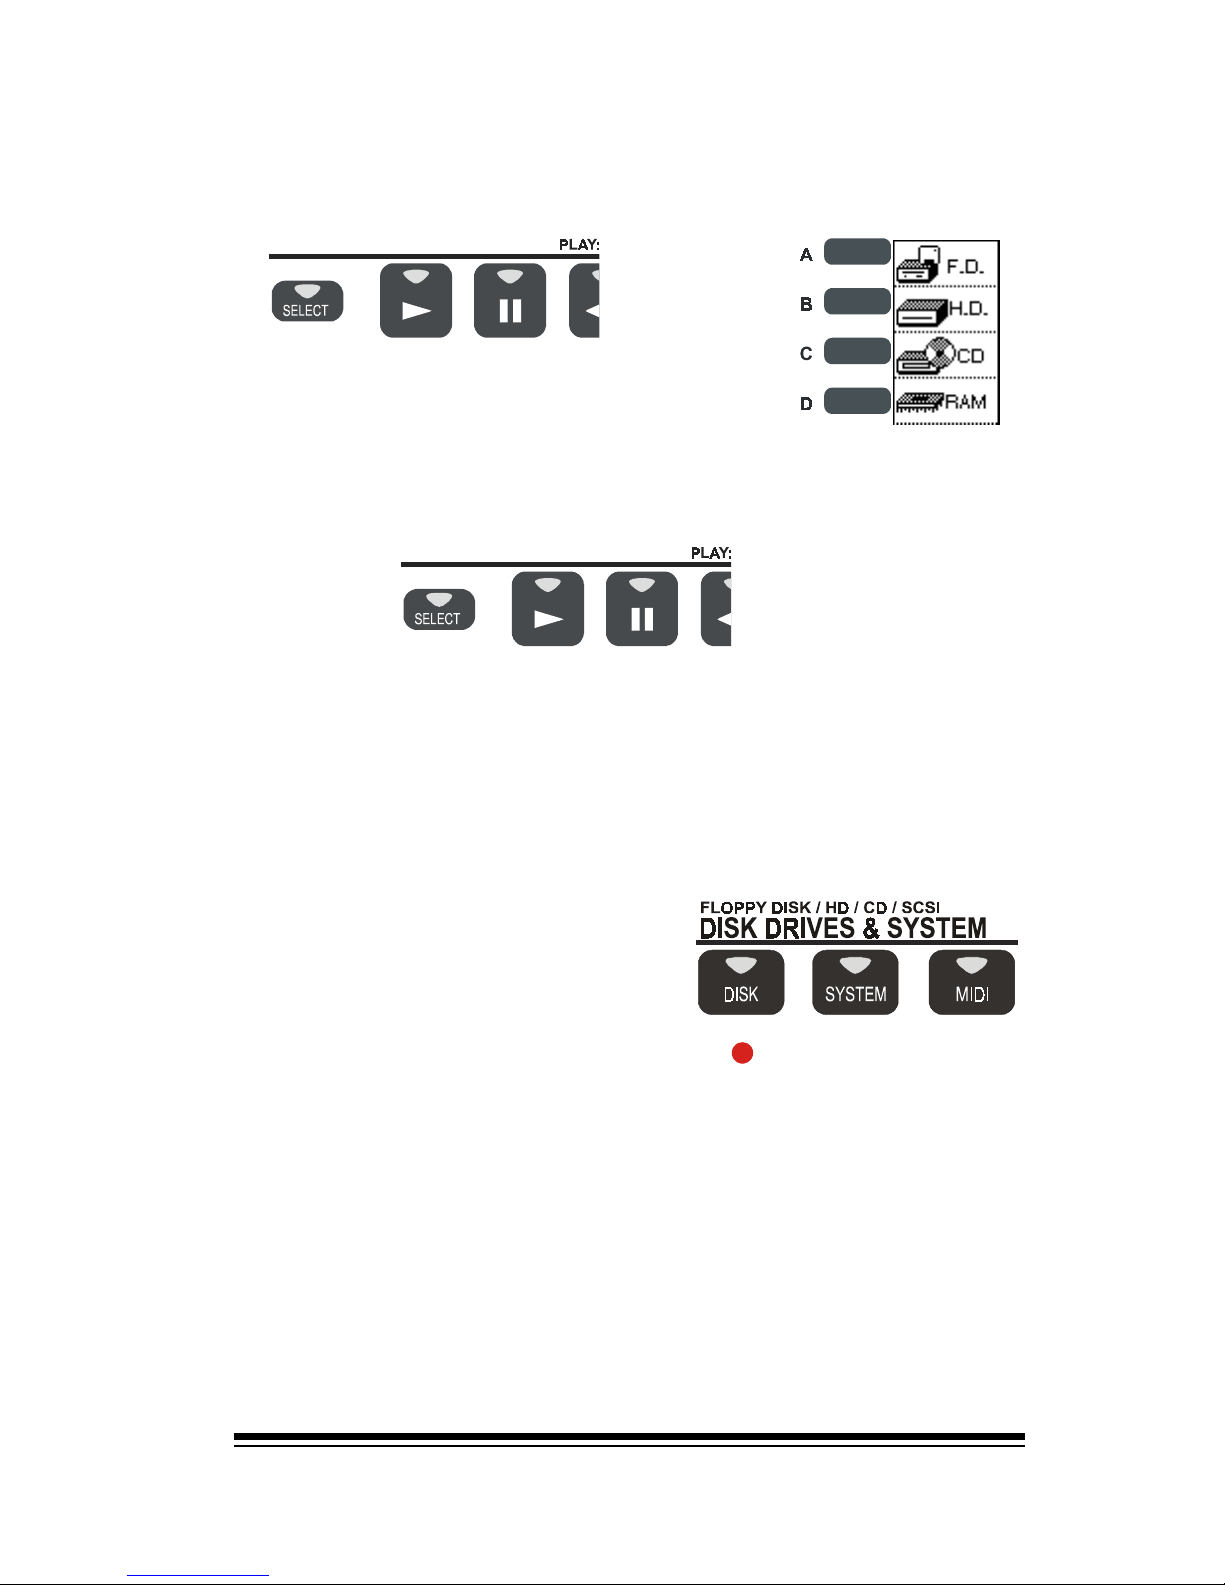
Song Player
Page 61
SONG PLAYER/REC STUDIO
|
J
J
SONG PLAYER/REC STUDIO
|
J
J
e) Select the Song/Player section and select RAM as drive
player.
f) Select and Play any song.
g) If you press the [DISK] button in the panel again, the
instrument will not stop the current song. In this way
you can enter again in the file directory, and load another
file in any free song location.
Standard midifiles playing optimization.
It was implemented a new Generalmidi 1 and 2 compatible
conversion table, allowing the use of the best Genesys
Ensemble sound, even reproducing commercial midifiles,
guaranteeing in this way as the best audio quality as
possible.
Page 71
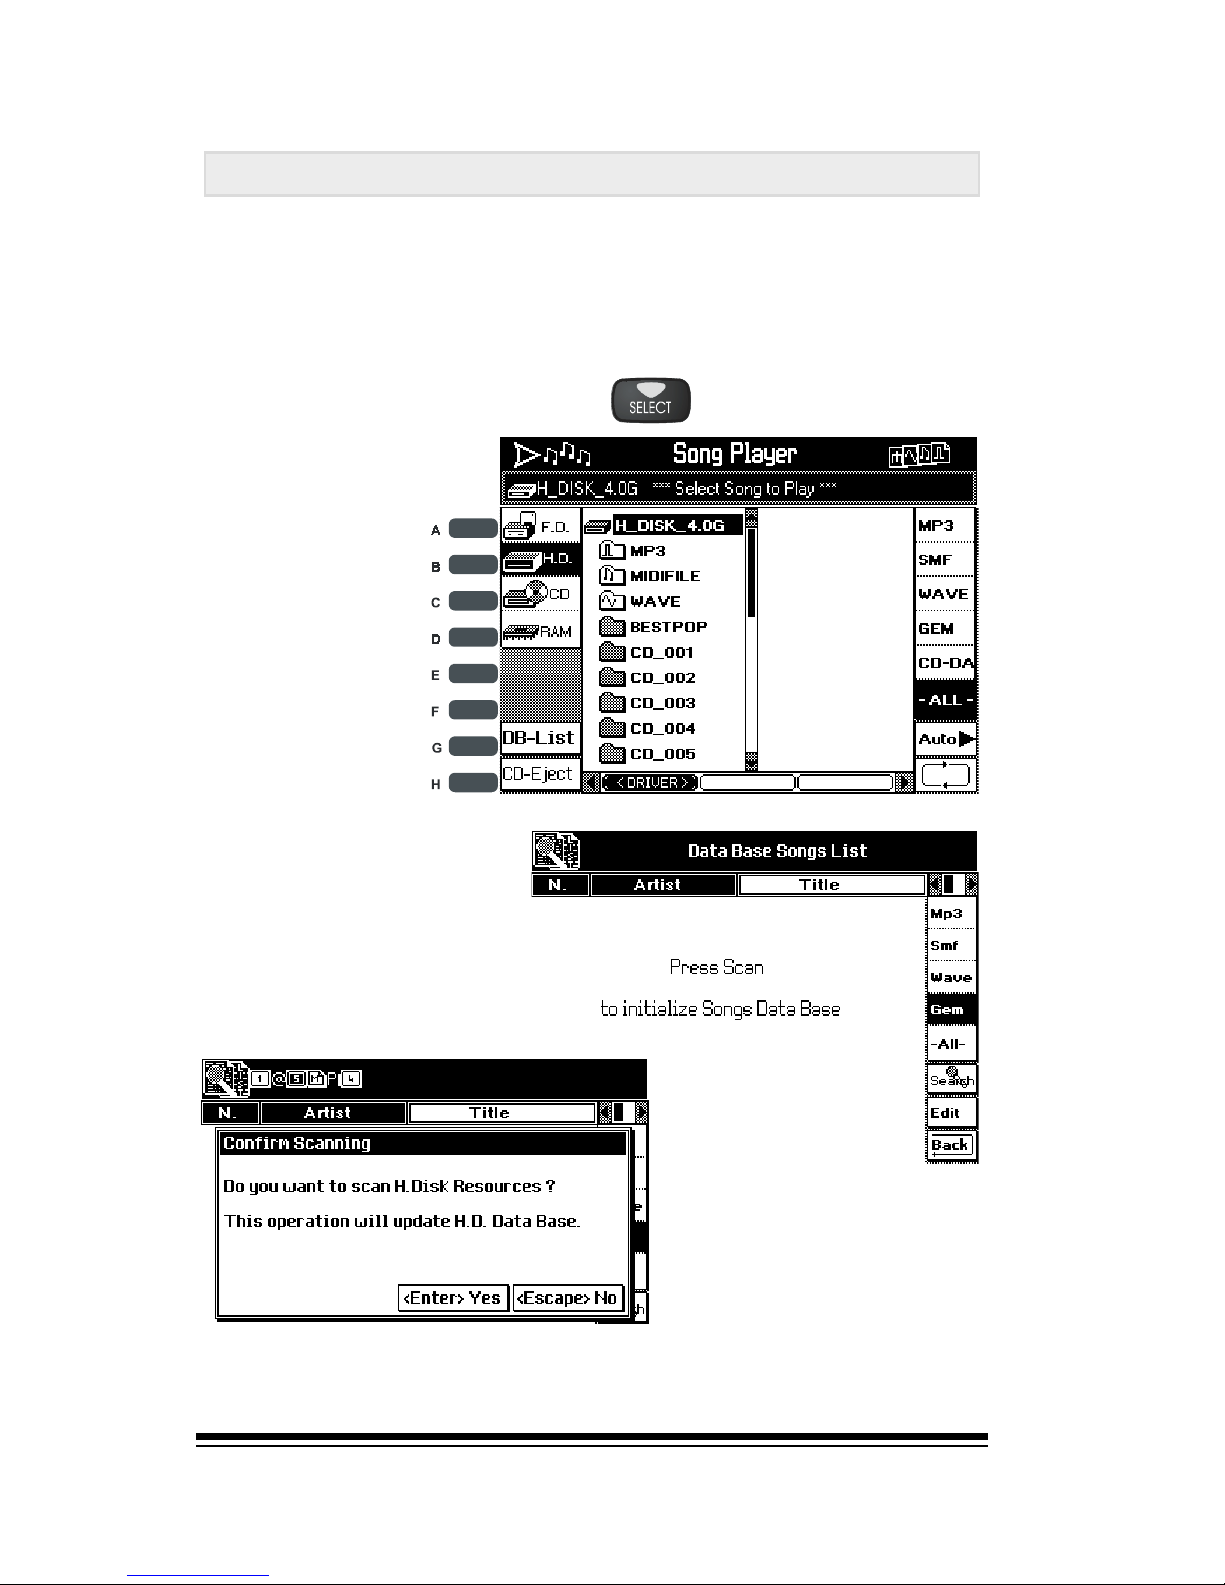
genesys ensemble/genesys grand ensemble
Page 62
DB List
This function ets you create a database of all your musical
files (Mp3, Smf, Wave, GEM Songs) that are stored on the
Hard Disk.
For this function to work correctly, all the files in your musical repertoire must already be present on the Hard Disk.
Press the select button.
Now press ENTER to create the database
J
Press button G
(DB list)
J
You should see
the following
display
Page 72
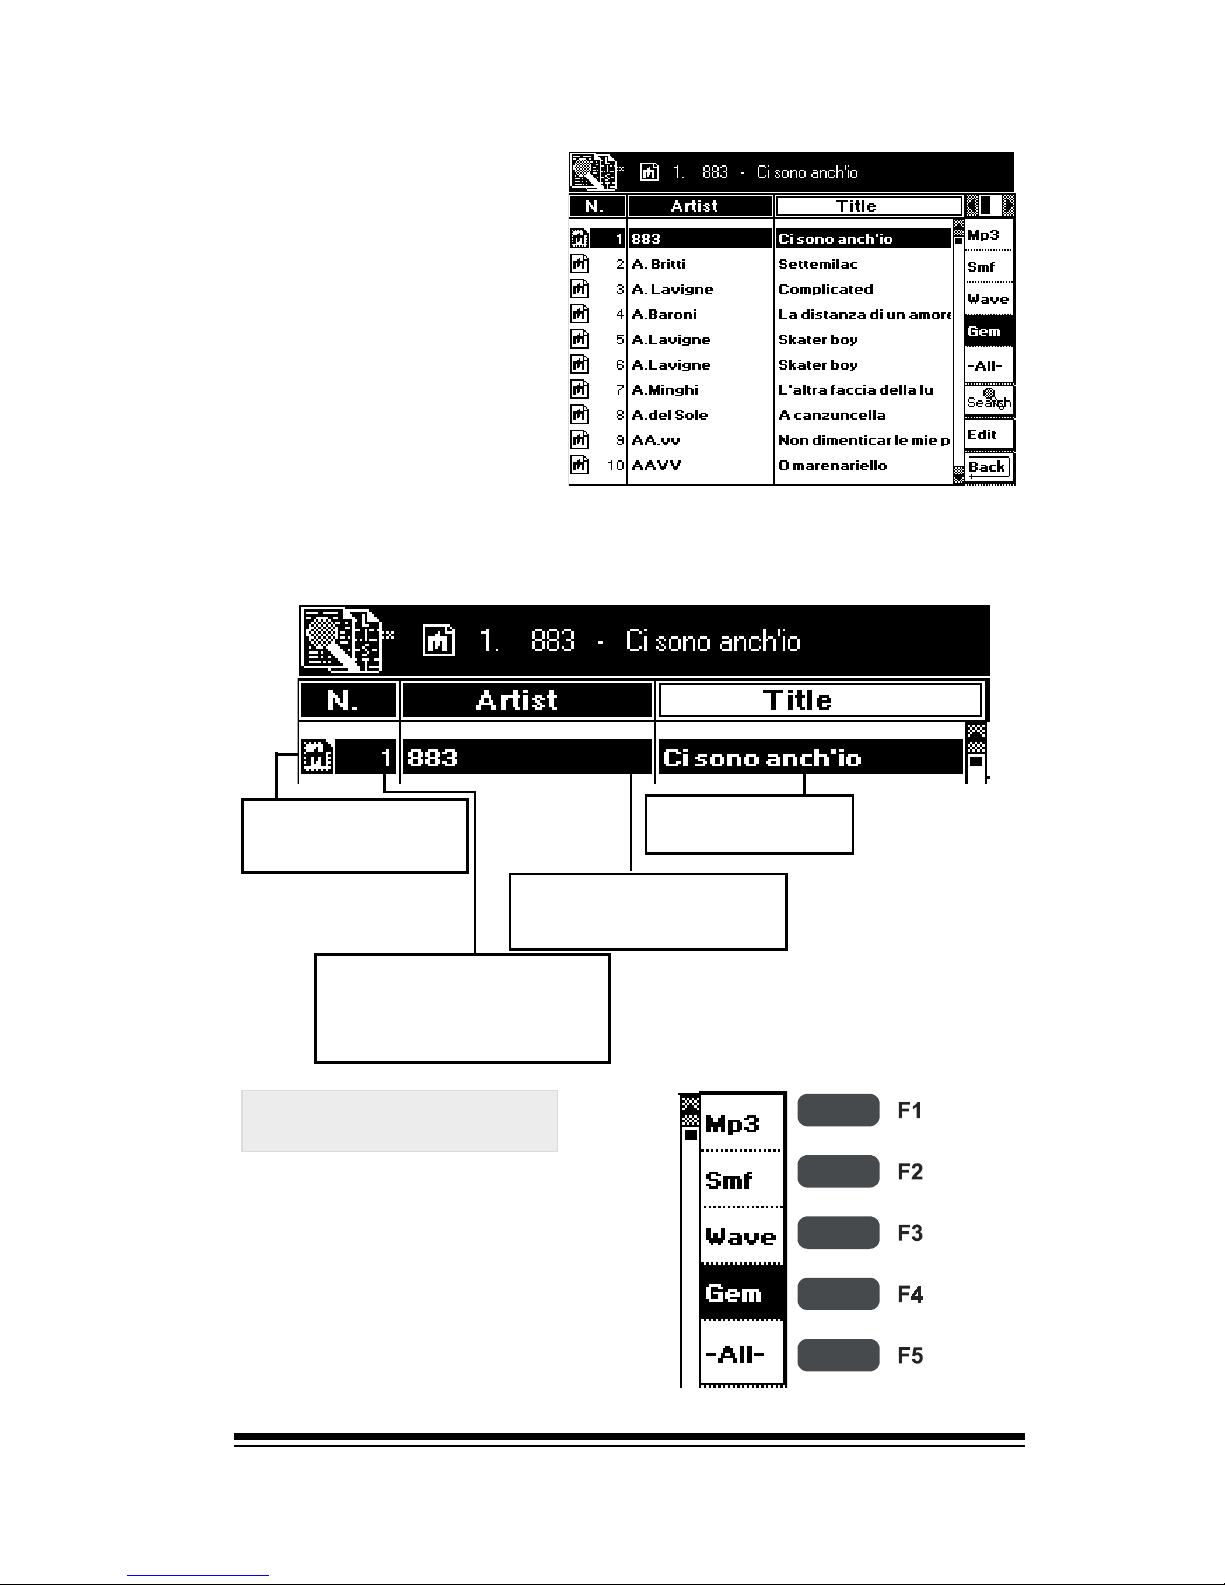
Song Player
Page 63
The function keys (F1...F4)
allow you to select which
types of files you want to
see, while the F5 button will
allow you to view all files
regardless of their type.
J
When the operation is
complete (it may take a
few minutes), you will
see a display similar to
the following.
Your database has now
been created.
Now lets take a look at the various options in the DB list
Icon indicating
the type of file
Artist (or creator)
field
Song title field
Number indicating
the position of the
file in the database
View filters
Page 73
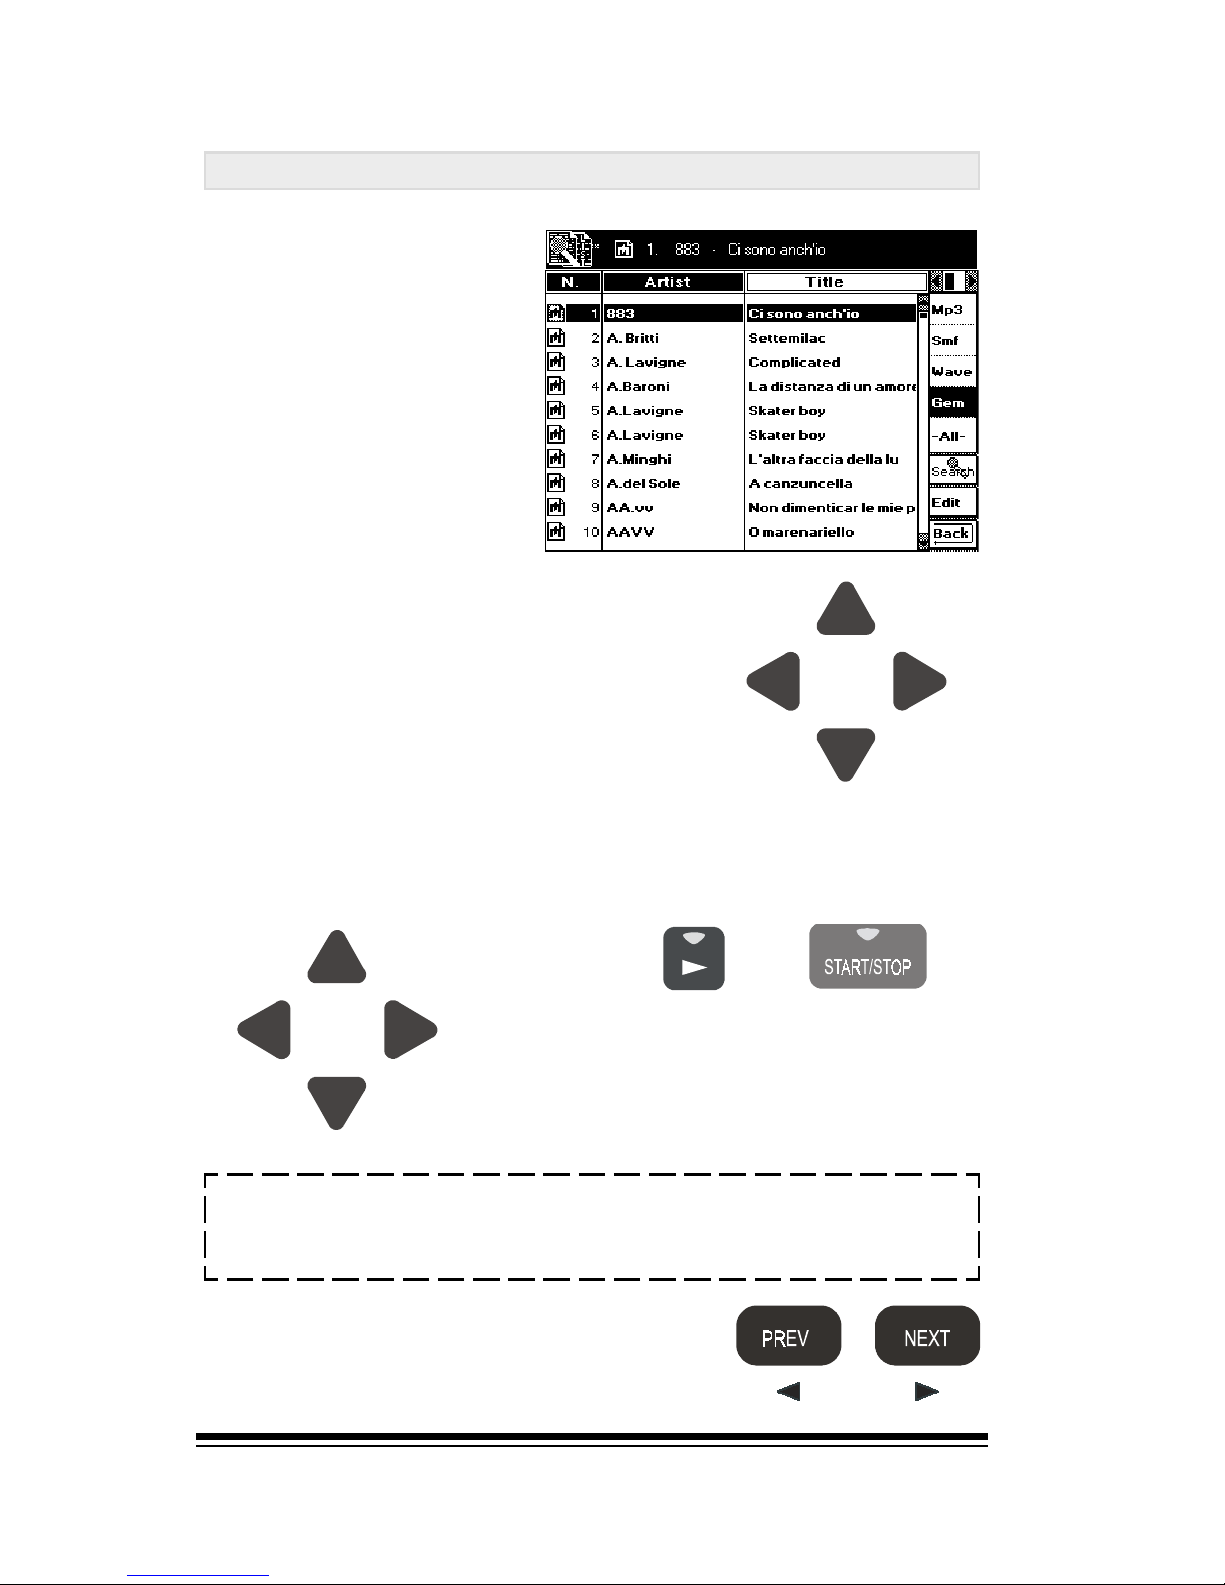
genesys ensemble/genesys grand ensemble
Page 64
Select and play songs from database list
By default, the songs are
listed alphabetically by
ARTIST (writer or creator
of the piece).
By moving the cursor over
to the title-field on the
right, the listing will be
automatically re-sorted to
show the database in
alphabetical TITLE order.
Use the cursor keys to select the song you want to hear
and then press either PLAY or START/STOP.
If you want to move more quickly
around the list than the cursor keys
allow, you can also use the PAGE
buttons.
PA G E
J
This operation will work even while a
song is playing.
J
J
N.B. Once a song has started to play, you may interrupt it
and immediately commence playing a new song by first
selecting the new song and then pressing ENTER twice.
JJ
Page 74
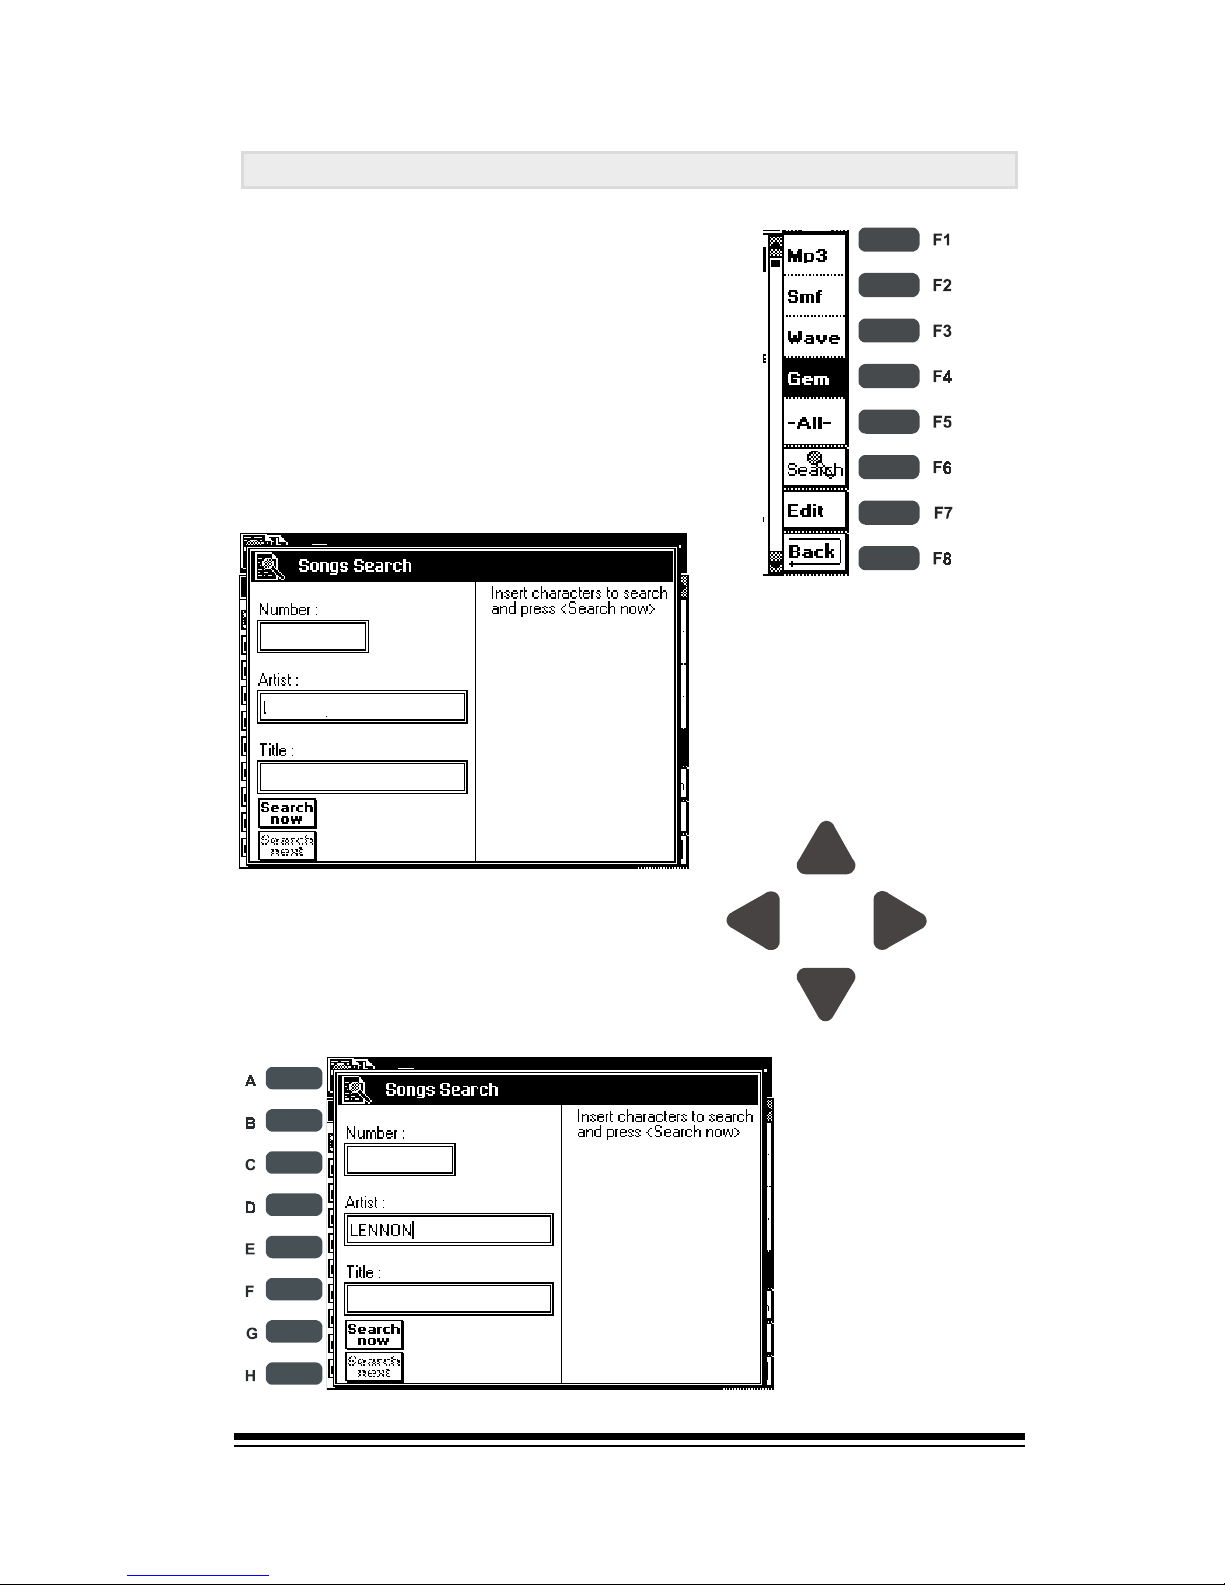
Song Player
Page 65
SEARCH FUNCTION
You can search for any song in your
newly created database ,either by
number, title or artist, using the
search function (F6).
Now choose one of the available
fields using the cursor keys.
For example, if we
are looking for a
Lennon song, we
only need to type
LENNON in the
Artist field and
then press button
G (search now)
Pressing this button will
cause the resulting
window to be displayed
J
J
J
Page 75
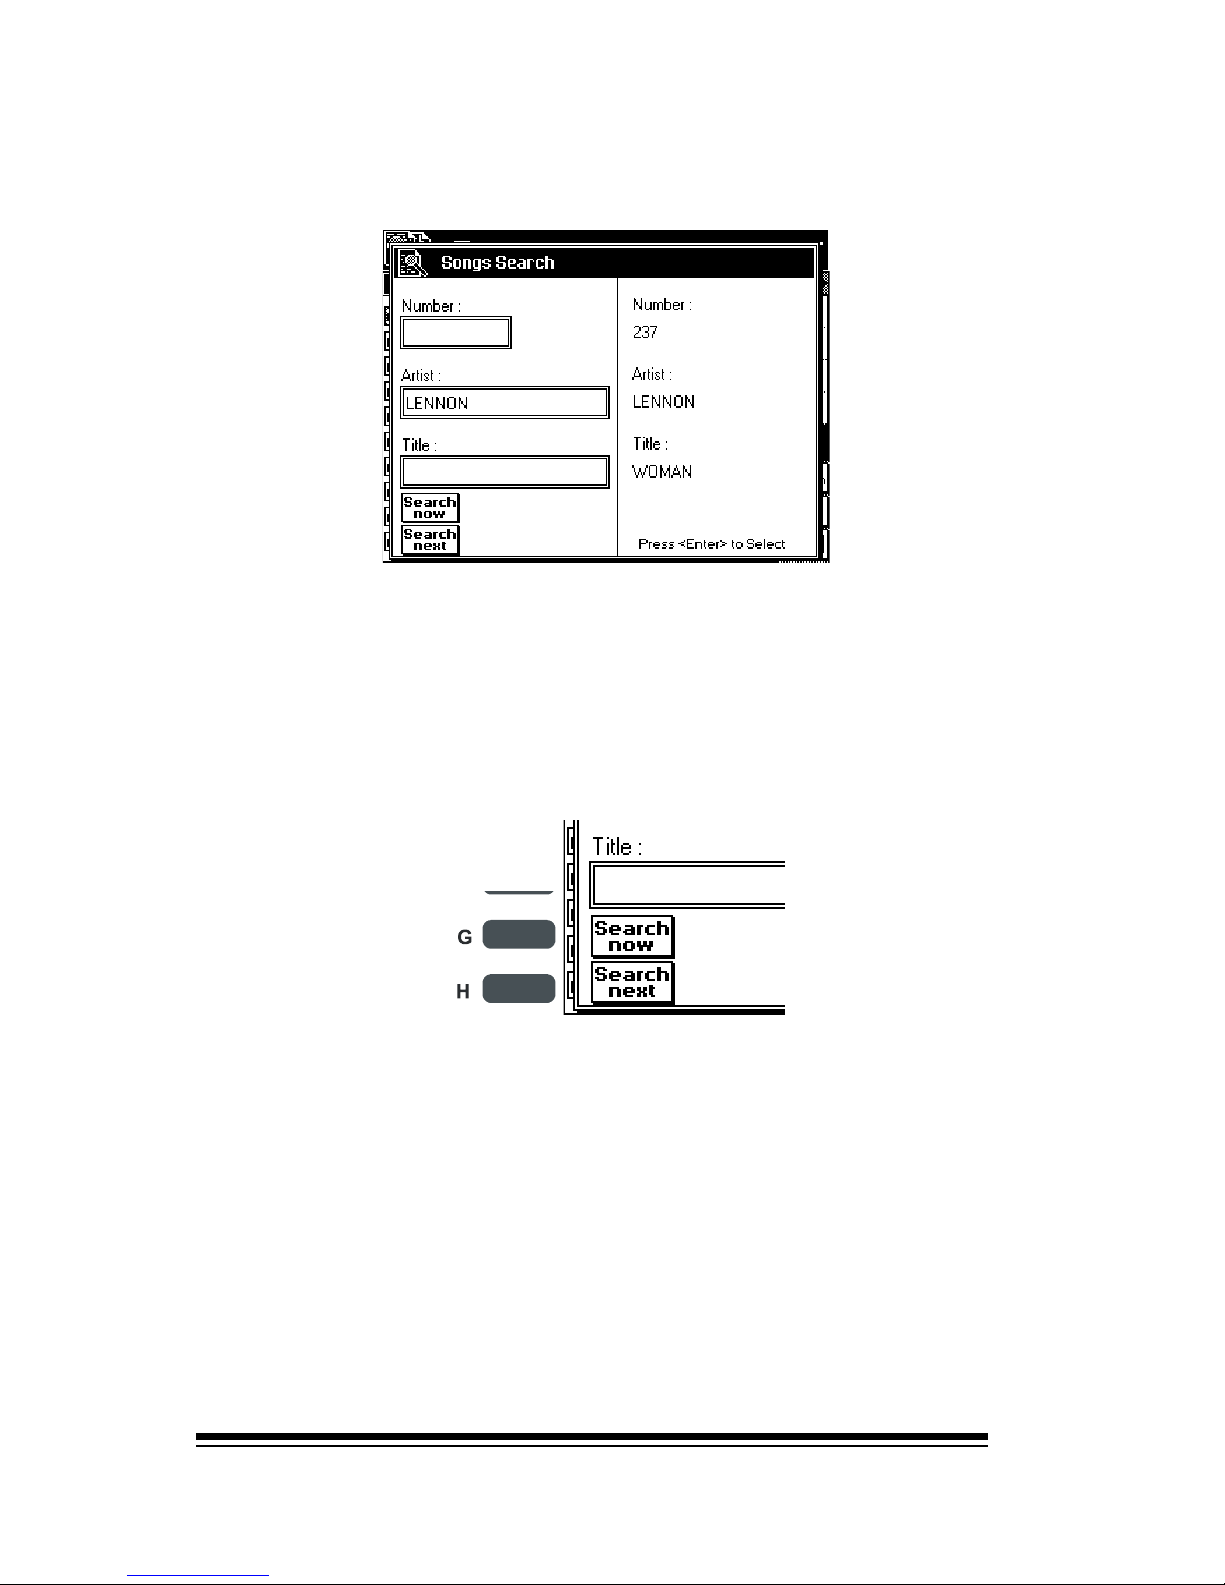
genesys ensemble/genesys grand ensemble
Page 66
The display will then show details of the first result it finds
If the song displayed is the one you were looking for, just
press ENTER to commence playback. Otherwise, press
button H (search next)to continue searching for additional
songs.
J
Page 76
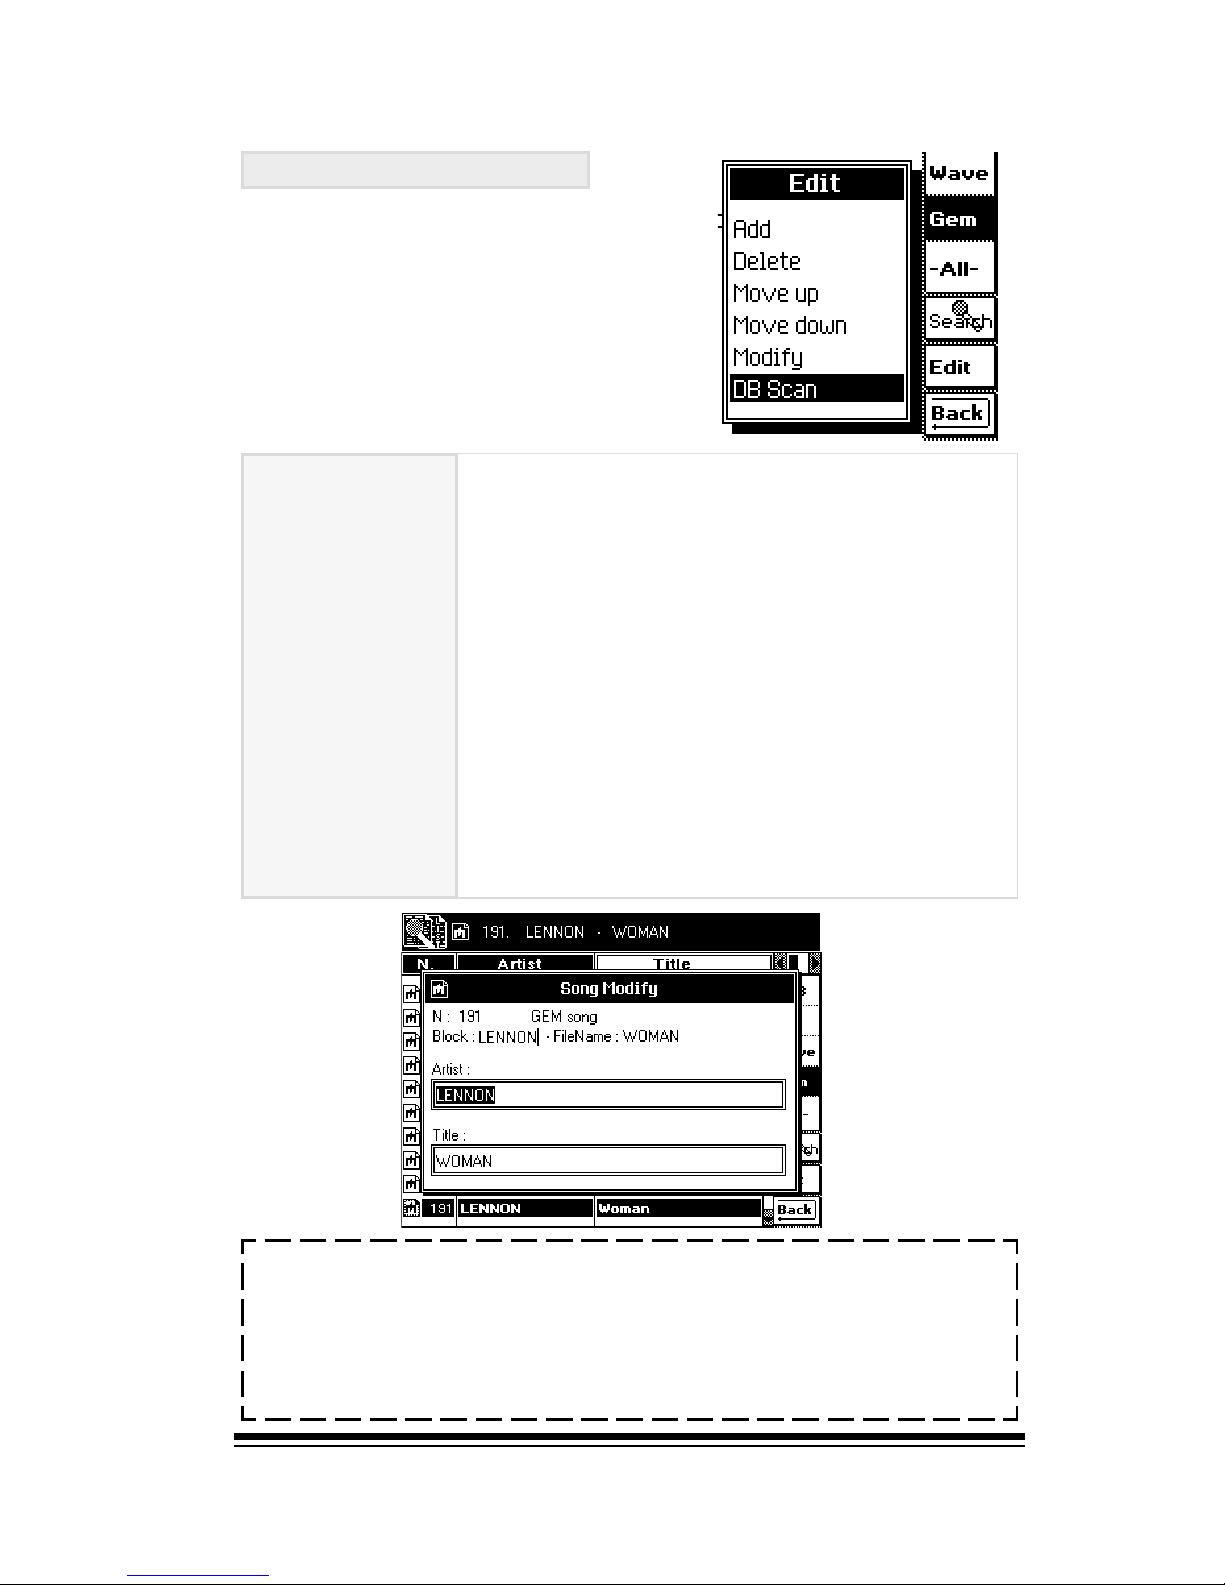
Song Player
Page 67
F7 EDIT Functions
The EDIT function of DB List
provides a variety of features which
allow you to modify the nature of
the listing or the list elements.
Note: searching for songs by Artist or Title, the song
number is not important. However, in case you become
accustomed to accessing songs by their numbers, the
Add function will preserve all the existing song numbers
in the database.
Add: Add one or more songs to the database.
It will add your new song(s) to the end o
f
the current list and number them
accordingly.
Delete: cancel one or more songs in the database.
Move up: move the selected song numerically back
in the list.
Move down: move the selected song numerically
forward in the list.
Modify: lets you modify various song parameters
(number, artist or title).
DB Scan: creates a database from scratch.
Page 77
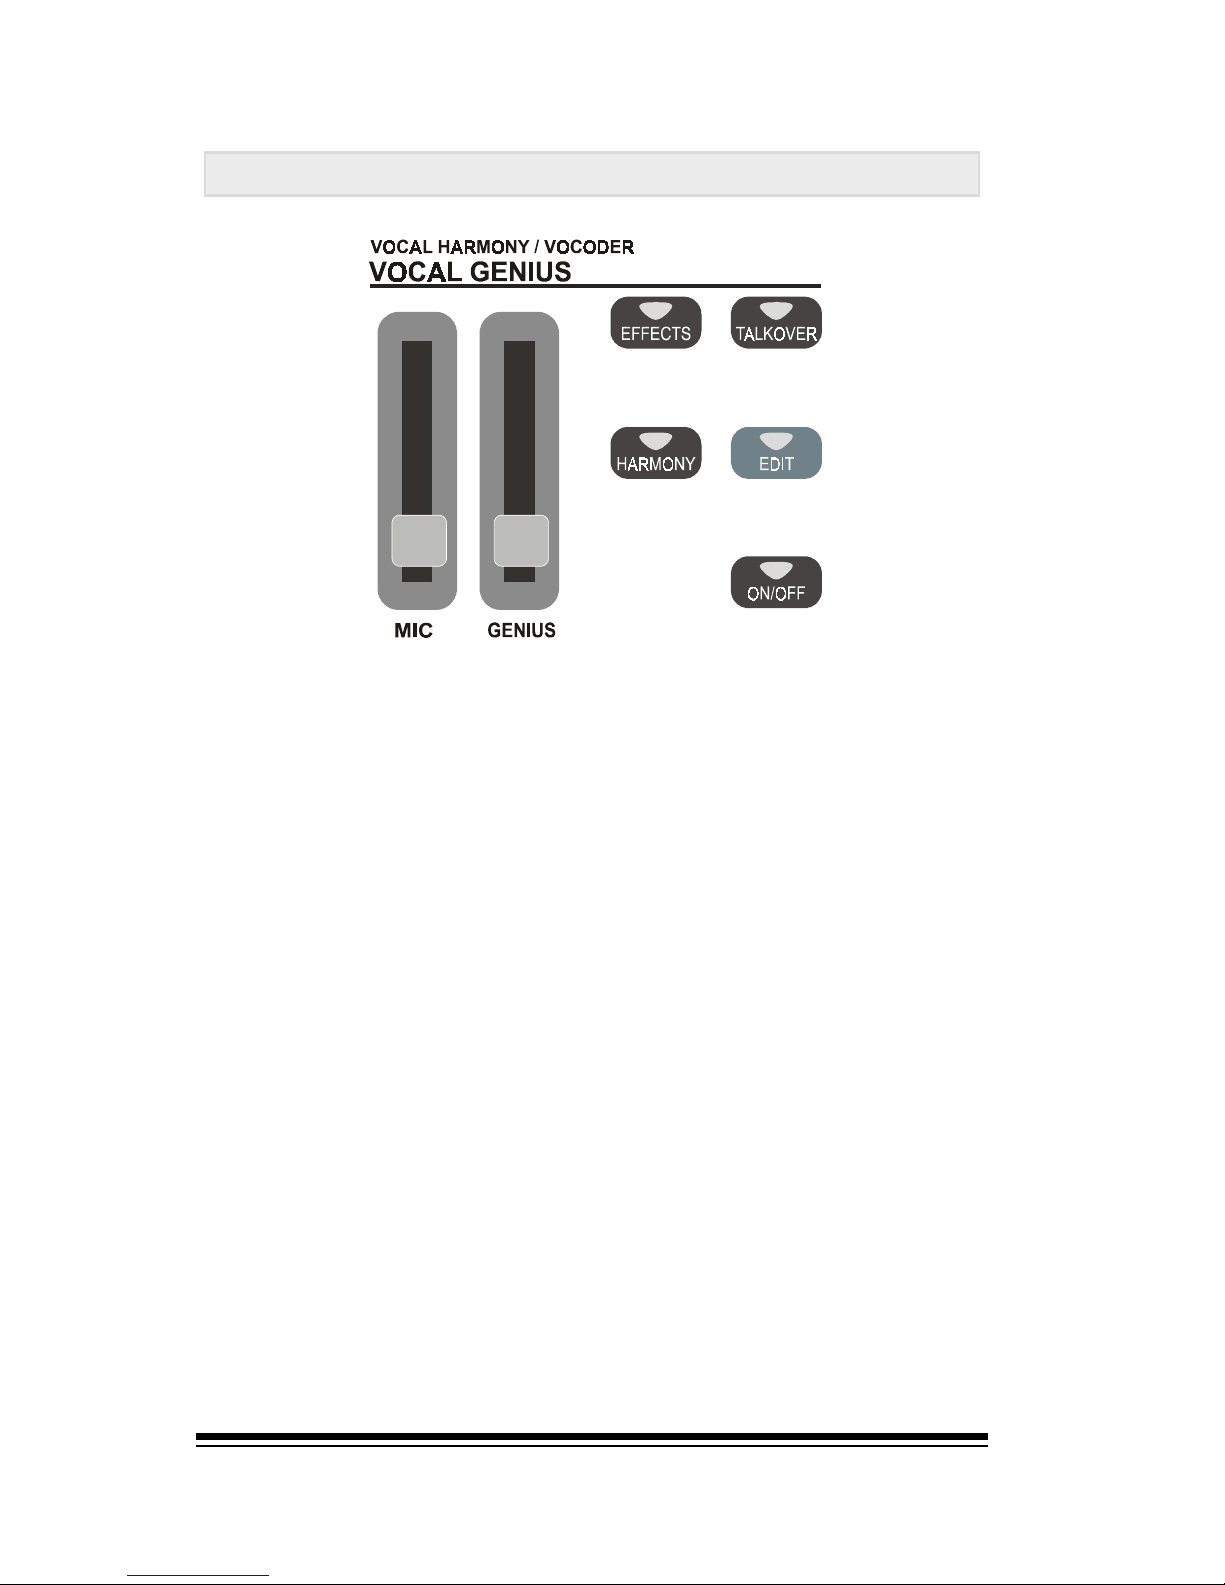
genesys ensemble/genesys grand ensemble
Page 68
VOCAL GENIUS
The VOCAL GENIUS section is a powerful processor which
can add a variety of exciting effects to your voice or any
other instrument connected to the input jacks on the
Genesys Ensemble back panel.
The VOCAL GENIUS is divided into two separate sections.
The EFFECTS section allows you to control three different
effects which can be applied to a connected microphone or
any other mono or stereo instrument, (like a guitar or a
second keyboard).
The HARMONY section is used to create the effect of a group
of backing vocalists accompanying you while youre singing.
To begin, reduce the MIC volume in the VOCAL GENIUS
section to minimum. Now youre ready to connect a microphone to the MIC/L input on the instruments back panel.
Youll notice that there are two inputs here. The MIC/L input is used for a microphone and this is the input which is
processed by the harmony function. This is the input we
will use for our examples in this section.
Page 78
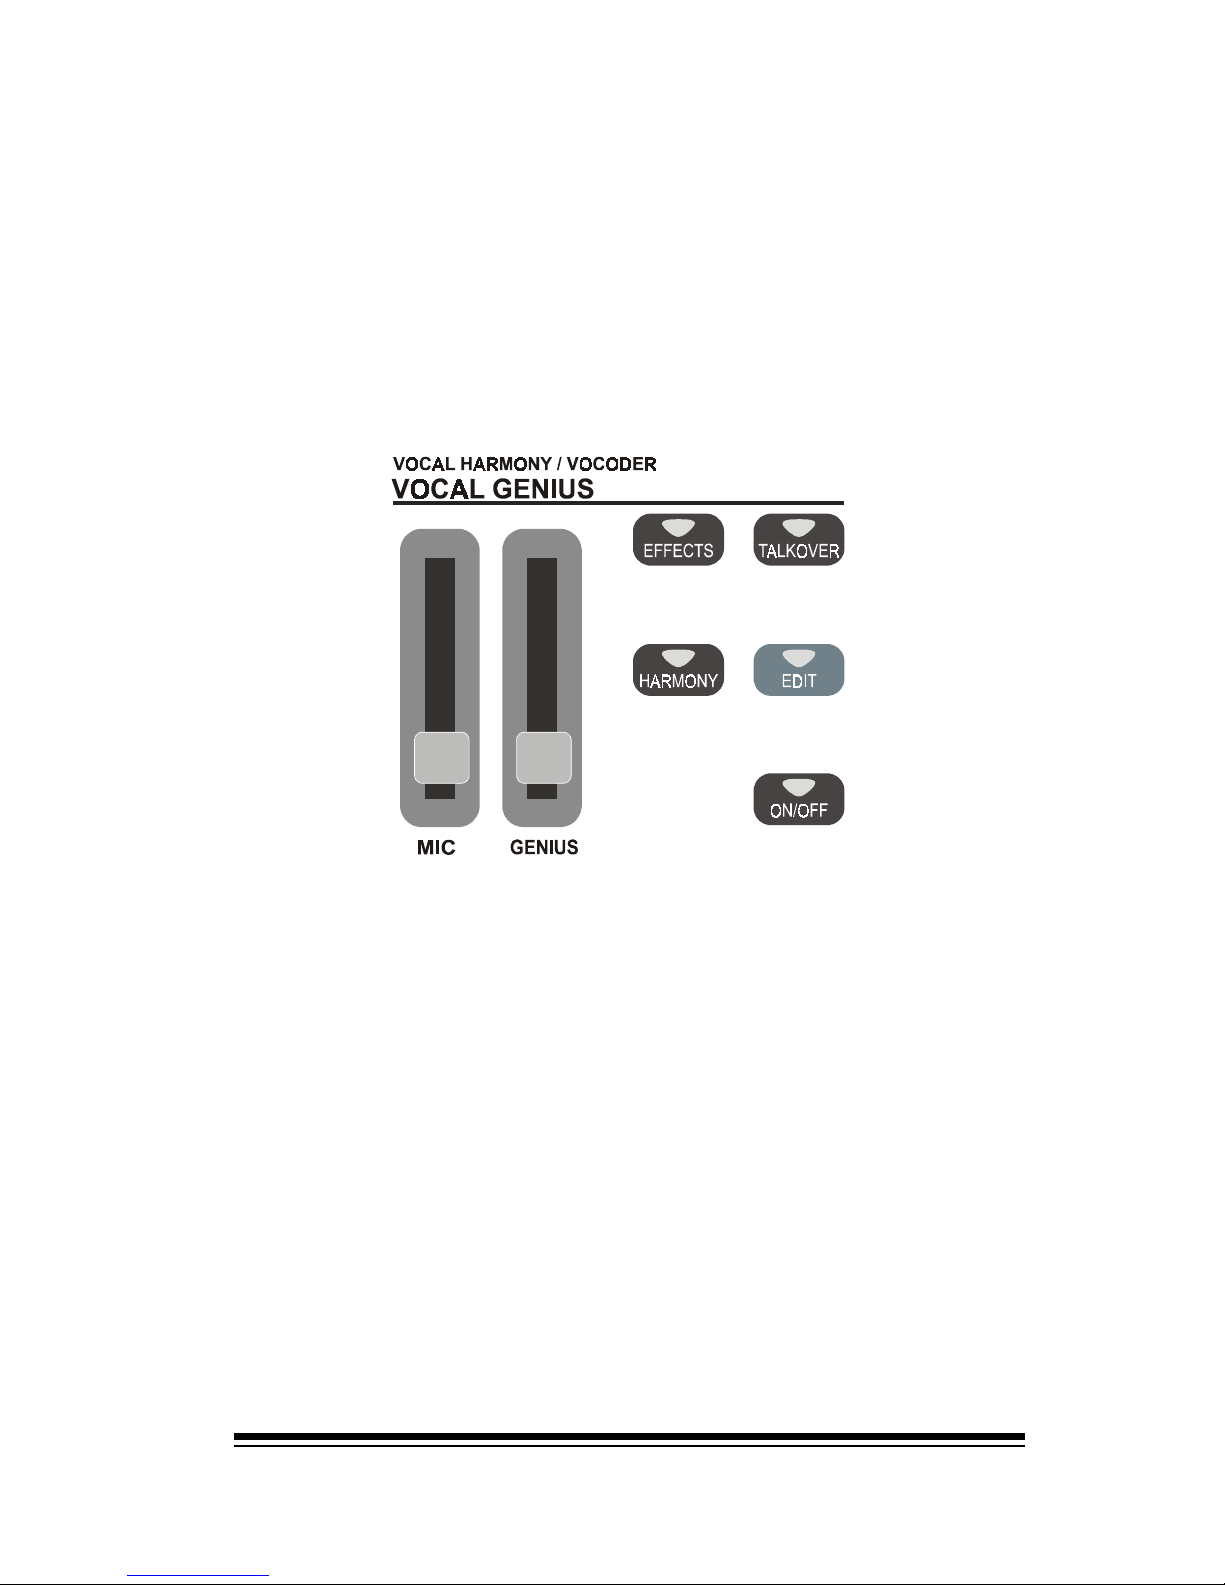
Vocal Genius
Page 69
The second input, marked LINE/R can be used either for a
second microphone or another instrument but this input
will not pass through the harmony function. Dont connect
anything to this input for the moment.
Once your microphone is connected, youll need to check
that everything is working correctly. First, make sure that
the microphone is switched on then turn on the ON/OFF
button in the VOCAL GENIUS section.
Now test the microphone, increasing the MIC volume slider
as you speak. If you still cannot hear the sound of your
voice through the speakers or if the level is very soft, try
adjusting the sensitivity control next to the inputs on the
back panel. This control has an inner and outer knob: one
for each input.The sensitivity control for the input were
using is the inner knob.
By now you should be able to hear something from the
microphone. Try to set the sensitivity to a suitable level so
that the MIC volume slider offers a good range of control.
Remember that the MAIN volume slider on the left side of
the instrument also controls the overall microphone volume. If youve set the microphone fairly loud but the main
volume is only set at about 50%, the microphone will probably be much too loud if you increase the main volume.
J
Page 79
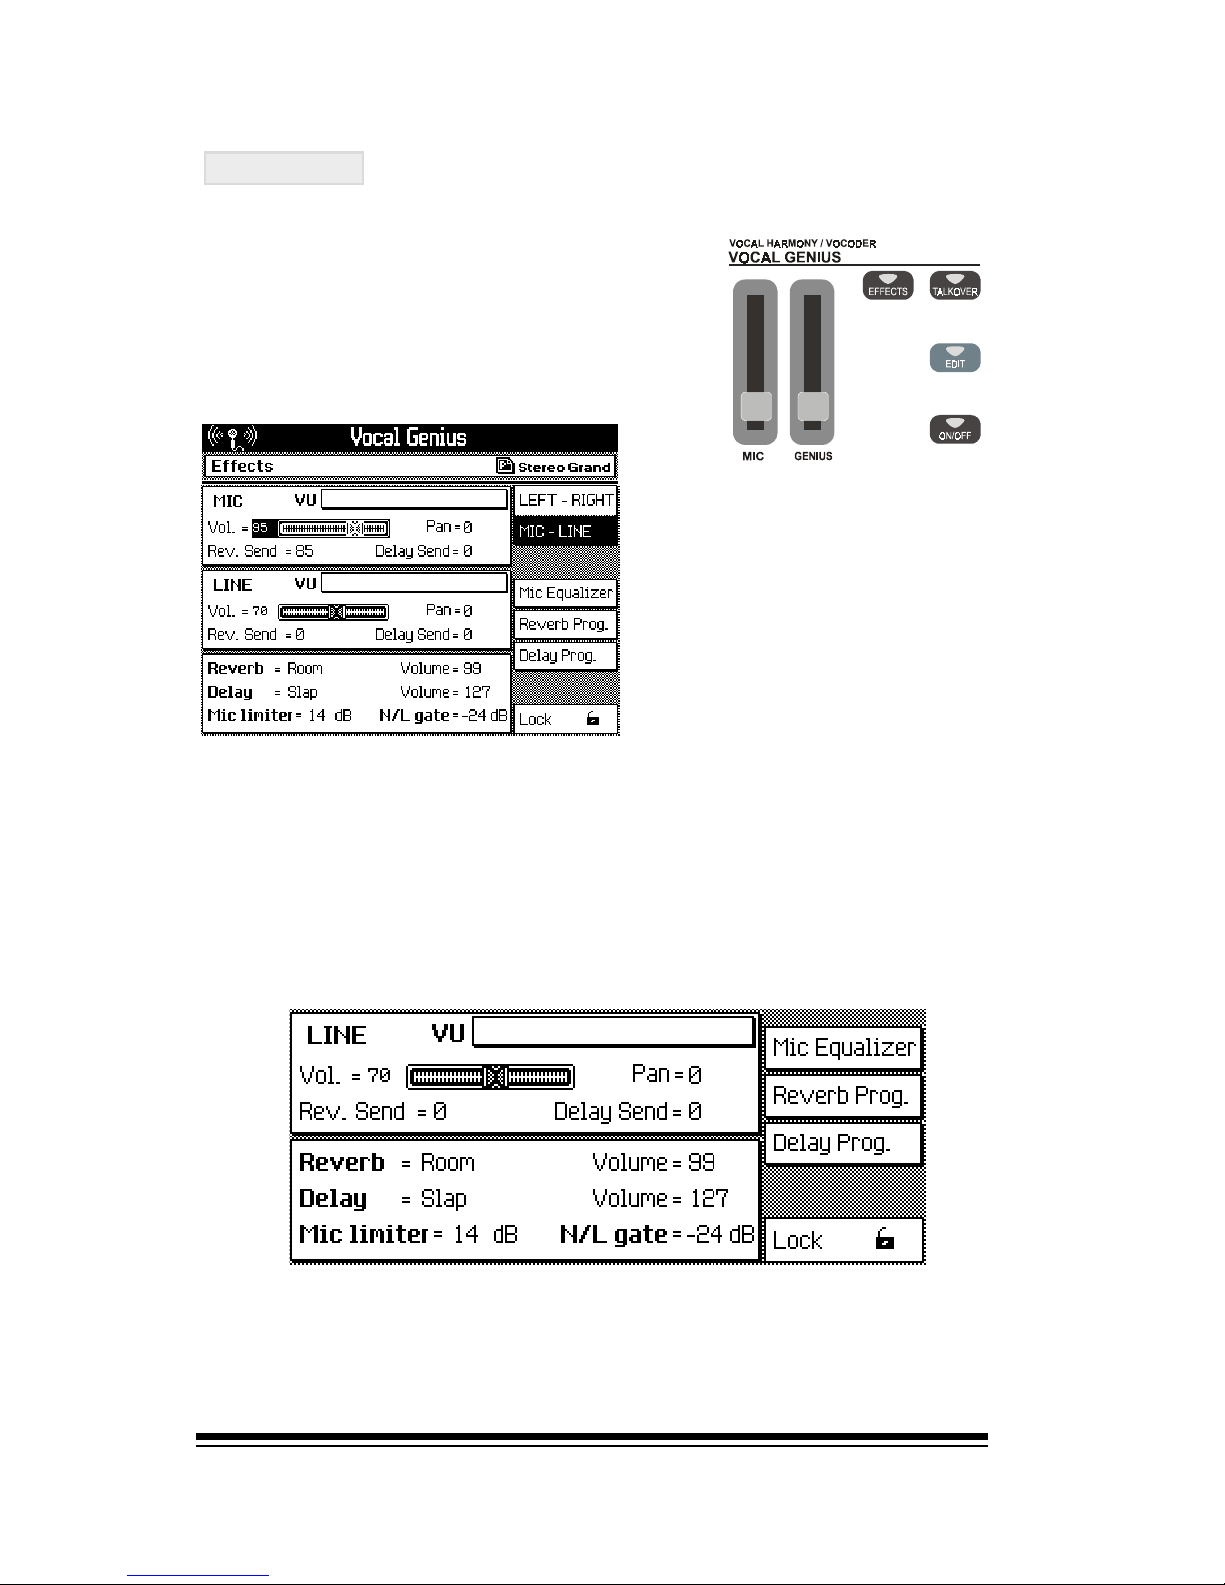
genesys ensemble/genesys grand ensemble
Page 70
EFFECTS
Lets start by looking at the EFFECTS section of the VOCAL
GENIUS.
Press the EFFECTS button.
Before we do anything
else, make sure that the
MIC-LINE option is selected at the upper right
side.
This simply tells the instrument that we are using the input
jacks as two separate inputs instead of as a stereo pair, (as
you might for a stereo keyboard or a CD player).
In the main part of the display you can see three rectangular boxes. The first two boxes represent the two inputs
on the back panel MIC and LINE. Since were only using
the MIC input, we can ignore the LINE box in the center.
The box at the bottom is where you select the different
effects that the microphone or other instruments can use.
You can see that there are already some effects selected.
To hear these effects, you need to adjust their SEND levels
in the MIC section at the top.
J
Page 80
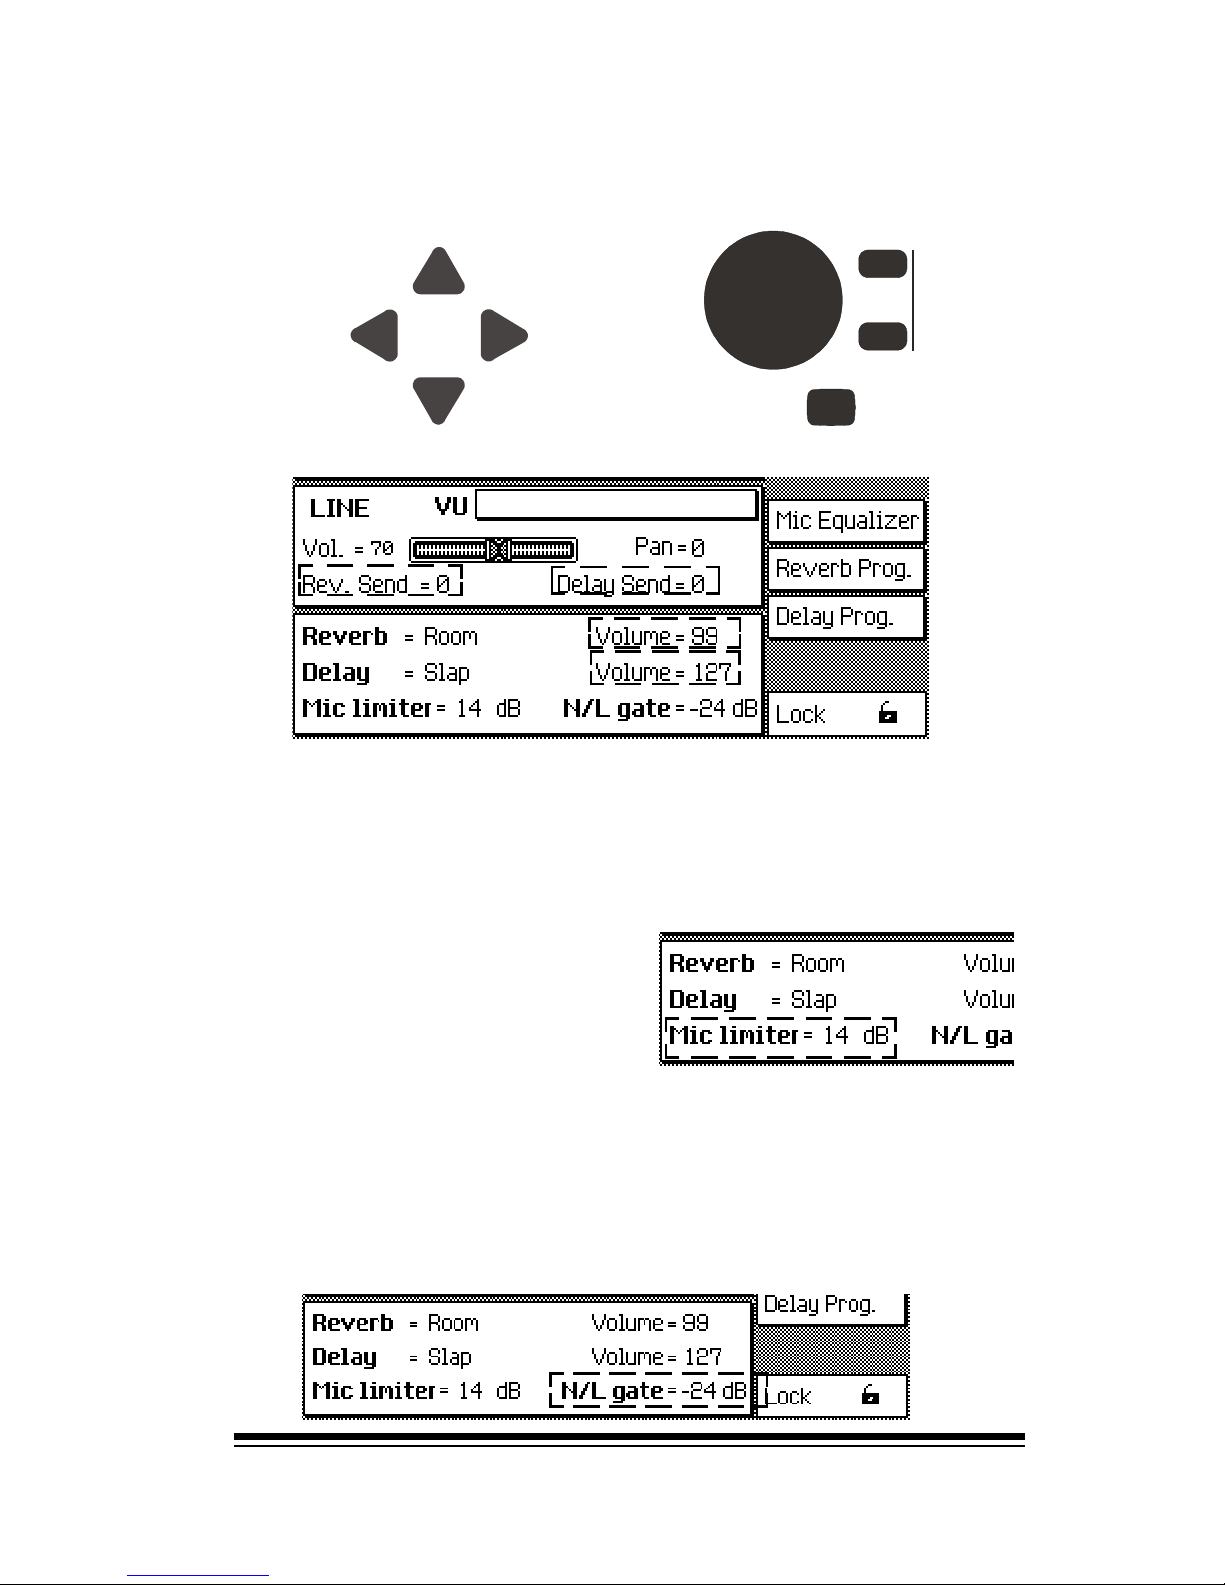
Vocal Genius
Page 71
Use the arrow keys to highlight REV SEND, (Reverb Send)
in the MIC section, then use the dial to increase the amount
of reverb on the microphone.
Now you can adjust the DELAY SEND in the same way.
In the box at the bottom of the screen, you can adjust the
overall volume of the reverb and delay effects.
You can also change the type of reverb and delay. There
are eight different settings for each.
The MIC LIMITER THRESHOLD
controls the internal compressor/limiter circuit. This has already been set at the factory
but you may adjust it as you
wish. Setting it to 0dB effectively turns the limiter off.
IN C
DEC
ENTER ESCAPE
PANIC
TEMPO / DATA
J
J
The N/L parameter allows you to reduce and/or completely
eliminate the possibility of microphone feedback (Larsen
effect), particularly when the microphone is used in close
proximity to a loudspeaker. The sensitivity of this parameter can be adjusted from -48 to -12db. There is also an
Off setting which allows this function to be bypassed.
Page 81
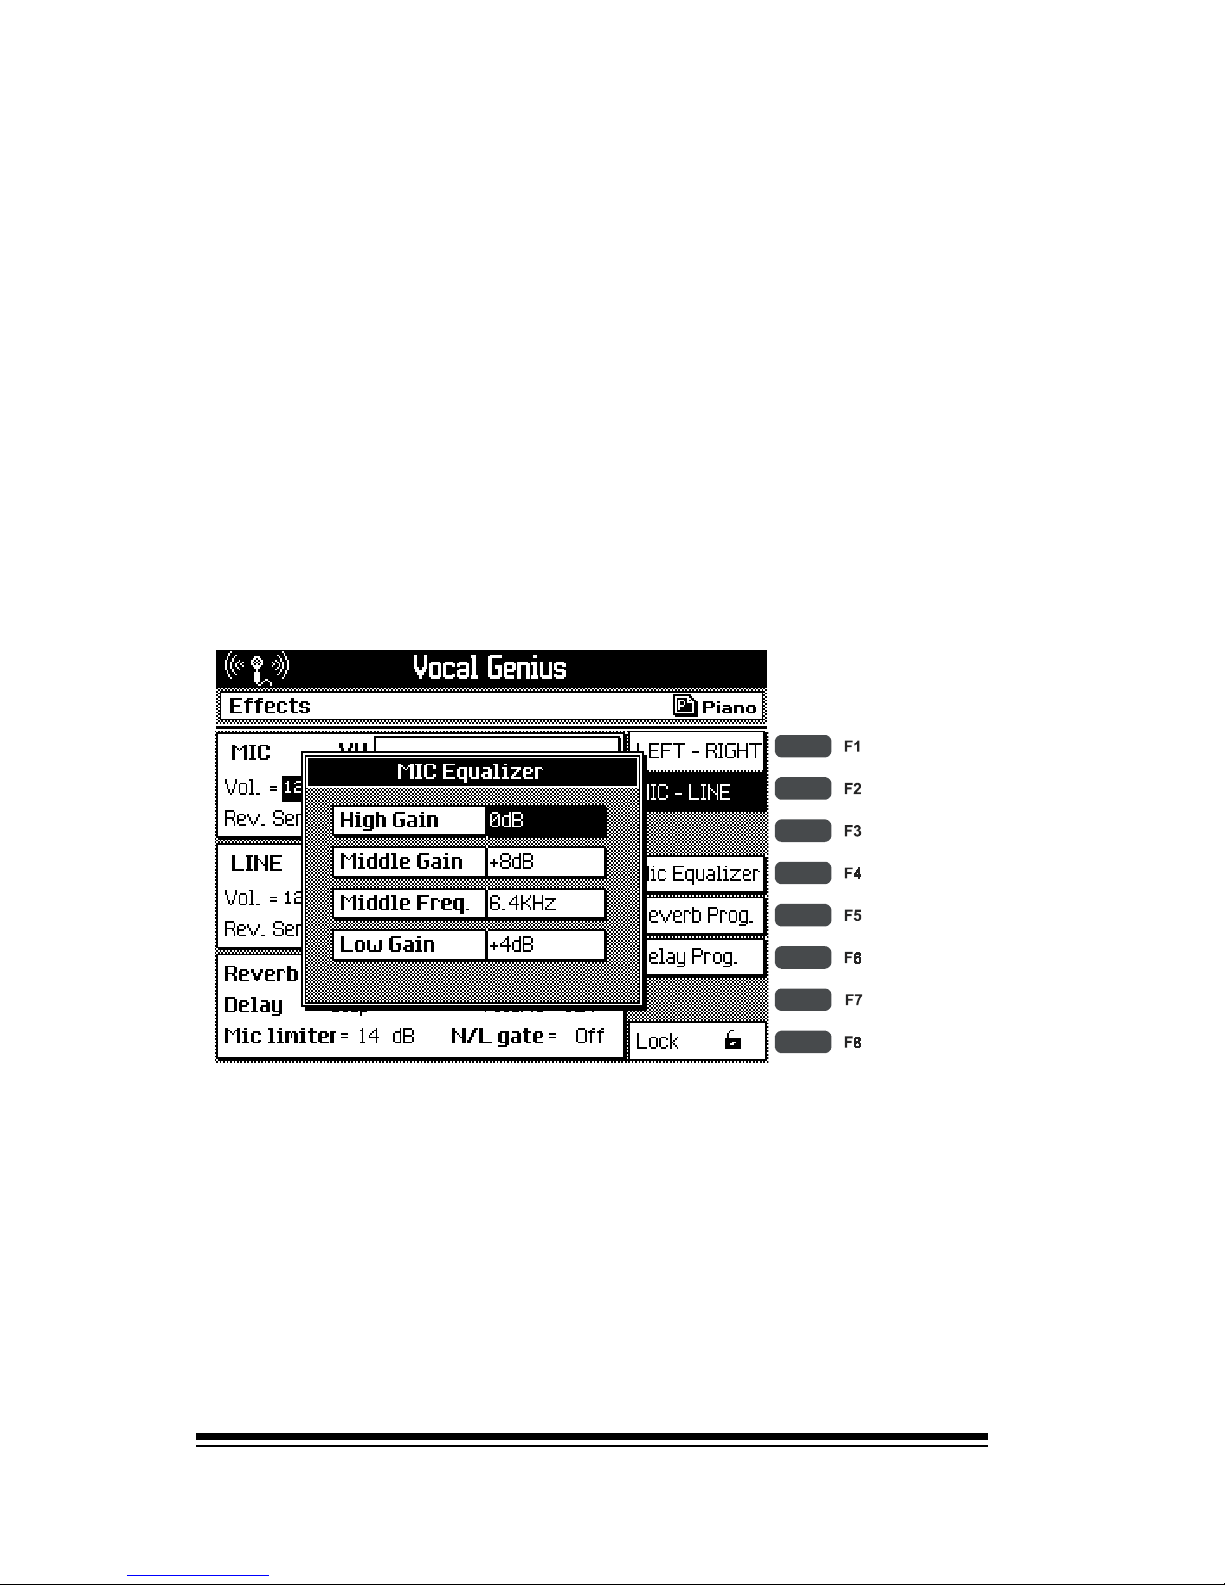
genesys ensemble/genesys grand ensemble
Page 72
The limiter is a system which prevents the microphone input
from accidental overload. By restricting the maximum level
of the microphone, the limiter ensures that the microphone
will not peak if you suddenly sing very loud. To see how the
limiter works, try setting the level to 0dB and then singing
louder and louder. As your volume increases, you will hear
the microphone begin to distort as the input overloads.
Now increase the limiter threshold while you are still singing. When
you reach a point at which you can no longer produce this distortion, the limiter is set at the correct level for your singing style.
At the right side of the display you will see some other
options. The first of these is the MIC EQUALIZER. Press
this button to see the MIC EQUALIZER window.
This is a simple three-band EQ for the microphone. Here
you can adjust the treble, (High Gain), bass, (Low Gain)
and middle, (Middle Gain) to get the right tone for your
microphone. There is also a Middle Frequency control which
allows you to position the Mid Gain control within the available range of middle frequencies. The values range from
low-mid, (250Hz 1KHz) to high-mid (1.3KHz 6.4KHz).
Selecting the right value of Middle Frequency and then reducing the Middle Gain can be a very effective way to eliminate microphone feedback.
J
Page 82
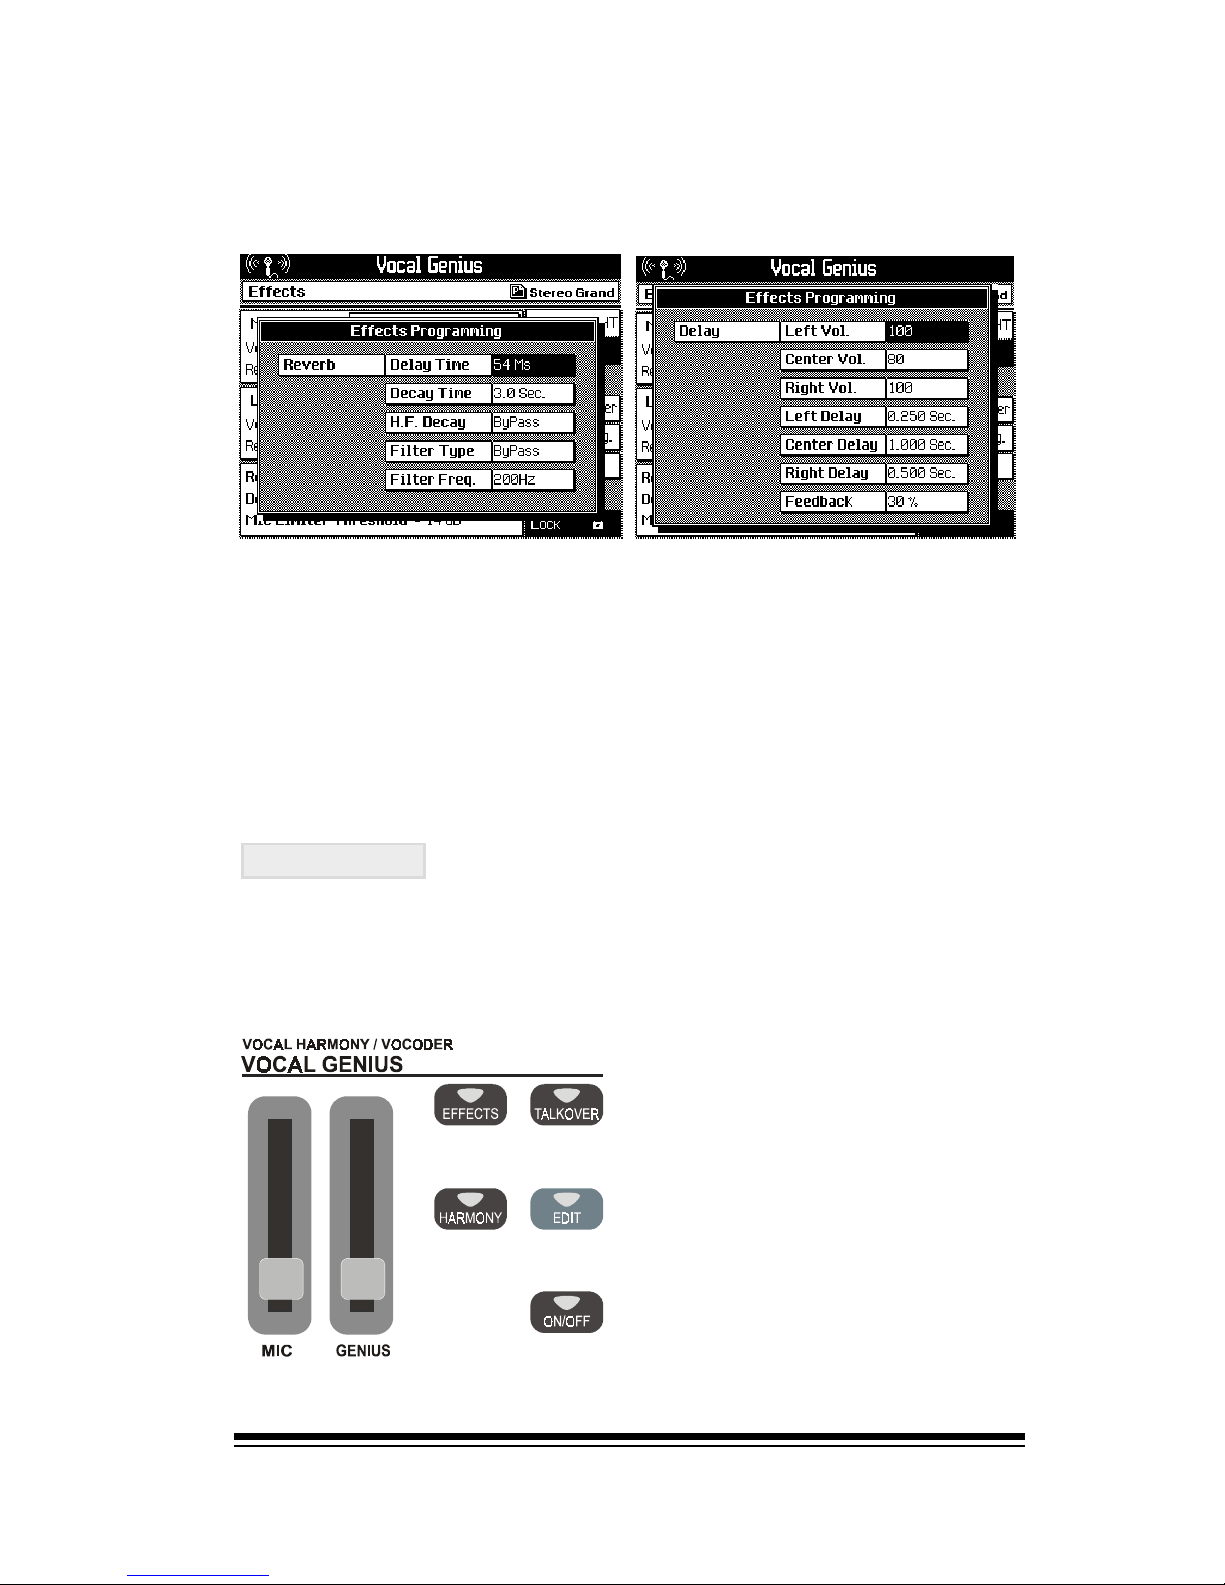
Vocal Genius
Page 73
HARMONY
The harmony section allows you to sound like a complete
vocal group even though theres only one of you!
Press the HARMONY button to turn this section on.
Press ESCAPE when youre ready to return to the main
EFFECTS screen.
The two other buttons here allow you to change the settings for the reverb and delay effects respectively. Whenever you choose one of the eight reverb or delay presets,
the values in these sections change. In fact all of the presets have been constructed simply by adjusting the values
in these sections to make the desired effect. If you know
something about effect editing, you can make your own
custom effects by simply changing these values.
The volume of the harmony
backing group is controlled by
the GENIUS slider. Move this slider
to its maximum position.
You may already hear some other
voices when you sing through the
microphone . If not, press the
ACCOMP. SPLIT button in the KEYBOARD MODE section and play a
chord on the left side of the keyboard. Can you hear the harmony
voices now?
J
J
Page 83
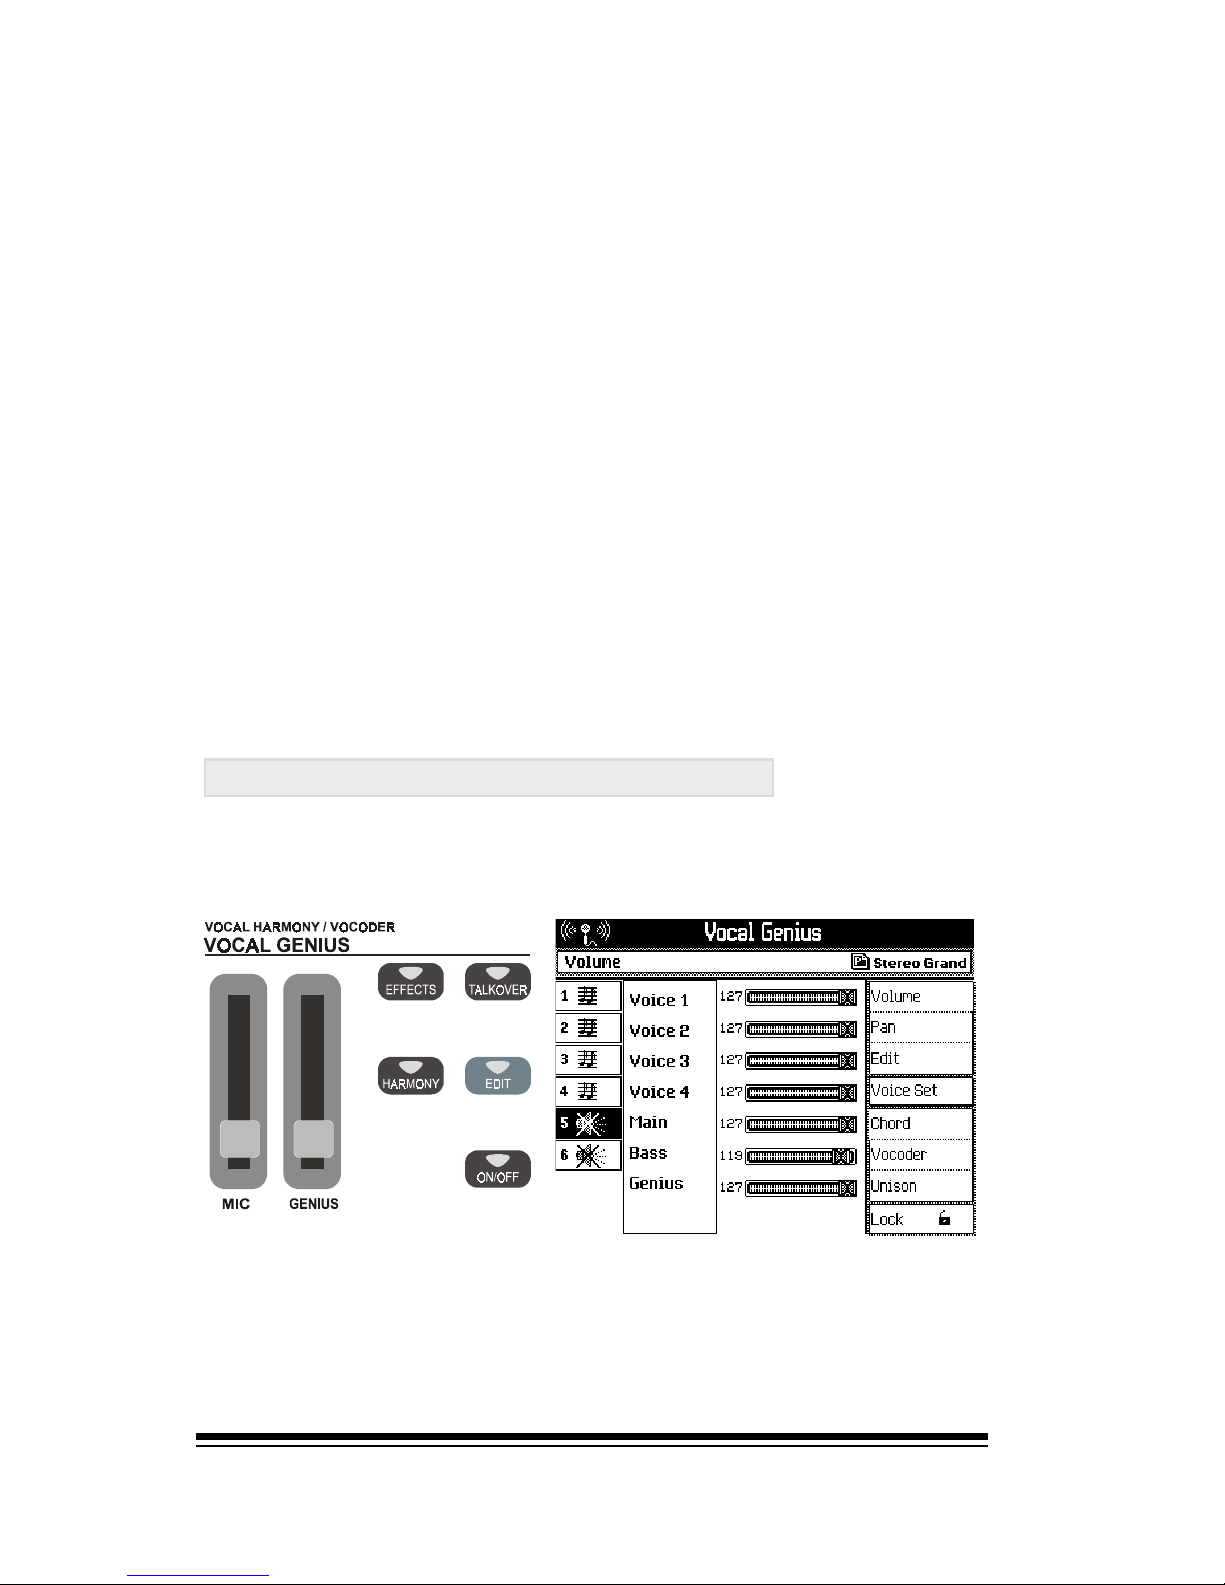
genesys ensemble/genesys grand ensemble
Page 74
The vocal harmony group is comprised of yourself and up to
four additional singers or harmony voices. The two sliders
in the VOCAL GENIUS section allow you to easily adjust the
volume of yourself, (MIC slider) and the volume of the harmony voices, (GENIUS slider). If you want, you can turn
yourself off completely and just listen to the harmony group.
These harmony voices are actually just copies of your own
voice which are transposed in pitch to create a musical harmony. The harmony itself is taken from the chord that you
played with your left hand. Try singing the same note while
you play different chords on the keyboard. Notice how the
harmony changes to match the chord you are playing.
With the VOCAL GENIUS set up in this way, you can play and
sing while using the styles. The harmony voices will automatically follow the chords of the song which you are playing.
Changing the Harmony Settings
You can change the way that the harmony singers behave
by pressing the EDIT button.
This screen tells you which of the harmony voices are currently active and which are muted.
You can un-mute any of the muted voices by clicking the
related button on the left side.
J
Page 84
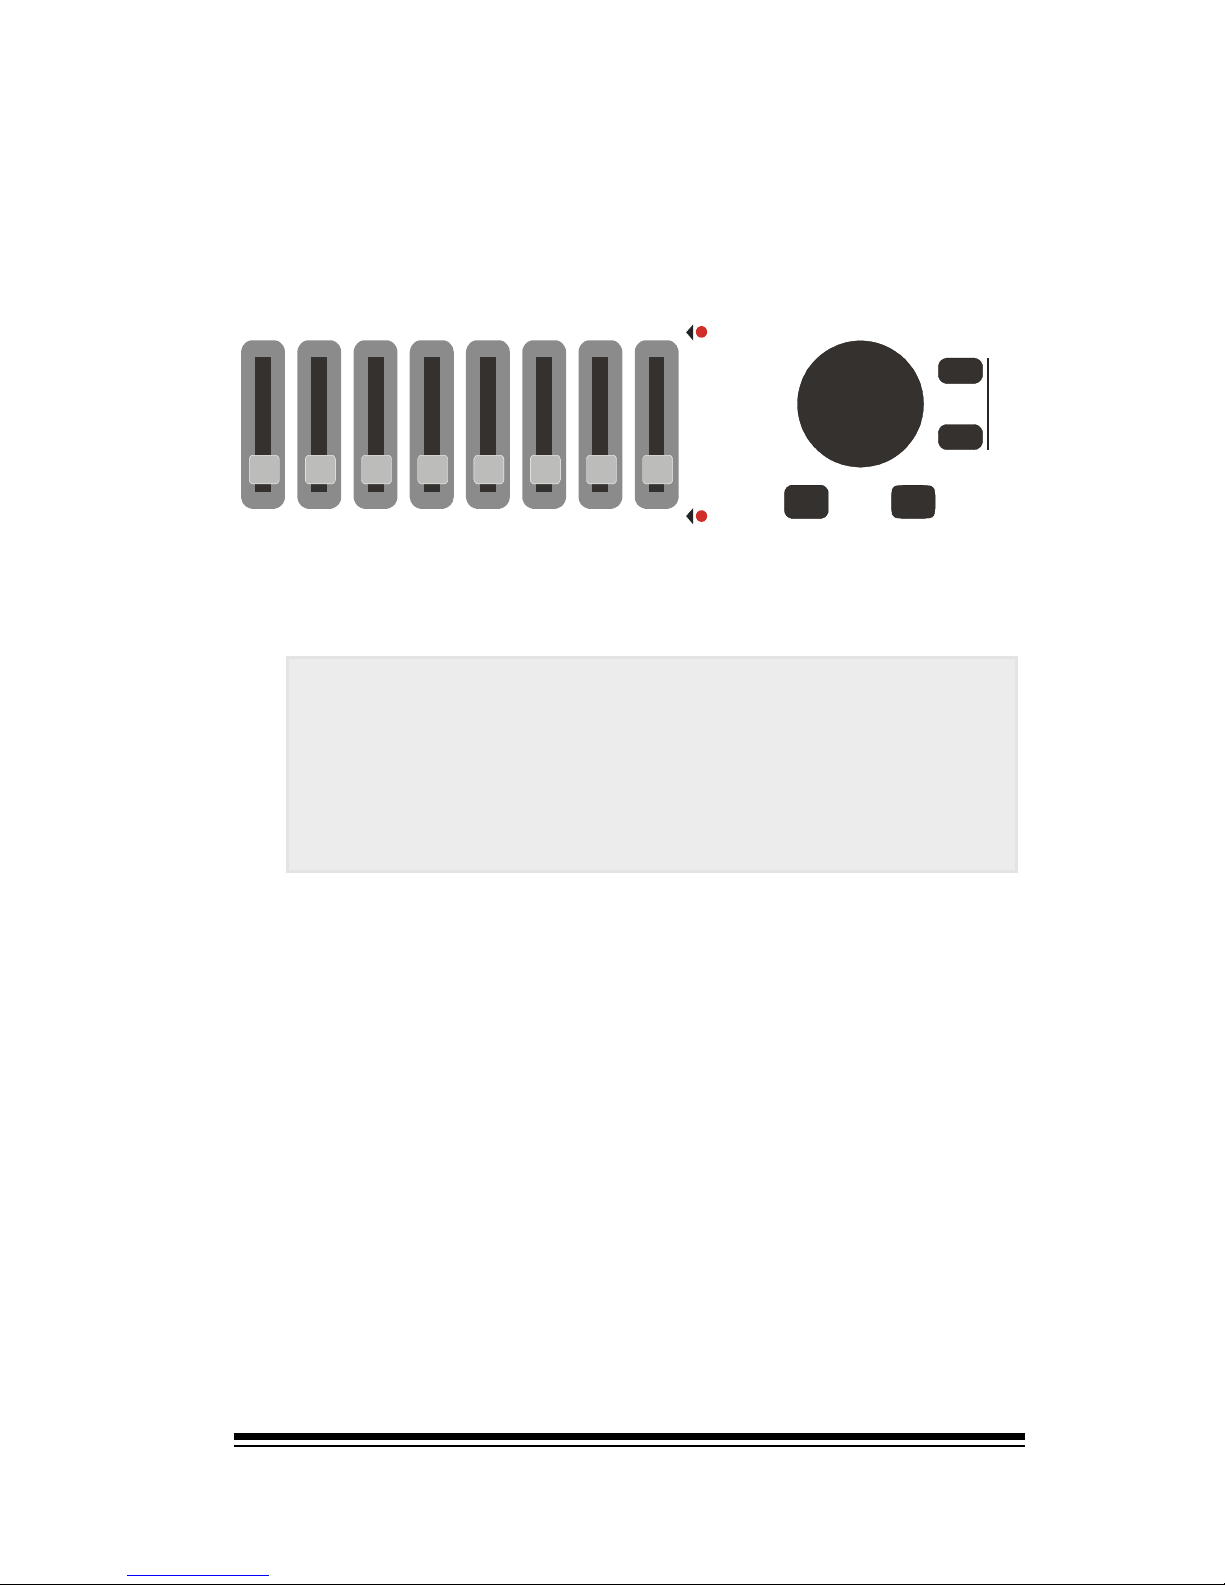
Vocal Genius
Page 75
"
"
"
"
"
"
You can also change the volume of any of the individual
harmony voices; either by using the dial to adjust the selected voice or by using the sliders on the left side which
correspond to the A, B, C, D, E and F positions in the screen.
Voice 1 : Lowest note of chord
Voice 2 : Second lowest note of chord
Voice 3 : Highest note of chord
Voice 4 : Second highest note of chord
Main : A copy of your actual singing voice, used
for doubling the melody
Bass : One octave lower than your singing voice.
Below the BASS voice, you will see the HARMONY or GENIUS level. This is simply the overall level of the harmony
group which is controlled by the GENIUS slider.
Now press the PAN button on the right side of the screen.
Here you can see the pan position or stereo balance for
each voice in the harmony group. Use the dial to place
each voice wherever you wish within the stereo spectrum.
The 0 setting means that the voice is completely centered
in the stereo image. Increasing the value, (up to 31), moves
the voice to the right while decreasing it, (down to 31),
moves it to the left. This allows you to effectively place
your backing singers at different points around the stage.
There are six harmony voices available but only four may
be active at the same time. The voices are tuned as follows:
C
D Mp3 HD AUDIODRUMSBASSA
CCO
MP LOWER UPPER
ABCDEFGHA
INC
DEC
ENTER ESCAPE
PA N IC
TEMPO / DATA
J
J
Page 85
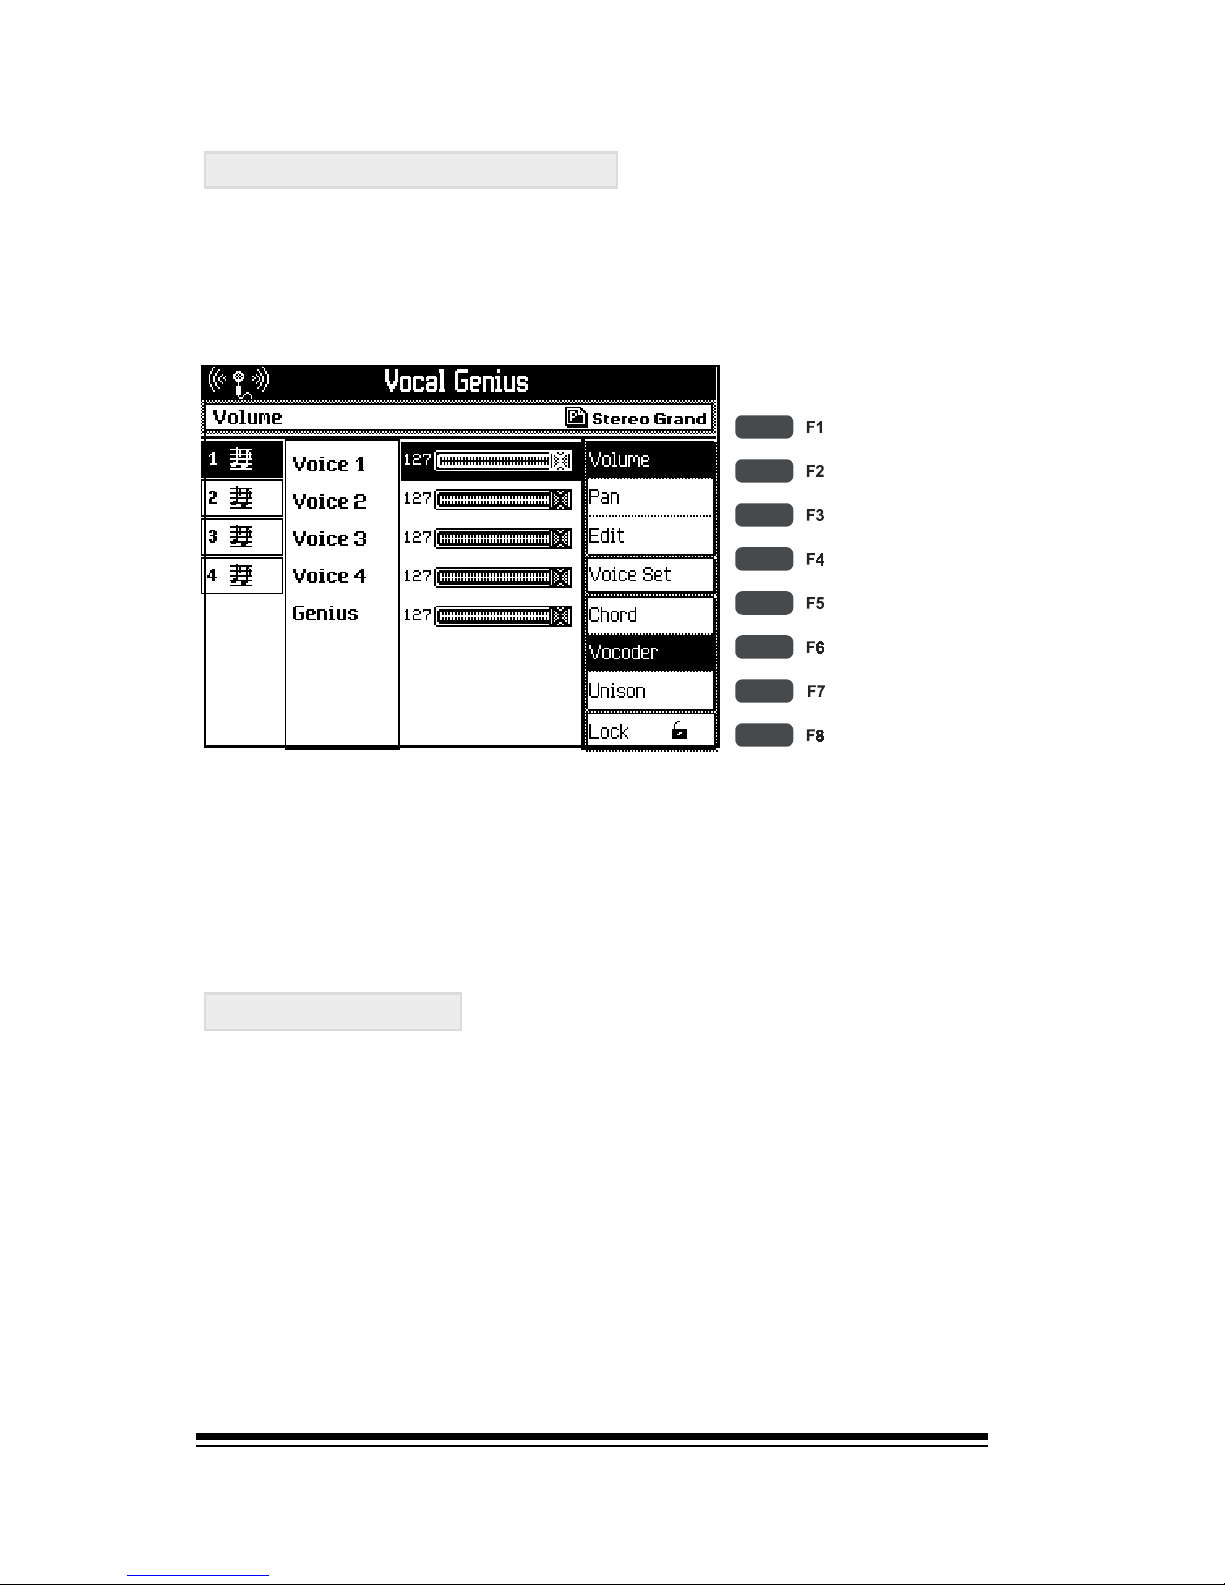
genesys ensemble/genesys grand ensemble
Page 76
VOCAL GENIUS MODES
The VOCAL GENIUS has three different modes which can be
useful depending on the way you play and the particular
vocal effect that you want to achieve. Until now, weve only
been using the system in CHORD mode. You can see this
mode selected at the right side of the screen.
CHORD mode is primarily designed when you are playing
with the styles and wish to have the harmony voices accompanying the chord changes of the song
The other two modes available are VOCODER and UNISON.
Each has its own particular use and application. Lets take a
look at these other modes.
Vocoder Mode
In Chord Mode, you may have noticed that the harmony voices
changed depending on which notes you were actually singing.
In Vocoder mode the harmony voices are forced to sing exactly
the notes that are being played, regardless of what notes you are
singing. This mode is extremely useful for a number of purposes.
1. Creating vintage vocoder effects
2. Commanding the harmony group to sing specific
harmony voicings.
3. Allowing the harmony voicings to be controlled by a
track of a midifile.
J
Page 86
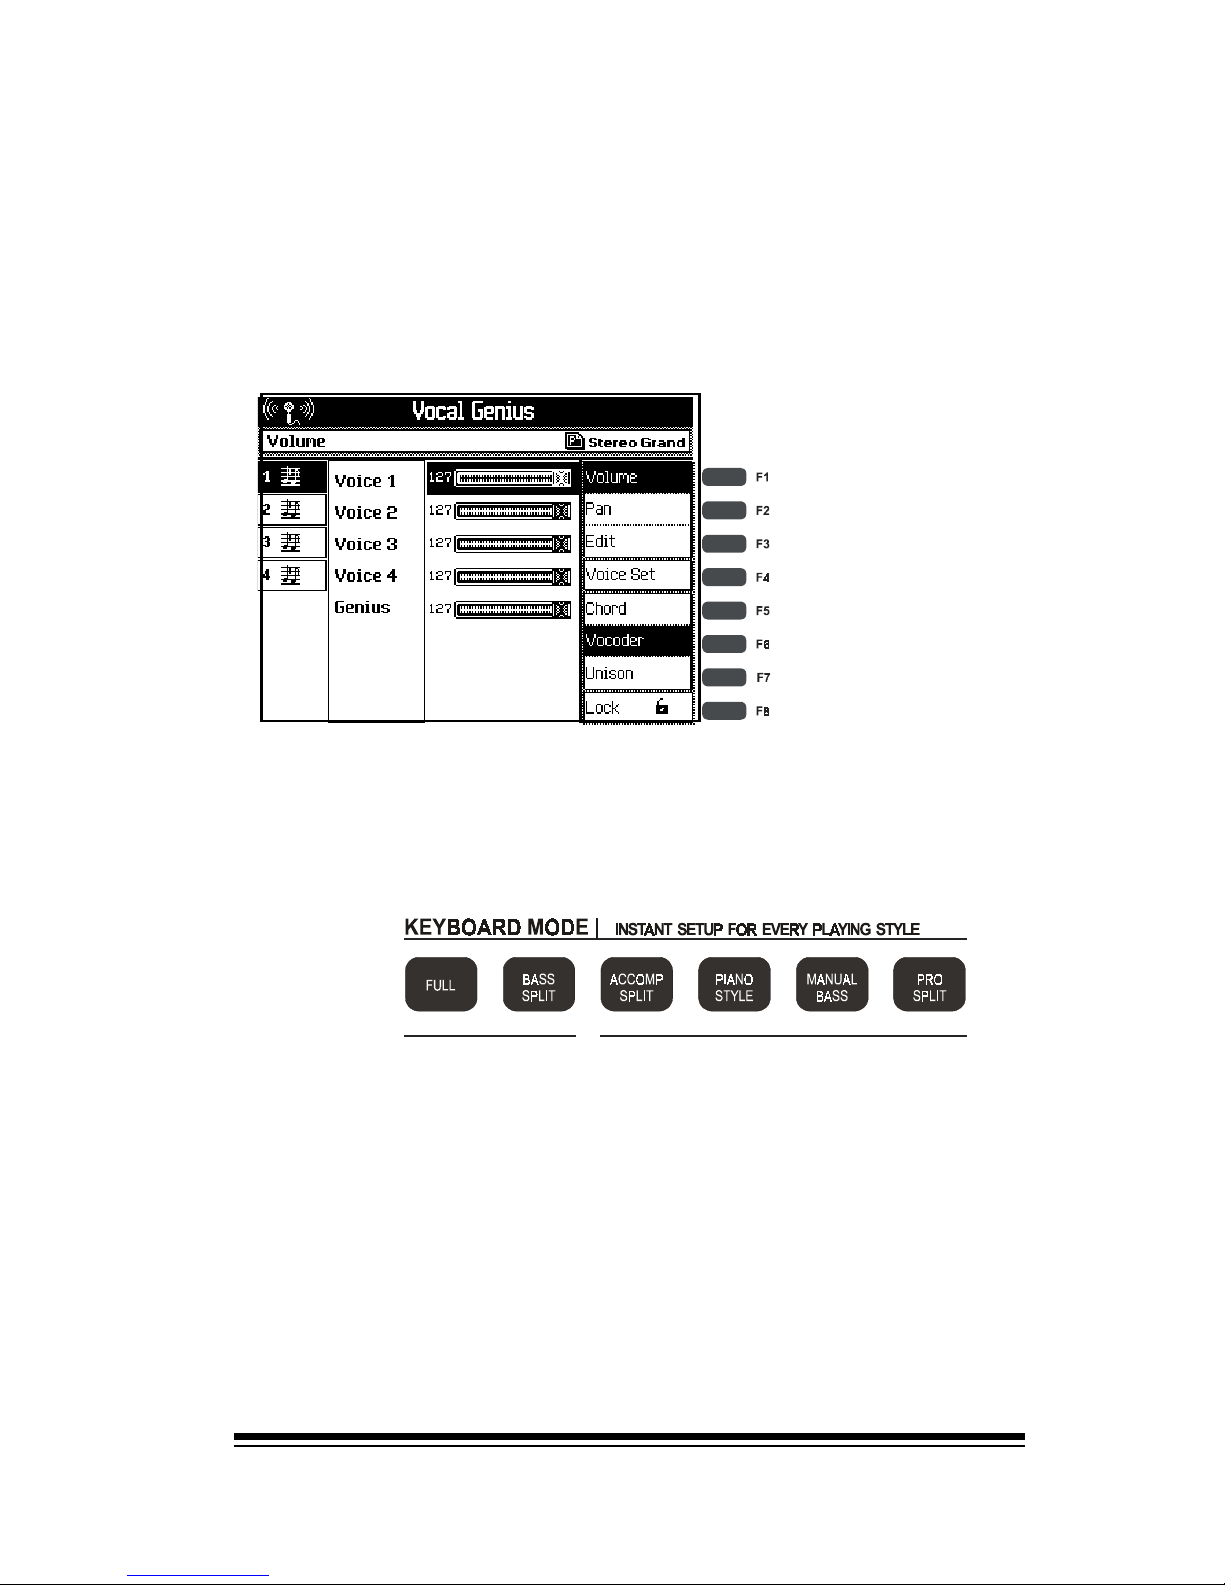
Vocal Genius
Page 77
The best way to appreciate how Vocoder Mode actually works
is to start with the classic vintage vocoder effect. The word
Vocoder actually comes from a special voice processing
synthesizer that became popular in the 70s. The original
robotic-sounding vocoder effect has been used on hundreds
of hit records and will be familiar to you once you hear it.
First lets change the mode to VOCODER.
Next, make sure that each voice is not muted and that its
volume level is maximum.
In vocoder mode, the harmony voices do not respond to notes
played on the left side of the split as they did in Chord Mode. For
this example you can put the keyboard back into FULL mode.
Next, so that we can really hear how the harmony voices
are responding, lets turn down the volume of the sound on
the keyboard. Press ESCAPE to return to the home screen
and then reduce the UPPER volume slider to minimum.
Now hold down a note on the keyboard. You should hear no
sound at all. While still holding this note, sing into the microphone. You can sing any note you like. No matter which
note you sing, the harmony voice will only sing the pitch of
the note you are holding. To hear the full effect, adjust the
MIC volume to minimum and the GENIUS volume to maximum.
NO ARRANGER ARRANGER
J
J
Page 87
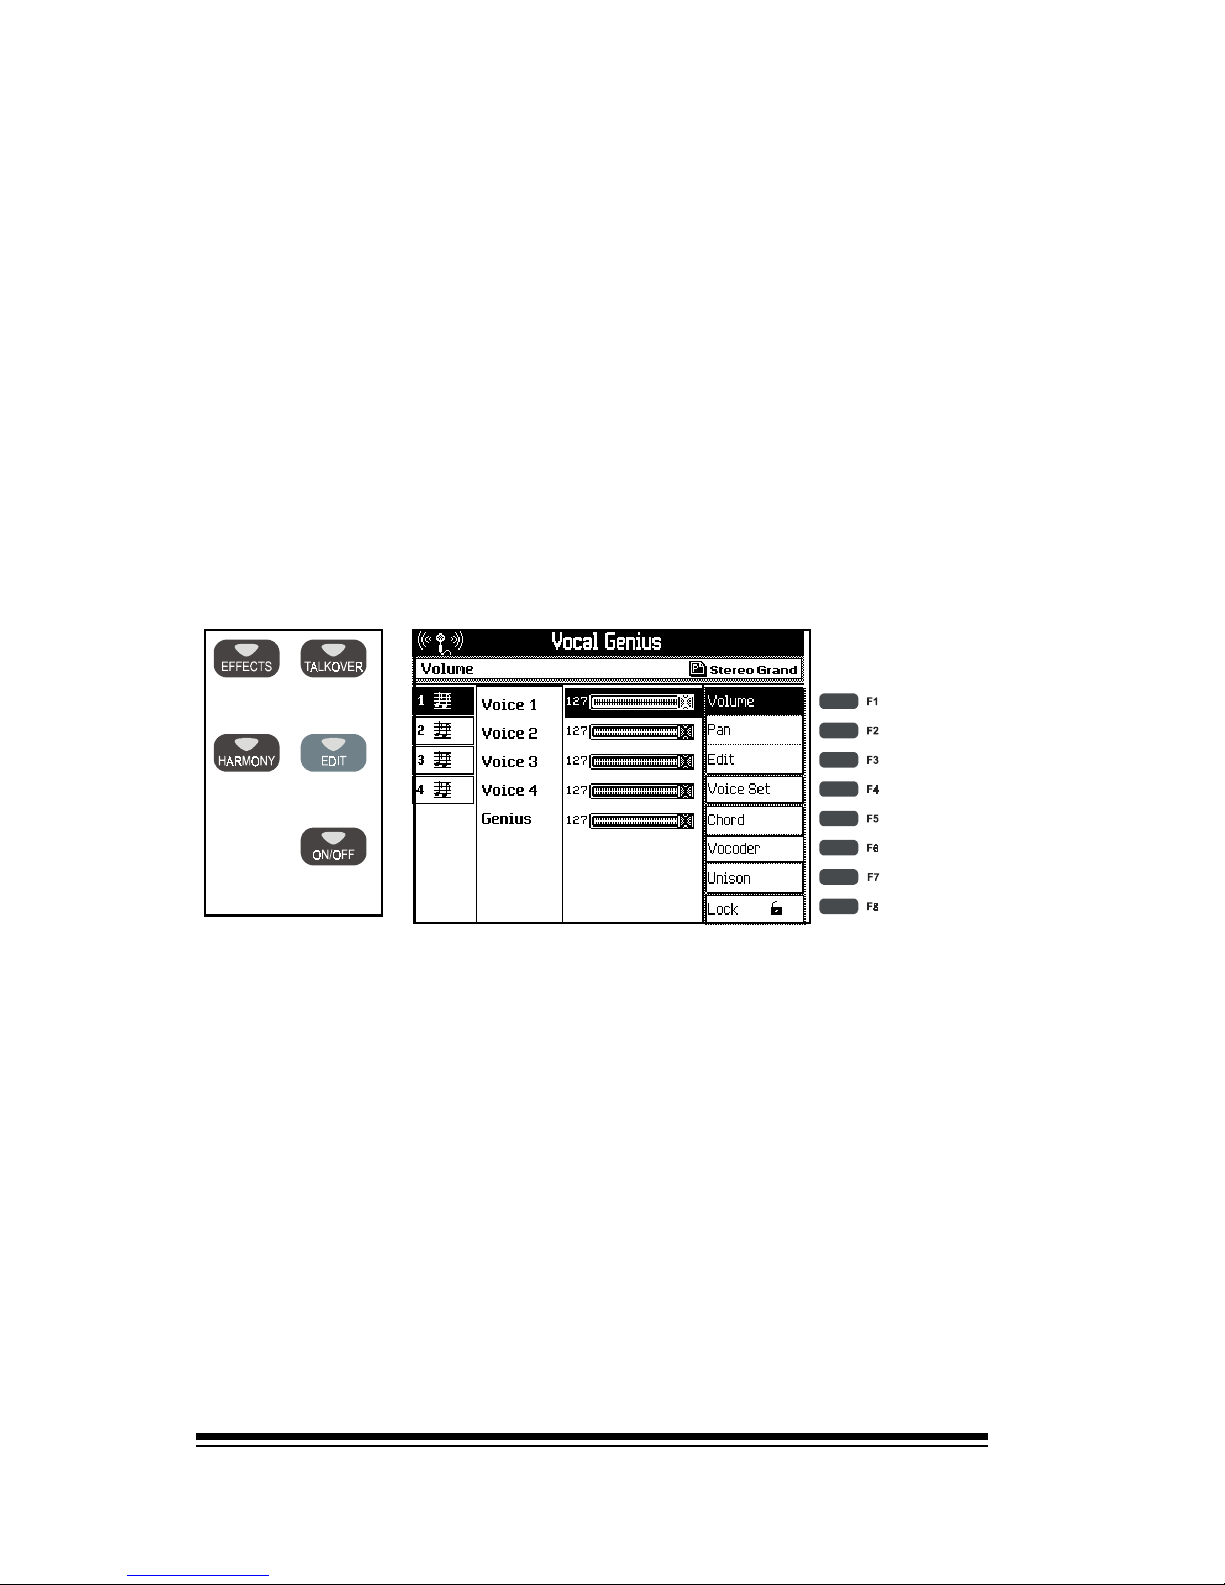
genesys ensemble/genesys grand ensemble
Page 78
If you sing the same note repeatedly into the microphone
while playing different notes on the keyboard, you will start
to recognize this classic vocoder effect. In this way, you
can actually talk the words to a song while playing the
correct notes on the keyboard.
At the moment we are only hearing Voice 1 from the four
harmony voices available. If you play two notes together
on the keyboard, you will hear Voice 1 singing the lowest
note while Voice 2 sings the highest note. Playing three
notes will bring in Voice 3 and four notes will add Voice 4.
Press EDIT again and select VOLUME on the right side of
the screen.
Now you can adjust the individual volumes of each voice in
the harmony.
Using the four harmony voices in this way allows you to create some fairly complex vocal group arrangements. Remember that, since the harmony voices will sing any note you
play on the keyboard, you can play wide harmonies using
both hands across more than one octave of the keyboard.
Now try turning up the MIC volume again so that you can
hear your own voice in addition to the harmony voices and
experiment with some of the beautiful effects you can create
with your own five-part vocal group.
J
J
Page 88
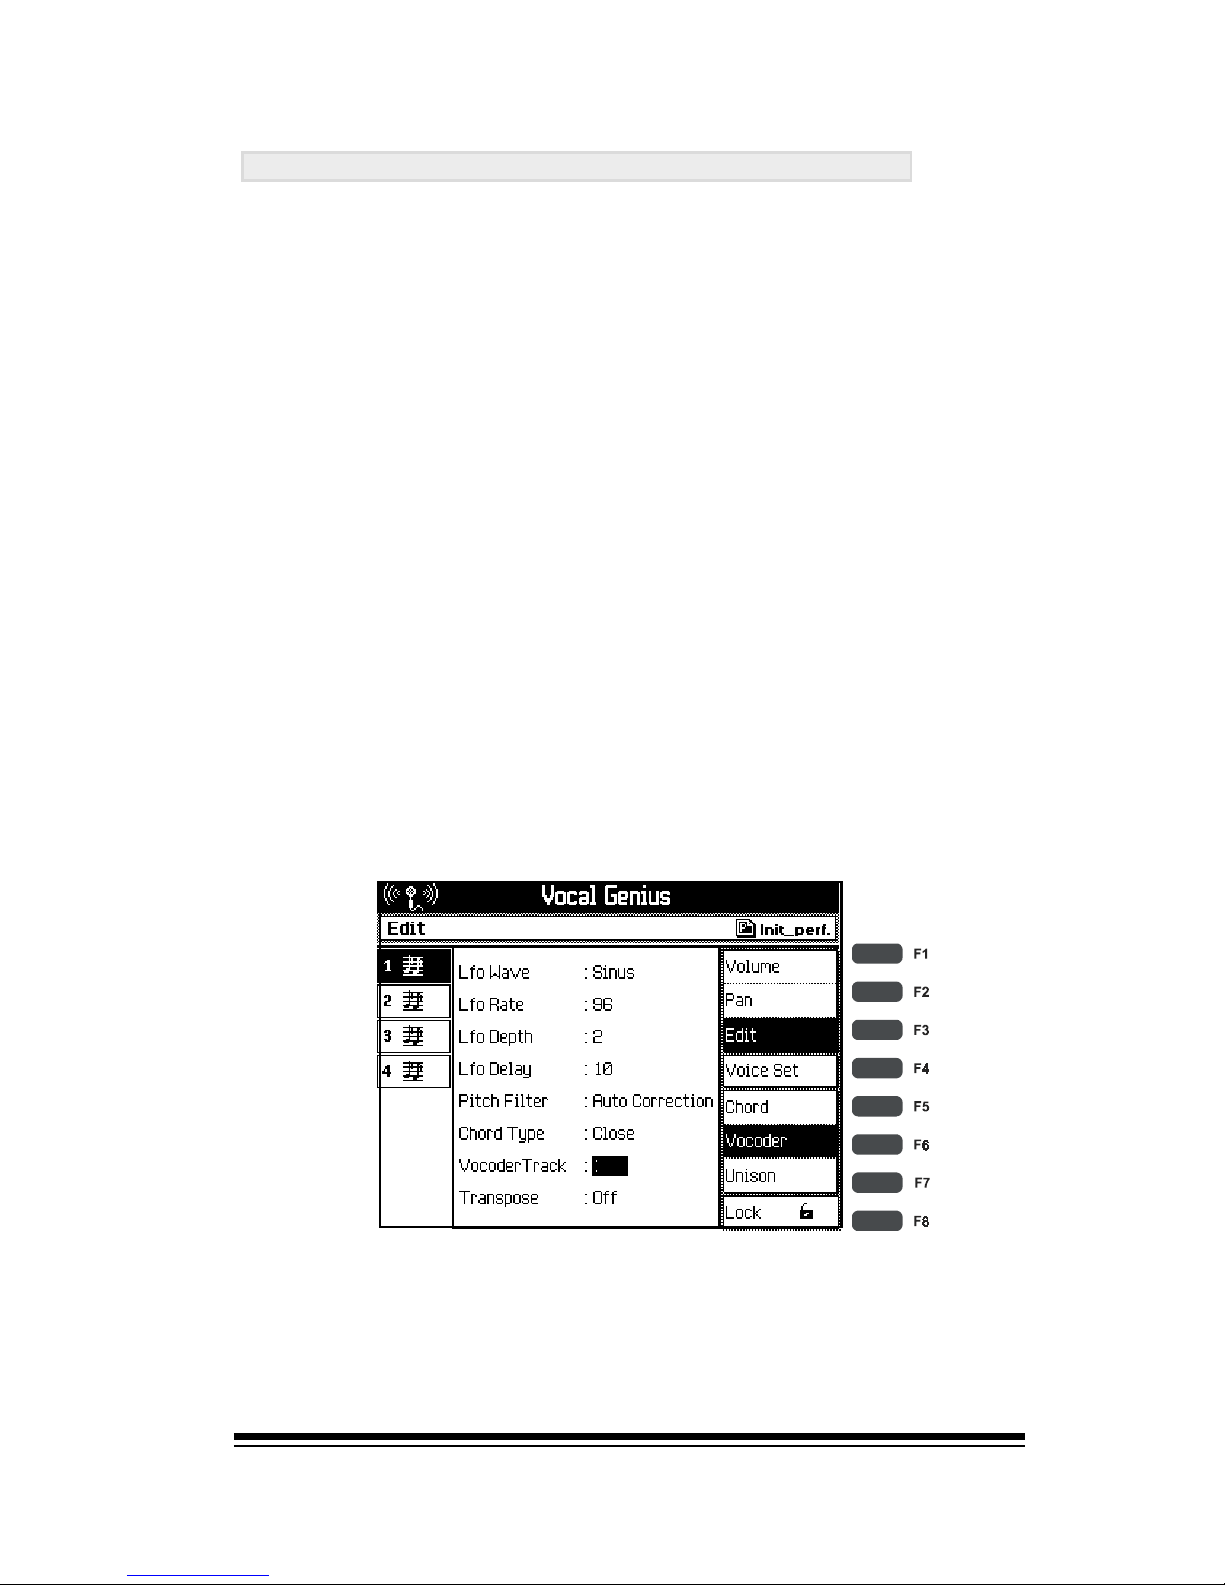
Vocal Genius
Page 79
Using Midifiles with Harmony Tracks
Many commercially produced midifiles now include a special track, (usually track #5), which instructs the harmony
voices when and how they should sing. The Genesys Ensemble receives these instructions in Vocoder Mode.
If you load a midifile into the Genesys Ensemble which
contains a harmony track, the Vocal Genius will automatically configure itself to follow the harmony track.
If you use the SONG PLAYER to play your midifile direct
from disk then you will need to configure the Vocal Genius
manually. However, you only need to do this once. After
youve set the Vocal Genius to follow the harmony track in
the song file, you can lock the settings so that it will always
operate that way. Heres how to do it:
1. Select VOCODER mode.
2. Check that all four voices are un-muted and that
their volume levels are up.
3. Press the F3 button, (EDIT) and set the Vocoder
Track to 5.
To lock these settings, just press the LOCK
button, (F8) at the lower right corner of the
screen.
J
5
J
Page 89
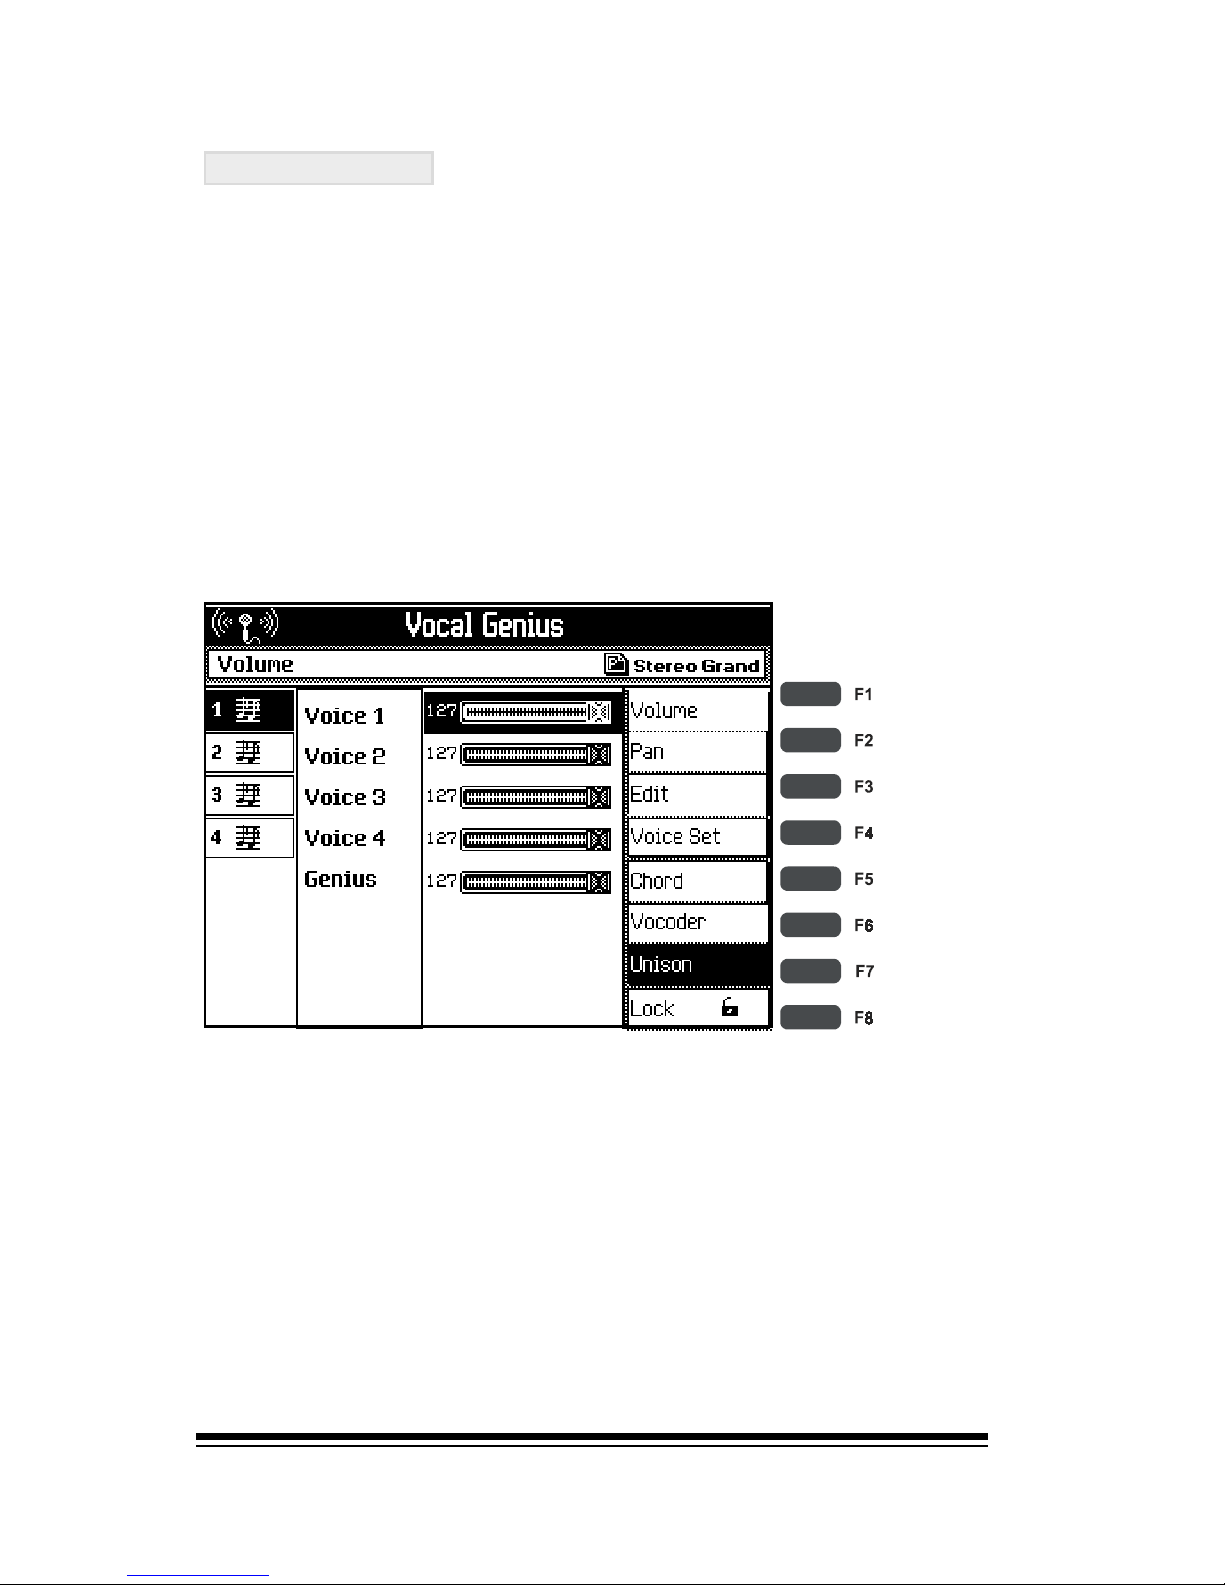
genesys ensemble/genesys grand ensemble
Page 80
Unison Mode
The third Vocal Genius mode is called UNISON. This is not technically a harmony but instead, a setting which is used to thicken the
sound of your voice to produce a richer, warmer tone.
Unison mode works by making four copies of your voice
and having them sing along with you. Since Unison mode
does not actually produce any harmony notes, (notes which
are completely different in pitch to the original), it ignores
any notes that you are playing on the keyboard since these
are not necessary for the creation of the unison effect.
Select Unison mode now and you will hear the effect as soon
as you start singing.
Voice 1, 2, 3 and 4 each represent a copy of your voice.
However each copy is slightly different from the next. In
order to sound a little different from each other, each voice is
detuned from the others by a tiny amount. You can modify
the unison effect using the volume controls for each voice;
mixing them together in different proportions or using just
one or two of them.
J
Page 90
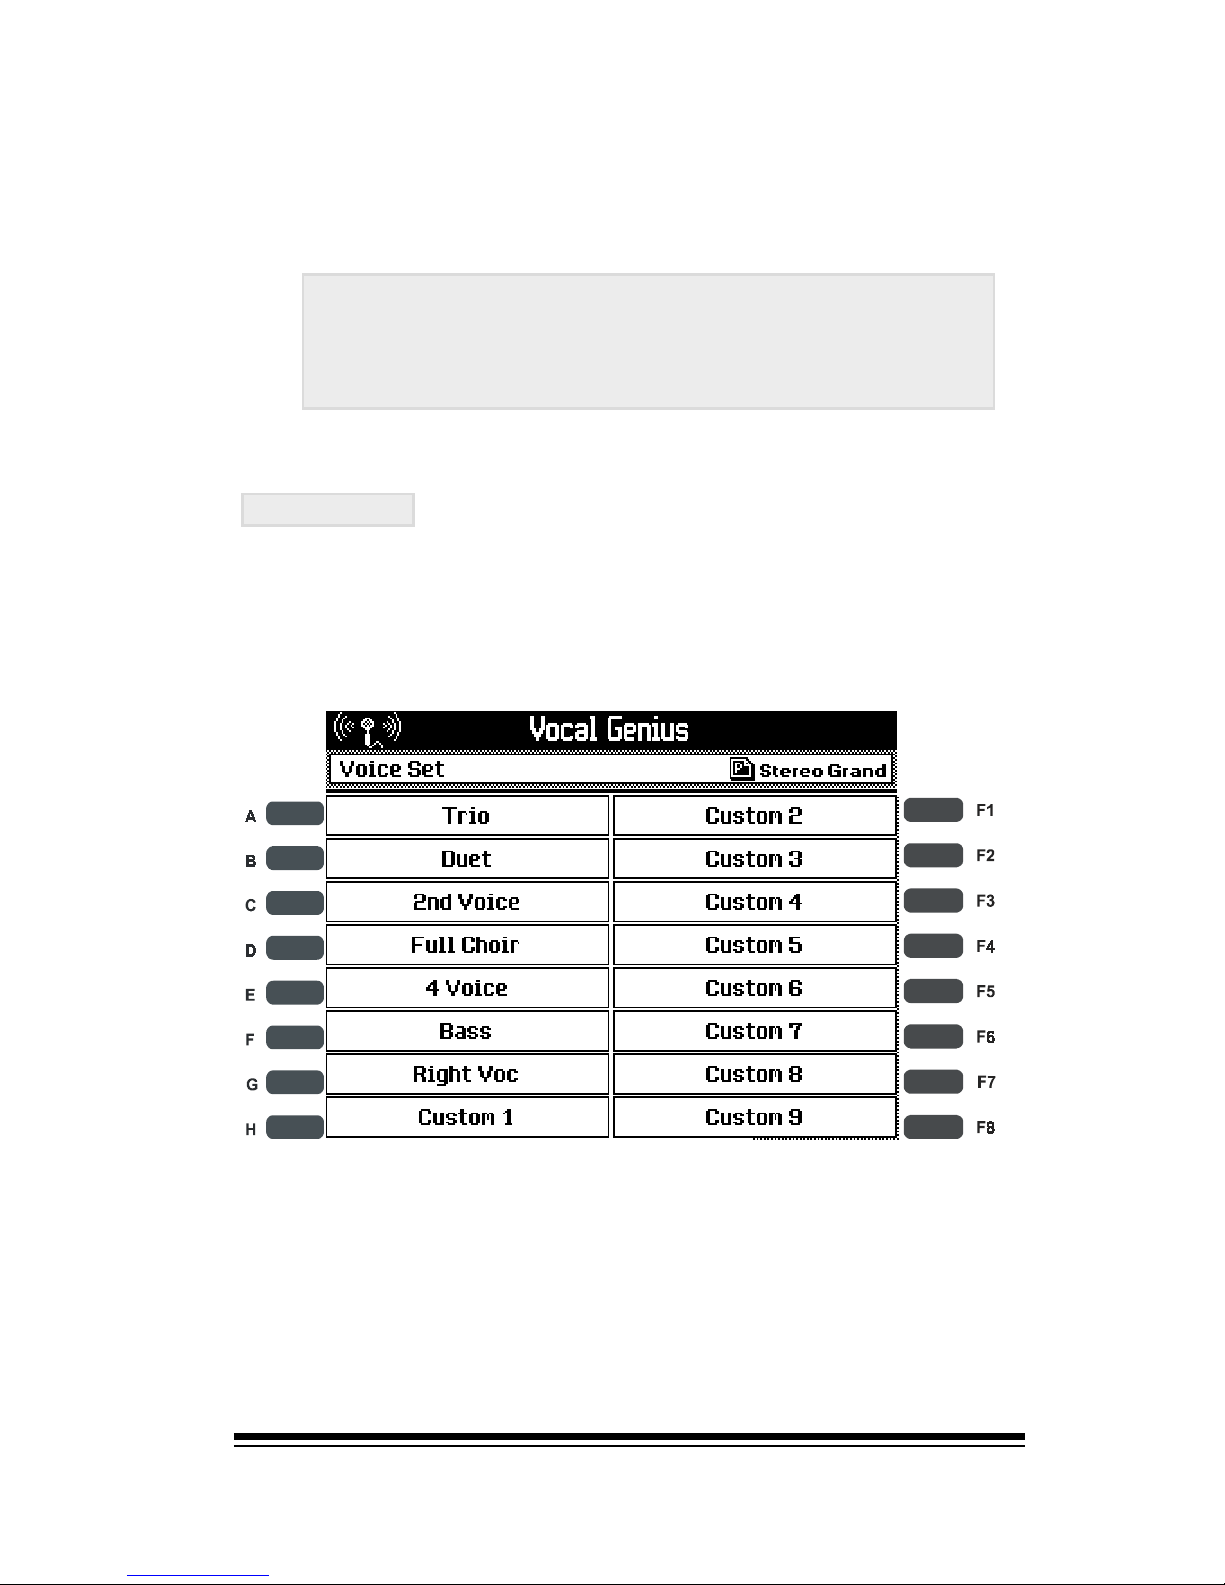
Vocal Genius
Page 81
Voice Set
The Vocal Genius comes complete with 16 factory presets
which automatically configure the harmony voices and Vocal Genius mode for different playing styles. Press the VOICE
SET button to see these presets:
Press the button beside any of these presets to select it.
The harmony settings will automatically change according
to the preset you selected.
Heres how the four unison voices are tuned. The tuning
differences are expressed in cents where each cent is
equal to 1/100th of a half-step or semitone.
Voice 1 is 12 cents higher than your real voice.
Voice 2 is 7 cents higher than your real voice.
Voice 3 is 7 cents lower than your real voice.
Voice 4 is 12 cents lower than your real voice.
"
"
"
"
Page 91

genesys ensemble/genesys grand ensemble
Page 82
Recording Studio
The Genesys Ensemble offers the most powerful digital recording studio in its class; featuring both a Midi sequencer
and an integrated Hard Disk Audio Recording System.
First, its important to understand the difference between
these two different types of recording devices.
A Midi Sequencer is what you might find on many worksta-
tion and arranger keyboards. It allows you to record what
you play using the instruments internal sounds and styles.
Recordings made using a Midi Sequencer can only be played
back by other electronic keyboards or by computers running some kind of sequencer or media player software.
Hard Disk Audio Recording is not normally found on keyboards of any type and the Genesys Ensemble is the first
arranger keyboard to offer this powerful feature. Hard Disk
Audio systems are usually found in recording studios. They
can be used exactly like a tape recorder to record any sound
at all: your singing voice, your guitar playing and so on.
Recordings made using a Hard Disk Audio system can easily be transferred to CDs so they can be listened to anywhere without the need for any special playback equipment.
Whenever you press RECORD on the Genesys Ensemble,
the first thing you have to decide is whether you want the
recording to be a Midi Sequence, (which we call a SONG),
or Hard Disk Audio, (which we call a WAVE).
SONG PLAYER/R EC STUD IO
|
Page 92

Recording Studio
Page 83
As a general rule, if you want to record using only the keyboard and its built-in sounds you should use SONG. If you
want to sing or play another instrument and record this as
well, you should use WAVE.
The big advantage with SONG recording is that you have
extensive editing capabilities. If you make a mistake while
youre recording a song, you can go back later and repair it.
SONGs can also be recorded one track at a time, taking as
long as you need to prepare a complex arrangement of up to
32 tracks. WAVE recordings do not allow you to do this. If
you make a mistake, you must go back and start again.
The Genesys Ensemble also lets you combine both types
of recording. You can spend as much time as you need
carefully preparing a perfect backing track as a SONG. Then
you can play your finished song while you overdub the vocals and record the entire performance as a WAVE.
How to Record A SONG
Lets get ready to record our first SONG. Set the instrument up in the normal way so that everything is ready to
play the piece you want to record.
At this stage we wont worry about anything complex like
multi-tracking. Were just going to record everything at once.
The Genesys Ensemble will record exactly what you play as
you play it.
Once the instrument is set up and ready to play, press the
gray RECORD button
SONG PLAYER/REC STUDIO
|
J
Page 93
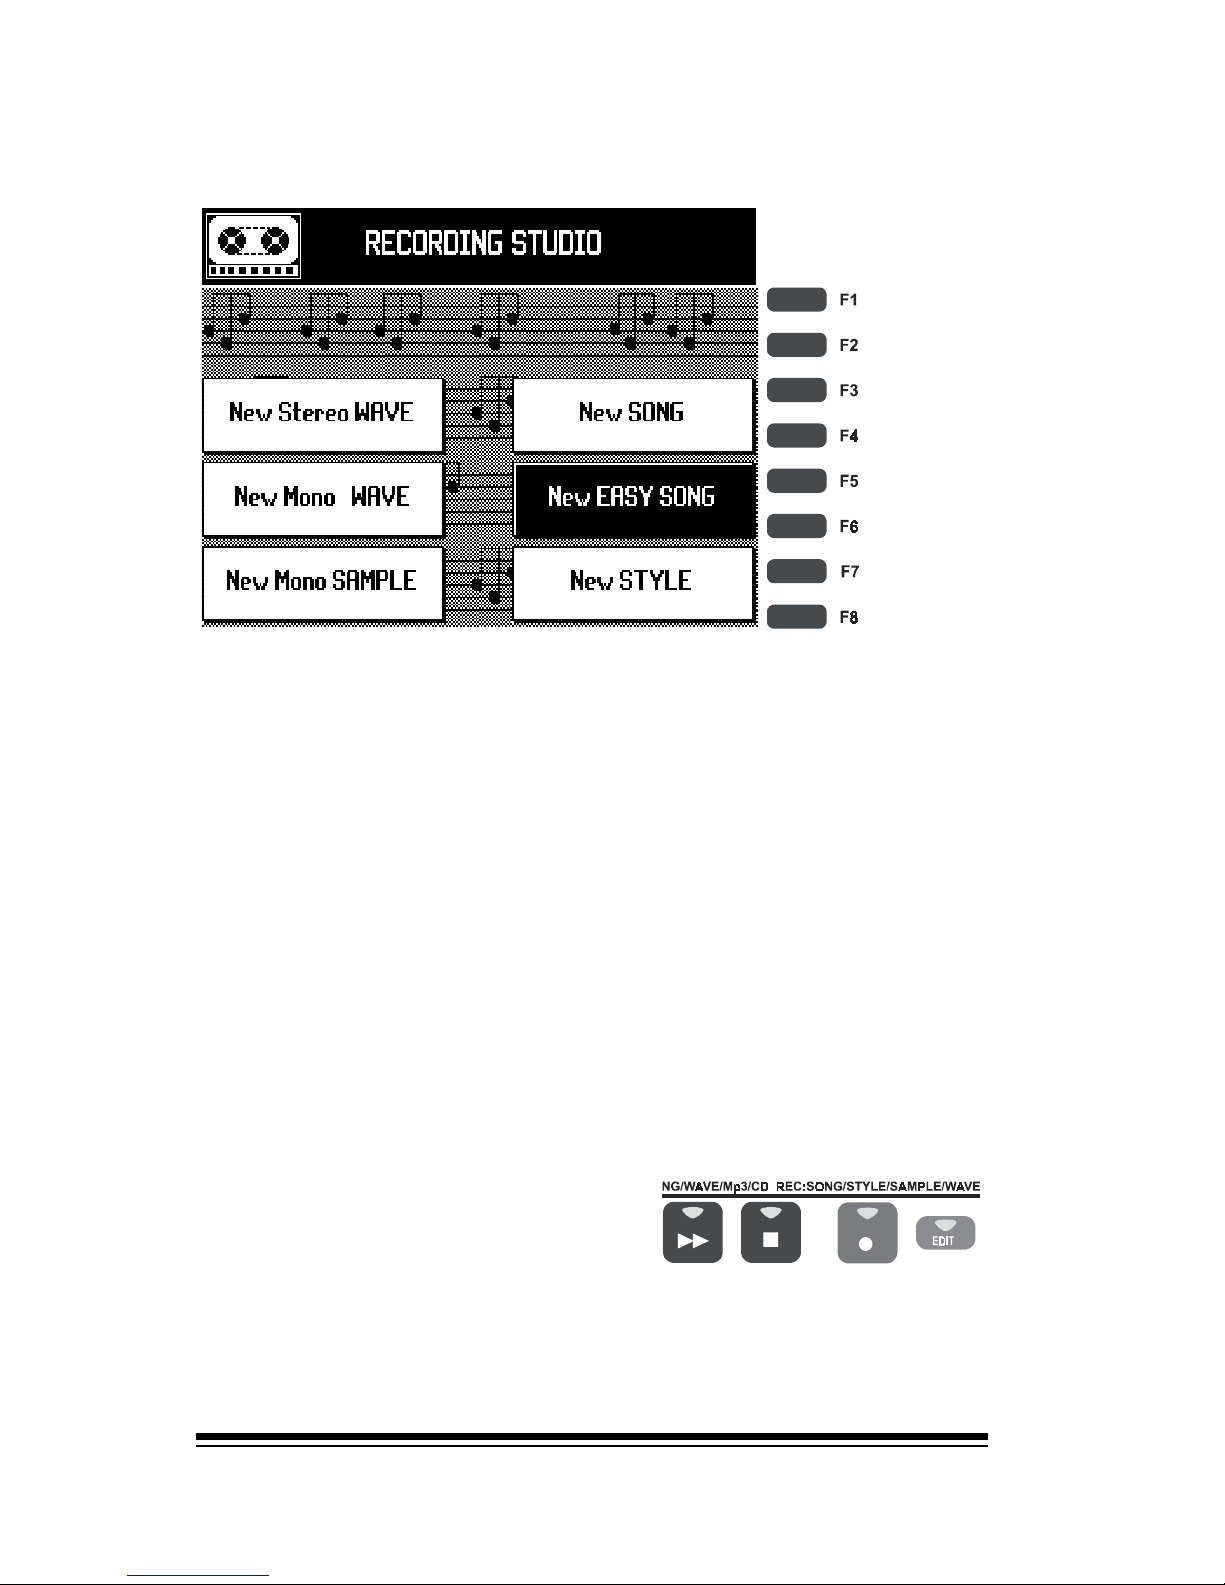
genesys ensemble/genesys grand ensemble
Page 84
J
SONG PLAYER/REC STUDIO
|
From the options in the screen, select New EASY SONG.
Now youre ready to begin. The instrument is ready to record
everything you play from this point. Whenever the instrument is in recording mode, the screen changes to reverse
colors.
If you are going to play using a style then recording will
commence automatically when you press START/STOP or
play in with an INTRO. You can also use SYNCHRO in the
normal way if you wish.
If you are going to play without a style, perhaps a solo
piano piece, you must start the recording manually by pressing the PLAY button. So that you can best follow the examples in the next section, please record using a style,
playing chords in the left hand and melody in the right.
When youve finished recording, even if you were using a
style and you finished by
pressing START/STOP or ENDING, you must press the STOP
button to complete the recording process.
J
Page 94
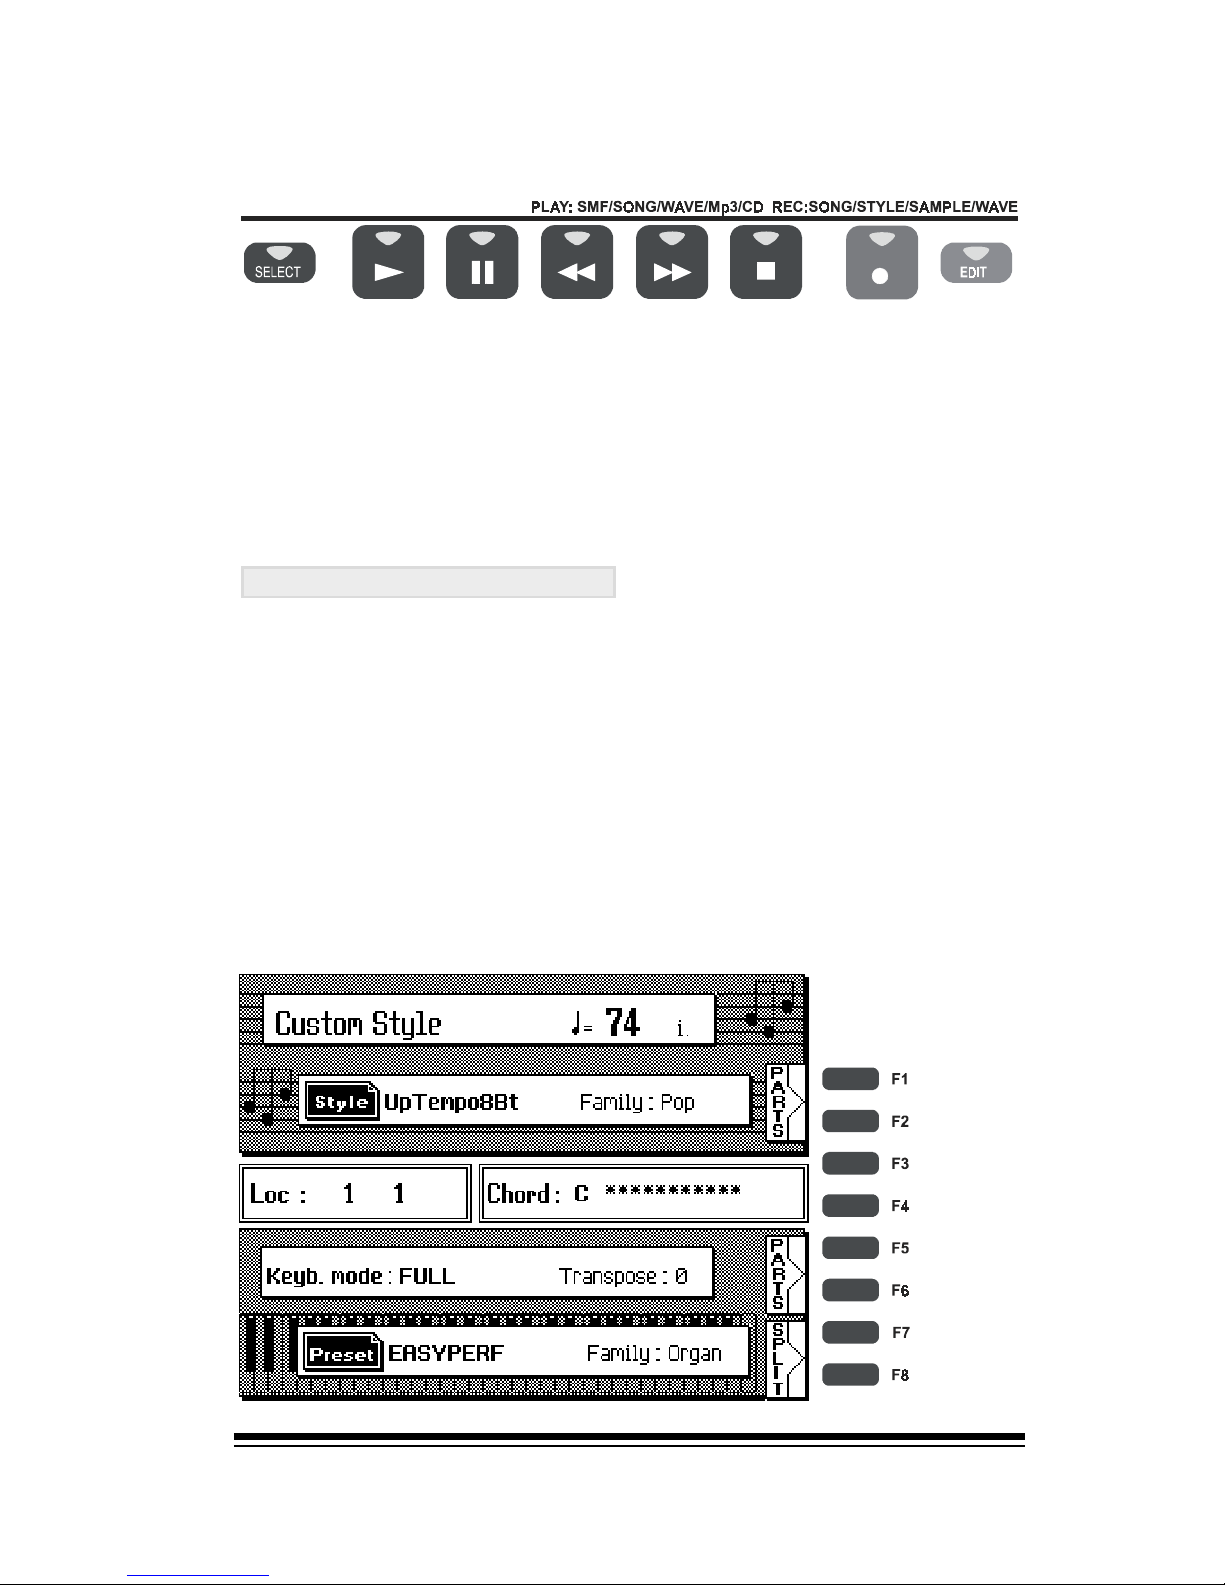
Recording Studio
Page 85
Now you can listen to what was recorded by pressing PLAY.
Congratulations. Youve just made your first recording.
During playback, you can even use the PAUSE, FORWARD
and BACK buttons in the normal way to move around within
the song.
Examining your song
Now its time to take a look at what was actually recorded.
The EASY SONG function that we used automatically takes
everything you are playing drums, bass, melody etc.
and places each part in its own separate track.
The number of tracks that EASY SONG uses depends on
which particular style and sounds you were using while you
were recording. More complex sounds and style variations
require more tracks than simpler ones.
To see exactly how EASY SONG arranged your performance,
press PARTS at the top right side of the screen.
SONG PLAYER/R EC STUDIO
|
J
J
Page 95
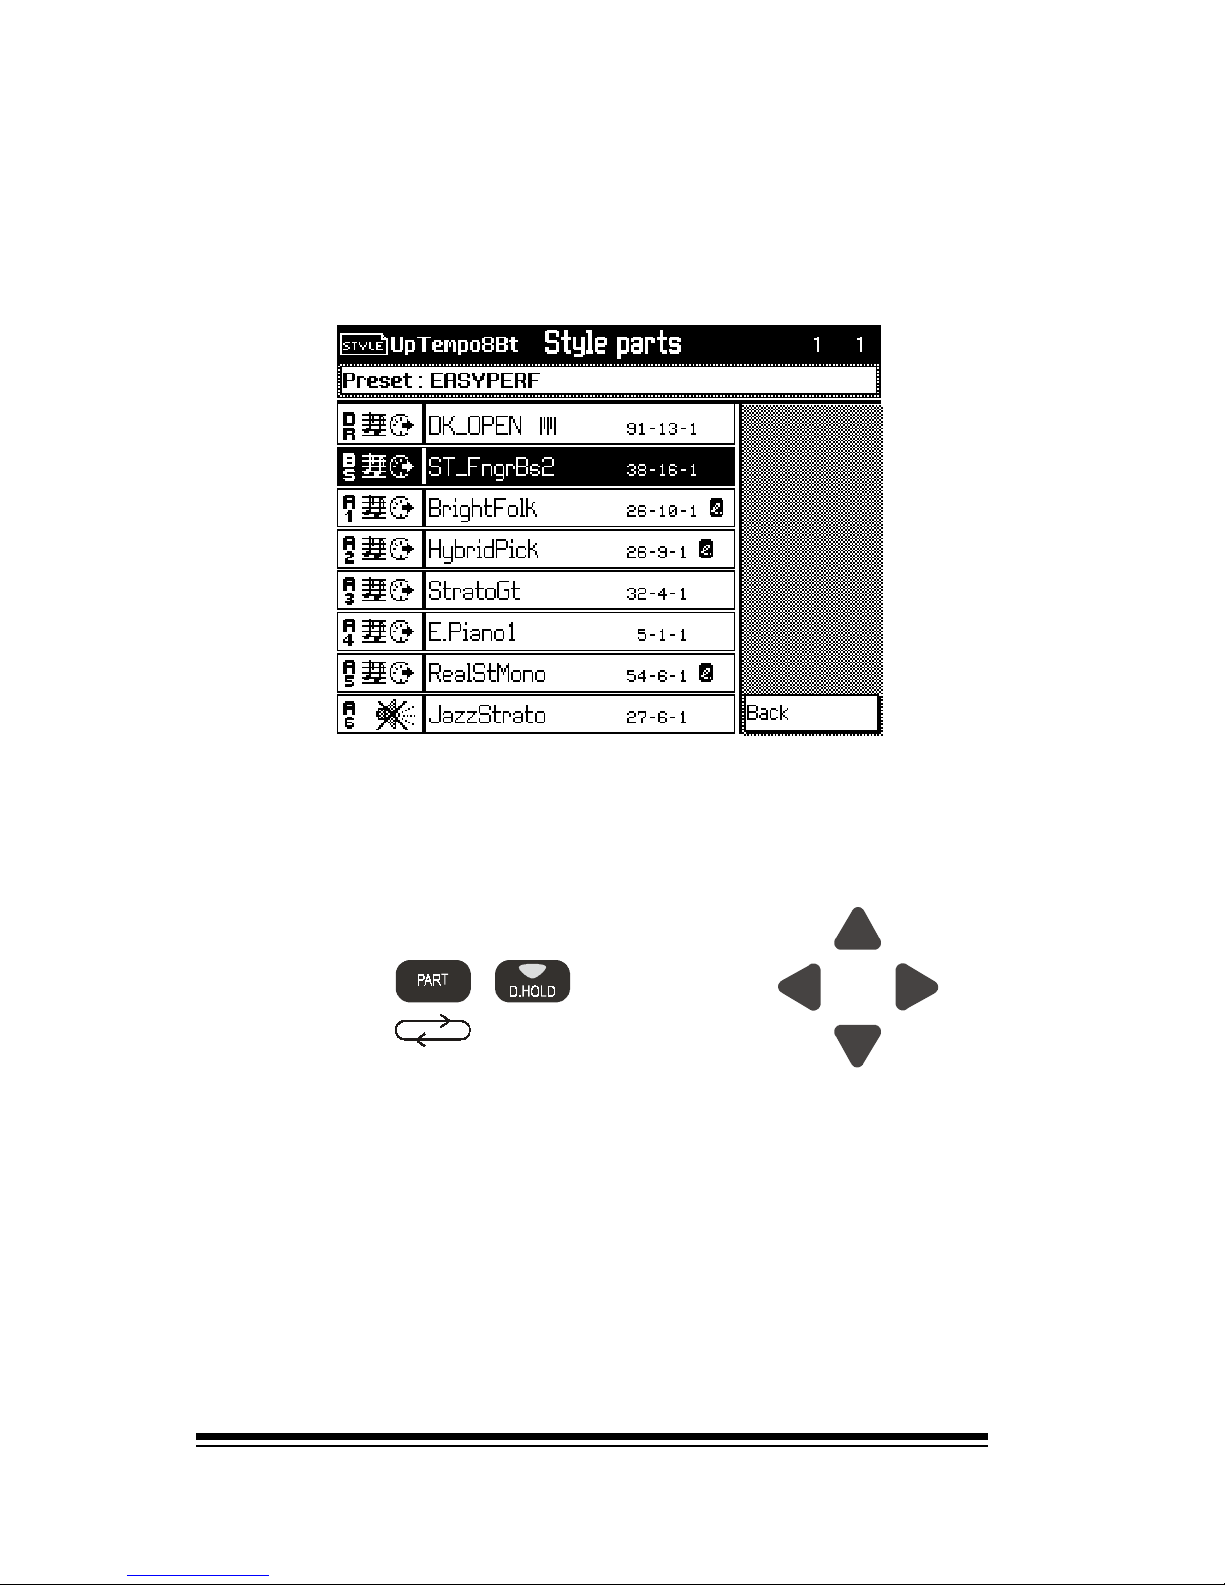
genesys ensemble/genesys grand ensemble
Page 86
You should now see the first 8 tracks of the song. To the left
of each track is a small icon which tells you whether or not
that track has been used. The mute icon tells you that a
track is currently empty while the music icon tells you that
the track contains some recorded music.
You might remember this view from when we used the SONG
PLAYER to play Midifiles and GEM songs. In that section we
discussed how to change any of the sounds or adjust the
volume level of each track. You can change these things now
in exactly the same way. In fact, the recording you just made
is already in the GEM song format. When you come to save
it, you can either leave it as a GEM song or you will have the
option to save it as a Midifile, (so that it can be played on any
other keyboard).
J
J
J
If you repeatedly press the down arrow you can scroll through
all the way to track 8 or simply press the button to the left of
the track name to select it. To see additional tracks, press
the PART button.
Page 96
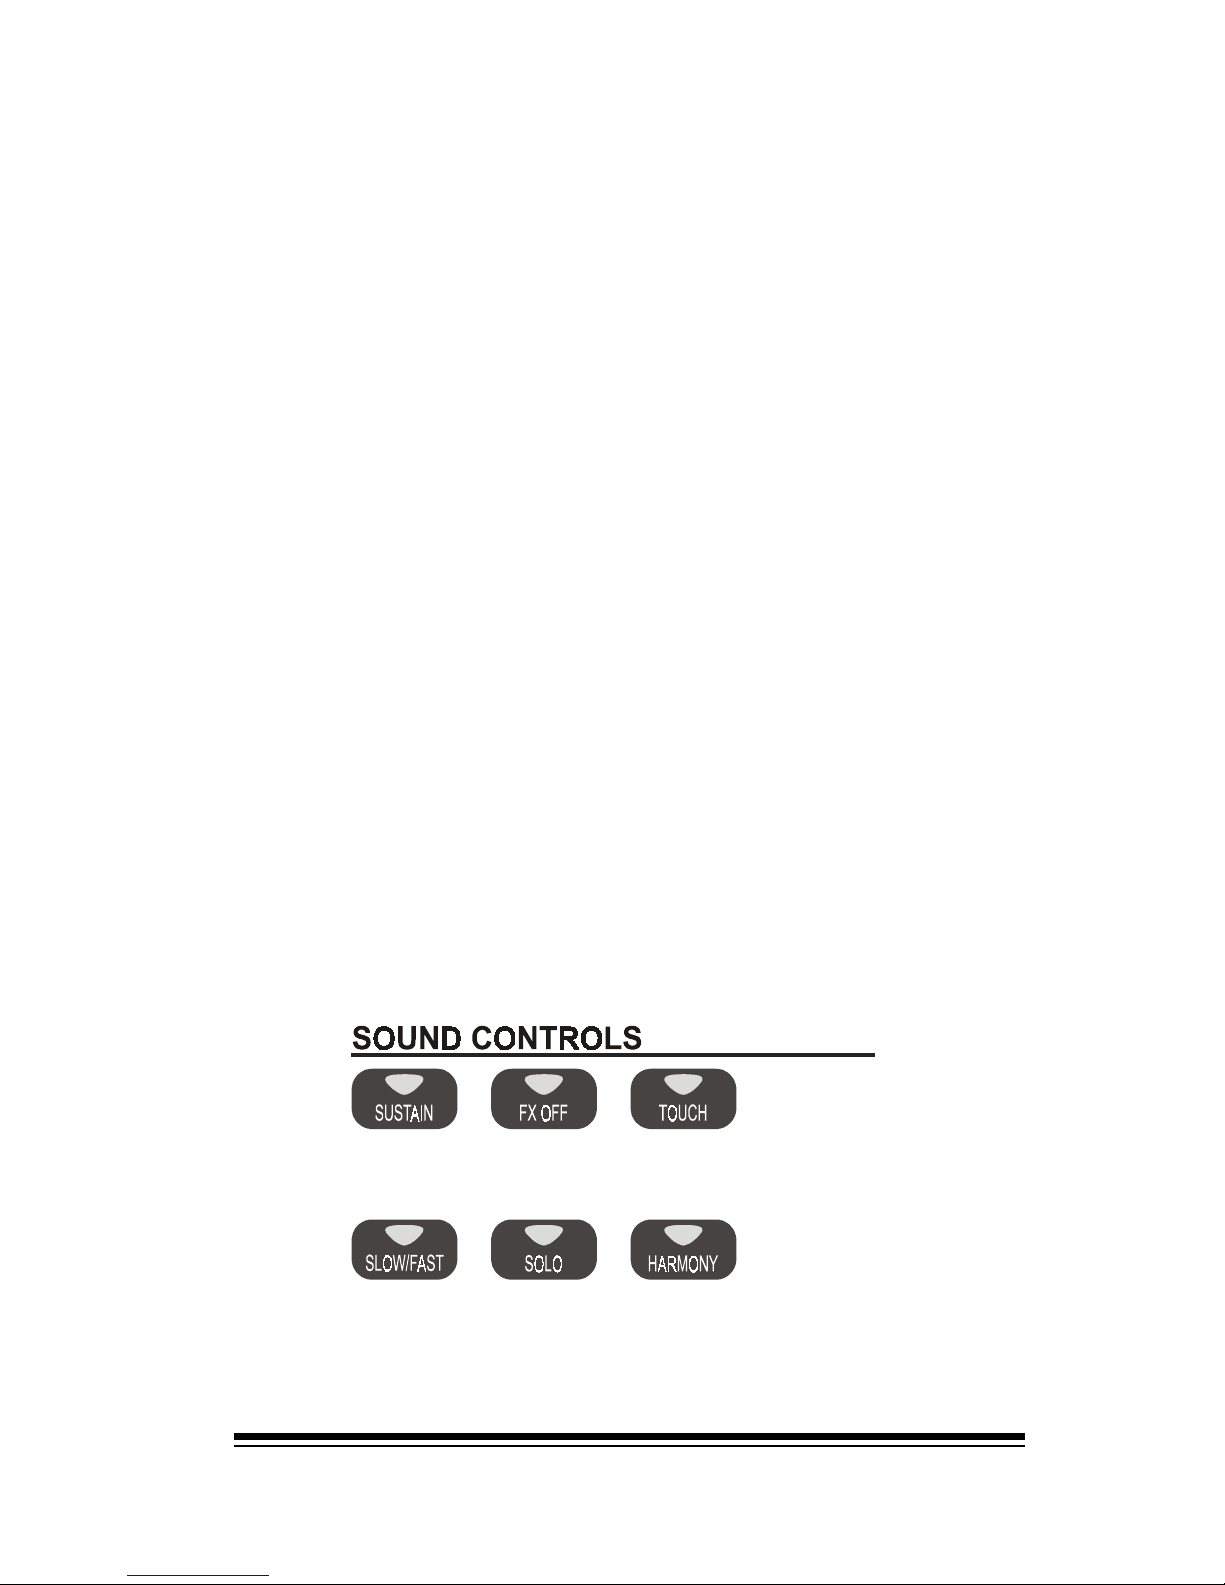
Recording Studio
Page 87
Changes can be made regardless of whether the song is
playing or stopped. The best way to make changes is to try
them while the song is playing and see what they sound
like. If you like the results then you can store these changes
permanently into the song. If you dont like the changes
youve made then you dont have to store them. In this
case, the changes you made will be lost the next time you
re-start the song.
Lets make a couple of small changes to the song we just
recorded. Well change the sounds used by the melody part
and the bass part and adjust some volumes too. The melody
part should be on track 8 while the bass can be found on
track 10. But how do we know that?
EASY SONG always records the right hand melody in tracks
3-8, (if you have one sound for the right hand it will go into
track 8, two sounds will go into 7 and 8 and so on). Tracks
9-16 are used for the style accompaniment, 9 for the drums,
10 for the bass and 1116 for the other accompaniment
instruments.
After a little while youll become more familiar with the way
that EASY SONG assigns its tracks. In the meantime, theres
an easy way to check whats in a particular track if youre
not sure. Start the song playing and then press the SOLO
button.
J
Page 97
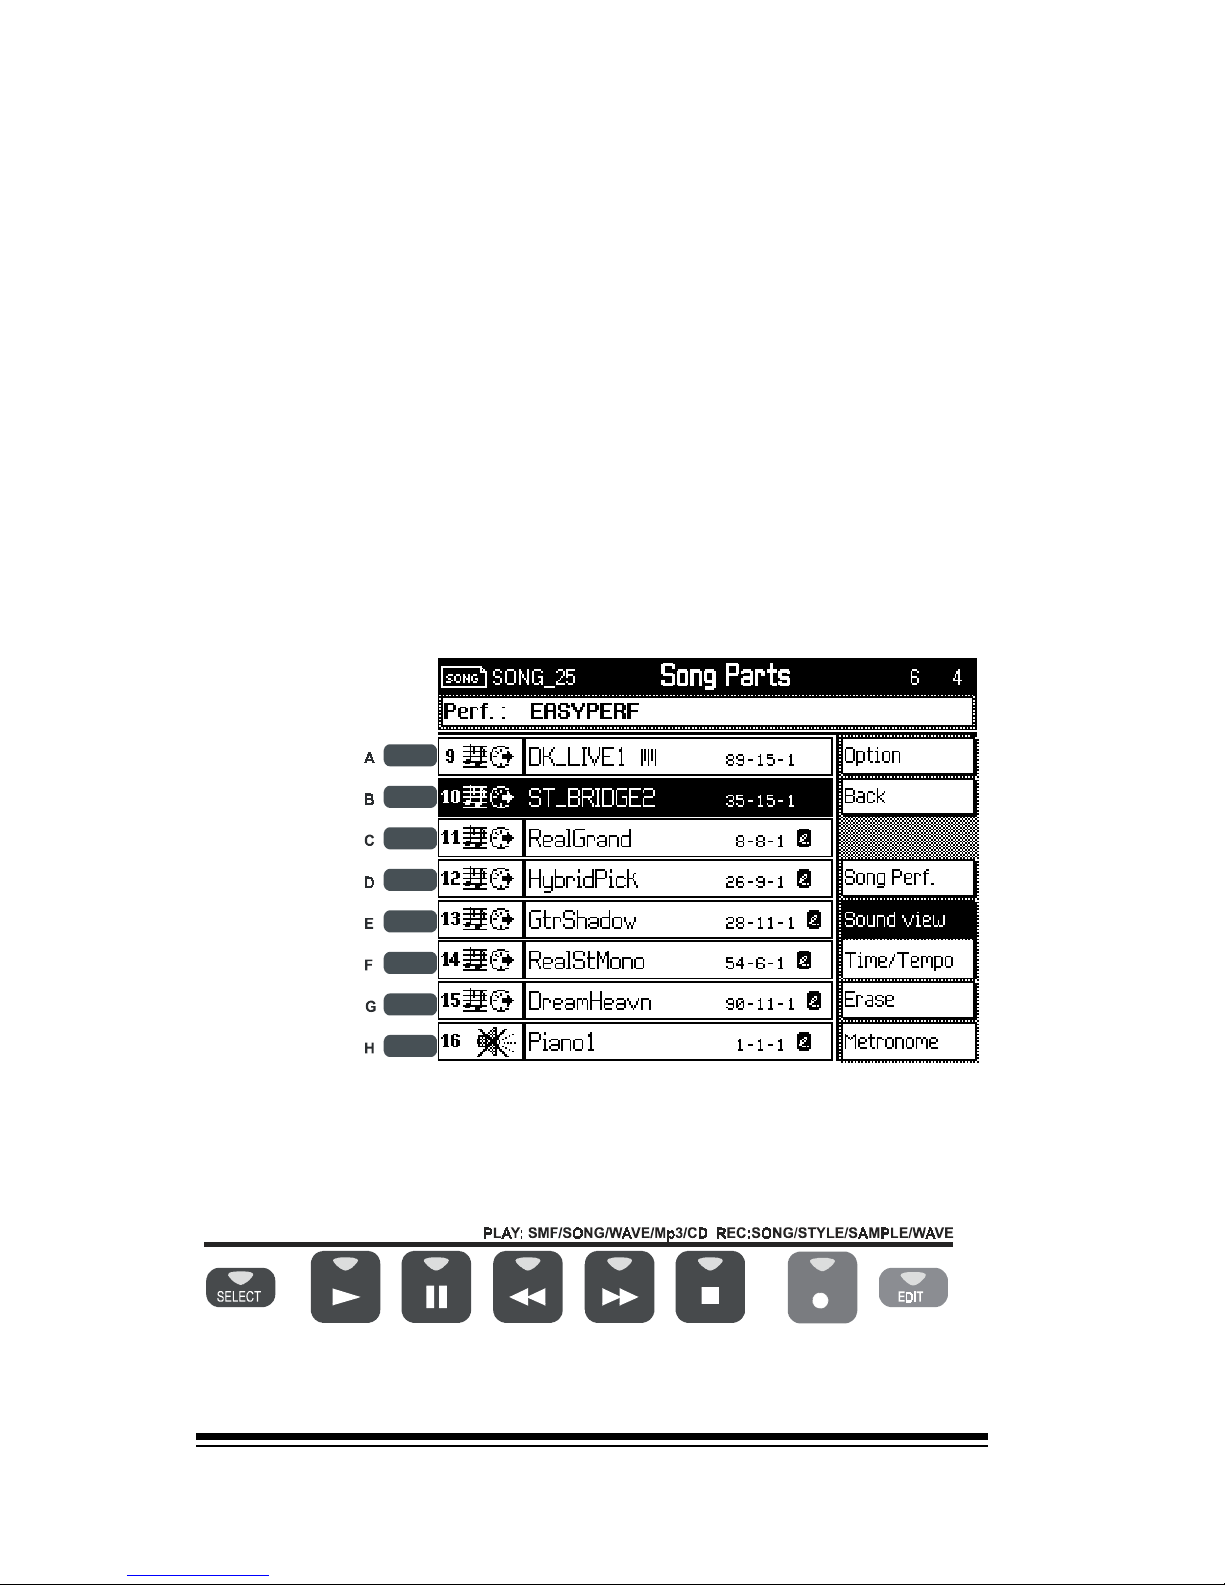
genesys ensemble/genesys grand ensemble
Page 88
When the SOLO button is turned on, you will hear only the
track which is currently selected. At this point you may hear
absolutely nothing. Thats probably because the track which
is currently selected is empty. Select a track which contains
some recorded music, (remember, you can tell by the icon
on the left), and you should hear that track playing on its
own. If you still hear nothing, it will only be because that track
isnt playing anything at this particular point in the song.
Now you know how to identify any track, lets change the
sounds that are being used by track 8, (the melody) and
track 10, (the bass). Make sure that tracks 1-8 are displayed in the screen. If they are not, keep pressing the
PART button until the screen shows these tracks.
Now select track 8 by pressing the button to the left of it.
Make sure that SOLO is turned off and start the song playing
by pressing PLAY
J
SONG PLAYER/REC STUDIO
|
J
Page 98
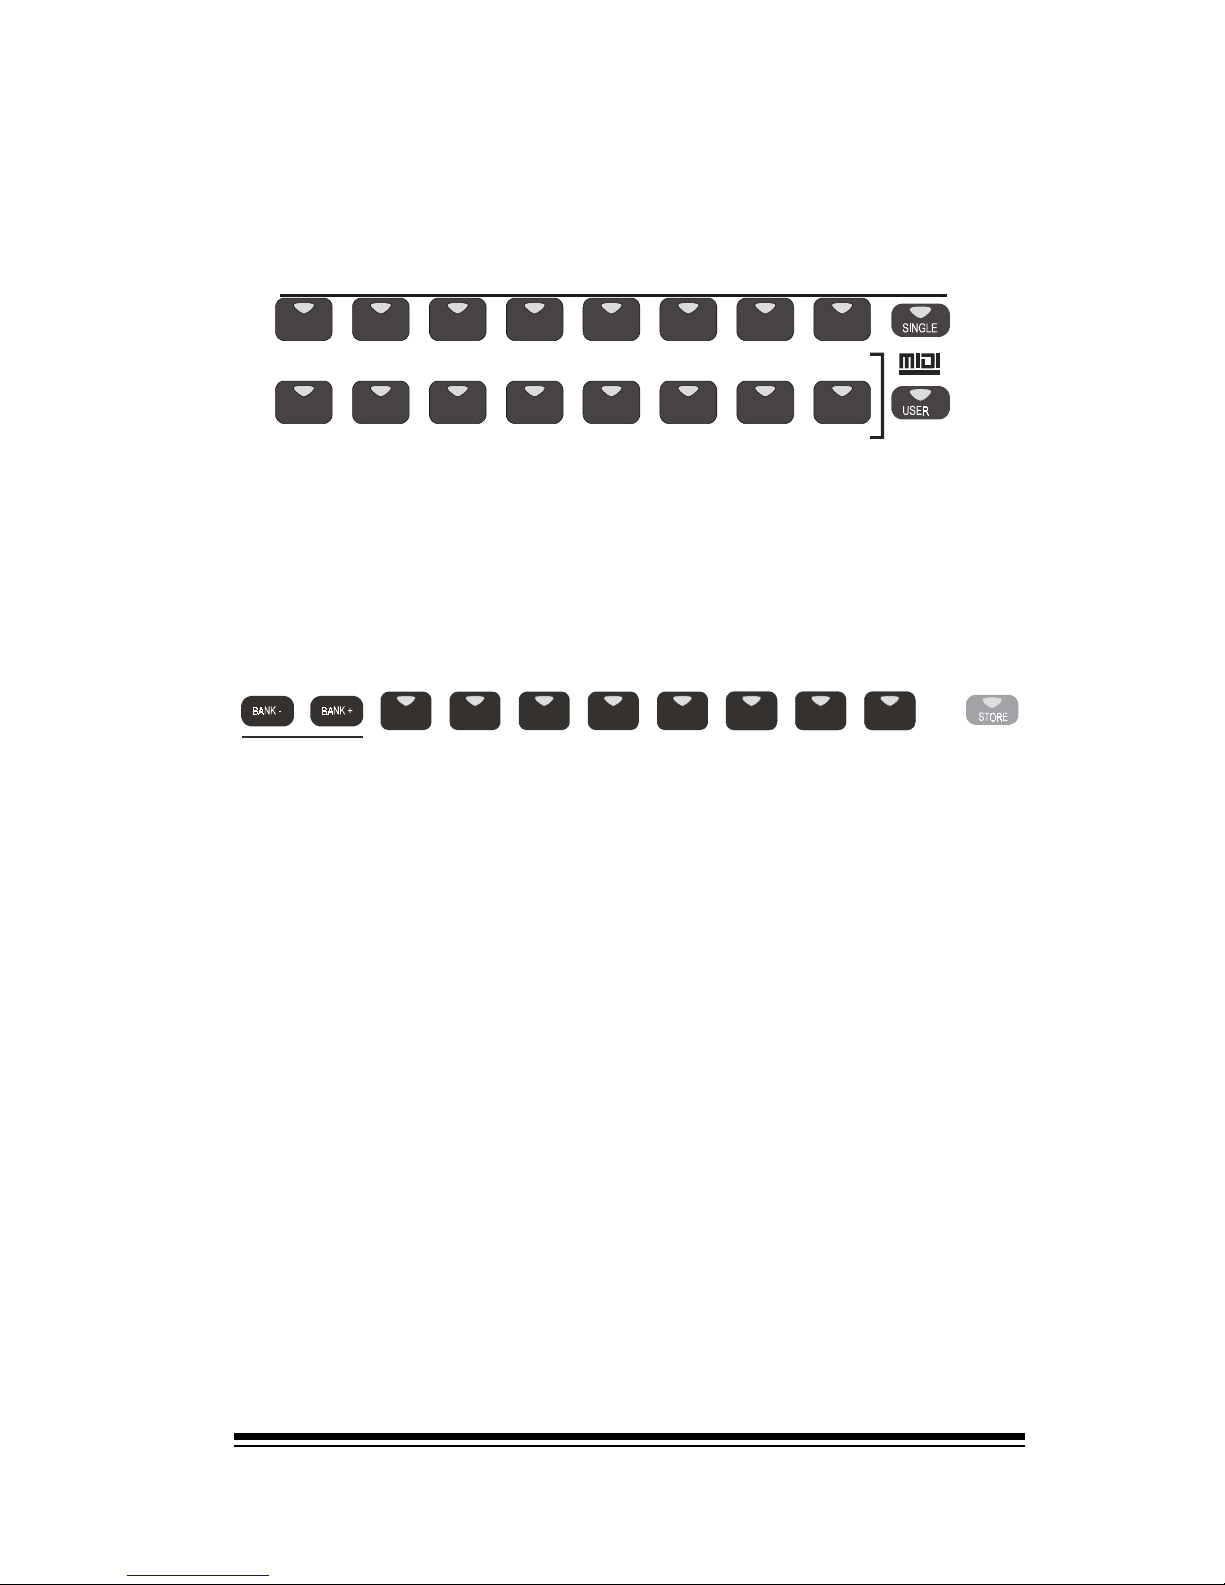
Recording Studio
Page 89
Now press SINGLE in the Preset Families section and choose a
replacement sound for this track. As soon as you chose a new
sound, you should hear it playing in place of the old sound.
STRINGS
STRINGS
DRUMS
ETHNI
C
REAL
SOUNDS
ENSEMB
EFFECTS
PER
C
DRAWBAR
BRASS
SAMPLES
EFFE
CTS
ORCH.
REED
ACCORD
PIPE
BRASS
S
YN.LEAD
WIND
S
YN.PAD
SYNT
S
YNTH FX
PIANO
PIANO
MALLET
CHROM
ORGAN
ORGAN
GUITAR
GUITAR
BASS
BASS
PRESET FAMILIES
|
256 PRESETS / OVER 1000SINGLE SO UNDS / SAMPLES / DRAWBAR ORGAN
GENERAL
12345678
LI
S
T
J
J
Now the song will play with your new sound instead of the
old one. If you dont like the change that you made, ignore
the previous steps and the old sound will remain as before.
Now press PART, select track 10 and change its sound in
the same way. Remember to store the changes if you want
to keep the new sound you selected.
Changing the mix is just as easy. You can press MIXER if
you want, (you dont have to but it helps you to see whats
happening). Just use the eight sliders on the left side to
adjust the volumes of the 8 tracks visible in the screen. If
you want to mix different tracks, just use the PART button
to place the desired tracks in view.
Just as before, you can adjust the mix while you are listening
to the song playback. If you like the way it sounds after youve
re-mixed the song, just press STORE and then ENTER to memorize your changes, (you can even do this while the song is
playing). If you dont like your new mix, dont press STORE
and the song will be unchanged the next time you press PLAY.
Press ESCAPE to return to the previous view and then press
STOP. If you like the change that youve made, you can
store it into the song in the following way.
1.Press STORE, (to the right of the MEMORIES).
2.Press ENTER
Page 99
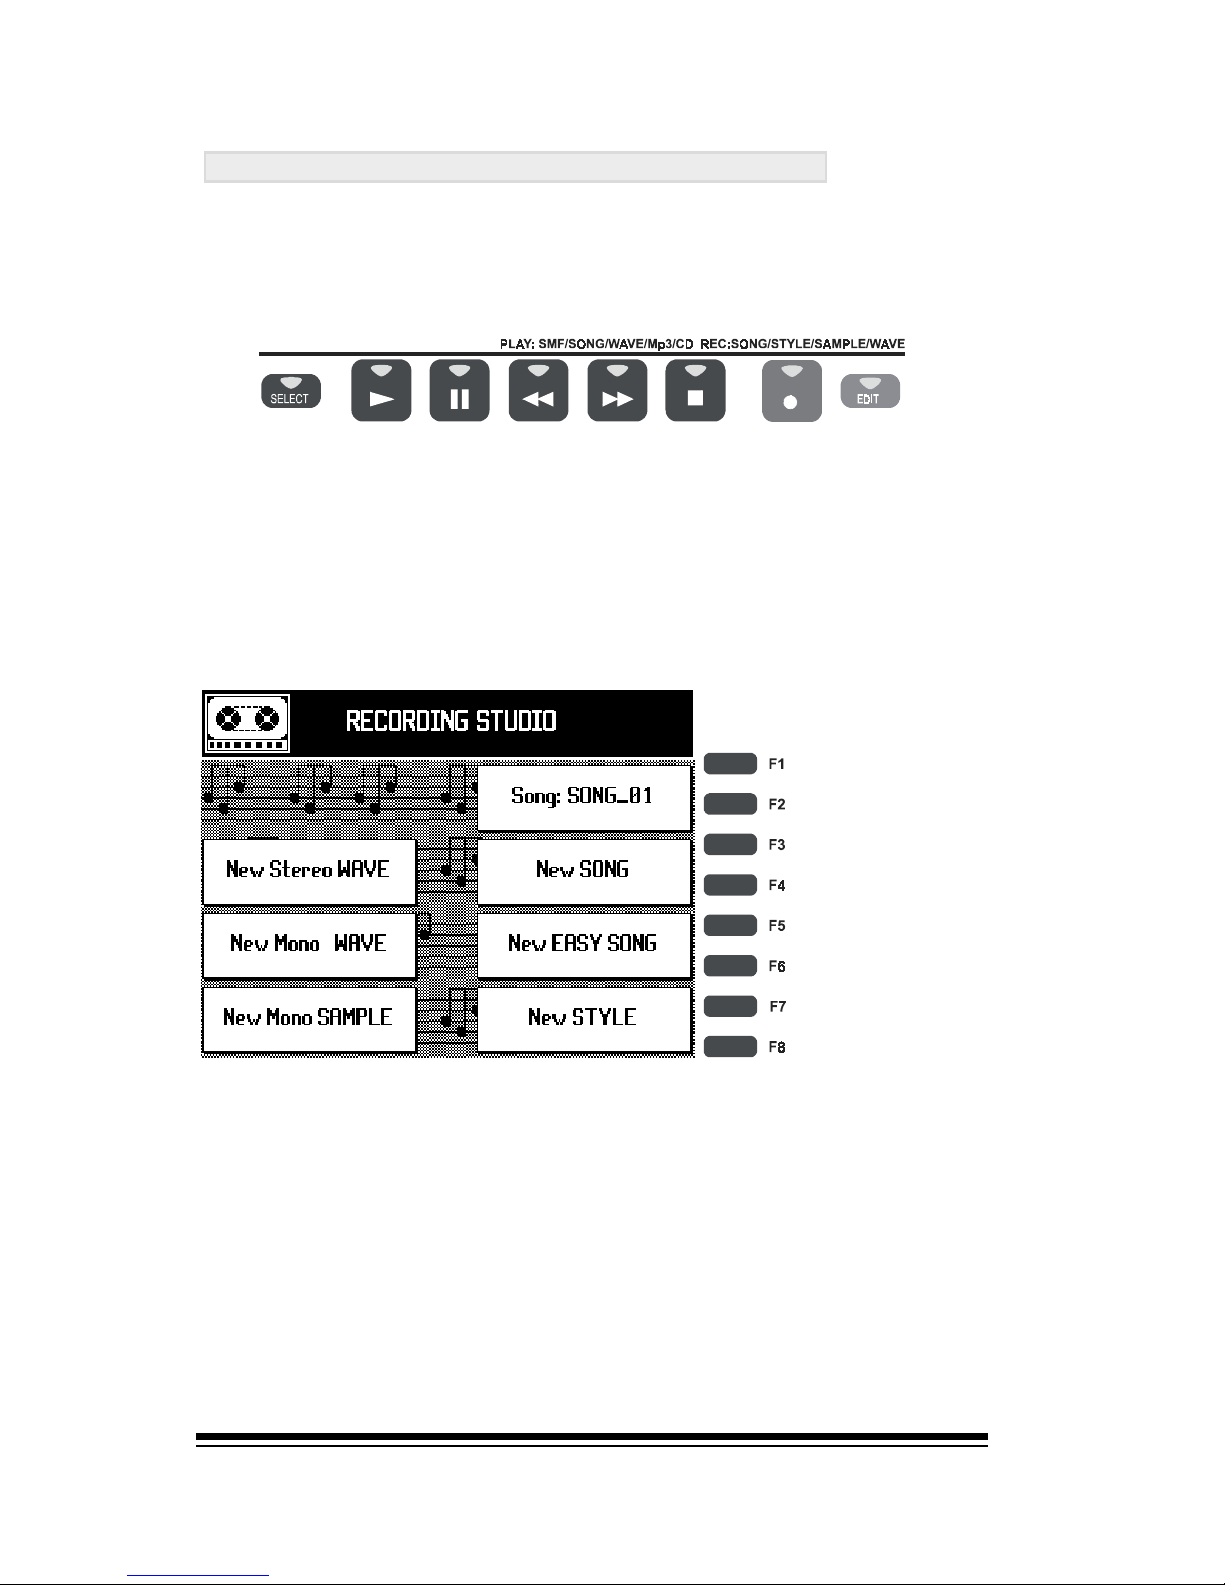
genesys ensemble/genesys grand ensemble
Page 90
Adding another track to your song
As youve already seen, your song contains a number of
empty tracks. You can use any of these tracks to record
additional musical parts. Lets record one additional part
on a spare track. To begin press RECORD.
This time, we dont want to commence recording a new
song. We want to go back and add something to the song
we just recorded, (which we will call the CURRENT SONG).
The CURRENT SONG appears at the top right side of the
display. Since we didnt give the song a name yet, its name
is shown simply as SONG_01. Select this now.
Were back in recording mode, (notice the reverse screen
colors), and ready to add a new track to our song. Select
any empty track, (for example, track 1), and then press
the button beside it once more to get that track ready for
recording. Notice how the tracks icon changes to a little
tape recorder.
Before we start recording, we can change the sound and
volume level of this track as we wish. You should know how
to do this now. Make sure SINGLE is still selected in the
Preset Families and choose the sound you want to use.
Then press ESCAPE to return the previous screen.
J
SONG PLAYER/REC STUDIO
|
J
Page 100
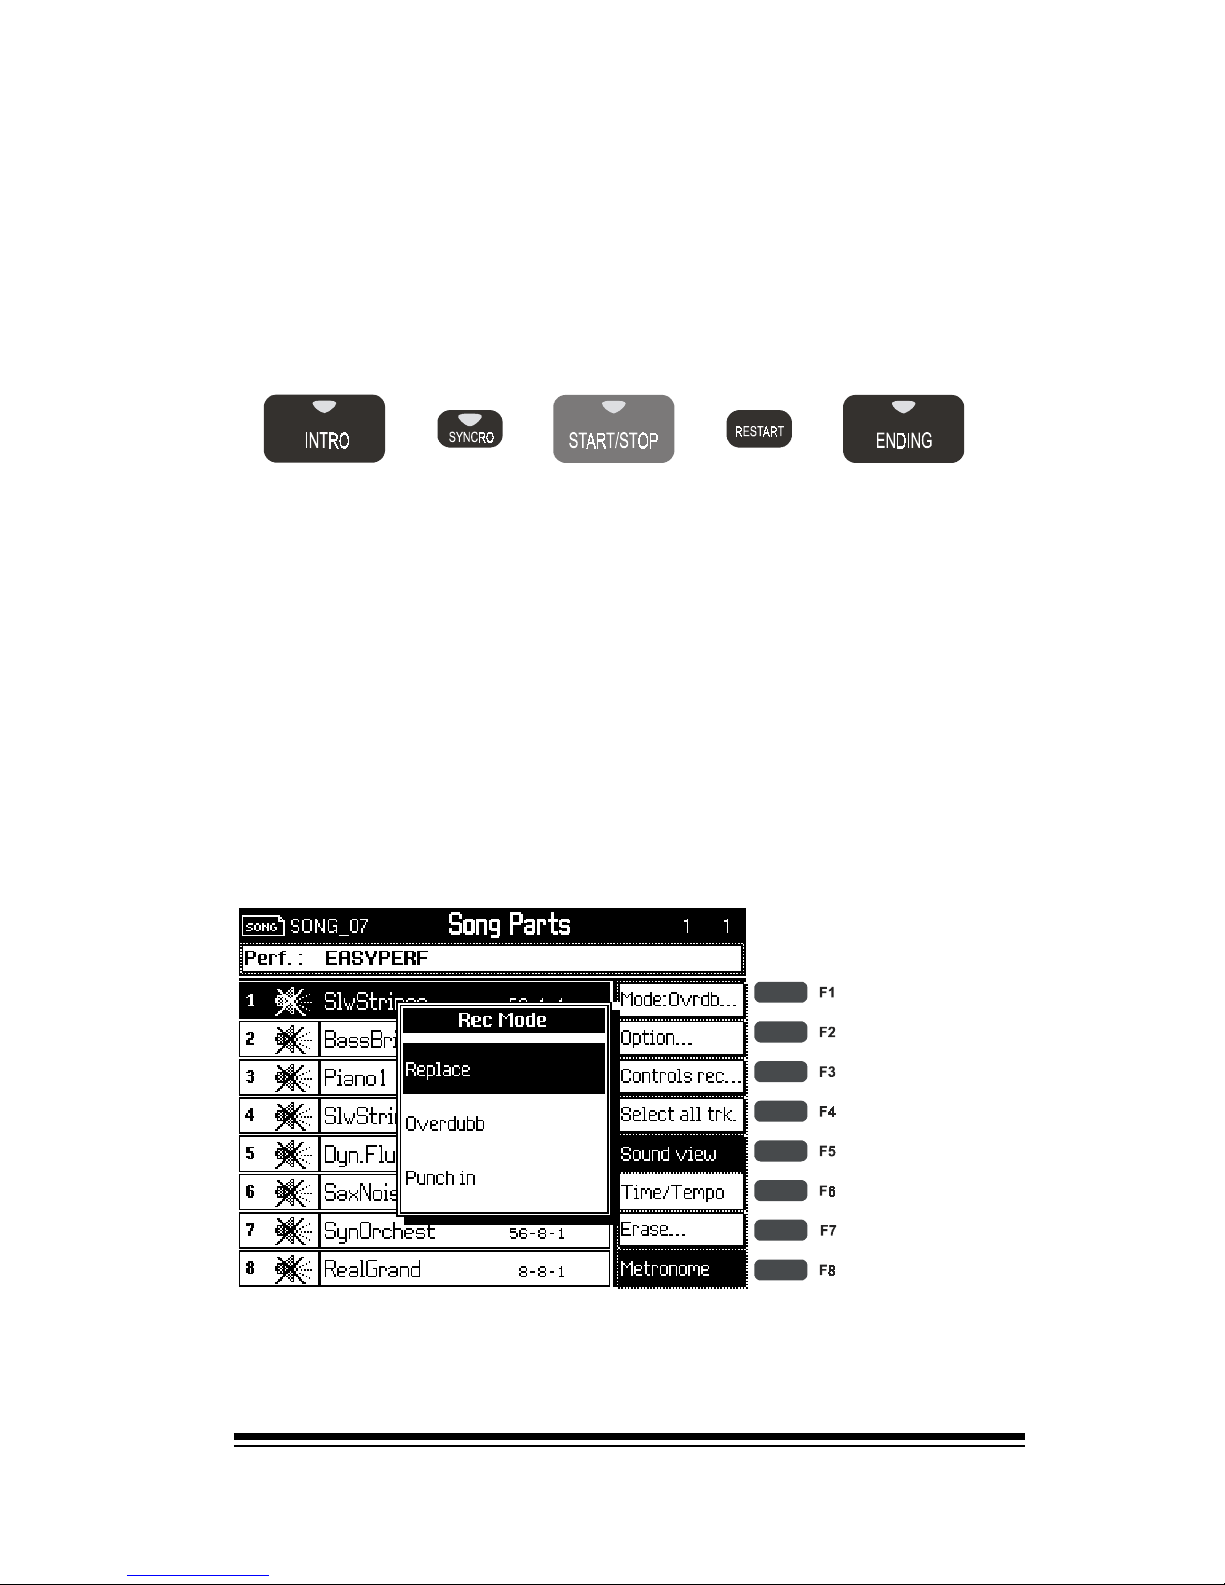
Recording Studio
Page 91
If you need to change the volume level, just use the corresponding slider on the left side. Remember that the letters
to the left of the track buttons correspond to the letters
printed beneath each slider.
Now youre ready to start. Dont worry if either the sound
or the volume level are not perfect. You can always change
them later. To start recording press START.
J
J
Now press ENTER. You can re-record your new track by
pressing START again. When youve finished recording you
can exit from record mode by simply turning off the RECORD
button.
After the one-bar count-in, youll hear the song playing
back. Anything you play on the keyboard now will be recorded into your new track. When you finish, press STOP. If
youre happy with what you just recorded, press the button beside the track one more time and it will switch from
recording mode to playback mode, (notice how the icon
changes). Now you can select any other empty track and
record another new part in exactly the same way. If youre
not happy with what you just recorded or you made a mistake, press the F1 key (MODE) in the top right corner of
the screen and use the up arrow to select REPLACE.
 Loading...