

Page 1
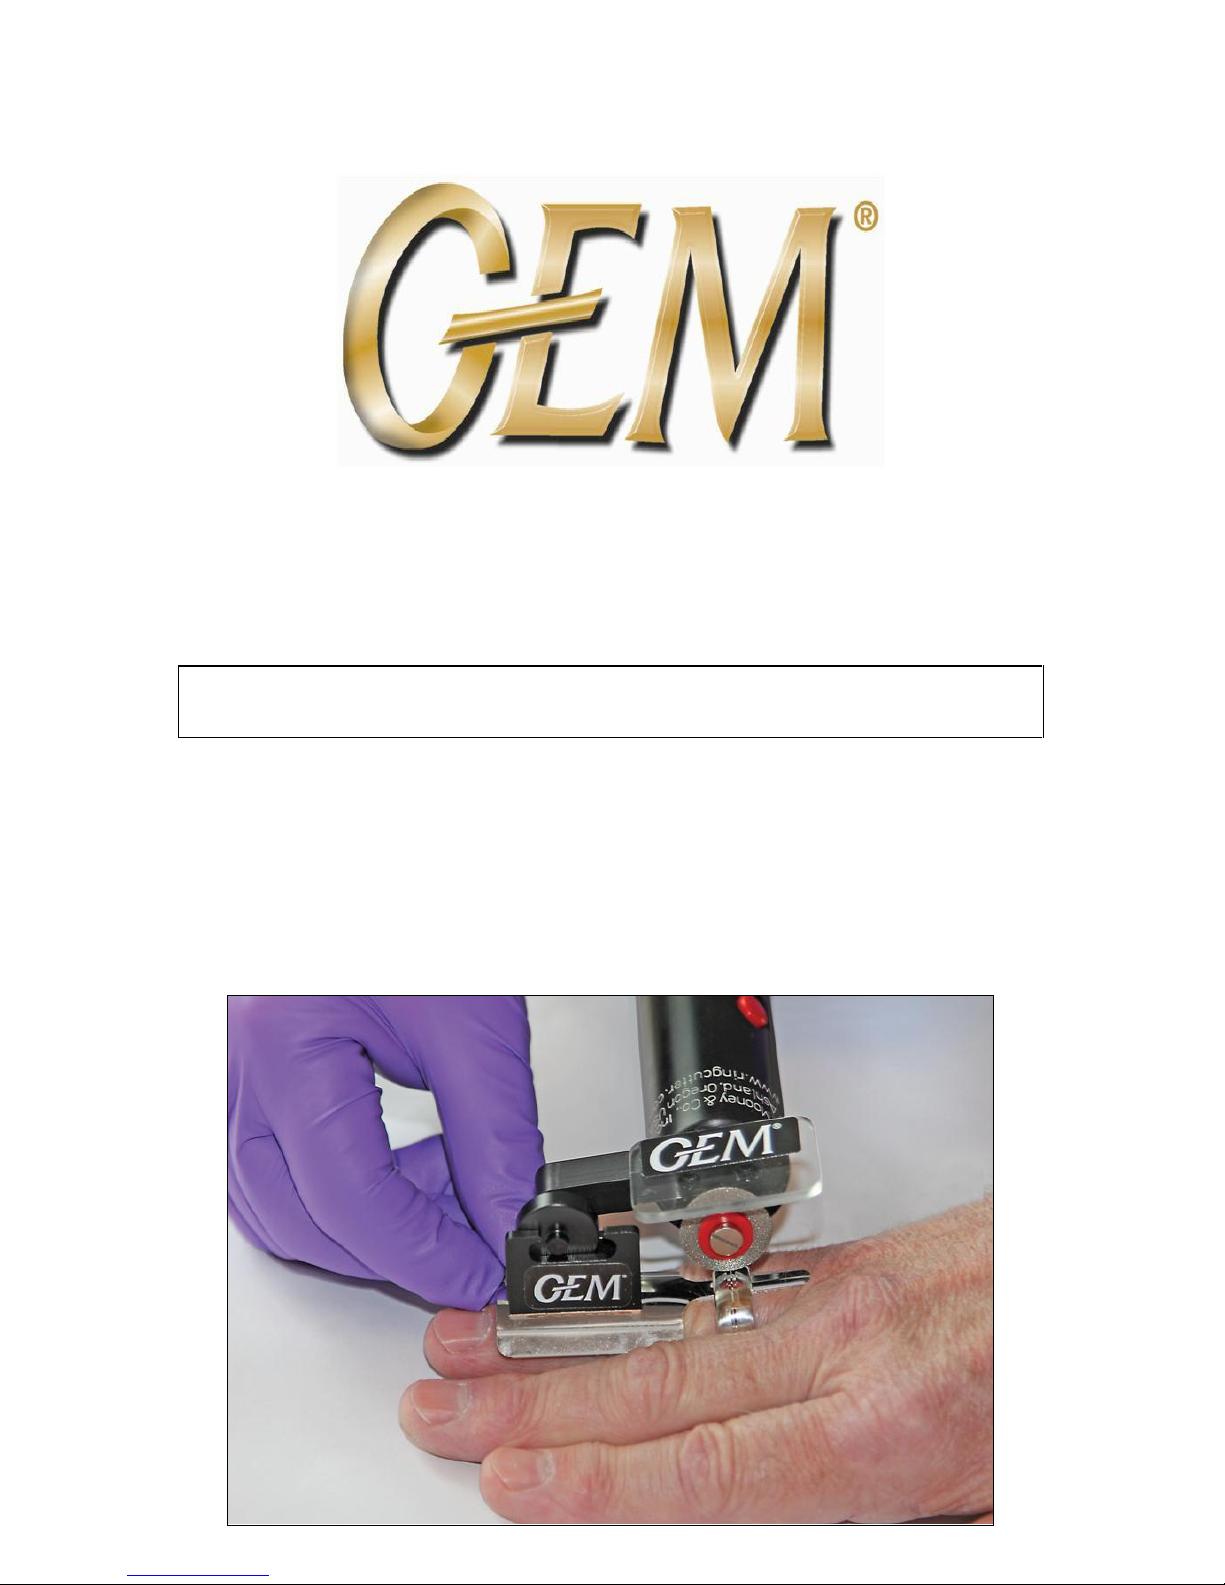
RING CUTTING SYSTEM
OPERATION MANUAL
The lighter your touch, the
faster GEM cuts
®
Page 2
SYSTEM OVERVIEW
The GEM® system consists of a slow speed, low torque drive unit,
a unique finger guard and two distinctly different types of abrasive
discs. The discs are guided in a back and forth motion, using the
lightest pressure, across the surface of the ring or band removing
subsequent layers of material until a full-thickness cut is
accomplished.
The 10 steps in using the GEM® systems are:
❶
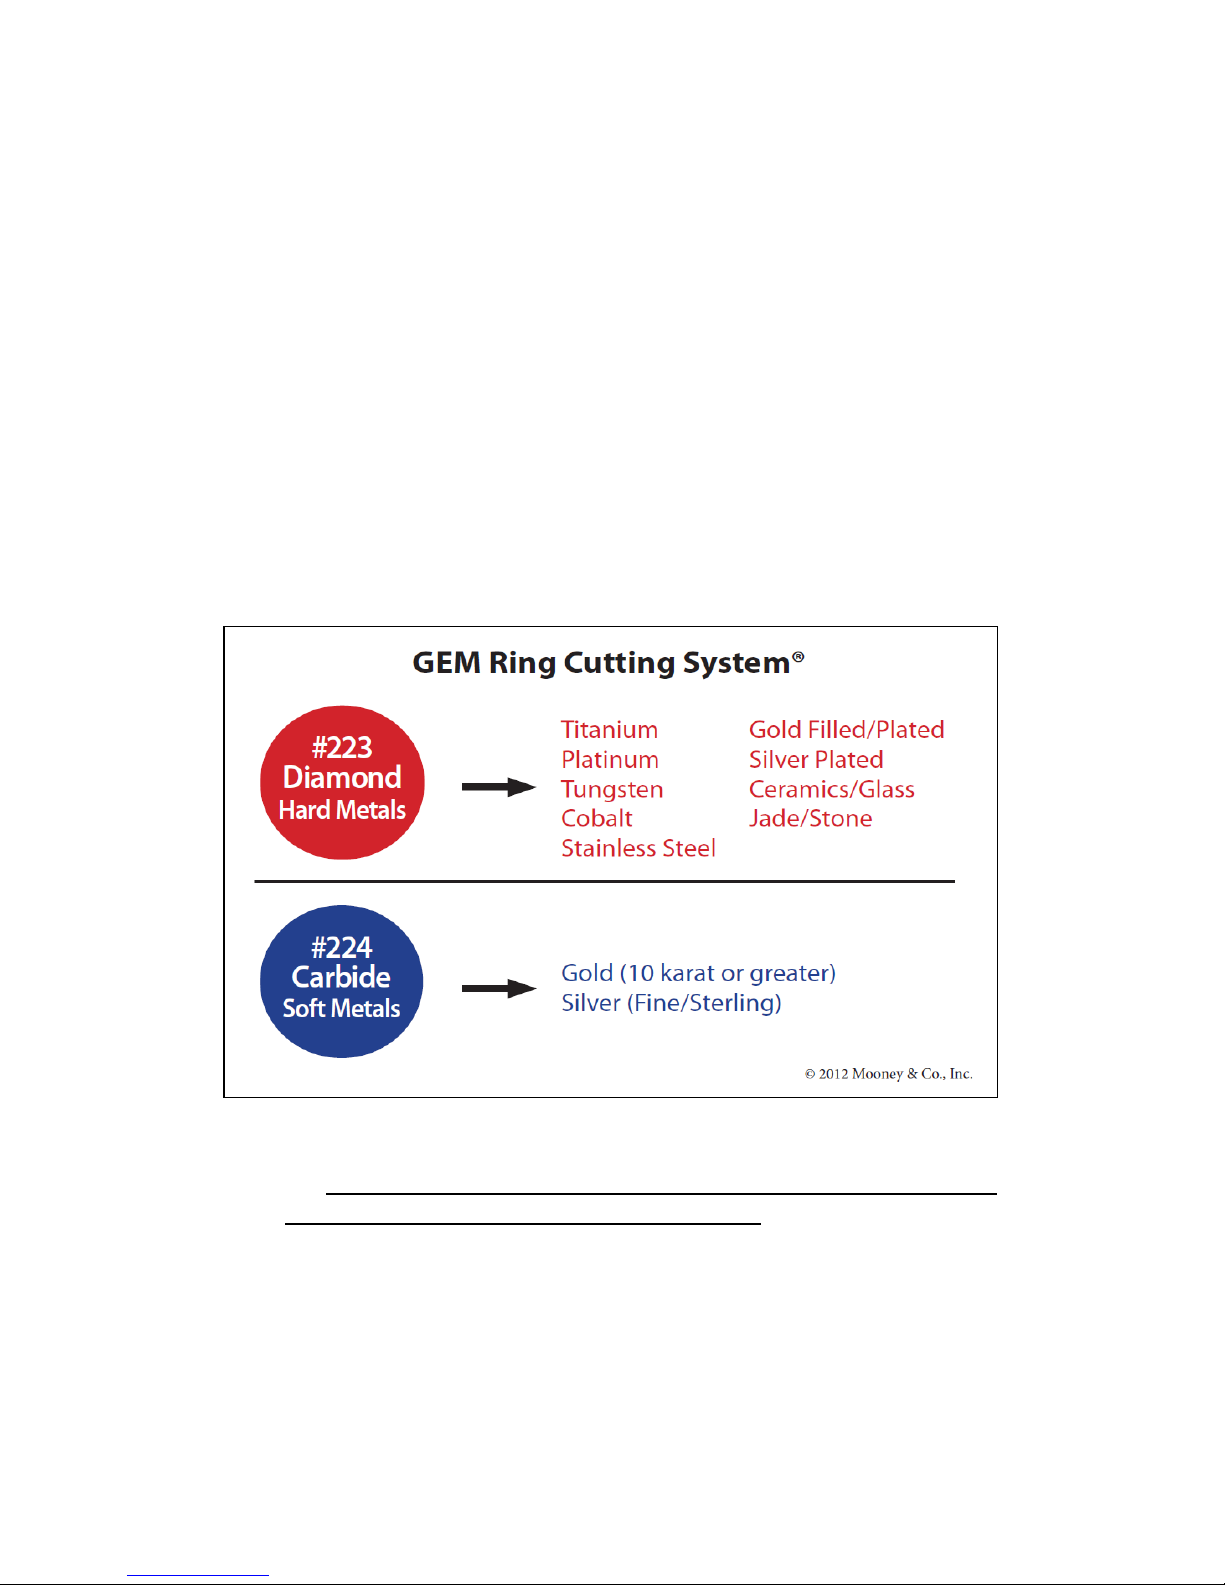
SELECT CORRECT GEM® CUTTING DISC
❶ YOU CANNOT USE ONE TYPE OF GEM CUTTING DISC
FOR BOTH SOFT AND HARD METALS.
The #224 Carbide disc will crack if used on hard metals. Using
the #223 diamond disc on gold and silver will rapidly make the
disc dull and useless.
❷ WHEN IN DOUBT begin with the #224 carbide disc (BLUE).
If it doesn’t cut the material immediately, change to the #223
diamond cutting disc (RED).
Page 3
❷
ATTACH GEM® CUTTING DISC TO DRIVE UNIT
❶ Press thumb against the mandrel to prevent it from turning.
❷ Unscrew the disc screw from the mandrel.
❸ Push the disc screw through the hole in the center of the disc.
❹ Use the small screwdriver supplied with the system to tightly secure
the disc to the mandrel.
❸
PROVIDE POWER TO GEM® DRIVE UNIT
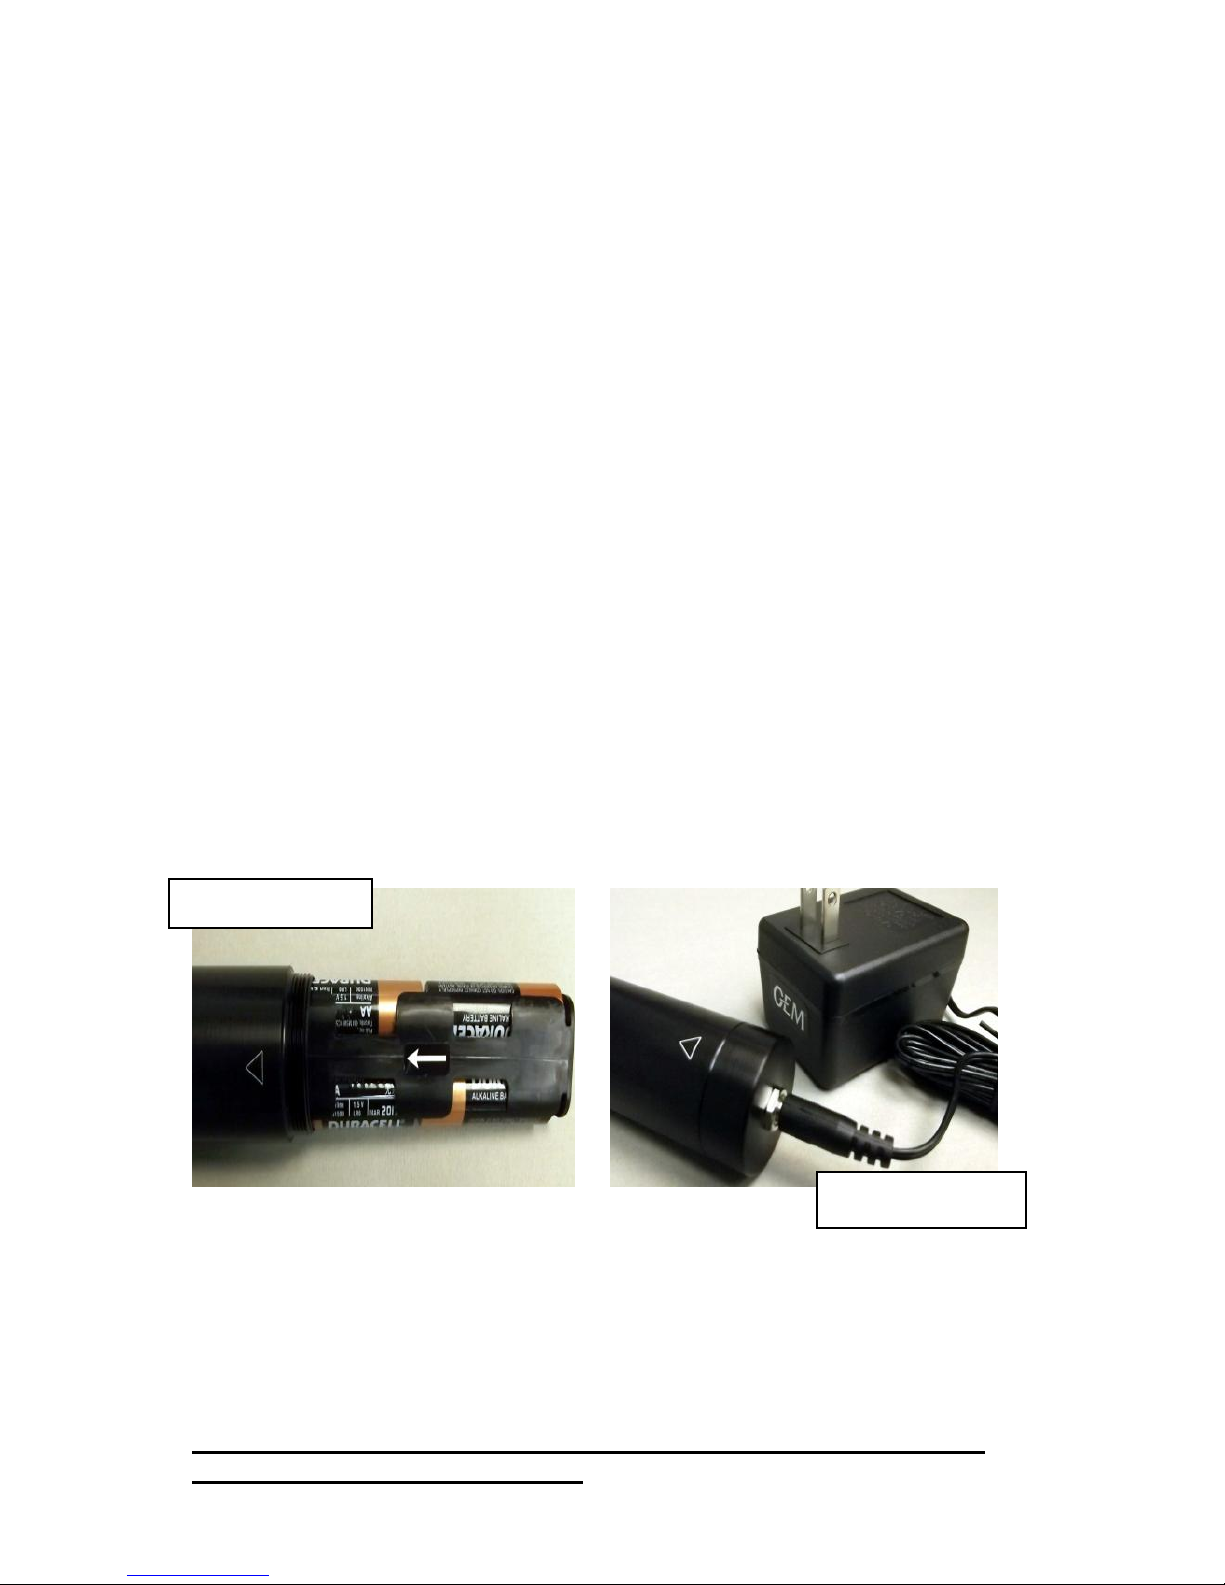
Model #522: INSTALLING THE BATTERY CASSETTE:
❶ Install four fresh AA batteries into cassette, follow polarity diagram
shown on the inside of cassette ❷ Unscrew the drive unit’s end cap ❸
Slide the cassette into the drive unit in the direction of the arrows on the
drive unit and battery cassette and secure the end cap tightly.
Model #622: INSTALLING THE AC POWER SUPPLY
❶ Plug power supply into wall outlet. ❷ Plug power cord into jack on
the bottom of the GEM® model #622 drive unit.
Model #622 must be plugged into a wall outlet to operate, it does
not use a re-chargeable battery.
Model #522
Model # 622
Page 4
❹
POSITION GEM® FINGER GUARD
❶ LUBRICATE: Liberally apply surgical lube to the ring and the
surrounding skin surface. This makes it easier to position the guard, acts
as a coolant and picks up any metal dust.
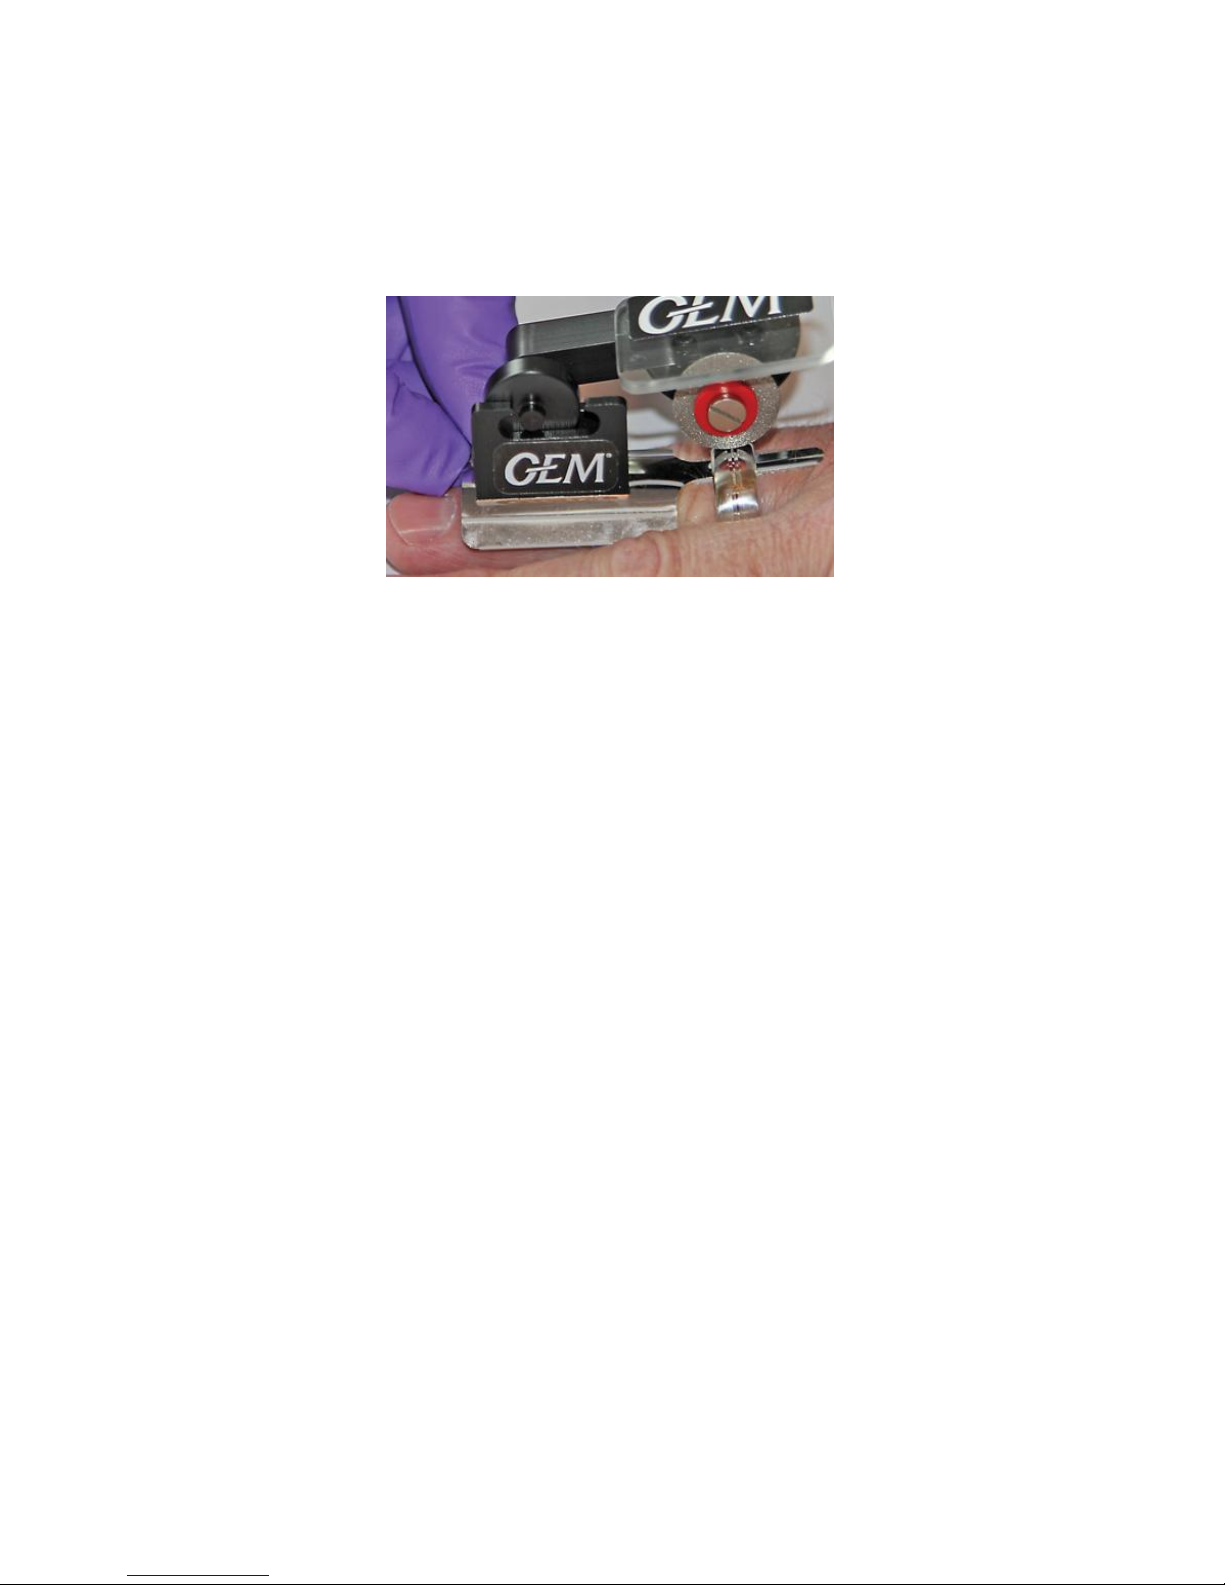
❷ POSITION THE GUARD: The finger guard is flexible; it can be bent,
even into a “U” to fit under even an embedded ring. Slide the guard
between the ring and the finger.
❸ MATE THE GUARD TO THE DRIVE UNIT: The channel of the finger
guard is designed to precisely guide the disc in order to produce an
accurate cut.
❺
ACTIVATE THE GEM® DRIVE UNIT
❶ PRESS THE RED BUTTON TO ACTIVATE: Use eye protection.
❷ BRING ROTATING DISC IN CONTACT WITH RING’S SURFACE.
Page 5

❻
CUT AND REMOVE THE RING
❶ Use proper technique: The GEM® drive unit is designed to stop
if downward pressure is applied. Use the lightest touch to guide the
abrasive discs rapidly back and forth across the surface of the ring
allowing them to remove one layer of material after another.
If the drive unit stalls or stops you are applying too much pressure
The lighter your touch, the faster GEM cuts
®
❷ Make a single cut then use the GEM® ring spreader instrument
(Order code #250) to spread and remove the ring.
❷ Make two cuts in rings made of titanium, chromium cobalt, or
tungsten carbide or if the ring is to be preserved and repaired.
❼
REMOVE DISC FROM DRIVE UNIT
❶ Use thumb to prevent mandrel from turning ❷ Use disc tool
supplied with your system to loosen disc screw ❸ clean disc using
protocol shown in ❿ ❹ Return to disc to plastic container ❺ Reinstall disc screw using thumb to prevent mandrel from turning.
❽
EVALUATE AND DISCARD DULL CUTTING DISCS
Diamond (RED) cutting disc: run your finger along its edge, if the
edge is smooth, discard.
Carbide (BLUE) disc: if the carbide is worn down to the point that it
will not cut completely through a ring, discard the disc.
Using dull and worn discs are the primary reason for drive unit
failures.
Page 6
❾
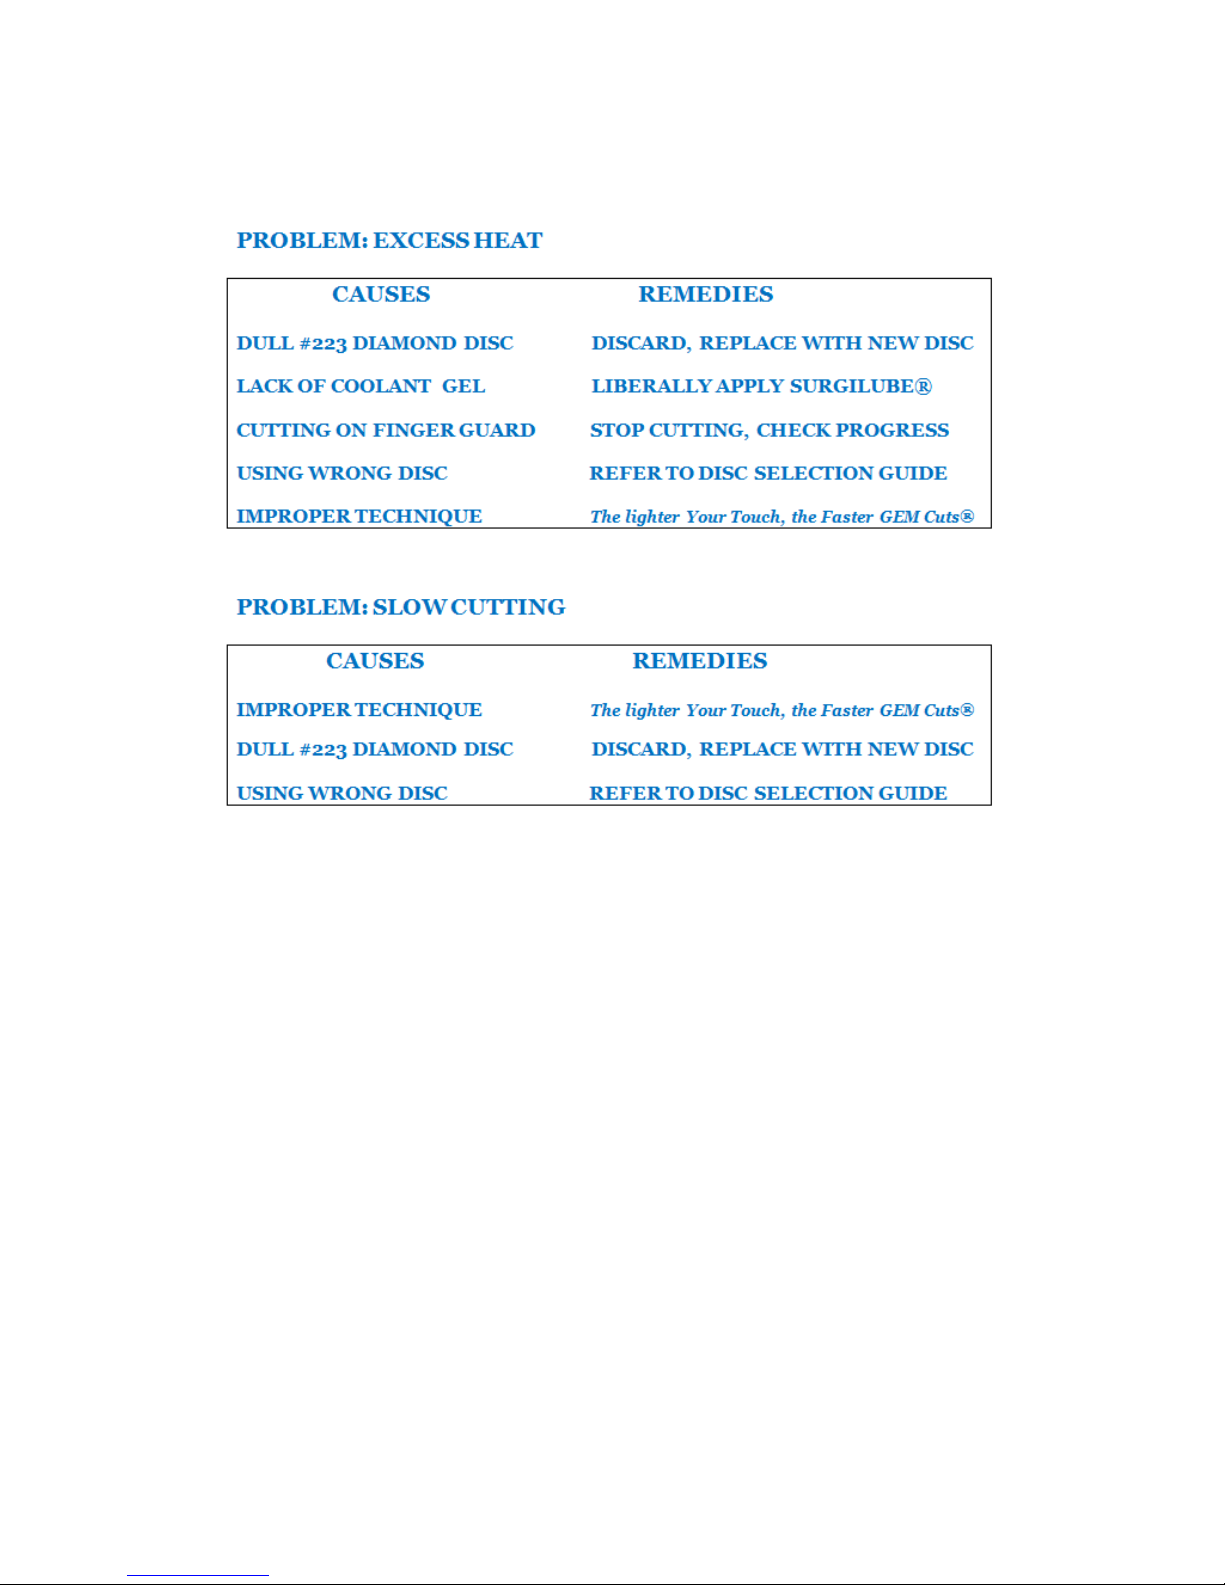
PROBLEM SOLVING
❿
CARE OF GEM® AFTER USE
❶ Remove the cutting disc from drive unit and clean discs after
each procedure using warm water and mild detergent. Disinfect
with quaternary ammonia after each use. If blood is present, soak in
bleach according to manufacturer’s directions for appropriate
contact time. Dry thoroughly with a clean lint-free cloth, then store
in its container.
❷ Clean guard and drive unit with an alcohol, quaternary ammonia
or hydrogen peroxide moistened lint-free cloth or equivalent wipe.
❸ Return all components to carrying case. Storage should be
done in a manner to protect the device and reduce risk for infection.
❹ Note: Do not apply any abrasive material on any part of the
equipment, spray or immerse in liquid. Do not use corrosive agents
to clean/disinfect.
Page 7

REPAIRS
The GEM® system must be returned to Mooney & Co. for all repairs. Any
attempt to repair or service the system invalidates its warranty.
WARRANTY
The GEM® drive unit is warranted against defects in materials and
workmanship for a period of one year after date of purchase. Other
components of the GEM® system are warranted against defects in
material and workmanship for a period of 60 days.
QUESTIONS
CALL 1-541-488-2381/1-800-230-5770
FAX 1-541.488-2396
EMAIL [email protected]
WEB www.ringcutter.com
GEM® ORDER CODE NUMBERS
#522 GEM® Battery Powered System
#622 GEM® AC Powered System
#223 GEM® Diamond cutting disc (2 discs per pack)
#224 GEM® Carbide cutting disc (6 discs per pack)
#525 GEM® finger guard (2 per pack)
#360 GEM® disc retaining screws (pack of 4)
#250 GEM® Ring Spreader instrument
Page 8

COMPLETE IN-SERVICE MATERIALS ARE
AVAILABLE ONLINE AT
www.ringcutter.com
Mooney & Co., Inc.
415 Williamson Way, Suite #9
Ashland, Oregon USA 97520
Telephone 541.488.2381/1.800.230.5770
Fax 1.541.488.2396
Email [email protected]
GEM® is a registered federal trademark, all rights reserved
© 1993 - 2013 Mooney & Co., Inc.
 Loading...