

Page 1
OPERATING INSTRUCTIONS
PETOL™ Flange Spray Defl ector
FD1 & FD2
Form SHPG-FD1/FD2 Rev. 02/01/13
4450 S. Hwy. 6 • P.O. Box 192
Clifton, TX 76634 U.S.A.
www.gearench.com
PETOL™ Flange Spray Defl ector
Description: The PETOL™ Flange Spray Defl ector is a tool that helps minimize the spray
that is produced when a fl ange set is broken open and direct the spray into a known direction.
Occasionally, when unbolting fl anged connections some liquid or gas under pressure may
spray out from between the fl anges. This spray poses a danger due to chemical exposure, hot
water and/or steam burns. This device is meant to help protect the worker, not to replace
any personal protective equipment (PPE) or seal or contain any pressure. The fl ange
spray defl ector consists of a nitrile elastomer strap, tension adjustment bolt and a tension
clamp.
Uses: • First line breaks • Low point breaks
• Hot bolting • Draining defl ection and/or guiding
• Blinding
CATALOG FITS FLANGE
NO. STRAP WIDTH O.D. UP TO WEIGHT
FD1 2" 22" 2 lbs.
FD2 2" 45" 2-3/4 lbs.
(254)675-8651
fax (254)675-6100
sales@gearench.com
2
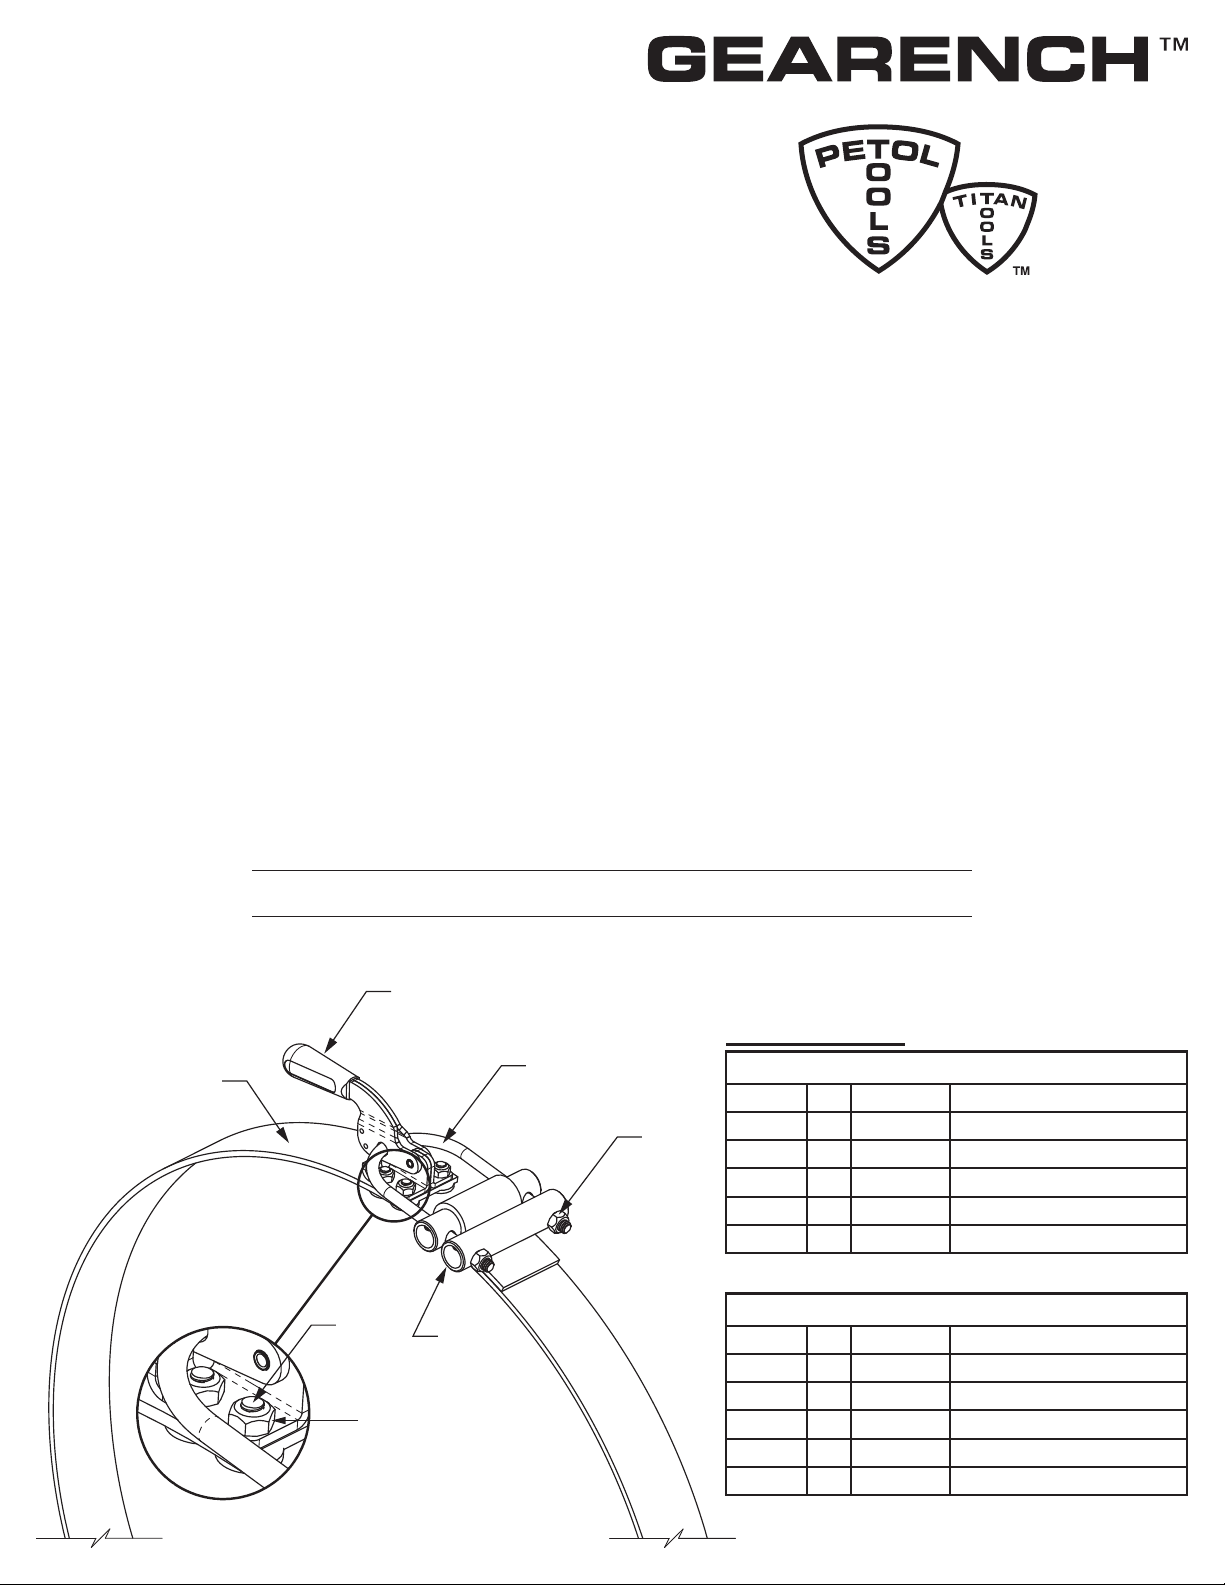
Replacement Parts
1
6
7
5
3
Item No. Qty. Part No. Description
4
1 1 FD2-ST-072 Strap
2 1 FD2-C Tension Clamp
3,4 1 FD1-UB Tension Adjustment Bolt & Nut
5 2 FD2-LP Adjustment Lock Pin
6,7 4 HB70 Clamp Bolt & Nut
Item No. Qty. Part No. Description
1 1 FD2-ST-144 Strap
2 1 FD2-C Tension Clamp
3,4 1 FD2-UB Tension Adjustment Bolt & Nut
5 2 FD2-LP Adjustment Lock Pin
6,7 4 HB70 Clamp Bolt & Nut
FD1
FD2
Page 2
WARNING!
Improper use of the PETOL™ Flange Spray Defl ector
may result in INJURY or DEATH!
Read Operating Instructions prior to operation.
This device IS NOT intended to replace any personal protective equipment (PPE).
Before using, inspect the strap for cuts, tears, burns or
damage and replace or return any damaged tool.
DO NOT use to seal or contain pressure.
DO NOT use for lifting or support of any load.
DO NOT use to hold fl anges in alignment.
DO NOT use to support an unbolted line, blind, valve or fi tting.
DO NOT use on surfaces that exceed 275°F.
Follow OSHA, NSC, etc., standards, safe practices, and procedures.
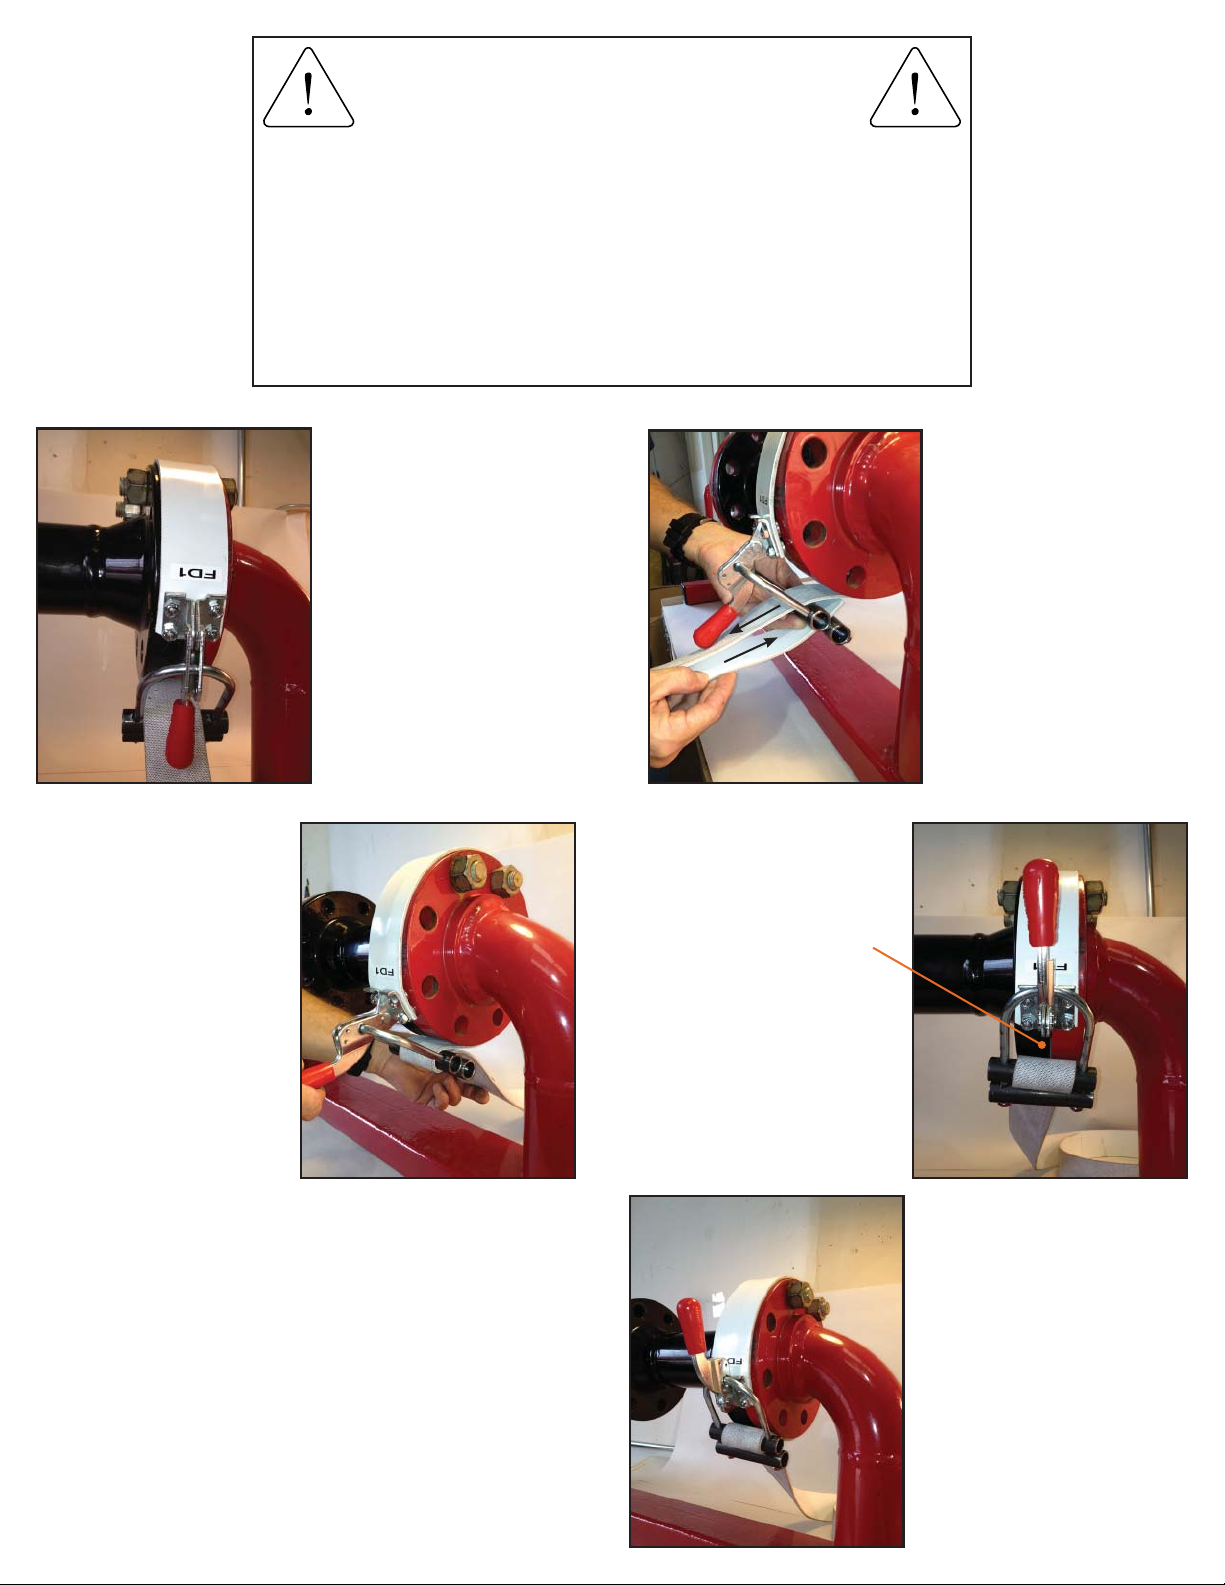
1
3. With the tension clamp in the
relaxed position pull the slack
out of the strap until the strap is
just snug around the fl anges.
1. Wrap the strap around the
bolted fl anges prior to unbolting.
Feed the free end over the top
of the two adjustment lock pins.
3
2
2. Then feed the free end back
through the tension adjustment
bolt, in between the two adjustment lock pins.
4
4. Arrange the tension adjustment bolt so that the fl ange
access gap (pictured right) is
pointed in a safe direction. The
fl ange access gap allows the
operator to use a pry bar to
break the seal between fl anges.
The P95-525 POP-IT™ Tool can
be used to break the seal when
using the FD2 spray defl ector.
5
5. Engage the tension clamp. If
the tension clamp is diffi cult to
close loosen the strap slightly
and try again. The strap is
tightened correctly when the
edges are fi rmly seated around
the fl anges and does not slip
when pressure is applied at any
point.
Copyright © 2013 by GEARENCH™. All rights reserved. Form SHPG-FD1/FD2 Rev. 02/01/13
 Loading...