

Page 1
GE Monogram ®
Assembly Instructions
Before you Begin - Read these instruclions completely and careflllly.
Note To Inslaller: Be sure to leave these instructions wilh tile ConsuIner.
Note to Consunmr: Keep these instructions with your Use and Ca1 e Book for fhture reference.
If you have questions concerning the installation of
this product, call tile GE Answer Center ® Consumer
Information Service at 800.626.2000, 24 hours a day,
7 days a week.
If you received a damaged Grill Cart, you should
contact your dealer.
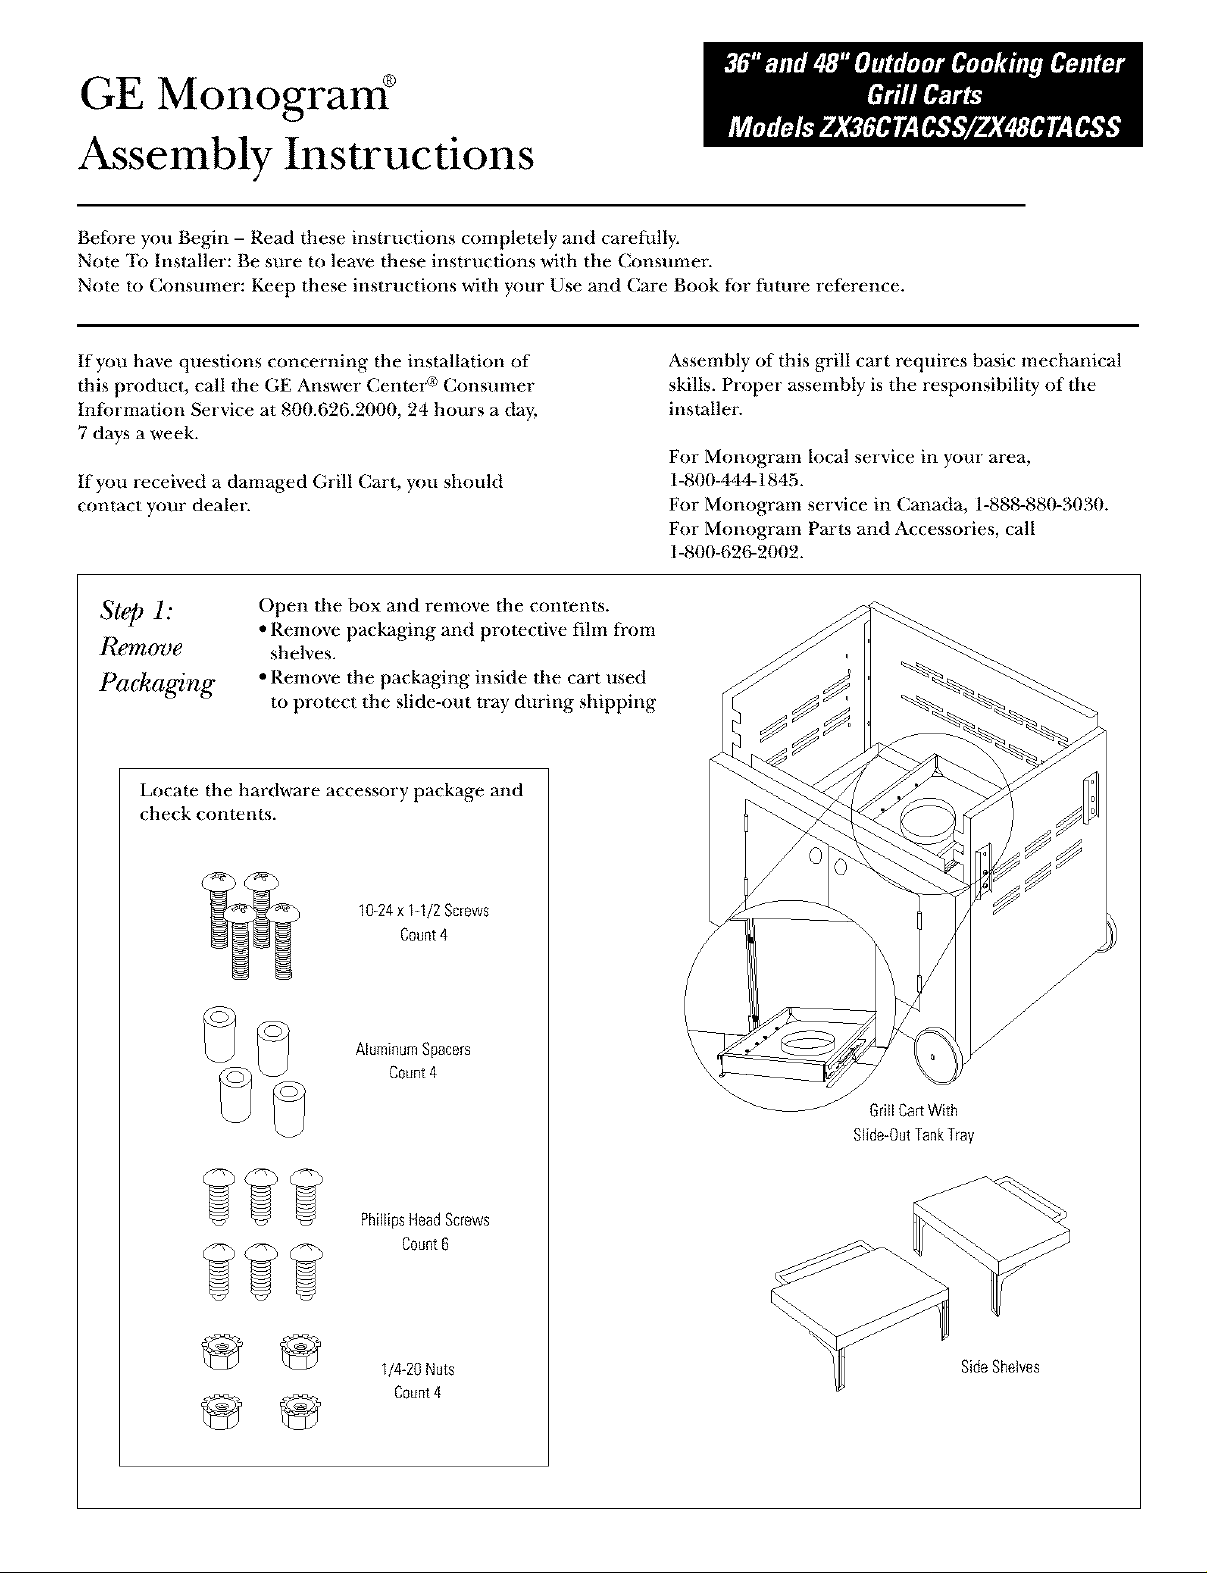
Step h
Re.love
Packaging
Open lhe box and remove the contents.
• Remove packaging and prmective fihn fl*om
shelves.
• Remove the packaging inside dm cart used
to protect the slide-out 1ray during shipping
Locate the hardware accessory package and
check conteIltS.
Count4
10-24x 1-1/2 Screws
Assembly of this grill cart requires basic mechanical
skills. Proper assembly is the responsibility of tile
installer.
For MonograIn local service in your area,
1-800-444-1845.
For MonograIn service in Canada, 1-888-880-3030.
For MonograIn Parts and Accessories, call
1-800-62(}-2002.
_ _ PhillipsHeadScrews
1/4-20 Nuts Side Shelves
Count4
/
J
GrillCart With
Slide-0ut Tank Tray
Page 2
Installation
36" and 48" Grill Cart Assembly
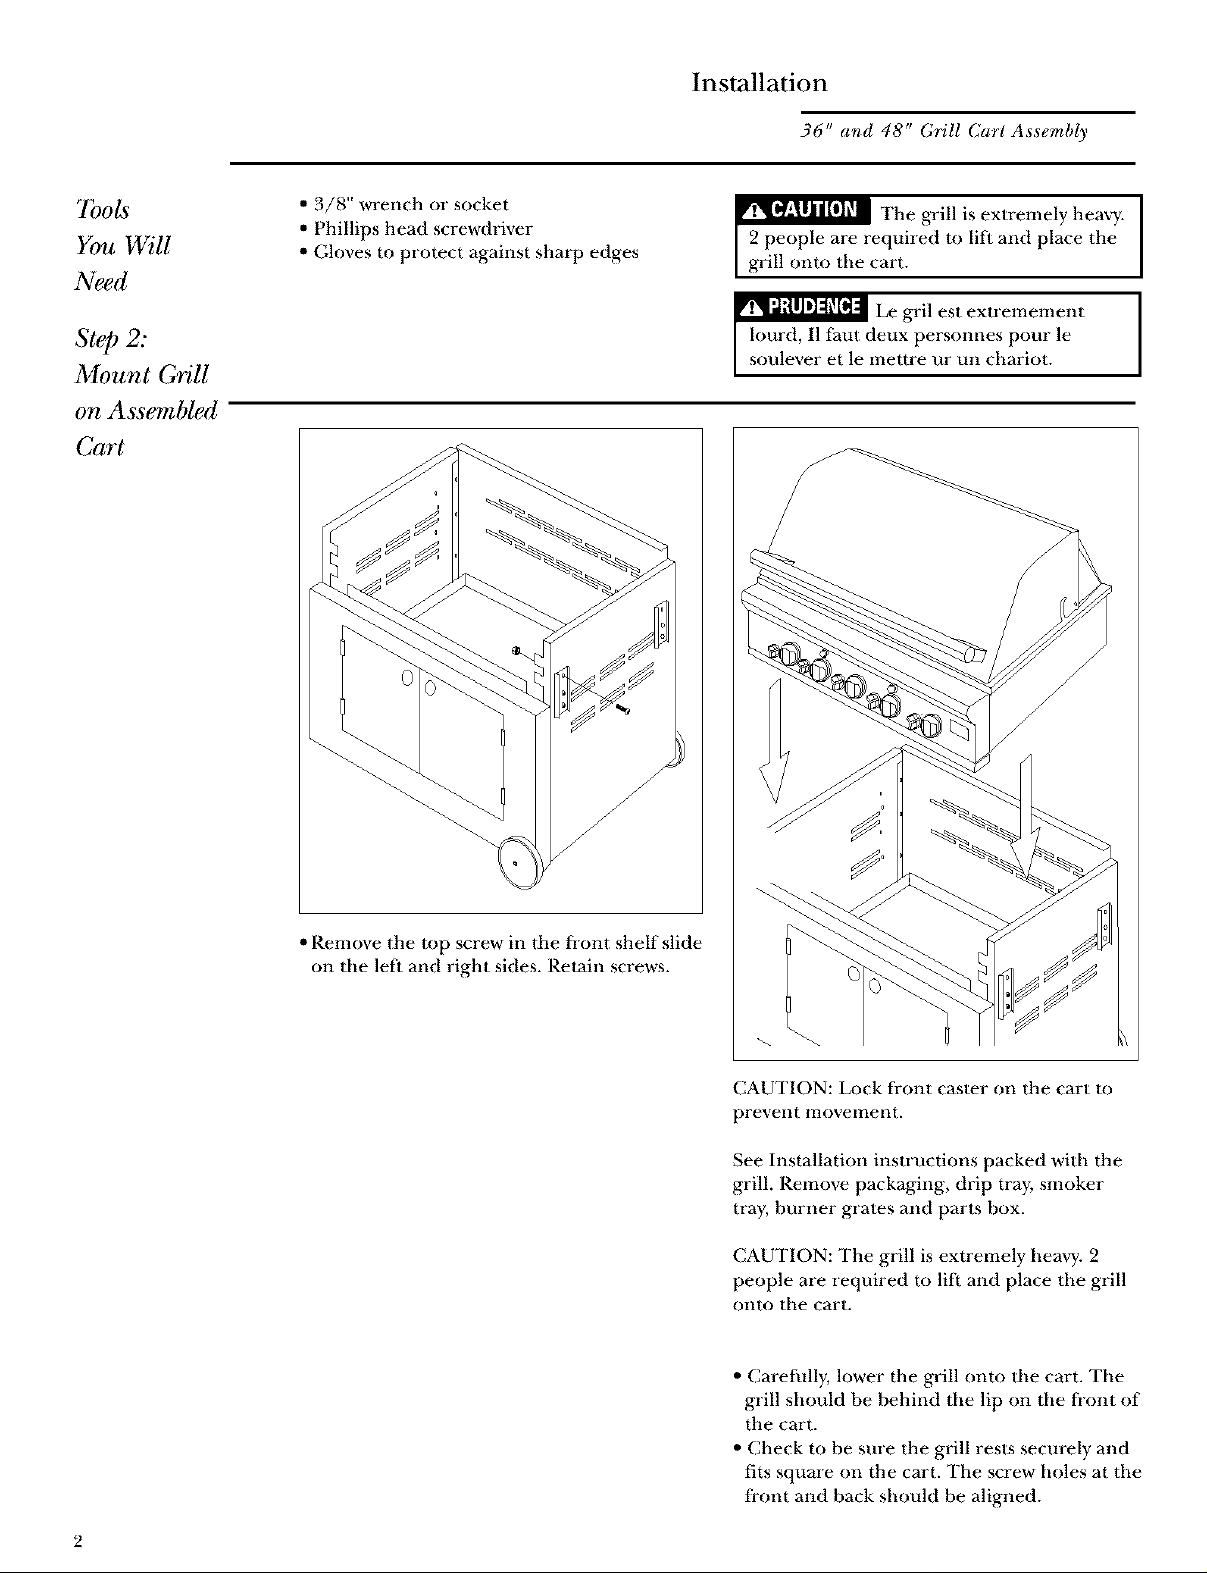
7bols
You Will
Need
Step 2:
Mount GdU
on Assembled
Cart
• 3/8" wrench or socket
• Phillips head screwdriver
• Gloves to protect against shall0 edges
*V_l_[ll_llllfl_m The grill is extremely hea W.
2 people are required m lift and place the
grill onto the cart.
•" Le gril esl exlremement
lourd, n faul deux personnes pour le
soulever et le mettre ur un chariot.
/
• Remove the mp screw in file front shelf slide
on the left and right sides. Retain screws.
CAUTION: Lock firont cas/er on the cart m
prevent moveIllent.
See Installation inslructions packed with the
grill. Remove packaging, drip tray, smoker
tray, burner gra/es and paris box.
CAUTION: The grill is extremely heavy. 2
people are required to lift and place the grill
onto the cart.
• Carefidly, lower the grill onto the cart. The
grill should be behind the lip on the front of
the cart.
• Check to be sure the grill resls securely and
fits square on the cart. The screw holes at the
front and back should be aligned.
Page 3

Installation
36" and 48" Grill Cart Assembly
Step 3:
Secure Gyill
to Cart
Step 4:
Install
• Install 3 screws along the fi'ont and 3 screws
along Ibe back with a phillips head screw-
driver.
• Re-install long screws previously reInoved in
tile top of each front slide.
/
/
/
Side Shelves
• Slide shelf supporls up and into the chan-
nels on tile sides of tile cart.
/
/
/
/
• When tile shelf reaches stops at the top, fold
lbe shelf out horizonlally.
• The shelf should rest securely in the
channels.
• Install the long 10-24 screws and spacers
below the shelf supports. Secure wilb ImtS on
lbe inside of the cart. (2 on each side.)
• The spacers and screws will prevent the shelf
fi'om sliding out of the channels when folded
down.
3
Page 4

Step 4:
Install
Side Shelves
(continued)
Installation
36" and 48" Grill Cart Assembly
/
/
/
/
To fold the shelves down:
- Lift lbe shelf up unlil it clears the channels.
- Fold down and let Ibe shelf slide down and
• Fold both shelves down.
O Monogram
General Electric Company
Loutsville, KY4022_
stop on the spacers.
7b obtain sper'ific i*_furmation c_nco'ning" an';
M_nogram product or service, call €_ Answer Cenle_ ®
c_nsumer i*lfo_wzatzcrn servile at 800.626.2001l a*ly
time, day or rt_ght.
For Monogram local service in your area, call
! 800-444 !845.
NOIE: Pr¢_du_t imp_o_emem is a continuing endeavor at General
E]e_t_icfheret_)re, materials, appearan_earldspecifi_ationsare
subiectto_hangewlthoutnoti_e
Pt_b No 49_q000_q
Dwg No 164_)3_433P226
© 2000 GE Applian( es
(N D 536) 2/00
32562
 Loading...